Author: Amy Lyons O’Neil

  • Vegan Grinch Cupcakes

    Vegan Grinch Cupcakes

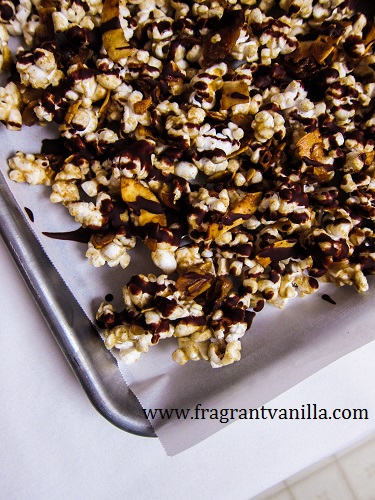
    Everyone has their favorite classic Holiday movie.  I have a few that I have to watch every year, including “White Christmas”, “Charlie Brown Christmas” and “How the Grinch Stole Christmas”.  The latter of which is my favorite.  There are so many things that I love about it.  How happy the Whos are in Whoville, how they get so excited to celebrate every year, and how they all seem to be filled with joy and love to start with.  Also, the Grinch himself is pretty comical, and his song even more so…”You’re a mean one, Mr. Grinch…” you know the one.  And the story has a happy ending with the Grinch’s heart growing and him finally accepting Christmas.  But I only like the old version of the movie, the old classic animated one.  The new one with Jim Carey is ok, but the animation on the old one is what makes it so much more awesome.  They just don’t make animated movies like they used to.  I mean, it is pretty impressive that was all drawn by hand and not computer generated like it is now.  Anyways, this year I decided to make some Grinch cupcakes in honor of my favorite Holiday movie.

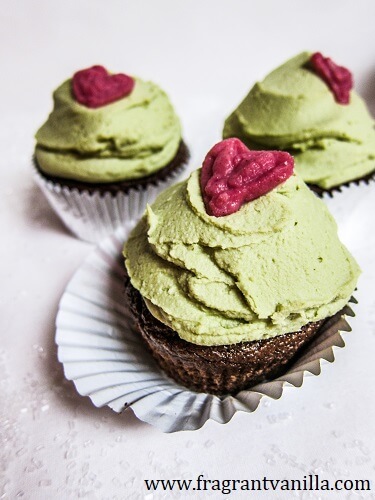
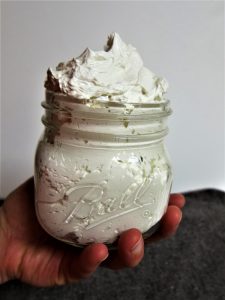
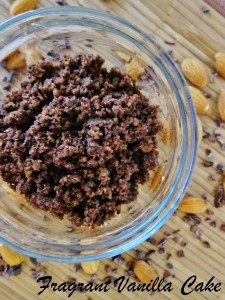
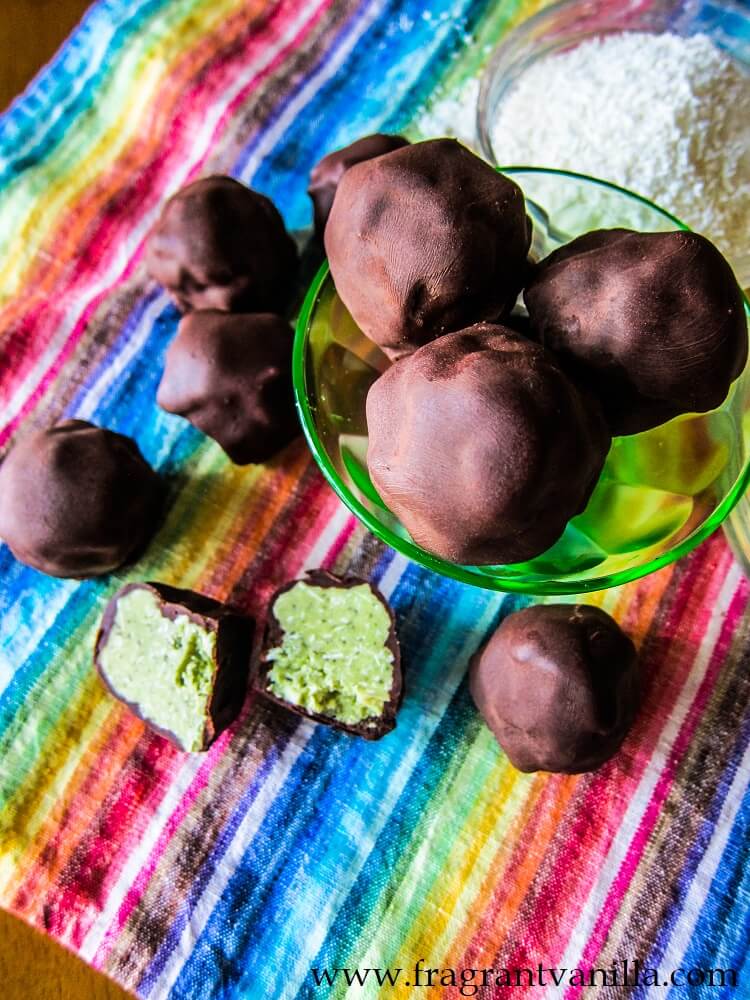
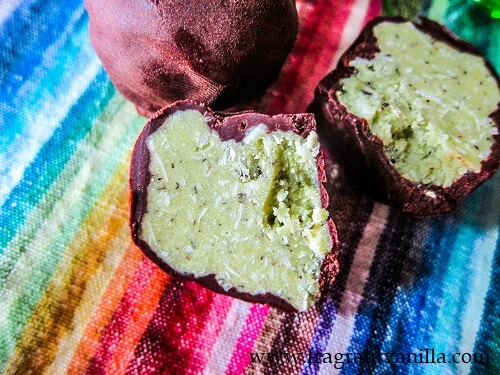
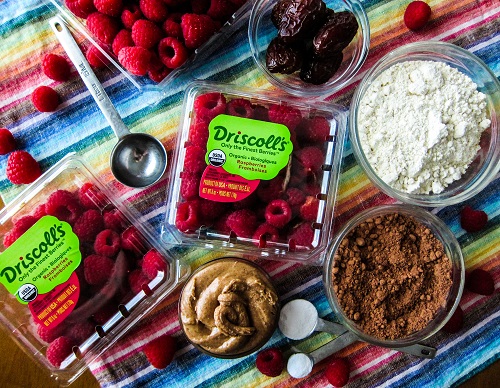
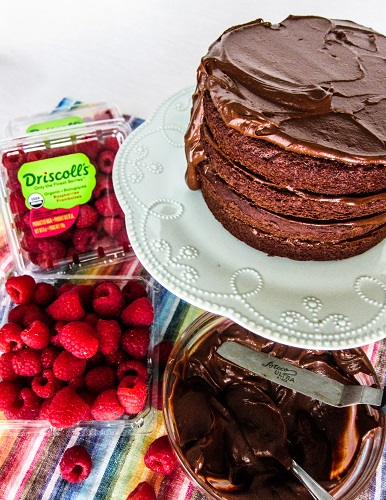
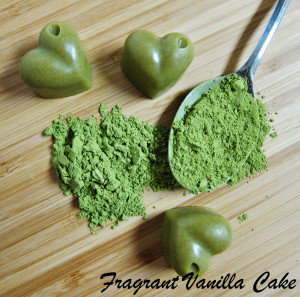
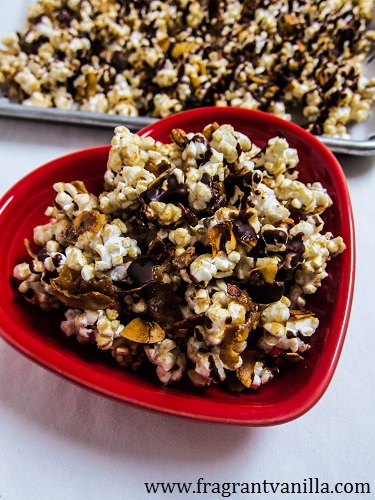
    I thought I might as well make them delicious as well, so I flavored them chocolate, mint and matcha.  It is a heavenly combination.  I drink matcha daily so I always have it on hand. Peppermint kind of seems essential this year, and chocolate I don’t need to explain, it is always good no matter what it is in dessert-wise. For the cupcakes, I baked up my classic date sweetened chocolate cake because it is quick and easy to make in a blender, and I can not resist anything sweetened with dates.  It was just the right consistency once baked. Moist, soft and light as cupcakes should be if you bake them the right amount of time.  To make these “Grinch” cupcakes, I needed to color the frosting green, which is why I chose matcha.  Now, of course I could have used food coloring or spinach powder but that doesn’t give them the lovely flavor that matcha has. I added in some peppermint as well and it was so good!  I use a combination of coconut milk and cashew butter in my frosting, and it turns out like buttercream frosting, which was always classic go-to before going vegan.

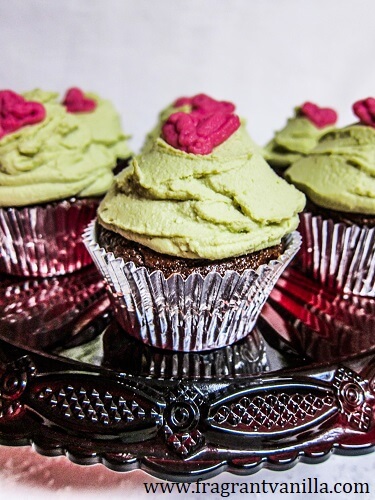
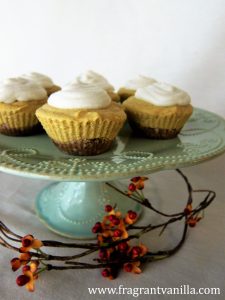
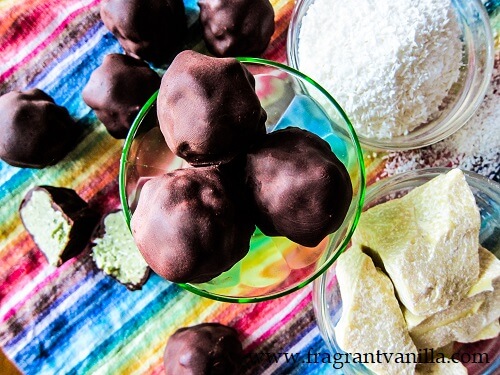
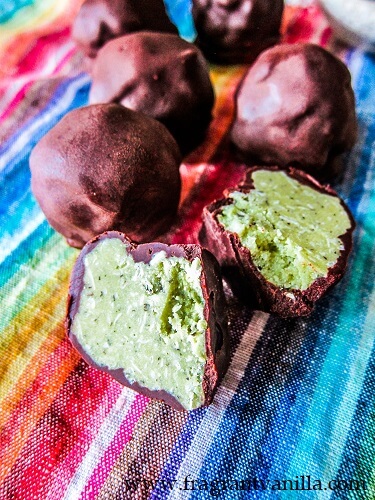
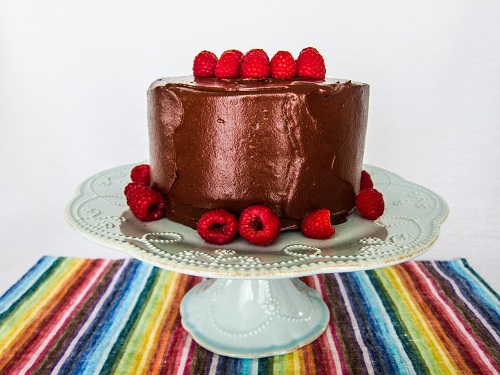
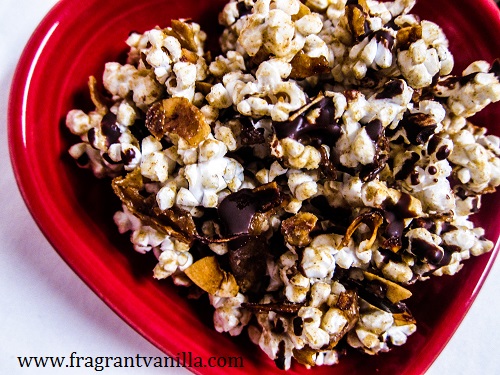
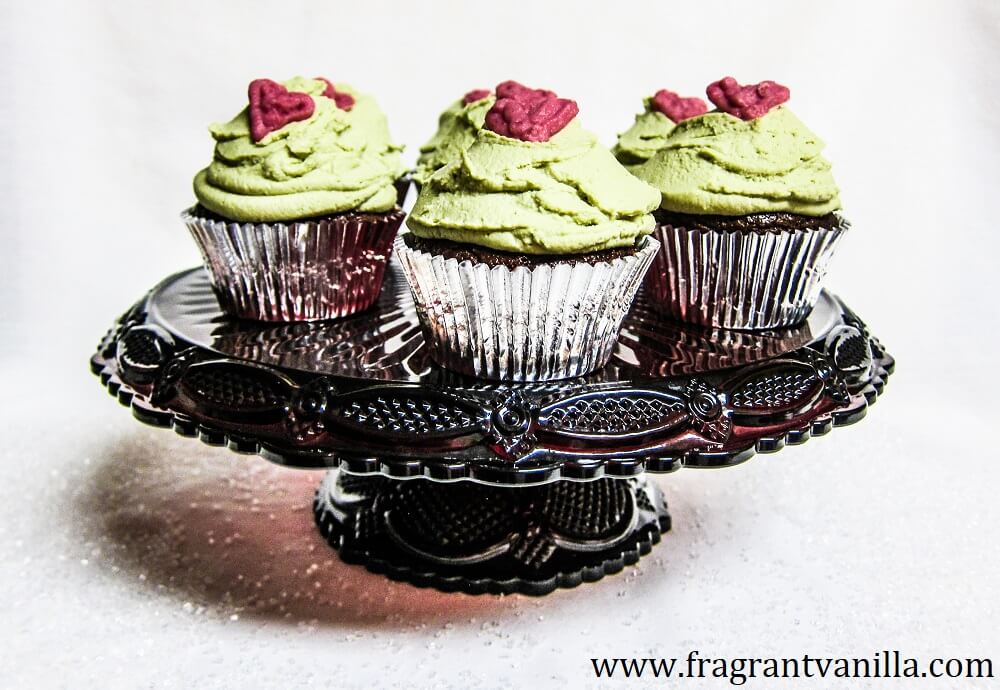
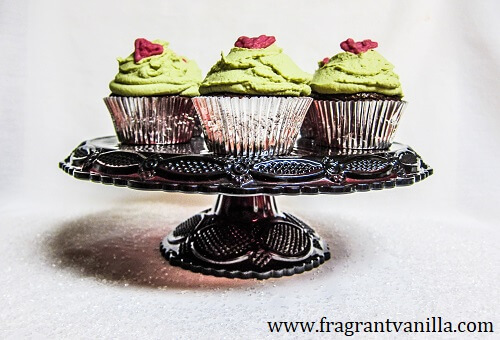
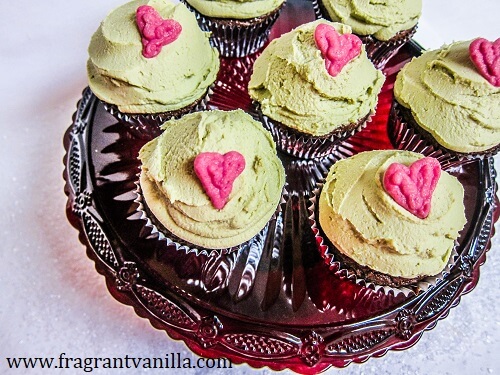
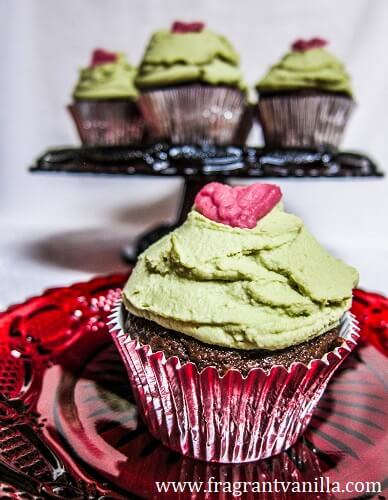
    They were a lovely green color, but in order to complete them, they needed the red heart, the one that grew 3 sizes in the movie.  So, I tinted some white chocolate red, and made cute little hearts to top them off.  They were super delicious!  Rich dark chocolate cake, fluffy minty frosting scented lightly with matcha…right up my alley, I was very pleased with how they turned out.  These would even make the Grinch happy I think!  I hope you are all having a wonderful Holiday season!

    Vegan Grinch Cupcakes  (Chocolate Matcha Mint Cupcakes)
    Makes 16 cupcakes

    Ingredients:

    2 8 hole muffin tins

    16 cupcake liners

    Cake:

    • 1 1/2 cups Bob’s Red Mill Gluten Free All Purpose Flour
    • 1/4 cup cacao powder or unsweetened cocoa powder
    • 1 1/2 tsp baking soda
    • 1 tsp baking powder
    • 1/2 tsp sea salt
    • 1 1/4 cups packed soft medjool dates, pitted, soaked in water for 30 minutes and drained
    • 1/4 cup almond butter
    • 1 tsp pure vanilla extract
    • 1 tsp peppermint extract
    • 2 cups filtered water
    • 2 Tbsp apple cider vinegar


    Frosting:

    • 1 15 oz cans full fat organic coconut milk, at room temperature
    • 1/2 cup raw cashew butter
    • 1/4 cup maple syrup
    • 1/8 tsp sea salt
    • 1 tsp pure vanilla extract
    • 1/2 tsp peppermint extract
    • 3 Tbsp matcha powder (or as needed)
    • 1/2 cup plus 2 Tbsp raw coconut butter (NOT OIL), warmed to liquid


    Candy hearts:

    • 1/4 cup vegan white chocolate, chopped
    • natural vegan red food coloring


    Directions:

    1. Preheat the oven to 375F degrees and position rack in center of oven.
    2. Line muffin tins with cupcake liners.
    3. Whisk flour, cocoa powder, baking powder, baking soda, and sea salt in a large bowl to blend well.
    4. Place dates, water, almond butter, and vanilla extract into a blender, and blend until smooth, then whisk this blended mixture into the flour mixture until well blended. Whisk in the cider vinegar until bubbles form.
    5. Pour the cake batter into prepared tins, and place in the oven.
    6. Bake cakes until set and a toothpick inserted into the center comes out almost clean, about 12-15 minutes.  Remove from oven, and let cool completely.
    7. Meanwhile to make the frosting, combine all ingredients in a blender and blend until smooth.  Pour into a bowl and place in the freezer allowing it to chill until the consistency of whipped cream, (which usually takes about 45 minutes depending on how warm it has gotten) whisking about every 15 minutes.
    8. Meanwhile, to make the hearts, melt the white chocolate, and whisk in the food coloring.  Place in a pastry bag or ziplock bag with the corner cut off and pipe into little hearts on a piece of parchment.  Place in the freezer to harden.
    9. Place the frosting in a pastry bag once it has chilled, and pipe over the cupcakes (or spread it over if you don’t prefer to pipe).  Place a heart on top of each one.  Enjoy!
    10. Store any leftover cupcakes in a covered container in the refrigerator.


  • Vegan Chocolate Gingerbread Bourbon Balls

    Vegan Chocolate Gingerbread Bourbon Balls

    Sometimes you have those days where you are a disaster in the kitchen and in fact you should probably stay far away from it.  But unfortunately sometimes you don’t have a choice, you have to get things done, even if you are a clutz or super forgetful that day because you have other stuff on your mind or maybe are just trying to work too fast.  Well, I have those days sometimes.  The ones where I spill an entire thing of protein powder on the floor, burn my quinoa, and accidentally touch part of the oven on my arm and burn it.  You know, those types.  Well, I was having a bad cooking day a few week back when I decided to make some molasses spice (or cheater gingerbread) cookies.  The dough turned out wonderful  and they were baking up beautifully but then I got distracted and they got over baked.  No, they were not burnt, simply just super hard when they cooled down.  I hate cookies that are too hard. Molasses cookies should be somewhat soft, so I was super disappointed.  But not to fret, I figured I would save them and use them for something.  And I figured out just the thing.  Bourbon balls!  Back in the day I made several different types of liquor balls around the Holidays.  You know, like rum balls, bourbon balls etc.  I even made a cherry vodka ball which was really good.  But my favorite were always the bourbon balls.  Well, it has been a really long time, like maybe 7 years since I have made them so I figured it was about time this year.

    So, I blended up the cookies to a fine powder, and they were the perfect base for bourbon balls.  I decided that these needed to be chocolate bourbon balls, because those are my favorite so I added some cocoa powder too.  Plenty of bourbon, some maple syrup for a little more sweetness and the “dough” it made was really delicious. I had to have a little shot of bourbon while I was making them too, because why not?  I should have just made a hot toddy in the style my Mom used to with bourbon, because tis the season but I was feeling a little lazy.  I rolled them into little balls, chilled them for a while in the freezer and they were ready for their coating.

    I mean, yes I could have coated them with cocoa powder, but dark chocolate is so much better. So I melted down my favorite brand and they took a bath in it.  Once they were all set, they were lovely.  They tasted wonderful too.  Boozy and rich and chocolaty with the warming spices of gingerbread.  These are very warming little treats between the bourbon and the spices.  If you over baked your gingerbread cookies, now you know what to do with them!  But even if you didn’t these are delicious so maybe you should sacrifice a few for this treat.

    Vegan Chocolate Gingerbread Bourbon Balls
    Makes 10

    Ingredients:

    • 2 cups vegan gluten free gingerbread cookie crumbs (or molasses cookie crumbs)
    • 1/4 cup cocoa powder
    • 2 Tbsp bourbon (make sure it is vegan on Barnivore)
    • 2 Tbsp maple syrup
    • 1 1/2 cups chopped vegan dark chocolate


    Directions:

    1. Place the gingerbread crumbs and cocoa powder in a food processor and process until very fine like flour.
    2. Add the bourbon and maple syrup and blend until smooth and the consistency of dough.
    3. Roll into balls, and place on a parchment lined tray.  Place in the freezer and freeze until firm, about an hour.
    4. Melt the dark chocolate in the top of a double boiler, and then dip the balls one by one into it, letting the excess drain off (I like to set them on a fork to do so), then place them back on the tray.  When they are all done, place the tray in the freezer until they are set.
    5. Store them in the refrigerator for up to 1 month.
  • Mini Vegan Swedish Rice Rings with Raspberry Sauce

    Mini Vegan Swedish Rice Rings with Raspberry Sauce

    When I was little, my Mom used to make one of the most delicious desserts for the Holidays, a Swedish rice ring. No, we are not Swedish, my Mom’s side of the family is German in fact, but she got the recipe from a coworker back in the day and it was a keeper. It was like the most delicious rice pudding, scented with vanilla and almond, shaped into a beautiful ring with a bundt pan. It was topped off with sweet raspberry sauce, which made it even better.  Both me and my Mom’s favorite fruit is raspberries.  So, I would beg her to make it every year.  She made it from the time I was little, until at least high school.  I never actually watched her make it, I just enjoyed the results.  It kind of went by the wayside, being replaced with other things, like cookies I wanted to make and whatnot, but last week I thought about it, and how good a vegan version of it might be.  Funny I haven’t thought to veganize it until now, because it was fairly easy to do so.

    I am not sure what kind of rice my Mom used, but I went for the jasmine rice I had in the cupboard.  It has a sweet aromatic aroma and it was perfect for the rice pudding.  Bonus, it cooks up way faster than brown rice, and this had to have a white rice in it as was tradition.  I combined it with a coconut cream mixture I usually use for “whipped cream”, thickened it with coconut butter, and it was perfect!  It was so delicious with the almond extract and vanilla, and it smelled amazing!  I could have eaten it just like that, all fluid and whatnot like a bowl of sweet risotto, but I poured it into mini molds.  Mini molds because I don’t have a lot of people to feed it to, so they were perfect for sharing.  The longest part of this recipe is simply waiting for it to firm up in the refrigerator. But it is so worth the wait!

    I made a simple raspberry sauce to top it off with and it was lovely once drizzled with it! It was sweet and delicious just like my Mom’s rice ring but without all of the animal products.  The original one had milk, butter, gelatin and whipping cream. But I did not even miss it, the vegan version was so good!  I had to share it with my Mom of course, and she loved it as well.  If you are looking for a Holiday dessert that is a little different, give these a try!

    Mini Vegan Swedish Rice Rings with Raspberry Sauce
    Makes 6

    Ingredients:

    Rice ring:

    • 1 1/4 cups jasmine rice
    • 1 3/4 cup filtered water
    • 1 15 oz can full fat organic coconut milk
    • 3 Tbsp maple syrup
    • pinch sea salt
    • 1 tsp pure vanilla extract
    • 1 tsp almond extract
    • 3/4 cup plus 2 Tbsp coconut butter, warmed to liquid


    Raspberry Sauce:

    • 1 1/2 cups fresh or frozen (and thawed) organic raspberries
    • 2 Tbsp maple syrup


    Instructions:

    1. To cook the rice, combine it with the water in a pot, and bring to a simmer.  Cover, and cook until all of the water is absorbed and the rice is really soft, about 15-20 minutes or so.
    2. Stir in the coconut milk, maple syrup, sea salt, vanilla and almond extracts, and coconut butter, and stir until very well blended.  Remove from heat.
    3. Grease 6 mini bundt pans (mine are silicone, and I recommend it), and pour the rice mixture into it.  Place in the freezer for a few hours until they are set up completely.
    4. Meanwhile, to make the raspberry sauce, mash the berries with the maple syrup in a bowl until the consistency of jam.
    5. Unmold the rice rings from the pans, and arrange them on plates, flat side down.
    6. Pour the raspberry sauce over them, and enjoy!
    7. Store any extras in the refrigerator, covered.
  • Vegan Dark Chocolate Cranberry Pistachio Brownie Cookies

    Vegan Dark Chocolate Cranberry Pistachio Brownie Cookies

    Making Christmas cookies with my Mom when I was little was one of my favorite parts of the Holidays.  We would have the old family favorites like the pfeffernusse cookies, or my Grandma’s sugar cookie recipe (which was the most delicious I had ever tasted), or the pecan tassies, which were my Mom’s favorite.  But often times we would try new ones as well.  We would check out cookbooks at the library filled with cookie recipes, or browse through old ones we had at home and find something exciting and new.  Some of the new cookie recipes were not so good or didn’t turn out sometimes, so we never made them again. But other times they turned out awesome and we decided to add them to our list of things to make for the next year.  A couple of Martha Stewart’s cookie recipes stuck, like her gingerbread and cranberry noels (which were little butter cookies with cranberries and pecans).  I still love trying new cookie recipes around the holidays, and there are just a few I make every year, like peanut blossoms, and molasses spice cookies, because those two are my favorites.  But now, instead of browsing cookbooks for new cookie ideas I come up with ideas in my head and then try to make them.  They usually turn out, and those are the ones I share with you.  I too have flops sometimes though that end up in the garbage and it makes me sad because I hate wasting ingredients, but I don’t want to eat something that isn’t good.

    Well, luckily that hasn’t happened to me for a while, and the cookies I made a few days back were a big success!  I always like to make something chocolaty too, so I decided to make some Vegan Dark Chocolate Pistachio Brownie Cookies!  They are like chocolate chocolate chip cookies basically, so soft and delicious, but a little crispy at the edges and definitely decadent.  I call them brownie cookies, because they taste like brownies, and if you don’t over-bake them they have sort of a brownie like texture.  This dough contains plenty of cacao powder so it is intense and rich.  I sweetened it with coconut sugar and it gave it almost a caramel flavor too.  I stirred in dark chocolate chips too because I can not resist warm cookies with gooey chocolate chips.  But let me tell you the dough was delicious even before I baked them, and eating cookie dough is the best part of baking cookies as far as I am concerned.  Eating the warm cookies is second best.

    My kitchen smelled amazing while these baked, like the aroma of brownies or chocolate cake. It is such a happy smell!  These cookies are really easy to make, and in fact it took me only about 30 minutes to make them from start to finish not including cooling time.  Not that I let them cool long, because they are so good warm. These would make a great edible gift for anyone that loves chocolate, or as part of a Holiday cookie tray.  I hope you are all having a wonderful holiday season, and getting to enjoy baking some delicious things.  And, of course I hope you try out these cookies!

    Vegan Dark Chocolate Cranberry Pistachio Brownie Cookies
    Makes 2 dozen cookies

    Ingredients:
    • 2 Tbsp ground flax seed
    • 1/4 cup plus 2 Tbsp filtered water
    • 1 cup virgin coconut oil, warmed to liquid
    • 1 1/2 cups coconut sugar
    • 1 teaspoon vanilla extract
    • 1 cup cacao powder
    • 1 teaspoon baking soda
    • 1/2 teaspoon sea salt
    • 2 1/2 cups all purpose gluten free flour
    • 1/2 cup pistachios
    • 1/2 cup dried cranberries
    • 1 cup vegan dark chocolate chips

    Instructions:

    In a small bowl, whisk together the flax seed and filtered water.
    Meanwhile, in a large bowl, coconut oil with sugar and mix until well combined.
    Mix in the vanilla extract and flax mixture until well combined.
    Add the cacao powder, baking soda and salt then the flour, a cup at a time, mixing between each addition, until well combined.
    Mix in the pistachios, cranberries, chocolate chunks.
    To bake, Preheat your oven to 350 degrees. Line 2 large baking sheets with parchment paper. Roll balls into about 1 inch balls, and place on prepared cookie sheets a couple inches apart. Bake for about 10-12 minutes, until puffed and just starting to brown slightly.  Remove from the oven and let cool on the pan a few minutes, then remove to a wire rack to cool.  Repeat with remaining cookies and let cool completely.
  • Holiday Gift Ideas from Fragrant Vanilla Cake

    Holiday Gift Ideas from Fragrant Vanilla Cake

    Tis the season for giving.  So, I am sure some of you are still looking for ideas since I know this is a really busy time of the year and procrastination is common.  So, I thought a few ideas were in order!  To me, gifts are special when they are well thought out. Not necessarily expensive.  Taking the time to make something yourself can be special, and you can personalize it so that is fits the person you are giving it to. I have ideas here for home made food gifts, as well as home made body care items.  A few favorite books, as well as personal items you can buy or edible treats if you are not into making them yourself. I hope you are all having a wonderful Holiday season so far!  Here are my gift ideas…

    Cookie-2BButter-2B11

    Sugar Cookie Dough Butter…this tastes just like sugar cookie dough!  If you are the type of person who likes cookie dough better than actual cookies, then this is for you, or if you know someone who is, then this would be an awesome food present!

    Marbled-2BCake-2BBatter-2BButter-2B3

    Marble Cake Batter Nut Butter…If you cant decide between chocolate and vanilla, then this is your nut butter.  Good straight out of the jar, or stirred into some morning oatmeal, this is delicious!  Also, so pretty, so it is an impressive thing to share with a nut butter lover in your life.

    Brownie-Butter

    Raw Walnut Hemp Brownie Fudge Butter …this tastes like fudge brownies. Plus, you are getting healthy omega 3 oils too when enjoying this! I like it straight out of the jar.  Gift this to the chocolate lover in your life. And for even more nut butter recipes…visit THIS POST! I have many nut butter recipes on my website if you would like to explore other flavors!  I would be thrilled to receive such a gift, being the nut butter lover I am.

    Gingerbread Almond Butter If you know a gingerbread lover, or if you yourself are, you should whip up a batch of this deliciousness!  It is easy to make with a high speed blender or food processor and it is so good!  It tastes just like gingerbread cookies, but is healthier for you!

    Vegan Dark Chocolate Sea Salt Popcorn…this has it all!  Salty, sweet, crunchy, and of course chocolaty.  It is crave worthy!  It is the perfect thing to put in a jar and give to someone else to enjoy for delicious edible Holiday gift!  That is if you don’t finish it off first.

    IMG_1454

    Raw Maple Chestnut Truffles…these babies are sweet, nutty, soft and delicious!  Chestnuts are one of my favorite things this time of the year, and they are not available year round, which makes them even more special. They need to stay refrigerated, but these are a sweet treat that is sure to please anyone with a sweet tooth.

    IMG_1395

    Raw Cranberry Pecan Truffles...these look like you put a lot of work into them, but really they are pretty easy to make.  Just buzz all the filling ingredients in the food processor, roll into balls, dip in chocolate and voila! They keep well too, so they make a great gift.


    Vegan Eggnog Truffles…know someone that loves eggnog? I do, Eric loves it, and he loved these when I made them as well.  They taste like eggnog, but even better thanks to the chocolate coating.  A box of these would be a welcome treat to bring to a party or as a hostess gift.

    Gingerbread Cookie Dough Truffles 

    Vegan Nutella Truffles 

    Vegan Sugar Cookie Dough Truffles  These taste just like sugar cookie dough!  I love cookie dough better than actual cookies, which is why I made these.  They are heavenly.  It doesn’t get much better than cookie dough dipped in dark chocolate!  If  you have a cookie dough lover in your life, whip up a batch of these for them!

    Vanilla Bean Rose Body Frosting…this body frosting keeps your skin smooth during the winter months, and we can all use that with the dry cool air.  It smells amazing, and it fairly easy to make.  Don’t forget to make yourself some as well so you can have smooth skin.  If you can find a pretty jar to put it in, it makes a fabulous gift.

    Lavender Epsom Salts Bath Soak…a wonderful relaxing gift that will make your loved one feel pampered!  I take epsom salt baths often to sooth overworked muscles, and they work wonders!  I always include lavender essential oil for relaxation. To make soak for gifting, simply place 4 cups epsom salts in a bowl, add 1/4 cup dried lavender flowers, and drop about 20 drops lavender essential oil over them and mix together. Spoon into 4 8 oz jars.

    Scrub-2B2

    Mocha Almond Body Scrub …for the coffee lover in your life!  The caffeine stimulates the skin as the sugar exfoliates, and the almond oil leaves skin moisturized. It is great to use in the morning, and it smells amazing.

    Green-Tea-Mint-Scrub-3

    Green Tea Mint Scrub…for the green tea lover in your life. The matcha contributes antioxidants, the coconut oil moisturizes, and the mint wakes you up and cools your skin. This is particularly wonderful to use after a workout in my opinion.  Plus you smell good after using it!

    Lip-2BBalm-2B51

    Home Made Flavored Lip Balms…who doesn’t like to use lip balm flavors like brownie batter and vanilla maple?! Well, in case you don’t, there are also lavender orange and grapefruit rose which smell amazing as well.  Making home made lip balm is fun, and there is always plenty to share! These make great stocking stuffers.

    p.txt

    Citrus Cacao Butter Lip Balm…in case you would like to smell like white chocolate orange every time you apply your lip balm.  Or, you may use this as cuticle treatment for dry rough hands.  I have done that in the Winter, and it works great!  If you gift this, your friends will wonder what just what you put in this magical concoction to make it smell so amazing.

    0091

    Pangea Organics Facial Products…if you are not into making your own body care items, but you want your loved one to feel pampered, get them a set of facial care products from Pangea Organics!  These make your skin feel beautiful, and they are made from quality ingredients.

    Pacifica Makeup and Beauty Products…they are affordable, vegan, and cruelty free!  Not only that, you can find them at Target, on Amazon, on Vitacost.com, and at some drug stores. They have fun eye shadow palates, perfumes and lip products that would make great stocking stuffers or small gifts.

    11998950_893619094020257_7536361588102447922_n

    My Books, Fragrant Vanilla Cake: Sweet and Just Vegan Cakes! Of course I had to put these on the list.  I have a large cookbook collection that I am always adding to, and I always welcome cookbooks as gifts.  So if your loved one is into good food and recipes (especially desserts), then these are for you.

    IMG_1545

    L.C. Finns Extracts…these are a must have for the baker in your life.  Where else can you find flavors like hibiscus and anise?  They smell amazing and they add wonderful flavor to anything you include them in.  They have gift sets too, so they are perfect for giving!

    Raw Guru Products…like their heavenly Rawmio Spreads, Veggimins CBD products, Dastony Nut Butters, and Rawmio Chocolate Bars!  They have so much that is perfect for gifting, and I love their stuff!  It is all good quality and super delicious.  One of my favorite things is the CBD chocolate hazelnut butter pictured here.  I could just eat that with a spoon, and any chocolate lover you gift this too will love it!

    026

    Zimt Chocolates…quality coconut sugar sweetened treats are hard to find, but Zimt has you covered.  They have deliciously flavored chocolate bars and macaroons as well as cookie dough cups which are to die for.  Their baking chunks are awesome as well for cookies or just snacking. For the chocoholic in your life, consider Zimt!

    IMG_1206

    Rickaroons Macaroons…for the coconut lover in your life.  They bring macaroons to a whole new level.  My favorite is the chocolate blonde that tastes like cookie dough, but if you wanted to go seasonal, there is always the chocolate mint as well plus many other delicious flavors!

    Quooze Diffusers, are a great gift for anyone.  They are attractive (which is not something I can say about all diffusers), and they work perfectly for filling your home with pleasing aromas as well as adding a little humidity to the air (which we need in the winter, at least where I live).  I use mine whenever I know I am going to be home for a while.  Rosemary and citrus are great energizers in the morning, and lavender is a relaxing aroma at night.

    1 Gallon Wine Fruit Kit …My boyfriend got this for me last year and I have had so much fun with it!  You can make your own fruit wine (about 5 bottles a batch), and who doesn’t love good wine?  I have been making it since he gave it to me so that I always have some on hand and I love experimenting with different types of fruit.  So, if you have a wine lover in your life, consider this as a gift!


  • Vegan Christmas Tree Pizza

    Vegan Christmas Tree Pizza

    The ground is covered in snow, and I am listening to Christmas music all day at work, all of my Christmas presents are bought, but for some reason I still can’t believe Christmas is almost here!  The year went by so fast, it seems like it was just Summer.  Anyways, I am trying to be festive and making fun stuff, so I decided to make a Christmas tree pizza a few nights ago on my day off.  We will get to that in a minute though.  Pizza was a big part of my life before going vegan.  There was a point in time where pizza was made every week at my house, soon after I was gifted a pizza stone.  I would choose different toppings every week, almost never repeating them to keep it interesting.  Some were just ok, but other combinations were amazing.  I learned that I liked fruit on pizza, especially strawberries and pineapple because they become sweet and delicious when roasted and it is a wonderful contrast with the salty cheese.  I also learned that I love lots of veggies on pizza. I have tried almost every kind, and one of my favorites is winter squash.  No plain cheese pizza for me, which is funny because that was my favorite as a child, with extra cheese always.  Back to that Christmas tree pizza, I made it using ingredients that I had on hand that were colorful.

    I figured I might as well include the cooked squash I had on hand, since it is my favorite.  But that wasn’t enough on it’s own, it needed more.  So I made a quick simple chunky tomato sauce to go on it as well.  And, I had to add something healthy and green, so I added arugula after baking.  It is my favorite green, so I always have some on hand in my refrigerator and try to eat it daily.  On a side note, it is awesome stirred into your soup just before serving.   The pizza had to have cheese as well, so I used some home made vegan mozzarella I had on hand. I often times make a batch, then freeze half and use it later.  It makes the pizza making process a little faster the second time around.

    I made a simple gluten free dough, and shaped it into a tree.  It looked lovely with the red and green very festive!  But most importantly, it baked up nicely and it was super delicious.  I don’t even miss regular pizza with dairy cheese, this type of pizza is so much better! Not only that, your tummy will be happier after eating it because it is easier to digest than dairy.  As a side note, if you don’t prefer to make this gluten free, you can swap it with whole wheat pastry flour.  I hope you give this pizza a try, and I hope you are all having a wonderful Holiday season!

    Vegan Christmas Tree Pizza
    Makes one 14 inch pizza

    Vegan Mozzarella Cheese:

    • 1 15 oz can full fat organic coconut milk
    • 2 Tbsp arrowroot starch
    • 1/4 plus 1 Tbsp filtered water
    • 3 Tbsp agar flakes or 1 Tbsp agar powder
    • 1 Tbsp lemon juice
    • 1 tsp sea salt or Himalayan salt
    • 1 Tbsp virgin coconut oil
    • 1 tsp guar gum


    To make the cheese, heat the coconut milk in a saucepan until it comes to a simmer.  Meanwhile, dissolve the arrowroot starch in the water and set aside.Once the coconut milk has come to a simmer, add the agar flakes, and heat until they are dissolved (mine took about 8 minutes, if you are using the powder, it should dissolve within one minute). Next, add the lemon juice and sea salt to the coconut milk.  Mix the coconut oil with the guar gum so that the guar gum does not clump up.  Turn off the heat and add the arrowroot mixture, guar gum and coconut oil. Whisk for about 30 seconds, then pour into a silicone mold (I used a loaf pan, but if you had another shape you would like to use go ahead). Refrigerate for a few hours until firm, then pop out of the mold. You will need half the cheese for this recipe, reserve the other half for another use in the fridge, wrapped in an airtight container.  Shred the half you will be using into a bowl, and keep in the refrigerator until ready to use.


    Tomato Sauce:

    • 2 tsp olive oil
    • 2 garlic cloves, minced
    • 1 1/2 cups organic diced tomatoes (canned is fine)
    • 1/2 tsp each basil and oregano
    • sea salt to taste


    Heat the olive oil over medium heat in a small pan, add the garlic and allow to cook until fragrant, about 30 seconds.  Add the tomatoes, herbs and sea salt and cook for about 10 minutes until the tomatoes have started to break down.  Remove from heat and set aside.


    Pizza Dough:

    • 1 1/2 cups organic whole wheat pastry
    • 1 Tbsp olive oil
    • 1/2 tsp sea salt
    • 1/2 cup plus 1 Tbsp filtered water


    To make the pizza crust, combine the flour, and sea salt in a bowl, and whisk until well blended. Add the oil and water, and mix in until you have a soft dough.  Turn out onto a sheet of parchment paper with a light dusting of flour, and roll out into Christmas tree shape.  Set aside.


    For Pizza Assembly:

    • olive oil
    • 1 cup cooked butternut squash, cubed
    • fresh arugula leaves


    Pre-heat the oven to 400F degrees.  Set a pan on the center rack with an upside down sheet pan, or a pizza stone set on it. Brush the crust with olive oil, sprinkle with sea salt, and slide the parchment with the crust on it onto the stone.  Bake crust for 10 minutes, then remove the crust from the oven (still on the parchment). Top with the tomatoes and squash, then the cheese, making sure it is all evenly distributed.  Place the pizza in the oven, turn up the temperature to 475F and bake for 20-25 minutes until the cheese is bubbling and starting to brown (keep an eye on it after 15 as some ovens cook faster than others). Remove the pizza and parchment from the oven, slide pizza onto a cutting board or plate, scatter arugula over the top, slice and enjoy!

  • Vegan Peppermint Swirl Ice Cream Cake

    Vegan Peppermint Swirl Ice Cream Cake

    I know it is Winter, and it is chilly outside, but I still love to enjoy ice cream when I am home and all nice and warm in my pjs.  So, I still make ice cream year round, because it is fun to come up with new and exciting flavors, and I need something to serve with my fruit crisp, or pie.  It dawned on me though, I haven’t made a Winter ice cream cake in a long time.  You know, like a Dairy Queen ice cream cake with the crunchy bottom and smooth ice cream filling.  I used to love those as a kid.  Well, mostly just the crunchy bottom and fudge crunch layer in the middle that they had because their vanilla ice cream did not taste like real vanilla to me.  So, anyways, last weekend I decided to be ambitious and make an ice cream cake instead of just scoop-able ice cream. I thought it should have a Holiday theme, and I had 3 ideas of flavors to make, gingerbread, eggnog, or peppermint, but I decided on the peppermint because I thought I could have more fun with color.  Plus, I haven’t made anything peppermint in a while, and I love it this time of the year. I even put peppermint oil in my diffusers in the car and in my house because it smells so festive and happy.

    So, I thought it was the perfect flavor for my cake.  I made a crunchy crust for this ice cream cake with no refined ingredients, unlike the ones I enjoyed as a kid. I know it is traditional to use Oreos or something, but I  have never really been a fan of those, they have lots of artificial ingredients in them.  I also did not want to make cookies simply to crush them up because that was just too much work. So I used ingredients I had on hand to make a chocolate crust which was pretty much what I use for my raw cheesecakes sans the cacao powder.  It is the perfect thing to showcase an ice cream cake on, and it is easy and fast to make.  For the filling, I used a mixture of coconut milk and cashew butter to give it a silky smooth texture like real ice cream.  I sweetened it with maple syrup, and added vanilla and peppermint extracts and it was super delicious even before I froze it.  I mixed beet powder into half of it to give it a candy cane swirl look once finished and it turned out lovely!  If you don’t have beet powder for this recipe, you can use red food coloring, just make sure it is natural.

    Lastly, I wanted this cake to have a fudge element, so I topped it off with a gooey sweet chocolate fudge.  It was the type of thing you would make a delicious ice cream sundae with.  I then sprinkled the cake with some peppermint white chocolate and it turned out even more lovely than I thought it would!  Originally I was going to buy some candy canes just for garnish but I really don’t even care for them and they are pretty sugary and I didn’t want to buy a whole pack just to use one.  So I made the white chocolate instead.  It was a good choice because it tasted wonderful with the cake! The cake was heavenly!  Just the right amount of peppermint and vanilla, sweet, creamy and delicious that gooey fudge, rich white chocolate and crunchy crust the perfect additions.  If you are in the mood for ice cream for your Holiday dessert, give this a try!

    Vegan Peppermint Swirl Ice Cream Cake
    Makes One 8 inch cake

    Crust:

    • 3/4 cup organic gluten free rolled oats
    • 3/4 cup finely shredded dried unsweetened coconut
    • 3 Tbsp unsweetened cocoa powder
    • 3/4 cup soft pitted medjool dates (soaked in filtered water if not soft for 30 minutes and drained well.)
    • 3 Tbsp almond butter
    • 1/4 tsp sea salt


    Ice Cream:

    • 2 15 oz can full fat coconut milk
    • 1 cup raw cashew butter
    • 2/3 cup maple syrup (or to taste)
    • 1 tsp peppermint extract
    • 1/4 tsp sea salt
    • 1 tsp pure vanilla extract
    • 2 Tbsp beet powder or a few drops natural vegan red food coloring


    Fudge:

    • 1/3 cup almond butter
    • 1/4 cup maple syrup
    • 1/4 cup unsweetened cocoa powder
    • 1/4 tsp sea salt
    • 2 Tbsp filtered water (or as needed)


    Assembly:

    • vegan white chocolate*
    • vegan chocolate chips


    Instructions:

    1. Oil a 8 inch spring form pan and line with parchment paper.
    2. To make the crust, combine all ingredients in a food processor and process until fine and starting to hold together when squeezed. Once it is at that stage, press it into the bottom of the prepared pan.  Set aside.
    3. To make the ice cream, combine all ingredients but the beet powder in a high speed blender or food processor and blend until very smooth (if you are using a food processor and it still has little bits you may want to strain it through a fine meshed strainer to remove them).
    4. Pour into a bowl and place in the freezer for about 30 minutes or until chilled, whisking after 15.
    5. Divide between 2 bowls, and whisk the beet powder into one of them.
    6. To assemble the cake, pour the two different colors of filling into the center of the pan by the 1/4 cup, alternating between the two until it is full.
    7. Place in the freezer until firm, about 6 hours.
    8. Whisk together the fudge until smooth (if it is too thick add a little more water, too thin a little more cocoa powder, you want it pour-able but not too runny).
    9. When ready to serve, pour the fudge over it, sprinkle with the white chocolate and chocolate chips, and enjoy!
    10. Store any leftover cake in the freezer in an airtight container.


    *You may use store bought vegan white chocolate or make your own, this is the white chocolate recipe I used:

    Vegan Peppermint White Chocolate

    • 1/4 cup cacao butter (2 oz)
    • 3 Tbsp raw cashew butter
    • 1/3 cup coconut butter
    • 1 tsp pure vanilla extract
    • 1/2 tsp peppermint extract
    • 3 Tbsp maple syrup (or to taste)
    • 1/8 tsp sea salt
    • 1 Tbsp beet powder, or a few drops natural vegan red food coloring


    Instructions:

    1. Combine cacao butter, cashew butter, vanilla, peppermint, maple syrup,  and sea salt over a double boiler, and whisk until smooth.
    2. Divide in half, and whisk the beet powder or food coloring into one bowl until even in color.
    3. pour the two different colored chocolates into the pan, alternating between the two and swirl them, then place them in the freezer to set.
    4. Chop into pieces.
    5. Store in an airtight container in the freezer for up to a few months.

  • Cinnamon Maple Chestnut Pecan Butter

    Cinnamon Maple Chestnut Pecan Butter

    We have all heard the Holiday song with the line “Chestnuts roasting on an open fire…” but how many of us have actually tried chestnuts?  I admit, I did not try them until I was about 21 when I saw them at the local co op, and decided to be adventurous and try them.  I am all for trying any fruit, vegetable nut etc. that is completely vegan.  I had no idea how to prepare them and I had to look it up in a cookbook, which ended up being the Martha Stewart Holiday cookbook I had gotten from the library.  I roasted them in the oven, no open fires at my house.  They smelled really delicious and ended up being really yummy!  I was hooked, and for the rest of the season, I was buying them every week to enjoy.  I still buy them when I see them at the store because they are sort of a special seasonal treat, and you only get them for a few months here.  I had never actually bought them pre-cooked, I usually roast my own, but my Mom gifted me with a container of roasted chestnuts she bought at Trader Joes.  They were actually really good and tasted just like the ones I make myself, just not as warm and toasty.  But, perfect for using in recipes when you don’t want to mess with cooking them (which can be kind of tedious since you have to cut an x in the top of each one before roasting to let the steam escape).

    So what to do with them?  I usually use them in a dessert, but I wasn’t in a dessert mood that day so I decided to make a nut butter out of them.  I figured since they are a lower fat nut, I would combine them with pecans which are rich in fat to make a smooth and delicious nut butter. A lot of times I do mix the nuts in my nut butter to achieve a smoother nut butter, or a certain flavor.  I sometimes like my nut butters more savory and leave them with just a little sea salt, but I decided to add a little cinnamon and maple to this one.  It blended up nicely and the combination was super yummy.  I already love pecan butter for its caramel like flavor, but this one was even more delicious with the chestnuts.

    This is simply heavenly for snacking with a spoon.  But it would also be awesome on apple slices, stirred into your oatmeal, or on toast…you get the idea!  If you happen upon some chestnuts, be sure to give them a try.  If you want to make them yourself, here is how you do it.  Preheat the oven to 400F degrees, and cut an X in the top of each chestnut with a knife.  Spread them out on the sheet pan, and place them in the oven.  Bake them until they start to smell fragrant and the insides are looking toasted, about 10-15 minutes depending on your oven.  Remove them from the oven, and let cool until you can handle them.  Then, remove the shell by pressing down on them (it usually cracks in half if they have roasted long enough). Trust me, it is something you must make at least once in your life, they are super delicious even just plain and fresh roasted!

    Cinnamon Maple Chestnut Pecan Butter
    Makes about 2 cup

    Ingredients:

    • 12 oz roasted chestnuts
    • 3 cups chopped pecans
    • 1/4 cup maple sugar
    • 1 tsp cinnamon
    • 1/4 tsp sea salt


    Directions:

    1. Place all ingredients in a high speed blender and blend until smooth.
    2. Pour into a jar.  Store in the refrigerator for 1 month.


  • Chocolate Covered Chestnut Caramels

    Chocolate Covered Chestnut Caramels

    My Grandma used to give us grand kids boxes of chocolate on Holidays.  The assorted ones that had at least 15 different chocolates, and you did not know what they were.  I would always try to guess.  I loved the ones that were all chocolate, caramel, or raspberry cream.  But then sometimes I would bite into one that I totally did not like, maybe a cherry cordial or orange cream (sorry if those are your favorites).  You could usually tell the caramels because they were square.  I really didn’t care if they were dark chocolate or milk chocolate, the caramels were my favorite!  I was thinking about those boxes of chocolates recently and I thought to myself, why not make some chocolate coated caramels?!  I could have a whole batch of my favorite!  I thought I could give them a festive twist though, and I added chestnuts to them.  I love chestnuts this time of the year, they are a delicious snack, that does not get enough attention because I don’t think people know how to cook them. You can usually buy them in the produce section at the store this time of the year.  I have included instructions for making them at the bottom of this post.  Anyways, I think they have kind of a nutty buttered popcorn flavor.  They have a different texture from other nuts that is worth trying out.  You might just get hooked like I am!

    So back to those caramels, I actually had some cooked chestnuts on hand, so I blended them up with some gooey dates to make a delicious caramel.  Date caramel is something that is completely essential if you are a vegan who is trying to eat unprocessed foods.  I mean, technically if you are craving caramel you could just eat a date because they are nature’s caramel, but if I did that here, I could not get that smooth texture and combine them with the delicious chestnuts.  I added some coconut oil to the caramel to help it firm up enough to hold the square caramel shape and it was so silky smooth and luscious!  I could have just eaten it with a spoon, but instead I chilled it and cut it into caramels.

    I melted my favorite dark chocolate for coating these, but you can use your favorite brand. If you are looking for a good quality vegan dark chocolate with good ingredients and no refined sugars, I recommend Lily’s chocolate chips, Luv dark chocolate chunks, or Zimt baking chocolate. Once the caramels were all dipped and set up I was so excited to try one! They were super delicious!  Rich buttery creamy sweet gooey caramel with a thin layer of dark chocolate!  So heavenly!  I would take these over those ones in the boxes of candy I had as a kid any day.  If you are a big caramel fan, or looking for a recipe to include some chestnuts in, give these a try!

    Chocolate Covered Chestnut Caramels
    Makes 16

    Ingredients:

    • 2 cups soft pitted medjool dates (soak them in water 30 minutes until soft if not soft, and drain well before using in recipe)
    • 1 cup roasted chestnuts, finely chopped*
    • 1/2 cup filtered water
    • 1/4 cup melted coconut oil (at room temperature)
    • 1 tsp pure vanilla extract
    • 1/4 tsp sea salt
    • 1 1/2 cups chopped vegan dark chocolate or dark chocolate chips


    Instructions:

    1. To make the caramel filling, combine the dates, chestnuts, water, coconut oil, vanilla, and sea salt in a high speed blender and blend until smooth.  Spread out onto a parchment lined tray in a square about an inch thick.  Set in the freezer for a few hours until completely firm. Cut into 16 squares, separate them, then place back into the freezer until they are completely hard (if they have warmed up at all).
    2. Melt the chocolate in the top of a double boiler until smooth.
    3. Dip each caramel into the chocolate, coating it completely and allowing the excess to drain off (I like to set mine on a fork to do so), and place back onto the tray.  When they are all done, put them back into the freezer to harden the chocolate if it isn’t set yet.
    4. Store caramels in the refrigerator for up to a month in an airtight container with a lid.


    *For Roasted Chestnuts:

    Preheat the oven to 400F degrees, and cut an X in the top of each chestnut with a knife.  Spread them out on the sheet pan, and place them in the oven.  Bake them until they start to smell fragrant and the insides are looking toasted, about 10-15 minutes depending on your oven.  Remove them from the oven, and let cool until you can handle them.  Then, remove the shell by pressing down on them (it usually cracks in half if they have roasted long enough).

  • Loaded Baked Potato Bites

    Loaded Baked Potato Bites

    I was watching a cooking show recently with a football game foods theme and they were making potato skins.  They looked delicious and it got me to thinking, I haven’t eaten potato skins since I was about 10 probably.  I mean, it isn’t something I really see often at the restaurants I go to and it isn’t like I ever made them at home.  But I love the idea of them.  They are usually loaded up with some pretty greasy stuff at most restaurants like bacon, cheese and sour cream so even if they were on a menu somewhere they are most likely not at all vegan or something I would eat.  But you know me, I like to veganize things and make them a bit healthier, so I decided to do just that.  Well, kind of.  Let me explain, what I made wasn’t exactly skins because I instead sliced the potatoes and made little loaded baked potato bites.  You know the concept of sweet potato toast?  Well I thought why not use it with regular potatoes.  I thought about making large ones and slicing the potato lengthwise, which you can totally do if you are having these for dinner or something and you want them more like actual potato skins without all of the work of scooping flesh (plus no wasting this way).  But, I thought since it is the Holiday season, why not make them little bites perfect for serving at parties?

    So, I sliced a few potatoes thinly into cute little rounds, and roasted them with some olive oil to create delicious little potato disks.  Now, I thought about making a vegan sour cream to top them off with but I instead decided on using guacamole.  After all, it is creamy, delicious, AND healthy.  Already winning over those traditional potato skins.  I wanted to top them with bacon too.  No greasy animal products here though.  I made a crispy coconut bacon to top them off.  Trust me, if you have never tried coconut bacon it is something you have to try.  It is the most delicious vegan bacon substitute I have had and perfect for crumbing over things like salads or popcorn or these little bites.  Don’t do it until the last minute before serving though because you want them to stay nice and crispy not absorb moisture (this is not an appetizer that should be assembled more than an hour before serving).   Lastly, I sprinkled scallions and red pepper flakes over them.

    They looked adorable, but not only that, they were super delicious.  If I were at a party, I would be the one that kept coming back and eating all of them.  You know what I mean.  I was kind of like that as a kid with anything involving cheese.  No cheese here though, just vegan deliciousness.  These are not only vegan, but they happen to be completely gluten free and nut free too, so they are perfect if you are serving guests with allergies to those things.  Happy Holiday season!


    Loaded Baked Potato Bites
    Serves 12

    Ingredients:

    Potatoes:

    • 4  yukon gold potatoes, sliced into 1/4 inch thick slices
    • olive oil
    • sea salt to taste

    Coconut Bacon:

    • 1 1/2 cups large flake coconut
    • 2 Tbsp tamari
    • 2 Tbsp liquid smoke
    • 1 Tbsp maple syrup

    For topping:

    • 1  cup guacamole
    • 2 scallions, sliced
    • red pepper flakes


    Instructions:

    1. Preheat the oven to 400F degrees, and oil a sheet pan.
    2. Toss the potatoes with just enough olive oil to coat, and sea salt.  Spread the potatoes out on the sheet pan, place in the oven and roast until golden brown, about 25 minutes depending on your oven.  Remove from the oven and let cool until just warm or at room temperature.
    3. To make the coconut bacon, preheat the oven to 350F degrees, and line a sheet pan with parchment.
    4. Toss the large flake coconut with the tamari, liquid smoke and maple syrup and spread out on the pan.  Place in the oven and bake for about 12-15 minutes (depending on your oven), keeping a close eye at the end and checking it in the final minutes because it burns fast.  Remove from oven and let cool.
    5. Spoon some of the guacamole onto each potato slice.  Place a little coconut bacon and scallions on each toast and sprinkle them with a little red pepper flakes.  Arrange on a plate and serve!


  • Vegan Eggnog Caramel Tart

    Vegan Eggnog Caramel Tart

    It doesn’t feel like December here yet, it was 50 degrees this weekend and yesterday, perfect weather to get out running and biking in.  I know some people are missing the snow, but I love that it is warm still. I know it is going to snowy here soon enough, but for now I will enjoy the ideal weather while it lasts.  I still am getting into the Holiday spirit though despite the weather, and I am in the mood to listen to Christmas music and drink eggnog.  The first time I actually had eggnog, it wasn’t even the real dairy kind.  I actually bought soy nog, because one of my coworkers said it was amazing.  So I tried that in my mid 20s and it was delicious.  I understood why people loved it so much. And, adding a little bourbon to it made it even better.  I was actually scared to try eggnog as a kid, which is why soy nog was my first exposure to it.  Because my Dad made fun of it and called it “egg-snag”  when I was little which did not sound very appetizing, and I thought that it must be gross. To be honest, the idea of the dairy kind grosses me out now, because of all of the eggs and milk.  I don’t know why but I can’t even stand the smell of eggs and milk anymore, or the idea of where they came from.  But luckily now actually make my own home made vegan eggnog because it is easy and healthier and less sugary than the store bought and I am sure it is way better than the dairy version.  I don’t usually use soy though, I make a coconut milk based one.  Since it is the eggnog season, and I was craving it I decided that I wanted to make an eggnog dessert last weekend.

    I mean, yes I could have just made eggnog.  But hot much more fun is it to make a Vegan Eggnog Caramel Tart!  Which is actually what I decided to make.  I have made a raw eggnog cheesecake before, and this filling ended up tasting like that, but it was easier to make.  I thought about making a baked crust, but decided that I wanted to make something faster and easier so I made a coconut oat crust which was perfect!  It is kind of like my quick graham cracker crust substitute for pies and tarts.  It is sweet, delicious and the perfect base for just about anything!  For the filling, I used a mixture of coconut milk and cashew butter to make a super smooth luscious base that tasted like eggnog once I added the maple syrup to sweeten, salt, nutmeg and bourbon.  It was heavenly before I even poured it into the tart.  I thought about leaving it just like that and topping it off with whipped cream, but instead opted for a bourbon caramel.

    Yes, this tart is a little boozy.  If you aren’t into that substitute water.  But the bourbon in this is awesome!  I know some people use rum and brandy in their eggnog, but bourbon is just what i usually use.  Feel free to swap in what you like! Once it was all set and ready to enjoy I could not wait to dive in.  It was super delicious!  Like a creamy eggnog cheesecake ribboned with boozy caramel.  This would make the perfect Holiday dessert if you are an eggnog fan (or even if you aren’t it might win you over).

    Vegan Eggnog Caramel Tart
    Makes one 8 inch pie

    1 9 inch pie plate or removable bottom tart pan

    Crust:

    • 3/4 cup finely shredded dried coconut
    • 3/4 cup Bob’s Red Mill gluten free rolled oats
    • 1 cup soft pitted medjool dates (if they are not soft, soak them 30 minutes and drain well before using)
    • 1/4 tsp sea salt
    • filtered water as needed


    Filling:

    • 1 1 15 oz can full fat organic coconut milk, chilled
    • 1/3 cup maple syrup
    • 1/4 tsp sea salt
    • 1 tsp pure vanilla extract
    • 3 Tbsp bourbon
    • 1/8 tsp nutmeg
    • 1/2 cup raw cashew butter
    • 1 cup coconut butter warmed to liquid


    Caramel:

    • 1 cup soft, pitted medjool dates (soaked in water 30 minutes, and drained well before using if not soft)
    • 1/4 cup pecan butter or almond butter
    • 1/4 cup plus 3 Tbsp filtered water
    • 1 Tbsp bourbon
    • 1 tsp pure vanilla extract
    • pinch sea salt


    Instructions:

    1. For the crust, combine all ingredients in the food processor until finely chopped and starting to hold together when squeezed (if it doesn’t you may need to add a little filtered water 1 Tbsp at a time).
    2. Press the mixture into a 9 inch pie crust, or a 9 inch removable bottom tart pan or pie pan greased with avocado oil (or other oil that doesn’t harden when chilled).
    3. For the filling, combine all ingredients in a high speed blender and blend until smooth. Pour into the prepared crust.
    4. For caramel, place all ingredients in a high speed blender and blend until smooth.  Drop the caramel over the filling by the heaping teaspoon, then swirl it with a knife or toothpick to marble it.  Place in the freezer until set, about 2 hours.
    5. Tart keeps refrigerated for 1 week in a container.


  • Vegan 5 Spice Peanut Butter Cookies

    Vegan 5 Spice Peanut Butter Cookies

    When I was younger I used to like to go to a local spice shop and walk around and open all of the sample jars and smell them.  Even if I had already smelled them before, it was all part of the experience of shopping there.  Some things smelled better than others of course, and I especially had a thing for the baking spices.  Cinnamon was one of my favorites, as was Chinese 5 spice powder.  It is a sweet heavenly aroma.  If you have never heard if it, it is a mixture of star anise, cloves, cinnamon, Sichuan pepper and fennel.  It smells sweet and a little like licorice and of course cinnamon.  Just the thing to use in Christmas cookies, even though it does have lots of savory applications as well.  I had made 5 spice peanut butter cookies back when I was in college because I had thought it sounded good and it totally was.  But sadly they were not vegan so I haven’t made it in a long time.  But I decided that it was about time I veganize it.  I have been waiting several weeks to do so actually until I had time after Thanksgiving.  Because the last few weeks have been super busy I feel like with food prep and getting together with people and stuff going on.  So, finally Monday I had time to relax and bake.

    Peanut butter cookies are already pretty simple to make, so it is not a hard recipe to veganize.  I just substitute ground flax seed mixed with water for the eggs and coconut oil for butter and it works just as well.  Everything else is pretty much the same, except I have swapped out coconut sugar for the brown sugar. I added in a generous tablespoon of the 5 spice powder and the dough was delicious!  I have to say, I like cookie dough even more than actual cookies, and I do “sample” a lot of it when I make them. It is kind of tradition, and what makes baking the cookies so enjoyable!  That, and the warm ones when they come out of the oven.

    These smelled amazing while baking!  The sweet aroma of 5 spice, coconut oil and peanut butter filling my kitchen.  I did not wait until they cooled completely to try them, they had to be warm and still very soft.  I love that.  They were sweet, yummy, and just as good as the non-vegan version I made back in the day.  If you are a peanut butter cookie fan and want to try a jazzed up version give these a try!

    Vegan 5 Spice Peanut Butter Cookies 
    Makes 12 cookies

    Ingredients:

    Cookies:

    • 1 Tbsp ground flax sseed
    • 3 Tbsp filtered water
    • 1 cup coconut sugar
    • 1 Tbsp 5 Chinese 5 spice powder
    • 3/4 cup organic peanut butter
    • 1/4 cup coconut oil, warmed to liquid
    • 1 tsp pure vanilla extract
    • 1 1/4 cups gluten free all purpose flour
    • 3/4 tsp baking soda
    • 1/2 tsp baking powder
    • 1/2 tsp sea salt


    Instructions:

    1. In a small bowl, whisk together the flax seed and water.  Place the bowl in the fridge for 15 minutes, this is your flax egg.
    2. In a large bowl, with a wooden spoon, mix together the sugar, 5 spice powder, peanut butter, coconut oil, vanilla and flax egg, until smooth.  Then mix in the flour, soda, baking powder, and sea salt in until the mixture is smooth.
    3. Preheat the oven to 375F degrees.  Line a sheet pan with parchment.
    4. Shape the cookie dough into 2 inch balls, place on your baking sheet a few inches apart and flatten with a fork, like you would with peanut butter cookies.
    5. Place in the oven and bake at 375 for 12 minutes or so, until lightly browned and set.  Allow to cool on a rack.
    6. Enjoy!
  • Vegan Gingerbread Cookie Dough Truffles

    Vegan Gingerbread Cookie Dough Truffles

    I am a planner.  I like to plan things ahead and know what is going on before I dive into things so I know what to expect.  A lot of times I go through a bunch of different scenarios in my head before I carefully pick which one that I think is best then go with it.  But sometimes things go a little differently than I had hoped, and in the last few years I think I have learned to adapt more.  Like yesterday when I was looking forward to baking some gingerbread cookies all day, and day dreaming about them at work.  But then stuff happened and I ended up staying late at work and not having enough time to make and decorate them.  So I adapted and decided to make an easier faster recipe some gingerbread truffles.  It actually worked out perfect, because I love decorating gingerbread cookies, and they are delicious but not as delicious as the cookie dough.  I have a thing for cookie dough, and it is always my favorite part of baking cookies, getting to eat it.  It stems from the days of when I was a little kid baking cookies with my Grandma in the kitchen.  I would steal a little cookie dough each time she was not looking and I became a cookie dough loving girl for life.  Now, you may not thing gingerbread dough is as good as chocolate chip cookie dough, or peanut butter cookie dough, but think again. It is good stuff, and that spicy flavor is perfect for this time of the year.

    There wasn’t any actual real dough in these though, I used almond butter as a base, because I figure eating a truffle made of nut butter at least has some redeeming health qualities like protein and all of the benefits of nuts like fiber and nutrients.  The almond butter made a smooth crave worthy rich base, and all I needed to add to it was maple syrup, a little coconut butter to firm it up so it could hold shape, and some sea salt along with traditional gingerbread spices.  Ginger, cinnamon, nutmeg and cloves smell and taste simply heavenly together!  It honestly tastes just like gingerbread cookie dough!  Now, you could eat the “dough balls” just like this, but I wanted them to be dipped in dark chocolate.

    Because chocolate is amazing with gingerbread. I admit I thought about dipping them in white chocolate, but I ended up going with the dark because it was easier and I was more in a rich dark chocolate sort of mood.  These came together fast, and I could not wait to try them!  They were crave worthy!  They honestly turned out even better than I imagined, just the right amount of sweet, tasting like cookie dough, and that dark chocolate on the outside was the perfect addition!  These would make a great Holiday food gift, if they make it out of your kitchen…but it is so tempting to eat them all yourself, so you may have to make a double batch.

    Vegan Gingerbread Cookie Dough Truffles
    Makes 16

    • 1 cup almond butter
    • 2 Tbsp melted coconut butter (or 3 if your almond butter is especially runny)
    • 1/4 cup maple syrup
    • 2 tsp ground ginger
    • 2 tsp ground cinnamon
    • 1/2 tsp ground cloves
    • 1/4 tsp nutmeg
    • 1/4 tsp sea salt
    • 1 1/2 cups chopped vegan dark chocolate


    Instructions:

    1. in a bowl, mix together the almond butter, coconut butter, maple syrup, ginger, cinnamon, cloves, and nutmeg until smooth.
    2. Roll the mixture into 1 1/2 inch balls, and place on a parchment lined tray.  Place in the freezer for about 15 minutes (or until firm).
    3. Meanwhile, melt the chopped dark chocolate in the top of a double boiler until smooth, stirring often.
    4. Once the chocolate is ready, dip each of the gingerbread fillings into the chocolate letting the excess drain off (I like to set it on a fork to do so) and place back onto the tray.  Repeat with the remaining truffles, and place back into the freezer until the chocolate is hard, about 10 minutes.
    5. Store truffles in an airtight container in the refrigerator, they keep for 1 month.


  • Vegan Mexican Dark Chocolate Layer Cake 

    Vegan Mexican Dark Chocolate Layer Cake 

    Last weekend we celebrated Eric’s Birthday, and he totally lucked out because the weather has been fabulous and warm here lately and his Birthday didn’t fall on Thanksgiving this year.  Some years it does and it is kind of not fair since who wants their Birthday on a Holiday when everything is closed and you can’t do the things you want to.  So, this year  we visited our favorite brewery, took a brewery tour, and enjoyed one of our favorite special occasion restaurants.  I felt bad because he did have to work on Thanksgiving, so I tried to make the weekend fun.  He is my best friend and of course one of my top recipe tasters so he is super important to me.  So, I wanted him to be able enjoy himself.   His Birthday is actually today even though we celebrated it early due to having to work, and as is tradition I made him a cake.  Ever since 2012 (when we met), I have made him a cake of his choice.  Back then I was raw vegan so the first one was a Raw Mexican Dark Chocolate Turtle Cheesecake and it was heavenly!  He almost always chooses chocolate, although last year it was a Vegan Sweet Potato Bourbon Caramel Pecan Cake.  This year we decided to go for the spiced chocolate again with a Mexican Dark Chocolate Layer Cake.  It was definitely a good choice, and just the cake I would pick for him.

    He is obsessed with hot peppers.  In fact, the first food item I ever shared with him when we first met was a small jar of habanero hot sauce.  We both appreciate that sort of thing, because he actually makes hot sauce too.  At one point we would buy a 5 lb box of habaneros at a time from the produce department at my work and share it to make hot sauces.  That kind of went by the wayside, because we are both busy, but he still asks me “what if you made (insert dessert here) with hot peppers?  I have made quite a few spicy things pairing sweets and heat for him in the past.  He recently got a pepper grinder with ghost peppers in it and we sat at the table eating dinner, both trying it and sweating.  He put way more peppers than me on his food but it was pretty comical to watch each other sweat.  That is what kind of gave us the idea for this cake.  Chocolate and spicy peppers are heavenly together.  I did not put ghost peppers in this cake though, I went for the more mild chipotle pepper because I figure you want to still be able to taste the cake as you eat it.

    I made a decadent rich chocolate cake batter sweetened with dates and it made for a moist and delicious cake that wasn’t too heavy, but just right.  I am super picky about cake consistency, and so I made sure to bake this for just the right amount of time.  Nothing ruins a cake like over baking it (or under baking it).  I had added chipolte powder and cinnamon into the batter to give it an aromatic special touch.  You could taste the spice in there, and it had a bit of heat, but not so much that you couldn’t taste the rich chocolate flavor.  For the frosting, I went with a super fudgy one that is my go to for many cakes, one made with a sweet potato base.  It may sound weird but it is amazing once it is finished and tastes super rich.  So yes, this cake is actually refined sugar free, and gluten free but you would never know because it tasted amazing.  It was the perfect cake for my favorite guy on his birthday!

    Vegan Mexican Dark Chocolate Cake 
    Makes one 2 layer 6 inch cake

    Ingredients:

    2 6 inch cake pans

    Cake:

    • 1 1/2 cups Bob’s Red Mill Gluten Free All Purpose Flour
    • 1/4 cup cacao powder or unsweetened cocoa powder
    • 1 1/2 tsp baking soda
    • 1 tsp baking powder
    • 1/2 tsp sea salt
    • 1 tsp cinnamon
    • 1/2 tsp ground chipotle pepper
    • 1 1/4 cups packed soft medjool dates, pitted, soaked in water for 30 minutes and drained
    • 1/4 cup almond butter
    • 2 tsp pure vanilla extract
    • 2 cups filtered water
    • 2 Tbsp apple cider vinegar


    Frosting:

    • 1 1/4 cups mashed Japanese sweet potatoes*
    • 1  cup soft pitted medjool dates (soaked in water for 30 minutes and drained before using if not soft)
    • 1/3 cup almond butter
    • 1/2 cup filtered water (or as needed)
    • 1/2 cup unsweetened cocoa powder
    • 1 tsp pure vanilla extract
    • 1/4 tsp ground chipotle powder
    • 1/4 tsp sea salt


    Directions:

    1. Preheat the oven to 375F degrees and position rack in center of oven.
    2. Oil two 6 inch round cake pans with coconut oil and line the bottom with parchment.
    3. Whisk flour, cocoa powder, baking powder, baking soda, cinnamon, chipotle sea salt in a large bowl to blend well.
    4. Place dates, water, almond butter, and vanilla extract into a blender, and blend until smooth, then whisk this blended mixture into the flour mixture until well blended. Whisk in the cider vinegar until bubbles form.
    5. Pour the cake batter into prepared pans, and place in the oven.
    6. Bake cakes until set and a toothpick inserted into the center comes out almost clean, about 25-30 minutes.  Remove from oven, let cool completely, the un-mold them onto two plates (I like to cover mine and chill in the refrigerator for a few hours to make slicing easier).
    7. Slice cakes in half horizontally so that you have 4 layers. Set aside.
    8. To make the frosting, combine all ingredients in a blender and blend until smooth (adding water a little at a time if you think it is too thick).  Set aside.
    9. To assemble, place one cake layer on a plate, and spread frosting 1/4 inch thick over it. Place the other cake layer over that, then spread more frosting, over it like the last layer.  Repeat with another layer, and top off with last piece of cake.  Spread the remaining frosting on the top and down the sides of the cake.


    *I like to roast my sweet potatoes in the oven. To do so, cut them in half, and place them cut side down on a parchment lined tray.  Roast at 400F degrees for about an hour or until they are tender.  Let cool before pureeing.

  • Raspberry White Chocolate Chunk Peanut Butter

    Raspberry White Chocolate Chunk Peanut Butter

    When I was in high school shopping with my Mom at the store, I came across a jar of the most amazing sounding peanut butter ever.  It was raspberry white chocolate.  I begged my Mom to buy it, and it was pretty amazing.  Up until that point, I hadn’t seen anything but the standard peanut butter and almond butter and we didn’t shop in stores that had much of a variety at that point so it was kind of exciting for me.  Now of course, there are hundreds of different varieties of brands and nut butters out there to choose from.  I never usually buy nut butter, because I prefer to make my own, but I am always keeping my eyes open for inspiration for things to make.  I think it would be awesome to have a nut butter company and come up with interesting flavors and I am sure they would sell well!  I mean, who doesn’t like things like chocolate chunk peanut butter, or sugar cookie dough butter.  I am fortunate enough to be able to create my own flavors and make them in the Vitamix even if they never leave my house.  If you read my blog often, you know I am obsessed with all things nut butter, and not only do I use it in a lot of recipes, I eat it with a spoon too.  So yesterday I decided to recreate that raspberry white chocolate chunk peanut butter but make it even better.

    I will find any excuse to make another flavor of nut butter, even if it is just that it sounds good. It was actually quite simple to make!  I blended up my organic peanuts, and then blended freeze dried raspberries into half to give it an intense raspberry flavor. I thought about just stirring the raspberries into the peanut butter, but then the texture gets a little odd so I decided that the blending was better.  Plus, it gave it even more delicious raspberry flavor.  I stirred my home made chocolate chunks into it and it was simply heavenly.  Yes, this is something that is meant to be eaten with a spoon and enjoyed.  But of course you could stir it into oatmeal, or make some super delicious toast with it too.  If you are a peanut butter lover, definitely give this recipe a try!

    I get asked a lot of questions about making my own nut butter, so I figured I would give you a few general tips for making nut butter too.  First, if you are using a Vitamix, about 4 or 5 cups is the max amount you should add to the blender, or it will not blend well and tax the blender.  Second, always use the tamper to press the nuts down into the blades, but not too hard if it is struggling at all.  If it is, ease up a little before pressing more down.  Some nut varieties need a little oil to blend well because they don’t have as high of a fat content.  I find that with cashews and hazelnuts I usually need to add a little neutral oil (like a few Tbsp to 1/4 cup depending on how much I am blending) like avocado oil because it doesn’t harden once cooled. If you are using a food processor to make nut butter, it will take 2-3 times as long, and you will need to scrape the sides down every few minutes.  Be patient, it will blend if your food processor is good quality, it just won’t get as smooth.  Peanuts are one of the easiest things to blend thanks to their fat content, so this recipe should come together faster for you!  Happy nut butter making!

    Raspberry White Chocolate Chunk Peanut Butter
    Makes about 2 1/2 cups

    Ingredients:

    • 4 cups roasted organic peanuts
    • 1/4 tsp sea salt
    • 1 cup organic freeze dried raspberries*
    • 3 Tbsp raw coconut sugar
    • 1/3 cup vegan white chocolate, cut into chunks*


    Instructions:

    1. In a high speed blender, blend the peanuts and sea salt at high speed, using the tamper to press them into the blades until they are smooth.  Remove half of the peanut butter to a glass measuring cup.
    2. Add the raspberries and coconut sugar to the remaining peanut butter in the blender, and blend until smooth. Stir the white chocolate chips into the raspberry peanut butter.
    3. pour the 2 peanut butters into a jar, alternating between the two.
    4. Enjoy! Store in the refrigerator.


    *You can use store bought white chocolate, your own recipe, or make my recipe below.


    Vegan White Chocolate Chunks
    Makes about 2 cups

    Ingredients:

    • 1/4 cup cacao butter (2 oz)
    • 2 Tbsp raw cashew butter
    • 1/4 cup coconut butter
    • 1 tsp pure vanilla extract
    • 2 Tbsp maple syrup (or to taste)
    • 1/8 tsp sea salt


    Instructions:

    1. Combine cacao butter, cashew butter, vanilla, maple syrup,  and sea salt over a double boiler, and whisk until smooth.  Pour into a chocolate mold, then place them in the freezer to set, about 30 minutes.
    2. Chop into chunks, and store in the refrigerator.


  • Vegan Sweet Potato Pecan Pie

    Vegan Sweet Potato Pecan Pie

    We always had 3 different types of pie at Thanksgiving gatherings at my Grandparent’s house when I was little.  It was always apple, pecan and pumpkin.  I would always take some of each as was tradition, but really the pecan was my favorite.  It was my Mom’s favorite and my Grandma’s favorite too, so maybe that was hereditary.  I mean, I could enjoy apple pie at other times of the year, because it was something my Mom liked to make, but pecan we only enjoyed that one day of the year.  There was just something about that gooey caramelly nutty pecan goodness that was amazing.  I still feel that way, but I now make my pecan pies refined sugar free.  No corn syrup in sight, I usually do a date caramel now, because I love fruit sweetened deliciousness.  In fact I think for the past 10 years or so I have made pecan pie in some form for Thanksgiving, because my Mom always requests it.  Grandma is no longer around, but if she were, I know she would love them.  Well, this year my Mom asked me to make a sweet potato pecan pie to bring to Thanksgiving.

    Of course I was happy to make one!  It sounded good to me too!  Sweet potatoes are my favorite in any form, and I love them in desserts.  Plus, I think that they are even more delicious in pie than pumpkin because they have a naturally sweeter flavor.  Not that I don’t like pumpkin pie, it is a classic, but I just prefer sweet potatoes if I have a choice.  And, they can be used in the same manor. Just FYI, if you ever want a pumpkin style pie but only have yams or sweet potatoes on hand, if you cook them and puree them they can be swapped for an even more delicious pie.  For this pie, I wanted a gooey layer of pecan pie on the bottom.  Just like the traditional stuff.  So I made a sweet gooey date caramel with pecan butter and stirred in plenty of chopped pecans.  It was so good I wanted to keep sampling it, but I had to stop so that there would be enough for the pie.

    For the filling, I used my pumpkin pie recipe, and it was super delicious even before being baked.  It tasted like delicious sweet potato pudding.  As the pie baked it filled my home with the most heavenly aroma!  Spice and caramel and a buttery smell from the crust….I was super excited!  But, I  had to wait until it cooled which was unfortunately overnight since I made it in the evening.  Once I was able to try it though, it was simply heavenly!  The crunchy pecans suspended in gooey caramel filling and creamy spiced sweet potato filling on top of the buttery crust were just what I was hoping for!  I am proud to share it with my family, and you would never know it is vegan because it tastes like it is rich and traditional.  If you are looking for a new pie to make this Holiday season, give this a try!

    Vegan Sweet Potato Pecan Pie

    Makes one 9 inch pie

    Crust:


    Pecan Layer:

    • 2 cups soft, pitted medjool dates
    • 1/2 cup pecan butter (or almond butter if you can not get pecan)
    • 1/4 cup filtered water
    • 3 Tbsp maple syrup
    • 1 Tbsp coconut oil
    • 1 tsp pure vanilla extract
    • 2 cups chopped pecans


    Filling:

    • 2 cups cooked sweet potato (canned is ok too), packed
    • 1/3 cup pure maple syrup
    • 3/4 cup full fat organic coconut milk
    • 2 tsp coconut oil
    • 1 1/4 teaspoon ground cinnamon
    • 1 teaspoon ground ginger
    • 1 /4 teaspoon ground nutmeg
    • 1/4 tsp ground cloves
    • 1/4 teaspoon salt
    • 1 1/2 tablespoons cornstarch
    • 3/4 teaspoon agar powder


    1. To make the crust, in a large bowl, mix together flour, sugar, sea salt, and spices. Cut in coconut oil with a pastry blender or 2 knives until it is in pea sized pieces. Mix in  just enough water to create a smooth dough that holds together but isn’t too sticky. Add more water if needed, and knead slightly until a smooth dough is created. Roll out into a 10 inch circle on a sheet of parchment paper, then use the paper to help you transfer it to a 9 inch pie dish.  Flute the edges, and set aside in the refrigerator.
    2. Pre-heat the oven to 375F degrees.
    3. To make pecan filling, blend all of the ingredients except the pecans in a blender until smooth, then stir in the pecans.  Pour into the crust and smooth the top.
    4. To make the sweet potato filling, place all ingredients in the blender and blend until smooth.
    5. Pour the sweet potato filling over the pecan layer and smooth out the top.
    6. Place in the pre-heated oven and bake for about  50 min. until the edges of the crust are lightly brown, and pie is set.  Allow to cool completely before serving (I chilled mine overnight in the refrigerator).
    7.   Store any leftovers in the refrigerator.


  • Butternut Squash and Cranberry Casserole

    Butternut Squash and Cranberry Casserole

    Squash is one of my favorite things ever, and I get super excited when it comes into season.  There was a point in my life when I was younger when I used to eat it almost every day for pretty much the Fall and Winter seasons in different ways for dinner. My skin even started to take on a little squash like hue that my Mom called my “squash tan”.  I don’t go quite to that extreme now, but I do enjoy it a couple of times a week.  After all, it is not around all year (well at least not the good tasting kind that only come when in season) so it is special and deserves to be enjoyed.  I love it stuffed, roasted in cubes in salads, or even mashed sometimes.  I can’t believe as a little kid I thought it was gross because I had been told that it was by a family member and I didn’t want to try it.  I was missing out.  I started to enjoy it though, when my Mom served the roasted kind stuffed with apples.  It turned me around and got me over my fear.  I have mostly  been roasting it cubed up this year for salads because it gets nice and crispy, but sometimes I roast it cut in half, which is what I did the other night when I happened to have a lot of extra squash.  I thought I could use it for other recipes.  You know, you can replace canned pumpkin in desserts with it, and it tastes even more sweet and delicious!  But this time I decided to make a savory side fit for the Thanksgiving table.

    Everyone makes sweet potato casserole, and that is fine, I love sweet potatoes, but I thought why not make a squash casserole?  I have not seen one before (I am sure they are out there, I have just never tried one), and I thought it would be delicious.  I also had a package of cranberries in my refrigerator waiting to be used in a recipes, so I decided to make this a double layer casserole with the cranberries.  I cooked them into a jammy sauce.  Not that nasty stuff from the can type of sauce, but the good kind that can only come from real cranberries.  I like them a little chunky.  Trust me, butternut squash and cranberries are a delicious combination for those that are skeptical.  Plus you get two of your Thanksgiving sides in one!

    Lastly, I wasn’t going to leave the casserole just like that, because in Minnesota casserole, (or really “Hot Dish” as we call it), should have some sort of crispy topping sprinkled on top that can be browned.  So, I made an oat streusel.  The whole thing smelled amazing while baking! Kind of like dessert, but it is definitely a savory Thanksgiving side.  It was super delicious!  The squash was sweet and delicious, the cranberries slightly tart, aromatic with orange and jammy, and the struesel was the perfect touch, crunchy and satisfying.  If you are looking for a new dish to try this Thanksgiving, give this a go!

    Butternut Squash and Cranberry Casserole
    Serves 12

    Ingredients:

    Squash:

    • 2 large butternut squash, halved
    • 1 tsp cinnamon
    • 2 Tbsp maple syrup
    • 1/4 tsp sea salt


    Craberries:

    • 2 7.5 oz packages fresh organic cranberries
    • 1/2 cup maple syrup (or to taste)
    • 1/4 cup orange juice
    • 1/4 tsp sea salt


    Topping:

    • 1/2 cup gluten free rolled oats
    • 2 Tbsp gluten free all purpose flour
    • 1/4 cup coconut sugar
    • 1/4 tsp sea salt
    • 1/2 tsp cinnamon
    • 2 Tbsp coconut oil


    Instructions:

    1. Preheat the oven to 400F degrees and oil a sheet pan, or line it with parchment.
    2. Cut the squash in half lengthwise and remove the seeds.  Place cut side down on the tray, and place in the oven.  Roast for about an hour until the squash is tender.  Remove from the oven and scoop out the flesh into a bowl.
    3. Add the maple syrup, cinnamon, and sea salt, and mash the squash with them until there are not any big lumps.  Spoon into an 8×8 square pan, or two smaller casserole pans (which is what I did).
    4. To make the cranberries, combine them with the syrup, orange juice, and sea salt in a saucepan and bring to a boil.  Lower to a simmer and cook until the cranberries are tender and thickened, about 15 minutes.  Remove from heat, and pour over the squash in the pan.
    5. To make the topping, combine all ingredients in a bowl, and mix together with your hands until it is small clumps that hold together when squeezed.  Scatter over the cranberries evenly.
    6. Place the pan (or pans) in the oven and bake until the topping is browned about 15-20 minutes.
    7. Remove from the oven and serve!
  • Vegan Triple Layer Chocolate Pumpkin Pie

    Vegan Triple Layer Chocolate Pumpkin Pie

    I do my best thinking on my runs.  Which is why they are so important and an essential part of my life.  If I am trying to sort out a problem, it is a good time to just be inside my own head and try and figure out a way to fix it.  Or, maybe I am just stressed out, it seems to melt it away because I feel like I am taking my frustrations out on the ground.  I am one of those types of people who likes to do a lot of thinking and weigh out the options before making a big decision.  But it isn’t all serious stuff, I also come up with some of my best recipes this way.  And, how I came up with the idea to make a super decadent pumpkin pie.  I loved cream pies growing up, or things like french silk chocolate pie, so I thought, why not make a pumpkin pie in that fashion?  I dreamed up 3 layers of pumpkin deliciousness.  I am one of those people who can’t just make things the way they are traditionally made all the time.  I have to tweak it and make it even more exciting.  Pumpkin pie just as is with no whipped cream or anything is kind of boring, but add in a layer of creamy chocolate filling and fluffy whipped cream too and it is exciting.

    I used my usual classic coconut oil gluten free pie crust for this, because it always turns out buttery and delicious.  I  suppose I could have just made this a no bake pie, but I went for the baked version.  For the filling first, I made a chocolate silk layer.  A rich concoction of coconut milk and cashew butter with rich cacao.  It was good even before I baked it.  I used my classic pumpkin pie filling next in the pie after that, filled with just the right amount of aromatic spices. The pie smelled wonderful while baking, and I thought to myself it was a shame I had to wait until the next day to enjoy it.  Because it was evening when I made it and it had to chill.

    Once it had chilled I made a fluffy coconut whipped cream to top it off.  It was a beautiful sight.  I love whipped cream on a pie.  The chocolate layer reminded me of chocolate silk pie, and it paired perfectly with the spiced pumpkin for a fall twist.  The whipped cream was just enough to balance out the intensity of the chocolate and spices.  It was simply heavenly!  If you are looking for a beautiful pie to serve for Thanksgiving, consider this one!

    Vegan Triple Layer Chocolate Pumpkin Pie

    Makes one 9 inch pie

    Crust:


    Chocolate filling:

    • 3/4 cup thick organic coconut milk (the thick kind from the top of a chilled can)
    • 3/4 cup cashew butter
    • 3 Tbsp maple syrup
    • 1/8 tsp sea salt
    • 1/4 cup cacao powder


    Filling:

    • 2 cups organic cooked pumpkin (canned is ok too), packed
    • 1/3 cup pure maple syrup
    • 3/4 cup full fat organic coconut milk (the thick kind from the top of a chilled can)
    • 2 tsp coconut oil
    • 1 1/4 teaspoon ground cinnamon
    • 1 teaspoon ground ginger
    • 1 /4 teaspoon ground nutmeg
    • 1/4 tsp ground cloves
    • 1/4 teaspoon salt
    • 1 1/2 tablespoons cornstarch
    • 3/4 teaspoon agar powder


    Coconut Whipped Cream:

    • 1 15 oz can full fat organic coconut milk (the thick kind from the top of a chilled can)*
    • 3 Tbsp maple syrup
    • pinch sea salt
    • 1 tsp pure vanilla extract
    • 1/2 cup plus 2 Tbsp coconut butter, warmed to liquid


    Instructions:

    1. To make the crust, in a large bowl, mix together flour, sugar, sea salt, and spices. Cut in coconut oil with a pastry blender or 2 knives until it is in pea sized pieces. Mix in  just enough water to create a smooth dough that holds together but isn’t too sticky. Add more water if needed, and knead slightly until a smooth dough is created. Roll out into a 10 inch circle on a sheet of parchment paper, then use the paper to help you transfer it to an 8 inch pie dish.  Flute the edges, and set aside in the refrigerator.
    2. Pre-heat the oven to 375F degrees.
    3. To make the chocolate filling, whisk together all ingredients until smooth and set aside.
    4. To make the pumpkin filling, place all ingredients in the blender and blend until smooth.
    5. To assemble the pie, pour the chocolate layer over the crust, then pour the filling over that.
    6. Place in the pre-heated oven and bake for about  50 min. until the edges of the crust are lightly brown, and pie is set.  Allow to cool completely, then chill in the refrigerator for a few hours (I chilled mine in the refrigerator overnight).
    7. For the whipped cream, combine all ingredients in the blender and blend until smooth, then pour into a bowl. Place in the freezer, and allow to chill for about 30-45 minutes until the consistency of whipped cream.
    8. Spoon the whipped cream on top of the cake and spread almost to the sides.  Serve!  Store any leftovers in the refrigerator.


    *If your coconut milk is especially runny (since some brands vary in texture), you may want to add a few Tbsp more coconut butter.

  • Vegan Pumpkin Spice Caramel Corn 

    Vegan Pumpkin Spice Caramel Corn 

    It is fun to find things you didn’t know you had.  Like the 20 dollar bill in your coat pocket from last year.  Or your sunglasses you thought you lost in the luggage you hadn’t used in 5 years.  I found a big bag of popcorn I had bought a while back from the bulk section that got pushed to the back of the cupboard.  I had since bought another bag, so I have loads of popcorn now and have been making it a lot.  I love popcorn and it made me sad I forgot that bag back there.  Luckily it was not stale and still usable.  I hate throwing food away. I made some vegan cheddar bacon popcorn a couple times last weekend, and some with just sea salt and it was really good as always.  And, I made another delicious sweet flavored caramel corn yesterday, and I think that was my favorite so I decided I needed to share the recipe with you in case you want to enjoy the deliciousness too.

    I often times draw inspiration for things while I am at the store. I see something and say to myself, “I can veganize that, and make it healthier without fake ingredients.”  That is exactly what happened when Eric and I were at Aldi a few days back and I saw some pumpkin spice popcorn.  I looked at the ingredients an there was a lot of refined sugar, so I wouldn’t buy it but I was inspired to make my own healthier version.  This has happened to me a few times at Trader Joes too.  They have a lot of stuff that sounds good but isn’t vegan or is sugary but I have made it to suit my needs, like these pumpkin pie pop-tarts.  There really is a lot of inspiration at the store.  Anyways, Eric said that the pumpkin spice pop corn sounded gross, but I knew it wouldn’t be so I went with it.  I mean, spiced caramel corn sounds amazing!  So, I popped a good amount of popcorn in the Whirly Pop and got to work.

    It is actually pretty simple to make if you have the ingredients on hand.  The base isn’t technically real caramel which would be butter and sugar.  It is coconut butter to allow it to harden on the popcorn, in place of the butter, and pecan butter and maple syrup to give it that sweet caramel flavor. Of course it has to have sea salt as well, I mean salted caramel is one of the most delicious things ever!  And of course the pumpkin pie spice.  No, this does not actually have real pumpkin in it, it just uses pumpkin pie spice. But if you honestly taste the caramel before you pour it over the popcorn it will remind you of actual pumpkin pie.  This is super delicious.  Like you need to go back for a second bowl, or half the pan is gone and you don’t know what happened delicious.  So, if you need a sweet and salty snack, give this a try!

    Vegan Pumpkin Spice Caramel Corn 
    Makes 8 cups

    Popcorn:

    • 1/3 cup maple syrup
    • 1/3 cup coconut butter, warmed to liquid
    • 1/3 cup pecan butter (or almond butter)
    • 1/2 tsp sea salt
    • 1 tsp pure vanilla extract
    • 1 Tbsp pumpkin pie spice
    • 8 cups plain organic popped corn


    Instructions:

    1. To make the popcorn, in a glass measuring cup (or bowl) whisk together the maple syrup, coconut butter, pecan butter, sea salt and pumpkin pie spice, vanilla until well blended. Pour over the popcorn in a large bowl and mix well. Spread out onto a lined sheet pan, and place in the freezer until it is hard.
    2. Enjoy!


  • Vegan White Chocolate Pumpkin Pie Cups

    Vegan White Chocolate Pumpkin Pie Cups

    To be completely honest, pumpkin pie was not my favorite growing up.  It was just something I ate because it was tradition.  Apple and pecan won over it.  But, don’t worry.  I have come to appreciate it more as an adult, mostly because my home made version is really good.  You know what makes it so good?  Topping it with something rich and creamy like coconut whipped cream, or vanilla ice cream.  That is kind of a must for me.  It cuts the pumpkin spices and makes it feel more decadent.  I decided to make some pumpkin chocolates this week, and I opted for white chocolate instead of dark for this reason. White chocolate is kind of mellow, rich and creamy melt in your mouth, the same way the whipped cream and ice cream are with pumpkin.  Plus, I had never made white chocolate pumpkin candies and it sounded like a heavenly combination.

    When I was growing up I actually preferred white chocolate to dark because I have always been a vanilla girl.  But now I appreciate both.  I do feel like white chocolate is a little more special sometimes.  I know you can probably buy it at the store, but I prefer to make my own.  I use a mixture of cacao butter (the essential ingredient to make it taste like regular white chocolate), cashew butter, and coconut butter as a base and it tastes wonderful.  It melts in your mouth, and is silky and creamy almost.  I add in a touch of vanilla and sweeten it with maple syrup and it is so good!

    For the filling, I used the classic pumpkin pie spices with a little vanilla in some canned pumpkin puree I had left over.  This time of the year I often have little containers of it in the refrigerator or freezer leftover from other recipes because I hate to waste it.  Well, this was the perfect use for that 1/4 cup I had left!  So if you have a little left too, now you know what to make with it!  These are super delicious, the filling tastes just like the pie and it is so good with the decadent white chocolate!

    Vegan White Chocolate Pumpkin Pie Cups
    Makes 6 large candies

    Ingredients:

    • 1/4 cup cacao butter (2 oz)
    • 3 Tbsp raw cashew butter
    • 1/3 cup coconut butter
    • 1 tsp pure vanilla extract
    • 3 Tbsp maple syrup (or to taste)
    • 1/8 tsp sea salt


    Filling:

    • 1/4 cup Tbsp pumpkin puree at room temperature
    • 2 Tbsp coconut butter, softened
    • 1 1/2 Tbsp maple syrup
    • 1 tsp pumpkin pie spice
    • 1/2 tsp pure vanilla extract


    Instructions:

    1. Combine cacao butter, cashew butter, vanilla, maple syrup,  and sea salt over a double boiler, and whisk until smooth.  Pour into the bottoms of 6 larger peanut butter cup tins (or molds), then place them in the freezer to set.
    2. Mix the pumpkin puree and 1 Tbsp coconut butter together in a small bowl, along with the maple syrup and spices.
    3. Once the bottom chocolate has set, spoon about 1 tsp of the almond butter and then the jam onto the top of the set chocolate, then pour remaining melted chocolate over that.
    4. Place them in the freezer to set, about 15 minutes.
    5. Store in the refrigerator.
  • Vegan Maple Sweet Potato Caramel Mini Bundt Cakes

    Vegan Maple Sweet Potato Caramel Mini Bundt Cakes

    I am so not ready for Winter yet.  It is technically still Fall, but it totally feels like Winter.  The snow was flying last Friday, big fluffy clumps of flakes floating down, like the type you build a snowman with.  It looked like a snow globe outside, and this was actually the second snow like this.  Kinda sad, because last year at this time it was in the 60s and 70s outside.  We have been kind of spoiled the last few years with really nice weather in the Fall, so I guess I have forgotten what it can be like. I have dug out all of the Winter coats, hats, gloves and scarves and accepting the fact that Winter is pretty much here.  Which means I spend more time inside doing more things like baking delicious things.  Because what better way to forget about the fact that it is cold, than to bake something warm and delicious.  Plus it makes your house smell amazing, and you can leave the oven open after and let the heat out to get all warm.  I like to stand in front of it as the heat escapes and soak it in.

    Last weekend I decided it was a cake sort of weekend.  Cake just sounded good.  But, I didn’t want to make something super complicated and time consuming, and wanted to be able to enjoy it right away, so I decided on mini bundt cakes.  I make these often when I want something that bakes fast because they only take about 25 minutes or less to bake, and you put a simple glaze or drizzle on them and voila!  Deliciousness immediately.  I had some cooked sweet potatoes on hand, so I decided to make maple sweet potato caramel cakes.  I have been making a lot of pumpkin stuff lately, but the humble sweet potato deserves some love too.  It is after all even more naturally sweet than pumpkin and one of my top 3 all time favorite veggies. So I always have it on hand. Maple pairs perfectly with it, as does caramel, which is why I chose the combination.  My mouth was watering just thinking about it.  The batter is pretty easy to make, and it happens to be fruit sweetened thanks to dates which give it the caramel flavor.  It stays nice and moist after it is baked thanks to the fruits and veggies included, which is important to me because I hate dry cake.

    I made a quick caramel which was a mixture of pecan butter and maple syrup and it was so delicious drizzled over the cakes!  A sprinkle of pecans and they were good to go.  I actually used a special maple syrup which was gifted to me, a Bourbon Barrel Aged Maple Syrup from Trader Joes.  I wanted to use it in something special and this was a good choice.  It is some darn delicious syrup, and these cakes turned out so good!  They kind of reminded me of caramel rolls, but cake style.  If you are looking for a quick and easy cake to make, give these a try!

    Vegan Maple Sweet Potato Caramel Mini Bundt Cakes
    4 mini bundt pans

    Ingredients:

    Cake:

    • 3/4 cup all purpose gluten free flour
    • 3/4 tsp baking soda
    • 1/2 tsp baking powder
    • 1/4 tsp sea salt
    • 3/4 cup packed soft medjool dates, pitted, soaked in water for 30 minutes and drained well
    • 2 Tbsp pecan butter or almond butter
    • 1 tsp pure vanilla extract
    • 1/2 cup sweet potato puree
    • 1/2 cup plus 2 Tbsp filtered water
    • 1 Tbsp apple cider vinegar


    Caramel:

    • 1/4 cup pecan butter or almond butter
    • 2 Tbsp maple syrup (or as needed)
    • pinch sea salt
    • 1/2 tsp pure vanilla extract


    Topping:

    • 1/4 cup coarsely chopped toasted pecans


    Instructions:

    1. Preheat the oven to 375F degrees and position rack in center of oven. Oil 4 mini bundt pans so that the cake doesn’t stick.
    2. Whisk flour, baking powder, baking soda, sea salt, in a large bowl to blend well. Place dates, pecan butter, sweet potatoes, water and vanilla extracts into a blender, and blend until smooth, then whisk this blended mixture into the flour mixture until well blended. Whisk in the cider vinegar until bubbles form.
    3. Transfer cake batter to prepared pans and bake cake until tester inserted into center comes out clean, about 22-25 minutes. Cool cakes completely in pan on rack, about 1 hour. Turn cakes out onto a plate.
    4. To make the caramel, whisk together all ingredients until smooth and pourable (if too thick, add a little more maple syrup or a Tbsp or two filtered water, since nut butters vary in runniness).
    5. Drizzle the caramel over the cake and sprinkle with pecans.
    6. Serve!


    *If you do not have mini bundt pans, feel free to make this a mug cake and bake it in four mugs instead.

  • Vegan Chipotle Mac and Cheese with Greens 

    Vegan Chipotle Mac and Cheese with Greens 

    I loved mac and cheese when I was little.  I could have had it for every meal of the day every day.  Well that and grilled cheese.  I guess I was just a cheese loving little girl.  It never dawned on me that it might not be healthy because I didn’t really care I just knew that it was good.  I would beg my parents to make it for me, and we always had it on hand.  My Mom at least tried to add veggies to it to make it healthier.  When I got older and was more aware of what I was eating and the nutritional value that it had, I didn’t really enjoy mac and cheese anymore.  To me it was just a pile of white carbs with cheese and cream which wasn’t really what I was going for.  Not that it isn’t fine to indulge once in a while because you should but I try to have at least something healthy in every meal.  So I gave it up for a long time.  That is until I went vegan and began experimenting with healthier options with veggies included.  Because there should be veggies in every savory dinner as far as I am concerned.  My Mom was telling me about this frozen Mac and Cheese that she bought and I said to her, “I bet I can make an even better vegan version”.  It was on.  Although I was pretty confident because I have made vegan mac and cheese quite a bit before. I am one of those people who likes to experiment with things and make them in different ways to find the best one so this was going to be a different version.  I have made the regular potato and carrot version of mac and cheese that many vegans seem to swear by but I actually prefer something like squash in the base.  My Mom however doesn’t like squash and I was making this mac and cheese for her and to suit her tastes so I went with yams.

    We both love yams, so this was going to be good. I decided to make it chipotle mac and cheese as well with a little kick.  My Mom loves to sprinkle a little chipotle powder on things the way most people use red pepper flakes so it was perfect.  This cheese sauce is actually really easy to make once your yams are cooked and it comes together fast in a blender.  It is so good you will want to eat it with a spoon, or maybe dip some chips in it…I might have done both of those things while making it.  It reminds me of the mac and cheese sauce I enjoyed as a child but better. The thing that makes it appear to be rich like cheese is the cashew butter that I add.  But it is surprisingly mostly yams.  Who would have thought they would make such a good cheese sauce.  Banza had sent me some pasta to try, so that was what I used this time.  I use gluten free pasta 99% of the time, but I only like the ones made with beans that actually have protein in them.  This one was made from chickpeas, which is awesome!  Don’t worry, there was no beany flavor, just tasted like regular pasta.

    Once it was all mixed together I added in some greens to give it even more nutrients. It was super delicious.  My Mom loved it as well, she said it was better than the mac and cheese she had bought and the flavors were perfectly balanced.  Also, that it tasted like dairy and you would not be able to tell it was vegan.  That makes me so happy!  If you are craving mac and cheese, but want it to be healthy as well, you must give this a try!  It may become a staple this Winter!

    Vegan Chipotle Mac and Cheese with Greens 
    Serves 4

    Ingredients:

    • 2 cups mashed yam potato*
    • 3/4 cup hot filtered water (or as needed)
    • 1/3 cup raw cashew butter
    • 1 medium garlic clove
    • 1 Tbsp apple cider vinegar
    • 1/4 cup plus 2 Tbsp nutritional yeast
    • 1/4 tsp chipotle powder
    • 3/4 tsp sea salt (or to taste)
    • 16 oz gluten free pasta
    • 2-3 large handfuls of arugula or baby spinach


    Instructions:

    1. Combine the sweet potato, water, cashew butter, garlic, cider vinegar, yeast, chipotle, and sea salt in a high speed blender and blend until smooth and the consistency of cheese (if it is too thick add a little more water).  Set aside.
    2. Cook pasta according to package directions, drain, then place back in the pot, add the greens and cheese, and stir to coat.  Pour into a serving dish, and serve!


    *To cook the sweet potatoes, I like to roast them in the oven.  Take a large sweet potato, poke a few holes in it, and cut in half lengthwise.  Place cut side down on a sheet pan lined with parchment and bake for about an hour at 400F degrees or until tender.  Remove from oven and let cool before mashing.

  • Vegan Hazelnut Coffee Ice Cream with Fudge Swirl

    Vegan Hazelnut Coffee Ice Cream with Fudge Swirl

    I used to drink lots of coffee when I was in college.  Like 3 32 oz tall mugs every morning.  Don’t worry, I don’t anymore, I have adopted one large matcha tea instead.  I don’t know why I drank that much coffee, it was just a habit, and it tasted good and was warming and gave me energy. I usually just bought good quality coffee that didn’t need any add ins and drank it black.  I figured good coffee doesn’t need anything added to it.  But, I know I am kinda different in that respect.  Most people like a little something.  I know many people love to add hazelnut flavor to their coffee, but I never really got into that, because it always tasted fake to me (and probably had no trace of real hazelnuts).  You know what I mean, that fake hazelnut flavored creamer or hazelnut syrup, or coffee supposedly infused with it?  Well, it never tasted right to me, as in not like real hazelnuts.  But what if hazelnut coffee was done right and actually made with real hazelnut milk or something?  Now, I like that idea.  Because the idea of coffee and hazelnuts together sounds wonderful, just not the fake flavored stuff I was exposed to when I was younger.

    So, I decided to make an ice cream with those two ingredients.  I had lots of hazelnut butter on hand, because I had been given about 4 lbs of hazelnut meal and made a lot of it into butter.  Home made hazelnut butter is so much cheaper than store bought, and sooo good!  Especially if you turn it into nutella, but that is another post and another day.  Plain is awesome for using in recipes like this ice cream.  I used a coconut milk ice cream base, as it is my favorite for this.  I think it makes the silkiest ice cream next to cashew milk, but coconut milk is slightly sweeter and cheaper plus I have it on hand always. The base was super luscious with the mixture of hazelnut and coconut and just the right amount of sweet with maple syrup and vanilla added.  I also added espresso powder for the coffee flavor and it was so good!  Even better once churned all silky and creamy!  But I wanted to add even more deliciousness so I made a rich hazelnut chocolate coffee fudge to ribbon throughout it.

    It was simply heavenly!  Just the right amount of coffee aroma and the nutty flavor of real hazelnuts!  That fudge was the perfect pairing with it, gooey and rich on the luscious cool ice cream.  This is even better than the gourmet ice cream you buy at the store.  If you are a coffee lover, give this ice cream a try!

    Vegan Hazelnut Coffee Ice Cream with Fudge Swirl
    Makes about 3 cups

    Ingredients:

    • 1 15 oz can organic full fat coconut milk
    • 1/2 cup maple syrup (or to taste)
    • ½ cup hazelnut butter
    • 1 1/2 Tbsp very finely ground organic coffee (use your favorite kind) or 2 Tbsp coffee extract
    • 1/2 tsp sea salt
    • 2 tsp pure vanilla extract


    Fudge:

    • 1/3 cup hazelnut butter
    • 3 Tbsp cacao powder
    • 3 Tbsp maple syrup
    • 1/4 cup cooled brewed coffee (or as needed)


    Directions:

    1. Combine all ingredients in a high speed blender and blend until smooth.
    2. Pour into an ice cream maker and process according to package directions.
    3. Meanwhile to make the fudge, whisk together all ingredients until smooth and pour-able but still thick (if too thick, add a little more coffee, to thin, a little more cacao powder.
    4. Once the ice cream has finished churning, pour 1/3 of it into a freezer safe container with a lid, then drop 1/3 of the fudge over it.  Pour half the remaining ice cream over that, then half the remaining fudge, then more ice cream and more fudge. Swirl with a knife a few times.
    5. Place the lid on, place in the freezer and freeze for about 4 hours or until firm enough to scoop. Enjoy!


    *Note, if you do not have an ice cream maker you may also freeze it this way. Pour into a bowl, and place in the freezer. Whisk once every half hour until it has frozen to the consistency of soft serve. Then continue to pour into your freezer safe container as the above directions state.

    *If your ice cream gets hard after freezing, let sit out about 15-20 minutes before scooping.

  • Vegan Pumpkin Spice Chocolate Chip Cake with Fudge Frosting 

    Vegan Pumpkin Spice Chocolate Chip Cake with Fudge Frosting 

    I hate to waste things.  So, I have little containers in my freezer a lot of the time with odds and ends like extra strawberry puree, canned pumpkin or that 1/2 can of coconut milk in a container I had leftover.  I find uses for it all too!  Sometimes it  doesn’t even make it to the freezer though, I just randomly come up with something to make with it.  I made a recipe last week that required only about 1/4 cup of pumpkin puree so I needed something to do with the rest of the can. I thought long and hard.  I almost made a chocolate tart with a pumpkin swirl, but what I ended up making was a pumpkin chocolate chip cake with fudge frosting.  I don’t know if you have ever had pumpkin bread with chocolate chips but it is darn delicious.  I loved that stuff as a kid!  Sunday was kind of a damp chilly day here so it was just the sort of day to enjoy a cake.  I went out for a 30 mile bike ride in the morning and I spent some time outdoors with Eric going for a long walk later and by the time the evening rolled around I just wanted to be warm in my PJs and be all warm and cozy with my cake.  Because if you are at home, why not be all warm and cozy with your cake and watch a movie or something?

    In case you can’t tell I am an introvert and that is my kind of evening.  Anyways, back to the actual cake.  I wanted it to taste indulgent and delicious but I also wanted it to have some healthy aspects so I made it completely fruit sweetened with dates. Cake batter made with dates is my all time favorite.  It stays nice and moist and has almost a brown sugar like flavor too.  Add in the pumpkin and plenty of the spices you find in pumpkin pie and you have a delicious cake. The batter tasted good even before baking.  That is one of my favorite parts of making cake, the bowl licking (frosting and batter) so I don’t waste a drop.  It filled my kitchen with a heavenly Fall aroma as well.  There is nothing better than walking into someone’s house and being greeted with the scent of something sweet baking.

    A cake this good deserved a delicious frosting, so I made a luscious fudge frosting to top it off.  It has a secret ingredient, sweet potatoes!  But don’t worry, you would not even know that they are there. They just add a smooth texture and slight sweetness to the frosting, as well as give you some extra vitamins along with this cake.  In fact, you get your fiber and vitamins because of the sweet potatoes, dates and pumpkin!  I love hiding veggies in desserts.  But shhh!  When you serve this to people don’t tell them, just let them enjoy the rich tasting cake that is actually healthy.  If you are still craving pumpkin this far into the season (I know I am), give this delicious cake a try!

    Vegan Pumpkin Spice Chocolate Chip Cake with Fudge Frosting 
    Makes 1 6 inch 2 layer cake

    Ingredients:

    2 6 inch cake pans

    Cake:

    • 1 1/2 cups quinoa flour (or all purpose gluten free flour)
    • 1 1/2 tsp baking soda
    • 1 tsp baking powder
    • 1/2 tsp sea salt
    • 1 Tbsp cinnamon
    • 1 tsp ginger
    • 1/2 tsp nutmeg
    • 1/2 tsp cloves
    • 1/4 tsp chipotle powder
    • 1 1/4 cups packed soft medjool dates, pitted, soaked in water for 30 minutes and 1 cup of the soaking water reserved
    • 1/4 cup almond butter
    • 1 Tbsp pure vanilla extract
    • 1 cup pumpkin puree*
    • 2 Tbsp apple cider vinegar
    • 3/4 cup vegan chocolate chips


    Frosting:

    • 1 1/4 cups mashed Japanese sweet potatoes*
    • 1  cup soft pitted medjool dates (soaked in water for 30 minutes and drained before using if not soft)
    • 1/3 cup almond butter
    • 1/2 cup filtered water (or as needed)
    • 1/2 cup unsweetened cocoa powder
    • 1 tsp pure vanilla extract
    • 1/4 tsp sea salt


    Directions:

    1. Preheat the oven to 375F degrees and position rack in center of oven. Line two six-inch-diameter cake pans with 2-inch-high sides with parchment paper. Coat parchment paper and pan sides lightly with oil so that the cake doesn’t stick and line the bottom of the pan with a piece of parchment fit to the pan.
    2. Whisk flour, baking powder, baking soda, spices and sea salt in a large bowl to blend well.  Set aside.
    3. Place dates, reserved water, almond butter, pumpkin puree, and vanilla extract into a blender, and blend until smooth, then whisk this blended mixture into the flour mixture until well blended. Whisk in the cider vinegar until bubbles form. Fold in the chocolate chips.
    4. Transfer cake batter to prepared pans and bake cakes until tester inserted into center comes out clean, about 30-35 minutes. Cool cakes completely in pan on rack, about 1 hour. Cut around sides of pan to loosen. Turn cakes out onto plates, and peel off parchment paper. Set aside, covered so that it doesn’t dry out.
    5. To make the frosting, combine all ingredients in a blender and blend until smooth (adding water a little at a time if you think it is too thick).  Set aside.
    6. To assemble, place one cake layer on a plate, and spread about 3/4 cup frosting over it.  Place the other cake layer over that, then spread the remaining frosting on the top and down the sides of the cake.


    *If you are using home made pumpkin puree and not canned, make sure it is thinned out a little so it is the same consistency as canned (applesauce consistency).

    ***If you would like a 2 layer 9 inch cake, double this entire recipe and bake in two 9 inch cake pans.  It will take longer to bake, about 50 minutes to 1 hour.

  • Vegan Vanilla Maple Bourbon Apple Pie

    Vegan Vanilla Maple Bourbon Apple Pie

    I feel like sometimes people are a bit prejudiced against vegans.  I mean, how could you dislike someone that genuinely cares about all life so much that they won’t eat things or use things that harm animals or other creatures?  Well yes, I know a few vegans sometimes come across as too preachy and in your face (just because they are passionate), but I find that most of us are actually really kind nice people that just want to spread the word that we can live without hurting other things and still enjoy ourselves. It is probably because they don’t know the truth that they judge us.  Everyone becomes a “health expert” or a “nutritionist” when they find out you are vegan.  I mean, the other day I had someone tell me that I must be deficient in vitamins and protein and I was only healthy because I was young and I could not possibly be healthy not eating animal products.  I told them that I have done my research on how to eat a vegan diet and thrive, making sure all of the nutrients that I need are there for me.  I have my blood tested a few times a year and it always comes back normal.  I have never been deficient in iron, so it just goes to show I do not need to eat red meat.  And I do not feel good just because I am only 32, it is because of my diet that I feel good.  Not only that I told them that there have been recent studies showing that meat and dairy contribute to cancer.  I would never go back to a diet that includes animal products because I feel sad when I think of killing animals because of the selfish reason of wanting to eat them or wear them, and also, I feel great eating this way so why would I go back!  And, when asked “Well, don’t you ever crave meat or dairy and want to cheat?” I always answer, I never feel deprived or crave meat, because I have plenty of good things to eat.  And, I love to make things and share them with non-vegans to allow them to see how delicious vegan food can be!  Like the pie I made last weekend.

    It was a delicious maple bourbon apple pie.  Actually, it is one of my old recipes from when I first started my blog that I revamped and made even better. The old one was not gluten free, but for this one, I made a delicious gluten free crust including pecans to make it even more melt in your mouth. I love nut crusts.  I assembled this pie a little differently than most people do, kind of par baking the crust and cooking the filling until it was almost done before baking it.  It may seem a bit odd, but it cuts down on baking time, and ensures that the crust doesn’t get too dark before the filling is soft enough.  For the filling I included my favorite Minnesota baking apples, the Haralsons.  My Mom always used them and they make the most delicious pies.  If you don’t have them where you live, use another tart sweet apple.  They don’t need as much sweeteners as other apples, and they bake up beautifully.  The filling also had to include bourbon of course, and I used a good 3 Tbsp.  For the sweetener I used maple sugar to give this pie that beautiful maple aroma and flavor.  Lastly, I topped this pie off with a crumble topping.  I apologize to those of you that are sick of my crumble crusts lately (well, sorry not sorry), but I am obsessed with them and they are so much more flavorful in my opinion that just pie crust on the top.  That streusel…I could just eat a bowl of it!

    This pie smelled amazing while baking.  I could not wait to try it!  But, I had to wait until it cooled completely which unfortunately was overnight.  But, OMG was it ever delicious when I finally was able to try it! It was just the right amount of sweetness in the apples, the cinnamon and maple giving it one of the most beautiful Autumn aromas, and the crust was rich and buttery and the crumble topping sweet and crunchy!  Sooo good!  I shared some with my family, who are not vegans and my Mom loved it and my Grandpa said he wanted to keep the other half of the pie to eat himself!  That is a big compliment.  If you are craving apple pie, give this a try!

    Vegan Maple Bourbon Apple Pie
    Makes one 9 inch pie

    Filling:

    • 8 large Haralson (or other tart sweet apples) cut into 3/4 inch cubes
    • 1/2 cup maple sugar (or brown sugar)
    • 1 Tbsp cinnamon
    • 3 Tbsp bourbon (make sure it is vegan on Barnivore)
    • 1 tsp maple flavor (optional)
    • juice of one lemon
    • a pinch of sea salt
    • 1/4 cup plus 1 Tbsp Bob’s Red Mill all purpose gluten free baking flour


    Crust:


    Topping:


    Instructions:

    1. Preheat the oven tp 400F degrees.
    2. To make the filling, combine the apples, maple syrup, and cinnamon in a saucepan, and cook covered over medium heat, stirring often for about 15 minutes, or until the apples are softer and starting to turn translucent.  Stir in the the bourbon, lemon juice, and flour until thickened, and remove from heat and set aside.
    3. To make the crust, in a large bowl, mix together flour, sugar, sea salt, and spices. Cut in coconut oil with a pastry blender or 2 knives until it is in pea sized pieces. Mix in  just enough water to create a smooth dough that holds together but isn’t too sticky. Add more water if needed, and knead slightly until a smooth dough is created. Roll out into a 10 inch circle on a sheet of parchment paper, then use the paper to help you transfer it to an 9 inch pie dish.  Flute the edges, and place on a baking sheet.  Prick the crust a few times with a fork, and place it in the oven. Bake for 15 minutes.
    4. Meanwhile, mix together the topping ingredients in a bowl and squeeze with your hands to form clumps.
    5. Pour the filling into the pie crust.
    6. Scatter the topping over the pie, place in the oven and bake for about 15 minutes until the edges of the crust are lightly brown, and pie is set.  Remove from the oven to a wire rack.
    7. Allow to cool completely before serving.

    *Place about 1/4 cup pecans in the blender and blend until a fine flour, about 30 seconds.

    *If you don’t prefer gluten free flour, whole wheat pastry flour, or sprouted whole wheat flour will also work here.

  • Vegan Cheesy Potato Casserole

    Vegan Cheesy Potato Casserole

    My Mom used to make a really delicious cheesy potato casserole when I was young to serve at family gatherings. Usually brunch type occasions, like when she hosted Easter at our house, or maybe a Christmas special request from me.  I used to ask her to make it a lot because it was so good!  I think it filled most of my plate when it was served over all else.  I could have cared less about the meat of course, and I always took my token amount of veggies, and a roll, but the potatoes were the star to me.  I mean, what’s not to like about layers of creamy cheese and potatoes!  I have been saying to myself for a while now, you have to make a vegan version.  So this past week, I finally got around to it.  I had extra potatoes on hand, and some cheese sauce left over from some mac and cheese that I had made, so it was perfect!  My Mom used to use frozen hash browns in hers, but I decided to be a little different with mine since I don’t think I have ever bought frozen hash browns, and I had fresh potatoes to use up.

    I guess this was sort of in the style of a cheesy potatoes one of my coworkers at the deli used to make, crossed with my Mom’s potatoes. My coworker always just used large diced potatoes in her casserole and a little kick.  My Mom’s was more mellow and just creamy and delicious.  Combining the two ended up being awesome.  Of course both of these dishes had tons of cheese, butter, flour and cream.  I think my Mom’s had heavy cream in fact, because this dish was considered a treat.  But my cheesy potatoes actually have a healthy cheese sauce made from a secret ingredient that gives them their lovely yellow color.  Winter squash!  I like to hide veggies in my dishes, and lighten things up with them, so that was the idea here.  I guess I can’t bring myself to make vegan mac and cheese without including veggies in the sauce, so why would I not include them with the potatoes?  Don’t worry, the sauce is super delicious.  I added cashew butter to give it a little richness and volume so it has more of the texture of cheese, along with things like miso, nooch (nutritional yeast), salt, mustard and garlic to give it a wonderful savory flavor.  It may sound like a weird combo but it is so good once it is done!

    Once combined with the cooked potatoes it is bomb!  I could eat a giant bowl of these potatoes (just like I used to when I was little), but I would not feel bad about doing so or get a tummy ache after because these are so much healthier than the original version.  I love recreating old dishes from my childhood and making them vegan!  Often times they turn out even better!  If you are looking for a delicious side dish, or maybe you are just craving potatoes and cheese, which is totally legit too, give these a try!

    Vegan Cheesy Potato Casserole

    Serves 6-8

    Cheese Sauce:

    • 2 cups mashed cooked butternut squash or sweet potato*
    • 1 cup hot filtered water (or as needed)
    • 1/3 cup raw cashew butter or almond butter
    • 1 medium garlic clove
    • 2 tsp yellow mustard or stone ground mustard
    • 1 Tbsp apple cider vinegar
    • 1 Tbsp white miso (optional)
    • 1/4 cup plus 2 Tbsp nutritional yeast
    • 1/8 tsp cayenne pepper
    • 3/4 tsp sea salt (or to taste)


    Potatoes:

    • 3 lbs yukon gold potatoes, cut into 1 inch cubes
    • filtered water
    • sea salt


    Topping:

    • 3 Tbsp nutritional yeast
    • paprika for sprinkling


    Instructions:

    1. To make the cheese sauce, combine the squash, water, cashew butter, garlic, mustard, cider vinegar, yeast, cayenne, sea salt and turmeric in a high speed blender and blend until smooth and the consistency of cheese (if it is too thick add a little more water).  Set aside.
    2. Preheat the oven to 375F degrees.
    3. To make the potatoes, put them in a large pot, and cover with filtered water by 1 inch.  Add a few tsp sea salt to the water.  Bring to a boil, and then lower to a simmer.  Allow the potatoes to cook until tender, about 10-12 minutes.  Drain, then add back to the pot.
    4. Stir in the cheese sauce, then pour into a baking dish.
    5. Sprinkle the potatoes with the nutritional yeast, and place in the oven for about 15 minutes.  Sprinkle with paprika and serve!

    *To cook the squash, I like to roast them in the oven.  Cut one medium squash in half top to bottom, and remove the seeds.  Place cut side down on a sheet pan lined with parchment and bake for about an hour at 400F degrees or until tender.  Remove from oven and let cool before removing the skin and mashing.

  • Vegan Nutella Swirl Brownies

    Vegan Nutella Swirl Brownies

    I saw a recipe for Nutella brownies on Pinterest, and I said to myself, “I have to veganize those!!!”  I have tons of hazelnut butter on hand, and was in a chocolate craving mood so it was perfect!  I never buy actual real Nutella anymore because it is not vegan and contains mostly sugar and oil, but I used to love it as a kid. I mean, it was kind of an excuse to eat chocolate for breakfast on toast.  Not that it was a healthy breakfast, but I really didn’t care at that point.  I now make my own home made nutella and it is so much better.  The main ingredient is hazelnuts as it should be.  I love just plain old hazelnut butter as well.  I imagined these brownies as super decadent and rich with the nutella filling becoming almost a fudge or cheesecake like texture.  Fudgy brownies have always been my favorite, I am not of the cakey brownie camp at all. Well, I think I did pretty well with these creating my dream brownies.

    I used my classic brownie base which is rich from the avocado oil and sweetened with coconut sugar  For an added bonus, it is a gluten free batter as well, and you can’t even tell.  I added some hazelnut butter to it to to make it extra rich.  If you are going for an oil free version, I will note that you can use applesauce in place of the avocado oil, but keep in mind the texture of the brownies will be slightly less rich.  The batter tastes amazing even before baking, but you know what is even more tasty?  The nutella swirl that ribbons through it.  For that, I kind of made a variation of what I use in  my cheesecake brownies, only swapping hazelnut butter for the cashew butter and adding cacao powder to make it extra chocolaty and delicious.  I mean, this stuff is so good you could eat it with a spoon.  These brownies take about a half an hour to bake, and it is kinda torture and heaven at the same time as you sit and smell them.  That aroma always puts me in a good mood.  You can’t possibly remain crabby while baking brownies.  Not with licking the batter from the bowl, smelling the deliciousness as they bake and being able to taste them once they cool enough to cut. Happiness in a pan.

    Once they were cooled enough to cut I was getting excited.  They looked like the perfect brownies. When I cut into them, I could tell they were going to be just my style.  Nice and fudgy, melt in your mouth rich chocolate with that nutty hazelnut flavor.  And you know what?  These are especially for those of you that like the center pieces of brownies because these are all fudgy and all taste like center pieces as long as you do not over bake them.  I honestly think they are some of the best brownies I have tasted.  If you are a brownie lover, or have ever been a fan of Nutella I think you might just need these in your life!

    Vegan Nutella Swirl Brownies
    Makes 16

    Swirl:

    • 3/4 cup thick coconut milk (from the top of a chilled can)
    • 3/4 cup hazelnut butter (or almond butter will also work here)
    • 2 Tbsp maple syrup
    • 1/8 tsp sea salt
    • 1/4 cup cacao powder


    Brownies:

    • 1/2 cup avocado oil
    • 1/4 cup hazelnut butter
    • 1 cup coconut sugar
    • 1/4 cup plus 2 Tbsp filtered water mixed with 2 Tbsp ground flax seeds
    • 1 cup Bob’s Red Mill gluten free all-purpose flour*
    • 1/2 cup cacao powder or unsweetened cocoa powder
    • 1/4 teaspoon sea salt
    • ½ cup vegan chocolate chips


    Directions:

    1. To make the swirl, combine all ingredients in a blender and blend until smooth. Pour into a bowl and set aside.
      To make the brownies, pre-heat the oven to 350F degrees.
    2. Whisk together the sugar, oil and hazelnut butter until well combined and the sugar is starting to break down. Add the flax mixture and and beat until smooth. Add the flour, cacao powder and sea salt and beat until smooth.
    3. Scrape the batter into a greased 8×8 inch pan, then drop the swirl over it in 2 Tbsp amounts, and swirl it with a knife.
    4. Sprinkle with chocolate chips. Place in the oven, and Bake for about 30-35 minutes or until set (but do not over bake).
    5. Let cool before cutting into bars.

    *If you want to make these with whole wheat pastry flour or all purpose flour and not make these gluten free, just swap them one to one for the gluten free flour.

  • Vegan Peppermint Patties

    Vegan Peppermint Patties

    Peppermint patties are completely unique when it comes to Halloween candy. Unless you count the red and white after dinner hard candy peppermints your Grandma gave out when unexpected trick or treaters came by, they are pretty much the only minty candy out there (that I am aware of).  I admit they weren’t usually my first choice, because I was all about the Reese’s Peanut Butter Cups and Snickers Bars and I wasn’t a big fan of mint. But now as an adult, I can see why people like them.  They were one of my Dad’s favorite candies, and it makes sense since he is the most mint obsessed person I know.  He always had mints in his pockets when I was little that I would ask for from time to time and thin mint Girl Scout cookies were his favorite too.  So, peppermint patties make me think of him.  That and Christmas.  Which has nothing to do with Halloween candy, but you know, mint and Christmas go together like peanut butter and jelly.  So this year, I decided to make some vegan peppermint patties for Halloween.  I have made most other chocolate Halloween candies but not those yet so it was about time.

    I try to make new and different things every year because it is more exciting and you never know, one of you might love peppermint patties but want a vegan version so it would be a win for both of us!  These are actually pretty simple to make and not very time consuming.  For the filling I used a combination of coconut butter and raw cashew butter to get the right consistency and texture.  It was sweetened of course with maple syrup and I added plenty of peppermint and vanilla.  The filling was delicious even before I shaped it into the patties.  I always have to taste the desserts I am making during the process. Not just to snack on because my mouth is watering, but to make sure it tastes good so I don’t ruin the finished product. Especially when it is a new recipe I haven’t made before.  The filling for these was like play dough, all nice and pliable.  I felt kind of like a kid playing with play dough when shaping them. Once the filling was chilled it was time for the dark chocolate!

    I like to use a good quality vegan dark chocolate like Zimt Dark Chocolate Chunks, Luv Chocolate Chunks, or Lily’s chocolate chips. They are all either sugar free or refined sugar free and taste wonderful.  If you use the best chocolate your candy will taste the most delicious.  These were super yummy once they were finished and the chocolate was all set up.  To be honest they tasted even better than real peppermint patties.  If you are a mint fan, give these a try!  Making your own Halloween candy is not only fun, you can also make sure it is quality real ingredients like these and feel good about eating it!


    Vegan Peppermint Patties
    Makes 8

    Ingredients:

    • 1/4 cup coconut butter, softened
    • 1/2 cup raw cashew butter
    • 2 Tbsp maple syrup
    • pinch sea salt
    • 1 tsp pure vanilla extract
    • 1 tsp peppermint extract
    • 1 cup chopped vegan dark chocolate


    Instructions:

    1. In a medium bowl, combine the coconut butter, cashew butter, maple syrup, sea salt, vanilla extract and peppermint extract in a bowl, and mix together with a spoon until completely blended.
    2. Place the bowl in the freezer until the mixture is firm enough to be shaped, about 10-15 minutes (depending on how warm it was).
    3. Shape the mixture into 8 patties, and place on a parchment lined tray. Place in the freezer and freeze until firm, about 30 minutes.
    4. Melt the chocolate in the top of a double boiler.
    5. Dip each of the patties into the chocolate (I like to use a fork to set them on, and a spoon to assist) letting the excess drain off, and set them back onto the piece of parchment paper.  When they are all dipped, place them in the freezer until the chocolate has hardened, about 5-10 minutes.
    6. Store the chocolates in the refrigerator for up to a month in an airtight container.


  • Rustic Fall Root Vegetable Tart

    Rustic Fall Root Vegetable Tart

    Fall is at it’s peak of beauty right now here in Minnesota.  The leaves are all painted in warm hues, and fluttering to the ground.  But it hasn’t gotten cold yet, so it is the perfect weather to go walking and enjoy the view, and listen to the crunch of the leaves beneath your feet.  I am still craving Fall dishes though despite the warmth.  Things like roasted root vegetables and squash. We make a roasted root vegetable in the deli where I work and it is super popular when made but it takes me a really long time to prep it because I am slicing about 30 lbs of rutabagas and carrots to roast.  But it is so good when finished!  I mean, nothing compares to roasted vegetables. I have found that even vegetables that I don’t like are delicious when roasted.  It is my main method of cooking vegetables at home during the cooler months.  I mean, why not warm up the house with the oven and cook something delicious?!  So, I decided to make a roasted vegetable tart a few days back.  My Mom actually gave me the idea.  She likes to make suggestions of things I could veganize, and she showed me a photo of a gorgeous roasted vegetable tart.  It was far from vegan with a buttery crust and bacon on it.  But I knew I could make something even better.

    I made a gluten free crust for it actually, enhanced with a little almond flour because I love nut flours in crusts to make them more rich and delicious tasting.  For the filling I used some root vegetables that I had on hand.  Rutabagas, parsnips, carrots and yams.  That original tart that my Mom showed me had other veggies in it too, but I wanted this a little more simple and to my tastes.  I tossed the veggies with avocado oil, garlic, thyme, sea salt and pepper, and it all roasted to deliciousness in the oven once placed into the crust. This is a rustic tart, nothing fussy.  But if you wanted to get fussy and more fancy, you could place it into a 10 inch tart pan instead of free forming it.

    Once it was all baked and lovely, I added some coconut bacon instead of that real bacon that was on the inspiration recipe tart.  Not only that, I decided a bit of nut cheese would be awesome as well, and I happened to have some spiced nut cheese on hand which was perfect with the root vegetables (plain would be delicious too if you don’t like spicy).  Lastly a little arugula for color.  It was so delicious!  I never used to think I would like rutabagas and parsnips when I was younger, but they are really delicious when roasted like this, and in this tart, even better!  If you have root veggies on hand, give this a try!

    Fall Root Vegetable Tart
    Makes 1 10 inch tart

    Filling:

    • 3 1/2 cups mixed 1/2 inch thick cubed root vegetables  (rutabagas, parsnips, yams, carrots)
    • 2 Tbsp avocado oil or olive oil
    • 1 tsp dried thyme
    • 1 garlic clove, minced
    • 1/2 tsp sea salt (or to taste)
    • 1/2 tsp black pepper


    Crust:


    To finish Tart:

    • 1/2 cup vegan chevre from THIS RECIPE with or without the spices, broken into pieces
    • 1/2 cup coconut bacon from THIS RECIPE
    • a few fresh arugula leaves for garnish


    Instructions:

    1. Preheat the oven to 400F degrees, and line a sheet pan with parchment.
    2. To make the filling, add the root vegetables to a bowl, along with the oil, thyme, sea salt and pepper and toss to coat.  Set aside.
    3. To make the crust, combine the flour, almond flour, sea salt, and coconut oil in a bowl, and mix and squeeze together with your hands until the oil is in pea sized chunks. Add the water, and mix with hands just until it comes together and is not sticky.  If it is too dry, add a few Tbsp more water, too wet, a little more flour).
    4. Roll dough out on a sheet of parchment into an 11 inch round, then spoon the veggies into the middle, leaving a 1 1/2 inch boarder.  Fold the sides up, using the parchment to assist.
    5. Transfer the parchment to a sheet pan with the tart on it, and place in the oven.
    6. Bake for about 1 hour, or until the veggies are tender and the tart is lightly brown.
    7. Remove from the oven, let cool slightly and sprinkle the chevre, coconut bacon, and arugula over the top.  Cut into pieces and serve!

    *Note: Whole wheat pastry flour or sprouted whole wheat flour can be swapped for the gluten free if you prefer a more sturdy crust.

  • Vegan Cardamom Pear Almond “Cream Cheese” Pie

    Vegan Cardamom Pear Almond “Cream Cheese” Pie

    Back when I was in college, one of my favorite things ever was roasted pears.  It might not sound that exciting, but boy were they ever good!  I know most people choose apples over pears for things like pies and roasting, but the sweet pears tasted amazing once baked to spiced caramelized perfection.  I have no idea where I even got the idea to make the pears this way, but I think I made them almost every day one winter.  I would put them in a baking dish with apple juice, spices and some maple syrup around them, cover and bake them for a while (so they essentially sort of poached) until they were incredibly sweet, tender and delicious.  I would then top them off with a local creamy goat cheese.  Not one that was goaty, but one that was mild, creamy and delicious.  Man, was that a good combination.  Not only that, it was a relatively simple and affordable dessert to make. It has been ages since I made that, and come to think of it, I could make it with my vegan chevre, and should soon.  But I was thinking about it the other day when my coworker gave me a big bag of pears from her Dad’d trees.  I thought, why not make a pie with the same sort of flavors going on.

    I was thinking about making just a spiced pear pie and serving it with ice cream, or maybe some coconut whipped cream for that creamy element that the chevre gave the inspiring other dish.  But that wasn’t enough for me. What I ended up with was a pear pie spiced with cardamom, and a bit of cinnamon. This was just the beginning, and going off of that other idea.  I thought, why not include the creamy element in the actual pie?  So I added a delicious rich vegan cream cheese layer for that creamy chevre element.  Now, every pie needs a good crust, and one of my favorite things in the world is not crusts because they are so rich and delicious!  So the pears and cream cheese were housed in an almond crust and almond oat crumble topping. It smelled amazing while baking, and most importantly once it was finished it was super delicious.

    This is like my dream pie, it has it all.  Creamy, crunchy, sweet, jammy, salty… crave worthy deliciousness. The only sad part was waiting for it to cool so I could cut into it.  If you have pears on hand, and some free time to spend in the kitchen, definitely give this a try.  It is the perfect time of year to do so, while the pears are amazing! I hope you are all having a wonderful Fall so far!

    Vegan Cardamom Pear Almond “Cream Cheese” Pie
    Makes one 9 inch pie

    Crust:


    Filling:

    • 4 large organic pears (I like bartlett or d’anjou), sliced
    • 2 Tbsp maple syrup
    • 3/4 tsp cinnamon
    • 3/4 tsp cardamom
    • 1 Tbsp arrowroot starch or cornstarch
    • 1 Tbsp lemon juice


    Cream Cheese:

    • 3/4 cup thick organic coconut milk (from the top of a chilled can)
    • 3/4 cup cashew butter
    • 2 Tbsp maple syrup
    • 1/8 tsp sea salt
    • 1 tsp pure vanilla extract
    • 1 tsp almond extract
    • 1/2 tsp cider vinegar
    • 2 Tbsp arrowroot starch or cornstarch


    Topping:

    • 1/4 cup Bob’s Red Mill all purpose gluten free baking flour
    • 2 Tbsp coconut sugar
    • 1 1/2 Tbsp melted coconut oil
    • 1/4 cup plus 2 Tbsp gluten free rolled oats
    • 1/3 cup chopped almonds
    • pinch sea salt


    Instructions:

    1. To make the crust, in a large bowl, mix together flour, sugar, sea salt, and spices. Cut in coconut oil with a pastry blender or 2 knives until it is in pea sized pieces. Mix in  just enough water to create a smooth dough that holds together but isn’t too sticky. Add more water if needed, and knead slightly until a smooth dough is created. Roll out into a 10 inch circle on a sheet of parchment paper, then use the paper to help you transfer it to an 9 inch pie dish.  Flute the edges, and set aside in the refrigerator.
    2. To make the pears, combine the pears, maple syrup, cinnamon and cardamom in a saucepan, and cook covered over medium heat, stirring often for about 15 minutes, or until the pears are soft and starting to turn translucent.  Dissolve the arrowroot starch in the lemon juice, and add it to the pears.  Stir until thickened, and remove from heat and set aside.
    3. Pre-heat the oven to 375F degrees.
    4. To make the cream cheese, whisk together all ingredients until smooth and set aside.
    5. To assemble the pie, pour the cream cheese layer over the crust, then scatter the pear filling over that.
    6. Meanwhile, mix together the topping ingredients in a bowl and squeeze with your hands to form clumps.
    7. Scatter the topping over the pie, place in the oven and bake for about 45 minutes until the edges of the crust are lightly brown, and pie is set.  Remove from the oven to a wire rack.
    8. Allow to cool completely before serving.
  • 30+ Vegan Pumpkin Desserts

    30+ Vegan Pumpkin Desserts

    The last time I carved a pumpkin was over 5 years ago. Which is kind of sad actually, because it is fun, and even though I am an adult, I still enjoy doing things like that.  I am not the best at carving, and my designs always turn out a little less spectacular than I would like, but I love seeing pumpkins all lit up and festive.  It reminds me of my childhood.  Carving pumpkins, taking out the seeds and roasting them for snacks, then setting the pumpkins all up in the window for display once they were all finished.  Most people probably let their pumpkins rot and don’t use them for anything, but I think if I made one now I would have to cook off the flesh and make something delicious with it.  When it comes to pumpkin, I am usually more in favor of something sweet.  I am pretty obsessed with pumpkin desserts come Fall, and I thought you might be too, or maybe you are just looking for a way to use some extra canned pumpkin. So I thought I would gather all of my best pumpkin recipes in one place!  So here you go, 30 delicious vegan pumpkin desserts!  Because you know, this is the time of year to get in all of the pumpkin eating that you can!  I hope you are all having a wonderful Fall so far!

    Vegan Pumpkin Caramels

    Raw Chocolate Pumpkin Pie Cups

    Vegan Pumpkin Spice Latte Caramels

    Pumpkin Pie Popsicles 

    Mini Pumpkin Spice Cheesecakes 

    Vegan Pumpkin Spice Caramel Ice Cream 

    Vegan Pumpkin Pie Pop Tarts 

    Vegan Pumpkin Doughnuts with Maple Glaze 

    Vegan Pumpkin Cream Cheese Muffins 

    Vegan Maple Pecan Pumpkin Cookies

    Vegan Pumpkin Chocolate Chip Cookies 

    Vegan Pumpkin Spice Oatmeal Cookies 

    Vegan Pumpkin Caramel Rolls

    Vegan Pumpkin Cheesecake Swirl Brownies

    Raw Pumpkin Cheesecake Bars with Gingerbread Crust

    Raw Pumpkin Pecan Blondies

    Raw Pumpkin Spice Bars

    Vegan Pumpkin Apple Shortcakes 

    Vegan Pumpkin Chocolate Chunk Doughnuts   

    Vegan Pumpkin Spice Crepes 

    Vegan Mocha Pumpkin Bread

    Raw Pumpkin Crème Caramel

    Vegan Pumpkin Tiramisu 

    Raw White Chocolate Pumpkin Cheesecake 

    Raw Pumpkin Turtle Cheesecake

    Raw Chai Spiced Pumpkin Cheesecake

    Pumpkin Pecan Caramel Ice Cream Cake

    Raw Spiced Pumpkin Mocha Latte Cheesecake

    Mini Raw Pumpkin Spice Yogurt Cheesecakes

    Vegan Pumpkin Spice Latte Layer Cake 

    Vegan Pumpkin Spice Cake with Cream Cheese Frosting

    Vegan Pumpkin Cream Cheese Pie

    Mini Vegan Pumpkin Pies 

  • Vegan Caramel Apple Pancakes

    Vegan Caramel Apple Pancakes

    As far as I am concerned, last weekend was the perfect Fall weekend here in Minnesota.  Cool and 40F degrees in the AM, which is perfect for running through the crunchy leaves (one of my favorite parts of fall), and 70F degrees and sunny in the afternoon, which is ideal weather for visiting the local apple orchard.  Which is exactly what I decided to do!  Eric and I hit up a local new winery, 7 Vines Vineyard for their grand opening first, because it was close to the apple orchard that we were going to go to, and why not enjoy some wine AND apples.  On the way to the winery, we saw a giant line of cars that was about a mile long trying to get into the apple orchard, so we decided that we should probably go to a different one on the way back.  I am one of those people who really can’t stand crowds, and did not want to wait in line an hour to get in.  Luckily, the winery was not as packed but still busy, and we got to enjoy some delicious red wines.  I know there are delicious wines from all over the world, but I like to try and support local businesses.  Plus, nothing beats sipping your wine with a view of the vineyard, especially on a day like that where the weather is perfect.  So, we ended up going to another smaller apple orchard, Victoria Valley Orchard on the way back and not the one with the traffic jam, and I was happy I did.  It is actually right up the street from where I work, so very convenient location for me to visit, and it is family owned.  Their apples are just as good as the other larger orchards, but you don’t have to fight the crowds.  We even ran into a flock of turkeys in there, which were probably thinking that they were the luckiest birds in the world getting to feast on apples that had fallen to the ground.  It was all in all a good day, and I got my apples so I was happy.

    So what am I going to do with all of the apples?  Well, I wanted to try making an apple wine, and of course I have to make some more apple desserts like pies and crisps. I know you can get apples year round, but when you can get fresh local apples they just always taste so much better. I also decided to make some Vegan Caramel Apple Pancakes.  Because I hadn’t made pancakes in a while and they just sounded so good!  For the batter I used applesauce, cinnamon and nutmeg to give them that spiced apple flavor and I planned to top them off with sauteed apples too.  I used almond butter in place of the oil because I actually prefer it.  So, these are actually oil free!  They smelled amazing while cooking, kind of like the apple doughnuts that you smell being made when you visit some of the local apple orchards.  I also made a gooey caramel to top them off instead of just syrup.

    They turned out so good!  This is the perfect lazy Saturday morning treat.  Or dinner treat…since I made them actually in the evening. My Mom made pancakes sometimes for dinner when I was little and I always felt like I was getting something special.  So, I like to carry on that tradition.  If you have a bunch of apples, and are looking for yummy ways to use them, give these delicious pancakes a try!

    Vegan Caramel Apple Pancakes
    Makes 12

    Ingredients:

    • 1 1/2 cups gluten free all purpose flour
    • 2 tsp baking powder
    • 1 tsp cinnamon
    • 1/8 tsp nutmeg
    • 1/2 cup applesauce
    • 3/4 cup filtered water
    • 1/4 cup almond butter
    • 2 tsp pure vanilla extract
    • 1/4 tsp sea salt
    • 3 Tbsp maple syrup


    Topping:

    • 2 large apples, sliced
    • 2 Tbsp maple syrup
    • 1/2 tsp cinnamon
    • pinch sea salt


    Caramel:

    • 1/4 cup almond butter
    • 1/4 cup maple syrup
    • 2 Tbsp filtered water (or as needed)
    • pinch sea salt
    • 1 tsp pure vanilla extract


    Directions:

    1. In a food processor, combine all pancake ingredients and process until just blended, pour into a bowl and set aside.
    2. Meanwhile, to make the apples, place them in a non-stick skillet over medium heat with the maple syrup, cinnamon and sea salt and sautee until they are tender and starting to turn translucent (stirring often), about 10 minutes. Set aside.
    3. To cook pancakes, preheat oven to 110 degrees. Heat a large ceramic non-stick pan over medium heat. Once hot, add the batter in 1/4 cup amounts (I did 3 at a time, but it depends on your pan), and let cook for about 2-3 minutes on the first side until set and starting to brown, then flip with a spatula, and cook another 2-3 minutes.
    4. When cooked, place on a plate and keep warm in the oven while you repeat the process with the remaining pancakes.
    5. To make the caramel, whisk all ingredients together until smooth (adding a little more water if too thick to pour) and set aside until you are ready to serve.
    6. To serve, stack the pancakes on a plate, top off with the apples and caramel, and enjoy!

    *Note: If you do not own a non-stick pan, you may need to lightly oil your pan to prevent sticking, if you do not mind these not being oil free.

  • Vegan Pumpkin Tiramisu

    Vegan Pumpkin Tiramisu

    I have been wanting to make pumpkin tiramisu for years now, and this last weekend I finally made some! I was always a fan of the traditional tiramisu (even though I don’t drink coffee), and since people are obsessed with pumpkin spice lattes I figured pumpkin tiramisu would be amazing.  I have never actually had a pumpkin spice latte, and it has been years since I have bought coffee, but I can see how warming fall spices would be delicious in a coffee drink…or in this case a coffee dessert.  I had seen some on Pinterest a while back and told myself I was going to veganize it.  It was a little cooler here the last few days, feeling more like Fall, and so I figured it was the perfect time to make it. I don’t know about you, but I am obsessed with anything pumpkin lately.  You can use canned pumpkin for this recipe, but I actually cooked my own, because I was making it for another recipe.  Don’t you just love when you can cook something and give it multiple uses?

    I made pumpkin cake instead of using lady fingers in this because I prefer it, and that is just how I roll, making home made stuff instead of store bought add ins.  For the cake, I made my classic simple one bowl, mix and bake cake enhanced with pumpkin and spices.  The batter was super delicious even before I baked it. Yes, I taste all of my cake batter to make sure it is good. I have saved myself this way because one time I forgot to add the sugar.  We all have those days, but it isn’t so bad if you can fix your mistake and not have it be a baking disaster.  This cake smelled amazing while baking.  Just like Fall and spice cakes.  It reminds me actually of going to the apple orchard and smelling the doughnuts that are being made.  I never buy any because I am sure they are not vegan but it is an amazing smell.  I love being able to recreate that at home with something I know I can dive into.  Anyways, this home made tiramisu turned out amazing.

    Instead of the usual zabligone which is mixed into whipped cream for the filling, I made a vegan pumpkin spice cream that was simply heavenly!  And, to top off the cake, I made a coconut cashew whipped cream and topped it off with cinnamon.  Once assembled it was so good!  This Fall variation of tiramisu is simply heavenly!  If you are looking for a delicious way to use that leftover pumpkin, this is it!

    Vegan Pumpkin Tiramisu
    Serves 8-10

    Cake:

    • 1 1/2 cups Bob’s Red Mill gluten free all purpose flour
    • 1 cup coconut sugar
    • 2 Tbsp cinnamon
    • 2 tsp ground ginger
    • 1/2 tsp ground nutmeg
    • 1/4 tsp cloves
    • 1 tsp baking soda
    • 1 tsp baking powder
    • 1/2 tsp sea salt
    • 3/4 cup pureed pumpkin (canned is fine)
    • 1/4 cup avocado oil or olive oil
    • 1 Tbsp pure vanilla extract
    • 1/2 cup + 2 Tbsp strong brewed  coffee
    • 2 Tbsp apple cider vinegar


    Cream:

    • 2 15 oz can full fat organic coconut milk, at room temperature
    • 1 cup raw cashew butter
    • 1/2 cup maple syrup
    • 2 tsp pure vanilla extract
    • 1/2 tsp sea salt
    • 1 1/2 cups melted coconut butter (NOT OIL) (warmed to liquid), divided
    • 1/4 cup plus 2 Tbsp pumpkin puree
    • 1 Tbsp espresso powder or finely ground coffee
    • 1 tsp cinnamon
    • 1 tsp powdered ginger
    • 1/4 tspcloves
    • 1/4 tsp nutmeg


    To soak:

    • 1/4 cup strong brewed coffee
    • 1 Tbsp bourbon (optional)
    • 1 Tbsp maple syrup


    Instructions:

    1. For the cake, preheat the oven to 375 degrees and position rack in center of oven. Line one 9-inch-square cake pan with 3-inch-high sides with parchment paper. Coat parchment paper and pan sides with nonstick spray.
    2. Whisk flour, baking soda, spices, salt, and sugar in a large bowl to blend well.
    3. Whisk pumpkin, oil, maple extract, vanilla extract, and coffee together in small bowl to blend well, then whisk into the flour mixture until well blended. Whisk in cider vinegar until pale swirls form in the batter and it is well combined.
    4. Transfer cake batter to prepared pan and bake cakes until tester inserted into center comes out clean, about 25-30 minutes.
    5. Cool cake completely in pan on rack, about 1 hour. Cut around sides of pan to loosen. Turn cake out onto platter; peel off parchment paper. Slice in half horizontally being careful not to break the cake (I find that chilling it for a few hours first helps it be less fragile).
    6. To make the cream, combine the coconut milk, cashew butter, maple syrup, vanilla, sea salt and 1 1/4 cups of the coconut butter in a blender and blend until smooth and combined. Divide between 2 bowls, and whisk the pumpkin puree, espresso powder, spices and remaining 1/4 cup coconut butter into one of them until smooth.  Place both bowls in the freezer until the cream in each of them firms up, about 30-45 minutes depending on how warm they have gotten.  Place in the refrigerator until you are ready to assemble the cake.
    7. To make the soaking liquid, whisk together the coffee, bourbon, and maple syrup. Brush this over each cake layer.
    8. To assemble, place one cake layer on a plate, spread pumpkin cream over the first cake layer.  Place the other cake layer over that, and spread the plain cream over that.  Dust the top of the cake with cinnamon.  Let sit for a few hours before serving.
  • Vegan Nutella Truffles

    Vegan Nutella Truffles

    I used to think Nutella was pretty awesome when I was little.  I mean, I could eat chocolate on toast for breakfast and it was considered ok.  When I made a trip to Europe with my French class in high school, I ate nutella on baguettes or croissants every day.  What’s not to love about chocolate that is spreadable?!  I never thought about the fact that it had hazelnuts in it, because it didn’t really taste like them to me, and I have since looked at the ingredients and realize that it is because the first two ingredients are sugar and vegetable oil.  I didn’t really care what I ate then, and it didn’t matter to me at the time but it does now.  If I buy anything that is supposed to be nut butter, nuts better be the first ingredient in it.  I don’t eat real Nutella anyhow because it is not vegan.  So, I make my own more delicious vegan nutella!  I say more delicious because you can really taste the hazelnuts in it, and it contains way less sweetener (and no refined sugar).  I was given a bunch of hazelnuts recently and made a few jars of just plain hazelnut butter, and I decided that I wanted some “nutella” truffles.

    So, I whipped some up, and they were super simple!  Only 5 ingredients, if you use already made vegan dark chocolate.  I recommend Lily’s Dark Chocolate Chips, Zimt Baking Chocolate, or Luv Dark Chocolate Chunks for melting, because they are all either sugar free or refined sugar free and quality chocolate. I try to look for chocolate with few ingredients that are real.  The filling for the truffles is just hazelnut butter, maple syrup, sea salt and cacao butter, that is all!  I made my own hazelnut butter so it was a little less runny than some of the commercial brands, but if yours is commercial and more runny don’t worry, all you need to do is add a little more cacao powder (I have included instructions below). The truffles came out super delicious!

    This is way better than most of the Halloween candy out there, more like grown up real Halloween candy.  So, it is the perfect time of the year to make them, so you can enjoy them instead of the store bought candy that is not made with good ingredients.  I think if I had eaten these as a youngster,  I would not have liked the real Nutella because these are so much better and actually taste like hazelnuts!  If you are craving Nutella, you need to give these lovelies a try!

    Vegan Nutella Truffles
    Makes 12

    Ingredients:

    • 1 cup hazelnut butter*
    • 3 Tbsp maple syrup
    • 1/4 tsp sea salt
    • 3 Tbsp cacao powder (or unsweetened cocoa powder)
    • 1 cup chopped vegan dark chocolate


    Instructions:

    1. In a bowl, mix together the hazelnut butter, maple syrup, sea salt and cacao powder until well blended.
    2. Roll the mixture into balls, and place on a parchment lined tray. Freeze for about 1 hour.
    3. When the filling has chilled for an hour, melt the dark chocolate in the top of a double boiler until smooth.
    4. Dip each filling ball into the melted chocolate, let the excess drain off (I like to set it on a fork), and place back onto the tray.  When you are finished dipping them, place them in the freezer to firm up for about 10  minutes.
    5. Store truffles in the refrigerator for up to a few months in a sealed container.

    *Note: If you hazelnut butter is more runny, you may need to add an additional 2-3 Tbsp cacao powder to make the filling mixture firm enough.


  • Vegan Roasted Squash Garlic Nacho Cheese

    Vegan Roasted Squash Garlic Nacho Cheese

    There was a point in time I ate so much squash that my skin started to turn slightly orange hued.  I try to vary my diet a little more now, but maybe I am still a little orange since all year round I am eating squash, sweet potatoes and carrots at least once a day.  But not as much as the every day squash dinner that I used to do.  I was pretty obsessed in the Fall and Winter. I mean, it is pretty delicious, and I pretty much love it any way that it is prepared.  Roasted and stuffed is my favorite.  But sometimes you end up with a giant squash, and you bake one side for dinner to stuff and have an extra one, so what do you do with that? Well, I like to swap it out for pumpkin in baked goods, add it to hummus, or add it to things you don’t expect it in.  Like mac and cheese, or the Vegan Roasted Squash Garlic Nacho cheese I made last week.  I honestly did not set out to make nacho cheese, I set out to make a roasted garlic squash dip that I decided would be good made into a nacho cheese with something rich like cashew butter added to it.

    So, it morphed into nacho cheese.  I have corn tortilla chips on hand at all times, because they are my crunchy savory indulgence of choice with guac or salsa, so I was excited about the idea of nacho cheese.  I remember back in middle school, for lunch I would buy nachos with cheese a lot. I know, totally not healthy, and I am sure it was not real cheese but that didn’t stop me and I don’t think I cared about healthy food at that point, I loved the stuff. I mean, who doesn’t love gooey nacho cheese until they find out what is actually in it?!  Funny story though, one time at lunch (still in middle school), someone accidentally spilled nacho cheese on my head.  It was a gooey mess, and I was not happy at the time, but now looking back in it the situation was kind of funny. It didn’t deter me from eating it though.  It was a middle school lunch favorite for me.  As an adult though, I don’t think I have actually eaten nacho cheese ever.  Because I have tried to eat healthy since I was about 18, and the fake stuff in the usual nacho cheese was unappealing.  But…the idea of a healthy nacho cheese made with squash sounded awesome!  I could enjoy one of my old favorites and it would still be healthy!

    So, I was excited about this nacho cheese.  It is mostly squash, but the ingredient that makes it so good is the 4 heads of roasted garlic I added.  Before you go thinking 4 heads???  Yes, but when roasted they mellow out and become super delicious and almost a little sweet and rich.  I added cashew butter to that to make it silky and cheesy as well as some nutritional yeast and miso to give it even more of a cheesy flavor.  And, nacho cheese needs a little kick so it needed chipotle powder as well.  It turned out sooo good!  I am not going to lie, I ate most of a batch with my chips in one sitting. If you are looking for a healthier nacho cheese alternative, give this recipe a try!

    Vegan Roasted Squash Garlic Nacho Cheese
    Makes about 1 1/2 cups

    Ingredients:

    • 4 heads garlic
    • 1 cup cooked squash
    • 3/4 cup filtered water
    • 1/2 cup cashew butter
    • 1 Tbsp white miso
    • 2 Tbsp nutritional yeast
    • 1/2 tsp chipotle powder
    • 1/2 tsp sea salt or to taste


    Instructions:

    1. Preheat the oven to 425F degrees.
    2. Cut just the tops off of each head of garlic to expose the cloves, then wrap them in foil.
    3. Place the garlic in the oven and roast for about 45 minutes to 1 hour until the garlic is soft and tender.  Remove from the oven and let cool.
    4. Squeeze the garlic cloves out of the papery skins into a blender or food processor.
    5. Add all other ingredients and blend until smooth.
    6. Enjoy!
  • Vegan Pumpkin Patch Coffeecake

    Vegan Pumpkin Patch Coffeecake

    When I was little, my Mom found this delicious Fall coffeecake recipe in the local newspaper, and she made it her own by adding oats to the topping, extra spices and swapping out a portion of the oil with more pumpkin.  I always looked forward to it, it was so good!  Like something that you bake on a lazy Saturday morning and eat for brunch.  I totally would beg to eat it for my meal instead of other food.  I have no idea where that recipe went, but I remember how it tasted!  So I decided that I needed to create a veganized version of it so I could enjoy it again.  After all, I am getting all excited about anything pumpkin right now!  I don’t buy pumpkin spice lattes, but pumpkin desserts I am all over.

    For the cake batter, I used a date sweetened base with plenty of pumpkin and aromatic spices that you would find in pumpkin pie.  Cinnamon, ginger, nutmeg and cloves were a must!  It tasted good even before I baked it.  Yes, I always taste my cake batter to make sure it is good before baking it, because once I left something out and tasting it had saved me.  Now, the original cake did not have a cream cheese layer in it, but I had to put one in, simply because it sounded so good.  I have always been a sucker for coffeecakes with cream cheese ever since I was little.  I made a simple cashew coconut cream cheese and it baked up beautifully.  Lastly, I topped it off with a crunchy oat streusel like my Mom’s cake.

    It smelled amazing while baking.  Like Fall, the aromatic spices putting me in a good mood.  Whenever I have not had the best day, baking something always makes me feel better.  One can not be unhappy while smelling delicious cake baking after all, especially knowing you can devour a nice big piece later.  It baked up just as I had imagined, and it tasted wonderful.  I had to share some with my Mom of course, since the cake she made inspired it and she loved it as well.  So, the next lazy Fall Saturday you have, you should definitely bake this cake, it is the perfect brunch sort of thing.  But of course I wouldn’t limit it to that, it was a late night snack for me too.

    Vegan Pumpkin Patch Coffeecake
    Makes 1 9 inch round cake

    Streusel:

    • 1/2 cup gluten free rolled oats
    • 1/4 cup coconut sugar
    • 1/4 cup all purpose gluten free flour
    • 1/8 tsp sea salt
    • 3 Tbsp pecan butter or almond butter


    Cream Cheese:

    • 3/4 cup raw cashew butter
    • 1/3 cup coconut milk
    • 2 Tbsp  maple syrup
    • pinch sea salt
    • 1 tsp pure vanilla extract


    Cake:

    • 1 1/2 cups all purpose gluten free flour
    • 1 1/2 tsp baking soda
    • 1 tsp baking powder
    • 1/2 tsp sea salt
    • 1 Tbsp ground cinnamon
    • 2 tsp ground ginger
    • 1/2 tsp ground nutmeg
    • 1/4 tsp ground cloves
    • 1 cup packed soft medjool dates, pitted, soaked in water for 30 minutes and 1/2 cup of the water reserved
    • 1/4 cup pecan butter or almond butter
    • 1 Tbsp pure vanilla extract
    • 1 cup canned pumpkin
    • 2 Tbsp apple cider vinegar


    Instructions:

    1. For the streusel, combine all ingredients in a bowl, and mix and squeeze together with your hands until it forms little clumps.  Set aside.
    2. For the cream cheese, combine all ingredients in a high speed blender until smooth (if it seems too thick, add a little more water.  You want to be able to pour and spread it over the bottom layer of cake).  Set aside.
    3. Preheat the oven to 375F degrees and position rack in center of oven. Line a 9 inch round cake pan with 3-inch-high sides with parchment paper. Coat parchment paper and pan sides lightly with oil so that the cake doesn’t stick to the pan.
    4. Whisk flour, baking powder, baking soda, and sea salt, in a large bowl to blend well. Place dates, reserved water, oil, water, and vanilla extract into a blender, and blend until smooth, then whisk this blended mixture into the flour mixture until well blended. Whisk in the cider vinegar until bubbles form.
    5. Pour the cake batter to the prepared pan then pour cream cheese mixture over that (kind of pouring slowly and not just in one spot so it evenly distributes).  Sprinkle the streusel over the top.
    6. Place in the oven and bake cake until tester inserted into center comes out clean, about 1 hour. Cool cake completely in pan before un-molding and serving.


  • 25 Vegan Apple Dessert Recipes

    25 Vegan Apple Dessert Recipes

    I love apple season!  It means that Fall is officially here, and the leaves are starting to turn colors on the trees, the air is getting chilly, and it is time to bake delicious apple pies. I love a good apple pie served warm with some coconut ice cream, it is so cozy and comforting.  Every year I have to make a trip to the apple orchard to get a bag of local apples.  It is fun to wander through the orchard and pick your own.  My favorite for baking are Haralsons.  They are nice and tart, and hold up nice for baking without being crunchy once baked. For eating though, the Honeycrisps win hands down.  Especially the ones grown here in Minnesota.  They were developed here at the U of MN after all.  I don’t limit myself to pies though when it comes to apples, I love apple desserts in general.  I thought you might too, so I thought I would gather up all of my best apple recipes in case you just made a trip to the apple orchard or farmers market and have a large bag of apples you would like to make something delicious with.  Enjoy, and happy Fall you all!

    Vegan Cream Cheese Apple Galette

    Raw Chipotle Caramel Apple Chocolate Cups

    Vegan Caramel Apple Bars

    Raw Spicy Sweet Apple Crisp

    Raw Apple Thyme Crumble Tart

    Vegan Apple Spice Cake with Caramel Frosting

    Almond Joy Caramel Apples 

    Raw Apple Spice Filled Doughnuts

    Mini Vegan Apple Maple Cheesecakes

    Raw Apple Crumble Ice Cream 

    Vegan Spiced Apple Crisp in a Jar

    Vegan Apple Cinnamon Cobbler with Almond Biscuits

    Vegan Sticky Toffee Apple Pudding Cake

    Vegan Apple Pie Cookies 

    Vegan Crabapple Rustic Tart With Gingerbread Rye Crust

    Vegan Apple Cream Cheese Coffeecake

    Raw Caramel Apple Cheesecake

    Vegan Apple Maple Walnut Cake

    Vegan Apple Spice Oatmeal Cookies

    Vegan Hazelnut Crusted Apple Pie 

    Vegan Caramel Apple Galette

    Vegan Cinnamon Apple Pear Pandowdy

    Vegan Apple Streusel Doughnuts

    Vegan Pumpkin Apple Shortcakes

    Vegan Dutch Apple Cream Cheese Pie

  • Vegan Caramel Apple Pie Bars

    Vegan Caramel Apple Pie Bars


    The leaves are just barely starting to change colors on the trees, there is a slight chill in the air, and you can smell the aroma of bonfires in the evenings.  Fall is definitely here!  I am bringing out my cozy warm clothes, relishing in being able to run in chilly morning air with beautiful sunrises, and baking up a storm.  Because this is my favorite season to bake.  I haven’t made it to the apple orchard yet, maybe next weekend.  But I have bought some delicious local apples at the grocery store I work in the deli at.  I couldn’t resist.  I mean, there is nothing like biting into a local apple full of flavor that was just picked recently and hasn’t traveled half way around the world to get to you.  So, I had a big bag of them, and I have been making all things apple.  I have made a couple pies, an apple spice cake and some delicious caramel apple pie bars that I am sharing with you today because they were so delicious!  Actually, my Mom asked me to make her some bars to bring to a party with her friends, and I thought apple pie bars would be just the thing it being Fall and all.

    I used a special ingredient in them that I think you will all enjoy as well, D’vash Date Nectar! I don’t know about you, but I love sweetening things with dates.  They are about as natural as you can get when it comes to sweeteners, and they are the only ingredient in D’vash Date Nectar. The only thing about sweetening with dates the way I normally do is that you have to blend them, but with this, you eliminate that, and it is more concentrated and sweet.  You can use it in place of honey, agave nectar or maple syrup in recipes.  So, I used it in these bars to make them more caramel flavored as well as to make a delicious caramel to drizzle over the top.

    I made a pie crust for the bottom, a sweet apple filling, and topped it off with crunchy oat topping (which is my favorite way to top an apple pie) and the D’vash Date Nectar caramel.  These were so good!  If you would like to buy some D’vash Date nectar for yourself, you can use this special coupon code on their WEBSITE to get a 10% discount: DVASH_FRAGRANTVANILLACAKE

    Not only that, they have free shipping for orders about $20 on their website if you want to stock up and buy a few. Also, they have been kind enough to allow me to give one of their bottles of nectar away, so be sure to enter my giveaway below!

    Vegan Caramel Apple Pie Bars
    Makes 16

    Crust:

    • 1/2 cup coconut oil, softened
    • 1/4 cup coconut sugar
    • 1/4 tsp sea salt
    • 1 cup gluten free all purpose baking flour


    Filling:

    • 3 medium or 4 small apples, sliced 1/4 inch thick
    • 1/4 cup gluten free all purpose flour
    • 2 Tbsp D’vash date nectar or maple syrup
    • 1 tsp cinnamon
    • 1 tsp lemon juice


    Topping:

    • 1/2 cup gluten free old fashioned oats
    • 1/2 cup chopped pecans
    • 1/4 cup coconut sugar
    • 1/4 tsp ground cinnamon
    • 1/4 cup gluten free all purpose baking flour
    • 3 Tbsp coconut oil, softened


    Caramel:

    • 1/4 cup D’vash date nectar or maple syrup
    • 1/4 cup almond butter
    • 1/4 tsp sea salt
    • 1 tsp pure vanilla extract


    Instructions:

    1. Preheat the oven to 350F degrees, and line a 9×9 inch square pan with parchment.
    2. Mix together the crust ingredients, and press into the bottom of the prepared pan.  Place in the oven and bake for 15 minutes until set.
    3. Meanwhile, mix together the apple filling and set aside.
    4. Mix together the streusel filling in a bowl, and scrunch together with hands until it clumps up.  Set aside until crust is done.
    5. Remove the crust from the oven and spread the apples out over it (making sure they are all flat and evenly distributed), then sprinkle with the streusel.  Place back in the oven and bake for about 1 hour to 1 hour and 5 minutes until the streusel is lightly browned and apples are tender.  Note, since some ovens vary in temperature, check the bars after about 45 minutes and if they are starting to get too dark, tent them with foil so that they do not burn.
    6. Once the bars have finished baking, remove them from the oven and allow to cool completely.
    7. When the bars are cool, whisk together all of the caramel ingredients, and drizzle it over them.
    8. Cut into 16 bars, and enjoy!

    a Rafflecopter giveaway

    Stock up on D’vash Date Nectar with this special coupon code on their WEBSITE to get a 10% discount: DVASH_FRAGRANTVANILLACAKE

  • Vegan Apple Spice Cake with Caramel Frosting

    Vegan Apple Spice Cake with Caramel Frosting

    Last week was 90 degrees here, so not very Fall like at all.  In fact, Eric and I went for a walk, and it was so humid you would swear it was July, and he found some ripe raspberries still on the bush!  They are never usually around after the end of July, so that was interesting!  He said they were really good, maybe all of this warmth is extending the season.  I am still in the mood for Fall though, and this week it is cooling down finally.  I love the cool Fall weather, running through the crunchy leaves, pumpkin spice and baking apple desserts.  So, I baked a Vegan Apple Spice Cake with Caramel Frosting last weekend because even though it didn’t feel like Fall I wanted to enjoy all of the Fall things. Plus, I had a bunch of apples at home just waiting to be used in a recipe!

    Apple spice cake is one of those easy things to bake this time of the year. My Mom used to make it using applesauce, but pureed fresh apples work just as well.  This cake base is date sweetened, and between the apples and dates it is jut the right amount of sweet.  I spiced it lightly with cinnamon, nutmeg, ginger, and cardamom and it smelled amazing while baking. That is one of my favorite parts of Fall, the delicious aromas.  Apple pie, spice cakes, pumpkin desserts…they all smell amazing, and it makes me happy.  The cake baked up beautifully, moist, yet soft and not too heavy.  I wanted a smooth gooey caramel frosting to top it off.

    Instead of just using all dates, I decided to use a base of cooked white fleshed sweet potatoes with them to create smooth rich frosting with volume and just the right amount of sweetness.  Don’t worry, you can not tell it is sweet potatoes, it just comes out like the most delicious luscious caramel frosting!  The cake tasted amazing.  The soft cake scented with Autumn spices and the gooey frosting were just what I was hoping for!  If you have lots of apples and are looking for something to make with a few of them give this cake a try!

    Vegan Apple Spice Cake with Caramel Frosting
    Makes 1 6 inch 2 layer cake

    Ingredients:

    2 6 inch cake pans

    Cake:

    • 1 1/2 cups quinoa flour (or Bob’s Red Mill gluten free all purpose baking flour)
    • 1 1/2 tsp baking soda
    • 1 tsp baking powder
    • 1/2 tsp sea salt
    • 2 tsp cinnamon
    • ½ tsp nutmeg
    • 1 tsp ground cardamom
    • 1 tsp ground ginger
    • 1 ¼ cups packed soft medjool dates, pitted, soaked in water for 30 minutes and 1 cup of the soaking water reserved
    • 1/4 cup almond butter
    • 1 Tbsp pure vanilla extract
    • 1 cup pureed ripe apples
    • 2 Tbsp apple cider vinegar


    Frosting:

    • 3 cups cooked sweet potatoes (the white fleshed variety)
    • 1 cup soft, pitted medjool dates
    • 1/4 cup filtered water (or as needed)
    • 1/2 cup raw almond butter
    • 1/2 cup maple syrup
    • 1 tsp pure vanilla extract
    • 1/4 tsp sea salt


    Directions:

    1. Preheat the oven to 375F degrees and position rack in center of oven. Line two six-inch-diameter cake pans with 2-inch-high sides with parchment paper. Coat parchment paper and pan sides lightly with oil so that the cake doesn’t stick and line the bottom of the pan.
    2. Whisk flour, baking powder, baking soda, cinnamon and sea salt in a large bowl to blend well.  Set aside.
    3. Place dates, reserved water, almond butter, apple puree, and vanilla extract into a blender, and blend until smooth, then whisk this blended mixture into the flour mixture until well blended. Whisk in the cider vinegar until bubbles form. Transfer cake batter to prepared pans and bake cakes until tester inserted into center comes out clean, about 30 minutes. Cool cakes completely in pan on rack, about 1 hour. Cut around sides of pan to loosen. Turn cakes out onto plates, and peel off parchment paper. Slice each in half horizontally so that you have 4 layers (being really careful, because it is delicate).  Set aside, covered so that it doesn’t dry out.
    4. To make the caramel frosting, combine all ingredients in a high speed blender until smooth (add a little more water if too thick).  Set aside.
    5. To assemble, place one cake layer on a plate, and spread about 1/2 cup frosting over it.  Place the other cake layer over that, then spread more frosting, over it like the last layer.  Repeat with another layer, and top off with last piece of cake.  Spread the remaining frosting on the top and down the sides of the cake.


  • White Chocolate Hazelnut Pecan Butter

    White Chocolate Hazelnut Pecan Butter

    I love me some nut butters.  At any given time you will find at least 8 different kinds in my pantry.  I make about 3 a week, because I use it in recipes, and of course just straight up eat it.  I mean is there any better quick comfort food than a big spoon of peanut butter?  I would go for that over a piece of chocolate any day.  Also, I find that the richness of nut butter satisfies any cravings I would have for animal based fats like cheese or butter.  I make my creamy salad dressings with walnut butter, and you would swear it had dairy in it, and I use nut butters in place of the butter in things like cakes.  Or if I am craving something rich, I just have a couple Tbsp of nut butter for a snack and I feel satisfied.  So, I am always coming up with new delicious flavors just to enjoy by the spoonful or with fruit or stirred into my oatmeal.  I was always fascinated by all of the gourmet flavors of nut butter at the store growing up, so I was super excited as an adult when I could make my own after I bought a high speed blender.  I haven’t actually bought any nut butter from the store in the past 4 years, I always just make it.  It is much cheaper that way, and I can play around with combinations of nuts or add ins.

    The latest flavor I made this week was a White Chocolate Hazelnut Pecan Butter.  It was simply heavenly, which is why I decided that I needed to share the recipe with you all.  It is actually really easy to make if you have a high speed blender or food processor.  I started out with a toasted hazelnut and pecan base, and added in some rich cacao butter to give it that white chocolate flavor.  I suppose I could have stirred in white chocolate chunks too, but that was not what I was going for because I wanted just the right amount of sweetness.  I thought the chunks would make it too sweet for me, and I wanted it smooth.  I am a more smooth nut butter type of girl, I do make exceptions (like I have added dark chocolate chunks) but rarely.  I added in some coconut sugar to this to sweeten it just enough, some sea salt for balance, and some vanilla bean seeds for that delicious vanilla aroma that you find in white chocolate.

    It was super delicious!  Sweet, with a white chocolate aroma, and nutty toasty flavor!  It is perfect for drizzling while warm (like when you first make it), and would be amazing on apples or pears for a healthy fall treat.  Or, when it cools down it is more firm and spreadable.  I like it both ways!  It is good to have options.  Don’t you agree?

    White Chocolate Hazelnut Pecan Butter
    Makes about 3 cups

    • 2 cups toasted hazelnuts
    • 1 1/2 cups toasted pecans
    • 1 1/2 oz cacao butter, warmed to liquid
    • 1/4 tsp sea salt
    • 1/4 cup raw coconut sugar
    • seeds of one vanilla bean


    Instructions:

    1. In a high speed blender, combine the nuts, cacao butter and sea salt and blend until smooth, using the tamper to push the mixture down into the blades.
    2. Add the coconut sugar and vanilla beans to the blender and blend until well incorporated.
    3. Pour into a jar.
    4. Enjoy!  Keeps for a few months at room temperature and up to 6 when kept in the refrigerator.
  • Smokey Yam and Lentil Chili

    Smokey Yam and Lentil Chili

    We sell so much soup in the deli I work at that it is not even funny.  4 quart pots are emptied out in no time, and we are always making soup.  You would think it would slow down a lot in the Summer, but it still sells like hotcakes! Even more of course in the Fall and Winter. Especially Fall though, as people are feeling shocked by the cooler weather and wanting something warming.  To be fair, our soups are really good, some of the best I have tried anywhere.  I tend to be disappointed when I go out to restaurants and order soup because ours is top notch.  I like to think I make good soup at home too though.  My Mom taught me how when I was younger when we got a big soup book and made about 20 different soups from it.  We hardly ever bought canned after that.  I never buy canned now because I like home made so much more. My Mom gave me an idea for a chili to make combining lentils and yams, and I had to go right home and make it!

    I had all of the ingredients on hand, and I was excited.  I had never actually made chili with lentils, it was always beans. But I actually prefer lentils.  This chili was really easy to make, you just throw all of the ingredients but the yams in a pot and cook it, then throw in the yams.  I used tomatoes from my Grandpa’s garden instead of canned and I think that made it extra good.  I added a bit of liquid smoke to give it a little smokey flavor and make it more interesting.  It smelled so good while cooking!  Chili always reminds me of watching fall football games, or chilly fall evenings after spending the day outdoors.

    It turned out really good!  The thing I didn’t like so much about traditional chili growing up was always the ground beef.  I have never liked it and the smell of it turned my stomach.  But if lentils were added instead of the beef I think I would have liked it a lot more.  Because this lentil chili was awesome!  Also, they cook a lot faster than dried beans, so if you want your chili faster consider lentils.  The smokey chili was delicious with the sweet yams too!  If you are cooking for one like I was, this is even better and more flavorful the next day, so you will be excited when you have that second bowl for lunch the next day.  Or, of course you can double the recipe if you are cooking for two.  Either way, give it a try on a chilly Fall evening, you won’t be disappointed!

    Smokey Yam and Lentil Chili
    Serves 2-4

    Ingredients:

    • 2/3 cup french lentils
    • 1/2 cup diced onion
    • 1 carrot, cut in half  lengthwise and sliced
    • 1 stalk celery, sliced
    • 2 garlic cloves, minced
    • 2 cups diced tomatoes (canned are fine)
    • 4 cups filtered water
    • 1 Tbsp chili powder
    • 1 Tbsp ground cumin
    • 1/4 tsp chipotle powder
    • 2 tsp liquid smoke
    • 1/2 tsp sea salt or to taste
    • 2 small yams or sweet potatoes, diced


    Instructions:

    1. In a pot, combine all ingredients but the yams.  Bring to a boil, and lower to a simmer.  Cook on low heat for about 40 minutes or until the lentils are getting tender. Add the sweet potatoes, and cook for about 10 minutes more until they are tender.  Once everything is cooked, remove from heat, and enjoy!


  • Cinnamon Sugar Yam Fries with “Cream Cheese” Dipping Sauce

    Cinnamon Sugar Yam Fries with “Cream Cheese” Dipping Sauce

    Yam fries are my bacon.  As in, I love them so much I can’t stop eating them.  We make them at my work, and of course I always have to sample them every time to make sure they are up to par.  It is funny because when I was younger I couldn’t have cared less about sweet potatoes and yams, because of the way I was traumatized as a kid eating the canned ones in syrup.  But once I tried a roasted yam fry, from a fresh sweet potato, I was hooked.  This is the sort of thing I whip up a batch of if I want a healthy snack that tastes like it shouldn’t be.  It is usually just a little olive oil and sea salt and I am a happy girl with the more savory yam fries.  But I thought, hey why not make some sweet ones?!  Sweet yams can go so wrong.  I admit, I am not usually a fan of mashed super sweet yams for a savory dish because it tastes too much to me like pumpkin pie or something. But I was going for sweet this time, and they wouldn’t be mushy, they would be sweet, a little crisp and delicious!

    These actually ended up being oil free as well.  I tossed them with maple syrup, coconut sugar, cinnamon, sea salt (to get that sweet and salty thing going), and some chipotle powder to give it a little kick.  Because I am a fan of that sort of thing.  If you don’t like heat, you feel free to leave it out.  They smelled amazing while baking!  Like a cinnamony Autumn cake or something. Happy aromas coming from the kitchen are my favorite!  Especially when it is the smell of spice in the fall.

    I wanted a dipping sauce with these too.  As if they weren’t delicious enough as they were, because they could totally stand alone, but I wanted them to be over the top good.  I debated between a chocolate dipping sauce and a cream cheese dipping sauce, and the cream cheese won.  Because I can never resist cream cheese.  Vegan cream cheese of course.  My dip was a luscious mixture of cashew butter and coconut milk made sweet with a little more maple syrup plus a dash of sea salt and cider vinegar to make it taste like cream cheese.  It was so good!  And, even better with those delicious yam fries.  This reminds me of something you would get at the state fair but healthier of course.  If you are in the mood for a sweet snack, give these fries a try!

    Cinnamon Sugar Yam Fries with “Cream Cheese” Dipping Sauce
    Serves 2-4

    Ingredients:

    Yams:

    • 4 medium sized yams, cut into fries
    • 3 Tbsp maple syrup
    • 1/4 cup coconut sugar
    • 1/2 tsp sea salt (or to taste)
    • 1 tsp cinnamon
    • 1/8 tsp ground cayenne or chipotle powder


    Sauce:

    • 1/3 cup thick coconut milk
    • 1/2 cup raw cashew butter
    • 3 Tbsp maple syrup
    • 1/4 tsp sea salt
    • 1 tsp cider vinegar
    • 1 tsp pure vanilla extract


    Instructions:

    1. To make the fries, preheat the oven to 400F degrees, and line a sheet pan with parchment.
    2. Toss the fries with the maple syrup, coconut sugar, sea salt, cinnamon, and chipotle powder until they are coated, and spread them out on the sheet pan.
    3. Place in the oven and roast until tender and starting to brown, about 45 minutes.
    4. Meanwhile, to make the cream cheese dip, combine all ingredients in a food processor or blender and blend until smooth.  Set aside.
    5. When the fries are done, remove them from the oven and serve with the dip!
  • Vegan Chocolate Chip Cookie Dough Truffles with Fleur de Sel

    Vegan Chocolate Chip Cookie Dough Truffles with Fleur de Sel

    I don’t know about all of you, but I enjoy eating cookie dough just as much as baked cookies.  I always ignored the warnings about raw eggs, as I secretly swiped spoonfuls of dough from my Grandmother’s cookie dough bowl when her back was turned as a child in her kitchen.  Good thing I never got sick, and I admit that I haven’t made a batch of cookies myself as an adult without “sampling” well, more like indulging in the dough.  Good thing all of the cookie dough I make now is vegan, and contains no eggs, and therefore no risk of contamination.

    As I was enjoying some cookie dough last weekend for a batch of cookies, I was thinking how wonderful it would be if I made some just for enjoying in that form.  However, dough balls themselves are a bit messy, and would stick together once stored…so I thought dipping them in chocolate and having them be “truffle” style would be perfect!  Now, I know these probably don’t qualify as truffles but who says I can’t call them that on my own recipe. I was just about drooling at the thought of them.  But, what would make them even better in my mind was a little fleur de sel.  Salty and sweet is just an irresistible combination to me especially with dark chocolate! So I made a simple recipe for vegan chocolate chip cookie dough, omitting the rising ingredients, since they wouldn’t be needed and went to work!

    I will admit I ate quite a few of the dough balls before they were dipped in the chocolate because I just couldn’t wait, and of course I needed to be sure they were up to my standards! Once finished they were even better though, with the extra chocolate shell!  Who knew cookie dough could be even better than it already was.  If you are like me and you cannot resist cookie dough, you must try this.  Never deprive yourself of good cookie dough, enjoy!

    Vegan Chocolate Chip Cookie Dough Truffles with Fleur de Sel

    Makes

    Ingredients:

    • 1 cup rolled oats
    • 3/4 cup almond butter
    • 1 cup pitted soft dates (if they are not soft, soak them in filtered water before using in the recipe and drain well)
    • 1/4 cup filtered water
    • 2 Tbsp coconut butter or oil
    • 3/4 tsp fleur de sel or 1/2 tsp sea salt
    • 1 tsp pure vanilla extract
    • 1 3/4 cups vegan chocolate chips, divided


    Instructions:

    1. In a food processor or blender, blend the oats until a fine flour.  Remove and set aside.
    2. In the food processor or blender, combine the almond butter, dates, filtered water, coconut butter, sea salt, and vanilla and blend until smooth.
    3. Add the oats and blend until smooth.
    4. Stir in 3/4 cup of the chocolate chips.
    5. Roll the cookie dough into 1 1/2 inch balls, and place on a parchment lined tray.  Set in the freezer until firm, about 30 minutes.
    6. Melt the remaining vegan chocolate chips in the top of a double boiler.
    7. Dip each cookie dough ball into the chocolate (I like to set it on a fork), and allow excess to drip off.  Set back on the tray.  Repeat with the remaining truffles, and then place them all in the freezer until the chocolate has hardened.
    8. Store truffles in an airtight container in the refrigerator.
  • Vegan Chocolate Peanut Butter Banana Cookies

    Vegan Chocolate Peanut Butter Banana Cookies

    I think cookies are the perfect way to end a long weekend.  Don’t you think?  I had a 3 day weekend because I took Saturday off (my normal day to work) for Twin Cities Veg Fest.  Which I visited with Eric, because last year I enjoyed it so much and he had never been.  There were way more people there than I expected!  It is so awesome to see so many vegans, or people interested in veganism.  We sadly didn’t get to buy any food though because the lines were pretty long but it smelled and looked amazing.  Maybe next year.  It was still fun to see the other products that they had there though and spend time with fellow vegans.  Sunday, after my long run and baking an apple pie,  I visited my Grandpa and helped him pick tomatoes in the garden.  That is where my never ending supply comes from in the Summer and I am so grateful that he enjoys growing them and sharing with me.  Afterwards my Mom and I went to dinner at the French Meadow, one of my favorite local restaurants (because it has lots of vegan options).  So Monday, after a weekend of being busy with fun things, I decided to make some cookies while I watched the Vikings game!  Baking is one of my favorite relaxing activities.  And, I admit I was craving some cookie dough.

    I am one of those people who eats more dough than actual baked cookies.  And a close second is the warm cookies with gooey chocolate chips.  Mmmm.  I learned this when I used to bake cookies with my Grandma as a small child.  I was always stealing dough when she wasn’t looking.  When there was no more dough, I moved on to the warm cookies.  Still like that as an adult!  I wanted to try making a new cookie, so I decided to make some soft chocolate peanut butter banana cookies because I had all of the ingredients on hand.  That is important to me, being able to make something and not have to buy extra stuff for it.  Peanut butter, chocolate and bananas are things I always have on hand, not to mention a crave worthy combo!

    The thing I love about cookies is they are pretty straight forward and easy to make.  If you make them, I have to warn you the dough is hard to stop eating.  So delicious!  They baked up beautifully, soft and sweet, studded with gooey chocolate chips and crunchy peanuts with the light flavor of banana.  They are sort of like brownie cookies, if you are a fan of the texture of brownies.  If you are sick of banana bread by the way, this is a good use for a couple ripe bananas.  The weather is cooling down now, and it is the perfect time to do some baking!  So give these sweet delicious cookies a try!

    Vegan Chocolate Peanut Butter Banana Cookies
    Makes 1 dozen

    Ingredients:

    Cookies:

    • 1 cup coconut sugar
    • 1/3 cup peanut butter
    • 1/4 cup coconut oil, warmed to liquid
    • 2 medium well mashed very ripe organic bananas
    • 2 tsp pure vanilla extract
    • 1/2 cup maple syrup
    • 2 1/2 cups Bob’s Red Mill all purpose gluten free flour
    • 1/3 cup unsweetened cocoa powder
    • 1 Tbsp baking powder
    • 1 tsp sea salt
    • 1 cup vegan chocolate chips
    • 1 cup toasted peanuts


    Instructions:

    1. To make the cookies, in a large bowl, combine the oil and peanut butter with sugar, bananas, vanilla extract, and maple syrup until well combined.
    2. In a smaller bowl, whisk together flour, cocoa powder, salt, baking powder, then add to the large bowl, and mix until well combined.
    3. Mix in the chocolate, and peanuts and place in the fridge to chill until somewhat firm, about 30-45 minutes.
    4. To bake, Preheat your oven to 375 degrees. Line 2 large baking sheets with parchment paper.
    5. Roll dough into balls about 2 inch balls, and place on prepared cookie sheets a couple inches apart.
    6. Place in the oven and bake for about 15 minutes, until puffed and just starting to brown slightly.
    7. Remove from the oven and let cool on the pan a few minutes, then remove to a wire rack to cool slightly before enjoying!
  • Vegan Dutch Apple “Cream Cheese” Pie

    Vegan Dutch Apple “Cream Cheese” Pie

    My Mom used to make the best apple pies.  She would always use tart sweet apples like Haralson, which is a Minnesota apple.  Not only that, her pies had just the right amount of spice and sweetness and she always topped them off with a crunchy streusel topping.  So, that is what I have come to love best, even over just a regular double crust pie and what I make most often.  She would bring her pies to family gatherings and everyone was always impressed. I learned from her the perfect balance in a pie as far as flavorings went, always adding a little lemon juice for tartness and just the right amount of sugar to enhance the apples but not overpower them.  Local apples usually don’t require too much.  Apple season has finally rolled around, and I was craving some apple pie last weekend.

    So of course, it had a streusel topping. But this wasn’t just your run of the mill plain apple pie.  I made it a Dutch “cream cheese” apple pie.  This restaurant I used to go to as a kid had a Dutch apple pie with cream cheese, and I always thought that was awesome too, so I figured why not veganize it and apply my Mom’s pie philosophies?  I mean, apple pie a la mode is amazing, but if you add the cream cheese to an apple pie, it becomes decadent and doesn’t even need the ice cream.  This coming from someone who always has some ice cream with their fruit desserts, because I always think they need a creamy element.  But the cream cheese does that here.  It is really quite simple to create a crave worthy cream cheese layer in vegan baked goods if you have raw cashew butter on hand. Raw cashews are not just for raw cheesecakes.  I combine the cashew butter with some coconut milk for a luscious cream cheese filling that bakes up and sets up beautifully in this pie.

    I admit this pie has a few steps, but it is so worth it.  Things like pre-cooking the apples before you put them on the cream cheese layer so that they don’t get too watery.  It makes all the difference, and you can taste them to see if they have the right amount of sweetness before adding them, since apples of different varieties vary.  I topped the pie off with a crunchy streusel, and I could not wait until it was all baked and ready to devour.  Yes, I said devour, nut simply eat, because that piece I had was devoured after I took the photos.  I shared this pie with my family and they loved it as well!  If you are craving a rich apple dessert, give this pie a try!

    Vegan Dutch Apple “Cream Cheese” Pie
    Makes one 9 inch pie

    Crust:


    Filling:

    • 4 large organic tart-sweet apples (such as honeycrisp or pink lady), sliced
    • 2 Tbsp maple syrup
    • 1 tsp cinnamon
    • 1 Tbsp lemon juice
    • 1 Tbsp arrowroot starch or cornstarch


    Cream Cheese:

    • 3/4 cup thick organic coconut milk (from the top of a chilled can)
    • 3/4 cup cashew butter
    • 2 Tbsp maple syrup
    • 1/8 tsp sea salt
    • 1 tsp pure vanilla extract
    • 1/2 tsp cider vinegar
    • 2 Tbsp arrowroot starch or cornstarch


    Topping:

    • 1/4 cup Bob’s Red Mill all purpose gluten free baking flour
    • 2 Tbsp coconut sugar
    • 1 1/2 Tbsp melted coconut oil
    • 1/4 cup plus 2 Tbsp gluten free rolled oats
    • pinch sea salt


    Instructions:

    1. To make the crust, in a large bowl, mix together flour, sugar, sea salt, and spices. Cut in coconut oil with a pastry blender or 2 knives until it is in pea sized pieces. Mix in  just enough water to create a smooth dough that holds together but isn’t too sticky. Add more water if needed, and knead slightly until a smooth dough is created. Roll out into a 10 inch circle on a sheet of parchment paper, then use the paper to help you transfer it to an 9 inch pie dish.  Flute the edges, and set aside in the refrigerator.
    2. To make the apples, combine the apples, maple syrup, and cinnamon in a saucepan, and cook covered over medium heat, stirring often for about 15 minutes, or until the apples are soft and starting to turn translucent.  Dissolve the arrowroot starch in the lemon juice, and add it to the apples.  Stir until thickened, and remove from heat and set aside.
    3. Pre-heat the oven to 375F degrees.
    4. To make the cream cheese, whisk together all ingredients until smooth and set aside.
    5. To assemble the pie, pour the cream cheese layer over the crust, then scatter the apple filling over that.
    6. Meanwhile, mix together the topping ingredients in a bowl and squeeze with your hands to form clumps.
    7. Scatter the topping over the pie, place in the oven and bake for about 45 minutes until the edges of the crust are lightly brown, and pie is set.  Remove from the oven to a wire rack.
    8. Allow to cool completely before serving.
  • Vegan Margherita Pizza

    Vegan Margherita Pizza

    Back when I was in college, I got a pizza stone for Christmas, and I would make some of the best pizza.  Well, I thought it was the best.  Because it had a thin, cracker like crust which is what I prefer, and I topped each pizza with fresh veggies and different types of delicious cheese.  That crust recipe I had found in an Italian cookbook, and I modified it to be just the way I liked it.  I would roll it out super thin so it would be nice and crunchy.  For the toppings, I would use different combinations of fruits and veggies, and I would visit a local cheese shop and choose a different cheese every time.  Although I had a few favorites, the classic margherita was the first one I made and always a favorite in the Summer when I could get local tomatoes.  I thought I would have to say goodbye to this delicious home made pizza when I went vegan, but I was wrong.

    I have made different types of home made vegan cheeses, and they are always delicious on my pizzas, plus no animals were harmed in the process. I make mozzarella the most, because it is the cheapest to make and the most classic of course for a pizza.  Especially when you are going with the classic margherita with tomatoes, mozzarella and basil.  There is nothing like one of these babies hot from the oven especially when made with fresh picked tomatoes that are super flavorful.  I got my tomatoes from my Grandpa last weekend.  He sent over about 40 lbs, and I have been eating tomatoes at lunch and dinner almost every day.  I am super grateful for them though, because they are so good!

    For this pizza I roasted them to intensify the flavor and sort of caramelize them and they were perfect on the pizza! I used a sprouted wheat flour for the crust, because I was given some organic flour, and it worked perfect.  I always used to use whole wheat pastry flour in my crusts when I made them years ago and this tasted just as good.  I was just discussing vegan cheeses with a coworker a few days back and how she thought that they couldn’t possibly be good.  Well, I think that this pizza would prove her wrong.  The cheese got nice and melty, and perfect and gooey, and I topped it off with basil and it was so good!  I shared some with my Mom and she enjoyed it as well.  She is not vegan, but she is a fan of the things I make with vegan cheese. If you are craving pizza and have given up on cheese since you went vegan, or maybe you are not vegan yet, and are thinking about going vegan but aren’t because you don’t think you can give up cheese…either way, definitely try this pizza out! You will find that vegan cheese on pizza can be delicious!

    Vegan Margherita Pizza

    Makes one 14 inch pizza

    Vegan Mozzarella Cheese:

    • 1 15 oz can full fat organic coconut milk
    • 2 Tbsp arrowroot starch
    • 1/4 plus 1 Tbsp filtered water
    • 3 Tbsp agar flakes or 1 Tbsp agar powder
    • 1 Tbsp lemon juice
    • 1 tsp sea salt or Himalayan salt
    • 1 Tbsp virgin coconut oil
    • 1 tsp guar gum


    To make the cheese, heat the coconut milk in a saucepan until it comes to a simmer.  Meanwhile, dissolve the arrowroot starch in the water and set aside.Once the coconut milk has come to a simmer, add the agar flakes, and heat until they are dissolved (mine took about 8 minutes, if you are using the powder, it should dissolve within one minute). Next, add the lemon juice and sea salt to the coconut milk.  Mix the coconut oil with the guar gum so that the guar gum does not clump up.  Turn off the heat and add the arrowroot mixture, guar gum and coconut oil. Whisk for about 30 seconds, then pour into a silicone mold (I used a loaf pan, but if you had another shape you would like to use go ahead). Refrigerate for a few hours until firm, then pop out of the mold. You will need half the cheese for this recipe, reserve the other half for another use in the fridge, wrapped in an airtight container.  Shred the half you will be using into a bowl, and keep in the refrigerator until ready to use.

    Roasted Tomatoes:

    • 3 medium tomatoes, cut into wedges
    • olive oil
    • sea salt


    Preheat the oven to 450F degrees.  Toss the tomatoes with just enough oil to coat and a little sea salt, and spread out on a sheet pan.  Place in the oven and roast for about 30 minutes until starting to brown at the edges and softened.  Remove from oven and set aside.

    Pizza Dough:

    • 1 1/2 cups organic whole wheat pastry
    • 1 Tbsp olive oil
    • 1/2 tsp sea salt
    • 1/2 cup plus 1 Tbsp filtered water


    To make the pizza crust, combine the flour, and sea salt in a bowl, and whisk until well blended. Add the oil and water, and mix in until you have a soft dough.  Turn out onto a sheet of parchment paper with a light dusting of flour, and roll out into a 14 inch circle.  Set aside.

    For Pizza Assembly:

    • olive oil
    • 1 garlic clove, cut in half
    • fresh basil leaves


    Pre-heat the oven to 400F degrees.  Set a pan on the center rack with an upside down sheet pan, or a pizza stone set on it. Brush the crust with olive oil, sprinkle with sea salt, and slide the parchment with the crust on it onto the stone.  Bake crust for 10 minutes, then remove the crust from the oven (still on the parchment). Brush the crust with olive oil, and rub with the garlic cloves. Top with the tomatoes, then the cheese, making sure it is all evenly distributed.  Place the pizza in the oven, turn up the temperature to 475F and bake for 20-25 minutes until the cheese is bubbling and starting to brown (keep an eye on it after 15 as some ovens cook faster than others). Remove the pizza and parchment from the oven, slide pizza onto a cutting board or plate, scatter basil over the top, slice and enjoy!

  • Vegan Roasted Banana Caramel Ice Cream

    Vegan Roasted Banana Caramel Ice Cream

    We all get over-ripe bananas on our counters from time to time, and although you can make banana bread or smoothies, I decided to make some ice cream last week with mine.  I know you can make banana nice cream and use just bananas, I think the texture is a little light for me when I want actual rich ice cream, so I gave mine a coconut base along with the bananas. I like more of a gelato type smooth texture going on that doesn’t get all icy once put in the freezer.  I decided to roast my bananas to get the ultimate banana flavor.  If you have never roasted or cooked your bananas before using them in dessert, you need to try it, they are amazing.  Think banana’s foster. Not only that, it gets rid of some of that extra moisture that might contribute to adding extra water liquid that makes for hard frozen ice cream.  I didn’t just make a plain banana ice cream though, I decided to make a banana caramel to make it even more amazing.

    So, I added dates and pecan butter along with some vanilla extract, and some sea salt to give it a sort of salted caramel vibe going on.  I also added in a Tbsp of bourbon.  Not only for the delicious flavor, but when you add a little alcohol to your ice cream base, it stays more soft once frozen.  Just don’t add too much or it will not freeze.  This base was luscious, and it tasted kind of like an amazing bananas foster malt.  Once it was chilled, took its time in the ice cream freezer and was ready to go, I decided that it needed even more caramel.  Not because it actually needed it, because it was amazing just like that.  But I love to add gooey toppings to my ice cream.  I think it goes back to the days when I used to build ice cream sundaes at my Dad’s house, and I would always use fudge, caramel and butterscotch.  Man was that good. So I still do that, only with my healthy date caramel usually.

    I think caramel was my all time favorite topper. Yes, even over hot fudge. This ice cream was super delicious with the date caramel too!  If you have over ripe bananas on hand and are are in the mood for some decadent ice cream, but don’t want to have to buy it at the store, you need to give this a try!  Even if you don’t have an ice cream maker, I have included instructions for how to make it.  I hope you are all having a wonderful week!

    Vegan Roasted Banana Caramel Ice Cream
    Makes about 3 ½ cups

    Ingredients:

    Ice Cream Base:

    • 3 medium organic bananas
    • 1-2 Tbsp maple syrup
    • 1 15 oz can organic full fat coconut milk
    • 1/2 cup pecan butter or almond butter
    • 1/2 cup pitted medjool dates (if they are not soft, soak them in filtered water 30 minutes and drain well before using)
    • ¼ tsp sea salt
    • 1 Tbsp bourbon (make sure it is vegan on Barnivore)
    • 2 tsp pure vanilla extract

    Caramel Topping (optional):

    • 3/4 cup pitted medjool dates (soaked as above if not soft)
    • 2 Tbsp pecan butter or almond butter
    • 1 tsp pure vanilla extract
    • 1/8 tsp sea salt
    • ¼ cup filtered water (or as needed)

    Directions:

    1. To make the roasted bananas, preheat the oven to 400F degrees, and line a sheet pan with parchment.  Peel the bananas, and cut them in half lengthwise.  Place cut side down on the pan, and drizzle with a few Tbsp maple syrup. Place in the oven and bake for about 30 minutes until they are soft, and gooey.  Remove from the oven and let cool.
    2. To make the ice cream base, blend all ingredients (including the bananas) in a high speed blender until smooth.  Pour into an ice cream machine, and process according to package directions.  Or, if you do not have an ice cream maker, pour into a bowl, place in the freezer and stir every 30 minutes until the consistency of soft serve.
    3. Meanwhile, to make the caramel topping, combine all ingredients in a blender and blend until smooth adding a little more water if needed if the caramel is too thick.
    4. Once the ice cream has finished churning, pour it into a freezer safe container with a lid.  Place the ice cream in the freezer and allow it to freeze until firm enough to scoop.
    5. Serve with the caramel on top!
  • Vegan Blueberry Cream Cheese Coffeecake

    Vegan Blueberry Cream Cheese Coffeecake

    The Minnesota State Fair has been going on the past few weeks, and it seems like everyone in the state is headed out there.  I know most people go there to eat food, but in the past, I have mostly gone to look at stuff.  I love looking at the giant prize winning vegetables and the blue ribbon baked goods.  I have always said to myself  in the past, I should enter something sometime, but of course I never get around to it because I have a whole lot of stuff going on this time of the year usually. I do however gain inspiration sometimes from those baked goods and say to myself, I need to veganize that!  I did not go to the fair this year, but I did make something last weekend that was blue ribbon worthy as far as I am concerned.  The most amazing vegan coffeecake with cream cheese, blueberries, and a streusel topping.  It’s funny, I almost didn’t even make it.  I knew I wanted cake, but not something that had to be cooled a long time and frosted meticulously.  I thought about making blueberry upside down cake, but then I thought to myself, not enough texture.  I then decided on a blueberry coffeecake.  I am a sucker for a streusel layer on top of a delicious cake.  Then I thought…it would be even better with vegan cream cheese.

    All of my favorite things in one cake!  Yes, there were a few steps to making this, but it was so worth it.  The cake batter part is actually sweetened with dates so it stays nice and moist and has an almost caramel flavor as if you had used brown sugar.  Which was always my go-to sugar in coffeecake before I gave up refined sugars. I made a delicious vegan “cream cheese” from a mixture of cashew butter and coconut milk and it was delicious, even before I added it to the cake!  I had some flavorful fresh blueberries and I knew they would be amazing once baked and all jammy and delicious.  I topped it off lastly with a crunchy oat streusel.  It all smelled amazing while baking and I could not wait to try it!

    I had to cut myself a large piece because it looked amazing and this is one of my favorite things.  It has it all, crunchy topping, sweet moist cake, jammy blueberries and rich cream cheese.  I would be proud to serve this to anyone, vegan or not.  In fact I shared some with my Mom and she loved it, and Eric, who I gave a big hunk of the cake to, and it was gone in one day.  This is one of those comfort food type things that you have a piece, but then cut a second because it was that good.  If you have some blueberries on hand, this is a must make!  This is the perfect lazy Saturday project, because nothing is better than fresh warm cake on a cool weekend morning. I have a feeling it will get cool here really soon because Fall is coming!

    Vegan Blueberry Cream Cheese Coffeecake
    Makes 1 9 inch round cake

    Streusel:

    • 1/2 cup gluten free rolled oats
    • 1/4 cup coconut sugar
    • 1/4 cup all purpose gluten free flour
    • 1/8 tsp sea salt
    • 3 Tbsp pecan butter or almond butter


    Cream Cheese:

    • 3/4 cup raw cashew butter
    • 1/3 cup coconut milk
    • 2 Tbsp  maple syrup
    • pinch sea salt
    • 1 tsp pure vanilla extract


    Cake:

    • 1 1/2 cups all purpose gluten free flour
    • 1 1/2 tsp baking soda
    • 1 tsp baking powder
    • 1/2 tsp sea salt
    • 1 cup packed soft medjool dates, pitted, soaked in water for 30 minutes and 1/2 cup of the water reserved
    • 1/4 cup pecan butter or almond butter
    • 1 Tbsp pure vanilla extract
    • 1 cup filtered water
    • 2 Tbsp apple cider vinegar
    • 1 3/4 cups fresh organic blueberries


    Instructions:

    1. For the streusel, combine all ingredients in a bowl, and mix and squeeze together with your hands until it forms little clumps.  Set aside.
    2. For the cream cheese, combine all ingredients in a high speed blender until smooth (if it seems too thick, add a little more water.  You want to be able to pour and spread it over the bottom layer of cake).  Set aside.
    3. Preheat the oven to 375F degrees and position rack in center of oven. Line a 9 inch round cake pan with 3-inch-high sides with parchment paper. Coat parchment paper and pan sides lightly with oil so that the cake doesn’t stick to the pan.
    4. Whisk flour, baking powder, baking soda, and sea salt, in a large bowl to blend well. Place dates, reserved water, oil, water, and vanilla extract into a blender, and blend until smooth, then whisk this blended mixture into the flour mixture until well blended. Whisk in the cider vinegar until bubbles form.
    5. Pour the cake batter to the prepared pan then pour cream cheese mixture over that (kind of pouring slowly and not just in one spot so it evenly distributes).  Scatter the blueberries over that, then sprinkle the streusel over the top.
    6. Place in the oven and bake cake until tester inserted into center comes out clean, about 1 hour. Cool cake completely in pan before un-molding and serving.


  • Vegan Cheddar Bacon Popcorn

    Vegan Cheddar Bacon Popcorn

    Do you ever go to clean out your cupboards, and end up dumping something on yourself that was pushed way into the back in the highest one?  Something like lentils or say, popcorn kernels that end up spilling and bouncing off of the counter and yourself with little pings like rain drops and landing in every nook and cranny?  Well, that was me the other night.  It never fails, it has happened multiple times.  But this time it was popcorn and it was a mess.  But on the bright side, it gave me the idea to make some.  Because I had forgotten that I had it!  But what kind to make?!  I didn’t want to be boring and just make plain with sea salt.  Although that is needed sometimes, and it is healthy…but I wanted something more.  I cruised Pinterest for ideas, and finally ruled out the sweet because I was in a savory sort of mood.  I ended up deciding on cheddar bacon popcorn inspired by a parmesan bacon popcorn.  But vegan of course, because eating animal flesh or taking milk from cow babies is sad and unnecessary. This was going to be good.

    I have been putting nooch (nutritional yeast) on my popcorn forever as a sort of a vegan cheese like popcorn and it is always so good.  It reminds me of the cheese flavored popcorn that I had as a kid.  I loved that stuff.  I could sit and eat a large bag and I would be happy.  You know the kind, that stains your hands orange like Cheetos. Really not good for you, and I am sure it is not even real cheese.  But I was happy to discover nutritional yeast to replace it for a healthier version, I have been doing this since even before I went vegan. So that is what I used for the cheesy flavor in this popcorn.  I used some avocado oil to adhere the cheese to the popcorn, since it has sort of a neutral buttery flavor and it worked perfect!  I also added in some garlic powder, chipotle powder and sea salt and it was so good! Just good like that, but I didn’t stop there.

    No, I had to go and add coconut bacon as well to make it even more crave worthy!  On a side note, if you have not tried coconut bacon, you simply must. It is amazing game changing stuff.  It is the closest thing I have had to actual bacon crumbles because the texture is nice and crisp and the flavor is smoky, salty and slightly sweet.  I love the stuff.  Crumbled over salads, or even desserts, and of course this popcorn.  Bet you can’t have just a few handfuls.  I had a hard time tearing myself away because this is some crave worthy stuff.  If you are in the mood for an amazing salty crunchy snack, you need to try this popcorn!

    Vegan Cheddar Bacon Popcorn
    Makes 8 cups

    Ingredients:

    Coconut Bacon:

    • 1 1/2 cups large flake coconut
    • 2 Tbsp tamari
    • 2 Tbsp liquid smoke
    • 1 Tbsp maple syrup


    Popcorn:

    • 1/4 cup avocado oil, warmed to liquid
    • 1/2 tsp sea salt
    • 1/3 cup nutritional yeast flakes
    • 1 Tbsp garlic powder
    • 1/4 tsp chipotle powder
    • 8 cups plain organic popped corn


    Instructions:

    1. To make the coconut bacon, preheat the oven to 350F degrees, and line a sheet pan with parchment.
    2. Toss the large flake coconut with the tamari, liquid smoke and maple syrup and spread out on the pan.  Place in the oven and bake for about 12-15 minutes (depending on your oven), keeping a close eye at the end and checking it in the final minutes because it burns fast.  Remove from oven and let cool.
    3. Drizzle the oil over the popcorn in a large bowl and mix well with your hands.
    4. Add the salt, nutritional yeast, garlic powder, and chipotle powder and mix until coated.
    5. Add the coconut bacon and mix with hands until evenly distributed.
  • Vegan Lentil Goulash

    Vegan Lentil Goulash

    Goulash is a classic comfort food that many American families had in their recipe box growing up. But my Mom did not cook that sort of thing.  She was never really a big fan of hamburger helper type things, and I can totally understand why as ground beef never usually appealed to me either growing up.  But I did however eat some really good goulash at the Church daycare I went to when I was in elementary school.  Those lunch ladies who made the goulash were amazing cooks, and although the goulash was nothing special to look at, it was super delicious.  It was flavorful, hearty and had plenty of veggies along with the beef.  If Grandmas across the country made goulash like that, I can see why people liked it, and I can see how it would be something easy and economical to make for a big family. I had not even thought about that goulash lately, I mean it has been over 14 years since I even ate beef, but I was recently discussing what was in goulash with a coworker.  Which made me think to myself, I should make a vegan version!

    I am a big fan of healthy comfort foods, and I figured I could swap out the beef for lentils instead.  Even if you are not a vegan, I think you could be a fan of the health benefits of this swap.  After all, lentils are packed with fiber, and lower your risk for heart disease where as beef increases your risk.  I try to have lentils at least 3 times a week for dinner.  I admit they used to intimidate me because they looked weird to me when I first became vegan, and I had been just eating beans up until then, but then I tried some amazing Indian food with them and I was hooked.  I started experimenting with them in recipes and came to love their flavor, texture and the fact that they cooked faster than beans. So back to that goulash…they were the perfect swap for the beef!  I made a flavorful tomato sauce with tomatoes from my Grandpa’s garden that I had roasted.  If you have fresh tomatoes from the garden I highly recommend doing this, they are so good that way.  I combined them with Italian herbs, bay leaf, and alliums, and let it simmer for a while to let the flavors get all happy and delicious together.

    I then added in some lentils I had cooked, along with some gluten free chickpea fusilli and it was as simple as that!  A big pot of comfort food!  It was super delicious, rich in flavor, no greasy meat, and loads of yummy tomatoes. I shared some with Eric and he approved as well. If you were a fan of goulash growing up and want to enjoy it without the beef, give this recipe a try!

    Vegan Lentil Goulash

    Serves 3

    Ingredients:

    • 2/3 cup French lentils
    • filtered water
    • 1 tsp olive oil
    • 1/4 cup diced red onion
    • 1 garlic clove, minced
    • 1 tsp dried basil
    • 1/2 tsp fennel seed
    • 1 tsp dried oregano
    • 1/4 tsp red pepper flakes
    • 1 Tbsp tamari
    • 3 cups crushed canned tomatoes or fresh roasted*
    • bay leaf
    • filtered water as needed
    • 1 Tbsp cider vinegar
    • sea salt
    • 4 oz gluten free fusilli pasta or macaroni pasta


    Instructions:

    1. To cook the lentils, place in a pot and cover with filtered water by 3 inches.  Bring to a boil, then lower to a simmer and cook for 20 minutes or until the lentils are tender.  Drain, and set aside.
    2. Heat the olive oil in a medium pan. Add onions, and sauté until tender.  Add the garlic, tomatoes, bay leaf, herbs, tamari, pepper, vinegar, and filtered water as needed.  Bring to a simmer, and allow to cook until the tomatoes are very soft and the flavor has melded, about 15-20 minutes. Add the lentils and allow to heat through, taste for seasoning and add more salt if needed.  Meanwhile, cook the pasta according to package directions, and drain. Mix the pasta into the lentil mixture, and serve.

    *To roast the tomatoes, cut them into 2 inch wedges, and spread them out on a parchment lined baking sheet.  Place in a 400F degree oven and roast for about 30-45 minutes until tender and starting to brown at the edges. Remove from oven and you are ready to use them in this recipe.

  • Vegan Dark Chocolate Mini Bundt Cakes

    Vegan Dark Chocolate Mini Bundt Cakes

    Last week was really kind of stressful for me, between being super short handed at work, and just being super busy. I felt like I was just mentally tired, physically tired, emotionally tired and I needed a hot bath, and a glass of wine, and a massage, and to sit and watch movies, or maybe all of it.  So, all I wanted for the weekend was for it to be relaxing and enjoyable.  I think I managed that pretty well, Eric biked with me on my long run on Sunday (which is my Saturday since I work on Saturday), and then we headed down to our favorite part of Minneapolis for a long walk outdoors and sunshine, and met up with my Dad for dinner.  Afterwards all I wanted to do was watch a movie and eat chocolate cake.  Some chocolate cake I had made on Saturday night in an attempt to unwind and relax after work. I just wanted a rich chocolate cake for some reason.  That is what I was craving.  Even though I usually go for the vanilla stuff first.  What I did not want was to make a complicated chocolate cake with lots of steps.  So I went for some simple dark chocolate bundt cakes.

    I started off with a date-sweetened chocolate cake batter, because it comes out super moist and delicious but not heavy when baked just the right amount of time.  It tasted wonderful even before baking.  Yes, I always taste my cake batter, or dough, or whatever I am making.  Not just because I am a pig sometimes, but because I have prevented myself from making mistakes that way.  Case and point, I was making some pie dough last week, and I grabbed a container of salt instead of xylitol and ended up adding it to the batter.  Needless to say that dough was super salty and disgusting and got tossed.  But I didn’t waste my pie filling and more time because I had tasted it.  Sometimes you just have to laugh at yourself when stuff like that happens.  But luckily this chocolate cake batter was perfect.  I folded in some chocolate chips to make it extra decadent at the last minute.

    It baked up quickly, in about 15 minutes and it smelled like brownies.  That aroma makes me happy.  I decided to glaze the cakes with a quick and easy simple chocolate fudge.  It was the perfect addition!  Man were they good.  And I say they, because I had more than one.  If you are craving chocolate cake but don’t want to go through a whole lot of work, give these a try.  If you don’t have a bundt pan, you may use mugs instead. Eric loved the cake as well, wishing there had been more.  Well, there would have been if I hadn’t eaten them.  I hope you all have a wonderful stress free week, and if not, there is always this chocolate cake!

    Vegan Dark Chocolate Mini Bundt Cakes
    Makes four mini bundt cakes

    Ingredients:

    4 hole mini bundt pan

    Cake:

    • 3/4 cups Bob’s Red Mill Gluten Free All Purpose Flour
    • 2 Tbsp cacao powder or unsweetened cocoa powder
    • 1/2 plus 1/4 tsp baking soda
    • 1/2 tsp baking powder
    • 1/4 tsp sea salt
    • 2/3 cup packed soft medjool dates, pitted, soaked in water for 30 minutes and drained
    • 2 Tbsp almond butter
    • 1 tsp pure vanilla extract
    • 1 cup filtered water
    • 1 Tbsp apple cider vinegar
    • 1/2 cup vegan chocolate chips


    Fudge Glaze:

    • 3 Tbsp almond butter
    • 1 Tbsp maple syrup
    • 1 Tbsp Tbsp cacao powder or unsweetened cocoa powder
    • 3-4 Tbsp filtered water or as needed
    • pinch sea salt


    Directions:

    1. Preheat the oven to 375F degrees and position rack in center of oven.
    2. Oil a four hole mini bundt pan with avocado oil (or another oil that you prefer or have on hand).
    3. Whisk flour, cocoa powder, baking powder, baking soda, sea salt in a large bowl to blend well.
    4. Place dates, water, almond butter, and vanilla extract into a blender, and blend until smooth, then whisk this blended mixture into the flour mixture until well blended. Whisk in the cider vinegar until bubbles form.
    5. Fold in chocolate chips.
    6. Pour the cake batter into prepared pans, and place in the oven.
    7. Bake cakes until set and a toothpick inserted into the center comes out almost clean, about 15 minutes.
    8. Remove from oven, let cool completely, the un-mold them onto a plate or cooling rack.
    9. Whisk together the fudge glaze ingredients until smooth (adding a little more water if too thick), then spoon over the cakes and let it drip down the sides. Enjoy!


  • Vegan Blueberry Pop-Tarts

    Vegan Blueberry Pop-Tarts

    Pop-tarts were all the rage when I was little.  I remember a few of my friends bringing them to school for a snack every morning, and begging my Mom to get some.  My Mom let me get some, but I wasn’t allowed to have too many, because she tried to get me to eat healthier.  The Pop-tarts were ok, I think I liked the cinnamon sugar ones more as opposed to the fruit ones because they tasted artificial to me. But what I ended up really liking were toaster streudels.  Those greasy little frozen fruit toaster pastries that you squeeze cream cheese glaze on after they come out of the toaster. I would have eaten a whole box if my Mom let me.  Anyways, I like the concept of Pop-tarts, they are portable and cute, and I have made some as an adult that were way better than any I had as a kid.  The latest of which was blueberry.

    I just randomly decided to make some after work on Wednesday.  It was a hectic day with lots of stress at work, and I wanted nothing more than to relax and bake something.  Pop-tarts are fun and delicious, so they were perfect.  I figured I could share some with Eric too since he always needs snacks to bring to work.  My pop-tarts are more like mini pies though than those flavorless ones I had as a kid.  They actually are made with my classic pie crust so the crust even tastes delicious and not just the filling.  For the filling though, I made a quick sort of simple cooked blueberry jam and it was perfect!

    It is kind of relaxing to sit and cut shapes out of dough that you have rolled out as long as you have the time.  Like at Christmas when you are making fun cookies.  These were free form cutting, but sometimes I find meticulous things that I have to rely on myself for accuracy relaxing.  Don’t worry, these are not complicated, just straight edges, and if you don’t trust yourself, you can always use a ruler to help.  They turned out super cute and more uniform than I expected.  I even glazed them with a purple blueberry coconut butter glaze to make them more pretty and sprinkled some crushed up dried blueberries over them as sort of natural “sprinkles”.  These are 100 times better than real Pop-tarts, just sayin’.  You can even freeze them in a bag for enjoyment later if you wish, or if they last that long.  Did you eat Pop-tarts as a kid?  If so, what was your favorite flavor?

    Vegan Blueberry Pop-Tarts
    Makes 6

    Crust:


    Filling:

    • 1 cup fresh organic blueberries
    • 1 Tbsp maple syrup
    • 1/2 Tbsp arrowroot powder (or cornstarch) dissolved in 1/2 tsp lemon juice


    Glaze:

    • 3 Tbsp coconut butter, warmed to liquid
    • 1 Tbsp blueberry juice
    • 1 Tbsp maple syrup
    • pinch sea salt
    • 3-4 Tbsp filtered water or as needed


    Instructions:

    1. To make the crust, in a large bowl, mix together flour, sugar, and sea salt. Cut in coconut oil with a pastry blender or 2 knives until it is in pea sized pieces. Mix in just enough water to create a smooth dough that holds together but isn’t too sticky. Add more water if needed, and knead slightly until a smooth dough is created.
    2. Roll out into a large rectangle and cut into 12 identical rectangles.  Chill if too soft before assembling.  You want the dough a little pliable, but not so warm that it will break. Preheat oven to 375 degrees.
    3. To make filling, heat the berries and maple syrup in a small saucepan over medium heat, and cook them until they start to burst, about 10 minutes.  Add the arrowroot and lemon juice and cook until thickened.  Remove from heat, and set aside.
    4. To assemble, spread about 2 Tbsp jam over half of the dough rectangles (leaving a boarder so you can attach the dough at the sides). Cover with the remaining pieces of dough (I used a small spatula to carefully move them), pressing the edges and crimping with a fork or the edge of something with a flat edge, like a spatula. Bake for about 30 minutes until the crusts are starting to brown lightly. Remove from oven and let cool on a wire rack until warm.
    5. Whisk glaze ingredients together until smooth (adding more water if too thick, you want it to be pour-able). Spoon some of the glaze over each pop tart, and smooth it out to cover the top. Let set before serving.
  • Vegan Cheesy Hasselback Potatoes

    Vegan Cheesy Hasselback Potatoes

    Monday was kind of a rainy dreary day here in Minnesota.  Everyone was excited about the lunar eclipse taking place, but it ended up being covered by clouds.  Eric and I were hoping to see it, but instead we went out for a walk with our umbrellas.  It was one of those days where the weather makes you tired and you want to just curl up and watch movies.  I had a big bag of potatoes that needed to be eaten and I figured this was just the day to use them. After all, potatoes are one of the best comfort foods!  I thought about mashed potatoes, tater tots, or just roasted potatoes, but I wanted to do something more fun with them.  I decided on a vegan version of hasselback potatoes. I had seen a version on Pinterest for parmesan hasselback potatoes, and I figured I could make cheesy vegan potatoes with some nutritional yeast to make them a bit crispy instead.

    I have always seen this type of potato dish, and always wanted to try it but never have for some reason.  Maybe all of the little cuts into the potatoes intimidated me.  They sounded time consuming. But actually these ended up being fairly quick to prep.  They took a while to bake, but that gives you time to relax, or prepare something to go with them.  Most recipes for hasselback potatoes have lots of butter, but I used avocado oil instead.  Because it is vegan of course, and because it is neutral and stands up to high heat.  I coated the potatoes with plenty of nooch as well as some thyme, sea salt, garlic and pepper, to keep it simple.  A good hour plus in the oven later, my house smelled wonderful.  I don’t know about you, but nutritional yeast is a life saver for anyone who is craving something cheesy.  Good on popcorn or pasta dishes, or now roasted potatoes!

    They turned out delicious!  Cheesy tasting with just the right amount of garlic and thyme for aromatics.  Some of the potato at the edges got nice and crispy like chips, which was delicious, but then the inside ones were nice and tender.  These would be delicious served with a vegan porterhouse “steak” from the Herbivorous Butcher, or some sauteed tempeh, or my Chickpea Cutlets with Mushroom Gravy.  They turned out even more delicious than I thought, and I definitely forgot about the crummy weather outside.  So the next time you are in the mood for some comfort food potato style, give these a try!

    Vegan Cheesy Hasselback Potatoes
    Serves 5

    Ingredients:

    • 10 medium organic Yukon Gold potatoes
    • avocado oil or olive oil
    • 1 cup nutritional yeast
    • 1/2 tsp sea salt
    • 1/4 tsp black pepper
    • 2 tsp dried thyme
    • 2 garlic cloves, minced


    Instructions:

    1. Preheat the oven to 400F degrees, and oil a sheet pan.
    2. To prepare the potatoes, place one on a cutting board, and set 2 chopsticks on either side of it lengthwise (this will prevent you from cutting all the way through).  Use a knife to cut it into 1/8 inch thick slices crosswise, and set on the pan.  Repeat with the remaining potatoes.
    3. When they are all cut, drizzle each one with the avocado oil, being sure it covers all of the potato and gets in the sliced part too (being careful not to break it).
    4. Combine the nutritional yeast, sea salt, pepper, thyme, and garlic in a bowl, and mix up.
    5. Roll each potato in this mixture, and sprinkle a little between each cut.  Place back on the tray.  Repeat with other potatoes.
    6. Drizzle with a little more oil, and sprinkle with some of the leftover nutritional yeast mixture.
    7. Place in the oven and bake for about 1 hour and 15 minutes until the potatoes are tender and browning slightly.
    8. Remove from the oven and let cool for a few minutes before serving.


  • Vegan Spice Crusted Chevre

    Vegan Spice Crusted Chevre

    Before I went vegan, I used to buy tubs of local chevre at the co op all the time.  It was mild, slightly tangy (without being goaty) and delicious.  I would top salads off with it, eat it with fruit for dessert, or spread it on toast.  It was a staple.  So, of course I had to figure out how to make a vegan chevre.  At the time, there were not as many good store bought vegan cheeses out there, or they were expensive so that is why I chose to make my own.  I have made it many times over the years, and although the recipes change slightly depending on what I have on hand, it is always good.  Cashew based chevre is the most wallet friendly, but it is pretty amazing made with pine nuts or macadamia nuts if you happen to have some on hand. I don’t usually so cashews it is, and it is still darn delicious.  So delicious that in fact my boyfriend Eric loves it too even though he is not vegan.  I have never served it to anyone and had them not like it.  In fact most people are pleasantly surprised how good it is.  I always add a little something to give it a touch of tang, but it never has that off putting goat aroma that regular goat cheese sometimes has that people don’t like.

    I decided to make some last week because I wanted to serve it on a salad I would be making, and I decided to make a spice crusted one.  I love the aroma of spices like cumin and coriander so those were the main two I used.  I like to sprinkle them on my salads sometimes for extra flavor and crunch, so I knew they would be delicious with the nut chevre.  I added in some red pepper flakes and thyme as well, since I love all of those flavors together, and it smelled amazing!  It tasted even better.  I like the crunch of the spices on the smooth chevre.  This is good eaten just as is, plain honestly, but who sits and eats a log of just cheese.  Well, me maybe.  But I didn’t this time because I wanted to save some for that salad I was making.  This cheese would also be good with crackers of course, or veggies, such as stuffed celery like my Grandma used to make.  Or even spread on bagels or toast.  I will leave it up to you what you serve it with.  If you think vegan cheese can’t be good I do hope you give this a try.  I have a strong feeling you will love it.

    Vegan Spice Crusted Chevre
    Serves 10

    • 2 cups raw cashews, soaked for 4 hours, and drained
    • 1/4 cup filtered water
    • 1 Tbsp lemon juice
    • 1/2 tsp sea salt (or to taste)
    • 1/3 cup raw coconut butter, warmed to liquid
    • 1 1/2 Tbsp cumin seeds
    • 1 1/2 Tbsp coriander seeds
    • 2 tsp thyme
    • 2 tsp red pepper flakes


    Instructions:

    1. In a high speed blender combine the soaked cashews, filtered water, lemon juice, salt and coconut butter and blend until smooth.
    2. Pour into a bowl, place in the freezer for about 10-15 minutes until it is easier to work with, then scrape onto a piece of plastic wrap, and shape into a log while wrapping tightly.
    3. Place in the freezer for about 15 minutes until more firm (you want it to hold shape, but still stick to the herbs).
    4. Crush the herbs slightly with a mortar and pestle to make them more aromatic.
    5. Place the spices on a plate, then roll the log in them. Place in the refrigerator until firm, a few hours. Then enjoy!
  • Creamy Vegan Mac and Cheese (GF)

    Creamy Vegan Mac and Cheese (GF)

    I loved anything with cheese when I was little. Grilled cheese, mac and cheese, cheesecake.  I mean cheese was delicious.  I begged my Mom to make mac and cheese a lot, and what I liked was the boxed variety.  We always had some on hand, but what we didn’t usually have on hand was milk.  My Mom was not much of a milk drinker so we didn’t have any unless we specifically bought it for a recipe.  But one time I wanted mac and cheese and we had no milk.  So my Mom improvised and added apple juice and some mustard to the boxed mac and cheese.  It may sound really weird, but I ended up loving it so much that I always wanted her to make it that way.  It worked out because we usually had juice on hand. It had a delicious tangy cheesy flavor that I craved.  Whereas the normal recipe on the box was kind of blah.  So that is my random funny story about mac and cheese.  When I got older and started cooking more I made mac and cheese occasionally, but it usually had special stuff in it like veggies or something to give it some healthy qualities and some kind of fancy blend of cheese to make it taste delicious.

    When I went vegan of course, I had to change up the way I made it and get creative.  Cashew mac and cheese is pretty darn delicious, but I don’t always want my entire sauce made out of cashews because they can be pricey, so I have found I like to add other ingredients to make a creamy sauce and just some cashew butter so it still tastes rich but is more wallet friendly and not so heavy.  One of my favorite things to make cheese sauce out of is sweet potatoes.  The white fleshed variety that is a little less sweet and more savory work perfect for it.  They make a silky sauce once blended up with cashew butter and once you add in a few special ingredients to give it a cheesy flavor, it is amazing!  Not only that, then you are getting a serving of veggies without even realizing it.

    I use whatever pasta I have on hand normally, but since I found some actual elbow pasta that was gluten free I thought I would make a classic mac and cheese this time.  I kept is simple, no mix ins since I served a salad on the side instead.  This reminded me of the mac and cheese I had as a kid but of course the ingredients are real and I feel good after eating it, not sluggish.  So, the next time you are craving rich mac and cheese, give this a try!

    Creamy Vegan Mac and Cheese (GF)
    Serves 4

    Ingredients:

    • 2 cups mashed sweet potato* (the white fleshed variety)
    • 1 cup hot filtered water (or as needed)
    • 1/3 cup raw cashew butter
    • 1 medium garlic clove
    • 2 tsp stone ground mustard
    • 1 Tbsp apple cider vinegar
    • 1 Tbsp white miso (optional)
    • 1/4 cup plus 2 Tbsp nutritional yeast
    • 1/8 tsp cayenne pepper
    • 3/4 tsp sea salt (or to taste)
    • 1/4 tsp turmeric powder
    • 16 oz organic gluten free elbow pasta


    Instructions:

    1. Combine the sweet potato, water, cashew butter, garlic, mustard, cider vinegar, yeast, cayenne, sea salt and turmeric in a high speed blender and blend until smooth and the consistency of cheese (if it is too thick add a little more water).  Set aside.
    2. Cook pasta according to package directions, drain, then place back in the pot, add the cheese, and stir to coat.  Pour into a serving dish, and serve!

    *To cook the sweet potatoes, I like to roast them in the oven.  Take a large sweet potato, poke a few holes in it, and cut in half lengthwise.  Place cut side down on a sheet pan lined with parchment and bake for about an hour at 400F degrees or until tender.  Remove from oven and let cool before mashing.

  • Vegan Strawberry Shortcake Poke Cake

    Vegan Strawberry Shortcake Poke Cake

    I have seen poke cakes on Pinterest and Facebook but I have never actually made one or tried one myself.  Probably since most of them are made from boxed mixes and jello or already prepared ingredients and I prefer to do things myself.  But I decided last weekend to make one, since I had lots of strawberries on hand and I couldn’t imagine a lovelier way to serve them than soaked into a sponge type cake with whipped cream on top.  Almost like a giant strawberry shortcake, but better. There is nothing better than picking up a large container of fresh organic strawberries at the Farmer’s Market or store.  The local ones are the best.  Berries are one of the things I look forward to every year in the Summer because here in Minnesota we don’t grow them year round, and although they are available year round at the store, they just don’t taste as good when out of season you know?  So when they are in season, I consider them special and I love to use them in special desserts.

    For this cake, I wanted just a classic vanilla cake for the base.  I make a lot of date sweetened cakes (as I am sure a lot of you that follow my recipes have noticed), but that wouldn’t do for this one because they make for a darker brown cake.  I wanted it to be lightly colored.  So, I used xylitol for the sweetener and the cake came out a lovely light shade just like classic vanilla cake.  It smelled amazing while baking I might add.  It reminded me of the vanilla boxed cake mixes I used to beg my Dad to let me make when I was younger that always smelled amazing (yes, I used to make those a long time ago, don’t judge).  It was funny, I felt so grown up even though I was using a boxed mix and canned frosting.  No canned frosting or mixes today though. Just delicious home made vanilla cake.

    I made a slightly thickened strawberry sauce to pour over the cake after poking holes in it and and let it soak in.  I knew this was going to be good!  I topped it off with a creamy sweet whipped coconut cream, and it was lovely.  It tasted just like the vanilla cake I remember as a kid.  It was like strawberry shortcake but even better. If you have some fresh strawberries on hand, give this cake a try!  It is best in the Summer when the berries taste amazing.

    Vegan Strawberry Shortcake Poke Cake
    Makes 1 9 inch cake

    Ingredients:

    1 9 inch cake pan

    Cake:

    • 1 3/4 cups Bob’s Red Mill All Purpose Gluten Free Flour
    • 1 tsp baking soda
    • 1/2 tsp sea salt
    • 3/4 cup granulated xylitol*
    • 1/2 cup avocado oil or virgin coconut oil, warmed to liquid
    • 1 cup light coconut milk (at room temperature)
    • 1 Tbsp pure vanilla extract
    • 2 Tbsp cider vinegar

    Strawberry Puree:

    • 2 cups organic strawberries
    • 2 Tbsp maple syrup
    • pinch sea salt
    • 2 tsp arrowroot starch dissolved in 1 Tbsp lemon juice

    Coconut whipped cream:

    • 1 1 15 oz can full fat organic coconut milk, at room temperature
    • 1/4 cup maple syrup
    • pinch sea salt
    • 1 tsp pure vanilla extract
    • 1/2 cup plus 2 Tbsp raw coconut butter (NOT OIL), warmed to liquid

    Organic strawberries for garnish

    Instructions:

    1. Preheat the oven to 375F degrees and position rack in center of oven.
    2. Line a nine-inch-diameter spring form cake pan with 2-inch-high sides with parchment paper. Coat parchment paper and pan sides lightly with coconut oil so that the cake doesn’t stick.
      Whisk flour, baking soda, sea salt, and sugar in a large bowl to blend well.
    3. Whisk oil , coconut milk and vanilla extract together in small bowl to blend well, then whisk into the flour mixture until well blended.
    4. Transfer cake batter to prepared pan and bake cakes until tester inserted into center comes out clean, about 25-30 minutes.
    5. Use chopsticks to poke holes in it one inch apart from each other, and not too close to the edge of the cake.
    6. To make the strawberry puree, blend all ingredients in a blender until smooth, then pour into a small sauce pan and bring to a simmer. Once it is simmering, add the arrowroot starch mixture and whisk until it thickens.  Remove from heat, and pour evenly over the cake.
    7. Place the cake in the refrigerator, and allow to cool completely.
    8. For the whipped cream, combine all ingredients in a blender and blend until completely smooth. Pour into a bowl and place in the freezer until it is thick like whipped cream (whisking every so often), about 45 minutes to one hour.
    9. Spread the whipped cream over the top of the cake.
    10. Garnish with fresh strawberries, and serve!

    *The reason I used xylitol for this cake was to keep it pale in color.  If you do not care for xylitol, use 1 cup coconut sugar or 1 cup maple sugar instead, just keep in  mind you will get a darker color cake.

    *Do not feed this cake to dogs, xylitol is toxic to them.

  • Chocolate Covered Cherry Ice Cream Pops

    Chocolate Covered Cherry Ice Cream Pops

    The truth is I hated chocolate covered cherries growing up.  You know, the ones that ooze sweet syrupy white goo when you bite into them, and a cherry so red it can’t possibly be the real color?  My Grandma would give us kids each a big box of chocolates on Holidays, and I always tried to avoid that cherry.  You would think as a child I would have liked the sweetness but even then the cherries did not taste real.  So, I ended up not liking cherries much until I enjoyed some fresh ones as an adult.  What a difference!  Fresh sweet cherries are like nature’s candy.  So sweet and delicious just as they are without sugar.  Dip them in chocolate and they are amazing without all the sweet white goo.  So, when my Mom gave me some cherries, I decided to make some chocolate covered cherry ice cream pops.  Just because they sounded amazing. I have never actually made chocolate covered ice cream pops and I am always drooling over everyone else’s on Instagram so I figured now was a good time.

    I made a sweet cherry ice cream, made rich with coconut milk and cashews, and it was so good!  Even before I froze it, I could tell it was going to be amazing.  I poured it into the molds with more fresh cherries and all there was left to do was wait.  Waiting overnight is hard for good desserts.  Don’t you agree?  Well, I was making these after work, so I had to wait until the next day to dip them in chocolate.  I felt kind of like a little kid at play when I covered them in chocolate.  It was something that my five year old self would have liked to do.  That and lick the bowl after.  Which I did anyway, because I don’t ever want to waste a drop of delicious chocolate!

    Once the chocolate was all hard and ready to go I could not wait to taste one!  The ice cream was sweet and delicious, the chunks of cherries like little jammy jewels to bite into, and the dark chocolate coating was amazing with it all.  There is nothing like real cherries and chocolate paired together, especially when vegan ice cream is involved too.  Try these while cherries are in season and at their most flavorful.  Cherry season is not long here in Minnesota, so I feel like they are special in a way.

    Chocolate Covered Cherry Ice Cream Pops
    Makes 8

    Ingredients:

    Ice Cream:

    • 2 cups full fat coconut milk
    • 1/2 cup raw cashew butter
    • 1/4 cup maple syrup
    • 1 tsp pure vanilla extract
    • pinch sea salt
    • 1 cup sweet organic cherries (pitted), divided

    Coating:

    • 3/4 cup chopped vegan dark chocolate

    Instructions:

    1. Combine the full fat coconut milk, cashew butter, syrup, vanilla, sea salt, and half of the cherries in a blender and blend until smooth.
    2. Drop a few cherries into the bottoms of 8 popsicle molds, then pour half of the ice cream mixture over that, then more cherries, then the rest of the ice cream.
    3. Place sticks into the molds, leaving about 1 inch at the top, then place in the freezer until completely hard, about 4-6 hours (or overnight).
    4. Remove from the molds then place back in the freezer on a parchment lined tray until completely hard (you don’t want them melty when you put the chocolate on).
    5. Meanwhile, melt the chocolate in the top of a double boiler, then quickly dip each popsicle into it, then place back onto the tray and put back in the freezer until hard.
    6. Enjoy!  Store any leftover pops in a sealed container in the freezer.
  • Vegan Triple Chocolate Brownies

    Vegan Triple Chocolate Brownies

    Brownies remind me of good times and happy memories.  They remind me of cross country banquets in high school that I used to bake them for, or late night baking with my friend up at camp, or that one time my Mom baked them and the cat decided that she wanted some too and licked all of the caramel off.  Good times.  I have always loved brownies, but I am picky about them.  They have to be the fudgy kind, not over-baked so that they get dry, but super moist, and gooey.  I am not much of a cakey brownie person, if I want cake I make a cake.  My Mom used to make the most delicious brownies, but they were from a box.  She rarely made things from boxes, but that was the one exception.  They were the kind with a chocolate fudge that you would marble throughout the brownies to make them extra delicious.  Probably the last time I had them I was in high school, but I remember them well and I always got excited about them.  So, it is kind of surprising I had not come up with my own healthier version until now.

    I decided to veganize them on my day off last week, and I was super excited as was Eric because he loves anything chocolate.  I made my classic brownie base, because I know it always comes out fudgy and good.  For the fudge I used a date base, because I knew it would stay somewhat gooey once baked which was important for these.  It was so good I could have eaten it with a spoon but then the brownies would not be as tasty!  I added in chocolate chips as well, because why not?!  A little extra chocolate goodness never hurts.

    These smelled amazing while baking.  That is one of the best parts about baking brownies besides licking the bowl. The sweet aroma that fills your home.  It makes me happy. You can not be unhappy while baking brownies.  Bummer I had to let them cool before diving in, but it made me even more excited to try the finished product.  They were moist, fudgy, gooey, and rich just as brownies should be.  Never mind that they happened to be vegan and gluten free.  You could serve these to omnivores and not tell them they are vegan until after they try them and they would be super impressed.

    Vegan Triple Chocolate Brownies
    Makes 16

    Fudge:

    • 1 cup soft medjool dates, pitted (if they are not soft, soak them in water and drain well first)
    • 2 Tbsp maple syrup
    • 3 Tbsp cacao powder or cocoa powder
    • 1/4 tsp sea salt
    • 1/2 cup filtered water (or as needed)


    Brownies:

    • 1/2 cup avocado oil
    • 1/4 cup raw almond butter
    • 1 cup coconut sugar
    • 2 flax eggs (2 Tbsp ground flax seed mixed with 1/4 cup plus 2 Tbsp filtered water)
    • 1 cup gluten free all-purpose flour
    • 1/2 cup cacao powder or unsweetened cocoa powder
    • 1/4 teaspoon sea salt
    • 1 cup vegan dark chocolate chips plus more for sprinkling top


    Directions:

    1. Preheat the oven to 350F degrees.
    2. To make the fudge, combine all ingredients in a blender and blend until smooth (adding a little water if necessary, it should be the consistency of pour-able but still thick fudge). Pour into a bowl and set aside.
    3. Whisk together the sugar, oil and almond butter until well combined and the sugar is starting to break down. Add the flax eggs and beat until smooth. Add the flour, cacao powder and sea salt and beat until smooth.  Stir in chocolate chips.
    4. Scrape the batter into a greased 8×8 inch pan, then drop the fudge over it in 2 Tbsp amounts, and swirl it with a knife.
    5. Place in the oven, and Bake for about 30-35 minutes or until set (but do not over bake).
    6. Let cool before cutting into bars.


  • Vegan Blueberry Maple Pecan Shortcakes

    Vegan Blueberry Maple Pecan Shortcakes

    I used to love strawberry shortcake as a kid.  Of course it was usually the store bought sponge type cake ones with the strawberries in sugar and Cool Whip at my house. But it was awesome to my 8 year old self.  I had never actually tried a strawberry shortcake with biscuits until I was making my own desserts back in college.  Man was it heavenly when I got around to making one.  I did not use sponge type cake, but a rich biscuit dough instead.  Now I use my scone dough because it is amazing with fruit and whipped cream in a shortcake.  I was in the mood for a blueberry dessert last weekend, so I decided to make blueberry shortcake.  I had never made it before, but why not try it?!  I am a huge fan of any kind of berries in the Summer, and blueberries are beautiful in desserts!

    For the biscuits, I thought about going plain, but ended up deciding on maple pecan.  Because maple, pecans and blueberries are a match made in heaven!  The dough for these is extra rich because I used pecan meal along with the gluten free flour in them.  It is melt in your mouth tender once baked!  I added in chopped pecans as well because why not?  For the blueberries I kept it pretty simple because they were pretty flavorful on their own.  They needed just a touch of tart lemon juice and maple syrup and they were perfect!  Lastly, I made some delicious coconut whipped cream to complete this. It is always welcome on any fruit dessert in my house as far as I am concerned.  Sooo good!

    Once they were all assembled and I dove in I forgot about all that is wrong in the world.  That is why I love really good desserts, while I eat them, I just enjoy them and forget about everything else and everything is good.  These are simply heavenly, and I think if I had had one of these when I was little, I would have become a food snob and snubbed that store bought strawberry shortcake.  The tender biscuits are the perfect carrier for the sweet jammy berries and rich whipped cream!  If you are in the mood for something Summery, give these a try!

    Vegan Blueberry Maple Pecan Shortcakes
    Serves 4

    Ingredients:

    Fruit:
    • 3 cups fresh organic blueberries
    • 3 Tbsp maple syrup
    • 2 Tbsp lemon juice
    • 2 Tbsp arrowroot starch dissolved in 2 Tbsp lemon juice
    • 1 tsp pure vanilla extract


    Shortcake biscuits:
    • 3/4 cup Bob’s Red Mill gluten free all purpose baking flour
    • 1/2 cup pecan meal*
    • 2 Tbsp maple sugar or coconut sugar
    • 1/2 tsp plus 1/8 tsp baking powder
    • 1/8 tsp sea salt
    • 2 Tbsp solid coconut oil, cut into chunks
    • 1/4 cup cold full fat coconut milk (chilled in the fridge is best), mixed well
    • 1 tsp pure vanilla extract
    • 1 tsp maple extract (optional)
    • 1/2 cup chopped pecans


    Coconut whipped cream:

    • 1 1 15 oz can full fat organic coconut milk, at room temperature
    • 1/4 cup maple syrup
    • pinch sea salt
    • 1 tsp pure vanilla extract
    • 1/2 cup plus 2 Tbsp raw coconut butter (NOT OIL), warmed to liquid


    Instructions:

    1. In a medium saucepan, toss together the berries and maple syrup, and cook over medium heat until the berries are starting to burst.  Add the arrowroot and lemon juice mixture and vanilla, stirring constantly and cook just until thickened.  Remove from heat and let cool.
    2. Preheat oven to 400 degrees with the rack at the center position.
    3. Meanwhile, to make biscuits, in a large bowl, combine the flour, pecan meal, sugar, baking powder, and salt. Cut in the oil with a pastry blender or 2 knives until the mixture starts to clump into pea sized pieces. In a small bowl, stir the vanilla extract into the coconut milk. Add the milk to the dough, along with the pecans, and stir a few times, but do not over-mix. The dough should hold together when squeezed, but still be clumpy. Place dough on a floured work surface, and pat into a 1/2 inch tall rectangle.  Cut into 4 squares, and place on a parchment lined baking tray.
    4. Place biscuits in the oven and bake for about 20-25 minutes until starting to brown and done in the middle  (but not over-baked).
    5. Remove biscuits from the oven and let cool.
    6. For the whipped cream, combine all ingredients in a blender and blend until completely smooth. Pour into a bowl and place in the freezer until it is thick like whipped cream (whisking every so often), about 45 minutes to one hour.
    7. To assemble, slice a biscuit in half (carefully), spoon some blueberries and coconut cream over that and top with another biscuit and more coconut cream.  Repeat with the other 4.  Serve!
     *Raw pecans ground to a flour consistency in a food processor
  • Vegan Maple Bourbon Caramel, Fudge and Bacon Ice Cream Sundae

    Vegan Maple Bourbon Caramel, Fudge and Bacon Ice Cream Sundae

    I always see these outrageous ice cream sundaes full of decadent ingredients on Instagram and Pinterest, so I was inspired to make my own.  I have always loved the idea of a Sundae.  I would have a small mudslide sundae at Dairy Queen when I was little, and I thought it was the bomb.  That gooey caramel and fudge with nuts and soft sweet ice cream was pretty amazing to my 8 year old self.  I no longer eat Dairy Queen as an adult, because obviously they are not vegan friendly.  But I still like to create my own vegan creations that are similar, not to mention more real and healthy than the sundaes I had as a child.  I have made ones just like the mud slide with date caramel and fudge.  But this time I decided to make the sundae over the top with some crunchy elements as well.  Coconut bacon was the main one.  It is one of my all time favorite things lately.  I make a big batch and keep a bag in the refrigerator at all times.  It is great on salads or savory dishes (added at the last minute so it doesn’t get soggy), but I love it on sweets even more.  I love a little salty and crunchy with my sweet!  It goes especially well with anything maple or caramel.

    So, for the sundae I mentioned, I made a delicious creamy maple bourbon ice cream.  It was delicious on its own, and I knew it would be out of this world once paired with the other ingredients. It was sweet and creamy, and it stayed soft once frozen.  That is one of the challenges of home made ice cream sometimes, keeping it soft and scoop-able.  But here is a tip.  Adding 1 Tbsp or two of alcohol keeps it soft, so the bourbon had a double use here.  For the caramel I used a date base again, and added some bourbon.  I divided it in half and added cacao powder to one bowl to make it fudge.  They were both luscious.  I have always been a huge fan of fudge and caramel on my sundaes.  Not that chocolate syrup stuff though, the gooey fudge which is accomplished perfectly using dates as the base!

    I layered these things all together with the crunchy coconut bacon, chocolate chips and pecans and it was amazing!  It was the most amazing mudslide ever.  I am a big textural person when it comes to desserts, and this one had it all.  creamy, gooey and crunchy. Plus the salty sweet combo which is irresistible!  The next time you are in the mood for something decadent, give this a try.  Might as well as we are at the warmest time of the year and I can not imagine anything better than an ice cream sundae right now!

    Vegan Maple Bourbon Caramel, Fudge and Bacon Ice Cream Sundae
    Makes about 3 1/2 cups ice cream, enough for about 2-3 Sundaes

    Ingredients:

    Coconut Bacon:

    • 1 1/2 cups large flake coconut
    • 2 Tbsp tamari
    • 2 Tbsp liquid smoke
    • 1 Tbsp maple syrup


    Ice Cream Base:

    • 1 15 oz can full fat organic coconut milk
    • 1/2 cup raw pecan butter or almond butter
    • 1/3 cup maple syrup
    • 1/4 tsp sea salt
    • 1 tsp pure vanilla extract
    • 1 tsp maple extract (optional)
    • 2 Tbsp bourbon (make sure it is vegan on Barnivore)


    Fudge & Caramel:

    • 1 cup pitted soft medjool dates (if not soft, soak in water 30 minutes and drain before using)
    • 1/2 cup filtered water
    • 1/3 cup raw pecan butter almond butter
    • 1 tsp pure vanilla extract
    • 1/4 tsp sea salt
    • 1 tsp maple extract
    • 2 Tbsp maple syrup
    • 2 Tbsp bourbon (make sure it is vegan on Barnivore)
    • 3 Tbsp cacao powder or unsweetened cocoa powder


    For serving:

    • pecans
    • vegan dark chocolate chocolate chips


    Directions:

    1. To make the coconut bacon, preheat the oven to 350F degrees, and line a sheet pan with parchment.
    2. Toss the large flake coconut with the tamari, liquid smoke and maple syrup and spread out on the pan.  Place in the oven and bake for about 12-15 minutes (depending on your oven), keeping a close eye at the end and checking it in the final minutes because it burns fast.  Remove from oven and let cool.
    3. To make the ice cream, combine coconut milk, nut butter, maple syrup, vanilla, maple extract, bourbon and sea salt in a blender and blend until smooth. Pour into an ice cream maker and process according to directions. Alternatively, if you do not have an ice cream maker, pour it into a bowl, and whisk every half hour until it is to the consistency of a thick malt.
    4. Pour the ice cream into a freezer safe container with a lid.  Place in the freezer with the lid on, and continue to freeze until firm enough to scoop (at least 4 hours or overnight). If it becomes too firm, simply let it sit out for 15 minutes before serving.
    5. Meanwhile, place all caramel and fudge ingredients except the cacao powder in a high speed blender or food processor and blend until smooth, adding a little more water if too thick.  Divide between two bowls, and mix the cacao powder into one.  If either is too thick add a little more water and mix well.
    6. When ready to serve, spoon some of the fudge and caramel into a dish, then scoop some of the ice cream over it, then a little more fudge and caramel, then more ice cream, then sprinkle the coconut bacon, dark chocolate chips and pecans over that and enjoy!
  • Summer Watermelon and “Chevre” Salad

    Summer Watermelon and “Chevre” Salad

    There used to be this fabulous watermelon and mozzarella salad at a restaurant my Mom and I would go to often when I was younger and it was super delicious. I hadn’t thought about it since then, but then recently my Mom made a salad for a party for one of her friends that was very similar except with watermelon and chevre. She said it was a hit, and asked me if I could make a vegan version for her, since she doesn’t always eat cheese (she has cut down a lot on dairy). I was very happy to do so! It sounded really good to me, and I tweaked it slightly to make it more substantial. The funny thing about watermelon is, I don’t buy it often. Maybe because it is a lot to cut up, or heavy to lug home. But when I do get it and have it all prepped and ready, I wonder why I don’t get it more often. It is so good! Especially on a hot day after a long run. Probably the most refreshing thing to eat I can think of in the Summer. So, I was really happy my Mom suggested this.

    Her salad had just contained watermelon, chevre and basil. But I decided to add in some arugula tossed with a little avocado oil and lemon juice as well to make it more colorful and add some healthy greens. I made my usual cashew coconut chevre to top it off and scattered some fresh basil that was growing on my patio over it and it was so pretty! But it wasn’t just pretty, it was super delicious! You will not even miss the fact that this isn’t real cheese, it is salty, tangy and creamy just like real chevre. It is perfect with the sweet melon, peppery arugula and fragrant basil. Once you have the cheese made this is super fast to make, and I think it would be the perfect side salad for something like grilled tempeh.

    So, the next time you see a watermelon at the store, you need to try this! Since that watermelon was so good, it has me thinking about watermelon wine. I have been making my own fruit wines since last fall, and I have made many berry wines, and a mango peach wine, but not watermelon. I think it would be amazing since it is so sweet. What do you think?

    Summer Watermelon and “Chevre” Salad
    Serves 2-4

    Ingredients:

    • 8 oz arugula
    • 1 Tbsp avocado oil
    • 1 Tbsp lemon juice
    • sea salt to taste
    • 4 cups cubed organic watermelon
    • 1 cup crumbled vegan chevre*
    • 6 larger basil leaves, cut into chiffonade


    Instructions:

    1. Toss the arugula with the avocado oil, lemon juice and sea salt in a bowl.  Add the watermelon and toss until evenly distributed.
    2. Transfer the mixture to a serving plate, then crumble the chevre over it and sprinkle the basil over it.
    3. Serve!

    *Use this chevre recipe, minus the herbs and lavender.

  • Vegan Cream Cheese Plum Galette

    Vegan Cream Cheese Plum Galette

    I love making (and eating mostly) fruit pies, but I am also lazy at times.  Don’t get me wrong, I am a really hard worker when it comes to running, or work or things I said I would do for other people, but when it comes to pie, and it is a weeknight, I will make it easier if I can in any way.  That is where the galette comes on.  The lazy baker’s pie.  It has all the flavors of the pie, and the good crust and filling, but it is so much less fussy than a double crust pie.  Also, if pie intimidates you, it is a good thing to start off with.  I only wanted to deal with one crust that night last week so it was perfect!  I had bought some lovely little red plums at the store and this would be the perfect use for them.  I could slice them thinly and arrange them on the galette in a pretty fashion.
    I always have to have a rich creamy element when it comes to pie too, whether it be serving it with coconut whipped cream or ice cream, or including it in the actual pie, like in the form of vegan cream cheese.  I went with the vegan cream cheese for this one.  It is just irresistible to have a layer of cream cheese along with the fruit and rich crust! For the crust, I included hazelnut meal because it makes it so good!  Trust me, I make all of my crusts with a little nut flour now because it is more melt in your mouth delicious especially when it comes to gluten free baked goods.
    I topped the crust off with some delicious vegan cashew coconut cream cheese, then the sweet plums and popped it into the oven.  The plums were all jammy and delicious when it had finished baking and I could not wait to try it!  When it was cool enough, I dove in.  I did not have just one piece, but two because it was sooo good!  The rich cream cheese was amazing with the slightly tart jammy plums, and the rich hazelnut crust was perfect paired with it all!  If you have flavorful plums on hand, this is a must try.  I think sometimes plums don’t get enough attention, but you can’t go wrong with roasting them or baking them into something delicious!
    Vegan Cream Cheese Plum Galette
    2 galettes
    Crust:
    1 cup Bob’s Red Mill hazelnut meal
    1/4 cup coconut sugar
    1/2 tsp sea salt
    3/4 cup coconut oil, in its solid form
    filtered water as needed
    Cream Cheese:
    1/2 cup coconut milk
    1/3 cup raw cashew butter
    1 Tbsp maple syrup
    1/4 tsp sea salt
    1/2 tsp cider vinegar
    Filling:
    6-7 medium red plums, sliced 1/4 inch thick
    1/3 cup coconut sugar
    1 Tbsp pure vanilla extract
    the seeds of one vanilla bean
    juice of one small lemon
    1/2 tsp cinnamon
    a pinch of sea salt
    coconut sugar, for topping
    maple syrup for brushing
    To make the crust, in a large bowl, mix together flour, meal, sugar, and sea salt.  Cut in coconut oil with a pastry blender or 2 knives until it is in pea sized pieces.  Mix in just enough water to create a smooth dough that holds together but isn’t too sticky.  Add a touch of water if needed, and knead slightly until a smooth dough is created.  Divide into 2 pieces and shape into rounds (if it is too soft, refrigerate for about 15 minutes to firm it up slightly.  You want it pliable, but not super soft or it will be hard to shape).
    Roll each out into a 14 inch round using parchment underneath and floured rolling pin.  If it tears, no worries, just press it back together and patch it up.
    To make the cream cheese, whisk together all ingredients until smooth.  Set aside.
    Preheat oven to 400F degrees.  To make filling, mix together all ingredients in a large bowl.
    Spread the cream cheese over the crust leaving a 1 1/2 inch boarder.  Arrange the plums over the cream cheese, then carefully fold up edges to cover the edge of the fruit. Brush sprinkle with a little coconut sugar.  Place in the oven.  Bake for 45 minutes (checking after 20 and if they are very brown, if they are tent with foil) until bubbling and fruit is tender.  Remove from oven and let cool on a wire rack for at least an hour.
    *You can also make your own hazelnut meal by grinding up your hazelnuts to flour consistency in the blender.  Just don’t blend too much or you may get butter.  Also, you may substitute your favorite nut if hazelnuts don’t do it for you.
  • Vegan Coconut Mint and Lime Chocolates

    Vegan Coconut Mint and Lime Chocolates

    Sometimes I make desserts based on what I am craving, and sometimes I get ideas for them in my everyday life.  Maybe the way something looks, or an ingredient I am using at work (I work in a deli).  Well this time I gained inspiration from my favorite summer lip balm flavor.  A coconut lime and mint (Pitta) lip balm from Hurraw! It is seriously delicious.  I have always loved flavored lip balms.  Ever since I was in high school I keep an arsenal of lip balms and glosses, in fact my nickname was “Glossy”.  But now they have to be vegan and natural ingredients in order for me to buy them.  Anyways, this coconut lime mint one is perfect for Summer because not only does it smell like dessert, but it is cooling on your lips.  Well, I was sitting there smelling my lip balm (yes, smelling it) and I dreamed up a heavenly truffle recipe.

    A truffle with a heavenly coconut mint and lime white chocolate center and dark chocolate on the outside. Move over Mounds, this is way better. I was never a fan of Mounds bars growing up because the coconut part was a weird sweet flavor to my taste buds.  But I do love chocolate and coconut together.  I made a heavenly filling with cacao butter, coconut butter and cashew butter blended together with fresh mint and lime zest and it was crave worthy!  I mixed in some shredded coconut as well, because I love the crunchy texture.  I knew this would be so good with the dark chocolate, and it smelled just like the lip balm.

    Once it was all coated in dark chocolate, I could not wait to try them.  They were a lovely shade of green inside thanks to the fresh mint leaves, and they were a feast for the senses.  The lovely sweet aromas of coconut and dark chocolate, and the cooling mint flavor with the touch of lime… I felt like I was transported somewhere tropical!  Not that it doesn’t feel tropical here in Minnesota right now.  But you know, imagining palm trees and an ocean next to me.  These truffles are a little cooling, so they are perfect for Summer!  If you are a coconut fan, give these a try!  Even better if you happen to have fresh mint growing in your garden, and if you do I envy you, because all I have right now is basil.

    Vegan Coconut Mint and Lime Chocolates
    Makes 12

    Ingredients:

    White Chocolate Filling:

    • 1/2 cup cacao butter (4 oz)
    • 1/4 cup raw cashew butter
    • 1/2 cup coconut butter
    • 1/2 cup fresh mint leaves and/or 1/2 tsp peppermint extract
    • 2 Tbsp organic lime zest
    • 2 tsp pure vanilla extract
    • 1/4 cup maple syrup
    • 1 cup finely shredded coconut

    Coating:

    • 8 oz vegan dark chocolate, chopped

    Directions:

    1. Combine the cashew butter, coconut butter, and cacao butter over a double boiler, and whisk until smooth.
    2. Pour into a food processor and add the lime and mint leaves. Blend until smooth, and add the coconut, pulsing just to combine.  Place the bowl with the filling the freezer for about 15-20 minutes until it is firm enough to scoop. Scoop into 12 balls, rolling them with your hands until smooth and place on a parchment lined tray, and place back into the freezer until firm, about 30 minutes.
    3. Once the filling has firmed up, melt the dark chocolate in the top of a double boiler.
    4. Dip each white chocolate center into the dark chocolate (if it has gotten too cool and is firming up, warm it a little more over the double boiler) being sure to let the excess drain off, and place back onto the tray (I like to set mine on a fork to allow it to drain better). Once they are all dipped, set them in the freezer until hardened.
      Store any leftovers in the refrigerator.
  • Vegan Oatmeal Caramel Cookie Bars

    Vegan Oatmeal Caramel Cookie Bars

    My Mom is always asking me to veganize recipes she finds on pinterest or sees somewhere at a restaurant or bakery. And, I am happy to do so.  I love to create new vegan recipes, especially for non-vegans because often then they see that you do not need animal products to create delicious things.  My Mom loves most of my food though, and she has actually cut way down on the animal products that she eats and enjoys mostly plant based foods.  So, I am happy to cook and bake for her!  She buys these salted caramel oatmeal cookies from her work a lot, so I thought I would make something like that.  But then she also showed me a Pinterest recipe for some caramel stuffed cookies that she thought looked good so I sort of combined the two.  I made Vegan Oatmeal Caramel Cookie Bars.  Cookie on the top and bottom and caramel in the middle.  My Mom has always been a huge fan of oatmeal cookies, and that was one of the things she used to make often when I was little.  “They are healthier than regular cookies because they have good fiber.” She used to say.  I agree, and they are so delicious and I love that chewy texture.  Also, she made bar cookies often because they were faster than rolled. So I knew she would appreciate the bars.

    For the caramel I kept it simple, and made it with dates. Because dates are like nature’s caramel.  I can’t believe I used to be afraid to try them when I was little.  I was really missing out.  Seriously, it doesn’t get more natural than popping a date into your mouth instead of actual sugary caramel and it is better in my opinion because sometimes real caramel is too sweet for me. This caramel had only 4 ingredients and it was eat with a spoon delicious! I used my classic oatmeal cookie dough for these and I knew it would be amazing once combined with the caramel.  They smelled absolutely heavenly while baking!  The only bad thing about these is you have to wait for them to completely cool before cutting them.

    But trust me, it is well worth the wait!  They are chewy, gooey in the middle, and even more delicious than I imagined!  The oatmeal cookie dough has a caramel like flavor already thanks to the coconut sugar, but with the caramel in the center of the bars it is like double caramel deliciousness!  I can not wait to share them with my Mom, I know she will love them too.  If you are an oatmeal cookie fan, you need to try these!

    Vegan Oatmeal Caramel Cookie Bars
    Makes 16 bars

    Ingredients:

    Caramel:

    • 1 1/4 cups soft medjool dates, pitted (if they are not soft, soak them in water 30 minutes, and drain before using)
    • 1/4 cup raw pecan butter or almond butter
    • 1/4 tsp sea salt
    • 1 tsp pure vanilla extract
    • 1/2 cup filtered water


    Cookie:

    • 3/4 cup virgin coconut oil, warmed to liquid
    • 1 1/2 cups coconut sugar
    • 2 flax eggs*
    • 1 Tbsp pure vanilla extract
    • 1 1/2 cups gluten free oat flour
    • 1 tsp baking soda
    • 3/4 tsp sea salt
    • 3 cups gluten free old fashioned rolled oats


    Directions:

    1. To make the caramel, combine all ingredients in a high speed blender and blend until smooth.  Set aside in a bowl.
    2. For the cookie part, in a large mixing bowl, mix together the coconut oil, and sugar until well blended. Add flax eggs, vanilla, and beat until well combined (the mixture will become very thick).
    3. Mix in the flour, soda, and sea salt until well blended. Mix in the oats until well combined, and evenly distributed throughout the dough.
    4. Heat the oven to 350F degrees with the rack set at the middle position. Oil an 7×11 inch rectangular pan with coconut oil, and line the bottom with parchment.
    5. Press half of the dough into the prepared pan. Spread the caramel over that, then drop the remaining dough by the Tbsp over that.
    6. Place in the oven and Bake for 30-35 minutes or until golden and set, but not over baked. Let cool completely before cutting into bars.
    *Whisk together 2 Tbsp ground flax seed, 1/4 cup and 2 Tbsp water in a small bowl.  Allow to sit in the fridge for 15 minutes until the mixture has set up (or become kind of thick).
  • Vegan Dark Chocolate Raspberry Layer Cake featuring Driscoll’s Berries

    Vegan Dark Chocolate Raspberry Layer Cake featuring Driscoll’s Berries

    This post has been graciously sponsored by TheFeedFeed & Driscoll’s! All opinions are my own.  Thanks for supporting the brands that support me!

    Did you know that the Minneapolis-St Paul metro area is the raspberry consumption capitol of the USA?  According to research by Nielsen Company, we consume more than 132% more fresh raspberries on average than the rest of the country.  Now that is something I am proud to be a part of.  Maybe it is because about half of the year we have cold weather here and are craving sunshine in the form of berries.  But it could just be because they are darn delicious, because I love them year round.  Especially organic Driscoll’s berries.

    My love for raspberries started at a very young age.  My Mom would often buy fresh raspberries at the store, for just eating plain or to top off a delicious dessert.  They have always been my favorite fruit, and for as long as I can remember buying them, Driscoll’s has always provided the most flavorful berries at the store.  I can always count on their berries to taste the best in anything I add them to, and when eating them plain, there is nothing that compares. They are simply heavenly.  The most memorable recipe that my Mom used to make with them was a cream cheese tart.  They were the star of the show, topping off the tart like beautiful red jewels.  So, I guess I think of them as kind of special, because they remind me of desserts and special occasions, even if I am just eating them for a snack or with breakfast.  Driscoll’s raspberries taste the best because they have been developed through years of research using only natural breeding methods.  I think that is pretty cool, no GMOs here!  They grow their berries year round in regions where they can so that you can enjoy juicy flavorful berries all the time! Also, did you know that they are the leading brand to produce organic berries?  Well they are, and that is super important to me! It always factors in when I am at the store, which is why they are my top brand of choice.


    Driscoll’s berries can dress up any dessert and make it feel special, which is why I used them in the delicious Dark Chocolate Raspberry Layer Cake  I recently made for my family.  You don’t have to wait for a Birthday or anniversary to share good food with family, you can make any day special!  So I like to make something in the form of dessert often to enjoy with them. After all, there is nothing better than diving into a delicious cake filled with sweet jammy berries.  Many good conversations are had around the table while enjoying good dessert, at least at my house.  This cake had layers of rich chocolate cake sandwiched together with the fresh berries and a fudgy frosting to top it off.  It was simply heavenly.  What made it so good is the flavorful sweet berries.  Which is why it is important to choose a good brand like Driscoll’s when shopping for organic berries.  My family loved this cake and I think you will too!


    You know what I also think you will love?  An all expense paid trip to Madden’s on Gull Lake in Minnesota though Driscoll’s Berry Together Sweepstakes! Open exclusively for fellow Minnesota residents!  If you enter, it is a chance for yourself and 3 others to spend 4 nights at the resort, and who wouldn’t want to, it is beautiful!  That is not your only chance to win though, four other people will win fresh Driscoll’s berries for a year!  I don’t know about you, but that would make me very happy.  So how do you enter to win?  You head over to the Driscoll’s website HERE.  It is easy to enter, tell your friends too!

    Thank you to Driscoll’s and Feed Feed for sponsoring today’s post! All opinions and views expressed are my own.

    Vegan Dark Chocolate Raspberry Layer Cake
    Makes one 4 layer 6 inch cake

    Ingredients:

    2 6 inch cake pans

    Cake:

    • 1 1/2 cups gluten free all purpose flour
    • 1/4 cup unsweetened cocoa powder
    • 1 1/2 tsp baking soda
    • 1 tsp baking powder
    • 1/2 tsp sea salt
    • 1 1/4 cups packed soft medjool dates, pitted, soaked in filtered water for 30 minutes and drained before using
    • 1/4 cup organic almond butter
    • 2 cups filtered water
    • 2 Tbsp apple cider vinegar


    Raspberry Filling:


    Frosting:

    • 1 1/4 cups mashed sweet potatoes*
    • 1/2 cup maple syrup
    • 1/3 cup organic almond butter
    • 1/4 cup filtered water (or as needed)
    • 1/2 cup unsweetened cocoa powder
    • 1/4 tsp sea salt


    Topping:


    Directions:

    1. Preheat the oven to 375F degrees and position rack in center of oven.
    2. Oil two 6 inch round cake pans and line their bottoms with parchment paper.
    3. Whisk flour, cocoa powder, baking powder, baking soda, sea salt in a large bowl to blend well.
    4. Place dates, water, and almond butter into a blender, and blend until smooth, then whisk this blended mixture into the flour mixture until well blended. Whisk in the cider vinegar until bubbles form.
    5. Pour the cake batter into prepared pans, and place in the oven.
    6. Bake cakes until set and a toothpick inserted into the center comes out almost clean, about 25-30 minutes.  Remove from oven, let cool completely, the un-mold them onto two plates.
    7. Slice cakes in half horizontally so that you have 4 layers. Set aside.
    8. To make the raspberry filling, mash all ingredients together in a bowl with a fork until raspberries are the consistency of jam.  Set aside.
    9. To make the frosting, combine all ingredients in a blender and blend until smooth (since yams may vary in moisture, if you think the frosting is a little too thick add a few Tbsp more water).  Set aside.
    10. To assemble, place one cake layer on a plate, and spread a thin layer of frosting over it.  Then spread some of the raspberry filling over that (keeping it in the center of the cake and not more than 1/4 inch away from the sides).  Place the other cake layer over that, then spread more frosting, and berries over it like the last layer.  Repeat with another layer, and top off with last piece of cake.  Spread the remaining frosting on the top and down the sides of the cake.
    11. Decorate the top of the cake with the fresh raspberries.
    12. Serve!

    *I like to roast my sweet potatoes in the oven. To do so, cut them in half, and place them cut side down on a parchment lined tray.  Roast at 400F degrees for about an hour or until they are tender.  Let cool before pureeing.

  • Creamy Garam Masala Noodles

    Creamy Garam Masala Noodles

    I am a big fan of Thai peanut noodles.  They are simple, savory easy to make comfort food.  We make them at my work and they sell like hotcakes!  But I feel sorry for people who can not experience them because they are allergic to peanut butter.  So, I thought why not create something similar with out the peanuts or nuts?  I had been gifted a jar of Sunbutter, and I thought this would be the perfect opportunity to use it.  Not only are sunflower seeds nut and peanut free, they are rich in healthy fats and vitamin E so you are getting those benefits from eating them as well.  The Sunbutter has a little different flavor than other nut butters, but once you add the spices to it, it tastes delicious.

    I thought about making these Thai noodles, but I went with curry instead.  It was sort of inspired by an African groundnut stew recipe I used to make from one of the Moosewood cookbooks back in the day.  Or the flavors at least, with the Sunbutter instead of peanut butter.  It contained garam masala spice blend, which is really delicious paired with a silky sauce like nut butter.  I kept it simple for this since garam masala is already so aromatic and flavorful adding just a touch of garlic and red pepper flakes for heat.  This sauce is super easy to make, just whisk together, and toss with the cooked noodles and veggies.  I wasn’t sure if it would be as good as Thai peanut sauce, but once I tasted it I knew it would be wonderful combined with the rest of the ingredients.

    This was a quick and delicious dinner, and it was just as good as the peanut noodles.  Not to bash sunflower seed butter or anything, but using it in an application like this tastes so much better than simply spreading it on toast because it needs a little something if you know what I mean.  But it is awesome in a silky sauce like this.  If you are allergic to peanuts and want something similar to Thai peanut noodles or you just want something other than the usual give this a try!  It is also good cold the next day, so it is good for lunches.

    Creamy Garam Masala Noodles
    Serves 2

    Ingredients:

    • 4 oz organic edamame spaghetti
    • 2 small organic carrots, cut julienne
    • 1 small bell bell pepper, sliced
    • 2 scallions, sliced
    • 1 handful arugula or spinach

    Sauce:

    • 1/2 cup Organic Sunbutter (be sure to buy the kind with only sunflower seeds)
    • 3/4 cup filtered water (or as needed)
    • 1 garlic clove, minced
    • 1 Tbsp garam masala
    • 2 tsp cider vinegar
    • 1/4 tsp sea salt or to taste
    • 1/4 tsp red pepper flakes

    Instructions:

    1. Cook the pasta according to package directions.
    2. Meanwhile, in a bowl combine the veggies, and when the pasta is done cooking add that as well.
    3. Whisk together the sauce ingredients (if you want it thinner add a little more water), then toss with the pasta and veggies.
    4. Enjoy!
  • Vegan Snickers Pie

    Vegan Snickers Pie

    People always ask me why on earth I make my own Birthday cake.  Well, it is simple.  I can’t get the kind of cake I want anywhere, and I actually enjoy making my own.  I mean, where around where I live can I get a refined sugar free vegan dessert with no cheater ingredients?  Probably nowhere, and it would cost me an arm and a leg I am sure. A few times in the past making my own Birthday dessert didn’t work out so well.  like when I was younger and I tried to make a pink cake with beet coloring and it turned brown and tasted beety.  That wasn’t cool.  Or the time I tried to make a chocolate cake with ganache, following someone else’s recipe only to have it all run off the cake and plate and onto the floor.  Luckily this type of thing hasn’t happened in the past 8 years with my Birthday cakes at least.  Most of them turn out well.  I suppose that is a chance you take when creating a recipe for the first time for your Birthday.

    This year I did not even make a cake.  I made a pie.  Because it is my Birthday, so I can make whatever I choose!  This isn’t the first year I have done this, I made a peanut butter and jelly cream pie a few years back and it was pretty bomb.  One of my favorite recipes actually!  Also, my Birthday is in the Summer, so some years I just don’t want to heat up the oven, which is part of why I made a no bake pie.  The main reason though why I made this pie is because I wanted something dreamy, rich and creamy for my Birthday dessert.  The Vegan Snickers Pie I chose was all that and then some.

    I made a no-bake oat and coconut based chocolate crust. It was easy to make and the perfect carrier for the creamy fillings.  I made both a peanut butter mousse (kind of to replace the nougat portion of the snickers), and a chocolate peanut butter mousse because why not make this extra decadent.  And I made both a plain caramel and chocolate caramel to swirl into it.  It may sound complicated, and yes this pie has a few steps but it is worth it.  And you are actually just adding cacao powder into plain for both the caramel and filling to make the two flavors of each.  I sprinkled some peanuts on top, since this was snickers, and I could not wait for it to chill and be ready to try!

    It turned out super decadent and delicious.  It was just what I wanted for my Birthday dessert!  I may be 32 now, but I still feel like I am 25, and yes I still enjoy things like gooey snickers pies for my Birthday.  You don’t have to wait for your Birthday to make this, try it out now when you are craving something delicious.  Just for the heck of it!  You will be happy you did!

    Vegan Snickers Pie
    Makes one 8 inch pie

    1 9 inch pie plate or removable bottom tart pan

    Crust:

    • 3/4 cup finely shredded dried coconut
    • 3/4 cup Bob’s Red Mill gluten free rolled oats
    • 1/4 cup raw cacao powder or unsweetened cocoa powder
    • 1 cup soft pitted medjool dates (if they are not soft, soak them 30 minutes and drain well before using)
    • 1/4 tsp sea salt
    • filtered water as needed

    Filling:

    • 1 1 15 oz can full fat organic coconut milk, chilled
    • 1/3 cup maple syrup
    • 1/4 tsp sea salt
    • 1 tsp pure vanilla extract
    • 1/2 cup organic peanut butter
    • 1 cup coconut butter warmed to liquid
    • 2 Tbsp cacao powder or unsweetened cocoa powder

    Caramel:

    • 1 cup soft, pitted medjool dates (soaked in water 30 minutes, and drained well before using if not soft)
    • 1/4 cup peanut butter
    • 1/2 cup filtered water
    • 1 tsp pure vanilla extract
    • pinch sea salt
    • 1 Tbsp cacao powder or unsweetened cocoa powder

    Peanuts for topping


    Instructions:

    1. For the crust, combine all ingredients in the food processor until finely chopped and starting to hold together when squeezed (if it doesn’t you may need to add a little filtered water 1 Tbsp at a time).
    2. Press the mixture into a 9 inch pie crust, or a 9 inch removable bottom tart pan or pie pan greased with avocado oil (or other oil that doesn’t harden when chilled).
    3. For the filling, combine all ingredients but the cacao powder in a high speed blender and blend until smooth. Divide between 2 bowls, and whisk the 2 Tbsp cacao powder into one. Pour the one with the cacao powder over the crust and smooth to the sides.  Set this and the bowl of other filling aside.
    4. For caramel, place all ingredients but the cacao powder in a high speed blender and blend until smooth, then divide between two bowls and whisk the cacao powder into one of them along with 1 Tbsp filtered water.  Drop half of each of the two caramels (the plain and the chocolate) over the filling by the heaping teaspoon, then swirl it with a knife or toothpick to marble it.  Pour the plain filling over that, then repeat with the rest of the caramel, swirling it with a knife.  Sprinkle peanuts around the edge of the pie.  Place in the freezer until set, about 2 hours.
    5. Pie keeps refrigerated for 1 week in a container.
  • Roasted Yam, Coconut Bacon and Black Bean Salad with Miso Almond Dressing

    Roasted Yam, Coconut Bacon and Black Bean Salad with Miso Almond Dressing

    I made a potato salad with coconut bacon over the 4th of July holiday weekend and it was really good but I thought of something that would be even better.  Yams or sweet potatoes and coconut bacon.  A match made in heaven, sweet and salty together.  I had actually been thinking about this combination and how good it would be in the past, but never made it because I didn’t have a good vegan bacon substitute.  But then I discovered coconut bacon a few months back and it was perfect for such an application.  Coconut bacon is just the thing to top off salads, loaded baked potatoes and things like popcorn.  Not only that, you don’t have to kill anything to make it, and it keeps better than real bacon.  It is honestly the closest thing to real bacon that I have eaten.  And I used to be a bacon lover before I went vegetarian then vegan. So anyways, back to that roasted yam and bacon combo.

    I made a super delicious salad with that combination a few nights back.  It was crave worthy.  I tossed some chunks of yam with olive oil and sea salt and roasted them to crispy perfection in the oven.  This is one of my all time favorite things to snack on anyway, and it is amazing on a salad. I made some crispy coconut bacon, which was good for snacking (I probably ate half the pan before I made the salad) and awesome with the yams. I decided to add some black beans too for protein, since I always like full meal salads. I added in some greens, and bell peppers for color, and then I needed a delicious dressing to drizzle over it.

    I used one of my all time favorite dressings, a creamy almond miso. This is actually something that I keep in my refrigerator at all times, and I make it weekly.  I have instructions for a smaller batch below though in case you don’t want a giant jar of something, and I have also included instructions at the bottom for a large batch like I make if you become a fan. I like it served over pretty much any type of veggies, it is creamy and garlicy and just a tad sweet from the miso and it is honestly like nothing I have ever had.  It was amazing over this salad with the salty crunchy bacon and roasted yams.  A crave worthy salad may sound like an oxymoron, but it totally isn’t when it comes to this.  Trust me, you need to try it.  It was so good I am going to have to make it for Eric soon too because I did not share this batch.

    Roasted Yam and Chickpea Salad

    Serves 2

    Coconut Bacon:

    • 1 1/2 cups large flake coconut
    • 2 Tbsp tamari
    • 2 Tbsp liquid smoke
    • 1 Tbsp maple syrup


    Yams:

    • 1 large yam, diced
    • olive oil
    • sea salt


    Dressing:

    • 1/4 cup almond butter
    • 1/4 cup filtered water (or as needed)
    • 1 small garlic clove, minced
    • 2 tsp white miso
    • sea salt to taste


    Salad:

    • 1 cup cooked black beans
    • 1 red bell pepper, diced
    • 4 cups arugula leaves


    Instructions:

    1. To make the coconut bacon, preheat the oven to 350F degrees, and line a sheet pan with parchment.
    2. Toss the large flake coconut with the tamari, liquid smoke and maple syrup and spread out on the pan.  Place in the oven and bake for about 12-15 minutes (depending on your oven), keeping a close eye at the end and checking it in the final minutes because it burns fast.  Remove from oven and let cool.
    3. Raise the temperature of the oven to 400F degrees.  Toss the yams with just enough olive oil to coat and sprinkle with sea salt, then spread out onto the pan.  Roast for about 20-30 minutes until softened and browning at the edges.  Once the yams have finished cooking let them cool to room temperature.
    4. Meanwhile, to make the dressing, combine all ingredients in a bowl, and whisk together until smooth (or, I like to use an immersion blender in a tall glass measuring cup if you have that).
    5. To assemble the salad, scatter the arugula on the bottom of the plates, then top with the beans, yams, bell pepper and some of the coconut bacon. Drizzle with the dressing and serve!


    *If you want a large batch of dressing like I keep in my refrigerator:

    Miso Almond Dressing:

    • 1 cup almond butter
    • 1 cup filtered water (or as needed)
    • 3 small garlic cloves, minced
    • 2 Tbsp white miso
    • 1/4 tsp sea salt or to taste


    Blend in a blender or food processor until smooth (or whisk together if you don’t have one).  Keeps for 2 weeks in the refrigerator.

  • Chocolate Cherry Chia Pudding

    Chocolate Cherry Chia Pudding

    Chia pudding might sound like something for health nuts, but you know what?  It is actually similar to a tapioca or rice pudding.  I grew up with both of those, they were pretty popular at things like church potlucks or my Grandma’s house, and some were really delicious (like my Grandma’s) and some were just weird (like random ones sometimes at the potluck). I even made my own version of rice pudding that was pretty good if I do say so myself.  Anyways, I prefer to remember the ones that I enjoyed.  I was a big fan of butterscotch tapioca pudding, or just vanilla rice pudding.  But you know what?  Chocolate might have been good.  So back to that chia pudding.  I was thinking to myself a few days back, a black forest chia pudding would be amazing.  Bonus, you don’t have to heat anything up like you would have to for traditional chia or rice pudding.
    The thing I love most about chia pudding besides the texture is it is super easy to make. Just mix your liquids with the chia seeds let it sit for about 15-30 minutes and enjoy!  This one only contains 7 ingredients, two of which are water and salt.  So, I have a feeling many of you might already have them on hand except the cherries.  If you wanted this to be fruit sweetened, you could substitute 1/4 cup date paste for the maple syrup.  This pudding turned out super delicious, rich and chocolaty, cool and creamy.  The sweet rainier cherries that were mixed in were a perfect pairing with the chocolate.
    This is a delicious dessert, but I think it would be a good breakfast too if you were in the mood for something sweet.  I have eaten chia porridge for breakfast before and it is filling, hearty and filled with heart healthy omega 3s!  This is perfect for Summer because you don’t have to cook it, and it is perfect for impatient people like me that want to enjoy things right away!  Next time you are craving chocolate but want to eat something with health benefits along with it, give this a try!  Don’t have cherries on hand?  Berries would work just as well!
    Chocolate Cherry Chia Pudding
    Serves 3
    Ingredients:
    • 1 cups filtered water
    • 1/4 cup raw almond butter (or roasted if you prefer)
    • 3 Tbsp raw cacao powder, or unsweetened cocoa powder
    • 1/4 cup maple syrup
    • 1/4 tsp sea salt
    • 2/3 cup chia seeds
    • 1 1/2 cups pitted cherries
    Instructions:
    1. In a high speed blender, combine the water, almond butter, cacao powder, maple syrup, and blend until smooth.
    2. Add to a bowl with the chia seeds and whisk until blended.
    3. Let sit at least 30 minutes at least until the seeds have become creamy like rice pudding and soaked up a lot of the liquid.  Either stir the cherries in, or you can layer them with the pudding in serving jars.
    4. Enjoy!
  • Vegan Rainier Cherry Cobbler with Hazelnut Biscuits

    Vegan Rainier Cherry Cobbler with Hazelnut Biscuits

    I got 2 large containers of beautiful Rainier cherries at the store for a really good price, and I could not wait to bake something with them!  Before I had even found them at the store I was daydreaming about cherry cobbler.  I imagined it with dark cherries, but the Rainier were on sale so that is what I chose. I actually prefer them, but  they are normally more expensive around here so I was happy to find them on sale!  I have been making a lot of baked fruit desserts lately, cobblers, crisps and pie.  There is just something so delicious about a freshly baked warm fruit dessert that is still warm from the oven served up with cool ice cream.  These have always been a Summer staple at my house.  So, back to those cherry cobblers…
    I kept the filling simple to allow the flavors of the sweet cherries to shine, adding just lemon juice and vanilla along with the sweetener.  I knew these were going to be delicious because the cherries were super flavorful and sweet.  I suppose you can disguise under-ripe unflavorful fruit in desserts like this but they taste so much better when you don’t need to doctor them up much.  Which is why I prefer to eat what is in season.  And why I mostly make these in the Summer because berries, cherries and peaches my favorite cobbler fruits are only in season this time of the year. I always start the fruit baking in the oven so it can get all jammy and delicious before I add the cobbler, and it smelled amazing while baking.

    For the biscuits, I actually use my scone dough, but enhanced with nut flour to make it more rich and delicious.  These are not your typical biscuits, they are flaky, delicate and better than any other ones I have tried.  I used hazelnut flour in them this time along with the gluten free AP flour and they had a nice nutty flavor.  Once they were added to the cobblers and all baked up and beautiful, I could not wait to try them!  They were super delicious served warm with coconut milk ice cream.  If you have cherries on hand, definitely give these a try!  This is sweet Summer comfort food at its best.

    Vegan Rainier Cherry Cobbler with Hazelnut Biscuits
    Serves 2-3
    Fruit:
    • 3 cups organic rainier cherries, pitted
    • 1 Tbsp maple syrup
    • 2 Tbsp gluten free all purpose flour
    • 1 Tbsp lemon juice
    • 1 tsp pure vanilla extract

    biscuit topping:

    6 inch wide ovenproof bowl or pie plate

    Instructions:

    1. Preheat oven to 400 degrees with the rack at the center position. Place a baking sheet lined with foil on the rack. Oil a 6 inch wide pie plate or bowl with coconut oil. In a large bowl, toss together the fruit, maple syrup,  lemon juice and zest, vanilla, flour. Spoon into prepared bowl or pie plate, and cover with foil. Place plate on baking sheet and bake for 45 minutes until fruit is cooked through and bubbling.
    2. Meanwhile, when the fruit in the oven is almost at 45 min, to make biscuits, in a large bowl, combine the flour, hazelnut meal, sugar, baking powder, and salt. Cut in the oil with a pastry blender or 2 knives until the mixture starts to clump into pea sized pieces. In a small bowl, stir the vanilla extract into the coconut milk. Add the milk to the dough, and stir a few times, but do not over-mix. The dough should hold together when squeezed, but still be clumpy. Place dough on a floured work surface, and pat into a 1/2 inch tall rectangle.
    3. Remove baking fruit from oven. Cut small shapes out of the dough using a cookie cutter (or free form it), and place on top of the cobbler.  When all biscuits are on top of cobbler, sprinkle with coconut sugar and return to the oven. Bake for about 20 minutes until biscuits are cooked through and lightly brown and toasted on top (keep a close eye on they could burn very quickly). Remove from oven and let cool until warm, and top with some ice cream or coconut vanilla whipped cream and…enjoy!

    *raw hazelnuts ground to a flour consistency in a food processor

  • Thai Peanut Popcorn

    Thai Peanut Popcorn

    Eric and I were shopping the other day at a local mall and we walked past a vendor with many different popcorn flavors.  He is always temped to buy stuff like that, and I admit it always smells good and brings back childhood memories.  But I always say, “I can make some better popcorn at home”.  And that is just what I did when I got home since I was really hungry after being gone all day.  I like to always experiment with new flavors, even though just a little coconut oil and sea salt is always welcome.  This time I went a little more savory than sweet which is what I usually gravitate towards.  I was in the mood for peanut butter though, so I ended up making Thai peanut popcorn.  I like just about anything Thai peanut.  We make a Thai peanut slaw, and Thai peanut noodles at work that are really good, and I like Thai peanut tofu and Thai peanut soup.  I guess I am just a big peanut butter addict, and Thai red curry sauce is pretty amazing aromatic stuff.

    Just be sure to buy the vegan kind, some could contain fish sauce.  I usually just buy Thai Kitchen, because it has no sugar or fish sauce in it.  Anyways, it was great on the popcorn mixed with a few other things I already had in my pantry.  I combined it with the peanut butter of course, some coconut butter, and oil, and sea salt along with some red pepper to make it more spicy.  It was super delicious and simple.  It was savory, crave worthy amazing little bites of deliciousness!  It had the Thai peanut flavor, but it also had kind of a cheesy popcorn kind of aftertaste which I loved.  I was obsessed with cheese flavored popcorn as a kid.  About 1/4 of the pan was gone before I was done taking photos of it.

    This is the type of thing I like to cuddle up on the couch with and watch a movie or smuggle into the movie theater since their popcorn has lots of fake stuff in it and is super expensive.  Trust me you will feel much better after eating this and it is way better because it is real.  The next time you are in the mood for something salty and crunchy give this a try!

    Thai Peanut Popcorn
    Makes 8 cups

    Ingredients:

    • 1/2 cup coconut butter, warmed to liquid
    • 1/3 cup peanut butter at room temperature
    • 2 Tbsp coconut oil, warmed to liquid
    • 1/2 tsp sea salt
    • 3 Tbsp Thai red curry paste
    • 1/2 tsp red pepper flakes
    • 8 cups plain organic popped corn

    Instructions:

    1. In a glass measuring cup (or bowl) whisk together the coconut butter, peanut butter, coconut oil, sea salt, Thai red curry paste  and pepper flakes until well blended.
    2. Pour over the popcorn in a large bowl and mix well with your hands.
    3. Spread out onto a lined sheet pan, and place in the freezer until it is hard. Enjoy!
  • Vegan Almond Caramel Bars

    Vegan Almond Caramel Bars

    Wednesday was hot, hot, hot.  Well, in the 90s with high humidity.  I know some people love this weather, and it is great for laying around at the pool, but not so much for running in, or working in a hot kitchen all day both of which I had done.  From the moment I woke up I felt sweaty and I felt like someone had dumped a bucket of water on me after my run.  Eric asked me, how can you stand to go out in this and workout?  I said, I don’t always enjoy it but I have to get used to it because I am sure one of my races will be on a hot day.  Plus, it seems a little less hot once you are used to it.  Or I feel like that at least.  My favorite season is actually Fall, because it is moderate most of the time.  But my Birthday is smack dab in the middle of Summer, July 15 and that is almost always a hot day.  That doesn’t stop me from doing fun things though, usually outdoors.  So anyways, we are into that part of July now and so I am trying not to heat up the oven as much making things some days that don’t require baking.  I had been gifted some almond butter and wanted to make something with it.  I thought about incorporating it into something with ice cream, which would have been nice, but I still had some other ice cream on hand.  Or maybe just ice cream sandwiches, but I would have to bake cookies which would defeat the purpose.

    Well, on my walk after work as I sweated some more I came up with the most delicious idea for no bake bars.  Almond Caramel Bars.  A cookie like layer for the base, with oats, almond butter and maple syrup that tasted like oatmeal cookies.  I wanted to keep these simple.  Although it looks like these have a lot of ingredients it is actually only 8, including salt and water.  For the caramel, I made my classic date caramel with almond butter  and a little coconut oil to thicken and it was super delicious!  I could not stop sampling it.  I knew it would be good with that oatmeal cookie later.

    I couldn’t just leave them like that though.  I thought about just melting chocolate and smoothing it over the top, but that doesn’t always cut so nice and I wanted something crunchy so I decided to add chopped toasted almonds and dark chocolate.  That was the perfect choice.  That little bit of dark chocolate made these extra good.  The are gooey, sweet, crunchy, and a little salty.  All of the things I look for in a crave worthy dessert.  If you don’t want to heat up your oven give these a try.  Not a fan of almonds?  You could use another nut butter, and that type of chopped nut on top.  I hope you are all staying cool where you live!  I heard some parts of the US were up in the 100s this week.

    Vegan Almond Caramel Bars
    Makes 12

    Crust:


    Caramel:

    • 1 cup soft, pitted medjool dates (if they are not soft, soak them in filtered water 30 minutes & drain before use)
    • 1/3 cup almond butter at room temperature
    • 1/4 cup coconut oil, warmed to liquid
    • 4 Tbsp filtered water
    • 2 Tbsp maple syrup
    • 1 tsp pure vanilla extract
    • 1/4 tsp sea salt


    Topping:

    • 3/4 cup chopped toasted almonds
    • 3/4 cup chopped vegan dark chocolate


    Instructions:

    1. Combine all crust ingredients in a food processor and process until holding together when squeezed.  Press into the bottom of a parchment lined pan and set aside in the freezer.
    2. To make the caramel, combine all ingredients in a high speed blender or food processor and process until smooth. If you do not have a high speed blender and you still have little date bits you may strain the caramel through a fine meshed strainer to remove them.  Pour the caramel over the prepared crust.
    3. Sprinkle the toasted almonds and dark chocolate chunks over the caramel and press lightly so that they stick.
    4. Place the bars in the freezer for a few hours until firm.
    5. Cut into 16 bars. Enjoy!
    6. Store any extra bars in the refrigerator in an airtight container.
  • Vegan Dark Chocolate Cake with Peanut Butter Caramel

    Vegan Dark Chocolate Cake with Peanut Butter Caramel

    I took a poll last week on Facebook to see if people preferred chocolate or vanilla and chocolate won by a landslide!  I guess I am usually a vanilla girl, my blog is called Fragrant Vanilla Cake after all, but I guess I was surprised that it wasn’t more split down the middle.  Chocolate is pretty darn delicious though, and I agree sometimes it is just something you crave and have to have.  Like last weekend when I decided that I needed some chocolate cake.  I was going to make something more Summery involving things like berries and whatnot, but I just wanted chocolate cake so that is what I made.  I thought about just making a classic chocolate cake with rich fudgy frosting, because that is what sounded so good, but me being a blogger that is always trying to make things that are especially good decided to add peanut butter caramel to it as well.  After all, chocolate, peanut butter and caramel are so amazing together.

    For the cake batter, I used my classic date sweetened chocolate  cake with a little peanut butter to make it rich.  The batter tasted amazing even before I baked it, and my kitchen smelled like brownies while it was in the oven.  This cake is actually oil free and fruit sweetened too which you would never know by tasting it.  The peanut butter is plenty rich so it doesn’t need any oil and the dates give it a caramel flavor.  They are actually the main component in the caramel as well.  If you are vegan you must have a good recipe for date caramel!  Just sayin’.  It is some amazing stuff especially on a chocolate cake.

    For the frosting, I actually used sweet potatoes as the base because they are sweet, so you don’t need to add as many dates and they make for a silky frosting without having to use tons of nut butter.  Don’t worry, you can’t taste them, they just blend in.  This fudgy frosting is so good you could eat it with a spoon, but be sure to save enough for the cake too!  This cake turned out amazing once it was all assembled.  You would never know it was vegan, it tastes super rich and chocolaty and the sweet gooey slightly salty peanut butter caramel is the perfect addition!  If you are in the mood for chocolate cake, put this on your list!

    Vegan Dark Chocolate Cake with Peanut Butter Caramel
    Makes one 2 layer 6 inch cake

    Ingredients:

    2 6 inch cake pans

    Cake:

    • 1 1/2 cups Bob’s Red Mill Gluten Free All Purpose Flour
    • 1/4 cup cacao powder or unsweetened cocoa powder
    • 1 1/2 tsp baking soda
    • 1 tsp baking powder
    • 1/2 tsp sea salt
    • 1 1/4 cups packed soft medjool dates, pitted, soaked in water for 30 minutes and drained
    • 1/4 cup organic peanut butter
    • 2 tsp pure vanilla extract
    • 2 cups filtered water
    • 2 Tbsp apple cider vinegar


    Caramel:

    • 1 cup soft, pitted medjool dates (if not soft, soak in filtered water 30 minutes and drain well)
    • 1/4 cup filtered water (or as needed)
    • 1/4 cup organic peanut butter
    • 1 tsp pure vanilla extract
    • 1/4 tsp sea salt


    Frosting:

    • 1 1/4 cups mashed Japanese sweet potatoes*
    • 1  cup soft pitted medjool dates (soaked in water for 30 minutes and drained before using if not soft)
    • 1/3 cup organic peanut butter
    • 1/2 cup filtered water (or as needed)
    • 1/2 cup unsweetened cocoa powder
    • 1 tsp pure vanilla extract
    • 1/4 tsp sea salt


    Directions:

    1. Preheat the oven to 375F degrees and position rack in center of oven.
    2. Oil two 6 inch round cake pans with coconut oil and line the bottom with parchment.
    3. Whisk flour, cocoa powder, baking powder, baking soda, sea salt in a large bowl to blend well.
    4. Place dates, water, peanut butter, and vanilla extract into a blender, and blend until smooth, then whisk this blended mixture into the flour mixture until well blended. Whisk in the cider vinegar until bubbles form.
    5. Pour the cake batter into prepared pans, and place in the oven.
    6. Bake cakes until set and a toothpick inserted into the center comes out almost clean, about 25-30 minutes.  Remove from oven, let cool completely, the un-mold them onto two plates (I like to cover mine and chill in the refrigerator for a few hours to make slicing easier).
    7. Slice cakes in half horizontally so that you have 4 layers. Set aside.
    8. To make the caramel, combine all ingredients in a high speed blender until smooth (add a little more water if too thick).  Set aside.
    9. To make the frosting, combine all ingredients in a blender and blend until smooth (adding water a little at a time if you think it is too thick).  Set aside.
    10. To assemble, place one cake layer on a plate, and spread frosting 1/4 inch thick over it.  Then spread some of the caramel over that.  Place the other cake layer over that, then spread more frosting, and caramel over it like the last layer.  Repeat with another layer, and top off with last piece of cake.  Spread the remaining frosting on the top and down the sides of the cake.


    *I like to roast my sweet potatoes in the oven. To do so, cut them in half, and place them cut side down on a parchment lined tray.  Roast at 400F degrees for about an hour or until they are tender.  Let cool before pureeing.

  • Vegan Blueberry Peach Anise Scones

    Vegan Blueberry Peach Anise Scones

    Have you ever been to a coffee shop or bakery, bought a scone, and it tasted dry, crumbly and just sugary without much other flavor? Well, I have.  Honestly, I thought that I did not like scones at all until I started working at my job in the deli and was taught by one of my coworkers how to properly make them.  Her scones are amazing.  They are rich, flaky, flavorful and delicious.  However they are not vegan so I no longer eat them, but I have been working there since before I became vegan so I had sampled some in the past.  The trick is not to over mix the dough or it will become tough and not delicate and buttery.  Also, it helps if your milk (or coconut milk in my case) and butter (or coconut oil in my case) are chilled so that they create pockets of deliciousness that melt only when baked.  A while back I came up with a veganized version of those work scones, and I think they are just as good and you feel better after eating them.  Mine also happen to be gluten free too, which is another win.

    I was in a scone making mood after work one day last week, and I had a ripe peach and some blueberries so I thought why not blueberry peach scones?! I decided to add in some oatmeal as well, since I love the texture, and some anise for sweetness.  It was a delicious combination, and I knew it would be good when I sampled the dough.  I always have to sample my dough for cookies, scones, and brownie and cake batters.  Not only is it delicious and part of the process that I enjoy, but it has prevented me from forgetting to add ingredients like the sugar or sweetener before. This scone dough was heavenly.

    They smelled amazing while baking as well, almost like pie because the fruit started to get a little jammy in the hot oven just as it should.   These turned out just right, not dry or too crumbly.  Just incredibly tender and delicious, the jammy sweet fruit suspended in the flaky rich fragrant dough.  If you are looking for the perfect lazy Saturday morning treat, this would be it!

    Vegan Blueberry Peach Anise Scones
    Makes 8

    Ingredients:


    Instructions:

    1. Preheat oven to 425 with the rack set at the middle position.
    2. Line a baking sheet with parchment.
    3. In a large bowl, combine the flour, oats, sugar, baking powder, anise and salt and whisk together.
    4. Add the coconut oil, and cut in with a pastry blender or 2 knives until the mixture starts to clump into pea sized pieces.
    5. In a small bowl, stir the vanilla into the coconut milk. Add the coconut milk to the dough, and stir a few times, but do not over-mix. The dough should hold together when squeezed, but still be clumpy. fold in fruit until evenly distributed.
    6. Place dough on a floured work surface, and shape into a 4 inch wide log. Use a bench scraper to cut into triangles. There should be about 8.
    7. Place scones on the prepared baking sheet, reshaping slightly if necessary.
    8. Brush the tops lightly with the coconut milk (only if they seem dry, you want the sugar to stick), and sprinkle with coconut sugar.
    9. Place in the oven and bake for about 20 minutes or until golden brown (after about 15 minutes you may need to reshape with 2 bench scrapers if the scones are spreading, then place back in the oven).  Remove from oven.
    10. Cool on a wire rack.
  • Vegan Blueberry Almond Banana Pancakes

    Vegan Blueberry Almond Banana Pancakes

    When it comes to simple, easy foods, pancakes are always a good option.  When I was little, my Mom would sometimes make them for a quick dinner and I was always happy with that!  After all, what’s not to like about pancakes, and also it felt like I was getting dessert for dinner because they were usually the sweet variety and we topped them off with fruit, most of the time berries.  We never used a boxed mix, we actually made them from scratch with a recipe my Mom had found that quickly became our favorite.  It was one that had whipped egg whites to make them extra fluffy.  Well, I made some vegan pancakes this week that reminded me of those.  But they were much more simple to make.

    They actually had only 9 ingredients, including salt and water and they were delicious!  I had some ripe bananas, so that is actually what was the bulk of the wet ingredients in these and made them so soft and fluffy.  I added in some almond butter for richness, and of course they needed something stirred in to make them extra delicious so I added blueberries.  I would normally go for chocolate chips, but since it is Summer and the berries are so good right now, why not?!  Plus, I love how they become all warm and jammy as the pancakes cook.

    These turned out super delicious and they come together and cook in under 30 minutes if you have a pan you can cook several on at a time.  They would be perfect for a weekend brunch, or of course a weeknight dinner if you are in the mood for something breakfasty.  No excuses to not make pancakes from scratch, these are easy and taste so much better than a boxed mix.

    Vegan Blueberry Almond Banana Pancakes
    Makes 12

    Ingredients:


    Directions:

    1. In a food processor, combine all pancake ingredients (except the blueberries) and process until just blended, stir in the blueberries, pour into a bowl and set aside.
    2. To cook pancakes, preheat oven to 110 degrees. Heat a large ceramic non-stick pan over medium heat. Once hot, add the batter in 1/4 cup amounts (I did 3 at a time, but it depends on your pan), and let cook for about 2-3 minutes on the first side until set and starting to brown, then flip with a spatula, and cook another 2-3 minutes.
    3. When cooked, place on a plate and keep warm in the oven while you repeat the process with the remaining pancakes.

    *Note: If you do not own a non-stick pan, you may need to lightly oil your pan to prevent sticking, if you do not mind these not being oil free.

  • Vegan Berry Crisp in a Jar

    Vegan Berry Crisp in a Jar

    Last Saturday was a beautiful day.  The sun was out, it was about 50 degrees in the morning and I ran the Roseville Run for the Roses 5k.  Now, 50 degrees might not sound like a nice Summer day to some, but it is perfect for running and I was thankful for the cooler temps for my race.  It went pretty well, and although I didn’t have as fast of a time as I would have liked since the course was hilly, I won the women’s division so that was cool.  This is a race I used to do back in the day when I first started running outside of school and actually the first road race I ever ran 14 years ago.  So I was glad it went well this year too.  After the race in the afternoon it had warmed up a bit, and Eric and I decided to visit a local vineyard for their raspberry festival.  Nothing like enjoying wine on a beautiful afternoon!  Then it was time to relax, and I was in the mood for something like pie for dessert but I wasn’t in the mood to bake something complicated so I went for a berry crisp.

    Crisp is always so delicious and is the perfect sweet comfort food.  The one I made requires very little oven time as I cooked the fruit on the stove and just the topping in the oven. I decided I wanted to make it festive as well, since the 4th of July is fast approaching so I cooked my two types of berries separately.  You wouldn’t have to do this if you wanted it to be less fussy, you would just end up with a purple filling instead of separate red and blue. The berries were so sweet that they needed very little sweetening which is always nice and this is the way it often is when you use fruit that is in season.  For the topping I used a mixture of oats, coconut and flour made a little rich with some pecan butter instead of the usual coconut oil.  I am liking this for crisps lately, it tastes wonderful!

    They smelled wonderful once they were all done and I enjoyed one warm with some cool coconut ice cream on top.  I always have to have cool ice cream on my warm crisps and cobblers, I love the contrast of textures, temperatures and flavors. This was simply heavenly!  If you are looking for a delicious recipe for the 4th, give this a try!

    Vegan Berry Crisp in a Jar
    Serves 2-4

    Fruit:

    • 2 cups organic strawberries, halved
    • 2 cups organic blueberries
    • 3 Tbsp maple syrup (divided)
    • pinch sea salt
    • 2 Tbsp (divided) arrowroot powder
    • 2 Tbsp (divided) lemon juice


    Topping:
    • 3 Tbsp gluten free all purpose flour
    • 3 Tbsp large flake dried unsweetened coconut
    • 1/2 cup gluten free rolled oats
    • 3 Tbsp coconut sugar
    • 1/8 tsp sea salt
    • 3 Tbsp raw pecan butter or almond butter


    For serving:

    • 4 smaller, shorter mason jars (or 2 large if you like a big serving like me)


    Instructions:

    1. Preheat the oven to 350F degrees.
    2. Place the strawberries in one medium saucepan and the blueberries in another.  Add 1 1/2 Tbsp maple syrup to each pan, then a pinch of sea salt to each, and cook over medium heat until the berries start to sizzle, then lower heat to medium, cover, and cook until the berries in each pan are tender (stirring often) about 15 minutes.  Dissolve 1 Tbsp arrowroot in 1 Tbsp lemon juice in a small bowl, add it to the strawberries and stir until thickened.  Remove from heat.  Repeat with the blueberries using 1 Tbsp arrowroot and 1 Tbsp lemon juice again and cooking until thickened once added.  Remove from heat. Set pans aside.
    3. To make the topping, combine all ingredients in a bowl and mix together with your hands scrunching together to form small clumps until there are no floury spots left. Spread out on a sheet pan, place in the oven and bake until crunchy, about 15 minutes.  Remove from oven and let cool.
    4. Spoon the berry filling into jars, the blueberry first, then the strawberry, then top with the crumble topping.  Serve!
  • Vegan Blueberry Cheesecake Popsicles

    Vegan Blueberry Cheesecake Popsicles

    I have been waiting months to make popsicles, and now that Summer is officially here, it is time to make them!  I made some strawberry lemonade ones last week, but this week I wanted something a bit more decadent.  More like sort of an ice cream pop than actual ice.  Although fudge pops are always good, I wanted something more along the lines of vanilla.  I had blueberries on hand, and was in a cheesecake sort of a mood, so blueberry popsicles it was!  There was this little ice cream shop up north that My Dad and I always used to stop at when we went on trips, and they had about 20 delicious flavors of ice cream, all of which I wanted to try.  I usually ended up with 2 different scoops, but after I tried their blueberry cheesecake ice cream, that was all I wanted.  It was so good!

    So, I knew these popsicles were going to be good, and better for me since they wouldn’t have any refined sugar or dairy in them. For the base, I kept it pretty simple and used a mixture of coconut milk and cashew butter to make it silky smooth with the flavor of cheesecake.  This is actually one of my favorite ice cream bases as well.  I sweetened it with maple syrup added a dash of vanilla and it was wonderful!  Lastly, I added the blueberries to half of it so that these would be pretty two tone popsicles.  They are actually only 7 ingredients including salt, so pretty easy to make.

    It was hard to wait to sample them, but since it was night when I made them I had to let them sit overnight to firm up.  They were well worth the wait though!  They tasted just like frozen cheesecake, the blueberries the perfect Summer addition to the rich base, bringing me back to my childhood with that delicious ice cream up North.  If you have a popsicle mold you need to try these babies out soon!

    Vegan Blueberry Cheesecake Popsicles

    Makes 8

    Ingredients:

    • 2 cups full fat coconut milk
    • 1/2 cup raw cashew butter
    • 1/4 cup maple syrup
    • 1 tsp pure vanilla extract
    • pinch sea salt
    • 1/2 tsp cider vinegar
    • 1 cup organic blueberries, divided


    Instructions:

    1. Combine the full fat coconut milk, cashew butter, syrup, vanilla, sea salt, and cider vinegar in a blender and blend until smooth.
    2. Drop a few blueberries into the bottoms of 8 popsicle molds, then pour half of the coconut mixture over that.
    3. Blend the remaining coconut mixture with the remaining blueberries, then pour over the other coconut mixture in the molds.
    4. Place sticks into the molds, leaving about 1 inch at the top, then place in the freezer until completely hard, about 4-6 hours (or overnight).
  • Cherry Lemon Mint Margarita

    Cherry Lemon Mint Margarita

    I don’t know about you, but I love a good margarita in the Summer.  To me, a good margarita is not one of those ones you can buy at restaurants made with a mix in some electric bright color and full of refined sugar.  To me, a good one is made with fresh, real ingredients like real fruit.  One of the best margaritas I ever had was actually one made with real carrot and orange juice.  Sounds unusual but it was so good, and worked so well with the tequila!  Although I like the traditional lime and citrus margarita I like to think outside the box sometimes and use whatever fruit I have on hand and see if it works.  Last weekend that was cherries.

    There is nothing like fresh cherries.  Sweet, juicy and delicious!  When I was a kid I thought I hated cherries, but it was only because I had only been exposed to the canned ones or maraschino variety in syrup.  I have never been a fan of either.  They just taste weird to me, or maybe it is that fake color that turns me off as well.  Anyways, when I finally tried real cherries fresh from the store when I was in college, I was pleasantly surprised and I have been buying them ever since when they come into season.  They are sort of special here.  Which brings me back to that margarita.  I had bought some cherries, and decided they would go great with tequila.

    I used lemon instead of lime in this margarita since that was what I had on hand, and I also included some fresh mint to make it even more cooling and Summery. Lastly, since I don’t usually use sweetened liqueurs, I added some vanilla maple syrup to this instead.  It may sound like a sort of different combination, but it was super refreshing, delicious and classy.  This is like something you would get at an upscale bar and pay $12 for.  Next time you are in the mood for a good margarita, give this a try!

    Cherry Lemon Mint Margarita
    Makes 1

    Ingredients:

    • 6 large ice cubes
    • 4 good sized fresh mint leaves
    • 4 oz tequila blanco
    • 2 oz cherry puree
    • 1 oz fresh lemon juice
    • 1 1/2 oz vanilla syrup*
    • ice for serving


    Directions:

    1. To make drink, in a martini shaker add the ice, then muddle the mint with the ice until crushed.  Add the tequila, cherries, lemon juice, vanilla syrup, and place top on shaker.
    2. Shake until well blended.
    3. Pour the drink through a strainer into the prepared glass (with some ice in it if you prefer your drink on the rocks), garnish with mint leaves, and serve!


    *Vanilla syrup

    • 1/4 cup maple syrup
    • 1/4 cup filtered water
    • 1 vanilla bean pod, split lengthwise


    Combine all ingredients in a jar, put the lid on and shake to dissolve syrup. Let sit at least a day to infuse, then strain to vanilla bean pod. Store in the fridge for up to a month.

  • Cherry Berry Quinoa Salad with “Chevre”

    Cherry Berry Quinoa Salad with “Chevre”

    I have been eating more quinoa lately than I used to.  It stems from trying to eat a variety of vegan protein sources instead of my usual few in my meals (tofu, tempeh, garbanzo beans, lentils).  Plus, quinoa makes a great salad and that is usually how I enjoy it.  I can make a big batch ahead of time, and it makes a satisfying meal later. So, I have been making many different new recipes with it.  The most recent of which involved sweet berries and cherries.  It may sound like more of a breakfast porridge combination than a salad, but it was savory, sweet and super delicious!  In the past I have always jumped to making desserts first when I have fruit, but lately I have been trying to incorporate it into savory applications as well.  After all, I eat more meals than I do desserts.

    I decided to keep the flavors in this quinoa simple and just use lemon, mint and a little avocado along with some lime juice to flavor it.  No overpowering alliums in this dish.  I wanted the flavors of the strawberries and cherries to shine!  The mint just gave it a lovely fragrance along with the berries and lemon plus added the little pop of green color that it needed.  I tossed in some toasted walnuts for crunch and some nut “chevre” that I had on hand, and it was delicious!

    This is the perfect make ahead of time salad for Summer if you want something delicious for lunch or even of you are having a picnic or party and want to impress guests.  Just make sure your fruit is super flavorful, that is crucial to this tasting amazing!

    Cherry Berry Quinoa Salad with “Chevre”
    Serves 2-4

    Ingredients:

    • 1 cup quinoa, rinsed
    • 2 cups filtered water
    • 1/4 cup lemon juice
    • 1 Tbsp organic lemon zest
    • 2 Tbsp avocado oil or olive oil
    • sea salt to taste
    • 1 cup cherries, pitted and halved
    • 1 cup strawberries
    • 1/4 cup fresh mint leaves (if larger, tear them into pieces)
    • 1/2 cup toasted walnuts
    • cashew chevre*

    To prepare the quinoa, place quinoa and water in a medium saucepan and bring to a boil. Reduce to a simmer, cover and cook until all the water is absorbed about 15 minutes, or when all the grains have turned from white to transparent, and the spiral-like germ has separated. Drain, and set aside.

    To assemble the salad, combine all ingredients in a bowl except the chevre, and toss together until well combined.  When ready to serve, sprinkle with the chevre (you will have more left over for another use).

    *Use this chevre recipe and omit the herbs: https://www.fragrantvanilla.com/vegan-herbes-de-provence-chevre/

  • 20 Delicious Vegan Strawberries and Rhubarb Desserts!

    20 Delicious Vegan Strawberries and Rhubarb Desserts!

    One of my favorite things about Spring besides the beautiful flowers and grass becoming green is the strawberries and rhubarb that are available. It is one of my all time favorite flavor combinations, and something I have been enjoying for as long as I can remember when my Grandma made strawberry rhubarb sauce during the Spring and Summer.  She always had giant rhubarb plants growing behind her garage so she had plenty to make it with. I love pretty much everything with strawberries and rhubarb, especially pies. There is just something so comforting about a warm strawberry rhubarb pie with cool vanilla ice cream or whipped coconut cream on top.  Simply heavenly!  So, because of my love for strawberries and rhubarb, I thought I would round up a few delicious recipes from my fellow bloggers for all of us to enjoy in one place!  Maybe you love it too and are looking for dessert recipes or ideas.  I know I always am!  So, enjoy this list, and hopefully it inspires you to make something delicious!

    Vegan Strawberry Rhubarb Ginger Ice Cream 

    Raw Strawberry Rhubarb Cheesecake Bars

    Vegan Almond Butter and Strawberry Rhubarb Jelly Bars

    Vegan Strawberry Lavender Scones 


    Paleo Strawberry Coconut Thumbprint Cookies by Strength and Sunshine

    Strawberry Rhubarb Coconut Milk Popsicles by Veggie Inspired

    3 Ingredient Strawberry Mousse by Easy Cooking with Molly 

    Strawberry Rhubarb Crisp by Beautiful Ingredient

    Individual Vegan Strawberry Rhubarb Cobblers with Almond Biscuits

    Vegan Strawberry Rhubarb Galette

    Vegan Strawberry Pie with Walnut Oat Crust By Where You Get Your Protein 

    Rhubarb Almond Tart by Occasinally Eggs

    Gluten Free Strawberry Rhubarb Lime Pie by by Unconventional Baker

    Vegan Strawberries and Cream Pie

    Raw Strawberry Rhubarb Cake

    Strawberry Peanut Butter Cheesecake by Contentedness Cooking 

    Vegan Lavender Gin Strawberry Shortcake by Healthy Slow Cooking

    Gluten-Free Vegan Strawberry Sponge Layer Cake by Rhian’s Recipes

    Strawberry Rhubarb Crispy Cream Cake by Amanda Nicole Smith

    Springtime Rhubarb Almond Cake with Fresh Strawberries by Black White Vivid 

  • Vegan Turtle Ice Cream Cake

    Vegan Turtle Ice Cream Cake

    I have been seeing a lot of turtles around here lately.  They are out in full force sunning themselves on logs, laying eggs, and crawling across the grass.  I saw 3 large snapping turtles laying eggs on one of my runs last week.  I recently read an article about how to help them cross the road last week HERE, and it makes sense to help them, since we built all of our homes on their territory that used to be just wild. It always makes me sad to see the ones that didn’t get across.  Anyways, seeing the turtles out always makes me happy because I know Summer is here. So in honor of the turtles, I decided to make a turtle dessert.  Not one made with actual turtles, that would not be vegan.  Turtle like the delicious chocolate caramel and pecan combination.

    It was super hot last weekend here, so I made an ice cream cake.  I don’t think I have made one in over a year, so it was about time!  A decadent chocolate one sounded really good.  For the ice cream, I veered off a little bit from my usual ice cream recipe and added a special secret ingredient.  Some chickpeas.  Don’t worry, you can not taste them, they just add a little protein and substance to the ice cream without having to add another can of coconut milk.  I still used one can to make it silky along with some almond butter and that was just enough.  Once I added some cocoa powder and dates it tasted like luscious mousse and was even better once frozen.

    The ice cream sat atop a simple chocolate crust, and I made a date caramel to swirl into it and added in crunchy pecans.  I could not wait for it to freeze so I could try it all together!  It was super decadent and delicious!  The texture silky smooth.  If you are in the mood for some ice cream cake for a special occasion give this a go.  It is way better than any of the Dairy Queen ice cream cakes I had growing up.

    Vegan Turtle Ice Cream Cake
    Makes One 6 inch cake

    Crust:

    • 3/4 cup organic gluten free rolled oats
    • 3/4 cup finely shredded dried unsweetened coconut
    • 3 Tbsp unsweetened cocoa powder
    • 3/4 cup soft pitted medjool dates (soaked in filtered water if not soft for 30 minutes and drained well.)
    • 3 Tbsp almond butter
    • 1/4 tsp sea salt


    Ice Cream:

    • 1 cup cooked chickpeas
    • 1 15 oz can full fat coconut milk
    • 1/2 cup almond butter
    • 3/4 cup soft pitted medjool dates (soaked in filtered water if not soft for 30 minutes and drained well.)
    • 1/2 cup unsweetened cocoa powder
    • 1/4 tsp sea salt
    • 1 tsp pure vanilla extract


    Caramel:

    • 1 cup soft pitted medjool dates (soaked in filtered water if not soft for 30 minutes and drained well.)
    • 3/4 cup filtered water (or as needed)
    • 1/4 cup almond butter
    • 1/4 tsp sea salt
    • 1 tsp pure vanilla extract


    Assembly:

    • 1 cup pecans (half chopped and half whole)


    Instructions:

    1. Oil a 6 inch spring form pan and line with parchment paper.
    2. To make the crust, combine all ingredients in a food processor and process until fine and starting to hold together when squeezed. Once it is at that stage, press it into the bottom of the prepared pan.  Set aside.
    3. To make the ice cream, combine all ingredients in a high speed blender or food processor and blend until very smooth (if you are using a food processor and it still has little bits you may want to strain it through a fine meshed strainer to remove them).
    4. Pour into a bowl and place in the freezer for about 30 minutes or until chilled, whisking after 15.
    5. Meanwhile, to make the caramel, combine all ingredients in a high speed blender and process until smooth.  If it is too thick add a little more water. You want it gooey and almost pour-able not not runny.
    6. To assemble the cake, spoon half of the ice cream mixture over the crust in the pan, then drop 1/3 of the caramel over it by the tsp and sprinkle with 1/4 cup chopped pecans.  Swirl with a knife, then pour the remaining ice cream over that, smoothing the top, and drop half the remaining caramel over that and another 1/4 cup chopped pecans.  Swirl with a knife, and tap on the counter to get rid of any bubbles.
    7. Place in the freezer until firm, about 6 hours.
    8. When ready to serve, drizzle with the remaining caramel, and whole pecans, cut into pieces, and enjoy!
    9. Store any leftover cake in the freezer in an airtight container.


  • Strawberry Dessert Hummus

    Strawberry Dessert Hummus

    Sometimes I start making a recipe and it turns into something totally different.  That was what happened a few days ago when I was going to make some Vegan High Protein Cookie Dough, but I ended up making strawberry hummus instead.  How does that happen?  Well, the cookie dough base is chickpeas, so I threw those in the blender, along with some almond butter and dates.  There weren’t quite enough dates in the container I was using so I went back in the refrigerator for more and saw the large amount of strawberries in there.  Hey…I could make strawberry hummus!  I thought to myself.  I am obsessed with chickpeas and hummus and love snacking on them, so I why not make a dessert hummus and change it up from the always savory?!  So that is how I ended up with the recipe I am sharing with you now.  I ended up not even needing the extra dates because it was sweet enough with the berries.

    This is super simple, just 5 ingredients including sea salt!  You whiz it all together in the blender and voila!  Snack deliciousness!  Now you may be thinking to yourself, it sounds a bit weird, but it is actually really good.  You can’t taste the chickpeas.  To me this is actually reminiscent of raw strawberry cheesecake before it has set up, so really tasty!  Not to mention packed with strawberry flavor.

    So what do you serve this with?  Well, I honestly just ate mine with more strawberries, dipping them into it and it was heavenly that way.  But I think you could spread this on bagels cream cheese style because of how much it reminds me of strawberry cheesecake.  Or you could just eat it straight up with a spoon.  As I also did.  I love dessert hummus!  If you are in the mood for something a little different featuring strawberries, give this a try!

    Strawberry Dessert Hummus
    Makes about 2 cups

    • 1 cup cooked chickpeas
    • 1 1/2 cups organic strawberries
    • 1/3 cup pitted medjool dates (if they are not soft, soak them in filtered water for 30 minutes and drain well)
    • 1/4 cup raw almond butter
    • 1/4 tsp sea salt
    1. In a high speed blender or food processor, combine all ingredients, and blend until smooth.
    2. Enjoy!  Store unused dough in the refrigerator.
  • Vegan Raspberry Rhubarb Cream Cheese Pie

    Vegan Raspberry Rhubarb Cream Cheese Pie

    I got a bunch of rhubarb from my Dad’s garden recently and made some strawberry rhubarb wine, but I decided that a dessert featuring rhubarb sounded really good as well.  I usually just go with the classic strawberry rhubarb combination, probably because one of my favorite things growing up was when my Grandma made strawberry rhubarb sauce. It was good on ice cream, vanilla cake, or just straight up!  But this time I went with raspberry rhubarb to be a little different and since I had the raspberries on hand. I usually like a creamy element whenever I make a fruit pie, either in the form of ice cream, or coconut cream, but this time I decided to add the creamy element to the pie itself with a cream cheese layer. My Dad used to buy a raspberry cream cheese pie from a local restaurant when I was little and it was amazing!  I knew I could make an even better vegan version.

    I made a simple pie crust with Bob’s Red Mill gluten free flour to allow the fillings to shine and it was perfect!  For the cream cheese, I used a mixture of coconut milk (the thick cream part) and cashew butter.  Once sweetened with a little maple syrup and vanilla it was simply heavenly!  A little arrowroot to thicken it while baking and voila!  Delicious cheesecake type filling.  I kept the raspberry rhubarb simple, using only the fruit, a little maple syrup and some arrowroot to thicken. Lastly, I was torn about the topping and couldn’t decide between whipped cream once the pie was cooled or an oat crumble topping, and my Mom helped me decide.  Crumb topping it was.  I have always been a sucker for that too.

    I have to admit I was unsure how exactly this was going to bake up.  if the fruit would become jammy or too watery, or if the cheesecake would set properly.  But it all worked out and it baked up perfect and beautiful!  The crust was buttery and rich, the creamy cheesecake a perfect compliment to the tart sweet jammy rhubarb filling and the salty sweet crumb topping the perfect partner for it all!  This pie was super delicious!  I will have to make it again before the Summer is over.

    Vegan Raspberry Rhubarb Cream Cheese Pie

    Makes one 9 inch pie

    Crust:

    Cream Cheese:

    • 3/4 cup thick organic coconut milk (from the top of a chilled can)
    • 3/4 cup cashew butter
    • 2 Tbsp maple syrup
    • 1/8 tsp sea salt
    • 1 tsp pure vanilla extract
    • 1/2 tsp cider vinegar
    • 2 Tbsp arrowroot starch or cornstarch

    Filling:

    • 3 cup organic raspberries
    • 2 cups organic rhubarb
    • 2 Tbsp maple syrup
    • 3 Tbsp arrowroot starch or cornstarch

    Topping:

    • 1/2 cup Bob’s Red Mill all purpose gluten free baking flour
    • 2 Tbsp coconut sugar
    • 3 Tbsp melted coconut oil
    • 3/4 cup gluten free rolled oats
    • pinch sea salt
    1. To make the crust, in a large bowl, mix together flour, sugar, sea salt, and spices. Cut in coconut oil with a pastry blender or 2 knives until it is in pea sized pieces. Mix in  just enough water to create a smooth dough that holds together but isn’t too sticky. Add more water if needed, and knead slightly until a smooth dough is created. Roll out into a 10 inch circle on a sheet of parchment paper, then use the paper to help you transfer it to an 9 inch pie dish.  Flute the edges, and set aside in the refrigerator.
    2. Pre-heat the oven to 375F degrees.
    3. To make the cream cheese, whisk together all ingredients until smooth and set aside.
    4. To assemble the pie, pour the cream cheese layer over the crust, then mix together the fruit filling ingredients and scatter them over the cream cheese filling.
    5. Place in the pre-heated oven and bake for about  25 min.
    6. Meanwhile, mix together the topping ingredients in a bowl and squeeze with your hands to form clumps.
    7. Scatter the topping over the pie and bake 25 min more until the edges of the crust are lightly brown, and pie is set.  Remove from the oven to a wire rack.
    8. Allow to cool completely before serving.
  • Vegan Berry Cheesecake Popcorn

    Vegan Berry Cheesecake Popcorn

    I have been obsessed with all things berry lately.  Mostly fresh berries of course, because they are finally beginning to be flavorful again, coming into season soon, but I will take other berry stuff too.  Like the popcorn I made last week, it was vegan berry cheesecake flavor and it was amazing!  I like to make new and unusual flavors of popcorn, I admit mostly sweet but they all have to have a little salt added too.  I always thought the popcorn at those mall vendors when I was younger smelled good but a lot of it looked artificial.  I probably wouldn’t have cared then if it was or not by my Mom wasn’t going to buy it for me, she taught me to enjoy real food.  So now, I think it is fun to create delicious popcorn that isn’t full of bad stuff.  I came up with the cheesecake flavor because I was in the mood for cheesecake, and my recent berry obsession.  I was just going to make it blueberry cheesecake, but I had other freeze dried berries on hand as well so I went for a triple berry combination.

    You may  think that freeze dried fruit is just a cheaper stand in for fresh, but seriously it is packed with some really good flavor. I keep it around for when I want to add fruit flavor to things but not moisture.  Like for instance, in a frosting.  When pulverized to powder and added to frosting it tastes wonderful. It worked really well in my popcorn, and made it so it didn’t get soggy.  I used a combination of cashew butter and coconut butter to make the “cheesecake” coating and it was super delicious once vanilla and maple syrup were added.

    Once the popcorn was all coated and ready to go it was some crave worthy stuff!  Now it obviously doesn’t have the texture of cheesecake but it has the delicious flavor!  It is like eating cheesecake, but it has a satisfying crunch and sweet berries!  This has it all as far as a snack goes when you are craving something but don’t know what.  It is crunchy, sweet, a little salty, and rich.  Don’t buy popcorn at the store, make your own instead!  It is much more fun!

    Vegan Berry Cheesecake Popcorn
    Makes 8 cups

    Ingredients:

    • 1/3 cup maple syrup
    • 1/3 cup raw coconut butter
    • 1/3 cup raw cashew butter
    • 1/2 tsp sea salt
    • 1 tsp lemon juice
    • 1 tsp pure vanilla extract
    • 8 cups plain organic popped corn
    • 1 cup mixed freeze dried berries


    Instructions:

    1. In a glass measuring cup (or bowl) whisk together the maple syrup, coconut butter, cashew butter, sea salt and vanilla until well blended.
    2. Pour over the popcorn in a large bowl, along with berries and mix well. Spread out onto a lined sheet pan, and place in the freezer until it is hard.
    3. Enjoy!
  • Vegan Broccoli “Bacon” Salad

    Vegan Broccoli “Bacon” Salad

    There is a broccoli bacon salad that is very popular among Minnesotans at church potlucks or summer picnics.  It has a creamy dressing, raisins, sunflower seeds, onions and sometimes cheese depending on who makes it.  I used to like it when I was little because it was sweet and had bacon, but when I got older it was too sweet for me, as it is usually loaded up with sugar and mayonnaise two things I am not a fan of not to mention the bacon which I haven’t eaten since I went vegetarian in 2003 (I have been vegan 5 years).  One of my friends jokingly used to call it “broccoli barf”  because she was a vegetarian too and thought it was too sugary and mayo filled as well.  We actually make a version of this in the deli I work at and it is pretty popular.  Which got me to thinking, why couldn’t I make a vegan version of it that I could actually eat, and tailor it to my tastes so I would enjoy it as well?

    I admit I don’t usually reach for the broccoli first, but I really wanted to make a good vegan version of this!  I mean, yes, I could have made it really simple and bought vegan bacon and vegan mayonnaise, but were is the fun in that?  And, I don’t usually like store bought mayonnaise even if it is vegan.  So, I made my own creamy sweet dressing that ended up tasting even better than the mayo one.  It had a coconut milk cashew base made a little tangy with cider vinegar and sweet with maple syrup.  It was delicious once poured over the salad.

    For the bacon, I made coconut bacon.  It is now my favorite vegan bacon for when I want to sprinkle it on top of something or just snack on it.  It is honestly the closest thing texture and flavor wise I have found to real bacon.  It was super delicious in the salad and added a nice crunch.  I kept it classic with onions and sunflower seeds, but I swapped out the raisins for dried cherries because I am not a huge raisin fan and that was what I happened to have on hand.  I shared some of this salad with my Mom, who has tried the original version probably way more times than me and is usually not a fan, but she loved the vegan version I made.  If you are looking for a dish to bring to a Summer picnic or potluck, give this a try!

    Vegan Broccoli “Bacon” Salad
    Serves 2-4

    Ingredients:

    Coconut Bacon:

    • 1 1/2 cups large flake coconut
    • 2 Tbsp tamari
    • 2 Tbsp liquid smoke
    • 1 Tbsp maple syrup


    Dressing:

    • 1/3 cup raw cashew butter
    • 1/3 cup full fat coconut milk (mostly the thick part from the top of the can)
    • 1 Tbsp cider vinegar
    • 1 1/2 Tbsp maple syrup
    • 1/3 tsp sea salt (or to taste)


    Salad:

    • 2 medium heads organic broccoli
    • 1/4 cup diced onion
    • 1/2 cup dried cherries
    • 1/2 cup sunflower seeds


    Instructions:

    1. To make the coconut bacon, preheat the oven to 350F degrees, and line a sheet pan with parchment.
    2. Toss the large flake coconut with the tamari, liquid smoke and maple syrup and spread out on the pan.  Place in the oven and bake for about 12-15 minutes (depending on your oven), keeping a close eye at the end and checking it in the final minutes because it burns fast.  Remove from oven and let cool.
    3. To make the dressing, whisk all ingredients together until smooth.
    4. Combine broccoli, onions, cherries, sunflower seeds, and coconut bacon in a bowl, and toss together with the dressing.
    5. Enjoy!


    *Note: If you are not serving this right away, do not add the coconut bacon until you are just about to serve it so that it stays crisp.


  • Vegan Berry Swirl Cheesecake

    Vegan Berry Swirl Cheesecake

    The end of last week, my website went down because someone felt the need to infect it with malware.  Which is really upsetting to me, that someone specifically creates programs to destroy other people’s websites.  There are so many nasty people in the world I am always very thankful for the nice ones I encounter.  It was very frustrating dealing with the whole website thing, about 6 phone calls, hours on the phone and more money than I cared to spend over a span of 4 days, it was fixed.  But surprisingly I didn’t get too stressed out over it because I feel like I am learning to better cope when I get stressed out through things like prayer, and doing other things I enjoy like art.  Anyways, I am thankful it is back up and working again so that you all can enjoy my recipes.  I felt really bad having to tell people it was not accessible at the time.  With the whole website thing going on, I had a little break from recipes, which was kind of nice but at the same time weird.  I did make one however, a delicious Vegan Berry Swirl Cheesecake!

    I wanted to make something simple, because I knew I would have a busy weekend otherwise, which is why I decided on a cheesecake.  I had some fresh organic berries that were on sale at the store, and I knew they would be amazing in it.  I have made a lot of raw cheesecakes since I started this blog and this one is sort of similar to one but it has a few non-raw ingredients that are easier to come by.  I used to always use young coconuts in my raw cheesecakes, but this one uses full fat coconut milk instead which is much cheaper.  I mixed it with cashews for the most luscious filling that was so good with the berries!  For the crust, instead of the sprouted buckwheat groats that I use in my raw cheesecakes, I used gluten free rolled oats since I know you all don’t want to sprout buckwheat and I didn’t have any on hand.  This cake came together in about 30 minutes, and all that was left to do was let it chill.

    I actually let it chill overnight because it was going to be enjoyed the next day and it was perfect. I had made two different fillings and swirled them together.  One with strawberries and raspberries, and one with blueberries and blackberries.  Once they were all combined, it was pure delicious goodness.  The texture was silky and melt in your mouth, the flavor sweet vanilla with flavorful tart sweet berries.  This would be the perfect thing to make this Summer when fresh berries are plentiful, especially ones from the Farmer’s Market.  I can’t wait to go there!

    Vegan Berry Swirl Cheesecake
    Makes one 8 inch cake

    Crust:

    • ½ cup finely shredded dried coconut
    • ½ cup gluten free rolled oats
    • ½ cup pitted medjool dates
    • ¼ tsp sea salt
    • 2 Tbsp almond butter


    Cake:

    • 1 15 oz can organic full fat coconut milk at room temperature*
    • 1 cup cashew butter at room temperature
    • 2/3 cup maple syrup
    • 2 tsp pure vanilla extract
    • ¼ tsp sea salt
    • 1 cup coconut butter (not oil), warmed to liquid
    • ½ cup strawberries (sliced) and raspberries
    • ½ cup blackberries and blueberries


    Instructions:

    1. In a food processor, combine the coconut, oats, dates, and sea salt.  Process until fine, then add the almond butter and process until holding together when squeezed.
    2. Press into the bottom of a greased 8 oz spring form pan lined with parchment paper at the bottom.
    3. To make the filling, combine the coconut milk, cashew butter, maple syrup, vanilla, sea salt and coconut milk in a high-speed blender or food processor and blend until smooth.  Divide between two bowls.
    4. Place the first bowl of filling back into the blender and add the strawberries and raspberries.  Blend until smooth, then pour back into the bowl.  Rinse out the blender.
    5. Add the second bowl of filling back to the blender, and add the blackberries and blueberries.  Blend until smooth.
    6. To assemble the cheesecake, drop the two fillings by the Tablespoonful into the pan over the prepared crust until they are all used up.  Swirl the filling with a knife, then a toothpick to create finer marbling.
    7. Place the cake in the freezer for about 3-4 hours until completely firm, then move to the refrigerator (or, you can just put it straight into the refrigerator if you want to let it sit overnight like I did).
    8. When ready to un-mold, run a knife around the sides to release the cake and carefully remove the pan.  Place on a plate, garnish with berries if desired, and enjoy!


    *Make sure your coconut milk is a brand that is plenty rich and has a lot of cream and not lots of water in it.  I prefer to use Thai Kitchen or So Delicious Culinary coconut milk.  If your can is not 15 oz, use 1 1/2 cups being sure to include all the rich part of the milk.


  • Vegan White Chocolate Strawberry Almond Butter Cups

    Vegan White Chocolate Strawberry Almond Butter Cups

    Berries and white chocolate is a simply heavenly combination!  So thank goodness I am able to make vegan white chocolate at home so I can enjoy it.  I admit, when I went vegan I thought I would not be able to enjoy it again since it has milk a lot of the time, and I don’t eat refined sugars or sketchy ingredients which can be found in a lot of commercial white chocolate even the plant based ones, so it seemed impossible.  But I have found recipes that allow me to make it at home, and tailored them to my tastes and needs and come up with one that I like and don’t feel yucky after eating.  I was craving white chocolate and berries together the other day, and I had just made a batch of strawberry chia jam, so the first thing that popped into my mind was strawberry white chocolate cups.  But that wasn’t decadent enough, I had to add almond butter too to make it even more crave worthy.

    This white chocolate is so good you will want to scrape the bowl clean with your spatula to enjoy every little bit.  The base is a mixture of cacao butter, coconut butter and cashew butter and it is luscious and creamy almost once set!  I sweeten it with a little maple syrup and it is just right. For the jam, like I mentioned I used a strawberry chia jam I had made the day before.  I like it because not only is it delicious but you get the health benefits of the the chia seeds along with your sweet jam!  If you would like to make some for yourself, all you need to do is cook 3 cups strawberries, 2 Tbsp water, 2 Tbsp maple syrup, a pinch sea salt, and 1 Tbsp lemon juice over medium heat in a sauce pan for about 15 minutes until the berries have softened.  Then mash them a little with a fork and add 1/3 cup chia seeds.  Allow to cool and sit for 30 minutes until it thickens. It keeps in the refrigerator for 2 weeks.

    It is so good with the white chocolate and almond butter in these candies let me tell you!  These are simply heavenly. Of course if you have your own favorite strawberry jam you would like to use, (or even another flavor of jam) these would be just as delicious I am sure.

    Vegan White Chocolate Strawberry Almond Butter Cups
    Makes 6 large candies

    Ingredients:

    • 1/4 cup cacao butter (2 oz)
    • 2 Tbsp raw cashew butter
    • 1/4 cup coconut butter
    • 1 tsp pure vanilla extract
    • 2 Tbsp maple syrup (or to taste)
    • 1/8 tsp sea salt
    • 2 Tbsp strawberry jam
    • 2 Tbsp organic almond butter


    Instructions:

    1. Combine cacao butter, cashew butter, vanilla, maple syrup,  and sea salt over a double boiler, and whisk until smooth.  Pour into the bottoms of 6 larger peanut butter cup tins (or molds), then place them in the freezer to set.
    2. Once the bottom chocolate has set, spoon about 1 tsp of the almond butter and then the jam onto the top of the set chocolate, then pour remaining melted chocolate over that.
    3. Place them in the freezer to set, about 15 minutes.
    4. Store in the refrigerator.

  • Vegan PB & J Mug Cakes

    Vegan PB & J Mug Cakes

    It has been pretty much raining here every day for over a week now.  It is a little depressing outside on one hand, and not so motivating to wake up to no sunshine, but on the other hand, everything is looking really green outside and the rain is kind of calming.  I did my first road race of the season, the Foodie 4 Mile run to support the Northeast Minneapolis Farmers Market on Saturday, and I admit I was a little worried about the rain being a downpour during the race.  I mean, I have done races in downpours before but it is not fun when it makes you chafe in places, your shoes are sloshing and you can’t see.  Luckily that didn’t happen.  It was just a nice light calm mist of rain that cooled it down just enough to create the perfect running conditions.  It was really fun, and I ran faster than I thought!  Not only that, I love that it supports something I am passionate about, food.  I love the farmer’s market!  Local food is always the best.

    Anyways, after the race was over it started raining harder and continued all day. Kind of just another continuation of the whole week.  Eric and I ended up going for a walk in the rain in the afternoon, which was calming but I felt so chilly after.  I decided that I needed something comforting and warm for dessert.  Some PB and J cake was what I ended up making.  A simple cake with delicious filling, so no need for frosting, just meant to be enjoyed warm.  I used my usual cake batter for these sweetened with dates, and a little peanut butter added in for richness and it was delicious!  I don’t know if you taste your cake batter before baking it but I always do. And this was yummy even before baking. I made two little cakes, just enough for us to enjoy.  A good sized dallop of peanut butter and jelly in the center before baking.

    They were so delicious!  This is definitely something you need to enjoy warm from the oven. Maybe with some vegan ice cream on top of you have any on hand.  I am always a big fan of anything PB & J and these came together in less than 30 minutes which was a big win.  It was the perfect thing to enjoy after a nice hot bath with lavender and epsom salts, and awesome for a rainy day when in need of good cake.  On a side note about the epsom salts, they are seriously a life saver for any kind of sore muscles and what not.  It helped me get my plantar fasciitis under control, through soaking my feet every day.  So now after a hard effort, I like to soak in them.  It is also a really good way to relax when you add your favorite essential oils.

    Vegan PB & J Mug Cakes
    Makes 4

    Four mugs

    Cakes:

    • 3/4 cup Bob’s Red Mill gluten free all purpose baking flour
    • 3/4 tsp baking soda
    • 1/2 tsp baking powder
    • 1/4 tsp sea salt
    • 3/4 cups packed soft medjool dates, pitted, soaked in water for 30 minutes and 3/4 cup of the water reserved
    • 2 Tbsp organic peanut butter
    • 2 tsp pure vanilla extract
    • 1/2 cup filtered water
    • 1 Tbsp apple cider vinegar


    Filling:

    • 6 Tbsp organic peanut butter
    • 6 Tbsp raspberry jam


    Instructions:

    1. Preheat the oven to 375F degrees and position rack in center of oven. Oil four 2 cup mugs.
    2. Whisk flour, baking powder, baking soda, sea salt in a large bowl to blend well. Place dates, reserved water, peanut butter, water, and vanilla extract into a blender, and blend until smooth, then whisk this blended mixture into the flour mixture until well blended. Whisk in the cider vinegar until bubbles form.
    3. Transfer half of the batter to prepared mugs, then drop 1 1/2 Tbsp jam and peanut butter into the center of each.  Pour the remaining batter over it.
    4. Place in the oven, and bake until tester inserted into center comes out clean, about 20-25 minutes until set and a toothpick inserted into the center comes out almost clean with a few moist crumbs attached.  You don’t want to over-bake.  Let cool until warm and enjoy!


  • Vegan Maple Glazed Bacon Doughnuts

    Vegan Maple Glazed Bacon Doughnuts

    I feel like so many people are obsessed with bacon.  Well, guess what?  I used to be too before I became vegan.  Well vegetarian first so the bacon was long gone by the time I went vegan because it has been a total of about 14 years since I have eaten meat.  I have tried many bacon substitutes, and I have to be honest, I have not cared for most and they were not like bacon.  But the closest thing to bacon I have made is coconut bacon which I recently discovered (finally).  OMG it is sooo good.  Salty, crunchy and smokey just like bacon.  I used it in a caramel corn recipe and it was yummalicious, so I thought to myself, why not add it to maple doughnuts like I see other people doing with regular bacon?  Coconut bacon is after all so much more appealing on a dessert (at least to me).

    So, I baked up some maple cake doughnuts.  I have this lovely doughnut pan I picked up a few years back and I love it!  The batter for these is actually sweetened with dates, so they have sort of a caramel maple flavor that is sooo yummy!  They smelled amazing while baking too.  Sort of like pancakes with the whole maple thing going on.  I love the aroma of maple.  My coworker was baking maple scones the other day and the scent always makes me happy. It reminds me of when my Mom used to make pancakes when I was little. I had to top these off with something delicious so that the bacon would stick to them, so I topped them off with a sweet maple glaze.

    It has a coconut butter base actually and was super simple to make, but tasted so good on the doughnuts, especially once the bacon was added.  These were simply heavenly!  Thank goodness for maple bacon!  If you have never tried it, you simply must!  These would be perfect for baking on a lazy weekend morning!

    Vegan Maple Glazed Bacon Doughnuts
    Makes 6

    One 6 hole doughnut pan

    Doughnuts:

    • 3/4 cup Bob’s Red Mill all purpose gluten free baking flour
    • 3/4 tsp baking soda
    • 1/2 tsp baking powder
    • 1/4 tsp sea salt
    • 3/4 cups packed soft medjool dates, pitted, soaked in water for 30 minutes and 3/4 cup of the water reserved
    • 2 Tbsp raw pecan butter (or raw almond butter)
    • 2 tsp pure vanilla extract
    • 1 tsp maple flavor
    • 1/2 cup filtered water
    • 1 Tbsp apple cider vinegar


    Coconut Bacon:

    • 1 1/2 cups large flake coconut
    • 2 Tbsp tamari
    • 2 Tbsp liquid smoke
    • 1 Tbsp maple syrup


    Glaze:

    • 1/3 cup coconut butter, warmed to liquid
    • 1 ½ Tbsp maple syrup
    • 1 ½ Tbsp filtered water or as needed
    • Pinch sea salt
    • ½ tsp maple extract (optional)


    Instructions:

    1. Preheat the oven to 375F degrees and position rack in center of oven. Oil a 6 hole doughnut pan.
    2. Whisk flour, baking powder, baking soda, sea salt in a large bowl to blend well. Place dates, reserved water, pecan butter, water, maple, and vanilla extract into a blender, and blend until smooth, then whisk this blended mixture into the flour mixture until well blended. Whisk in the cider vinegar until bubbles form.
    3. Transfer batter to prepared pan and bake until tester inserted into center comes out clean, about 15-20 minutes until set and a toothpick inserted into the center comes out almost clean with a few moist crumbs attached.  You don’t want to over-bake.
    4. To make the coconut bacon, preheat the oven to 350F degrees, and line a sheet pan with parchment.
    5. Toss the large flake coconut with the tamari, liquid smoke and maple syrup and spread out on the pan.  Place in the oven and bake for about 12-15 minutes (depending on your oven), keeping a close eye at the end and checking it in the final minutes because it burns fast.  Remove from oven and let cool.
    6. To make the glaze, whisk together all ingredients until smooth (adding more water if too thick, you want it to be pour-able but not too thin).  Spoon over the doughnuts, allowing it to drip down the sides.  Sprinkle with the coconut bacon. Let set until dry (which happens faster if you put them in the refrigerator for 15 minutes).  Enjoy!

  • Blackberry Lime Margarita

    Blackberry Lime Margarita

    Last weekend was pretty warm here.  It kind of came as a shock to the system and I didn’t realize it until I went on a long run and felt pretty overheated after. I guess I am used to it being in the 40’s and 50’s in the morning and not weather that makes me start sweating in the first minute.  But even if it is not perfect running weather, it is perfect patio weather and perfect weather for sipping margaritas.  I had some blackberries left over from my tart I made for Mother’s Day, so I decided that I wanted some blackberry margaritas!  I never got my Cinco de Mayo margarita, so I figured I deserved one, and a good one at that!  I have never been one to enjoy margaritas made with mixes and lots of sugar along with the tequila, instead I love the ones made with actual fruit.

    One of the best margaritas I have ever had, I enjoyed in New Orleans at a Mexican restaurant where they juiced their own fruit and it tasted amazing!  That actually happened to be a carrot margarita and it was honestly the best one I have ever had!  I have made that one at home as well, and I shall have to share it sometime, but for now I am sharing the blackberry because it was just as good.  When I first started making margaritas, I admit they weren’t very balanced and good, but I think I have gotten the hang of it 10 years later.  Partly with the help of my Mom, she is really good at mixing an awesome margarita.

    For these ones, I used just fresh blackberries, lime juice, tequila and a home made vanilla syrup.  It was very refreshing and delicious and I shared some with Eric when he got off work and he was excited about it as well!  This is the perfect drink for when it feels like Summer!  I hope you are all having a wonderful week!

    Blackberry Lime Margarita
    Makes 1

    Ingredients:

    • 6 large ice cubes
    • 4 oz tequila blanco
    • 2 oz blackberry puree
    • 1 oz fresh lime juice
    • 1 1/2 oz vanilla syrup*
    • ice for serving


    Directions:

    1. To make drink, in a martini shaker add the ice, tequila, berries, lime juice, vanilla syrup, and place top on shaker.
    2. Shake until well blended.
    3. Pour the drink through a strainer into the prepared glass (with some ice in it if you prefer your drink on the rocks), and serve!


    *Vanilla syrup

    • 1/4 cup maple syrup
    • 1/4 cup filtered water
    • 1 vanilla bean pod, split lengthwise


    Combine all ingredients in a jar, put the lid on and shake to dissolve syrup. Let sit at least a day to infuse, then strain to vanilla bean pod. Store in the fridge for up to a month.


  • Vegan Italian Lentil Walnut Meatballs

    Vegan Italian Lentil Walnut Meatballs

    When I was little, my Mom made really good meatballs with a red sauce.  It was a recipe from a family friend.  So years ago, she had asked me to make some vegan ones and she ended up liking them even better than this original recipe.  I don’t have that recipe anymore, it was from before I was big into blogging (so not saved anywhere) and they were not gluten free so I would have to tweak them anyway to make them to my liking. So I thought why not make them again, and if they were really good I could share the recipe.  Also I kind of wanted to make something for my Mom that I knew she would like around Mother’s Day but we went out for dinner that day, so I thought I would make it after so she could enjoy them during the week.

    I based this meatball recipe off of my classic meatball recipe that everyone, including meat eaters raves about.  It is just a really good base made from lentils, walnuts and oats for a binder that ends up tasting pretty amazing once finished.  I have had people that were skeptical of vegan meat substitutes try it and say they really liked it!  Which always means a lot to me, it means I did a good job, and maybe they will think about eliminating meat from their diet.  I made a simple Italian sauce for these, and served them with some of my favorite pasta, one made from edamame and mung beans that is gluten free.

    But the important thing was, Mom loved them as well!  They were super delicious.  I was never a big fan of ground beef growing up, so I think if I did a taste test of both I would have picked these as the winner!  I think they beat meat hands down taste wise!  If you are craving meatballs, give these a try!

    Vegan Italian Lentil Walnut Meatballs
    Serves 4

    Meatballs:

    • 2/3 cup uncooked French lentils
    • filtered water
    • 1 tsp olive oil
    • 1 small onion, diced
    • 2 garlic cloves, minced
    • 2 Tbsp tamari or shoyu
    • 1/4 cup organic tomato paste
    • 1 tsp dried oregano
    • 1 tsp dried basil
    • 1 tsp fennel seeds
    • 1/4 tsp sea salt
    • 2 cups chopped walnuts
    • 1 cup gluten free rolled oats


    Sauce:

    • 2 tsp olive oil
    • 1/4 cup chopped onion
    • 2 garlic cloves, minced
    • 1 tsp dried basil
    • 1 tsp dried oregano
    • 1 tsp fennel seeds
    • 1/4 tsp red pepper flakes
    • 1 15 oz can diced tomatoes
    • 1/2 cup tomato paste
    • 3/4 cup filtered water
    • 1/2 tsp sea salt (or to taste)


    Instructions:

    1. To make the meat balls, add the lentils to a pot, and cover them with enough water to have a few inches above the lentils.  Bring to a simmer, and cook for about 40 minutes until the lentils are tender.  Drain, and set aside.
    2. In a pan, heat the olive oil and onions, and cook until the onions are softened and tender, about 5 minutes.
    3. Add the garlic and sautee a minute more until fragrant.
    4. Add to a food processor, along with lentils, and all other meatball ingredients.  Pulse until everything is blended but not completely smooth.
    5. Preheat the oven to 375F degrees.  Roll the meatball mixture into one and a half inch balls, and place them on a lined baking sheet. Place in the oven and bake for 30 minutes or until firm, but still soft in the middle.
    6. Meanwhile, to make the sauce, heat the oil in a non-stick skillet, and add the onions.  Sautee for about 5 minutes until softened, over medium heat, then add the garlic and spices and cook a minute more.  Add the tomatoes, water, and sea salt, and bring to a simmer.  Cook for about 10-15 minutes until the flavors have combined.
    7. When the meatballs have finished cooking, toss them with the sauce, and serve garnished with parsley over pasta!
  • Vegan Blackberry Vanilla Cream Tart

    Vegan Blackberry Vanilla Cream Tart

    My Mom used to make these amazing fruit tarts with a cream cheese filling and fresh fruit topping, usually berries in the Summer.  They were so delicious!  I think that was one of my favorite desserts growing up, and I would never turn one down.  Not that I ever turned down a dessert.  But berries and vanilla cream are my favorite. My Mom was always good at making desserts.  She asked me recently if I have ever made a veganized version of those fruit tarts, and I haven’t so I decided that I needed to make one for Mother’s Day weekend.  Because she loved them as well, and I thought it would be the perfect thing to share.

    She usually used raspberries on hers, or a mix of fruit, but I went for the blackberries because they were on sale for a good price and they looked beautiful!  I knew they would be perfect to top off the tart.  For the filling, I made a vanilla cheesecake cream with a mixture of coconut milk and cashew butter and it was luscious.  Like, you could eat the whole bowl with a spoon if you weren’t careful.  I decided to add a vanilla bean as well, since this was a special occasion.  I love little flecks of vanilla bean in my desserts!  I made a simple no bake coconut oat crust, because I didn’t want to heat up the oven and it was delicious.   Plus, my Mom and I both have a love for oats in recipes.

    Once it was all assembled, it was simply heavenly!  The perfect Mother’s Day dessert, and since Summer is coming, it is the season to make it!  No oven required is a plus, and it is pretty easy to make.  My Mom loved it as well, which is what really mattered this time.  I hope you all had a wonderful Mother’s Day!

    Vegan Blackberry Vanilla Cream Tart 
    Makes one 8 inch tart

    1 8 inch removable bottom tart pan

    Crust:

    • 3/4 cup finely shredded dried coconut
    • 3/4 cup gluten free organic rolled oats
    • 2 Tbsp organic almond butter
    • 1 cup soft pitted medjool dates (if they are not soft, soak them 30 minutes and drain well before using)
    • 1/4 tsp sea salt
    • filtered water as needed

    Filling:

    • 1 1 15 oz can full fat organic coconut milk
    • 1/2 cup raw cashew butter
    • 1/3 cup maple syrup
    • seeds of one vanilla bean, or 2 tsp pure vanilla extract
    • 3/4 cup coconut butter (NOT oil), warmed to liquid

    For assembly:

    • 2 cups fresh blackberries


    Instructions:

    1. For the crust, combine all ingredients in the food processor until finely chopped and starting to hold together when squeezed (if it doesn’t you may need to add a little filtered water 1 Tbsp at a time).
    2. Press the mixture into a 8 inch removable bottom tart pan greased with coconut oil.
    3. For the filling, combine all ingredients in a high speed blender until smooth.
    4. Pour the filling over the crust and spread evenly.
    5. Place in the refrigerator to chill for about 30 minutes, then top with the fresh blackberries and place back in the refrigerator to firm up completely (about 2-3 hours depending on how warm it has gotten).  This works if you let it sit overnight in the refrigerator as well, just be sure to cover it so it doesn’t dry out.
    6. Enjoy!
    7. Tart keeps refrigerated for 1 week in a container.


  • Vegan Snickers Swirl Brownies

    Vegan Snickers Swirl Brownies

    I have been wanting to make brownies for a couple of weeks now, and I finally got around to it on Wednesday.  Maybe I just made it happen because I was day dreaming about them on my 7 mile run that morning.  Yes, I sometimes dream about recipes and come up with ideas when I am running.  It is a great time to think since I am just in my own head without other people talking to me, and it helps to distract from things like feeling fatigued for that middle mile or that my hamstring is angry. I decided that I wanted snickers brownies.  I have never made them before, and I knew they would be good.  I loved snickers when I was a kid, and that is what I looked for in my Halloween candy every year. Since I am a vegan now as an adult though, I usually make my own.

    I did not just cut up snickers bars and stir them into my usual brownies.  I made the brownies into sort of swirly snickers.  I made a luscious cheesecake type filling that served as the nougat part of the snickers, and it was so tasty even before I baked them.  It reminded me of a raw cheesecake filling and tasted just like I remember the nougat on a snickers.  I made a date caramel to swirl into these as well, and as always I couldn’t stop tasting that because it is super addictive.  I swirled those two fillings into the rich batter, and topped it all off with some peanuts and chocolate chips.  It was a lovely sight.

    Even more so when it came out of the oven and it was all set up and smelling amazing.  The sad part was I had to wait overnight for these to cool because I baked them in the evening after work and I wanted them to have clean edges when I cut them.  But they were well worth the wait.  So rich and delicious, I have a feeling these would win over any omnivore you are looking to convince that the vegan lifestyle doesn’t mean deprivation.  These were simply heavenly!  If you are in the mood for something  chocolaty and of the indulgent nature, give these a try!

    Vegan Snickers Swirl Brownies
    Makes 16

    Caramel:

    • 1/2 cup soft medjool dates, pitted (if they are not soft, soak them in water and drain well first)
    • 2 Tbsp organic peanut butter
    • 1 Tbsp maple syrup
    • 1/8 tsp sea salt
    • 1 tsp pure vanilla extract
    • 1/4 cup filtered water (or as needed)


    Swirl:

    • 3/4 cup thick coconut milk (from the top of a chilled can)
    • 1/2 cup cashew butter (or almond butter will also work here)
    • 2 Tbsp maple syrup
    • 1/8 tsp sea salt
    • 1 tsp pure vanilla extract
    • 1 tsp maple extract (optional)
    • 2 Tbsp arrowroot starch or cornstarch


    Brownies:

    • 1/2 cup avocado oil
    • 1/4 cup organic peanut butter
    • 1 cup coconut sugar
    • 1/4 cup plus 2 Tbsp reduced aquafaba or 2 flax eggs*
    • 2 teaspoon vanilla extract
    • 1 cup Bob’s Red Mill gluten free all-purpose flour
    • 1/2 cup cacao powder or unsweetened cocoa powder
    • 1/4 teaspoon sea salt
    • ½ cup vegan chocolate chips
    • 1/2 cup organic roasted peanuts


    Directions:

    1. To make the caramel, combine all ingredients in a blender and blend until smooth (adding a little water if necessary, it should be the consistency of pourable but still thick caramel). Pour into a bowl and set aside.
    2. To make the swirl, combine all ingredients in a blender and blend until smooth. Pour into a bowl and set aside.
      To make the brownies, pre-heat the oven to 350F degrees.
    3. Whisk together the sugar, oil and peanut butter until well combined and the sugar is starting to break down. Add the aquafaba and vanilla and beat until smooth. Add the flour, cacao powder and sea salt and beat until smooth.
    4. Scrape the batter into a greased 8×8 inch pan, then drop the swirl and caramel over it in 2 Tbsp amounts, and swirl it with a knife.
    5. Sprinkle with chocolate chips and peanuts. Place in the oven, and Bake for about 30-35 minutes or until set (but do not over bake).
    6. Let cool before cutting into bars.

    *The aquafaba is the liquid from cooked or canned chickpeas. You want it to be thick like egg whites. If you are wanting to make flax eggs, simply mix together 2 Tbsp ground flax seeds, and 6 Tbsp filtered water and let sit in the refrigerator for 15 minutes before using in the recipe.

  • Home Made Mother’s Day Recipes

    Home Made Mother’s Day Recipes

    Mother’s Day is fast approaching, so if you haven’t thought about it yet, time to get on figuring out how you are going to make Mom feel special.  Of course you can buy things, but sometimes it is nice to show Mom that you care by making home made things as well.  At least, I always find thoughtful home made gifts more special.  Today I am sharing with you the recipes I think would be perfect for making for Mother’s Day.  Things like chocolates for the Mom who loves chocolate.  They are pretty simple to make, but of course they are more special than store bought if you have the time to make them.  Also, home made body care items.  Any woman can appreciate those, products to make them feel pampered, and even better that you made them yourself!  I also have some brunch type sweets, in case you are serving Mom breakfast in bed, and a few other dessert recipes that are approved by my Mom, or would be special to serve to yours.  Or…maybe you are a Mom and maybe you get some alone time to do whatever you want and you want to make something yummy. Whatever the case, I hope you find something you can make Mom happy with on this list.  Happy early Mother’s Day to all the Mom’s out there!

    0191

    Strawberry Lavender Lemonade

    0721

    Berry Rose Sangria

    Matcha White Chocolates 3

    Vegan Matcha White Chocolates

    hazelnut chocolate eggs

    Hazelnut Chocolate Truffles

    Marzipan Truffles 2

    Raw Matcha and Rose Marzipan Truffles

    Almond Joy Bark 1.

    Raw Almond Joy Bark


    Raw Almond Butter Stuffed Chocolate Figs

    Dark Chocolate Sea Salt Popcorn 2

    Vegan Dark Chocolate Sea Salt Popcorn

    Pina-Colada-Waffles

    Vegan Pina Colada Waffles

    Vegan Caramel Stuffed Chocolate Chip Cookies 1

    Vegan Salted Caramel Stuffed Chocolate Chip Cookies

    Vegan Citrus Margarita Pancakes

    vegan cinnamon roll scones 1

    Vegan Cinnamon Roll Scones

    Pink Raspberry Heart Scones

    strawberry cheesecake 1

    Raw Strawberry White Chocolate Cheesecake

    Vegan Chocolate Almond Raspberry Mousse Tart

    Vegan Key Lime Cheesecake

    Vegan Dark Chocolate Red Wine Cake

    Caramel Cake 3

    Mini Vegan Caramel Cakes

    Vegan Flourless Chocolate Cake

    Vegan Chocolate Carrot Cake

    IMG_1621

    Vegan Molten Dark Chocolate Cakes


    Body Frosting 1

    Vanilla Bean Rose Coconut Body Frosting

    Green Tea Mint Scrub 3

    Green Tea Mint Scrub

    Lip-2BBalm-2B51

    Home Made Flavored Lip Balms


  • Vegan Maple Sandies

    Vegan Maple Sandies

    Before I discovered coconut sugar, there was a time I bought loads and loads of maple sugar for all of my desserts.  It is a wonderful substitute for regular sugar because it has a similar texture.  But of course it has that maple aroma, which I never minded since I love it!  But then I discovered coconut sugar and since it was more wallet friendly than the maple, it became my primary granulated baking sugar.  Now and then I still buy the maple, if I have something special in mind for it, or want to add more maple flavor without extra moisture.  If you want just a smaller amount, it can usually be found in the bulk section at your local health food store (that is where I find it).  This past weekend I had something in mind to use it in.  I have been wanting to make buttery rich little maple cookies for a while now and I was finally going to get around to it!

    The recipe I came up with to make these buttery and rich like I had imagined was based off of a shortbread cookie I used to make often.  These behave differently though, because I use coconut oil as the fat source.  The dough tastes wonderful I should note, like maple sugar cookies.  They made my kitchen smell wonderful while baking as well!  Whenever I am in a bad mood I like to bake.  That aroma alone makes me feel better.  Not that I was in a bad mood when I made these, actually I was in a good mood and feeling very motivated to get a lot done.

    They baked up nicely and I decided to drizzle them with sort of a quick maple caramel glaze.  Just to make them even more tasty and a bit prettier.  OMG were they ever delicious!  Melt in your mouth buttery little morsels , scented with beautiful maple, and the caramel glaze was the perfect topper!  I called them sandies because of the texture. The aroma of maple reminds me of lazy weekends, and pancake breakfasts when I was little, or going to the bakery with my Mom and getting maple glazed long john doughnuts.  All good stuff.  If you are a maple lover too, give these a try!

    Vegan Maple Sandies 
    Makes about 28 cookies

    Ingredients:

    • 1 1/2 cups Bob’s Red Mill gluten free all purpose baking flour
    • 1/2 tsp baking soda
    • 1/2 cup plus 3 Tbsp coconut oil, warmed to liquid
    • 2/3 cup plus 1/4 cup maple sugar or coconut sugar
    • 1 Tbsp pure vanilla extract
    • 1 tsp maple flavor (optional)
    • 1/4 tsp sea salt


    Maple Glaze:

    • 1 Tbsp raw pecan butter
    • 1 Tbsp coconut oil, softened
    • 2 tsp maple syrup
    • pinch sea salt


    Instructions:

    1. Preheat oven to 350F degrees.
    2. In a small bowl, whisk together flour and baking soda.
    3. In a large bowl, mix together coconut oil, maple sugar, vanilla, maple, and salts until blended completely.
    4. Mix in dry ingredients until well combined.
    5. Roll the dough into little one and a half inch balls, and place on a parchment lined sheet pan.  Press them down slightly.
    6. Place in the oven, and bake in the oven for 13-15 minutes or until set and starting to brown just at the edges.
    7. Allow to cool completely.
    8. Meanwhile, mix together glaze ingredients until smooth in a small bowl, then place in the refrigerator until it thickens up slightly, about 15 minutes.
    9. Drizzle the glaze over the cookies, then place them in the freezer for about 10 minutes to set.  Enjoy!
  • Vegan Turtle Chocolate Mousse Tart

    Vegan Turtle Chocolate Mousse Tart

    It has been absolutely gorgeous here in Minnesota lately!  The flowers are coming out full force with the lilacs and crab apple trees in bloom, and smelling heavenly, and the trees are looking full again.  I have been spending a lot of time outside, trying to soak up the sun and fresh air so I haven’t been making many recipes that are too complicated. Because you have to enjoy life, you know?  I have been making a lot of no-bake desserts also because the heating up the oven every night season is coming to an end.  My latest creation, a turtle mousse tart.  My Mom recently told me I should try to recreate a favorite mousse recipe that we used to make together when I was younger, so I went for it.

    The original recipe called for heavy cream and dark chocolate and that was it.  I sometimes used to add a little bourbon to it and that was amazing.  You just whipped the chilled cream, then slowly poured the melted chocolate into it to create the most luscious tasting mousse ever.  The veganized version I came up with is just as simple.  I whipped some coconut milk and maple syrup together in the food processor until smooth, then added my favorite vegan dark chocolate melted, blended and voila!  Deliciousness.   But I thought it deserved to be served in an even more grand fashion so I didn’t stop there.  I decided to make it into a tart.

    My Mom made tarts a lot when I was a kid, they were one of her favorite desserts, so I have grown to love them too.  It wasn’t going to just be a plain mousse tart though, as I mentioned earlier it was a turtle mousse tart.  Meaning gooey caramel and pecans joined the party as well.  I gave it a simple chocolate crust made from things I had on hand and it was the perfect base for the sweet dessert.  This tart was sooo good!  This is the type of thing you want to serve to guests to impress them.  The filling was luscious and decadent, the gooey sweet caramel the perfect topper and the pecans gave it the perfect amount of crunch.  I think this would make a wonderful Mother’s Day dessert, if your Mom is a chocolate lover!

    Vegan Turtle Chocolate Mousse Tart 
    Makes one 8 inch tart

    1 8 inch removable bottom tart pan

    Crust:

    • 3/4 cup finely shredded dried coconut
    • 3/4 cup gluten free organic rolled oats
    • 1/4 cup raw cacao powder or unsweetened cocoa powder
    • 2 Tbsp organic almond butter
    • 1 cup soft pitted medjool dates (if they are not soft, soak them 30 minutes and drain well before using)
    • 1/4 tsp sea salt
    • filtered water as needed


    Caramel:

    • 1/4 cup plus 2 Tbsp raw pecan butter or almond butter*
    • 2 Tbsp maple syrup
    • 1 tsp pure vanilla extract
    • 1/8 tsp sea salt
    • 1 Tbsp raw cacao powder or unsweetened cocoa powder
    • 1 Tbsp filtered water


    Filling:

    • 1 15 oz can full fat organic coconut milk, chilled
    • 2 cups vegan dark chocolate chips
    • 3 Tbsp maple syrup


    For assembly:

    • 3/4 cup toasted pecans


    Instructions:

    1. For the crust, combine all ingredients in the food processor until finely chopped and starting to hold together when squeezed (if it doesn’t you may need to add a little filtered water 1 Tbsp at a time).
    2. Press the mixture into a 8 inch removable bottom tart pan greased with coconut oil.
    3. For the caramel, combine the pecan butter, maple syrup, sea salt, and vanilla in a bowl until well blended.  Remove 2 Tbsp from the bowl to a smaller bowl, and whisk the cocoa powder and water together with that smaller bowl.  Set both aside.
    4. For the filling, melt the chocolate in the top of a double boiler, then pour into a glass measuring cup with a spout.
    5. Place the coconut milk and maple syrup in a food processor and blend until smooth.
    6. Turn the food processor on, and with the motor running, slowly pour the chocolate into it and blend until uniform in color.
    7. Pour half of the filling over the crust and spread evenly, then drop some of the plain caramel by the Tbsp over it and swirl with a knife. Pour the remaining mousse filling over that, and spread evenly to the edges, then scatter the pecans over it.  Drizzle with both the plain caramel and the chocolate caramel.  Place in the freezer to firm up (about 1-2 hours).
    8. Enjoy!
    9. Tart keeps refrigerated for 1 week in a container.


    *Note: Nut butters may vary in texture, some are more runny.  So, if yours is a little too stiff, add a little water to the mixture to loosen it up and make it pourable.


  • Vegan Toasted Almond Raspberry Ripple Chocolate Chip Ice Cream

    Vegan Toasted Almond Raspberry Ripple Chocolate Chip Ice Cream

    When I was little, I always loved going to ice cream places with many flavors.  You know, the shops that sold purely ice cream, and had at least 20-30 flavors at a time to choose from.  It was always exciting to eyeball all of them, and imagine what they would taste like.  Maybe asking for a few samples before buying if I wasn’t feeling too shy that day. One of my favorite places was up in northern Minnesota in a small town, and they had some super delicious flavors like blueberry cheesecake, blue moon, and turtle.  Which maybe don’t sound all that unusual now, but they were back in the 90s to my 10 year old self!  I had never heard of half the flavors let alone tried them.  Probably the most unusual ice cream I have ever had though was at Sebastian Joe’s ice cream in Minneapolis about 6 years ago before I went vegan, it was roasted garlic, and it was actually good.  Now, I like to dream up my own combinations of flavors to make.  I now have made at least 100 different kinds.  No roasted garlic, but I have made sweet corn, tomato, and habanero pineapple. Every now and then I just like some good home made ice cream.  The best part is you can make exactly what you are craving as long as you have the ingredients on hand.

    This week, it was Toasted Almond Raspberry Ripple Chocolate Chip.  I love adding nut butter to ice cream bases, it makes them so silky smooth.  What inspired this ice cream actually was one I used to enjoy with my Mom when I was little, a raspberry ripple chocolate chunk.  I just decided to pair the almonds with it because almonds go so good with raspberries and chocolate chips.  The base was super delicious, and I knew it would be wonderful once frozen and the add ins were incorporated.  Yes, it is good to have simple ice cream with no add ins sometimes, like if you are serving it with pie, but I like goodies in my ice cream if I am going to be eating it plain.

    This ice cream was simply heavenly!  The base was smooth, sweet and creamy a perfect balance with the slightly tart jammy raspberries and intense dark chocolate.  I added in some crunchy almonds as well for texture.  This is sort of like a sundae, but you don’t need to top if if you don’t want to because it is all there!  If you are in the mood for some ice cream, give this a try!  If you don’t have an ice cream maker, not to worry, I have included instructions to make this without one.

    Vegan Toasted Almond Raspberry Ripple Chocolate Chip Ice Cream
    Makes about 3 1/2 cups

    Ingredients:

    Ice Cream Base:

    • 1 15 oz can full fat organic coconut milk
    • 1/2 cup roasted almond butter
    • 1/3 cup soft, pitted medjool dates (if they are not soft, soak them in filtered water for 30 minutes before using)
    • 1/4 tsp sea salt
    • 1 tsp pure vanilla extract


    Raspberry Swirl:

    • 2 cups organic raspberries
    • 3 Tbsp maple syrup
    • pinch sea salt


    For assembly:

    • 3/4 cup chopped or sliced toasted almonds
    • 3/4 cup vegan chocolate chips


    Directions:

    1. Combine coconut milk, almond butter, dates, and sea salt in a blender and blend until smooth. Pour into an ice cream maker and process according to directions. Alternatively, if you do not have an ice cream maker, pour it into a bowl, and whisk every half hour until it is to the consistency of a thick malt.
    2. Meanwhile, mash the raspberries in a glass measuring cup with a fork, along with the maple syrup and sea salt until they are the consistency of jam.
    3. Pour 1/3 of the ice cream base into a freezer safe container with a lid then drop some of the swirl over it and sprinkle with the toasted almonds and chocolate chips.  Repeat with another layer of ice cream, swirl and almonds, then another.  Swirl with a knife to marble the fudge (just a few times, not too much).  Place in the freezer with the lid on, and continue to freeze until firm enough to scoop (at least 4 hours or overnight). If it becomes too firm, simply let it sit out for 15 minutes before serving.


  • Vegan Chocolate Chip Cookie Dough Cake

    Vegan Chocolate Chip Cookie Dough Cake

    I am obsessed with anything chocolate chip cookies dough.  This all stems from when I was little, in the kitchen with my Grandma when she was making chocolate chip cookies.  I would always steal the dough when she wasn’t looking.  But she knew, and always warned me not to eat too much because I didn’t want to get a tummy ache.  But I never did.  Sure, baked cookies warm out of the oven are good, but the cookie dough is even better in my opinion.  I think it is a texture thing.  It is more creamy and satisfying.  So, now as an adult, I like to incorporate cookie dough into anything I can.  I decided last weekend that I needed a chocolate chip cookie dough cake.  I have made a cookie dough frosting before and it was amazing, but I wanted the cake to have the flavors of cookies too.

    So basically, cookie flavored cake, and cookie dough frosting.  Sounded good to me! For the cake, I used my usual date sweetened recipe, because dates give a sort of caramel flavor much like you would get from brown sugar in cookies.  Not only that, I love to sweeten things with dates!  They add moisture to baked goods, and they are about as natural as you can get when it comes to sweeteners.  The cake batter tasted wonderful, and even better once the chocolate chips were stirred in.  My house actually smelled like chocolate chip cookies while it was baking!

    For the frosting, I used a coconut milk base made rich with cashew butter and pecan butter for a thicker more creamy texture. I sweetened this with dates as well to give it that caramel brown sugar sort of flavor.  This stuff was crave worthy!  And, even more so when it was added to the cake!   This cake is a chocolate chip cookie/cookie dough lover’s dream!  Soft, sweet cookie flavored cake, studded with dark chocolate chips and luscious creamy frosting reminiscent of cookie dough, chips included as well!  This was sooo good!  If you love chocolate chip cookie dough as much as I do, put this cake on your to make list!

    Vegan Chocolate Chip Cookie Dough Cake
    Makes 1 6 inch 2 layer cake

    2 6 inch cake pans

    Cake:

    • 1 1/2 cups Bob’s Red Mill gluten free all purpose flour
    • 1 1/2 tsp baking soda
    • 1 tsp baking powder
    • 1/2 tsp sea salt
    • 1 1/2 cups packed soft medjool dates, pitted, soaked in water for 30 minutes and 3/4 cup of the water reserved
    • 1/4 cup raw pecan butter (or raw almond butter)
    • 1 Tbsp pure vanilla extract
    • 1 cup filtered water
    • 2 Tbsp apple cider vinegar
    • 1/2 cup vegan chocolate chips


    Frosting:

    • 1 15 oz can organic full fat coconut milk*
    • 1/2 cup raw cashew butter (or raw almond butter)
    • 1/4 cup raw pecan butter
    • 1/2 cup pitted medjool dates
    • 1/4 tsp sea salt
    • 2 tsp pure vanilla extract
    • 3/4 cups coconut butter (NOT OIL), warmed to liquid
    • 1 cup vegan chopped chocolate or chocolate chips plus more for serving


    Instructions:

    1. Preheat the oven to 375F degrees and position rack in center of oven. Line the bottoms of two six-inch-diameter cake pans with 2-inch-high sides with parchment paper. Coat parchment paper and pan sides lightly with oil so that the cake doesn’t stick.
    2. Whisk flour, baking powder, baking soda, sea salt in a large bowl to blend well. Place dates, reserved water, pecan butter, water, and vanilla extract into a blender, and blend until smooth, then whisk this blended mixture into the flour mixture until well blended. Whisk in the cider vinegar until bubbles form, and fold in chocolate chips.
    3. Transfer cake batter to prepared pans and bake cakes until tester inserted into center comes out clean, about 25-30 minutes until set and a toothpick inserted into the center comes out almost clean with a few moist crumbs attached.  You don’t want to over-bake.
    4. Cool cakes completely in pan on rack, about 1 hour. Cut around sides of pan to loosen. Turn cakes out onto platter; peel off parchment paper.
    5. Meanwhile, to make the frosting, combine all ingredients in a high speed blender or food processor and blend until completely smooth (there should be no chunks, if there are continue to blend until it warms up and the coconut butter is lump free).
    6. Pour the frosting into a bowl and let sit in the freezer until the consistency of whipped cream, whisking every 15 minutes (this may take anywhere from 15 minutes to hour to an hour depending on how warm it has gotten and which appliance you used). Remove 3/4 cup of the frosting and stir in the chocolate chips. Keep the other frosting plain.
      To assemble, place one cake layer on a plate, and spread the chocolate chip frosting over it. Place the other cake layer over that, and spread the rest of the plain frosting over the top and down the sides of the cake. Sprinkle more chocolate chips over the cake, and serve!


    *For the coconut milk, be sure to use a brand that is plenty thick, not one that is mostly water, or you will not get the same results with the consistency.  Thai Kitchen Organic  and So Delicious Original Culinary always turn out good in my recipes. If using the So delicious for this recipe, just use 15 oz (since it does not come in cans).


  • Thai Red Curry Noodles

    Thai Red Curry Noodles

    We sell vegan Thai peanut noodles at my work, and they just seem to fly off the shelf!  I feel like we are always making them.  For good reason, what’s not to like about noodles in a creamy savory peanut butter sauce?!  Well, I have made similar ones at home for a while and they are always delicious.  Not only that, wallet friendly, and super fast to make as well!  In 20 minutes, you can be enjoying a comfort food dinner! Noodles are comforting, at least to me.  I recently made a variation on my peanut pasta, one using Thai red curry paste, and it was so good I had to share the recipe with you all.

    For most of my pasta recipes I use a bean based pasta because not only it it gluten free, but packs protein as well, so I don’t have to worry about adding another protein source to the recipe.  My favorite is either a mung bean and edamame fettuccine or an edamame spaghetti. In this case I used the spaghetti because it was what I happened to have on hand.  That is usually how I cook, I look in the pantry and the fridge and figure out what would be good together!  For the sauce, I used a silky almond butter.  There used to be a raw pad thai recipe that I made, and the dressing was almond butter based and it was sooo good!  That is how I knew this would be too!

    The sauce is pretty simple, just the nut butter, tamari, Thai red curry paste, water and garlic.  Just whisk together and voila!  A rich and delicious sauce!  It is also good on tofu by the way, which is how I first discovered it a few weeks ago when I was experimenting. Just toss the cooked pasta with some veggies, and this sauce and dinner is ready!  It is perfect for a weeknight when you don’t want to mess with making anything time consuming or complicated, and it is satisfying.  Bookmark this for next time you need a quick and delicious dinner!  Or, if you are just making it for yourself like I did, save the other half for lunch the next day.  It is good chilled as well as warm.

    Thai Red Curry Noodles
    Serves 2

    Ingredients:


    Sauce:

    • 1/2 cup almond butter
    • 1 Tbsp Thai red curry paste
    • 1 Tbsp tamari
    • 1/3 cup filtered water (or as needed)
    • 1 garlic clove, minced


    Instructions:

    1. Cook the pasta according to package directions.
    2. Meanwhile, in a bowl combine the veggies, and when the pasta is done cooking add that as well.
    3. Whisk together the sauce ingredients (if you want it thinner add a little more water), then toss with the pasta and veggies.
    4. Enjoy!
  • Vegan Maple Bacon Caramel Corn with Dark Chocolate Drizzle

    Vegan Maple Bacon Caramel Corn with Dark Chocolate Drizzle

    Back in the day, way before I went vegan I was a huge bacon eater.  Saturday mornings at Grandma’s house always involved bacon, the aroma filling the whole house as it cooked.  I especially liked it when she made Denver sandwiches with it.  And, when I went out to eat at a local pancake restaurant with my Mom I would always order bacon alongside my short stack. As if the pancakes weren’t enough.  I had to have that  crunchy salty crispy smoky goodness on the side.  I wasn’t a stranger to bacon cheeseburgers either.  A Wendy’s jr. bacon cheeseburger was at the top of my list when I was 16.  That all changed though when I went vegetarian in 2003 (I went full vegan in 2012), no more bacon.  It makes me really sad to think about the lives that pigs who are raised for food live, and my rule is if I wouldn’t want something done to me or my family I don’t do it to others.  Including animals.  Even if it is indirect, like the farm is killing the bacon and people just consume it.  You are still creating a demand for this product.  People can totally live without real bacon.  I have done so for 14 years, and I have not really missed it.  Eating animal flesh grosses me out. If there was something I missed about it, it was definitely not the fact that it was animal.  It was the flavor, texture and aroma.  All of which can be recreated in vegan form. I have made tempeh bacon, and attempted eggplant bacon.  But surprisingly not coconut bacon which I had always wanted to try.

    Well, I was browsing Pinterest and I saw some maple bacon caramel corn.  It was made with real bacon, and I said to myself.  That would be really good if it were vegan. I thought coconut bacon might be perfect for using in a vegan version too, so I finally threw some together.  I looked up a few recipes, then winged it with amounts of the ingredients I thought would work, and it turned out amazing!  The secret to making it taste like bacon is salty tamari, and smokey liquid smoke.  My house smelled like bacon as it was cooking.  Only 15 minutes and you can be enjoying vegan bacon deliciousness!  I made a vegan maple caramel corn with my classic caramel corn recipe and the bacon was a perfect addition.  This caramel corn doesn’t really require any cooking to make the caramel, it is sort of a faux quick caramel you just have to whisk together and it is super delicious.

    It wasn’t enough to just leave it like that though, as good as it already was.  I decided to drizzle it with dark chocolate too to make it even more heavenly.  I think any vegan or non-vegan would agree that this is some pure delicious goodness!  I will just say that about 1/4 of the tray was gone before I even got to taking photos.  If you are vegan and craving the flavors of bacon, I encourage you to try this.  I think this popcorn would cure most cravings.  It has it all.  Crunchy, salty, sweet, and chocolate all in one.

    Vegan Maple Bacon Caramel Corn with Dark Chocolate Drizzle
    Makes 8 cups

    Coconut Bacon:

    • 1 1/2 cups large flake coconut
    • 2 Tbsp tamari
    • 2 Tbsp liquid smoke
    • 1 Tbsp maple syrup


    Popcorn:

    • 1/3 cup maple syrup
    • 1/3 cup coconut butter, warmed to liquid
    • 1/3 cup pecan butter (or almond butter)
    • 1/2 tsp sea salt
    • 1 tsp pure vanilla extract
    • 1 tsp maple flavor (optional)
    • 8 cups plain organic popped corn
    • 3/4 cup vegan dark chocolate chips


    Instructions:

    1. To make the coconut bacon, preheat the oven to 350F degrees, and line a sheet pan with parchment.
    2. Toss the large flake coconut with the tamari, liquid smoke and maple syrup and spread out on the pan.  Place in the oven and bake for about 12-15 minutes (depending on your oven), keeping a close eye at the end and checking it in the final minutes because it burns fast.  Remove from oven and let cool.
    3. When the bacon has cooled, to make the popcorn, in a glass measuring cup (or bowl) whisk together the maple syrup, coconut butter, pecan butter, sea salt and maple, vanilla until well blended. Pour over the popcorn in a large bowl, along with coconut bacon and mix well. Spread out onto a lined sheet pan, and place in the freezer until it is hard.
    4. Meanwhile, melt the chocolate chips in the top of a double boiler.  Once melted, drizzle over the popcorn.  Place back in the freezer until the chocolate has hardened.  Enjoy!