Author: Amy Lyons O’Neil

  • Vegan Blueberry Lemon Truffles  

    Vegan Blueberry Lemon Truffles  

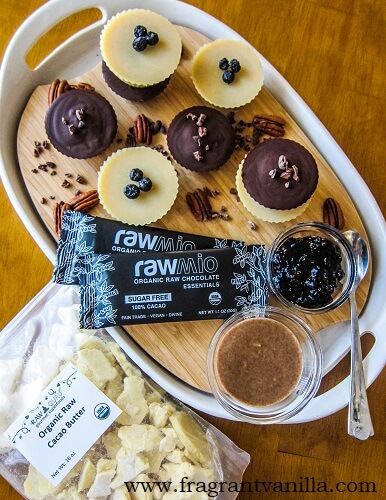
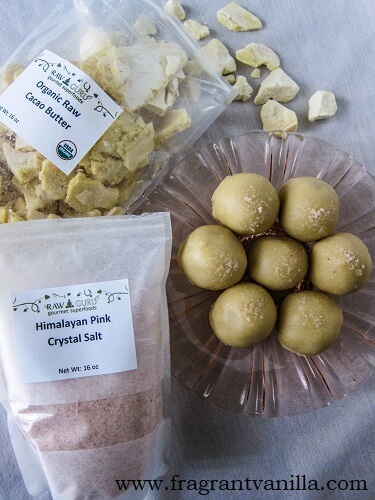
    Since finding a lot of extra cacao butter in my cupboard last month (3 lbs), and being sent another lb by Raw Guru I have been making a lot of chocolate and candy recipes.  I hope you all don’t mind.  I know I certainly don’t as I do enjoy eating them.  I went with peanut butter last time, so I figured something fruity would be good this week.  I wanted something Summery and refreshing, so I went with blueberry lemon truffles. I have always loved berries and citrus in truffles.  When I was little, my Grandma would always give me a box of truffles for each Holiday.  It was a game figuring out what each one was, since sometimes they were not labeled.  But I always considered it a win if I got a chocolate or caramel filled one, or anything berry cream flavored, lemon or lime.  So now as an adult, these are the candies that I recreate the most.

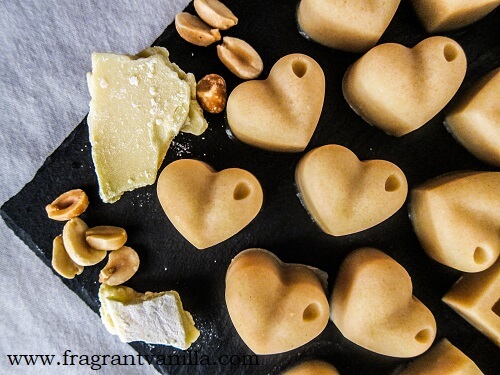
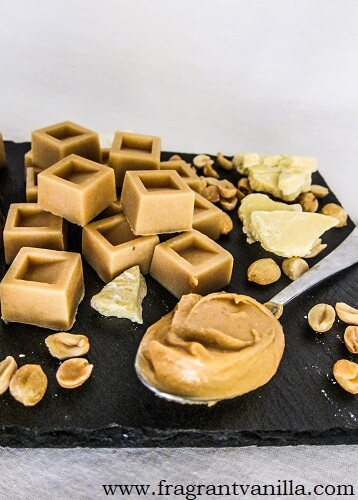
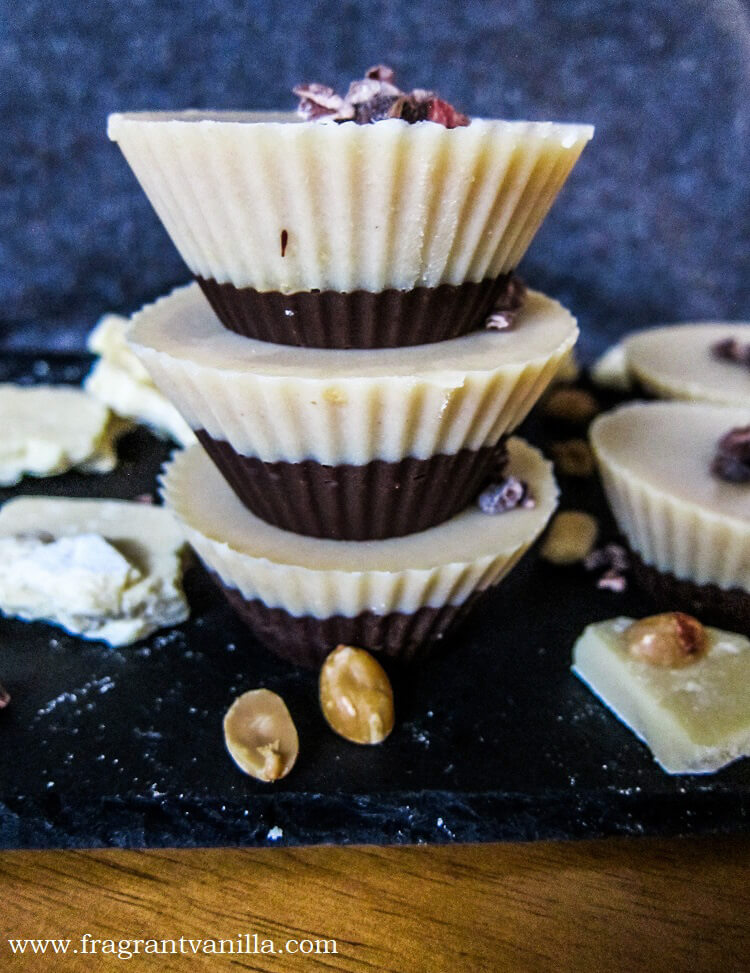
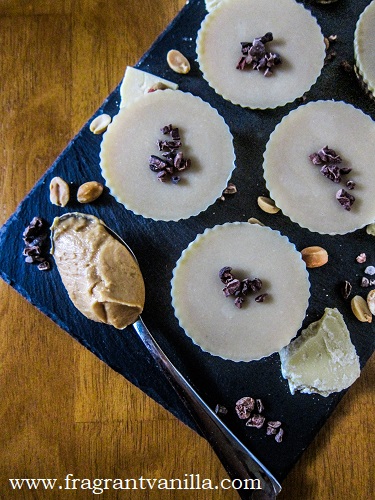
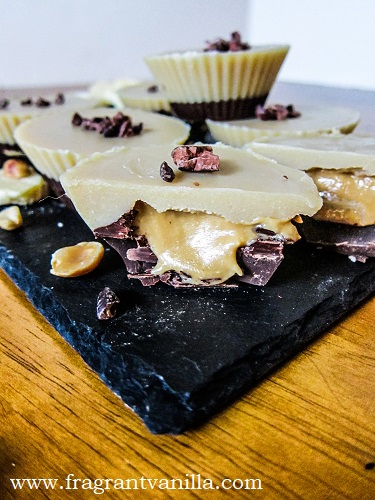
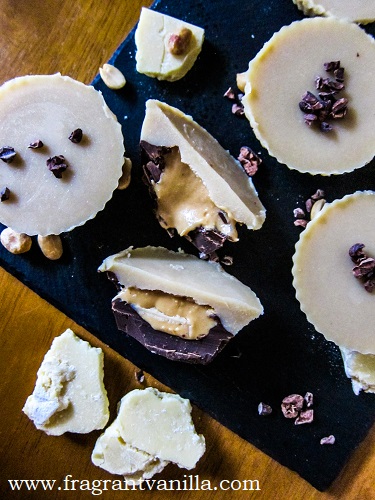
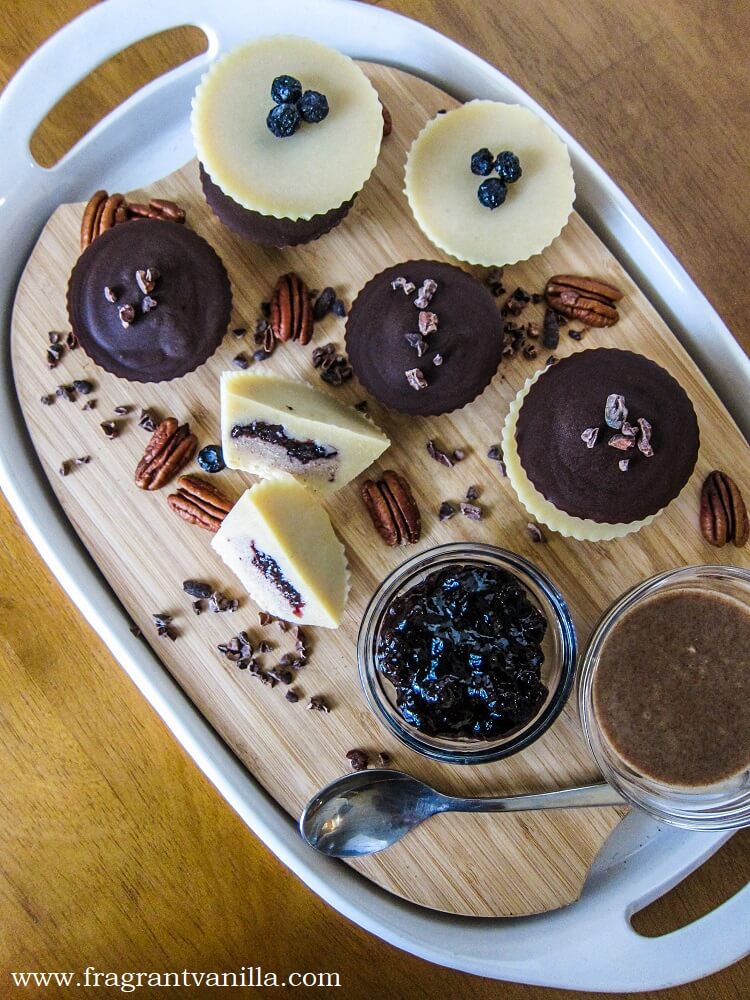
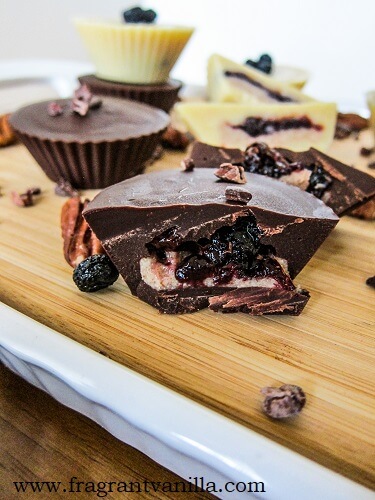
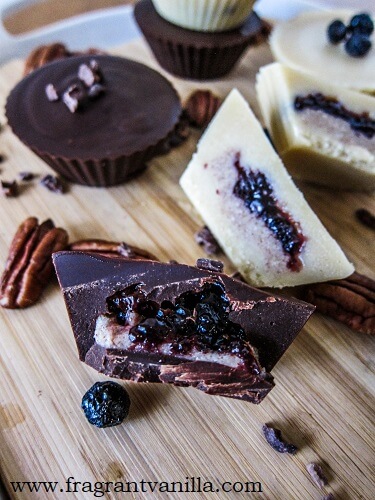
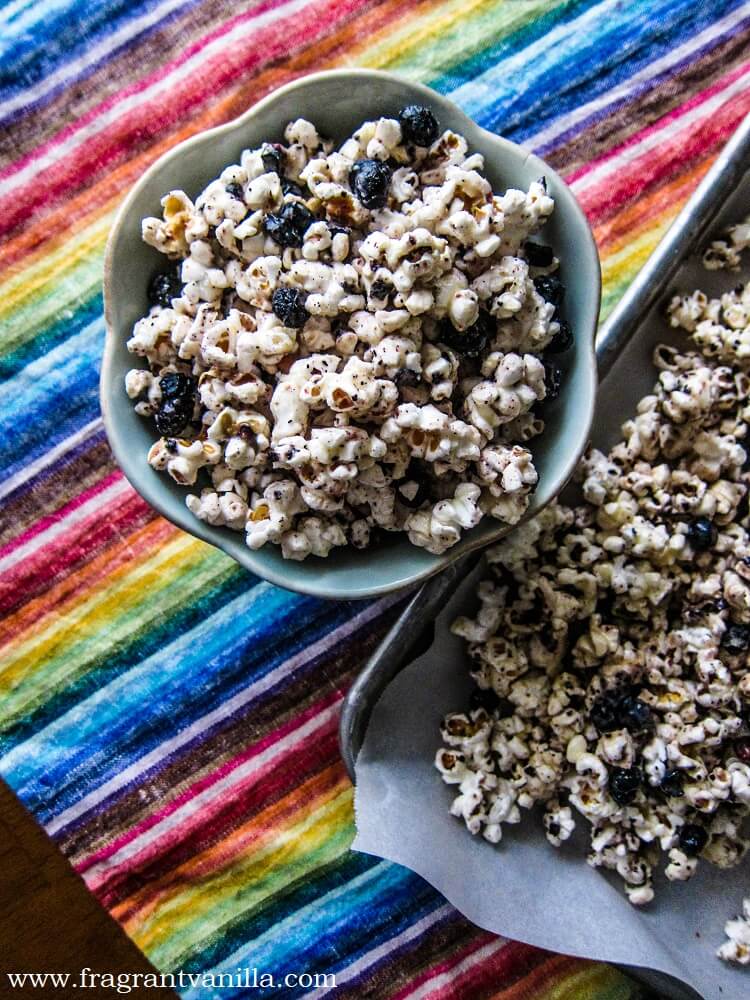
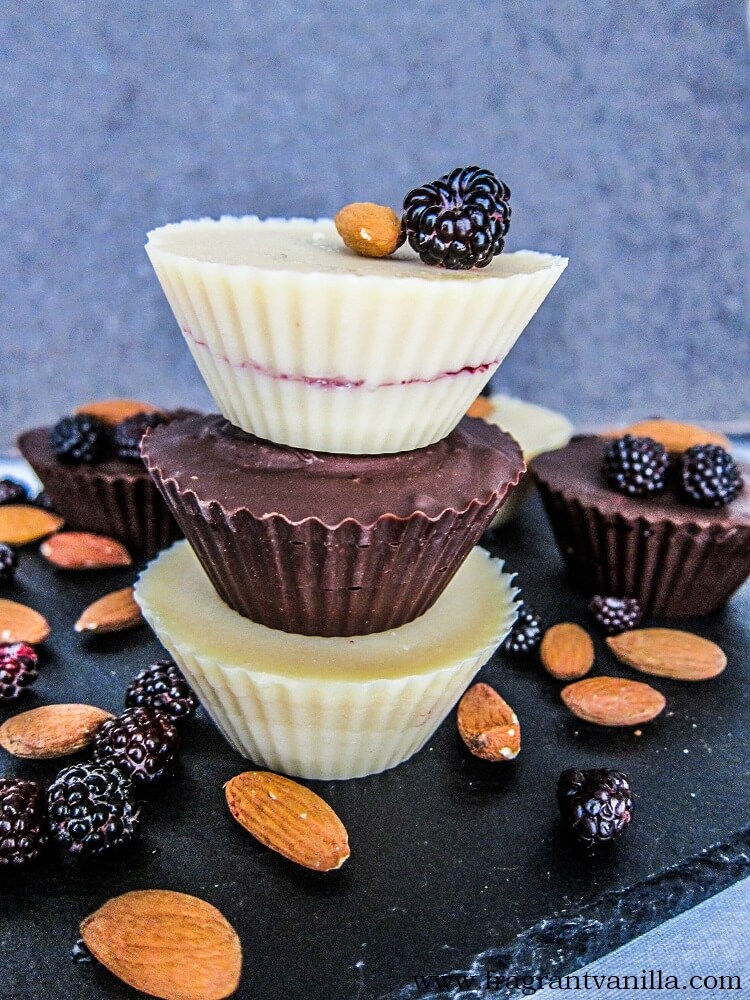
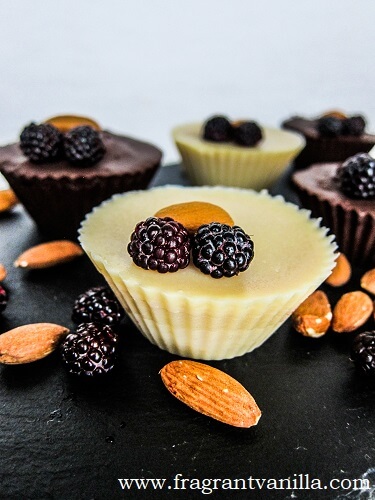
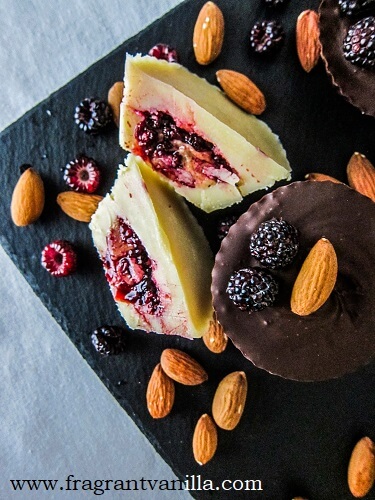
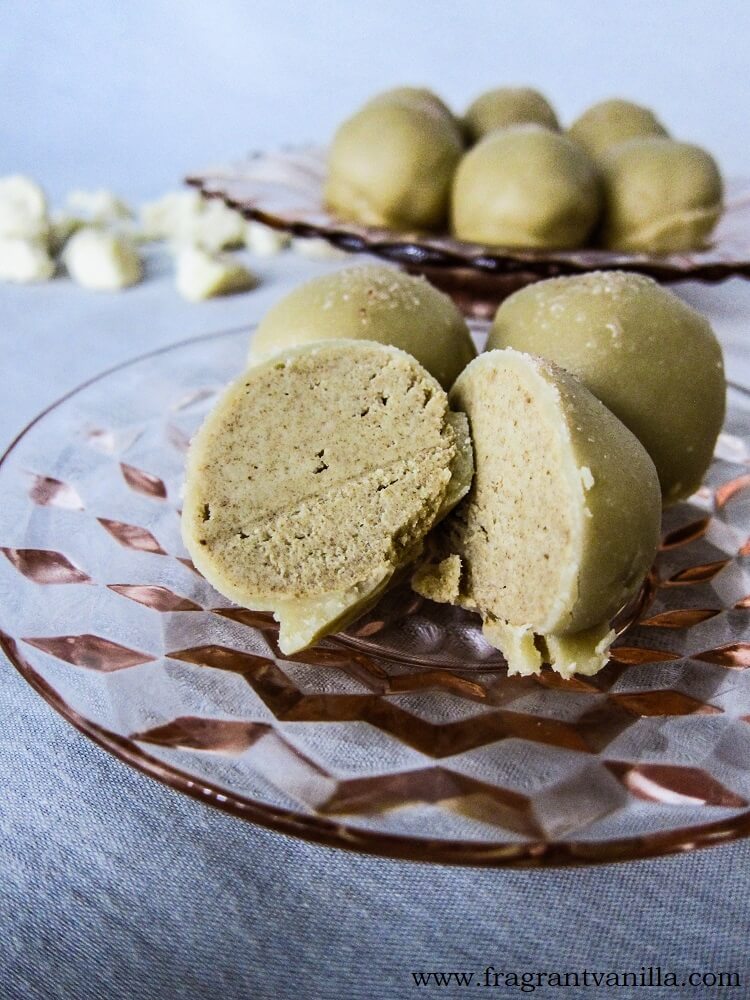
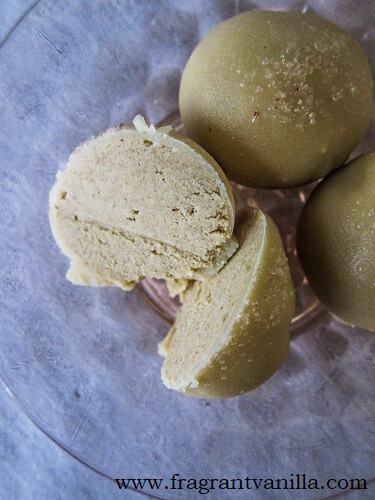
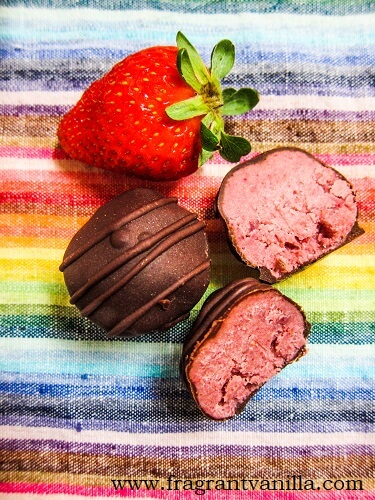
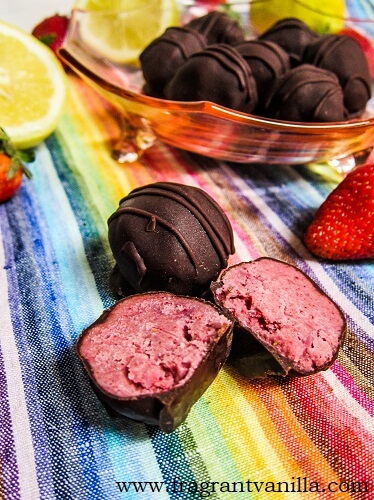
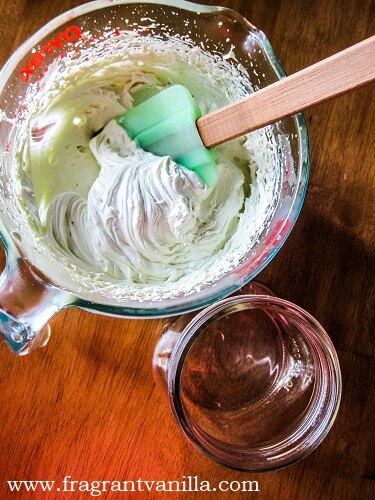
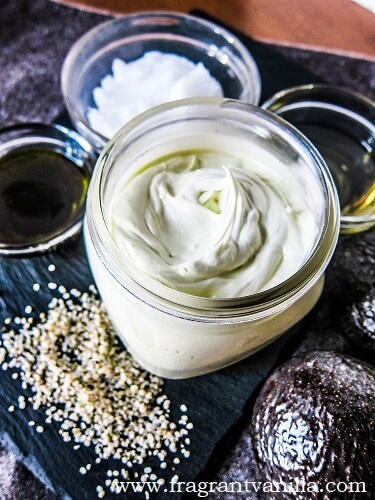
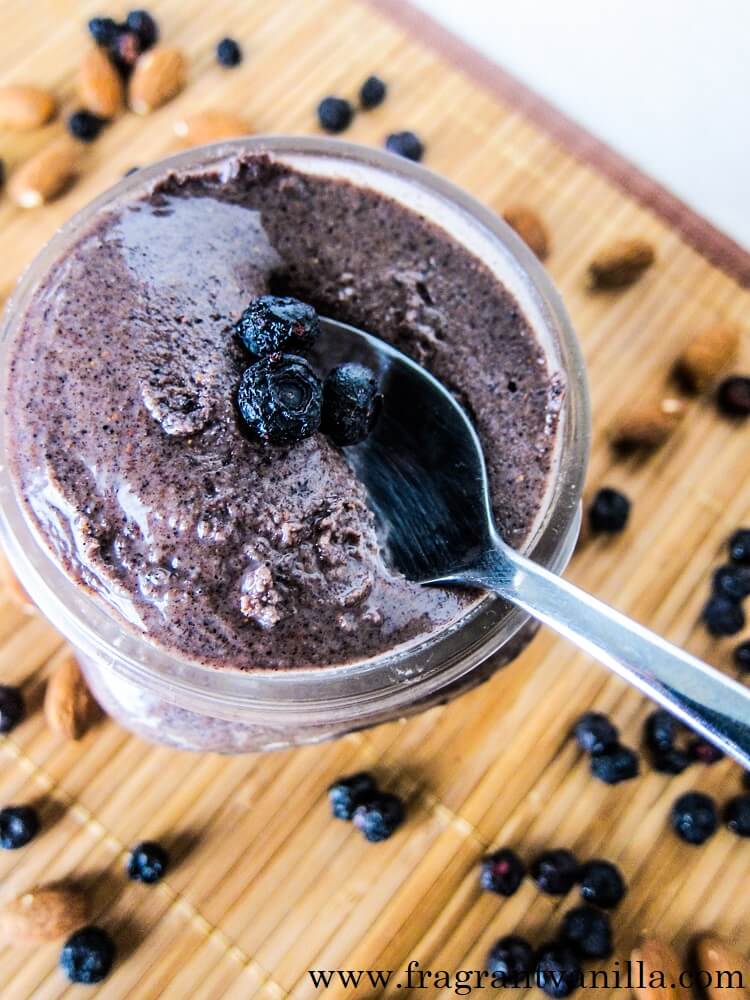
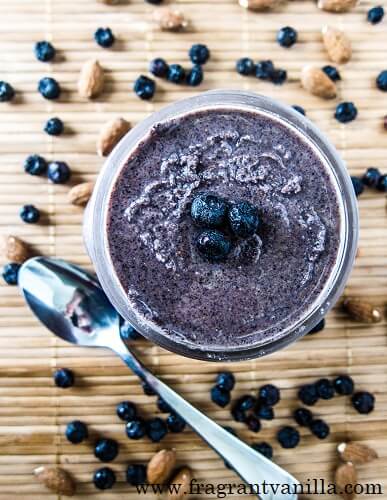
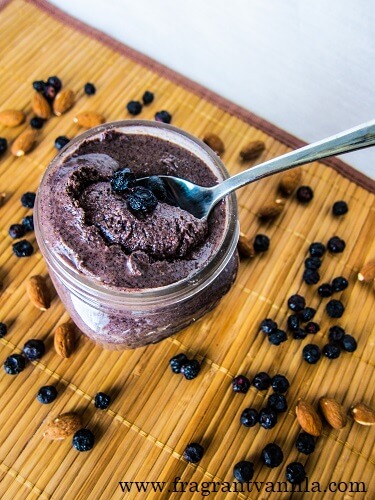
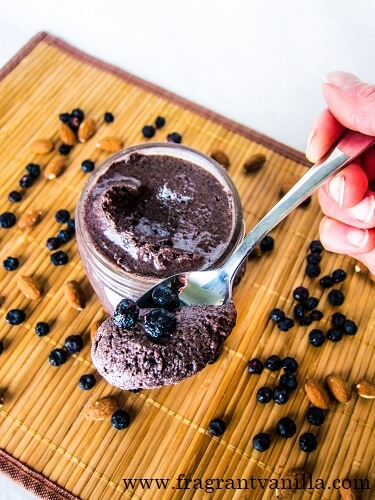
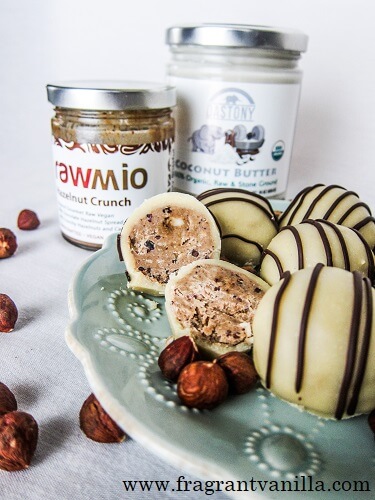
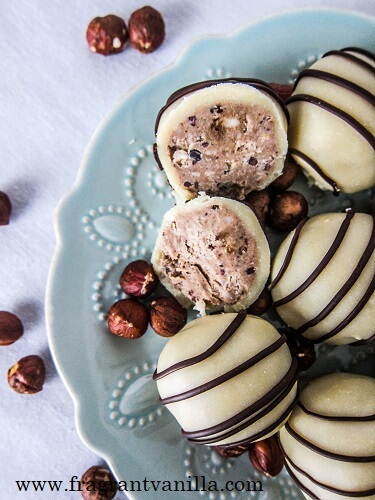
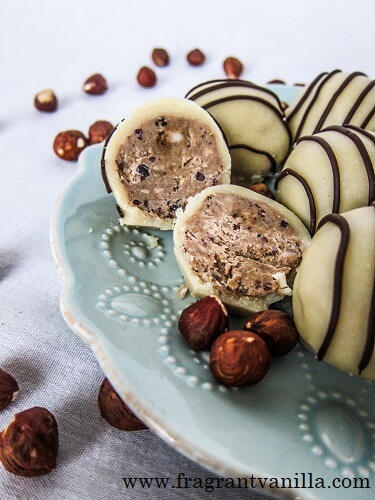
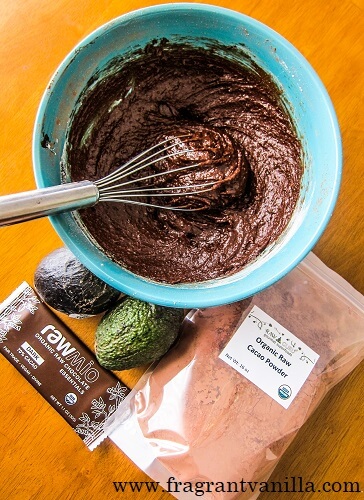
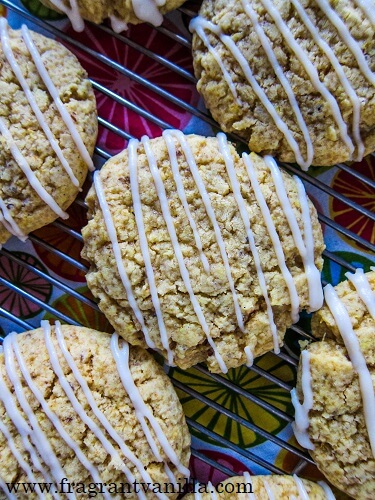
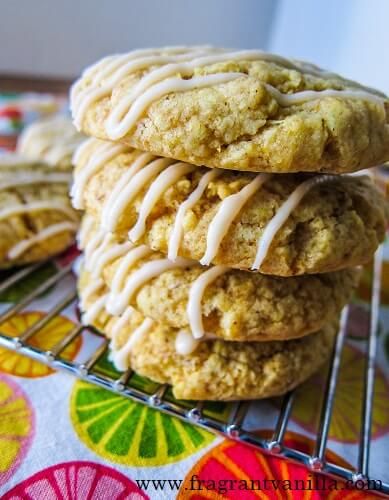
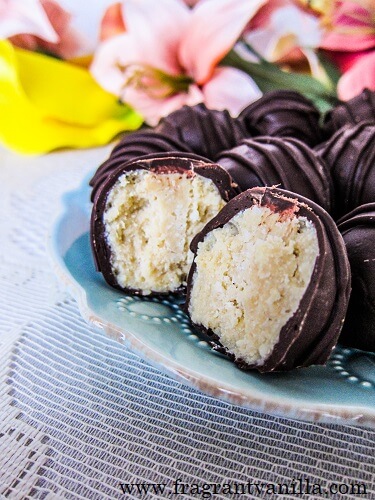
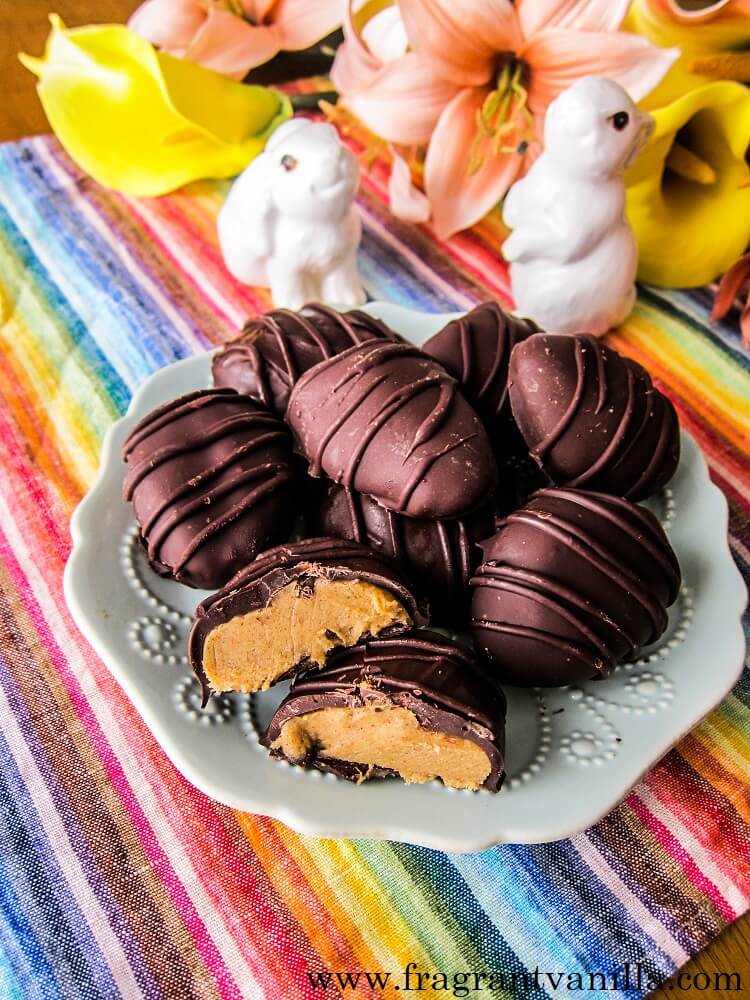
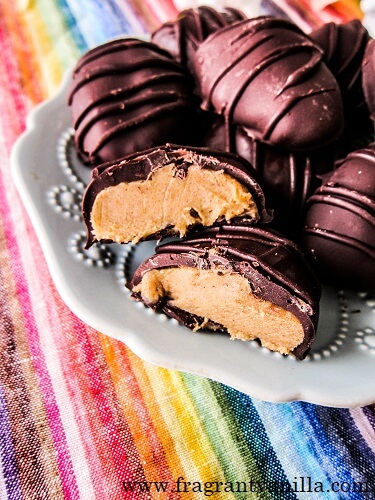
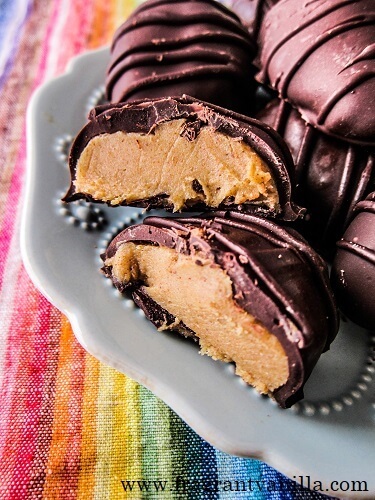
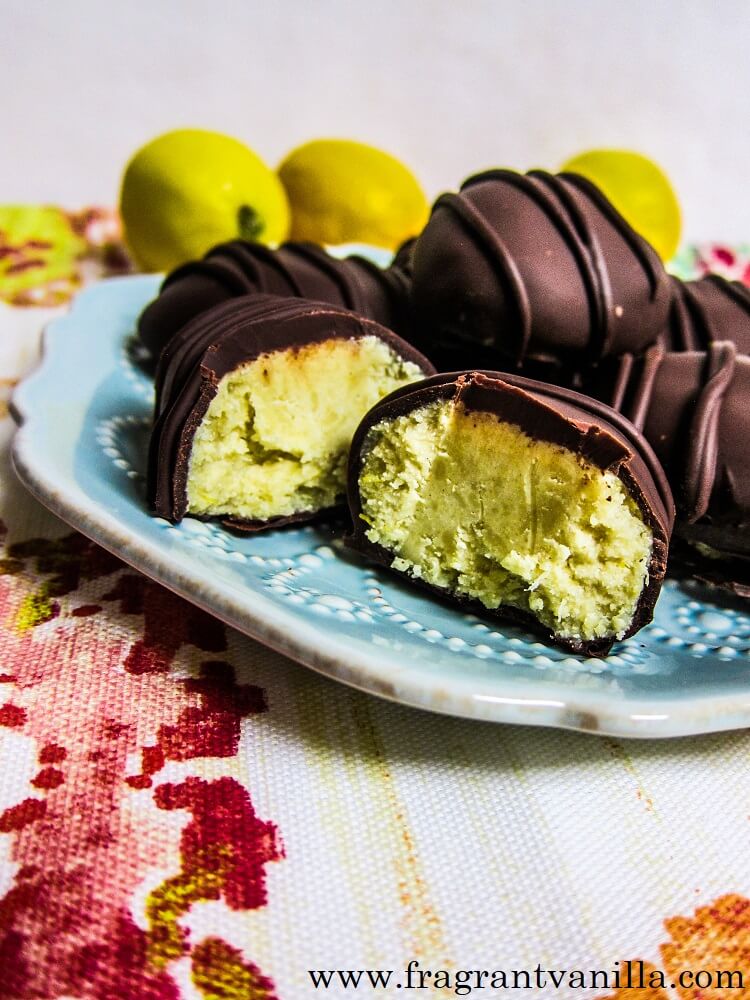
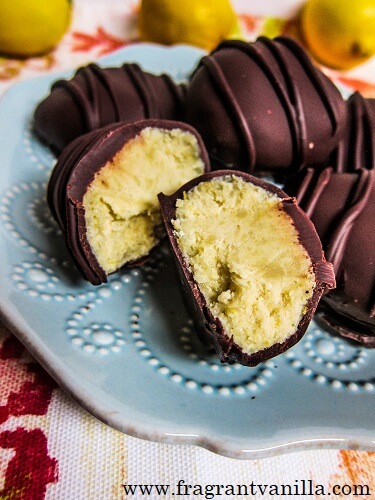
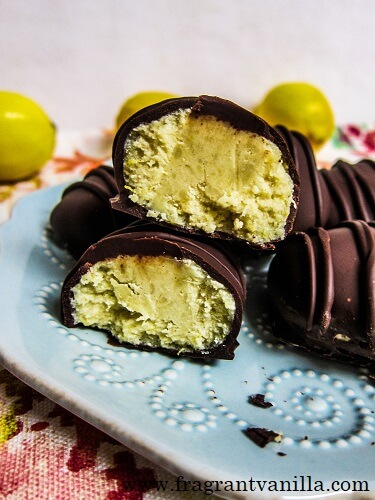
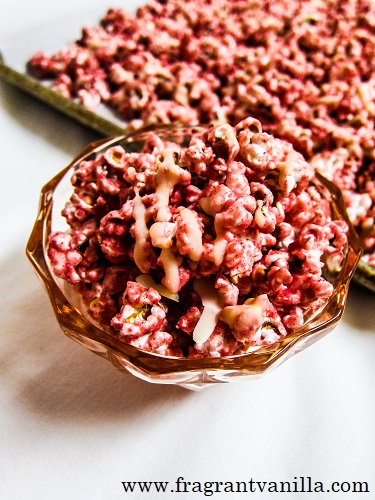
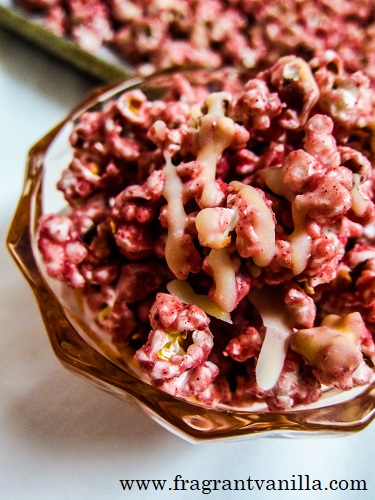
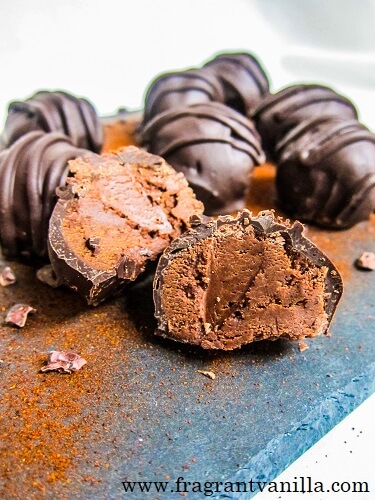
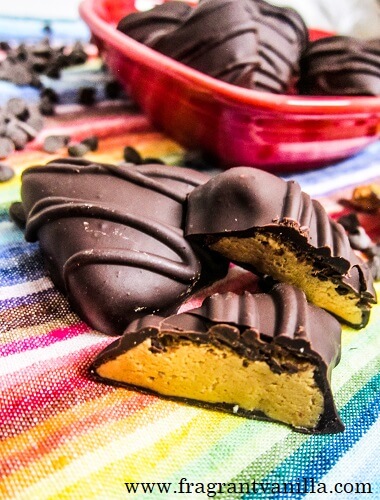
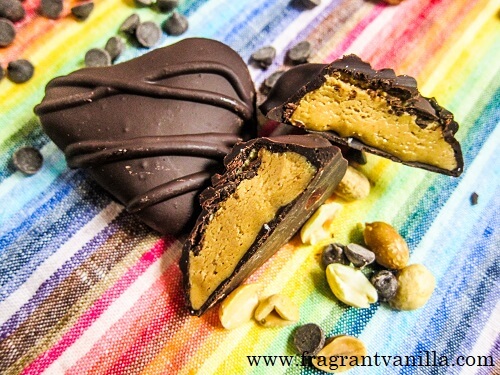
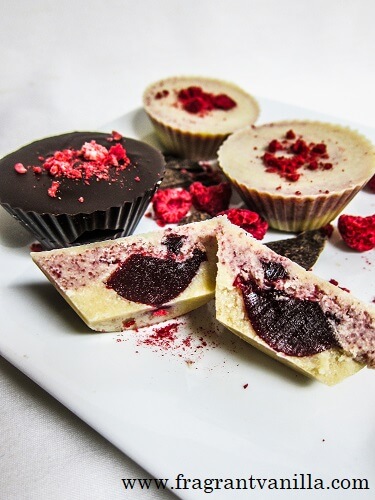
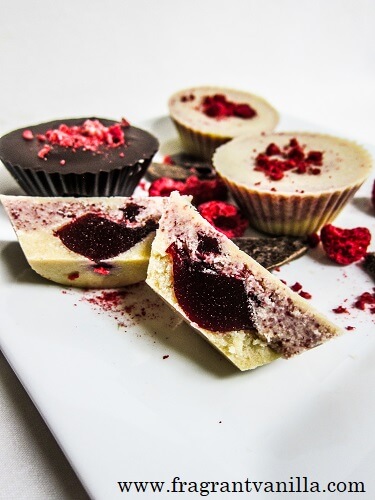
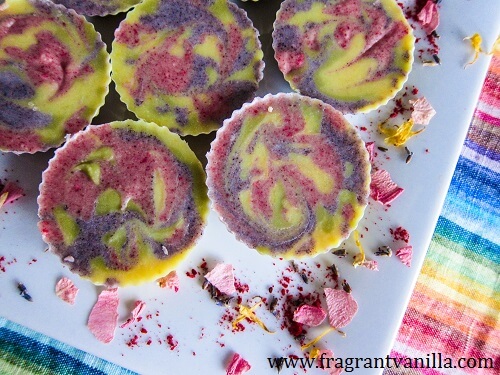
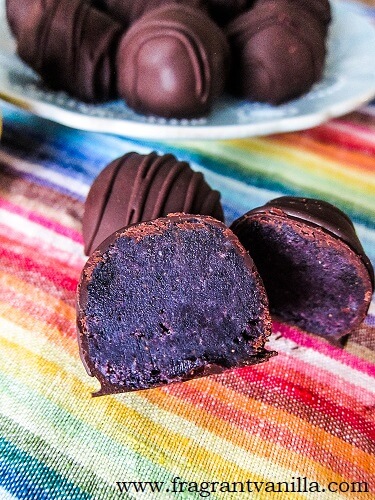
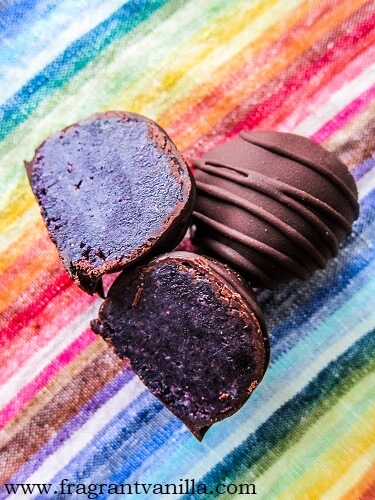
    These are actually pretty easy to make if you have all of the ingredients on hand.  For the filling, to make a creamy white chocolate, I combined cacao butter, coconut butter and cashew butter.  It creates the most smooth, rich filling that tastes like white chocolate when you add a bit of vanilla.  Then to flavor it with blueberries, I added freeze dried ones, because I had some on hand.  You may wonder why I didn’t use fresh, but I have a good reason not to.  The freeze dried ones work perfect because they don’t add excess moisture and help the filling to firm up a bit.  I sometimes add them to things like frosting too if I don’t want extra water in it (which makes it too runny).  Anyways, back to the filling. It was so good I was tempted to just eat some with a spoon.  And I did, but I had to leave enough to make truffles too of course!

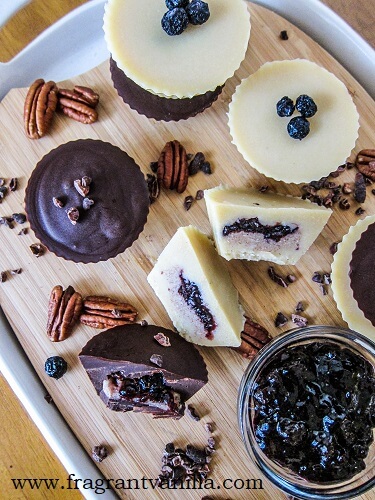
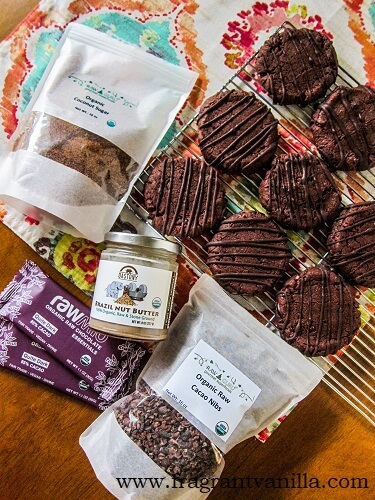
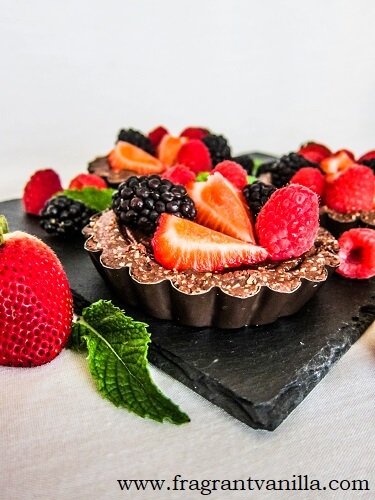
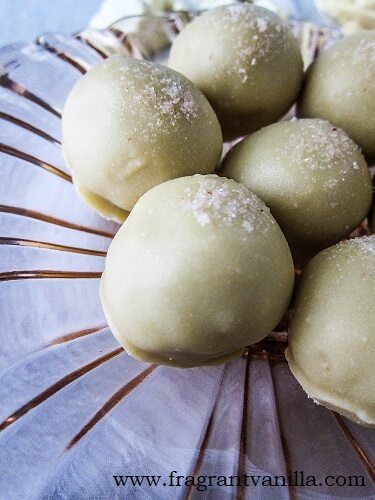
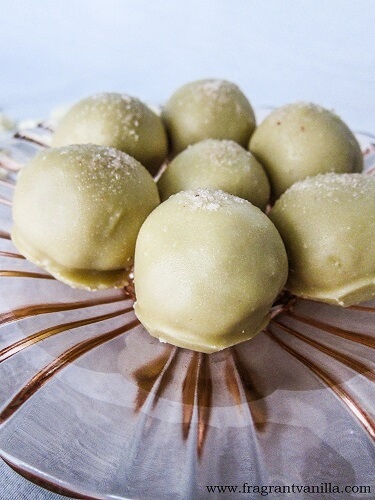
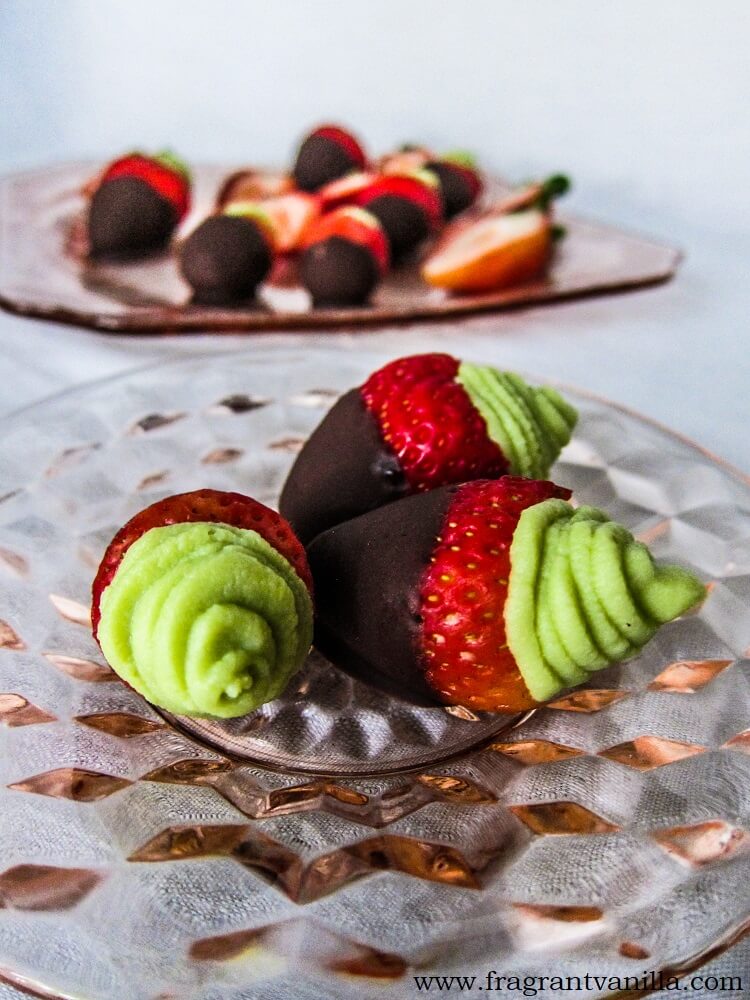
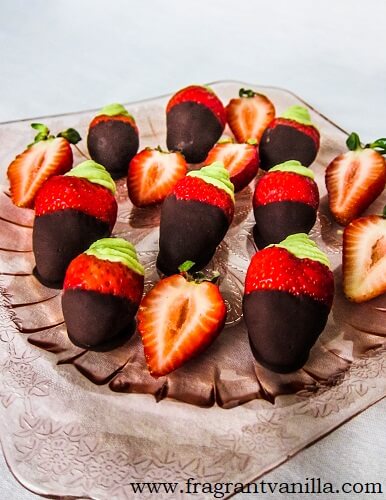
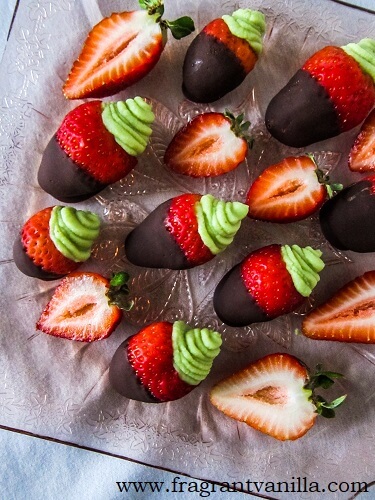
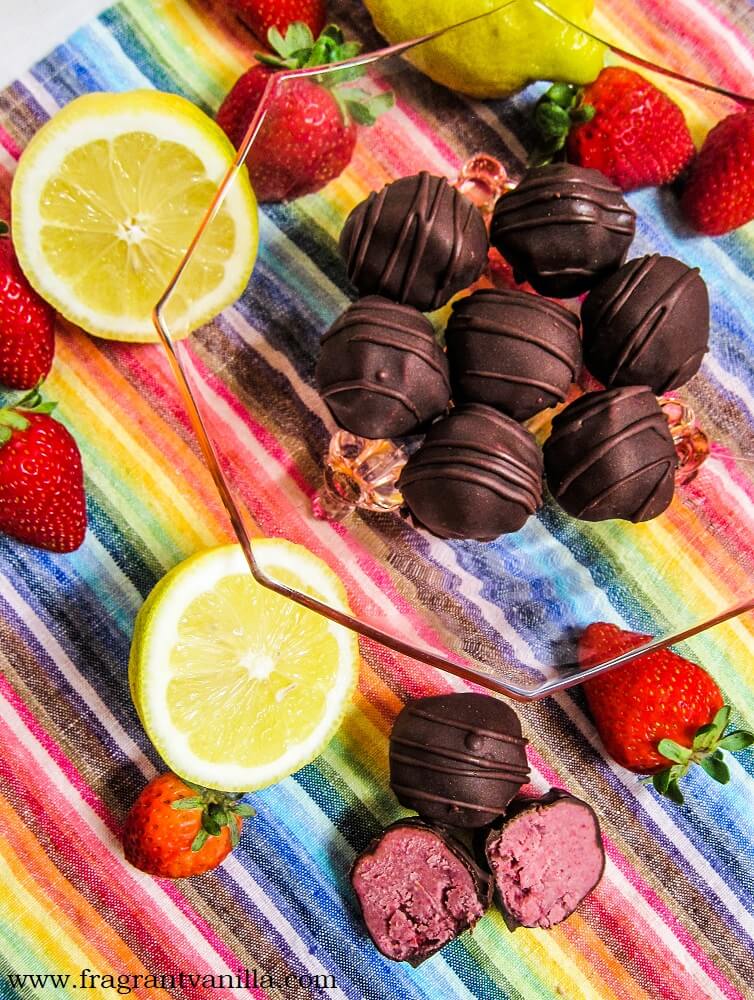
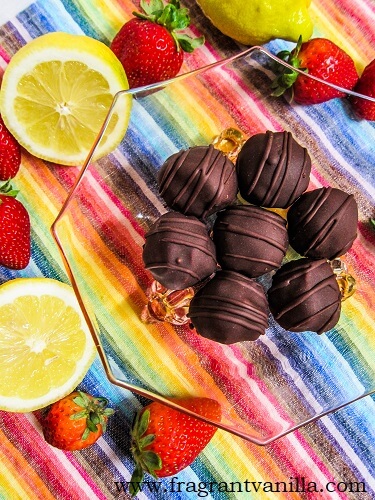
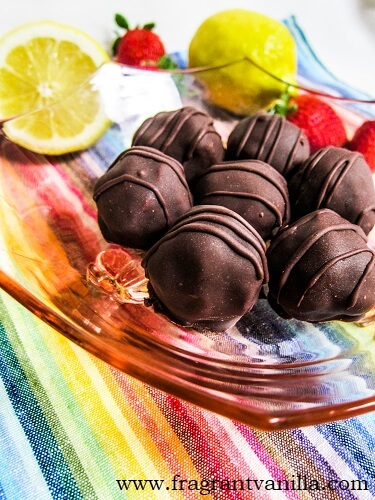
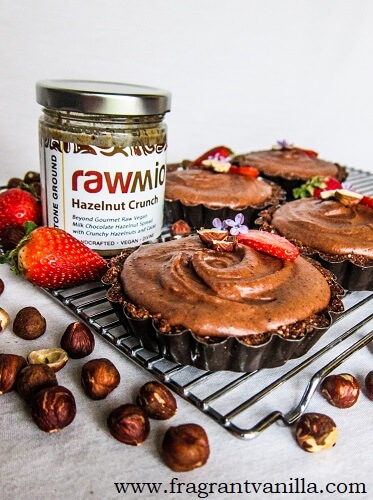
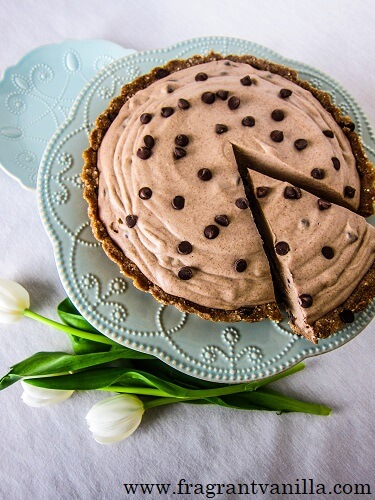
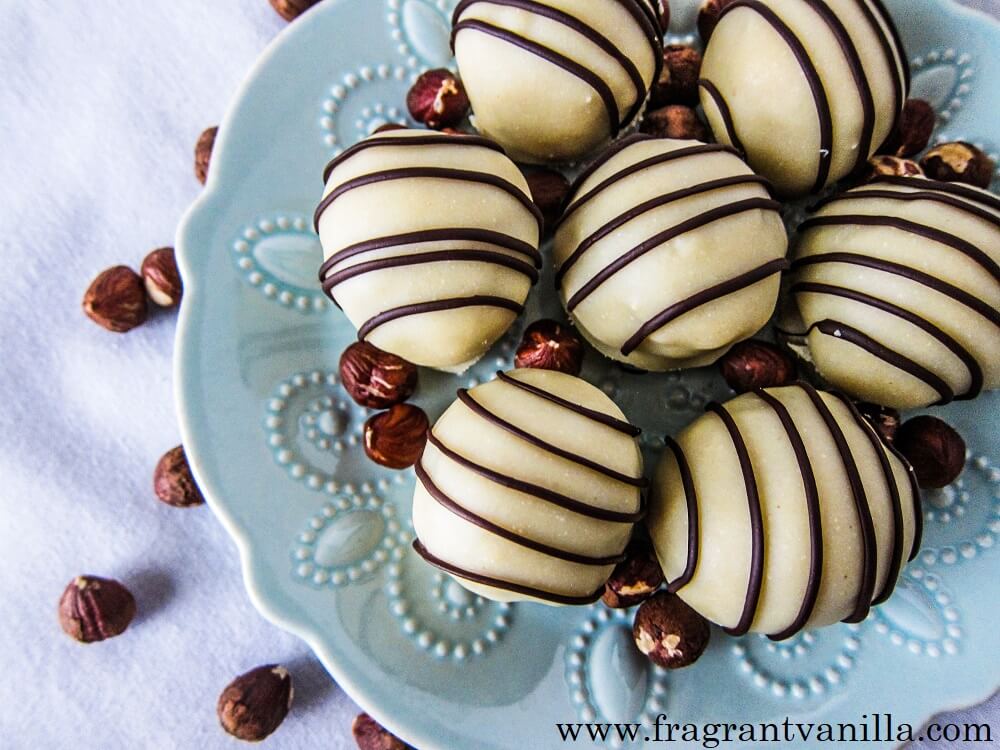
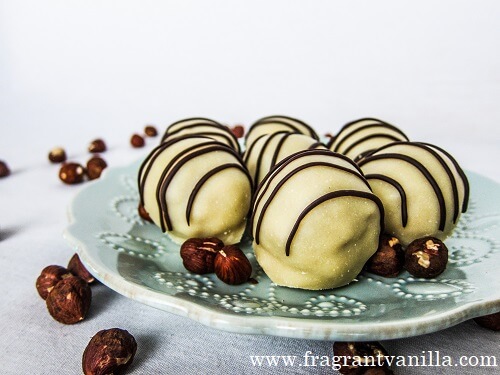
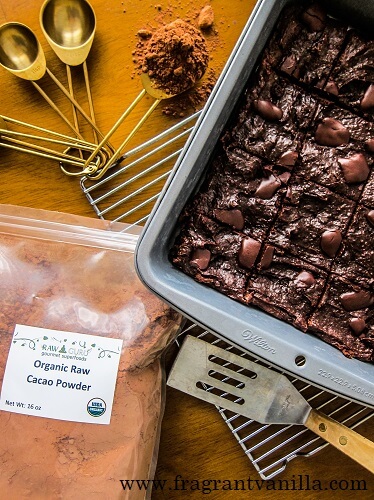
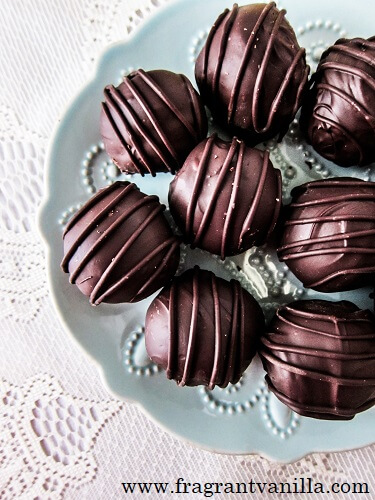
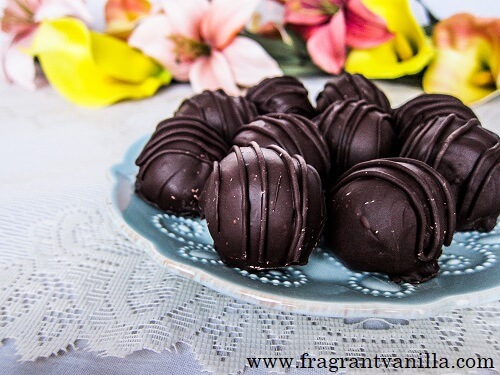
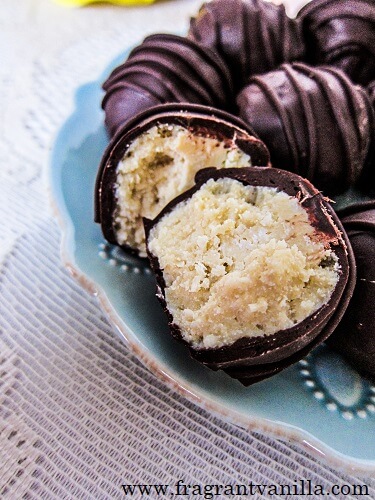
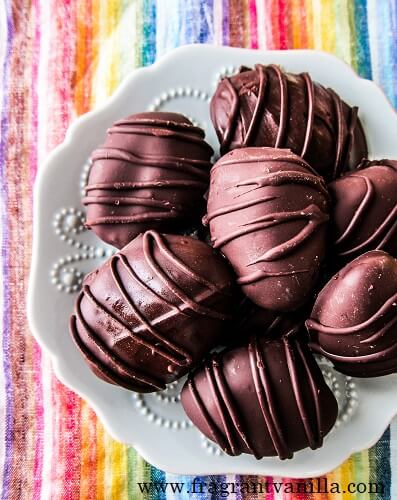
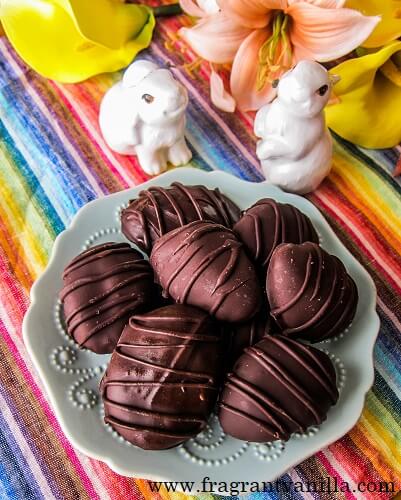
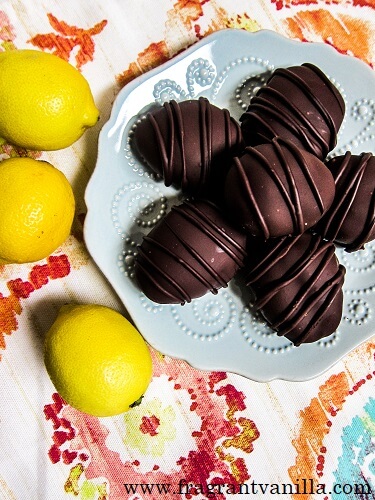
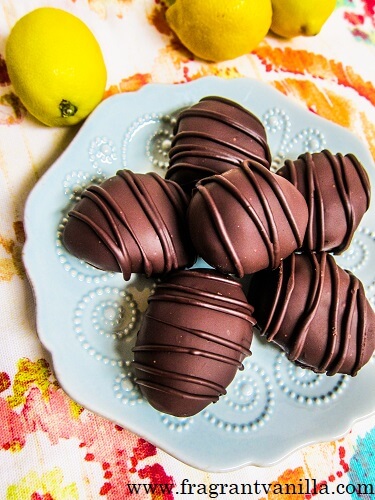
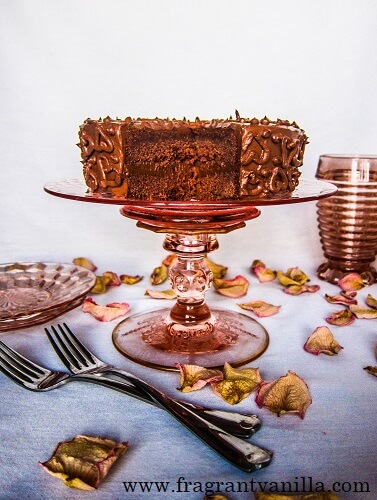
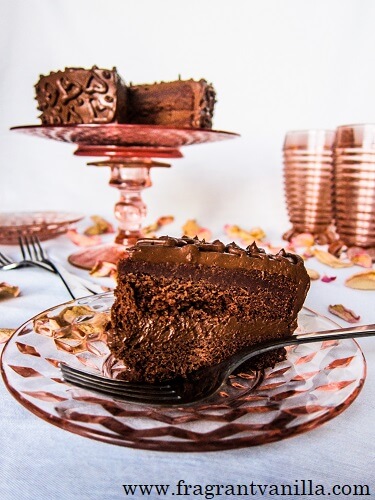
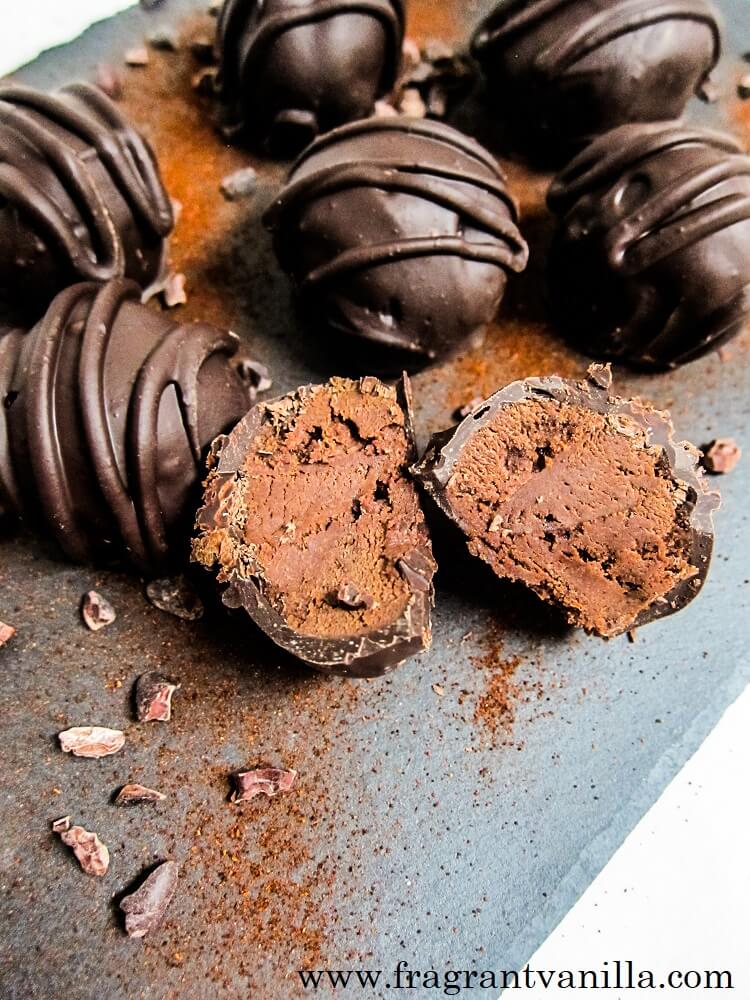
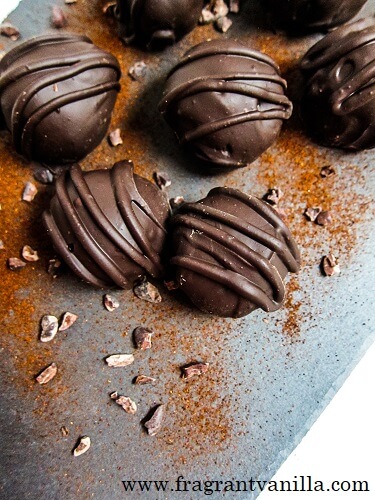
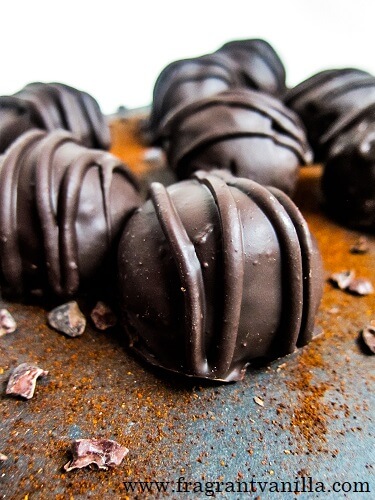
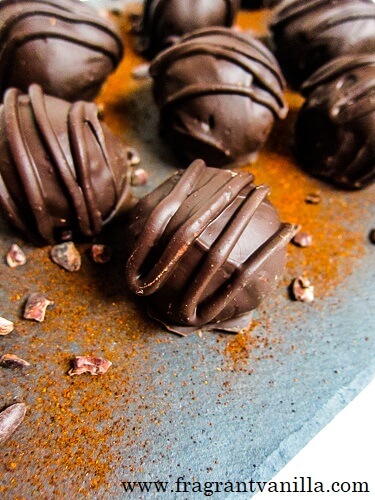
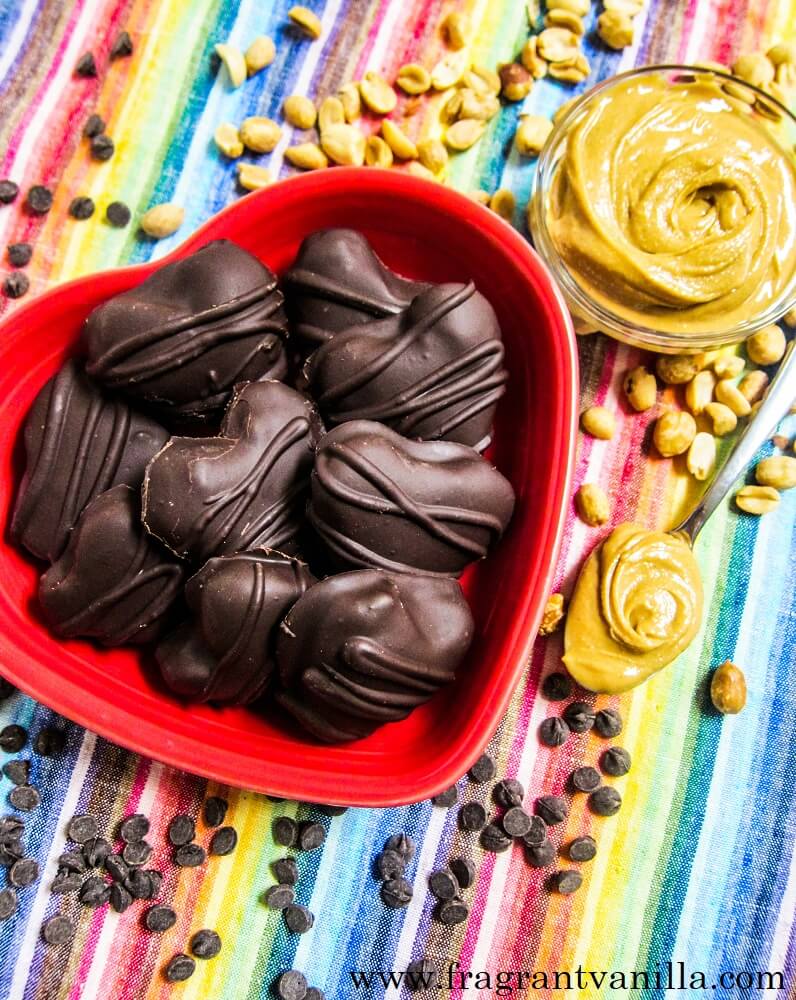
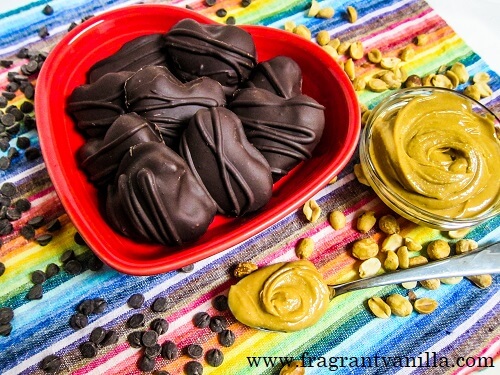
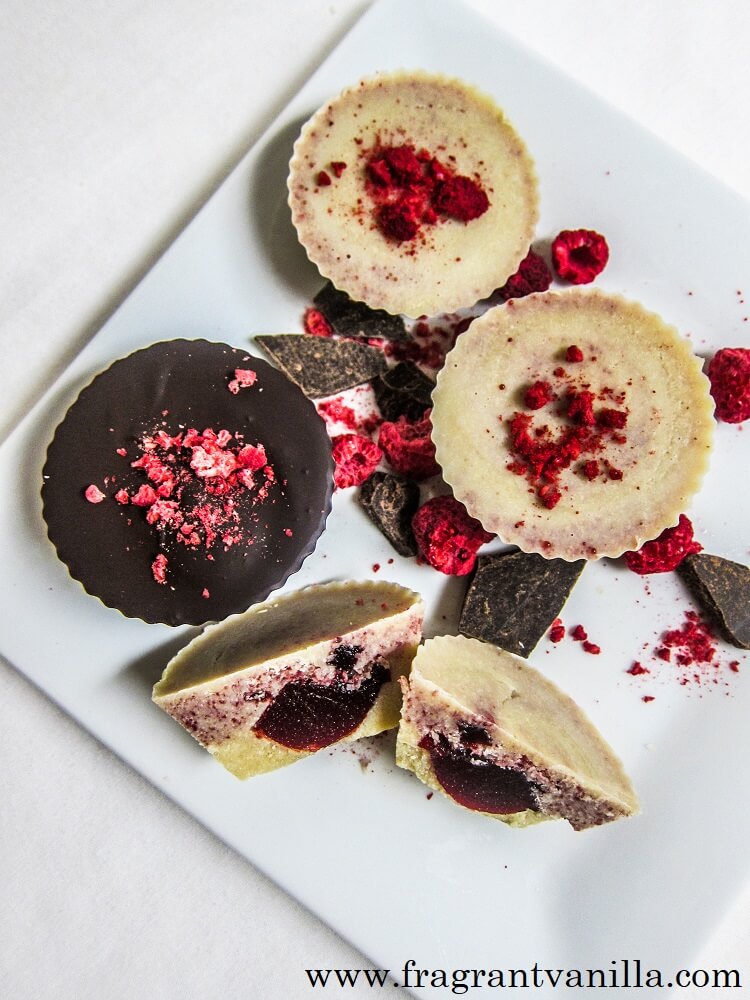
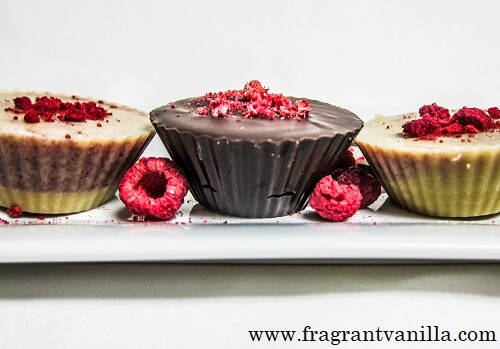
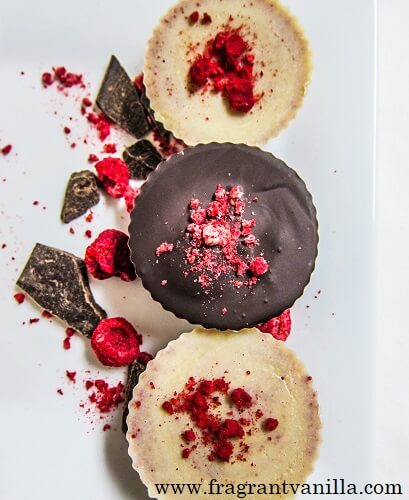
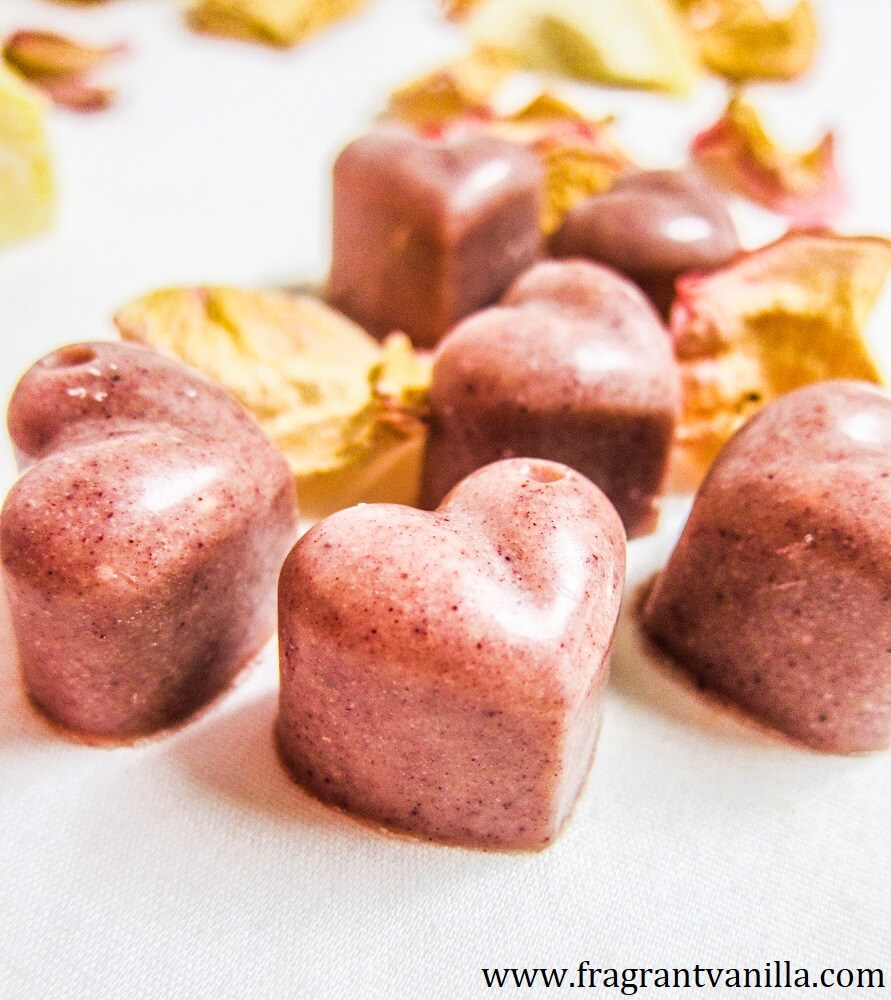
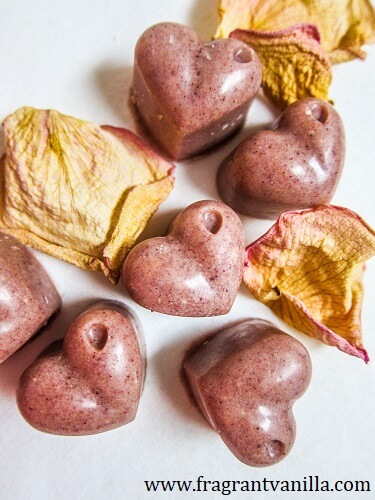
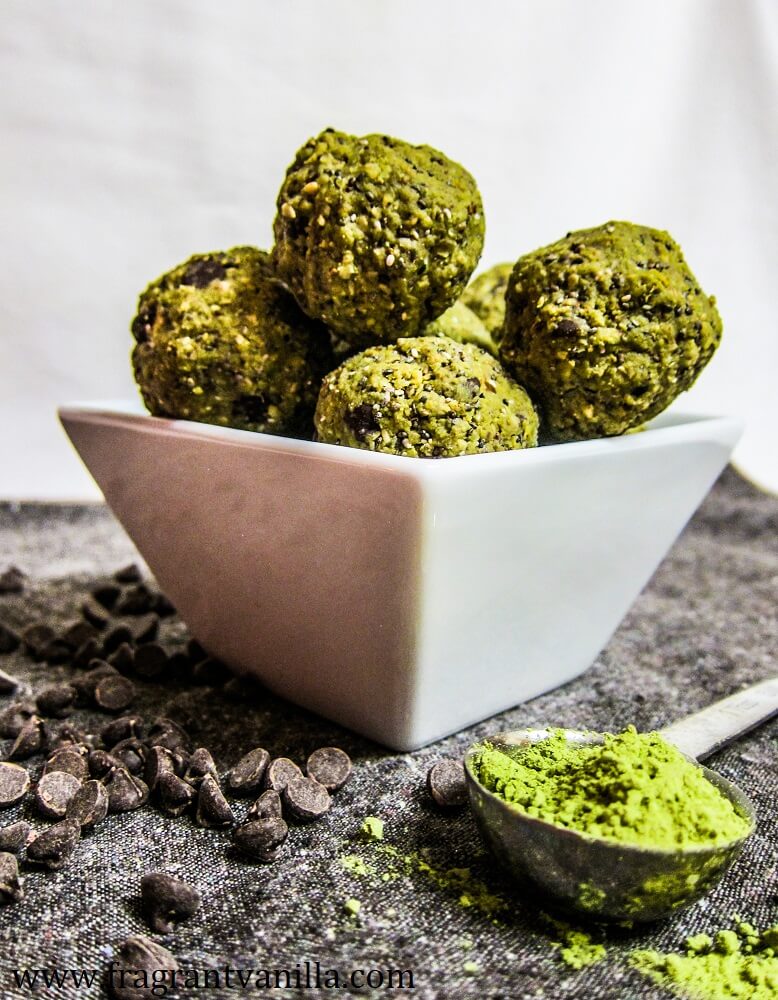
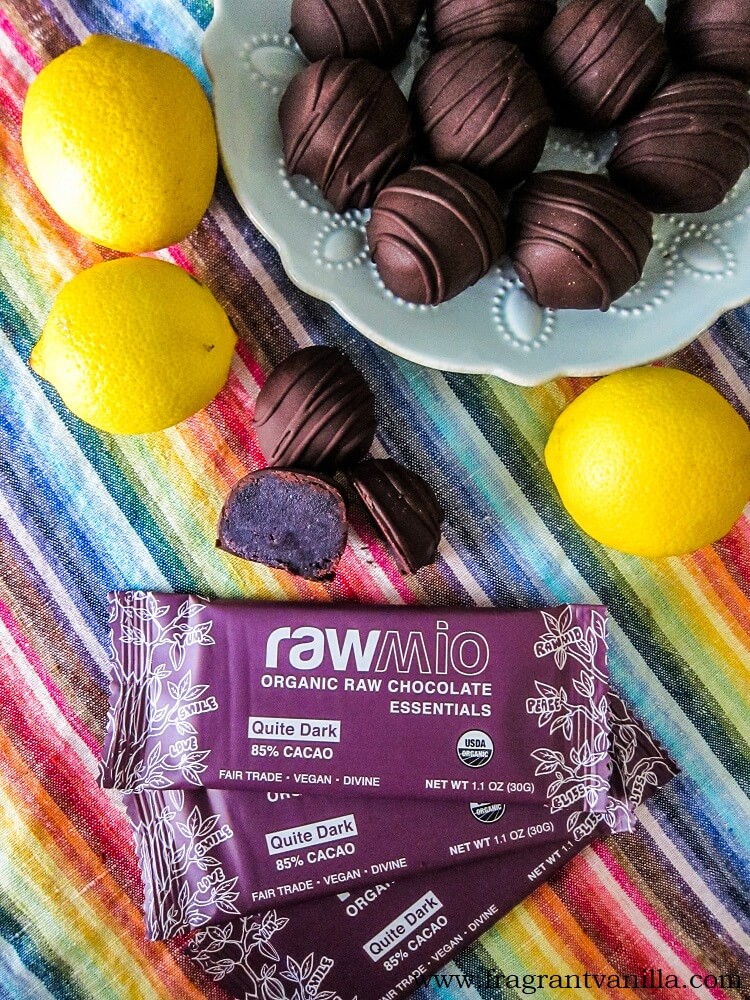
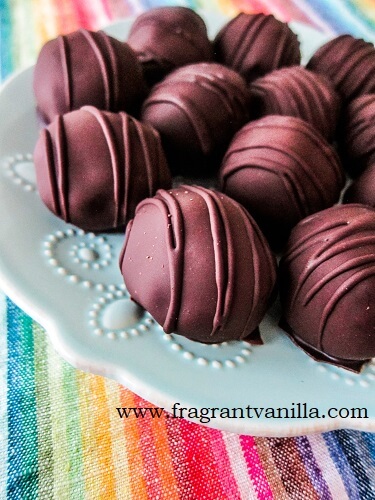
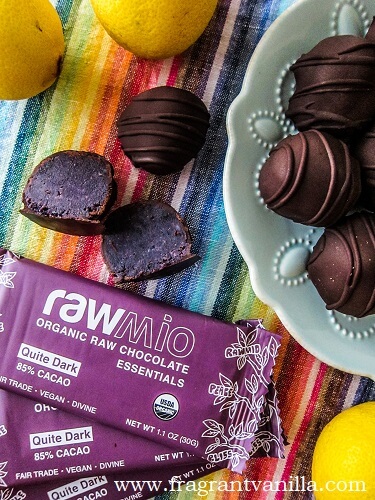
    I find it kind of fun shaping truffles like this, it is like playing with play dough.  Once they were all shaped, chilled and ready to go, I dipped them in melted Rawmio Essentials 85% cacao dark chocolate.  It is so good!  For snacking, or for desserts like this!  Raw Guru recently sent me a box of goodies including this as well as a bunch of other chocolate, nut butters and nuts and I was super excited so of course I had to use some in a recipe right away.  I am looking forward to featuring them in upcoming recipes.  Definitely check out their website, their products are amazing!  The truffles turned out sooo good!  Rich and creamy packed with sweet blueberry flavor and a hint of tart lemon to make them refreshing!  It paired so well with the intense dark chocolate coating!  If you are in the mood for something sweet and delicious, make yourself a batch of these!

    Vegan Blueberry Lemon Truffles  
    Makes 10 truffles

    Ingredients:

    Filling:


    Dark Chocolate:


    Directions:

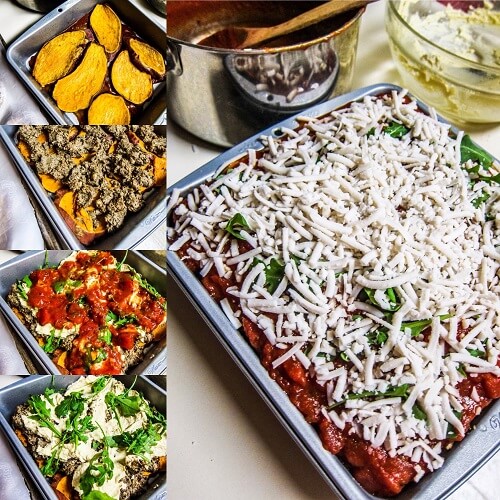
    1. Combine all of the filling ingredients but the berries, water, lemon juice and zest over a double boiler, and whisk until smooth.
    2. Pulverize the berries in a blender until fine, then whisk into the mixture in the double boiler along with the water lemon juice and zest. Place in the freezer for about 15-20 minutes until it is firm enough to scoop. Scoop into 10 balls, rolling them with your hands.   Place on a parchment lined tray, and place back into the freezer until firm, about 30 minutes.
    3. Meanwhile, to make the dark chocolate, combine all ingredients in a double boiler, and whisk until combined and melted.
    4. Once the filling has firmed up, dip each chocolate into the dark chocolate, being sure to let the excess drain off, and place back onto the tray (I like to set mine on a fork to allow it to drain better). Once they are all dipped, set them in the freezer until hardened.
      Store any leftover truffles in the refrigerator.
  • Vegan 8 Layer Bars

    Vegan 8 Layer Bars

    Magic cookie bars, seven layer bars, five layer bars 8 layer bars.  They are all similar, and I loved them all growing up because they were all delicious.  If you aren’t sure what I am talking about, they are typically made with a graham cracker crust topped off with coconut flakes, chocolate chips, peanut butter chips (or butterscotch chips, I have seen both), white chocolate chips, walnuts and sweetened condensed milk.  It is then baked to perfection until all bubbly and cooled until it is all set.  My Mom calls them candy bars, but there is no denying that they are delicious.  They are pretty much a staple at any potluck or picnic in Minnesota (and probably other states in the US too).  A while back I made a raw version, but my Mom recently asked me if I could make a baked version more similar to the original bars.

    Of course I was game!  I loved those bars growing up, and I knew I could create something just as delicious.  I decided to make the 8 layer version, but tweak it slightly with what I had on hand, and what I wanted in it.  For the crust, instead of using store bought graham crackers, I made my own.  Because I am not a store bought graham cracker person.  I made an almond butter cookie crust instead and it was delicious with all of the toppings.  For a vegan replacement for the sweetened condensed milk, I blended up coconut milk with medjool dates to create a caramel flavored gooey mixture that was even better than sweetened condensed milk if you ask me.  For the add ins I chose coconut flakes, peanut butter white chocolate chunks, white chocolate chunks, dark chocolate chips, almonds and pistachios.  I made the white chocolate and peanut butter white chocolate, because I love my home made versions and I didn’t want to have to buy it.  I had to make the bars slightly different than the original version, layering the ingredients and milk because it is slightly less runny and my white chocolate chips melt, but the end result was the same as the old style ones.

    They smelled amazing while baking, like a candy factory.  That is part of what I love about baking, all of the heavenly aromas!  They had to chill overnight, but it was well worth the wait to taste them.  They were sweet and delicious like the original version, but not just sugary, packed with the flavors of caramel, the chocolates, and crunchy nuts.  They were heavenly!  If you were ever a fan of these type of bars, give them a try!  It is a little more work making your own chocolate and all, but so worth it.  I made mine a day ahead so that I had it on hand.  I hope you all have a wonderful week!

    Vegan 8 Layer Bars
    Makes 16 bars

    Ingredients:

    Crust:

    • 2 Tbsp coconut oil, warmed to liquid
    • 1/4 cup plus 2 Tbsp coconut sugar
    • 1/2 tsp pure vanilla extract
    • 1 1/2 Tbsp filtered water mixed with 1/2 Tbsp ground flax seed
    • 1/2 cup almond butter
    • 1/4 cup plus 2 Tbsp all purpose gluten free flour
    • 1/4 cup plus 2 Tbsp almond meal*
    • 1/4 tsp baking powder
    • 1/4 tsp sea salt


    Topping:

    • 1 cup plus 2 Tbsp thick coconut milk (from the top of the can)
    • 1 cup soft, pitted medjool dates (if they are not soft, soak them in filtered water first, and drain well before using)
    • 1/2 tsp pure vanilla extract
    • 1/8 tsp sea salt
    • 1 cup chopped almonds
    • 3/4 cup pistachios
    • 3/4 cup large flake coconut
    • 1 cup vegan dark chocolate chips or dark chocolate chunks
    • 1 cup vegan white chocolate chunks (recipe follows)
    • 1 cup vegan peanut butter white chocolate chunks*


    Instructions:

    1. Preheat oven to 350F degrees with the rack set in the center position. Line a 9×9 inch square pan with parchment, and/or grease it with coconut oil.
    2. Whisk the coconut oil and sugar together in a bowl with the vanilla and flax mixture until the sugar starts to dissolve. Then add the pecan butter and mix until combined.
    3. Add the flour, baking powder, sea salt and stir in until well blended.
    4. Spread this mixture over the bottom of the pan, pressing it to the edges with your fingers. Set aside.
    5. Combine the coconut milk, dates, vanilla and sea salt in a high speed blender or food processor and process until smooth.  Set aside.
    6. Sprinkle the crust with 3/4 cup almonds, 1/2 cup pistachios, 1/2 cup coconut, 3/4 cup dark chocolate chips, 3/4 cup white chocolate chunks, and 3/4 cup peanut butter chunks distributing it all evenly. Pour the coconut milk mixture over it, making sure it is evenly covering the whole thing.  Sprinkle the remaining nuts, dark chocolate and coconut over the top (but hold off on the white chocolate and peanut butter white chocolate until it is done baking so they don’t melt on top) press in slightly with your hands.
    7. Place in the oven. Bake for about 45 minutes until lightly browned and set.  Remove from oven and scatter with remaining peanut butter white chocolate chunks and white chocolate chunks.
    8. Let cool completely before cutting into bars.


    Vegan White Chocolate
    Makes 40 chocolates


    Instructions:

    1. Combine cacao butter, coconut butter, cashew butter, vanilla, maple syrup,  and sea salt over a double boiler, and whisk until smooth.
    2. Pour into silicone molds, and place in the freezer until firm (about 45 minutes or so).
    3. Pop out of molds and enjoy!  Store any extra in the refrigerator in an airtight container.


    *If you don’t prefer to make your own vegan peanut butter white chocolate, you can find some HERE.

    *If you don’t prefer to make your own vegan white chocolate you can find some HERE.


  • Vegan Peanut Butter White Chocolates

    Vegan Peanut Butter White Chocolates

    I love white chocolate and I love peanut butter, so I figured, why not make some peanut butter white chocolate?!  I mean, yes I could have just made white chocolate peanut butter cups, and I did make those recently.  But I had another motive for making these.  My Mom recently requested that I make some vegan 7 layer bars, and I needed peanut butter white chocolate chunks (I was not going to make chips, too much work).  So I figured I could make a batch of peanut butter white chocolates, and have some to enjoy and just eat as is, and some for the 7 layer bars recipe.  If I like something I like to make extra and I knew these would be pretty amazing the big peanut butter lover that I am.  Peanut butter is something that I make a big jar of every week because I go through it that much.  It is as good as dessert to me if I just eat a few spoonfuls.  So that is why I try and find ways to work it into so many recipes.

    These chocolates are really simple to make, with very little hands on time which is always a win as far as I am concerned.  They only have 6 ingredients!  You just melt everything together in the top of a double boiler, pour it into molds, and let it set up and chill in the freezer for a while.  I knew they were going to be good when I taste tested the mixture before pouring it into molds. It was sooo good!  They were even better once they had set up.  Luscious white chocolate with the rich peanut butter included is a heavenly combination.

    They are good just for eating alone, but I think they would be really good in cookies if chopped up (just press them in at the end of baking, because they will melt too much in the oven). Or stirred into or served on top of ice cream, or chopped up and stirred into brownies.  I am pretty excited about trying them in my 7 layer bars.  I just have to figure out what other ingredients I need to include in them.  If they turn out I will share the recipe for those too, but for now these peanut butter white chocolates are pretty bomb, so I know this recipe is worth sharing!  If you love peanut butter too, give these a try!

    Vegan Peanut Butter White Chocolates
    Makes 40 chocolates


    Instructions:

    1. Combine cacao butter, coconut butter, peanut butter, vanilla, maple syrup,  and sea salt over a double boiler, and whisk until smooth.
    2. Pour into silicone molds, and place in the freezer until firm (about 45 minutes or so).
    3. Pop out of molds and enjoy!  Store any extra in the refrigerator in an airtight container.
  • Vegan Cheesecake Dessert Hummus

    Vegan Cheesecake Dessert Hummus

    I love hummus of any sort, and I am always trying to come up with new and interesting flavors.  I love the classic hummus with tahini, lemon, and lots of garlic and cumin of course, and I can get that kind in the deli I work in because ours is really good.  But when I am at home, I like to experiment.  Especially with dessert hummus.  If you haven’t heard about the latest trend in the last year of dessert hummus, and think it sounds weird, trust me it is amazing stuff.  I mean, you get to enjoy dessert and a protein and fiber rich snack at the same time!  Which is why I love it.  I like my desserts to have nutritional benefits sometimes and this is perfect for that.  I have made many different kinds, including chocolate cake batter, red velvet cake batter, mint chip, strawberry, pumpkin pie and salted caramel and they were all delicious.  I realized however I was missing cheesecake dessert hummus. How could I miss my favorite dessert for a hummus flavor inspiration?

    So a few days back I decided to make some cheesecake dessert hummus. You may think that chickpeas in something cheesecake flavored sounds odd, but I actually use chickpeas in some of my nut free cheesecake fillings. They are neutral and they blend in well.  So I knew they would be perfect in this hummus!  They composed the bulk of it, but I also added coconut milk instead of water to make it creamy, as well as cashew butter in place of the tahini in traditional hummus.  I sweetened it with a bit of maple syrup and added a touch of vanilla and it smelled amazing.  Lastly to give it the tang of cheese I added some lemon juice and of course sea salt.  I buzzed it up in the vitamix until it was nice and smooth and I could not wait to try it out!

    It was so good!  I enjoyed it with some berries, and it was like eating cheesecake, only soft enough cheesecake to dip things into.  You can’t go wrong with that.  There are so many things you could pair it with.  Chocolate, graham crackers, cookies, different types of fruit etc.  If you are a big cheesecake fan or an adventurous hummus flavors person you should definitely give this a try!

    Vegan Cheesecake Dessert Hummus
    Makes about 3 cups

    Ingredients:

    • 1 1/2 cups cooked chickpeas
    • 1/3 cup maple syrup (or to taste, if you like it sweeter add 1/2 cup)
    • 1/2 cup coconut milk (or as needed)
    • 1 Tbsp lemon juice
    • 1 Tbsp pure vanilla extract
    • 1/4 tsp sea salt
    • 1/2 cup raw cashew butter or almond butter


    Instructions:

    Combine all ingredients in a high speed blender or food processor and blend until smooth (adding a little more water if necessary).  Keeps in the refrigerator for about 1 week in a sealed container.


  • Vegan Blueberry Pie Cookies

    Vegan Blueberry Pie Cookies

    I made some apple pie cookies a while back and they were really good, so when I had some leftover blueberry jam, I thought it would be fabulous in some mini pie cookies!  It is Summer after all, the season of blueberries!  I love any type of fruit pie, but I don’t always want to make a giant one for just myself.  Plus these little guys are portion controlled.  You have a couple and you are good.  I am calling them cookies though instead of hand pies because they are the size of cookies.  Hand pies to me are more like pop tart sized.  I like to make a batch of cookies like these, then freeze the extra to enjoy later.  I always have a box of different types of cookies on hand in the freezer to enjoy when I feel like it.  Anyways, back to the blueberry pie cookies.  They were pretty simple to make.  Not fast to make because you have roll out the dough and assemble them, but at least the filling is already made if you have blueberry jam on hand.

    I like to use a fruit sweetened blueberry jam.  But you can use whichever one you want.  Just make sure the jam you use is vegan of course. For the dough I decided to use an organic whole wheat pastry flour, because I like the way it tastes in a pie crust. It is a basic vegan pie crust recipe, and I have been using it for over 10 years.  I used to use vegan margarine in pie crusts, but I don’t really like the ingredients in the commercial ones, so I now use coconut oil instead.  It gives the crust a slight sweetness and buttery flavor that I love!  It was kind of fun cutting out the little pie crusts.  Like when I was little and used to play with Playdough and roll it out and cut it into shapes.  I used to pretend I was making cookies and whatnot.  So I guess it is no wonder I love making desserts now!

    Once I had spooned the blueberries into the crusts, topped them, crimped them shut and they were all ready to go, I could not wait to try them!  But of course they had to bake first and they were completely aromatic while baking.  My whole house smelled like delicious blueberry pie. Once they had cooled enough to try them I was super excited.  Of course they had to still be warm.  They were so good!  Gooey sweet blueberry filling and a nice rich buttery crust!  If you have some jam on hand, you know what to make!  If you want to make these gluten free, you can substitute Bob’s Red Mill Gluten Free Baking Flour for the whole wheat 1:1.  They will just be lighter in color.

    Vegan Blueberry Pie Cookies
    Makes 18

    Crust:


    Filling:

    • 1/2 cup blueberry jam


    Topping:

    • coconut milk or aquafaba for brushing tops
    • maple sugar or coconut sugar for sprinkling


    Instructions:

    1. Preheat oven to 375 degrees.
    2. To make the crust, in a large bowl, mix together flour, sugar, sea salt, and spices.
    3. Cut in coconut oil with a pastry blender or 2 knives until it is in pea sized pieces. Mix in  just enough water to create a smooth dough that holds together but isn’t too sticky. Add more water if needed, and knead slightly until a smooth dough is created.
    4. Roll out into a large rectangle 1/8 inch thick using parchment underneath and floured rolling pin, and cut into 36 circles with a cookie cutter.
    5. Spoon the jam by the tsp onto half of the prepared little crust circles, and cover with the top pieces of dough (I used a small spatula to carefully move them), pressing the edges and crimping with a fork.
    6. Brush very lightly with a little coconut milk, then sprinkle with a little maple sugar.  Place the pan in the oven.
    7. Bake for about 30 minutes until the crusts are starting to brown lightly. Remove from oven and let cool on a wire rack until warm.
  • Raspberry Jalapeno Margarita

    Raspberry Jalapeno Margarita

    The first food item that I had made that I shared with my boyfriend Eric wasn’t a dessert, it was my habanero hot sauce.  One of the first things that we discovered about each other was our love for spicy food.  He is from Arizona, so that is understandable, but I am not the typical Minnesota mild black pepper is spicy type of person.  I love habaneros, and pretty much all hot peppers, and so does he. We both used to make hot sauces and see who’s could be the hottest and share them with each other.  I don’t always have time to make hot sauce now, but I still buy hot peppers and use them in recipes all the time.  They aren’t just for chili and tacos though, I found a recipe for a jalapeno infused tequila and decided to make some.  Why not?!  I knew it would be put to good use.  There used to be a drink at a restaurant I went to back in the day that is now closed that had a drink with a 7 pepper infused vodka that was amazing and spicy, so I thought this would be similar.

    When I go to restaurants now, I really do appreciate seeing specialty cocktails on the menu that are artfully crafted with flavors you wouldn’t expect together. Also, I get ideas for things to make at home.  I decided to use my jalapeno tequila to make a raspberry jalapeno margarita.  The sweetness with the spicy peppers sounded perfect!  I do love hot peppers with fruit!  This had a few more ingredients though than just the raspberries and jalapeno vodka. I decided to add some fresh mint that I had on hand, plenty of lime juice and a sweet vanilla syrup.

    It turned out so incredibly good!  Perfectly balanced tart and sweet with a slight kick and the fresh aroma of mint.  This is the perfect way to end a work week, which is why I made it.  Making your own fancy cocktails at home is so worth it!  If you are a fan of things with a little spice, give this recipe a try!  It would be perfect to serve with tacos!

    Raspberry Jalapeno Margarita
    Makes 1

    Ingredients:

    • 6 large ice cubes
    • 4 fresh mint leaves
    • 4 oz jalapeno infused tequila (recipe here)
    • 2 oz raspberry puree
    • 1 oz fresh lime juice
    • 1 1/2 oz vanilla syrup*
    • ice for serving


    Directions:

    1. To make drink, in a martini shaker add the ice and the mint and muddle the mint with the ice until fragrant and crushed up a bit.
    2. Next, add the tequila, berries, lime juice, vanilla syrup, and place top on shaker.
    3. Shake until well blended.
    4. Pour the drink through a strainer into the prepared glass (with some ice in it if you prefer your drink on the rocks), and serve!


    *Vanilla syrup

    • 1/4 cup maple syrup
    • 1/4 cup filtered water
    • 1 vanilla bean pod, split lengthwise


    Combine all ingredients in a jar, put the lid on and shake to dissolve syrup. Let sit at least a day to infuse, then strain to vanilla bean pod. Store in the fridge for up to a month.

  • Black and White Peanut Butter Cups

    Black and White Peanut Butter Cups

    It is no secret that I love chocolate and peanut butter together.  I have about 50 chocolate and peanut butter recipes on this blog.  Yes, I am a little, obsessed.  Or maybe I just know what I like, and I figure that some of you out there have a similar mind set when it comes to the combo.  Reese’s peanut butter cups were my all time favorite candy as a kid, so my love for chocolate and peanut butter started early.  Whenever I would see them at the store, I would beg for my Mom to buy some.  Also, they were the candy I got excited about at every holiday.  Those big giant egg shaped ones for Easter, the single ones for Halloween, which I would trade my other candy for, and of course the red and green wrapped ones for Christmas.  You know what was really exciting to me though?  When they came out with the white and dark chocolate ones back when I was still in high school.  I worked at Michael’s Arts and Crafts at the time, and we had a vending machine in the break room with those in there, and every time I went on break I would buy some.  It made the day more exciting.  Yes, I get pretty motivated by food. The white chocolate ones were my favorite at the time.

    Now of course I do not buy commercially made peanut butter cups like that, because they are usually not vegan, they contain artificial ingredients and lots of sugar.  But that doesn’t mean I don’t still get to enjoy peanut butter cups.  I make my own!  It is much more fun, and that way I can choose which ingredients go into them. I saw some at the gas station, and it made me want some so of course I had to make some. I couldn’t decide between white chocolate and dark, so I decided to make black and white peanut butter cups and get the best of both worlds!  I made my own home made white chocolate, a melt in your mouth delicious concoction made with real cacao butter (unlike a lot of commercial white chocolate that substitutes cheap fat instead), coconut butter and cashew butter (for creaminess).  It is so good, and I think I like it even better than the white chocolate I ate growing up.  For the dark chocolate I decided to melt down some vegan dark chocolate chips that I had on hand.

    I used my own home made peanut butter for the filling (one very important staple in my kitchen that I make weekly), and I did not add anything to it.  I figure the chocolate parts of the cup are sweet enough, and I wanted the center to just be salty, rich and delicious.  They turned out sooo good!  The light and dark chocolate tasted amazing together and the salty gooey peanut butter was just the thing to pair them with.  As a side note, I know I have been making a lot of chocolate recipes lately, but that is a good thing, right?  I have a funny reason why too. I found 2 bags of cacao butter in the back of my cupboard on the top shelf where I can’t reach, and I had bought a third…so I figure what better way to use it then to make chocolate?! If you are a big peanut butter cup fan like me, give these babies a try!

    Black and White Peanut Butter Cups
    Makes 12 large cups

    Chocolate:

    • 1 1/2 cups vegan dark chocolate chips, or vegan dark chocolate chopped


    White Chocolate:


    Filling:

    • 1/3 cup organic peanut butter*


    Instructions:

    1. Melt the dark chocolate in the top of a double boiler until smooth.
    2. Spoon a little chocolate into the bottoms of 12 peanut butter cup molds, filling them about 1/4-1/3 full.  Place in the freezer until hard, about 10 minutes.
    3. Combine cacao butter, cashew butter, vanilla, maple syrup,  and sea salt over a double boiler, and whisk until smooth.
    4. Spoon a heaping 1 tsp of the peanut butter over the hardened dark chocolate layer, then pour the white chocolate over it in the cups until the peanut butter is covered, and place them in the freezer until set, about 20 minutes.
    5. Enjoy! Store any extra in the refrigerator.


    *

  • Vegan Double Chocolate Zucchini Muffins 

    Vegan Double Chocolate Zucchini Muffins 

    The other day at work I was cutting up some zucchini for a recipe, and I thought to myself, chocolate zucchini bread or zucchini muffins sound really good.  I haven’t made any zucchini desserts for a really long time, I think since I was writing my cookbook “Just Vegan Cakes” and I made a chocolate zucchini cake.  That one is really good by the way, but I didn’t want a whole cake just for myself this week, so I made muffins instead.  Plus, who doesn’t like muffins?  Especially when they involve chocolate and you can have them while they are still warm and the chocolate chips are still gooey.  Plus they are super easy to make.  You just need a bowl, a whisk and muffin tins, no special equipment or complicated things.

    I already had a zucchini on hand just begging to be used in a recipe, so it was meant to be.  I love it when I don’t have to buy things for recipes, and I have them in my kitchen.  I veganized and tweaked a chocolate zucchini bread recipe from one of my Grandma’s old church cookbooks and turned it into muffins.  For the batter, I used coconut sugar to sweeten them, and avocado oil instead of the butter.  If you have never used avocado oil in baking, it is amazing.  It has a buttery mild flavor and it stays soft when it cools down unlike coconut oil.  I made these muffins gluten free as well, with Bob’s Red Mill gluten free all purpose baking flour.  If you don’t have that on hand though and you don’t care if they are not gluten free, you may use whole wheat pastry flour or regular all purpose flour instead swapped 1:1. The batter was rich and delicious.  Yes, I had to taste it of course.  The best part of the process of baking stuff like this besides the finished product is licking the batter from the bowl.  I know I sound like a little kid right now, but yeah I am not ashamed.

    As if they didn’t have enough chocolate goodness to them, I decided to add some vegan dark chocolate chips as well.  Because the gooey chocolate chips while they are still warm is one of my favorite things.  They smelled amazing while baking, like really good chocolate cake or brownies!  And once they were cool enough to try, they were sooo good!  They were moist, light and soft, with an intense rich chocolate flavor.  You can’t really tell that they have zucchini in them, but I love that it is in there.  I am one of those people who likes to hide veggies in things.  Why not?  If you can’t tell it is there, it is a good way to get some veggies.  If you are in the mood for something rich and chocolaty, make a batch of these!  You can enjoy them in less than an hour!


    Vegan Double Chocolate Zucchini Muffins
    Makes 12

    Ingredients:

    • 1 cup coconut sugar
    • 1/2 cup avocado oil
    • 1 1/2 Tbsp ground flax seed mixed with 4 1/2 Tbsp filtered water
    • 1 1/4 cups gluten free all purpose flour
    • 1/4 cup cacao powder or cocoa powder
    • 1/2 tsp sea salt
    • 1/2 tsp baking soda
    • 1/8 tsp baking powder
    • 1 cup peeled and shredded zucchini
    • 3/4 cup vegan chocolate chips


    Instructions:

    1. Preheat the oven to 350F degrees, and line 12 muffin tins with liners.
    2. Whisk together the coconut sugar, avocado oil and flax and water mixture in a large bowl.
    3. Add the flour, cacao powder, sea salt, baking soda and baking powder, and whisk until smooth.
    4. Add the zucchini and chocolate chips and mix until blended.
    5. Spoon the batter into the prepared muffin tins.
    6. Place in the oven, and bake for about 25 minutes until a toothpick inserted into the center comes out almost clean with a few moist crumbs attached.
    7. Let cool on a rack for at least 20 minutes before enjoying.
  • Vegan Peach Streusel Pie

    Vegan Peach Streusel Pie

    We don’t grow peaches here in Minnesota, so every Summer, they are like a treat.  At least to me, because there is nothing like a perfectly ripe, sweet peach.  Funny because when I was little, I wasn’t as big of a fan of them since I had only had the canned ones in peach pies that were just ok.  But nothing like the fresh ones.  I think the first time I had really good fresh peaches was when my Mom and I got them at a local store that was known for carrying really good ones.  That is actually where I bought 8 lbs of them earlier this week to make things out of because I haven’t had any yet this Summer.  They were so good too!  Perfectly ripe, not hard or too soft.  I am always bummed when I see peaches that look good but they are not ripe.  But these were perfect for the main thing I wanted to make with them, pie!  I have been dreaming about making a peach pie for weeks now, and I finally got around to making one.

    The last pie I made was a double crust pie, but this time I decided to go for a streusel topping, because not only is it my favorite, but it is easier to make than rolling out two crusts and not as fussy.  Which I was all for. No fussy recipes this week.  Do you ever have those weeks where you are tired and want good food that you made yourself but for not a lot of work?  Well that is me right now.  For the crust, I used a mixture of gluten free flour and Raw Guru almond flour because it makes the most delicious crusts!  The almonds give it a bit more richness than it would normally have and it sort of melts in your mouth.  The filling was pretty simple, just peaches, coconut sugar, cornstarch (to thicken), and vanilla. That was all it needed, because the peaches were so delicious and flavorful.  To make the topping extra crunchy, I added oats.  That was what my Mom always used when she made streusel, and so that is what I always use.  It makes them so much better than just flour, sugar and oil.

    The pie smelled so good while baking!  A sweet aroma of peaches and crust filling my kitchen.  I could not wait to try it, but of course I had to wait until the next day because I made it at night.  But it was well worth the wait!  I served it warm, topped off with my Peach Bourbon Ice Cream I recently made.  It was heavenly!  If you have a lot of peaches on hand, give this a try!  And, if you would prefer to make a gluten free pie, just use Bob’s Red Mill gluten free all purpose flour instead of the whole wheat flour, and quinoa flakes instead of the oats, just swap it in 1:1, it will turn out just as good.

    Vegan Peach Streusel Pie

    Makes one 9 inch pie

    Crust:


    Filling:

    • 6 cups organic ripe peaches
    • 3/4 cup coconut sugar
    • 1/4 cup cornstarch
    • 1 tsp pure vanilla extract


    Topping:


    Instructions:

    1. To make the crust, in a large bowl, mix together flour, almond sugar, and sea salt. Cut in coconut oil with a pastry blender or 2 knives until it is in pea sized pieces. Mix in  just enough water to create a smooth dough that holds together but isn’t too sticky. Add more water if needed, and knead slightly until a smooth dough is created. Roll out into a 10 inch circle on a sheet of slightly floured parchment paper, then use the paper to help you transfer one to an 9 inch pie dish.  Set it aside in a cool place.
    2. Pre-heat the oven to 400F degrees.
    3. To make the filling, combine the peaches coconut sugar, vanilla, and cornstarch in a bowl, and toss together.  Pour this mixture into the crust, then cover with foil, and bake until the filling is bubbling, about an hour.
    4. Meanwhile, to make the topping, mix all ingredients together with hands in a bowl until small clumps form.  Once the pie has baked for an hour, add the topping, and bake for 10-15 minutes more until it is golden brown.
    5. Remove from the oven to a wire rack.
    6. Allow to cool completely before serving.
  • Vegan Bourbon Peach Ice Cream 

    Vegan Bourbon Peach Ice Cream 

    I have been really into the berries this Summer, but what I have really been craving lately are some peaches!  They are not something that grows local here, but this is the time of the year when you can get the really good ones, so when I find some, I have to get them.  A lot of the ones this year that I have seen have not been the most ripe, so I have refrained from buying them, but Eric and I finally made it over to a store that always has really good perfectly ripe ones, and I bought a whole bunch.  Enough for a batch of wine, a pie and making some ice cream!  The latter of which today’s post is about.  I decided that some peach ice cream sounded perfect so I had to make some.  Growing up, my Grandparents often had peach frozen yogurt or ice cream in their freezer and it was pretty good!  It wasn’t something that we had at my house, we usually  just had the ice cream flavors with chocolate, mint or strawberry.  So it was something that was kind of a treat at my Grandparent’s.  They always let me have some too if I asked. I was thinking about that ice cream and how good it was while I was at work sweating it out in the kitchen, and I had all of the ingredients on hand at home!

    It was quite simple to make really, I used a coconut milk and cashew butter base to make it extra creamy, rich and delicious! No, this is not a low fat recipe.  So no need for anyone to comment on that letting me know. I am fully aware that this is rich, and that is how I wanted it!  Because ice cream is a treat.  Man was the base ever dreamy too!  It happens to be completely fruit sweetened, because the peaches were sweet, and I added dates as well to give it a slight caramel flavor.  Also, I decided to give it a slight upgrade and add some bourbon, because why not?!  Not only does it give the ice cream a little bit of smooth delicious bourbon flavor, but it prevents it from freezing too hard so that it is more scoop-able.  But you don’t want to add too much or it will not set up, just enough to give it flavor.

    Once it was all frozen and ready to go, I couldn’t wait to try it!  It was sweet, full of peach flavor, creamy, dreamy and delicious!  This is something I would get a double or triple scoop of at an ice cream shop!  You would never be able to tell that it is vegan either because it tastes even better than the dairy ice cream I ate growing up.  If you have peaches on hand, give this s try!

    Vegan Bourbon Peach Ice Cream 
    Makes 3 cups

    Ingredients:

    • 1 15 oz can full fat organic coconut milk
    • 1/2 cup raw cashew butter
    • 1 1/2 cups fresh organic peaches
    • 1/2 cup soft, pitted medjool dates (if they are not soft, soak them in filtered water for 30 minutes before using)
    • 2 Tbsp bourbon (make sure it is vegan on Barnivore)
    • 2 tsp pure vanilla extract
    • 1/4 tsp sea salt


    Instructions:

    1. Combine all ingredients in a blender and blend until smooth.
    2. Pour into an ice cream maker and process according to directions.  Alternatively, if you do not have an ice cream maker, pour it into a bowl, and whisk every half hour until it is to the consistency of a thick malt.
    3. Pour into a freezer safe container with a lid, and continue to freeze until firm enough to scoop (at least 4 hours or overnight). If it becomes too firm, simply let it sit out for 15 minutes before serving.
  • Vegan Chocolate Blueberry Pecan Butter Cups

    Vegan Chocolate Blueberry Pecan Butter Cups

    When I was little, I loved going shopping with my Mom at the mall.  And one of the local malls had this really cool store that looked like a log cabin house inside and they mostly sold home decor items.  You would think that would be a boring place for a kid to shop with her Mom at, but I loved the fact that it was like a house to explore inside and get lost in. Plus I was always up for any kind of shopping trip, it was like an adventure. They always had some goodies near the register for sale, including some huckleberry chocolates that I would always beg my Mom to buy.  They were so good, dark chocolate with jammy huckleberries in the middle!  I don’t think that store is there anymore, but those candies were my main memory of it. A lot of my memories tend to be food related, what can I say?  I like food. Which is why I am sharing recipes with you all in the first place!  I have never seen any huckleberries or huckleberry jam for sale around here, but what we do have is a lot of blueberries, the huckleberry’s close cousin.

    I was thinking about those chocolates the other day and how good they were, so I decided to make something similar with a blueberry jam.  Now I say similar, because I made these into nut butter and jelly cups, one of my all time favorite things.  There is just something so good about the gooey nut butter, jammy fruit and dark chocolate that is so good!  Yes, I take this over a truffle any day!  I bought some fruit sweetened blueberry jam, and I had recently made some pecan butter, so it was perfect!  I decided to make both white and dark chocolate cups because Raw Guru recently sent me both some Rawmio Essentials 100% Cacao Dark Chocolate Bars and Raw Cacao Butter.  The 100% dark chocolate is amazingly smooth, and contains only 2 ingredients, cacao butter and cacao nibs.  If you are truly a dark chocolate lover, you can just eat it as is, but if you like a little more sweetness, you can add your choice of sweetener to it after you melt it down, which is what I did for these cups.  It turned out just perfect as a chocolate base for these cups!

    For the white chocolate I used a mixture of cacao butter, coconut butter, and cashew butter for a rich and creamy base.  Both of the chocolates were sooo good with the pecan butter and blueberry jam filling!  I make my own pecan butter at home in the Vitamix because it is more cost effective than store bought, and I end up making it about once a week.  If you can’t make your own though, and you can’t find it in a store or online, you could use another nut butter like almond for these, that would be really good too.  If you need chocolate making supplies, for desserts like this, you can find the Rawmio Essentials bars, raw cacao butter, or even cacao powder, on the Raw Guru website!

    Vegan White Chocolate Blueberry Pecan Butter Cups
    Makes 6 large candies

    Ingredients:


    Filling:


    Instructions:

    1. Combine cacao butter, cashew butter, vanilla, maple syrup,  and sea salt over a double boiler, and whisk until smooth.  Pour into the bottoms of 6 larger peanut butter cup tins (or molds), then place them in the freezer to set.
    2. Once the chocolate has hardened, mix together the pecan butter and coconut butter for the filling, and spoon a heaping 1 tsp of the pecan butter mixture over it, then spoon 1 tsp of the jam over the pecan butter.
    3. Pour more chocolate over the cups until the jam is covered, and place them in the freezer until set, about 20 minutes.
    4. Store any extra in the refrigerator.


    Vegan Dark Chocolate Blueberry Pecan Butter Cups
    Makes 6 large candies

    Chocolate:


    Filling:


    Instructions:

    1. To make the chocolate, whisk together all ingredients until smooth.
    2. Spoon a little chocolate into the bottoms of 6 peanut butter cup molds, filling them about 1/4-1/3 full.  Place in the freezer until hard, about 10 minutes.
    3. Once the chocolate has hardened, mix together the pecan butter and coconut butter for the filling, and spoon a heaping 1 tsp of the pecan butter mixture over it, then spoon 1 tsp of the jam over the pecan butter.
    4. Pour more chocolate over the cups until the jam is covered, and place them in the freezer until set, about 20 minutes.
    5. Store any extra in the refrigerator.


    *If you would rather make your own dark chocolate, use this recipe that follows. Or if you have another dark chocolate you want to use, just melt down 1 1/2 cups chopped for the recipe.

    Raw chocolate:


    Whisk together until smooth. Pour into molds, and chill until hard.  Keeps for a few months in a sealed container in the refrigerator.


  • Vegan Mocha Brazil Nut Butter Cookies 

    Vegan Mocha Brazil Nut Butter Cookies 

    You know what my favorite guilty pleasure is?  Nut butters.  Yes, I eat a little bowl of nut butter with fruit to dip in it and call it dessert sometimes. It is not because I am too lazy to make a dessert, it is because I am craving delicious nut butter.  And, I wish I could eat the whole jar, but I know that anything in excess is not healthy.  I have my favorites, like peanut butter and pecan butter, but love them all, and when Raw Guru recently sent me some Brazil nut butter I was excited about it.  I make my own nut butters all the time, but none of them are as smooth and rich as the Raw Guru nut butters, so if you like really good nut butter too, check them out on their website.  Brazil nut butter is something that seems unusual and special to me too, so instead of just eating the jar like I normally would, I decided that it deserved to be used in something really good.  So I made some Vegan Mocha Brazil nut butter cookies.

    Nut butter cookies are always amazing, but add some cacao and coffee into the mix and they are even better!  For these, I made my usual peanut butter cookie base, but with the Brazil nut butter, cacao powder and espresso and it was sooo good!  As you know if you read this blog frequently, I am a cookie dough girl.  I like it better than actual baked cookies most of the time, so of course I had to keep sampling this dough.  Of course, second best is fresh baked cookies, so I got both out of it which was a win all around.  I added in some Raw Guru cacao nibs too for a nice crunch. I like cacao nibs because they are chocolaty without being sweet, and I am someone who likes really dark chocolate.  They have almost a coffee flavor note to them too, which fits right in with these cookies.

    They smelled amazing while baking, the aroma of dark chocolate and a hint of coffee filling my kitchen and home. That is part of why I love baking, the amazing smells.  It is hard to be unhappy while baking, the aromas alone are mood boosters.  They turned out soft and chewy, just how I wanted them.  I decided to drizzle them with Rawmio dark chocolate Raw Guru sent me as well, because why not?! Make them extra decadent and delicious!  These cookies are sooo good!  Rich, fudgy, dark chocolate flavor with a slight nuttiness, and touch of coffee.  The cacao nibs add a nice little crunch that I love as well!


    Vegan Mocha Brazil Nut Butter Cookies 
    Makes 12 cookies

    Ingredients:

    Cookies:


    Chocolate Drizzle:


    Instructions:

    1. In a small bowl, whisk together the flax seed and water.  Place the bowl in the fridge for 15 minutes, this is your flax egg.
    2. In a large bowl, with a wooden spoon, mix together the sugar, brazil nut butter, coconut oil, vanilla and flax egg, until smooth.  Then mix in the flour, cacao powder, espresso powder, soda, baking powder, and sea salt in until the mixture is smooth. Then mix in the cacao nibs.
    3. Preheat the oven to 375F degrees.  Line a sheet pan with parchment.
    4. Shape the cookie dough into 2 inch balls, place on your baking sheet a few inches apart and flatten slightly with your hand or the bottom of a glass.
    5. Place in the oven and bake at 375 for 12 minutes or so, until lightly browned and set.  Allow to cool completely on a rack.
    6. Melt the dark chocolate in the top of a double boiler.
    7. Drizzle the dark chocolate over the cookies, then set in the freezer until it has hardened.
    8. Enjoy!

    *If you can’t get Brazil nut butter, or you prefer another nut or seed butter, go ahead and use that.  Just make sure it is a more runny nut butter or mix in a little melted coconut oil to make it runny, because the consistency of the Brazil nut butter is runny and in order for the recipe to work, it should be one with the same consistency.

  • Vegan Strawberry Lemon Cream Tarts

    Vegan Strawberry Lemon Cream Tarts

    It has been beautiful here in Minnesota the last couple of days.  A low 60 degrees in the morning, 80 in the afternoon and the humidity has finally dropped.  It is bearable to workout outside again, and my injury has healed just in time to be able to enjoy running in it.  It was so nice to go out and run this morning and not be immediately sweating and have a nice breeze with it! While I was enjoying the outdoors, I also was contemplating what I should make with the many organic strawberries I had in my refrigerator.  I hadn’t decided by the end of my run, but luckily I had all day at work to think about it.  My mind is like a snow globe sometimes, too many ideas floating around all at once.  What I decided on though at the end of the day were some strawberry lemon tarts.  I have always been a fan of tarts, ever since I was little and my Mom and I used to go to Cafe Latte in St. Paul and get dessert.  I liked the little mini tarts with fruit on top.  Pretty soon we found recipes to make our own and it quickly became one of our favorite desserts. So simple, but so good.  So now even as an adult I love them.

    Raw Guru recently sent me a goodie box that included Supernova Almond Flour and Stone Ground Organic Coconut Butter, so I knew I could put them to good use in my tarts.  Their almond flour is actually truly raw, which can not be said of most “raw” almond products in the US, but theirs comes from Italy and it is top quality.  It has a nutty sweet flavor that is perfect when used in desserts, like the tart crusts in this recipe.  Their coconut butter is silky smooth, more so than the stuff I make myself at home, so it makes for a nice smooth filling in a recipe like this or frosting or coconut cream which is what I most often use it in.  If either of these things sound good to you, check them out on the Raw Guru website!  I have loved all of their products that I have tried, especially their nut butters.  definitely check those out too while you are there!

    Back to the tarts, they were simple and easy to make, which is awesome on a weeknight!  For the crust, I used the almond flour, quinoa flour, dates, coconut butter and sea salt, and they turned out just right! Rich tasting and a simple but delicious base for the filling. The filling was a mixture of coconut milk and cashew butter with a hint of tart aromatic lemon and it was silky smooth, reminiscent of cheesecake filling. It set up nicely and it was the perfect pairing with the fresh strawberries.  What I also love about these tarts is you don’t have to heat up the oven, which is awesome in the Summer!  They are super delicious, so if you happen to have fresh strawberries on hand, give them a try!

    Vegan Strawberry Lemon Cream Tarts
    Makes four 4 inch tarts

    Crust:


    Filling:

    • 3/4 cup full fat coconut milk (the thick part from the top of the can)
    • 2 Tbsp raw cashew butter
    • 1/3 cup Dastony coconut butter, warmed to liquid
    • 1 Tbsp lemon juice
    • 1 Tbsp organic lemon zest
    • 2 Tbsp maple syrup
    • 1/4 tsp sea salt


    Topping:

    • about 1 cup organic strawberries, quartered


    Instructions:

    1. To make the crusts, combine all ingredients in a food processor and process until the mixture is the consistency of dough, and holds together when squeezed.
    2. Oil four 4 inch tart pans, and press the mixture into the bottoms of the pans and up the sides.
    3. To make the filling, place all ingredients in a food processor and process until smooth.  Spoon into the tart shells, and smooth the tops.
    4. Arrange berries on top of the tarts, and refrigerate for at least 3 hours before serving.


  • Vegan Raspberry White Chocolate Cheesecake 

    Vegan Raspberry White Chocolate Cheesecake 

    I make my own Birthday cake every year, and half the time when I tell people that, they are baffled as to why.  I even had someone tell me that it was sad that I made my own, and someone else should make me one or buy me one.  But that is not how I feel at all.  My boyfriend or family would be happy to buy me one I am sure.  I mean, I grew up most of my life with other people making me cakes.  But at one point back when I was in college and I started baking a lot, I decided that I loved making my own, because then I could make something fun, something healthier probably than I would get at a bakery, and a cake that was exactly what I wanted.  Sometimes it was not cake at all, a few years  I made pies because I like those too and that was what I felt like. Even put candles in them and everything. Most years I have an idea of what I want way before hand.  Like last year,  I made a Vegan Snickers Pie.  It was bomb!  But this year I knew I wanted something with raspberries and vanilla and I went back and forth between cheesecake and a baked vanilla layer cake.

    I ended up deciding on the cheesecake, because I had a lot going on at the time, and I figured it would be easier to make, plus the heat index was 108F degrees that day and it was super humid, and I did not want to heat up the oven.  Also, I always know cheesecakes are going to be good and I hadn’t made one in a really long time.  They were my favorite dessert for a while a few years back when I ate only raw foods, and I made one almost every weekend. Now it is usually every few months, and whenever I make one I am reminded of how good they are.  Funny story, a raw vegan cheesecake was the reason I decided to go vegan. I made one, and it was so good, that I decided to never make a dairy cheesecake again, and that maybe I didn’t need dairy after all.  Because that was the main thing that was stopping me from being a vegan, the cheese and dairy products.  I became vegan after that and haven’t missed animal products. Anyways, back to the cake I made for my Birthday. I decided to make a raspberry white chocolate cheesecake.

    Raspberries are my favorite fruit, and back in the day when I was in school I would joke that if I ever owned my own restaurant I would name it “Raspberry”.  Yeah, that is not going to happen, but you get the idea, I really love raspberries.  I had plenty of cacao butter on hand, so a raspberry white chocolate cake was the perfect thing to make!  It is really quite simple to make a raw cheesecake too, don’t let this one fool you.  I made a raspberry filling and a vanilla filling, both containing the cacao butter for white chocolate, as well as a raspberry swirl. It turned out exactly how I wanted it!  So rich and delicious, creamy like dairy cheesecake, and scented with sweet raspberries, vanilla and white chocolate. This is the perfect cake for Summer!  So, if you have raspberries on hand, give it a try!

    Vegan Raspberry White Chocolate Cheesecake 
    Makes one 8 inch cake

    Crust:

    • 1/2 cup finely shredded coconut
    • 1/2 cup gluten free organic rolled oats
    • 1/2 cup pitted medjool dates (if not soft, soak them in filtered water first and drain well)
    • 1/4 tsp sea salt


    Filling:


    Instructions:

    1. Oil an 8 inch spring form pan, and line the bottom with parchment paper.
    2. To make the crust, place all ingredients in a food processor, and process until crumbs and starting to hold together (if they are not holding together when squeezed, add a few tsp filtered water and blend). Press into the bottom of the prepared pan.
    3. Meanwhile, to make the filling, combine the coconut milk, cashew butter, maple syrup, lemon juice and zest, vanilla and sea salt in a high speed blender or food processor and blend until smooth.  Add 1/2 cup of the coconut butter and cacao butter and process until smooth.  Divide the filling between 2 bowls.
    4. Add one bowl of filling back to the food processor and add 1 cup of raspberries and 2 Tbsp coconut butter and process until smooth.  Pour back into the bowl and set aside.
    5. Rinse out the food processor and puree the other 1/2 cup of raspberries until a loose jam consistency.
    6. To assemble the cake, Pour all but about 1/4 cup of the raspberry cheesecake filling over the crust, then drop some of the raspberry puree over that by the tsp, and swirl with a knife.  Then pour the vanilla filling over that, and drop the raspberry filling and raspberry jam over that by the tsp (you may have extra, but don’t add it if you have enough already on top of the cake or it will look messy) swirling it with a knife to make the top pretty.
    7. Place cheesecake in the freezer to set for about 4-5 hours (or overnight in the refrigerator if you are not in a hurry).
    8. Remove from the freezer, un-mold, and enjoy!  Store any leftover cake in the refrigerator.


    *I use Thai Kitchen full fat coconut milk.  If you are using a different brand, just make sure it is the thick type, 2/3 of the can at least should be very thick.


  • Lets get Fizzy with Sparkling ICE and my Strawberry Kiwi Sparkling Tonic!

    Lets get Fizzy with Sparkling ICE and my Strawberry Kiwi Sparkling Tonic!

    This post is sponsored by Sparkling ICE but the content and opinions expressed here are my own.

    I love sparkly things, especially in cocktails!  And I have been making quite a few lately!  It has been really steamy here in Minnesota this week!  We had a heat index of about 108F degrees a few days back, and it created some monster thunderstorms, but they didn’t do much to cool it off outside. I pretty much expect that July will be hot as it is the peak of Summer.  But you know what makes it better?  Those cocktails I mentioned earlier.  I don’t mind the 90F degree heat so much when I am sitting on the patio sipping something cool.  I love my Summer drinks, but what I don’t love is added sugar in them.  A lot of drink mixes come with loads of sugar so I avoid that stuff.  But you know what I just discovered that is perfect for using in cocktails?  Sparkling ICE !  It is a fruity sparkling water with zero sugar, zero calories, vitamins, antioxidants and loads of natural fruit flavor.  When I was younger I pretty much lived on sparkling water. I have never been one to drink pop, but I love the fizz of sparkling water, and the Sparkling ICE is some of the most delicious I have tasted! My boyfriend Eric has been drinking it for a while, because he decided that he wanted to drink less sugary soda, and he buys this instead. He was the one who first got me to try it, and it is super refreshing and delicious!  The Kiwi Strawberry and Lemon Lime flavors are my favorite.

    The Lemon Lime is good for when you want a citrus twist in your cocktail, and even just adding a shot of vodka or tequila to it is a simple cocktail that anyone can make!  But I made something a little more fancy yesterday, a Strawberry Kiwi Sparkling Tonic!  I have been craving a gin drink since I saw one in a restaurant on a cocktail menu, but I had decided not to order it because it had honey in it (which isn’t vegan), plus it had another sugary syrup too which was too much sugar, and I told myself, I should make one at home because I knew I could make one that was just as good.  So I bought myself a bottle of gin, and some Kiwi Strawberry Sparkling ICE as well as some fresh berries and lemons and I had the makings for a delicious cocktail! I muddled mint and strawberries in a shaker, then added the lemon juice, gin and Kiwi Strawberry Sparkling ICE and voila!  A delicious refreshing drink. It only took me a couple of minutes to make, and it was as good as something I would have ordered in a restaurant.  If you want to impress your friends at your next gathering make them one of these cocktails, recipe is at the bottom of the post.

    Drinks with no added sugar and only natural ingredients are important to me, which is why I often choose Sparkling ICE as my mixer! Most of us are wanting to look good in our Summer clothes and be confident, and making drinks that are low in calories, and don’t make us feel yucky or give us a sugar buzz is a good way to keep us feeling that way!  You can find all 16 flavors of Sparkling ICE on Amazon HERE!

    Strawberry Kiwi Sparkling Tonic
    Makes 1 drink

    Ingredients:


    Instructions:

    1. In a cocktail shaker, combine the ice, strawberries, mint leaves, and muddle (smash) it all together with a muddler, or the end of a wooden spoon if you do not have one.
    2. Add the lemon juice, put the top of the shaker on, and shake it briefly, then pour in the Sparkling ICE and stir it a few times to blend.
    3. Pour into a tall serving glass over ice, and enjoy!
  • Vegan Summer Chocolate Berry Tartlettes

    Vegan Summer Chocolate Berry Tartlettes

    One of my favorite parts of Summer is the berries!  And, luckily the wild raspberries are growing like crazy around here this year!  Every time Eric and I go out for a walk practically we find more ripe ones to pick. I guess I consider berries special because it is only this time of the year that they taste the best, and are affordable to buy.  I always try to buy organic berries if I am buying them because they are a heavily sprayed crop, and in the off months (so October through end of April), I see raspberries being sold for $8.99/lb sometimes! Yikes, and they don’t even taste that good because they have to be shipped in from far away.  This is why it is important to eat in season fruits and enjoy them while you can!  So between the wild raspberries I have picked, and the good prices on berries lately I have been eating a lot of them.  Why not?  They are high in vitamins and antioxidants!

    I had 3 different kinds of berries in my fridge, and I said to myself, I need to make something pretty and delicious with some of these. Involving chocolate. Because chocolate is absolutely amazing with berries!  I did not want to spend a lot of time on it though because it was a work night, so I decided on some simple chocolate tarts. I had all of the ingredients on hand (mostly pantry items except the berries), and they took me about 30 minutes to make.  For the crust I used a mixture of  oats, nuts, and cacao powder.  Super easy, and all you do is press it into the pans, no baking required, which is always good on a 90F degree day, which it was!

    I made a luscious avocado mousse filling so good I could have eaten it with a spoon, but I saved it for the tarts.  They would have been good just like that of course if all you wanted was chocolate, but berries were to be the star of this show, so that is what I topped them off with.  They were so pretty!  Almost too pretty to eat, but that never stops me when I am hungry.  They were so good with the creamy rich chocolate filling, crunchy crust, and sweet jammy berries!  These are actually pretty healthy, so I wouldn’t judge if you decided to eat all three that the recipe makes instead of sharing them!

    Summer Chocolate Berry Tartlettes
    Makes 3 4 inch tartlettes

    Crust:

    • 1/2 cup organic gluten free rolled oats
    • 1/2 cup organic almond meal
    • 1/3 cup soft, pitted medjool dates
    • 2 Tbsp raw cacao powder or unsweetened cocoa powder
    • 1 Tbsp almond butter
    • 1/4 tsp sea salt


    Filling:

    • 1 medium avocado
    • 2 Tbsp almond butter
    • 2 Tbsp raw cacao powder or unsweetened cocoa powder
    • 2 Tbsp maple syrup
    • 1/4 tsp sea salt


    Topping:

    • about 1 cup mixed fresh organic berries (if they are strawberries, quarter them)


    Instructions:

    1. To make the crusts, combine all ingredients in a food processor and process until the mixture is the consistency of dough, and holds together when squeezed.
    2. Oil 3 4 inch tart pans, and press the mixture into the bottoms of the pans and up the sides.
    3. To make the filling, place all ingredients in a food processor and process until smooth.  Spoon into the tart shells, and smooth the tops.
    4. Arrange berries on top of the tarts, and refrigerate for at least 3 hours before serving.


  • Vegan Blueberry Vanilla White Chocolate Popcorn

    Vegan Blueberry Vanilla White Chocolate Popcorn

    Usually every weekend I make a dessert, like a cake, or pie or cheesecake or something. But this weekend I decided to make a sweet popcorn instead for dessert because that is what I was craving.  Is that weird?   I like to make gourmet type popcorn, like the kind that you can buy at the mall in all sorts of different flavors, only mine do not contain any artificial colors, flavors, or refined sugars.  No matter which kind I make, it is really good 99% of the time.  I luckily have yet to have a popcorn making fail.  Popcorn is something that always makes me hungry when I smell it.  Like at the movie theater.  I never buy any there, I usually just smuggle some of my own in because it costs an arm and a leg there and isn’t healthy (plus might contain animal products).  But if I don’t have any popcorn with me, it makes me hungry smelling it and I usually have to go home and make some.  Cleaver whoever first decided that movies went with popcorn, and that they should sell it at the theater.  Anyways back to those popcorn flavors.  I sometimes go savory and make something like Vegan Bacon Cheddar, but I love the sweet flavors the most like my Dark Chocolate Sea Salt Popcorn or Raspberry Ghost Pepper Caramel Corn. You get a sweet and salty effect (because I add a bit of sea salt too), plus the crunch of popcorn is so satisfying.

    This time I decided to make blueberry vanilla white chocolate.  You may wonder how I added blueberries to popcorn without it getting soggy. Well, I used freeze dried ones, because they are packed with loads of blueberry flavor without the moisture of fresh berries.  I often times use them in things like coconut whipped cream, frosting, or raw chocolates for color. I made my own white chocolate coating for this, with the same ingredients I use to make actual vegan white chocolates, cacao butter, cashew butter, coconut butter, and maple syrup just in different proportions so that it coats the popcorn better. I added in plenty of vanilla, my favorite flavor, and it was heavenly, even in melted form!  I had whipped up a big batch of popcorn in my Whirly pop the day before, so this was a really quick and easy to make recipe!

    It was so good!  Crave worthy, that sweet vanilla white chocolate, a hint of sea salt and the flavorful berries!  I could not stop sampling, and half the pan was gone before I knew it.  I had to save some though, because I wanted to share it with Eric, who is an even bigger popcorn lover than me.  Skip buying store bought gourmet popcorn and whip up a batch of this for yourself!


    Vegan Blueberry Vanilla White Chocolate Popcorn
    Makes 8 cups

    White Chocolate:

    • 1/4 cup cacao butter, melted
    • 2 Tbsp raw cashew butter
    • 1/4 cup coconut butter, warmed to liquid
    • 1 tsp pure vanilla extract
    • 2 Tbsp maple syrup (or to taste)
    • 8 cups plain popcorn
    • 1 cup organic freeze dried blueberries, crushed


    Instructions:

    • To make the white chocolate, whisk together all ingredients until smooth, then pour over the popcorn in a large bowl, and add the blueberries.
    • Toss together until all of the popcorn is coated, and the berries are evenly distributed.
    • Allow to cool until the white chocolate dries (I put it in the freezer for 15 min).  Enjoy!
  • 24 Fabulous Vegan Pie Recipes

    24 Fabulous Vegan Pie Recipes

    When it comes to desserts, pie is one of my top three.  I mean, you can have so much variety when it comes to ingredients, textures and flavors!  There are cream pies, fruit pies, nut pies.  All delicious in their own sort of way.  Just when I think I have a favorite I make a new recipe, and I am in love with another pie all over again.  I admit, the cream pies have a special place in my heart, as that was my favorite kind of pie as a kid, but there is nothing like a warm fruit pie a la mode!  Pie is something that is good for every occasion, in fact I have even been to a wedding that served pie instead of cake, which I thought was an awesome idea.  I thought you might love pie too, so I have gathered my top 24 vegan pie recipes for you to browse!  These are the ones that wowed me, and I thought were worth sharing again. There is something for everyone here, rich and creamy pies, sweet fruit pies, decadent chocolate pies, crunchy nut pies…you get the idea!  These are pies from all year round, not just limited to the Summer ones, even though it happens to be Summer right now, because heck, what is to stop someone from making a pumpkin pie in July if they are craving it?!  I hope this list inspires you to do some pie making!

    Vegan Strawberry Margarita Pie

    Vegan Chocolate Chip Cookie Dough Pie 

    Strawberry Rhubarb Pie 

    Vanilla Maple Bourbon Apple Pie

    Mango Nectarine Pie with Almond Oat Crust 

    Vegan Snickers Pie

    Vegan Nectarine Strawberry Lavender Cobble Pie

    Vegan Cardamom Pear Almond “Cream Cheese” Pie 

    Triple Layer Chocolate Pumpkin Pie

    Vegan Peanut Butter Banana Cream Pie

    Vegan Raspberry Rhubarb “Cream Cheese” Pie

    Vegan French Silk Pie 

    Vegan Hazelnut Crusted Apple Pie 

    Raw Peanut Butter and Jelly Pie 

    Vegan Sweet Potato Pecan Pie 

    Vegan Dutch Apple “Cream Cheese” Pie 

    Vegan Grasshopper Pie 

    Vegan Black and Blueberry Cheesecake Pie 

    Vegan Mixed Berry Pie with Crumble Topping

    Raw Matcha Coconut Cream Pie 

    Vegan Lemon Blackberry Cream Pie 

    Vegan Butternut Squash Apple Pie

    Raw Raspberry Dream Pie 

    Raw Banana Macadamia Coconut Dream Pie


  • Raspberry Rosé Slushie

    Raspberry Rosé Slushie

    People think of Minnesota as being the land of snow and ice, but what they don’t realize is that there is a part of the year when it gets pretty hot here.  It is not just hot either, it is the type of hot that also includes humid.  Like you walk outside and a few minutes later you start to sweat and pretty soon your clothes are clinging to you, your hair is a poofy frizzy mess, and your face starts dripping. It was like that earlier this week, and I work in a kitchen so I am hot at work, and hot when I get off work.  So with all of this heat and warmth, I decided that I needed to make something refreshing. A slushie seemed like the perfect solution.  I used to love them as a kid. I mean who didn’t love those giant big gulp slushies that you could get at the gas station that came in all sorts of pretty colors?  Well, now I don’t, because I know that they are made with fake ingredients and artificial colors, but back in the day I thought that they were bomb!  Also, I had a slushie maker when I was little that I thought was pretty cool, and we used to just use fruit juice with it, so it was healthier than the slushies at the store.  As an adult, I still occasionally make slushies, when the weather calls for it.

    This time, I made a raspberry rosé slushie.  I had been dreaming about this one for a while.  Wine in a slushie?  Heck yes!  I actually make my own wine so I have plenty of it stashed away, and I thought why not add it to a slushie along with some fruit? Of course, if you are making this, you can use whatever your favorite rosé wine is.  Just make sure it is a sweeter one so that the slushie will be balanced.  I had gotten some organic raspberries from my work, and I thought that they would be perfect for pairing with the rosé.  I also decided to add in some fresh mint, because I love it with berries.  If you are not a mint fan you can leave it out, but I like the freshness it adds.

    These are super easy to make if you have a blender, it only takes about 30 seconds or less!  So no excuses not to make these the next time you are in a slushie sort of mood. I kind of felt like a little kid again drinking it but of course these have an adult twist with the rosé.  I think it would be fun to make them for a party in the Summer!  I hope you are all staying cool where you live!

    Raspberry Rosé Slushie
    Serves 1

    Ingredients:

    • 1 1/2 cups fresh organic raspberries
    • 1 cup sweet rosé wine (make sure it is vegan on Barnivore)
    • 2 Tbsp fresh mint leaves
    • 3 cups ice cubes


    Directions:

    Combine all ingredients in a blender with the raspberries at the bottom, and blend (but not too long or it will be all liquid) until the ice is finely crushed.  Pour into a nice tall glass, and enjoy!

  • Vegan Chocolate Black Raspberry Almond Butter Cups

    Vegan Chocolate Black Raspberry Almond Butter Cups

    I know that being a runner doesn’t define me, but I still get kind of sad and feel lost when I have an injury and can’t do the thing I love.  It usually takes me a few weeks to adjust, because to me, it is my therapy, and what keeps me from getting as stressed out as I would otherwise.  I has always been that way, ever since I was in college and I had my first bad injury that sidelined me for a few months.  A few weeks back I was running fine and did a race, then bam!  Injury struck again.  I have had a lot of stressful things going on in my life lately and lots of change which I don’t do well with (being a very routine person who likes things the same), and I think my body was just tired of it.  So I am taking time off from running now for a few weeks (or as long as this stubborn thing takes to heal).  I have to still fill that time with something active though, or I will go nuts!  I have been biking, and thank goodness it is nice outside!  I went on a 31 mile bike ride last Saturday, and not only was it nice, but while I was enjoying the scenery along the trails, I spotted a bunch of black raspberry bushes. I didn’t have anything with me to carry them if I picked them, so later me and Eric came back and picked some.

    I love Minnesota wild black raspberries!  You can’t usually buy them at the store, most of the time you have to find them wild and pick them.  I hit the jackpot with all those bushes!  Normally I find a bush here and there, maybe with about 5 ripe berries on it, but these bushes had loads of them!  It must be a really good year for raspberries.  We picked a good sized container, and later I decided to make some black raspberry almond butter cups.  Both white and dark chocolate for variety. Eric approved of my choice of dessert to make with them, and he was excited about trying them as well. Nut butter cups are one of my favorite things.  Ever since I was exposed to Reese’s peanut butter cups as a child.  Although, I like my home made ones better.

    These were pretty simple to make, because I actually had some vegan chocolate already made and on hand.  But in case you don’t I included the recipes so you can make some.  For the dark chocolate, you could just melt vegan dark chocolate chips and use those instead of making your own if you want to simplify things.  I just mashed the berries with a touch of maple syrup (not much was needed because they were so flavorful already), and it tasted like really good jam.  A bit of almond butter for the filling as well, and I could not wait to try them!  Once they were all set up and ready to enjoy and I was able to try them, they were heavenly!  I can’t pick which one I like better, the white chocolate is equally as good as the dark.  If you have access to black raspberries where you live, give these a try (or use red raspberries if you can’t get black).  They definitely put a smile on my face, and made me forget about the running injury.  The berry picking was a fun adventure too!


    Vegan White Chocolate Black Raspberry Almond Butter Cups
    Makes 6 large candies

    Ingredients:


    Filling:

    • 6 scant tsp almond butter*
    • 1/4 cup black raspberries
    • 1 tsp maple syrup


    Instructions:

    1. Combine cacao butter, cashew butter, vanilla, maple syrup,  and sea salt over a double boiler, and whisk until smooth.  Pour into the bottoms of 6 larger peanut butter cup tins (or molds), then place them in the freezer to set.
    2. Once the chocolate has hardened, spoon a heaping 1 tsp of almond butter over it, then mash the berries with the tsp maple syrup until jam like, and spoon 1 tsp of that over the almond butter.
    3. Pour more chocolate over the cups until the jam is covered, and place them in the freezer until set, about 20 minutes.
    4. Store any extra in the refrigerator.

    *Please note: if your almond butter is the runny variety, you may need to add some coconut butter to it to firm it up so it doesn’t run when placed in the cups. Add about 1 tsp coconut butter to it if it is runny.


    Vegan Dark Chocolate Black Raspberry Almond Butter Cups
    Makes 6 large candies

    Chocolate:


    Filling:

    • 6 scant tsp almond butter*
    • 1/4 cup black raspberries
    • 1 tsp maple syrup


    Instructions:

    1. To make the chocolate, whisk together all ingredients until smooth.
    2. Spoon a little chocolate into the bottoms of 6 peanut butter cup molds, filling them about 1/4-1/3 full.  Place in the freezer until hard, about 10 minutes.
    3. Once the chocolate has hardened, spoon a heaping 1 tsp of almond butter over it, then mash the berries with the tsp maple syrup until jam like, and spoon 1 tsp of that over the almond butter.
    4. Pour more chocolate over the cups until the jam is covered, and place them in the freezer until set, about 20 minutes.
    5. Store any extra in the refrigerator.


    *Please note: if your almond butter is the runny variety, you may need to add some coconut butter to it to firm it up so it doesn’t run when placed in the cups. Add about 1 tsp coconut butter to it if it is runny.

  • Tie Dye Lemon Berry Popsicles

    Tie Dye Lemon Berry Popsicles

    When I was little, I think we mostly lived on popsicles and freezees in the Summer.  We would play outside most of the day, doing things like building forts, riding our bikes, or running through the sprinkler.  But we would always come back and want something cold and refreshing.  My Dad always had a giant supply of freezees and popsicles in the freezer for us, and we loved them. They may have just been sugar water, but it was awesome to my 8 year old self and my friends. As I got older though, I realized that they were not good for me, and didn’t have much flavor or any real flavor at all and I began t prefer the popsicles made from real fruit.  They tasted so much better!  I now like to make my own popsicles instead of buying them from the store, and I share them with Eric.  We like to eat them while we go for a walk on a hot day, it helps for a little while at least to stay cool.  I recently made some lemon berry ones that were really simple, but so good, and the perfect thing to enjoy on a super hot day.  Which it totally was, because the day I made them it was heat indexed at 108F degrees. That’s the thing about Minnesota, people think it is just cold here, but it gets really hot and humid in the Summer, like the type of heat where you immediately start sweating after walking outside.  So the popsicles were needed.

    I admit when I made these I was going for more of a red, white and blue healthy Bomb Pop (those sugary red, white and blue ice pops everyone has around the 4th of July) sort of thing for the 4th of July, but they didn’t exactly turn out those colors.  Red and purple was more like it and it reminded me of tie dye, so that is what I named them.  They turned out really good though, which was what mattered, so I still wanted to share the recipe even though they look different than I wanted.

    These are super simple to make if you have a blender, and now is the time to make them when fresh berries are in season.  They can be made with frozen as well, if you don’t happen to have fresh on hand. I am all for using what you have at the time!  They are sweet from the berries, and a little tart from the lemon, like a really good lemonade when you get to the lemon layer. These are so much better than any of the popsicles I ate as a kid.  The flavors are real, bright and delicious!  You might just want to eat more than one, and you totally can because they are healthy! I hope you are all staying cool this Summer!

    Tie Dye Lemon Berry Popsicles
    Makes 6

    Ingredients:

    • 1 1/2 cups fresh organic strawberries and raspberries
    • maple syrup
    • 1 1/2 cups fresh organic blueberries
    • 1/4 cup lemon juice
    • 3/4 cup filtered water


    Instructions:

    1. To make the popsicles, blend up the fresh strawberries in the blender until smooth, and add about 1 tsp maple syrup. Pour into the bottoms of your popsicle molds.
    2. Next, blend up the blueberries and add about a tsp of maple syrup.  Pour into the popsicle molds over the strawberry raspberry layer.
    3. Mix together the lemon juice, water, and about 2 Tbsp maple syrup (or to taste).  Pour over the other layers in the popsicle molds.
    4. Place in the freezer for about 30 minutes or until the mixture is starting to harden, and add the popsicle sticks (you do this because otherwise they fall over if the mixture hasn’t started to freeze).
    5. Let freeze until firm (I left mine overnight), then un-mold and enjoy!  If they are stuck to the molds, run them briefly under warm water then try to remove them.


  • Moroccan Roasted Carrot Hummus

    Moroccan Roasted Carrot Hummus

    One of my favorite things to make at work (in a health food store deli) is hummus.  It is not my usual job, I am the one who makes salads, vegan soups and vegan hot bar, but when I have all of my stuff done, and they need help making hummus, I always volunteer.  We make really good hummus, red pepper and regular, and of course, we always have to taste test it to make sure it is fit for the customers.  Which is why I love to make it.  It has plenty of lemon juice, sea salt, and a little bit of a kick, which is the way I love it, and the way I usually make it at home.  A few days back my coworker was making it and I said to myself, you know what sounds good for dinner?  Hummus with a big plate of veggies.  So, that is exactly what I made when I got home.  I decided to make a new flavor of hummus though, because I like to keep it interesting.  Raw Guru had recently sent me some Dastony Sesame Tahini so, it was the perfect time to make hummus!  Their tahini is super smooth and creamy, not bitter like tahini sometimes is.  So, it made for some rich and delicious hummus!

    I decided to make a Moroccan roasted carrot hummus, because I was in the mood for something with plenty of spices and I had carrots on hand.  When deciding what to make, I almost always try to just use what I have on hand at home already.  This way I never waste food, and I save money which is a win all around.  I roasted the carrots until they were tender in the oven, bringing out their sweet flavor, and then combined them with cooked chickpeas for the bulk of the hummus.  I always have cooked chickpeas on hand for things like this, because I cook up a big batch, then freeze them in portions so that they are ready to use. It is more cost effective than using canned, plus I think they taste a little better.  I added  the smooth Dastony Sesame Tahini to the hummus, and it was so silky smooth!  All it needed were the aromatic spices.   I chose garlic, cumin, paprika, cinnamon, coriander and turmeric.  Also some cayenne for heat.  It smelled sooo good!

    I could not wait for dinner!  I just had to cut up all of my veggies.  It didn’t take long because I am a veggie chopping expert, and I was hungry for that hummus!  The flavor was delicious!  A little sweet from the carrots, and the blend of aromatic spices a bit warming with that rich tahini texture…it was sooo good!  I ate the whole plate of veggies and hummus.  This is one of my favorite Summer meals, and I always have to make it a few times.  But if I am not ambitious about cutting that many veggies, the hummus just makes the perfect afternoon snack with some cucumber slices after work.  I hope you are all having a fabulous Summer so far, if you are a hummus fan like me, give this one a try!

    Moroccan Roasted Carrot Hummus
    Makes about 2 1/2 cups

    Ingredients:

    • 2 large organic carrots, cut into 1 inch pieces
    • olive oil
    • 1 1/2 cups cooked chickpeas
    • 1/2 cup Dastony Sesame Tahini
    • juice of 2 large lemons (1/4 cup)
    • 1 garlic clove, minced
    • 1/2 tsp Raw Guru Himalayan salt or sea salt (or to taste)
    • 2 tsp ground cumin
    • 1 Tbsp smoked paprika
    • 1/8 tsp cayenne (or more if you like spicy)
    • 1/4 tsp cinnamon
    • 1/2 tsp coriander seed
    • 1/2 tsp turmeric
    • filtered water as needed


    1. To roast the carrots, preheat the oven to 400F degrees.
    2. Toss the carrots with just enough olive oil to lightly coat them, and spread out on an oiled sheet pan.  Place in the oven and roast until the carrots are tender, about 30-40 minutes.  Remove from oven and let cool.
    3. Place the carrots in a high speed blender or food processor, along with all of the other ingredients, and blend until smooth, adding filtered water as needed to create a smooth consistency.
    4. Enjoy!  Keeps in an airtight container in the refrigerator for up to 2 weeks.


  • 40+ Vegan 4th of July Recipes!

    40+ Vegan 4th of July Recipes!

    Besides the excitement of the being outdoors, parades, lake time, and fireworks, food always plays an important roll on the 4th of July.  I can remember being up at my Grandparents cabin when I was little and always looking forward to the cookout type food and whatever was for dessert. My Mom usually brought dessert, and it usually involved berries.  My favorite was a fruit tart with berries. I still like to carry on the tradition of good food, although my 4th is way lower key than it used to be.  Whether you are like me and you simply have some quality time with a few loved ones and watch fireworks, or you are the type to celebrate like a crazy man/woman and go all out,  I have gathered a list of recipes I think are 4th of July worthy. If you don’t get around to making them for the 4th, these are awesome all summer long!  Enjoy!

    Red and Blueberry Lemonade

    Double Berry Lavender Lemonade

    002

    Watermelon Cooler

    Pineapple Limeaide 2

    Pineapple Ginger Cilantro Limeade

    0721

    Berry Rosé Sangria

    Cherry Mint Margarita 

    Blackberry Lime Margarita 

    Broccoli Bacon Salad

    Berry Salad 1

    Triple Berry Salad with Macadamia Chevre and Raspberry Chia Dressing

    Summer Corn Slaw 2

    Summer Cabbage Corn Slaw

    005

    Summer Berry Kale Salad

    Spicy Slaw

    Spicy Peanut Slaw with Edamame

    008

    Summer Vegetable Quinoa Salad

    Cherry Berry Quinoa Salad

    005

    Confetti Fruit Salsa

    005

    Vegan Veggie Dip

    Spicy Jalapeno Mint Hummus

    Berry Cheesecake Popcorn

    Pesto Mushrooms 3

    Raw Pesto Stuffed “Roasted” Mushrooms

    002

    Quinoa Veggie Burgers

    026

    Black Bean Burgers

    Raw Tacos 1

    Amy’s Raw Tacos

    Vegan Lentil, Mushroom and Yam Tacos

    Confetti Veg Pizza

    Raw Confetti Vegetable Pizzas

    Red White and Blue Berry Bars 2

    Red, White and Blue Berry Layered Bars

    Red and Blue Macaroons 1

    Raw Raspberry and Blueberry Macaroons

    Cherry Rhubarb Hand Pies 2

    Raw Rhubarb Cherry Hand Pies

    Vegan Double Berry Crisp 

    Vegan Black and Blueberry Cheesecake Pie

    Vegan Raspberry Cream Cheese Pie

    Raspberry Pie 1

    Raw Raspberry Dream Pie

    Raw Key Lime Pie Shooters 3

    Raw Key Lime Pie Shooters

    008

    Vegan Berries and Cream Parfaits

    Berry Doughnuts 3

    Vegan Double Berry Lemon Doughnuts

    Berry Almond Tart 1

    Raw Berry Almond Tart

    Red, white and blue cake

    Raw Red, White and Blue Dream Cake

    Berry Shortcake 4

    Raw Berry Red Velvet Short Cake

    Vegan Vanilla Berry Cake with “Cream Cheese” Frosting

    carrot-020

    Vegan Berry Lemon Cake

    014

    Red, White and Blue Berry Semiffreddo

    Nectarine Cherry Mint Popsicles (500x432)

    Cherry Nectarine Mint Popsicles

    Apricot Blackberry Popsicles 3

    Apricot Blackberry Lavender Popsicles

    Vegan Galaxy Berry Swirl Ice Cream 

  • Vegan Almond Butter Brownies

    Vegan Almond Butter Brownies

    Almond butter has come a long way since I first had it when I was younger.  Back then I thought it was some gross nut butter that was super thick and didn’t spread nicely like peanut butter did. But now most commercial brands are nice and smooth and have a nice sweet almond flavor.  Like the Dastony Raw Almond Butter Raw Guru recently sent me.  Silky smooth and super delicious!  I have come to love almond butter almost as much as peanut butter and I use it in a lot of my recipes.  Mainly when I don’t want a peanut buttery flavor, but I also like to feature it as a main ingredient because it tastes good.  The main things I like to use it in are cakes and brownies.  It is usually just in the batter so it gives them a little richness without more oil.  On Tuesday I had one of those days when stuff was just extra hard and not going my way all day (you know what I mean), so I decided to bake brownies.  Baking is one of the things that I do to make myself feel better if I had a bad day or I am in need of a mood boost. Because creating things makes me happy, especially edible things that don’t take a lot of time and make my house smell amazing.  So when I got home from work I got to work making brownies.

    I wanted to feature the almond butter as the main ingredient this time!  Why not, it is delicious, rich and creamy and I love brownies swirled with decadent things! I actually used some in the brownie base as well, because it makes for nice fudgy brownies.  These are pretty simple to make, which I always consider a win.  I made the batter gluten free, because I knew many of you would appreciate that, and honestly you don’t notice the difference, they taste just as good as when I make brownies with wheat flour.  The batter tasted so good!  Brownie batter is one of my favorite things to lick from the bowl.  It goes back to the days when my Mom used to make boxed brownies when I was little and I would always beg her to lick the bowl.  It is one of the best parts of baking at home.  Brownie batter, cake batter, frosting, heck yes! I stirred in vegan dark chocolate chips to make them even more delicious and swirled in plenty of almond butter since it was the star ingredient in these.

    They smelled amazing while baking.  Nothing compares to the aroma of chocolate filling your kitchen and home.  Also made me even more hungry.  I couldn’t wait to dive in, but I had to wait until they cooled It was worth the wait though!  Total yumminess!  The rich almond butter was the perfect thing to swirl into them!  They were fudgy, rich, nutty, and it was hard to eat just one!  If you are an almond butter fan too, give these a try!

    Vegan Almond Butter Brownies
    Makes 16

    Brownies:


    Directions:

    1. Preheat the oven to 350F degrees.
    2. Whisk together the sugar, oil and 1/4 cup of the almond butter until well combined and the sugar is starting to break down. Add the flax eggs and beat until smooth. Add the flour, cacao powder and sea salt and beat until smooth.  Stir in chocolate chips.
    3. Scrape the batter into a greased 8×8 inch pan, then drop the almond butter over it in 2 Tbsp amounts, and swirl it with a knife.
    4. Place in the oven, and Bake for about 30-35 minutes or until set (but do not over bake).
    5. Let cool before cutting into bars.


  • Vegan Salted Caramel White Chocolates 

    Vegan Salted Caramel White Chocolates 

    Everyone always thinks to pair dark chocolate with salt, but why not white chocolate?  At least that was what I was pondering last weekend when I decided to make some vegan salted caramel white chocolates.  The idea sounded absolutely heavenly!  For most of my life, I have thought of myself as mainly a vanilla favoring girl.  Always vanilla cake over chocolate, and blondies over brownies or white chocolate over dark when I was little.  I have come to appreciate dark chocolate more, but anything vanilla or vanilla caramel always has a special place in my heart.  Raw Guru recently sent me some Raw Guru Raw Organic Cacao Butter and Raw Guru Himalayan Pink Crystal Salt and they were the inspiration for the salted caramel white chocolates.  These are two ingredients that I always have to have on hand, and the Raw Guru products are some of the best quality I have tried.  Salt belongs in everything as far as I am concerned.  I use it to bring out flavors in everything from sweet to savory and I prefer Himalayan salt, because it contains the most minerals.  Cacao butter is something I use a lot to make things like chocolate (white or dark), to thicken things like cheesecake (giving it a white chocolate flavor), or to make body care products.  So, I was excited about receiving both!

    For the caramel, I used dates to make a sweet gooey filling.  Dates are nature’s caramel after all.  They are about as natural as you can get when it comes to sweeteners too.  I have always loved caramel.  But what I don’t love is the refined sugar content.  So when I found out about date caramel years ago I was super excited.  It is my go-to caramel now in recipes.  In this one, I combined the dates with the cacao butter to give the caramel a white chocolate flavor, and added in some vanilla and the Himalayan salt and it was sooo good!  Like the sort of thing you want to eat with a spoon, or pour over your ice cream.  Once it chilled for a while, it became mold-able soft caramel.  I decided to dip it in some of my vegan home made white chocolate.

    The whole process was fun, because it was a little messy, and I could eat the extra white chocolate and leftover chocolate chunks that were left on the parchment paper from dipping the chocolate. Sooo good!  What was even better was the finished product with the sweet slightly salty caramel and rich decadent dark chocolate.  If you are a white chocolate person, give these babies a try! Also, if you want to try out any of the Raw Guru products on their website, use the coupon code FRAGRANTVANILLA to get 10% off your order, typed in at your checkout.  I hope you all are having a wonderful start to your week!

    Vegan Salted Caramel White Chocolates 
    Makes 12

    Ingredients:

    Caramel Filling:


    White Chocolate:


    Decoration:


    Instructions:

    1. To make the filling, combine all ingredients in a high speed blender, and blend until smooth like caramel.
    2. Pour into a bowl, and place the bowl in the freezer for about 45 minutes until it is firm enough to scoop.
    3. Scoop the filling out and roll into 12 balls.  Place on a parchment lined tray and freeze until firm, about an hour.
    4. Meanwhile, to make the  white chocolate, combine all ingredients in a double boiler, and whisk until combined and melted.
    5. Once the filling has firmed up, dip each ball into the white chocolate, being sure to let the excess drain off, and place back onto the tray (I like to set mine on a fork to allow it to drain better). Once they are all dipped, set them in the freezer until hardened.  If you want a thicker layer of white chocolate, you will have to repeat this process several times.  I dipped mine 3 times.  Allow to harden in the freezer.
    6. Melt the dark chocolate in the top of a double boiler, then drizzle it over the truffles, then sprinkle with the salt.  Allow the chocolate to harden, then enjoy!
    7. Store any leftover truffles in the refrigerator.
  • Vegan Strawberry Rhubarb Pie

    Vegan Strawberry Rhubarb Pie

    When I was little, my Mom and I used to go to this local 50s style diner restaurant that had the best strawberry rhubarb pie.  It was amazing. The perfect balance of tart and sweet, with plenty of jammy filling and a flaky crust.  I have had plenty of other ones that were just sub par because whoever made it added too much sugar and it was too sweet, or the flavor was just meh.  I am super picky about strawberry rhubarb stuff, because my Grandma used to make a simple strawberry rhubarb sauce with the rhubarb that grew in her back yard and nothing could compare to it, except a good pie like that one at a diner.  They were both just the pure flavors of strawberry and rhubarb and not much else.  So now, when I try to make strawberry rhubarb desserts, I try to get that balance right too.  I have been craving strawberry rhubarb pie for a few weeks now, and I just got some rhubarb from my Dad’s garden and organic strawberries were on sale at the store so I finally made time to make one.  I do not consider myself a good double crust pie maker, in fact, most of the time they turn out wonky and whatnot, so I usually opt for a crumble topping which is hard to mess up.  But I wanted a pie like the diner one, because that was what I was craving so I went for it even with that in mind!

    For the crust, I went with an organic whole wheat pastry flour, because it is what tastes the best to me.  It is what I used before I went vegan even, because I didn’t want to go for the bleached white flour and I had grown to love it.  Yes, I have made gluten free pie crusts (since I know some of you might wonder why this isn’t gluten free because many of my other recipes are), but I don’t prefer them if the pie is just for me and my family because we are not gluten intolerant so it is not a big deal to use the whole wheat pastry flour. However, if you are gluten intolerant, you can still make this pie, just sub Bob’s Red Mill all purpose gluten free flour 1:1 and it will still turn out (I have used it before for crust).  The dough will just be a little more fragile so you will have to be a little more careful.   I use coconut oil instead of butter in this crust and it gives it a slight sweetness that I enjoy.  I admit I was snacking on the scraps of this pie crust like cookie dough it was that good.

    For the filling I kept it super simple, just strawberries, rhubarb and coconut sugar.  Because the fruit was super flavorful that was all it needed.  Now like I said earlier, I am not an expert double crust pie maker, so I didn’t do anything pretty or special with the crust, just poked the vent holes in it and popped it in the oven.  It didn’t come out the prettiest, but you know what?  It tasted so good I did not care.  My pie crusts always look a little ugly (this one cracked because I wasn’t careful with the dough), but they taste good!  The fruit was perfectly jammy and sweet with just enough tartness from the rhubarb, and the crust was rich and delicious just like I had imagined it being. It got a big thumbs up from my family as well, so I know it is a keeper.  This is perfect served a little warm with some coconut milk ice cream!  Anyone else a big strawberry rhubarb fan?

    Vegan Strawberry Rhubarb Pie

    Makes one 9 inch pie

    Crust:


    Filling:

    • 4 cups organic strawberries
    • 4 cups organic rhubarb
    • 1/2 cup coconut sugar
    • 1/4 cup cornstarch


    1. To make the crust, in a large bowl, mix together flour, sugar, sea salt, and spices. Cut in coconut oil with a pastry blender or 2 knives until it is in pea sized pieces. Mix in  just enough water to create a smooth dough that holds together but isn’t too sticky. Add more water if needed, and knead slightly until a smooth dough is created. Roll out into 2 10 inch circles on two sheets of slightly floured parchment paper, then use the paper to help you transfer one to an 9 inch pie dish.  Set them both aside in a cool place.
    2. Pre-heat the oven to 375F degrees.
    3. To make the filling, combine the berries, rhubarb, coconut sugar, and cornstarch in a bowl, and toss together.  Pour this mixture into the crust, then take the other crust, and place over the top of the pie, using the parchment to assist you.
    4. Place in the pre-heated oven and bake for about  50 minutes or until the pie juices are bubbling (check the pie half way through, and if it is getting too dark, then cover the top with foil).
    5. Remove from the oven to a wire rack.
    6. Allow to cool completely before serving.
  • Vegan CBD Mint Chip Ice Cream Pops

    Vegan CBD Mint Chip Ice Cream Pops

    It was super hot and humid in Minnesota last weekend.  We have had a few big thunderstorms, and then when the sun came back out it just brought more of the humidity into the air.  I went on a long 28 mile bike ride and I felt like I had jumped into a pool when I got home, only it was just my own sweat.  I try not to let the heat stop me from doing things outside like running, biking and walking because I need the fresh air and sunlight, but boy it is hard sometimes.  I was craving something in the form of ice cream hard core.  So, I decided to make some ice cream pops.  Mint chip was what I had decided on.  Back in the day when I was little, mint chip was one of my favorite ice cream flavors.  There is just something super refreshing about the combination of vanilla and mint, and those dark chocolate pieces distributed throughout it made it heavenly.  It sounded like the perfect thing to cool me off, and they would be individually portioned which is awesome for when you don’t want to scoop ice cream.

    Raw Guru recently sent me a box of goodies including some CBD oil and chocolate bars.  I decided that my ice cream pops would be even better with these items included.  The CBD oil is 300 mg Veggimins organic CBD oil , and I was super excited about receiving it.  I have been taking CBD oil before bed for a few months now, and it really helps me sleep better and calms my nerves, and I really wanted to try the Veggimins brand.  CBD is also good for relieving inflammation, which I need help with sometimes since I work out a lot.  If you have never tried this oil, it does not contain THC the psychoactive part of cannabis, so you don’t get high, it just helps with things like decreasing anxiety, fighting inflammation, relieving nausea and decreasing depression among other things.  Definitely check it out, it is worth it! The oil they sent me was the cinnamint flavor, so I thought it would be the perfect thing to add to my ice cream pops, why not include my daily dose of CBD?!  I also chopped up some of the Sunbiotics Chocolate with Probiotics and Peppermint and their Original chocolate that they sent me, because it paired so well with the mint theme I had going.  I have to add though, that that chocolate bars were delicious on their own too, because I had to sample them while I added them to the ice cream of course. I love the idea of including probiotics in chocolate.  Why not have dessert and healthy probiotics too?!

    The ice cream bars turned out sooo good!  I made a creamy base with a secret ingredient, avocado.  Don’t worry, you can’t taste it, it just makes the ice cream silky smooth and gives it a light green tint that is typical of mint chip ice cream.  The bars were so refreshing and delicious!  They tasted like the ice cream I enjoyed as a kid but in ice cream bar form, and no refined sugars added.  If you are a mint chip fan, give these babies a try!  If the CBD oil and Sunbiotics chocolate sounded like something you would like to try, you can get 10% off on the Raw Ruru Website when you order with the code: FRAGRANTVANILLA entered when you check out.  I hope you are all staying cool if it is hot where you live like it is here currently!

    Vegan CBD Mint Chip Ice Cream Pops

    Makes 4-8 popsicles (depending on what type of molds you have)


    Instructions:

    1. Combine all ingredients but the chocolate chips in a high speed blender and blend until smooth.
    2. Stir in the chocolate chunks or chips.
    3. Pour into molds, and freeze until firm before un-molding.


  • Vegan Pecan Blueberry Jam Bars

    Vegan Pecan Blueberry Jam Bars

    I am loving anything berry lately.  We kind of get deprived of berries in Minnesota for about half the year, so when they are available, I am all over them.  I recently made some blueberry jam from a couple of pints of blueberries, and instead of simply using it to top toast with, or stir into oatmeal, I thought that a delicious dessert was in order.  I decided on some jam bars.  They were one of my favorite things growing up.  I mean, what’s not to love about buttery bars with a streusel topping and jam filling?!  I almost always include a nut butter of some sort in the ones I make now, even though, I don’t think the classic ones had it. It just makes them even more delicious, you know like a good PB and J sandwich but dessert.  I usually go for peanut butter, but since I was using blueberry jam for this instead of raspberry or strawberry, I decided on pecan butter.  Blueberries and pecans are heavenly together!

    These are actually pretty easy to make if you already have the jam on hand.  The dough is kind of like wet cookie dough, and it was super delicious even before it was baked.  I should know, I sampled enough of it.  I can not resist cookie dough (I know it isn’t technically cookie dough but you get the idea).  I used Bob’s Red Mill gluten free all purpose baking flour for these, but you would never be able to tell because it tastes just like regular flour once they are all done.  I actually combined it with half pecan meal though, because I wanted these to be extra rich and delicious and I love adding nut flour or meal to my cookies, bars and pie crusts.  It just makes them over the top good!

    They smelled heavenly while baking, and I could not wait to try them.  But unfortunately I had to wait until the next day because they would not look so nice if I just dove right in. That is the only bad thing about having to take pictures of your food.  Having to wait.  Waiting for it to cool so that it looks nice when cut.  I totally used to dive right into stuff when it wasn’t set before I was a food blogger.  These were worth the wait though and they were the perfect post work treat last Friday.  I get excited about this type of stuff if I know I have it waiting for me at home.  These are sooo good!  The sweet, gooey jammy blueberry filling is perfect with the crispy buttery nutty pecan struesel and crust!  If you have some blueberry jam on hand, these are a must try!

    Vegan Pecan Blueberry Jam Bars
    Makes 16 bars

    Ingredients:

    • 1/4 cup coconut oil, warmed to liquid
    • 3/4 cup coconut sugar
    • 1 tsp pure vanilla extract
    • 3 Tbsp filtered water mixed with 1 Tbsp ground flax seed
    • 1 cup pecan butter (if you can’t get pecan butter, you may use another nut butter like almond butter)
    • 3/4 cups all purpose gluten free flour
    • 3/4 cup pecan meal*
    • 1/2 tsp baking powder
    • 1/2 tsp sea salt
    • 1 1/4 cups blueberry jam (make sure it is vegan)
    • 2/3 cup chopped raw pecans


    Instructions:

    1. Preheat oven to 350F degrees with the rack set in the center position. Line a 9×9 inch square pan with parchment, and/or grease it with coconut oil.
    2. Whisk the coconut oil and sugar together in a bowl with the vanilla and flax mixture until the sugar starts to dissolve. Then add the pecan butter and mix until combined.
    3. Add the flour, baking powder, sea salt and stir in until well blended.
    4. Spread 2/3 of this mixture over the bottom of the pan, pressing it to the edges with your fingers.  Then spread the jam over that with a spoon or offset spatula. Drop chunks of the remaining dough over that, and sprinkle with the pecans.
    5. Place in the oven. Bake for about 45 minutes until lightly browned and set.
    6. Remove from the oven and let cool completely before cutting into bars.


    *Make the pecan meal by blending pecans in a blender just until they become fine like flour (but not too long or you will start to get pecan butter).


  • German Chocolate Granola

    German Chocolate Granola

    When I was little, granola was something that I thought hippies made or something that was brought along on camping trips.  But the truth is I had never actually tried it and it just looked like something healthy to me.  At that point in my life I wasn’t into “healthy” foods made with whole grains that you could see.  Granola was something that they sold in the bulk bins at the health food store, or in the breakfast aisle.  I got over my fear of whole grains a few years later, and when I finally did try granola (probably after begging my Mom to buy me some), I thought it was super delicious.  I mean, what’s not to love about the crunchy sweet snacky goodness that granola is?  Once you finally try it.  It was some time later that I realized the store bought stuff wasn’t the healthiest, and I started making my own at home back in college. It was even better than the store bought.  I found a good recipe, then tweaked it quite a few times until I found the perfect balance.  I made granola every few weeks for a few years, because I loved snacking on it.  My granola making has since gone by the wayside, but I get a craving for it sometimes.

    Last weekend I decided it was time for some granola.  I had made a raw German chocolate granola a few years back that was really good, so I decided to make that one, only not raw, with rolled oats in place of the buckwheat and cooked in the oven instead of the dehydrator.  That was the only thing I didn’t like about making raw granola.  Having to wait overnight to enjoy it while it dried.  Well, this stuff is done in less than an hour and I love warm granola!  I wanted to include the things you would find in a German chocolate cake for this, a cacao coated chocolate base for the oats, and walnuts and coconut like you would find in the frosting, as well as dates because the frosting is usually caramel, and dates are natures caramel.  Lastly it needed chocolate chips.  You could use cacao nibs if you wanted it less sweet, but I was going for a dessert like thing here.

    I treat granola like dessert actually because I love the crunchy texture, sweetness, and slight saltiness it has.  It is crave worthy stuff, hard to put down sometimes especially when it is sitting there cooling. Every time I walked by I had to grab some!  This one was more decadent than the usual vanilla based ones I make, and I loved it!  If you are a chocolate fan, and looking for the perfect crunchy snack, give this a try!

    German Chocolate Granola
    Makes 12 cups

    Ingredients:

    • 6 cups organic gluten free old fashioned rolled oats
    • 2 cups raw walnuts
    • 2 cups finely shredded, dried unsweetened coconut
    • 1/2 cup coconut oil, warmed to liquid
    • 1/2 cup maple syrup
    • 1/2 cup almond butter
    • 1/3 cup cacao powder
    • 1 tsp sea salt
    • 2 tsp pure vanilla extract
    • 1 cup vegan chocolate chips
    • 1 cup dates, cut into small pieces


    Instructions:

    1. Line a large baking sheet with non-stick foil, and spray with cooking spray.
    2. Preheat the oven to 350 and set rack at the medium position.
    3. In a large bowl, combine oats, walnuts, and coconut, and set aside.
    4. In another bowl, whisk together oil, maple syrup, almond butter, cacao powder, sea salt, and vanilla extract until well combined, then pour over oat mixture and toss to coat until completely blended.
    5. Pour out onto prepared baking sheet, and spread out evenly.
    6. Bake for 35 minutes, stirring about every 10 minutes or so until the granola is evenly browned. Remove from oven and let cool. Stir in cacao nibs and enjoy!
  • Vegan Raspberry Ghost Pepper Caramel Corn

    Vegan Raspberry Ghost Pepper Caramel Corn

    They are coming out with ghost pepper everything lately.  Well, mostly savory items, I haven’t seen any commercial ghost pepper desserts, just things like chips, hot sauces, BBQ sauce etc.  I was gifted a Trader Joes Ghost Pepper Grinder recently and I love it!  Eric had one last year, and I would use his all the time, but turns out it is seasonal, so once they were gone they were gone.  But now they are back and I am excited.  You need just a small amount on your food to give it a nice kick and they have a nice smokey aroma as well.  But of course Eric likes not just a small amount, he likes to put so much on there that he starts sweating.  He is from Arizona so he loves hot and spicy things.  I do too, but I like to taste my other food as well haha!  I decided last weekend that I wanted to make some sort of delicious snack with the ghost peppers included.  What I decided on was caramel corn.  Because I wanted something slightly sweet, and crunchy with a touch of salt too.  So, it was the perfect thing to make!

    I told Eric what I was making and he said that some sort of dried fruit would be good in it too, and I had dried freeze dried raspberries on hand, so I decided to include them as well.  This is not your average caramel corn.  Not just because of the ghost peppers and raspberries.  Most caramel corn is made with butter, sugar and corn syrup, but I don’t eat those things.  Because first off I don’t eat animal products of course, being that I am vegan.  And second, because I try to stay away from refined over processed sugars.  So, my “caramel” isn’t technically caramel but tastes like caramel, and is sticky like caramel, so it is caramel enough for me! It is a mixture of maple syrup, coconut butter, and pecan butter with a touch of vanilla and sea salt.  It is sooo good!  If you can’t get pecan butter, no worries, you can use cashew butter or raw almond butter instead and it will still be good.

    It was wonderful once I added in the ghost pepper flakes and raspberries!  I actually added slightly more than I put in the recipe, because I was going to be sharing with Eric, and he loves spice.  Also, I didn’t want to kill anyone if they can’t handle much, and I know one person’s spicy is another person’s medium or mild, so I added the amount to the recipe that I felt would be the most people pleasing as a start.  Feel free to adjust the amount of peppers to your tastes though.  The popcorn was so good!  Sweet, salty, fruity, spicy, a tad smokey with the aroma of the peppers.  Crave worthy stuff that I could not stop sampling in fact.  If you lare adventurous and like ghost peppers or just chilies in general, give this a try!

    Vegan Raspberry Ghost Pepper Caramel Corn
    Makes 8 cups

    Popcorn:

    • 1/3 cup maple syrup
    • 1/3 cup coconut butter, warmed to liquid
    • 1/3 cup pecan butter (or almond butter)
    • 1/2 tsp sea salt
    • 1/4 tsp ghost pepper flakes (or more if you like spicy)
    • 1 tsp pure vanilla extract
    • 8 cups plain organic popped corn
    • 1 cup freeze dried raspberries, crushed


    Instructions:

    1. To make the popcorn, in a glass measuring cup (or bowl) whisk together the maple syrup, coconut butter, pecan butter, sea salt, ghost pepper flakes and vanilla until well blended.
    2. Pour the mixture over the popcorn in a large bowl, along with raspberries and mix well.
    3. Spread popcorn out onto a lined sheet pan, and place in the freezer until it is hard.
    4. Enjoy!


  • Vegan Strawberry Jalapeno Gelato

    Vegan Strawberry Jalapeno Gelato

    Although I have my favorite ice cream flavors that I make again and again, I will never tire of coming up with new ones.  I have over 100 ice cream recipes on my blog already but why stop there?  Keeps it interesting for me at least.  Once you get your own ice cream maker, it is hard to go back to store bought.  Or at least for me, because I enjoy making it, and many of the store bought vegan ice creams don’t have a texture that I like, or are made with refined sugars or artificial ingredients.  I have tried other ones that had a good texture and no refined sugars that were just ok, but I missed my home made stuff.  Ice cream is so easy to make at home.  Even if you don’t have an ice cream maker (see the note in the recipe if you don’t).  I have been making it for over 10 years at home with and without an ice cream machine.  It feels like Summer here and I was craving some ice cream after a long day at work, so I made some strawberry ice cream a few days back.  Not just strawberry ice cream though, that isn’t exciting enough for me right now.  Strawberry jalapeno gelato!  I am a big fan of sweet fruit desserts with a kick from chilies. Especially in the Summer because chilies actually have a cooling affect on the body.  If you are skeptical, trust me on this one.  I started adding chilies to things because Eric loves spicy food and desserts and I have come to love them too.

    This ice cream was super easy to make.  I don’t want to go through too much work to make things on a work night, so all it took was a moment in the blender and it was ready to go into the ice cream maker.  The base tasted delicious like a strawberry milk shake with a kick. How did I give it that gelato like texture?  With a mixture of coconut milk and cashew butter.  It makes for a super rich base that you would swear had dairy in it.  I added in plenty of strawberries, a dash of lime juice and of course the jalapeno.  I did not seed it because I like the kick, but you can if you want.  It actually ended up being just the right amount of heat.  Something that doesn’t hit you right away, but slowly builds as you begin to taste it.

    The gelato turned out so incredibly good!  Like classic creamy strawberry ice cream with a little heat at the end and a pop of lime flavor.  You know what would be amazing?  If you made a strawberry ice cream float with this in some strawberry kombucha with a shot of tequila.  Yes, I have made something like this before so that’s how I know it is bomb!  If you are someone who likes to try new ice cream flavors, or maybe you just love chilies in things, give this gelato a try!

    Vegan Strawberry Jalapeno Gelato
    Makes 3 cups

    Ingredients:

    • 1 15 oz can full fat organic coconut milk
    • 1/2 cup raw cashew butter
    • 1 1/2 cups fresh organic strawberries
    • 1/4 cup soft, pitted medjool dates (if they are not soft, soak them in filtered water for 30 minutes before using)
    • 1/4 cup lime juice
    • 1 jalapeno, diced (seeds removed if you want it less hot
    • 1/4 tsp sea salt


    Instructions:

    1. Combine all ingredients in a blender and blend until smooth.
    2. Pour into an ice cream maker and process according to directions.  Alternatively, if you do not have an ice cream maker, pour it into a bowl, and whisk every half hour until it is to the consistency of a thick malt.
    3. Pour into a freezer safe container with a lid, and continue to freeze until firm enough to scoop (at least 4 hours or overnight). If it becomes too firm, simply let it sit out for 15 minutes before serving.
  • Watermelon Mint Julep 

    Watermelon Mint Julep 

    Nothing is more refreshing than watermelon in the Summer when it comes to fruit.  I could eat a whole one, and I have actually.  It is a very hydrating fruit, at 92 percent water, so it is the perfect thing to enjoy post workout if you blend it up and drink it instead of a sports drink to re-hydrate.  I love blending it up and just drinking it in a big glass.  But of course I will never say no to it if it is just cut up as well.  I was gifted a big heavy watermelon at work last Friday and I thought why not make a drink out of part of it because it was kind of a mentally stressful week.  I am not talking just blending up the watermelon.  I mean adding a little kick to it in the form of alcohol.  I wanted a margarita but all I had was bourbon and I didn’t want to have to go out and buy a whole bottle of tequila, so I decided to make a watermelon julep.  I picked up some mint at my work (I work in a health food store), and some limes and I could not wait to make this drink.  Let me tell you, I had a lot of watermelon during the process of making this.  I cubed up the watermelon, and of course I had to snack on it while I made the drink, and I had gone for a walk after work so I needed refreshment plus it was irresistibly good.  Needless to say at least 1/4 of it was gone before I even made the drink.

    It is really simple to make actually.  You just take watermelon and blend it up in a high speed blender to make juice, then combine it with the other ingredients in the blender to mix it.  I have never actually made a mint julep before to be honest, but I looked up a few recipes to get an idea of the nature of the drink.  This one is a little more fancy than most, because the classic ones just contain bourbon, sugar, mint and ice.  But the watermelon was to be the bulk of the drink with a good quality bourbon added.  It needed the fresh mint of course, and I added a little lime juice to balance out the sweet.  This drink did not contain any refined sugar, I instead opted for just a bit of maple syrup as it blends well into drinks.

    It was so good once I added the ice and poured it into the glasses!  I imagine sipping this drink on the patio on a hot Summer day!  If I had a patio.  Sipping it in my kitchen was just fine.  It is just the right amount of sweet, the bourbon blends perfectly with the watermelon flavor, and the fragrant mint makes it super refreshing!  If you have a watermelon on hand, give this s try!

    Watermelon Mint Julep 
    Makes 2

    Ingredients:


    Directions:

    1. To make drink, combine all ingredients but the serving ice in a blender at low to medium speed and blend briefly until mixed together.
    2. Place 1/3 cup ice into 2 serving glasses.
    3. Pour the mixture through a strainer into the prepared glasses, garnish with mint leaves and serve!


  • Chocolate Dipped Key Lime Pie Stuffed Strawberries

    Chocolate Dipped Key Lime Pie Stuffed Strawberries

    Key lime pie has always been one of my favorite Summer desserts.  It has to be the good kind though, plenty of tart lime and not too sweet. When I was little, my Mom and I found the perfect recipe for it that was the perfect balance, and it always tasted amazing.  Especially on a hot Summer day.  But a lot of times when we would order key lime pie in a restaurant or buy it somewhere it was never as good and we were disappointed.  I remember one year at the Minnesota State fair they had a key lime pie on a stick.  Because at our state fair everything has to be on a stick in case any of you were wondering about that.  But anyways, I bought one to try, and I was disappointed because it was way too sweet and not tart enough.  I liked the concept though, because lime with chocolate is amazing.  I have since come up with vegan key lime pie recipes that I enjoy.  Like these Chocolate Covered Key Lime Pie Bars, or my Key Lime Pie Shooters, or this Key Lime Cheesecake.  I will never tire of key lime pie recipes.

    I was in the mood for some key lime pie a few days back, but I didn’t want to take a lot of time to make it, and thought strawberries  and chocolate would be amazing to add to it.  So, I came up with chocolate dipped key lime pie stuffed strawberries.  I mean, no they aren’t actual pie slices, but they are darn delicious and that filling is just like key lime pie.  I kept them pretty simple.  I trimmed a pound of organic strawberries (eating the insides, because why waste such deliciousness), then dipped them in a vegan dark chocolate.  I just melted down my favorite vegan dark chocolate chips and that did the trick.  I sometimes make my own chocolate but when I am in a hurry, it is nice to have some already on hand.

    For the filling I used a special secret ingredient I use in most of my key lime pie recipes, avocado.   It works perfect!  It is rich and creamy, neutral and lime, a bit of maple syrup and coconut butter to thicken it hides the fact that it is avocado and not some soft of dairy or egg filling like you would find in most classic key lime pies.  These little strawberries are super delicious!  I bet you can’t eat just a couple.  I needed quite a few.  I figure they are fairly healthy, you are getting your fruit and heart healthy avocado and dark chocolate all in one dessert!  I hope you will give them a try, I have a feeling you will love them!


    Chocolate Dipped Key Lime Pie Stuffed Strawberries
    Makes about 24

    Ingredients:


    Filling:

    • 1 ripe avocado (not so ripe that it is brown)
    • 1/4 cup lime juice
    • 2 Tbsp maple syrup
    • 1 tsp pure vanilla extract
    • 3 Tbsp coconut butter, warmed to liquid


    Instructions:

    1. To prepare the strawberries, cut the tops off, and cut a v shaped hole into the middle from the top so that you have room for the filling.
    2. Melt the chocolate in the top of a double boiler.
    3. Line a baking sheet with parchment paper.  Dip each strawberry bottom into the chocolate by about 3/4 of an inch to an inch depending on the size of the berry.  Place on the parchment paper.  When they are all dipped, place the sheet pan in the freezer until the chocolate is firm.
    4. To make the filling, put all of the ingredients in a food processor and process until smooth.
    5. Place the filling in a pastry bag, or a ziplock bag with the tip cut off, and pipe into each strawberry.
    6. Serve!  These are best enjoyed the day that they are made, but keep any leftovers refrigerated.
  • Vegan Strawberry Lemonade Truffles

    Vegan Strawberry Lemonade Truffles

    It was 90F+ degrees last weekend here in Minnesota. Which is pretty odd for this time of the year.  You usually don’t get a bunch of days like that until June or July.  But it feels like July!  It was character building for my Sunday morning run.  I really appreciated any trees to provide shade, or sprinklers in people’s yards near the street I could run through to cool off.  Because being in direct Sun was brutal.  If I stood in one place afterwards I would create a small puddle I was sweating so bad.  After I had taken a cooling shower, and hydrated I decided that I wanted to stay cool and not go back outside because I had sweated enough already.  It was a good day for an indoor activity and I felt like making something delicious in the kitchen.  But not something that would heat up the kitchen.  I decided on truffles.  Why not?  They are easy to make, and I had all of the ingredients.  I do a little happy dance when I have all of the ingredients for the recipe I am visualizing. These weren’t just going to be plain chocolate truffles, they were going to be strawberry lemonade truffles.  Because I am on a Strawberry kick.  I hope you all don’t mind, but I am loving anything strawberry lately.  Maybe because I was deprived all Winter long and they are plentiful finally.

    The truffles were fairly easy to make.  To make the filling creamy and rich, I used a combination that I normally use for my white chocolate base, cacao butter, cashew butter, and coconut butter.  Add a dash of vanilla and it is luscious.  But of course these were strawberry lemonade so I added plenty of lemon juice and zest, as well as freeze dried strawberries.  Why freeze dried?  Well, they add loads of flavor in things like this without a lot of moisture so you can get the correct texture.  The filling tasted kind of like strawberry lemon cheesecake!  I could not wait to combine them with the chocolate shell!  I thought about making them white chocolate, but decided on dark instead for more of a contrast.  And, because I love chocolate with both berries and lemon.

    Once the filling was all shaped and set, I dipped them in dark chocolate and could not wait to try them.  They were sooo good!  The filling was sweet, and a tad tart with the flavor of jammy berries and aromatic lemon.  It was perfect with the rich dark chocolate to accompany it!  They tasted like Summer and were actually kind of refreshing!  If you are a strawberry fan definitely give these a try.  They are the perfect thing to make when you are escaping the heat, because they won’t heat up your kitchen.

    Vegan Strawberry Lemonade Truffles 
    Makes 12

    Ingredients:

    Filling:

    • 1/4 cup cacao butter (2 oz) or coconut oil if unavailable
    • 1/4 cup raw cashew butter
    • 1/4 cup coconut butter
    • 1 tsp pure vanilla extract
    • 2 Tbsp maple syrup
    • 1 cup freeze dried strawberries
    • 1/4 cup lemon juice
    • 1 Tbsp organic lemon zest


    Dark Chocolate:

    • 2 cups vegan dark chocolate chips


    Directions:

    1. Combine all of the white chocolate ingredients but the berries and lemon juice and zest over a double boiler, and whisk until smooth.
    2. Pulverize the berries in a blender until fine, then whisk into the white chocolate along with the lemon juice and zest. Place in the freezer for about 15-20 minutes until it is firm enough to scoop. Scoop into 12 balls, rolling them with your hands.   Place on a parchment lined tray, and place back into the freezer until firm, about 30 minutes.
    3. Meanwhile, melt the chocolate chips in a double boiler, and whisk until combined and melted.
    4. Once the filling has firmed up, dip each chocolate into the dark chocolate, being sure to let the excess drain off, and place back onto the tray (I like to set mine on a fork to allow it to drain better). Once they are all dipped, set them in the freezer until hardened.
      Store any leftover truffles in the refrigerator.
  • Vegan Strawberry Margarita Pie

    Vegan Strawberry Margarita Pie

    I am not used to the humidity here yet.  We basically went from Winter (18 inches of snow) to Spring for a few weeks right into hot Summer weather.   I really prefer moderate weather like 45 degrees in the morning and a high of 70 degrees or lower in the afternoon which is why I love early Fall so much.  I still go out and run though, and I ask myself why I am doing it half way through.  It is character building for sure, and I never quit.  Last Friday I was 6 miles into my 7 mile run and feeling way too hot and sweaty when I thought to myself, a cool strawberry margarita pie sounds amazing!  So I made up my mind that I had to finish the run, and make one later that day after work.  I ended up finishing my run a minute faster than I had been so that made up for being uncomfortable.  It ended up being kind of a butt kicking stressful day, work was really busy, and I found out my website was not working so I had to make phone calls to get help fixing it when I got home instead of relaxing.  So, I really needed to make that pie to unwind and calm myself afterwards.  I find making desserts relaxing.  And, why not a dreamy strawberry pie with lime and tequila?!

    I had envisioned a creamy strawberry lime filling laced with tequila and swirled with a strawberry puree.  Served nice and cold of course.  The perfect thing to make when it was 90 degrees and I didn’t want to heat up the oven.  I used a mixture of coconut milk, coconut butter, cashew butter to create a creamy base, and added plenty of strawberries, lime and tequila to make it a margarita pie.  The filling was luscious and sooo good even before it was ready to be spooned into the pie.

    Kind of like ice cream, only not as cold. For the crust, I made a simple no bake crust with quinoa flakes, coconut, almond meal, and dates and it was perfect!  Simple, so that the filling could shine. Once the filling was all chilled, I swirled a sweet raspberry puree into it and it was so good!   The pie turned out fabulous!  It tastes like Summer, and it is perfect for when you want to indulge but not heat up the house.   Also, it is perfect for unwinding after a stressful week.  I hope you all had a wonderful Holiday weekend!

    Vegan Strawberry Margarita Pie

    Make 1 8 inch pie

    Crust:

    • 1 cup quinoa flakes, or rolled oats if you don’t mind it not being gluten free
    • ½ cup finely shredded, dried coconut
    • ½ cup almond meal
    • ½ cup pitted medjool dates, soaked in filtered water and drained well if they are not soft
    • ¼ tsp sea salt


    Filling:

    • 1 15 oz can full fat coconut milk (you want the kind that has mostly cream, at least ¾ of the can)
    • ½ cup raw cashew butter
    • 1 cup fresh organic strawberries
    • 1/3 cup maple syrup
    • ¼ cup lime juice
    • 1 Tbsp organic lime zest
    • 3 Tbsp tequila (make sure it is vegan on Barnivore)
    • ¼ tsp sea salt
    • 1 cup coconut butter, warmed to liquid


    Swirl:

    • ¾ cup fresh organic strawberries
    • 2 tsp maple syrup
    • 1 tsp chia seeds
    • Pinch sea salt


    Instructions:

    1. To make the crust, combine all ingredients in a food processor and process until fine crumbs that hold together when squeezed.  Press into the bottom of an 8 inch removable bottom tart pan or oiled pie plate.  Set aside in the freezer.
    2. To make the filling, combine all ingredients but the coconut butter in a high speed blender and blend until smooth.  Add the coconut butter and blend until combined.  Pour into a bowl, and chill in the freezer until it thickens to the consistency of whipped cream (you want to whisk it occasionally so it chills evenly).
    3. Meanwhile, for the swirl, blend the ¾ cup strawberries, maple syrup, chia seeds, and sea salt in a blender until smooth and set aside.
    4. Once the filling has thickened, spread half into the pie crust (it will be mounded) then drop half of the strawberry puree over that and swirl it with a knife.  Spoon the remaining filling over that, then drop more of the swirl over it by the tsp, and swirl with a knife.
    5. Place back in the freezer to chill until firm enough to cut, a few hours.
    6. Remove from the freezer, garnish with berries and lime, and serve!


  • Avocado Hemp Butter

    Avocado Hemp Butter

    Have you ever gone to the store and wanted a vegan spreadable butter, and looked at the ones that were available, only to find out that they contained processed ingredients, or unhealthy oils?  Well, I have.  It has been the only thing that has stopped me from buying them.  About 10 years ago I actually tried some (because I cared less what was in my food then), but I didn’t really care for it because it had a weird flavor.  Most of them are made with canola oil, soy bean oil or palm oil, all of which I try to avoid so I have just avoided the spreadable butters all together. But I recently said to myself, I bet I can make one at home with ingredients that I have on hand that would actually be better for me.  I told my Mom I would share it with her too and get her opinion on it, because she is a fan of spreadable butters, and she gave me the idea to try making one.  Now when I say butter of course it is not real butter like with dairy in it.  I am talking totally plant based!

    I wanted this butter to have some heart healthy oils in it, so I went for the avocado oil.  It already has a buttery but neutral flavor to it, which is why I love to use it on popcorn or for baking.  It blends in beautifully.  Next, I wanted to add some hemp seed oil.  I had a big bottle on hand, and I know it contains heart healthy omega 3 fatty acids, so why not add some of that too?  I try to have a little every day anyhow.  These two oils are both liquid even when refrigerated, which is important for making the butter spreadable.  I figured mix them with one fat that is solid when chilled and the butter would be the prefect consistency.  I chose coconut oil. I like the slightly sweet flavor of coconut oil, and I figured it would mimic the sweetness in some sweet cream butter. But of course if you are making this and want it more neutral, use a refined coconut oil instead of the unrefined I use in the recipe.  That is just what I happen to like.  I added a touch of sea salt and apple cider vinegar (to make it taste more like dairy), and it was perfect!  So how do you make this into buttery perfection?  well, the process is a little fun.

    You don’t just pop it in the refrigerator to chill, that would result in a less spreadable butter. It gets whipped up like frosting!  You just chill it until it starts to get a little cloudy, then whip it with a hand mixer. This is actually the process I use for making body butter, so I knew it would work beautifully for this.  It turned out so good!  It spreads onto toast perfectly like real butter, and it tastes good too, it has a slightly sweet nutty flavor I love!  I shared it with my Mom and she said it was better than the store bought vegan butter she had been buying.  So, if you are a butter person, skip the store bought vegan butter and give this a try!  It is easy to make and worth it!

    Avocado Hemp Butter
    Makes about 2 cups

    Ingredients:

    • 1/2 cup raw unrefined coconut oil*
    • 1/4 cup hemp seed oil*
    • 1/4 cup avocado oil
    • 1/4 tsp sea salt
    • 1/4 tsp apple cider vinegar


    Instructions:

    1. In a medium glass bowl, whisk together all ingredients until combined.
    2. Place in the freezer until the mixture starts to solidify at the edges, and becomes cloudy, about 20 minutes or so.
    3. Remove from the freezer, and whip with an electric mixer on high speed until light, fluffy and the consistency of creamy frosting (you may have to scrape the bowl sides half way through).
    4. Spoon into a jar, and let sit in the refrigerator until more firm, about an hour at least.
    5. Keeps in the refrigerator for a few months.


    *Note: if you want less of a coconut flavor, use refined coconut oil instead. I just prefer the unrefined.


  • Vegan Strawberry Lemon Cheesecake Popsicles

    Vegan Strawberry Lemon Cheesecake Popsicles

    It feels like Summer here, so I am craving popsicles.  When I was little, they were an essential item that we always had to have around in the freezer.  The plain fruit sweetened ones were my favorite, especially the raspberry or strawberry.  I wasn’t as big of a fan of the fake ones that were blue and green and whatnot.  Although I would never turn down a Freezee (those colored tubes of popsicle ice in case you have not heard of them), those were very popular when I was little.  Now as an adult, I like to get a little more creative with my popsicles, adding interesting flavors, or turning classic desserts into them.  Like the strawberry lemon cheesecake popsicles I made last weekend.  They tasted just like strawberry cheesecake!  I suppose it might be more appropriate to call them ice cream bars, but I am just sticking with popsicle, because that is the mold shape that I have.  I had organic strawberries on hand so I didn’t have to buy any ingredients, which is always a win in my opinion!

    The strawberries are so good and flavorful lately too, so I knew these were going to be good before I even made them.  What most people don’t realize is that it is really easy to substitute dairy in vegan recipes like this one.  Vegan cheesecake is just as delicious if not even more delicious than traditional dairy cheesecake.  I made a rich ice cream base with coconut milk and cashew butter and it tasted just like cheesecake once I added the vanilla.  I also added plenty of lemon zest and a bit of juice to give it a refreshing lemon flavor that didn’t overpower.  I wanted these to be layered, so I had a layer of strawberries, then a layer of strawberry cheesecake cream then the plain lemon cheesecake cream. They were lovely!  Then I just had to let them chill and set.

    I wanted to try one, but I had to leave them overnight because I made them in the evening.  But it was perfect, because I got to try them the next day when it was pretty warm out after taking a walk, and I needed something refreshing.  They were sooo good!  They tasted just like cheesecake with a hint of lemon and the sweet jammy strawberries were what made it!  you would never guess that this does not contain any dairy, since it tastes so rich and delicious!  Give these a try, no need to wait until it is actually Summer!

    Vegan Strawberry Lemon Cheesecake Popsicles

    Makes 8

    Ingredients:

    • 2 cups full fat coconut milk
    • 1/2 cup raw cashew butter
    • 1/4 cup maple syrup
    • 1 tsp pure vanilla extract
    • pinch sea salt
    • 1 Tbsp lemon zest
    • 2 Tbsp lemon juice
    • 1 cup organic strawberries, chopped (divided)


    Instructions:

    1. Combine the full fat coconut milk, cashew butter, syrup, vanilla, sea salt, lemon zest and juice in a blender and blend until smooth.  Remove half and set aside in a bowl.
    2. Drop a few strawberries into the bottoms of 8 popsicle molds.
    3. Blend the remaining coconut mixture (that you did not remove) with the remaining berries, then pour over the strawberries in the molds. Pour the mixture you had set aside without the strawberries over that.
    4. Place sticks into the molds, leaving about 1 inch at the top, then place in the freezer until completely hard, about 4-6 hours (or overnight).
  • Vegan Roasted Asparagus Garlic Flat Bread

    Vegan Roasted Asparagus Garlic Flat Bread

    Last weekend I ran the Foodie 4 Mile, a race to celebrate the opening day of the Minneapolis North East Farmer’s Market.   It was a beautiful perfect morning for running, about 49 degrees and cloudy.  I like the cooler temperatures because then I don’t overheat.  I ended up beating my time from last year by 6 seconds which was a surprise because I recently took a little time off from an injury and didn’t feel like I was in as good of shape as I normally am this time of the year. It went really well though, and I was glad I did it.  I just prayed before the race that I would feel good and go well, and it did!  They gave out reusable totes with coupons to the farmer’s market, so we had to stop there after and browse around.  I love farmer’s markets, but I don’t get there often because usually I work on Saturdays and am busy on Sundays, so it is packed up by the time I would get there.  But it was awesome to be able to visit right after the race on the way home.  They had surprisingly a good amount of produce for this time of the year.  I bought some beautiful asparagus, purple and green.  Since it is so good this time of the year.

    I thought it deserved to be used in something delicious. I usually would just roast it with a little olive oil and sea salt and eat it like that, but I decided to use that roasted asparagus to top off a flatbread. It just sounded good.  I wanted it to have a nice sauce on the bottom underneath the veggies, so I decided to use some Dastony watermelon seed butter that Raw Guru recently sent me to make a creamy garlic sauce.  If you have never had watermelon seed butter, it tastes similar to tahini just a little more mild.  I honestly did not even know it existed until they sent me some to try but it is good, and actually has health benefits!  Perfect for people who want to make a creamy sauce but are allergic to cashews.  If you want to check it out for yourself, you can find it HERE. If you do check out the Raw Guru Website, and you decide to order something, use my coupon code FRAGRANTVANILLA to get 10% off your order, typed in at your checkout.  Back to that flatbread.  The creamy garlic sauce was the perfect thing to spread over the flatbread.

    I had made a whole wheat cracker crust, because that is what I like. I am not as much of a fan of doughy crusts for some reason.  It is the toppings that matter to me.  I roasted plenty asparagus, then combined it with arugula, kalamata olives, and some vegan garlic white cheddar I had made and it was beautiful.  Lastly a sprinkle of red pepper flakes for garnish and it was perfect!  It was a nice combination of textures and flavors, with the crunchy crust, savory veggies, creamy cheddar and garlic sauce and kick of pepper flakes.  If you are in the mood for something that screams “Spring!” give this a try!

    Vegan Roasted Asparagus Garlic Flat Bread
    Serves 2

    Ingredients:

    Dough:

    • 1 1/2 cups organic whole wheat pastry
    • 1 Tbsp olive oil
    • 1/2 tsp sea salt
    • 1/2 cup plus 1 Tbsp filtered water


    Asparagus:

    • 2 cups organic asparagus, cut into 2 inch pieces
    • olive oil
    • sea salt


    Sauce:

    • 1/2 cup Dastony watermelon seed butter
    • 1 garlic clove, minced
    • 1 Tbsp lemon juice
    • 1/3 cup filtered water (or as needed)
    • 1/4 tsp sea salt, or to taste


    To finish:

    • 1/2 recipe Vegan Garlic White Cheddar , or store bought, such as Miyoko’s Kitchen cheddar
    • 1 handful arugula
    • 1/2 cup kalamata olives, halved
    • red pepper flakes


    To make the dough, combine the flour, and sea salt in a bowl, and whisk until well blended. Add the oil and water, and mix in until you have a soft dough.  Turn out onto a sheet of parchment paper with a light dusting of flour, and roll out into a 14 inch circle.  Set aside.

  • Vegan Almond Butter Maple Blondies 

    Vegan Almond Butter Maple Blondies 

    It smells so good here right now, like you have walked into a secret garden if you close your eyes when you walk outside.  The trees and flowers are all in bloom in all of their beautiful Spring glory, and they are loving the warm weather we have been having.  It may not seem like the time to be baking things, since you want to spend all of your time outside in the sun when the weather is like this, and you are not at work, but I figured I went outside for a 7 mile run in the morning, worked then went for a 3 mile walk in the afternoon, so why not relax and bake something afterwards?  I was in the mood for something chocolate chip cookie dough like.  Blondies sounded perfect!  I hadn’t made any in a really long time, and I am still looking for a perfect blondie recipe.  Meaning one that tastes just as rich and delicious as traditional ones, and is healthier without tasting like it.  One good way to make thing taste rich and delicious?  Add nut butter to the recipe.  And nut flour in this case.

    Raw Guru recently send me some raw almond butter and I had some of their raw almond meal, so I thought that they would be perfect in my little blondie recipe experiment.  Their almond products are fabulous by the way, the almond butter is super smooth and has a sweet flavor, and their almond flour is the best I have tried.  I should mention, if you do check out the Raw Guru Website, and you decide to order something, use my coupon code FRAGRANTVANILLA to get 10% off your order, typed in at your checkout.  Back to the blondies, I was super excited about them.  For the dough, I used my chocolate chip cookie recipe but tweaked it a bit.  I always use flax eggs in my cookies, because I always have ground flax seed on hand, and they always work perfect.  You would not even be able to tell there are not eggs in m cookies.  For the oil portion that I normally use in my cookie recipe, I swapped half with almond butter to make these nice and chewy, plus give them a delicious almond flavor.  I swapped out 1 cup of the gluten free flour for almond meal and it was perfect!  I used maple sugar in these to give them a sweet maple flavor, and let me tell you, the dough was amazing.  Like the best chocolate chip cookie dough ever. I added in plenty of chocolate chips. Because that is how I like it.  Someone recently complained that I put too many chocolate chips in my cookie recipes, but guess what?  I need all of those chocolate chips in my cookies and bars and that is how they will always be on this blog.  Because gooey chocolate chips are amazing!  The more the better!

    They baked up beautifully, and my kitchen smelled so amazing for hours after!  Unfortunately I had to wait for them to cool a bit (a bit more than I would like, because I wanted them to look nice in pictures for you all).  But OMG were they ever amazing when I was finally able to dive in!  I think I actually like blondies better than cookies, because they are softer in the center and remind me more of cookie dough!  If you are in the mood for something cookie like, but don’t want to roll out cookies and all that jazz, give these a try!  Blondies are just as amazing!

    Vegan Almond Butter Maple Blondies 
    Makes 16 large cookies

    Ingredients:

    •  2 Tbsp ground flax seed
    • 1/4 cup plus 2 Tbsp filtered water
    • 1/2 cup virgin coconut oil, warmed to liquid
    • 1/2 cup Dastony raw almond butter
    • 1 1/2 cups maple sugar or coconut sugar
    • 1 teaspoon vanilla extract
    • 1 tsp maple extract
    • 1 teaspoon baking soda
    • 3/4 teaspoon sea salt
    • 1 cup Raw Guru raw almond meal
    • 2 cups gluten free all purpose flour
    • 1 cup mini vegan chocolate chips or chocolate chunks


    Directions:

    1. Preheat your oven to 350F degrees. Line an 8×8 inch square pan with parchment and oil it.
    2. In a small bowl, whisk together the flax seed and filtered water.  Set aside in the refrigerator for 15 minutes.
    3. Meanwhile, in a large bowl, coconut oil and almond butter butter with sugar and mix until well combined
    4. Mix in the vanilla extract and flax mixture until well combined.  Add the baking soda and salt then the almond meal and flour, a cup at a time, mixing between each addition, until well combined.  Mix in the chocolate chips. Spread the dough evenly into the prepared pan.
    5. Place in the oven and bake for about 30-35 minutes until starting to brown, and set in the center, but do not over bake.  You want soft blondies.
    6. Remove from the oven and let cool, then cut into 16 bars and enjoy!
  • Mini Vegan Nutella Mousse Tarts

    Mini Vegan Nutella Mousse Tarts

    When I was little, I loved Nutella.  I loved having Nutella toast, it was like having dessert for breakfast.  After all, the real Nutella has sugar as the main ingredient and is super sweet.  My 10 year old self loved that.  When I visited Europe in high school, I ate Nutella on baguettes almost every day for breakfast the two weeks we were there.  I know, super healthy, but when I was 16 I didn’t really care if I ate healthy or not.  As an adult, I prefer real nutella, not the commercial stuff, the small batch stuff I either make at home, or get from somewhere like Raw Guru. They have some amazing raw hazelnut spreads, like their Raw Hazelnut Crunch Spread.  They recently sent me a jar, and that stuff is pure deliciousness.  So much better than the Nutella I had as a kid. I decided to make it into some delicious nutella tarts last weekend.  I wanted a simple dessert involving chocolate and they fit the bill.  Plus, I was daydreaming about how good something nutella would be.

    They are super simple to make.  For the crust, I kept it gluten free by buzzing up a mixture of quinoa flakes, hazelnuts, Raw Guru cacao powder, dates, and sea salt in the food processor. If you have never heard of quinoa flakes, they are a great gluten free substitute for oats in most recipes, and they work awesome!  Anyways, the crust tasted wonderful like chocolate cookies, and I knew it would be perfect with the topping.  The topping is simple to make as well, and it gets its richness from coconut milk and butter and of course the delicious hazelnut spread.  It was heavenly!  I kept “sampling” it because it was so good.  Not because it needed anything but I wanted to keep eating it.  I had to control myself so that there would be enough for the tarts.   A little chill time in the freezer and voila!  Delicious dessert goodness.

    They taste like real home made nutella, so heavenly.  Rich smooth creamy mousse filling that melts in your mouth.  If you are in a chocolate mood, do yourself a favor and whip up a batch.  These babies are sooo good!  If you happen to wander over to the Raw Guru Website to check out their delicious Rawmio products I mentioned in the post, bring my coupon code with you in case you decide to order some.  Just type in the code FRAGRANTVANILLA to get 10% off your order!  I hope you are all having a wonderful week so far!

    Mini Vegan Nutella Mousse Tarts
    Makes 4 mini tarts

    Ingredients:

    Four 4 inch removable bottom tart pans

    Crust:

    • 1/2 cup quinoa flakes
    • 1/2 cup raw hazelnuts
    • 1/4 cup soft, pitted medjool dates (if they are not soft, soak them first in filtered water 30 minutes and drain well before using)
    • 2 Tbsp Raw Guru raw cacao powder
    • 1/4 tsp sea salt
    • 2 tsp filtered water (or as needed, see note in recipe)


    Filling:


    Instructions:

    1. To make the crust, combine all ingredients but the water in a food processor, and process until fine. Add the water (but only if you did not soak your dates in water) and process until it is starting to hold together but not too sticky.
    2. Oil four mini tart pans (4 inch wide), and press the crust into the bottoms and up the sides of the tart pans. Set aside in the refrigerator.
    3. To make the filling, combine all ingredients but the coconut butter in a high speed blender or food processor, and process until smooth.  Add the coconut butter, and process until just blended.
    4. Pour the filling into the tart shells, and place in the freezer for about 1 hour or until set.
    5. Remove from the freezer and enjoy!  Store any leftover tarts in the refrigerator.


    *If you are using regular hazelnut butter, add an additional 1-2 Tbsp maple syrup to the recipe.


  • Vegan Strawberry Lemon Cream Cheese Galette

    Vegan Strawberry Lemon Cream Cheese Galette

     
    It is the little things in life that make me happy.  For instance, when I went out for a run on Friday I was a bit tired and sluggish, but my spirits were quickly lifted.  The lilacs were starting to bloom.  Let me tell you, that is one of my favorite times of the year. They smell amazing and running past a row of them is like being in a garden.  I am so envious of anyone who has them in their yards.  Not only that, they were finally sweeping the streets in my city (sand is really hard to get traction on when you are running on asphalt), and they put the porta potties back out in the parks and along the trails.  Trust me, to a runner these things are big.  And it all made me so happy!  So I went into my day in a super good mood.  I decided after work that some baking was in order.  I like to bake when I am happy, or at least I have more motivation to!  One of my coworkers had made hand pies in the deli I work in and it made me want to make some when I got home.  Except, I am a little lazier so I went for making a galette with the same ingredients instead.  Trust me, it is a lot less work.
    A galette is like a way easier version of pie.  You only need one crust, and you don’t have to do anything fancy with it, since it is rustic.  I decided to give it an almond crust.  I had just gotten a box of goodies from Raw Guru, including some raw almond butter and raw almond meal, so I thought they would be amazing in a crust!  As a side note, if you visit the Raw Guru Website and you see something there you want to buy, you can use my coupon code FRAGRANTVANILLA to get 10% off your order!
    Back to the galettes, the almond products in the crust were amazing!  I like nut crusts for pastries, because it gives them a more rich flavor without adding too much other oil.  To be honest, I kept eating chunks of it before I rolled it out, since it tasted kind of like cookie dough.  Next, I made some vegan “cream cheese” filling from thick coconut milk and cashew butter with a touch of vanilla and lemon and it was sooo good! I knew it would be amazing with the strawberries!
    For the fruit filling I used some fresh organic strawberries I had bought at work since they were on sale, and they were so flavorful and delicious!  They barely needed any sweetening, and a touch of lemon juice made them shine!  It all baked up beautifully and my kitchen smelled amazing!  I could not wait to try it, but unfortunately I had to wait because it needed to cool off before diving in.  It was well worth the wait though!  Jammy flavorful strawberries, a lemon scented luscious cream cheese layer, and a flaky crust.  It was heavenly!  If you have strawberries on hand, and are craving pie but you are a bit intimidated by it, give this a try! It is much easier to make!
    Vegan Strawberry Lemon Cream Cheese Galette
    Makes 1 10 inch galette

    Ingredients:

    Crust:


    Cream Cheese:
    • 1/2 cup full fat coconut milk
    • 1/2 cup raw cashew butter
    • 2 Tbsp maple syrup
    • 1/4 tsp sea salt
    • 1 tsp lemon juice
    • 1 Tbsp organic lemon zest


    Filling:
    • 2 cups fresh organic strawberries, sliced
    • 3 Tbsp maple sugar or granulated xylitol
    • juice of one small lemon
    • a pinch of sea salt
    • coconut sugar, for topping


    Directions:
    1. To make the crust, in a large bowl, mix together flour, meal, sugar, and sea salt.  Cut in coconut oil and pecan butter with a pastry blender or 2 knives until it is in pea sized pieces.  Mix in just enough water to create a smooth dough that holds together but isn’t too sticky.  Add a touch more water if needed, and knead slightly until a smooth dough is created.
    2. Roll it out into a 14 inch round using parchment underneath and floured rolling pin.  If it tears, no worries, just press it back together and patch it up. Using the parchment to move it, place on a sheet pan.
    3. To make the cream cheese, whisk together all ingredients until smooth.  Set aside.
    4. Preheat oven to 400F degrees.  To make filling, mix together all ingredients in a large bowl.
    5. Spread the cream cheese over the crust leaving a 1 1/2 inch boarder.  Spread the berries over the cream cheese, then carefully fold up edges to cover the edge of the fruit. Sprinkle with a little sugar.  Place in the oven.  Bake for 45 minutes (checking after 20 and if it is very brown, if they are tent with foil) until bubbling and fruit is tender.  Remove from oven and let cool on a wire rack for at least an hour.
    *If you want this to be gluten free, Gluten Free All Purpose Flour will work as well in this recipe (the same amount substituted for the whole wheat flour).
  • Vegan Peanut Butter Chocolate Pancakes

    Vegan Peanut Butter Chocolate Pancakes

    I am a peanut butter and chocolate fanatic. I even have a round up of 30+ Vegan Chocolate and Peanut Butter Recipes!  Growing up, Reese’s peanut butter cups were my all time favorite candy, and now my own home made peanut butter cups are. It is just an irresistible combination!  So a few days back at work I was kind of rungry (mid day hungry after running in the AM even though I ate a good breakfast, it just happens), I was daydreaming about what sort of chocolate and peanut butter concoction I could make when I got home.  I landed on pancakes after sorting through quite a few ideas in my head.  I thought peanut butter cup pancakes sounded amazing!  But I wasn’t going to chop up peanut butter cups and mix them in.  I wanted the pancakes themselves to be chocolate and peanut butter.  An amazing stack of deliciousness!

    This may sound like it would take quite a bit of time and effort to make, but not at all!  No pancake mixes here either.  I mean it is only about a minute more of your time to make your own so why not do it?  That way I can use the sweetener I want as well instead of just sugar.  I prefer maple syrup in my pancakes.  I made them with my classic gluten free batter, with plenty of peanut butter mixed in, then divided it in half and added in some cacao powder.  I thought about swirling the two batters and making the pancakes marble, but that was too much work, so I just cooked the two batters separately and decided to layer them together instead.  They cooked up beautifully and nice and fluffy.

    They were lovely when stacked together with their opposite colors! But they needed a special decadent topping as well.  I was thinking fudge syrup and peanut butter syrup. So I whipped some up in just a few minutes and it was perfect on the pancakes.  Lastly, they needed a little crunchy element so I scattered some chocolate chips and peanuts 0ver them. It was a sight to behold. They were super delicious as well!  I consider them dessert, but I never make pancakes just for breakfast, it is usually in the evening when I get around to doing so!  But if you have the time on your day off in the morning, why not have dessert for breakfast and make yourself some of these?!

    Vegan Peanut Butter Chocolate Pancakes
    Makes 12

    Ingredients:

    • 1 1/2 cups gluten free all purpose flour
    • 2 tsp baking powder
    • 1/2 cup peanut butter
    • 1 1/4 cups filtered water
    • 2 tsp pure vanilla extract
    • 1/4 tsp sea salt
    • 3 Tbsp maple syrup
    • 3 Tbsp cacao powder mixed with 3 Tbsp filtered water


    Peanut butter and chocolate fudge syrup:

    • 1/2 cup smooth peanut butter
    • 1/3 cup maple syrup
    • 1/4 tsp sea salt
    • filtered water as needed
    • 2 Tbsp cacao powder or unsweetened cocoa powder mixed with 1/4 cup filtered water


    For serving:

    • 1/2 cup vegan dark chocolate chips
    • 1/2 cup roasted organic peanuts


    Directions:

    1. In a food processor, combine all pancake ingredients (except the cacao mixture) and process until just blended, pour into a two bowls.
    2. Whisk the cacao water mixture into one of the bowls.
    3. To cook pancakes, preheat oven to 110 degrees. Heat a large non-stick pan over medium heat. Once hot, add the peanut butter batter in 1/4 cup amounts (I did 3 at a time, but it depends on your pan), and let cook for about 2-3 minutes on the first side until set and starting to brown, then flip with a spatula and cook another 2-3 minutes.  Do the same with the chocolate batter pancakes.
    4. When cooked, place on a plate and keep warm in the oven while you cook the other pancakes.
    5. To make the peanut butter and chocolate syrups, whisk together the peanut butter, maple syrup, and sea salt until smooth. Divide between 2 bowls.  Add the cacao water mixture to one and mix until smooth.  If either of the syrups are too thick, add a Tbsp or two filtered water and whisk it in until smooth.  They should both be pour-able.
    6. Serve the pancakes topped off with the syrups, and sprinkle with peanuts and chocolate chips.

    *Note: If you do not own a non-stick pan, you may need to lightly oil your pan to prevent sticking, if you do not mind these not being oil free.

  • Vegan Strawberries and Cream Brownies 

    Vegan Strawberries and Cream Brownies 

    I spent most of last weekend outside, going for long bike rides and walks, because I feel like we haven’t seen the sun or warmth like this in forever.  I mean, Winter lasted an extra 2 months, and now I feel like Summer has arrived and we have skipped Spring weather wise.  It is ok though, it feels nice and now we just have to wait for the plants to catch up.  When I did take a break from the outdoors stuff,I made some really delicious food. On Sunday, after Eric and I took a 27 mile bike ride, I made some vegan ramen from a recipe by Cilantro and Citronella.  You can find it HERE.  Man was it ever delicious!  I don’t usually follow recipes when I make stuff, but her recipe sounded amazing.  I was craving that type of ramen because it is the type I like to order at a local restaurant and I wanted to make it at home.  It turned out sooo good! It has a creamy sesame broth that makes it like comfort food.  I know, not really 80 degree weather type food but I was hungry for it.  The second thing I made is what this post is all about, some Vegan Strawberries and Cream Brownies.

    I am in a strawberry type of mood now that it feels like Summer, and I thought to myself, why not pair them with chocolate in some fudgy brownies?!  Yes, my brownies have to be fudgy, I am not a cakey brownie person at all.  I used my gluten free brownie base for these, and they turned out perfect!  It has a mixture of apple sauce and avocado oil to keep it moist but you would never know.  If you don’t have access to avocado oil, olive oil would work too (you can’t taste it because of the strong chocolate flavor).  For the strawberries and cream part, I used a mixture of coconut milk and cashew butter with freeze dried strawberries and it turned out like strawberry cheesecake swirls.  Why freeze dried strawberries?  Well, they are packed with strawberry flavor, but don’t add a lot of moisture to the recipe.  Lastly, I dropped some strawberry jam over the brownies as well.  I swirled it together, and could not wait to try them!

    Sadly I had to wait until they cooled but it was so worth it!  They were so good!  Super fudgy texture, rich chocolate flavor and sweet strawberry cheesecake like filling with flavorful jam throughout.  They taste like Summer brownies!  I mean, these are so much better than chocolate dipped strawberries!  If you are in the mood for something chocolaty, give these a try!  I hope you are all having a wonderful week!

    Vegan Strawberries and Cream Brownies 
    Makes 16

    Cheesecake swirl:

    • 1 cup freeze dried strawberries
    • 3/4 cup thick coconut milk (from the top of a chilled can)
    • 1/2 cup raw cashew butter
    • 2 Tbsp maple syrup
    • 1/8 tsp sea salt
    • 1 tsp pure vanilla extract


    Brownies:

    • 1/4 cup avocado oil
    • 1/2 cup applesauce
    • 1 cup coconut sugar
    • 2 Tbsp ground flax seed mixed with 1/4 cup plus 2 Tbsp filtered water
    • 2 teaspoon vanilla extract
    • 1 cup gluten free all-purpose flour
    • 1/2 cup cacao powder or unsweetened cocoa powder
    • 1/4 teaspoon sea salt
    • 1/2 cup strawberry rhubarb jam


    Ingredients:

    1. To make the swirl, combine all ingredients in a blender and blend until smooth.  Pour into a bowl and set aside.
    2. To make the brownies, pre-heat the oven to 375F degrees. Whisk together the sugar, avocado oil and applesauce until well combined and the sugar is starting to break down.
    3. Add the flax water mixture, and vanilla and beat until smooth.
    4. Add the flour, cacao powder and sea salt and beat until smooth.
    5. Scrape the batter into a greased 8×8 inch pan, then pour the swirl over it, then drop the jam by the tsp over that.
    6. Place in the oven, and Bake for about 30 minutes or until set (but do not over bake).
    7. Let cool completely before cutting into bars.


  • Vegan Chili Mole with Rice

    Vegan Chili Mole with Rice

    I have always loved spicy chili. When I was little, my best friend’s Dad made the best chili with the vegetables from his garden. Including spicy peppers like habaneros and jalapenos. I always loved it when I could eat dinner at her house when chili was being served. It was so packed with flavors, unlike any soup I usually ate from a can at that point in my life (I was about 10). I remember one time we were enjoying dinner, and the doorbell rang so we all got up to see who it was, and when we got back to the table the dog had jumped up and was enjoying the chili too. So everyone loved it! When I decided to start cooking for myself in college, I made vegetarian chili a lot because I knew it was something I liked. Also, because it was pretty hard to mess up, and it was always so good. I ended up combining several recipes, and it included some unusual ingredients like peanut butter, cacao powder, and vegan worchestershire sauce. Every time I served it to people, they would tell me how good it was but they couldn’t quite figure out what made it so good. I love making foods like that. I still make a version of that chili at the deli I work in and the customers like it. But at home I like to switch it up a bit. The peanut butter and cocoa powder thing was kind of a play on mole sauce I believe. So, recently I have been making a slightly different chili mole.

    Or, at least that is what I am calling it. It is by no means traditional mole sauce, but it is inspired by it so I am calling it that.  I have made this chili about 4 times now and it is so good that I finally needed to include it on my blog. It has been Sunday supper for me and Eric and I have been loving it! It is easy to make, and so good! I just combine the ingredients in a pot, cook them until flavorful, and it is that simple. I know traditionally people sautee everything in oil, but I decided to skip that step because I think it tastes the same and I know a lot of you appreciate oil free recipes. It does have a lot of spices in it, 5 different kinds of chilies technically, but that is what makes it so good.  That and cocoa powder, touch of cinnamon, and almond butter I added, which were mole inspired.

    I used to serve my chili with cornbread, but I have recently been serving it with jasmine rice and I love it that way!  The rice kind of cools the heat from the chili, because I make mine spicy.  Also, I serve it topped off with cool, rich avocado.  Trust me, the combination is so good!  I know the weather is getting warmer now, but I still like this sort of thing, especially on a rainy day which we tend to get a lot in the Spring.  Eric loves this chili too, which is why I have made it a few times. Both of our bowls are always gone pretty fast!  If you love a good spicy chili too, give this a try!

    Vegan Chili Mole with Rice
    Serves 2-3

    Chili:

    • 1 small onion, diced
    • 1 jalapeno, minced
    • 1 stalk celery, sliced
    • 2 garlic cloves, minced
    • 3 cups diced tomatoes (canned are fine)
    • 1 tsp ancho chili powder
    • 2 tsp ground cumin
    • 1/2 tsp chipotle powder
    • 1/2 tsp cinnamon
    • 1/4 tsp cayenne pepper
    • 1/4 tsp black pepper
    • 2 tsp Spanish paprika
    • 1 Tbsp unsweetened cocoa powder
    • 1/2 tsp sea salt or to taste
    • 2 Tbsp almond butter
    • 1 1/2 cups cooked black beans
    • cooked rice for serving (I used jasmine rice)


    Instructions:

    1. In a pot, combine all ingredients but the almond butter and beans.
    2. Bring to a boil, and lower to a simmer.
    3. Cook on low heat for about 20 minutes or until the veggies are getting tender.
    4. Add the beans, and almond butter and cook for about 10 minutes more until they soak up the flavor and the almond butter is well incorporated.
    5. Remove from heat, and serve with the rice in bowls topped off with the avocado slices.


  • Avocado Lime Margaritas

    Avocado Lime Margaritas

    Since it is Cinco de Mayo, I thought it would be the perfect day to share some margaritas with you!  No, not those cheap ones with all of the sugar and artificial color and stuff that you get in many restaurants, some quality margaritas with healthy ingredients that won’t make you feel gross after drinking them.  I do love a good margarita, but it has to be made with real fruit and quality liquor.  I only order them in restaurants when they fit those qualifications.  Of course just a good old fashioned one with lime, orange and tequila is awesome, but I have had some pretty amazing ones with unusual flavors.  For my 21st birthday I had a passion fruit one and it was sooo good. I also had an awesome carrot margarita in New Orleans a few years back (that I later recreated at home and you can find it here).  But one that I have been wanting to try making is an avocado margarita.  I had seen a recipe for one a while back and I said to myself I need to make my own version. Well, yesterday was perfect timing.  So, I got the ingredients for it, and made some avocado lime margaritas after work.

    The perfect think to relax with on a Friday right?!  It is really pretty simple to make, you just blend up the ingredients in a blender, and pour them over ice.  Of course I used avocado for the base, but it needed some other add ins to taste margarita worthy.  So I added in some fresh lime juice for that classic tartness, and some orange juice instead of the orange liqueur that is usually in margaritas.  I added a little maple syrup, and a touch of chipotle pepper for  kick, and the base was super delicious!  Once I added in the silver tequila it was perfect!

    I like cocktails that are made with coconut milk, because they are super silky, and this had that same quality, but it was even more refreshing.  The bright citrus flavor, that touch of sweetness from the maple syrup and the dash of spicy chipotle had married together well and it was smooth going down.  If you are an avocado lover like me, and you are always looking for new recipes to use them in, give these a try.  Or even if you aren’t a giant avocado fan, this just tastes like a creamy and delicious drink, kind of like creamy key lime pie but with orange, so you might still love it too!  Do yourself a favor and make these!

    Avocado Lime Margaritas
    Makes 2

    Ingredients:

    • handful of ice cubes
    • 1 medium avocado, pitted and diced
    • 1 cup tequila blanco or silver tequila (be sure to check Barnivore to make sure it is vegan)
    • 1/2 cup fresh lime juice
    • 1 cup fresh orange juice
    • 2 Tbsp maple syrup
    • 1/8 tsp chipotle powder (optional)
    • ice for serving
    • lime slices for serving


    Directions:

    1. To make drink, combine all ingredients but the serving ice and lime slices in a blender and blend briefly until smooth.
    2. Place about 1/3 cup ice into 2 serving glasses.
    3. Pour the mixture into the prepared glasses, garnish with lime and serve!


  • Vegan Chocolate Drizzled Tahini Cookies 

    Vegan Chocolate Drizzled Tahini Cookies 

    You may think of tahini as something that you add to hummus, or make dressing out of.  But did you know it is really good in desserts too?  I am not just talking about halva (a tahini candy popular in the Middle East). I mean adding it to actual desserts for richness in place of nut butters.  Like in delicious cookies.  My Mom gave me a jar of tahini from Trader Joes, and asked me to make some cookies with it. Heck yes!  I was excited about making them, because I like working with ingredients I don’t normally use all the time.  You know me, I tend to get obsessed with peanut butter and almond butter and don’t venture outside of those boxes, but tahini is a great ingredient too!  Especially if you happen to be allergic to nuts or peanuts, it is a life saver if you are craving rich nut butter cookies.  Which is exactly what I ended up making.  I modified my peanut butter cookie recipe, and added in creamy tahini instead of the peanut butter.

    The dough came together perfect! Honestly it tasted like peanut butter cookie dough, with the same texture just not as strong.  Sometimes tahini can be a tad bitter, but the stuff from Trader Joes is not, and it tasted good in this recipe.   Not only that, it has a nice smooth runny texture not too stiff.  Be sure that the tahini you are using for this recipe is the runny type that has been mixed well. I could not stop sampling the dough, but what else is new?!  I love cookie dough.  Most importantly though, these baked up beautifully!  I wasn’t sure if they would come out as nice as the peanut butter cookies, but they came out perfect!  They smelled amazing, like peanut butter cookies, with that hint of caramel from the coconut sugar.  I decided to drizzle them with dark chocolate, because I like to adorn cookies with something if they don’t have a lot of add ins.

    They tasted wonderful!  Rich peanut butter like flavor and a buttery texture.  Soft in the center, crispy at the edges, the dark chocolate the perfect touch!  If you are allergic to peanut butter or nuts,  but are wanting some delicious peanut butter cookies definitely give these a try!   Or, even if you aren’t allergic, still give them a try because I am sure you will love them!

    Vegan Chocolate Drizzled Tahini Cookies 
    Makes 12 cookies

    Ingredients:

    Cookies:

    • 1 Tbsp ground flax seed
    • 1/4 cup plus 1 Tbsp filtered water
    • 1 cup coconut sugar
    • 1 1/4 cups organic tahini*
    • 1/4 cup coconut oil, warmed to liquid
    • 1 tsp pure vanilla extract
    • 1 1/4 cups gluten free all purpose flour
    • 3/4 tsp baking soda
    • 1/2 tsp baking powder
    • 1/2 tsp sea salt

    Chocolate Drizzle:

    Instructions:

    1. In a small bowl, whisk together the flax seed and water.  Place the bowl in the fridge for 15 minutes, this is your flax egg.
    2. In a large bowl, with a wooden spoon, mix together the sugar, tahini, coconut oil, vanilla and flax egg, until smooth.  Then mix in the flour, soda, baking powder, and sea salt in until the mixture is smooth.
    3. Preheat the oven to 375F degrees.  Line a sheet pan with parchment.
    4. Shape the cookie dough into 2 inch balls, place on your baking sheet a few inches apart and flatten with a fork, like you would with peanut butter cookies.
    5. Place in the oven and bake at 375F for 12 minutes or so, until lightly browned and set.  Allow to cool completely on a rack.
    6. Melt the dark chocolate in the top of a double boiler.
    7. Drizzle the dark chocolate over the cookies, then set in the freezer until it has hardened.
    8. Enjoy!
  • Vegan Chocolate Chip Cookie Dough Pie

    Vegan Chocolate Chip Cookie Dough Pie

    I am one of those types of people that would make a batch of cookies just to eat the dough and not actually bake it.  Because the dough is my favorite part!  Usually when I make cookies, I do eat more dough than the baked cookies (I share them), just because there is just something irresistible to me about the texture and flavor of it that is better than the baked cookies. When I was a kid in my Grandma’s kitchen, I was always stealing dough.  She would tell me not to eat too much, or I would get a tummy ache, but I never got one.  I love the dough just as much now, and of course it is vegan dough so no dealing with that raw egg stuff.  I have even made a few cookie dough desserts (besides actual real dough), like my Vegan Chocolate Chip Cookie Dough Cake , Vegan Chocolate Chip Cookie Dough Truffles, Vegan Cookie Dough Ice Cream, and Vegan Cookie Dough Popcorn, and they were all amazing.  But I hadn’t made a pie yet.  The idea was in my head, I thought about making one a while back, but it got pushed to the back burner.  My brain is like a snowstorm of different ideas sometimes, with the snowflakes being ideas, so something has to wait to be made since I can’t make them all at once.  Well, it sounded really good to me last weekend so I finally made a chocolate chip cookie dough pie!

    I was super excited.  I had all of the ingredients on hand, which is always a plus.  I love it when I don’t have to buy anything extra.  I decided to make this gluten free and nut free as well, since I know a lot of you will appreciate that.  For the crust, I usually use oats, but I wanted to try quinoa flakes as a completely gluten free option.  It worked perfect! They blend up more fine than the oats, and are pretty neutral in flavor.  If you prefer oats though and don’t mind it not being gluten free, you can feel free to use them if you can’t get the quinoa flakes.  I blended them with dates and a few other things to make a sort of cookie dough crust and it was the perfect base for my cookie dough filling!  The filling has a somewhat unusual dessert ingredient, chickpeas.  I like to use them in things like this because they are neutral in flavor, and work like nuts in a recipe like this.  I wanted to keep it nut free, so they are a perfect substitute for cashews.

    I also added coconut milk, as the bulk of the filling to give it a creamy luscious texture like a cookie dough mousse. I added in a little vanilla and it was perfect!  It did taste like cookie dough mousse.  I could have eaten it with a spoon like that, but a pie is prettier and even better with the crust. This is a cookie dough lover’s dream!  If you agree that cookie dough is better than actual baked cookies most of the time, give this pie a try!

    Vegan Chocolate Chip Cookie Dough Pie
    Makes one 8 inch pie

    1 8 inch removable bottom tart pan

    Crust:

    • 1/2 cup finely shredded dried coconut
    • 1 1/4 cups quinoa flakes
    • 1 cup soft pitted medjool dates (if they are not soft, soak them 30 minutes and drain well before using)
    • 1/4 tsp sea salt
    • 2 Tbsp coconut butter
    • 1/4 cup vegan chocolate chips

    Filling:

    • 1 1 15 oz can full fat organic coconut milk, chilled
    • 1 cup soft, pitted medjool dates (if they are not soft, soak them 30 minutes and drain well before using)
    • 3/4 cup cooked chickpeas
    • 1/4 tsp sea salt
    • 2 tsp pure vanilla extract
    • 3/4 cup coconut butter warmed to liquid
    • 3/4 cup vegan chocolate chips


    Instructions:

    1. For the crust, combine all ingredients but the chocolate chips in the food processor until finely chopped and starting to hold together when squeezed.  Mix in the chocolate chips by hand.
    2. Press the mixture into an 8 inch removable bottom tart pan greased with avocado oil (or other oil that doesn’t harden when chilled).
    3. For the filling, combine all ingredients but the coconut butter and chocolate chips in a high speed blender and blend until smooth.
    4. Pour in the coconut butter and blend until smooth. Stir in the chocolate chips.
    5. Pour the filling over the crust, and sprinkle with more chocolate chips.
    6. Pie keeps refrigerated for 1 week in a container.


  • Blueberry Vanilla Almond Butter

    Blueberry Vanilla Almond Butter

    It is no secret that I love nut butters of any kind.  I am always including them in recipes (especially peanut butter but I love them all), and at any given time I probably have at least 8 different kinds in my pantry.  Almond, peanut, pecan, cashew, walnut, and coconut butter are all staples, but I like to have some gourmet varieties as well for snacking.  You know, like more than sea salt and nuts in them, or a mixed nut butter.  Sometimes for a simple desert or snack when I am craving something sweet, I eat it with fruit or just with a spoon. There is no shame in eating nut butter with a spoon, I do it all the time!  Well, this week I decided to make another new gourmet nut butter.  When I say gourmet, I mean something that would be in a fancy store with delicious things added in and might be a bit spendy just for one jar.   Well, I never usually buy those, I just get ideas from them, and make them at home later.  Because most commercial brands have refined sugars and maybe flavors that are artificial.  So I have fun in my kitchen with my own versions!

    The one I made this time was with blueberries.  I thought about making a blueberry cashew butter, but I was more in the mood for almonds, so I went with almond butter. Blueberries and almonds are a heavenly combination!  This is really simple to make if you have a high speed blender.  You just blend almonds, then add in freeze dried blueberries,  maple sugar, sea salt and vanilla.  That simple!  I used raw almonds because toasted would hide the blueberry flavor too much and overpower it.  Also, the reason I use freeze dried blueberries instead of just regular dried ones is that they blend up smooth and don’t gum up your blender.  The maple sugar gives the nut butter a hint of maple which is perfect with the other flavors.

    This stuff was so good I could not stop sampling it as I was putting it into the jar.  I probably ate like half a cup.  I know, I know, that is too much nut butter for one sitting, but it was so good!  It tastes like sweet summer blueberries with the luscious texture of almond butter with a light vanilla scent. Sooo good! Next time you are craving some really good gourmet nut butter, skip the stuff at the store and make some at home!  Note, you could make this in a high speed food processor but it will take much more time and will not be as smooth.

    Blueberry Vanilla Almond Butter
    Makes about 2 1/2 cups

    Ingredients:

    • 3 1/2 cups raw almonds
    • 2 cups freeze dried blueberries
    • 1/3 cup maple sugar
    • seeds of one vanilla bean
    • 1/4 tsp sea salt


    Instructions:

    1. In a high speed blender, blend the almonds at high speed, using the tamper to press them into the blades until they are smooth.
    2. Add the remaining ingredients, and blend until smooth.
    3. Scrape into a jar.
    4. Store in a jar in the fridge, keeps for 1 month.


  • Vegan Chocolate Chili Mousse Tart 

    Vegan Chocolate Chili Mousse Tart 

    I got a dessert cookbook from my friend when I was in high school, and it had the most delicious chocolate mousse recipe in it that I ended up making dozens of times back in the day.  It was super simple, only 2 ingredients, but so elegant, rich and delicious!  If I was making food for people or for a holiday, I would often times make that as the dessert because it could be made ahead of time, and always got rave reviews.  You just chilled some whipping cream, then melted dark chocolate and then poured it in slowly as you whisked it, and it turned into the most luscious chocolate mousse you can imagine.  Yes, sadly it wasn’t vegan thanks to that heavy whipping cream.  Although I usually used chocolate without milk in it.  It took me a while to attempt to veganize it but I finally got around to it. I was worried at first it wouldn’t work the same with coconut milk instead of the cream, but I was pleasantly surprised when it did!  I make the process easier though, and use a food processor instead of a hand mixer to blend the mousse and it works perfect!

    At the deli I work in, they sell these little chocolate mousse tarts which got me to thinking, I should make my own vegan version.  Because why not?!  I decided to make a big tart though instead of little ones because I wanted a bigger piece than just a little tart.  I decided to jazz it up a little as well, and add some chipotle chili powder because I was going to be sharing it with Eric and he likes anything chocolate with a little kick.  He is always telling me to put chilies in things.  Sometimes I give in, like in this case.  For the crust, I made a chocolate almond crunchy crust, because why not make this all chocolate the whole way through.  I am in the mood for rich chocolate lately which is kind of weird because I am normally all about the vanilla. This crust was the perfect thing to combine with the mousse! It came together fast in the food processor.  No bake, which is awesome because it means less time to make.

    Although I normally don’t add almonds to my mousse, this time I decided to add some almond butter as well, because almonds, chocolate and chilies go so heavenly together.  What resulted was the most rich and delicious mousse that would have been perfect just as it was, but it was even better when combined with the crust.  I loved how it turned out!  If you are a big chocolate fan, and you like a little spice with your chocolate, give this a try!  If you don’t like spicy things, you could leave it out and just make a chocolate mousse tart.  It will still be really yummalicious!

    Vegan Chocolate Chili Mousse Tart 
    Makes one 8 inch tart

    1 8 inch removable bottom tart pan

    Crust:

    • 3/4 cup finely shredded dried coconut
    • 3/4 cup sprouted, dehydrated buckwheat groats, or organic rolled oats (if not gluten sensitive)
    • 1/4 cup raw cacao powder or unsweetened cocoa powder
    • 2 Tbsp organic almond butter
    • 1 cup soft pitted medjool dates (if they are not soft, soak them 30 minutes and drain well before using)
    • 1/4 tsp sea salt
    • filtered water as needed


    Filling:

    • 1 1 15 oz can full fat organic coconut milk, chilled
    • 2 cups vegan dark chocolate chips
    • 2 Tbsp almond butter
    • 3 Tbsp maple syrup
    • 1/2 tsp chipotle powder


    Instructions:

    1. For the crust, combine all ingredients in the food processor until finely chopped and starting to hold together when squeezed (if it doesn’t you may need to add a little filtered water 1 Tbsp at a time).
    2. Press the mixture into a 8 inch removable bottom tart pan greased with coconut oil.
    3. For the filling, melt the chocolate in the top of a double boiler, then pour into a glass measuring cup with a spout.
    4. Place the coconut milk, almond butter, maple syrup and chipotle powder in a food processor and blend until smooth.
    5. Turn the food processor on, and with the motor running, slowly pour the chocolate into it and blend until uniform in color.
    6. Pour the filling over the crust and spread evenly.  Place in the freezer to firm up (about 1-2 hours).
    7. Enjoy!
    8. Tart keeps refrigerated for 1 week in a container.


  • Salted Caramel Dessert Hummus

    Salted Caramel Dessert Hummus

    Chickpeas are a staple in my kitchen.  Every week I cook off a huge batch of them, about 10 cups and I use them throughout the week for recipes.  I used to cook them and freeze them in portioned out containers, but I always use all of them up within the week now so there is no need to.  No offense to other beans, but they are what I use most, because they don’t taste as beany to me.  I use them in things like salads, soups, and hummus of course, but I also like them in dessert applications.  I have made several vegan cheesecake recipes that included them in place of cashews and they turned out awesome!  I also love making dessert hummus.  I love savory hummus, but dessert hummus is what I have been making lately because why not have something that tastes like sweet dessert but is actually healthy and contains fiber and protein too?!  I am always trying to get the best nutritional bang for my buck, even with desserts.

    It was really simple to make, only 6 ingredients that buzzed up silky smooth within 2 minutes in my high speed blender.  I love it when recipes take no time at all to make.  If you have cooked chickpeas on hand already this is a breeze! It actually happens to be fruit sweetened too, it gets its caramel flavor from dates, one of my all time favorite ingredients, and a must for any vegan caramel I make.  They are after all, nature’s caramel and about as natural as you can get when it comes to sweeteners.  I added in a bit of pecan butter which I think has a bit of caramel flavor too, and it was perfect!  If you don’t have pecan butter though, no need to rush out to the store to get some, just use some almond butter instead, it will still be good.

    The hummus was super delicious!  So good you could just eat it with a spoon like pudding, but It was amazing on banana slices, and I think it would be good with most fruit.  Or of course, you could enjoy it on toast, or with crackers or pretzels like regular hummus is.  If you are a caramel fan, or adventurous hummus fan, this is a must try!  What is your favorite type of hummus?

    Salted Caramel Dessert Hummus
    Makes about 3 cups

    Ingredients:

    • 1 1/2 cups cooked chickpeas
    • 1 1/4 cups pitted medjool dates, soaked in filtered water for 30 minutes and drained
    • 1 cup filtered water (or as needed)
    • 1 Tbsp pure vanilla extract
    • 1/4 tsp sea salt
    • 1/2 cup pecan butter or almond butter


    Instructions:

    Combine all ingredients in a high speed blender or food processor and blend until smooth (adding a little more water if necessary).  Keeps in the refrigerator for 2 weeks in a sealed container.

  • Vegan Hazelnut Crunch White Chocolate Truffles

    Vegan Hazelnut Crunch White Chocolate Truffles

    It snowed for 2 days here, and I really didn’t feel like going outside.  I had to go to work, and drive home in a scary blizzard, but after that I just hunkered down until the snow stopped.  It was the perfect time to make some truffles.  I can’t imagine a better way to make the fact that there was a blizzard here in April than making candy in my kitchen.  My go to activity for when I can’t go outside is coming up with new recipes.  Desserts are my favorite of course.  Raw Guru recently sent me some of their Raw Coconut Butter , and Rawmio Hazelnut Crunch Spread, and I thought it would be perfect to make truffles with!  Their coconut butter is super smooth compared to the stuff I make at home, so it was a treat, and that hazelnut crunch spread is like dessert just by itself.  It is a smooth sweet raw hazelnut butter with vanilla and cacao nibs for crunch.  So good!  If you would like to try either of them, Raw Guru has given me a 10% off code for you to use when checking out on their website.  Just enter the code: FRAGRANTVANILLA

    So back to my truffles I have been telling you about.  The filling is super simple, you just combine the hazelnut crunch spread with the coconut butter and it is so good!  The spread is sweet enough that you don’t need to add anything to it.  But if you were making this with just a plain hazelnut butter, you could add maple syrup to taste. The filling mixture is so good, you will be tempted to eat it with a spoon. But trust me, it is even better with the white chocolate!  I used a mixture of the coconut butter, cashew butter and cacao butter sweetened with maple syrup and vanilla  which is what I always use, but it was even more delicious than usual.  The stone ground coconut butter is so much more silky than home made.

    I dipped the centers in the white chocolate, which always gets a little messy in my kitchen, but it is ok.  Because I like eating all of the excess chocolate that falls off and drips off. You don’t have to be perfect when making truffles, all that matters is that they taste good.  I actually ended up dipping these about 3 times to get a thick layer of the white chocolate, but it was so worth the extra effort, because they turned out so good!  I drizzled them with some dark chocolate for decoration and they were perfect!  I couldn’t wait to try the finished product.  They were bomb!  Sweet, rich nutty hazelnut filling with crunchy cacao nibs, and a sweet, vanilla scented white chocolate coating!  So much better than anything you can buy at the store or get in a box of chocolate.  If you are a white chocolate fan, give these a try! They definitely cured my snow blues!

    Vegan Hazelnut Crunch White Chocolate Truffles 
    Makes 8 truffles

    Ingredients:

    Filling:


    White Chocolate:


    Dark Chocolate:

    • about 1/2 cup chopped vegan dark chocolate or chocolate chips


    Directions:

    1. Combine Rawmio hazelnut butter and coconut butter, and whisk until completely combined. Place in the freezer for about 15 minutes until it is firm enough to scoop (stirring occasionally so it cools evenly). Scoop and roll into 8 balls, rolling them with your hands.   Place on a parchment lined tray, and place back into the freezer until firm, about 30 minutes.
    2. Meanwhile, to make the  white chocolate, combine all ingredients in a double boiler, and whisk until combined and melted.
    3. Once the filling has firmed up, dip each truffle into the white chocolate, being sure to let the excess drain off, and place back onto the tray (I like to set mine on a fork to allow it to drain better). Once they are all dipped, set them in the freezer until hardened.  If you want a thicker layer of white chocolate, you will have to repeat this process several times.  I dipped mine 3 times.  Allow to harden in the freezer.
    4. Melt the dark chocolate in the top of a double boiler, then drizzle it over the truffles.  Allow the chocolate to harden, then enjoy!
    5. Store any leftover truffles in the refrigerator.


    *If you are just using regular hazelnut butter, add 3 Tbsp of maple syrup to it (or to taste).

  • Italian Pasta and Chickpea Soup 

    Italian Pasta and Chickpea Soup 

    So apparently Winter is never going away here.  They are predicting even more snow, even though it is mid April and the tulips should be blooming by now.  I am so over it.  Last year the first week of April I was wearing shorts outside.  So, I am not quite into the light Spring food yet, I am in comfort food mode until it warms up.  Which will probably be another month from the looks of it.  The soups are flying out of  the deli I work in, and I feel like soup making and serving is non-stop.  I can’t blame people, I feel the same way about soup right now.  So a few nights back I made myself a big pot of warming comforting soup.  I was in the mood for something with Italian flavor because I had made one at work and it just tasted and smelled so good I wanted my own. I had all of the ingredients on hand as well, so it was perfect!  I love it when I don’t have to go shopping for things to make dinner.

    It was really pretty simple to make as far as soups go. I have made my own soup ever since my Mom taught me how to make soup when I was in high school.  She had gotten this soup book and we would pick different recipes and make them together.  I thought that was pretty exciting, and it taught me a lot. It was useful knowledge when I decided I wanted to cook for a living.  My favorite soups out of that book were the Italian ones, so that is what we made most often, and those memories are what I based my Italian soup I made this week off of.  One called pasta e fagioli, or beans with pasta.  It had plenty of vegetables in the base, it was flavorful thanks to the herbs and alliums, and it was definitely comfort food. This one came together in about 45 minutes and it was just as delicious!

    The only things I changed were I swapped the usual white beans we used to use for chickpeas, and used elbow pasta instead of little alphabet shaped pasta I loved so much when I was younger, just because that is what I had on hand.  If you are making this for yourself, feel free to add in your favorite vegetables, or pastas or use a different bean.  Because that is what cooking at home is all about, making it work for you, and using what you like and have on hand!

    Italian Pasta and Chickpea Soup 

    Serves 3

    Ingredients:

    • 1 tsp olive oil
    • 1/4 cup diced red onion
    • 2 stalks celery, sliced
    • 2 carrots, cut in half and sliced
    • 2 garlic cloves, minced
    • 1 tsp dried basil
    • 1/2 tsp fennel seed
    • 1 tsp dried oregano
    • 1/4 tsp red pepper flakes
    • 1/2 tsp sea salt
    • 3 cups crushed canned tomatoes or fresh roasted*
    • 2 cups filtered water
    • 1 Tbsp balsamic vinegar
    • sea salt
    • 4 oz gluten free elbow pasta
    • 1 1/2 cups cooked chickpeas
    • 1/4 cup chopped fresh parsley


    Instructions:

    1. Heat the olive oil in a medium pan.
    2. Add onions, carrots and celery and sauté until tender.
    3. Add the garlic, tomatoes, herbs, sea salt, pepper, vinegar, and filtered water.
    4. Bring to a simmer, and allow to cook until the tomatoes are very soft and the flavor has melded, about 30 minutes.
    5. Add the pasta to the pot, and let cook for about 5 minutes.
    6. When the pasta is cooked, stir in the chickpeas and fresh parsley.
    7. Serve!


    *To roast the tomatoes, cut them into 2 inch wedges, and spread them out on a parchment lined baking sheet.  Place in a 400F degree oven and roast for about 30-45 minutes until tender and starting to brown at the edges. Remove from oven and you are ready to use them in this recipe.

  • Vegan Almond Strawberry Rhubarb Jam Bars

    Vegan Almond Strawberry Rhubarb Jam Bars

    I am so ready for strawberry and rhubarb season!  Spring is way behind here this year, with ice still on the lakes, snow on the ground and the ducks and geese that flew back here to Minnesota look confused.  Hopefully soon we will have green grass, tulips blooming and rhubarb growing.  But until then I will dream about it and enjoy strawberry rhubarb jam instead.  I was gifted a jar of lovely strawberry rhubarb jam and it honestly tastes like Summer.  When I was little, my Grandma used to make strawberry rhubarb sauce with the rhubarb that grew behind her garage and it was one of my all time favorite things!  I would eat a giant bowl and she would always warn me that if I ate too much I would get a stomach ache, but I never did.  It was so good.  Maybe that is why I love the combination of strawberries and rhubarb so much, it brings back good memories.  Monday, I decided that some strawberry rhubarb jam bars sounded good, so I went to work making some.

    Raw Guru recently sent me a care package including some Raw Guru Supernova Almond Flour and Raw Guru Supernova Raw Almonds, so I thought why not give the bars a buttery almond crust.  They are really good quality almonds from Italy, and they are actually truly raw and unpasturized, which is really hard to find here in the US.  They get toasted in this recipe, but if you are looking for raw almonds for raw recipes, these are awesome!  I actually made some almond butter from them, as well as used some chopped up nuts in the recipe, and the almond flour of course, so they are filled with almond goodness! The crust also doubled as a crunchy topping, so there is plenty of almond goodness to go around.  The flavor paired perfectly with the strawberry rhubarb.

    These smelled amazing while baking with the jammy fruit and almond crust toasting as it baked.  I could not wait to try them!  But unfortunately I had to wait until they cooled so that they would cut nice.  That is the downside of being a food blogger sometimes, you can’t just dive right into things.  It is ok though, because it was so worth the wait!  The gooey sweet tart strawberry rhubarb jam was amazing with the rich buttery almond crust!  If you are ready for Spring, whip up a batch of these!  If you can’t find strawberry rhubarb jam, you can use strawberry and they will still be really good.  Lastly, I would like to mention, that Raw Guru has been kind enough to give me a coupon code for you all, to get 10% off of your order.  So if you go on their website, when you are checking out with your items, enter the coupon code: FRAGRANTVANILLA

    Vegan Almond Strawberry Rhubarb Jam Bars
    Makes 16 bars

    Ingredients:

    • 1/4 cup coconut oil, warmed to liquid
    • 3/4 cup coconut sugar
    • 1 tsp pure vanilla extract
    • 3 Tbsp filtered water mixed with 1 Tbsp ground flax seed
    • 1 cup almond butter
    • 3/4 cups all purpose gluten free flour
    • 3/4 cup Raw Guru almond flour
    • 1/2 tsp baking powder
    • 1/2 tsp sea salt
    • 1 1/4 cups strawberry rhubarb jam (make sure it is vegan)
    • 2/3 cup chopped Raw Guru almonds


    Instructions:

    1. Preheat oven to 350F degrees with the rack set in the center position. Line a 9×9 inch square pan with parchment, and/or grease it with coconut oil.
    2. Whisk the coconut oil and sugar together in a bowl with the vanilla and flax mixture until the sugar starts to dissolve. Then add the almond butter and mix until combined.
    3. Add the flour, almond flour, baking powder, sea salt and stir in until well blended.
    4. Spread 2/3 of this mixture over the bottom of the pan, pressing it to the edges with your fingers.  Then spread the jam over that with a spoon or offset spatula. Drop chunks of the remaining dough over that, and sprinkle with the almonds.
    5. Place in the oven. Bake for about 45 minutes until lightly browned and set.
    6. Remove from the oven and let cool completely before cutting into bars.


  • Vegan Avocado Brownies

    Vegan Avocado Brownies

    Brownie baking is the perfect activity for your day off.  Especially if it has been a particularly stressful, or the weather outside is crappy.  I mean, one can not possibly be in a bad mood while baking brownies.  The whole process is enjoyable.  Eating the last bit of batter leftover in the bowl, taking in the heavenly aroma of the baking brownies, and of course devouring them when it is all over.  Makes me happy!  So, that is just what I decided to do last weekend.  I have been wanting to make avocado brownies for a while now, so that is what I made!  I have made a chocolate avocado cake before and it turned out awesome, so why not brownies?!  And I figure they will be perfect for people who are oil free as well, since the avocado is the healthy fat in these.  Plus, Raw Guru was kind enough to send me a lovely care package including some raw cacao powder and Rawmio Essentials dark chocolate so I couldn’t wait to use them in something.  If you have never heard of them, definitely check out their website, it is filled with good things like superfoods, chocolate, nuts, nut butters etc.  I have loved everything I have tried from them, especially their nut butters (since I am obsessed with nut butter).

    Anyways, back to those brownies.  In the event that you have some over ripe avocados laying around, these would be the perfect solution to use them up.  Not that it happens often, because they are usually devoured in my house, but I ended up with 2 bags last week so I had a lot.  The brownies are pretty simple to make, you just need to blend up some ripe avocados and whisk in all of the other ingredients.  That is the thing I like about brownies, they are easy.  The batter is like rich chocolate cake batter, I should know I sampled enough of it!  I used coconut sugar to sweeten them, and these actually happen to be gluten free so they are better for you than regular brownies.  Not to mention the heart healthy fats that they contain.  They bake up in about 35 minutes and you are on your way to chocolate heaven!

    I chopped up the Rawmio Essentials chocolate and scattered it on top of the brownies, because why not have gooey chocolate chunks?!  I like my brownies to be extra chocolaty. They baked up nice and fudgy just how I like them and I couldn’t wait to give them a try!  They were rich and delicious thanks to the avocado, none of that dry cakey stuff going on.  I am definitely a center brownie piece person, the fudgiest part the better.  If you are in search of healthier brownies, or just an avocado lover like me that is always finding new ways to use them, give these a try!

    Vegan Avocado Brownies
    Makes 16

    Ingredients:

    8×8 inch Pan

    Brownies:


    Directions:


    1. To make the brownies, pre-heat the oven to 350F degrees.
    2. Whisk together the sugar and avocado puree until well combined and the sugar is starting to break down. Add the flax mixture and and beat until smooth. Add the flour, cacao powder and sea salt and beat until smooth.
    3. Scrape the batter into a greased 8×8 inch pan. 
    4. Sprinkle with chocolate chunks. Place in the oven, and Bake for about 30-35 minutes or until set (but do not over bake).
    5. Let cool before cutting into bars.


  • Vegan Lemon Sugar Cookies

    Vegan Lemon Sugar Cookies

    I have always loved all things lemon.  Most likely it is inherited, because my Grandma loved lemon desserts, and my Mom does too.  None of that weak artificially lemon stuff either, it had to be real tart lemon, and plenty of it.  The fake stuff just isn’t the same.  I still feel that way.  I like my lemon meringue pie and lemon bars to have loads of flavor.  Lemon also makes me think of Spring.  I know citrus is in season mid Winter here, but I feel like that extends into Spring, and right now we have 8 inches of snow on the ground and it was in the single digits (Fahrenheit) this morning.  I am so ready for the snow to leave and green grass.  But in the mean time, I decided to stay inside and bake some lemon cookies. I had a bag of lemons on hand, so it was perfect!  I have been wanting to make some lemon sugar cookies for a while now, because the deli I work in makes some and they always smell amazing but they are not vegan, so I always tell myself I need to make my own.

    They are actually pretty simple to make, I just used my classic vegan sugar cookie dough.  I use xylitol, because it gives the cookies the same pale color that regular sugar would.  I like them to look like my Grandma’s sugar cookies.  But if you don’t care for xylitol, and would rather use coconut sugar or maple sugar go right ahead. Just keep in mind the cookies will turn brown.  The dough for these tastes amazing by the way, which is important to me, because I love cookie dough!  This dough is fragrant with lemon thanks to the large amount of zest I include in them.  My kitchen smelled amazing while they were baking and I could not wait to try them.

    But first, they had to cool, and I wanted to give them a glaze to make them pretty, and give them even more lemon flavor. So, I made a simple glaze of coconut butter, lemon juice, and maple syrup and it was perfect!  They turned out even better than I imagined.  A nice buttery rich texture, plenty of lemon aroma and flavor and a hint of sweet vanilla. Maybe it is snowing where you live and you need a little sunshine too.  If so, give these a try! They taste like sunshine!

    Vegan Lemon Sugar Cookies

    Makes 24 cookies
    Ingredients:
    Cookies:
    • 2 Tbsp ground golden flax seed
    • 1/4 cup plus 1 Tbsp filtered water
    • 1 Tbsp lemon juice
    • 2 Tbsp lemon zest
    • 1 cup virgin coconut oil, warmed to liquid
    • 1 1/2 cups xylitol* (coconut sugar may be used but keep in mind the cookies will not be the same pretty yellow color)
    • 1 teaspoon vanilla extract
    • 1 teaspoon baking soda
    • 1/2 teaspoon sea salt
    • 1/8 tsp turmeric powder (optional for color)
    • 3 1/2 cups all purpose gluten free flour


    Glaze:

    • 1/4 cup plus 2 Tbsp coconut butter, warmed to liquid
    • 3 Tbsp lemon juice
    • 1 Tbsp maple syrup


    Instructions:

    1. In a small bowl, whisk together the flax seed, filtered water and lemon juice and zest.  Set aside in the refrigerator for 15 minutes.
    2. In a large bowl, mix coconut oil with xylitol and mix until well combined.
    3. Mix in the vanilla extract and flax mixture until well combined.
    4. Add the baking soda, salt, turmeric then the flour, a cup at a time, mixing between each addition, until well combined.
    5. To bake, Preheat your oven to 350 degrees. Line 2 large baking sheets with parchment paper. Roll balls into about 1 1/2 inch balls, and place on prepared cookie sheets a couple inches apart.
    6. Place in the oven, and bake for about 15-18 minutes, until puffed and just starting to brown slightly.  Remove from the oven and let cool on the pan a few minutes, then remove to a wire rack to cool.  Repeat with remaining cookies and let cool completely.
    7. To make the glaze, whisk all of the ingredients together (if it seems too thick to drizzle, add a little more lemon juice to it).
    8. Drizzle the glaze over the cookies.
    9. Place the cookies in the freezer until the glaze is set.
    10. Enjoy!


    *Do not feed these cookies to dogs, xylitol is toxic to dogs similar to how chocolate is.

  • Vegan White Chocolate Coconut Truffles 

    Vegan White Chocolate Coconut Truffles 

    My Mom is one of my best friends.  She has always supported me in whatever I have chosen to pursue in life.  She was always at every track and cross country meet growing up, and she still comes to my road races.  And, she is one of my taste testers for my recipes, always being a good sport even if it isn’t necessarily something that she likes before trying it.  She is actually my inspiration for eating healthy food, because she raised me to eat plenty of veggies and stay away from processed food.  And also, she got me into cooking.  We would cook and bake together when I was younger, and also she made some pretty amazing desserts.  Baking Christmas cookies was my favorite.  My Mom’s Birthday is tomorrow, and so I wanted to make something special for her.  I made some White Chocolate Coconut Truffles.  She has always been a big fan of coconut.  When I was little when I would get Halloween candy, I would always give her my Almond Joy and Mounds bars, because those were her favorite.  Mine were the Snickers.  I have come to appreciate coconut more as an adult though, especially when it is not the kind that is already sweetened.

    The truffles I made turned out so good, and they were pretty easy to make.  For the inside I used a mixture of cacao butter for the white chocolate flavor, coconut butter to help firm them up, and cashew butter to give it a creamy texture. I mixed in some vanilla to make them fragrant, maple syrup for sweetness, and of course the shredded coconut to give them plenty of coconut flavor. The filling tasted divine, even before it was shaped into truffles.  I thought about dipping them in white chocolate, but decided on dark for a nice contrast, and so that they tasted like dressed up Mounds bars.  Trust me, they were way better than those though!

    They were sweet, delicious and even better than I imagined.  I know my Mom will love them!  When I was little, we would go to the candy counter at Dayton’s (now Macy’s), and we would each get a truffle to enjoy.  I always looked forward to that part of our shopping trip.  We would usually chose the ones with dark chocolate on the outside, and something creamy in the middle. These turned out just as good as those ones we had back in the day, so I am happy I can share them with her!

    Vegan White Chocolate Coconut Truffles 
    Makes 12 truffles

    Ingredients:

    White Chocolate:

    • 1/4 cup raw cacao butter (2 oz) or coconut oil if unavailable
    • 1/2 cup raw cashew butter
    • 1/4 cup raw coconut butter
    • 1 tsp pure vanilla extract
    • 2 Tbsp maple syrup
    • 1 cup finely shredded dried unsweetened coconut
    • 1/4 cup filtered water


    Dark Chocolate:


    Directions:

    1. Combine all of the white chocolate ingredients but the finely shredded dried unsweetened coconut and water over a double boiler, and whisk until smooth.
    2. Whisk the coconut into the white chocolate along with the water. Place in the freezer for about 15-20 minutes until it is firm enough to scoop. Scoop into 12 balls, rolling them with your hands.   Place on a parchment lined tray, and place back into the freezer until firm, about 30 minutes.
    3. Meanwhile, to make the dark chocolate, combine all ingredients in a double boiler, and whisk until combined and melted.
    4. Once the filling has firmed up, dip each chocolate into the dark chocolate, being sure to let the excess drain off, and place back onto the tray (I like to set mine on a fork to allow it to drain better). Once they are all dipped, set them in the freezer until hardened.
      Store any leftover truffles in the refrigerator.
  • Vegan Carrot Crepe Cake

    Vegan Carrot Crepe Cake

    Whenever there is a holiday, I feel that a delicious dessert is in order to be served with the meal.  Growing up there was always something for dessert, like the pies at Thanksgiving and Christmas, and the sweet giant cinnamon rolls and Swedish rice ring that were always served with Easter brunch when I was little.  So, even to this day, I always have to make something grand for every Holiday.  This year for Easter I decided to make a carrot cake. We don’t do brunch anymore, we just visited with family then came home and made dinner.  It was something super non-traditional oddly enough.  I made taco salad.  But it was amazing, so it didn’t matter if it were Easter themed or not.  The carrot cake though, was fit to be served at a traditional Easter meal.  I love carrot cake, and so I try and work it into my cake making every Spring.  But I wanted to have a little fun and make something different and exciting.  I am always like that though, always making different versions of things, and not always sticking with the original.  The nice thing about this cake is that you don’t have to bake it in the oven, but you do have to make crepes on the stove.

    It is actually kind of fun though.  My first experience with making crepes was in high school French class.  Our teacher brought in crepe batter and pans and we made them.  They were so good and it was one of the best class periods ever!  I like making crepes as an adult too, they are pretty easy, and you can fill them with whatever you like.  But of course these were going to be carrot cake, so I added in plenty of carrots and spices. Carrot cake has to have aromatic spices. I like ginger, nutmeg, cardamom and cinnamon in mine. It smells so good while they are cooking!  Yes, it takes a little time to cook them, but I just worked on making the cream frosting to fill the layers while I made them. It is a pretty simple vanilla cream that I put on a lot of my desserts.

    Once the crepes were all made and cooled and the frosting was ready, I assembled that baby.  I like the look of many layers, it is so pretty.  It tasted just like carrot cake too, but of course with even more creamy frosting which is a big plus for me because the frosting on cake is always my favorite part.  These have the perfect frosting/cake ratio!  Easter may be over now, but carrot cake is in season all of Spring (and I make it all year anyhow) so if you want to try a new recipe for carrot cake, give this a try!  I hope you are all having a wonderful Spring, it is snowing here right now so it still feels like Winter.

    Vegan Carrot Crepe Cake

    Makes one 6 inch cake

    Crepes:

    • 1/4 cup ground flax seed
    • 3/4 cup filtered water
    • 1 1/2 cups gluten free all purpose flour
    • 1 Tbsp ground cinnamon
    • 1/2 Tbsp ground ginger
    • 1/2 tsp nutmeg
    • 1/2 tsp cardamom
    • 3 Tbsp coconut sugar
    • pinch sea salt
    • 1/4 cup melted coconut oil
    • 1 1/2 cups light coconut milk
    • 1 tsp pure vanilla extract
    • 2 cups grated organic carrots


    Cream:

    • 2 15 oz cans organic full fat coconut milk, chilled
    • 1/2 cup maple syrup
    • 2 tsp pure vanilla extract
    • 1/4 tsp sea salt
    • 1 1/4 cups coconut butter, warmed to liquid


    Garnish:

    • toasted coconut
    • pecans


    Instructions:

    1. To make the crepes, mix together the flax seed and water in a bowl, and set aside in the refrigerator for 15 minutes until it is the consistency of egg whites.
    2. Meanwhile, whisk together the coconut sugar, flour, and sea salt in a bowl, then whisk in the coconut oil. Slowly whisk in the milk little by little to make sure the mixture stays free of lumps. Next, whisk in the vanilla, followed by the flax mixture you had set aside and the carrots.
    3. Heat a non-stick 6 inch pan over medium heat, then pour in 1/3 cup batter, and swirl the pan so that it spreads out to the edges.
    4. Cook for about 3 minutes on the first side, then flip over and cook the second side. Once the crepe is done, set aside on a plate.  Repeat with the remaining batter, separating the crepes with parchment paper on the plate so that they don’t stick together. Once you have finished allow them to cool completely.
    5. To make the cream, combine the coconut milk, maple syrup, vanilla and sea salt in a food processor and process until smooth.  Then, slowly with the motor running, add the coconut butter through the feed tube (you don’t want the mixture to separate and clump up.  But if it does, just continue to blend until smooth (it will be liquid at this point), then place in the freezer and allow to chill until thick) until the mixture is thick.  Set aside in a bowl in the refrigerator.
    6. To assemble the cake, place one crepe on a plate, then spread some of the cream over that in a thin layer, then top with another crepe.  Repeat the layers until you get to the last crepe then top the cake with the remaining cream.  Garnish with toasted coconut and pecans.  Let the cake set in the refrigerator for at least an hour before cutting.
  • Carrot Lime Margarita

    Carrot Lime Margarita

    I have always been a fan of fresh carrot juice.  When I got my juicer, it was the first thing we made with it, and honestly it almost tastes sweet like dessert if you get really good fresh carrots.  Add in a little lime or lemon to balance out the sweet and it is bomb!  Also a good way to get in a lot of vitamins at a time. So, when I was in New Orleans a couple of years ago with my Mom and we saw a carrot margarita on the menu at a restaurant, we were intrigued.  Yes, it sounded a bit odd, but I like odd things and odd flavor pairings. I don’t usually order margaritas in restaurants because many of them are made from sugary mixes with artificial colors and flavors etc.  But we asked the bartender what this one was made with and as it turned out, they juiced their own carrots, and used fresh orange and lime juice squeezed in house!  So we went for it!  And, I am so glad we did, it was one of those things that you just can’t believe how good it was.  We came back the next night for them they were so good.  Now if only they had that restaurant in Minnesota.  I would go there often.  I have wanted to recreate those margaritas for a couple of years now, but never got around to it because I don’t usually have tequila on hand.  But I decided that I wanted some last weekend so I bought all of the ingredients.

    When I first told Eric about them he was a little skeptical too, and he thought it sounded weird, but I was determined to make them really good like the ones we had down south.  I juiced my own carrots, squeezed some super juicy cara cara oranges, and fresh limes and my kitchen smelled all amazing and fresh!  I added in a little maple syrup instead of simple syrup, because it blends well with liquids and it was just enough to sweeten.  You can leave it out if you prefer, but since I was using orange juice and a tad more tequila instead of orange liqueur in these (which tends to have sugar), I needed it to give it the right flavor.  I added in some silver tequila and could not wait to try them!  I used a blender to mix them because I was making 3 servings and it would be too much for a shaker, but if you were making one serving (and 1/3 of the recipe) a shaker could be used instead.

    They turned out so good!  Just as good as I remembered the ones in New Orleans, and now I will have to make them again. Maybe next weekend for Easter, because why not?!  If you are looking for a new refreshing cocktail to try, or you are a margarita fan give these a try.  They are after all the ultimate veggie lover’s margarita!

    Carrot Lime Margarita
    Makes 3

    Ingredients:

    • handful of ice cubes
    • 1 cup fresh carrot juice
    • 1 cup tequila blanco or silver tequila (be sure to check Barnivore to make sure it is vegan)
    • 1/2 cup fresh lime juice
    • 3/4 cup fresh orange juice
    • 2 Tbsp maple syrup (optional)
    • ice for serving
    • lime slices for serving


    Directions:

    1. To make drink, combine all ingredients but the serving ice and lime slices in a blender at low speed and blend briefly until mixed together.
    2. Place 1/4 cup ice into 3 serving glasses.
    3. Pour the carrot mixture through a strainer into the prepared glasses, garnish with lime and serve!


  • Vegan French Silk Pie

    Vegan French Silk Pie

    When I was little, French silk pie was one of my favorite things ever. Luscious mousse like chocolate filling covered in fluffy whipped cream and chocolate it was heavenly!  And, at that point in my life I would always choose a cream pie over a fruit one any day.  They are about equal now, but nothing beat a cream pie back then.  It felt special because it wasn’t something I ate a lot, it was something that my family would buy for special occasions. I surprisingly have never made a vegan version, but I decided it was about time because I was craving one last weekend.  I knew I could make something even better than the original, and I went for it!  Perfect timing too because this is just the sort of thing you would want to include with your Easter meal if you wanted to go the more traditional route and didn’t want a cake.

    It wasn’t difficult to make at all, and I had all of the ingredients on hand.  Which is another reason I chose to make it last weekend.  I don’t know about you, but if I can make something without having to buy anything and it saves me money that makes me happy!  This pie has a press in no-bake crust, which makes it easier to make.  I don’t always like to fuss with blind baking crusts, so this is the route I usually take.  I made a chocolate crust for this one, because why not make it extra chocolaty!  One can never have too much chocolate, right?!  This crust is actually gluten free too, because I used buckwheat in the crust instead of oats.  But if you prefer oats and that is what you have on had, you can use those instead.  Or walnuts will work as well (as noted below).  The crust comes together in about 2 minutes and it tastes kind of like chocolate cookie dough.  The filling has a coconut milk cashew base and it is heavenly once the cacao powder is added.  Pretty much like a rich chocolate mousse, and I could eat it just like that.

    But I added a layer of fluffy whipped coconut cream like the original pie had, and sprinkled it with mini chocolate chips.  It was sooo good!  I enjoyed this version even better than the one I had as a kid, because it tasted better to me, and I still felt good after eating it.  Not like I was going to go into a sugar coma.  I think this would be the perfect addition to your Easter feast if everyone is a chocolate fan!  I hope you all are having a wonderful Spring so far!

    Vegan French Silk Pie
    Makes one 8 inch pie

    1 9 inch pie plate or 1 9 inch round removable bottom tart pan

    Crust:

    • 3/4 cup finely shredded dried coconut
    • 1 cup sprouted, dehydrated buckwheat groats, or raw walnuts
    • 1/4 cup raw cacao powder or unsweetened cocoa powder
    • 1 cup soft pitted medjool dates (if they are not soft, soak them 30 minutes and drain well before using)
    • 1/4 tsp sea salt
    • filtered water as needed


    Filling:


    Cream Topping:


    Topping:


    Instructions:

    1. For the crust, combine all ingredients in the food processor until finely chopped and starting to hold together when squeezed (if it doesn’t you may need to add a little filtered water 1 Tbsp at a time).
    2. Press the mixture into a 9 inch removable bottom tart pan or pie pan greased with coconut oil.
    3. For the filling, combine all ingredients in a high speed blender and blend until smooth. Pour into the crust.
    4. Place in the freezer until set, about 2 hours.
    5. Meanwhile, for the cream topping, combine all ingredients in a blender and blend until completely smooth. Pour into a bowl and place in the freezer until it is thick like whipped cream (whisking every so often), about 45 minutes.
    6. Once the cream is ready, spread over the top of the pie.
    7. Scatter chocolate chips or chocolate chunks over the top, and serve!
    8. Pie keeps refrigerated for 1 week in a container.
  • Vegan Chocolate Covered Caramel Eggs

    Vegan Chocolate Covered Caramel Eggs

    When I was little, caramel was one of my all time favorite things in the world.  When I would get a box of chocolates from my Grandma on holidays, I would always seek out the little square caramels first, because I knew they would always be sweet and delicious, whereas the other ones were hit and miss.  Whenever I had an ice cream sundae, it always had to have gooey caramel on it too.  When I decided to give up refined sugars, and when I went vegan, I thought that I would never be able to enjoy gooey delicious caramel again, because I thought that the best caramel had to have heavy cream in it.  But I was totally wrong, because I then discovered the wonders of date caramel.  Dates are nature’s caramel after all on their own, so if you turn them into an actual caramel it tastes just as good as the bad for you refined sugar caramel, or non-vegan caramel. Even better if you ask me, because I still feel good after eating it. I love it blended into a caramel sauce for pouring over things, but I also like chocolate covered caramel candies.  They sounded really good to me a few days back, so I made an excuse to make some.  Easter is in less than two weeks, so I decided to make some cute little caramel eggs!

    Filled eggs with a chocolate shell have always been my favorite Easter candy. But surprisingly I have never made caramel ones. I had mini caramel eggs when I was little that were amazing, so I knew home made ones would be even better.  The filling in these is completely date sweetened!  I love naturally sweetened desserts, and dates are about as natural as you can get when it comes to sweeteners.  I like to buy mine in the bulk section at the health food store because they are cheaper that way. Anyways, this filling is easy to make if you have a high speed blender.  You just buzz dates, almond butter, coconut butter, vanilla and sea salt in the blender and you get the most delicious sweet caramel!  It has to set up a little while before you can shape it, but trust me it is worth the wait.

    I dipped them in a delicious dark chocolate, just my favorite dark chocolate chips melted down, so super simple.  They were lovely!  I couldn’t wait to try one with the chocolate.  Not that I hadn’t been sampling the filling earlier (it was hard to put it down after I did so), but I knew it would be even better with the chocolate.  They were so much better than any Easter candy I had as a kid!  They are just as sweet and delicious, but these are larger, so more caramel to enjoy!  If you are a caramel fan, and looking for something special to make for Easter, give these a try!

    Vegan Chocolate Covered Caramel Eggs
    Makes 16

    Ingredients:

    • 2 cups soft pitted medjool dates soaked in water 30 minutes until soft and drain well before using in recipe
    • 1/2 cup almond butter
    • 1/3 cup filtered water
    • 1 cup coconut butter, warmed to liquid
    • 1 tsp pure vanilla extract
    • 1/4 tsp sea salt
    • 2 cups chopped vegan dark chocolate or dark chocolate chips


    Instructions:

    1. To make the caramel filling, combine the dates, almond butter, water, coconut butter, vanilla, and sea salt in a high speed blender and blend until smooth.
    2. Drop it onto a parchment lined tray by the mounded tablespoon, you should have about 10 mounds.  Place in the freezer until they are more firm (about 20 minutes), and you can shape them into eggs.  Shape them into eggs with your hands (like you would with play dough.  Put them back on the tray and freeze until hard, about 1 hour to 1-2 hours.
    3. When the centers are almost ready, melt the chocolate in the top of a double boiler until smooth.
    4. Dip each caramel egg into the chocolate, coating it completely and allowing the excess to drain off (I like to set mine on a fork to do so), and place back onto the tray.  When they are all done, put them back into the freezer to harden the chocolate if it isn’t set yet.
    5. Store caramels in the refrigerator for up to a month in an airtight container with a lid.


  • Vegan Berry Chocolate Chip Cookies

    Vegan Berry Chocolate Chip Cookies

    They make giant batches of chocolate chip cookie dough at the deli I work in.  Much larger batches than the rest of the cookies, because they are the most popular and they fly out of the store. I always see that big bowl of cookie dough, then want my own, and occasionally I will go home and make some cookies.  I mean, who doesn’t like chocolate chip cookies?  I loved them since I was little, although I am very particular about when I eat them. What I mean by when is the part of the cookie making process.  You see, I love the dough the most.  It is soft and comforting and delicious.  I could eat a whole bowl of dough.  But I suppose that defeats the purpose of cookies.  My second most favorite time to eat them is while they are still warm from the oven.  I love the gooey chocolate chips, and the softer consistency of the cookie before it has completely cooled.  I will eat cookies that have cooled but it is not the optimal time if you know what I mean.  So I am sure to enjoy them throughout the process.  That is why I love being the one making the cookies, instead of just eating them later, so I can do so!

    Anyways, I got the idea to make chocolate chip cookies a few days back, because there was that giant bowl of dough at work, and one of my other coworkers said she was going to make some at home too.  I was suddenly thinking that I needed some in my life!  The ones at work aren’t vegan, so I was making my own. Plus, I wanted to put a twist on it.  Add delicious berries!  I am craving berries again, we have been deprived of the more fresh ones here in Minnesota since last fall, so I miss them.  I didn’t have any fresh ones, so I used freeze dried in this recipe.  One good reason to use the freeze dried is so that they don’t add excess moisture to the dough.  The berries are still packed with as much flavor as fresh though, don’t worry!  The dough for these tasted amazing.  I had to keep sampling it, because it was one of those addictive things like potato chips or popcorn where I kept going back for more.  Plenty still made it onto the pan though, because I planned on sharing some of these cookies with others so I didn’t want to eat too much dough.

    They baked up beautifully and quickly!  From start to finish, it only took me less than half an hour to make them.  Granted I wasn’t able to dive in for a few minutes when they came out of the oven, but this is an easy to make cookie.  They are delicious!  Studded with sweet little berries along with the rich chocolate chips!  I recommend enjoying while still warm while the chips are gooey.  If you are looking for a new chocolate chip cookie recipe to try, give this one a go!  They happen to be gluten free and refined sugar free so it is a win all around!

    Vegan Berry Chocolate Chip Cookies
    Makes 16 large cookies

    Ingredients:

    •  2 Tbsp ground flax seed
    • 1/4 cup plus 2 Tbsp filtered water
    • 1/2 cup virgin coconut oil, warmed to liquid
    • 1/2 cup raw almond butter
    • 1 1/2 cups maple sugar or coconut sugar
    • 1 teaspoon vanilla extract
    • 1 teaspoon baking soda
    • 3/4 teaspoon sea salt
    • 3 cups gluten free all purpose flour
    • 1 cup mini vegan chocolate chips or chocolate chunks
    • 1 cup freeze dried strawberries and raspberries


    Directions:

    1. In a small bowl, whisk together the flax seed and filtered water.  Set aside in the refrigerator for 15 minutes.
    2. Meanwhile, in a large bowl, coconut oil and almond butter with sugar and mix until well combined
      Mix in the vanilla extract and flax mixture until well combined.  Add the baking soda and salt then the flour, a cup at a time, mixing between each addition, until well combined.  Mix in the chocolate chips and berries. Place in the freezer for about 10  minutes until it is firm enough to scoop (if it is too soft at all, it may not be, in that case proceed with scooping. It just depends on how warm the coconut oil was).
    3. To bake, Preheat your oven to 350F degrees. Line 2 large baking sheets with parchment paper. To Form the cookies take about a 2 inch chunk of dough, form into a ball and on prepared cookie sheets a couple inches apart, and press down just slightly. Bake for about 12-15 minutes, until puffed and just starting to brown slightly.  Remove from the oven and let cool on the pan a few minutes, then remove to a wire rack to cool.  Repeat with remaining cookies and let cool before enjoying.
  • Vegan Carrot Cake Scones

    Vegan Carrot Cake Scones

    The arrival of Spring has me in the mood for carrot cake. Because to me, it is the quintessential Spring dessert.  I mean, it is perfect for Easter celebrations, and carrots first come into season this time of the year (well not for a while in Minnesota, but in other parts of the country). I like plenty of aromatic spices in mine, and chopped pecans, and it has to have a cream cheese frosting or glaze.  Gosh, I am making myself hungry talking about it.  I had carrots on hand last weekend and it just seemed right to make carrot cake, but I didn’t have the ambition to bake a cake, make frosting, and frost it.  I wanted something a little more instant.  Scones sounded amazing as well, I was craving their flaky rich texture so, I decided to make carrot cake scones.  We make a carrot scone at the deli I work in, and I am always telling myself that I need to make a vegan version, so now was the time!  I can’t believe I have never made any carrot cake scones, I have been baking for a long time and they sounded amazing!

    These are actually pretty quick and easy to make, which is always a win!  You can be enjoying them much faster than actual carrot cake. I made a gluten free dough for them, and added in some pecan meal for richness and extra flavor.  Trust me, this little addition makes them so much better!  For spices, I added cinnamon, ginger and nutmeg and it was just enough to make them aromatic.  Yes, these have coconut oil and full fat coconut milk in them, they are not a low fat recipe, but it is so worth it!  It makes them flaky, delicious and crave worthy.  The trick to making them turn out perfect is to mix the dough just until it is starting to hold together with small lumps of coconut milk and coconut oil still in the dough, then you get those pockets of flaky perfection. I mixed in plenty of carrots and pecans and even the dough tasted good!  Yes, I eat this dough just like I do with cookie dough haha!

    They smelled amazing while baking, the sweet aroma of carrot cake spices filling my kitchen.  They baked up beautifully, and I could not wait to try them!  But first, since they were carrot cake, they needed a “cream cheese” glaze.  So I whipped one up in a minute and it was just what they needed.  These are heavenly! They have all of the flavor of sweet carrot cake, but they are rich, flaky and delicious!  That slightly tangy sweet glaze is the perfect addition. These would be perfect for an Easter brunch, but of course I recommend making them now, just because they are so good!

    Vegan Carrot Cake Scones
    Makes 8

    Ingredients:

    Scones:


    “Cream Cheese Glaze:

    • 1 Tbsp raw cashew butter at room temperature
    • 1 Tbsp coconut butter, warmed to liquid
    • 2 tsp maple syrup
    • pinch sea salt
    • 1/8 tsp cider vinegar


    Instructions:

    1. Preheat oven to 425F degrees with the rack set at the middle position.
    2. Line a baking sheet with parchment.
    3. In a large bowl, combine the flour, pecan meal, sugar, ginger, cinnamon, nutmeg, baking powder, and salt. Cut in the coconut oil with a pastry blender or 2 knives until the mixture starts to clump into pea sized pieces. In a small bowl, stir the vanilla into the coconut milk. Add the coconut milk to the dough, and stir a few times, but do not over-mix. The dough should hold together when squeezed, but still be clumpy.
    4. Fold in carrots and pecans until evenly distributed.
    5. Place dough on a floured work surface, and shape into a 4 inch wide log. Use a bench scraper to cut into 8 triangles.
    6. Place scones on the prepared baking sheet, reshaping slightly if necessary.
    7. Brush the tops lightly with the coconut milk (only if they seem dry, you want the sugar to stick), and sprinkle with coconut sugar.
    8. Place in the oven and bake for about 20 minutes or until golden brown (after about 15 minutes you may need to reshape with 2 bench scrapers if the scones are spreading, then place back in the oven).
    9. Cool on a wire rack.
    10. Whisk together the glaze ingredients until smooth, and drizzle over scones. Enjoy!


    *If you prefer to make these not gluten free, you can swap the gluten free flour for organic whole wheat pastry flour.

    *For the pecan meal, blend about 3/4 cup pecans in a blender or food processor just until ground finely, but not too long or they will become butter. This should give you enough for the recipe.

  • Vegan Lemon White Chocolate Truffle Eggs 

    Vegan Lemon White Chocolate Truffle Eggs 

    When I was little, whenever I would go shopping with my Mom at the mall, we would always stop by the candy counter in one of the stores and buy a couple of truffles to enjoy.  There were so many delicious options, but the ones that we found ourselves drawn to time and time again were the key lime, and lemon cream. One time the woman at the counter said to us, “You know those are really tart!  I can’t handle them!” But we loved that about them!  I guess it runs in our family because my Mom and Grandma both loved tart lemon and lime desserts and passed that onto me.  I mean, what is a key lime pie, or lemon meringue pie without the tart and too much sweet?!  That is why now when I make those things or anything with lemon or lime for that matter, it has to be a bit tart to balance out the sweet.  So, last weekend I decided to make some lemon white chocolate truffle eggs and I wanted them to be packed with delicious lemon flavor!

    I have made berry cream eggs, mint cream eggs, hazelnut truffle eggs, peanut butter eggs, and vegan Butterfinger eggs, but never any lemon or lime ones.  And, it was about time.  It just sounded really good to me, because I had citrus on hand and I was thinking about those truffles I enjoyed as a child.  I wanted the filling to be luscious, so I combined cacao butter, cashew butter and coconut butter for a heavenly white chocolate base. Trust me, it makes the most creamy dreamy concoction once it has firmed up to the proper consistency.  I mixed in plenty of lemon in both the form of lemon juice and zest, and a touch of vanilla and it was so good! I formed it into little egg shapes once it had cooled and it was ready for its coating.  I thought about dipping it in more white chocolate but decided on dark chocolate instead for more of a contrast, and because dark chocolate is amazing with lemon.

    They turned out so cute!  Filled chocolate eggs are my all time favorite Easter candy treat (well obviously judging by the ones I mentioned earlier in this post)!  These are heavenly!  Sweet tart lemon white chocolate cream and decadent dark chocolate!  I would be so happy if I got these in my Easter basket! If you are a lemon fan too, give these a try!  What is your favorite Easter candy treat?

    Vegan Lemon White Chocolate Truffle Eggs 
    Makes 6-8 large eggs

    Ingredients:

    White Chocolate:

    • 1/4 cup raw cacao butter (2 oz) or coconut oil if unavailable
    • 1/2 cup raw cashew butter
    • 1/3 cup raw coconut butter
    • 1 tsp pure vanilla extract
    • 2 Tbsp maple syrup
    • 2 Tbsp organic lemon zest
    • 1/4 cup lemon juice
    • 1/8 tsp turmeric (for color)


    Dark Chocolate:


    Directions:

    1. Combine all of the white chocolate ingredients but the lemon zest and juice over a double boiler, and whisk until smooth.
    2. Whisk the lemon zest, juice, and turmeric into the white chocolate until well combined. Place in the freezer for about 20-30 minutes until it is firm enough to scoop. Scoop into 8 balls, rolling them with your hands and shaping them into eggs.   Place on a parchment lined tray, and place back into the freezer until firm, about 30 minutes.
    3. Meanwhile, to make the dark chocolate, combine all ingredients in a double boiler, and whisk until combined and melted.
    4. Once the filling has firmed up, dip each chocolate into the dark chocolate, being sure to let the excess drain off, and place back onto the tray (I like to set mine on a fork to allow it to drain better). Once they are all dipped, set them in the freezer until hardened.
      Store any leftover truffles in the refrigerator.
  • Spring Confetti Popcorn

    Spring Confetti Popcorn

    I am sooo ready for Spring!  The robins and ducks are back, the snow is melting quickly, and I have seen some pussy willows.  I have put away my Winter boots, and I am wearing my Spring clothes (even if it is still a little chilly darn it).  No more layer upon layer of jackets and such.  The thing I like most about Spring is running outside and watching everything come alive.  We aren’t quite to that point yet, but I know we will be soon.  Also, I am craving more Spring inspired food.  So strawberries and asparagus and such.  But since they are not quite in season, I decided to make a festive popcorn.  Easter and Spring make me thing pastels, so I thought, why not create a beautiful confetti popcorn with different colors.  I am an art major, so I am all about color, and making things pretty.  Although I could have just made it vanilla cream flavored popcorn and used just vegan food coloring, I decided to give it a fruity flavor and color it with some of my favorite things.

    I would have to divide the popcorn between 3 bowls, and mix separate colors, but it would be so worth it!  I made a sweet vanilla white chocolate from cacao butter, coconut butter and cashew butter sweetened with maple syrup.  It was luscious as it was, but it would be even better once I added the flavors.  The first flavor was strawberry.  I pulverized some freeze dried strawberries, and mixed them into the white chocolate. Second, I used some matcha and lime zest for the next flavor.  Matcha is one of my all time favorite things, and it pairs well with berries and citrus.  Lastly, I mixed a little turmeric and lemon zest into the last bowl of white chocolate.  It made for some beautifully colored popcorn!

    Honestly when it was all spread out, it reminded me of Spring flowers, or Easter pastel colors, so how appropriate for this time of the year.  Most importantly though, it tasted delicious!  Sweet vanilla white chocolate with berry, matcha and citrus flavors!  It was crave worthy, and covered all of the craving bases for if you want something snacky.  Sweet, a tad of salty, and crunchy!  If you are looking for a festive snack, give this a try!

    Spring Confetti Popcorn
    Makes 8 cups

    Ingredients:

    • 1/3 cup maple syrup
    • 1/3 cup raw cacao butter (you may also use coconut butter if you prefer)
    • 1/4 cup raw coconut butter
    • 1/3 cup raw cashew butter
    • 1/2 tsp sea salt
    • 1 tsp lemon juice
    • 1 tsp pure vanilla extract
    • 8 cups plain organic popped corn
    • 3 Tbsp freeze dried berries, ground to powder (I used a mortar and pestle)
    • 1/4 tsp turmeric
    • 1 tsp organic lemon zest
    • 1/2 tsp matcha powder
    • 1 tsp organic lime zest


    Instructions:

    1. In a glass measuring cup (or bowl) whisk together the maple syrup, coconut butter, cashew butter, sea salt and vanilla until well blended. divide between 3 bowls.
    2. Stir the berries into one, the turmeric and lemon zest into another, and the matcha and lime zest into the last.
    3. Divide the popcorn between 3 bowls. Pour one berry mixture over one, and mix well with your hands until the popcorn is coated.  Pour the turmeric mixture over the next bowl and do the same.  Pour the matcha mixture over the last and do the same.  Drop the popcorn onto a lined sheet pan by about a scant 1/4 cup, alternating the colors, and place in the freezer until it is hard.
    4. Enjoy!
  • Vegan Peanut Butter Banana Cream Pie

    Vegan Peanut Butter Banana Cream Pie

    I think banana cream pie is an under rated dessert.  I mean, apple pie, pumpkin pie and key lime pie get all of the attention.  Don’t get me wrong, I love all of those pies, and I love pie in general but banana cream pie is bomb, and I don’t see it around very often.  Maybe people are intimidated by the layers or cooking the filling or something.  I know I kind of used to be.  Before I was vegan, I remember I made a banana cream pie with a cooked pudding like filling and I wasn’t sure if it would turn out but it was well worth the time and effort.  Well, guess what?  The banana cream pies that I make now require absolutely zero cooking!  So less to screw up, right?  I decided last weekend that I wanted to make one.  It had been way to long since I had done so, my favorite recipe being this Raw Banana Macadamia Coconut Cream Pie.  But I wanted a little less complicated recipe this time that didn’t require cracking open young coconuts.  So, I made a Vegan Peanut Butter Banana Cream Pie instead.  Peanut butter is just as good with bananas as the macadamias and so much cheaper.  You know me, I am always trying to work peanut butter into my recipes.  I love the stuff so much I would eat a whole jar if I could.

    Anyways, this pie turned out bomb!  So I wanted to share the recipe with you all.  It is feeling Spring like here and the snow is melting, so I feel like a cream pie is the perfect dessert!  I don’t know why but they always remind me of Spring.  Maybe because I like to serve desserts like this at Easter celebrations. For the crust, I went simple and no bake.  A peanut laced crunchy cookie like crust was the result when it was all blended and pressed into the pan. I actually used a removable bottom tart pan for this because I figured it would be easier to get out, but an 8 inch pie plate would work too.  For the filling, I made a no bake banana peanut butter cream, and put bananas over that.  Next, a peanut butter cream layer, then a vanilla cream layer. Coconut milk was the “cream” for this, it is my favorite whipped cream substitute.  I used So Delicious original culinary coconut milk because it is already nice and thick.  I wanted this baby piled high.

    It was a sight to behold, almost to pretty to eat but of course it smelled amazing and I was hungry so I didn’t hesitate to cut it. It cut nicely and the layers turned out lovely!  It tasted amazing as well!  I was expecting it to be good, but it was damn delicious!  If you are a banana cream pie fan, give this a try!  Trust me it is awesome, and it would make the perfect dessert for serving at Easter.  If you are not a peanut butter fan, feel free to substitute your favorite nut and nut butter in the crust and filling.

    Vegan Peanut Butter Banana Cream Pie
    Makes one 8 inch pie

    one 8 inch pie pan, or removable bottom tart pan

    Ingredients:

    crust:


    Filling:

    • 1 cup mashed organic banana
    • 2 Tbsp organic peanut butter
    • 1/4 cup plus 2 Tbsp coconut butter, warmed to liquid
    • 2 Tbsp maple syrup
    • 1/4 tsp sea salt
    • 2 organic bananas sliced


    Topping:


    For garnish:

    • organic peanut butter (if is not runny enough, whisk in a little water)
    • sliced organic banana


    Instructions:


    1. To make the crust, combine all the ingredients in a food processor and process until finely chopped and starting to hold together.  Press the mixture into the 8 inch pie pan or 8 inch removable bottom tart oiled with coconut oil.  Place in the freezer while you prepare the filling.
    2. For the filling, combine all ingredients except the 2 sliced bananas in a blender and blend until smooth.  Pour into the prepared crust, and top with the banana sliced in an even layer. Place in the freezer while you prepare the cream topping.
    3. To make the topping, add the coconut milk to a bowl, whisk in the maple syrup, vanilla, and sea salt.  Then whisk in the coconut butter until it is thick (but don’t over-mix) Divide between two bowls, and whisk the peanut butter into one of them.
    4. Spread the peanut butter whipped cream over the pie, then the plain whipped cream, and place in the refrigerator to set for about 30 minutes.
    5. Drizzle the top of the pie with peanut butter, garnish with banana slices and serve!
    6. Store any leftover pie in the refrigerator.


    *Note: If you can not get the So Delicious Culinary Coconut Milk, substitute 2 15 oz cans full fat coconut milk (the kind with mostly cream in them not a lot of water, like Thai Kitchen full fat coconut milk), 1/4 cup plus 2 Tbsp maple syrup, same amount of sea salt and vanilla as above, and 1 cup plus 2 Tbsp coconut butter.  Blend it in the blender until smooth and well combined, and place it in the freezer to firm up to the consistency of heavy cream, then divide between 2 bowls, whisk the 2 Tbsp peanut butter into one, and continue with the recipe.


  • Mint Chocolate Chip Dessert Hummus

    Mint Chocolate Chip Dessert Hummus

    Dessert hummus is everywhere lately. It is actually a pretty awesome thing to make, because you can enjoy something that tastes like dessert but get some protein and fiber from the chickpeas at the same time.  Plus the chickpeas serve as a blank palate for any flavors you want to give them.  I have used them in vegan cheesecakes for that reason.  I feel like I make more dessert hummus lately than regular savory hummus!  Don’t get me wrong, I love a good tahini hummus with cumin and lemon.  But I can get that at my work, and I like to experiment with new things every time I make hummus.  The sweet dessert hummus world is more unexplored I feel like.  I have made Red Velvet Cake Batter Dessert Hummus, Chocolate Cake Batter Dessert Hummus, Strawberry Dessert Hummus and Vegan Peanut Butter Cookie Dough Dessert Hummus…but why stop there?!  I still have plenty of dessert flavors I would love to make into hummus.  This week, it was Mint Chocolate Chip Dessert Hummus.

    I loved mint chip ice cream (or peppermint bon bon as it was called) growing up, there was just something so refreshing and mellow about it.  The vanilla mixed with the cooling mint with rich flecks of dark chocolate.  I would eat it year round.  So I thought, why not make a hummus that tastes exactly the same, but won’t melt or make me cold.  It was really simple to make, because I already had the cooked chickpeas on hand.  I always make a big batch, then freeze it in smaller amounts so that they are ready to go for salads, soups and of course hummus!  I blended the chickpeas with raw cashew butter because it is neutral and gives the hummus a silky texture.  Kind of makes it like smooth cheesecake but not as firm so it is still spreadable. I added some maple syrup for sweetness, and of course peppermint extract and vanilla to give this that lovely aroma and flavor the ice cream has.  No artificial colors here, I added spinach for a vibrant green hue as well as add sneaky nutrients to the hummus.

    It blended up beautifully and lastly I stirred in my favorite vegan chocolate chips.  It was heavenly!  I wish I would have had some chocolate short bread to serve it with, but fruit, crackers and a spoon worked just fine!  It tasted just like the ice cream.  Creamy delicious texture, sweet fragrant vanilla mint and rich dark chocolate.  If you are a mint fan give this a try!

    Mint Chocolate Chip Dessert Hummus
    Makes about 3 cups

    Ingredients:

    • 1 1/2 cups cooked chickpeas
    • 1/3 cup maple syrup (or to taste, if you like it sweeter add 1/2 cup)
    • 1 cup filtered water (or as needed)
    • 1 large handful spinach
    • 1 Tbsp pure vanilla extract
    • 1 tsp peppermint extract
    • 1/4 tsp sea salt
    • 1/2 cup raw cashew butter or almond butter
    • 2/3 cup vegan dark chocolate chips


    Instructions:

    1. Combine all ingredients but the chocolate chips in a high speed blender or food processor and blend until smooth (adding a little more water if necessary).
    2. Stir in the chocolate chips.
    3. Keeps in the refrigerator for about 1 week in a sealed container.


  • Vegan Garlic White Cheddar “Bacon” Mac and Cheese

    Vegan Garlic White Cheddar “Bacon” Mac and Cheese

    Two of the biggest excuses that people use for not going vegan, or eating plant based are…cheese, and bacon.  “But I could never go without my cheese!” that was me when I was vegetarian.  “But bacon is so good!” I hear everyone say when I tell them that I am vegan.  Well, guess what?  I would rather not be killing pigs just because it is good, or contributing to the torture of cows just because of cheese.  I didn’t even know how bad the dairy industry was back when I was vegetarian, but if I did, I would have gladly given up cheese.  Guess what?  You don’t have to go without cheese and bacon on a vegan diet, I soon learned after deciding to be vegan.  There is delicious vegan cheese out there, and I don’t even miss real dairy cheese.  And I have discovered coconut bacon.  It has all of the crunch, saltiness, smokiness and flavor of real bacon, and is the closest thing I have had to the real thing.  Trust me, growing up I loved bacon, because I didn’t put two and two together about where it came from.  But what I loved was the flavor and texture, so I can get all that from coconut bacon.  Not only that, it is pretty easy to make.  And, even though I am vegan I can enjoy delicious vegan bacon mac and cheese.

    Which is exactly what I decided to make last week, and I thought you might be craving something similar so I am sharing the recipe with you all. I had made a Vegan Garlic White Cheddar  recently, and decided to use half for mac and cheese.  The texture was creamy and rich, and I knew it would easily melt into a perfect cheese sauce. I had some organic pea pasta that I wanted to try out too and I was excited about.  I am loving all of these gluten free bean based pastas on the market now.  It is awesome that they have protein, so you don’t need to add extra to your pasta dishes.  Not only that, most of the ones I have tried taste just as good as traditional pasta if not better!  This one smelled a little like peas while it was cooking, but it didn’t end up tasting like peas at all.  It made the mac and cheese a lovely green color!

    This is super simple to make if you have the cheese and bacon already made.  I like to make a big batch of coconut bacon ahead of time, and keep it in a container in the refrigerator for topping salads and popcorn and whatnot.  As far as the cheese goes, I usually make a batch, then save half cut up in the freezer for when I need it for dishes like this.  All you have to do is whisk a bit of the hot pasta water into the cheese and you have a silky delicious sauce!  This turned out so good!  Once the crunchy coconut bacon and savory scallions were stirred in it was crave worthy!  Next time you are hard core craving comfort food, give this a try!

    Vegan Garlic White Cheddar “Bacon” Mac and Cheese

    serves 2-3

    Ingredients:


    Instructions:

    1. Bring a large pot of salted water to a boil.  Add the pasta and cook for about 8 minutes or until the pasta is cooked to your liking.
    2. Drain the pasta, reserving 1/2 cup of the water.  Add the cheese and sea salt to the pot with 1/4 cup of the reserved water, and whisk until smooth, adding more water as needed until it is a sauce like consistency.  Add the pasta, 3/4 cup of the bacon and most of the scallions.  Stir to coat the pasta.
    3. Remove to a serving plate, sprinkle with the remaining coconut bacon and scallions, and serve!
  • Vegan Samoa Cookies

    Vegan Samoa Cookies

    I was never a Girl Scout.  I was in other things when I was younger like dance, choir and a group at church called Pioneer Girls instead.  But my family still always bought Girl Scout cookies, because I had friends that were Girl Scouts. I anxiously awaited those cookies every year.  I loved the Tag Alongs, and the Strawberries and Cream (sandwich cookies that were made when I was little in the 90s that aren’t made anymore) but Samoas were always my favorite.  I mean, what’s not to love about a crunchy shortbread cookie topped off with gooey caramel and coconut and drizzled with chocolate!  So heavenly.  I haven’t eaten real girl scout cookies in years though, because they are made with refined ingredients, and artificial ingredients and the Samoas are not vegan.  But I have made many girl scout inspired desserts.  Mostly Samoa inspired though, because nothing compared to it in my mind when I was little.  So it is kind of surprising I never attempted to make healthier vegan Samoa cookies.  I thought it was about time.  I was inspired last weekend when Eric and I were at our favorite local brewery and there was a little girl selling Girl Scout cookies.  He wanted to buy some and felt bad because he didn’t have any cash on him.  So I decided that I would make some.  That way I could enjoy them too.

    They really weren’t all that difficult to make, it just required a few steps.  First off, I made a simple cookie.  It wasn’t exactly a short bread cookie, but it accomplished the same result.  It was still a buttery vanilla cookie, the perfect base for a Samoa.  I scented it with vanilla, and sweetened it with maple sugar.  I did not cut out the middles like signature Samoas do, because I don’t have a small cookie cutter, and leaving it in is just more good cookie after all.  But if you have a little round cookie cutter and are making these, feel free to.  Just reduce the baking time by about 3 minutes.  The cookies were good just as is, but they were about to get even better with the toppings.  I made a gooey date caramel, and mixed in just the right amount of shredded coconut for a Samoa like topping.  I dipped the bottoms of the cookies in chocolate just like the real Samoas, and drizzled them with the dark chocolate, then all I had to do was wait a little bit for them to set.  I could not wait to try them!  I haven’t had Samoas in probably 15 years since I gave up refined sugar and processed foods.


    They turned out lovely!  The most important thing though was how they tasted.  They were absolutely delicious!  I thought that they were even better than the original Samoas I had as  kid, and these were vegan and gluten free, no refined sugar included!  I can’t wait to share these with my family and have them see what they think!  If you were ever a fan of Samoas and miss them, give these a try!

    Vegan Samoa Cookies
    Makes 16 cookies

    Ingredients:
    Cookies:


    Caramel:

    • 1 cup soft, pitted medjool dates (if they are not soft, soak them in filtered water 30 minutes and drain before using)
    • 2 Tbsp almond butter
    • 2 Tbsp virgin coconut oil
    • 1 tsp pure vanilla extract
    • 1/4 tsp sea salt
    • 1/4 cup filtered water or as needed
    • 1/2 cup finely shredded dried unsweetened coconut


    Chocolate:

    1 cup chopped vegan dark chocolate chips or chunks


     Directions:
    1. In a small bowl, whisk together the flax seed and filtered water.  Set aside in the refrigerator for 15 minutes.
    2. In a large bowl, mix coconut oil with maple sugar and mix until well combined.
    3. Mix in the vanilla extract and flax mixture until well combined.
    4. Add the baking soda, salt, then the flour, until well combined.
    5. To bake, Preheat your oven to 350 degrees. Line a large baking sheet with parchment paper.
    6. Roll the dough into 1 1/2 inch balls (there should be about 16), and place on prepared cookie sheet a couple inches apart, pressing down so that they are about 1/2 inch thick.
    7. Bake for about 15-18 minutes, until puffed and just starting to brown slightly.  Remove from the oven and let cool on the pan a few minutes, then remove to a wire rack to cool completely.  Save the parchment lined tray.
    8. To make caramel, combine all ingredients except the finely shredded coconut in a high speed blender or food processor and process until smooth.  Stir in the coconut.
    9. Melt the chocolate in the top of a double boiler until smooth.
    10. Dip the bottom of each cookie into the chocolate and set on the parchment lined tray that you baked them on.  When they are all done, then spread the caramel coconut mixture over the top of each one. Drizzle the chocolate over the top of each one (I put mine in a ziplock back with the corner cut off to make it easier).
    11. Place the tray in the freezer for about 15-20 minutes to allow the chocolate to harden, and the caramel to set.
    12. Enjoy!  Store any extra cookies in the refrigerator in an airtight container for up to 2 weeks.


  • Vegan Banana Chocolate Chip Scones

    Vegan Banana Chocolate Chip Scones

    In the deli I work in, they make a lot of baked goods.  My work station is right next to the cooling rack, so I get to enjoy the aroma of freshly baked sweets all day long, and I admit it is certainly a mood booster.  Happy smells.  That is why I love baking so much at home too!  Yes, I know it is surprising that I don’t bake at work. I am actually the one who prepares all of the salads for our case and vegetarian and vegan soups and hot bar.  Plus, we don’t have any vegan baked goods prepared in house at the time, so I don’t eat them anyway.  I am hoping some day we do.  But in the mean time, I can still enjoy the baked goods delicious aroma at work.  Not only that, I am often times inspired to veganize them at home, and then share the recipes with you all!  One of my coworkers makes the most amazing scones. A long time ago I had tried them (before I went vegan, I have worked there 12 years), and they were the most delicious scones ever.  Perfect flaky texture, perfect amount of sweetness and super tender. And, I was lucky enough to have her teach me how to make scones, because she was making a big batch for a party and needed help.  So I learned how to properly mix the dough so that they turn out perfect.  The key is to leave clumps and not over-mix them.  I started making my own at home and they were just as delicious, and later I came up with the perfect vegan recipe.  It really wasn’t hard to veganize, swapping the butter for coconut oil, heavy cream for coconut cream, and leaving out the eggs made them even better in my opinion.

    So, the other day, she made banana chocolate chip scones, and there they sat, smelling amazing on the rack next to me.  I had to make a veganized version.  Surprisingly I have never made any banana scones before.  So it was a good time to try it!  I actually ended up making these twice, because the first attempt got over-mixed and slightly over baked.  And, I wanted them to be perfect to make sure they would be good if you all made them.  I make mistakes too sometimes, so don’t ever feel bad if you do!  Anyways, back to the scone recipe.  For the base, I used gluten free flour, coconut sugar to sweeten, and a touch of cinnamon and nutmeg.  Once I added in the coconut oil and full fat coconut milk, it was perfect!  Yes, I enjoy eating scone dough too.  Be sure to use full fat coconut milk for these by the way, you want the thick creamy part from the top of the can.  Because this is what replaces the heavy cream in classic scones.  No, these are not fat free, but hey, we all need a little fat sometimes in our diets and these are a treat.

    I mixed in the bananas and chocolate chips, and shaped them into little triangles and they looked so good even before I baked them!  They smelled amazing while baking, and I could not wait to try them.  But of course they needed to cool so I had to wait a bit.  But it was so worth the wait!  The scone was tender and flaky, with sweet bits of jammy banana and gooey rich chocolate chips (I had it warm).  I love veganizing recipes!  If you are looking for the perfect thing to bake on a lazy weekend morning, this is it!  After all, the smell of fresh baked goods in the morning will make you feel happy all day.

    Vegan Banana Chocolate Chip Scones
    Makes 8

    Ingredients:


    Instructions:

    1. Preheat oven to 425F degrees with the rack set at the middle position.
    2. Line a baking sheet with parchment.
    3. In a large bowl, combine the flour, sugar, cinnamon, nutmeg, baking powder, and salt. Cut in the coconut oil with a pastry blender or 2 knives until the mixture starts to clump into pea sized pieces. In a small bowl, stir the vanilla into the coconut milk. Add the coconut milk to the dough, and stir a few times, but do not over-mix. The dough should hold together when squeezed, but still be clumpy.
    4. Fold in bananas and chocolate chips until evenly distributed.
    5. Place dough on a floured work surface, and shape into a 4 inch wide log. Use a bench scraper to cut into 8 triangles.
    6. Place scones on the prepared baking sheet, reshaping slightly if necessary.
    7. Brush the tops lightly with the coconut milk (only if they seem dry, you want the sugar to stick), and sprinkle with coconut sugar.
    8. Place in the oven and bake for about 20 minutes or until golden brown (after about 15 minutes you may need to reshape with 2 bench scrapers if the scones are spreading, then place back in the oven).
    9. Cool on a wire rack.


    *If you prefer to make these not gluten free, you can swap the gluten free flour for organic whole wheat pastry flour.

  • Vegan Garlic White Cheddar Cheeze

    Vegan Garlic White Cheddar Cheeze

    Often times when I am at the store, I see an item that isn’t vegan that sounds good to me and I try to veganize it once I get home, so I can enjoy it too.  It is honestly one of the best sources for inspiration, walking through the store.  So, recently I saw a garlic white cheddar and thought to myself, a vegan version would be amazing.  I had made a cheddar style cheese before and it turned out really delicious so I was going to go for it!  I was a big cheese lover before I went vegan and a long time ago I even said that I could never give up cheese.  But guess what?  I did, and I don’t even miss non-vegan cheese because there is so much delicious vegan cheese out there now, and I also make some delicious stuff at home. When I first went vegan I didn’t even know I could make cheese.  I thought I had to buy it at the store and at that point in time there weren’t many good options.  Mostly rubbery stuff that didn’t melt very well and didn’t taste that good.  But it has come a long way and now they even have awesome artisan vegan cheeses out there like Miyoko’s Kitchen and Punk Rawk Labs. Those both taste amazing if you want to just buy some.  But I actually enjoy making it at home too, which brings me back to that garlic white cheddar I made last week.

    I wanted it to have that sharp cheddar like flavor, so I added probiotics and let it ferment overnight.  It developed just the right level of tanginess that I wanted.  If you want it to be mild or not as tangy, you can skip the probiotics and instead of letting it sit overnight, just proceed with the recipe.  It had to have plenty of garlic flavor, so I roasted a head of garlic until it was all mellow and caramelized and used that in the cheese.  If you have never roasted a head of garlic before, you are in for a real treat.  If I wasn’t using it in the cheese, I would have saved it for using in recipes.  It tastes totally different than raw garlic, and almost has a sweet flavor.  It is the perfect thing to spread on toast, or puree into dressings for a rich garlic flavor.  Once it was added to the cheese, it tasted wonderful!

    It turned out even better than I imagined.  Rich garlic flavor without being overpowering and a nice sharp flavor like real cheddar. This is delicious with crackers on a cheese plate of course, but it also melts well if you mix it with hot water for a quick creamy cheese to be poured over pasta for a delicious mac and cheese.  So, if you a vegan and you are craving a good cheese, give this a try!  So many people say to me that they could never go vegan because they could not give up cheese.  Well, I think that they should try some vegan cheese, and they would change their minds! If you are looking for more replacements for dairy items, and more cheese recipes, check out my post on Why I am Vegan and Vegan Replacements for Dairy Items!

    Vegan Garlic White Cheddar Cheeze

    Serves 10

    • 2 cups raw cashews, soaked for 4 hours, and drained
    • 1 tsp probiotic powder
    • 1/4 cup filtered water
    • 1 Tbsp white miso
    • 1 head garlic
    • 1/2 tsp sea salt (or to taste)
    • 1/3 cup raw coconut butter, warmed to liquid*


    In a high speed blender combine the soaked cashews, probiotic powder, filtered water, and miso and blend until smooth.  Pour into a bowl, cover and place in a warm spot (like 70 degrees).  Let sit overnight.

    Meanwhile, preheat the oven to 400F degrees, and wrap the garlic in foil.  Place the garlic in the oven and roast until it is very soft and caramelized, about an hour.  Remove from the oven, let cool, then squeeze out the cloves.  Set aside in the refrigerator (if it is overnight, cover it).

    When the cheese is tangy, add it to a food processor or blender and add the garlic, sea salt and coconut butter and blend until well incorporated.  Pour into a bowl, place in the freezer for about 10 minutes, then scrape onto a mold, or if you want to shape it like I did, put it on a large piece of plastic wrap,  and shape into a ball in the middle.  Flatten it, and wrap the plastic wrap tightly around it.  Place in the refrigerator until firm, a few hours.  Then enjoy!

    *Note: If you want the cheese to not have any hint of coconut flavor, you can use refined coconut oil instead of the butter.

  • Vegan Peanut Butter and Jelly Cobbler 

    Vegan Peanut Butter and Jelly Cobbler 

    I basically lived off of peanut butter and jelly sandwiches for lunch when I was a kid. I did not like meat at all, so sandwiches with meat were out of the question.  So, my Mom would make me good old PB and J. It was always with raspberry jam, and that ended up being my favorite. A close second was the strawberry jam PB and J sandwiches that my Dad made, because he always used strawberry jelly.  When we would go on road trips in the Summer this was a staple meal for us, because it was easy to pack the ingredients and they wouldn’t spoil without refrigeration.  I would never turn down a good PB and J growing up.  I mean, what’s not to love about sweet jam and salty rich peanut butter.  As an adult I still love the combination, even though I am not much for sandwiches.  I like to use the flavors more in things like my overnight oats, or especially desserts.  Peanut butter and jelly in cake is amazing.  Just sayin’! So, last weekend I made a delicious skillet cobbler with those flavors. Arousing Appetites, a company that sells all natural and sustainably  sourced kitchen materials was kind enough to send me a beautiful Finex 10 inch cast iron skillet with a lid to test out.  I was super excited when it arrived, and could not wait to make something in it!  I was inspired to made a cobbler, because I have always wanted to make one in a skillet.
    So how did I get the flavors of peanut butter and jelly into a cobbler?  Well, first I cooked some organic berries on the stove in the skillet until they were good and jammy and added just a touch of maple syrup.  They were so good, and it had taken about 30 minutes less time than if I had cooked them in the oven like I normally do. Next, I made some peanut butter biscuits to top it off with.  I actually use a scone dough for these because it tastes like the most amazing flaky biscuits on a cobbler ever.  I used both peanut meal (finely ground peanuts, similar to almond meal), and peanut butter in the biscuits to give them lots of peanut flavor.  The dough even tasted amazing even before I baked them (and I would encourage you to try it).  Yes, I like to sample things as I go along.  Because that way, if I forgot an ingredient, or messed one up, I don’t ruin my entire dessert.  Because funny story, one time I accidentally used sea salt instead of granulated xylitol in my pie crust and it was a good thing I tasted it because that super salty crust tasted disgusting and if I had baked it my pie would have been ruined.  I had to remake the crust but I didn’t waste the fruit.  Stuff like this doesn’t happen often luckily but we all have off days once in a while where our mind is elsewhere.  So yes, I make mistakes too, and you should never feel bad if you happen to make one.  Anyways, back to that cobbler.  I obviously didn’t forget any ingredients in this because it turned out even better than I had imagined!
    After I placed the biscuits on it, I popped the skillet with the already hot cooked fruit in the oven and in 20 minutes it was beautiful!  The biscuits had puffed up to flaky deliciousness and it smelled amazing. Once it was cool enough to try, I enjoyed some with some peanut butter ice cream I happened to have in the refrigerator.  But you can use your favorite vegan ice cream.  The peanut butter and jelly combination was fabulous in this cobbler!  I encourage you to try it, and cooking it in the skillet was so much easier than just in a baking dish. If you would like one of these skillets for yourself, you can find them HERE.  The pan is definitely crafted very well, and an investment that you will be able to keep for the rest of your life.  I think a good cast iron skillet is essential to any serious cook’s kitchen.

    Vegan Peanut Butter and Jelly Cobbler
    Serves 8

    Ingredients:

    10 inch cast iron skillet with a lid

    Fruit:

    • 5 cups organic mixed berries (I used strawberries (halved), blueberries, and raspberries.  You can use fresh or frozen and thawed)
    • 2 Tbsp maple syrup
    • 1/4 cup gluten free all purpose flour
    • 1 tsp pure vanilla extract


    biscuit topping:

    • 1 1/2 cups gluten free all purpose flour
    • 1 cup peanut meal
    • 1/4 cup coconut sugar
    • 1 tsp plus 1/4 tsp baking powder
    • 1/4 tsp sea salt
    • 1/4 cup solid coconut oil, cut into chunks
    • 1/2 cup cold full fat coconut milk (chilled in the fridge is best), mixed well
    • 1 Tbsp smooth organic peanut butter
    • 1 tsp pure vanilla extract


    For serving:

    • Vegan Peanut Butter Ice Cream (use THIS RECIPE base) or other vegan ice cream


    Instructions:

    1. Preheat oven to 400 degrees with the rack at the center position.
    2. To make biscuits, in a large bowl, combine the flour, peanut meal, sugar, baking powder, and salt. Cut in the oil with a pastry blender or 2 knives until the mixture starts to clump into pea sized pieces.
    3. In a small bowl, stir the vanilla extract and peanut butter into the coconut milk.
    4. Add the milk to the dough, and stir a few times, but do not over-mix. The dough should hold together when squeezed, but still be clumpy.
    5. Place dough on a floured work surface, and pat into a 1/2 inch tall rectangle.
    6. Cut small shapes out of the dough using a cookie cutter (or free form it), and set them on a parchment paper lined tray.  Place in the refrigerator until the fruit is ready.
    7. To make the fruit, heat a 10 inch cast iron skillet over medium heat on the stove, and add the fruit and maple syrup to it.  Cook until the fruit is bubbly, jammy and starting to fall apart, about 10-15 minutes.
    8. Add the lemon juice and zest, vanilla, flour to the fruit mixture and stir to until incorporated.
    9. Place the chilled biscuits on top of the cobbler.  When all biscuits are on top of cobbler, sprinkle with coconut sugar and return to the oven. Bake for about 20 minutes until biscuits are cooked through and lightly brown and toasted on top (keep a close eye on they could burn very quickly). Remove from oven and let cool until warm, and top with some ice cream or coconut vanilla whipped cream and…enjoy!


    *To make peanut meal, place organic roasted peanuts in the blender and buzz for about 30 seconds until they are flour (but not too long or they may become butter)

  • 30 Vegan Layer Cakes

    30 Vegan Layer Cakes

    Layer cakes are my all time favorite thing to make.  There is just something about the process that I love.  Maybe it is the heavenly aroma of the cakes baking in the oven. All of the delicious possible fillings that you can give them, or the superb frosting to cake ratio that they have.  I think it is all of those things, and the fact that I feel like a child at play while I frost them and decorate them.  Being an artist, it is one of the most artistic things you can make from food, a layer cake.  Which is why I love them.  Also, why I make so many of them.  Too many to count since I started back in college.  I remember the first one I tried to make for my Mom when I was 18.  Key word here is tried because I forgot to line and grease the pan and I ended up with a pile of delicious crumbs because it stuck to the pan so bad.  It was a good lesson though.  I have never had that happen to me since.  I have been pretty lucky.  Most of the cakes that I have made were successes and all of the vegan ones can be found on my blog.  But, I thought I would share with you all of the ones that I think are the best in case you are a layer cake lover yourself, or looking for something fabulous to make.  These are all of my favorites!  Most of them are gluten free and all are refined sugar free. So enjoy!  Even if you don’t intend to do any baking, it is always fun to scroll through some vegan dessert porn!

    Vegan Chocolate Avocado Cake

    Vegan Chocolate Cake with Raspberry Frosting 

    Vegan Bananas Foster Cake

    Vegan Apple Spice Cake with Caramel Frosting

    Vegan Dark Chocolate Raspberry Layer Cake

    Vegan Dark Chocolate Cake with Peanut Butter Caramel

    Vegan Chocolate Chip Cookie Dough Cake

    Vegan Irish Coffee Layer Cake

    Vegan Peanut Butter Love Cake

    Vegan Dark Chocolate Red Wine Cake

    Vegan Banana Almond Cake with Cream Cheese Frosting 


    Vegan Dark Chocolate Bourbon Caramel Pecan Cake 

    Vegan Chocolate Carrot Cake

    Vegan Peanut Butter and Jelly Layer Cake

    Vegan Pumpkin Spice Cake with Cream Cheese Frosting

    Vegan Caramel Pear Cake with Cream Cheese Frosting

    Vegan Chocolate Chip Banana Cake with Fudge Frosting

    Vegan Snickers Layer Cake

    Vegan Mint Chip Cake 

    Vegan Vanilla Berry Cake with Cream Cheese Frosting

    Vegan Festive Carrot Cake

    Vegan Irish Oatmeal Layer Cake

    Vegan Samoa Layer Cake

    Vegan Peanut Butter Cup Cake 

    Vegan Orange Blossom Layer Cake 

    Vegan Strawberry Almond Layer Cake

    Vegan Hummingbird Cake

    Vegan Dark Chocolate Blood Orange Cake 

    Vegan Tiramisu Layer Cake 

    Vegan Lemon Poppy Seed Cake

  • Tofu Vegetable Noodle Soup

    Tofu Vegetable Noodle Soup

    I feel like everyone around me (including myself a few weeks ago) has been sick lately.  The cold and flu are going around like no other.  At least I just had a cold and it went away fairly quickly.  But others around me are not over it yet, and so I thought I would make some soup to share.  Because warm brothy soup and netti pots are your friend when you have a cold.  Of course the classic that my Grandma always made is chicken noodle, and I think that is the most popular thing that people buy at the store.  But this girl is vegan, and I think you can be just as healthy without chicken in your soup!  So, I made the classic, but my way.  Tofu vegetable noodle soup!  I was never a fan of chicken growing up anyhow, but I would have gladly eaten a bowl of tofu noodle.  To start off, I used a bunch of veggie scraps to make a flavorful stock for the soup.  It is important to start out with a flavorful base when your soup is going to be brothy.  Plus home made vegetable stock is healthier than store bought.  Many store bought brands have artificial flavors or sugar in them.  So, I make my own.  It is really easy and a good way to use veggie scraps.

    If you would like to make your own, you need about a cup of onion ends (or just 1 onion), about 2 cups of celery (or 3 stalks), about 1 cup green onion trimmings (or 1 bunch), and about 5 cloves of garlic, crushed.   Throw it all into a pot, cover with water, bring to a boil, then lower to a simmer and cook it slowly for at least 4 hours.  I make this at work a lot from scraps from my other dishes, which is why I say use onion butts etc.  But I know not everyone has that many left over if they have not been saving them in a bag in the freezer, so you can just use veggies that are not scraps if you wish.  Anyways, it made a great base for my soup.  I went with the classic carrots, celery, garlic and onions for my veggies, and my favorite Winter herb, thyme. It smelled amazing while it cooked on the stove!

    I added in some gluten free chickpea pasta for the noodles.  I know it is not traditional, but I love to add extra protein, and so gluten free bean noodles are a life saver!  I cooked my tofu in the oven and it was ready by the time the soup was ready.  Once it was added in and the soup came together, I could not wait to try it!  It was way better than any chicken noodle soup I ate as a child.  Rich with flavor, loaded with veggies and packed with protein.  So it was a win all around!  If you are feeling under the weather, give this soup a try!  The warm flavorful broth will definitely make you feel better!


    Tofu Vegetable Noodle Soup
    Serves 2-3

    Ingredients:

    Tofu:

    • 16 oz organic extra firm tofu, cut into cubes
    • 3 Tbsp sesame oil
    • 3 Tbsp tamari


    Soup:

    • 1 16 oz block 4 cups vegetable stock
    • 3 celery stalks, sliced
    • 1 small onion, diced
    • 2 carrots, sliced
    • 2 garlic cloves, minced
    • 1/3 tsp sea salt or to taste
    • 1/2 tsp dried thyme
    • 4 oz Explore Asian chickpea fusilli or other bean based pasta


    Directions:

    1. Preheat the oven to 400F degrees.
    2. Toss the tofu with 3 Tbsp sesame oil, and 3 Tbsp tamari in a bowl until the tofu is coated, and spread out on an oiled sheet pan.  Place in the oven, and bake until the tofu is starting to brown, and get crisp at the edges, about 45 minutes.  Set aside.
    3. Meanwhile, to make the soup, combine the stalk, celery, onion, carrots, garlic, sea salt, and thyme in a pot and bring to a boil.  Lower to a simmer and cook for about 20 minutes until the veggies have softened, then add the pasta and continue to cook until it is tender, about 10 minutes more.
    4. Add the tofu.  Remove from heat, and serve!


  • Vegan White Mulberry Pecan Caramel White Chocolate Cheesecake 

    Vegan White Mulberry Pecan Caramel White Chocolate Cheesecake 

    I draw inspiration from many things.  A non-vegan recipe I see online, or just walking through the produce department.  Or, my favorite, when someone gives me ingredients to play with and make something fabulous.  Vivapura was kind enough to send me some of their awesome products to use in my recipes, and I could not wait to create something with them.  They sent raw cacao butter, raw cashews, white mulberries, and vanilla coconut cream.  So much of my favorite things!  So, I thought that they deserved to be used in something beautiful.  A vegan cheesecake, my all time favorite vegan dessert.  A Vegan White Mulberry Pecan Caramel Cheesecake to be exact!  I have made a mulberry caramel before and it was amazing, so I thought why not make it and swirl it into a vanilla white chocolate cheesecake!  This is the sort of thing that vanilla lovers like me really appreciate.  I have been making a lot of chocolate lately, so it is about time I let vanilla steal the show.

    For the cheesecake base, I used a combination of thick full fat coconut milk and raw soaked cashews.  I think that this combination mimics the flavor and texture of regular dairy cheesecake the best.  Plus, I had all of those beautiful cashews from Vivapura to use in my dessert!  To thicken the filling, I used vanilla coconut cream from Vivapura and melted their melted raw cacao butter.  It gave it the most delicious vanilla white chocolate aroma!  The filling was rich and delicious even before I poured it into the cake to set up, and I had to keep tasting it because it was so good (the best part of being a dessert maker)! For the caramel, I blended dates and mulberries with some raw pecan butter and it was luscious!  This is the type of stuff you want to pour over your ice cream, but trust me it is wonderful in cheesecake too!

    It turned out amazing!  I would never go back to dairy cheesecake ever because vegan cheesecake like this is bomb!  The vanilla white chocolate cheesecake was creamy, rich and delicious just like dairy cheesecake only better.  The mulberry caramel was the perfect pairing with it, it was simply heavenly! If you would like to enjoy this cake, scroll down for the recipe.  And, guess what?!  Vivapura is letting me give away to one lucky winner one bag of Raw Cacao Butter!  Just think of all of the delicious things you can make with it.  And, this is a good sized bag, so you can make several different recipes!  If you would like to win a bag for yourself, simply comment on this post! What would you like to make with it if you won it?  Giveaway ends February 27th.  Also, definitely head over to the Vivapura website and check out all of the goodies that they have!

    Vegan White Mulberry Pecan Caramel Cheesecake 
    Makes one 8 inch cake

    Crust:


    Filling:


    White Mulberry Caramel:

    • 1 cup soft, pitted medjool dates, (soaked in filtered water for 30 minutes if not soft, and drained)
    • 3/4 cup Vivapura white mulberries
    • 1/3 cup raw pecan butter (or almond butter if unavailable)
    • 1 tsp pure vanilla extract
    • 3/4 cup filtered water (or as needed)


    For garnish:

    • white mulberries
    • pecans


    Instructions:

    1. Oil an 8 inch spring form pan, and line the bottom with parchment paper.
    2. To make the crust, place all ingredients in a food processor, and process until crumbs and starting to hold together (if they are not holding together when squeezed, add a few tsp filtered water and blend). Press into the bottom of the prepared pan.
    3. Meanwhile, to make the filling, combine all ingredients but the jam in a high speed blender or food processor and blend until smooth. Set aside.
    4. To make the mulberry caramel, place all ingredients in a high speed blender and blend until smooth. If it is too thick, add a little more water.  Pour into a bowl.
    5. To assemble, pour the 1/3 of filling over the prepared crust, then drop 1/4 cup of the caramel over that by the tsp spreading it out so you have even little circles of it.  Swirl with a knife. Pour half the remaining filling over that, then another 1/4 cup of caramel, dropping it in the same manor you did with the last 1/4 cup.  Pour the last 1/3 of the filling over that, and repeat with the caramel (you will have extra caramel), swirling it to make the top pretty.
    6. Place cheesecake in the freezer to set for about 4-5 hours (or overnight in the refrigerator if you are not in a hurry).
    7. Remove from the freezer, and un-mold the cake.  Place it on a plate.
    8. Thin out the remaining caramel a little with water so that it will drip easily.  Spread the caramel over the top of the cake, allowing it to drip down the sides.  Garnish the top of the cake with dried mulberries and pecans.
    9. Enjoy!  Store any leftover cake in the refrigerator.


    *I use Thai Kitchen full fat coconut milk.  If you are using a different brand, just make sure it is the thick type, 2/3 of the can at least should be very thick.


  • Vegan Cranberry White Chocolate Chip Oatmeal Cookies

    Vegan Cranberry White Chocolate Chip Oatmeal Cookies

    My Mom bought me a bag of cranberries and asked if I would make her some cranberry oatmeal cookies.  Of course I wasn’t going to say no.  Any excuse to bake cookies, I am in!  Oatmeal cookies are her favorite, and I think if she could eat them for breakfast every day she would.  She always told me when I was little that oatmeal cookies were healthier and the better choice than just plain chocolate chip cookies, and I agree!  You get the fiber of oats along with your cookie.  She was always trying to make recipes healthier when I would help her bake things growing up, like by adding apple sauce or mashed bananas instead of refined oil, and using whole wheat flour instead of white.  So, I think she kind of inspired me to try and make things healthier too.  I am always trying to improve upon recipes, and use the best ingredients that I can.  So back to the cranberry cookies.  I decided to make them just a tad more jazzed up than just just cranberries, and added in some home made white chocolate chunks, which my Mom loves as well.  The deli I work in makes a cranberry white chocolate chip cookie and it always smells amazing while baking, and I always say to myself, I need to make a vegan version.  I finally got around to it!

    These cookies were easy to make, and ready in about 45 minutes if you count cooling time.  For assembling and baking, it is about 30.  Which really isn’t a lot of time, and perfect for when you are craving cookies and want them now.  The dough from these was amazing by the way. I am a cookie dough girl all the way, and I actually prefer it to baked cookies most of the time.  So, I had to of course indulge in this dough.  That is the best part of baking cookies!  Second is of course eating the warm ones. These smelled amazing while baking and when they emerged from the oven.  Instant mood booster, the aroma of freshly baked cookies!  I always say I have the best work station in the world in the deli I work in because my work table is right next to the cookie cooling rack.

    So how did these beauties taste?  They were fabulous!  Soft in the middle, and chewy on the outside just how oatmeal cookies should be!  A hint of caramel flavor from the coconut sugar, vanilla and a touch of cinnamon for sweetness all the perfect pairing with the chewy tart cranberries and sweet white chocolate!  My Mom loved them too, which was the most important thing.  Skip going to a bakery to buy cookies, and give these guys a try!

    Vegan Cranberry White Chocolate Chip Oatmeal Cookies
    Makes 1 dozen large cookies

    Ingredients:


    Directions:

    1. In a large mixing bowl, mix together the coconut oil, and sugar until well blended. Add flax eggs, vanilla, and beat until well combined (the mixture will become very thick).
    2. Mix in the flour, soda, cinnamon and sea salt until well blended. Mix in the oats until well combined, then add cranberries and mix until evenly distributed throughout the dough.
    3. Heat the oven to 350 degrees with the rack set at the middle position. Line 2 baking sheets with parchment paper.
    4. Roll the dough into 12 large balls, and spread them out on the 2 cookie sheets with plenty of room in between, and flatten them out slightly. Bake for 13-15 minutes or until golden, but not over baked. Remove them from the oven and immediately press in the chocolate chunks before they cool.  Let cool on sheet a few minutes, then remove to a wire rack lined with parchment to cool.
    *For the flax eggs, whisk together 2 Tbsp ground flax seed, 1/4 cup and 2 Tbsp water in a small bowl.  Allow to sit in the fridge for 15 minutes until the mixture has set up (or become kind of thick).
    *Get my white chocolate recipe at the bottom of THIS POST.


  • Vegan Chocolate Avocado Cake

    Vegan Chocolate Avocado Cake

    An occasion such as Valentine’s Day, deserves the perfect decadent rich chocolate.  So, I decided to make one last weekend.  Eric and I celebrated early since the actual holiday is during the work week and I am working.  We went for a long walk around Minneapolis in our favorite area, then hit up our favorite local brewery Insight, then enjoyed some warming ramen at Tori Ramen in St. Paul, because that is the restaurant Eric chose. It was perfect though, because I am recovering from a cold and some warming broth was just what I needed.  And of course I had the dessert covered with the chocolate avocado cake I made.  I don’t know why I hadn’t thought of it before, but the combination is a great idea.  Think of it.  Chocolate is heart healthy, avocados are heart healthy so it is a healthy cake (wink, wink).  And why not make your cake healthy and taste amazing too!  Don’t worry, you can not taste avocado in this cake at all.  Just rich, decadence.

    For the cake part, I used my classic date sweetened chocolate cake, made with mashed avocado in place of the nut butter.  And, let me tell you, it made the most rich tasting delicious cake batter that was actually oil free.  You bet I  scraped the bowl clean and enjoyed the last bit of batter!  That is one of my favorite things about baking cakes, getting to eat the batter. It baked up beautifully as well, and the aroma of brownies filled my kitchen and home.  That is seriously one of the best scents in the world.  Once it had cooled down and was ready to frost, it needed a decadent rich frosting to finish it off.  So, I blended up avocados, date paste, cacao powder, and a little sea salt and vanilla and it was so good!  It tasted like avocado mousse and fudge combined.  Once it was spread onto the cake, it was lovely.  I couldn’t wait to try it!

    This is the chocolate lover’s dream.  It is just the right consistency as far as cake goes.  Moist, soft, and light, not dry or dense provided you don’t over-bake or under-bake it. I am super picky as far as cake texture goes so I am always careful about the amount of time I bake my cakes. This one turned out perfect.  It had rich chocolate flavor as well, and that gooey luscious frosting tasted so good you would swear that it contained some non-vegan ingredients.  But nope!  This cake is actually gluten free, oil free, and fruit sweetened, so wins all around!  So the next time you are in the mood for classic chocolate cake, give this a try!

    Vegan Chocolate Avocado Cake
    Makes one 2 layer 6 inch cake

    Ingredients:

    6 inch cake pans

    Cake:

    • 1 1/2 cups Bob’s Red Mill Gluten Free All Purpose Flour
    • 1/4 cup cacao powder or unsweetened cocoa powder
    • 1 1/2 tsp baking soda
    • 1 tsp baking powder
    • 1/2 tsp sea salt
    • 1 1/4 cups packed soft medjool dates, pitted, soaked in water for 30 minutes and drained
    • 1/4 cup mashed avocado
    • 2 tsp pure vanilla extract
    • 2 cups filtered water
    • 2 Tbsp apple cider vinegar


    Frosting:

    • 1 1/2 cups mashed avocado
    • 1/2 cup date paste* or maple syrup
    • 3/4 cup filtered water
    • 1/2 cup cacao powder
    • 1/4 tsp sea salt
    • 1 tsp pure vanilla extract


    Directions:

    1. Preheat the oven to 375F degrees and position rack in center of oven.
    2. Oil two 6 inch round cake pans with coconut oil and line the bottom with parchment.
    3. Whisk flour, cocoa powder, baking powder, baking soda, sea salt in a large bowl to blend well.
    4. Place dates, water, avocados, and vanilla extract into a blender, and blend until smooth, then whisk this blended mixture into the flour mixture until well blended. Whisk in the cider vinegar until bubbles form.
    5. Pour the cake batter into prepared pans, and place in the oven.
    6. Bake cakes until set and a toothpick inserted into the center comes out almost clean, about 25-30 minutes (be careful not to over-bake or under-bake the cake.  Check it at 25 minutes and put back into the oven a little longer if it is not finished baking).  Remove from oven, let cool completely, then un-mold them onto two plates, cover and set aside.
    7. To make the frosting, combine all ingredients in a high speed blender and blend until completely smooth.  Pour into a bowl and place in the freezer until the consistency of stiffly whipped cream (about 30-45 minutes depending on how warm it has gotten).  Once it is ready place in the refrigerator until ready to assemble.
    8. To assemble, place one cake layer on a plate, and spread about 3/4 cup frosting over it.  Place the other cake layer over that, then spread the remaining frosting on the top and down the sides of the cake.
    9. Decorate with sprinkles and enjoy!


    *To make date paste, soak 1 cup dates in filtered water for 30 minutes, then drain, reserving 2/3 cup filtered water.  Pour the dates and 2/3 cup water into the blender and blend until smooth.  Store date paste in a jar in the refrigerator for up to 2 weeks.


  • Vegan Red Velvet Popcorn with White Chocolate Drizzle

    Vegan Red Velvet Popcorn with White Chocolate Drizzle

    Since I really enjoyed the Red Velvet Cake Batter Dessert Hummus I made last week, I decided to make something else red velvet as well.  Because, why not?  Valentine’s Day is just a few short days away so it will be festive, and I always love popcorn.  It is kind of surprising that I have never made red velvet popcorn before.  I have made many other sweet dessert popcorn recipes.  Like berries and cream, chocolate mint, and turtle.  I pretty much love using the flavors found in classic desserts in popcorn.  I first got the idea when I was at a Mall on vacation when I was visiting New Orleans, and I came across a popcorn shop.  They must have had hundreds of flavors in there.  Pretty much anything you can think of savory and sweet.  I figured most of it wasn’t vegan and if it was, there was probably lots of refined sugar in it, so I just went in there to admire the flavors and maybe get ideas for making some at home. One of the flavors that I saw was red velvet cake. So, I thought to myself, I need to make that some day.  Well, it kind of got pushed to the back of my mind I guess, because I didn’t remember that I wanted to make it until this week.  And, that was over a year ago.  I guess I had to be in the right mood too.  Any excuse in February to make things that are pink and red and hearts for Valentine’s Day I am on it.  Of course this doesn’t have hearts but it is pinkish red so I have that covered.

    Also, I figured I could share it with Eric, because if I don’t share my snacks with him, he will go out and buy even more unhealthy ones.  Also, he has a huge sweet tooth as well. This is pretty easy to make if you have plain popcorn on hand.  I like to just make mine in the Whirly Pop with coconut oil, because it turns out perfect every time.  But you could also just buy it.  If it already has salt in it though, just omit the sea salt from the coating in the recipe.  The red velvet coating is so delicious!  It has only 6 ingredients including sea salt, and it is colored naturally.  I don’t bring artificial food coloring anywhere near my food anymore.  I actually used beet powder in this, which is my go-to red or pink food coloring.  It doesn’t end up a bright red, but more of a pink red.  I am ok with that though.  You can usually find it at your local health food store in the bulk section.  I get it at my work, Fresh and Natural Foods. The coating tasted like vanilla cake batter and that brilliant red, pink color was beautiful!

    But I decided to make it a little more over the top and add a white chocolate drizzle since I had some white chocolate on hand already.  If you don’t want to do this extra step, I totally understand, and it will still taste amazing.  It just won’t have white chocolate.  I also figured red velvet cake has frosting usually so the white chocolate drizzle is sort of the frosting.  Once the popcorn is all done it is so good!  Trust me, I ate half the pan before I knew it.  You will keep going back for seconds.  And thirds.  Lucky I had to save some for Eric or I might have eaten more. If you are looking for a sweet and crunchy snack, give this a try!

    Vegan Red Velvet Popcorn with White Chocolate Drizzle
    Makes 8 cups

    Ingredients:

    • 1/3 cup maple syrup, warmed to liquid
    • 1/3 cup raw coconut butter, warmed to liquid
    • 1/3 cup raw cashew butter at room temperature
    • 1 Tbsp red beet powder (vegan natural food coloring may be used instead, start by using just a few drops and add as needed)
    • 1/2 tsp sea salt
    • 1 tsp pure vanilla extract
    • 8 cups plain organic popped corn
    • 1/2 cup vegan white chocolate, store bought or home made (I made my own, recipe follows)


    Instructions:

    1. In a glass measuring cup (or bowl) whisk together the maple syrup, coconut butter, cashew butter, sea salt and vanilla until well blended.
    2. Pour over the popcorn in a large bowl, along with berries and mix well. Spread out onto a lined sheet pan, and place in the freezer until it is hard.
    3. Enjoy!


    Vegan White Chocolate 
    Makes enough for the recipe, or about 16 small white chocolates

    Ingredients:


    Instructions:

    1. Combine cacao butter, cashew butter, vanilla, maple syrup,  and sea salt over a double boiler, and whisk until smooth.  It is now ready to use in the above recipe.
    2. Or, if you just want to make white chocolates,  pour into a chocolate mold, and place in the freezer until set.
    3. Store white chocolate in the refrigerator.


  • Vegan Dark Chocolate Chili Truffles 

    Vegan Dark Chocolate Chili Truffles 

    My boyfriend Eric has a passion for hot peppers and spicy food. When I first met him, the first food item I ever gave him was some of my home made habanero hot sauce because I knew it would impress him. I too love spicy food, so we have that in common.  There was a point in time I would put hot sauce on pretty much every savory food item I was eating, and I would sit and sweat while I ate dinner.  He would do the same, because he made his own home made hot sauce too.  Recently, he had a shaker full of habanero flakes, and he would put them on everything.  He is originally from Arizona, so none of the Minnesota wimpy tastes for him.  I am not a wimp about spice, but people here in Minnesota are notorious for thinking black pepper and ketchup are spicy.  What Eric really seems to love is sweet and spicy together.  The first Birthday cake I made him was a vegan chipotle turtle cheesecake.  It was pretty amazing and chocolate and chilies are a match made in heaven.

    So, this week, I decided to make some dark chocolate chili truffles to share with Eric.  Because they sounded really good to me, and I knew he would love them too.  He loves chocolate way more than I do.  I wanted this to be a simple recipe because I didn’t have a lot of time, so lucky for you, they are easy to make and contain only 6 ingredients.  For the filling I used almond butter as the base because it is creamy, delicious and sort of a blank palate. But of course you can feel free to use your favorite nut butter.  I think peanut butter or cashew butter would be amazing as well.  I simply combined it with cacao powder, maple syrup, sea salt, and of course a good amount of chipotle powder to give these a kick.  It is actually slightly more than I have listed in the recipe, because I don’t want to kill anyone, but if you like super spicy too, just add a tad more.  This mixture tastes like the most amazing fudge, and I could sit and eat it with a spoon.

    But I rolled it into truffles, and dipped them in my favorite vegan dark chocolate melted. They turned out super delicious!  Almost like something you would pay a lot of money for if it were in say, a heart shaped box around Valentine’s day.  This is why I like to make my own candy, because it can taste just as good as the store bought, you know that good ingredients have gone into it, and of course what better way to show your significant other that you care, than taking the time to make something for them.  So, if you love chocolate and spicy things, give these a go!

    Vegan Dark Chocolate Chili Truffles 
    Makes about 10

    Ingredients:

    • 3/4 cup smooth almond butter
    • 1/4 cup plus 1 Tbsp cacao powder or unsweetened cocoa powder (or as needed)
    • 3 Tbsp maple syrup
    • 1/4 tsp chipotle powder
    • 1/4 tsp sea salt
    • 1 1/2 cups vegan dark chocolate chips, or chopped vegan dark chocolate


    Instructions:

    1. In a bowl, mix together the almond butter, cacao powder, maple syrup, chipotle powder and sea salt until smooth and well combined.  You want it to be the consistency of dough, if it is still too soft (since peanut butter may vary in how liquid it is), add a little more cacao powder.
    2. Roll into 1 1/2 inch balls, and place on a parchment lined tray.  Place in the freezer to chill for 1 hour.
    3. Meanwhile, when you are ready to dip the truffles, melt the chocolate in the top of a double boiler until smooth.
    4. Dip each truffle into the chocolate (letting the excess drain off, I like to set mine on a fork to dip to make it easier) and place back onto the tray until they are all done.  Place in the freezer to set the chocolate until it is hard, which usually takes 5-10 minutes.  Enjoy!
    5. Store any leftovers in the refrigerator in a container with a lid for up to a few months.
  • Red Velvet Cake Batter Dessert Hummus

    Red Velvet Cake Batter Dessert Hummus

    I am always up for trying new hummus as long as it is vegan and does not have any dairy thrown in.  Of course I love the classic with tahini, lemon and lots of cumin, and we make an amazing version of at my work.  But I like to switch it up when I make hummus at home.  There was a point in time I made it every week during the summer to enjoy with cucumbers fresh from the garden.  I would always add lots of chipotle and give it a good kick, since the cucumbers were cooling.  But the weekly hummus went by the wayside once Winter hit.  I have been making some every couple weeks though, but not of the savory variety.  It has all been sweet dessert hummus.  I keep seeing posts on social media about companies that make and sell their own dessert hummus, so it has been motivation for me to make my own because they always look and sound so good.  The latest one I made this week however, was not inspired by social media however, my Mom thought it up.  I shared some of my Chocolate Cake Batter Dessert Hummus with her when I made that one, and she said, “Why not make red velvet cake batter around Valentine’s Day?”  So I had to keep my promise. Besides, it sounded amazing.

    I have always leaned more towards vanilla than chocolate, as delicious as chocolate is.  So, this was right up my alley.  There would be no artificial red food coloring involved though. This was going to be all natural. Of course it had to be chickpea based, this was hummus after all.  But instead of the tahini that goes into savory hummus I used cashew butter.  You can of course use almond butter instead if that is your jam.  It had to have plenty of vanilla as well, and I sweetened it with maple syrup.  Lastly, for that beautiful color I used beet powder.  I thought about purchasing a red beet, cooking it and blending it into the hummus for color but that would have been too much work and I had the beet powder on hand already.  It was a lovely reddish pink color once finished, and it was beautiful just how it turned out.

    It is delicious for dipping fruit in and I so wished I had some strawberries, but I didn’t happen to have any on hand.  I think they would be amazing with it though, and how festive for Valentine’s Day. Of course, you can eat it with a spoon, that is not frowned upon, at least not by me because I do it myself.  Or as pictured here, you could serve it with some chocolate short bread (make without the almonds for what is pictured here) or brownie brittle.  The chocolate is a nice contrast to the vanilla hummus.  Or, if you only like vanilla, I think a cookie to dip in it would be amazing.  I just didn’t have any on hand.  So, if you are adventurous when it comes to hummus, and you like sweet things, give this a try!

    Red Velvet Cake Batter Dessert Hummus
    Makes about 3 cups

    Ingredients:

    • 1 1/2 cups cooked chickpeas
    • 1/3 cup maple syrup (or to taste, if you like it sweeter add 1/2 cup)
    • 1 cup filtered water (or as needed)
    • 2 Tbsp red beet powder or as needed (or natural vegan red food coloring as needed)
    • 1 Tbsp pure vanilla extract
    • 1/4 tsp sea salt
    • 1/2 cup raw cashew butter or almond butter


    Instructions:

    Combine all ingredients in a high speed blender or food processor and blend until smooth (adding a little more water if necessary).  Keeps in the refrigerator for about 1 week in a sealed container.


  • Vegan Chocolate Cake with Raspberry Frosting 

    Vegan Chocolate Cake with Raspberry Frosting 

    Today is my blogaversary!  8 years ago I decided to start a blog, just looking to share recipes with friends and family.  I had previously just been posting them to Facebook but I figured that wasn’t a very organized approach, and I wanted them all in one place, so I created a blog on Blogger.com.  I had a passion for creating new things and sharing them, but I never thought that I would go much beyond sharing things with only the people that I knew.  I also had no idea that basically anyone could create a blog.  It all had seemed so intimidating before that.  But soon, I joined some blog communities and as my followers grew, I thought to myself, this is fun and exciting and decided to stick with it.  It used to be so much easier to get your content out there on platforms like Facebook before they started making you pay to get views, and luckily I got in before that, so I gained much of my readers before they had that put in place.  Now, sometimes I feel like it is really hard to get my recipes out there because I can not afford to pay, and it becomes frustrating at times.  But I still keep going.  I no longer have my blog on Blogger, I have had my own website for the last 3 years and it is nice to have something to call my own.  Over the years my recipes have changed somewhat.  When I started out, I was a vegetarian, not vegan, but I still created many vegan recipes.  Finally though, back in 2012, I decided to go full vegan with the blog and remove all of the recipes with animal products, or revamp them.  It was a lot of work, but worth it!  Because I want you all to be able to come here and know that you will only see vegan recipes.  Also, when I first started my blog it was all desserts.  Because that is what I find the most joy in creating.  But I decided that I needed to share some savory things too, because I don’t just eat desserts of course, and you all asked for it!  So now here we are 8 years later, and I think that alone is worth celebrating.  The fact that I have been sharing recipes for 8 years, and it seems like it is so much a part of my life that I have been doing it forever.  I don’t know what I did with all my free time before I had a blog!

    So, I thought I would make a special cake to celebrate, because every Birthday deserves a fabulous dessert!  Also, everyone should have the perfect chocolate cake recipe.  So, I went with that.  A moist, rich chocolate cake that is date sweetened.  This is my tried and true chocolate cake base recipe, and it always turns out for me.  Moist and soft thanks to the dates, and just sweet enough.  I like the idea of things that are sweetened with fruit as well.  Now normally I would have gone for a chocolate fudge frosting to make a chocolate on chocolate cake, but I wanted something with color that could look festive.  I chose a pink frosting, since I love anything girly, and I actually flavored it with raspberries.  It was a sort of a vegan “cream cheese” frosting that was a rich mixture of coconut milk and cashews and it was super delicious with the raspberries added!  I actually used freeze dried berries because they are packed with flavor and they do not add any excess moisture to the frosting.  Trust me on this one.

    Lastly, I bought some vegan sprinkles just for this occasion.  They were cute, and pink and girly.  I just couldn’t resist.  I don’t eat or buy a lot of sprinkles, but this special occasion needed some.  If you don’t prefer to use sprinkles on your cake, feel free to decorate with fresh raspberries or even crush the dried ones and sprinkle them around the edge of the cake like sprinkles.  The cake turned out so delicious!  The sweet berry frosting the perfect pairing with the rich chocolate cake!  The combination kind of reminded me of the raspberry cream chocolate that was always included in my box of Valentine’s chocolates I would always get from my Grandma when I was little.  Those were always one of my favorites.  I think this cake would be perfect for Valentine’s day!  Here’s to another year of creating delicious recipes, and I want thank all of you that visit my website or follow my recipes!  You are the reason that I keep sharing!

    Vegan Chocolate Cake with Raspberry Frosting 
    Makes one 2 layer 6 inch cake

    Ingredients:

    6 inch cake pans

    Cake:

    • 1 1/2 cups Bob’s Red Mill Gluten Free All Purpose Flour
    • 1/4 cup cacao powder or unsweetened cocoa powder
    • 1 1/2 tsp baking soda
    • 1 tsp baking powder
    • 1/2 tsp sea salt
    • 1 1/4 cups packed soft medjool dates, pitted, soaked in water for 30 minutes and drained
    • 1/4 cup almond butter
    • 2 tsp pure vanilla extract
    • 2 cups filtered water
    • 2 Tbsp apple cider vinegar


    Frosting:


    For decoration:


    Directions:

    1. Preheat the oven to 375F degrees and position rack in center of oven.
    2. Oil two 6 inch round cake pans with coconut oil and line the bottom with parchment.
    3. Whisk flour, cocoa powder, baking powder, baking soda, sea salt in a large bowl to blend well.
    4. Place dates, water, almond butter, and vanilla extract into a blender, and blend until smooth, then whisk this blended mixture into the flour mixture until well blended. Whisk in the cider vinegar until bubbles form.
    5. Pour the cake batter into prepared pans, and place in the oven.
    6. Bake cakes until set and a toothpick inserted into the center comes out almost clean, about 25-30 minutes.  Remove from oven, let cool completely, then un-mold them onto two plates, cover and set aside.
    7. To make the frosting, combine all ingredients in a high speed blender and blend until completely smooth.  Pour into a bowl and place in the freezer until the consistency of stiffly whipped cream (about 30-45 minutes depending on how warm it has gotten.  Once it is ready place in the refrigerator until ready to assemble.
    8. To assemble, place one cake layer on a plate, and spread about 3/4 cup frosting over it.  Place the other cake layer over that, then spread the remaining frosting on the top and down the sides of the cake.
    9. Decorate with sprinkles and enjoy!


  • Colorful Kitchen Review and Sweet Potato Skins Recipe

    Colorful Kitchen Review and Sweet Potato Skins Recipe

    I have been admiring Ilene Godofsky Moreno’s recipes from her blog The Colorful Kitchen for a long time, so when she offered to send me a copy of her new book “The Colorful Kitchen” to review I was excited!  I am always admiring her amazing looking sandwiches, bowls full of colorful veggies and decadent looking desserts.  Everything of hers always looks so delicious and vibrant, so I knew this would be a good book.   It has over 100 vegan recipes, almost all of which are gluten free and made without refined sugars.  It includes smoothies breakfast, salads, soups sandwiches, sides, snacks & appetizers, entrees and dessert.  So no matter what you are hungry for chances are you can find something to satisfy your craving in this book.

    As I paged through it I couldn’t help but notice how beautiful the photography was.  This is a big draw for me, a book with lots of photos.  It is almost as important as the recipes as far as I am concerned and this is a book full of food art as much as it is recipes.  She has each one photographed so you know exactly what you are making.  The recipes themselves are very well organized and easy to read and follow. Also they are simple enough to make so that someone who is new to cooking will enjoy them and be able to make them as well as interesting enough that someone who cooks a lot will appreciate them.  So, there is something for everyone here. I should point out that this would be the perfect book for a new vegan who is looking to eat healthy and feel good. Because everything in this book is whole foods plant based and deliciously made breaking that stereotype that vegan food is boring and bland.  She has a list of main ingredients in the book as well explained so you will know exactly what you are using and preparing.  As I paged through the book I saw so many things that I wanted to make!  She has delicious breakfast recipes like Carrot Cake Oatmeal, salads like Crispy Chickpea and Kale Caesar Salad, Snacks like Coconut Crusted Avocado fries, desserts like Chocolate Cookie Sandwiches and main dishes like Sweet Potato Skins, which is the first recipe I made, and the one that she has allowed me to share with you today!

    I am a huge fan of sweet potatoes in any form, so this is the thing that caught my eye first.  They were super simple to make, and so good!  Roasted sweet potatoes have so much flavor, and filling them with things is one of my go to meals. Her recipe uses cooked lentils and black beans to stuff them with, and they are topped off with avocado and cashew sour cream.  This is the perfect balanced meal to keep you satisfied and feeling good.  It has it all, protein, fiber, veggies and healthy fats.  All of the recipes in her book are balanced this way, and if you eat this way, you will feel good.

    It is not often I come across a cookbook where I want to eat all of the recipes, but this one is that way.  Usually there are things in cook books that I say to myself, well that sounds tough to make, or it has ingredients that are hard to find, or things that I don’t think are that healthy but this book fits all of my nutritional needs as well as includes the types of things that I crave.  So you should definitely go check it out HERE!  Also, be sure to check out The Colorful Kitchen on Facebook and Instagram as well, it is definitely worth following! Guess what?! have another surprise for you!  If this book sounds like the sort of thing you will love, you can enter to win a copy of it for yourself!  Just leave a comment on this blog post!  Good luck! Giveaway ends February 9th.

    Sweet Potato Skins

    Ingredients:

    Sweet Potato Base:

    • 4 medium sweet potatoes
    • 1 batch Lentils (see below)
    • 1½ cups cooked black beans (or one 15-ounce can, rinsed and drained)
    • Salt and black pepper, to taste


    Toppings:

    • 1 avocado, sliced
    • Cashew Sour Cream (see below) or store-bought vegan sour cream
    • 2 tablespoons chopped green onions


    Instructions:

    1. To roast the sweet potatoes, preheat the oven to 400°F. Line a baking sheet with parchment paper. Use a knife to poke holes in the sweet potatoes, and place them on the baking sheet. Bake for 45–60 minutes, until tender. Remove the sweet potatoes from the oven, and let them sit until they are cool enough to handle.
    2. While the sweet potatoes cool, combine the Lentils and black beans in a medium saucepan over medium-low heat. Heat them until warm, about 5 minutes. Season them with salt and pepper.
    3. Slice the sweet potatoes in half lengthwise. Use a spoon to scoop out about half of the flesh from each Reserve the scooped-out flesh for another use. Spoon the lentil and black bean mixture into the sweet potatoes.
    4. Top each sweet potato half with an avocado slice. Top with the Cashew Sour Cream and green onions. Add any sauce you like, if desired.


    Lentils

    • 3 cups water or vegetable broth
    • 1 cup lentils
    • Dash of salt


    1. In a medium pot, bring the water or vegetable broth to a boil over high heat. Add the lentils and salt, reduce the heat to low, and simmer uncovered for about 30 minutes, until the water is absorbed. If you are not using the lentils right away, store them in an airtight container in the refrigerator for up to 4 days.


    Cashew Sour Cream

    • 1 cup raw cashews, soaked in water at least 4 hours
    • Juice of ½–1 lemon, to taste*
    • 2 teaspoons apple cider vinegar
    • 1 teaspoon maple syrup
    • 1–3 tablespoons nondairy milk
    • Salt and black pepper, to taste


    1. Drain and rinse the cashews. Transfer the cashews to a blender and add the lemon juice, apple cider vinegar, and maple syrup.
    2. Starting with 1 tablespoon at a time, add the nondairy milk as needed to blend, and blend until completely smooth. Add the salt and pepper and stir. Transfer to an airtight container and store in the refrigerator for up to 5 days.

    NOTE: Use a whole lemon for a tangier sour cream and a half lemon for a more mellow version.


  • Vegan Dark Chocolate Raspberry Brownies

    Vegan Dark Chocolate Raspberry Brownies

    I am in a chocolate mood lately.  So on my day off last weekend I decided that some brownie baking was in order.  The weather was pretty chilly so I didn’t feel like spending much time outside, so it was the perfect time to be a kitchen hermit.  By that I mean spending most of my time there.  Not that I am not kitchen hermit already most of the time because I admit I kind of am.  I do work in a kitchen and spend time in the kitchen at home developing recipes after all.  Baking brownies is one of those things that always makes me happy.  I mean, you can not possibly be in a bad mood while baking brownies. Eating the leftover batter from the bowl, smelling the chocolaty goodness baking, and of course eating the finished product.  It all produces comfort, satisfaction and happiness.  At least for me.  So it is one of my favorite memories.  I remember when I was in high school my friend and I would bake brownies from time to time…then end up eating most of the pan of warm gooey brownies. And, I would also sometimes beg my Mom to buy me a box of brownie mix sometimes and make them. Because no bar really compares to classic brownies.  If you are craving brownies, it has to be brownies.  Rich, and fudgy, the middle pieces for me.  I know we all have our preferences but that is how I like mine!

    I thought about making just classic brownies, because I was craving those brownies I had when I was little.  But in my typical way of thinking, I had to embellish them in some way.  Because I can never leave well enough alone with my recipes.  So, I decided to go wild and add in raspberries as well.  Yes, I know that is not super wild, but oh boy it made all the difference in those brownies.  I am still enjoying the raspberry jam from Eric’s dad, so that is what I used in these and it was so good with the rich dark chocolate!  This is my classic brownie base that I use most of the time.  It uses avocado oil and almond butter to make it rich and delicious.  If you are going for a more low fat thing though, you could substitute apple sauce for the avocado oil, but then the brownies would be more cakey, which I do not prefer.  So, I go with the oil. They are coconut sugar sweetened and it almost gives them the same flavor as a brown sugar would.  An almost caramel flavor in the background which I love! The batter tasted amazing before it was even baked.  I should know, I tasted plenty of it.

    My house smelled so good while these were baking!  Like raspberry pie and brownies combined!  The only bad thing about brownies is that if you want them to cut nicely you have to cool them completely which is usually a few hours.  And I did want them to cut nicely so I could photograph them for you all and have them look pretty.  But if you don’t want to wait, go ahead and enjoy these babies warm while the chocolate chips are still gooey because I think that would be amazing.  Top them off with some vegan ice cream, even better!  They taste wonderful with the decadent rich chocolate brownie base studded with chocolate chips and sweet jammy raspberries throughout!  If you want to impress someone and show them how delicious vegan food can be, whip up a batch of these and share with them!  If you can share that is, because you may not want to share once you taste one.

    Vegan Dark Chocolate Raspberry Brownies
    Makes 16

    Ingredients:

    8×8 inch Pan

    Brownies:


    Directions:


    1. To make the brownies, pre-heat the oven to 350F degrees.
    2. Whisk together the sugar, oil and almond butter until well combined and the sugar is starting to break down. Add the flax mixture and and beat until smooth. Add the flour, cacao powder and sea salt and beat until smooth.
    3. Scrape the batter into a greased 8×8 inch pan, then drop the jam over it in 2 Tbsp amounts, and swirl it with a knife.
    4. Sprinkle with chocolate chips. Place in the oven, and Bake for about 30-35 minutes or until set (but do not over bake).
    5. Let cool before cutting into bars.


  • Vegan Double Chocolate Cheesecake (Nut Free)

    Vegan Double Chocolate Cheesecake (Nut Free)

    Since that nut free Vanilla Raspberry Swirl Cheesecake I made last weekend turned out so good, I decided that this weekend I needed to make a chocolate one for all of you chocolate lovers out there.  You know who you are, the people who can never resist anything chocolate, and always choose it over vanilla.  Eric (my boyfriend) is like that.  In fact, the first dessert I ever made for his Birthday was a raw Mexican chocolate cheesecake. I don’t hate on chocolate just because I usually have a thing for vanilla.  In fact this week I have been craving something decadent and chocolaty so it is a win for everyone me making the chocolate cheesecake this weekend.  I didn’t want to make anything that was too difficult either, and vegan cheesecakes are usually pretty straight forward.  What mattered to me here was that the cheesecake be rich, decadent and still be healthier than traditional cheesecake.  I think I achieved all of that.

    For the crust, I my usual go to crust of oats, coconut and dates but with cacao powder this time to make it rich and sort of raw brownie like.  It was the perfect base for the richness to come.  The filling is a little unusual.  Like the other nut free cheesecake I made last weekend, I included chickpeas in this one for the creamy filling instead of my usual go-to cashews.  And you know what?  You can not even tell the difference once it is all blended up.  Once you add in the cacao powder you would never even know that they are in there!  Also, this cheesecake is completely fruit sweetened as well as an added bonus, because I used dates this time instead of maple syrup.  Dates are nature’s candy, and I love using them in desserts.  Anyways, back to that cheesecake filling…it was delicious even before I poured it into the crust.  Like a dreamy chocolate mousse that I could eat out of a bowl.  I decided to stir vegan chocolate chips into it to make it even more delicious!

    Since I made the cheesecake at night, I had to wait until the next day for it to set, but it was well worth the wait!  I topped it off with a gooey chocolate ganache, and I could not wait to dive in!  It was rich, delicious and everything I imagined it to be!  Perfect for all of you chocolate lovers out there.  I think this might be the perfect Valentine’s dessert if you and your significant other love chocolate.  So if you are going out to dinner, skip the dessert and make your own, because it is much more fun to make your own, and then you will have leftovers for later too!  And, nothing beats cheesecake leftovers!

    Vegan Double Chocolate Cheesecake (Nut Free)
    Makes one 8 inch cake

    One 8 inch spring form pan 

    Crust:

    • 1/2 cup finely shredded coconut
    • 1/2 cup gluten free organic rolled oats
    • 1/2 cup pitted medjool dates (if not soft, soak them in filtered water first and drain well)
    • 1/4 cup raw cacao powder or unsweetened cocoa powder
    • 1/4 tsp sea salt


    Filling:


    Ganache:


    Instructions:

    1. Oil an 8 inch spring form pan, and line the bottom with parchment paper.
    2. To make the crust, place all ingredients in a food processor, and process until crumbs and starting to hold together (if they are not holding together when squeezed, add a few tsp filtered water and blend). Press into the bottom of the prepared pan.
    3. Meanwhile, to make the filling, combine all ingredients but the chocolate chips in a high speed blender or food processor and blend until smooth.  Stir in the chocolate chips.
    4. Pour the filling over the prepared crust.
    5. Place cheesecake in the freezer to set for about 4-5 hours (or overnight in the refrigerator if you are not in a hurry).
    6. Remove from the freezer, un-mold and set in the refrigerator while you make the ganache.
    7. In the top of a double boiler, melt the dark chocolate and whisk in the coconut milk until smooth.  Pour over the top of the cake, and let it drip down the sides. Place in the refrigerator until it is more set, about 30 minutes.  Enjoy!
    8. Store any leftover cake in the refrigerator.


    *I use Thai Kitchen full fat coconut milk.  If you are using a different brand, just make sure it is the thick type, 2/3 of the can at least should be very thick.

  • Caramelized Onion Hummus

    Caramelized Onion Hummus

    Sadly last weekend my favorite team, the Minnesota Vikings lost their chance at getting to the Super Bowl.  Now, that may not seem like such a big deal to most, but of course we are hosting the Super Bowl here in Minnesota this year, so it would have been cool to have a team finally play in their home stadium for the big game.  Since that has never happened before.  But we had a really rough heartbreaking game and lost our chance.  It’s ok though, we still had a really good season, and I am still looking forward to watching the big game taking place in my home stadium.  Not from the stadium of course, because no way I could afford that, but in the comfort of my own home, which is really how I would prefer it.  Because I can be all comfy and make good snacks.  Everyone is in Super Bowl snack mode, and so I thought, what would I like to eat for the big game?  Well, I definitely would want some chips along with delicious things to dip them in.  I would already be making my Roasted Squash Nacho Cheese, and guacamole and salsa of course are a must, but why not something with a little protein and substance too?  Like a savory hummus!  I am a huge hummus fan.  I mean, it goes great with veggies for a snack, or dropped onto the top of a salad, or as a sandwich spread, or with chips of course.  So I figured I could get multiple uses out of it besides just snacking on for the big game.

    I love classic hummus with plenty of cumin, garlic, lemon and cayenne.  But I wanted something a little different this time.  You know that caramelized onion dip that everyone loves that is packed with onion flavor and loaded with dairy?  Well that was a favorite of mine with chips growing up.  So I thought why not make a hummus with those flavors.  So, I got some onions and garlic caramelizing on the stove and my house smelled like pure savory heaven. Yes, I actually do enjoy the smell of cooking onions, it is so comforting.  Once they were all caramelized browned and happy, I combined them with chickpeas and some cashew butter to make it extra rich and smooth in the blender.  All it needed was a little miso, sea salt and balsamic vinegar and it was sooo good!

    It smelled amazing even before I tasted it, but the flavor was rich and mellow.  It tasted of sweet onions and garlic, not harsh like the raw ones, but a savory flavor that was craveable, kind of like the flavor in the base of a good French onion soup. The balsamic added just a tad of acidity that it needed to cut the sweetness, and the miso a savory note.  All in all it was even better than I imagined it to be.  It is amazing with any kind of chips.  I happened to have corn chips on hand, because they are my favorite, but I have a feeling it would be amazing with ruffled potato chips, the way I used to always eat that onion dip with when I was little.  If you are a hummus lover like me, give this a try!

    Caramelized Onion Hummus
    Makes about 2 cups

    Ingredients:

    • 2 medium yellow onions, sliced
    • 8 garlic cloves, sliced
    • 1 Tbsp avocado oil or olive oil
    • 1 1/2 cups cooked chickpeas
    • 1/2 cup raw cashew butter
    • 1 Tbsp white miso
    • 2 tsp balsamic vinegar
    • 1/2 tsp sea salt
    • 1/2 cup filtered water


    Instructions:

    1. In a non-stick ceramic pan, combine the onions, garlic, and avocado oil over medium heat.  Cook over medium heat, stirring every few minutes until the onions and garlic are caramelized and nice and golden brown (about 15 minutes).  If at any time they stick a little to the pan, just add a couple of Tbsp filtered water.  Once they are caramelized remove from heat.
    2. Combine the onions, and all other ingredients in a high speed blender or food processor and blend until smooth (adding a little more water if necessary).  Keeps in the refrigerator for 2 weeks in a sealed container.


  • Vegan Peanut Butter Chocolate Hearts

    Vegan Peanut Butter Chocolate Hearts

    When it came to Valentine’s Day candy when I was little, hands down the Reese’s peanut butter hearts were my favorite.  You know, the giant ones that were almost the size of a candy bar, not just the little fun sized ones.  I always hoped to get those from my Grandma, who would every year give me a Valentine’s candy stash that included a box of chocolates and a few bigger ones like the peanut butter hearts. In school we also made Valentine’s boxes and gave out little Valentines to every one of our classmates.  Sometimes candy was included but of course it was usually the mini Reese’s pb cups because that would be expensive to buy for all 30 other kids and we had to give one to everyone. I always got lots of suckers and hard candies, and those I ate first because I have always enjoyed saving the best for last which was the peanut butter filled ones.  I am still that way, I figure it always gives me something to look forward too. Now, I am even more picky about candy though, and I mostly just make my own because then I know I will get exactly what I want.  It is still lots of peanut butter cups, or in this case peanut butter hearts, because that is what I decided to make last weekend!

    Honestly I got the idea from when Eric and I were in Target last weekend and I spotted the Reese’s Valentine’s hearts in the checkout line.  I began to remember how good they were to my 10 year old self and I really wanted one. But of course I wasn’t going to buy one because they are not vegan, they contain artificial ingredients now, and refined sugars.  So I HAD to make some.  There was no way around this craving.  I much prefer my home made peanut butter to the sweet peanut butter in those store bought ones anyhow.  They ended up being really easy to make!  Now, they are slightly different than a peanut butter cup, because the filling has to be a little less soft so that you can shape it, so I decided to add peanut flour to it. I have had it in my freezer for a while, I had picked it up a long time ago because it sounded interesting, and this was the perfect use for it!  It make the peanut butter filling more firm without taking away the peanut butter flavor.  I added just a little maple syrup and it was perfect!

    These actually only contain 5 ingredients including sea salt, so nothing too complicated here.  I used vegan chocolate chips for these instead of making my own chocolate so they were even faster to make than usual.  I like Lily’s Chocolate Chips because they taste really good and they happen to be vegan too!  So that is what I melted down to dip the peanut butter hearts in.  OMG were they ever delicious when they were all finished!  It was so good to satisfy my craving for peanut butter chocolate hearts!  If you have ever loved that classic candy, you need to give these a try!

    Peanut Butter Chocolate Hearts
    Makes about 10

    Ingredients:


    Instructions:

    1. In a bowl, mix together the peanut butter, peanut flour, maple syrup, and sea salt until smooth and well combined.  You want it to be the consistency of dough, if it is still too soft (since peanut butter may vary in how liquid it is), add a little more peanut flour.
    2. Shape into hearts, and place on a parchment lined tray.  Place in the freezer to chill for 1-2 hours.
    3. Meanwhile, when you are ready to dip the peanut butter centers, melt the chocolate in the top of a double boiler until smooth.
    4. Dip each peanut butter heart into the chocolate (letting the excess drain off, I like to set mine on a fork to dip to make it easier) and place back onto the tray until they are all done.  Place in the freezer to set the chocolate until it is hard, which usually takes 5-10 minutes.  Enjoy!
    5. Store any leftovers in the refrigerator in a container with a lid for up to a few months.
  • Vegan Raspberry Swirled Vanilla Cheesecake (Nut Free)

    Vegan Raspberry Swirled Vanilla Cheesecake (Nut Free)

    I have probably made over 200 cheesecakes since I started to love them at a young age.  I enjoyed them as a kid, but I never ate them very often because they were for special occasions in my family.  Then by the time I was in college, I was buying a slice at a local co-op bakery every weekend as a treat after my cross country races as a treat because they were so good.  I was hooked.  But then I thought to  myself, I like to bake.  Why not make my own?  So I did, and the weekend tradition was baking a cheesecake.  My cheesecakes were the best I had ever had too and I loved that I could make whatever flavor I felt like at the time.  Then I decided to go vegan and I thought I would never enjoy it again.   Boy was I wrong though.  One of my friends asked me to make him a raw cheesecake, and I was skeptical that it would be as good as the dairy ones I was used to in the past.  But it turned out amazing!  I started making cheesecakes again, and I was in love with vegan cheesecake.  In fact I have over 150 recipes for cheesecake in various forms on my blog, all of which are vegan.  So that just tells you how much I have to have it  in my life.  I don’t make it every weekend now, because I try to branch out and make other fabulous things like regular cakes and pies.  But when I do make it, I get pretty excited.  I have been wanting to make a nut free cheesecake for a while now, since before the Holidays and I finally got a chance last weekend.

    I do have some other nut free cheesecakes on my blog, and they are super delicious but they are raw cheesecakes and require the cracking open of coconuts.  Which I know not all of you want to do, and those darn coconuts can get spendy.  You need about 4 per cake and it is a lot of work.  So, I wanted to come up with a different nut free cheesecake base.  I came up with chickpeas and canned coconut milk.  Ok, I know it sounds like a weird and disgusting combination but trust me on this one.  Chickpeas work wonders in creating a silky smooth texture if you have a high speed blender.  I actually got the idea when I was making dessert hummus.  And, I have used chickpeas in an ice cream cake before so I knew it would work.  You can not taste them at all, and in fact, when mixed with the coconut milk, coconut butter, maple syrup and vanilla it tastes just like delicious vanilla cream.  I thought about making a plain vanilla cheesecake and just topping it off with berries, but instead I decided to swirl the berries in.

    Because then you get delicious hidden bites of berries throughout the cake.  I used a raspberry jam this time, because it is Winter here and fresh berries are super expensive.  Plus, Eric’s Dad gave us some of the best tasting raspberry jam ever and I wanted to use it in something special like this cake.  I just made a simple oat coconut date crust as a base for the cake and it was perfect!  The cheesecake turned out so good you would not even know it was vegan or had chickpeas in it.  The tart raspberry was the perfect partner for the sweet luscious vanilla scented creamy cheesecake!  The best part about this cake is it doesn’t require baking and it is relatively easy if you have a high speed blender.  So, if you are in the mood for cheesecake, give this baby a try!

    Vegan Raspberry Swirled Vanilla Cheesecake (Nut Free)
    Makes one 8 inch cake

    Crust:

    • 1/2 cup finely shredded coconut
    • 1/2 cup gluten free organic rolled oats
    • 1/2 cup pitted medjool dates (if not soft, soak them in filtered water first and drain well)
    • 1/4 tsp sea salt


    Filling:


    Instructions:

    1. Oil an 8 inch spring form pan, and line the bottom with parchment paper.
    2. To make the crust, place all ingredients in a food processor, and process until crumbs and starting to hold together (if they are not holding together when squeezed, add a few tsp filtered water and blend). Press into the bottom of the prepared pan.
    3. Meanwhile, to make the filling, combine all ingredients but the jam in a high speed blender or food processor and blend until smooth.
    4. Pour the 1/3 of filling over the prepared crust, then drop 1/4 cup of the jam over that by the tsp spreading it out so you have even little circles of it.  Swirl with a knife. Pour half the remaining filling over that, then another 1/4 cup of jam, dropping it in the same manor you did with the last 1/4 cup.  Pour the last 1/3 of the filling over that, and repeat with the jam, swirling it to make the top pretty.
    5. Place cheesecake in the freezer to set for about 4-5 hours (or overnight in the refrigerator if you are not in a hurry).
    6. Remove from the freezer, un-mold, and enjoy!  Store any leftover cake in the refrigerator.


    *I use Thai Kitchen full fat coconut milk.  If you are using a different brand, just make sure it is the thick type, 2/3 of the can at least should be very thick.

    **Make sure your jam is vegan and does not contain gelatin.  If your jam is too thick to be swirled into the cake with a knife, add a little water to it until it is.  Alternatively, if you do not want to use jam, you can make your own raspberry puree with 1 1/2 cups fresh or frozen (thawed and drained) raspberries, and 1 Tbsp maple syrup, blended in the blender.

  • Vegan Chocolate Raspberry Jam Cups

    Vegan Chocolate Raspberry Jam Cups

    I am in a chocolate making mood lately.  Probably because Valentine’s day is coming up, and I want to be able to give some as gifts, and enjoy some for myself.  So lots of chocolate goodies are essential.  I know people like to buy boxes of chocolates to give their significant others, but I like to make them myself, because I feel like if someone puts the time into making something special and thoughtful to me, it means more than if they just bought it.  Bonus points if it is my favorite flavor, or has ingredients that I really love in it.  Plus, I feel like there aren’t a lot of options out there for Vegan Valentine’s candy, at least not around here.  Well, you are in luck, I made something really simple but really delicious a few days back that your sweetheart might just really love. Some dark chocolate and white chocolate raspberry cups. So whether you and your significant other love chocolate, or vanilla I have you both covered.  These are what I would choose as a favorite next to peanut butter cups if I am in a fruit sort of mood. Because raspberries are my all time favorite fruit. And, although I would choose the white chocolate cups most days because I am a vanilla girl, the dark chocolate are amazing as well.

    Eric’s Dad sent us a big care package of his home made jam (a bunch of different flavors) and soap a few weeks back, and the raspberry is my favorite so I have been using some of it in my desserts. I figured this would be the perfect application for it to shine, and simplify my life significantly when making these cups so I don’t have to make a blend up a “jam”.  The white chocolate is luxurious, with a base of cacao butter, coconut butter and cashew butter.  It has that silky melt in your mouth thing going on that non-vegan chocolate has (or from what I can remember.  I like it better actually, since it is not super sugary, I add just enough maple syrup to sweeten it. I love also that it is vanilla scented, by favorite flavor, which smells heavenly before you even take a bite out of one of these babies.

    The chocolate is quite simple, only 4 ingredients plus the jam.  But of course if you didn’t want to make your own chocolate like I do, you could melt down your favorite vegan dark chocolate.  I just like to make my own because it is cheaper, and I control what sweetener goes into it.  If you are a dark chocolate person all the way, you will love these!  If you have some peanut butter cup molds, or even foil muffin tins, you can make these.  And, how much more special would it be if you made candy for your sweetheart than if you had bought it from the store for them this Valentine’s day?  If they are not a fan of raspberry jam, use their favorite instead.  Just make sure it is not too runny. I hope you are all having a wonderful week!

    Vegan White Chocolate Raspberry Cups
    Makes 6 large candies

    Ingredients:

    • 1/4 cup cacao butter (2 oz)
    • 2 Tbsp raw cashew butter
    • 1/4 cup coconut butter
    • 1 tsp pure vanilla extract
    • 2 Tbsp maple syrup (or to taste)
    • 1/8 tsp sea salt
    • about 1/3 cup vegan raspberry jam


    Instructions:

    1. Combine cacao butter, cashew butter, vanilla, maple syrup,  and sea salt over a double boiler, and whisk until smooth.  Pour into the bottoms of 6 larger peanut butter cup tins (or molds), then place them in the freezer to set.
    2. Once the bottom chocolate has set, spoon about a heaping 2 tsp of the jam onto the top of the set chocolate, then pour remaining melted chocolate over that.
    3. Place them in the freezer to set, about 15 minutes.
    4. Store in the refrigerator.


    Vegan Dark Chocolate Raspberry Cups
    Makes 6 large candies

    Chocolate:


    Filling:

    • about 1/3 cup raspberry jam


    Instructions:

    1. To make the chocolate, whisk together all ingredients until smooth.
    2. Spoon a little chocolate into the bottoms of 6 peanut butter cup molds, filling them about 1/4-1/3 full.  Place in the freezer until hard, about 10 minutes.
    3. Once the chocolate has hardened, spoon a heaping 2 tsp of jam over that.
    4. Pour more chocolate over the cups until the jam is covered, and place them in the freezer until set, about 20 minutes.
    5. Store any extra in the refrigerator.


  • Vegan Fig Almond Chocolate Chip Oatmeal Cookies

    Vegan Fig Almond Chocolate Chip Oatmeal Cookies

    I was gifted a few bags of dried figs, and I decided that I wanted to make something delicious with them.  I could have just snacked on them of course, and I did with some, but they deserved to be used in something exciting.  I thought about it all day at work.  Maybe some fig bars?  Nah, that was too much work with all of the blending for the filling and what not.  A fig cake?  Also too much work than I was willing to put in after work.  I wanted something that was more immediately satisfying. Like cookies!  Yes, chewy oatmeal cookies seemed like just the thing to include the figs in.  Bonus, was looking forward to eat some cookie dough while I was making them.  My favorite part of the whole process.  I wanted them to have some more mix ins too, something crunchy, and maybe something chocolate.  I first thought hazelnuts would be amazing but I didn’t have any in my pantry at the time.  I don’t know about you, but I am all about using what I have most of the time and not going out and buying new things when I have things to use already. So, I went with the toasted almonds I had on hand instead and they were perfect in the cookies!  Now, the question was white chocolate or dark chocolate?  Well, I have been making a lot of white chocolate stuff lately, and it would be more work because I would have to make more white chocolate so I went with dark chocolate  chips.  Which was a really good decision, because the figs had almost a dark chocolate flavor note in them so it paired very well together.

    The dough for these cookies mixes up really fast, and in fact, they were all mixed, shaped, baked and done in an hour.  Nothing beats that, especially on a work night.  These are the perfect cookie if you love oats, because they contain both oat flour and rolled oats. I myself have eaten oatmeal almost every day for about the past 15 years, so I always have it on hand and ready to whip up a batch of delicious cookies. I think I get it from my Mom, because she always has eaten oatmeal too, and oatmeal cookies are her favorite.  She would always say that they were healthier than just plain old cookies because they have more fiber.  I think that is true, and if you use a healthier less processed sweetener, even better.

    These cookies baked up beautifully!  I make mine pretty big, because if I am going to have a cookie, I am going to have a cookie…you know what I am saying?  I big hearty oatmeal cookie packed full of goodness.  They are chewy and soft in the middle and crisp at the edges, just as oatmeal cookies should be.  Especially good when they are warm and the chocolate chips are gooey.  The figs provide little sweet bursts of flavor, and the almonds some crunch and nuttiness.  If you are looking for an easy cookie recipe, give these a go, they are super delicious!

    Vegan Fig Almond Chocolate Chip Oatmeal Cookies
    Makes 1 dozen large cookies

    Ingredients:


    Directions:

    1. In a large mixing bowl, mix together the coconut oil, and sugar until well blended. Add flax eggs, vanilla, and beat until well combined (the mixture will become very thick).
    2. Mix in the flour, soda, cinnamon, cardamom and sea salt until well blended. Mix in the oats until well combined, then add figs, almonds and chocolate chips and mix until evenly distributed throughout the dough.
    3. Heat the oven to 350 degrees with the rack set at the middle position. Line 2 baking sheets with parchment paper.
    4. Roll the dough into 12 large balls, and spread them out on the 2 cookie sheets with plenty of room in between, and flatten them out slightly. Bake for 13-15 minutes or until golden, but not over baked. Let cool on sheet a few minutes, then remove to a wire rack lined with parchment to cool.
    *Whisk together 2 Tbsp ground flax seed, 1/4 cup and 2 Tbsp water in a small bowl.  Allow to sit in the fridge for 15 minutes until the mixture has set up (or become kind of thick).


  • Vegan Vanilla Sprinkles Cupcakes 

    Vegan Vanilla Sprinkles Cupcakes 

    Sprinkles have always made me smile. On cupcakes, on doughnuts, on cookies…they are just so adorable and when I was little the little colored balls caught my attention every time. They were a must for most of my Birthday cakes growing up, and I remember begging my Dad to buy me and my friend a funfetti cake mix complete with sprinkles for the top of the cake to that we later baked. It didn’t taste as good as it looked because it was from a box, but we had fun with it.  As an adult I haven’t used them much because I don’t like to use artificial color in things and I kind of missed them.  But, the other day when I was shopping after work, I was walking through the baking aisle, and some natural colored sprinkles caught my eye.  They were vegan too!  So, I had to buy them.  Yes, they have sugar in them, but I figure it is such a minor amount if you just sprinkle a small bit on top of your cake or cupcakes.  I was super excited, this called for some cupcake baking. Even though my blog is called “Fragrant Vanilla Cake”, I did not have a vanilla cupcake recipe on it.  That is, until now.  I decided that it was about time I made one with the sprinkles and all to inspire me.

    Most of the cakes I have made recently are date sweetened, but for this one I decided to use xylitol because it tastes like sugar in cakes and leaves the batter a pale color, not making it brown like say a coconut or maple sugar would.  I wanted these to taste and look as close to classic vanilla cupcakes as possible.  If you are not a fan of xylitol though, see my note at the bottom on replacements. Anyways, the vanilla batter tasted heavenly before I even baked it.  Just like the classic cake batter I remember licking from the bowl when I was little that was leftover.  They baked up nicely, and as they cooled I went to work making the frosting.  I wanted it to be luscious, fluffy and sweet, so I went with a vegan faux cream cheese frosting.  The mixture of coconut milk and cashew butter is what gives it that crave worthy flavor and texture.

    I tinted it pink, because why not make these super cute and girly?  But if you hate pink or something feel free to tint them another color.  For green you could use matcha powder, or for yellow, some turmeric (just go light on it, because you don’t want to taste it). I felt kind of like a little kid decorating them.  Like when I used to decorate cookies with my Grandma and frost and sprinkle them with sugar or candy balls. They turned out delicious!  Sweet, and aromatic with vanilla, the fluffy frosting the perfect thing to top them off with!  If you are craving classic vanilla cupcakes, give these a try!

    Vegan Vanilla Sprinkles Cupcakes 
    Makes about 10 cupcakes

    Ingredients:


    Cake:


    Frosting:

    • 1 1 15 oz can full fat organic coconut milk, at room temperature
    • 1/2 cup raw cashew butter
    • 1/4 cup maple syrup
    • 1/8 tsp sea salt
    • 1 tsp pure vanilla extract
    • 1 tsp lemon juice
    • 1/2 cup plus 2 Tbsp raw coconut butter (NOT OIL), warmed to liquid
    • 1 Tbsp beet powder or a few tsp natural vegan red food coloring


    For Topping:


    Instructions:

    1. Preheat the oven to 375 degrees and position rack in center of oven.
    2. Line 10 cupcake tins with paper or foil liners.
    3. Whisk flour, baking soda, sea salt, and xylitol in a large bowl to blend well.
    4. Whisk oil , coconut milk and vanilla extract together in small bowl to blend well, then whisk into the flour mixture until well blended.
    5. Transfer cake batter to prepared muffin tins and until tester inserted into center comes out clean, about 12-15 minutes (but do not over-bake, or the cakes will be dry).
    6. Remove from the oven and allow cupcakes to cool completely.
    7. For the frosting, combine all ingredients in a blender and blend until completely smooth. Pour into a bowl and place in the freezer until it is thick like whipped cream (whisking every so often), about one hour.
    8. Spread the frosting over the cupcakes, and sprinkle with the sprinkles.


    *The reason I used xylitol for this cake was to keep it pale in color.  If you do not care for xylitol, use 1 cup coconut sugar or 1 cup maple sugar instead, just keep in  mind you will get a darker color cake.

    *Do not feed this cake to dogs, xylitol is toxic to them.

    *If you wish to make a non-vegan cake, regular all purpose flour will work as well, or whole wheat pastry flour.


  • Vegan Rose White Chocolate Hearts 

    Vegan Rose White Chocolate Hearts 

    It feels downright balmy here in Minnesota with a 32F degree temperature!  That is because it has been in the below zero temps lately or just single digits.  Funny how in the Fall we think 32 is cold after having Summer temperatures, and now it is warm.  Well, I am embracing it and getting out for walks and runs while I can before it chills down more again.  Not that the cold ever stops me from being active.  When I was in high school, I spent nearly every day of the Winter outside for nordic skiing practice.  At one of my ski races I remember it was -15 and we had to bundle up, but not so much that we could not move.  My coach always said there is no such thing as bad weather if you dress right.  Well, I do occasionally go out running when it is that cold, I prefer it to be above 15 at least to go out for activities now.  And, when I do go out, it is not usually for more than a few hours.  Then it is time to warm up.  Since it is not Summer, and I am spending more time inside, I spend a little more time in the kitchen creating delicious things.  Like the Vegan Rose White Chocolate Hearts I made last weekend.

    I had made some white chocolate for topping an ice cream cake off with a few months back and it was delicious!  I told myself then, that I had to remake it into molds so I could enjoy it just as it was.  I had tinted the original stuff half pink and swirled it, so I thought this time I could do all of it pink, scent it with rosewater because it is so lovely, and make little hearts for Valentine’s Day.  It is almost a month away now, and Valentine’s candy makes me happy.  I have to make at least 5 different kinds every year.  Candy was always my favorite part of Valentine’s Day when I was little, and my Grandma used to give me those chocolate heart boxes filled with different types of chocolate.  It was super exciting to my 8 year old self. Now I mainly just make it for me and Eric.  I remember our first Valentine’s day I made him some chocolate dipped strawberries, and some spicy chipotle dark chocolate caramels.  He loved them!  But I usually make different things every year and these rose white chocolates are new.

    These are super simple to make if you have all of the ingredients, just combine everything in the top of a double boiler, let it melt and whisk it together, then pour it into molds.  I promise you, your kitchen will smell incredibly heavenly!  There is nothing like the smell of melted cacao butter.  It doesn’t take long to harden up, about an hour then you can enjoy some delicious white chocolate with rose!  This is way better than any of that store bought stuff with fake ingredients or dairy in it.  So, if your sweetheart likes white chocolate, make these for them!  Or maybe just for you, because you don’t have to share if you don’t want too, that is fine too.

    Vegan Rose White Chocolate Hearts 

    Makes about 16

    Ingredients:

    • 1/4 cup cacao butter (2 oz)
    • 3 Tbsp raw cashew butter
    • 1/3 cup coconut butter
    • 1 tsp pure vanilla extract
    • 1 tsp rosewater
    • 3 Tbsp maple syrup (or to taste)
    • 1/8 tsp sea salt
    •  2 Tbsp beet powder, or a few drops natural vegan red food coloring


    Instructions:

    1. Combine cacao butter, cashew butter, vanilla, rosewater, maple syrup,  and sea salt over a double boiler, and whisk until smooth.
    2. Whisk the beet powder or food coloring into one bowl until even in color.
    3. Pour into a chocolate heart mold, and place in the freezer until heard, which can take 30 minutes to 1 hour depending on how warm it is.
    4. Pop chocolate out of molds and enjoy!
    5. Store in an airtight container in the freezer for up to a few months.


    *I get my cacao butter from Amazon HERE.

  • Chocolate Cake Batter Dessert Hummus

    Chocolate Cake Batter Dessert Hummus

    Like any good vegan, I love hummus.  For years, I have been making different kinds of hummus to have on hand.  It is something that always has to be in my refrigerator. A lot of times, I like to add different veggies to it, to make it more flavorful or colorful, but also to add nutrients.  I also like spicy things in it as well, like plenty of chipotle, or cayenne pepper.  Savory hummus is a staple.  But recently I have been hearing about dessert hummus being all the rage.  Funny, because I was making some a few years back before it was a thing. I made peanut butter cookie dough hummus, pumpkin pie hummus and strawberry hummus among other things.  I can understand why people love it.  I mean you get a delicious dessert that is somewhat healthy and packs protein thanks to the chickpeas which are mild and can be transformed into whatever flavor you want.  When I first made it I was trying to make a sweet snack that was healthy that had substance and wasn’t just empty calories.  If you are of a similar mindset, read on.

    I have never made a chocolate dessert hummus before, so I thought why not now? Maybe then people can make some of their own instead of buying it for a high cost, and this one does not contain any refined sugar.  In fact, it is fruit sweetened thanks to gooey and delicious medjool dates!  They are my all time favorite thing when it comes to sweetening desserts, and they are about as natural as you can get too since all they are is dried and not processed.  This recipe actually has only 5 ingredients excluding sea salt and water.  So it is simple to make with things from your pantry.  Or, that is what I made it with.  The things I have on hand.  I would much rather use what I have, then have to make a trip to the store and spend more money.  All  it contains are chickpeas, dates, cacao powder, sea salt, vanilla, and almond butter plus enough water to blend it smooth.  It is that simple!

    Not only that, it is so good!  I was just going to call it chocolate hummus, but it reminded me of chocolate cake batter.  One of the all time most delicious things!  The texture and everything were similar.  So guess what?  You can make a batch of this, and feel like you are eating cake batter!  And it isn’t just a pile of sugar, it is a substantial snack when paired with fruit, toast, or crackers!  So chocolate lovers, this one is for you!  I hope you do try it, and if you make it feel free to let me know what you think!

    Chocolate Cake Batter Dessert Hummus
    Makes about 3 cups

    Ingredients:

    • 1 1/2 cups cooked chickpeas
    • 1 1/2 cups soft, pitted medjool dates
    • 1 cup filtered water (or as needed)
    • 1/3 cup cacao powder or unsweetened cocoa powder
    • 1 Tbsp pure vanilla extract
    • 1/4 tsp sea salt
    • 1/2 cup almond butter


    Instructions:

    Combine all ingredients in a high speed blender or food processor and blend until smooth (adding a little more water if necessary).  Keeps in the refrigerator for about 1 week in a sealed container.


    *Note: if you prefer sweeter, you can also add a little maple syrup too.

  • Vegan PB & J Cupcakes 

    Vegan PB & J Cupcakes 

    I make a dessert every weekend, it is just a thing I do.  Not something simple like cookies, usually a cake, or a pie, or cheesecake.  Something worth getting super excited over.  Not that cookies are not exciting, but they just don’t get me going like cakes and pies do.  I usually come up with something mid week that sounds fabulous, but last week I was kind of uninspired.  Probably from being a little tired from the Holidays.  I mean, they do take a lot out of you, especially if you work the week after Christmas like I did.  So I went into Friday, which is the day I bake or make these fabulous desserts, not knowing what I was making.  I was kind of thinking either a banana sticky toffee pudding or some peanut butter vanilla caramel cupcakes, but wasn’t set on either and I was up for change if inspiration came.  And I didn’t have to wait long for it to come.  Eric and I received a package of home made jam from his Dad that day we were at work.  He sent us 6 jars of different jams that he makes himself!  I was super excited.  Two of them were raspberry, my favorite. He actually grows the berries himself which makes it even more awesome.  So, given all of this jam, I had to make something using it. Of course I chose the raspberry.  My Mom always bought raspberry jam growing up, and it remains my favorite to this day.  I decided to make peanut butter and jelly cupcakes with it.

    I had kind of decided that I wanted cake, but not to have to make a whole layer cake, so cupcakes were perfect.  I made a date sweetened peanut butter cake batter, that tasted wonderful even before baking.  Dates are a great addition to cake batter if you want to have a cake that is moist, fruit sweetened and soft in texture but not too heavy.  They also impart a light caramel flavor that I love, and in this case it goes well with the peanut butter.  I could make these two ways.  I could bake the cupcakes, then scoop out the middle and put jam in there, or I could spoon it in the batter and let it bake in. I went for the latter because it was less work.  And, they turned out lovely!  I enjoyed the jam so much, that I decided to spoon a little on top of the cupcakes before the frosting too.

    For the frosting, I made a fluffy peanut butter cream frosting and it was super delicious!  It tasted like peanut butter mousse almost.  Once they were all frosted and looking lovely after a sprinkle of dried raspberries and peanuts I was ready to dive in. They were heavenly!  The luscious creamy frosting, and gooey tart sweet jam were so good with the moist sweet cake!  It was like the most amazing PB&J sandwich dessert style!  Peanut butter and jelly sandwiches were my favorite growing up, and although I never make them anymore, I do love a good peanut butter and jelly dessert!  If the inner child in you loves them too, give these cupcakes a try!

    Vegan PB & J Cupcakes 
    Makes 8 cupcakes

    Ingredients:

    Cake:

    • 3/4 cup Bob’s Red Mill Gluten Free All Purpose Flour
    • 3/4 tsp baking soda
    • 1/2 tsp baking powder
    • 1/4 tsp sea salt
    • 2/3 cup packed soft medjool dates, pitted, soaked in water for 30 minutes and 1/2 cup of the water reserved
    • 2 Tbsp organic peanut butter
    • 1 tsp pure vanilla extract
    • 1/2 cup filtered water
    • 1 Tbsp apple cider vinegar
    • about 1/3 cup raspberry jam


    Vegan Peanut Butter Cream Frosting:

    • 1 15 oz can full fat organic coconut milk, chilled
    • 1/2 cup organic peanut butter
    • 1/4 cup maple syrup
    • 1 tsp pure vanilla extract
    • 1/4 tsp sea salt
    • 1/2 cup plus 2 Tbsp melted coconut butter (warmed to liquid)


    For topping:

    • about 3 Tbsp raspberry jam
    • freeze dried raspberry pieces
    • organic roasted peanuts


    Directions:

    1. Preheat the oven to 375F degrees and position rack in center of oven.
    2. Line 8 muffin tins with paper liners.
    3. Whisk flour, baking powder, baking soda, sea salt in a large bowl to blend well.
    4. Place dates, reserved water, peanut butter, water, and vanilla extract into a blender, and blend until smooth, then whisk this blended mixture into the flour mixture until well blended. Whisk in the cider vinegar until bubbles form.
    5. Pour the cake batter into prepared muffin tins about 1/3 full, then drop 1 Tbsp of jam into the center.  Spoon the remaining batter over them so that they are 3/4 full, and place in the oven.
    6. Bake cake until set and a toothpick inserted into the center comes out almost clean, about 15 minutes.  Remove from oven, let cool completely.
    7. To make the frosting, combine all ingredients in a high speed blender or food processor and blend until completely smooth.  Pour into a bowl and place in the freezer until the consistency of stiffly whipped cream (about 30-45 minutes depending on how warm it has gotten).  Once it is ready place in the refrigerator until ready to frost the cupcakes
    8. When ready to assemble cupcakes, place 1 tsp jam onto the top of each one.  Place the frosting in a pastry bag, and pipe around the jam and on top of it (in a spiral motion starting at the outside edge) to cover the top of the cupcake.  Sprinkle with the freeze dried raspberries and peanuts.  Serve!
    9. Store any leftover cupcakes in a container with a lid in the refrigerator for up to 1 week.


  • Basil Almond Roasted Tofu and Veggies and Pop and Cook: My New Favorite Cooking Secret!

    Basil Almond Roasted Tofu and Veggies and Pop and Cook: My New Favorite Cooking Secret!


    There has been a big chill in the air here lately, and I am craving savory, warming vegan comfort food. A few nights back, I made delicious Basil Almond Roasted Tofu and Veggies, a new recipe experiment featuring Pop and Cook, which I discovered it at my local Walmart in the frozen vegetable section. It is an ingredient that makes prepping and preparing my meals a lot easier!  During the week, I like to make simple meals for dinner that don’t involve too many ingredients, because after work I don’t have a lot of time, and I want to have time to be able to relax at night.  I don’t know about you, but being able to unwind after work is very important to me.  Good tasting healthy food is also very important to me. Maybe you are trying to eat healthy too in the new year, if so read on.  I like all of my meals to have plenty of veggies and protein, so a tofu dish is the perfect option!  I love a good baked tofu, it is simple and a delicious blank palate perfect for soaking up delicious sauces and goes perfect with any veggies.  Which is where the Pop and Cook comes in.

    While my veggies and tofu were baking, I made a simple easy to make sauce using only 6 ingredients including salt and water.  Just almond butter, Pop and Cook basil, Pop and Cook glazed onions, and Pop and cook garlic. It may sound very plain but it was so flavorful and delicious thanks to the Pop and Cook!  If you have never heard of them, they are little frozen cubes of veggies or herbs used for flavoring, and all you need to do is pop them out into your dish that you are making.  Because they come frozen, they stay fresh until you need them.  Not only that, each little cube stays covered until you pop it out, so they stay fresh and don’t get freezer burned.  I don’t know about you, but I think peeling garlic and onions and chopping herbs can be a pain sometimes when I am in a hurry.  Not only that, fresh basil is not available here now, so the only option is usually dried which is just not the same.  If you use Pop and Cook, you get the same flavor as you would with fresh.  This sauce I made tasted like creamy basil pesto but better.  Who would have thought something as simple as Pop and Cook garlic, onions, and basil could make it taste so good! It was the perfect comfort food dish for a chilly Winter night.

    If you are busy like I am, you definitely need to check out this product.  Also, if you end up throwing away things like fresh herbs or garlic because you only need a little bit at a time for a recipe, then Pop and Cook is perfect for you.  You can use only what you need and save the rest for later.  Also, you would think that something as convenient as this would be spendy, but they are actually very affordable, and you can find them at your local Walmart in the frozen vegetable section.  So next time you are there, take a little trip down that aisle, it will make your weeknight dinner cooking so much easier.  Click HERE to find the nearest Walmart to you that carries them.  Pop and Cook doesn’t just offer basil, glazed onions and garlic, they also have cilantro, and ginger.  Think of all of the delicious things you could make with those.  No chopping onions, peeling garlic and ginger and mincing herbs. So you can get to the table faster, and enjoy really delicious food without a lot of effort.  Pop and Cook, is my new favorite cooking secret.

    Basil Almond Roasted Tofu and Veggies
    Serves 2

    Ingredients:

    Tofu:

    • 16 oz organic extra firm tofu, cut into cubes
    • 3 Tbsp sesame oil
    • 3 Tbsp tamari


    Veggies:

    • 1 1/2 cups butternut squash, cut into 1 inch cubes
    • 1 medium zucchini, cut in half, and sliced 3/4 inch thick on the bias
    • 2 Tbsp sesame oil


    Sauce:


    For Serving:

    • 2 cups cooked jasmine rice (optional)
    • green onions for garnish


    Instructions:

    1. Preheat the oven to 400F degrees.
    2. Toss the tofu with 3 Tbsp sesame oil, and 3 Tbsp tamari in a bowl until the tofu is coated, and spread out on an oiled sheet pan.  Place in the oven, and bake until the tofu is starting to brown, and get crisp at the edges, about 45 minutes.
    3. Meanwhile, to make the veggies, toss the butternut squash with 1 Tbsp sesame oil and spread out on an oiled sheet pan.  Place in the oven and roast for about 45 minutes or until tender and browned at the edges.
    4. Toss the zucchini with the remaining Tbsp sesame oil, and spread out on an oiled sheet pan.  Place in the oven and roast for about 25 minutes until tender and starting to brown at the edges. Remove from the oven once finished baking, while you wait for the tofu and squash to be done.
    5. Meanwhile while the veggies and tofu are cooking, to make the sauce, combine the almond butter, filtered water, Pop and Cook basil, and Pop and Cook garlic, and Pop and Cook onions and sea salt in a small saucepan over low heat.  Cook and stir to combine until the Pop and Cook cubes are completely mixed in and the sauce has warmed.
    6. When the tofu and veggies are finished cooking, combine them with the sauce in the pan, and mix until they are coated in the sauce.
    7. Serve with jasmine rice and sprinkle with green onions.


  • Vegan Spicy Sweet Potato Tots with Cilantro Avocado Dipping Sauce

    Vegan Spicy Sweet Potato Tots with Cilantro Avocado Dipping Sauce

    Minnesotans love their tater tots.  I mean, we have a whole hot dish featuring them and named after them.  So, why didn’t I love them as a child like everyone else?  I don’t know.  Maybe because they were always served in school lunches, and the first time I tried them they were soaked in the jello that was next to it, and I had kind of an aversion to them after that. Or because I liked mashed potatoes more, because that was what my family served.  My Mom never made tater tots.  But you know what?  As an adult one day I decided to make my own.  After all, they are just little mini hash browns sort of.  So, I made my own at home, and I ended up loving them.  Either they were way better than the ones I used to eat as a kid, or my tastes had changed.  Now I love the crunchy salty little morsels.  I have since made them many times at home, and even a tater tot hot dish vegan style.  I like to experiment with adding different other veggies to them too besides potatoes.  The latest of which was sweet potatoes.  I know, still sort of potatoes, but totally different flavor.

    Sweet potatoes are a diet staple for me, I eat them at least 5 times a week, sometimes more. I can’t help it, they are just so good stuffed, or cut into fries.  I had to find out if sweet potato tots were as good as regular tater tots.  So, I cooked some up a few nights back.  I actually used a mixture of sweet potatoes and regular potatoes because they need the starch of the regular but the flavor that came through was all sweet potato.  I wanted to add a bit of spiciness to them too, so I added some chipotle powder.  They turned out super delicious just like that, but when you have something spicy, you need a little something cooling to serve it with.  Plus tater tots are made for dipping.  Usually in ketchup but ketchup isn’t cooling, so I made a cilantro avocado sauce.

    Super simple, just buzz all of the ingredients for the sauce in the food processor while you are waiting for the tots to bake and you are all set!  These are so good I could eat the whole recipe.  But I decided to share some this time.  If you eat all of them yourself though, I totally won’t judge.  Next time you have a hankering for tater tots, give these a try.  Or, maybe for the Superbowl in a month you need a snack to serve to your friends.  I think these would be great for that!

    Vegan Spicy Sweet Potato Tots with Cilantro Avocado Dipping Sauce
    Serves 2-4 (two if you are me)

    Ingredients:

    Sweet Potato Tots:

    • 3 medium russett potatoes, peeled and cut into 2 inch chunks
    • 2 medium sweet potatoes  peeled and cut into chunks
    • filtered water
    • sea salt to taste
    • 1/4 tsp chipotle pepper (1/2 if you want it spicy)
    • 1 Tbsp olive or avocado oil (optional)


    Cilantro Avocado Sauce:

    • 1 large avocado
    • 1 bunch cilantro
    • 1/4 cup lime juice
    • 1/4 tsp sea salt, or to taste


    Instructions:

    1. Pre-heat the oven to 425F degrees. To make the tater tots, place the potatoes and sweet potatoes in a large pot of salted boiling water on the stove, and bring to a boil.  Cook until the potatoes are just tender but not too mushy, and drain.
    2. Let cool until able to handle the potatoes, and grate them into a bowl.  Add sea salt to taste, chipotle pepper, and mix together.
    3. Shape the potatoes into tater tots (they will be a little sticky, but no worries, they will crisp up when baked).
    4. Place on an oiled sheet pan, and drizzle with 1 Tbsp oil, tossing them around in it gently to coat them.  Place in the oven and bake for about 30-40 minutes until lightly browned and crisp on the outside, flipping them over with a spatula half way through so that they brown evenly.
    5. Meanwhile, to make the sauce, combine all ingredients in a food processor and process until smooth.
    6. Serve the tots with the sauce!
  • Veggie Filled Tempeh Fried Rice

    Veggie Filled Tempeh Fried Rice

    I was given an Instant Pot for Christmas, and I was pretty excited about it.  Before this year, I have never really thought about using a pressure cooker, but I had been seeing a bunch of my friends cooking things in them and posting photos on Instagram and Facebook and it got me interested. I haven’t made anything super exciting in it yet, just rice and beans, but wow do they ever cook fast!  I cooked dry un-soaked garbanzo beans in 40 minutes and it normally takes me like 2 hours on the stove!  And the other day I made some rice in it because I had a tofu dish I wanted to serve it with and it came out perfect in only 10 minutes.  I have a confession to make, I am usually horrible at cooking rice on the stove. I usually end up making it too mushy, or it gets to dry because I do other things and forget to turn it down. We use a steamer at work and it is a life saver for that type of stuff so I don’t have to worry about watching it.  Anyways, the Instant Pot is even faster than the steamer so I was very impressed.  I had some of that rice leftover because I made more than I needed, so I thought what better use for it, then to make some fried rice?!

    I hadn’t made it in years. Well, the traditional kind at least, I made a raw version a few years back but that is different.  I like my fried rice to be filled with veggies.  None of that super greasy stuff that is mostly rice and not much else that you get at restaurants sometimes.  Shrimp fried rice used to be my favorite before I went vegan.  But anything shellfish or shrimp totally grosses me out now, not to mention the idea of eating an animal.  So, for this one I decided to use tempeh cut into little cubes.  Kind of like they do for chicken with fried rice. It was perfect!  It added protein and a nice meaty texture without being meat.  I added in plenty of veggies as well, carrots, mushrooms, green onions, and garlic.

    Also, I had to add flavor, so I went for a tamari, miso and mirin mixture and it was super delicious!  The best part about this is it only took me about 15 minutes to make start to finish.  You can’t beat that for a quick weeknight dinner.  If you have different veggies on hand, or one of these ones is not your jam, feel free to swap them.  I am all for using what you have in the refrigerator and not wasting food.  Some of the best meals are made that way.  So, the next time you have leftover rice give this a try!

    Veggie Filled Tempeh Fried Rice

    Serves 2

    Ingredients:

    • 2 Tbsp avocado oil, divided
    • 6 oz organic tempeh, cut into small cubes
    • 2 garlic cloves, minced
    • 2 tsp fresh ginger, minced
    • 6 scallions, sliced very thinly
    • 1 medium carrot, cut julienne
    • 1 medium zucchini, cut in half lengthwise, and sliced on the bias
    • 8 crimini mushrooms, sliced
    • 2 tsp white miso
    • 2 Tbsp mirin
    • 2 Tbsp tamari
    • 2 cups cooked rice
    • sea salt to taste


    Instructions:

    1. Heat 1 Tbsp oil over medium heat in a ceramic pan. Add the tempeh, and sautee it until it is starting to brown slightly.  Remove from the pan and set aside.
    2. Add the remaining oil to the pan, along with the garlic, ginger, and scallions.  Sautee for a minute until fragrant.  Add the carrot, zucchini and mushrooms and sautee until softened, about 5 minutes.
    3. Mix together the miso, mirin, and tamari in a small bowl, and add to the pan, along with the rice. Cook and stir together until the rice is uniform in color.  Add the tempah back to the pan and stir to incorporate.  Add a touch of sea salt if needed.
    4. Serve!
  • Vegan Banana’s Foster Cake 

    Vegan Banana’s Foster Cake 

    I wanted something spectacular for my New Years dessert this year.  I just made cupcakes for Christmas instead of a layer cake, and although they were really delicious, they just don’t have the same pizzazz that a layer cake does.  I thought about going seasonal, and making something snow related, you know, like a white snowball cake or something, but for some reason I decided on a bananas foster cake.  My family has always loved banana cake. My Mom used to bake banana chocolate chip cake and frost it with cream cheese frosting.  It was so good!  Then eventually I found a banana almond layer cake recipe which quickly became the favorite dessert to make for special occasions.  So, banana seemed like a win, since I would be sharing this cake with my loved ones.  The classic dessert bananas foster has bananas and vanilla ice cream,  with a rum brown sugar sauce that is lit on fire before serving.  No lighting stuff on fire would be happening in my kitchen, but I wanted the cake to have all of the same flavors.

    I made my classic date sweetened banana cake, because it always turns out nice and moist, but not too dense.  Bonus, the dates give it almost a caramel like flavor.  It smells amazing while baking, like the best banana bread.  Instead of the vanilla ice cream bananas foster has, I made a vanilla “cream cheese” frosting as the creamy element of this cake.  It was luscious, like something you would want to eat with a spoon.  Lastly, I made a rum spiked caramel in place of that sauce that they serve with it.  I didn’t light it on fire though, so it was nice and boozy.  It is actually a date caramel, my favorite kind!  Simple to make, and dates are nature’s caramel so it is perfect!  It was beautiful spooned over the cake!

    I topped it off with bananas and white chocolate and it was a sight to behold.  I could not wait to taste it.  Well, let’s be honest, I mean taste it all together, because I had been tasting the frosting and caramel and cake batter as I went.  It was so heavenly!  The sweet moist banana cake, gooey boozy date caramel, fruity bananas and melt in your mouth frosting.  Just the sort of celebration cake perfect for New Years!  I hope you all have a wonderful 2018!

    Vegan Banana’s Foster Cake 
    Makes 1 6 inch 2 layer cake

    Ingredients:

    2 6 inch cake pans

    Cake:

    • 1 1/2 cups Bob’s Red Mill gluten free all purpose flour
    • 1 1/2 tsp baking soda
    • 1 tsp baking powder
    • 1/2 tsp sea salt
    • 1/2 tsp cinnamon
    • 1 cup packed soft medjool dates, pitted, soaked in water for 30 minutes and 1 cup of the soaking water reserved
    • 1/4 cup pecan butter or almond butter
    • 1 Tbsp pure vanilla extract
    • 1 cup pureed organic bananas
    • 2 Tbsp apple cider vinegar


    Frosting:

    • 1 15 oz can organic full fat coconut milk, chilled
    • 1/2 cup raw cashew butter
    • 1/3 cup maple syrup
    • 1/4 tsp sea salt
    • 1/4 tsp cider vinegar
    • 1 tsp pure vanilla extract
    • 1/2 cup plus 2 Tbsp melted coconut butter (warmed to liquid)


    Caramel:

    • 1 cup pitted medjool dates, soaked for 30 minutes and drained
    • 3 Tbsp pecan butter or almond butter
    • 2 Tbsp dark rum (make sure it is vegan on Barnivore)
    • 1/3 cup filtered water (or as needed)
    • 1 tsp pure vanilla extract
    • 1/8 tsp sea salt


    For assembly:

    • 2 small bananas, sliced
    • vegan white chocolate chunks


    Directions:

    1. Preheat the oven to 375F degrees and position rack in center of oven. Line two six-inch-diameter cake pans with 2-inch-high sides with parchment paper. Coat parchment paper and pan sides lightly with oil so that the cake doesn’t stick and line the bottom of the pan with a piece of parchment fit to the pan.
    2. Whisk flour, baking powder, baking soda, sea salt and cinnamon in a large bowl to blend well.  Set aside.
    3. Place dates, reserved water, nut butter, banana puree, and vanilla extract into a blender, and blend until smooth, then whisk this blended mixture into the flour mixture until well blended. Whisk in the cider vinegar until bubbles form. Transfer cake batter to prepared pans and bake cakes until tester inserted into center comes out clean, about 30 minutes. Cool cakes completely in pan . Cut around sides of pan to loosen. Turn cakes out onto platter; peel off parchment paper.
    4. To make the frosting, combine all ingredients in a high speed blender and blend until completely smooth.  Pour into a bowl and place in the freezer until the consistency of stiffly whipped cream (about 30-45 minutes depending on how warm it has gotten.  Once it is ready place in the refrigerator until ready to assemble.
    5. To make the caramel, combine all of the ingredients in a high speed blender or food processor and process until smooth (adding a little more water if it seems too thick).  Set aside until you are ready to assemble the cake
    6. To assemble, place one cake layer on a plate, and spread about 1/2 cup frosting over it.  Spread a layer of caramel over that (leaving a 1 inch boarder around it from the sides of the cake), cover with a layer of bananas. Place the other cake layer over that, then spread the remaining frosting on the top and down the sides of the cake.
    7. Thin out the remaining caramel slightly with a little water (you can always add more if needed).  Spoon the remaining  caramel over the cake allowing it to drip down the sides. Decorate the top of the cake with banana slices and white chocolate.

    ***if you would like a 2 layer 9 inch cake, double this entire recipe and bake in two 9 inch cake pans.  It will take longer to bake, about 50 minutes to 1 hour.

  • Top 15 Recipes of 2017 From Fragrant Vanilla Cake

    Top 15 Recipes of 2017 From Fragrant Vanilla Cake

    The year is coming to a close, and now is the time that I am reflecting on all of the memories of the past year.  Mostly good ones thank goodness.  Like all of the recipes I have made.  I like to go back and scroll through them and remember what occasion they were for, or who I shared the end result with.  Like my Snickers Birthday pie that I enjoyed back in July with my family, or the Peanut Butter Love Cake that was one of the best cakes I have ever made.  Even the Sweet Potato Lasagna, that was made just last week for Christmas, but one of my all time favorite savory recipes now.  I have compiled a list of my best recipes from the past year.  Not necessarily the ones that got the most page views, there are a few of those here.  But I wanted to share the ones I thought were the best with you, in case you didn’t see them the first time around because of Facebook algorithms and whatnot.  These are the things that wowed me, and that I would want to make again and again.  The ones I was really proud of.  So, I hope that you enjoy them too. Happy New Year, and I hope that 2018 is awesome!  I plan on making many more delicious recipes, so as always stay tuned!

    Vegan Sweet Potato Lasagna

    I made this lasagna for Christmas Eve dinner, and it was one of the best savory things I have ever eaten honestly.  I would pay $20 for a large piece in a restaurant, and that says a lot.  It tastes just like traditional meat and cheese lasagna, but the sweet potatoes make it even more delicious.  I have a feeling you could serve this to omnivores without telling them it is vegan and they would be none the wiser until you told them.  This is the sort of thing you serve to win people over and wow them.

    Cinnamon Sugar Yam Fries with “Cream Cheese” Dipping Sauce

    I make yam fries all of the time at the deli I work in, and they are my favorite thing in the world.  I say, yam fries are my bacon, because I eat them like they are.  So, one day when I got home, I decided that I needed to make some sweet and salty ones.  I made them with cinnamon and coconut sugar and they were so good!  But I made them even better with a sweet “cream cheese” dipping sauce.  It was one of the best snacks ever!

    Creamy Vegan Mac and Cheese (GF)

    If you are craving classic mac and cheese, like the kind you had from a box as a kid, that you loved and begged for every night…this comes close to it, but tastes better in my opinion.  It is the classic comfort food, and the perfect thing to serve to picky eaters.  No need to even tell them it is vegan, I shared some with my family and they loved it. Bonus, it happens to be gluten free too!

    Vegan Strawberry Shortcake Poke Cake

    I have always loved the idea of a poke cake, but what I didn’t love was that most of them come from boxed cake mixes and come with loads of sugar.  So I made my own completely home made vegan version!  It is like a giant strawberry shortcake, but with fluffy white delicious cake instead of biscuits.  This is the essential Summer dessert.  But of course, you don’t have to wait until Summer to make it if you have frozen strawberries on hand.

    Vegan Snickers Pie

    If you thought you loved the classic candy bar as a child, then you have to try this.  You will love it even more. It has all of the same flavors, the chocolate, caramel, and peanuts all in a creamy pie the consistency of cheesecake in a crunchy chocolate crust.  It was sooo good. This was actually my Birthday dessert instead of cake this year.

    Vegan Dark Chocolate Cake with Peanut Butter Caramel

    Think turtle cake but with peanuts instead of pecans.  This cake is something I could eat like 3 pieces of in one sitting.  Chocolate and peanut butter is one of my all time favorite combinations, and even better when caramel joins the show. I think this would make the perfect Birthday cake honestly since it is worthy of being served at a celebration, but don’t wait until your Birthday to make it.

    Vegan Italian Lentil Walnut “Meatballs”

    These were a recipe request from my Mom, who has always loved meatballs, but wanted a healthier non-meat version.  They taste just like the real thing, and they are delicious served over pasta. You won’t even miss the meat!

    Vegan Turtle Ice Cream Cake

    If you are looking for a showstopping ice cream cake, this is it.  It has rich chocolate ice cream, gooey caramel and fudge and crunchy pecans.  You will not even know it is vegan because it is just as creamy and delicious as regular ice cream.  Also, it is 100x better than the Dairy Queen ice cream cakes that I used to enjoy as a kid.

    Vegan Unicorn White Chocolates 

    Everybody was making everything unicorn this year and I loved it.  I mean, unicorns were one of my favorite things ever growing up!  What’s not to love about magical horses with horns and rainbows?!  So, I decided to make some unicorn white chocolate and it was so cute!  It was actually way healthier than some of the unicorn stuff like those Starbucks lattes too, because this doesn’t contain refined sugars. If you love unicorn stuff too, you have to make this.

    Vegan Chocolate Almond Raspberry Mousse Tart

    I made this for my Mom’s Birthday this year, and it was heavenly!  The filling is rich and delicious, the sweet raspberry layer the perfect pairing with the chocolate and almond. If you are not making a cake, this is perfect for celebrating with, and it looks elegant, but is actually easy to make.

    Vegan Peanut Butter Love Cake

    It is a tie between this cake and the Dark Chocolate Cake with Peanut butter Caramel for my favorite cake this year.  As you notice they both involve peanut butter, something I can’t live without.  If you are a peanut butter fiend too, you need this in your life.  It has rich layers of peanut butter cake, peanut butter caramel, peanut butter, and peanut butter cream frosting.  This is the cake I would choose to eat in my dreams.

    Roasted Sweets and Beets Lentil Salad

    This was my favorite main dish salad this year.  It has all of my favorite things.  Savory lentils, flavorful roasted veggies, nut cheese, and healthy greens.  If you want a salad that fills you up, but also leaves you feeling good, this is perfect for you.

    Matcha White Chocolate Tiramisu Cake

    I drink matcha every day instead of coffee, so I thought why not make a matcha tiramisu cake instead of one with coffee!  I added white chocolate and even better!  This is the tea drinker’s tiramisu, and it is not only beautiful, but super delicious as well.  I have a feeling those who don’t like tea would even enjoy it.

    Vegan Key Lime Cheesecake

    Two favorite desserts of mine combined, this cheesecake has the rich, crave worthy texture of cheesecake, and the sweet tart flavor of key lime pie.  So, you don’t have to choose, you can enjoy them both!  It is really easy to make, and limes are in season this time of the year, so why not make one for your family?

    Vegan Broccoli “Bacon” Salad

    This veganized version of a classic salad is the perfect thing to bring to a potluck.  The coconut bacon is a game changer, honestly the closest thing to bacon I have tried.  This salad still has the raisins, sunflower seeds, and of course the bacon of the classic salad with a creamy sweet dressing.  But no mayonnaise in sight, this creamy dressing is completely vegan. I never liked the non-vegan version of this salad, but I love this one!

  • Vegan Southwest Shepherd’s Pie Chili

    Vegan Southwest Shepherd’s Pie Chili

    I made my Sweet Potato lasagna the other day, but I have had another sweet potato recipe floating around in my head for a while that I wanted to try out. It is definitely comfort food type weather here, so warming food is needed so badly.  I have been wanting to make a sweet potato topped shepherd’s pie for a while.  I usually just make the classic shepherd’s pie with gravy, loads of veggies, lentils instead of the meat and mashed potatoes on top, very Minnesotan and not spicy at all.  But I have been dreaming of a version with a spicy chili on the bottom and mashed sweet potatoes on top.  I figured I would make a batch and share it with Eric because he loves chili, beans, and anything spicy.  I actually was going to make this for New Years eve, because we are staying in and staying warm this year.  So, I thought it would be a good test run.

    I made a simple chili for the bottom portion, it cooked up quickly, and I added plenty of spice in the form of chili powder, cumin, cinnamon, chipotle powder and smoked Spanish paprika. It smelled wonderful while cooking.  It cooked up quickly as well, because I already had some cooked black beans on hand.  I don’t buy canned beans because it is more wasteful and I like the texture of my own home cooked ones better plus they are cheaper when I buy dried.  I them in the bulk section at the store, then I just cook up a big batch, then freeze them in containers, pulling them out when I need them. Which works perfect for things like this.  The chili tasted delicious, and of course you could eat it just like that if you didn’t want to mess with the topping, but this was to be a beautiful shepherd’s pie.  So I baked up some sweet potatoes to top it off.  Although you could steam them if you were in a hurry, they taste so much better roasted, all of the flavor intensified and caramelized into them.

    I like to add a little lime juice and sea salt, a trick I learned from a vegetarian cookbook a long time ago when I was learning to cook.  It is sooo good, even just as a side dish.  But even better when topping spicy chili like this!  It turned out so good!  The perfect savory dinner for a chilly night!  The best part is, this was easier and faster to make then the usual shepherd’s pie and that is always a win!  I hope you are all staying warm this Winter!

    Vegan Southwest Shepherd’s Pie Chili
    Serves 2-4


    Ingredients:

    • 2 large sweet potatoes or yams, cut in half lengthwise
    • 2 Tbsp lime juice
    • 1/4 tsp sea salt or to taste


    Chili:

    • 1 small onion, diced
    • 1 carrot, cut in half  lengthwise and sliced
    • 1 stalk celery, sliced
    • 2 garlic cloves, minced
    • 3 cups diced tomatoes (canned are fine)
    • 1 Tbsp chili powder
    • 2 tsp ground cumin
    • 1/4 tsp chipotle powder (or 1/2 if you really want it spicy)
    • 1/2 tsp cinnamon
    • 1 Tbsp Spanish paprika
    • 1/2 tsp sea salt or to taste
    • 1 1/2 cups cooked black beans


    Instructions:

    1. Preheat the oven to 400F degrees, and place the sweet potatoes cut side down on an baking sheet lined with parchment.  Bake until tender, about 45 minutes to 1 hour. Let cool until you can handle them to take the skin off. Place the flesh in a bowl, and add the lime and sea salt.  Mash together until smooth.  Set aside.
    2. Meanwhile, in a pot, combine all ingredients but the beans.  Bring to a boil, and lower to a simmer.  Cook on low heat for about 20 minutes or until the veggies are getting tender. Add the beans, and cook for about 10 minutes more until they soak up the flavor.  Once everything is cooked, remove from heat, and spoon into a casserole dish, or two smaller ones.
    3. Spoon the sweet potatoes over the top of the chili, place in the oven and bake for about 10-15 minutes at 400F degrees until bubbling.
    4. Remove from the oven, let cool for about 10 minutes, and enjoy!


  • Matcha Mint Chocolate Chip Energy Bites

    Matcha Mint Chocolate Chip Energy Bites

    It is in the single digits here in Minnesota.  When I went to yesterday morning it was -5F degrees.  Which kind of feels like a shock right now because it has been in the 30s and 20s lately and that feels pretty warm compared to this.  I like to go outside and soak up the sun, but that is kind of hard for me right now since no matter what I wear the cold seems to find it’s way in.  I would run in this weather because at least I am working up a sweat (kind of), but walking is hard because I just don’t ever get warm.  I have become wimpier I have decided the older I am, because when I was in high school, I spent every day of the Winter outside pretty much for Nordic skiing practice even when it was below zero.  Not so much now.  I am kind of hibernating, and I know I should be stronger as a Minnesotan but oh well.  I am finding plenty of things to do indoors though, and at least I can still use my treadmill and bike so I don’t go stir crazy.  I have been making delicious things in my kitchen as well, some more time consuming, like the Sweet Potato Lasagna I made for Christmas, and some super simple, like the Matcha Mint Chocolate Chip Cookie Energy Bites I made last night.  I am obsessed with matcha lately.  It is not just for drinking (although I do drink it daily), it is awesome in sweet applications.

    I have a container of energy bites on hand at all times.  Although they are a good snack, and pack plenty of energy, they are mostly eaten as dessert.  Because they taste just like bites of cookies, but are way better for you.  I always include some sort of protein powder, some nut butter, and plenty of healthy seeds.  For these ones I used almond butter because it goes well with matcha, and a bit of coconut butter to firm them up.  I sweetened them with dates, and it was just enough to make it taste like the brown sugar in cookies. I added in hemp and chia seeds for some heart healthy omega 3 oils, and lastly some refreshing peppermint.  It was heavenly just like that, but there was one last thing I needed to add, some chocolate chips.

    Dark chocolate vegan chocolate chips of course.  I rolled them into balls, chilled them and voila!  Deliciousness.  These are relatively quick and painless to make. They are sweet, minty, crave worthy and delicious.  They taste like cookies but you don’t even need the oven. You will get some antioxidants from the green tea, fiber from the oats and seeds, omega 3 oils from the seeds, and protein from the powder and almond butter, these are a balanced snack with benefits!  If you are craving cookies but want something a little healthier give them a try!

    Matcha Mint Chocolate Chip Cookie Energy Bites

    Makes 16


    • ½ cup raw coconut butter, warmed to liquid
    • ½ cup raw almond butter
    • 1/2 cup pitted medjool dates
    • 2 Tbsp matcha powder
    • 1/2 tsp peppermint extract
    • 1 1/2 cups raw gluten free rolled oats
    • ¼ cup chia seeds
    • ¼ cup hemp seeds
    • 3 Tbsp vegan vanilla protein powder (I used Sunwarrior, but I like Sprout Living too)
    • 1/2 cup vegan dark chocolate chips


    Instructions:

    1. In a food processor, combine the coconut butter, almond butter, dates, matcha and peppermint together, and blend until smooth, then add the chia seeds, hemp seeds, and protein powder and blend again until well mixed.
    2. Add the oats and blend until mostly smooth (of course there will still be a few bits and the seeds will stay whole mostly but it is ok).
    3. Add the chocolate chips, and pulse until they are evenly distributed.
    4. Remove from the processor and squeeze and roll into balls with your hands. Set those on a parchment paper lined tray, and place in the freezer for about 30 minutes.
  • Vegan Sweet Potato Lasagna

    Vegan Sweet Potato Lasagna

    Before I went vegan, I used to like to make lasagna for Christmas.  I would make home made noodles, my own sauce, and fill it up with veggies and plenty of ricotta.  It was so good!  It was something I wished I could have all the time, but even without making your own noodles and sauce, it is kind of a long process that you should plan on taking a big chunk of your day. Well, the last time I made lasagna was back in 2010, and it actually was a vegan version oddly enough with tofu ricotta and Daiya mozzarella on top.  It was really good!  And, I totally could have made lasagna since then but I can be kind of lazy and psych myself out about making dishes that require a lot of steps.  Well this year I decided that I had to make some because I was hard core craving lasagna after seeing so many people post their yummy vegan versions on Instagram and Facebook.  I have had this idea in my head for a while to make a vegan lasagna with sweet potato slices instead of noodles.  But I have been putting it off. Well it was happening.

    I kind of made this over the course of a couple of days, because I was already roasting some other sweet potatoes in the oven the day before I assembled it, so I figured why not roast the slices?  These are kind of like sweet potato toast if you have heard of that, or that is how they appear once they are ready for lasagna.  You just roast them with some olive oil and sea salt.  The next important element to this lasagna was the filling.  It had to have lots of “cheese”.  I have been eating tofu ricotta since I was a kid, because my Mom actually made lasagna with it too and oddly enough I hated tofu as a kid but loved her lasagna.  It was all in the disguising of it.  My Mom was a genius to hide it in lasagna.  So, if you are trying to impress non-vegans and show them that tofu can be good, maybe make them some lasagna with tofu ricotta.  Mine turned out delicious!  It tasted just like cheese thanks to the add ins for flavoring.  That’s why I love tofu, it is a blank palate.

    I also wanted to include a faux “meat”, so I took a cue from my favorite vegan meatloaf recipe and used a mixture of lentils and walnuts.  Before you go thinking that sounds weird, once you add in all of the seasonings to make it taste like Italian sausage and put it in the lasagna it tastes like traditional lasagna.  For the sauce I kept it pretty simple and just make a tomato sauce with garlic and herbs.  That is how I like my pasta sauce though, simple and savory.  Lastly, it needed to be topped off with cheese.  This is where I got lazy, but it was totally ok and meant to be because I got to try a new vegan cheese I had been eyeing at work for a while. Normally I would make my own mozzarella but I bought some  Parmela Creamery mozzarella aged nut cheese.  Compared to the other brands it has way less ingredients, and not any fake ones, which is why I chose it.  And I am glad I did, it is delicious. It doesn’t melt completely but I did not mind.

    The lasagna baked up beautifully and smelled amazing.  I have missed lasagna. I admit I was a little worried that it might not come out nice, or the sweet potatoes might get too mushy but neither of those things happened.  It turned out even better than I had imagined!  It was sooo good!  It tasted like traditional lasagna with cheese and meat and all but of course no animals were harmed in the making of this.  I had a giant piece. This is the type of thing I would pay $20 in a restaurant for, and that is saying a lot because I am picky about what I spend my money on.  Good food of course is worth it though.  So, if you are looking for a really good gluten free vegan lasagna give this a try!  I have a feeling you will love it too, this is the ultimate crave worthy comfort food.  I might have to make it a Christmas tradition and make it every year!

    Vegan Sweet Potato Lasagna
    serves 6

    “Sweet potato noodles”

    • about 2 large sweet potatoes, sliced 1/4 inch thick lengthwise (so they resemble noodles, you want enough to fill 3 layers in a 9 inch square pan)
    • olive oil
    • sea salt


    Lentil walnut “meat”

    • 1 cup dried french lentils or brown lentils
    • 1 cup raw walnuts
    • 2 garlic cloves
    • 1/2 tsp sea salt or to taste
    • 1 tsp dried basil
    • 1 tsp dried oregano
    • 1/2 tsp fennel seeds
    • 2 tsp paprika


    Tofu ricotta:

    • 2 10 oz pkgs extra firm tofu
    • 1/2 cup raw cashew butter
    • 3 garlic cloves
    • 3 Tbsp nutritional yeast
    • 1/2 tsp sea salt or to taste
    • 1 Tbsp white miso


    Sauce:

    • 2 garlic cloves, minced
    • 2 tsp olive oil
    • 1 15 oz can diced tomatoes
    • 1 15 oz can tomato sauce
    • pinch red pepper flakes
    • 1 tsp dried basil
    • 1 tsp dried oregano
    • 1 Tbsp balsamic vinegar
    • 1/2 tsp sea salt or to taste


    For assembly and topping:

    • 2 handfuls of organic arugula or spinach
    • 7 oz pkg vegan mozzarella (I used Parmela Creamery)


    Instructions:

    1. To make the noodles, preheat the oven to 400F degrees, and line 2 sheet pans with parchment.
    2. Brush the sweet potato pieces with olive oil on both sides, and spread out on the sheet pan.  Sprinkle with sea salt, and place in the oven.  Bake for about 40 minutes or until almost tender and starting to brown. Remove from the oven and let cool.
    3. Meanwhile, to make the lentil walnut meat, combine the lentils and enough water to cover them by 3 inches in a saucepan, and bring to a simmer.  Cook until the lentils are tender, about 40 minutes.  Drain very well.  Place the lentils in a food processor along with all other “meat” ingredients and pulse until well blended but still chunky.  Set aside.
    4. Rinse out the food processor and drain well.
    5. To make the tofu ricotta, combine all ingredients in the food processor and process until smooth.  Set aside.
    6. To make the sauce, in a saucepan over medium heat, combine the garlic and olive oil and sautee for a minute until fragrant.  Add the tomatoes, and all other remaining ingredients and allow to simmer for about 10 minutes.  Remove from heat.
    7. To assemble the lasagna, spoon a little of the sauce into the bottom of a greased 9×9 inch square pan.  Then cover with a layer of the sweet potato “noodles”.  Next, half of the lentil “meat” over it, then spread half the ricotta over that.  Sprinkle with arugula leaves. Put a little more sauce over that, then the rest of the “meat”, ricotta, and arugula.  Top with another layer of noodles, then the remaining sauce, and lastly sprinkle the nut cheese over the top.
    8. Place in the 400F degree oven, and bake for about 30 minutes covered with greased foil, then uncover and bake another 15 minutes.  Remove from the oven and let set for about 15-20 minutes before serving.
    9. Enjoy!