Author: Amy Lyons O’Neil

  • Vegan Coconut Almond Macaroons

    Vegan Coconut Almond Macaroons

    Macaroons

    A few weeks ago, I was experimenting with making a fluffy almond cake with whipped aquafaba, and it was going pretty well.  The batter tasted amazing, and I had popped it in the oven and it was smelling amazing…when suddenly my oven had a malfunction and I started to smell it burning.  It had cranked itself up to high heat and burnt my cake, leaving it undercooked in the middle.  My oven had broken, and I ruined my cake.  I was so upset.  I am one of those people who hates to waste ingredients, and yes sometimes I cry when things like this happen.  I am still without an oven a couple weeks later, and I have been using Eric’s when I want to make something, but I don’t always want to go out…so my dehydrator has been getting a little more use.

    Macaroons 2

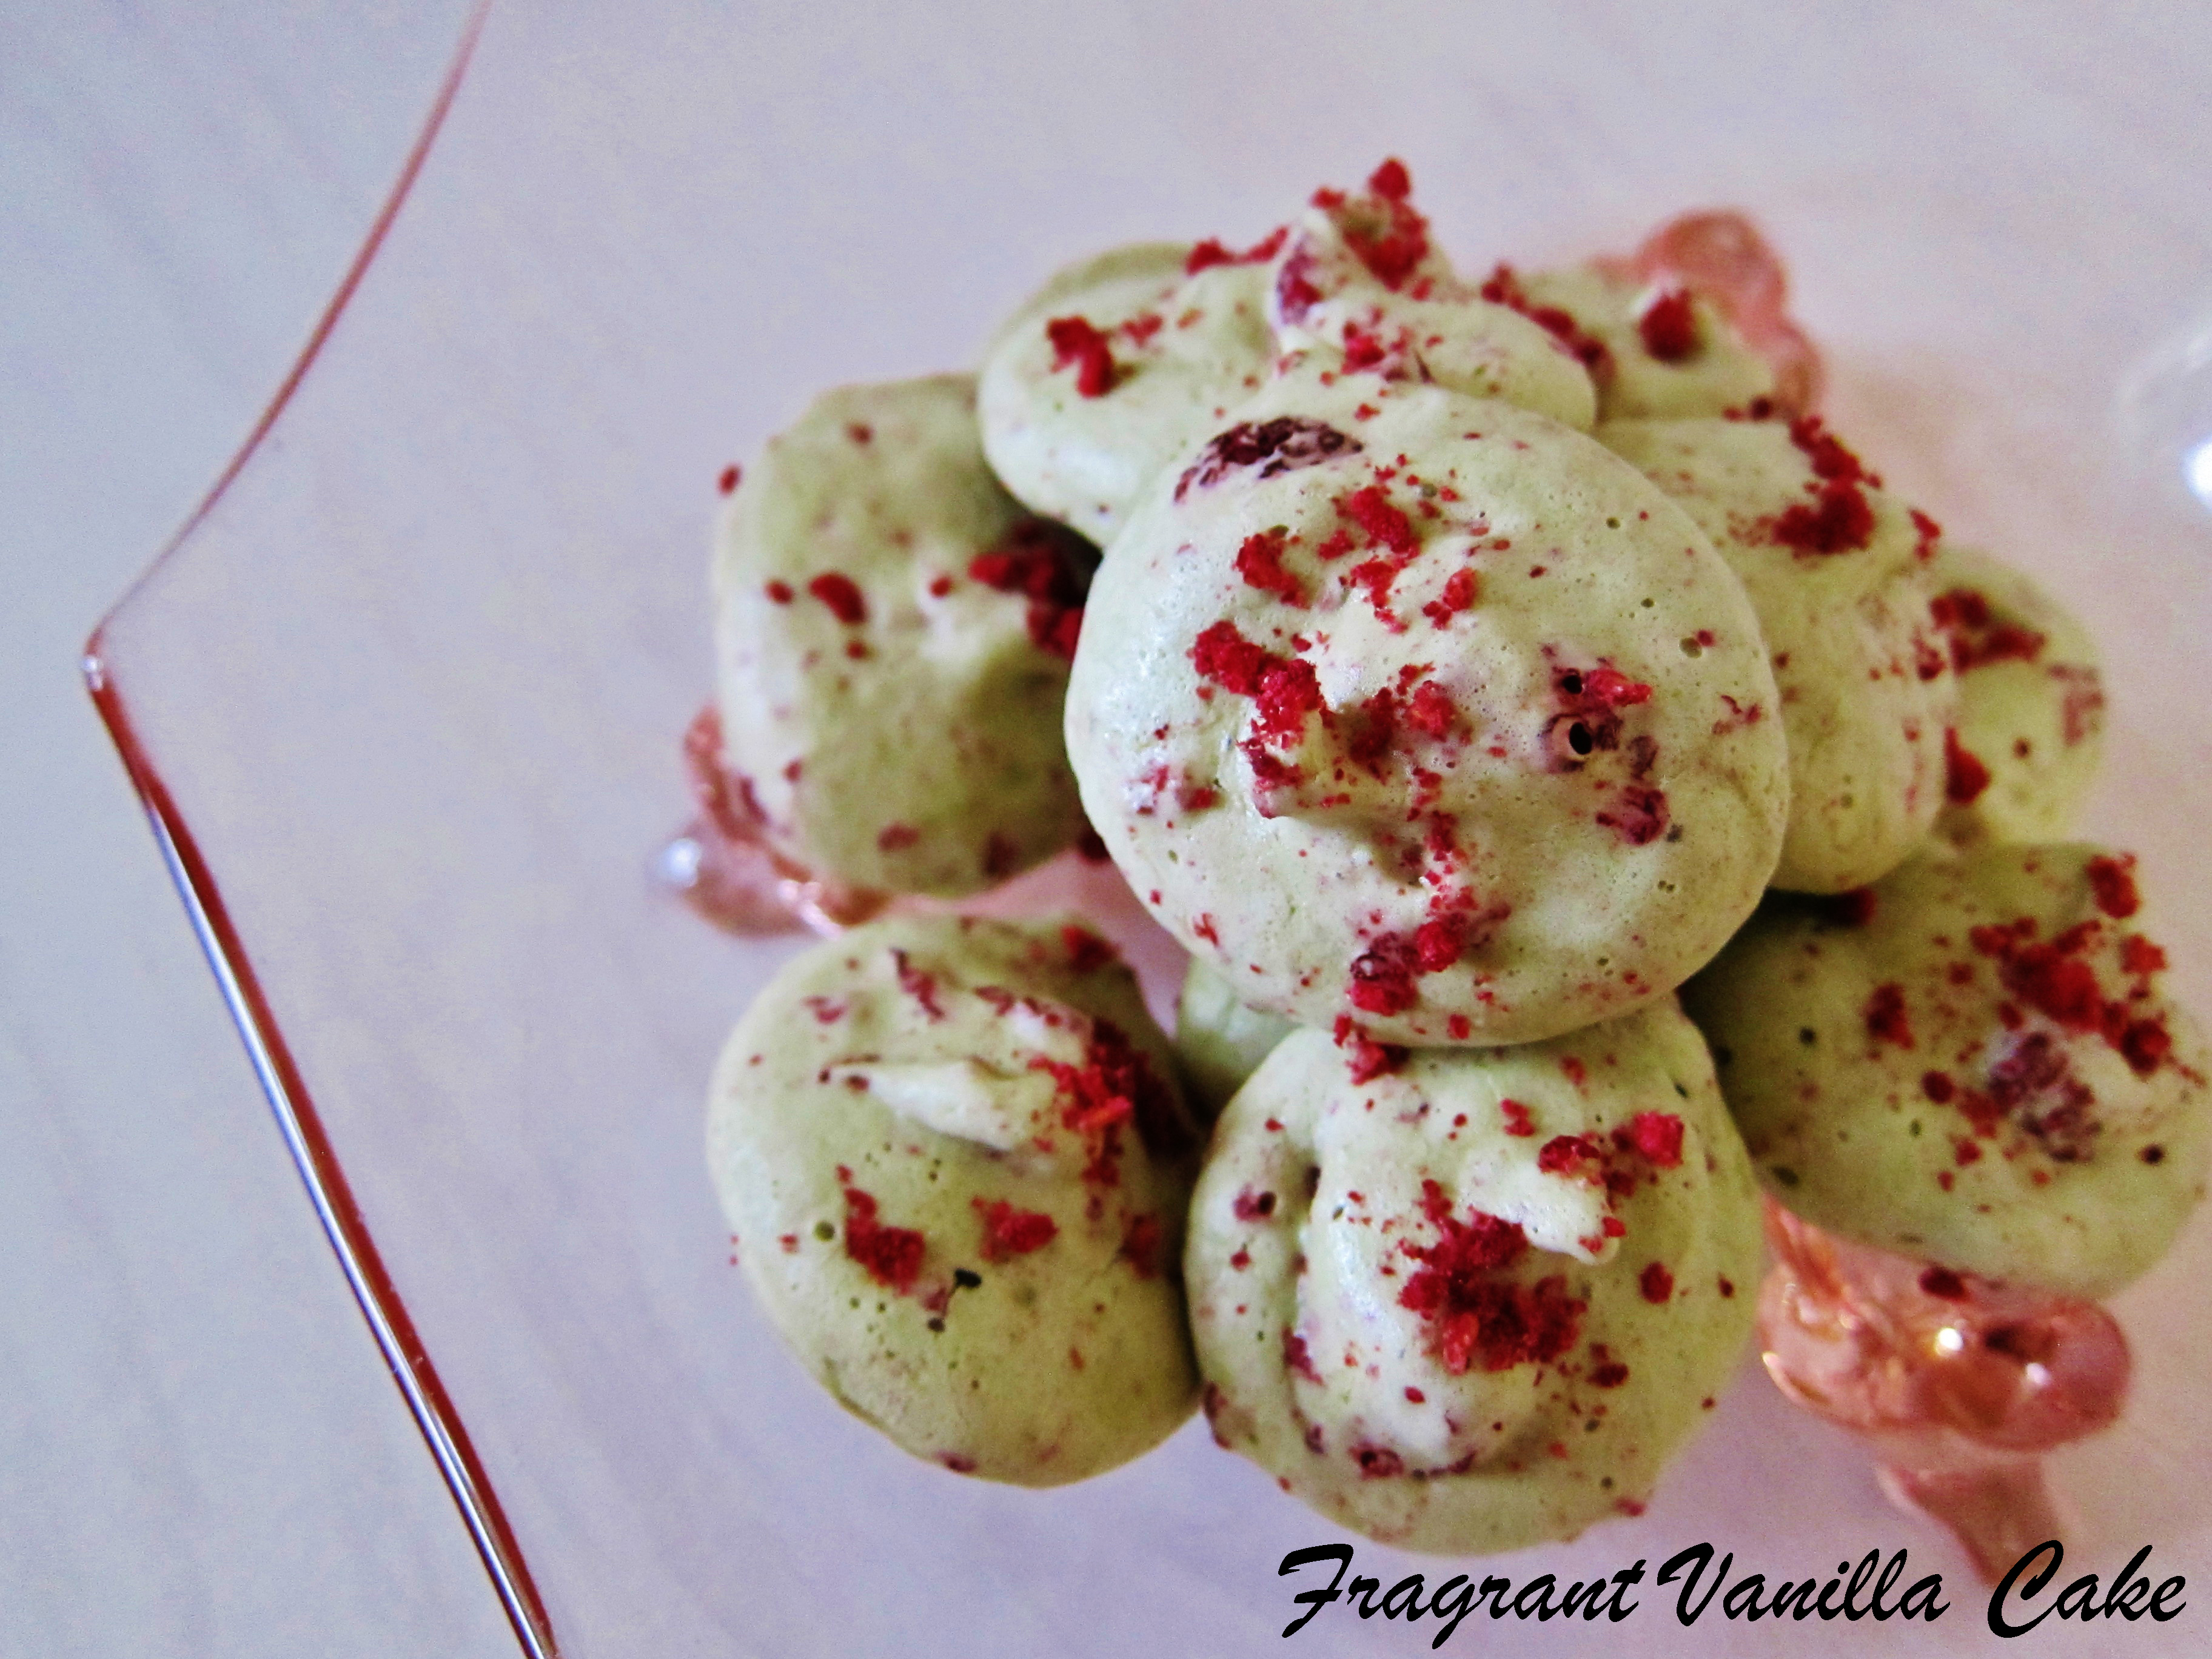
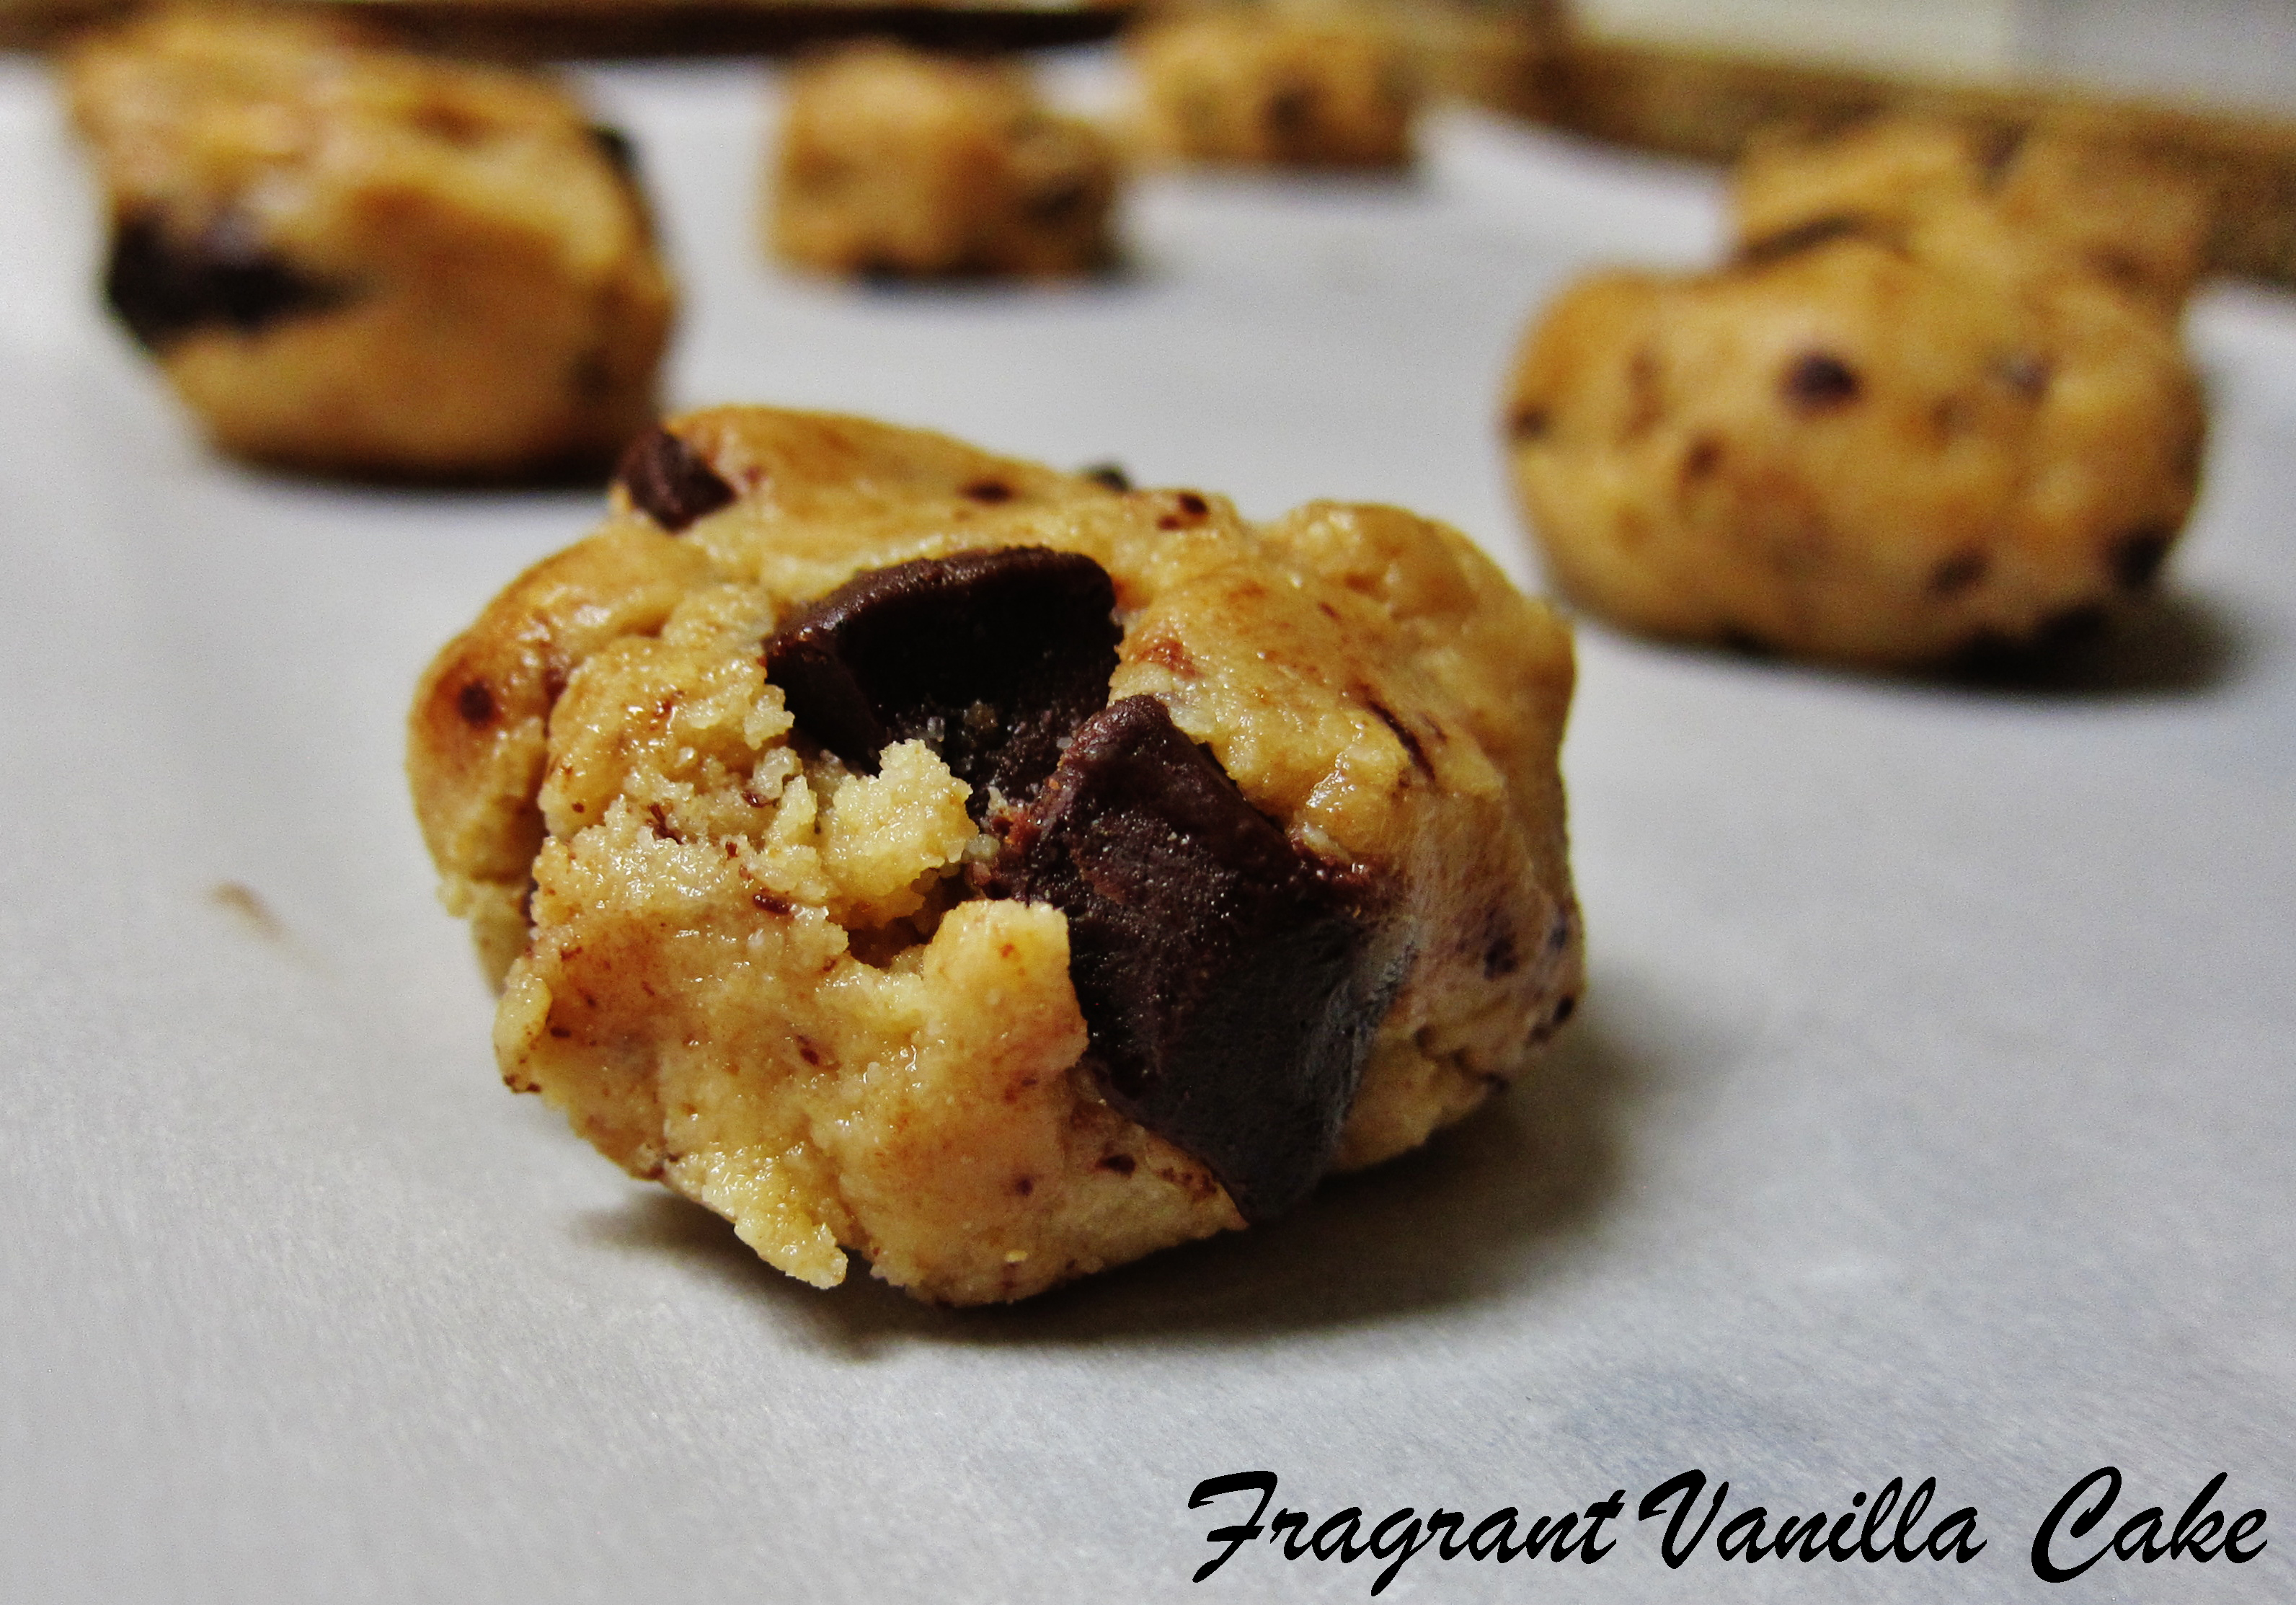
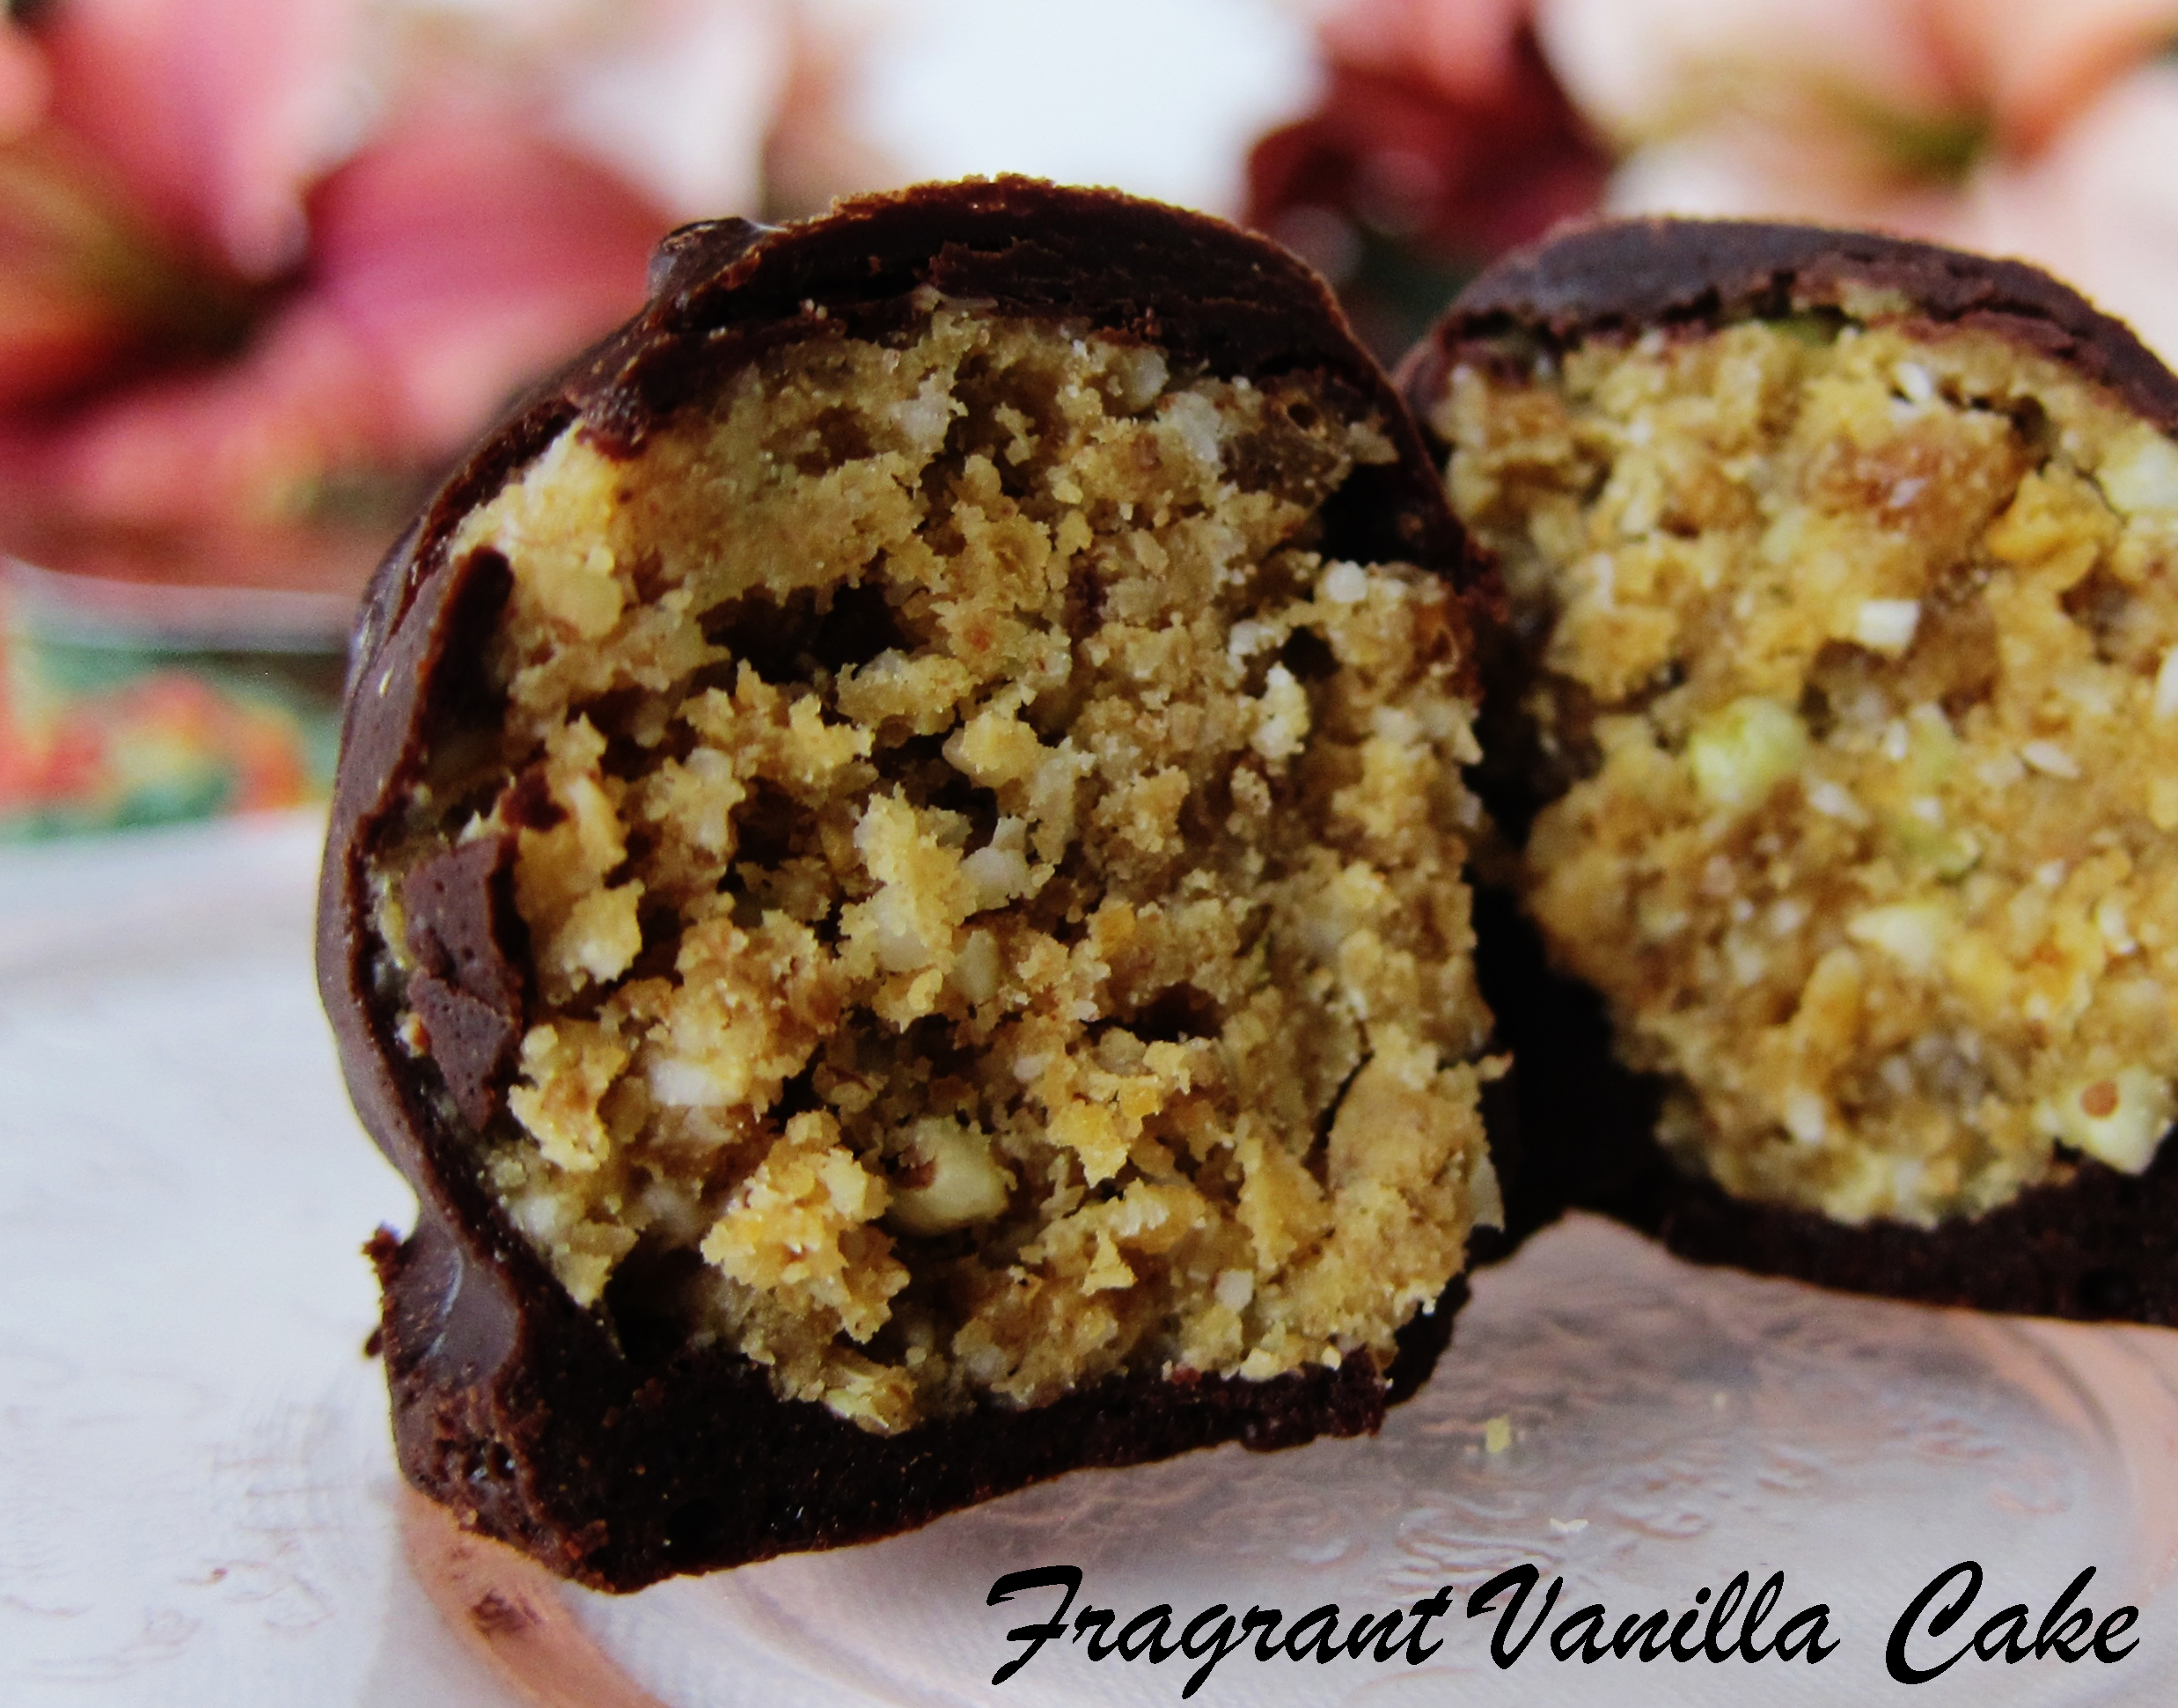
    That almond cake batter had tasted so good that I wanted to make something else with that flavor and similar ingredients.  I thought about almond cookies which could be dehydrated, and I started playing around.  I made an aquafaba mixture similar to my marshmallow fluff, mixed in almond meal, and it tasted amazing, like that cake.  But…then decided shredded coconut would be even better! I tasted it and it was like coconut macaroons!  So, I decided that these would be macaroons.  Yes, I know crazy random ingredient adding process but bear with me here, they turned out better than I imagined!

    Macaroons 3

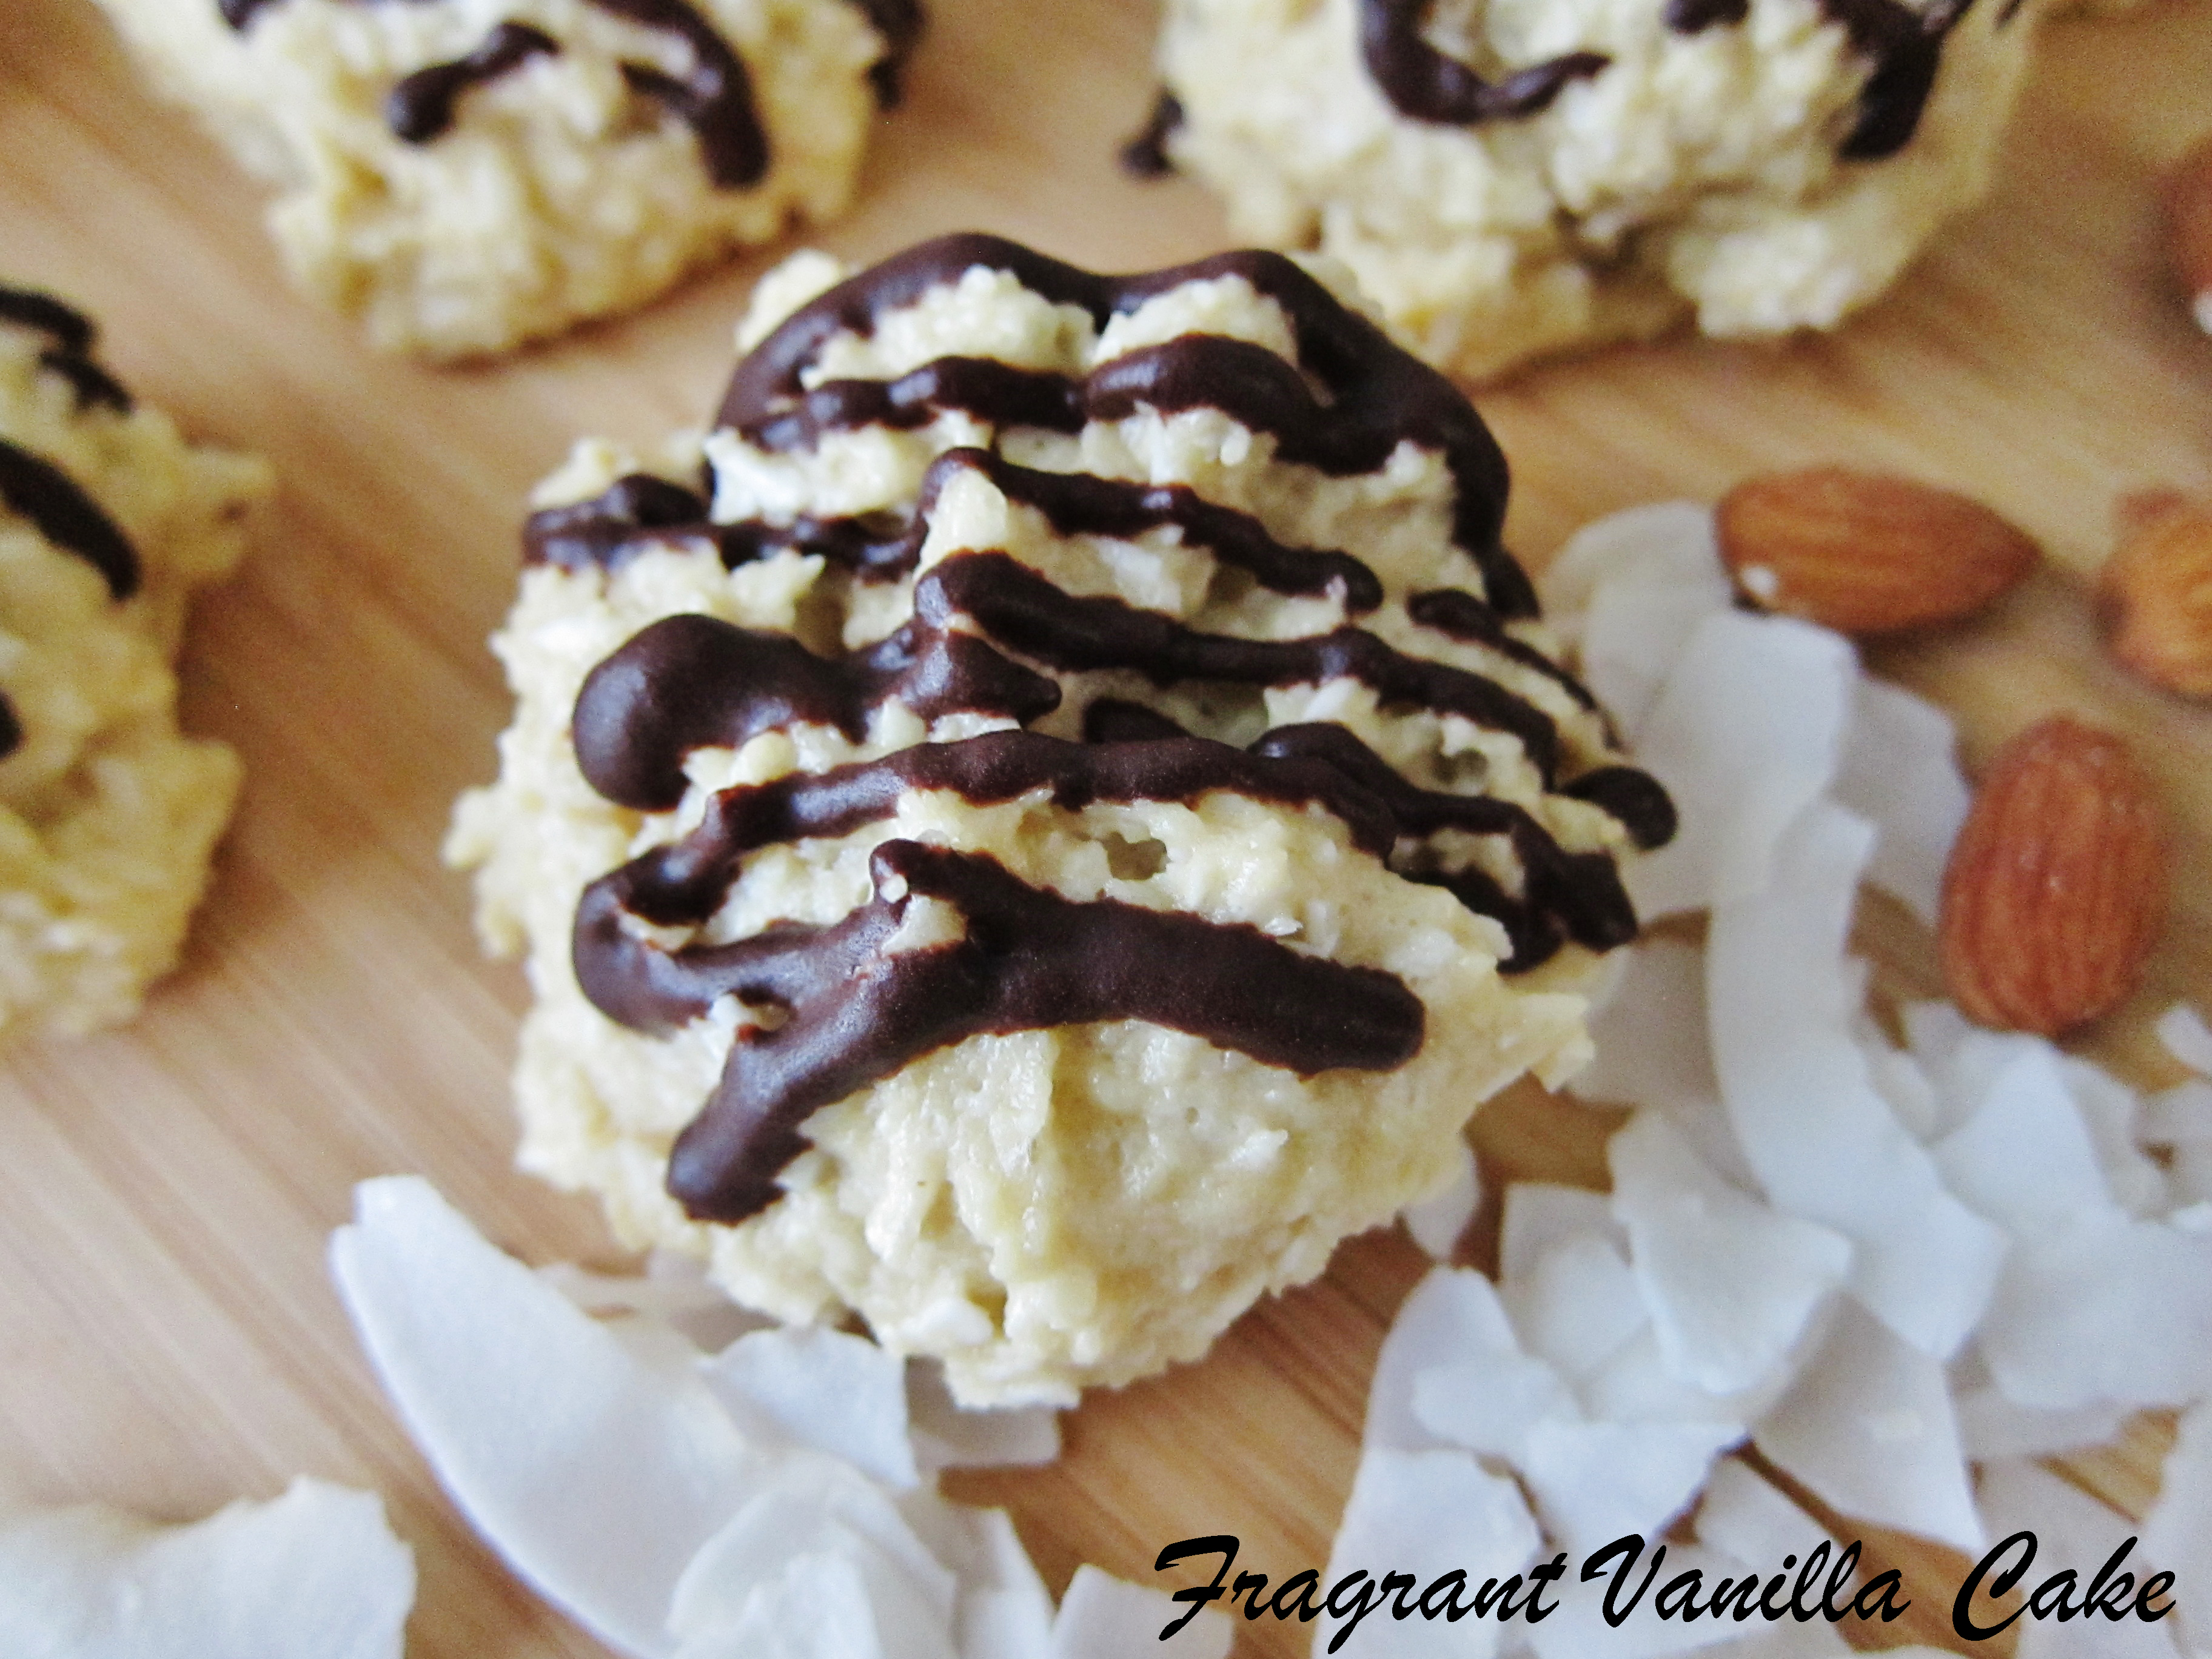
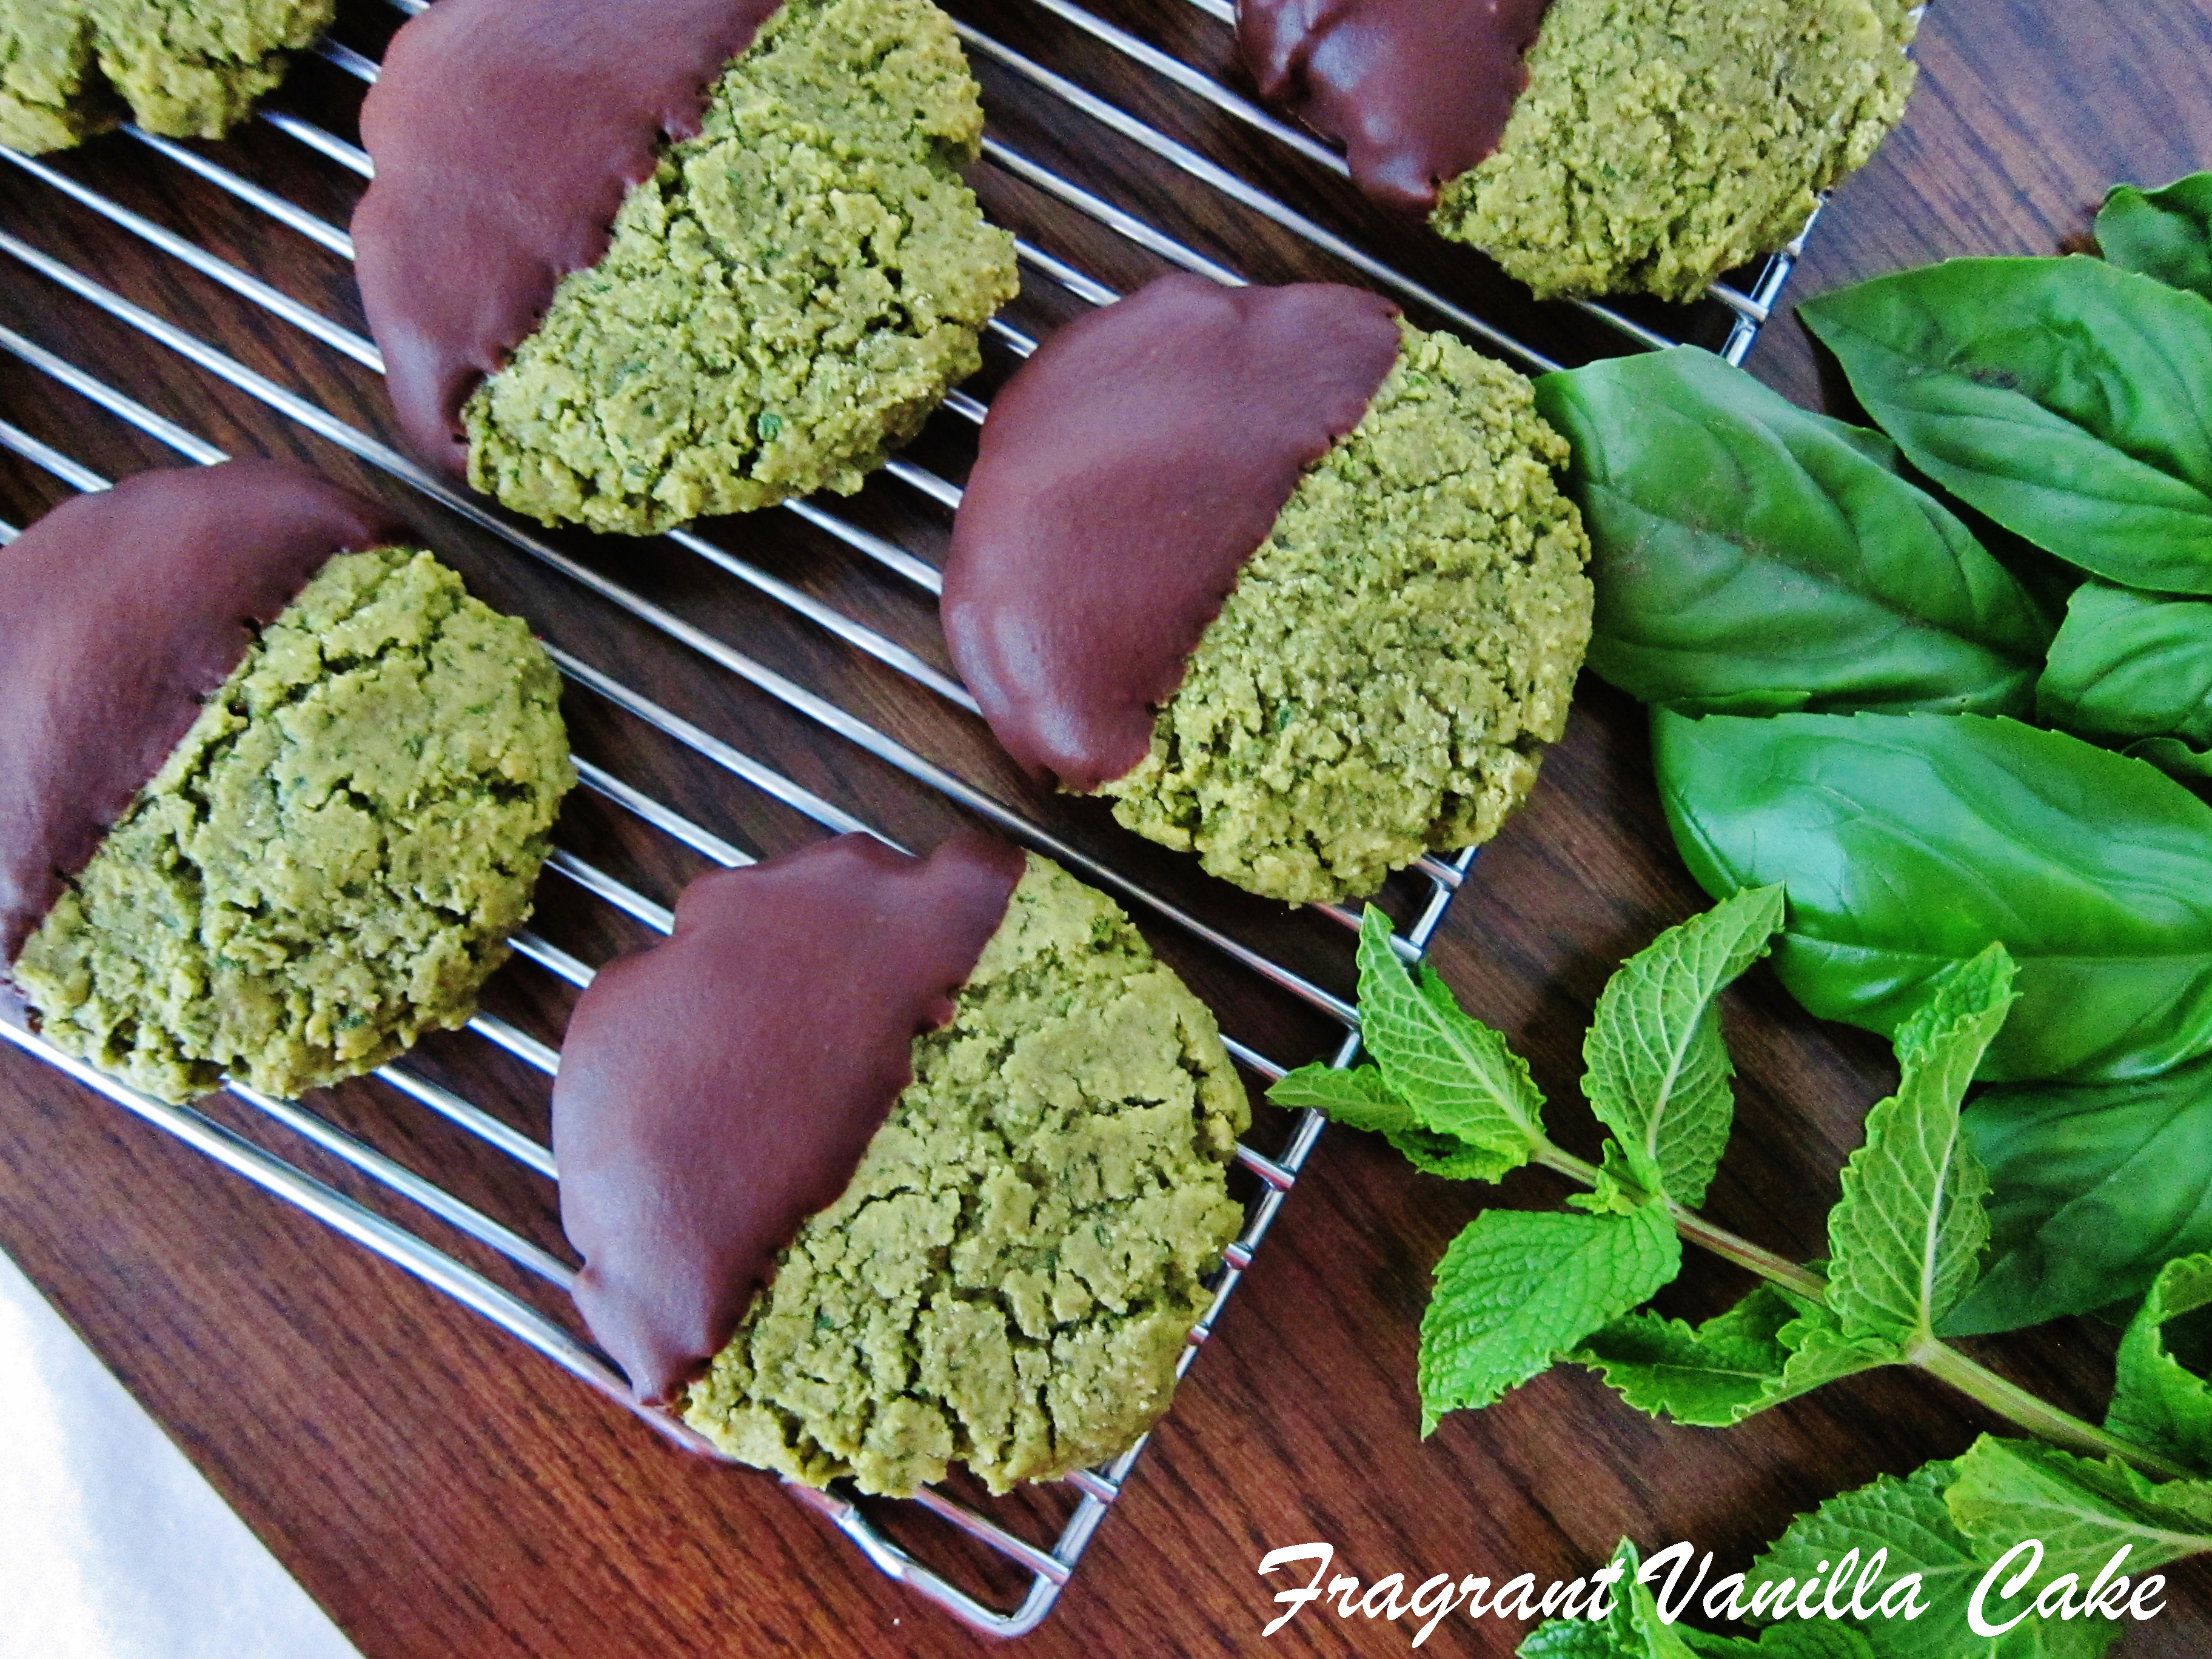
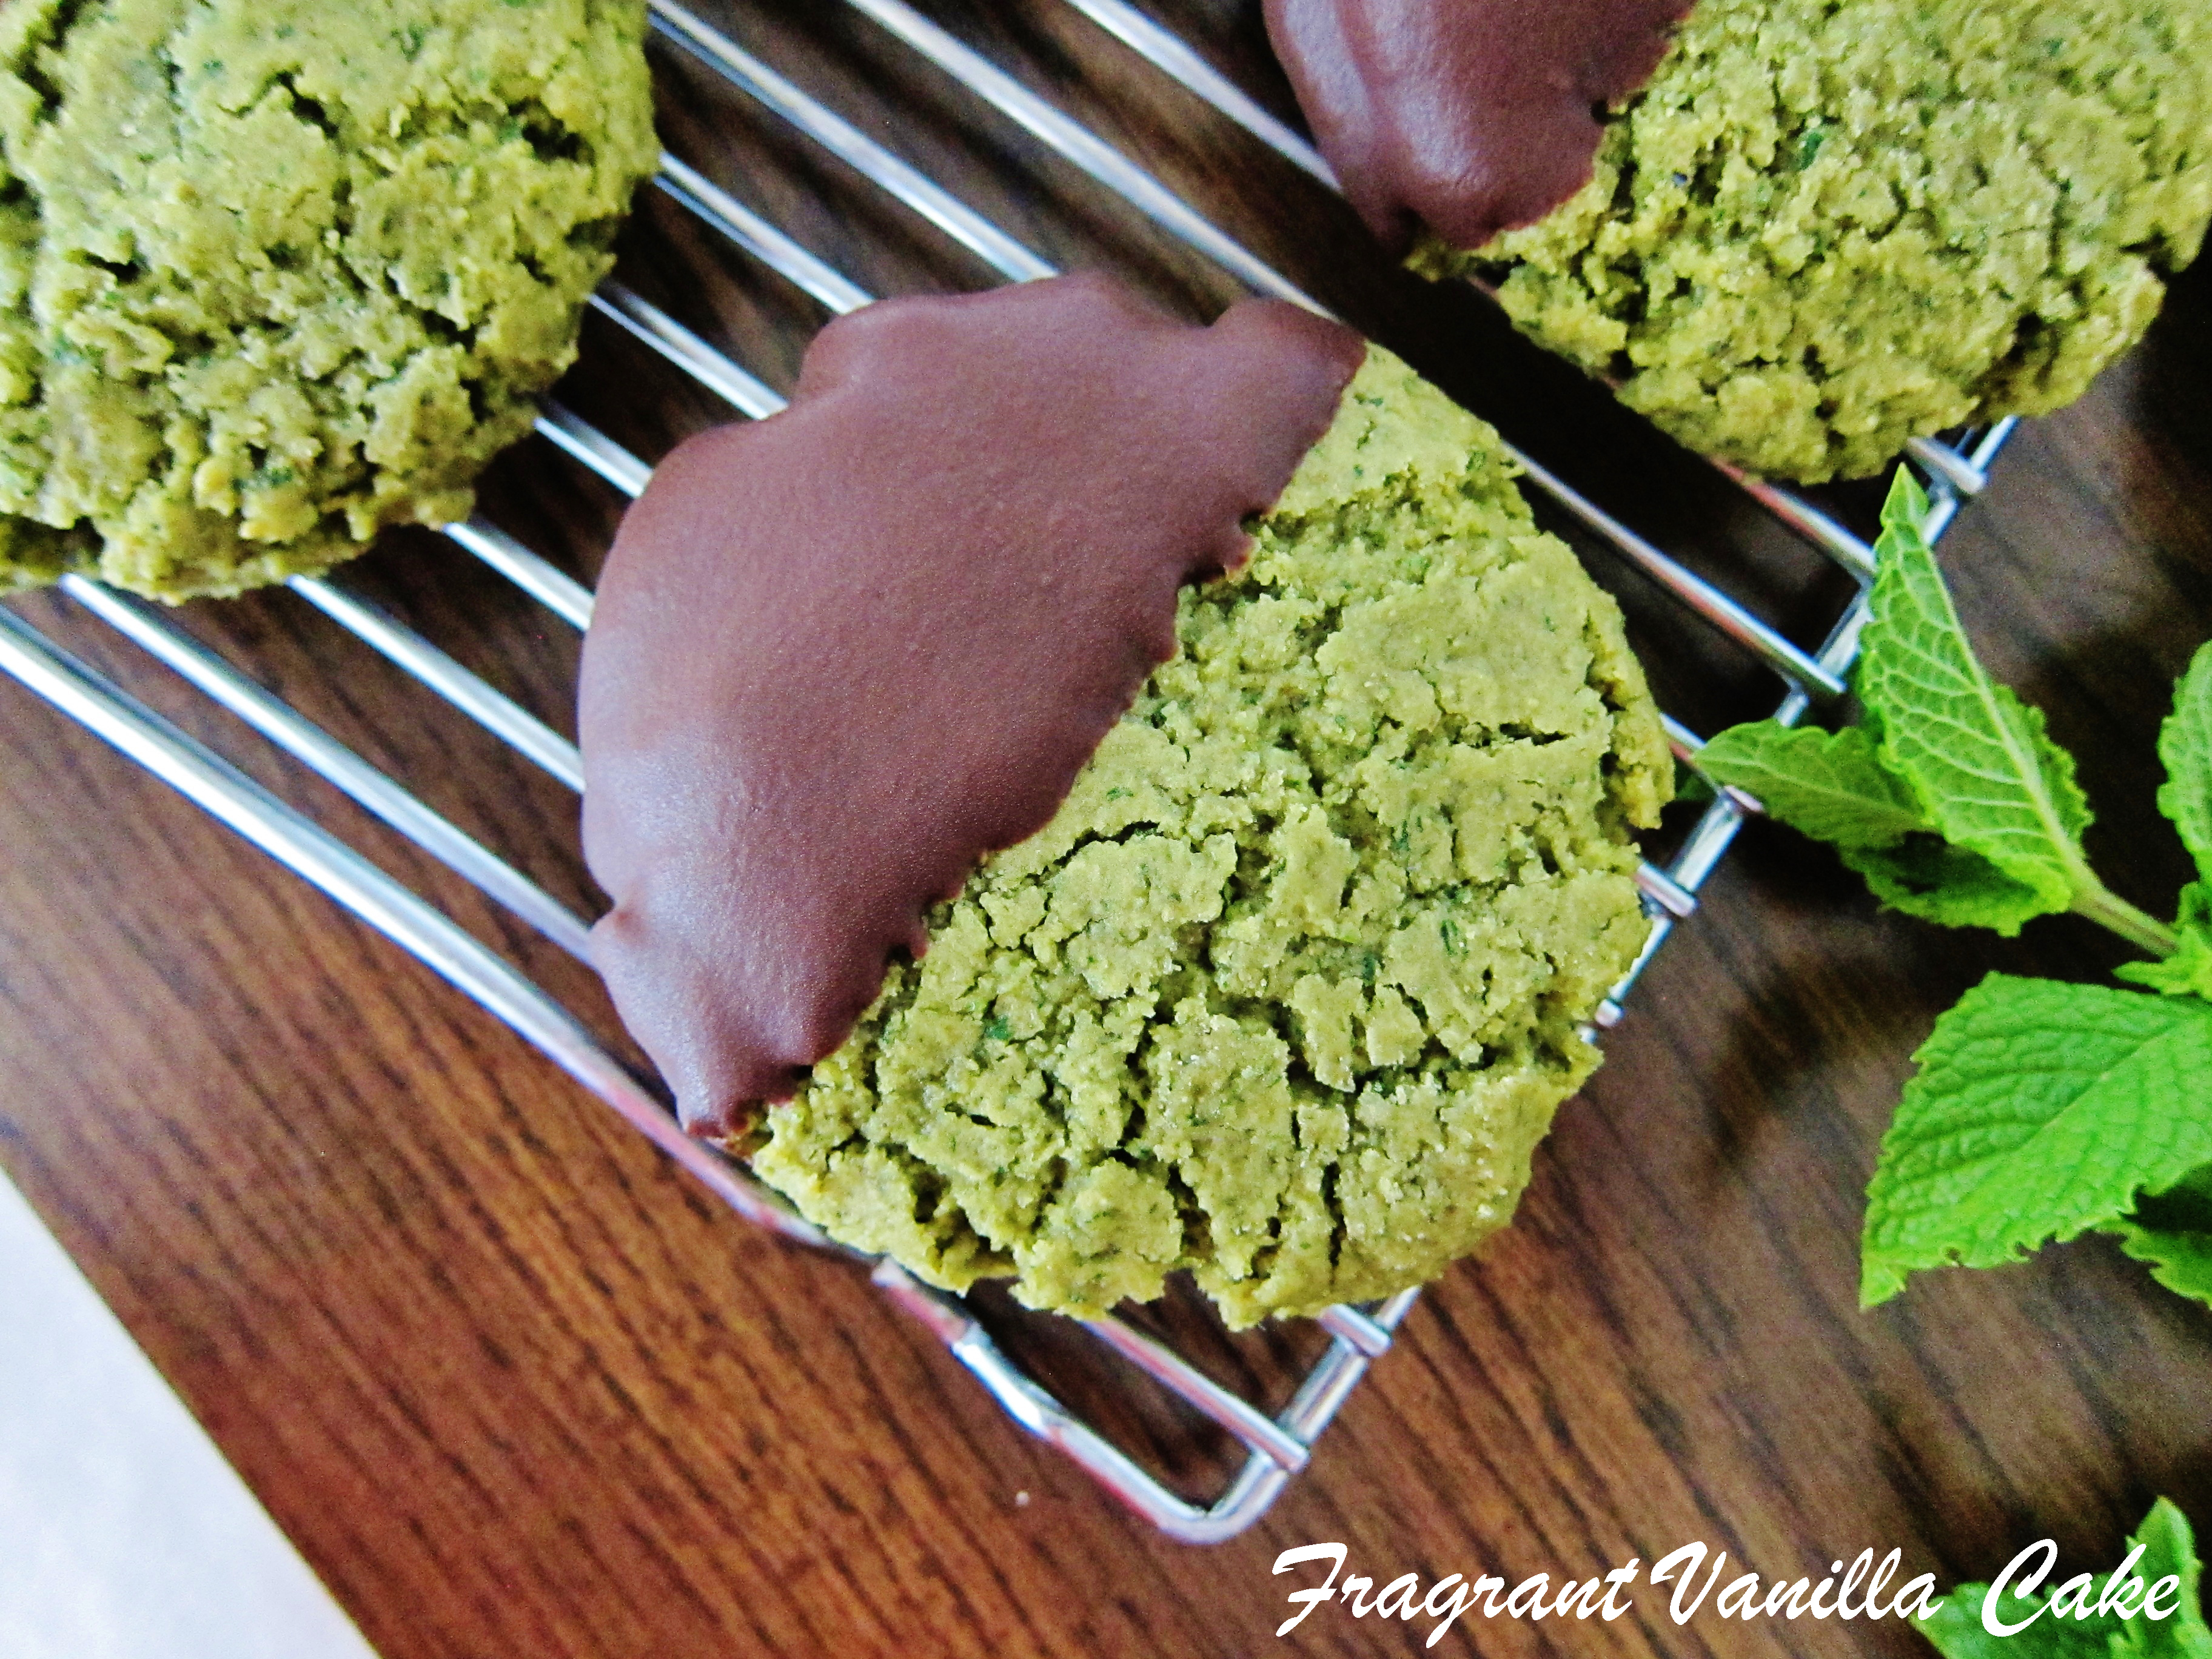
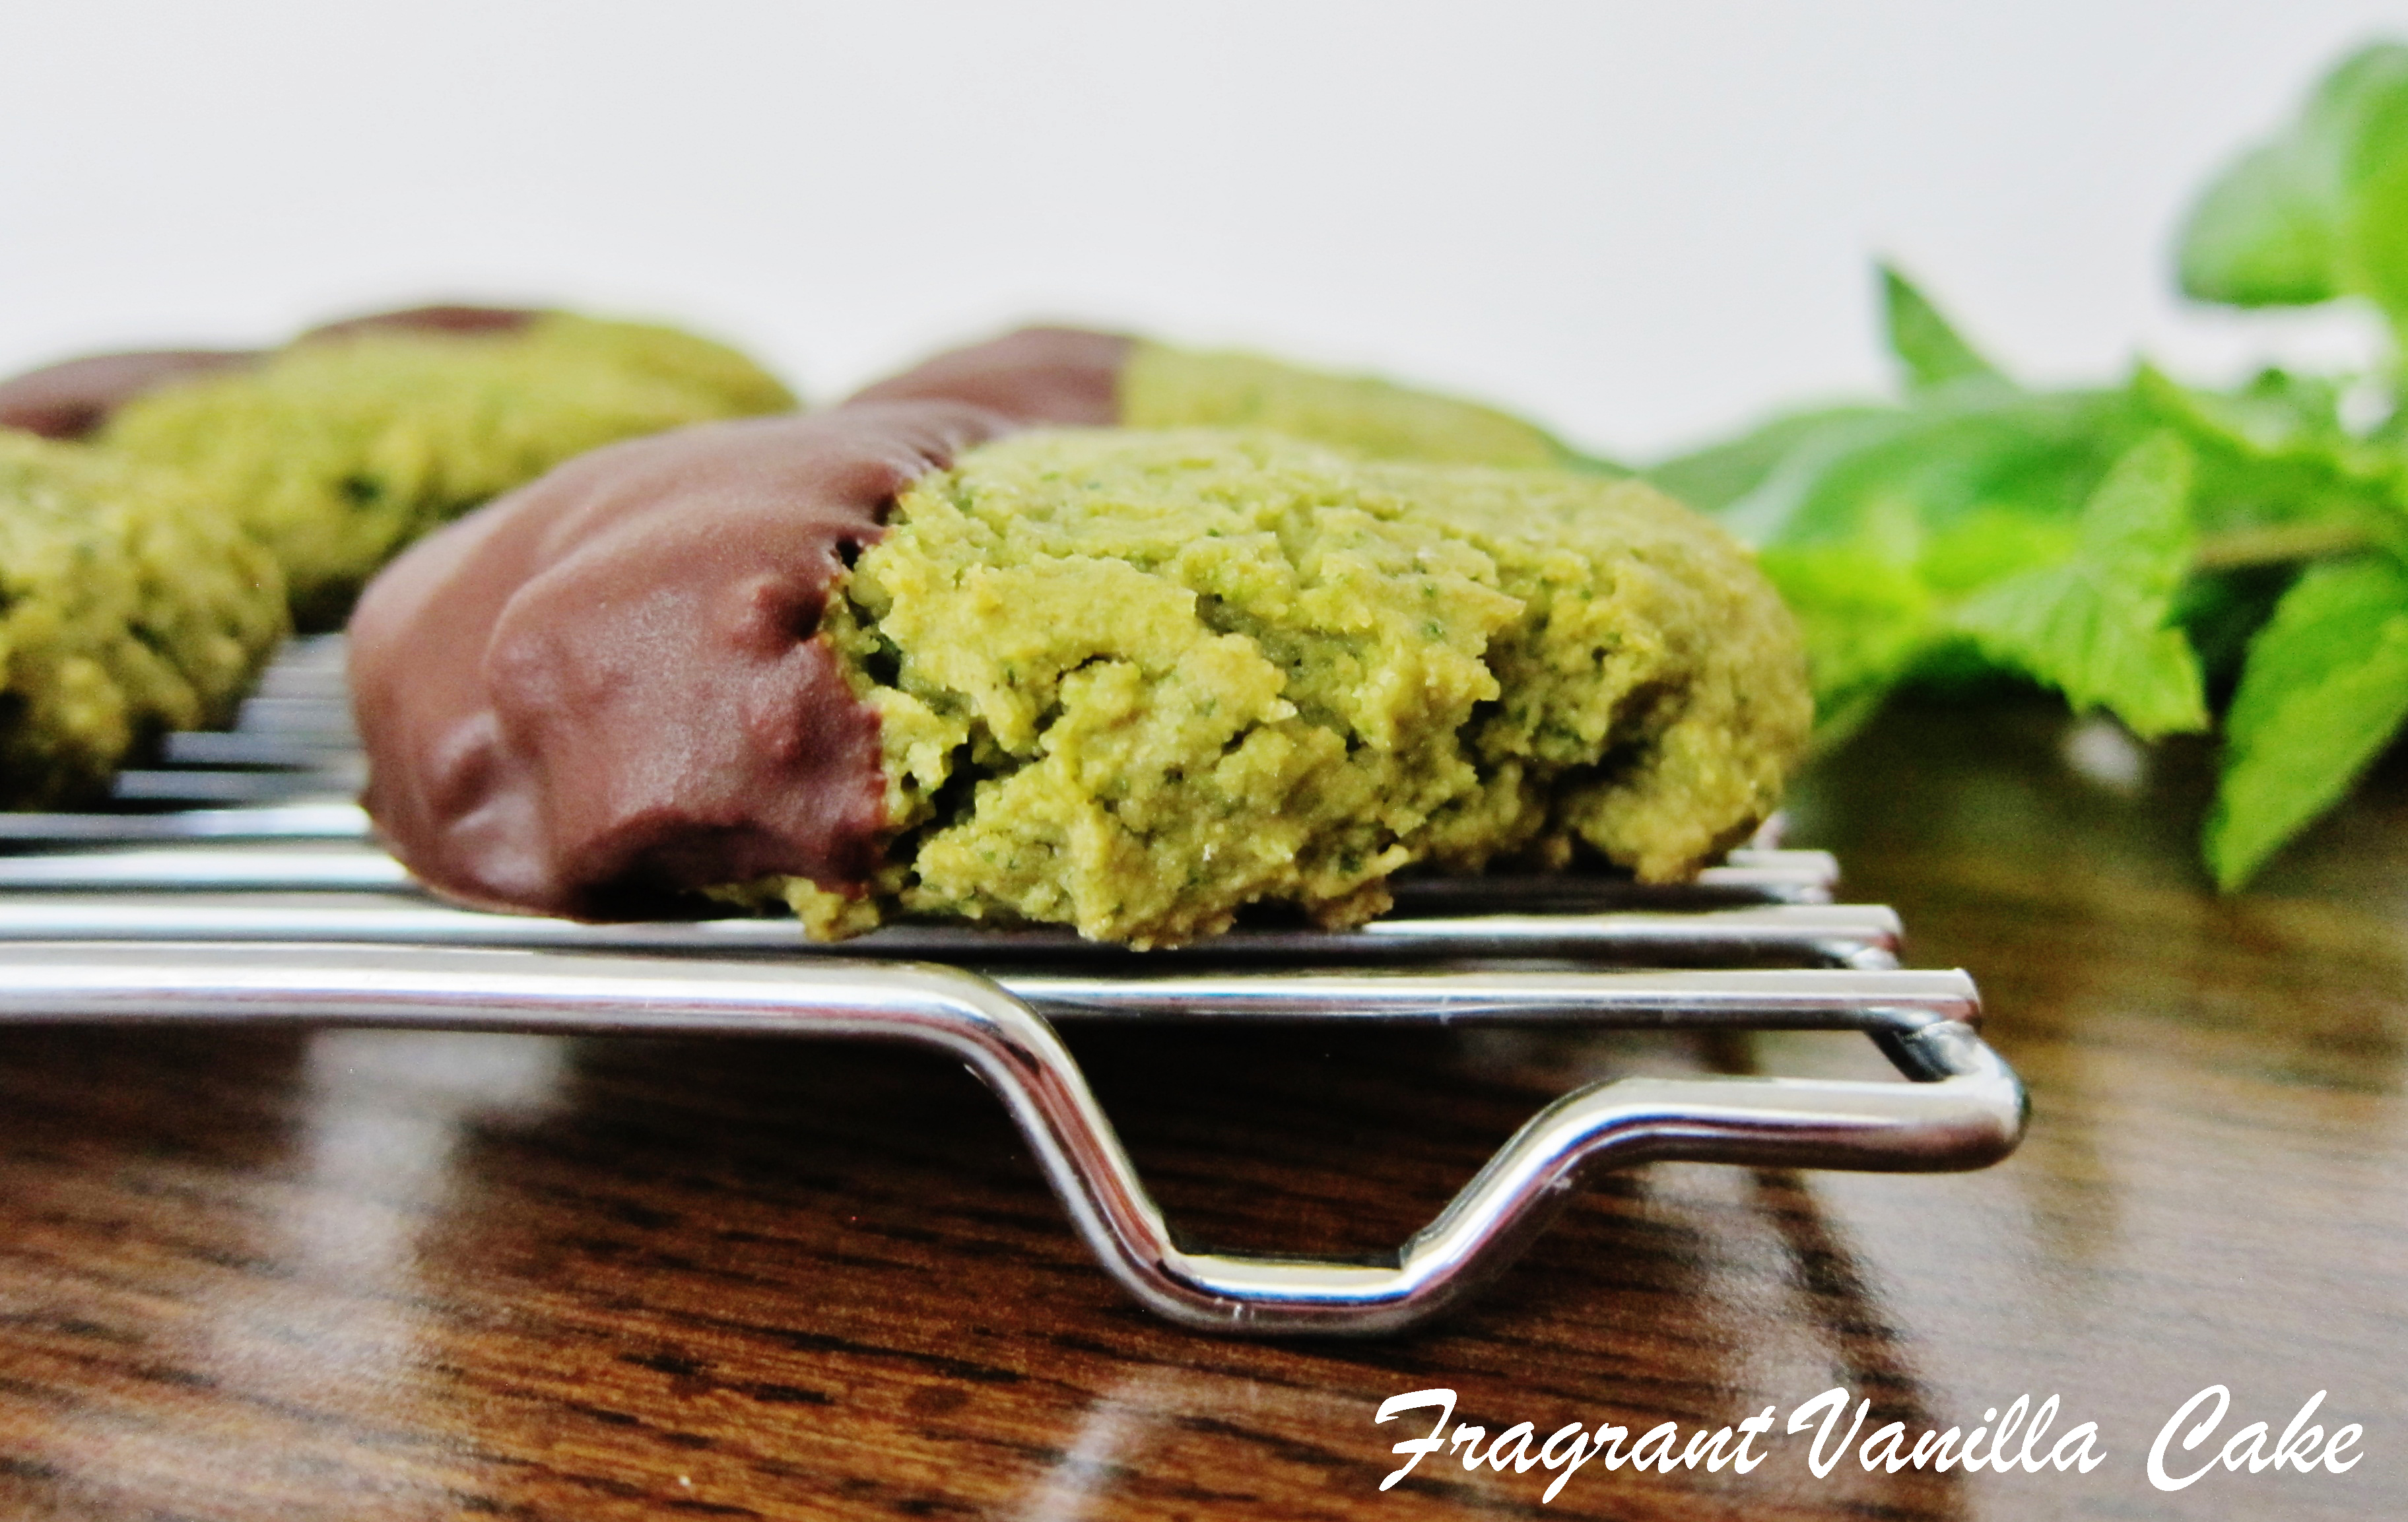
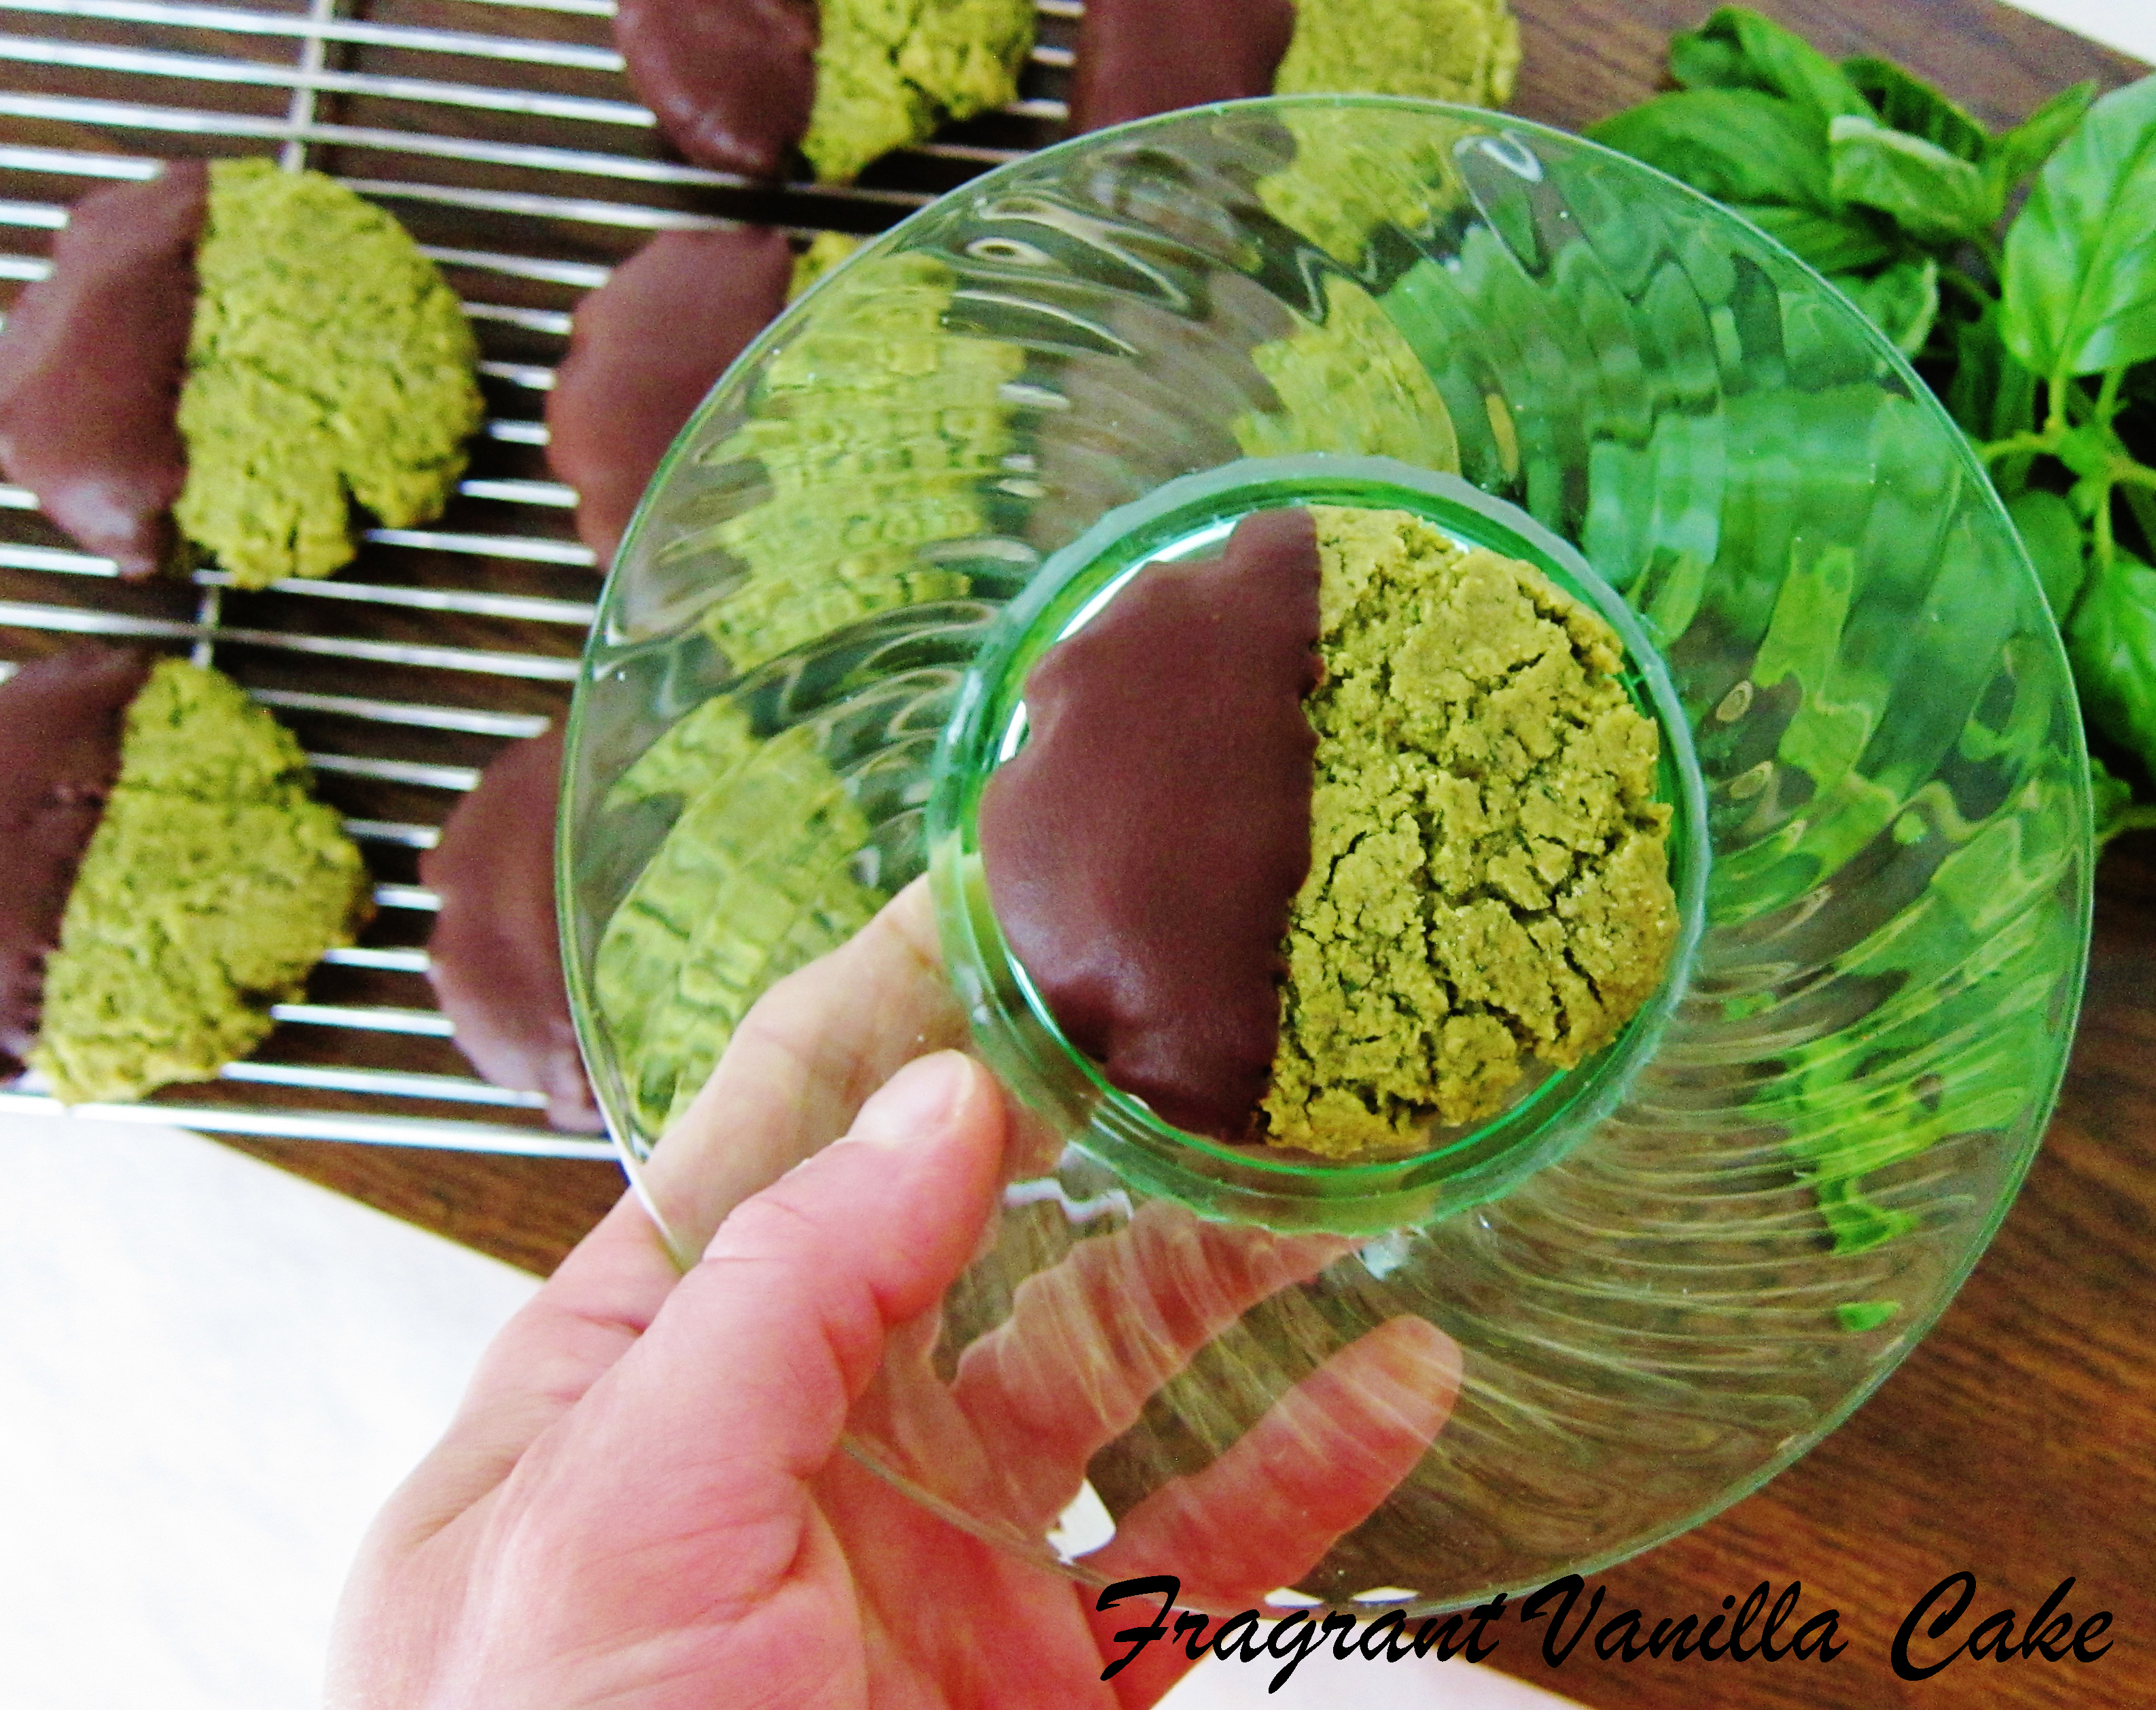
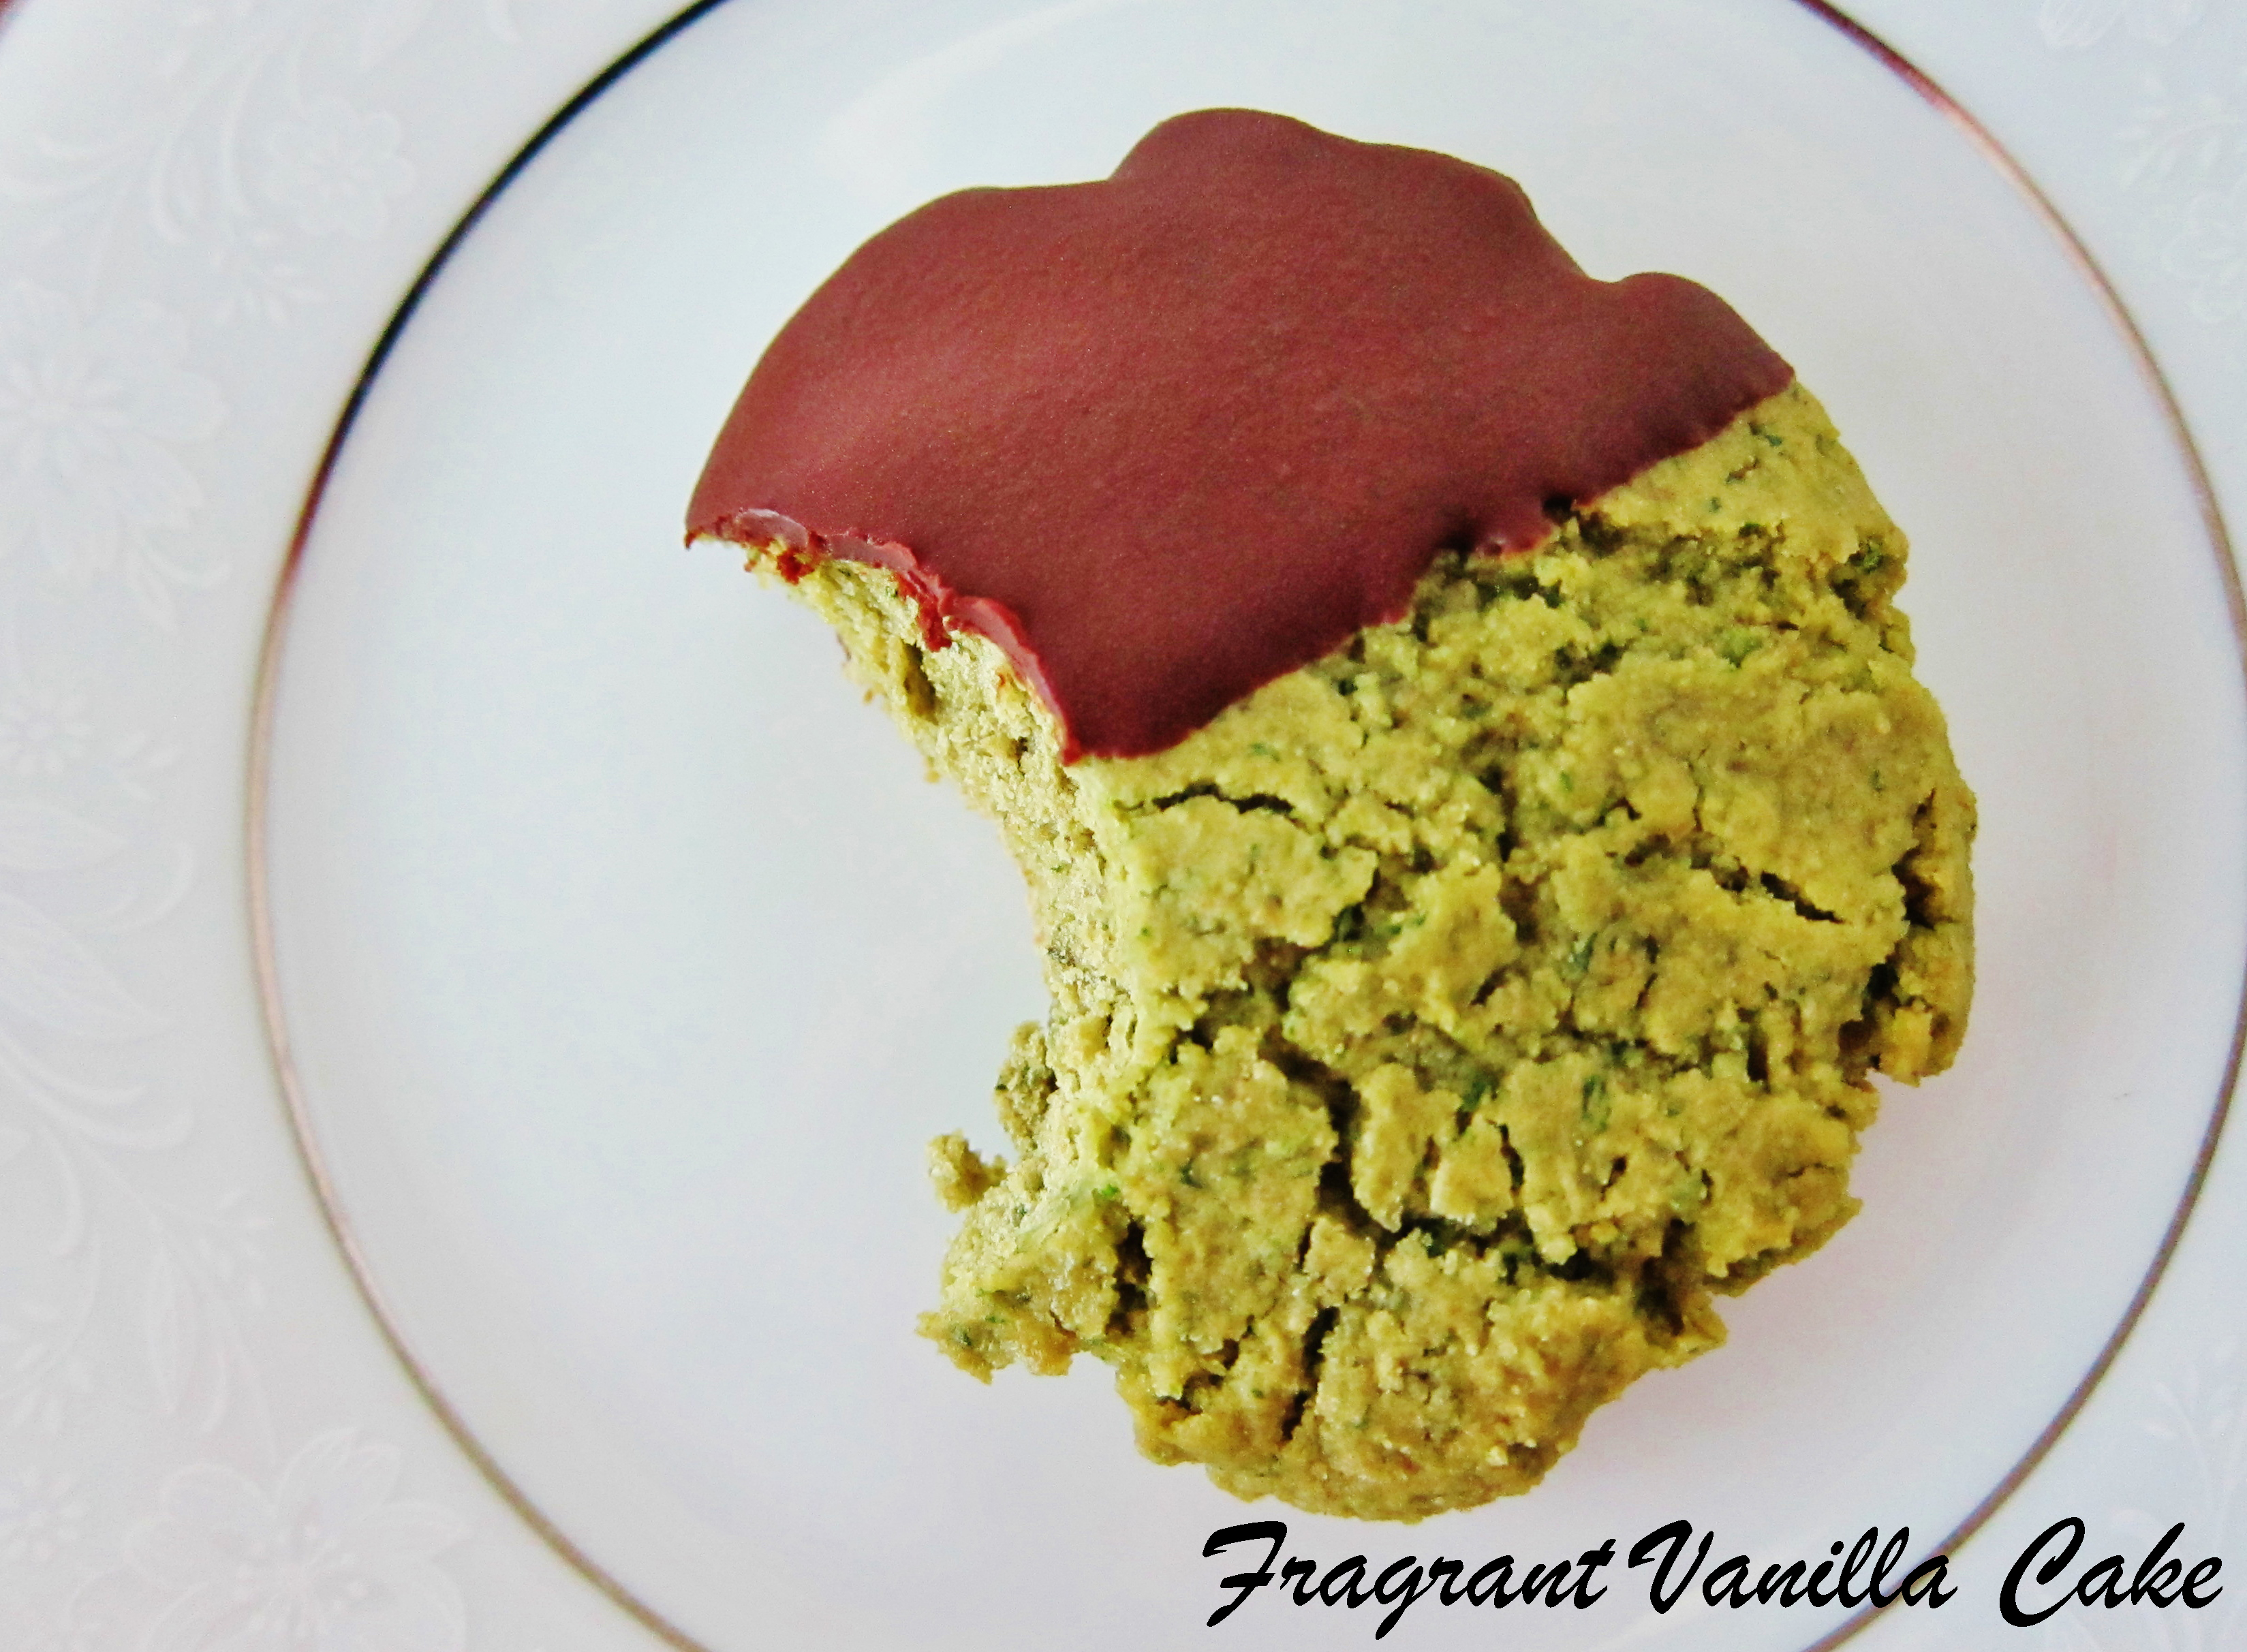
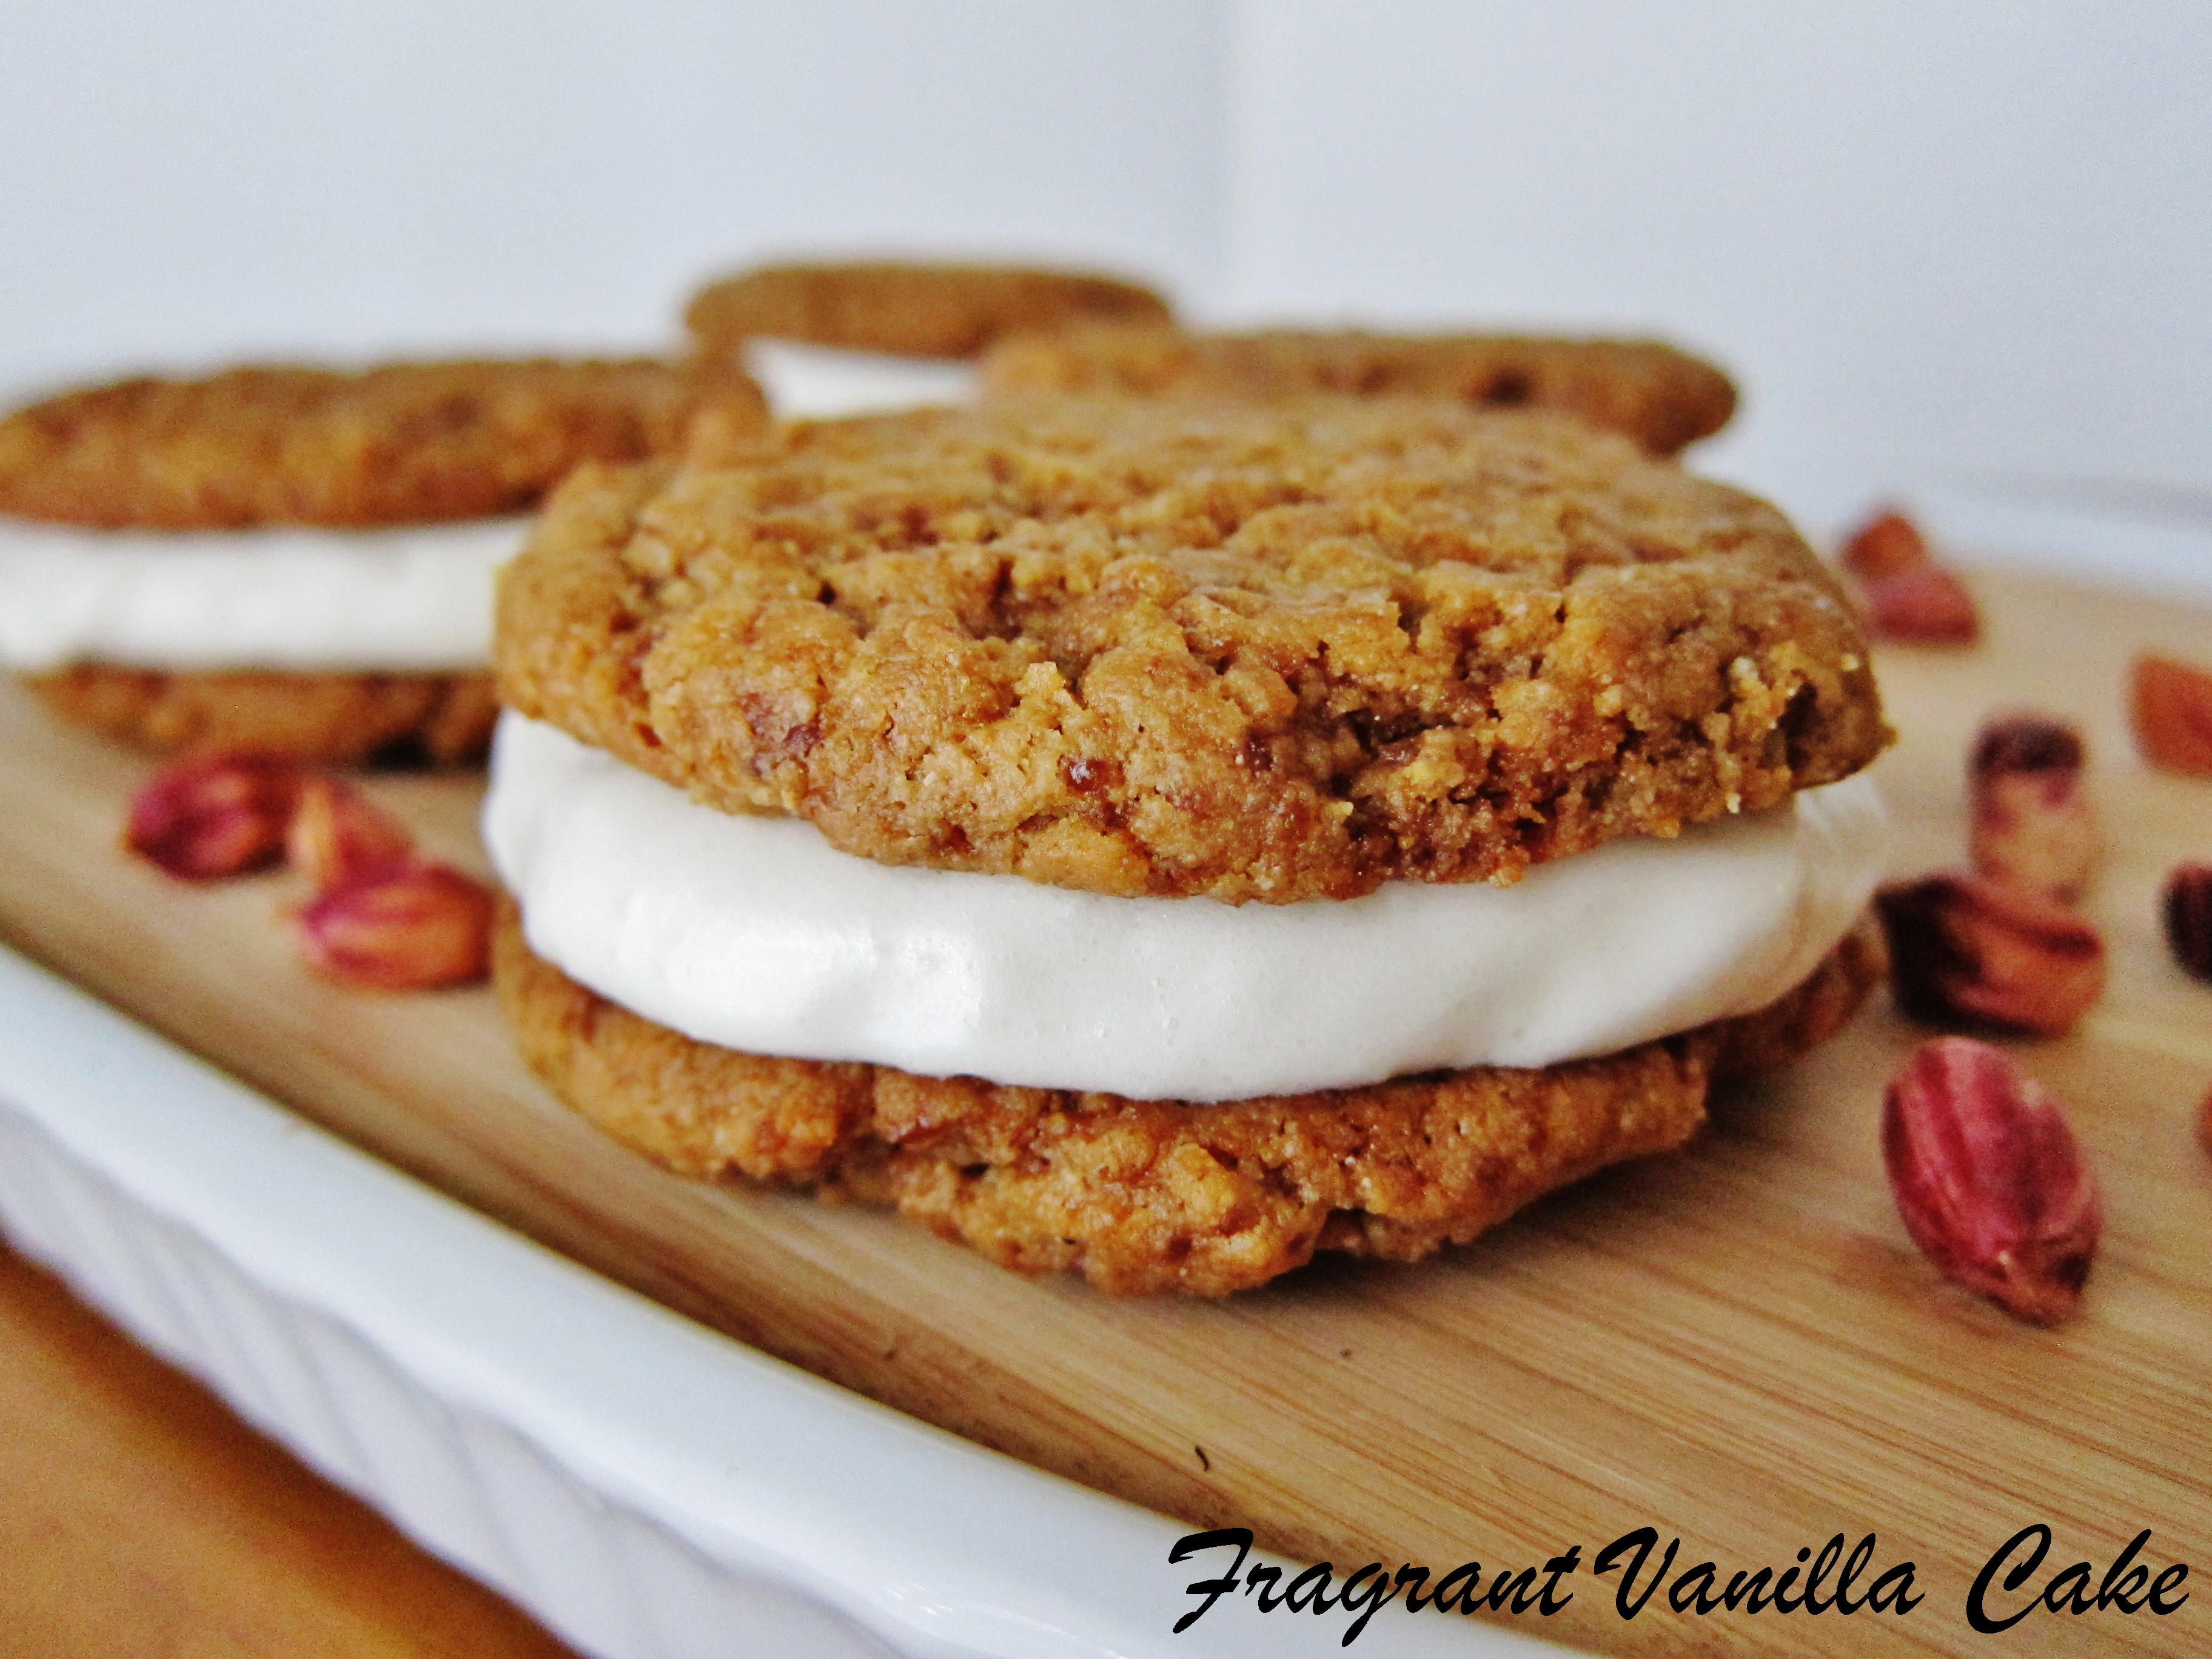
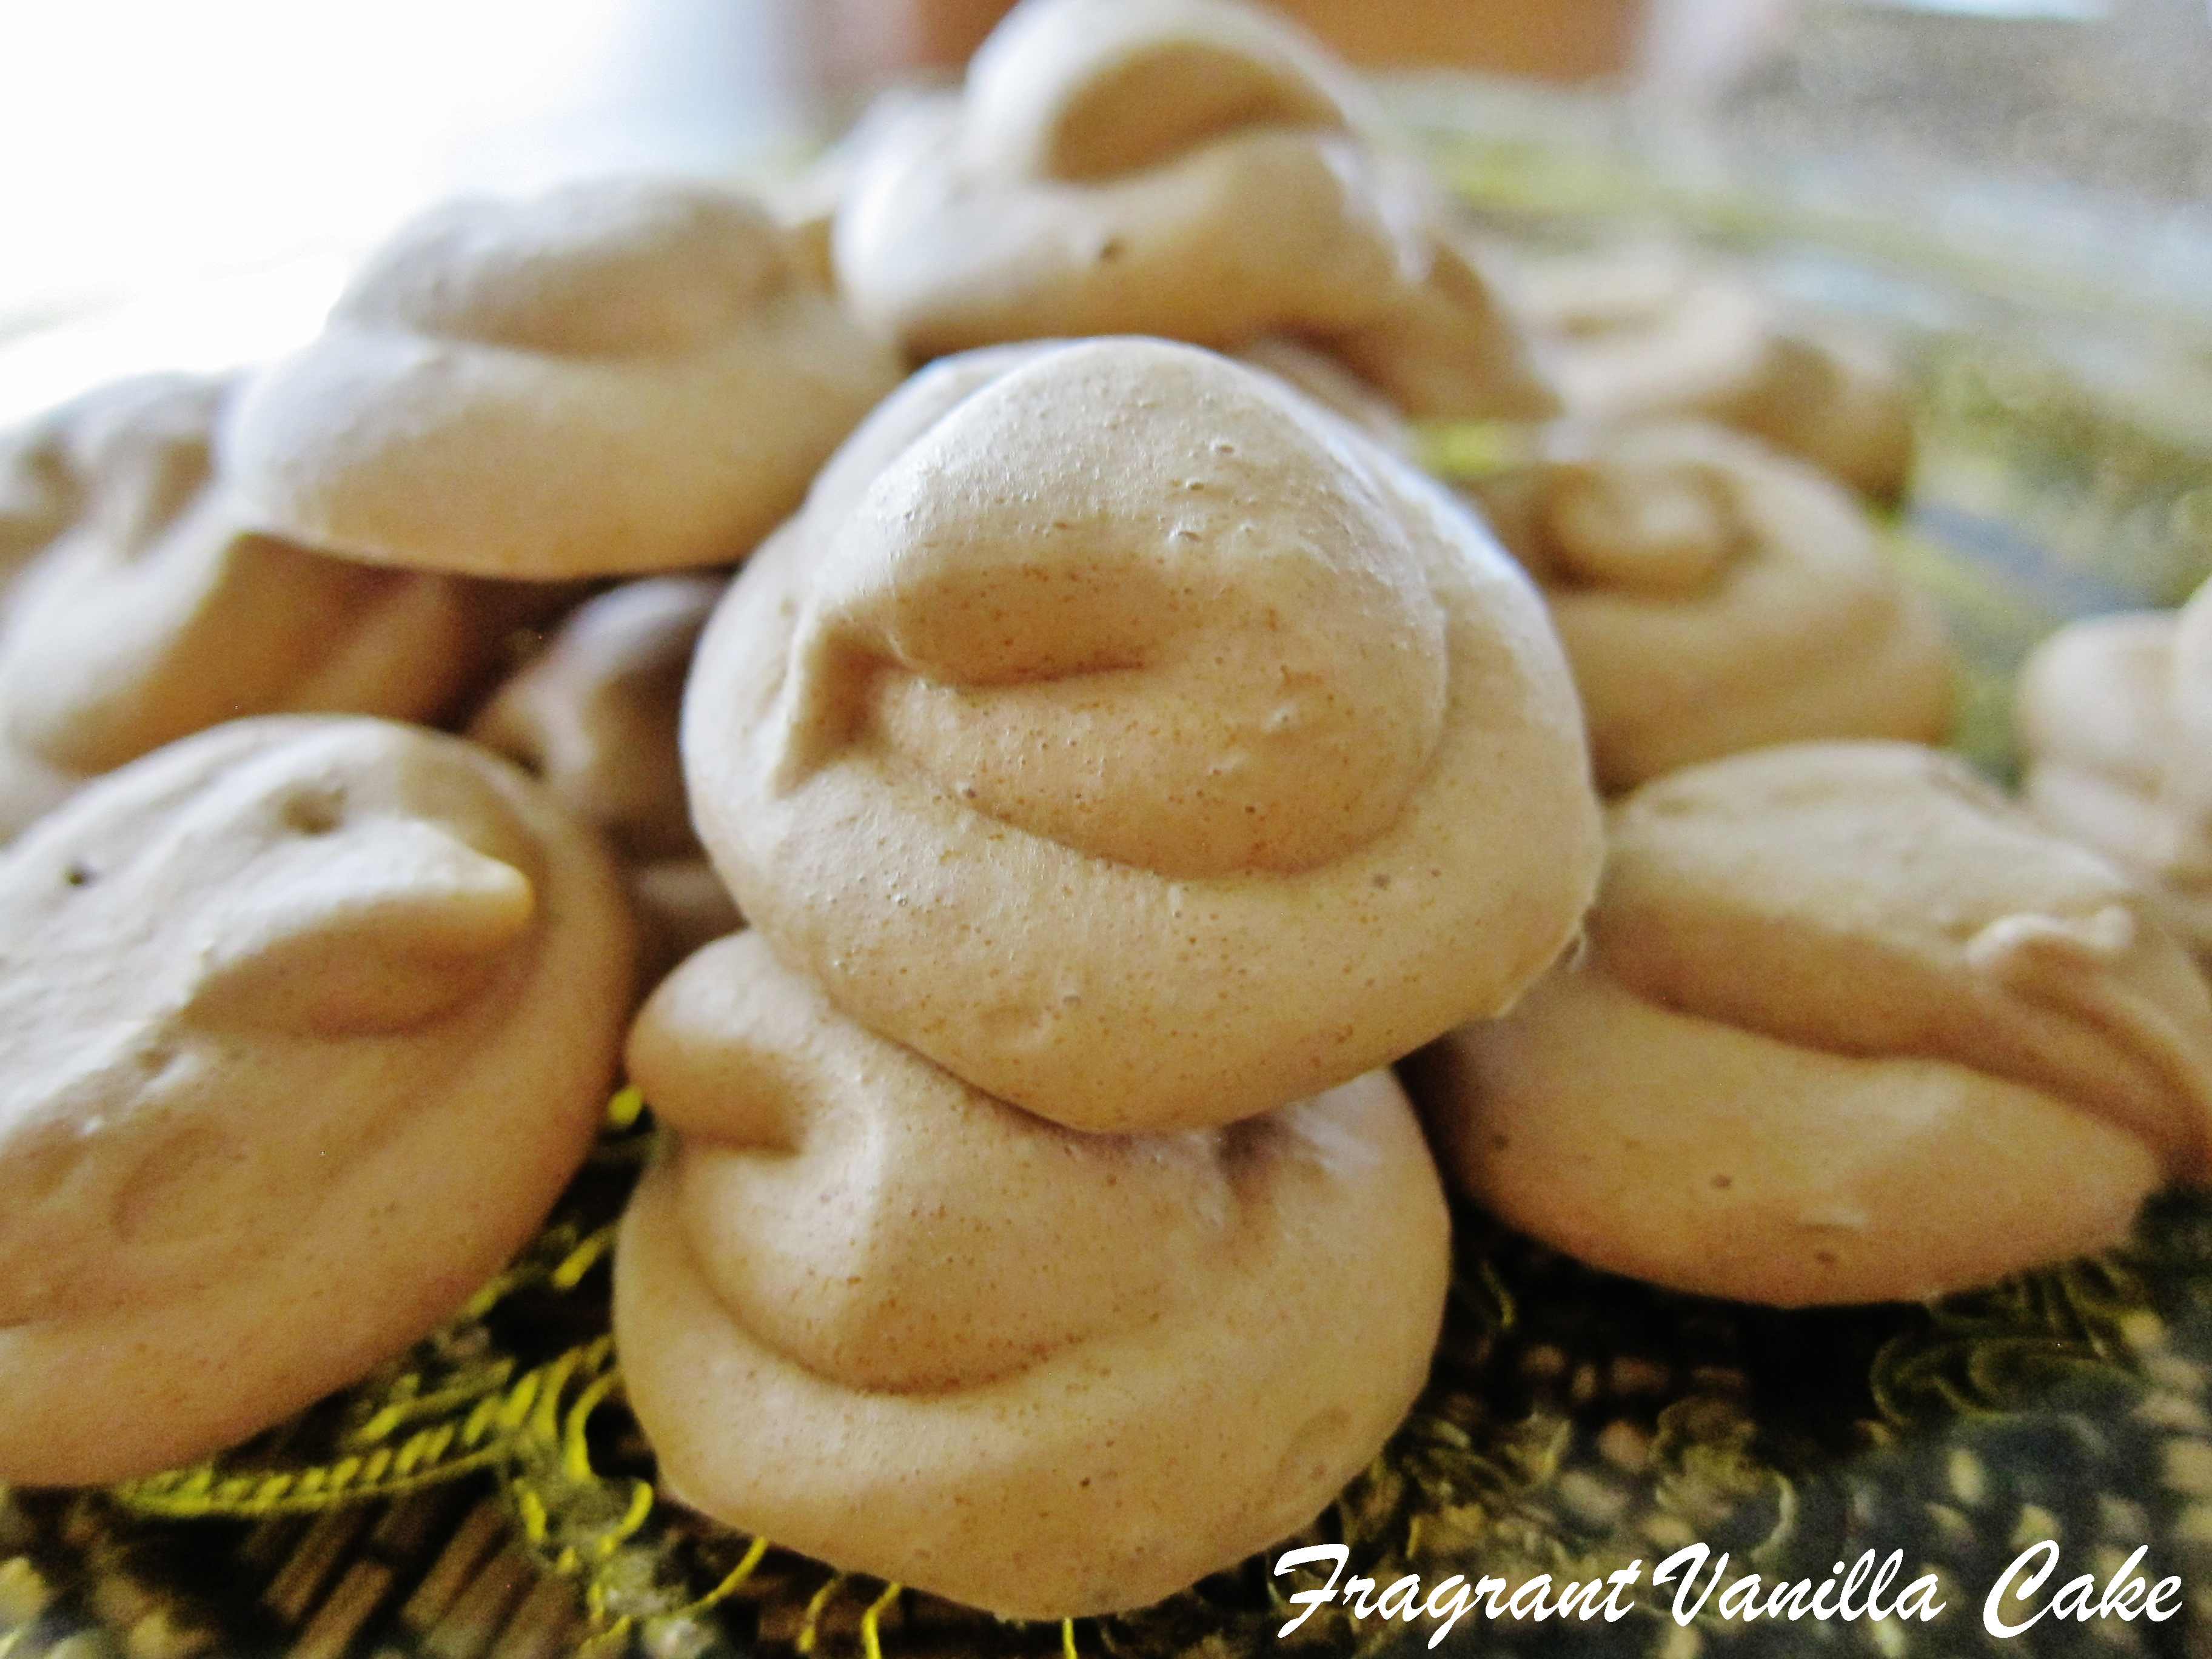
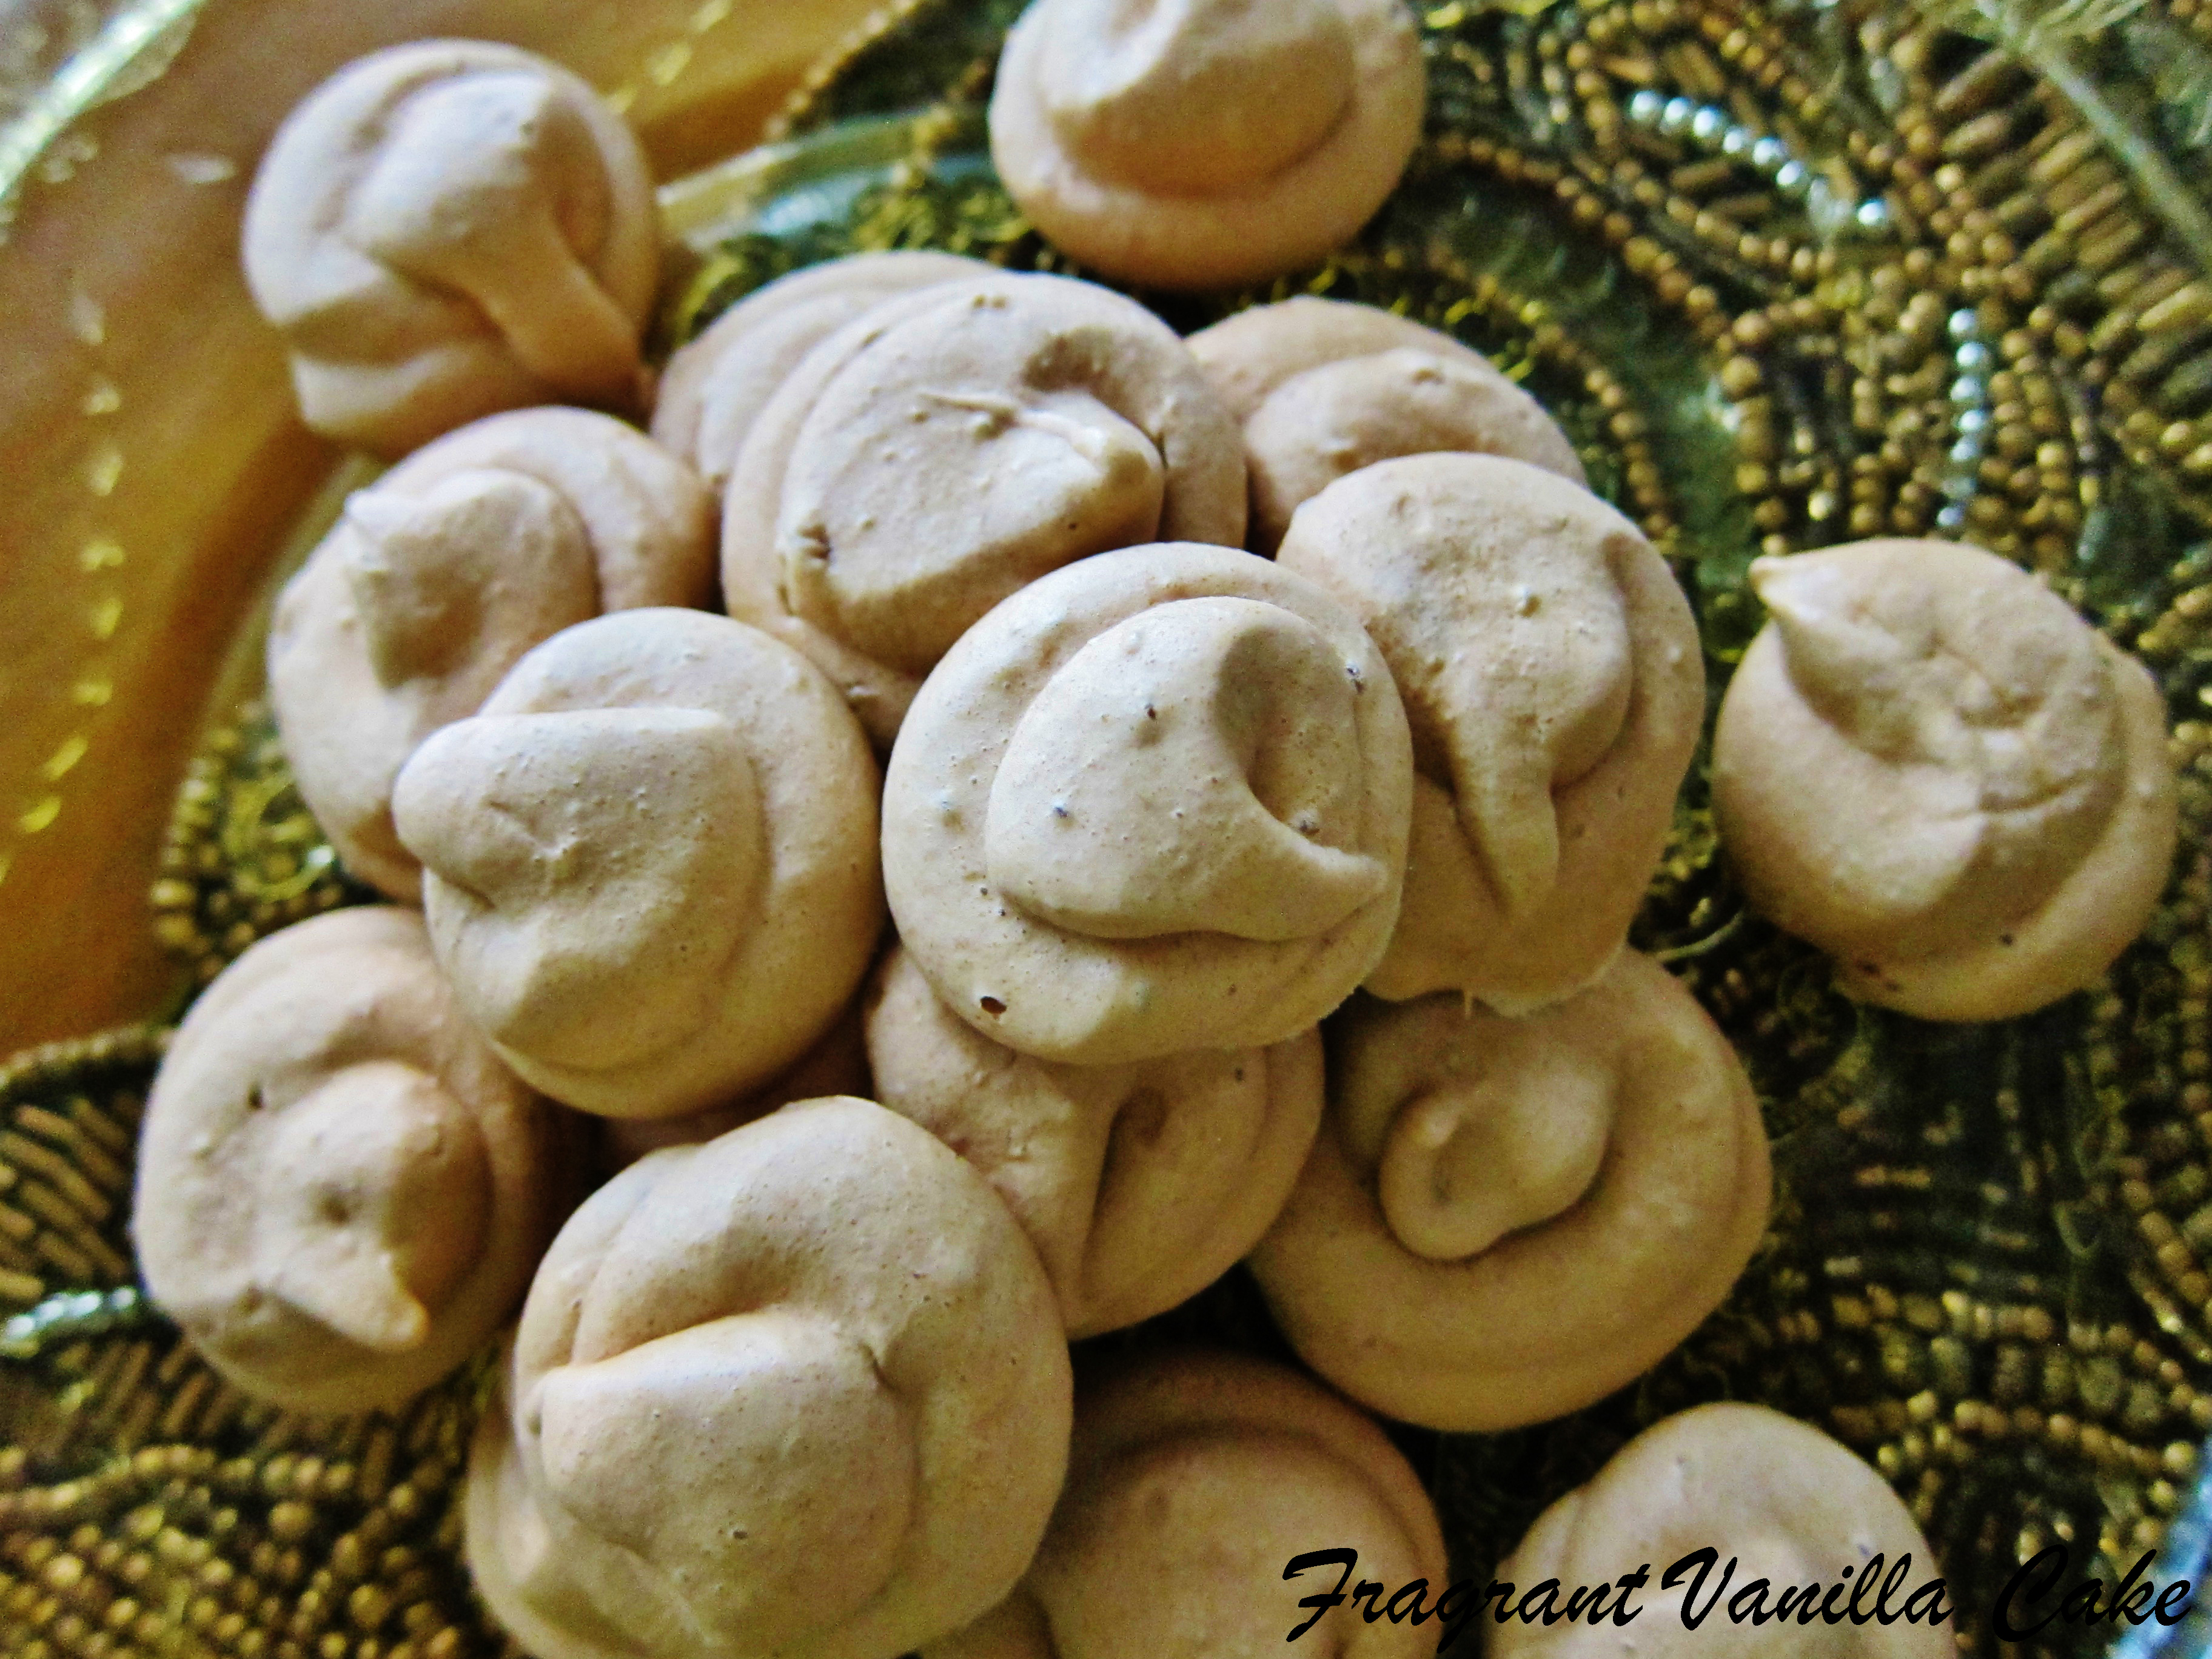
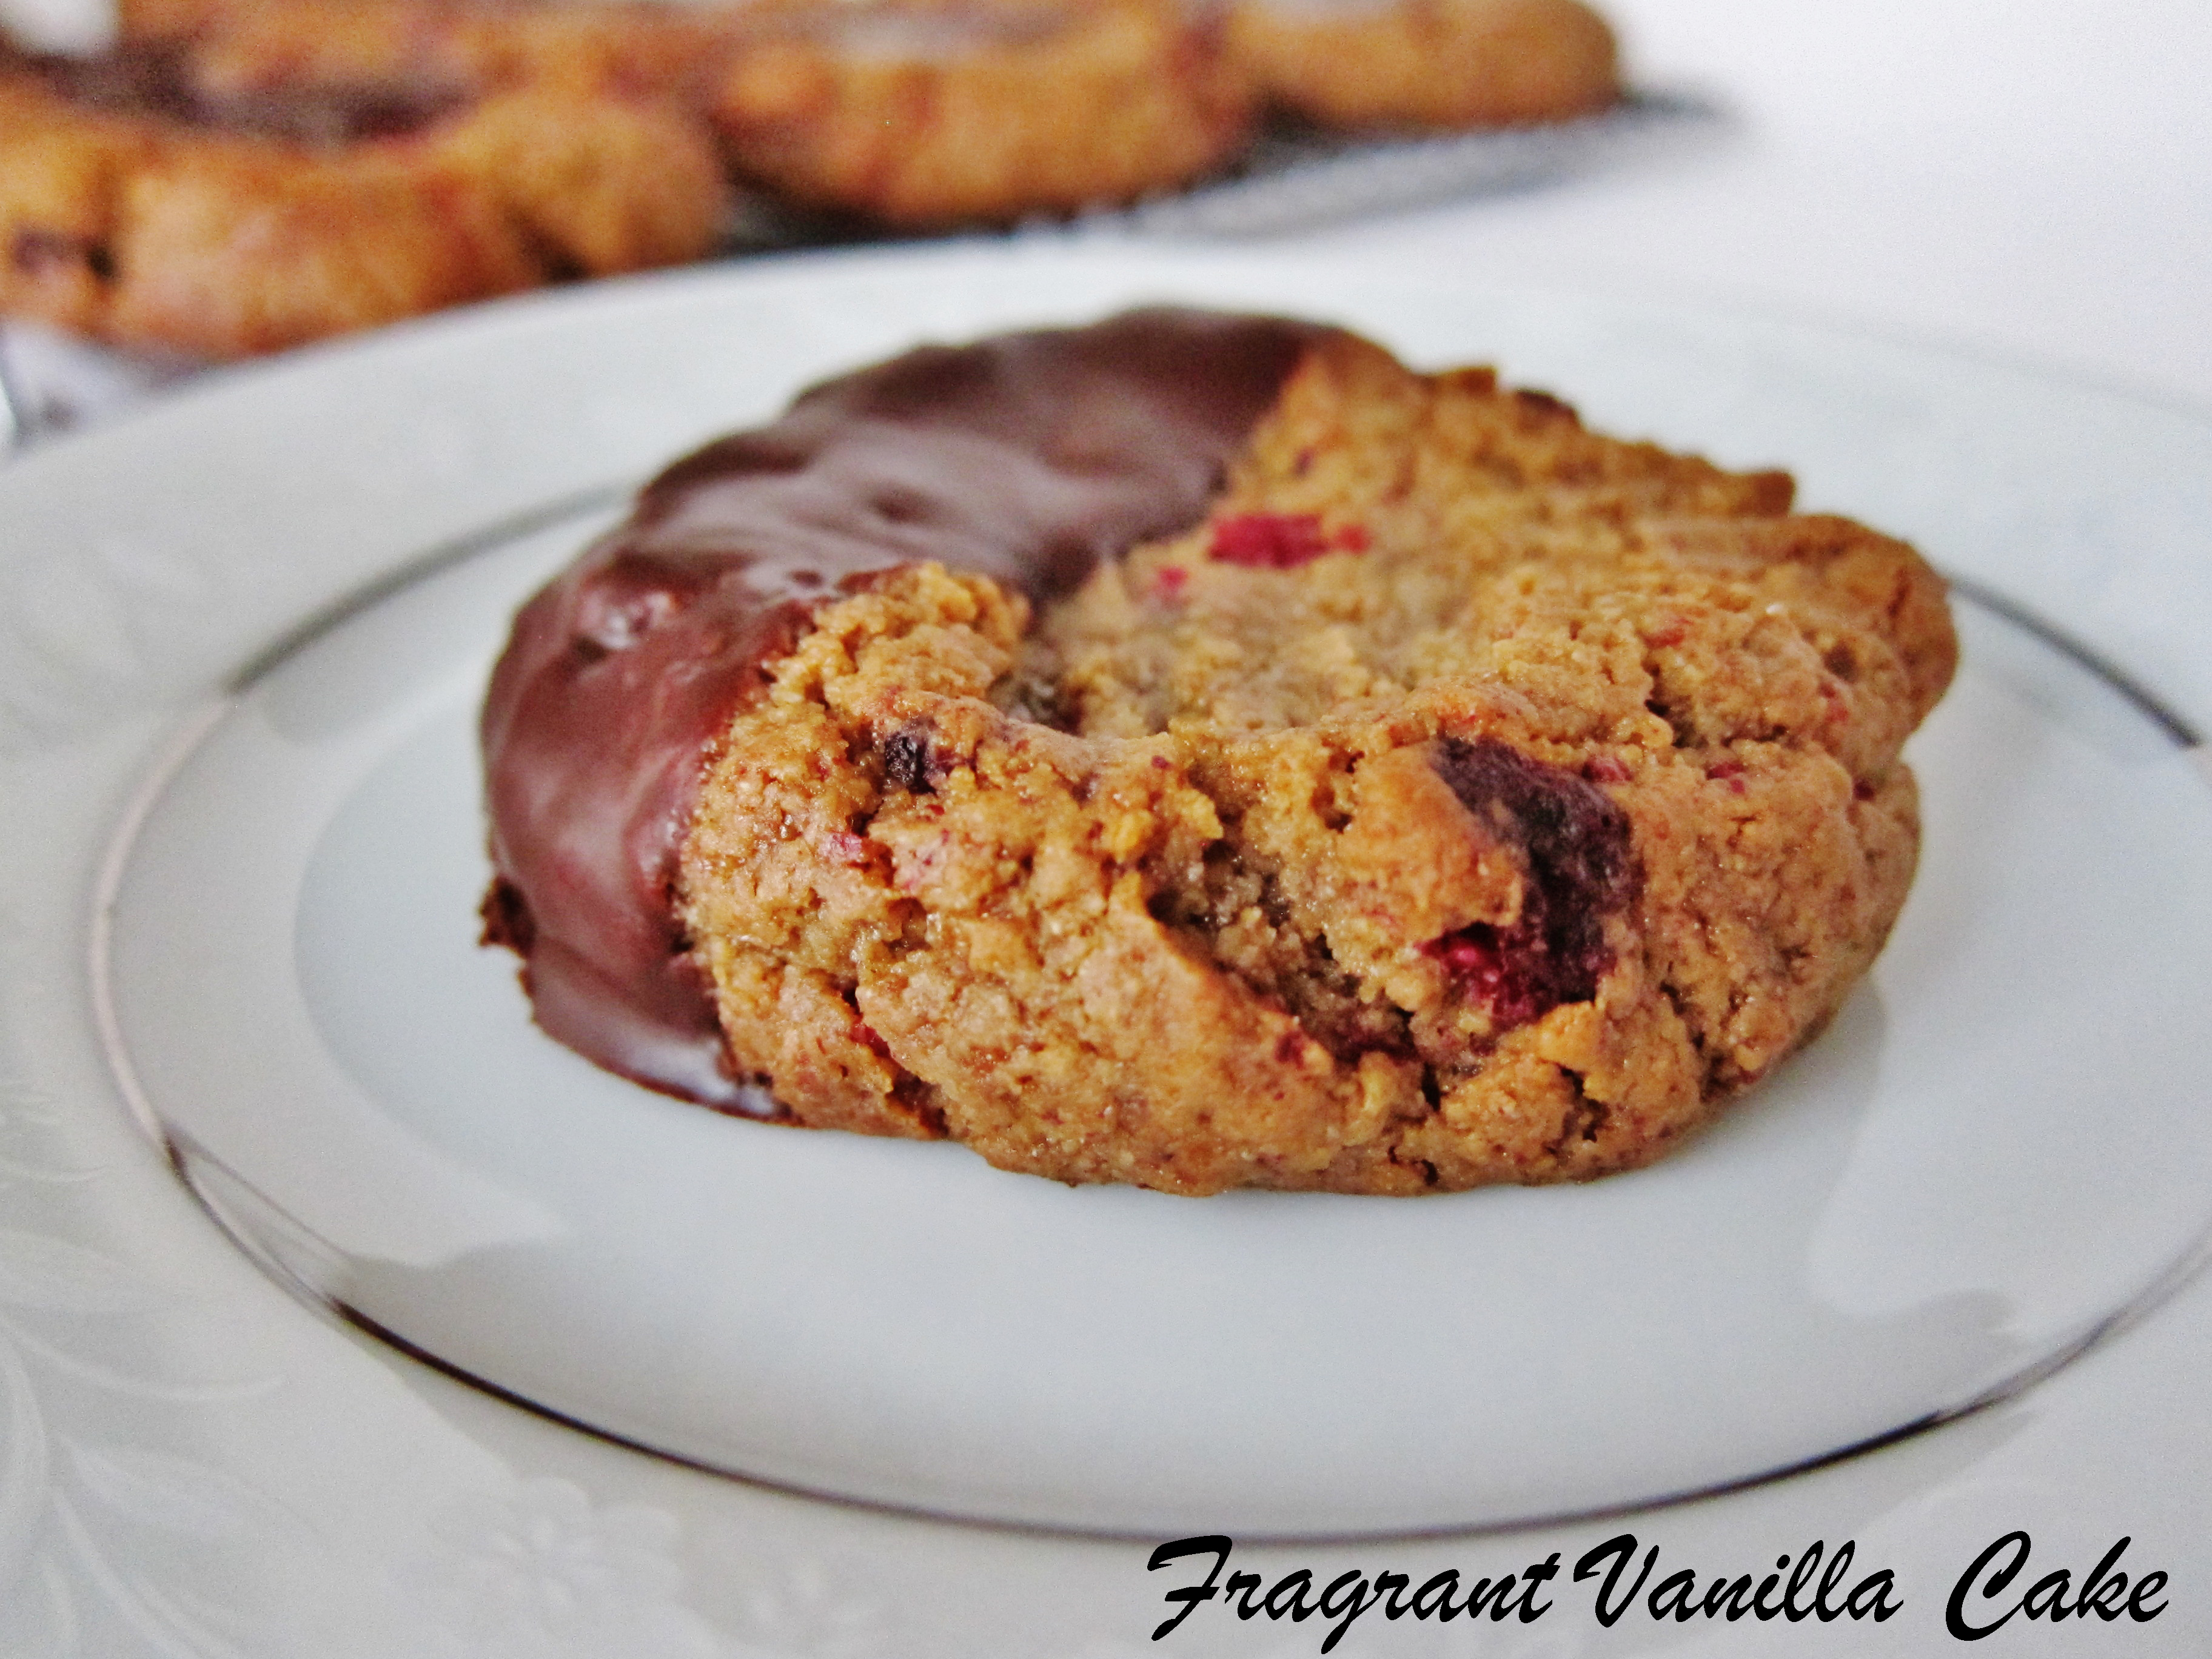
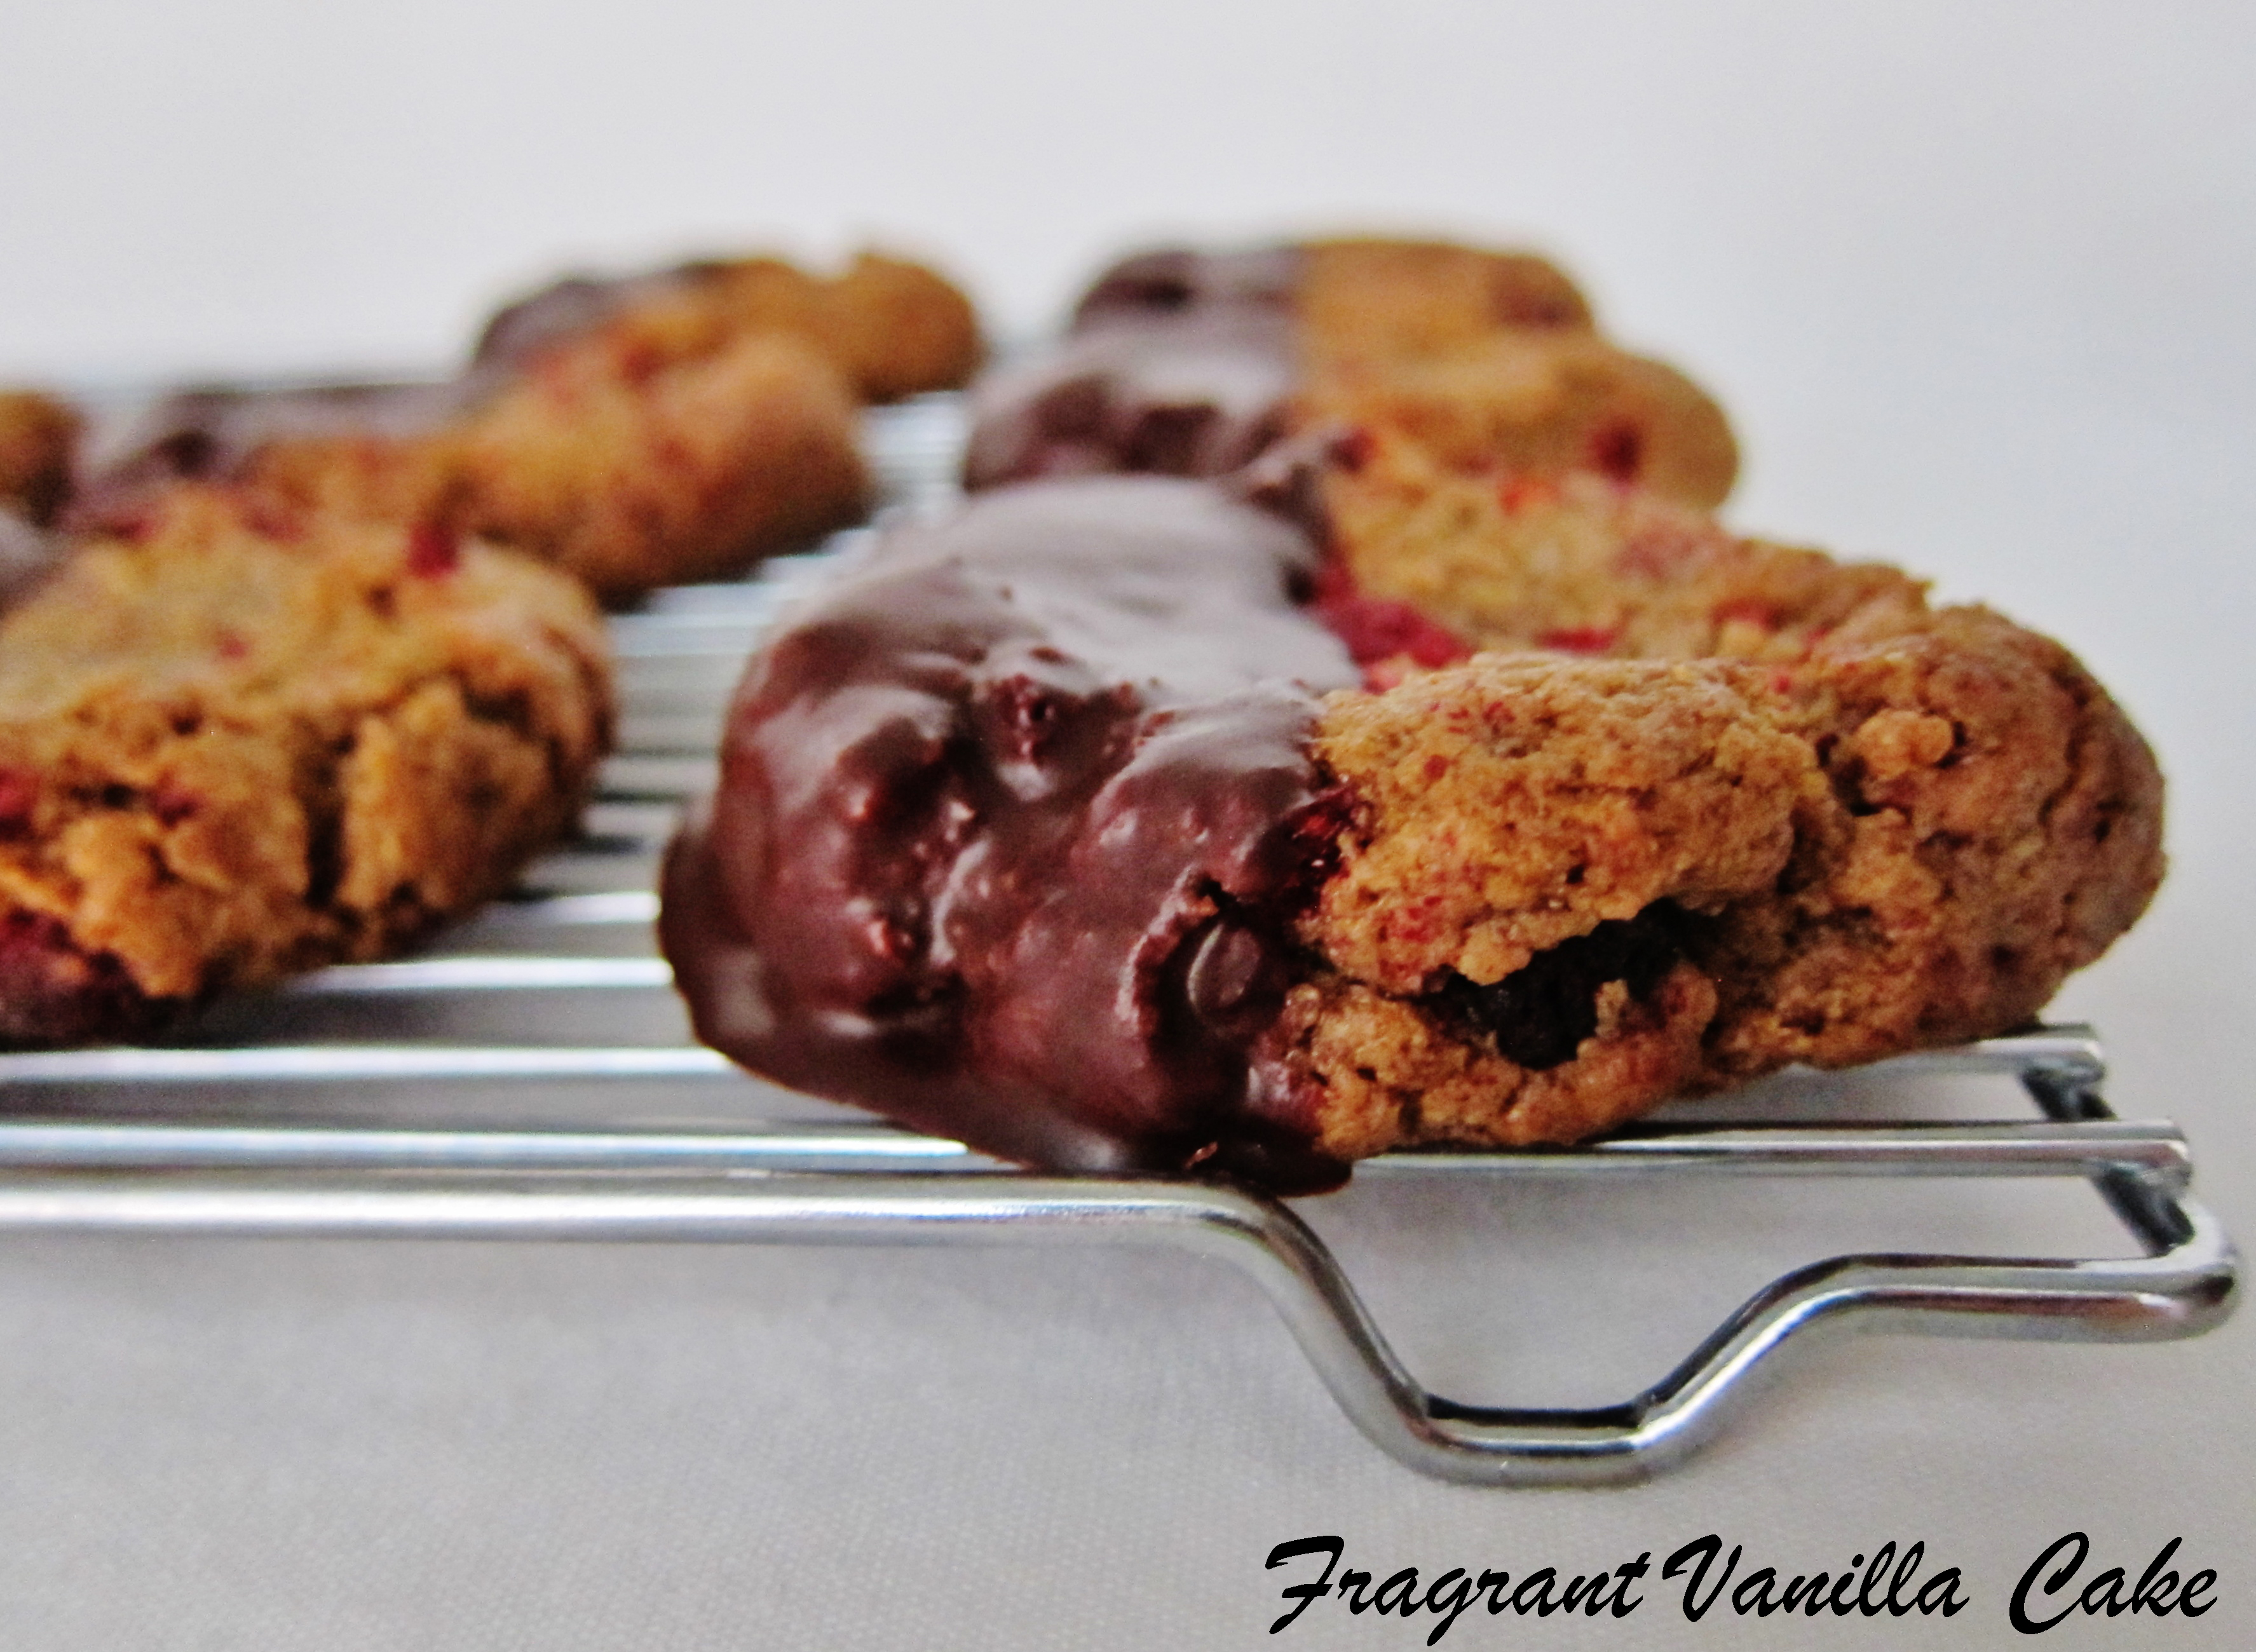
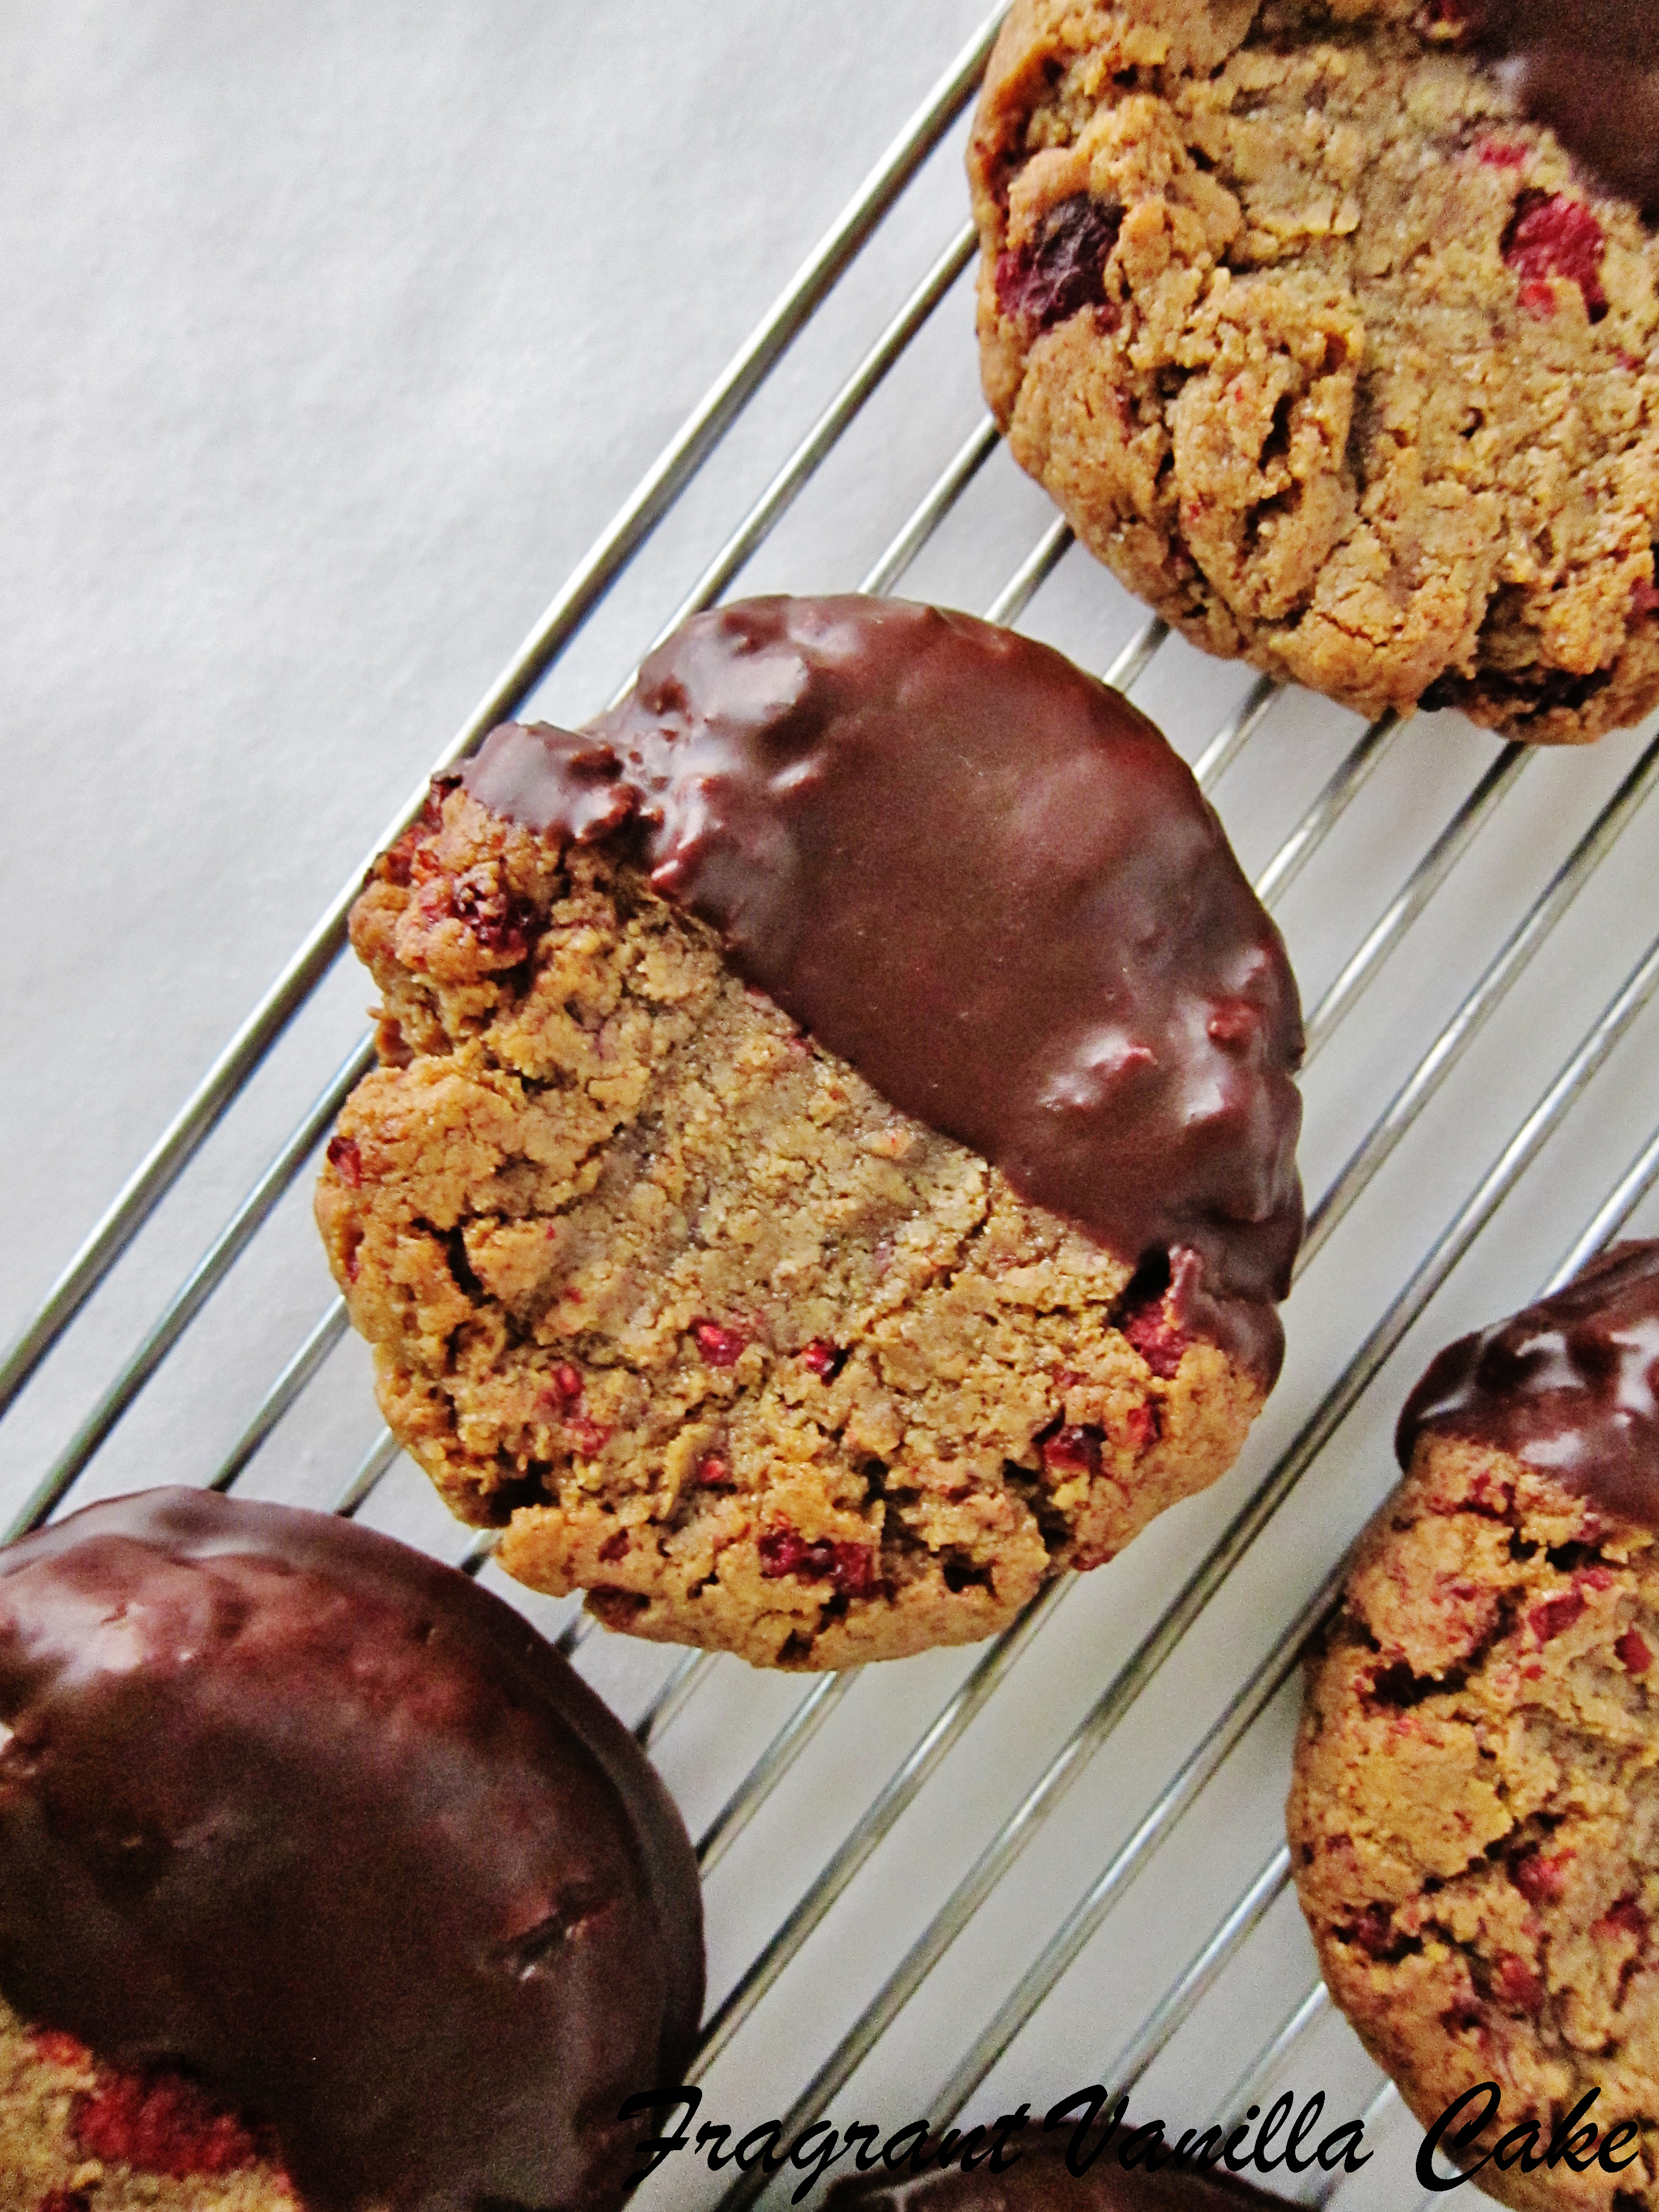
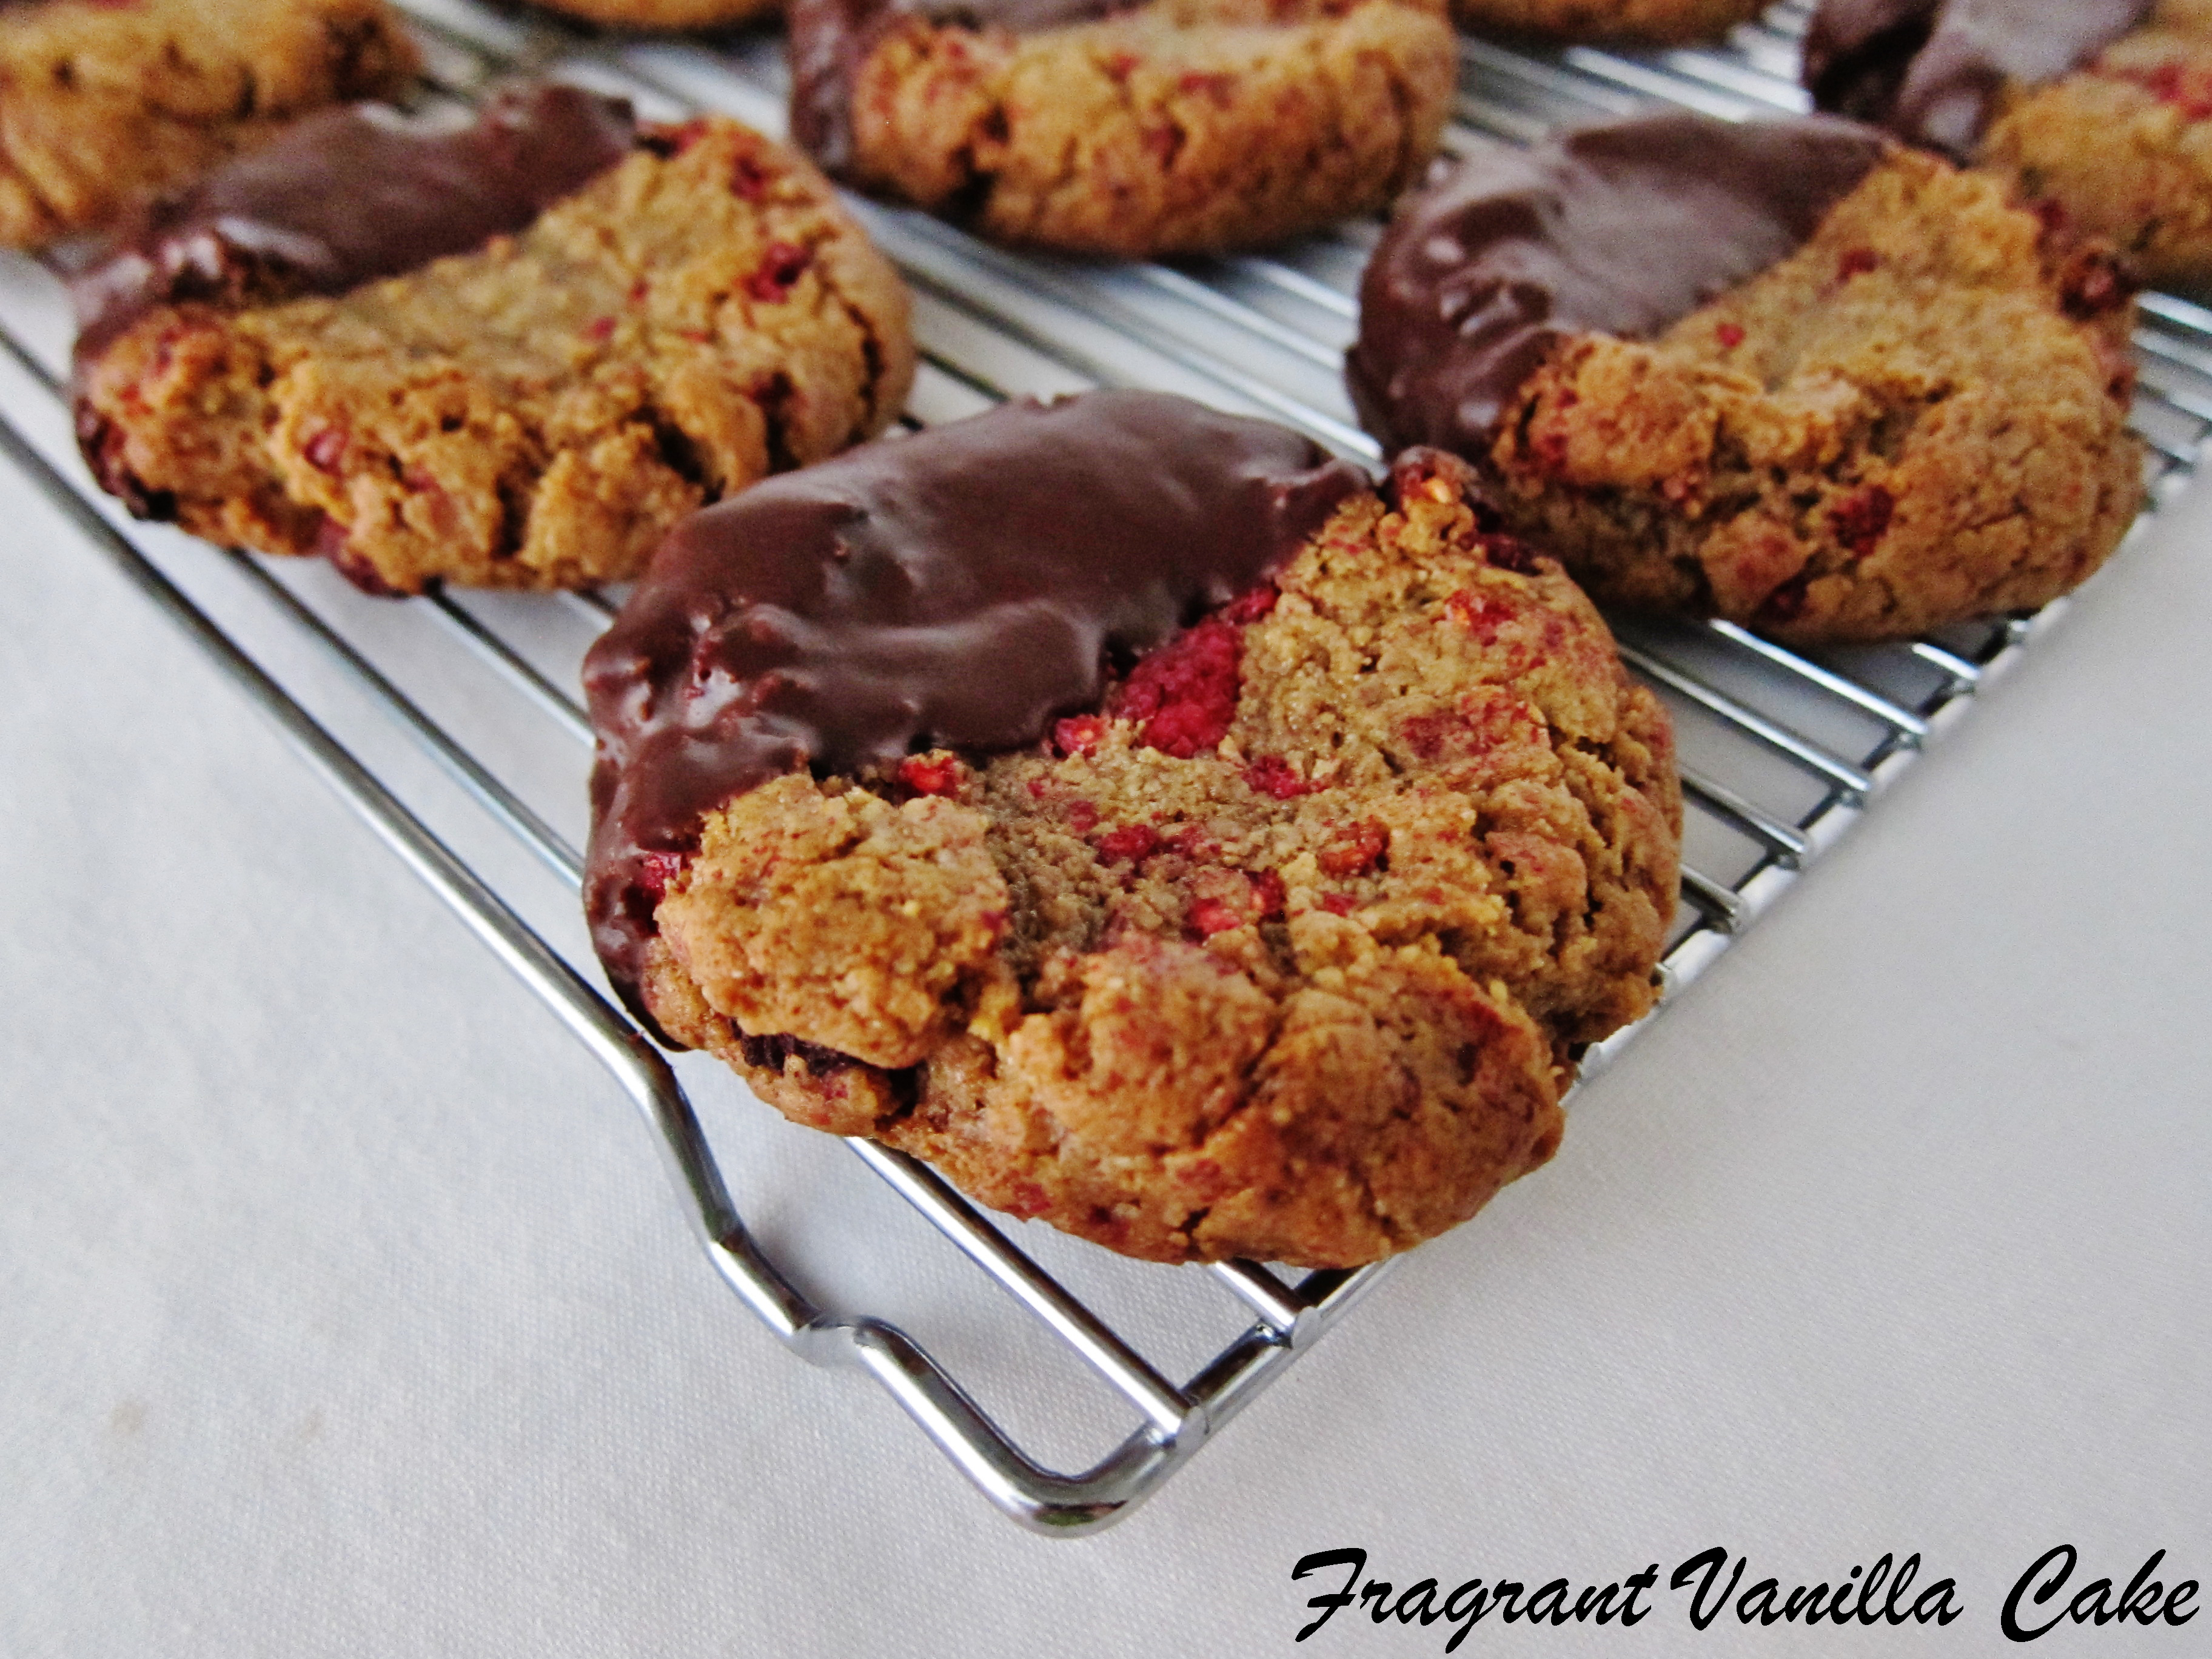
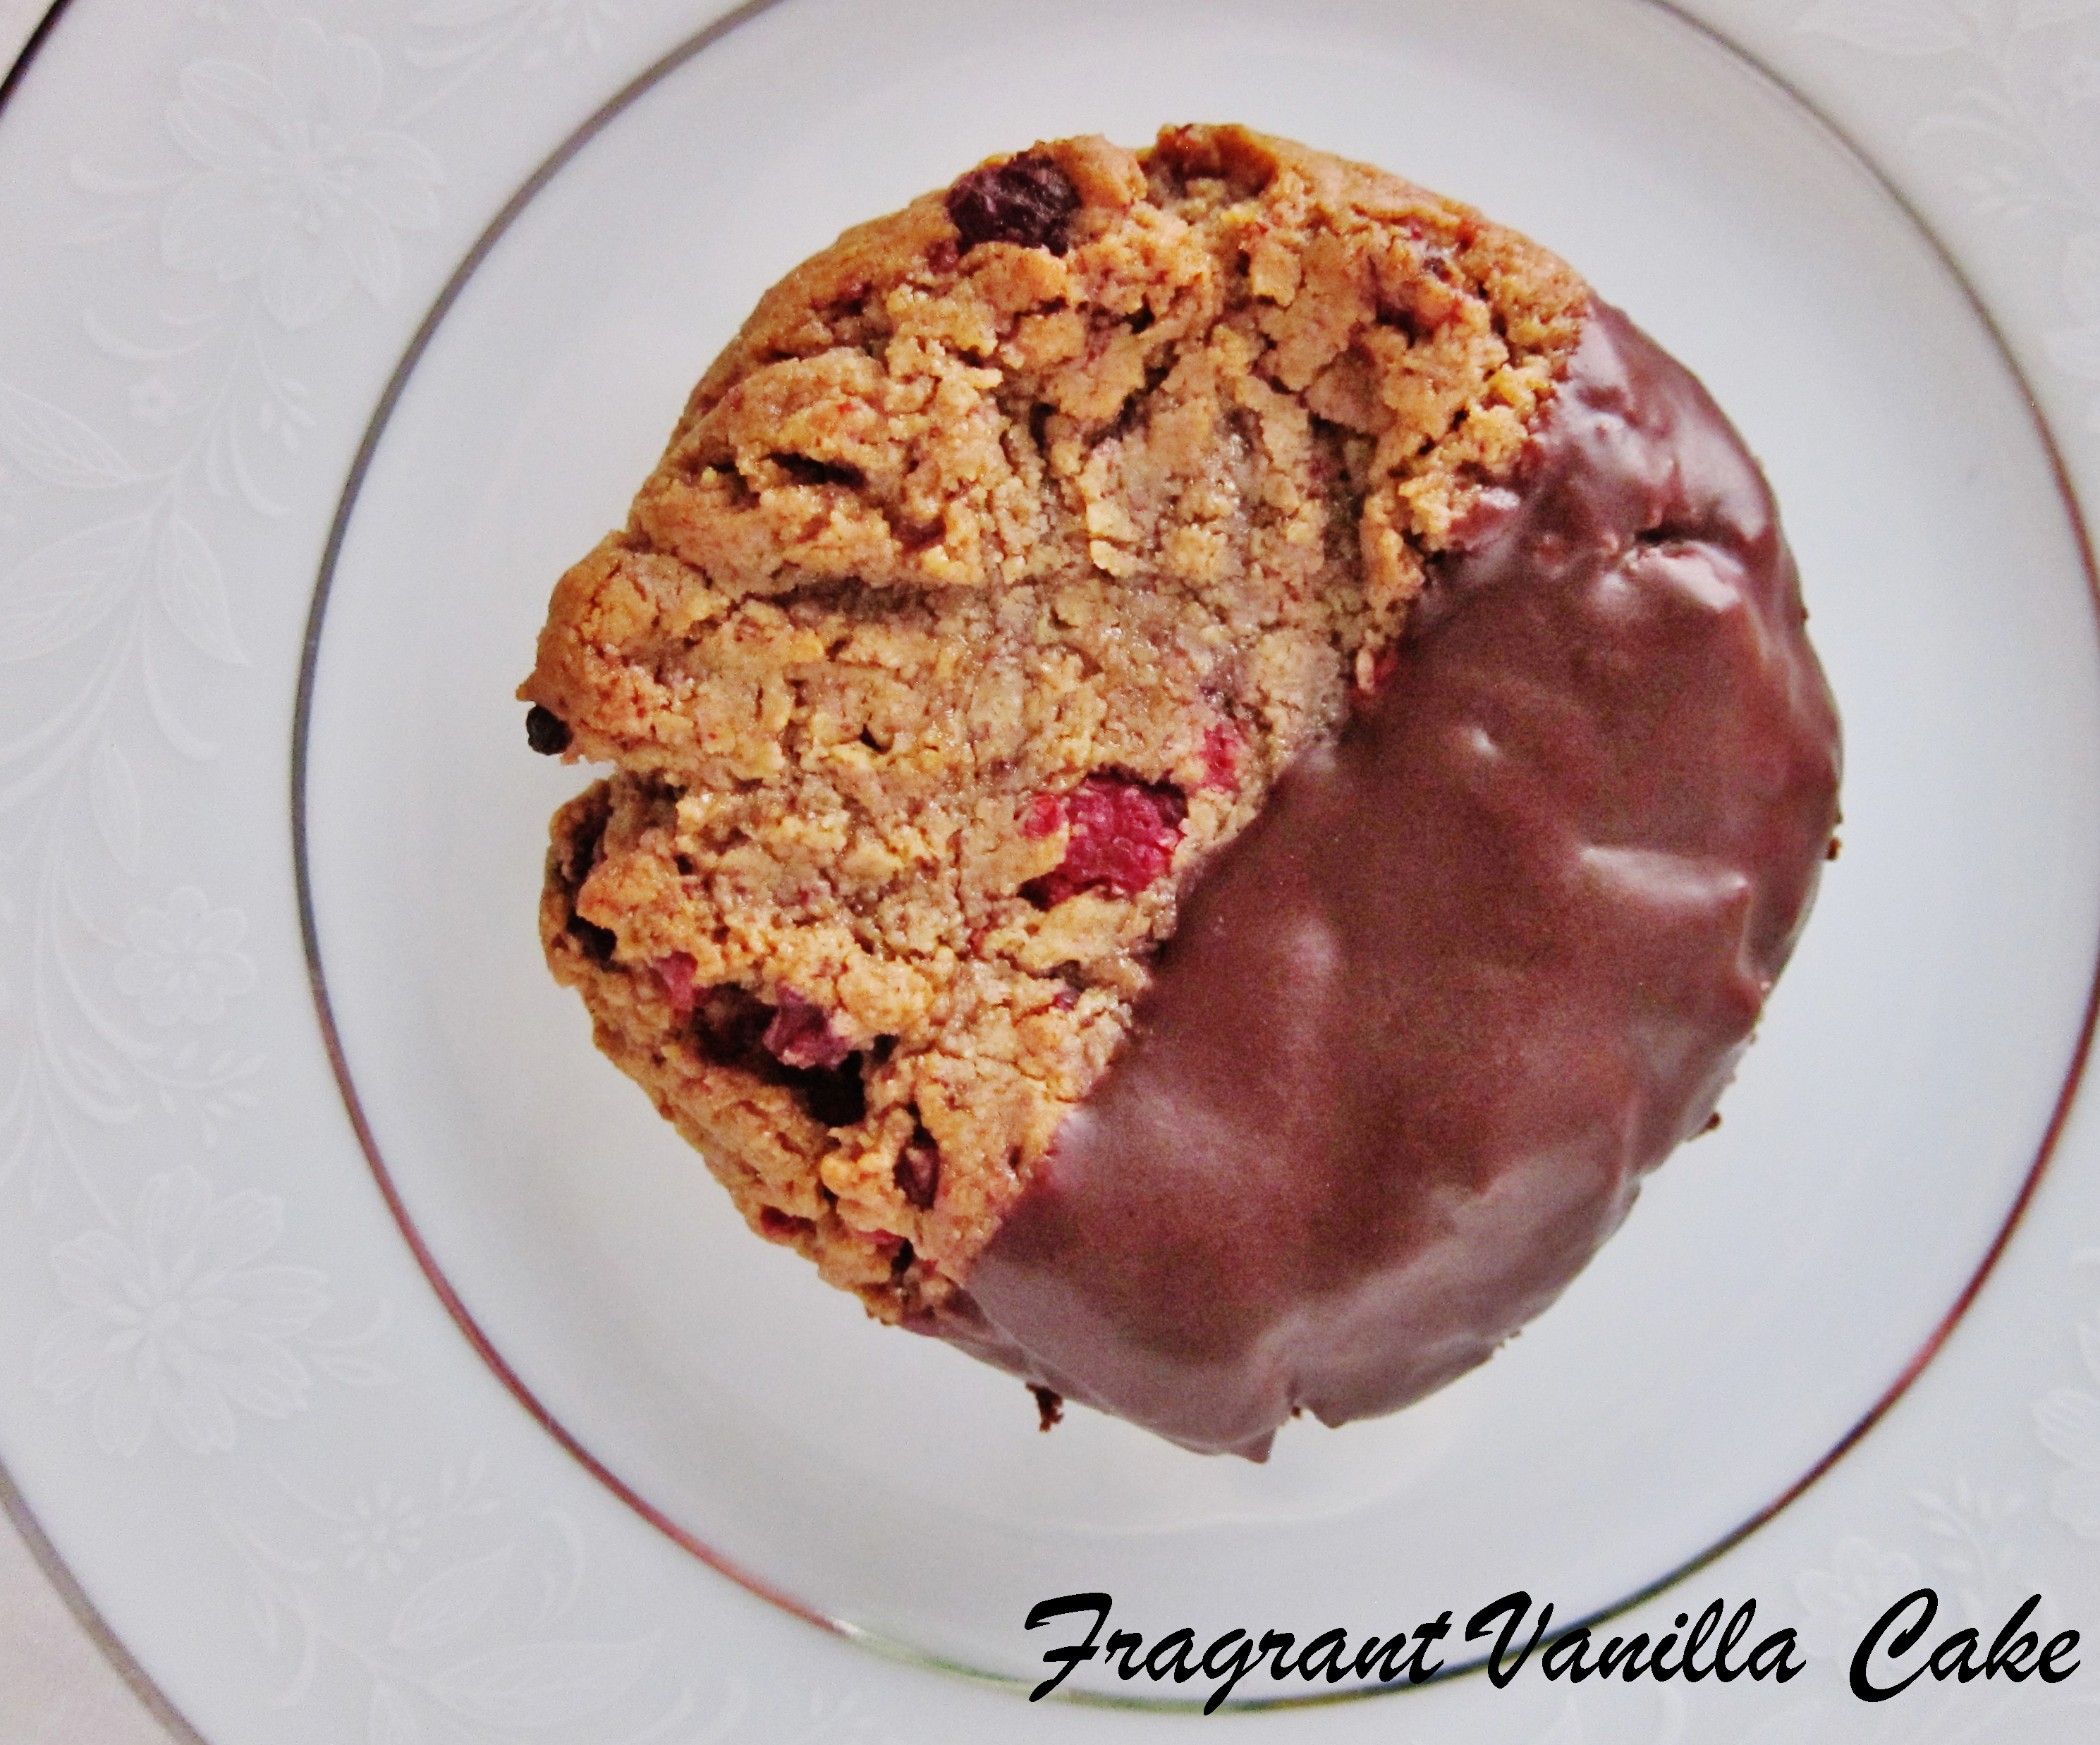
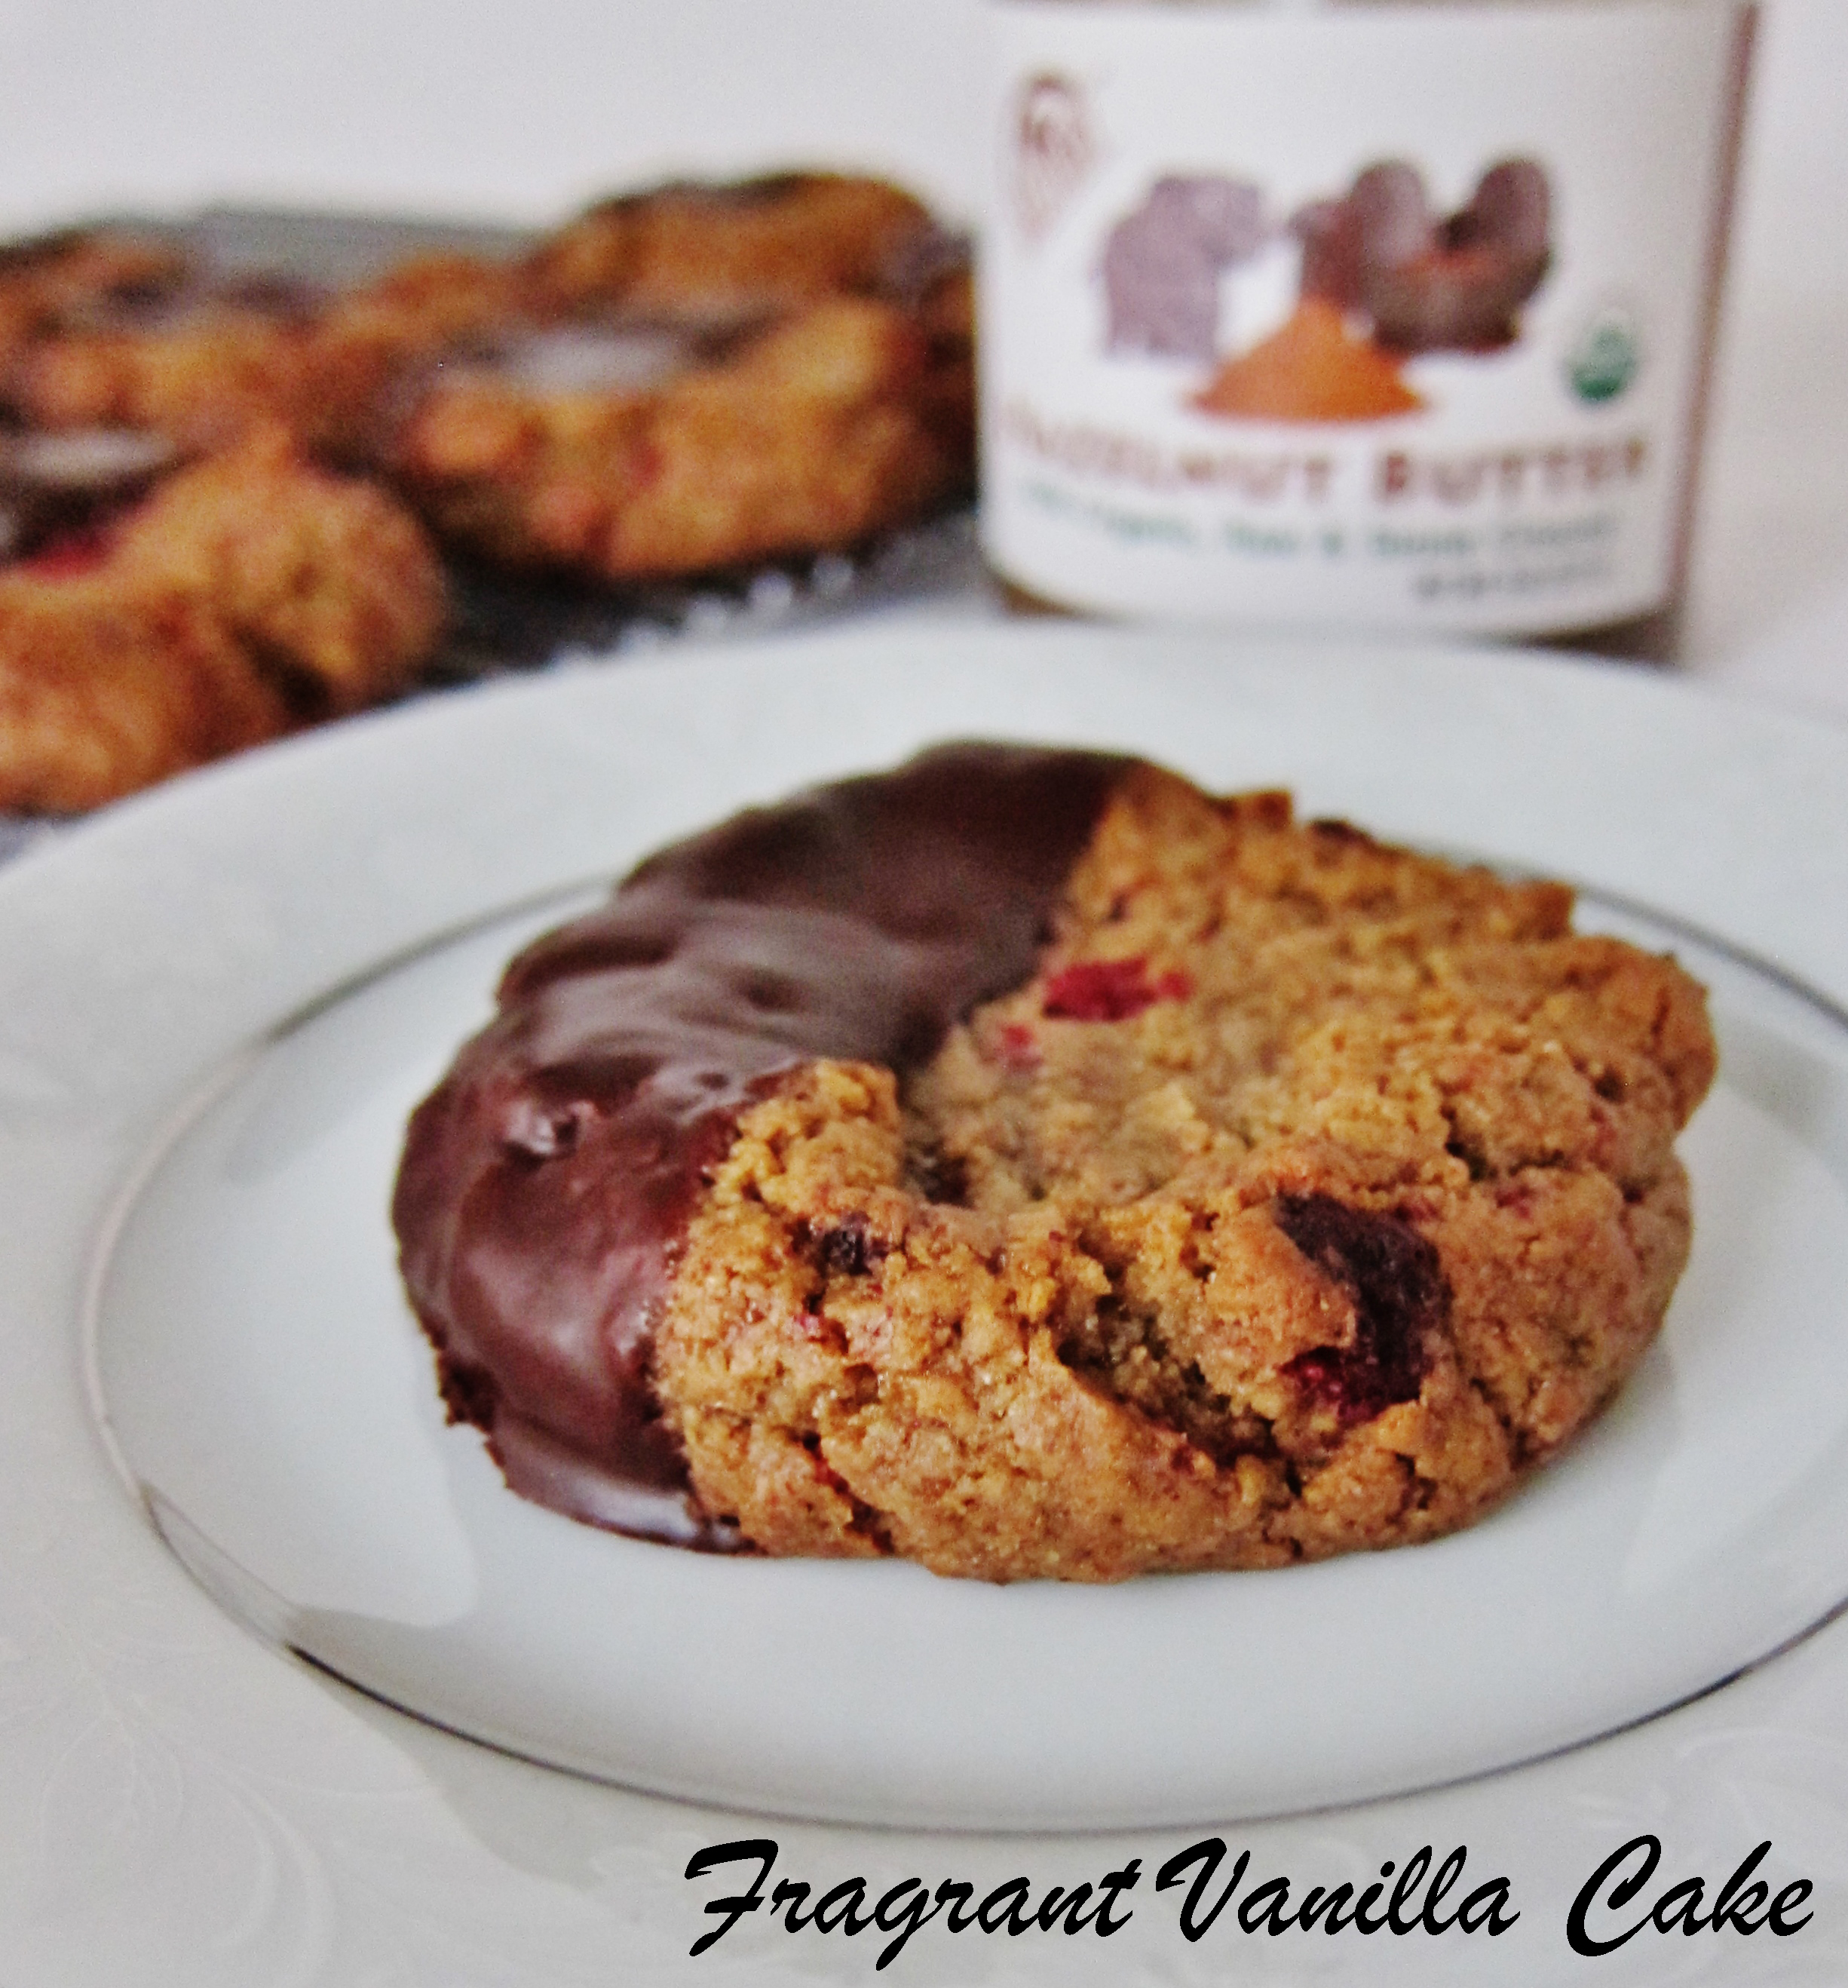
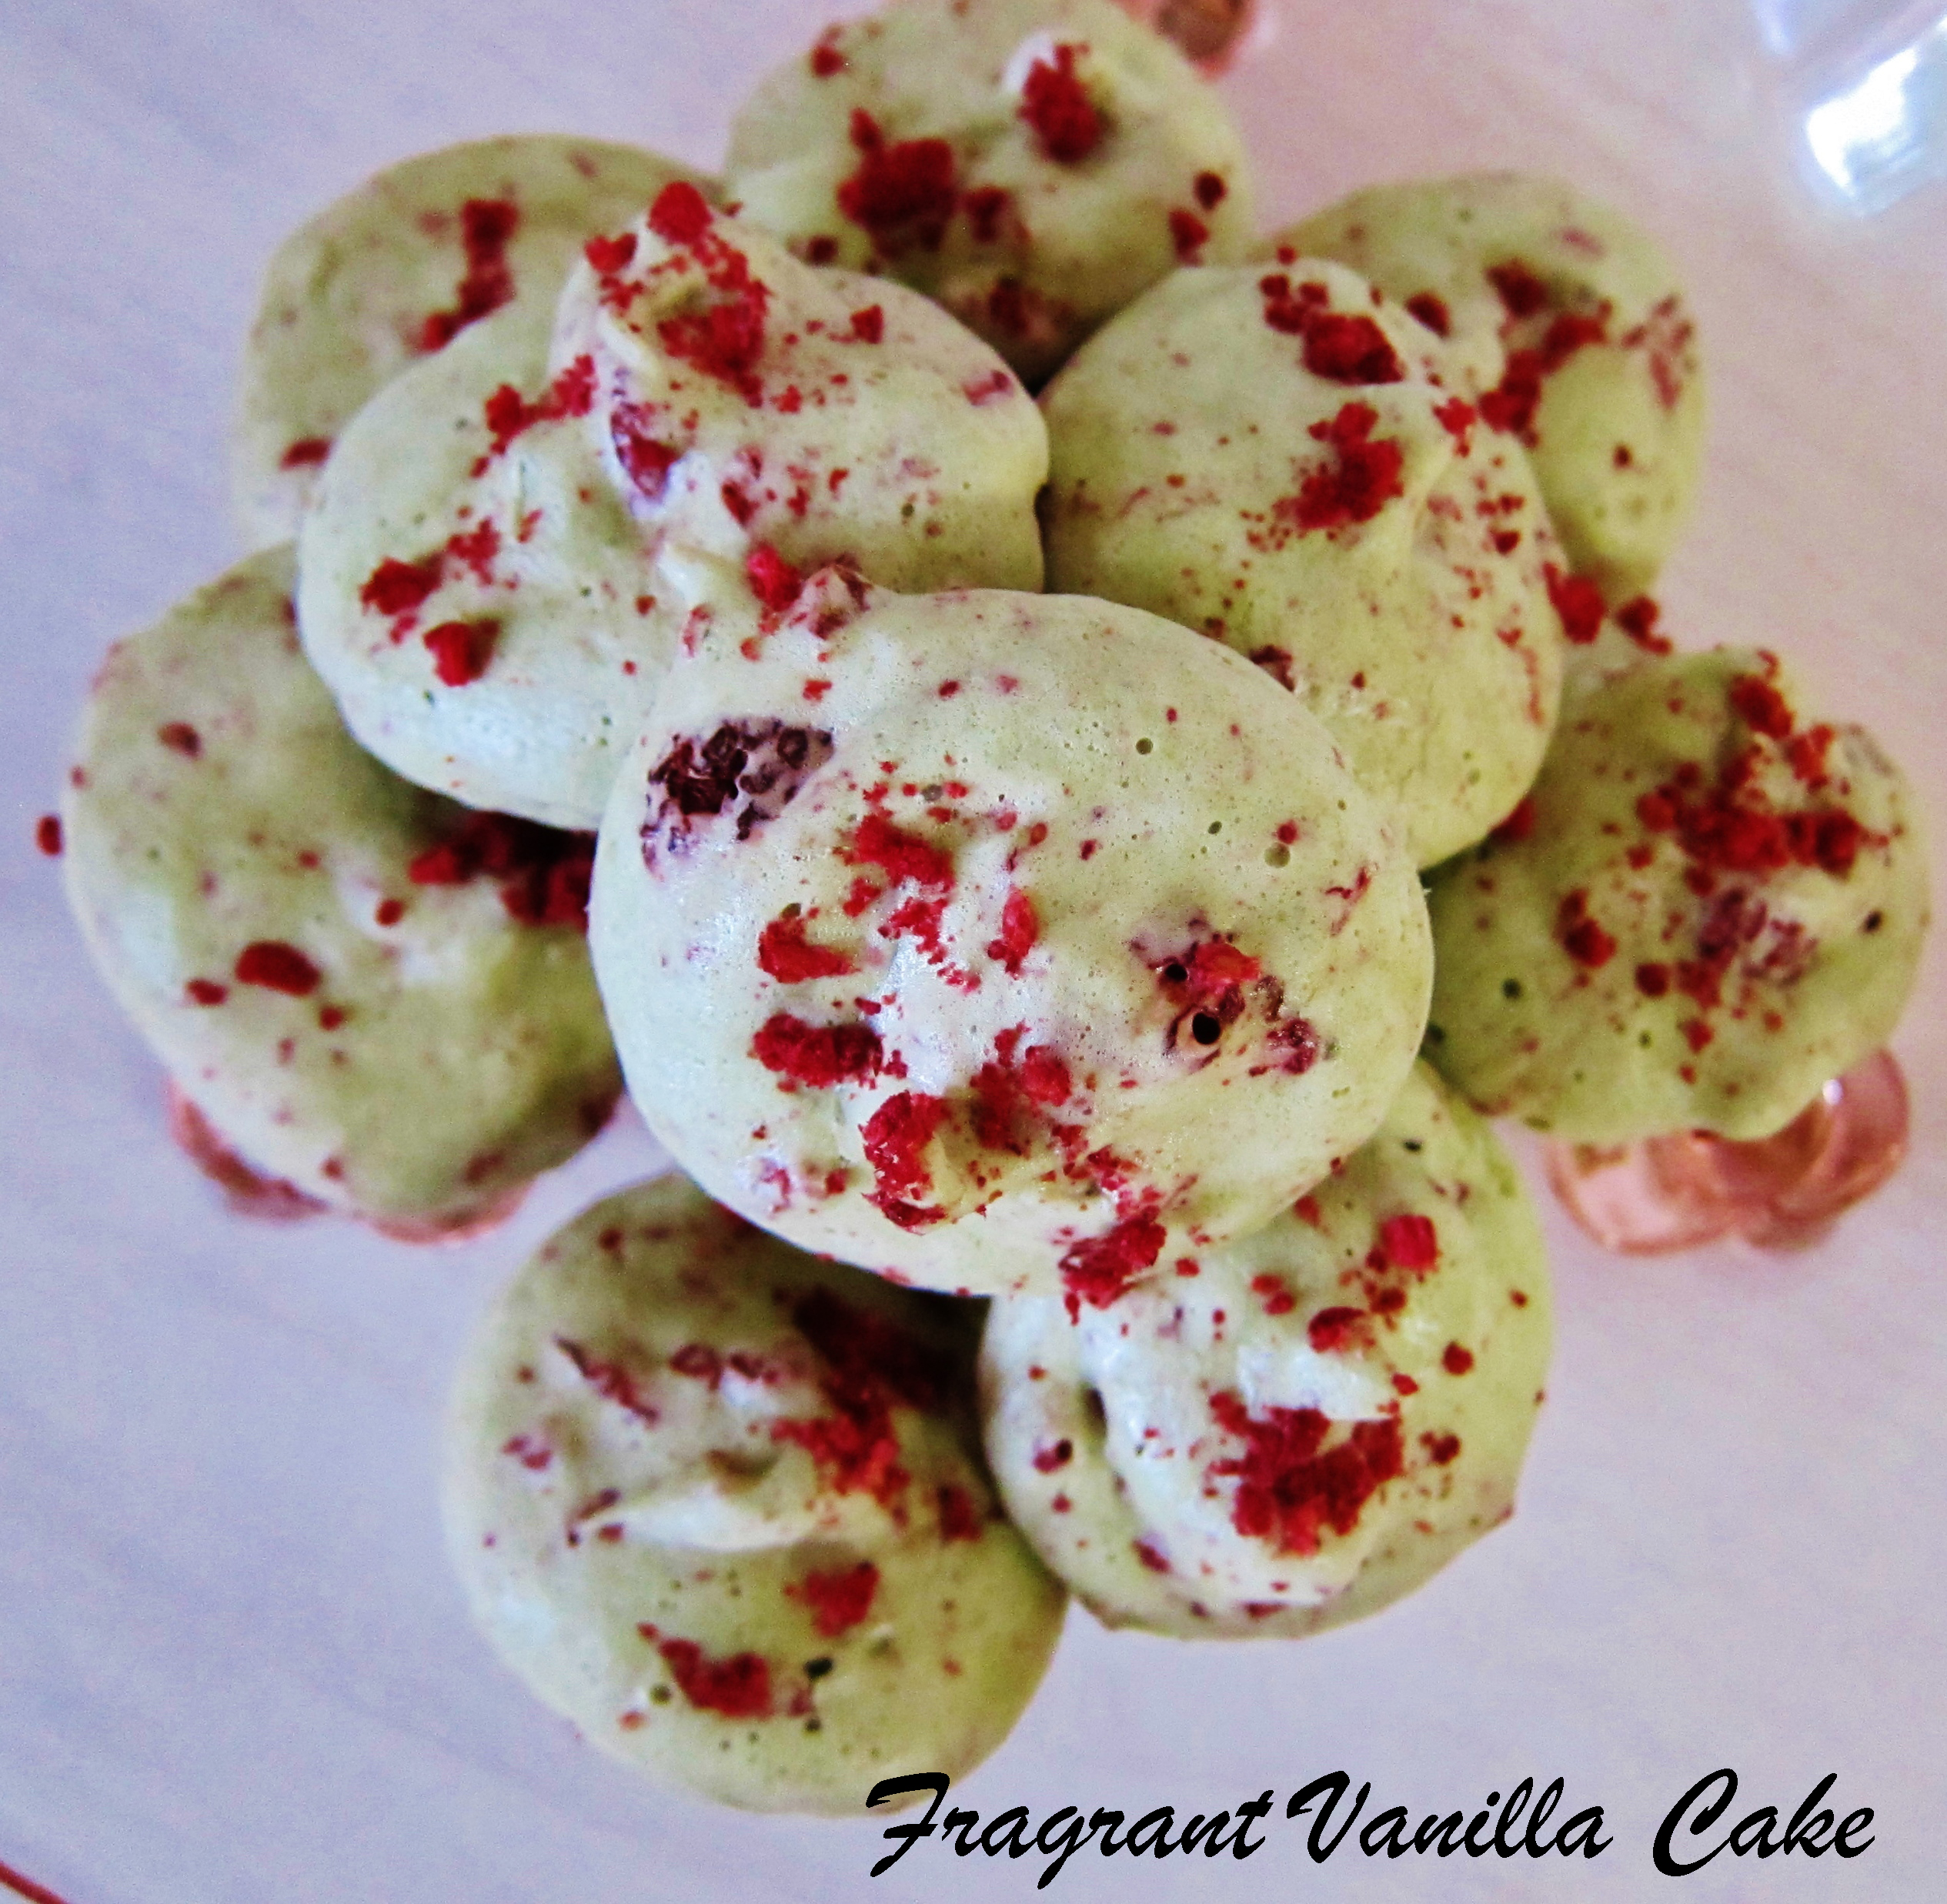
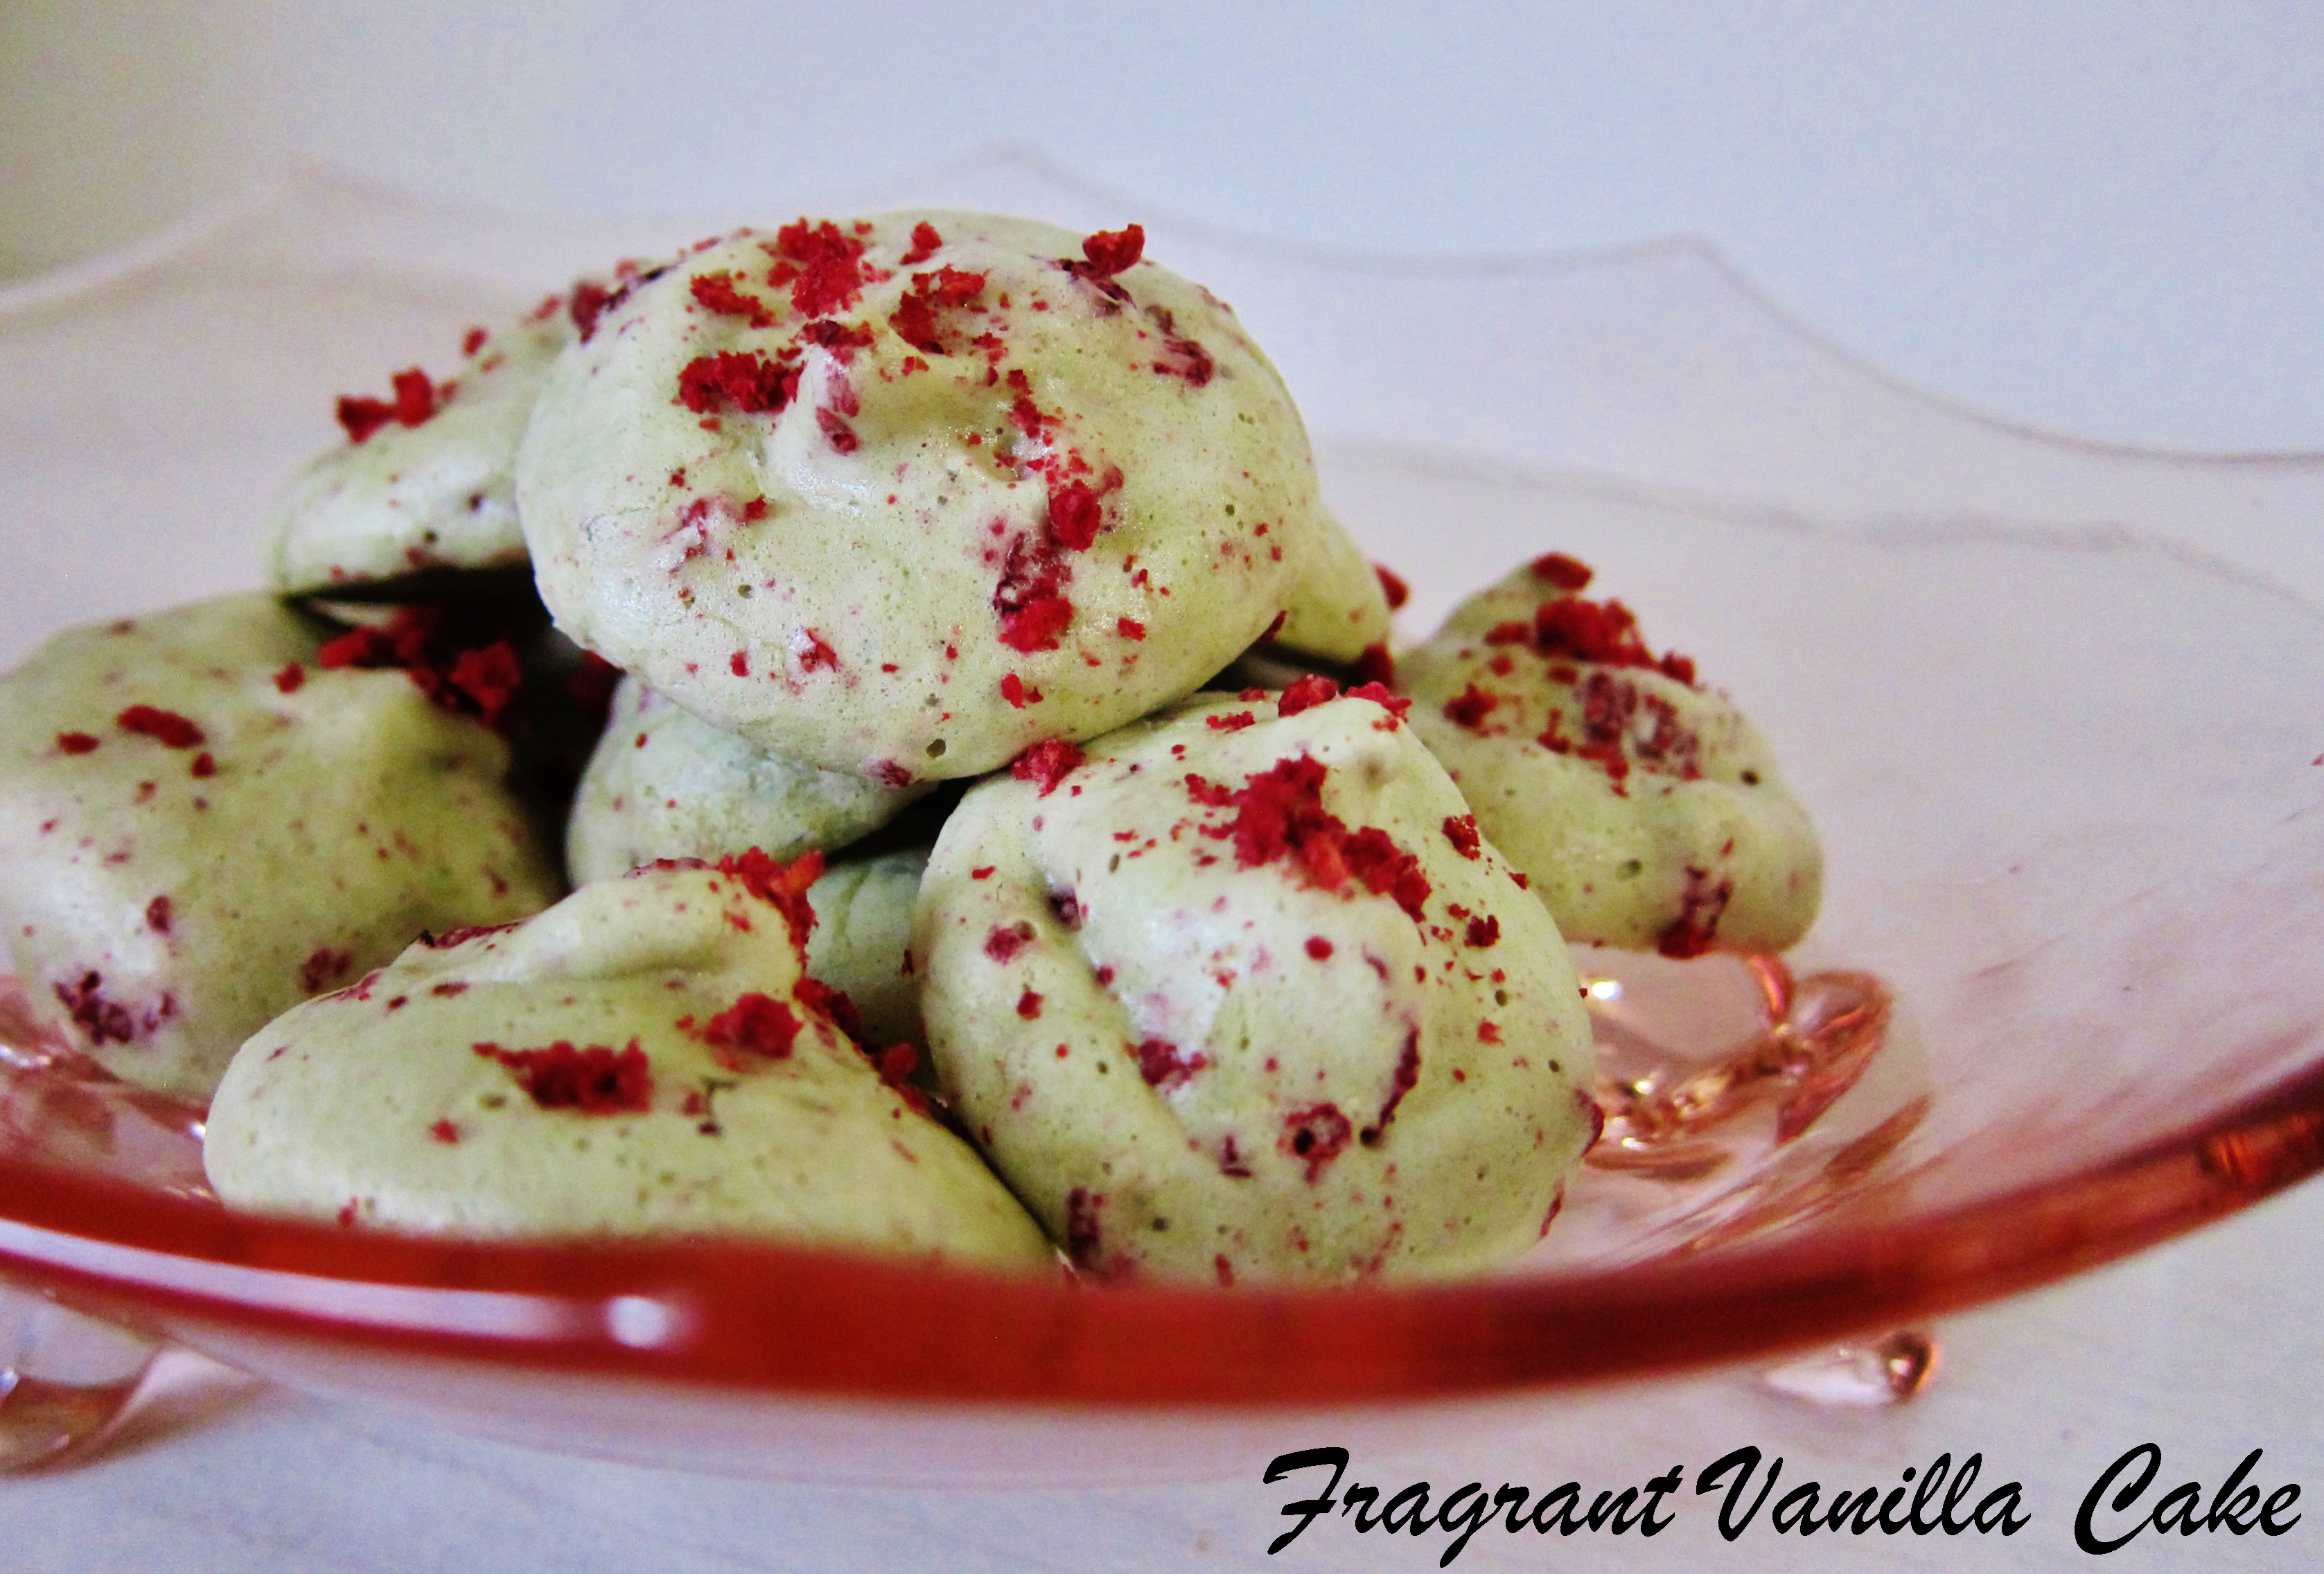
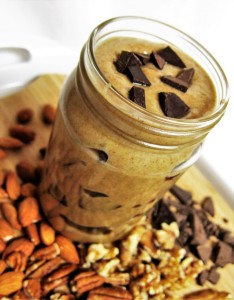
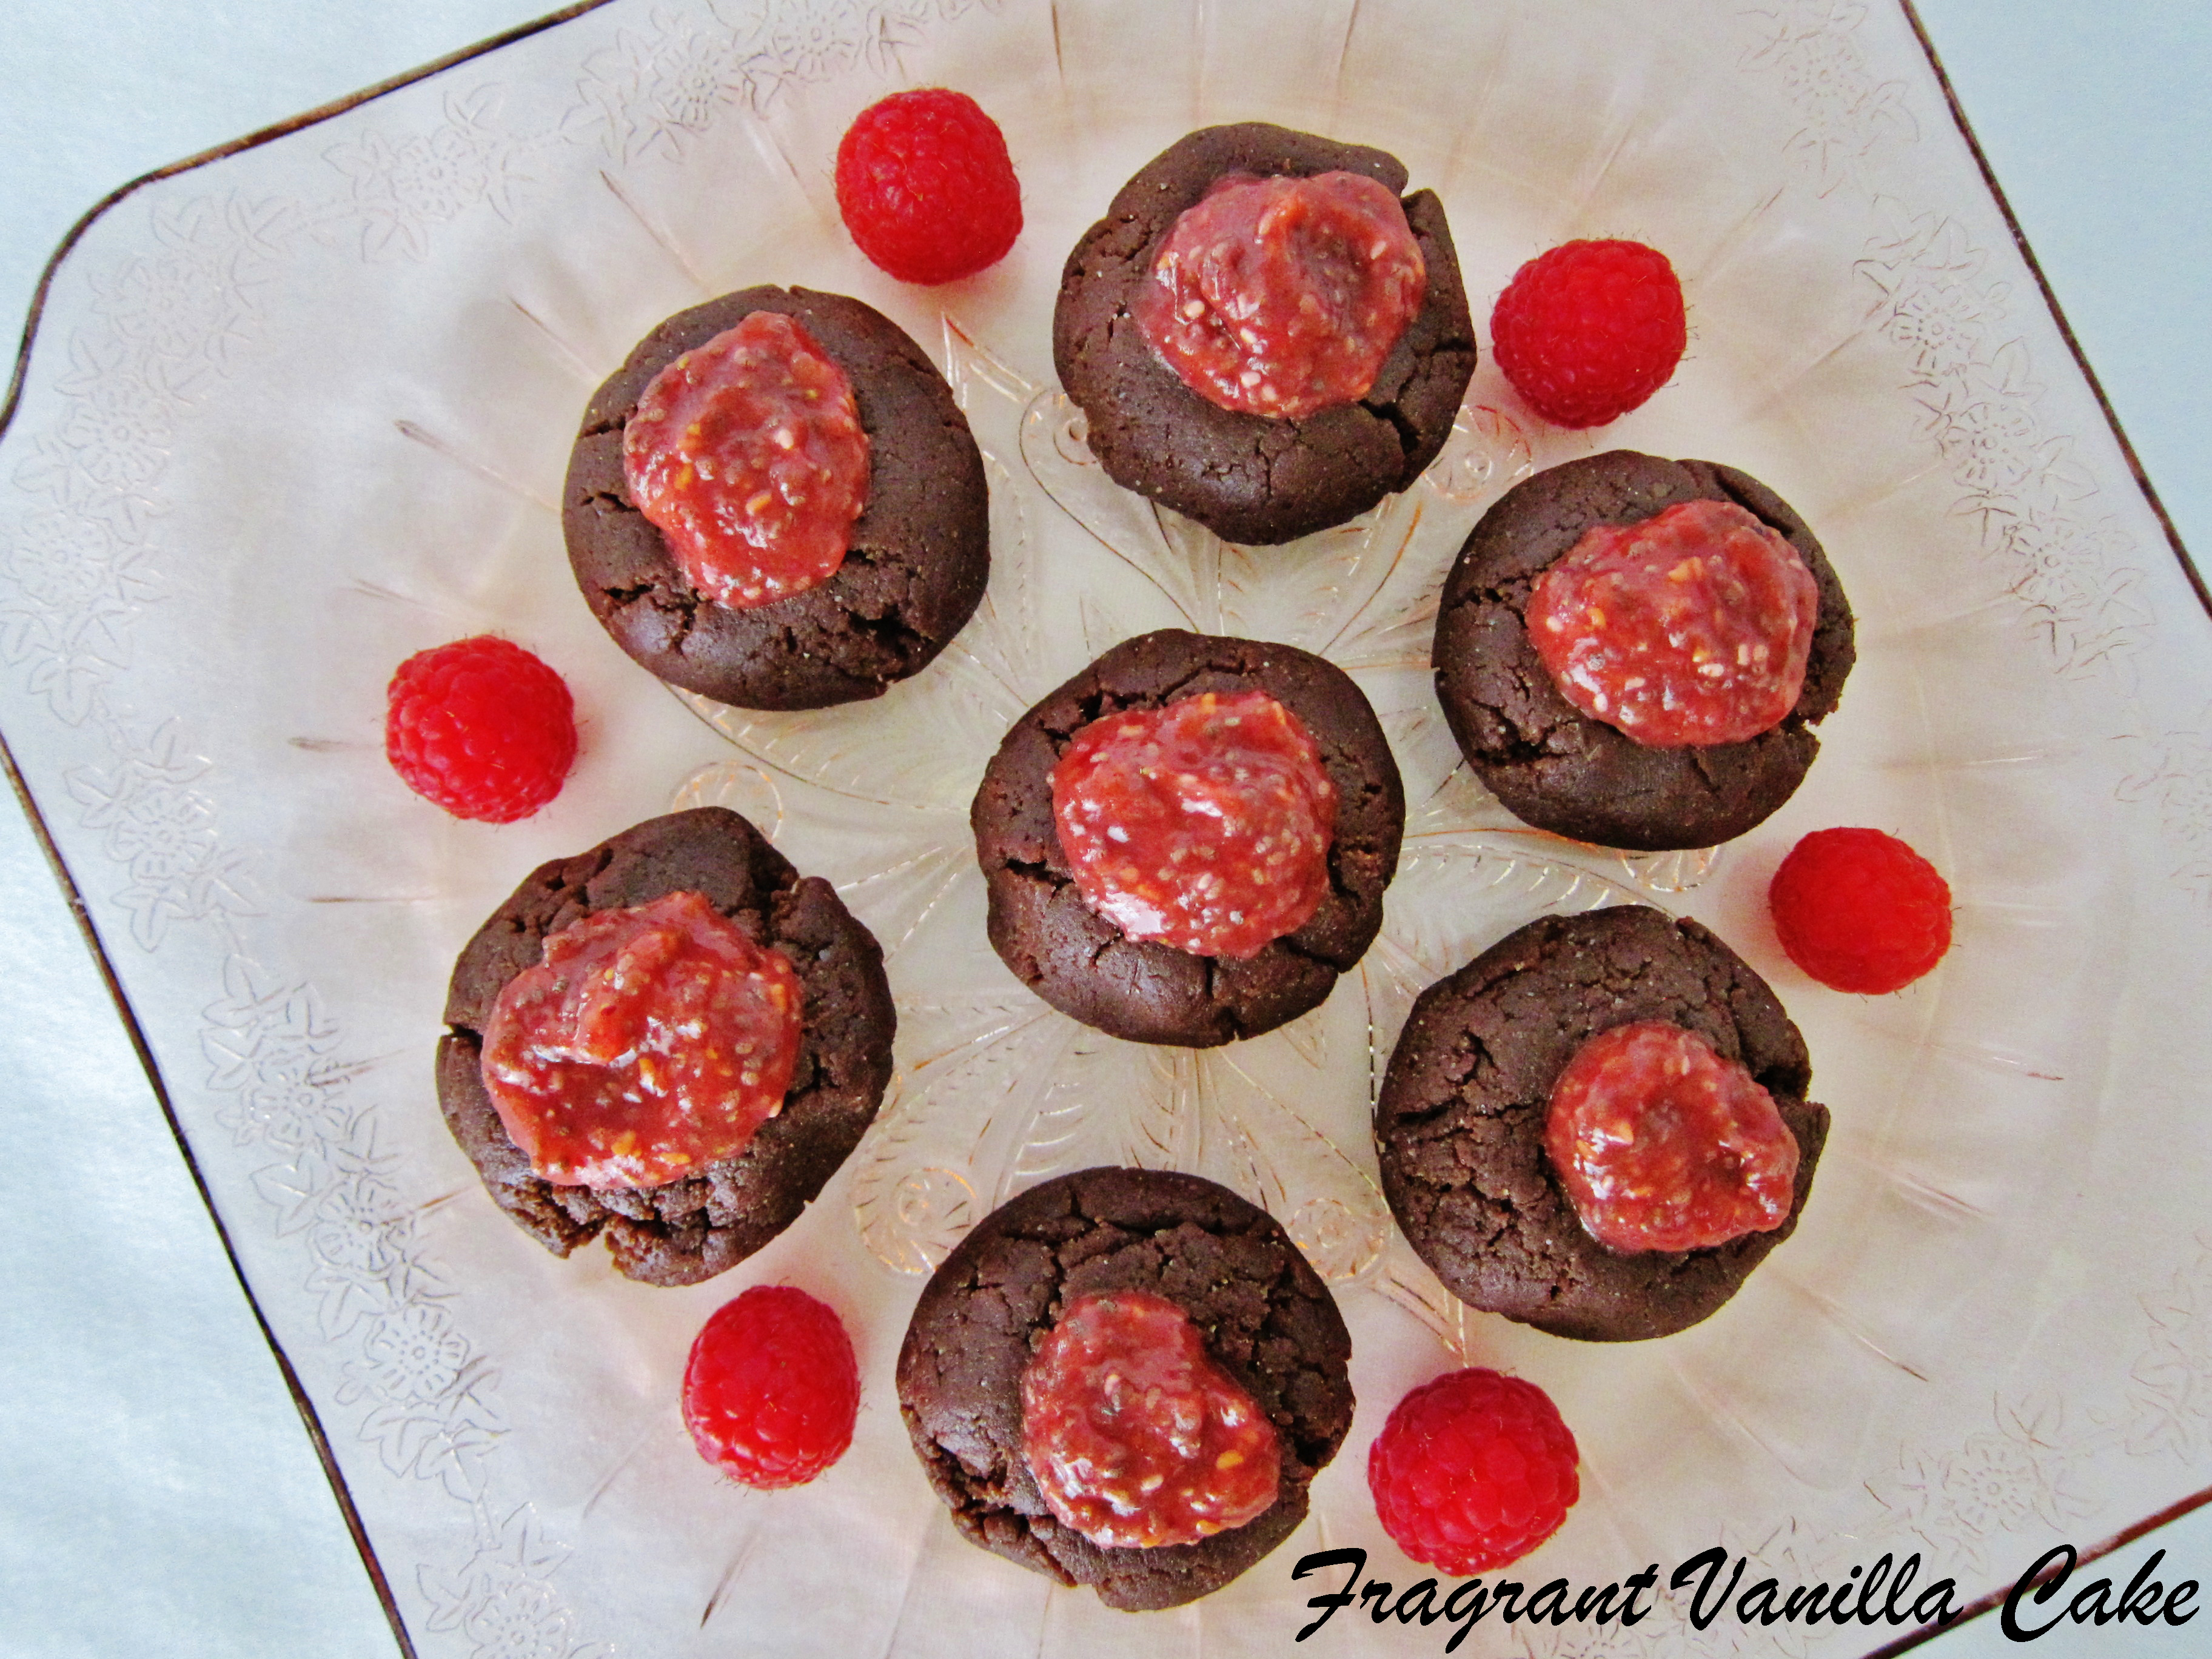
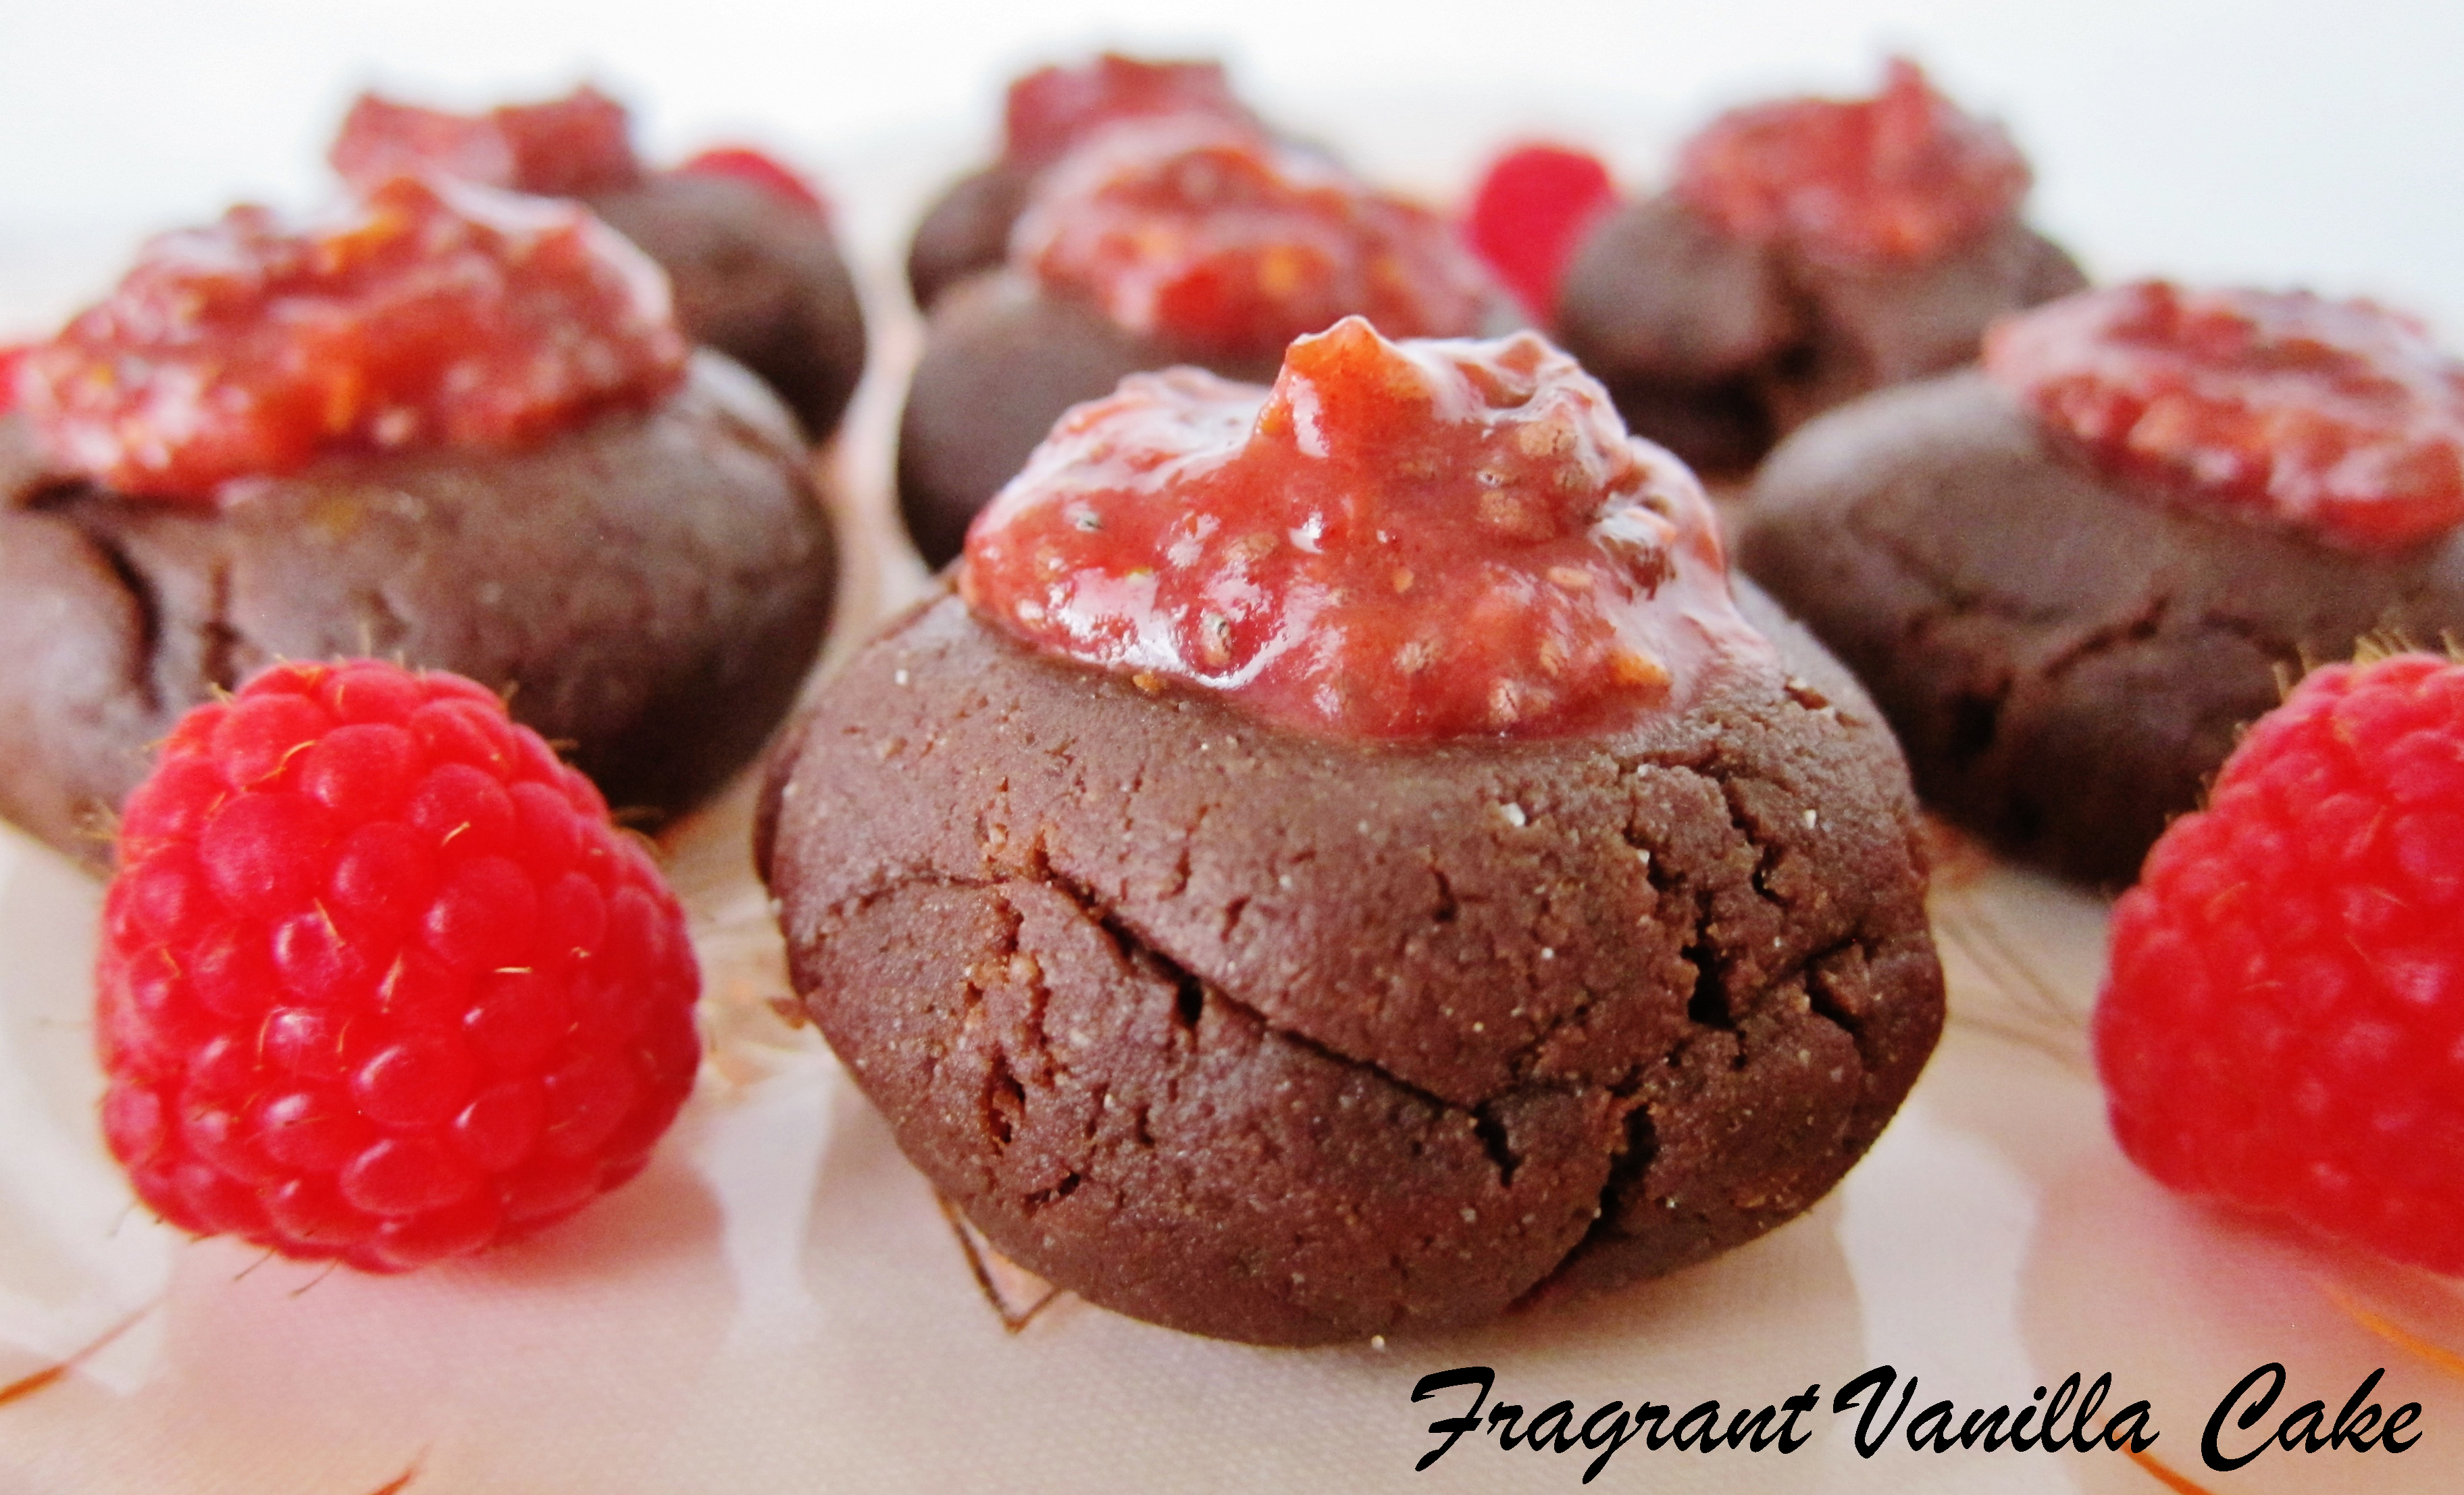
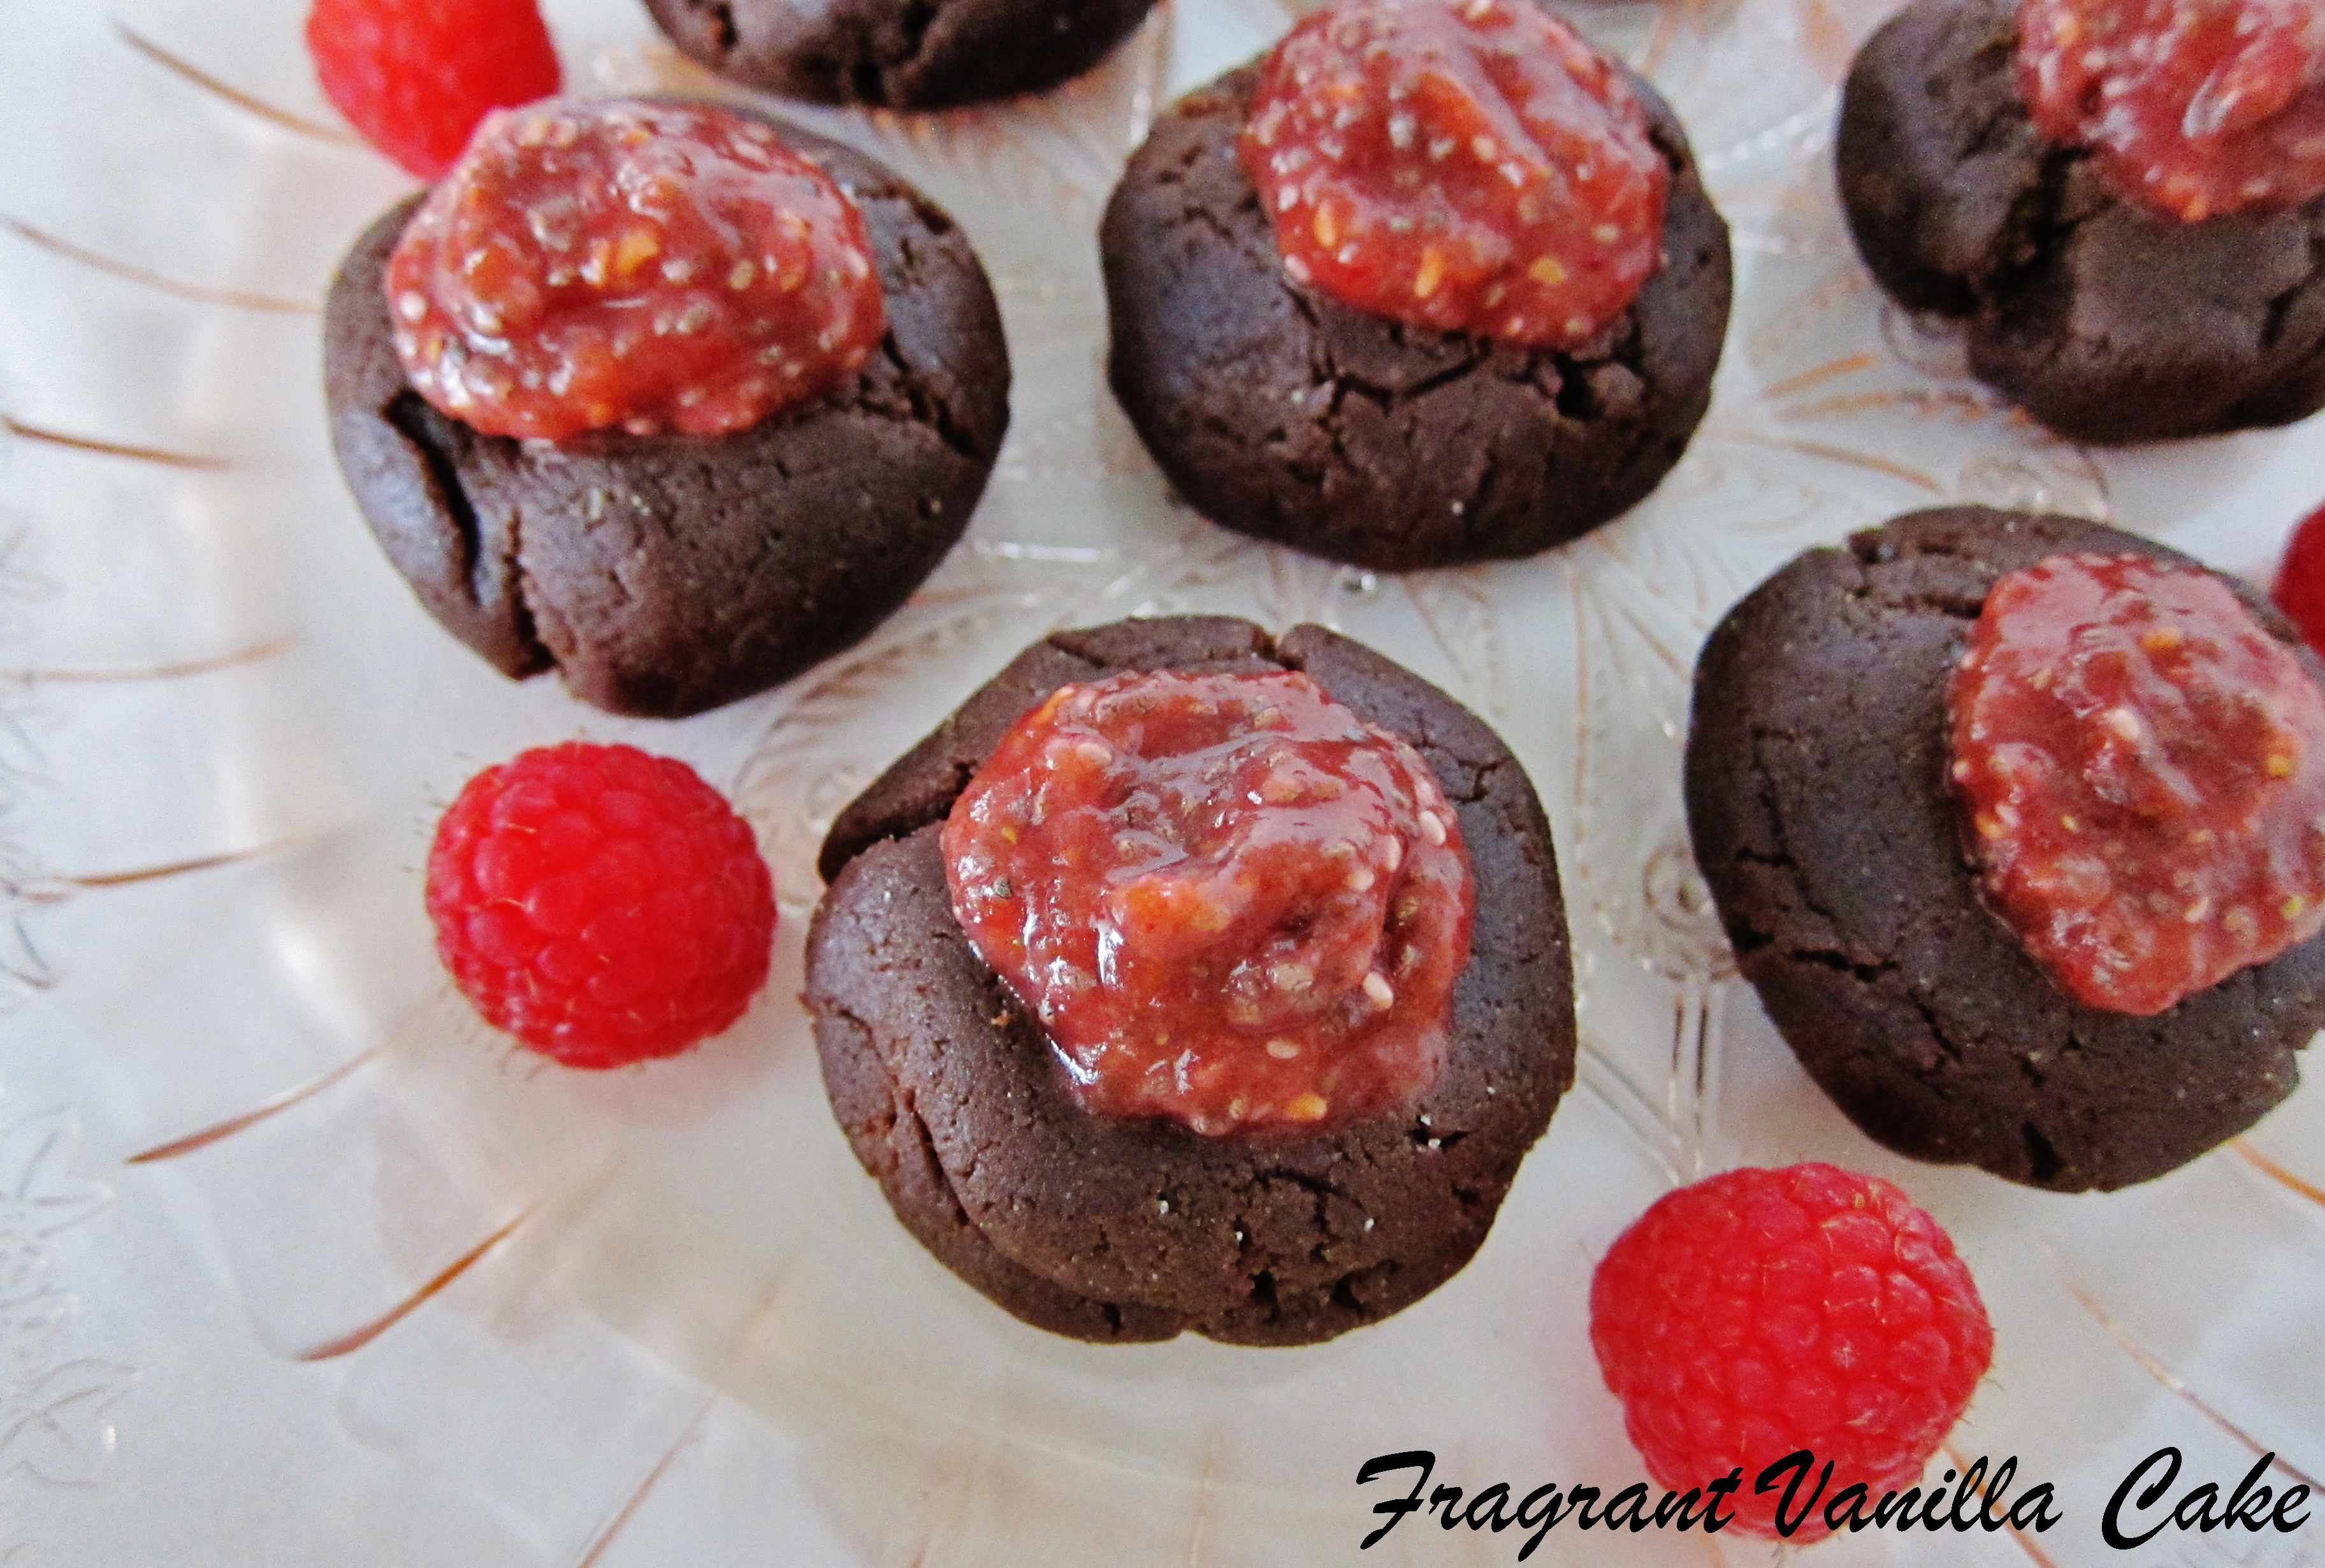
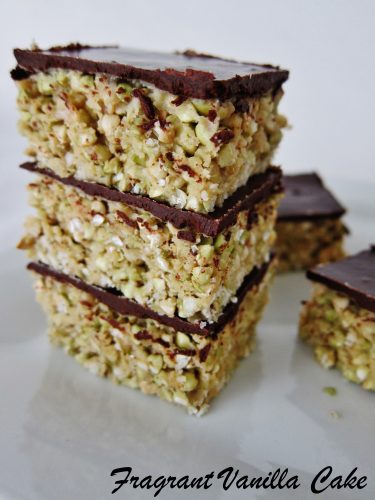
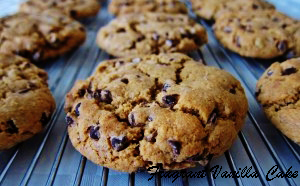
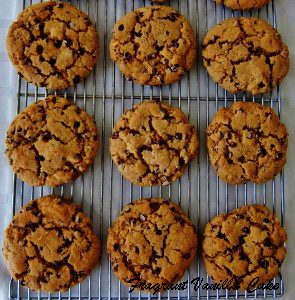
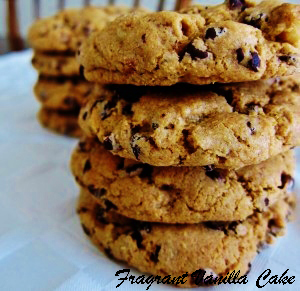
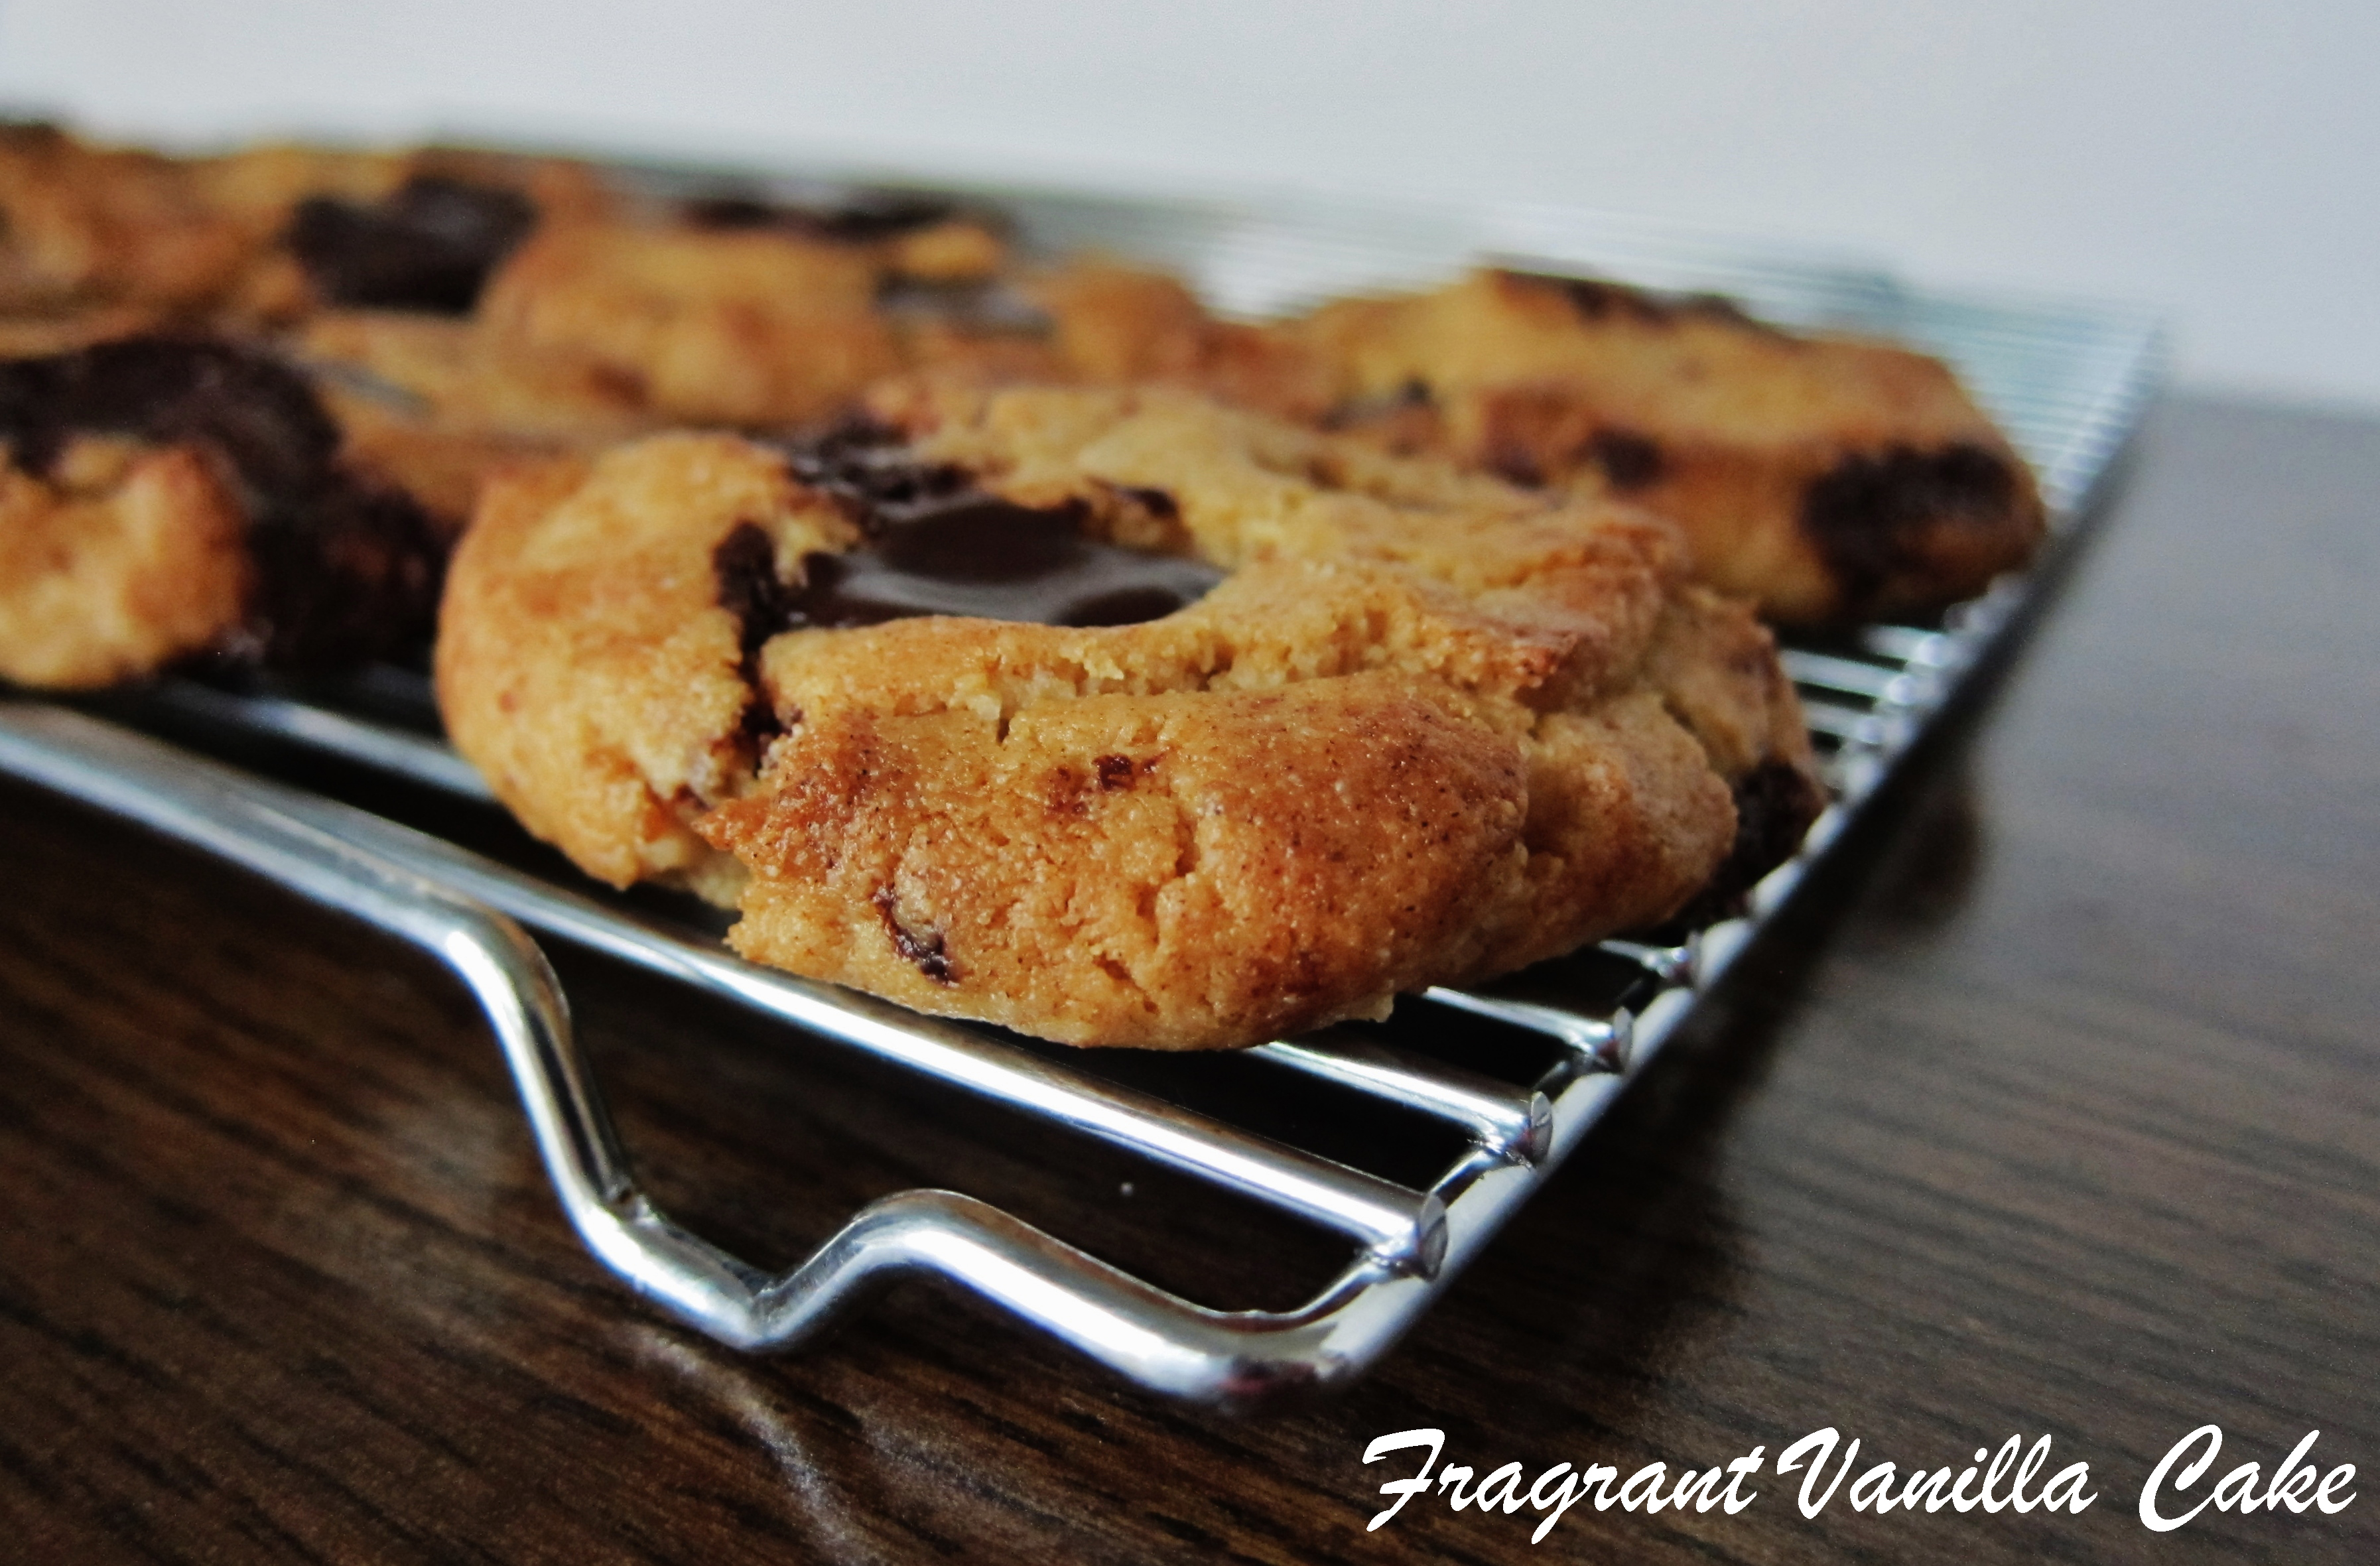
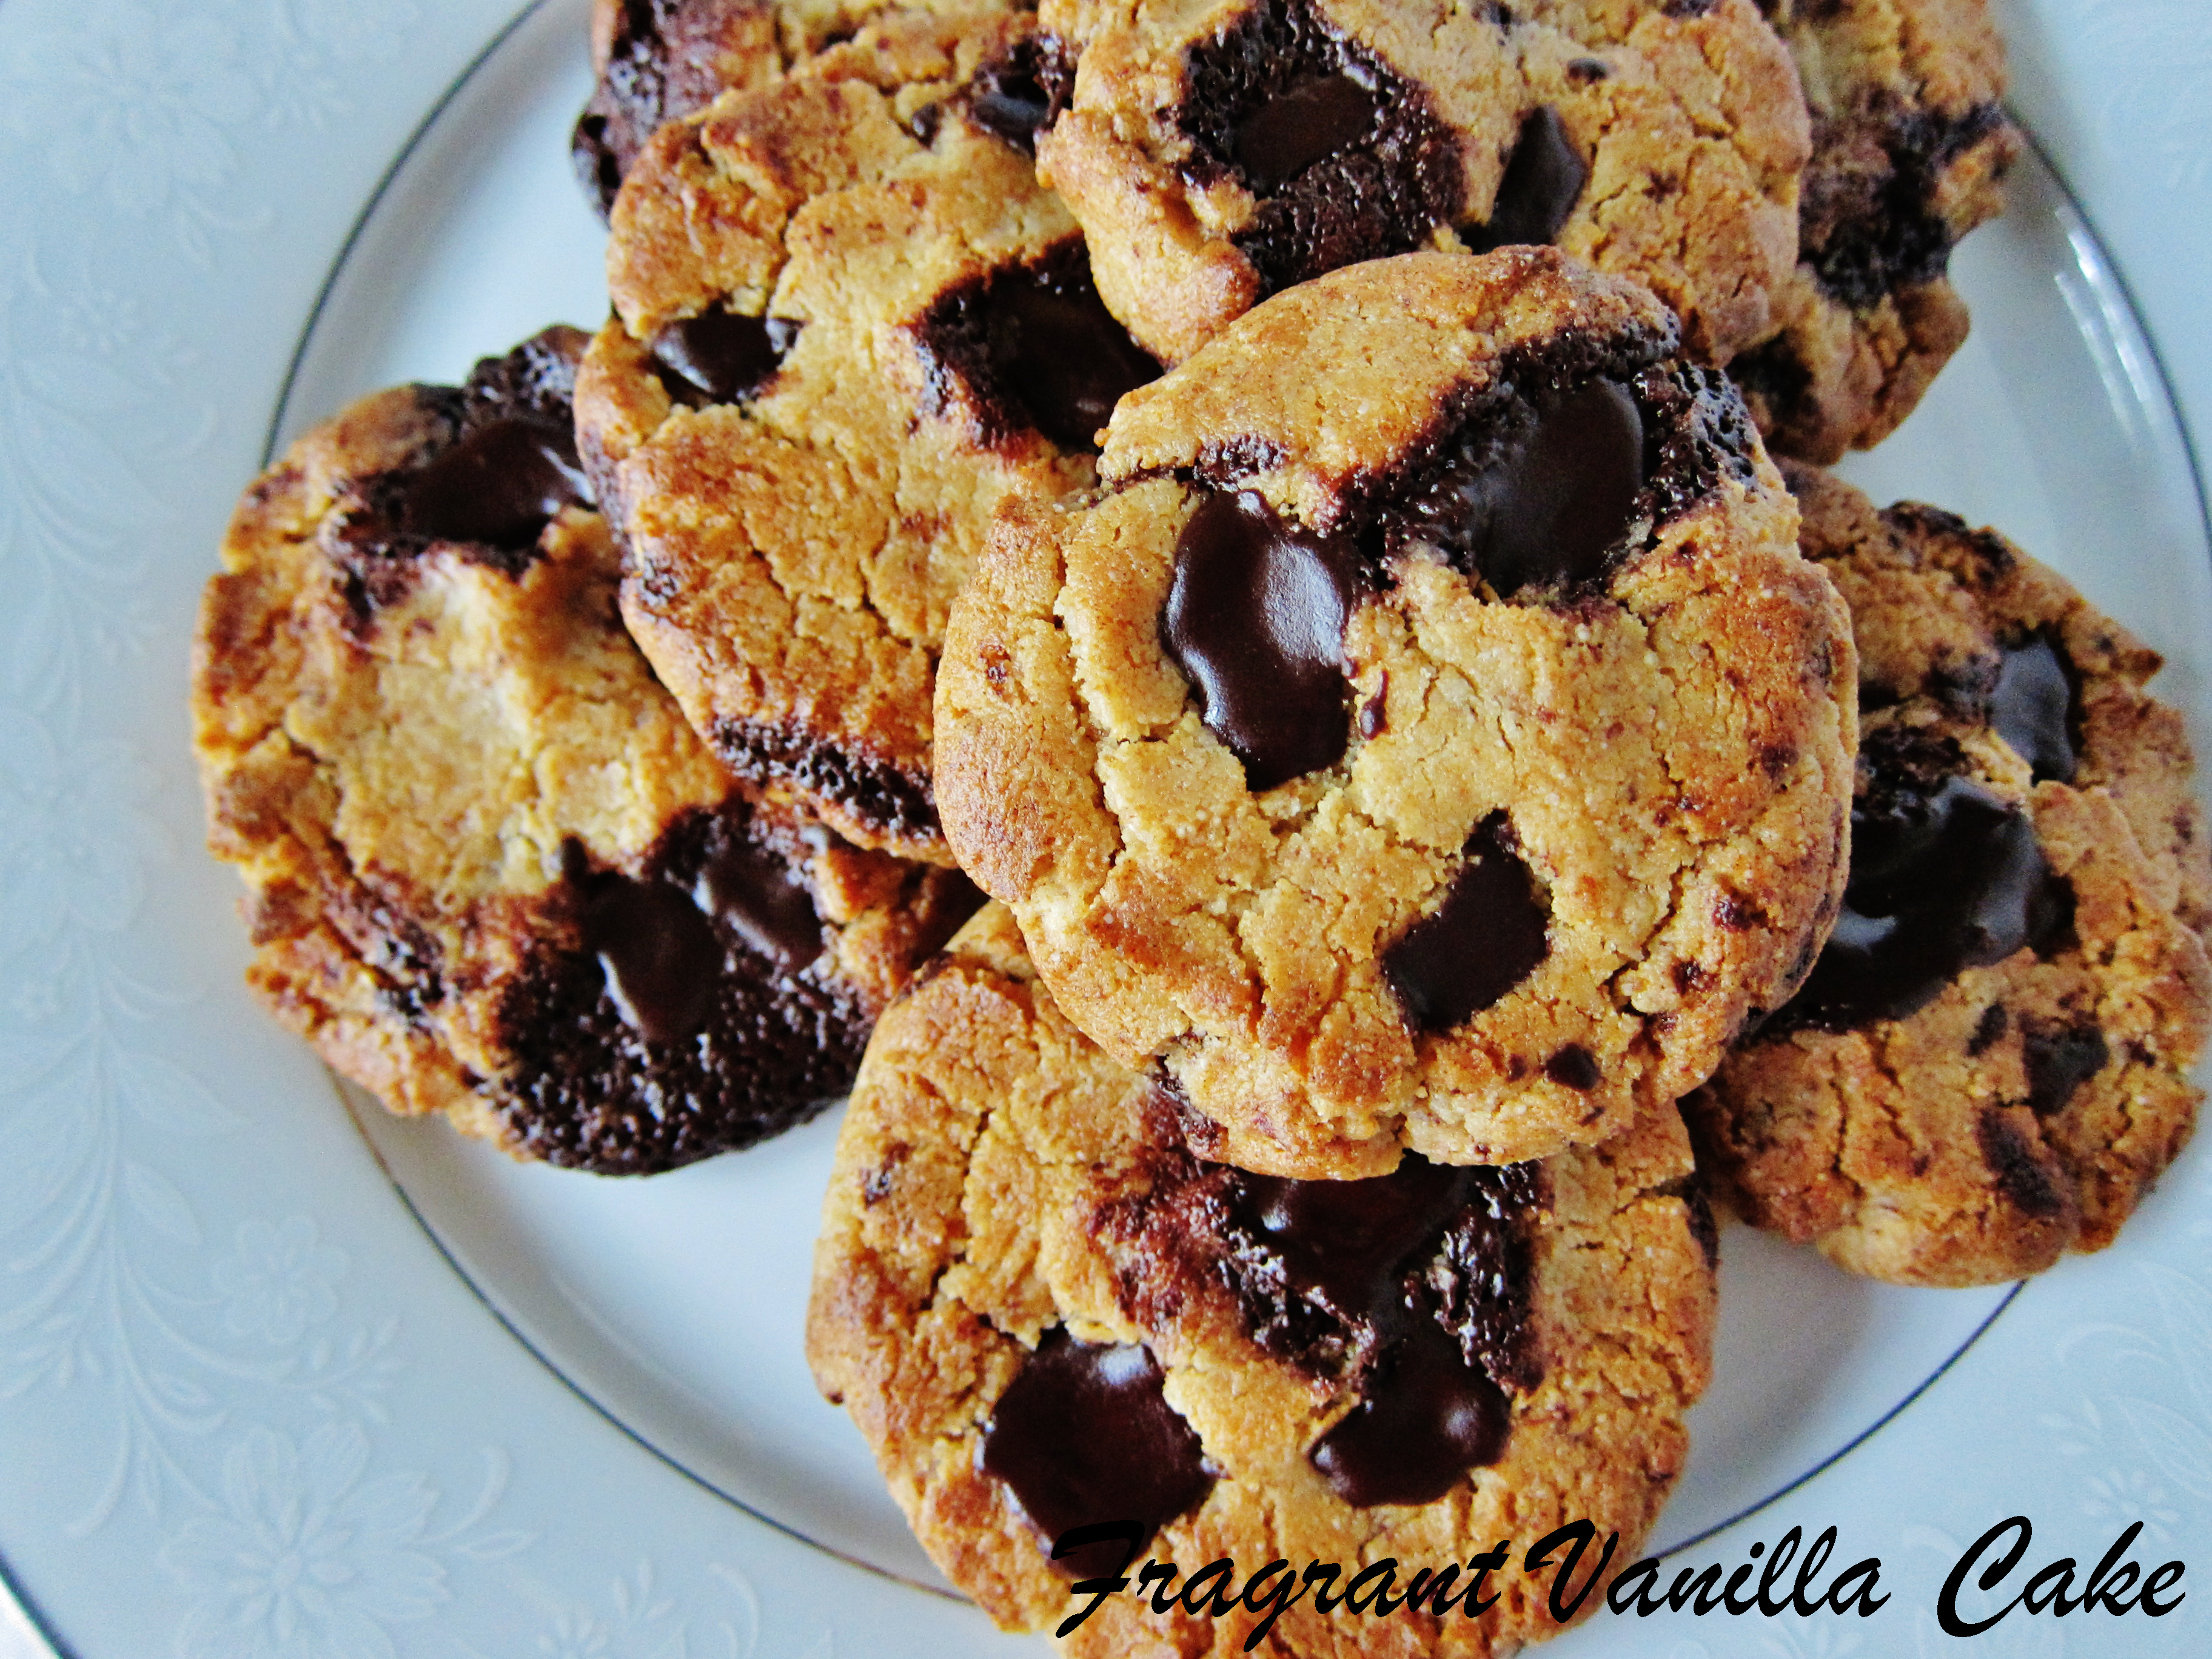
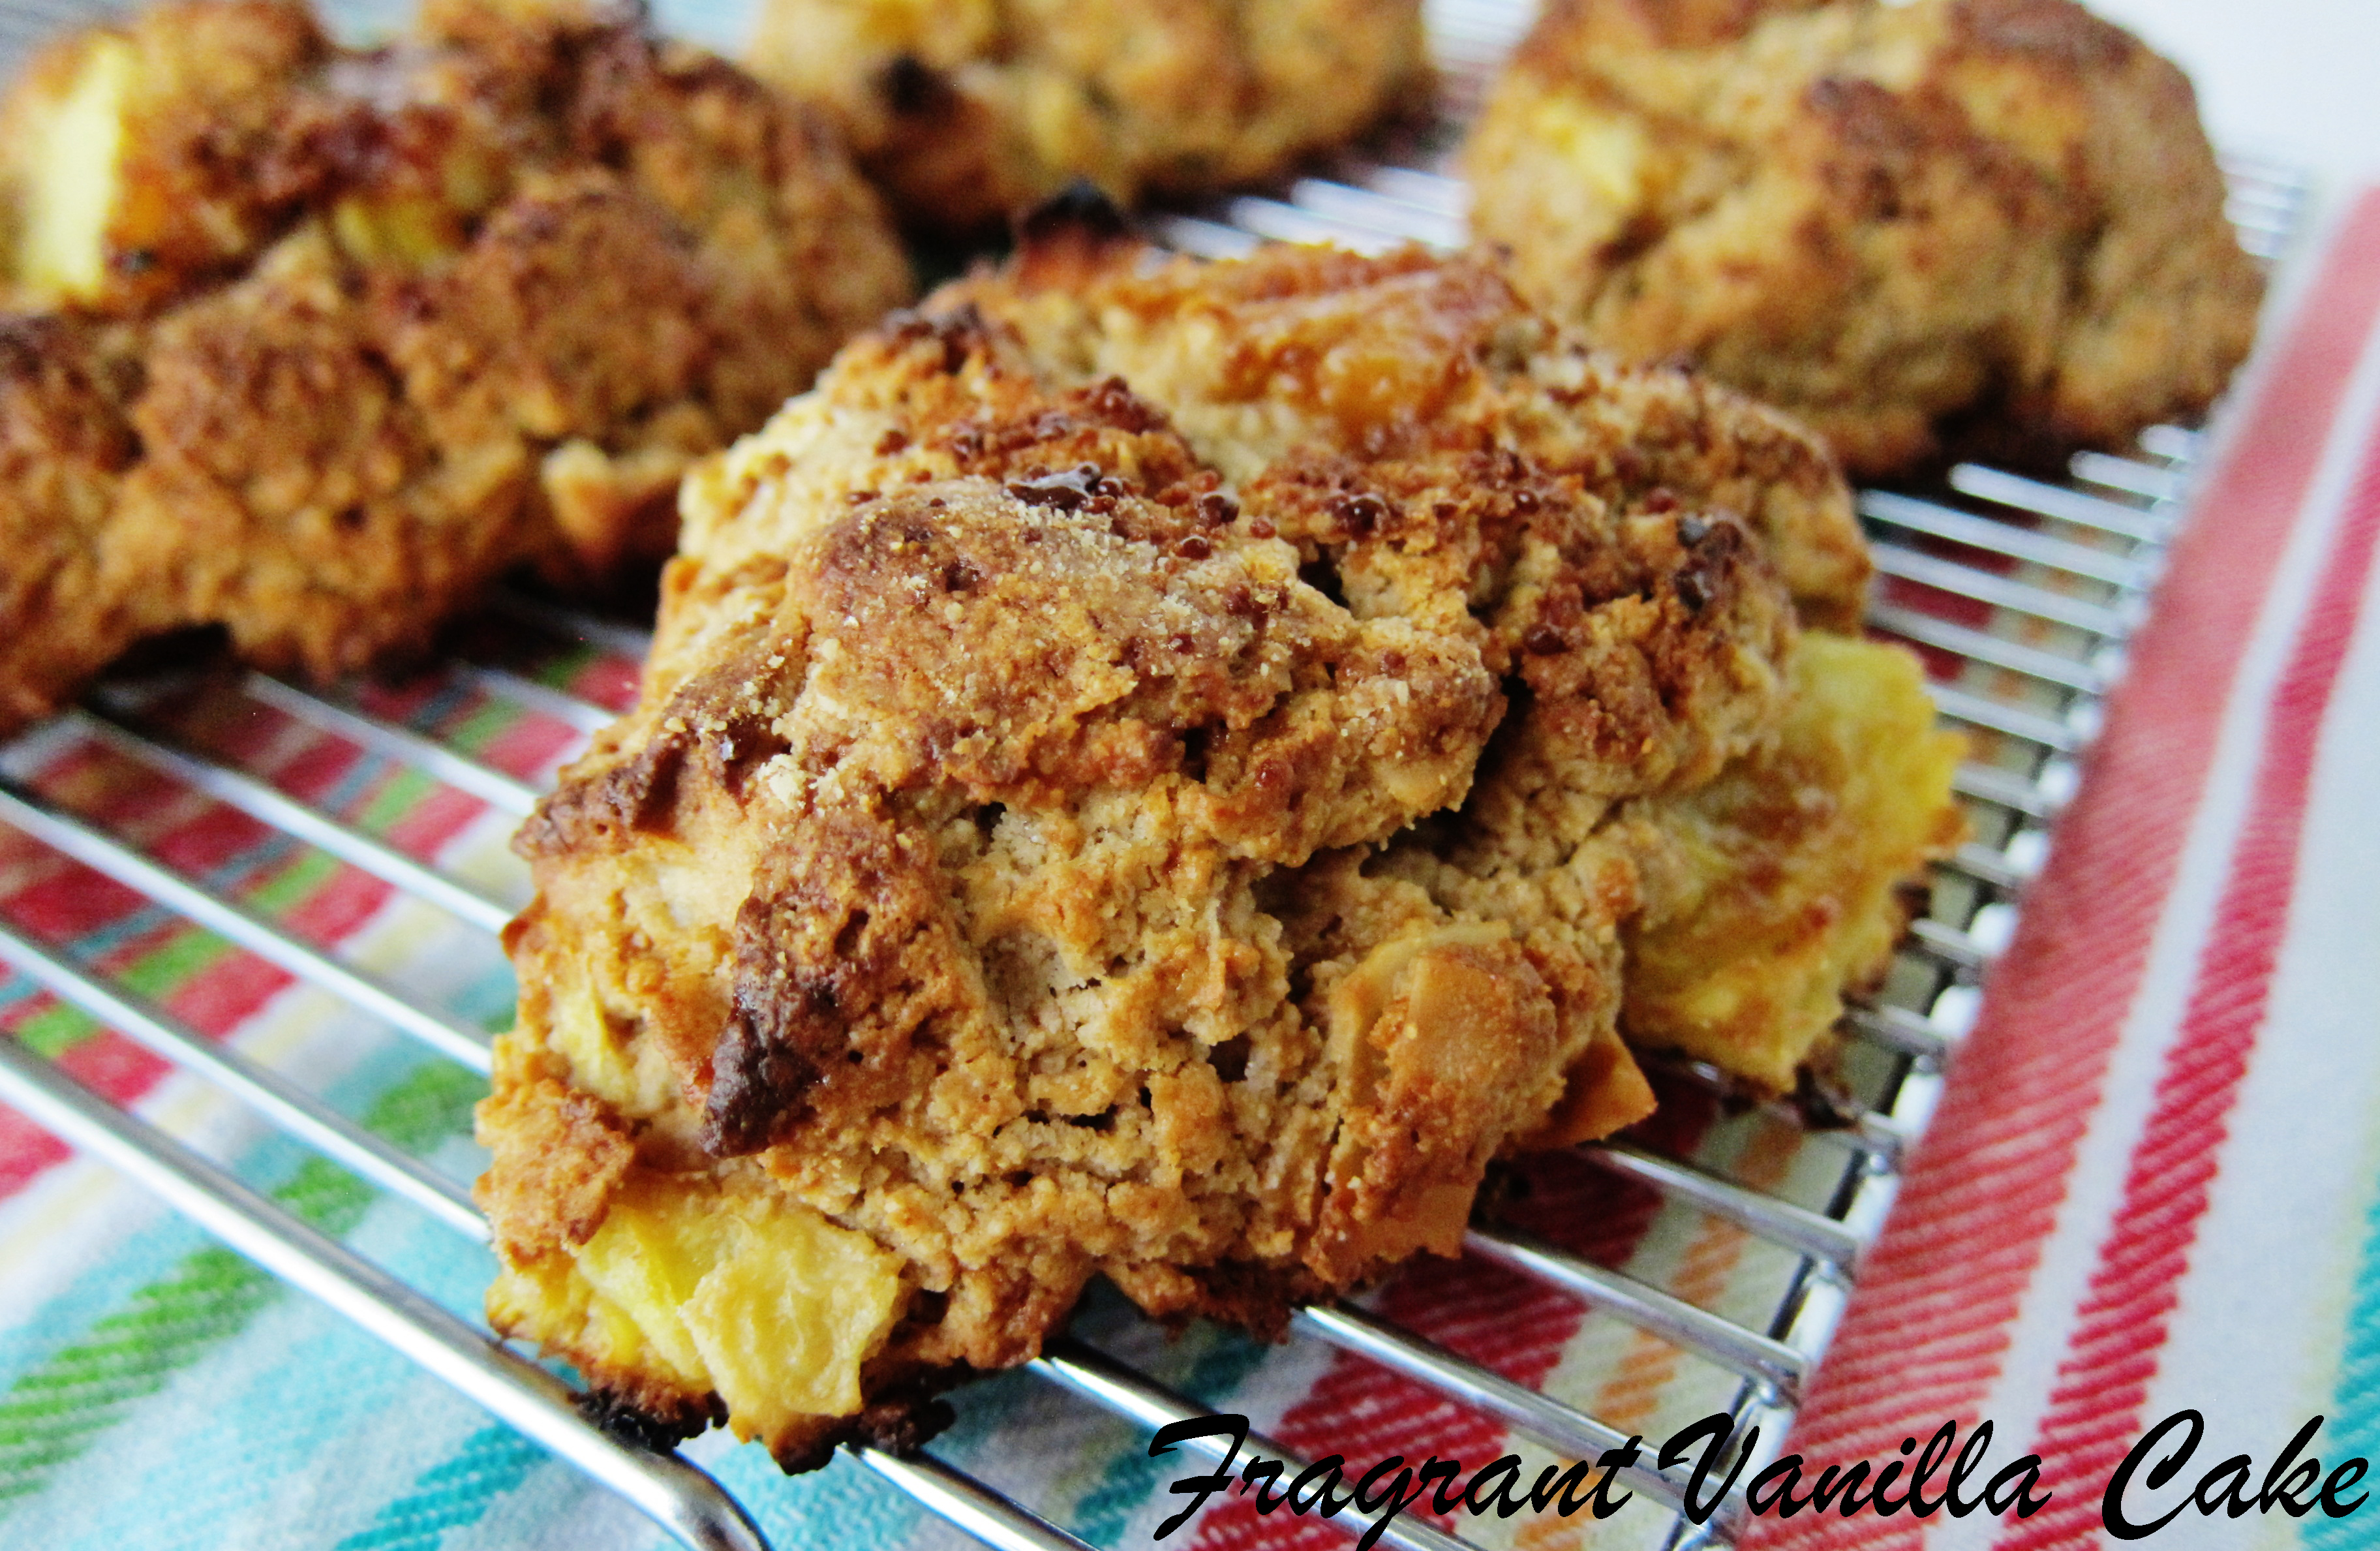
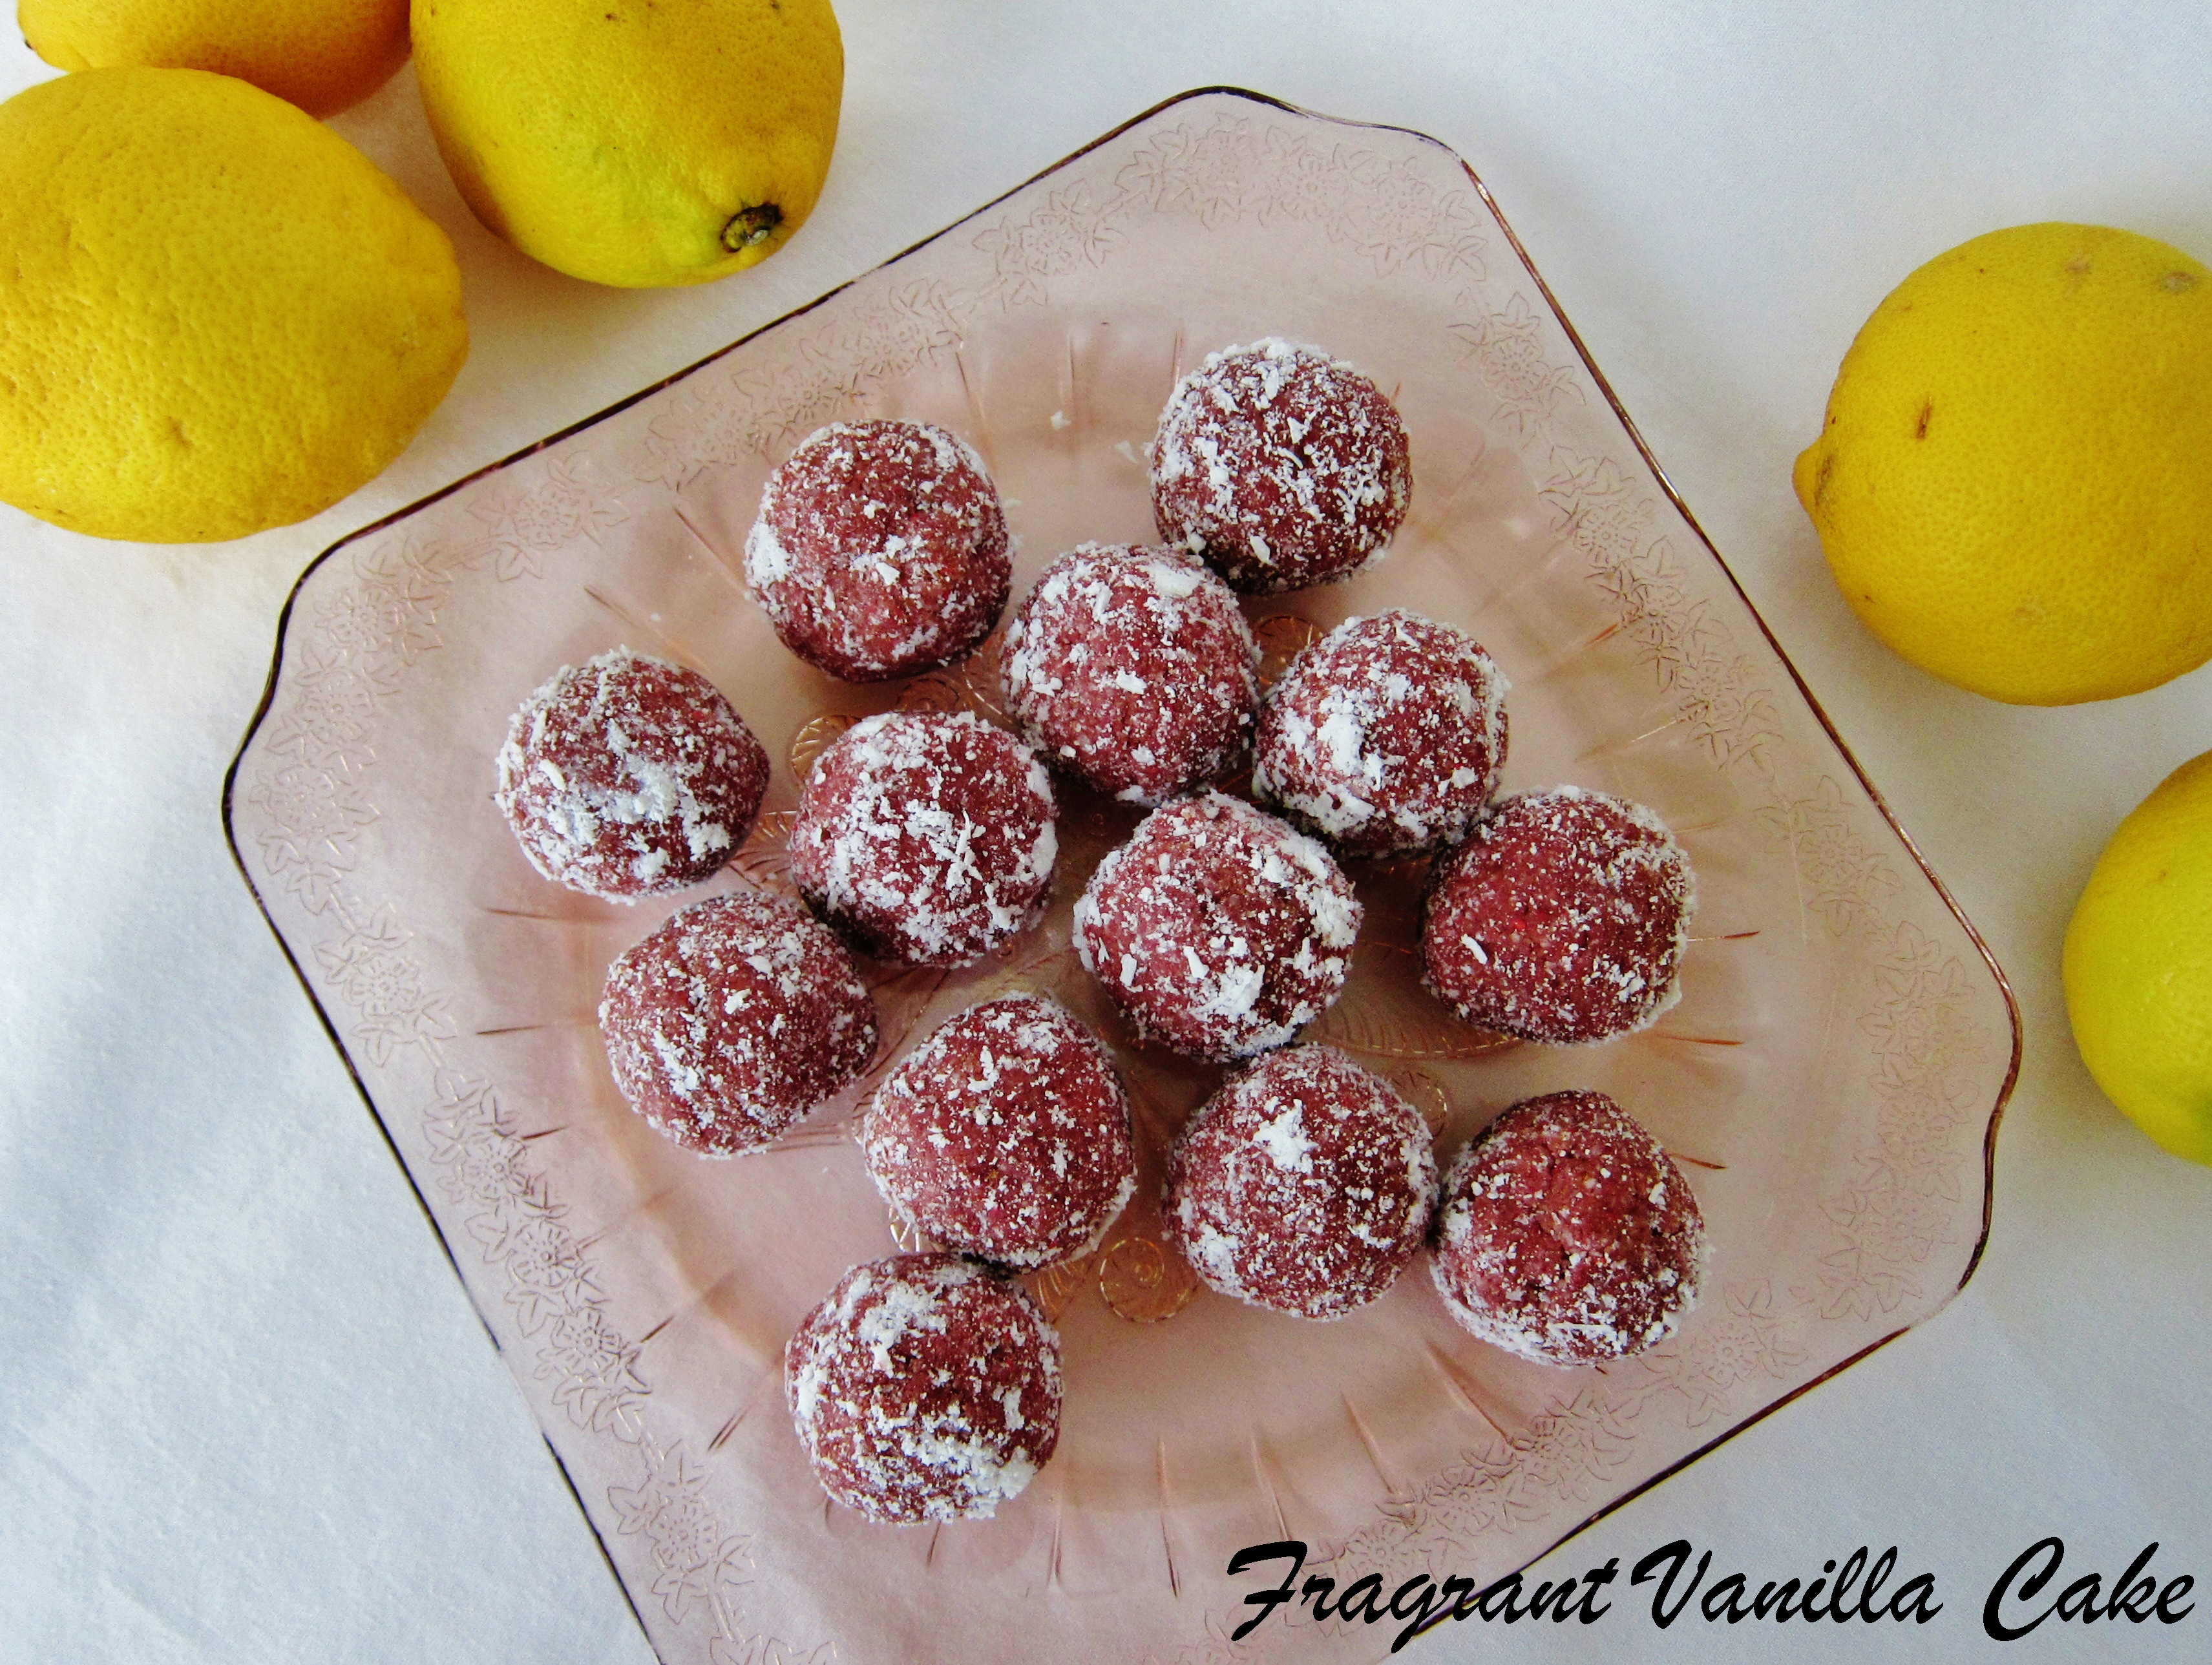
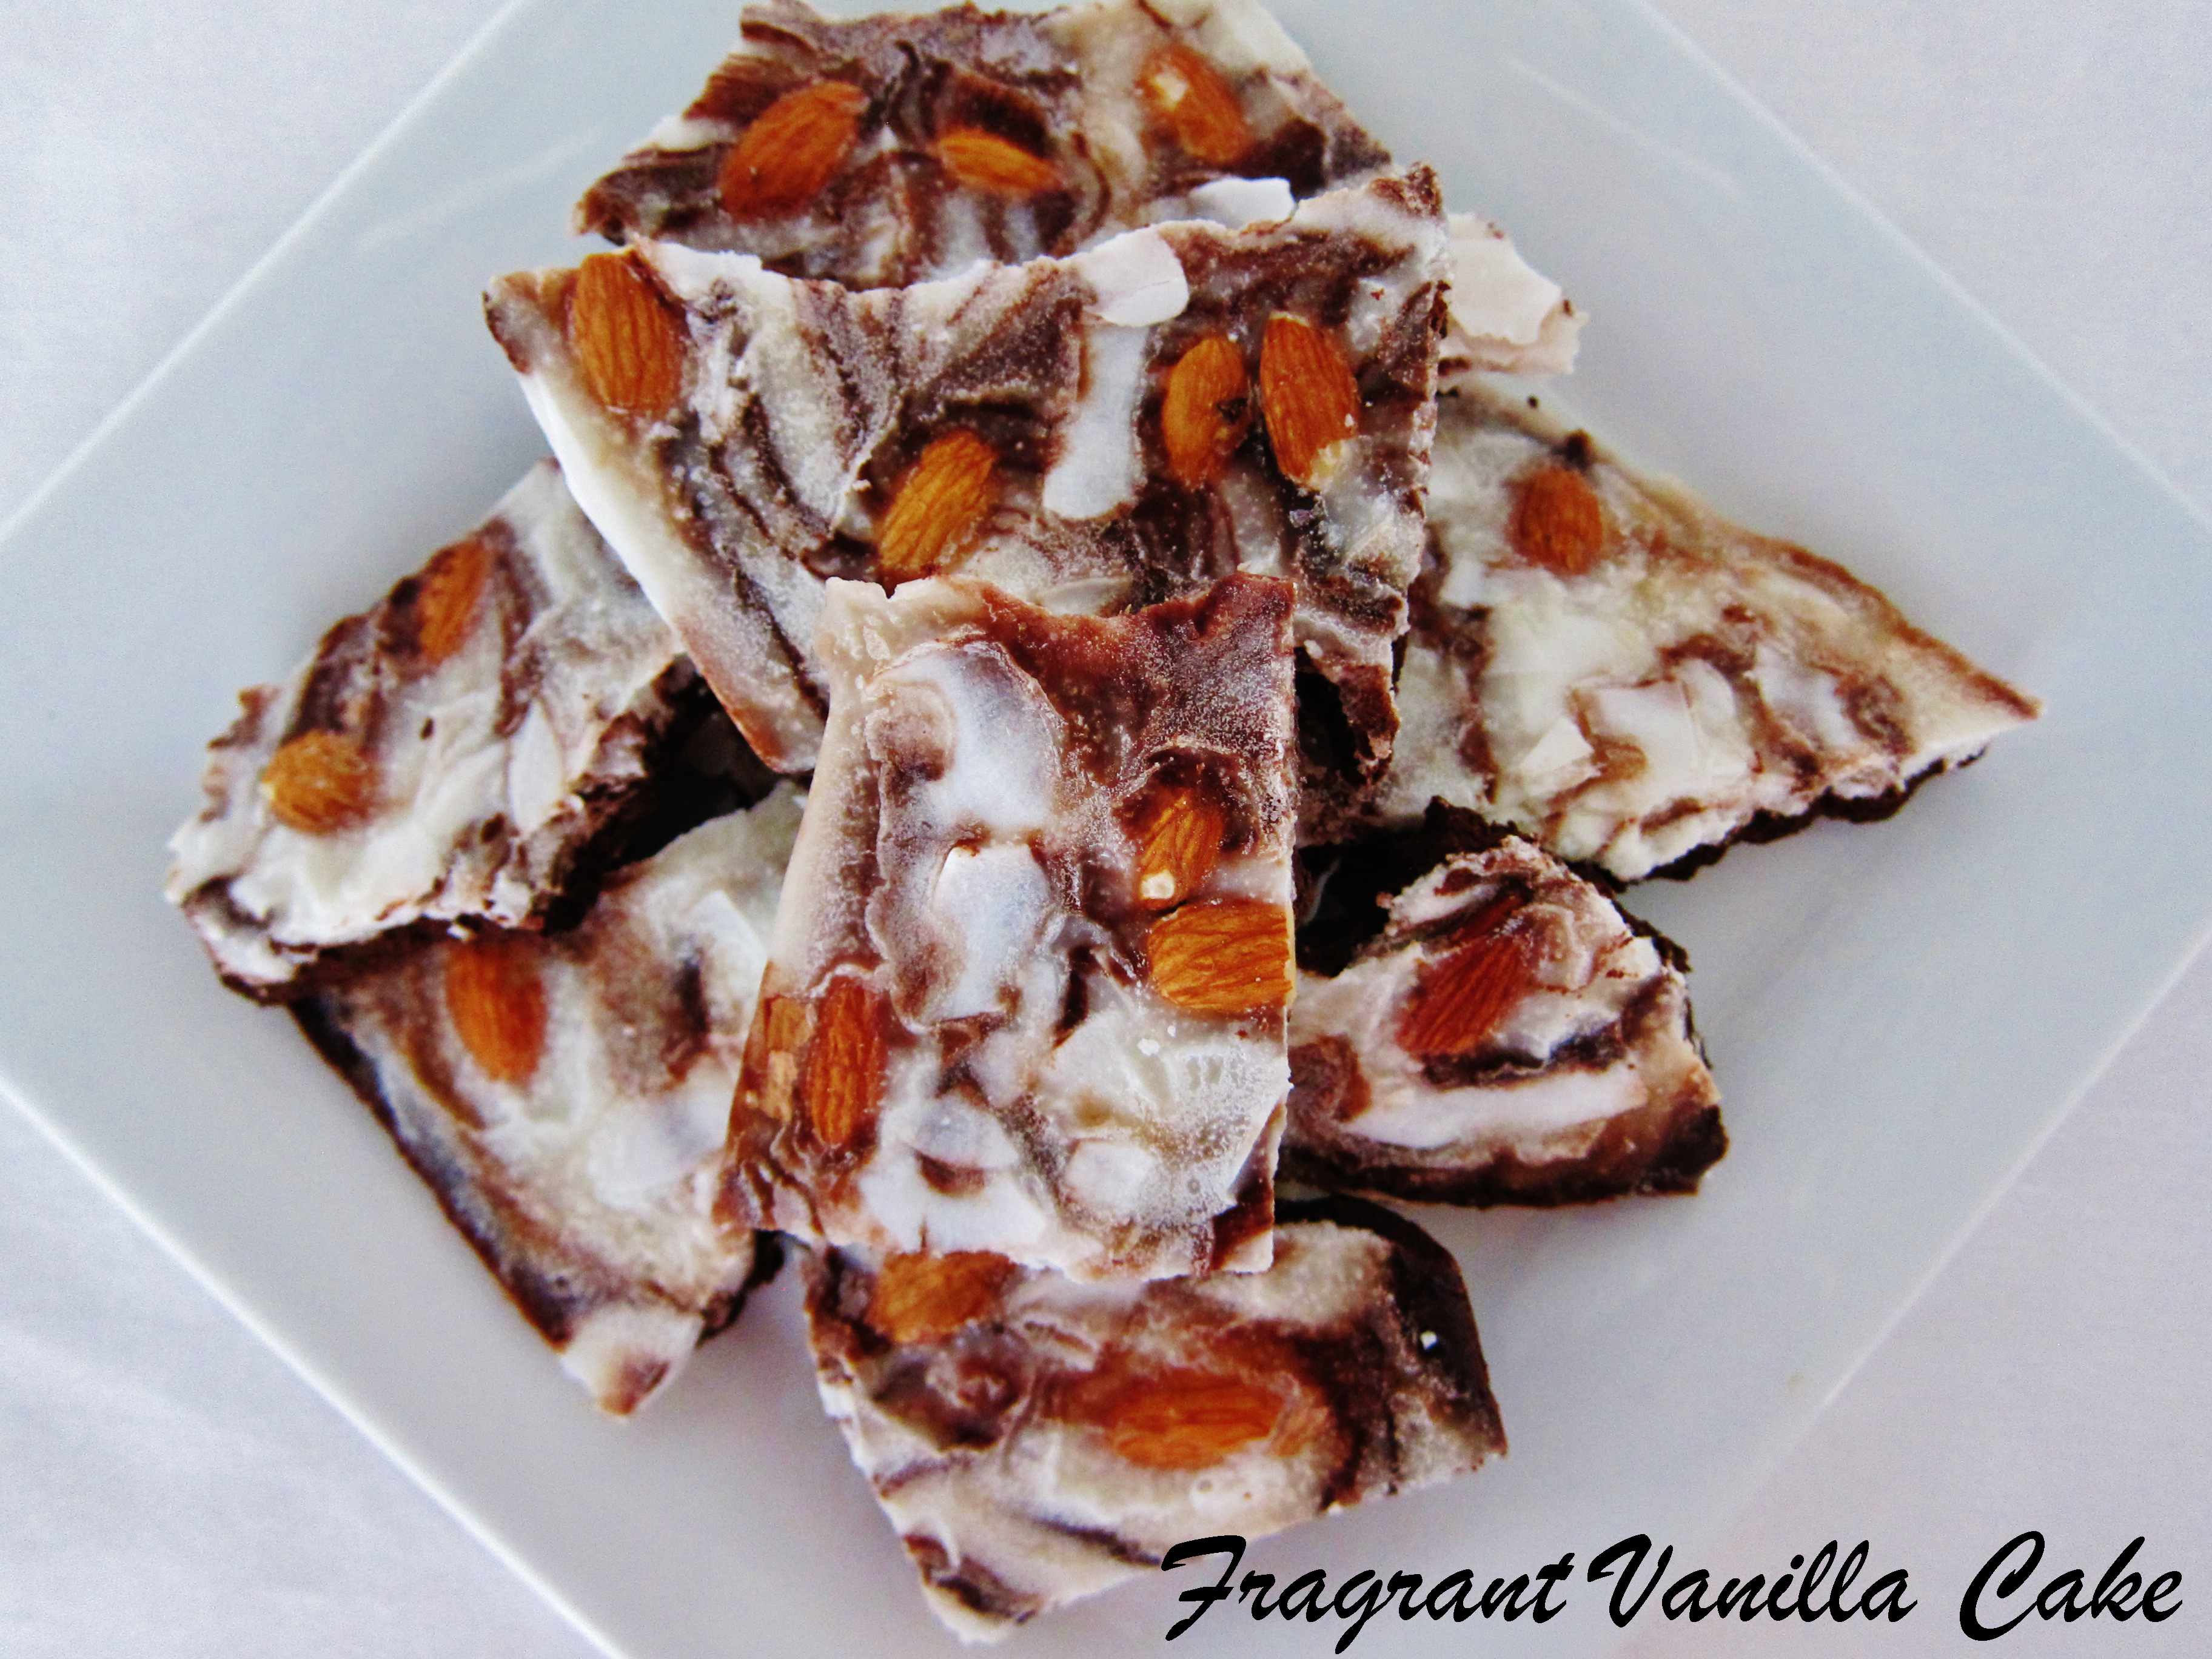
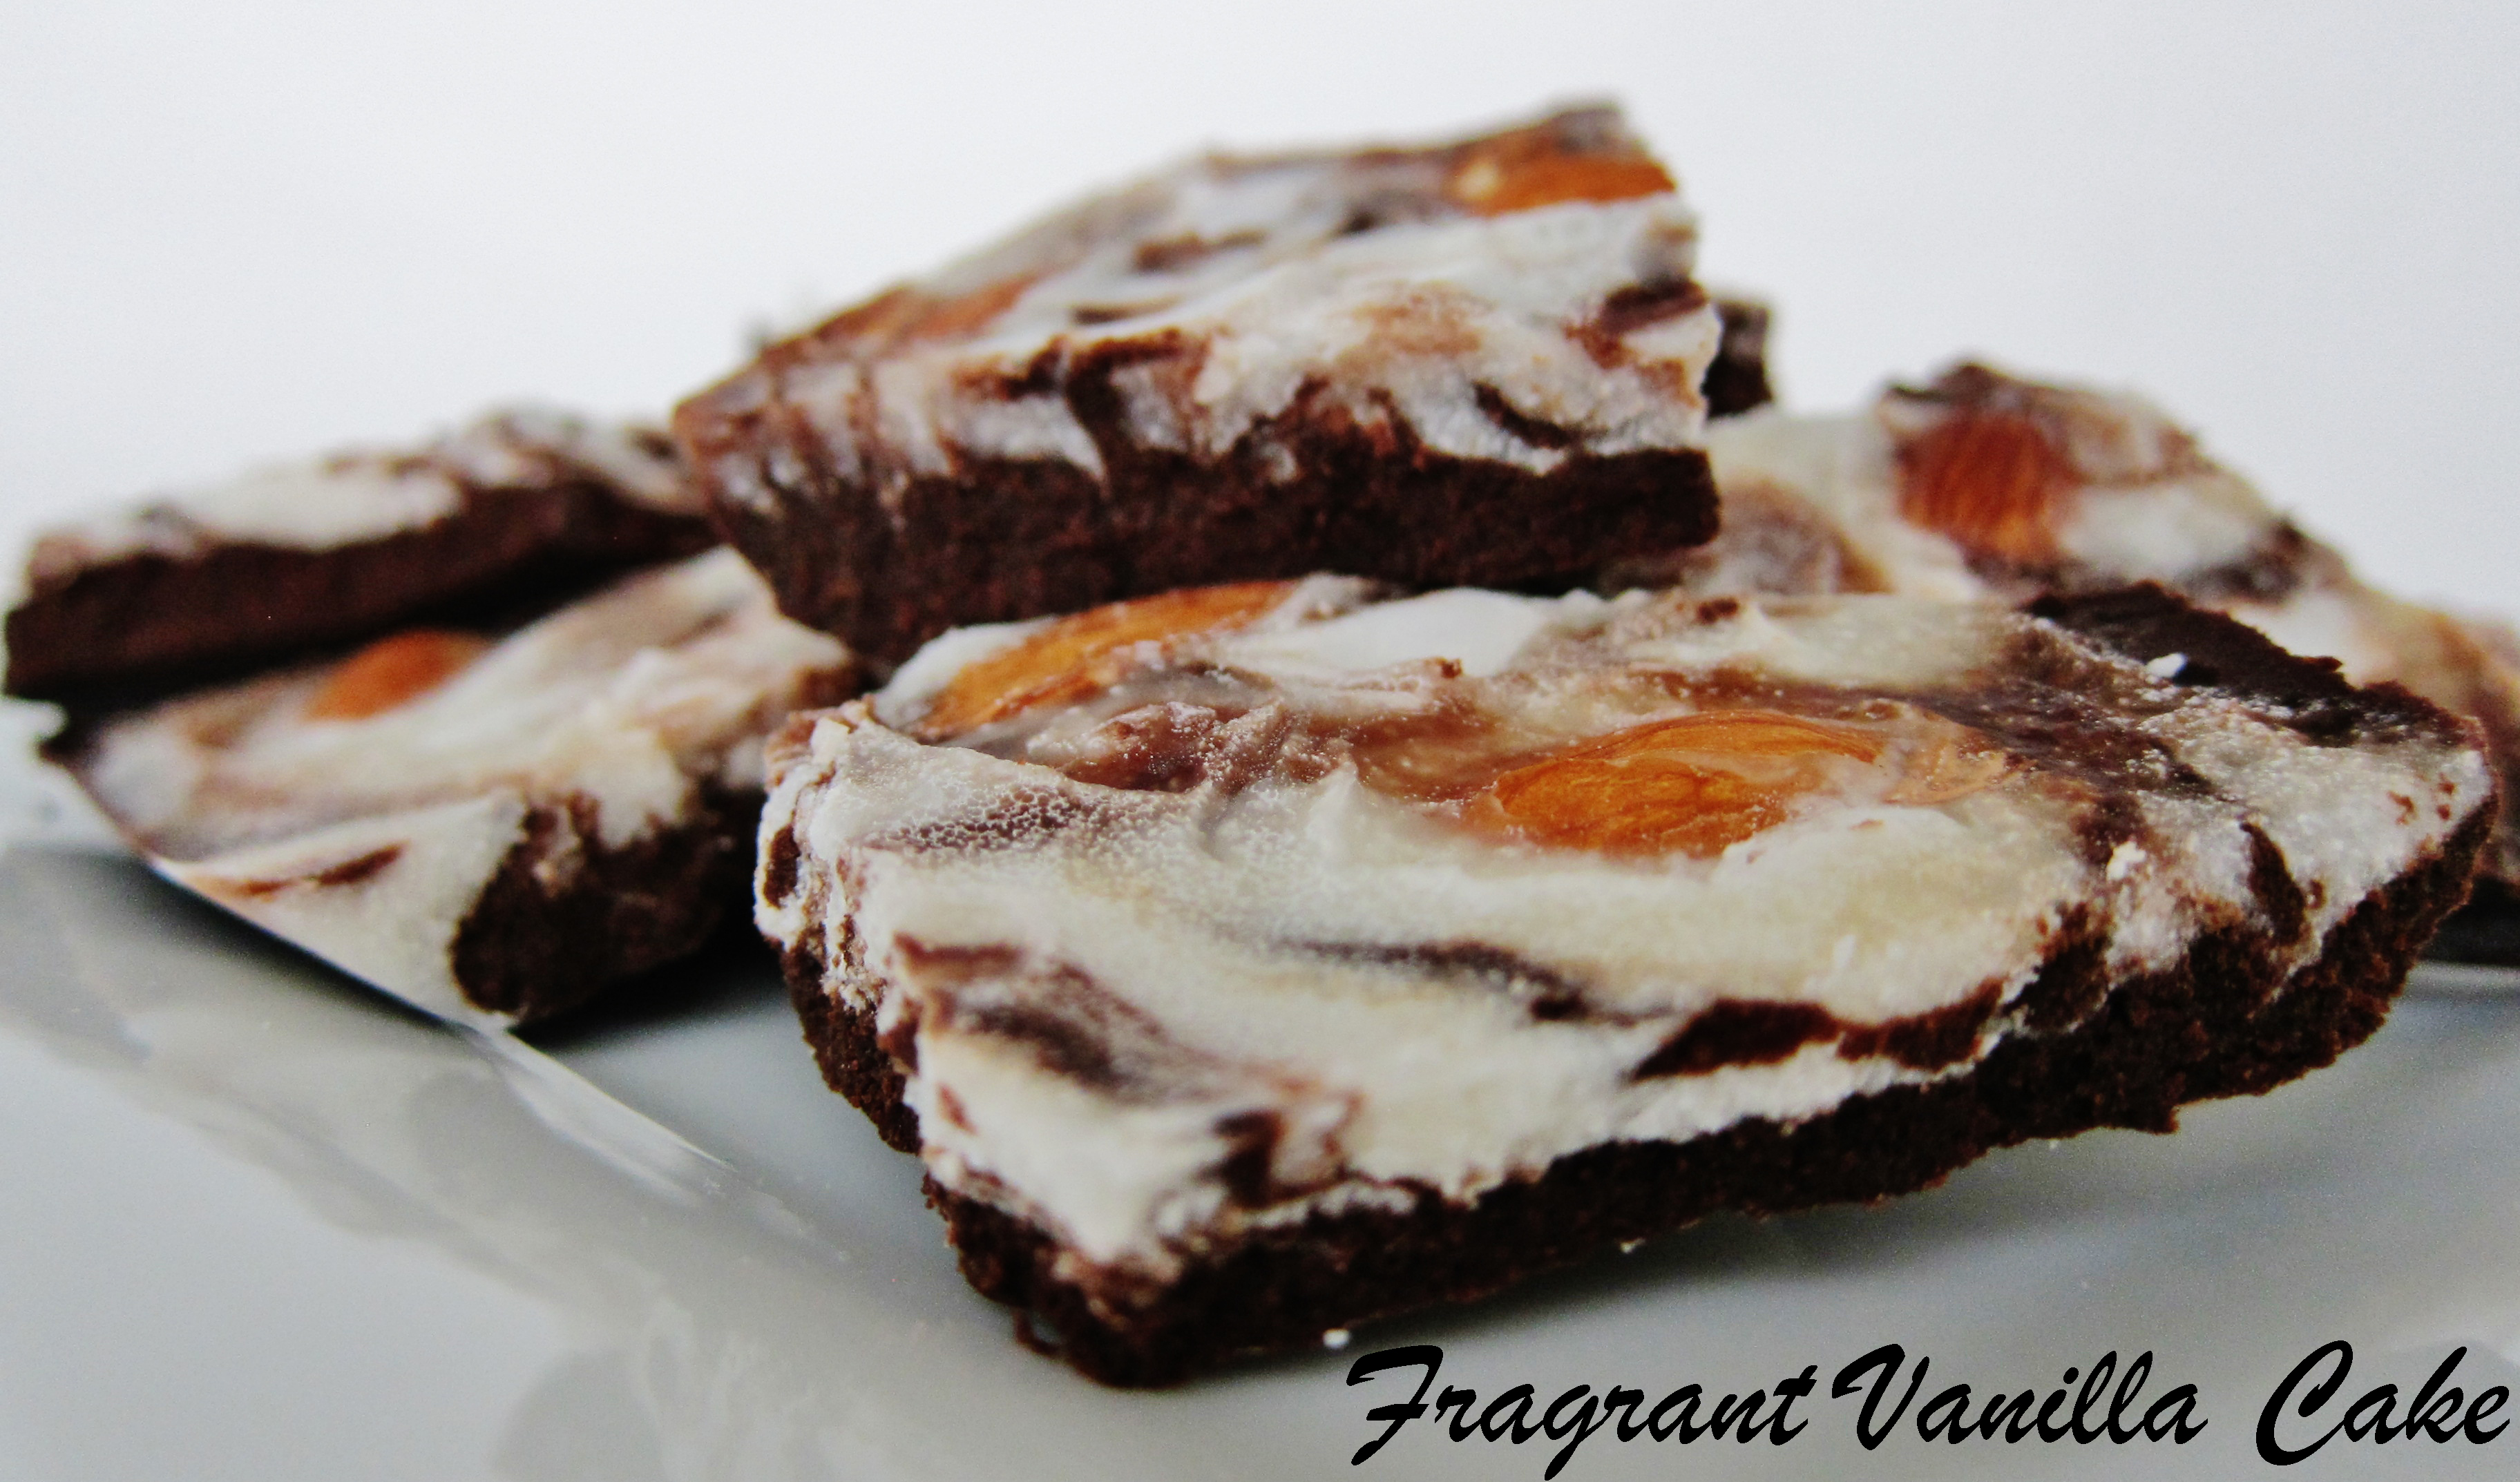
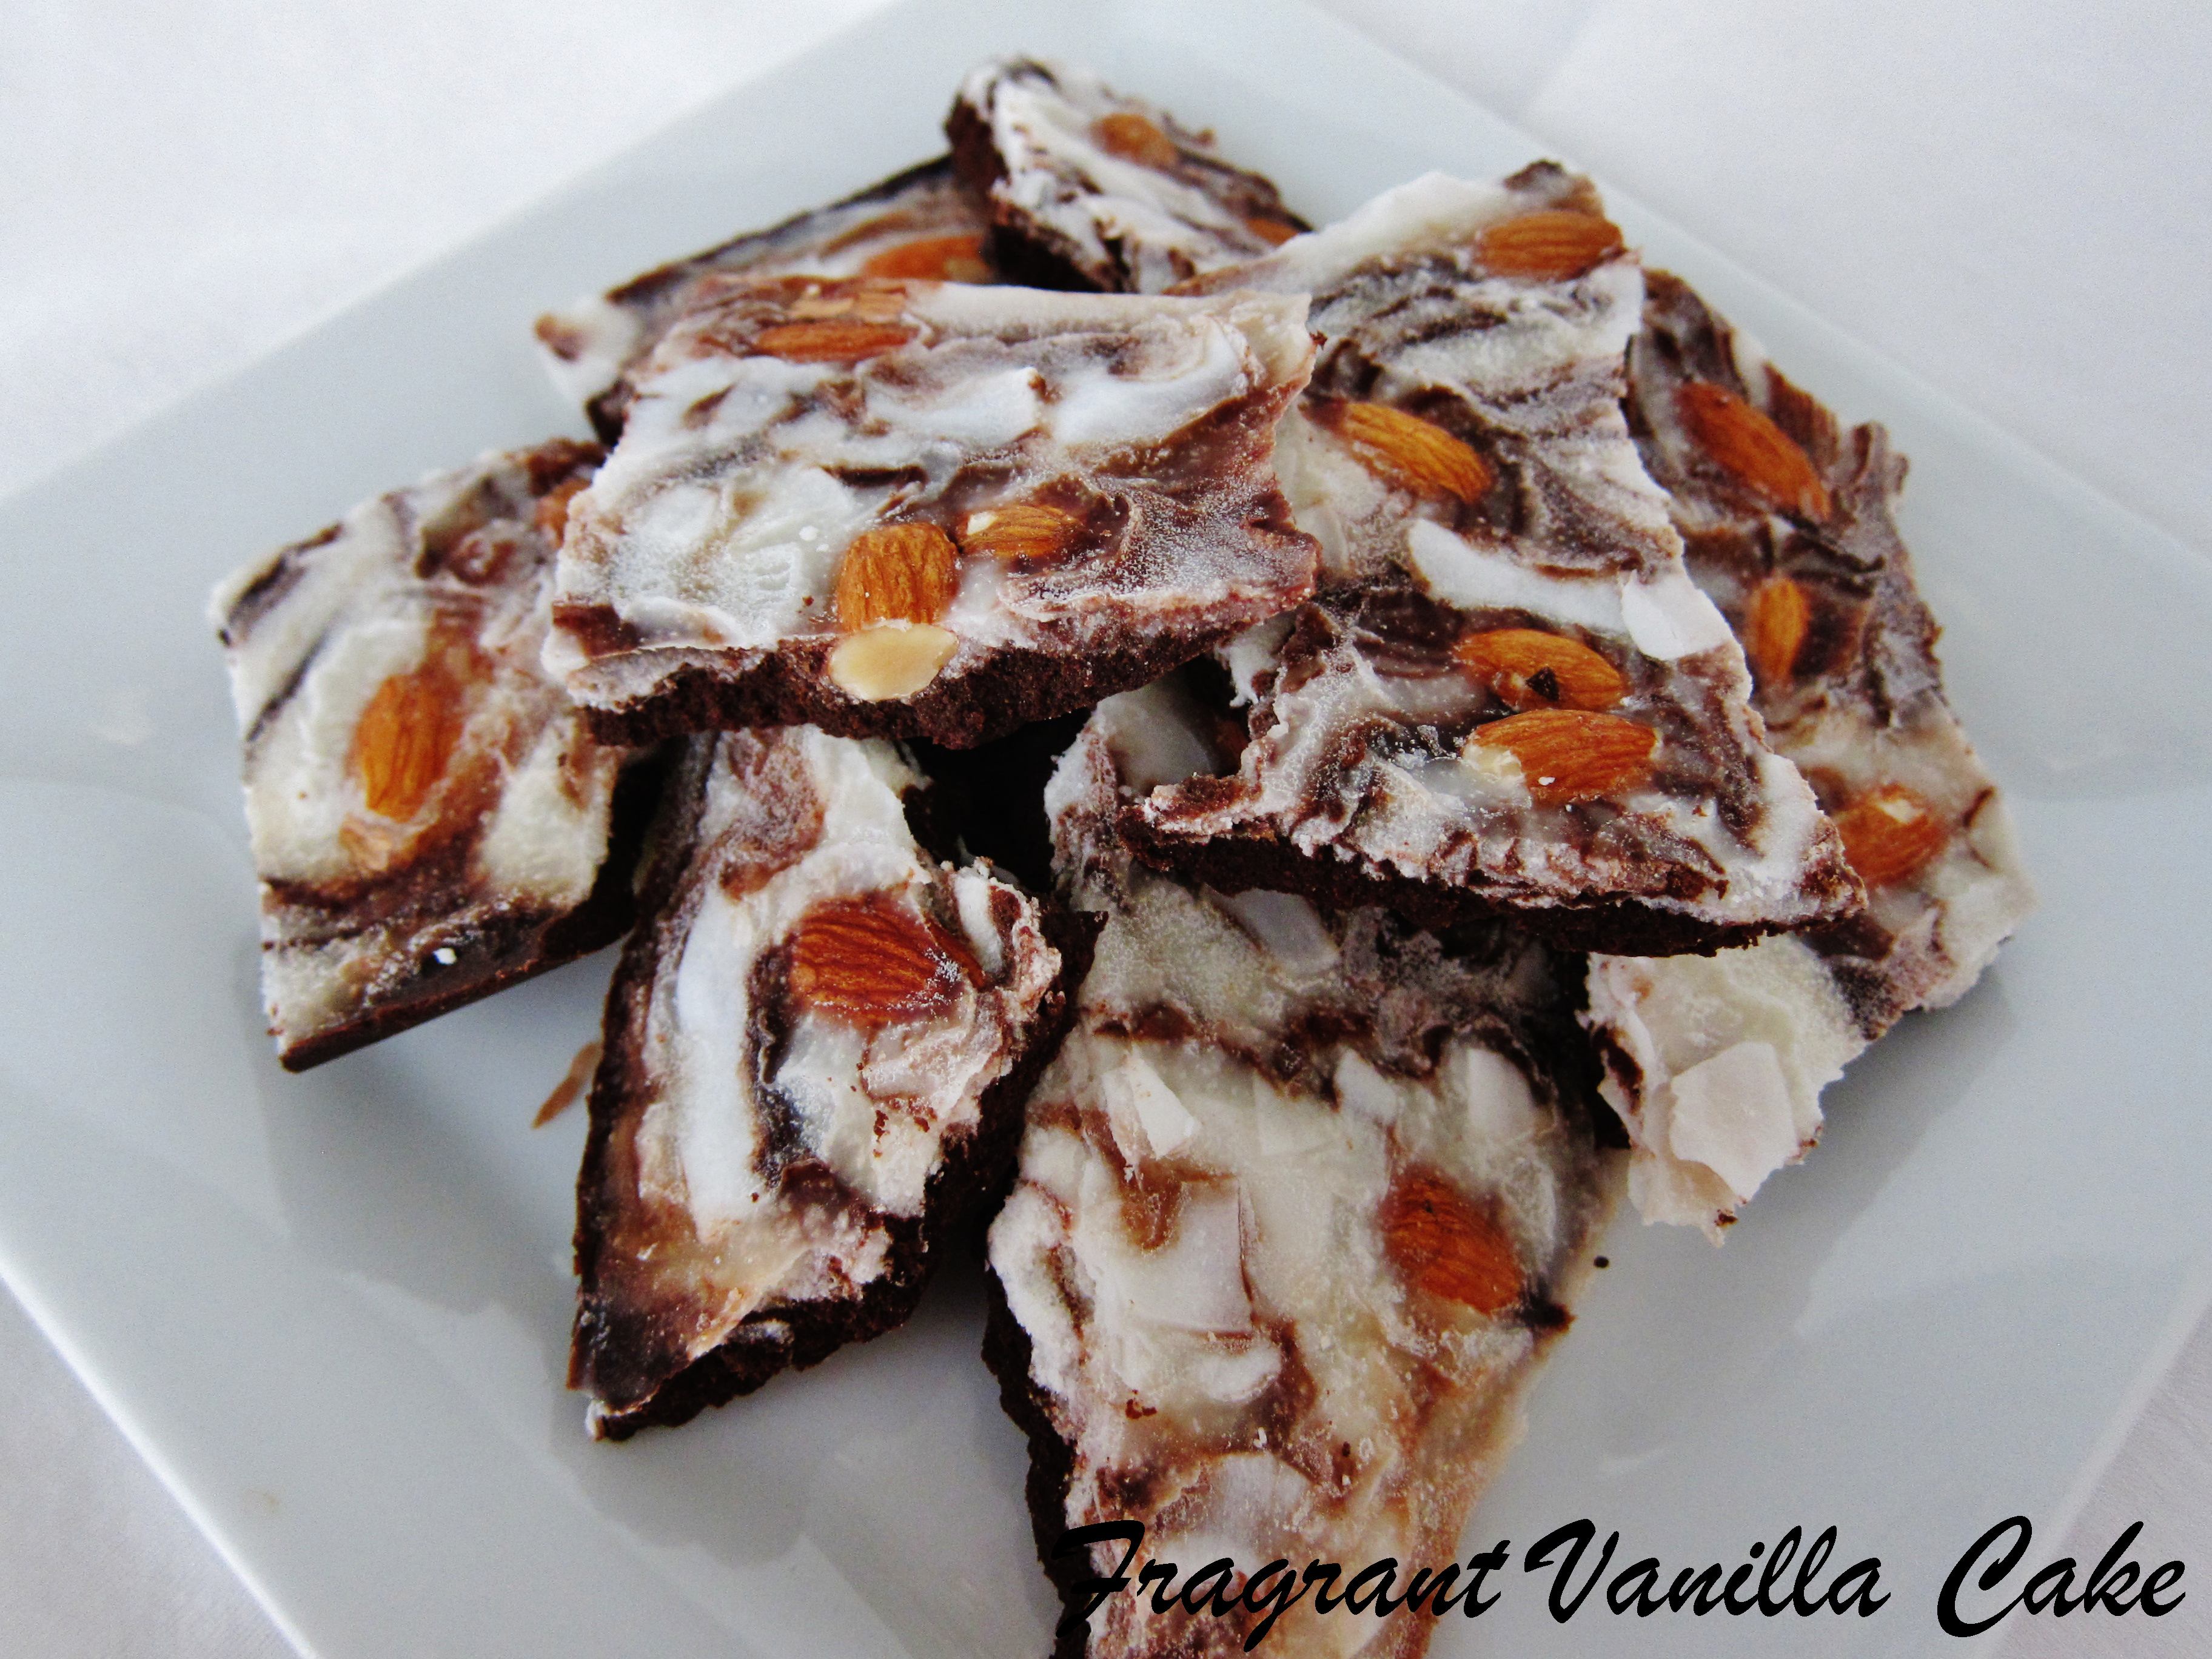
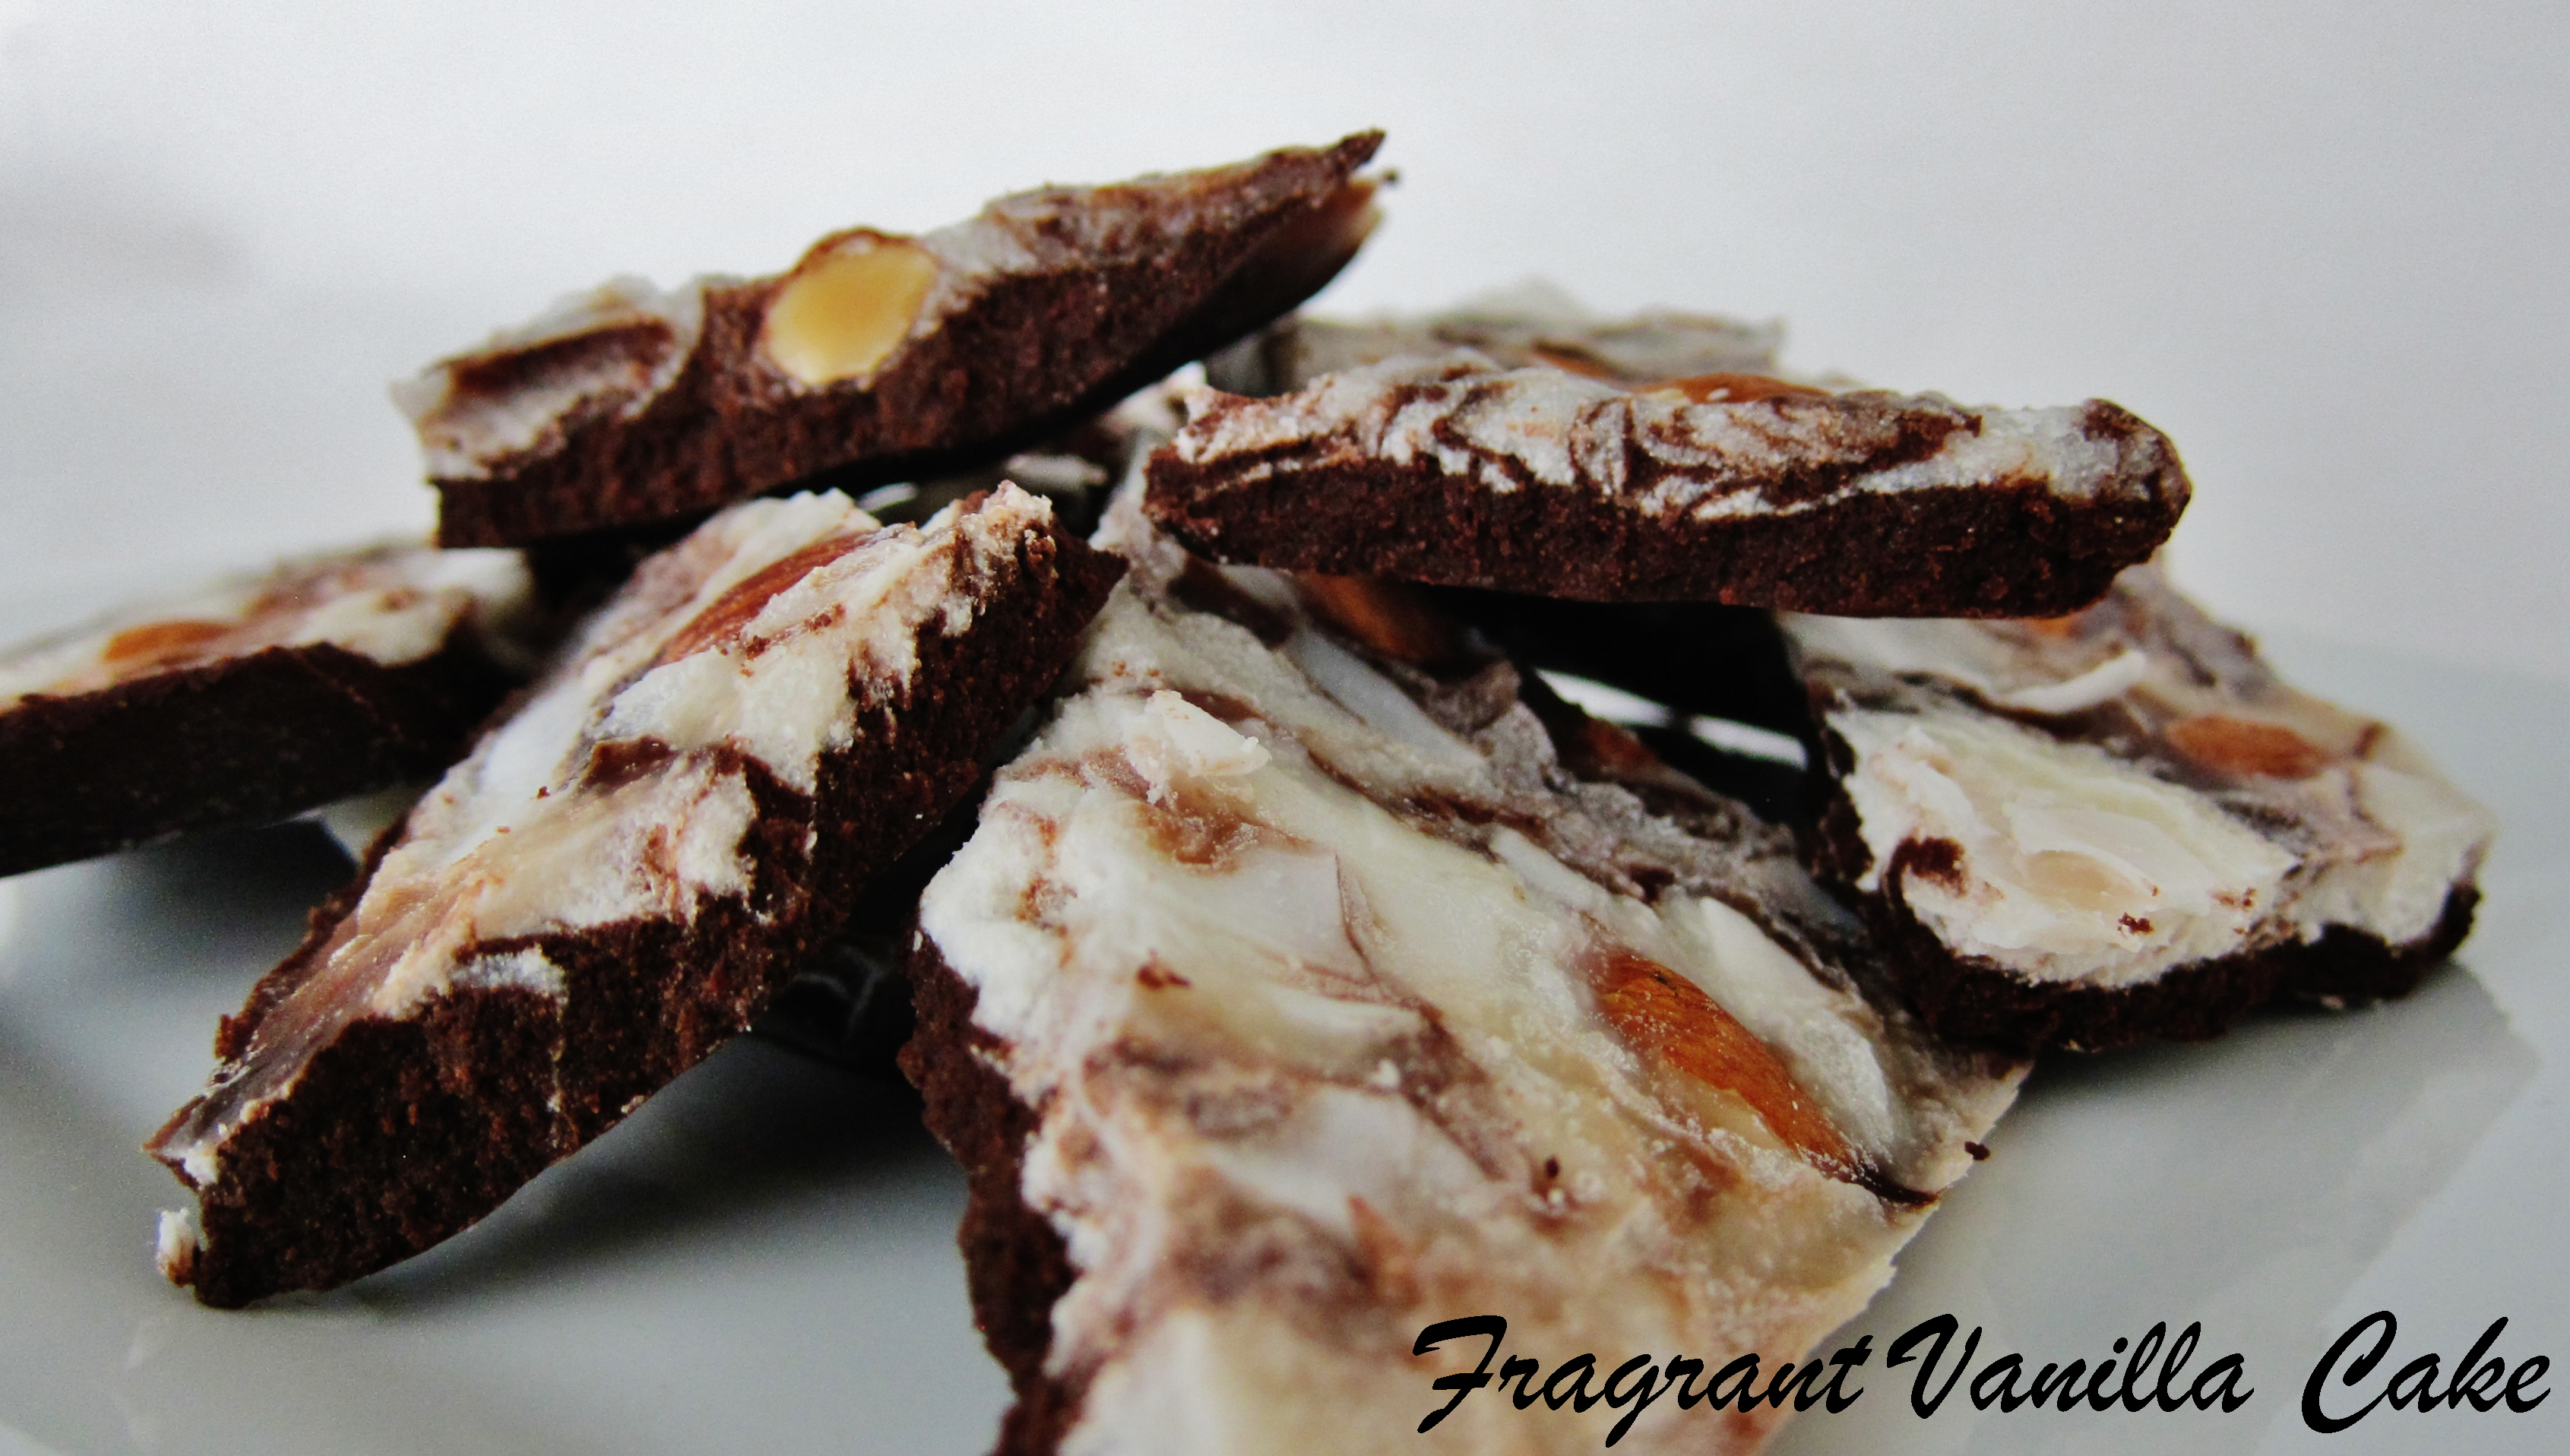
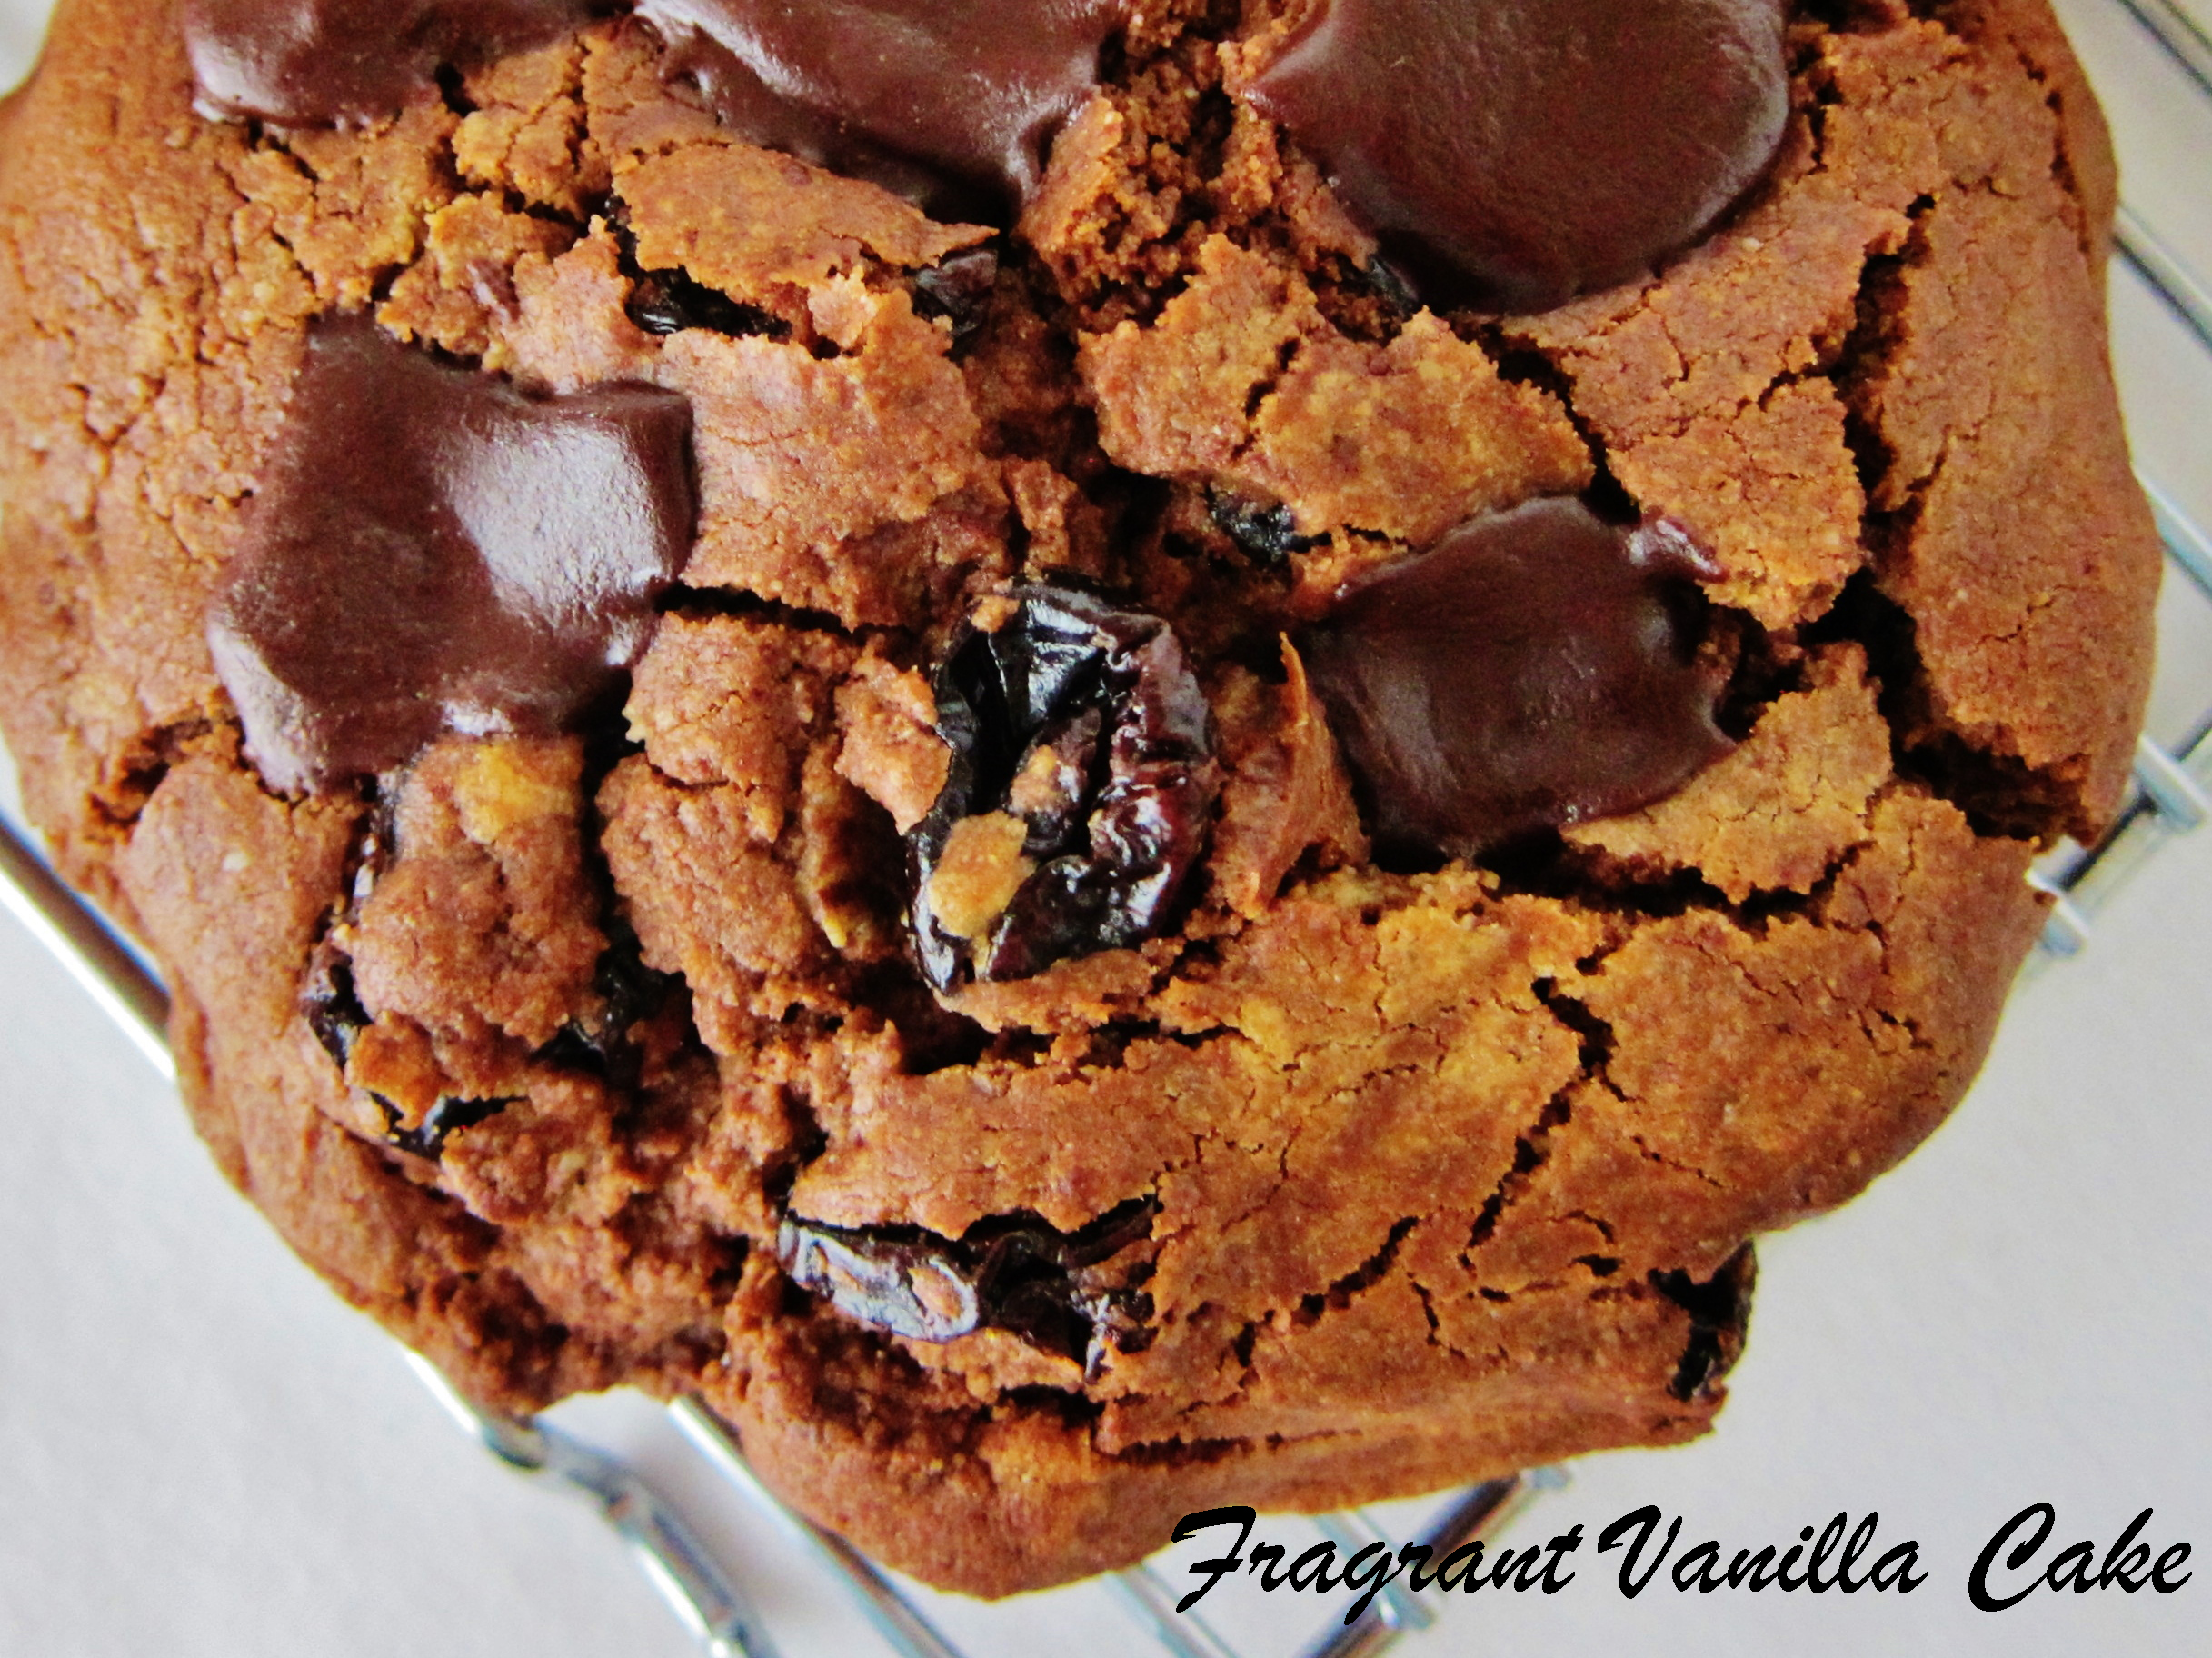
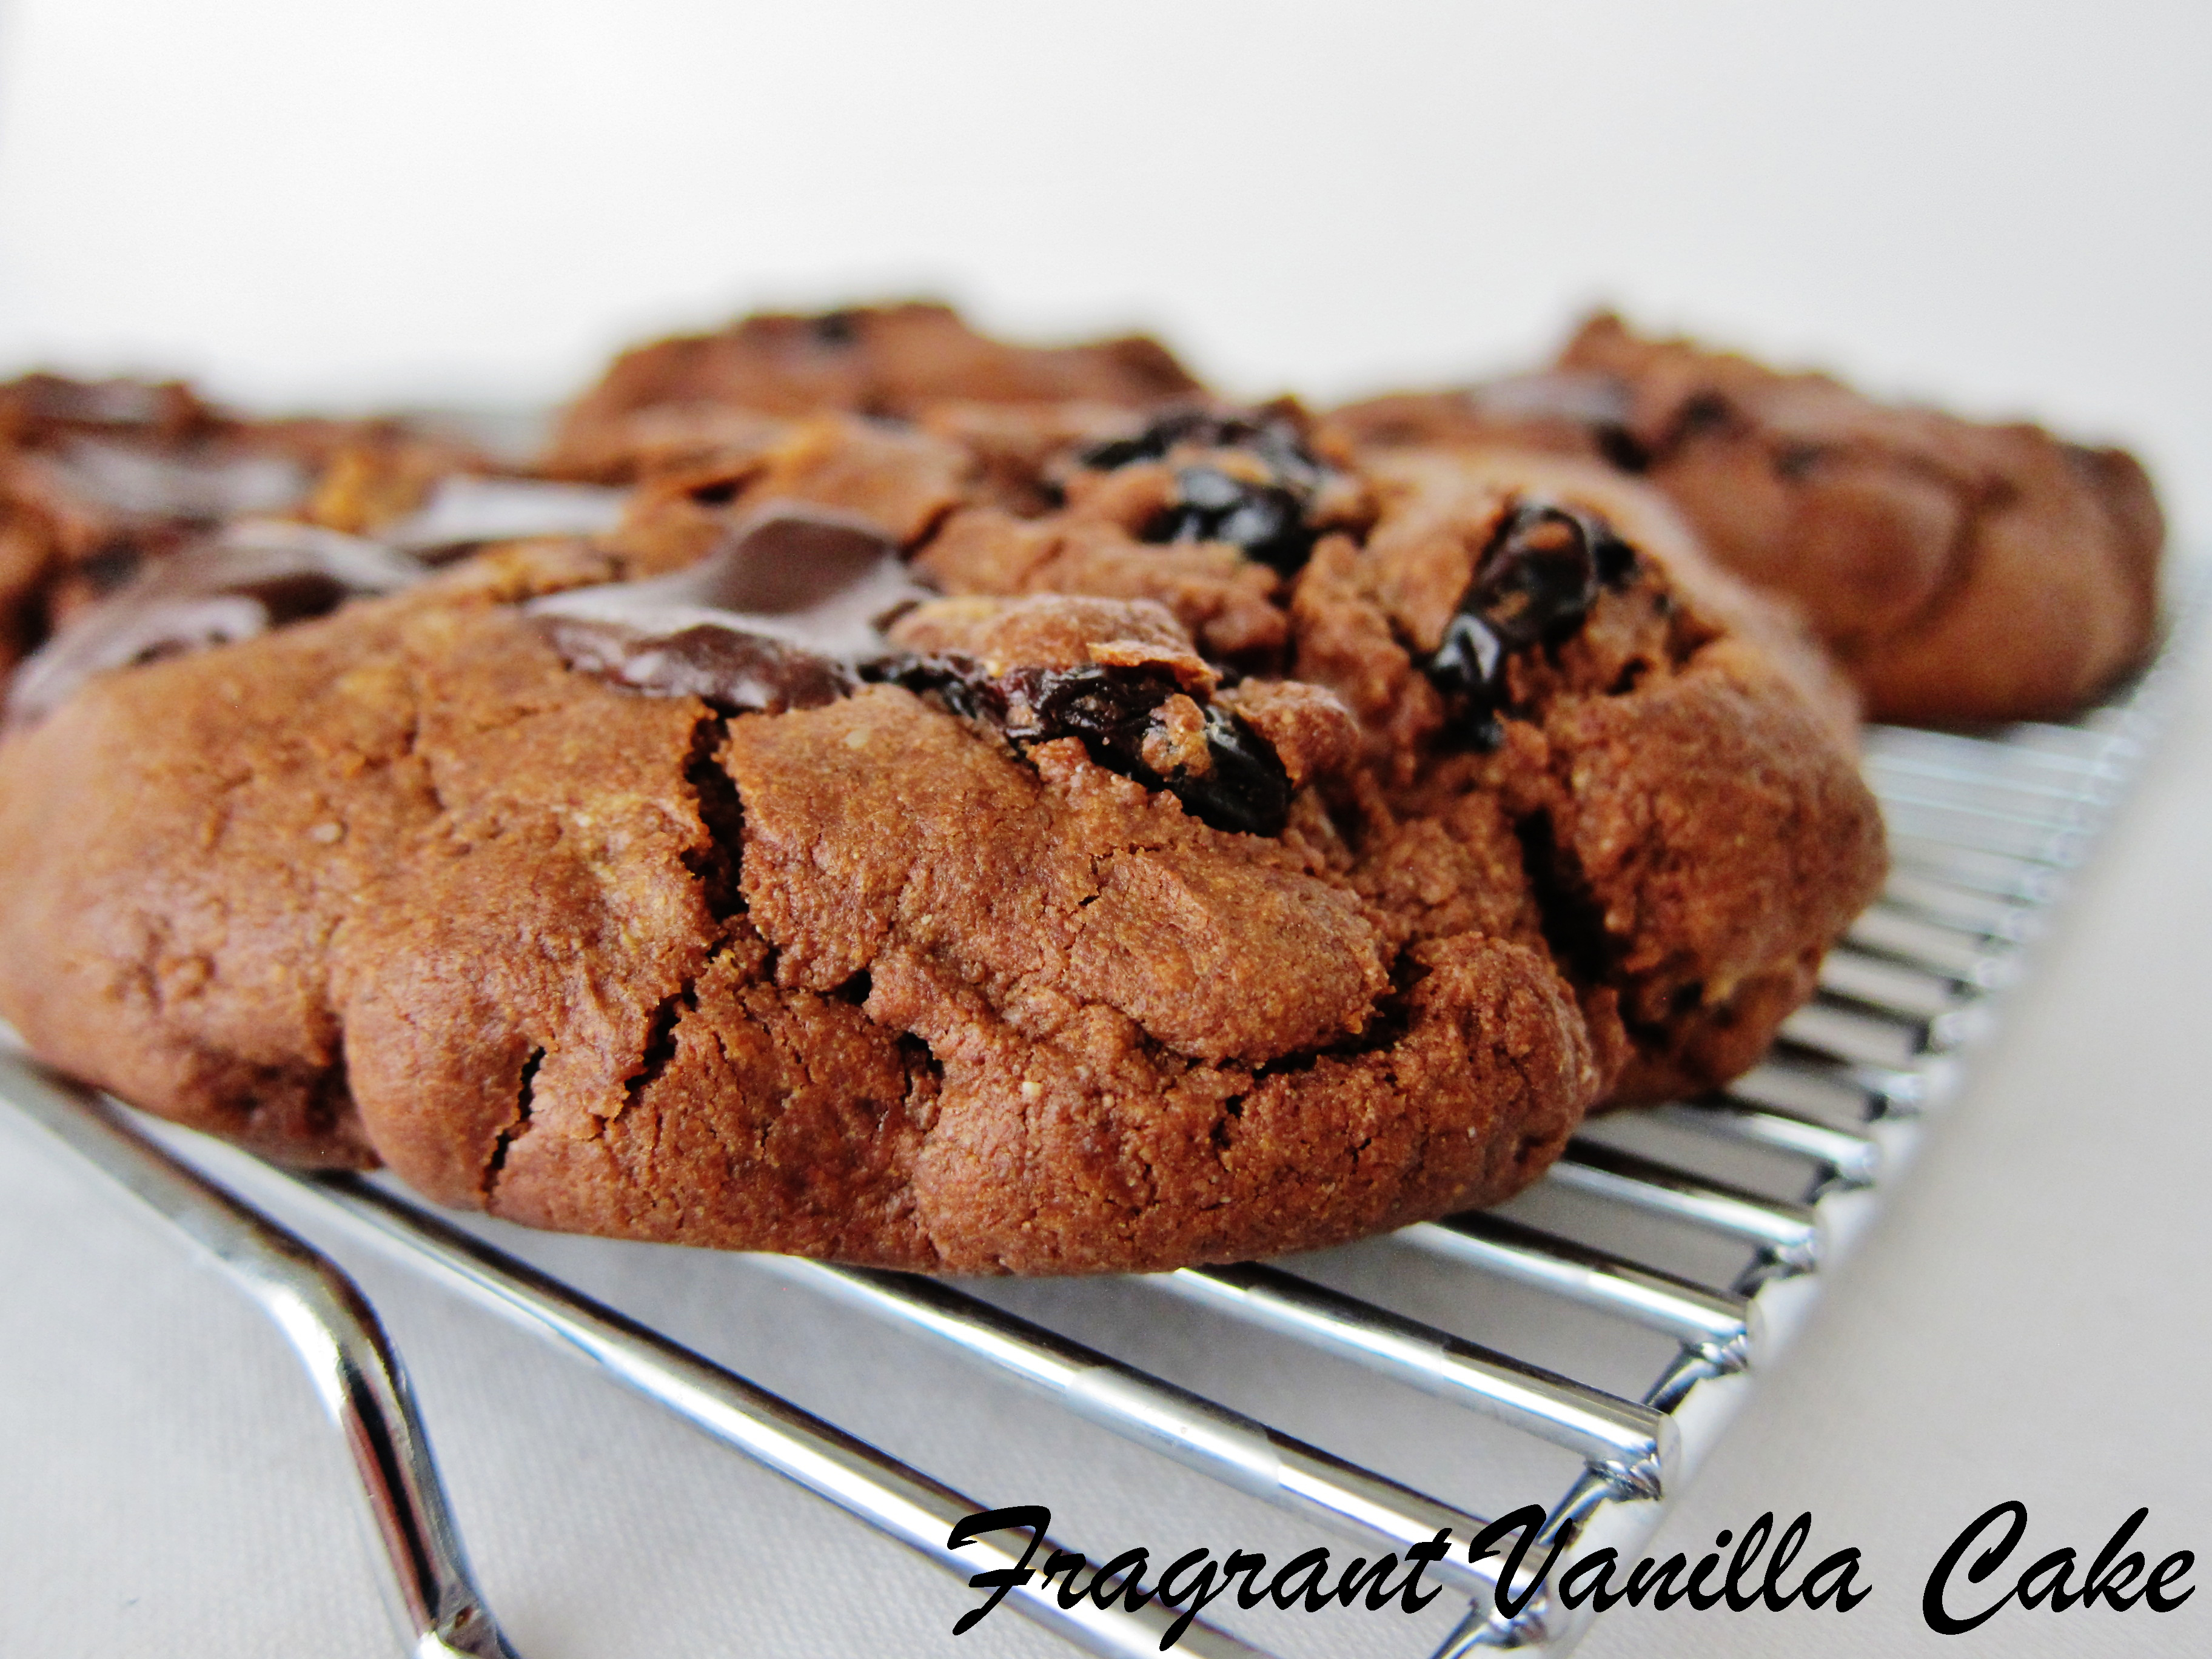
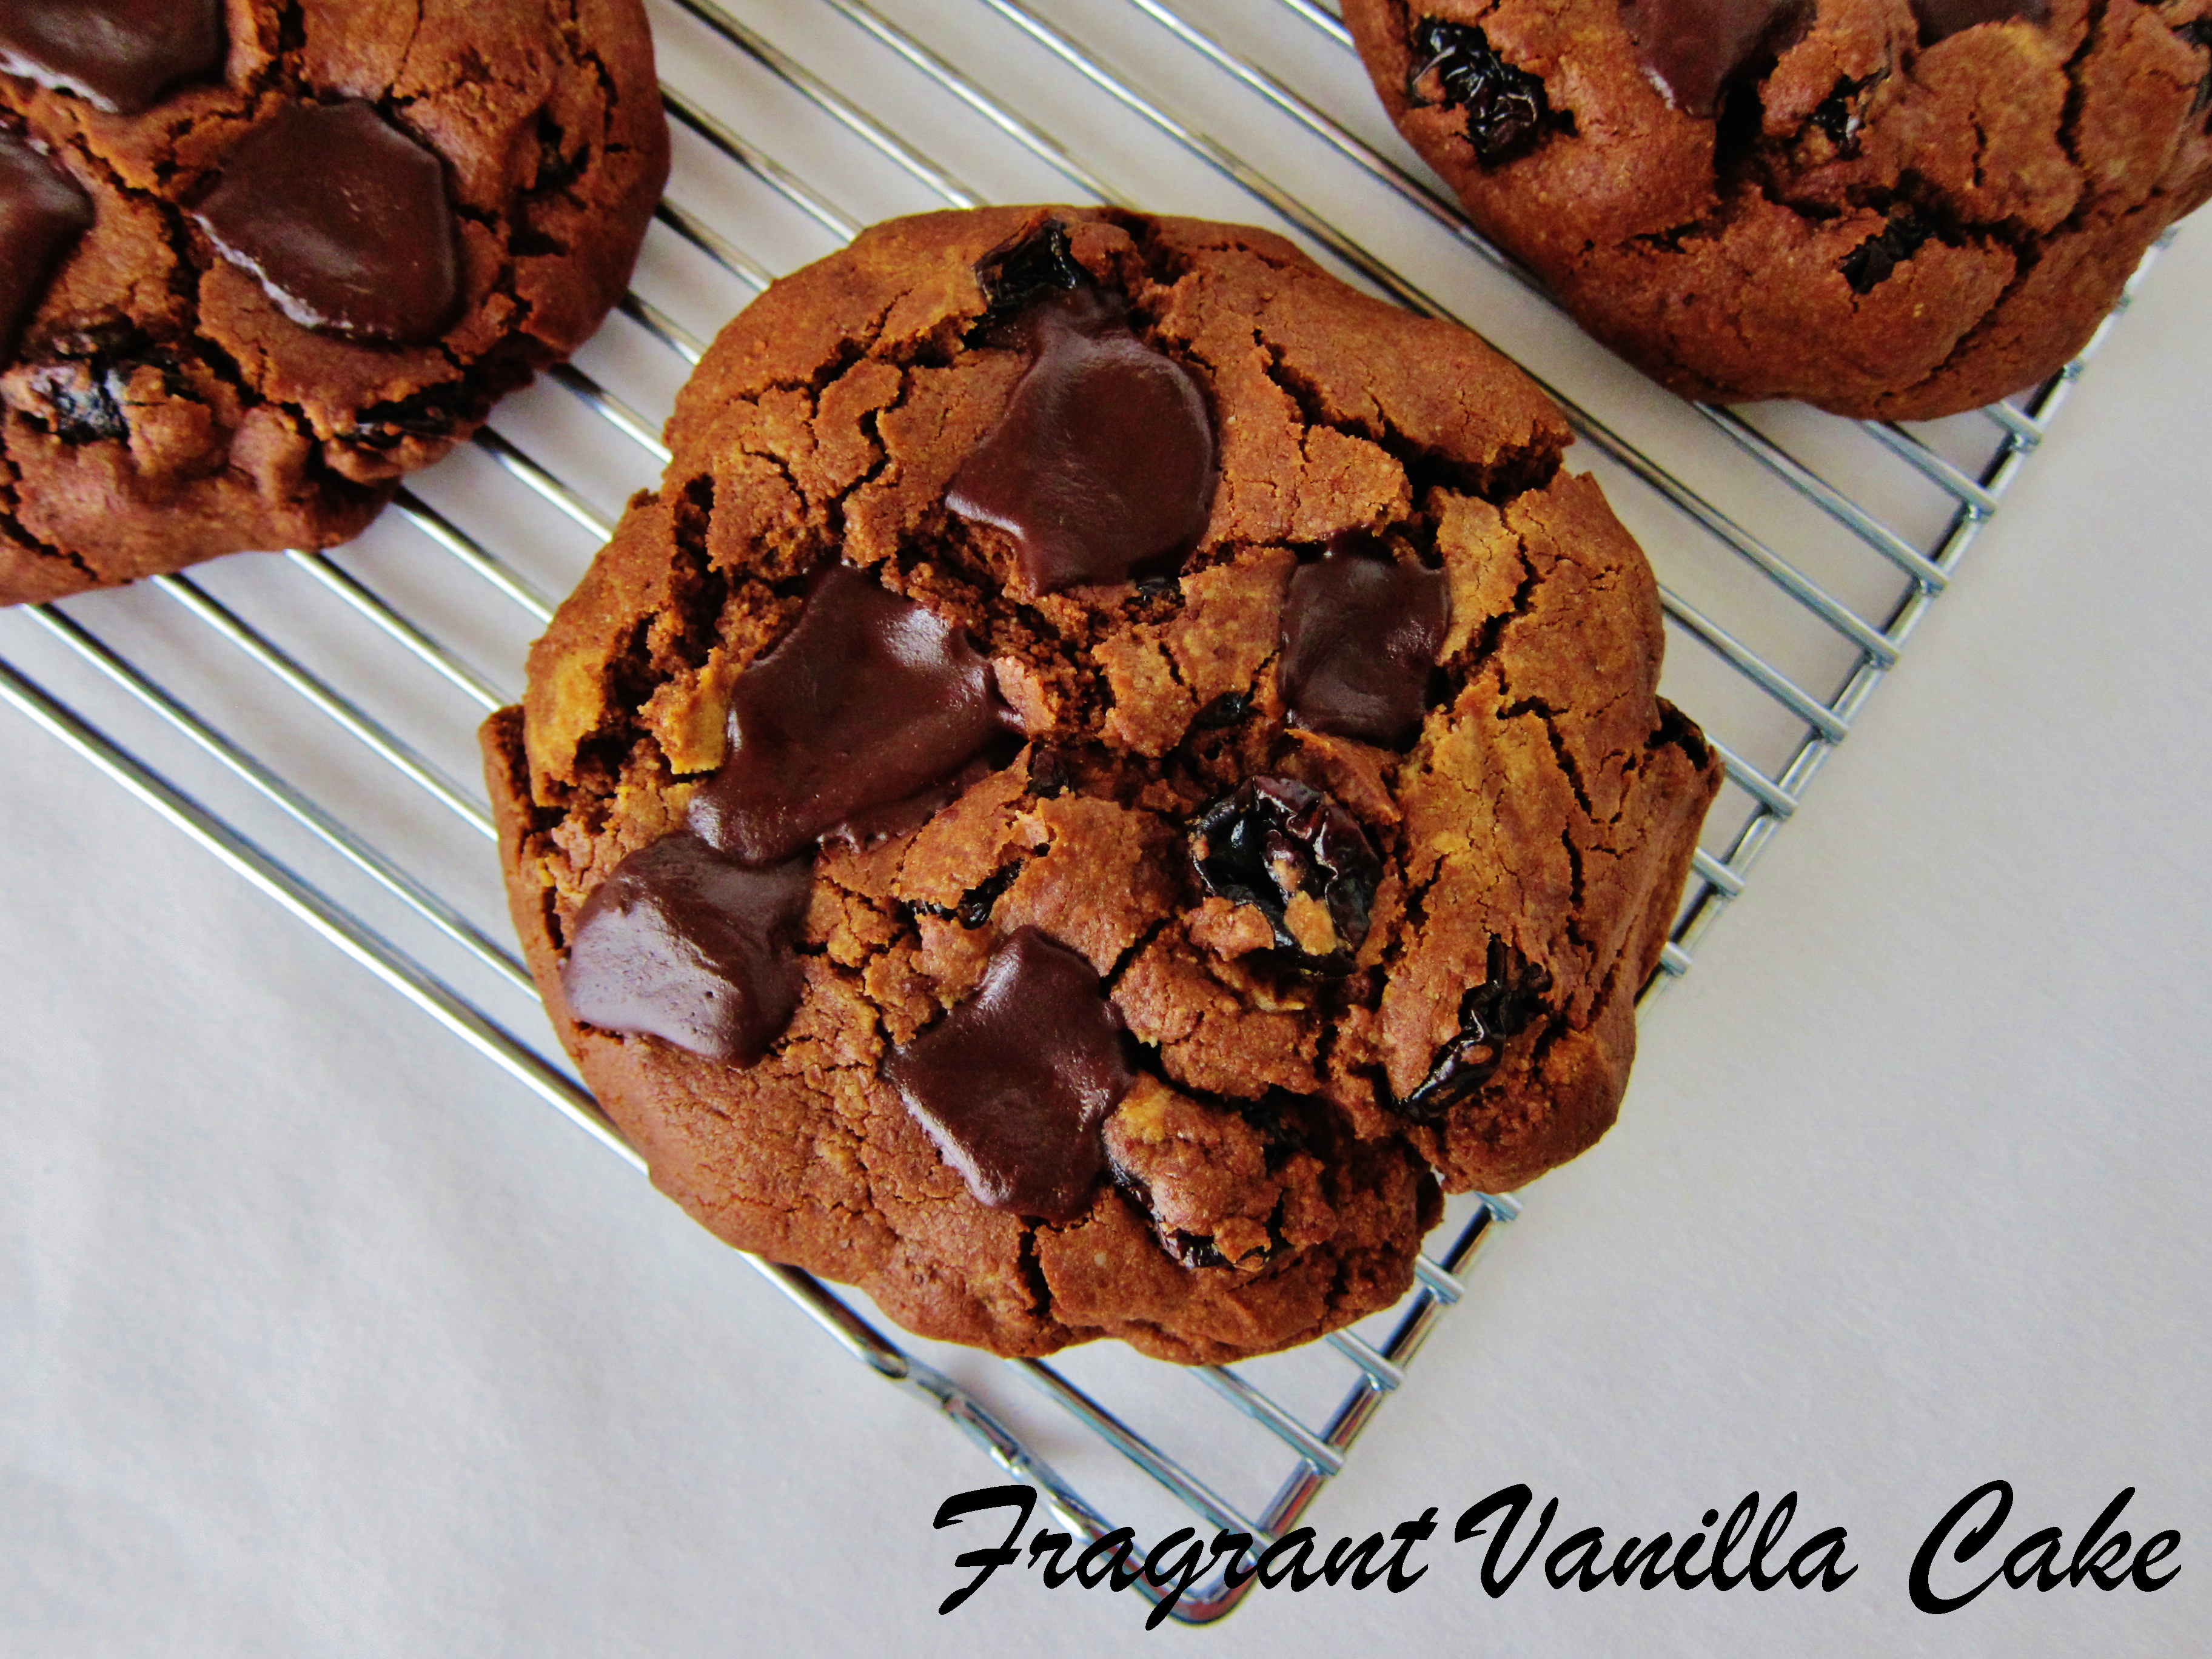
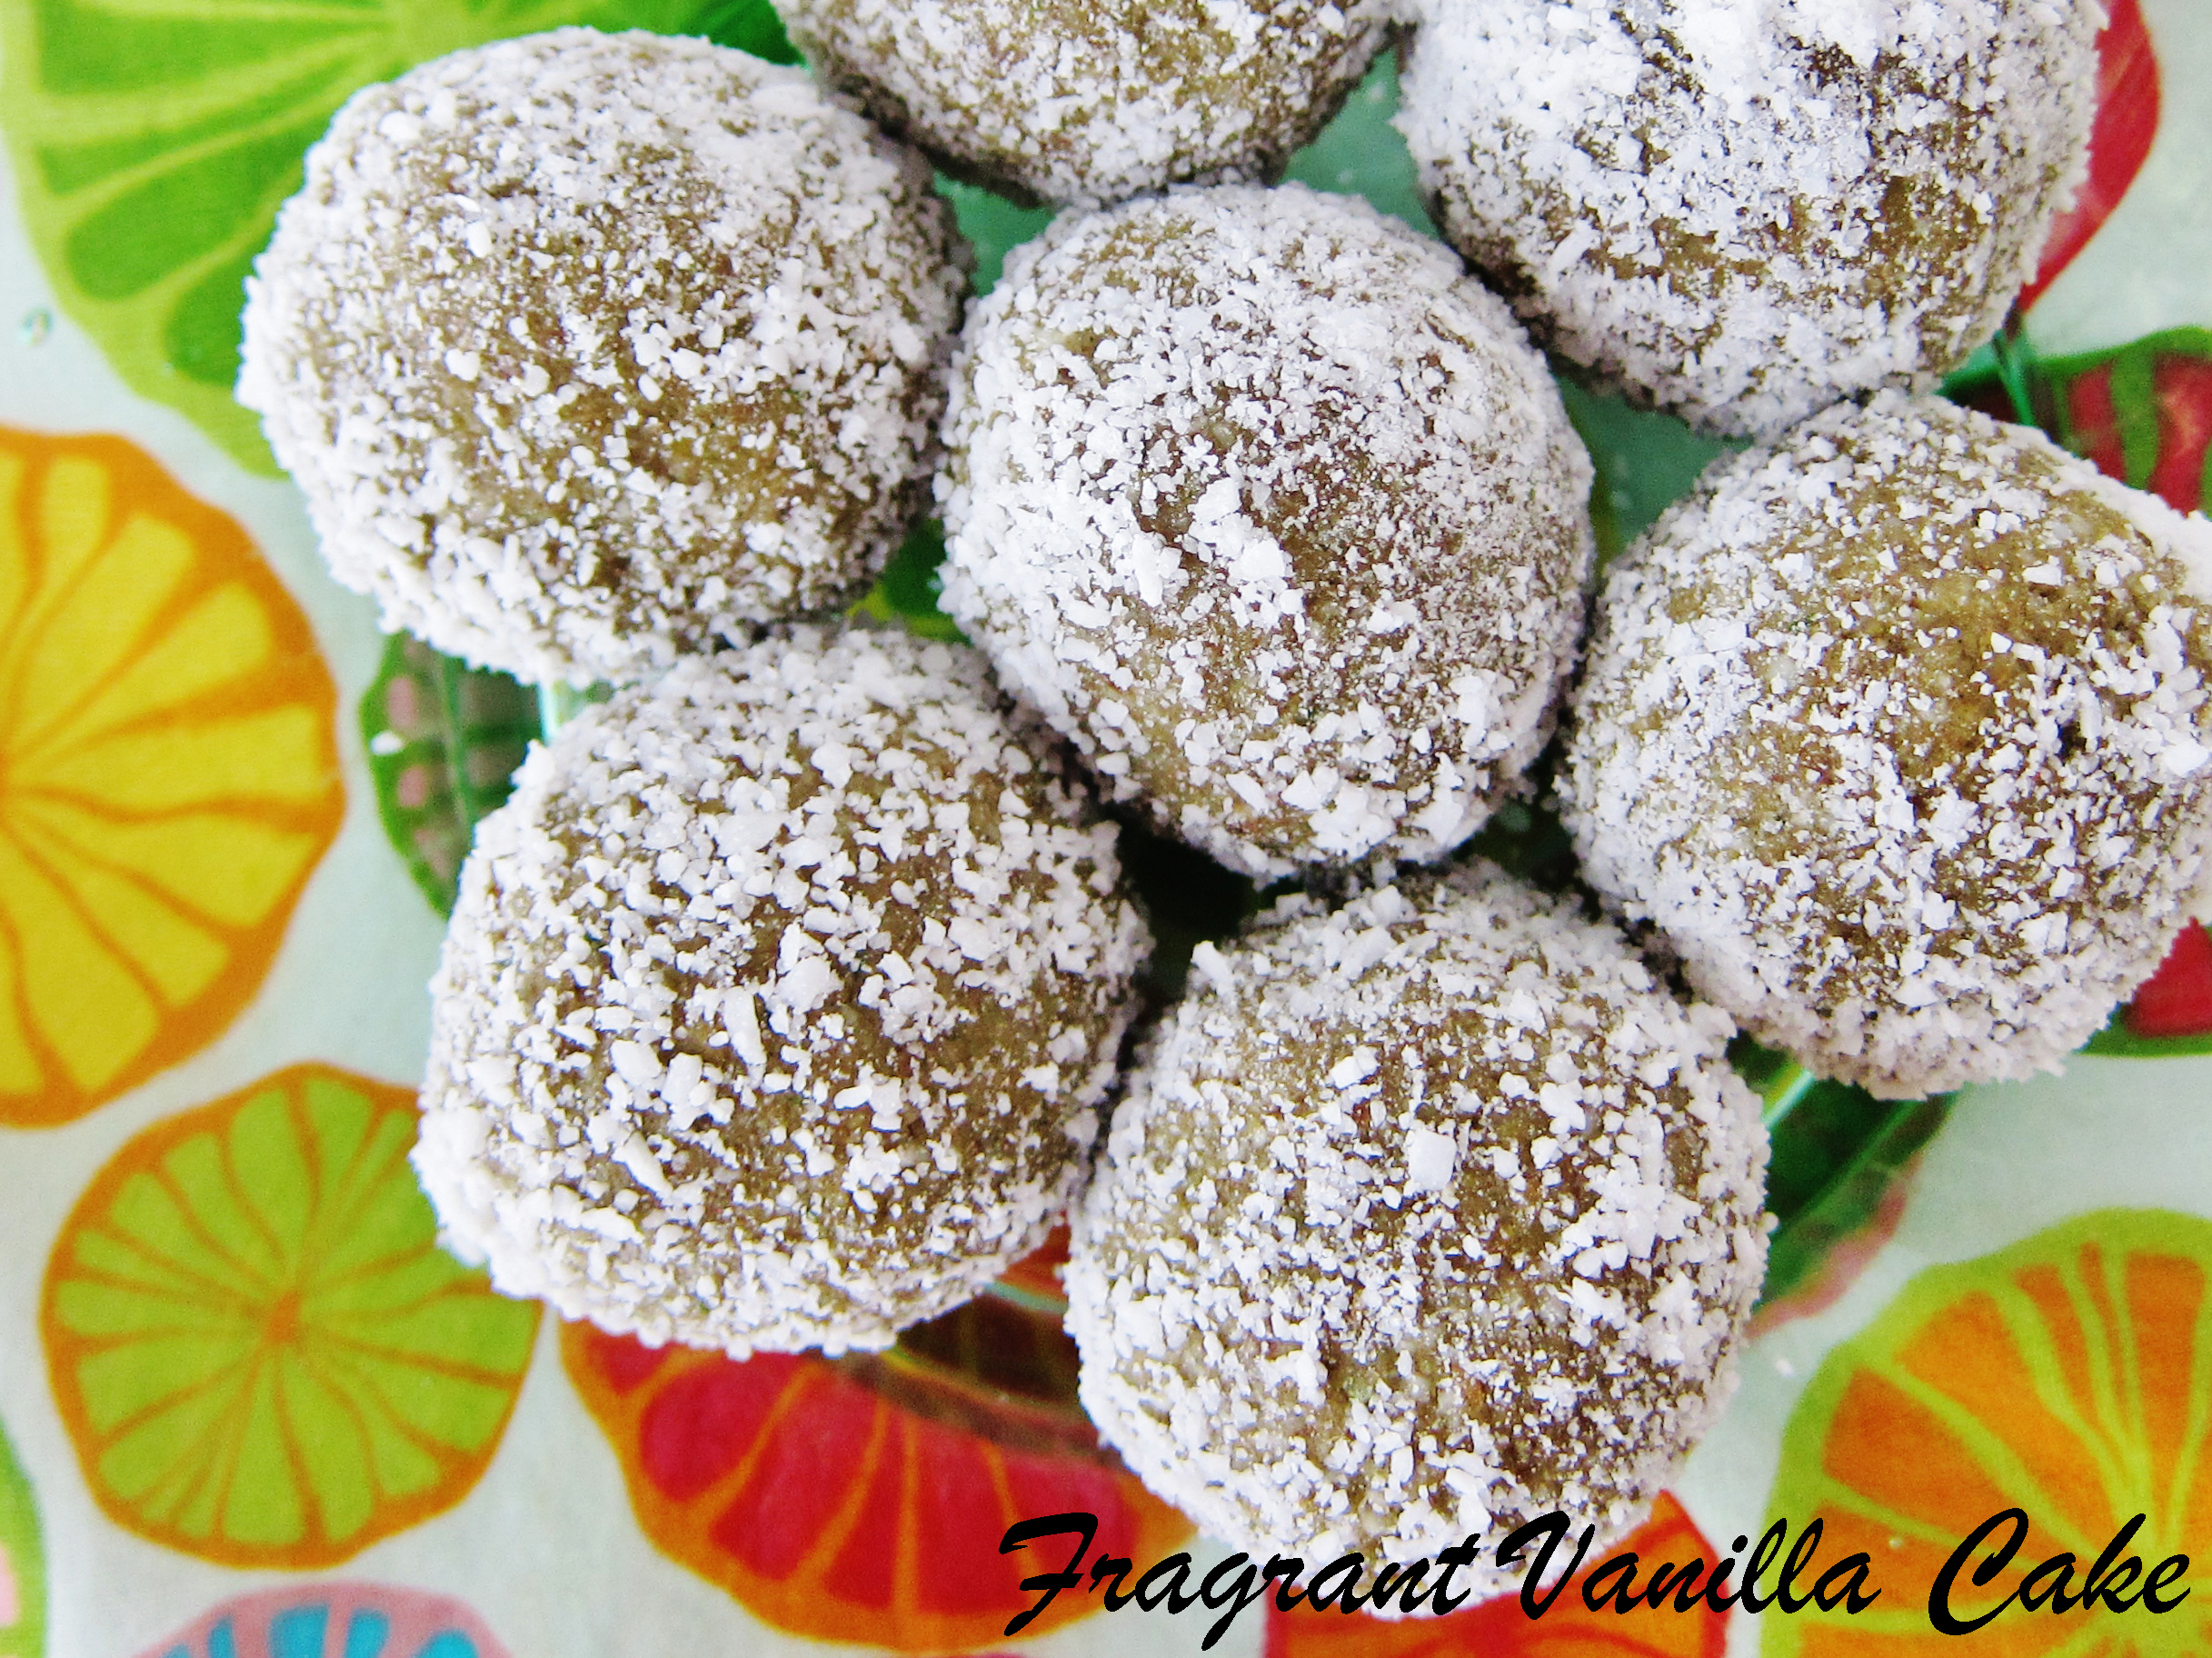
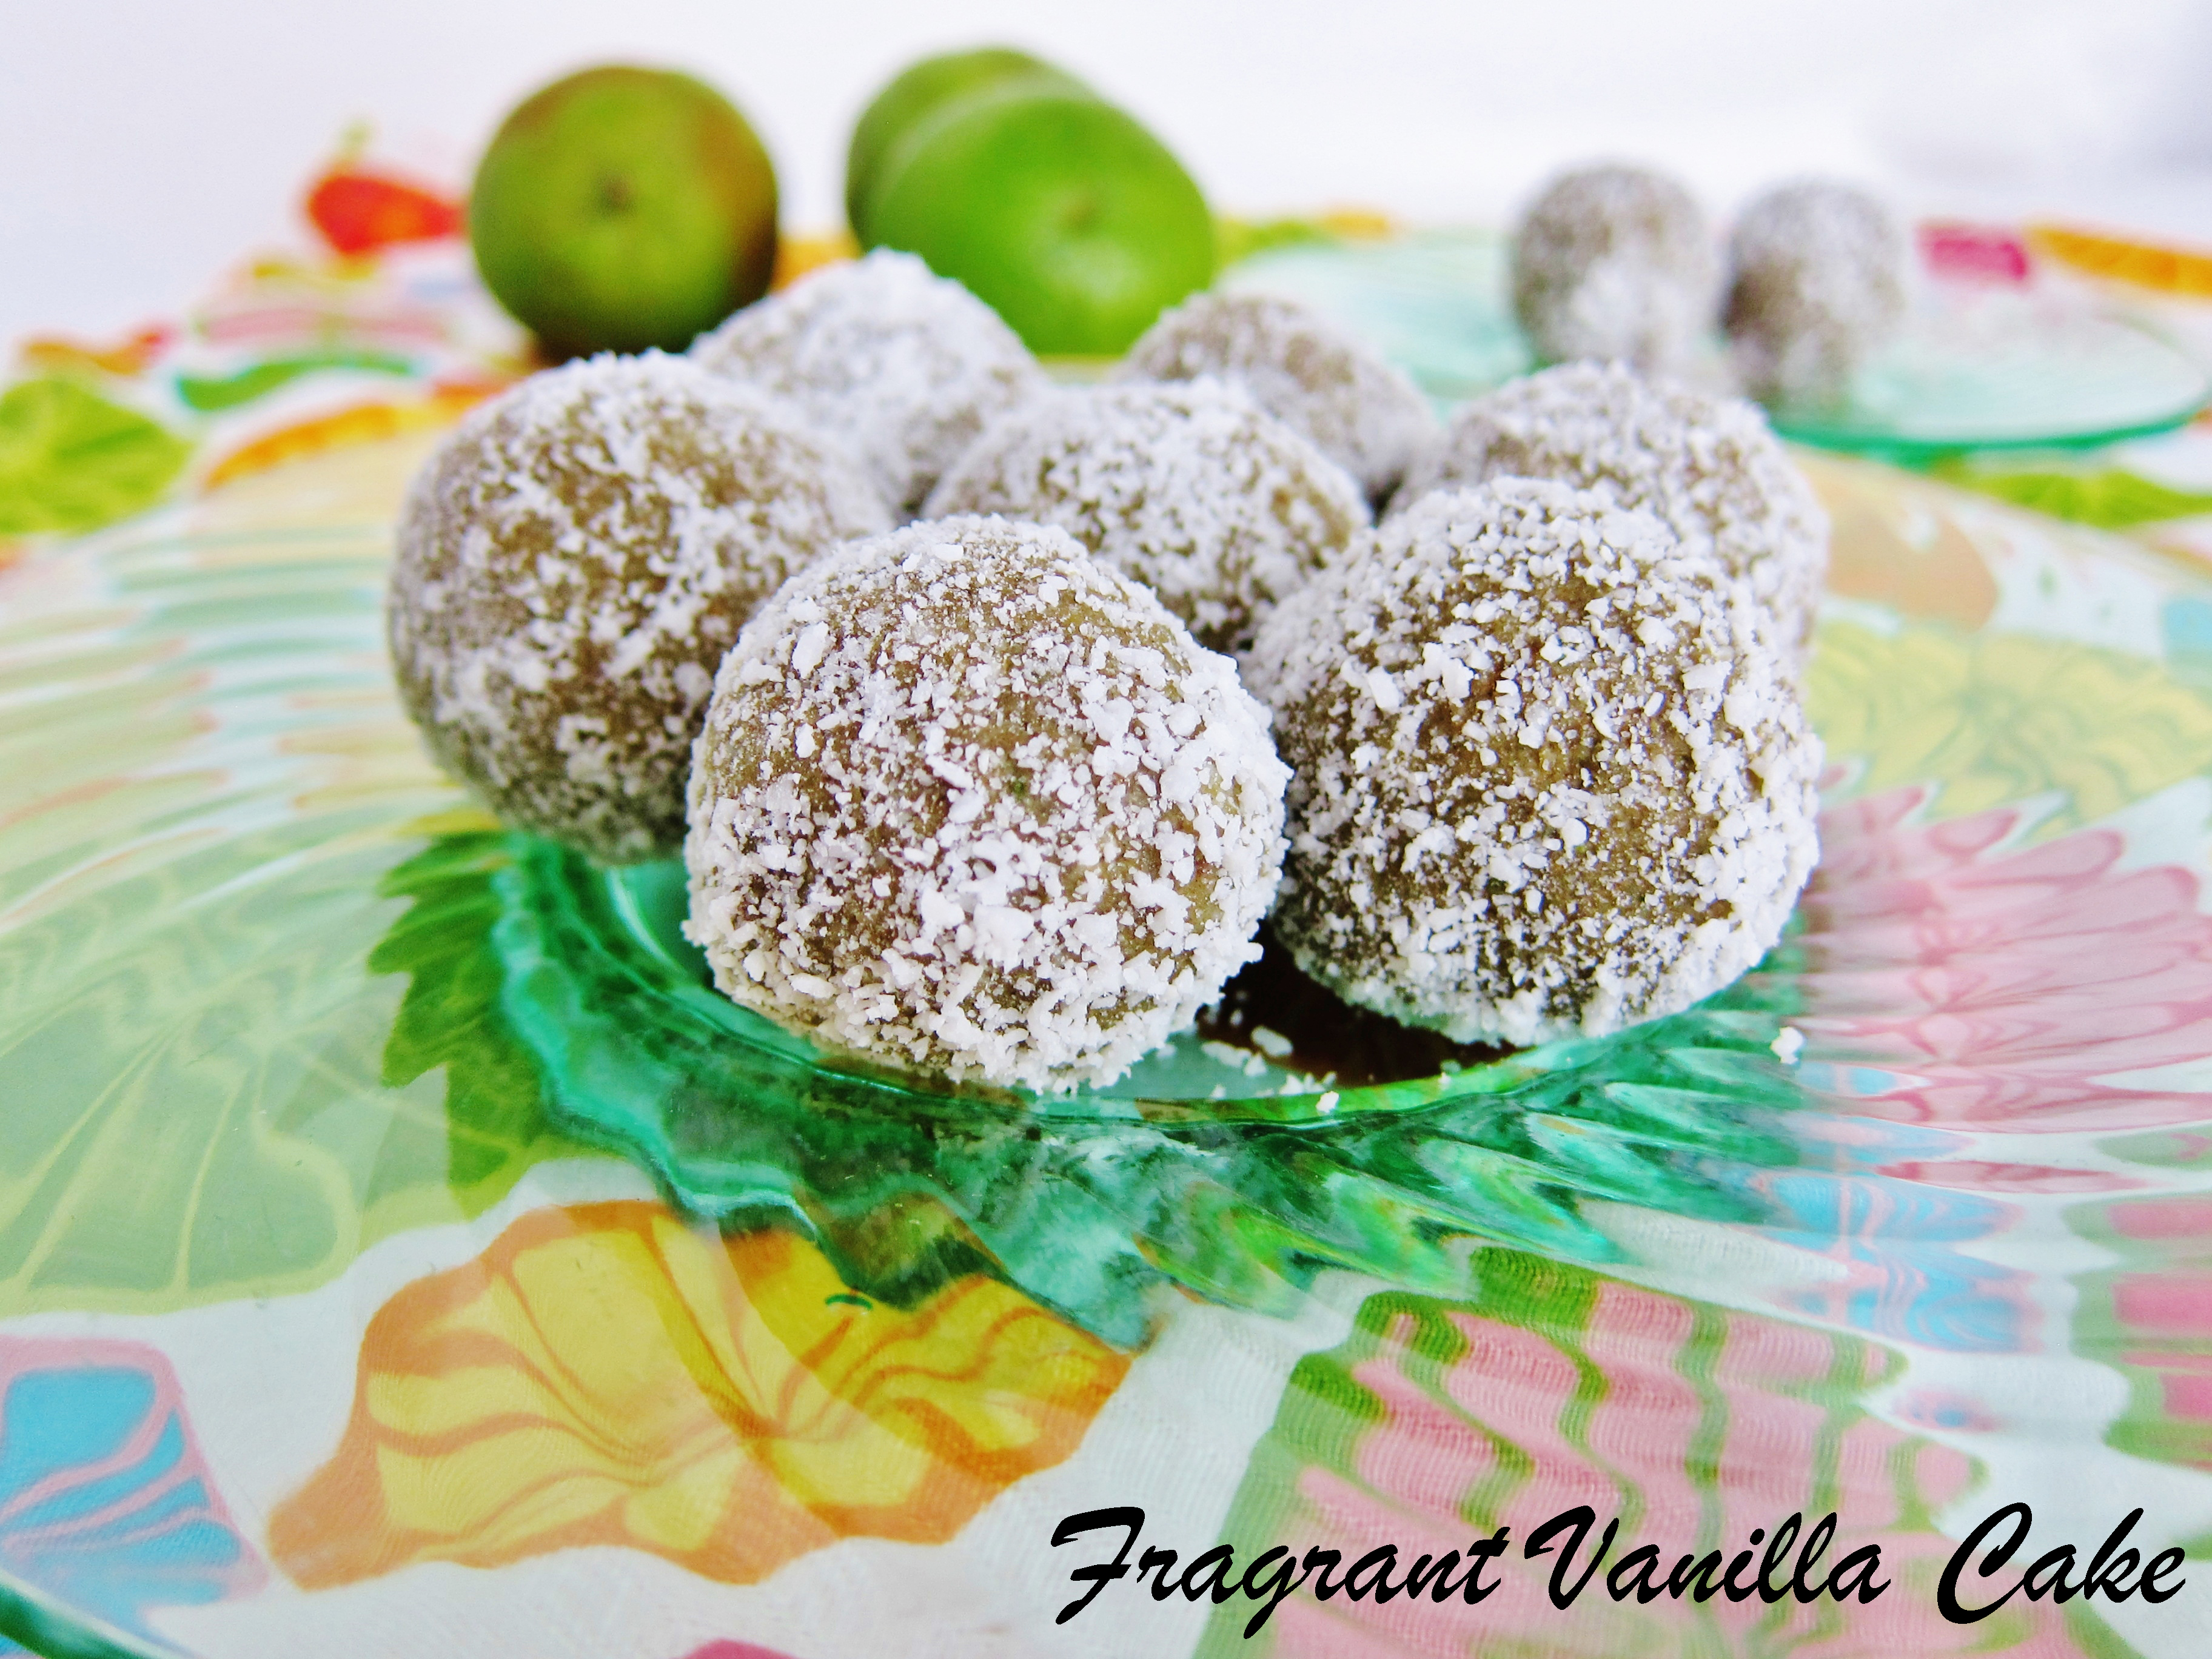
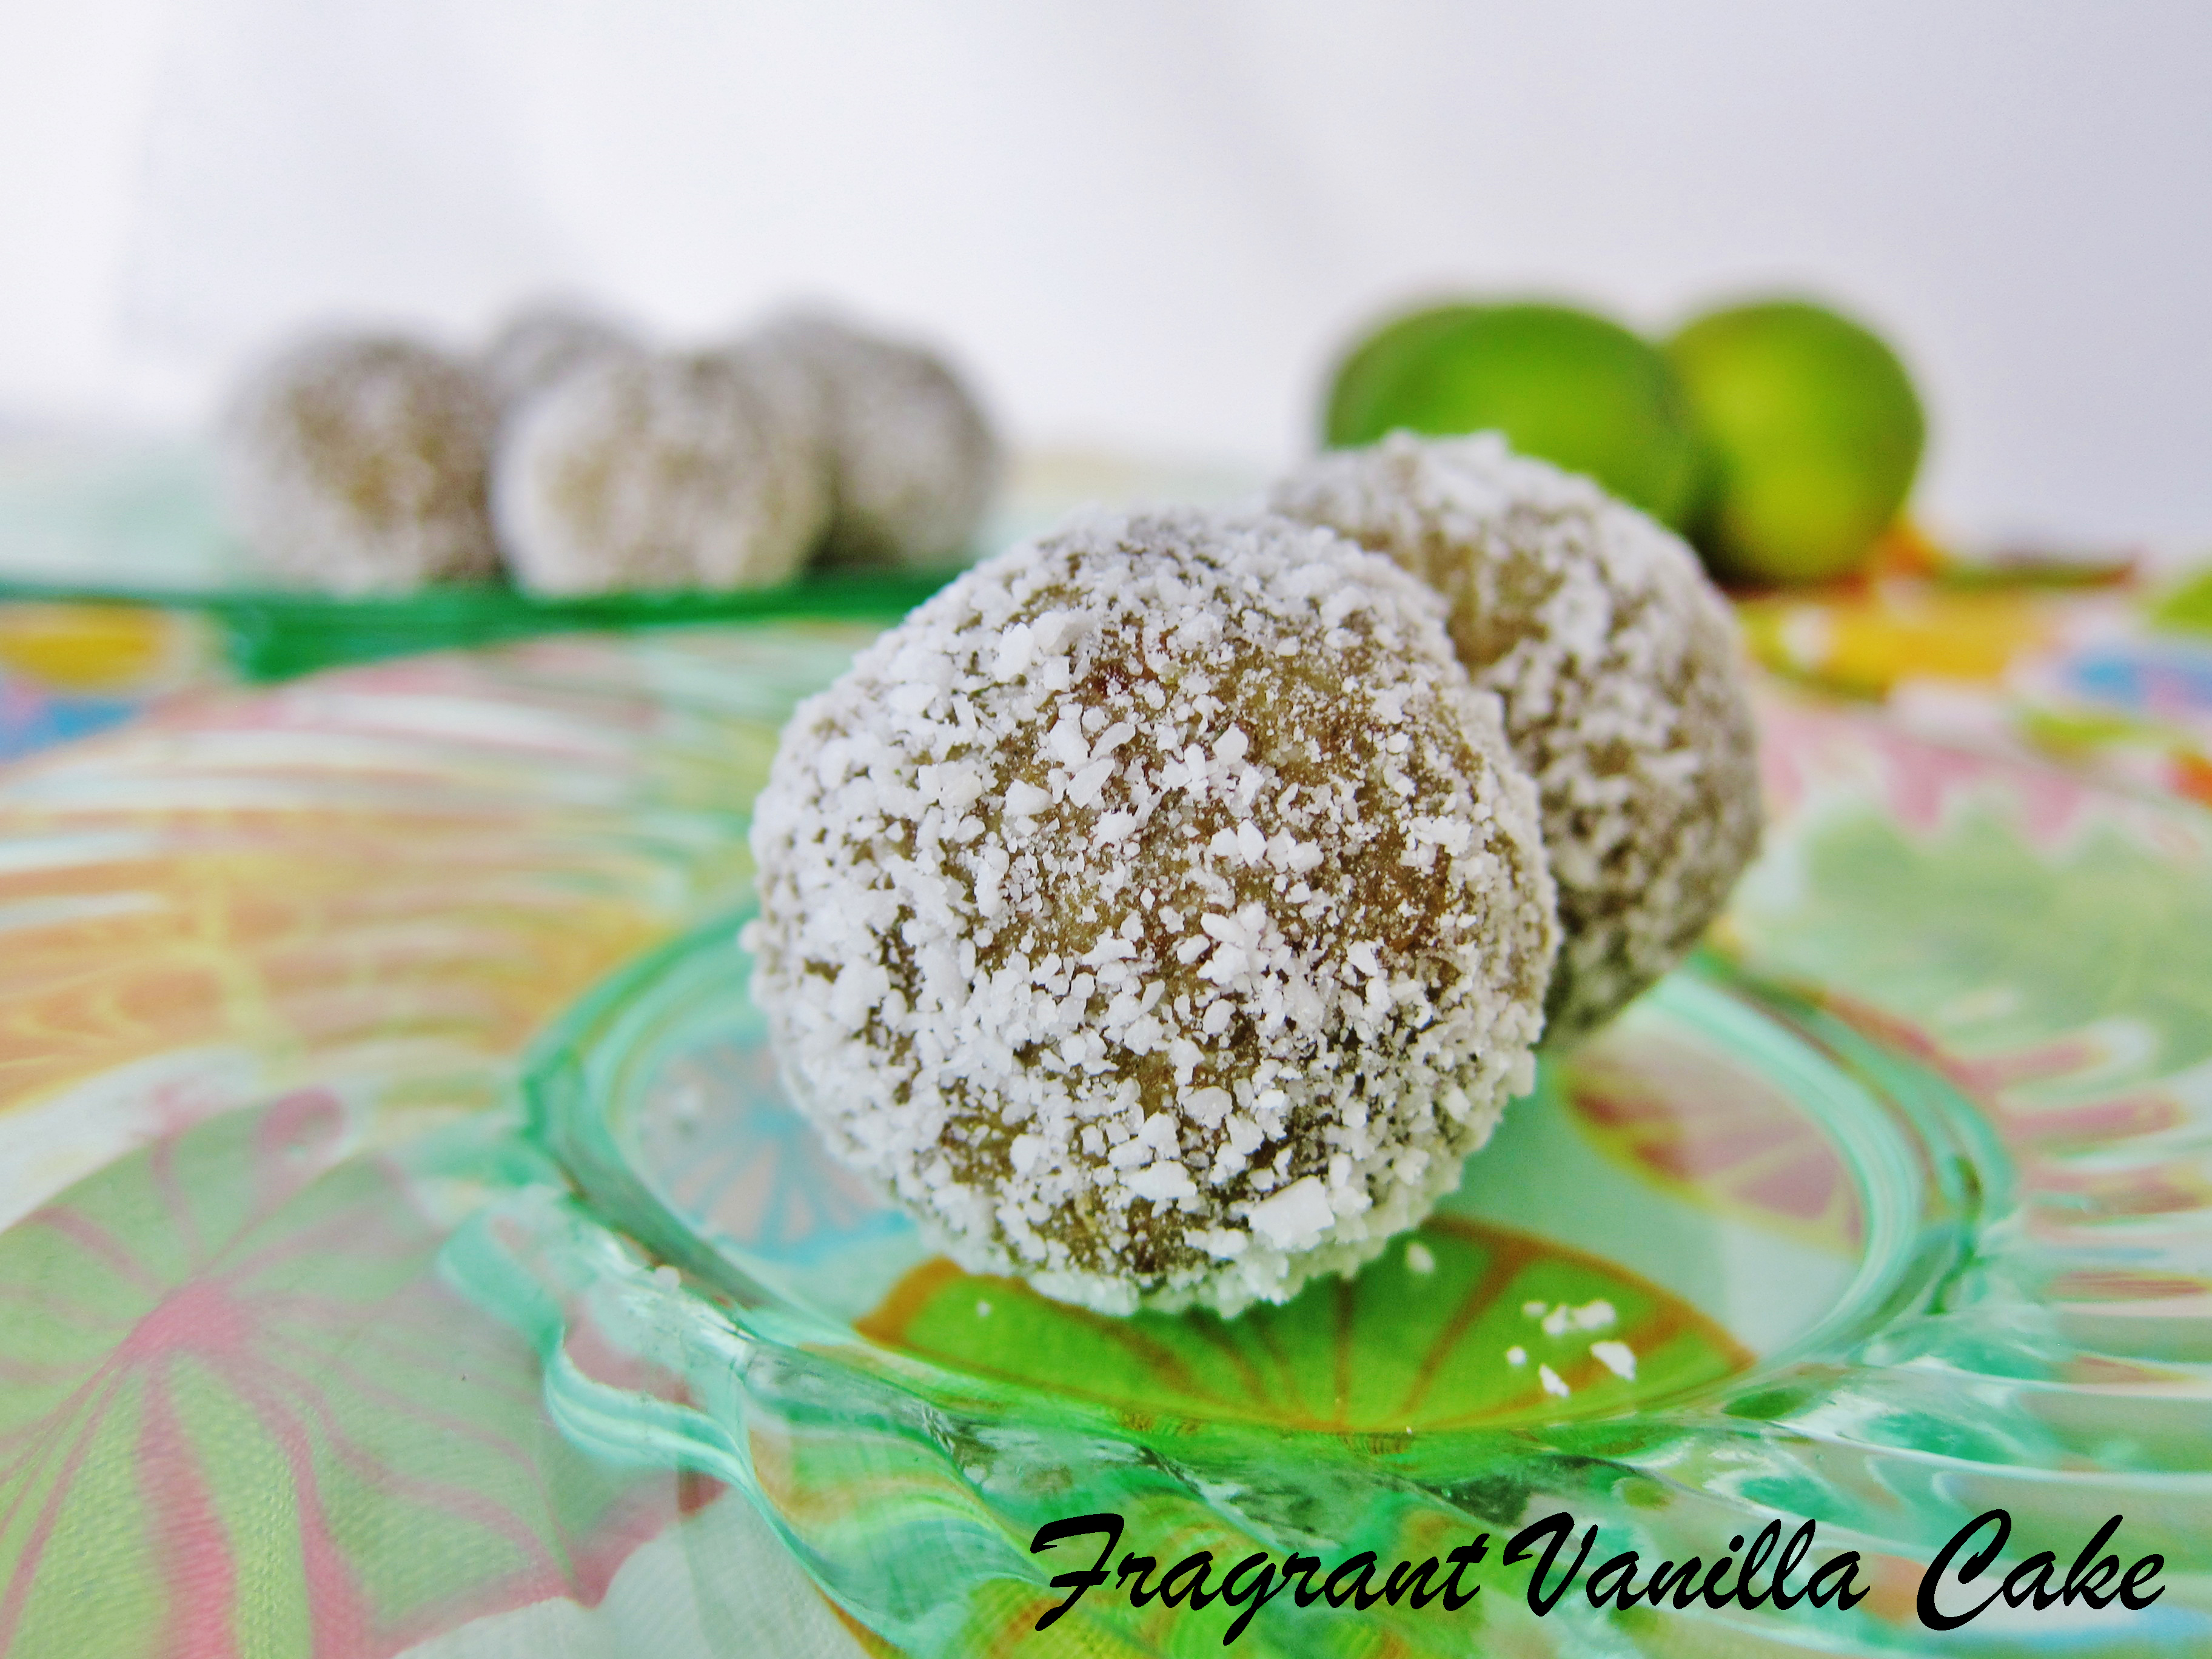
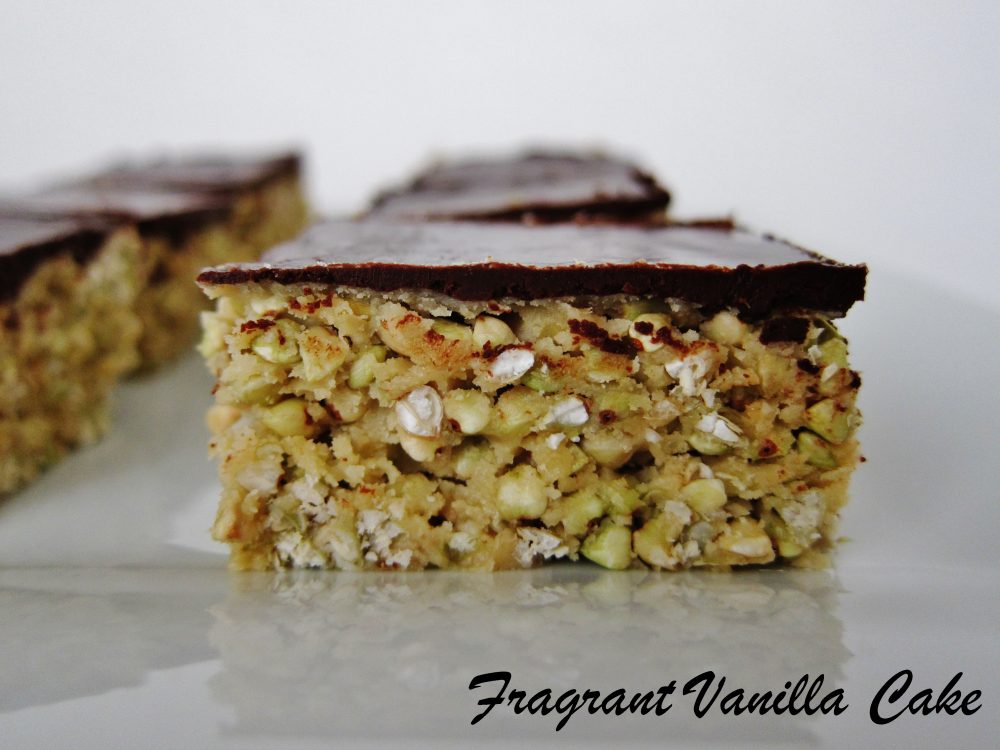
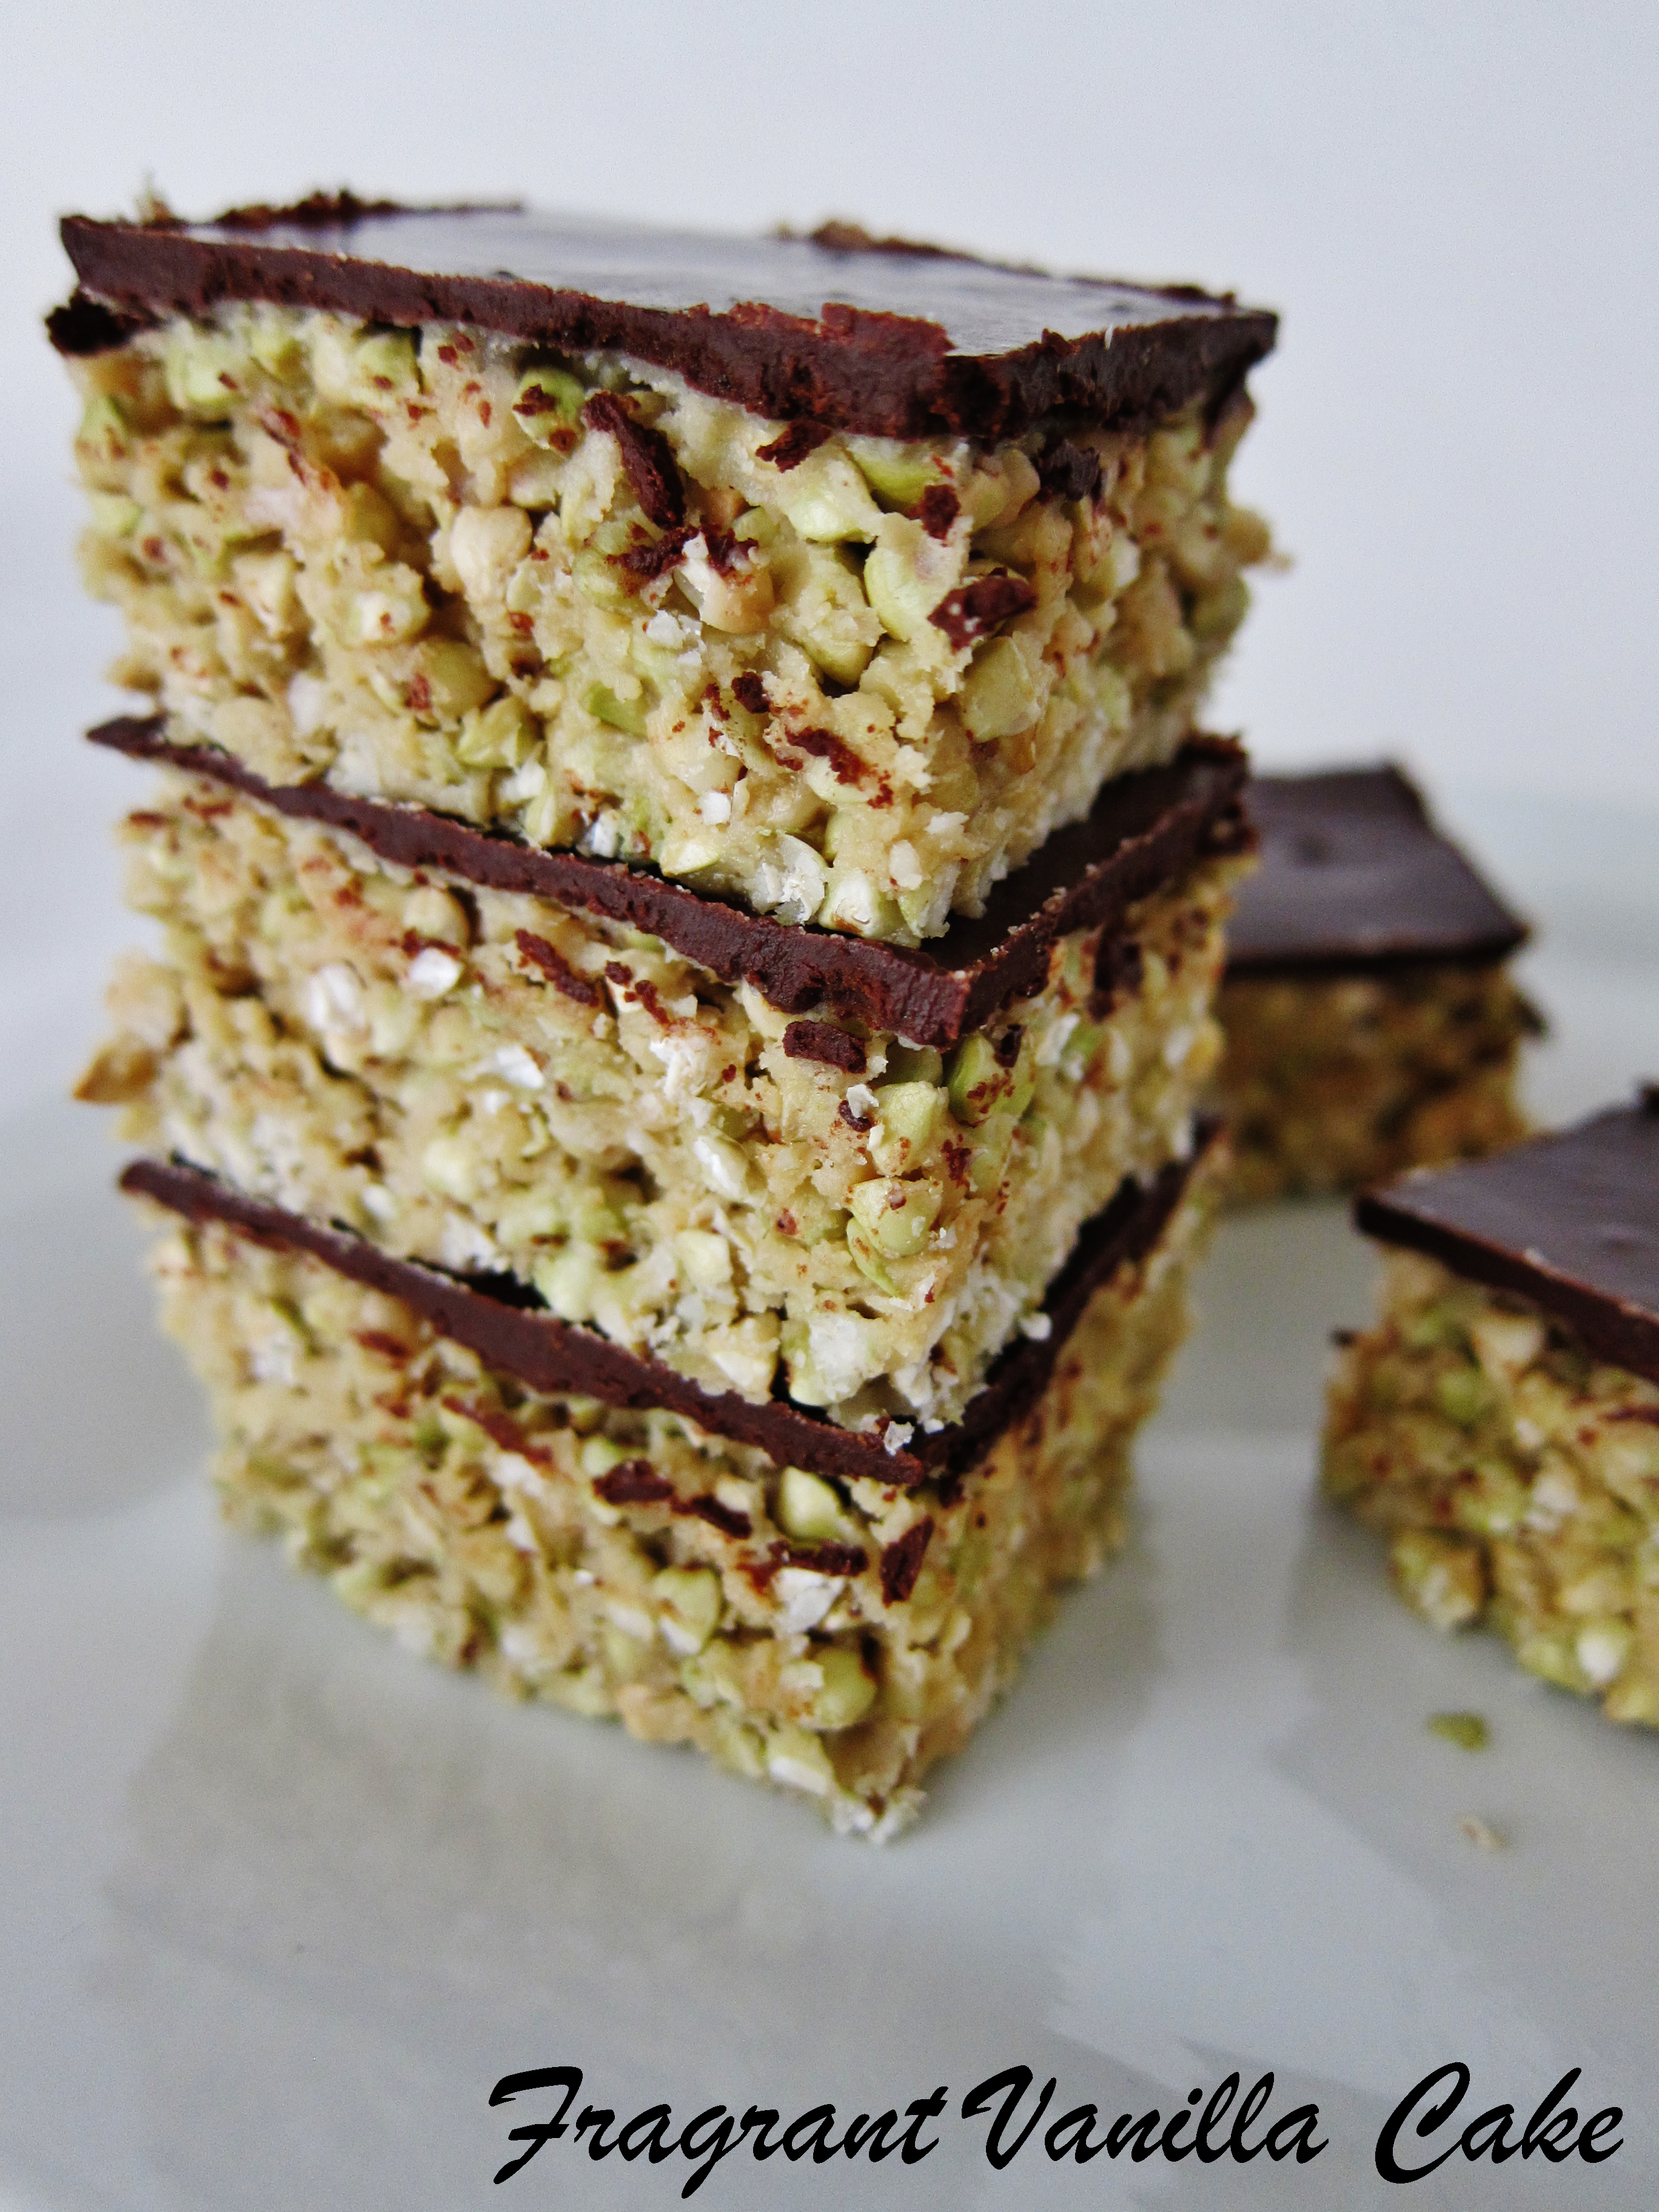
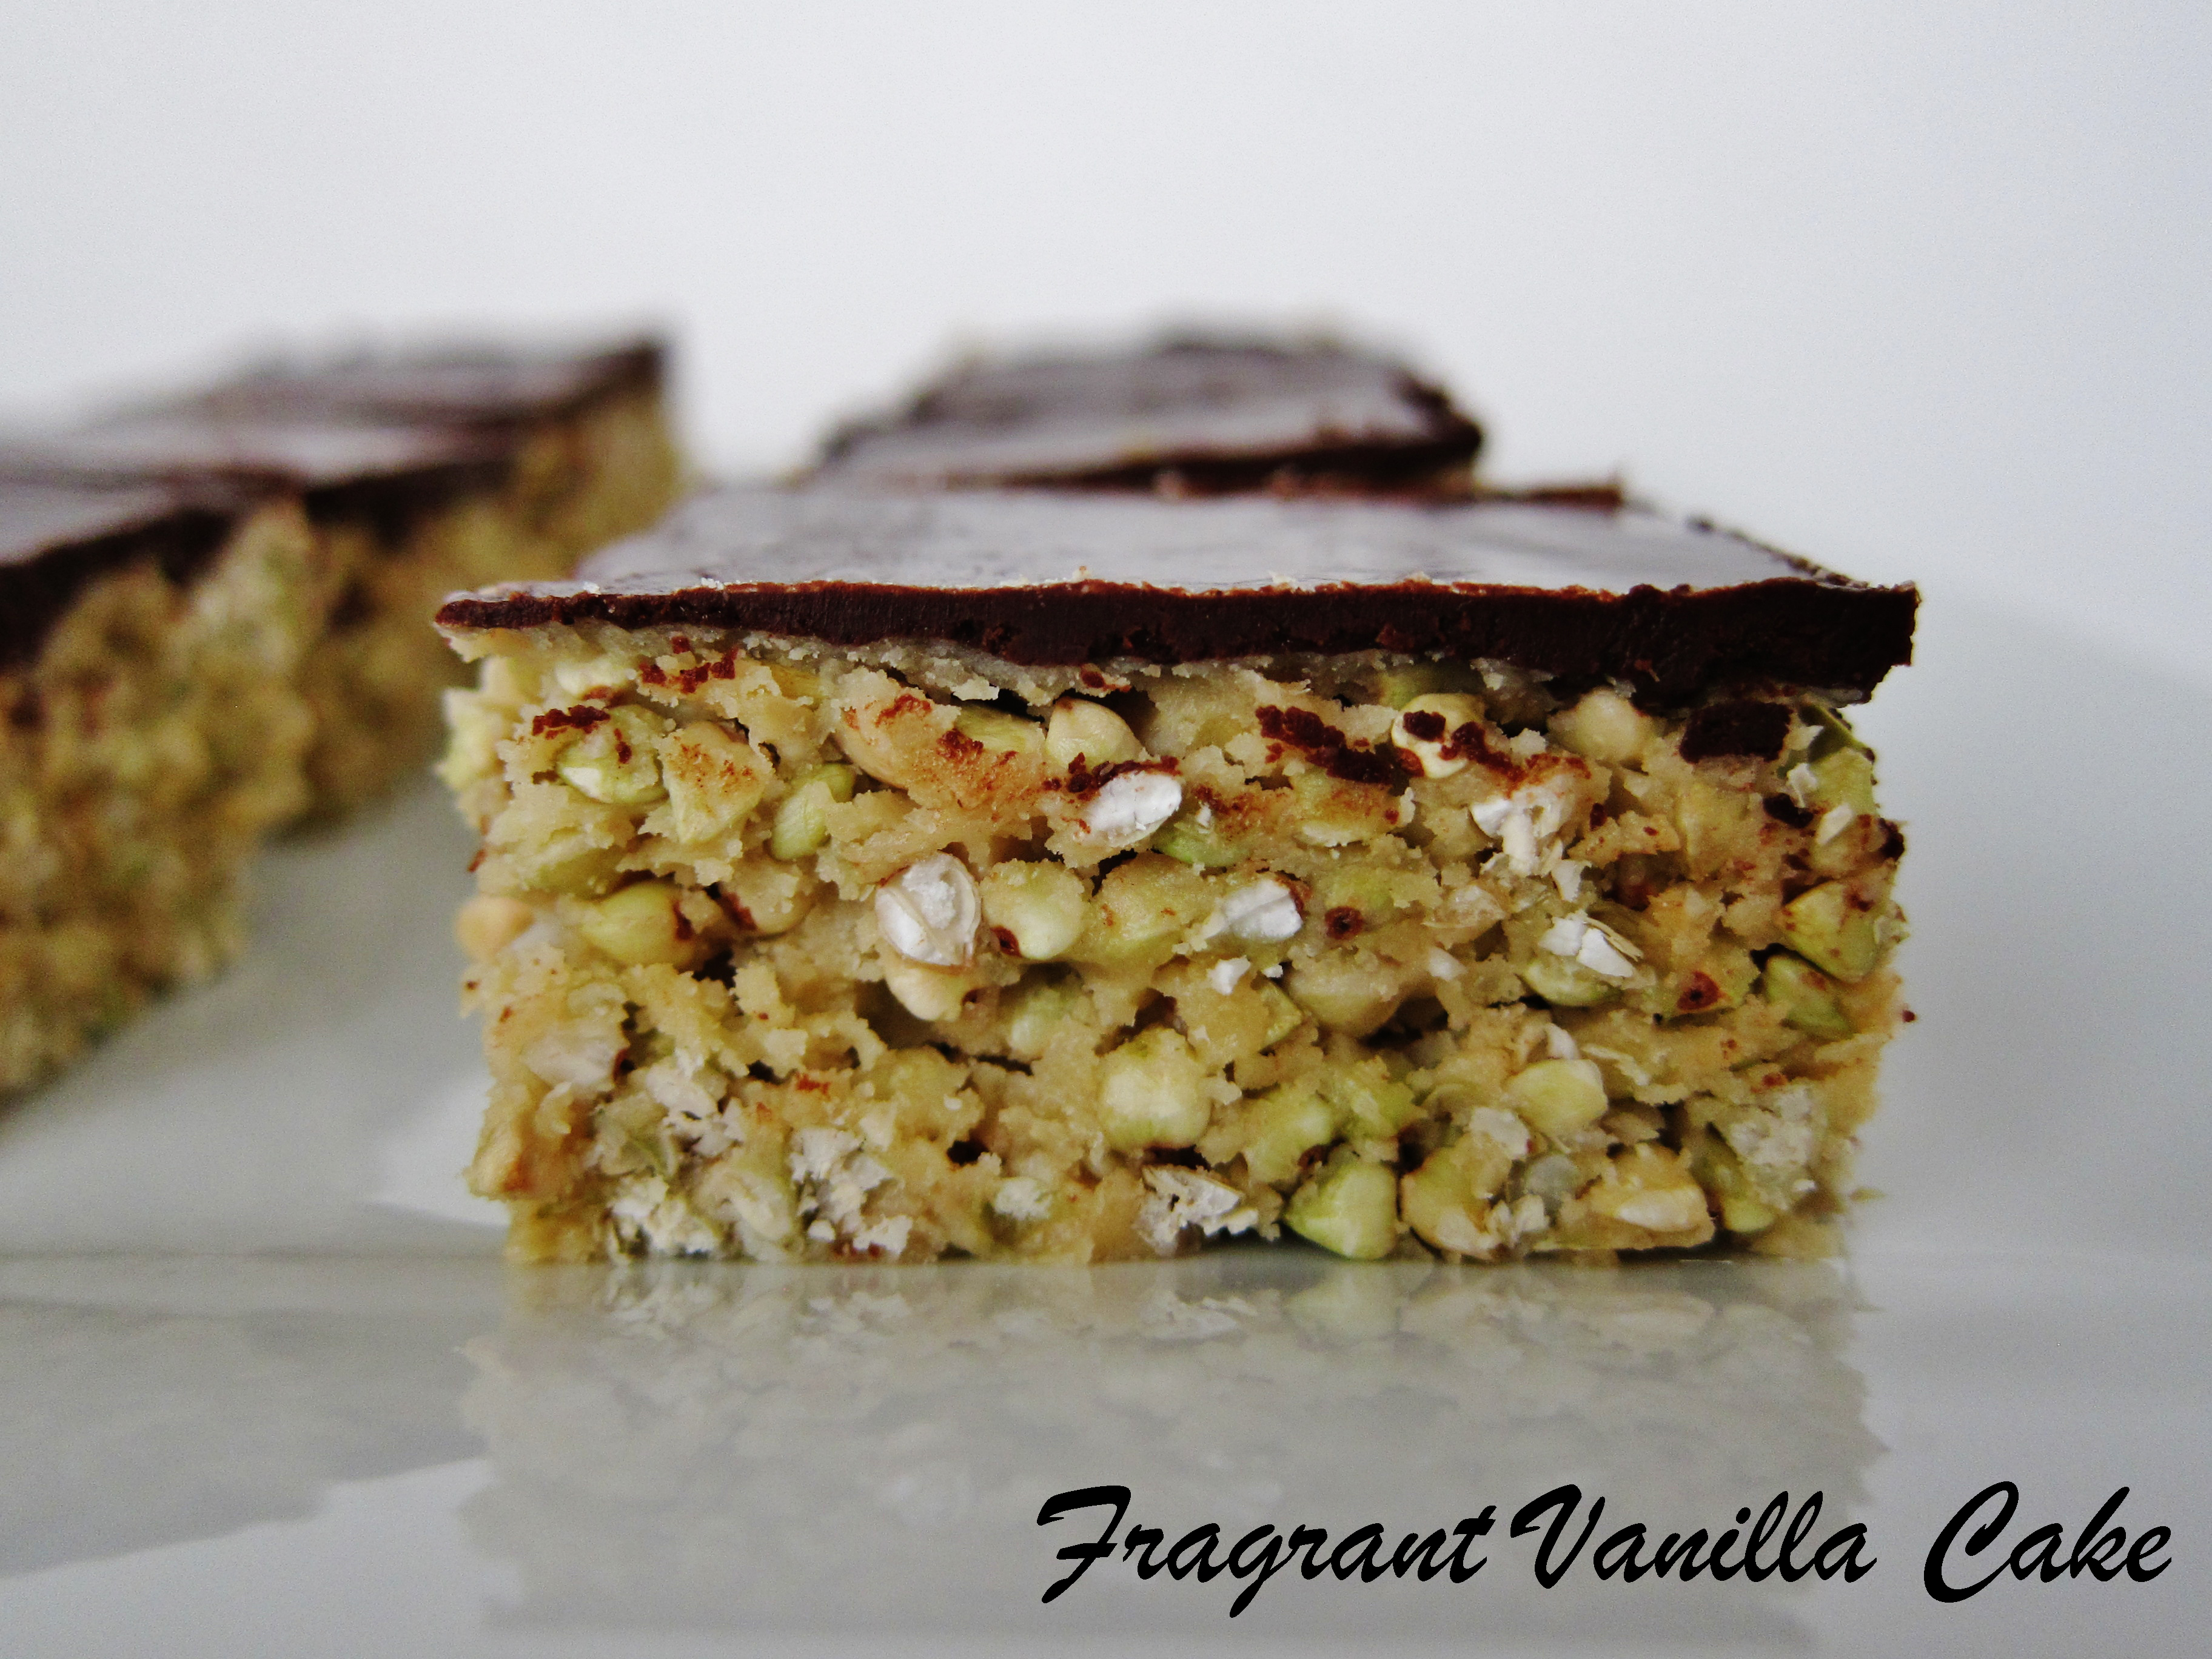
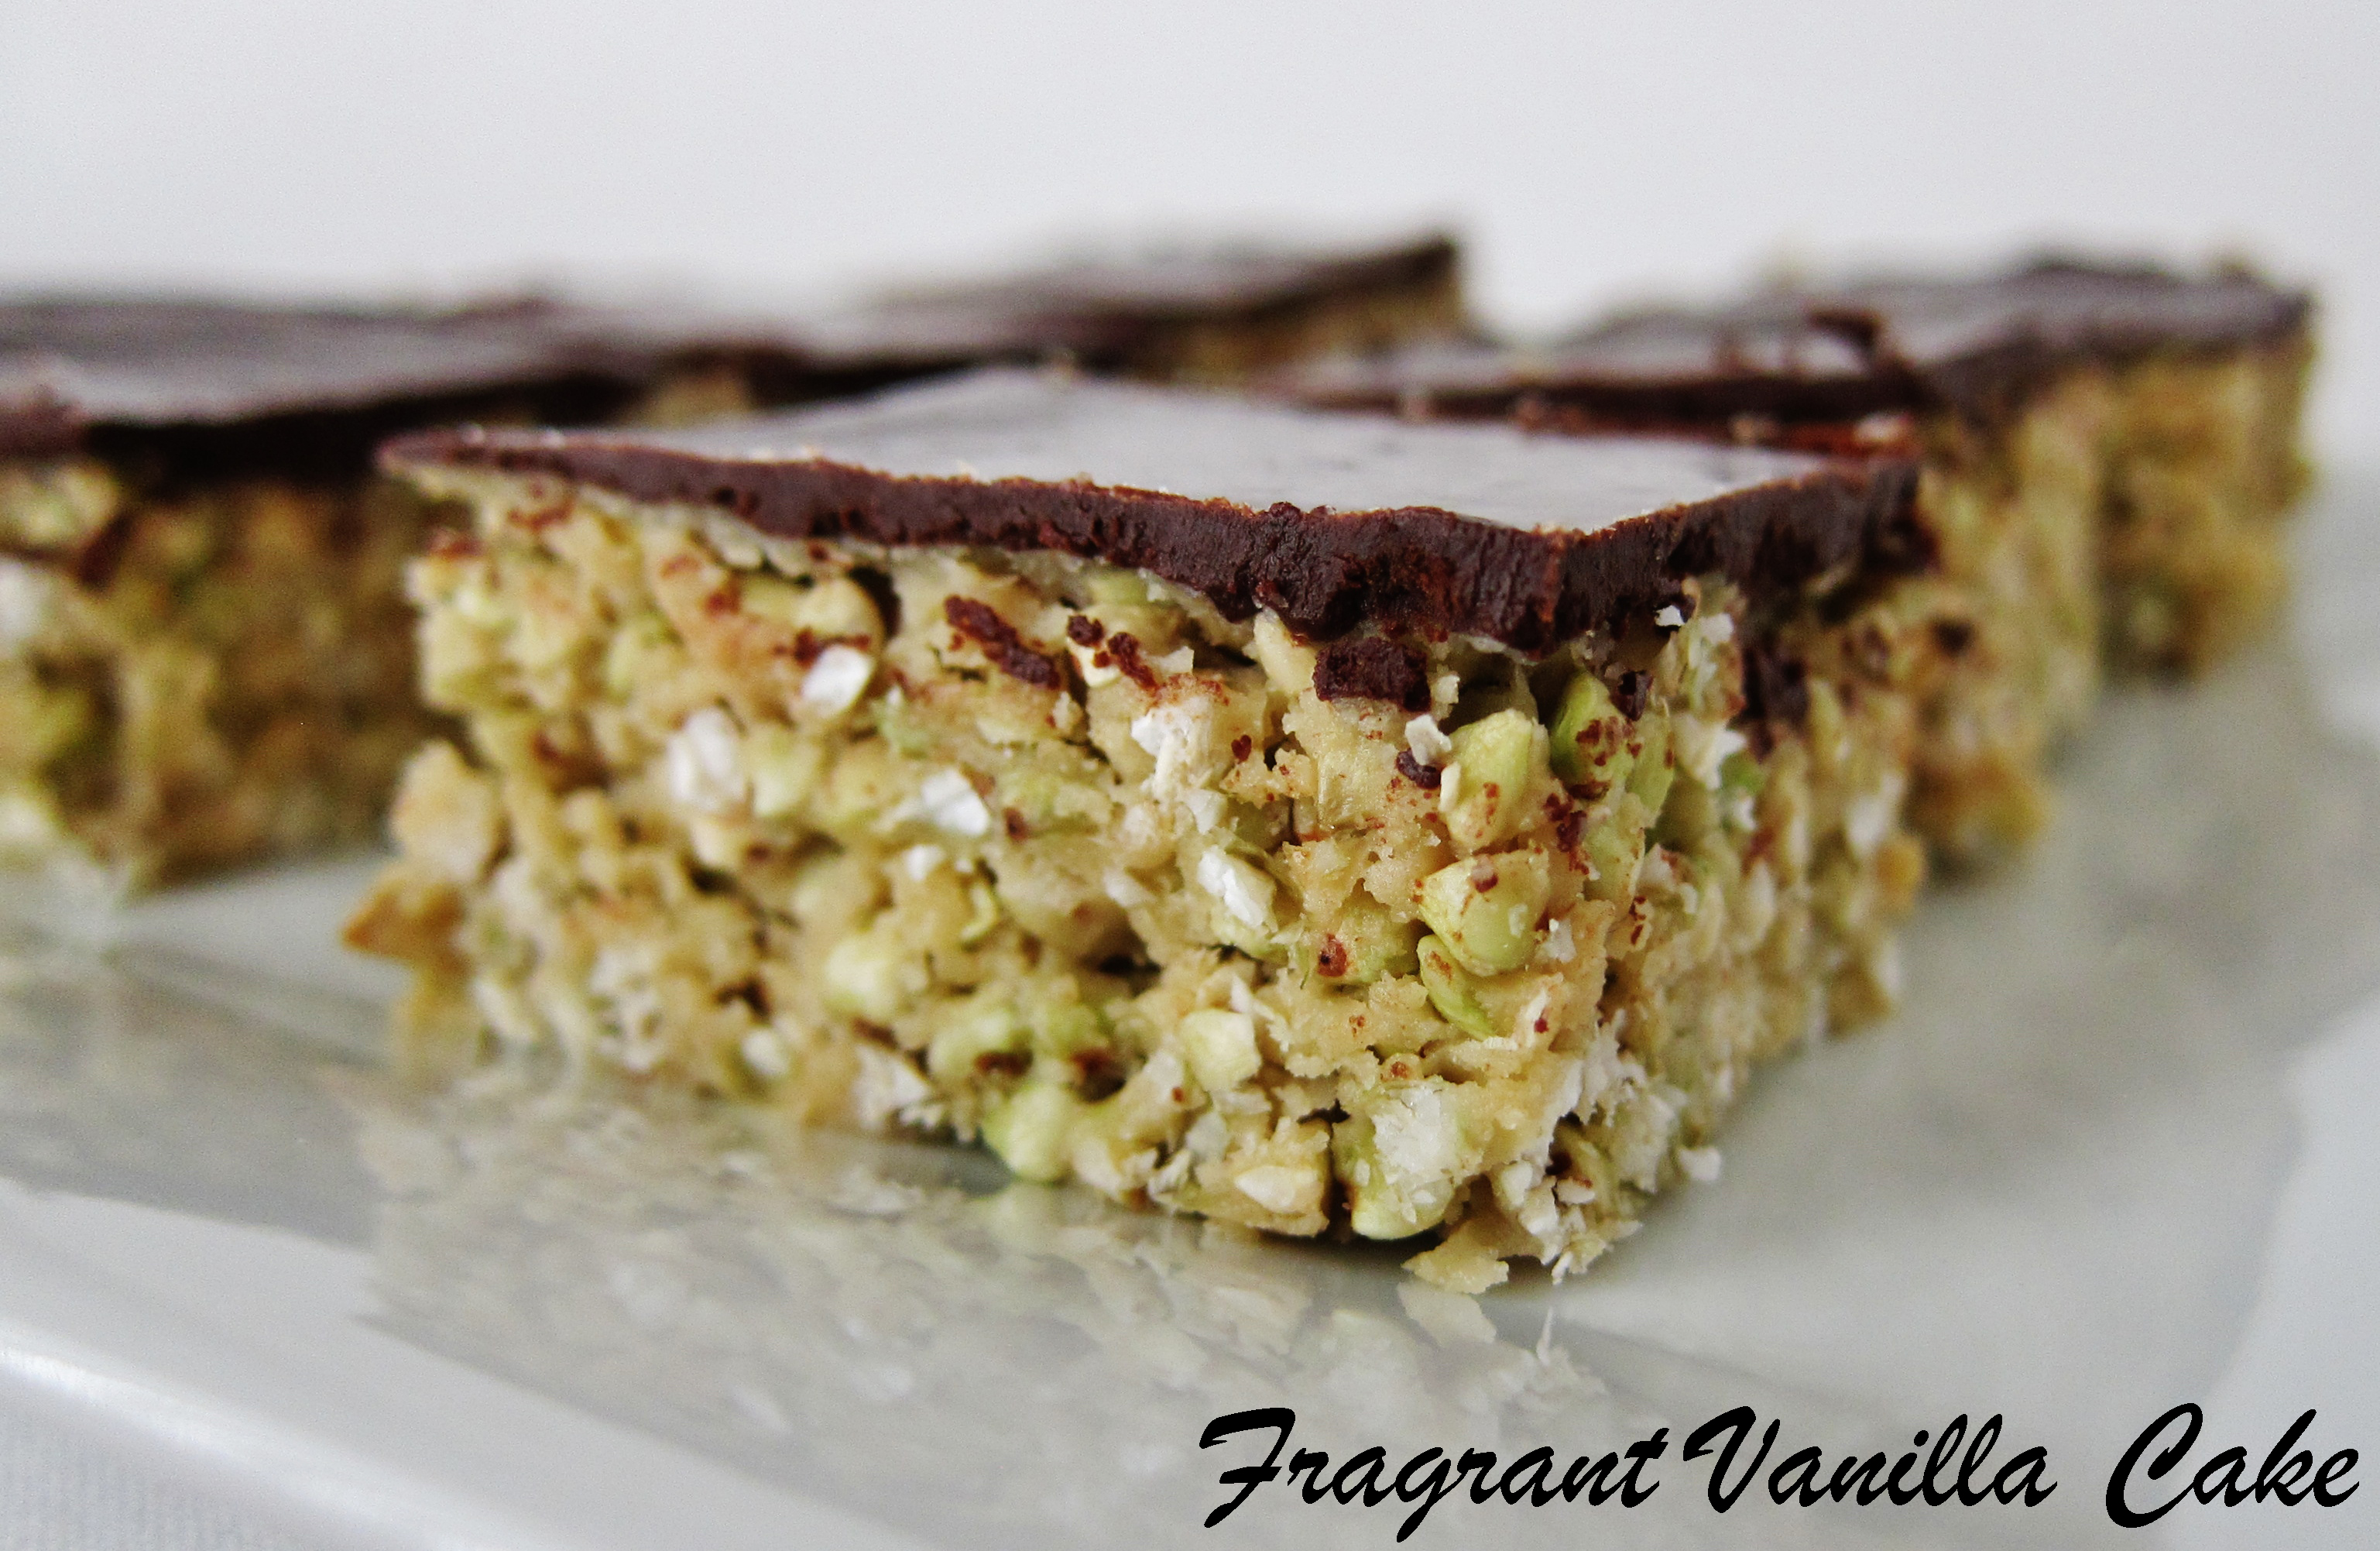
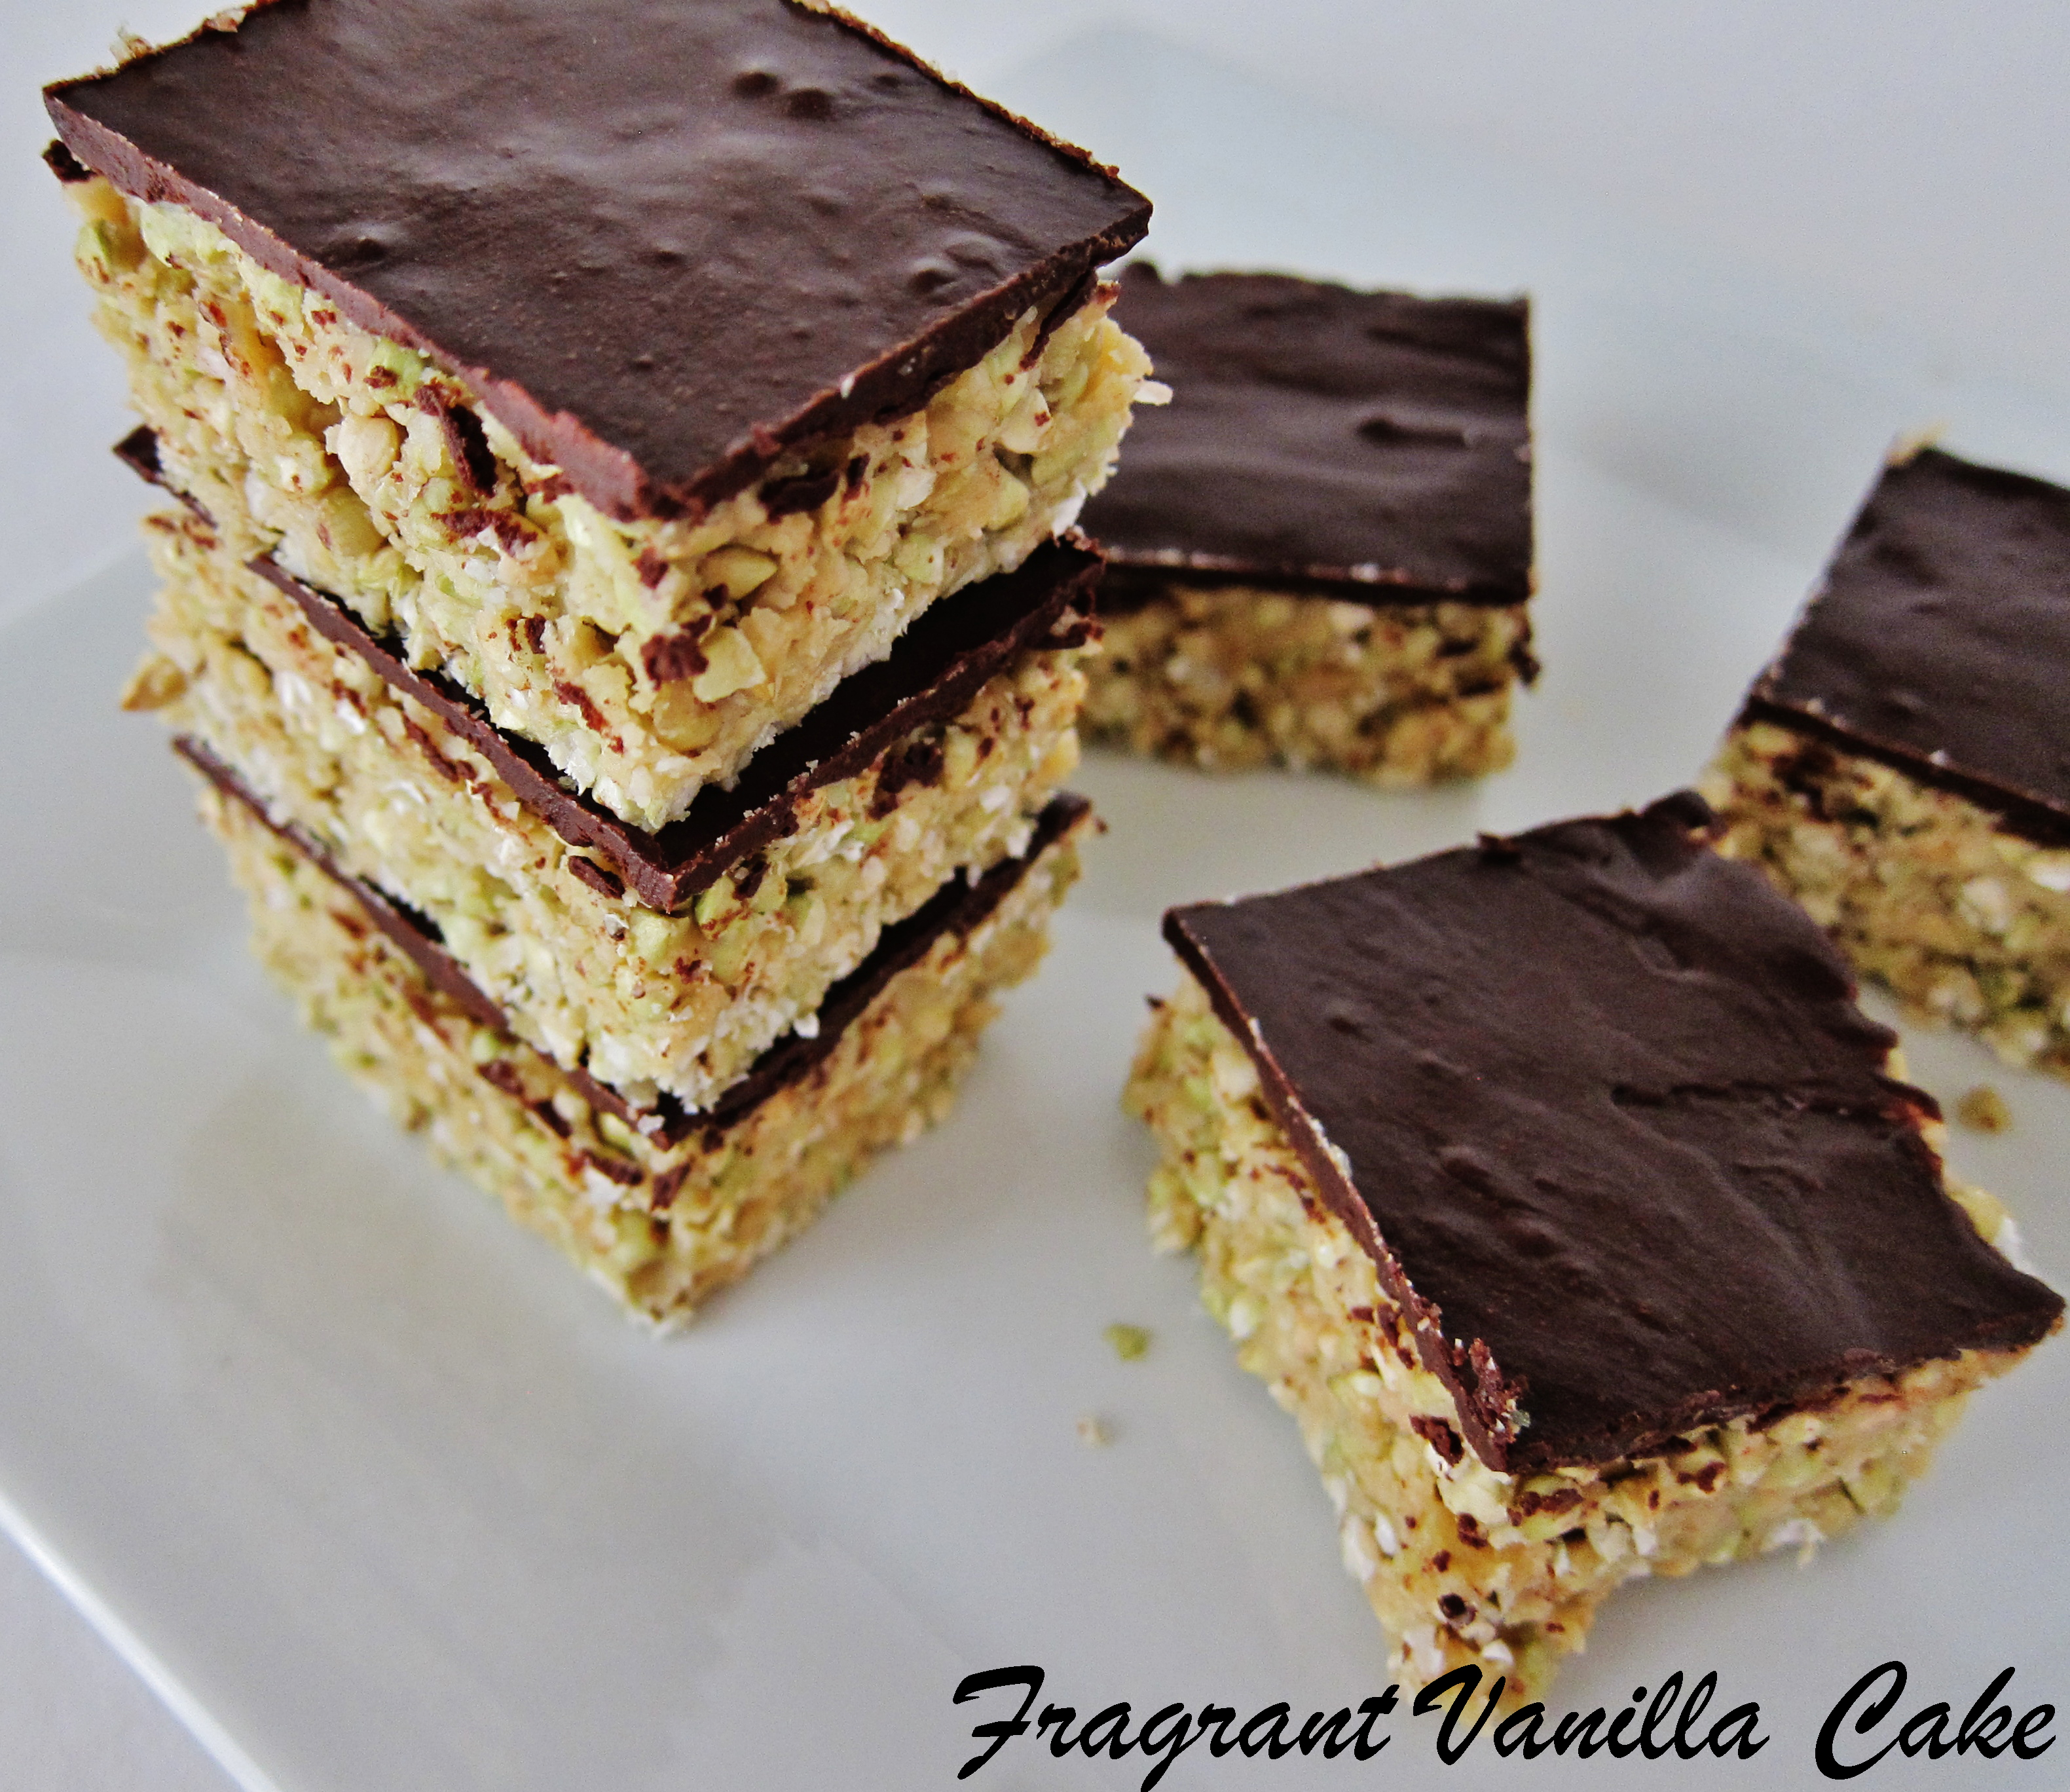
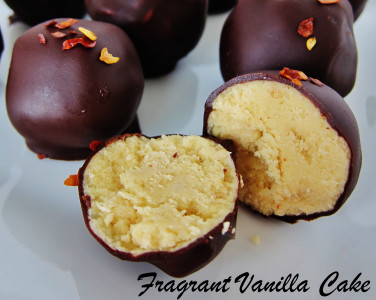
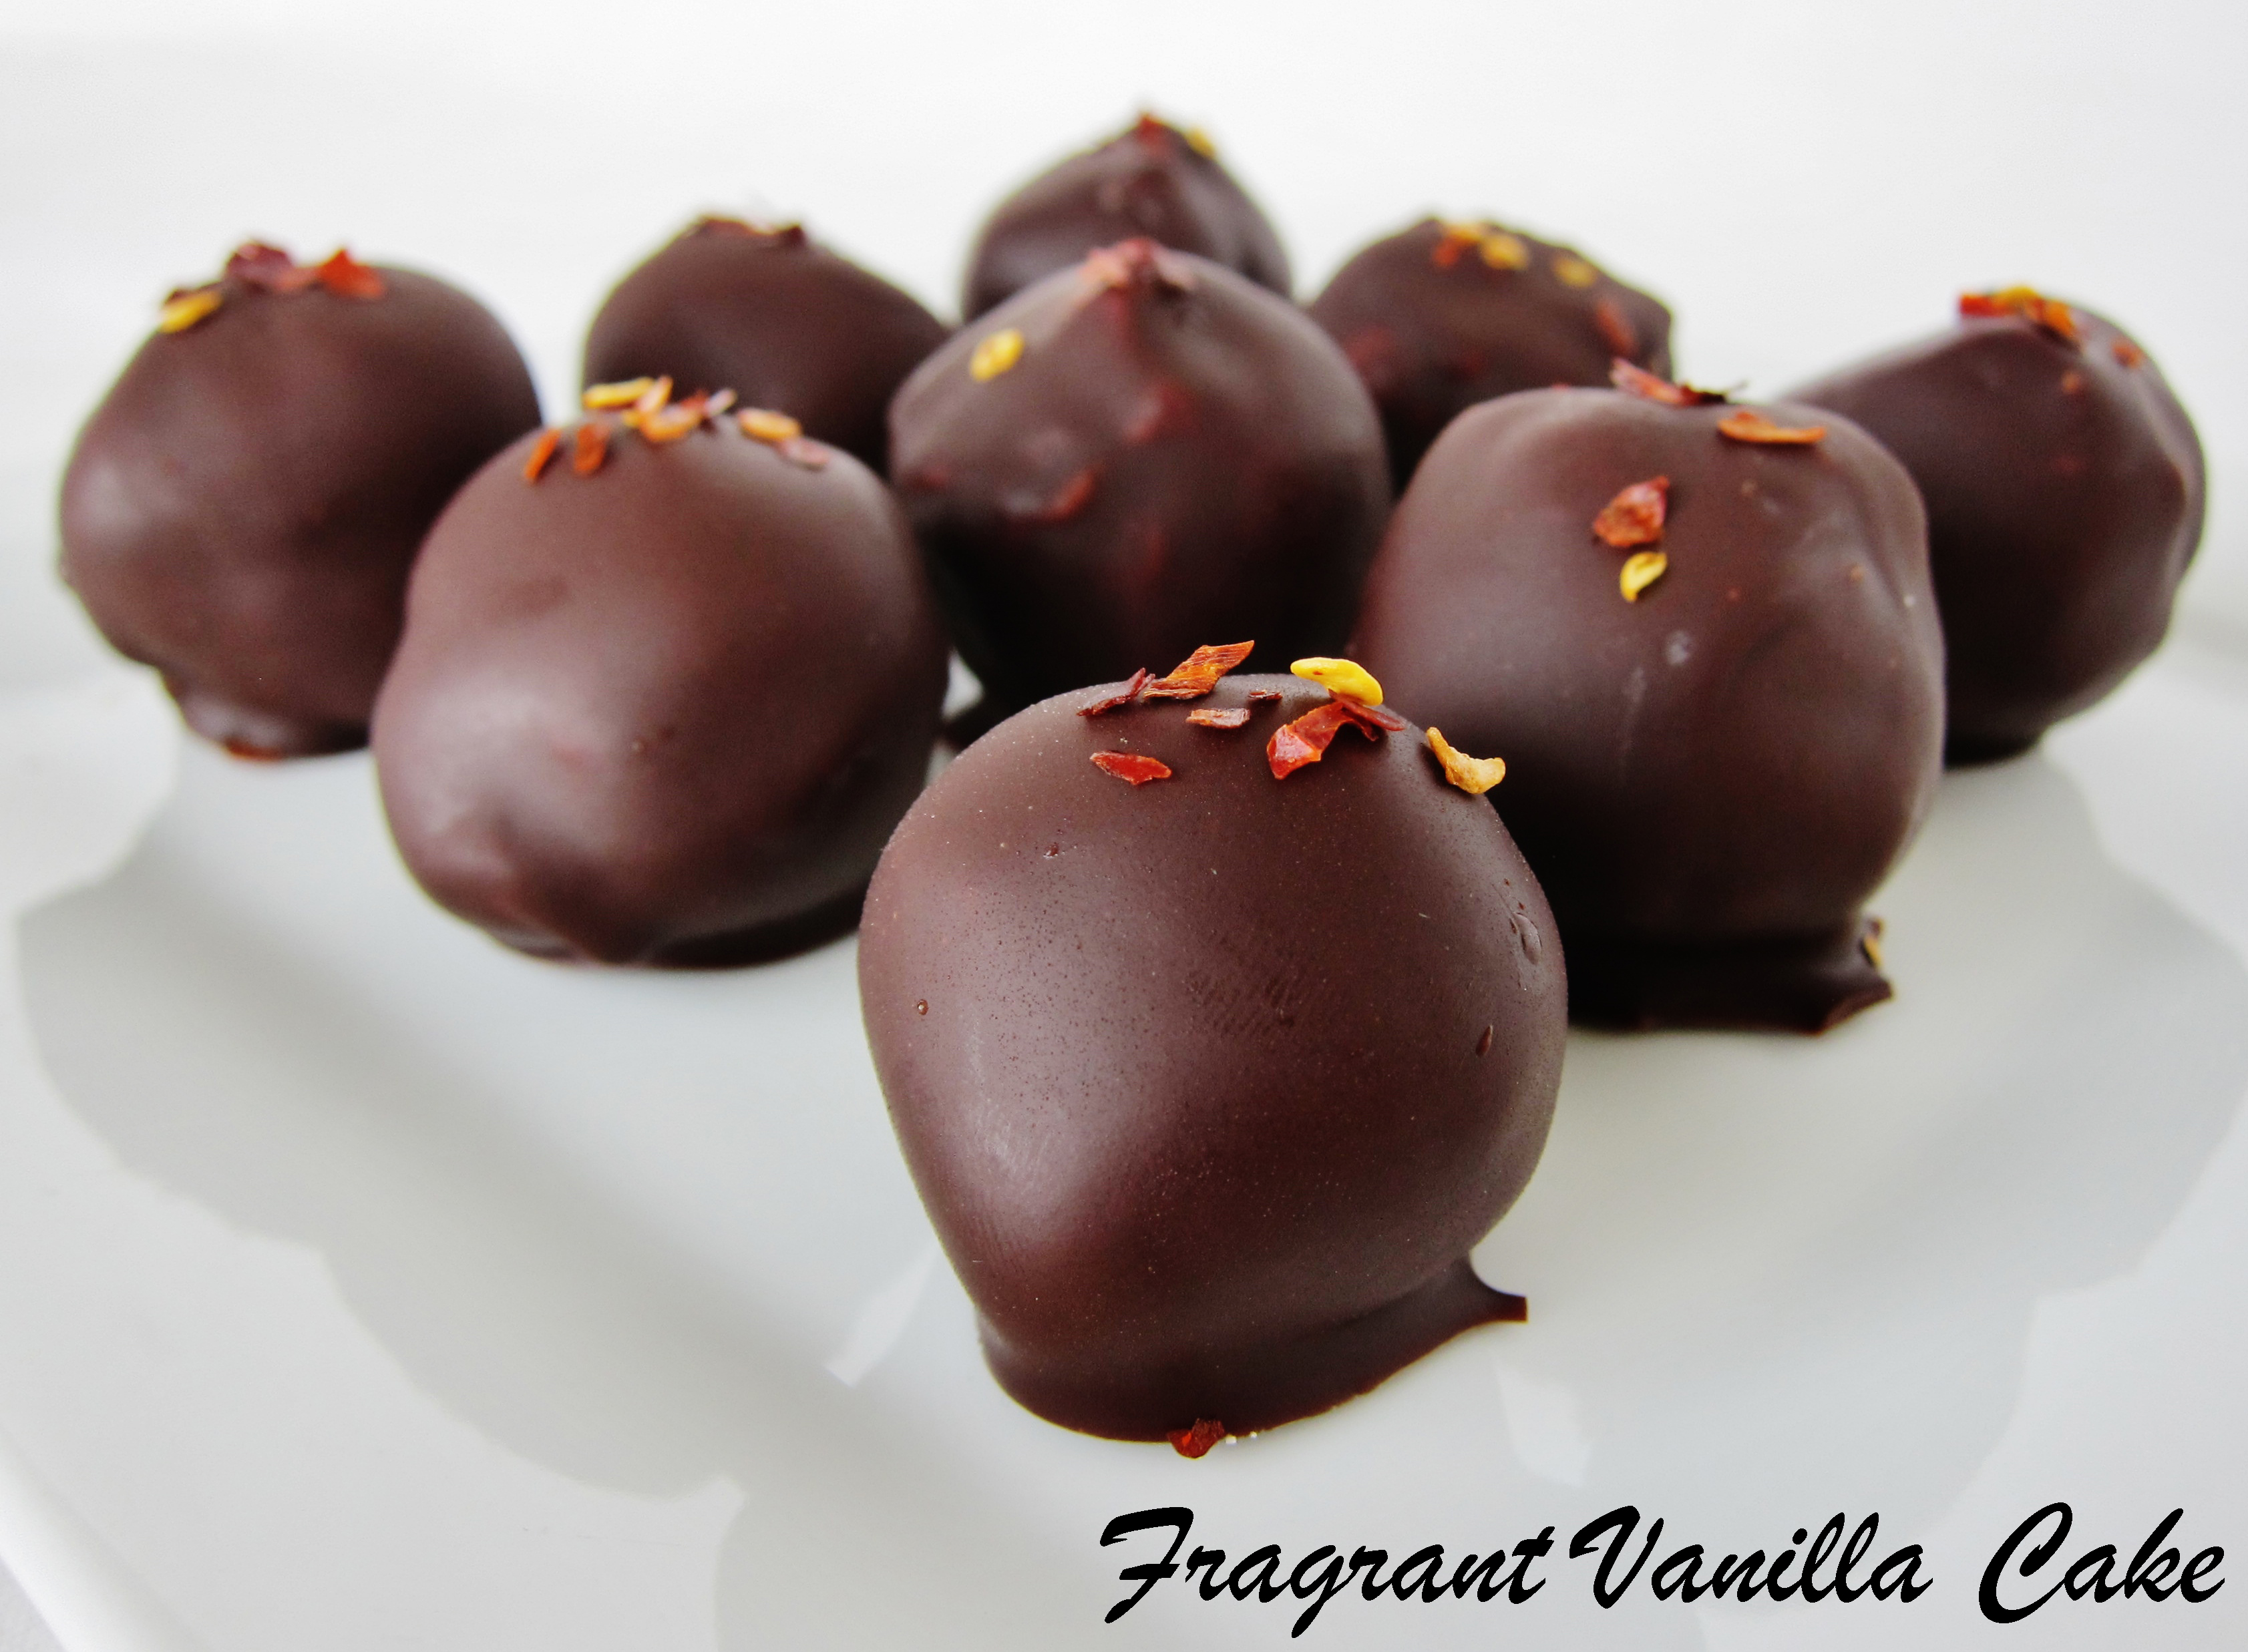
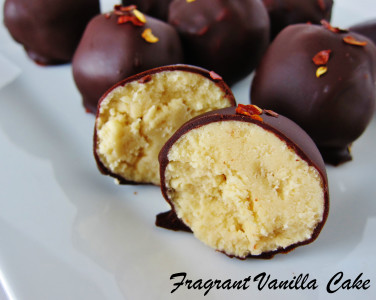
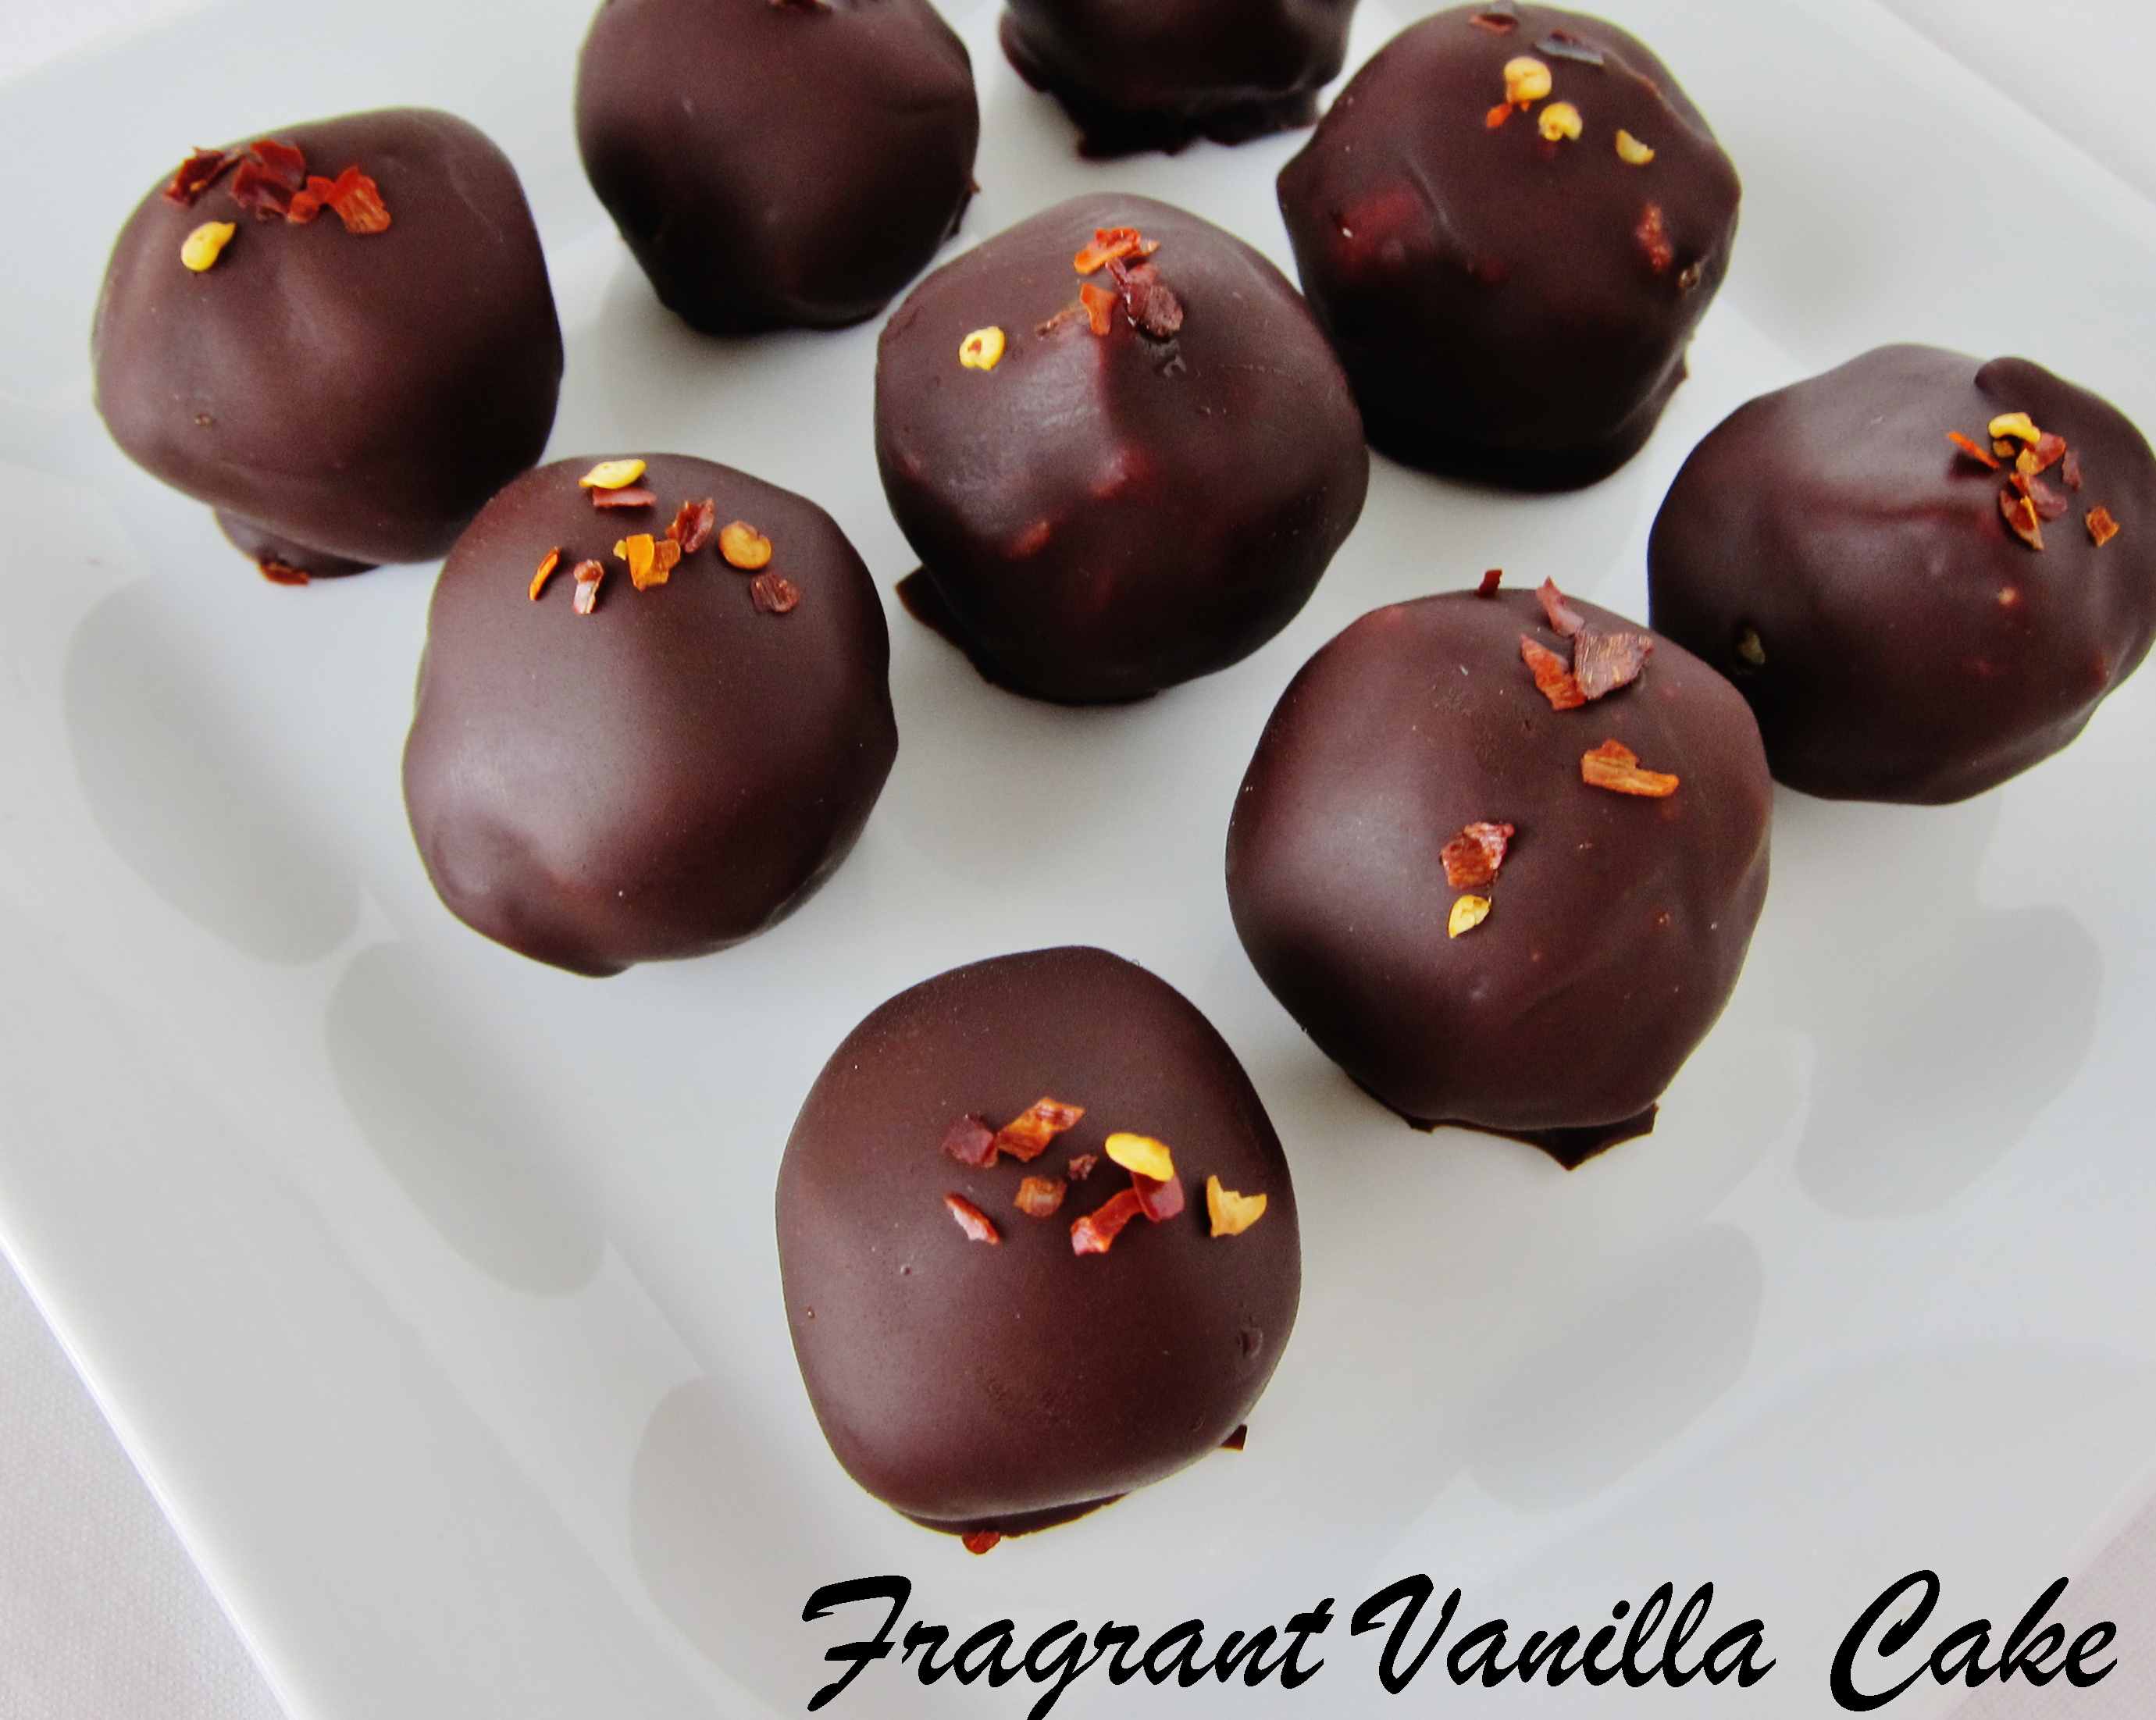
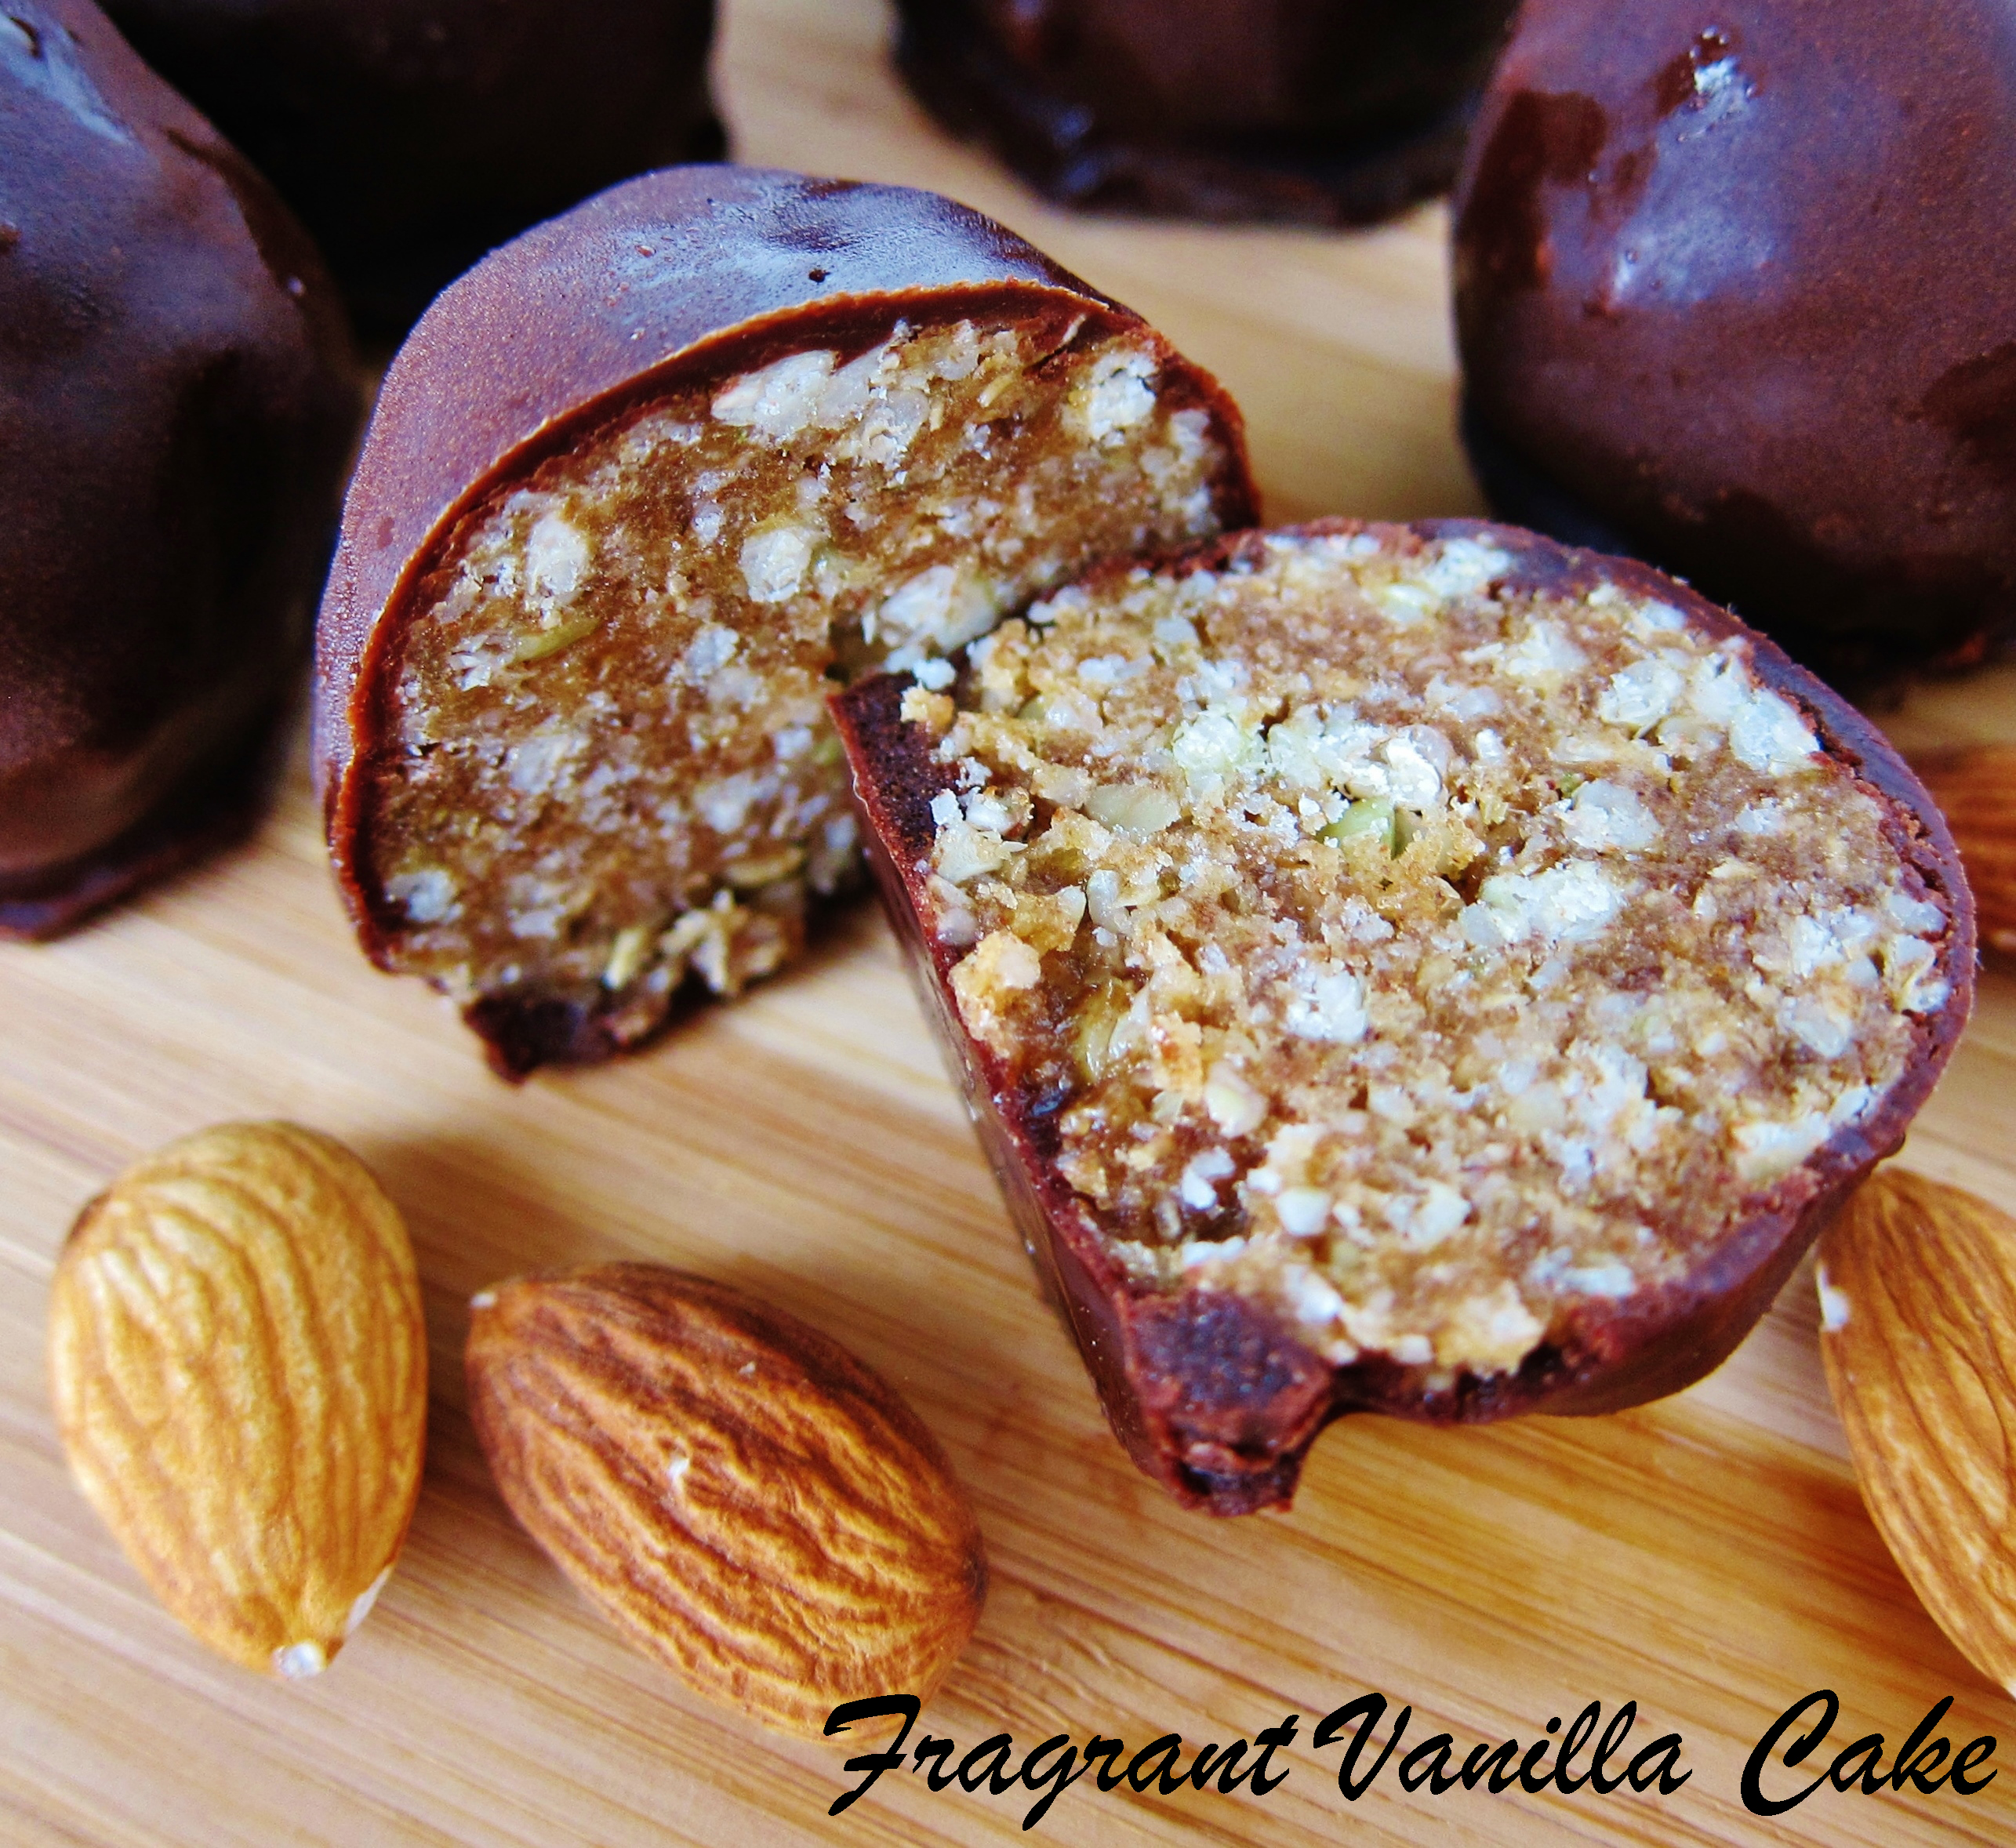
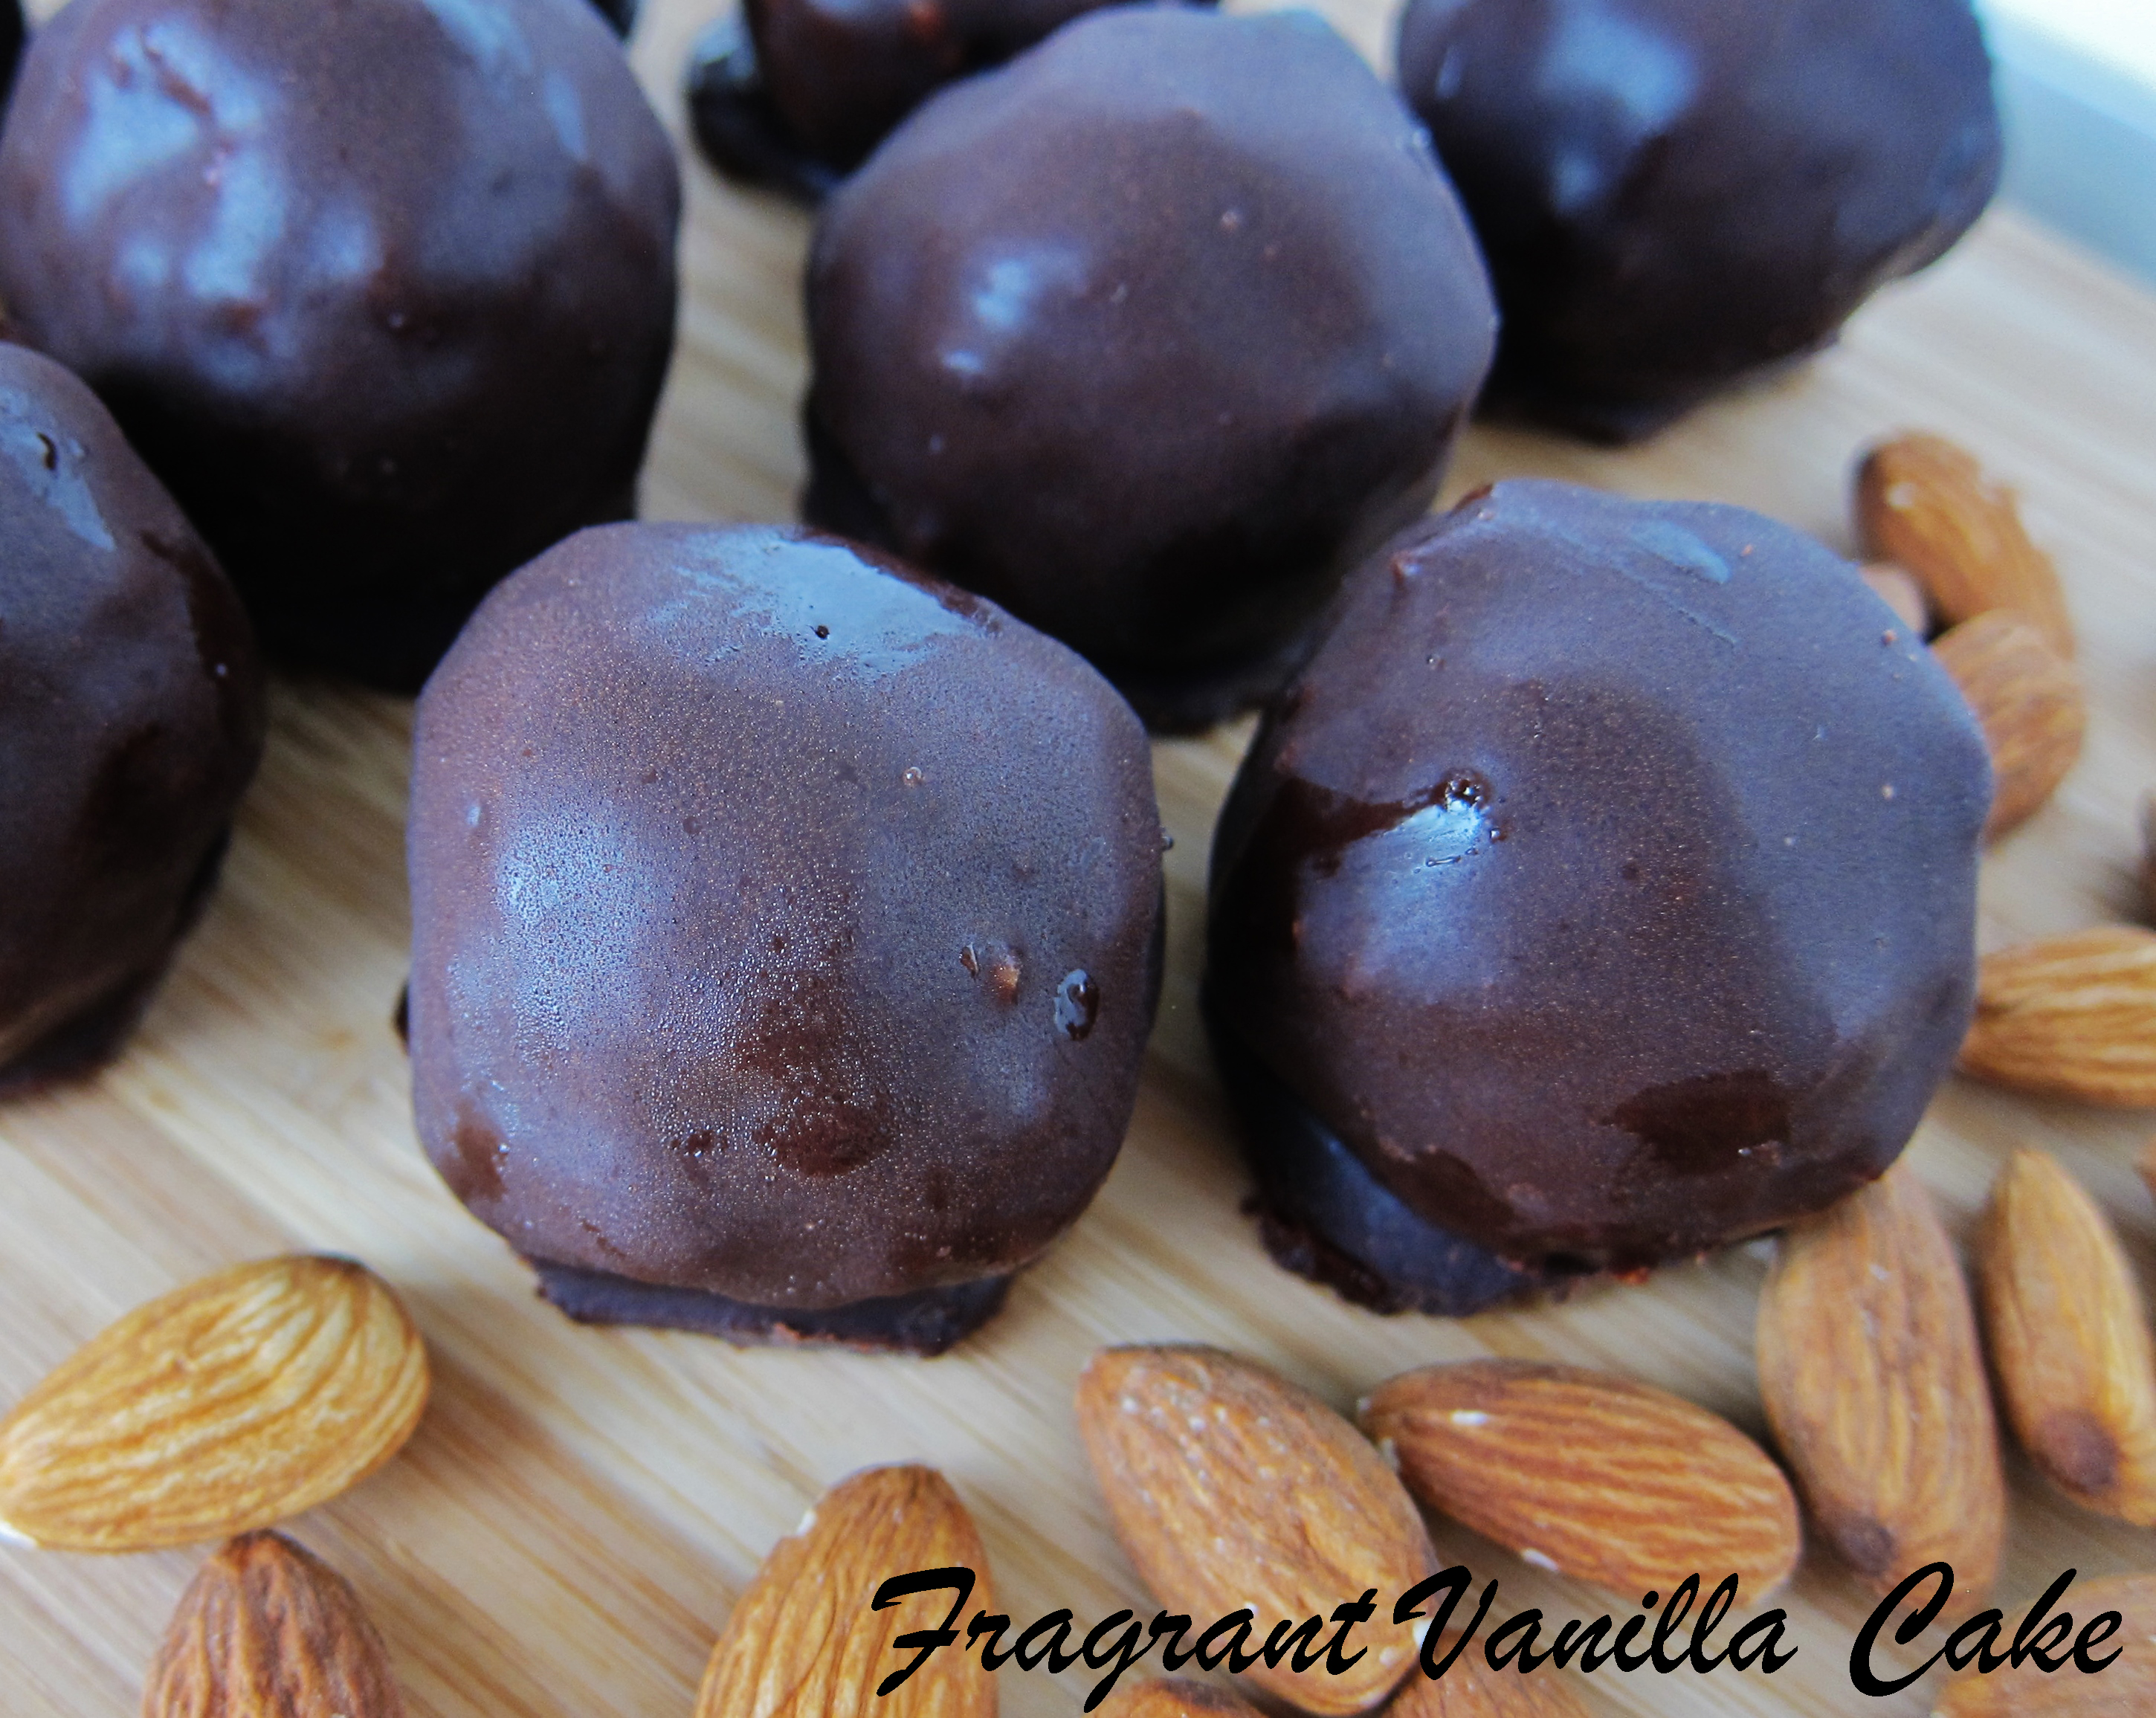
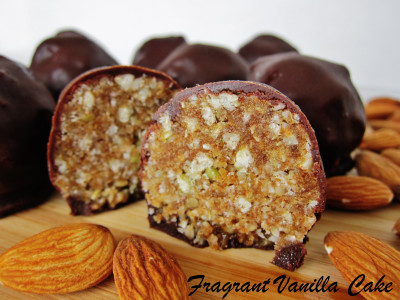
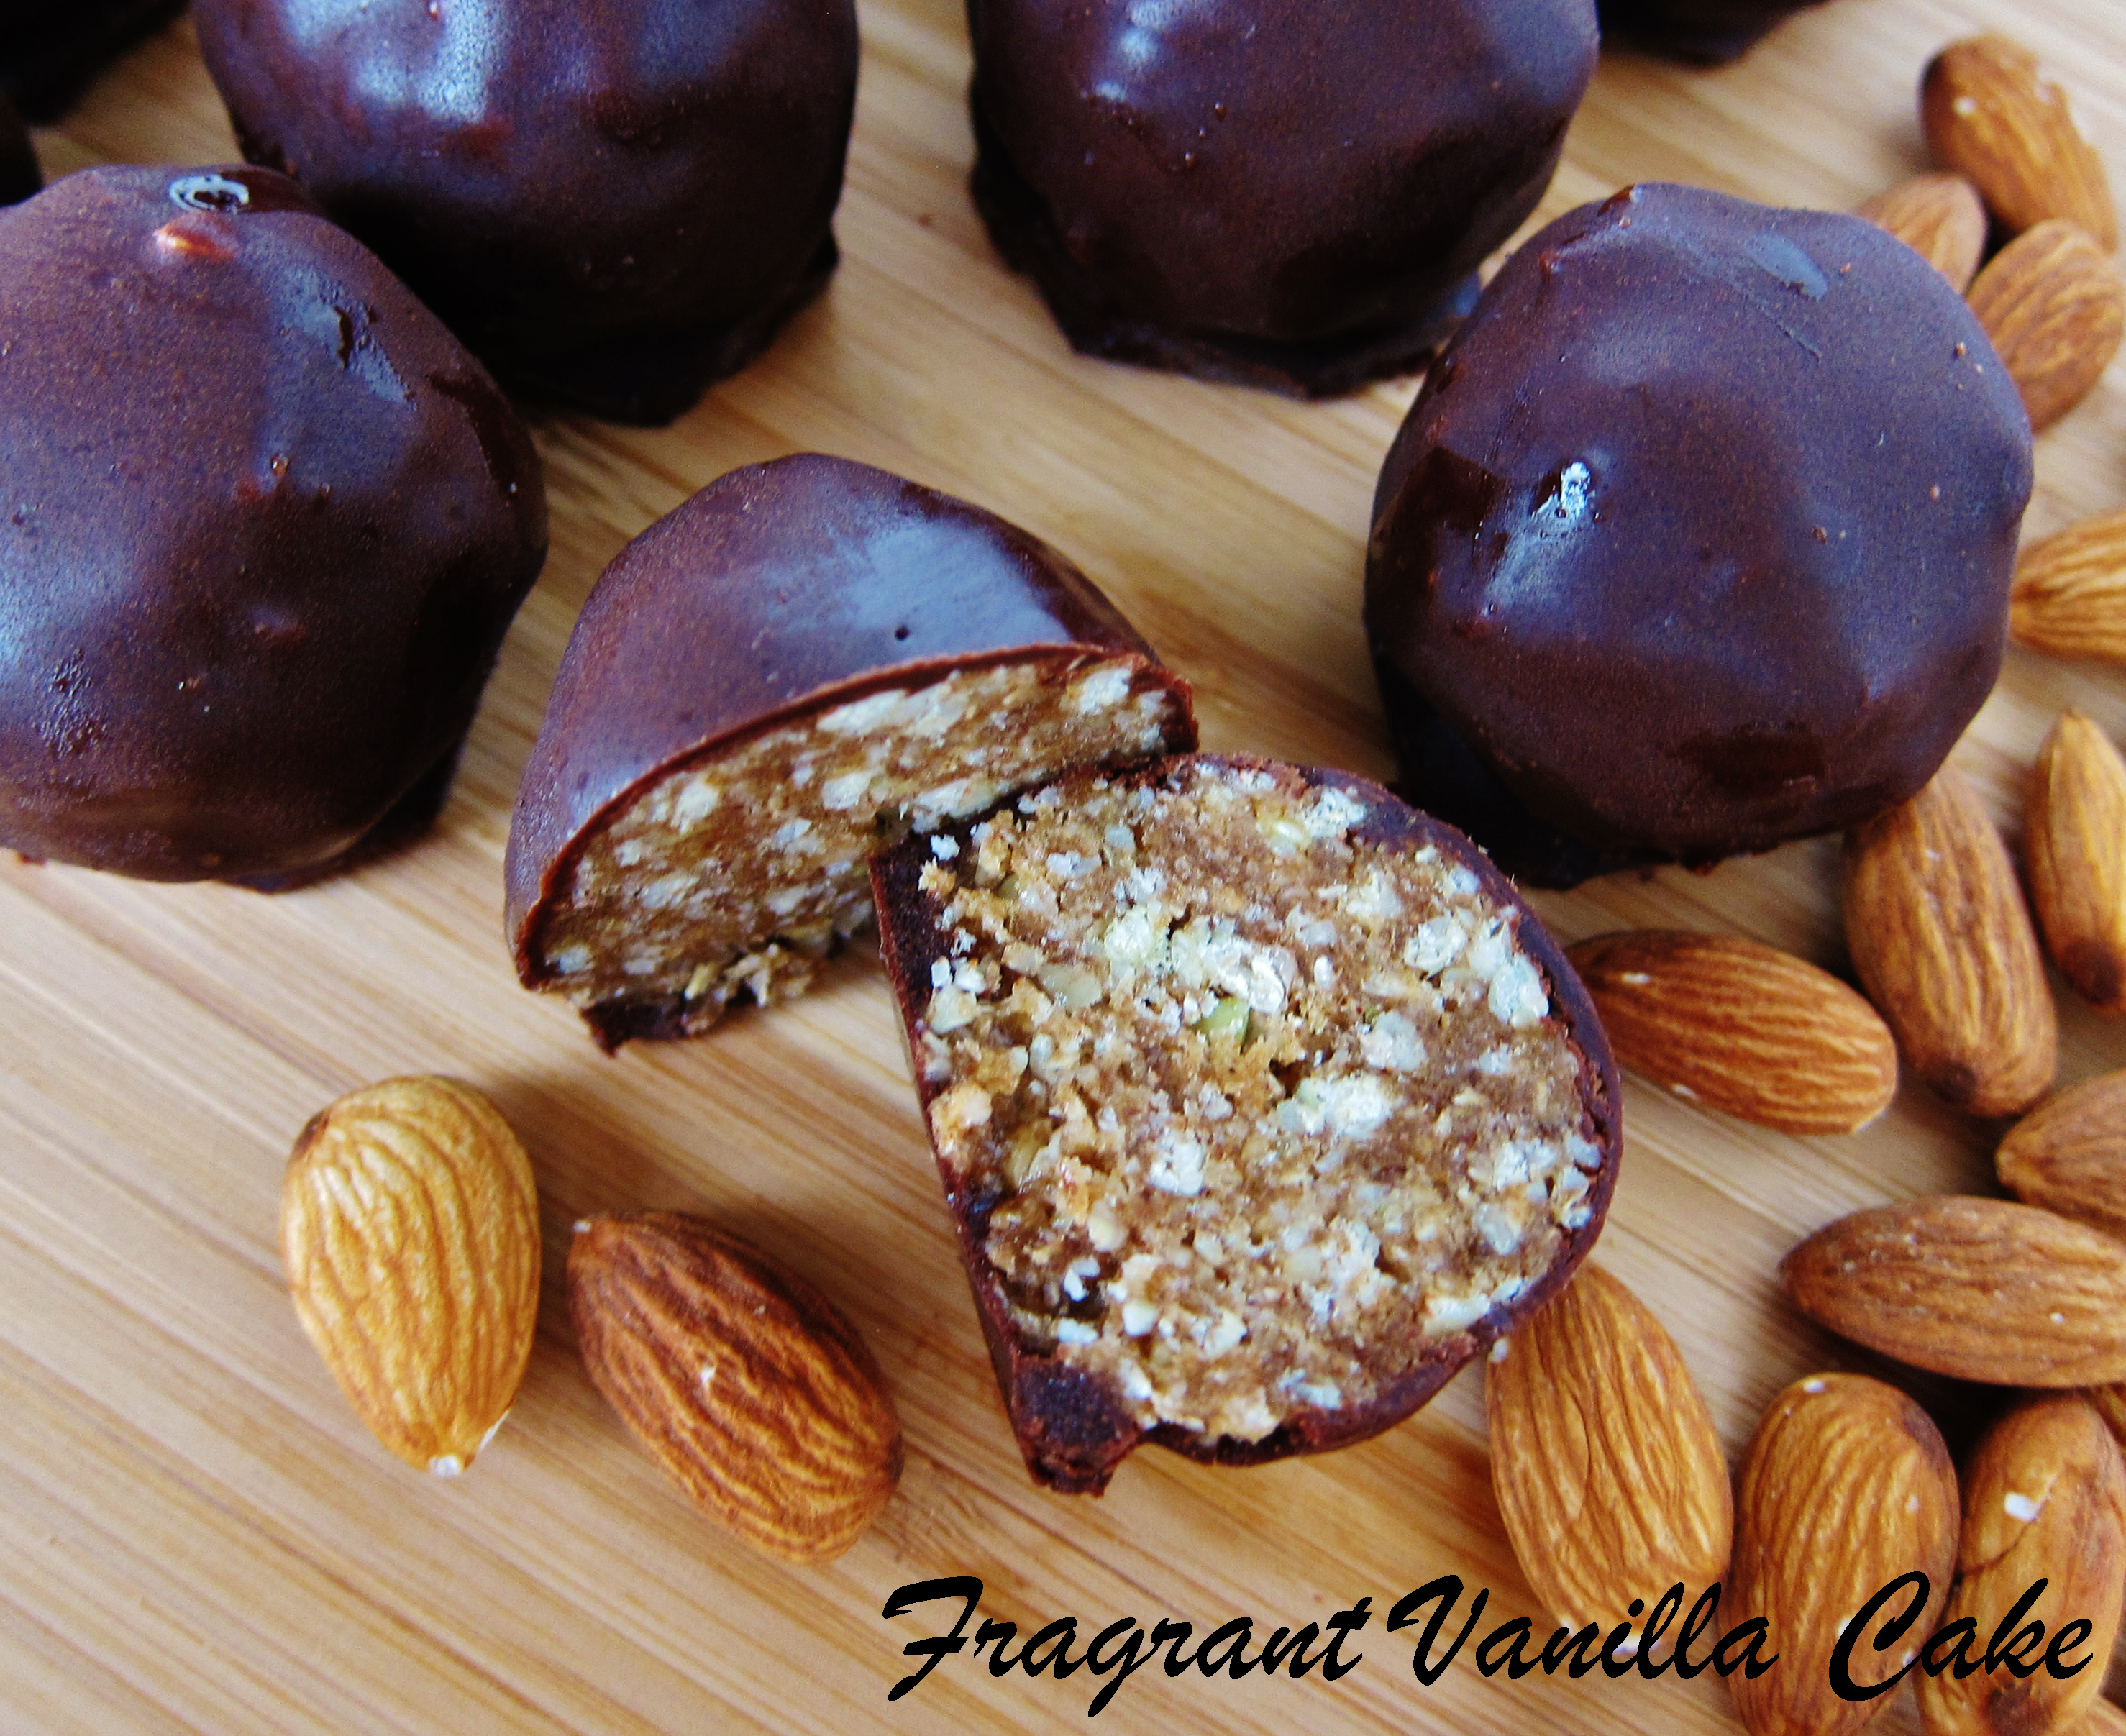
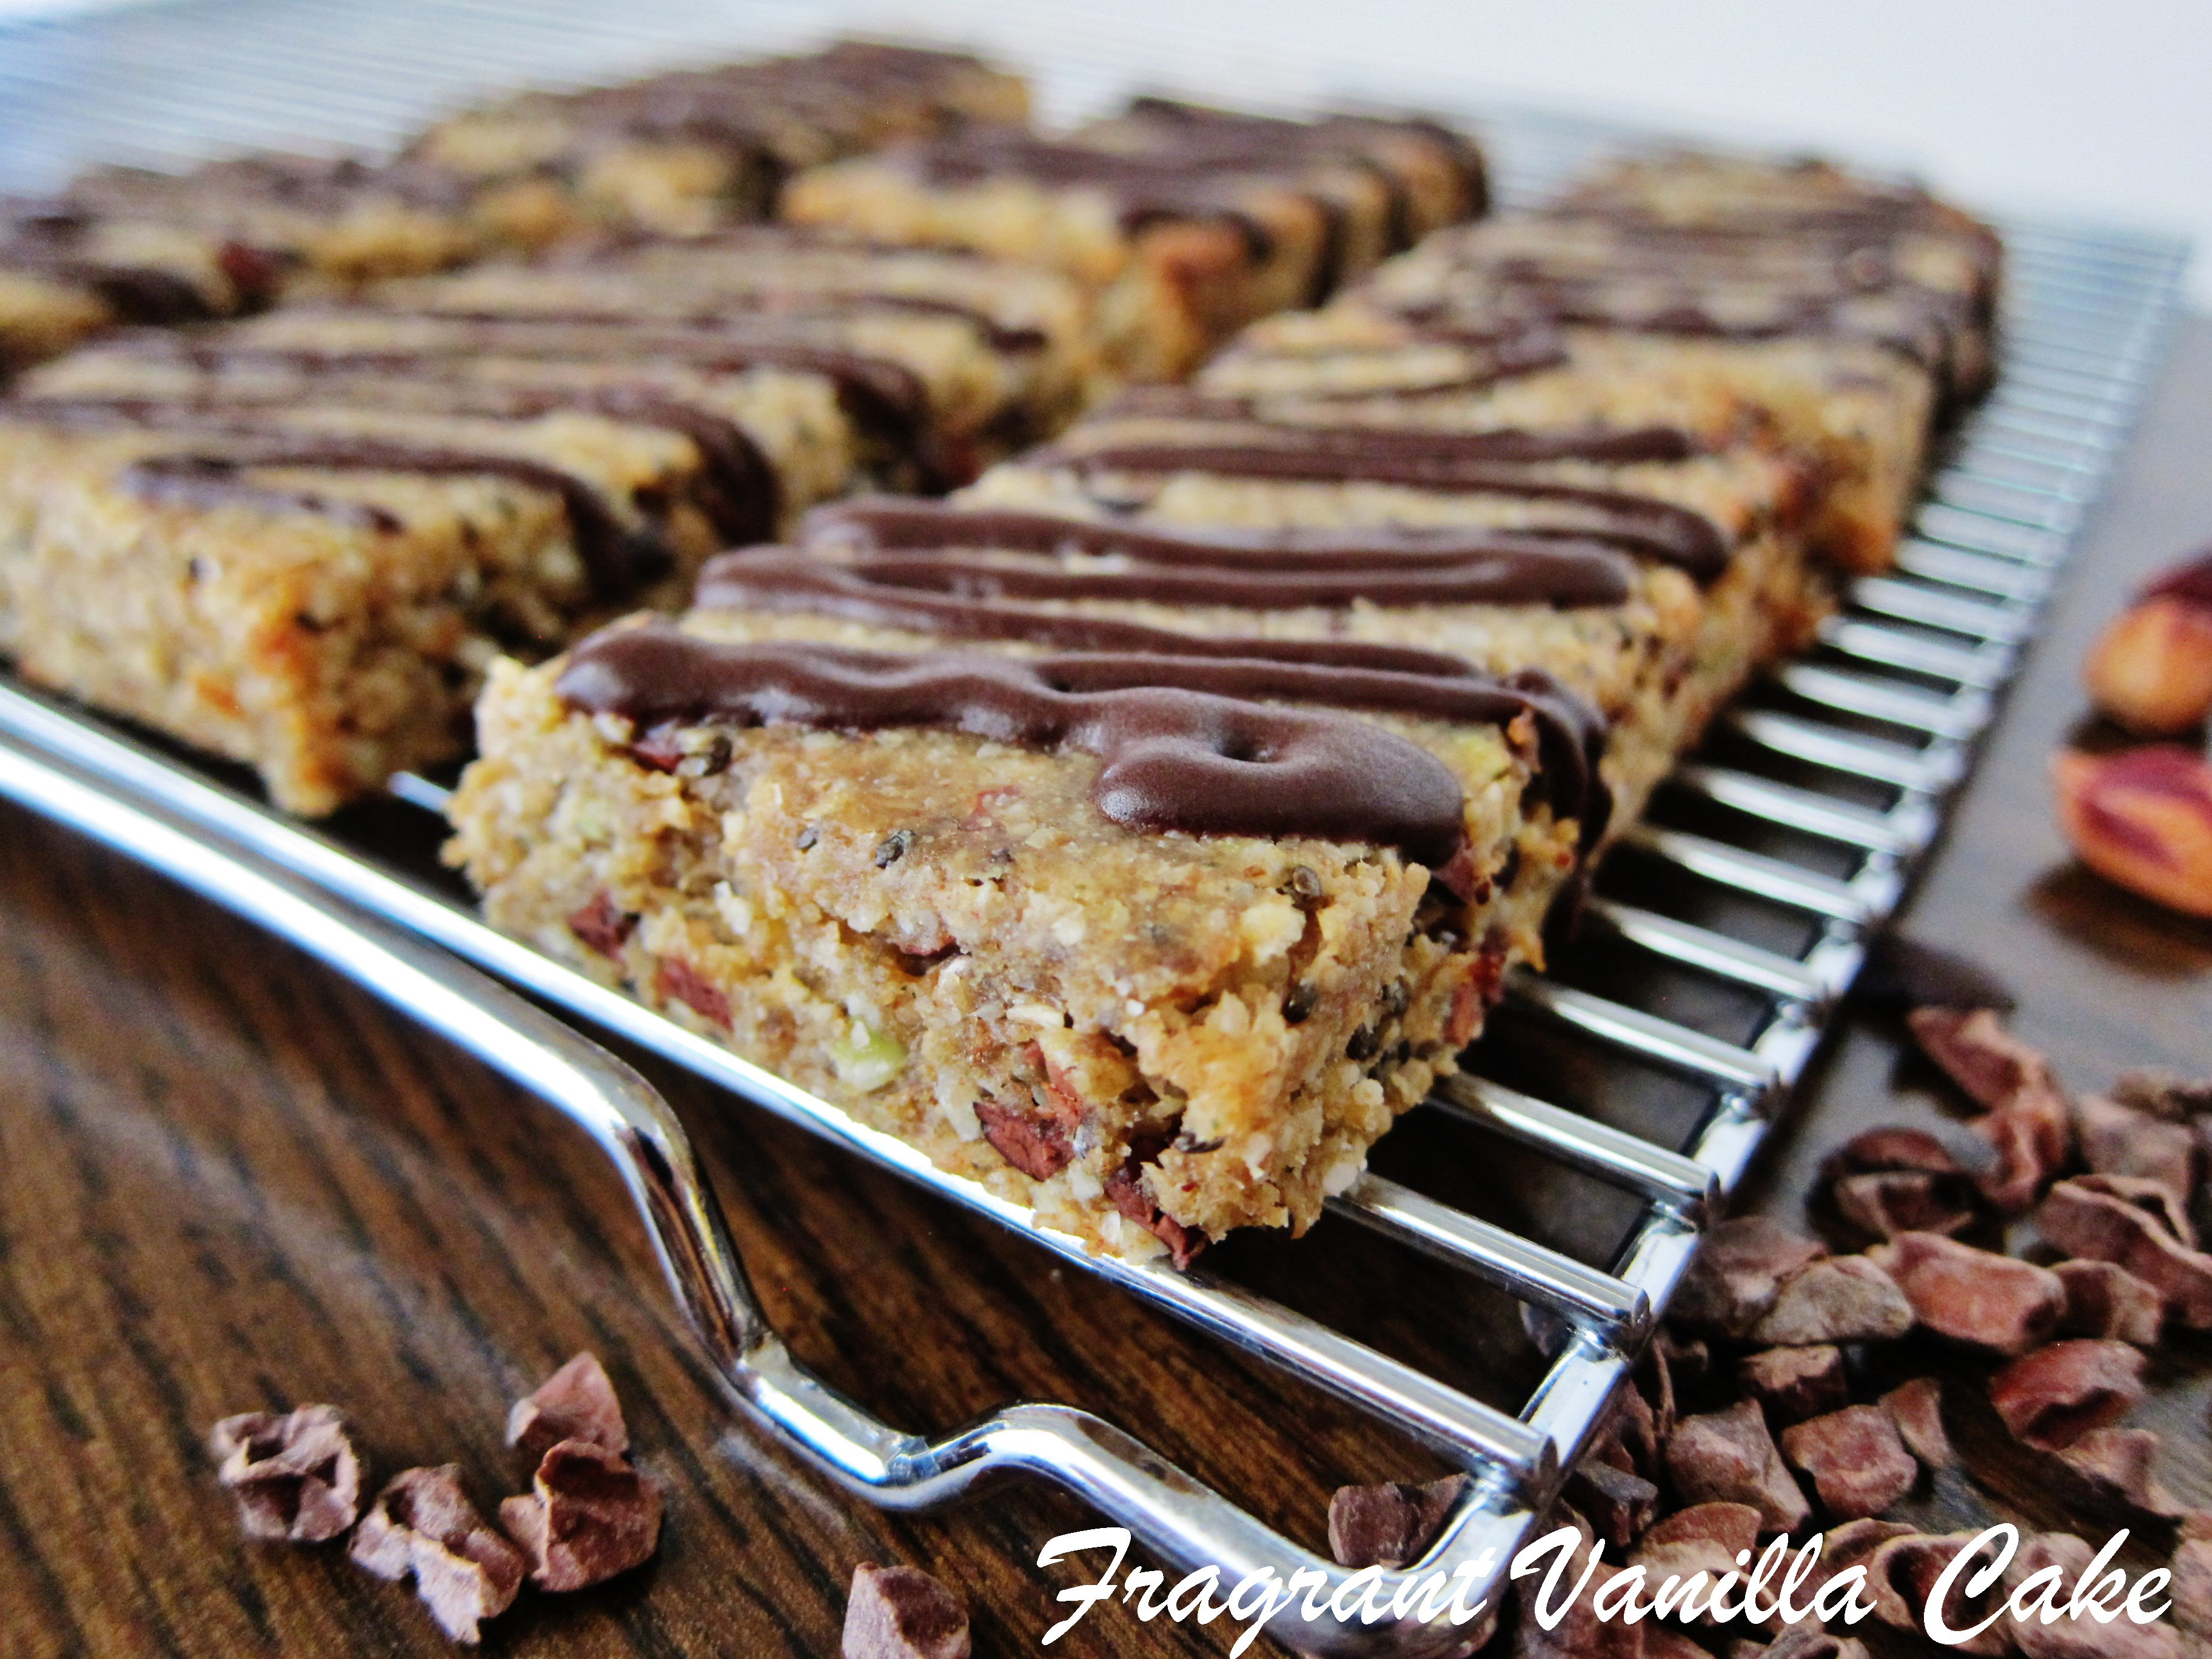
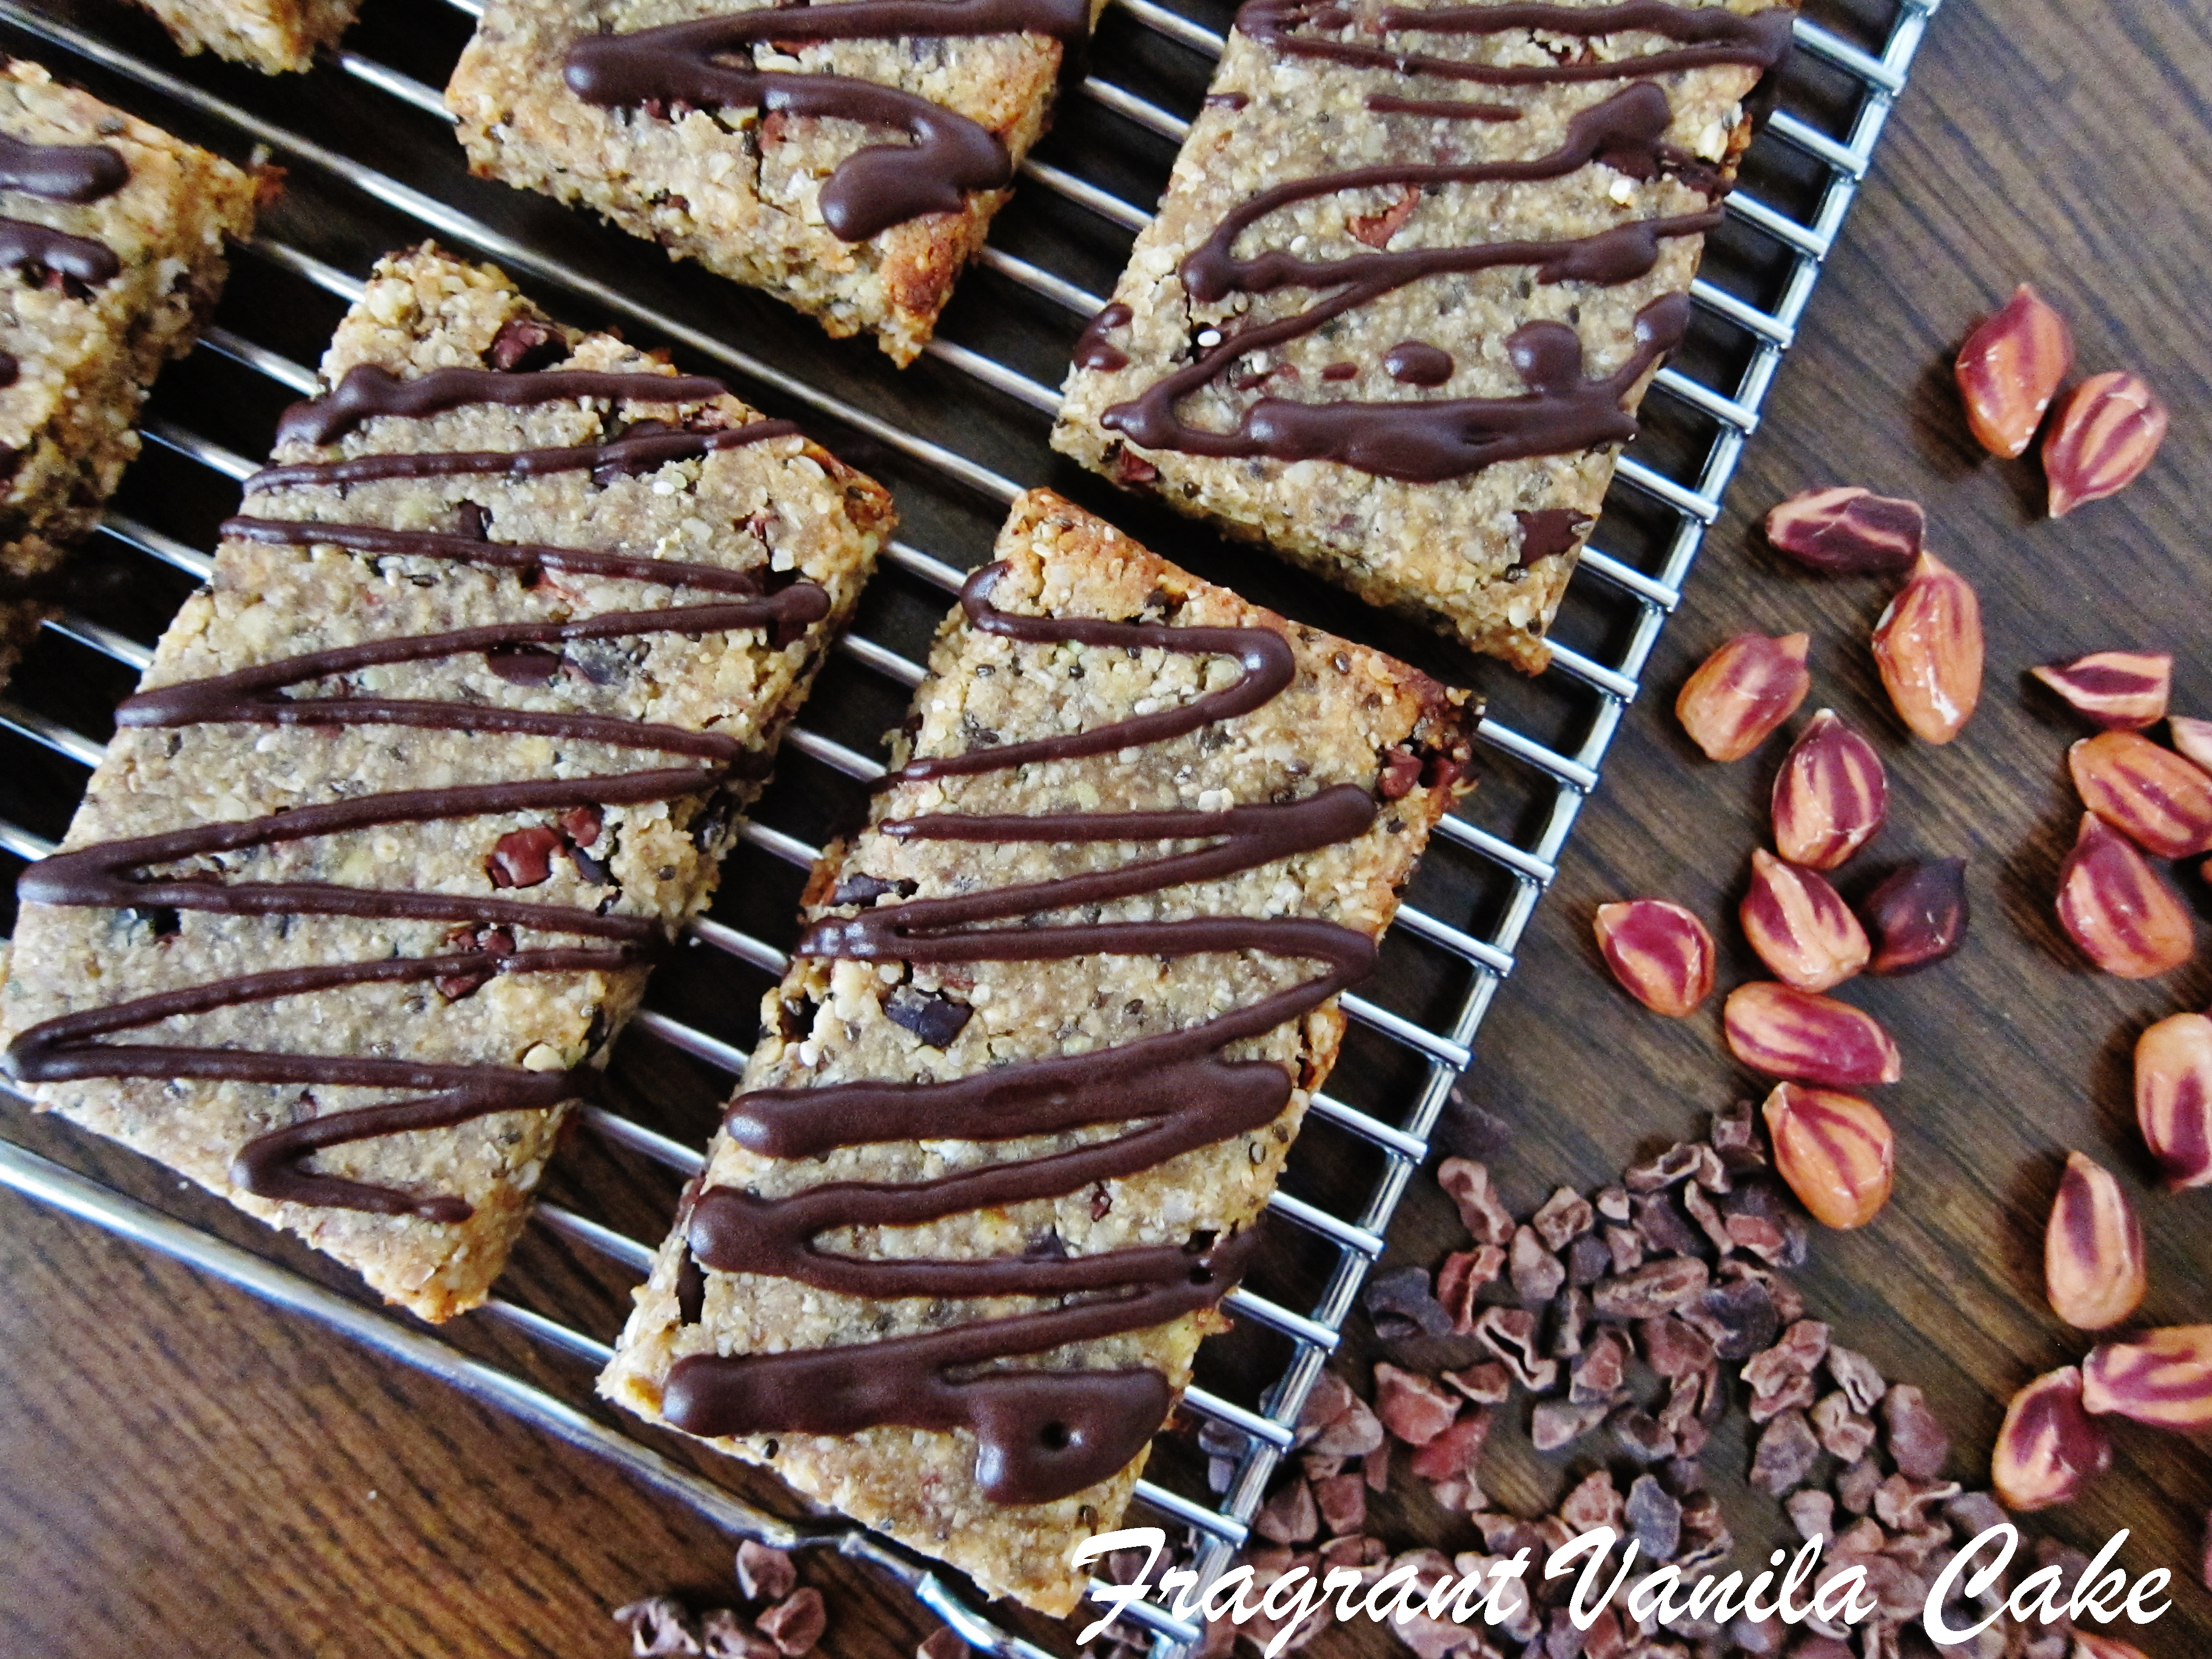
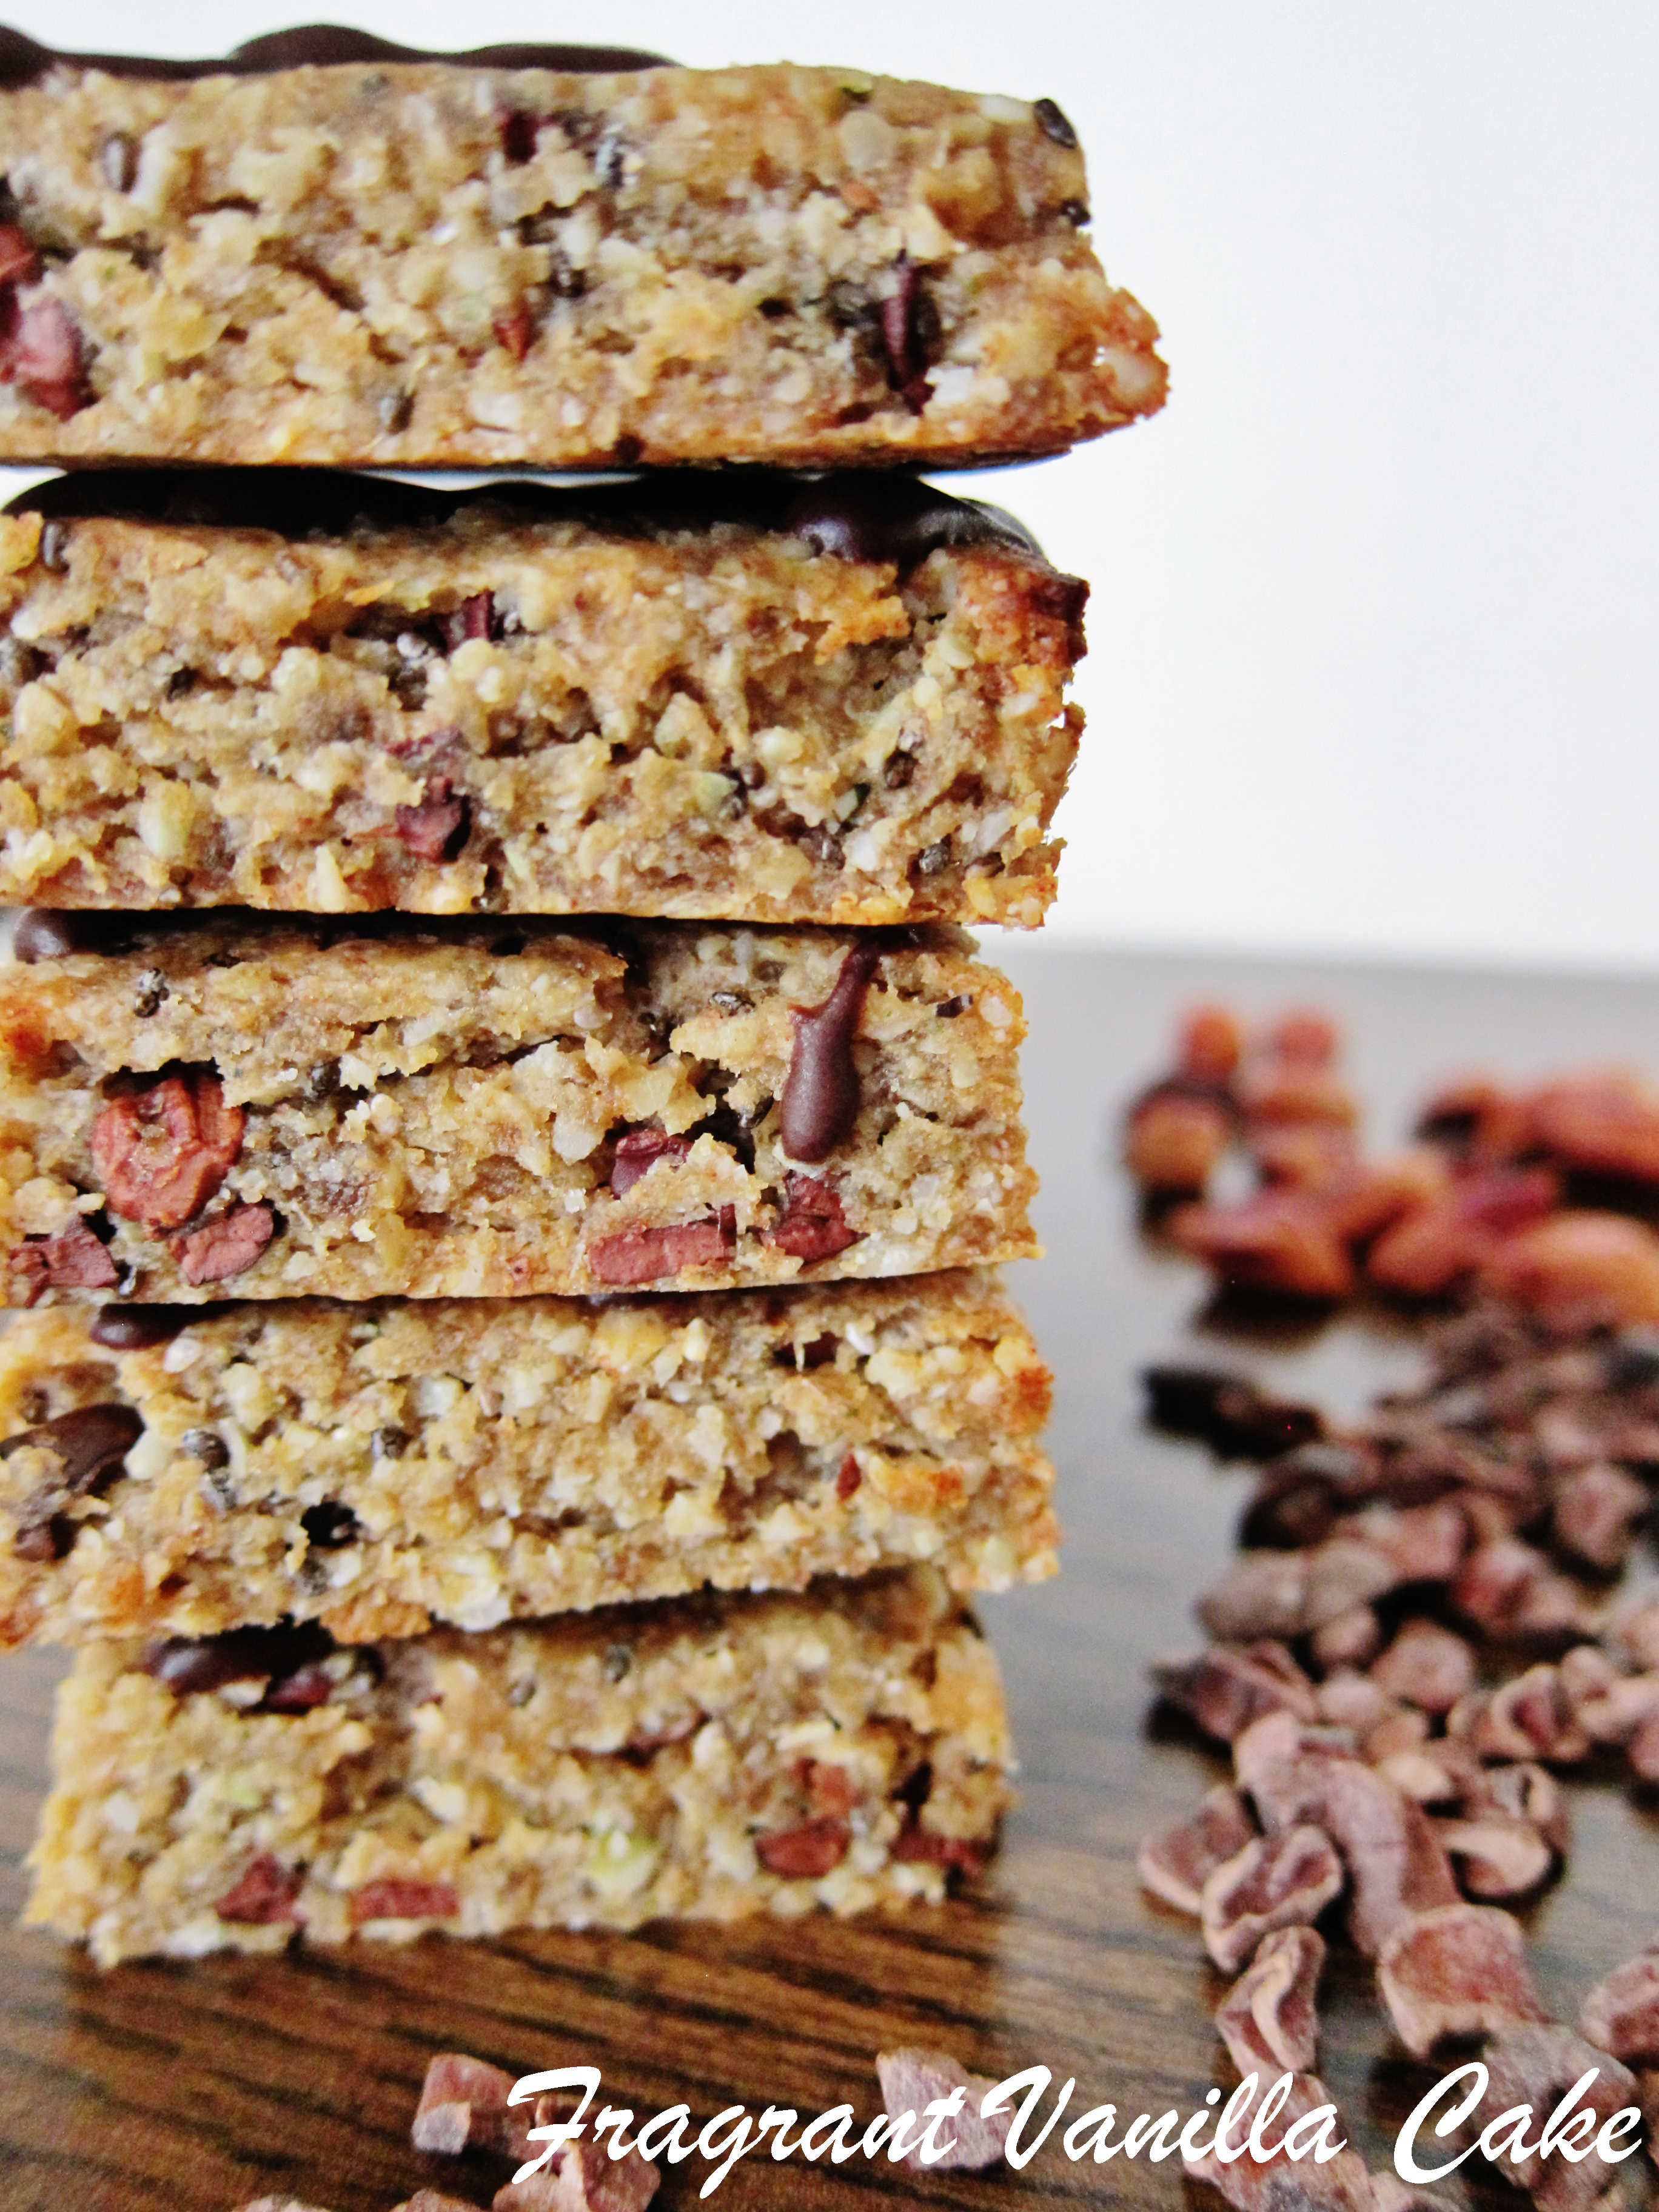
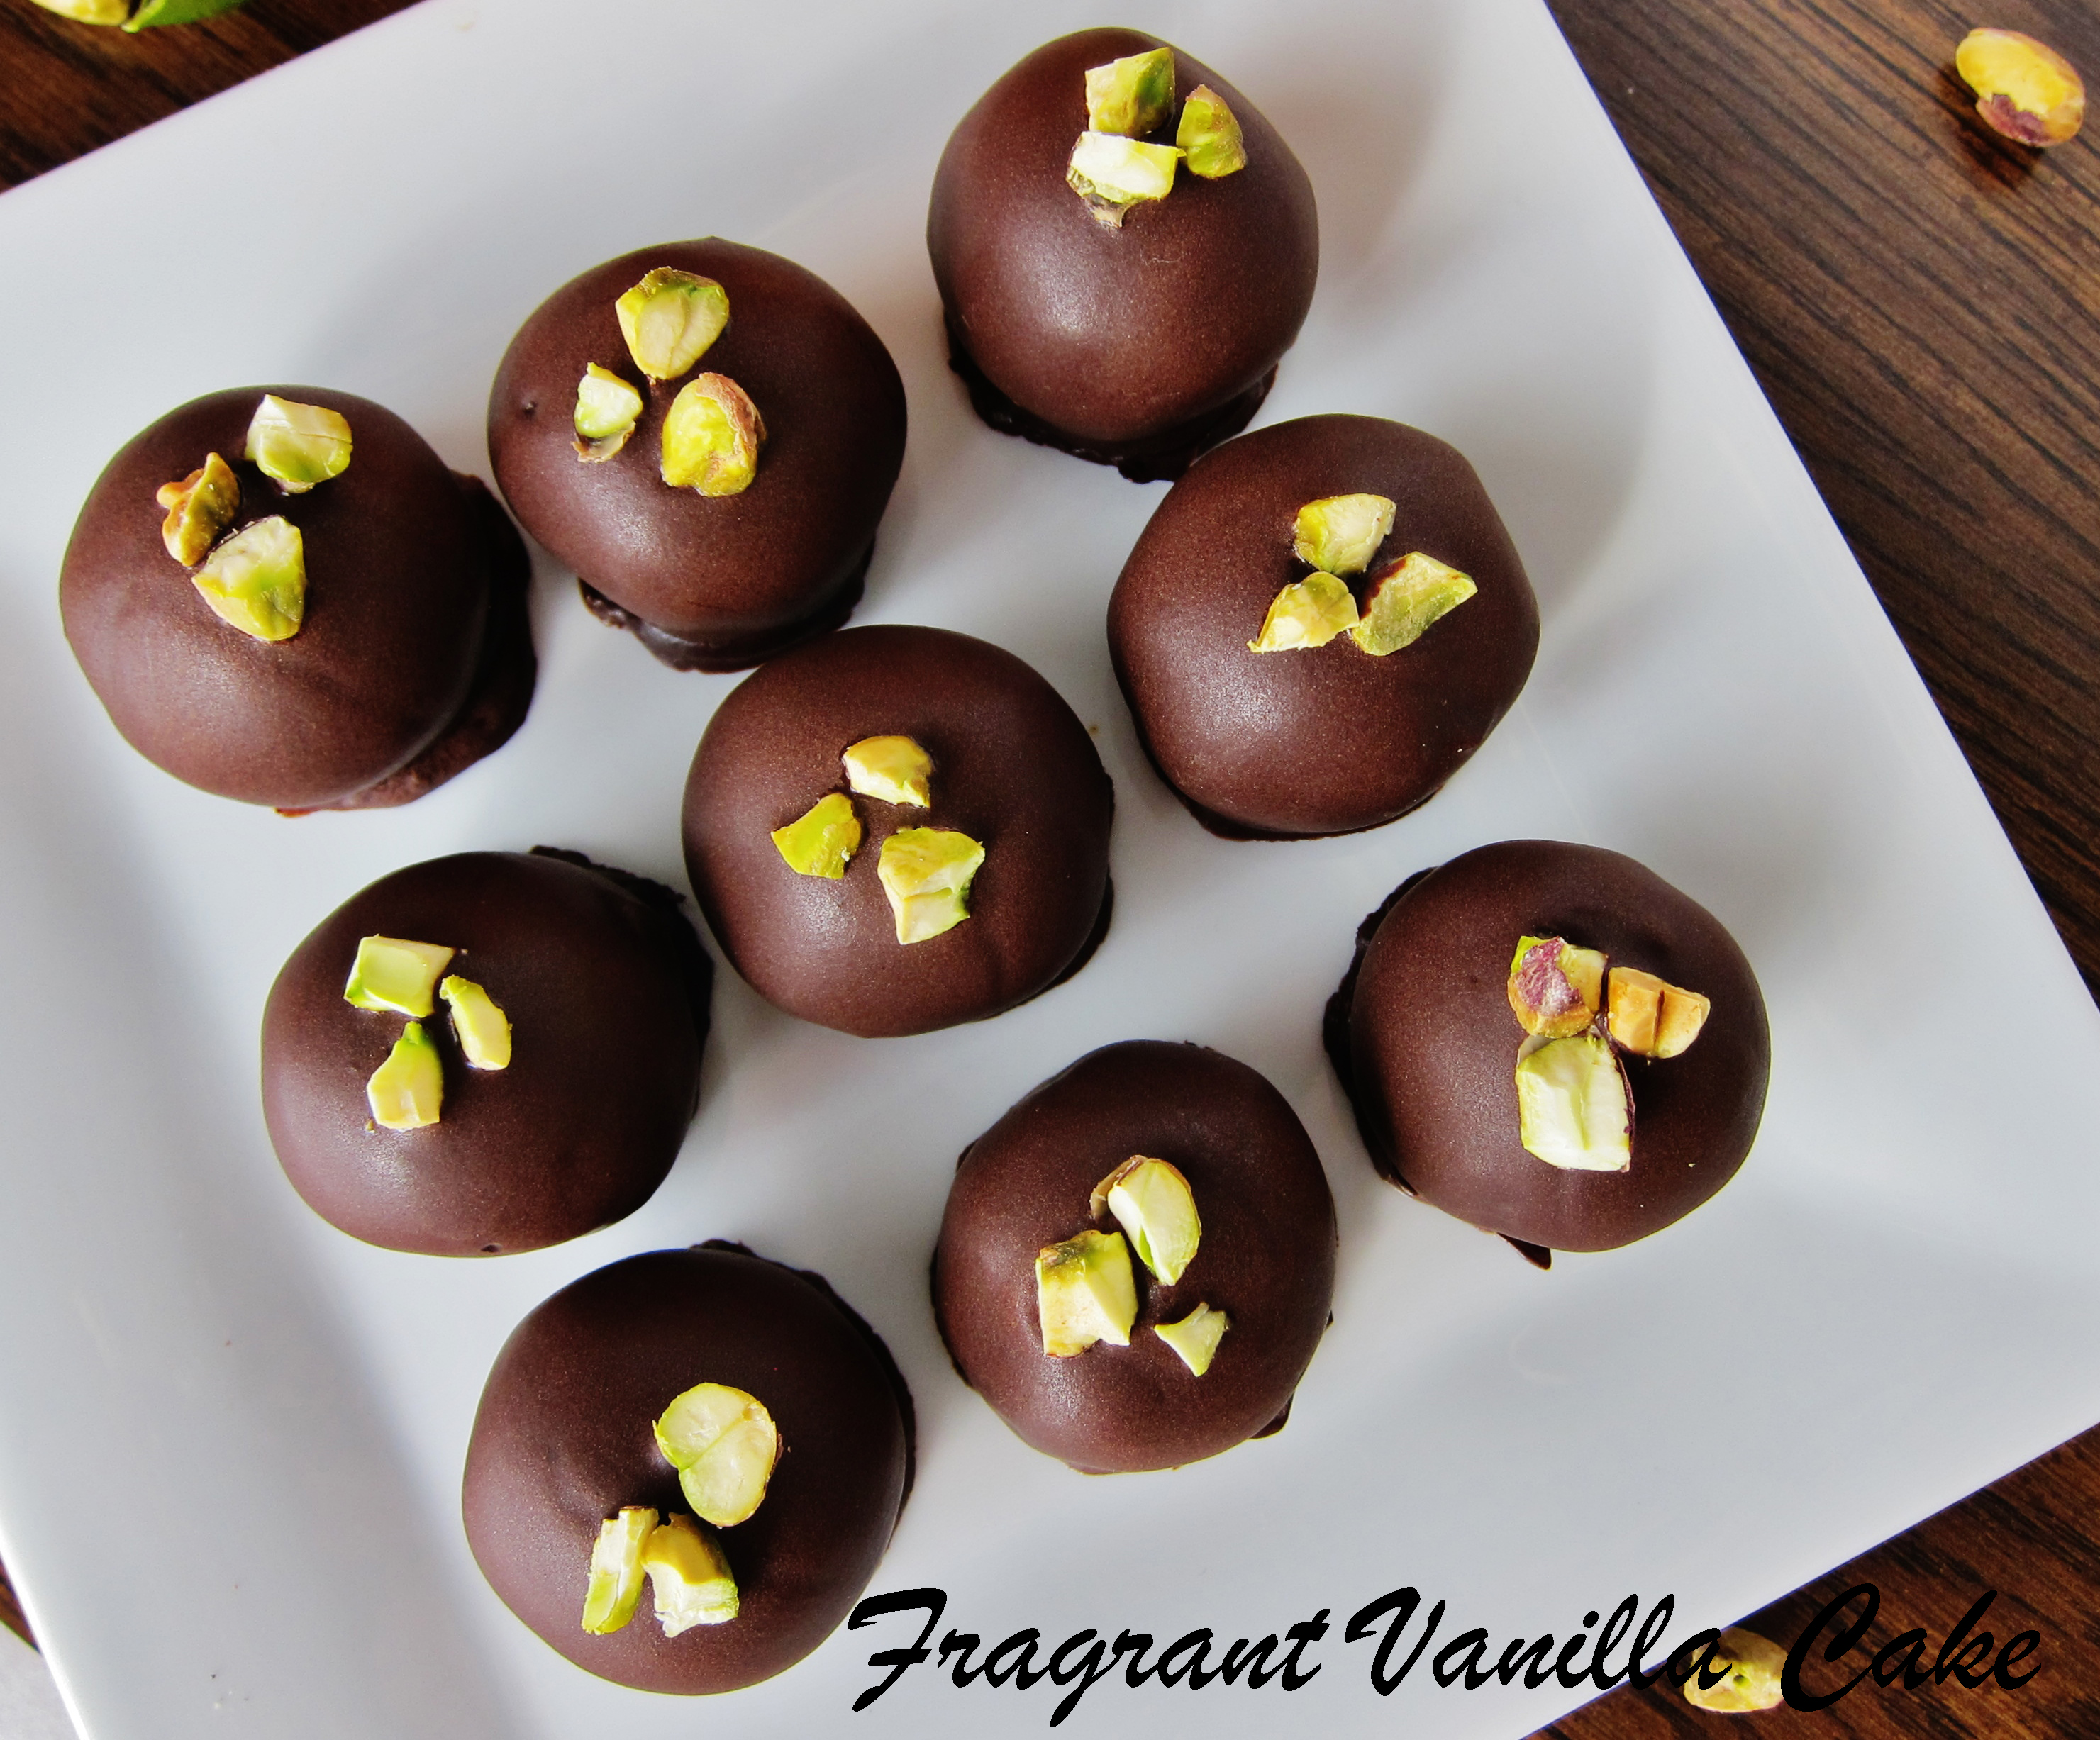
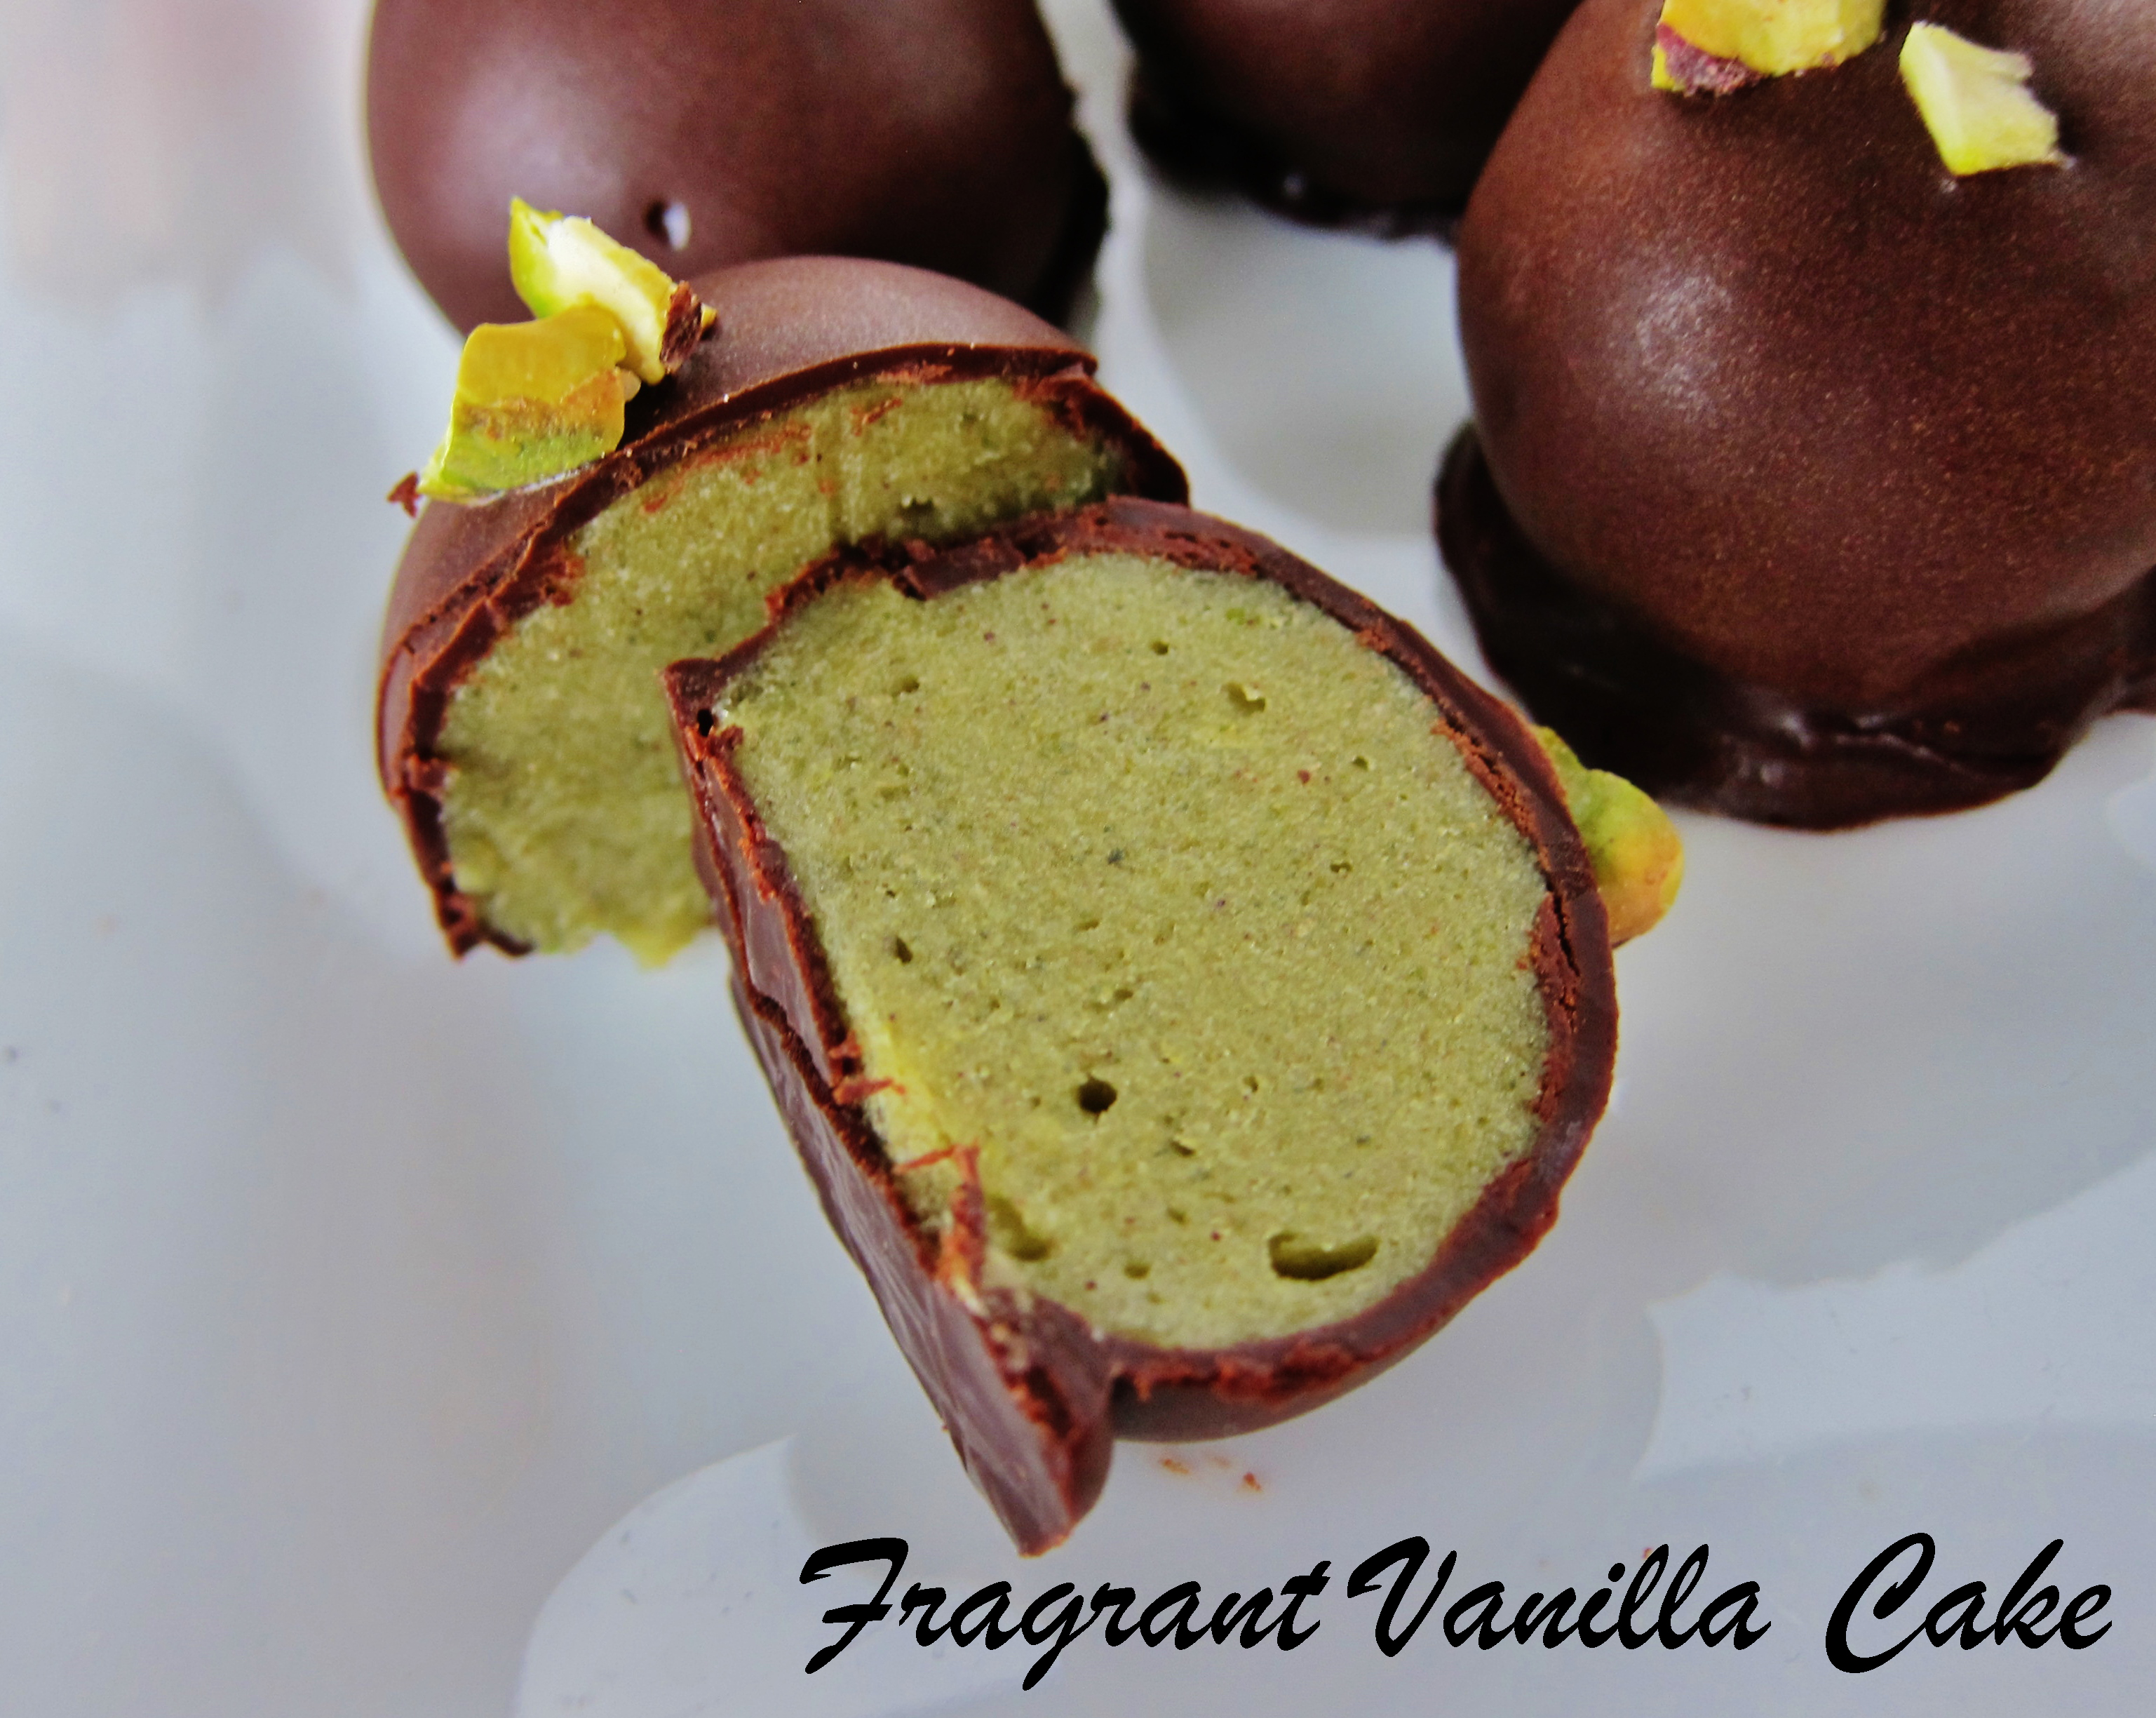
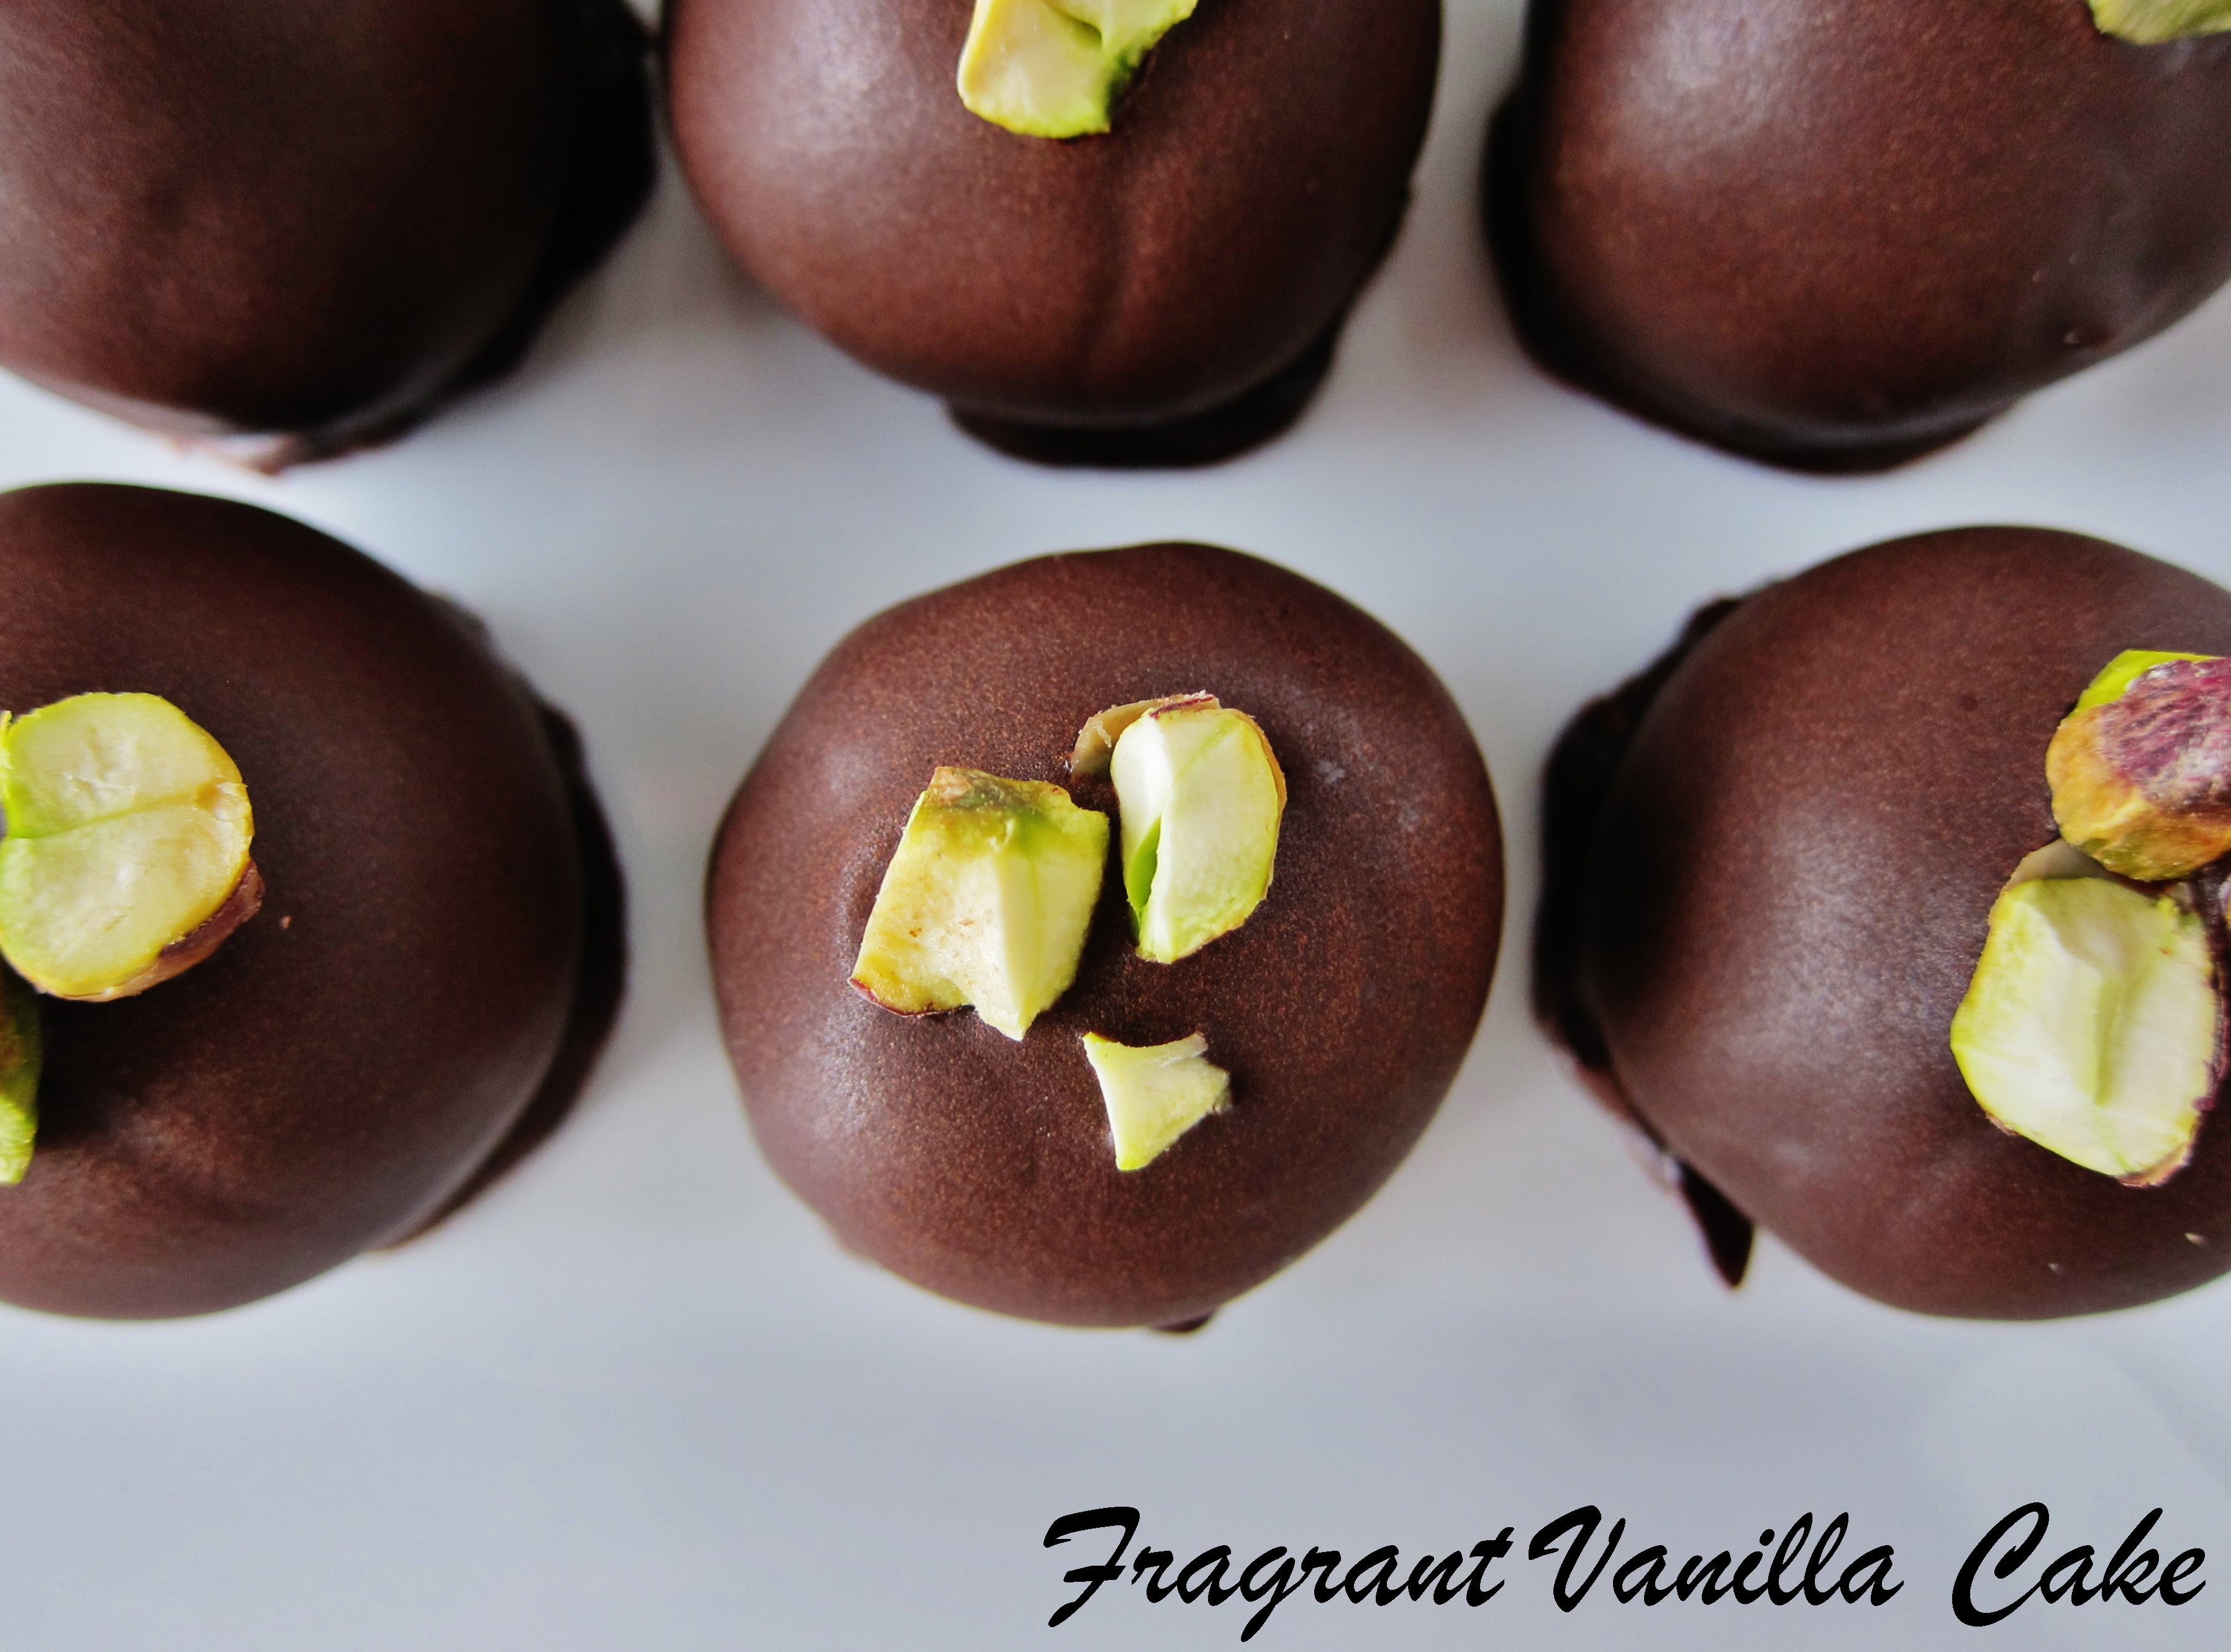
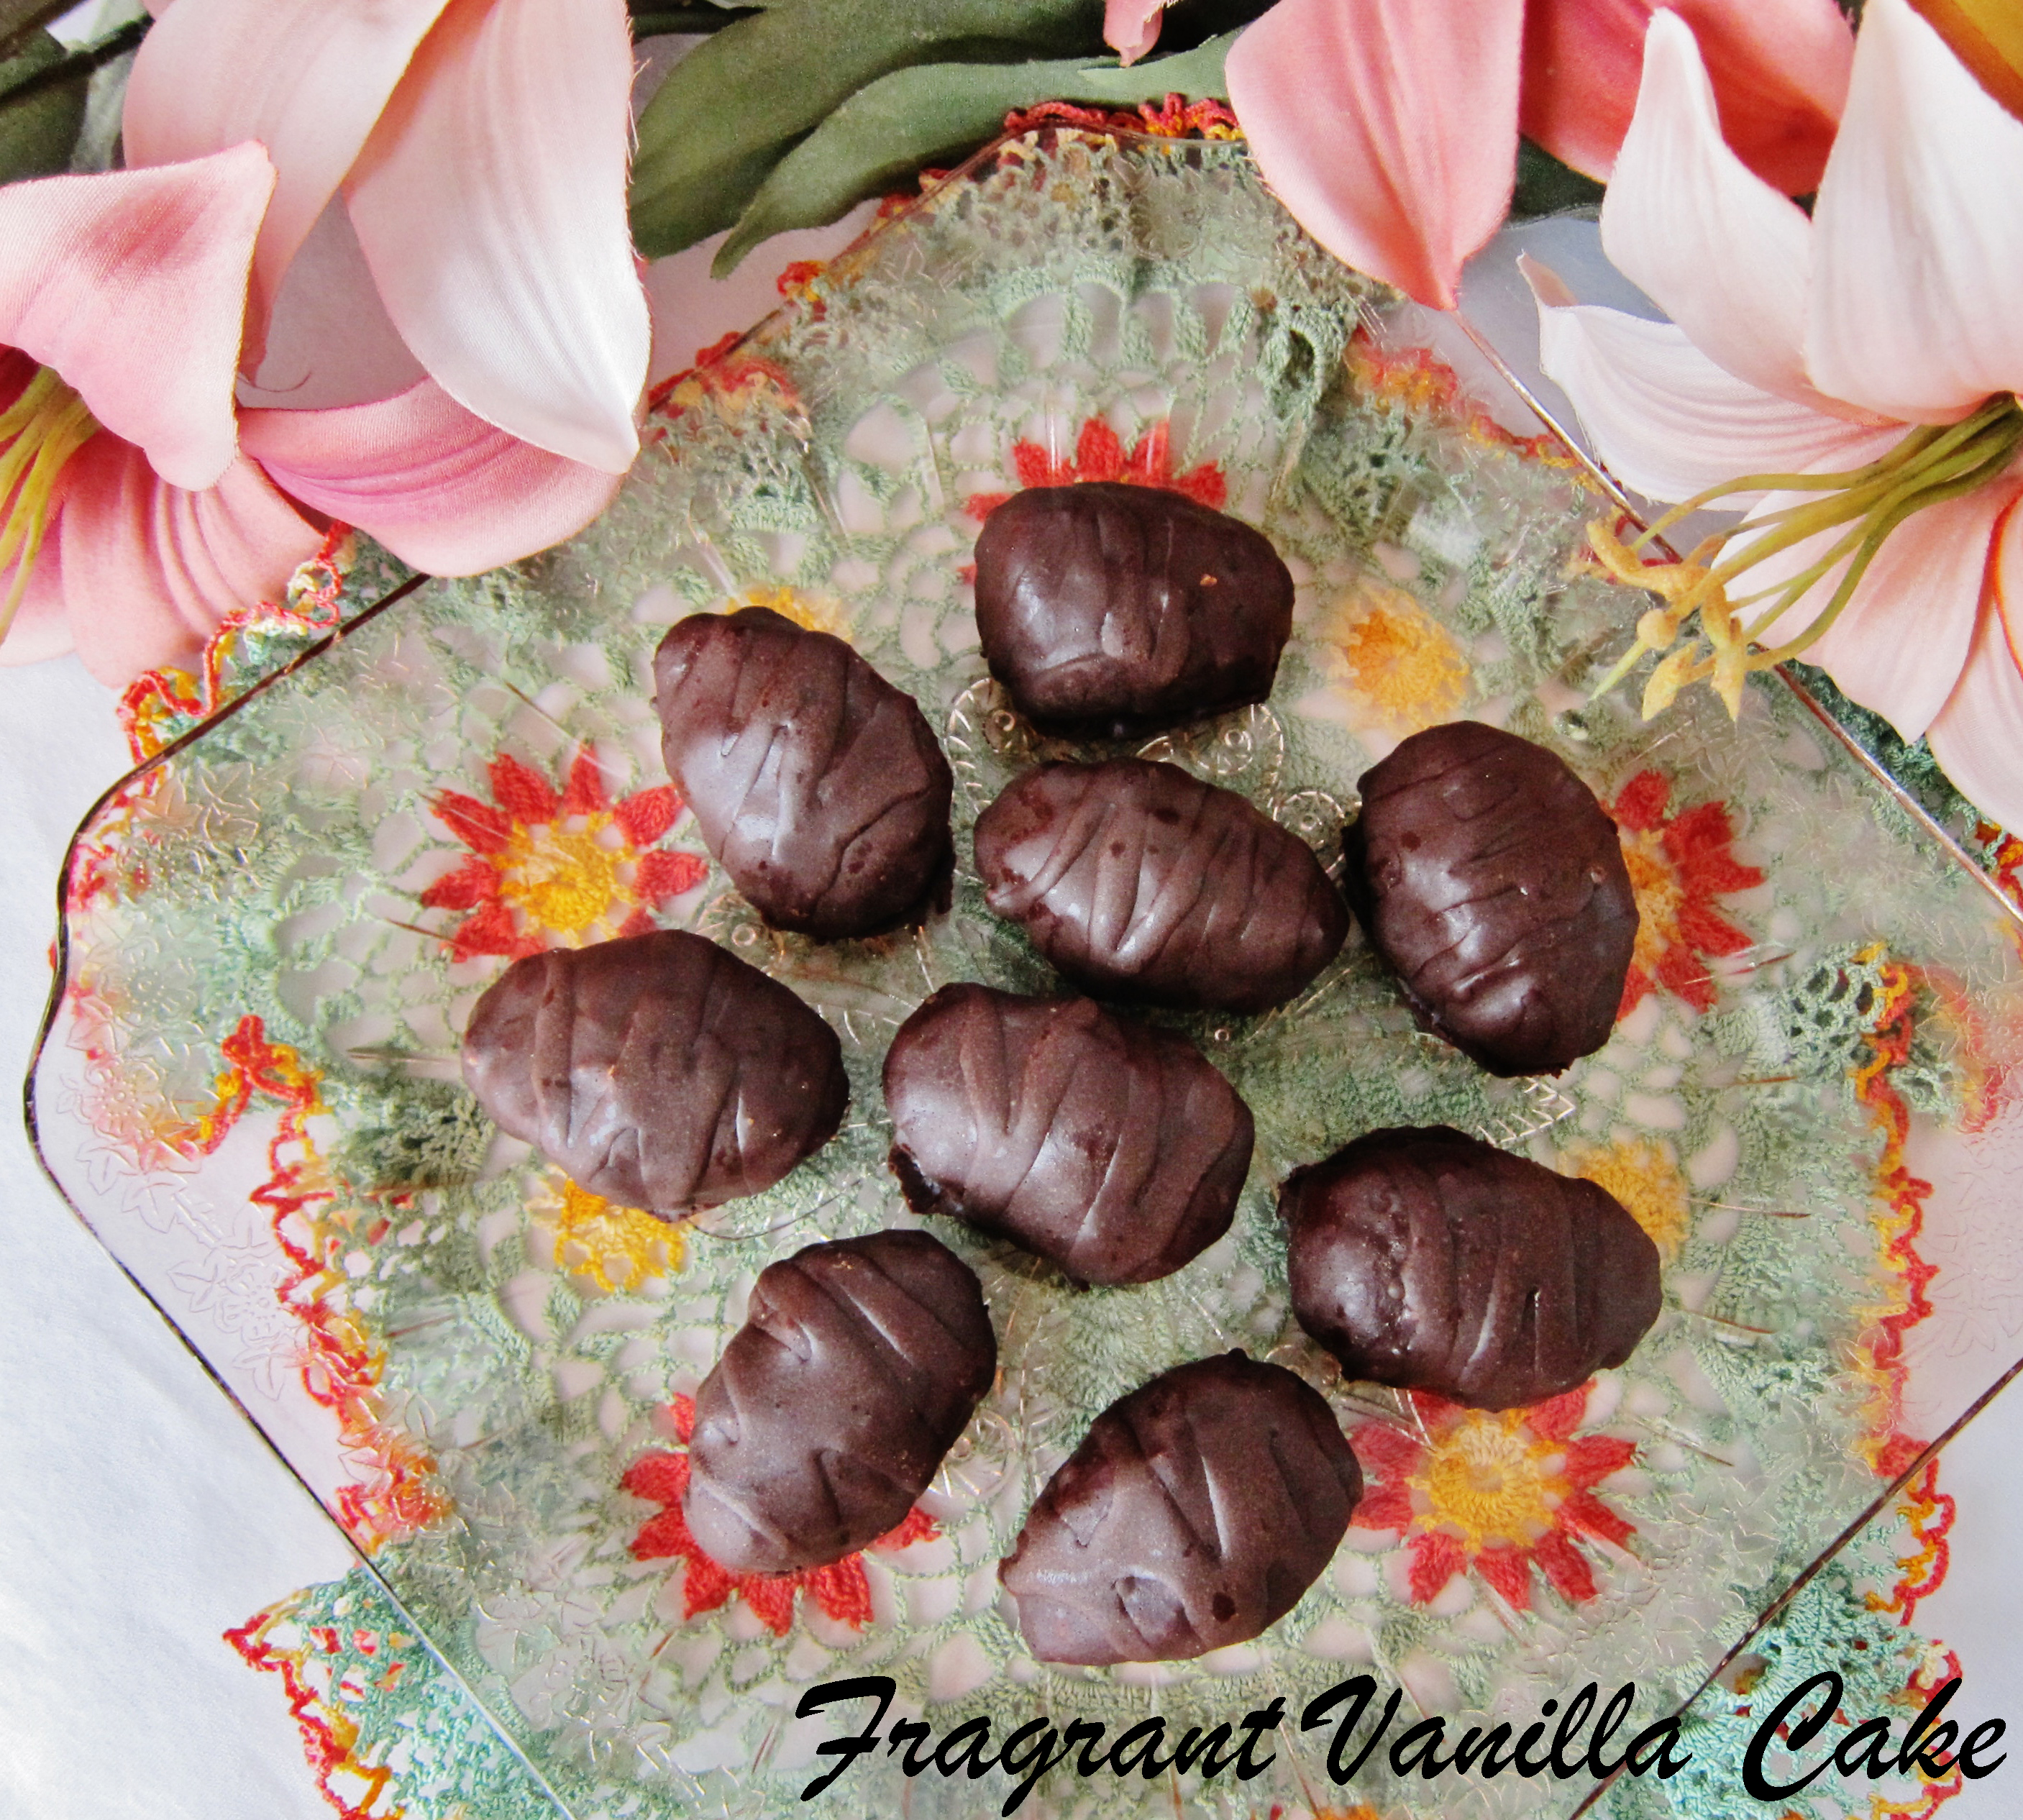
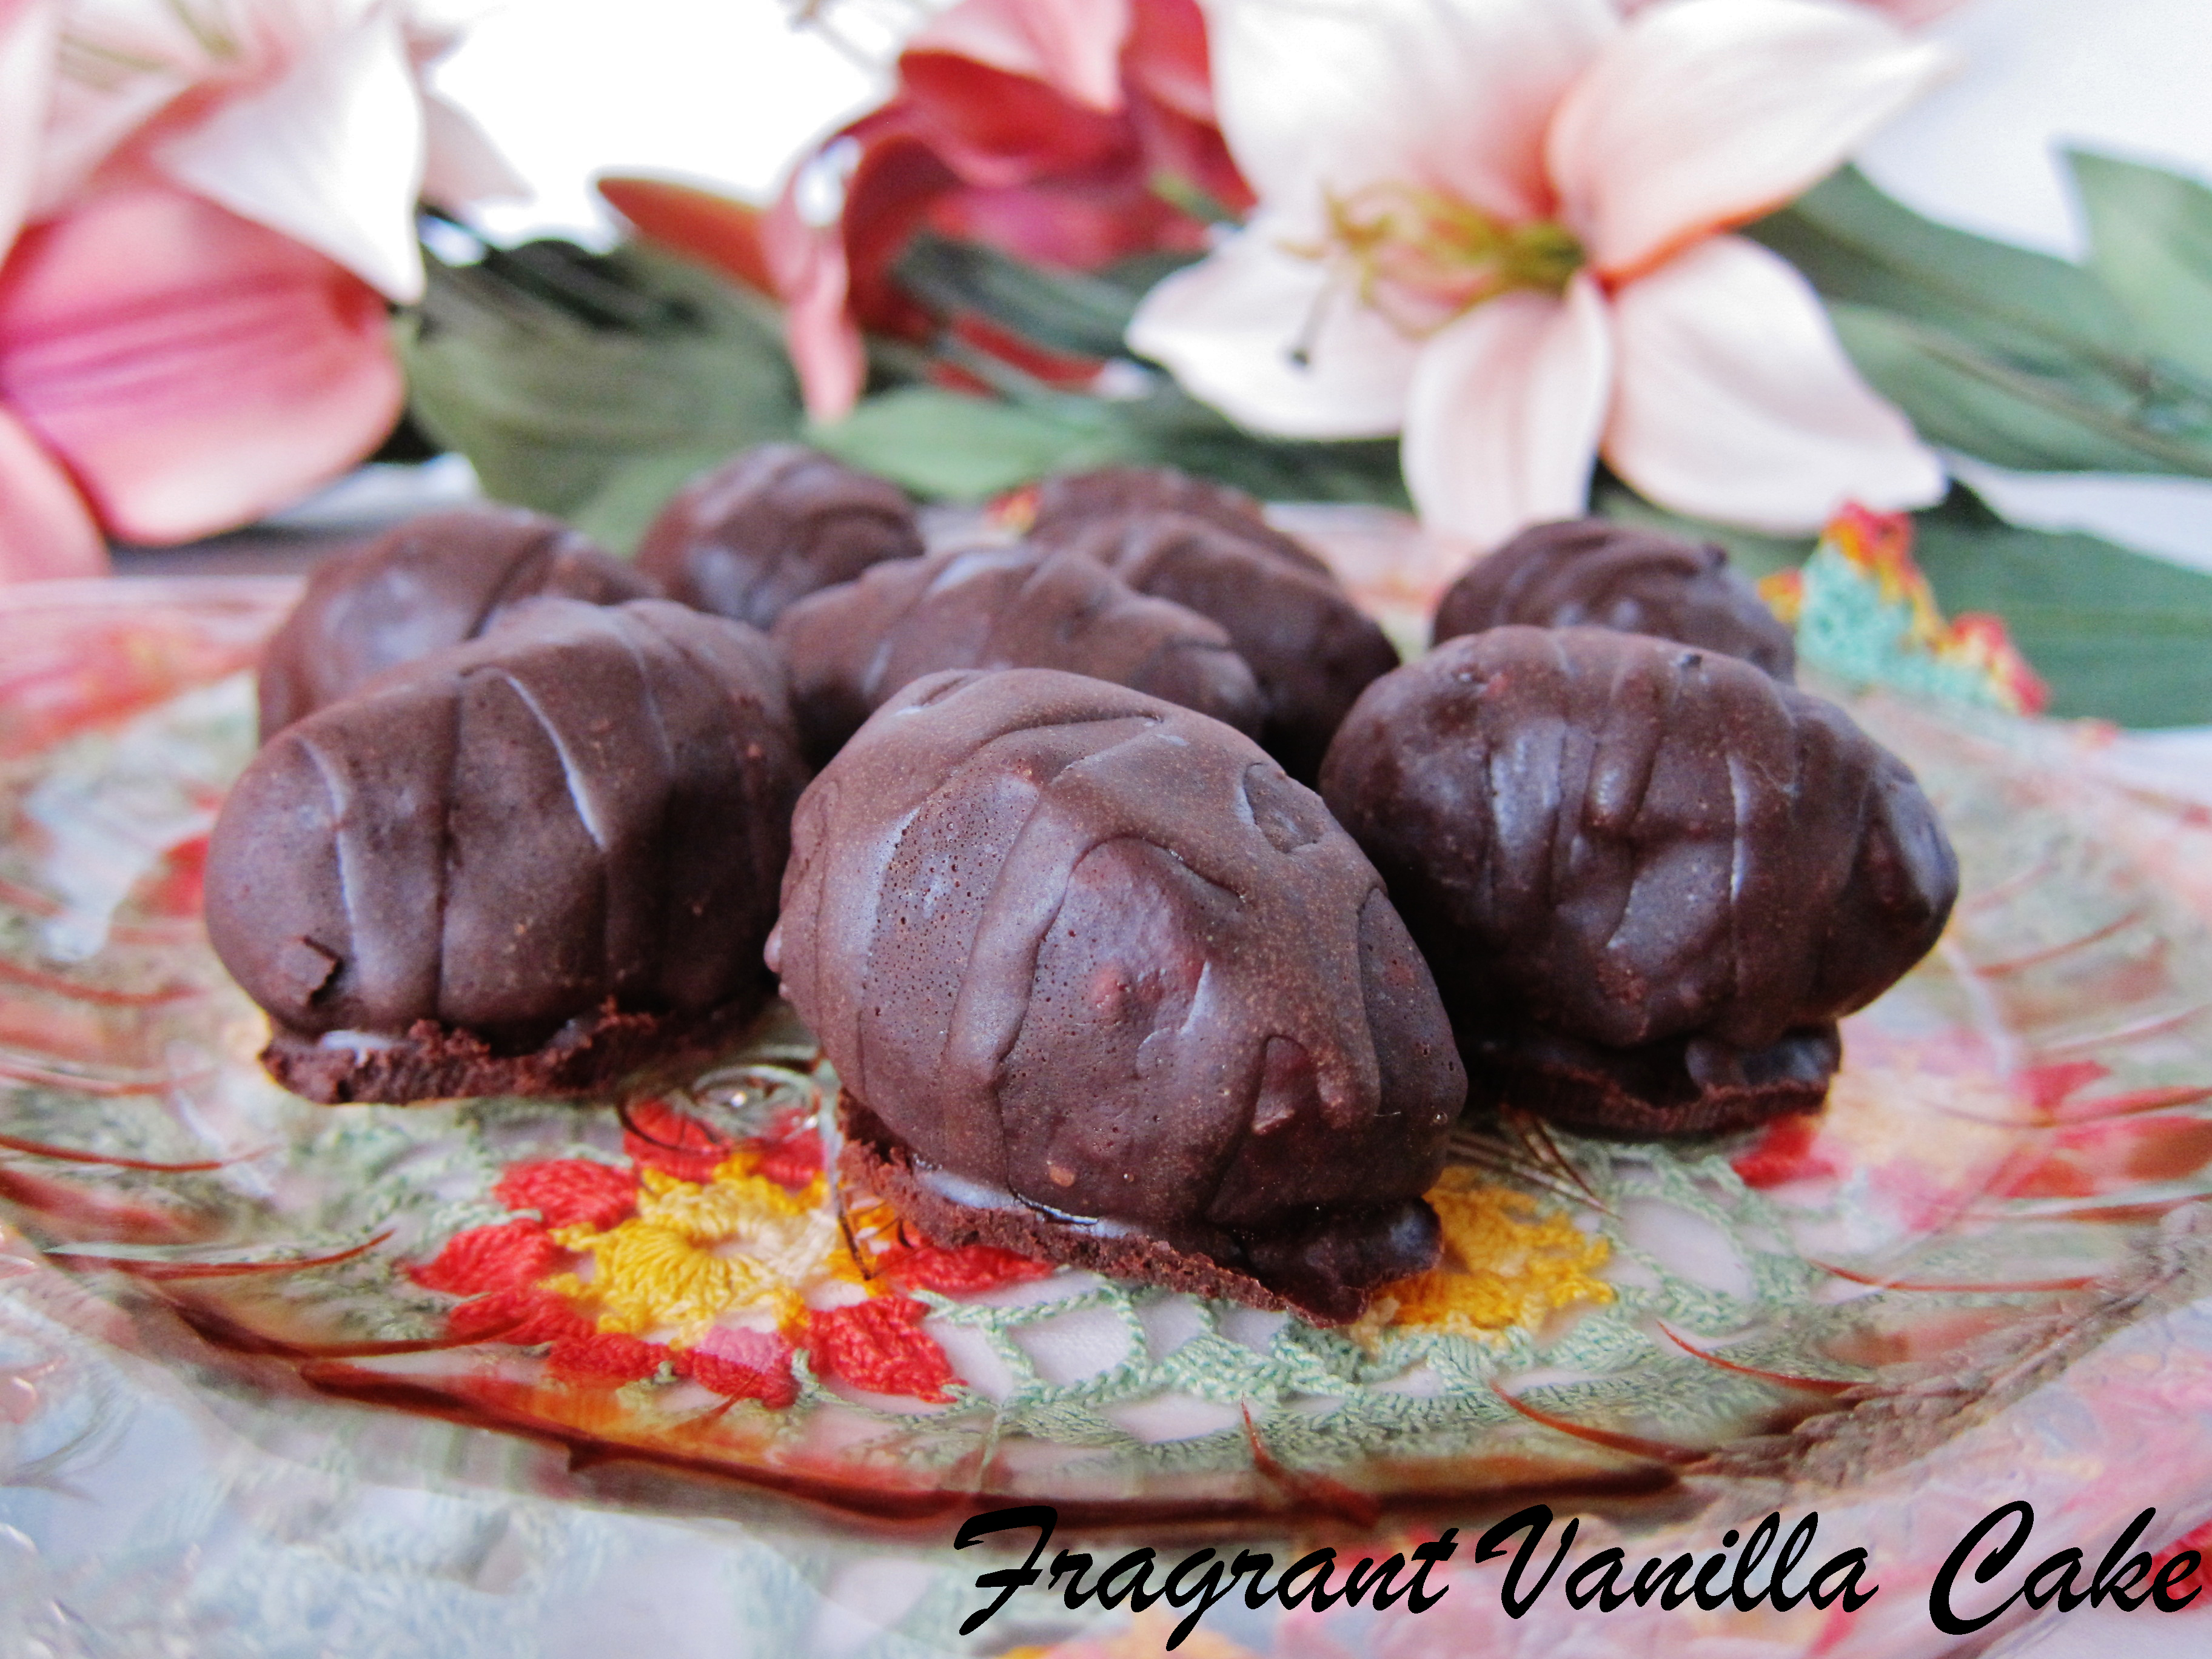
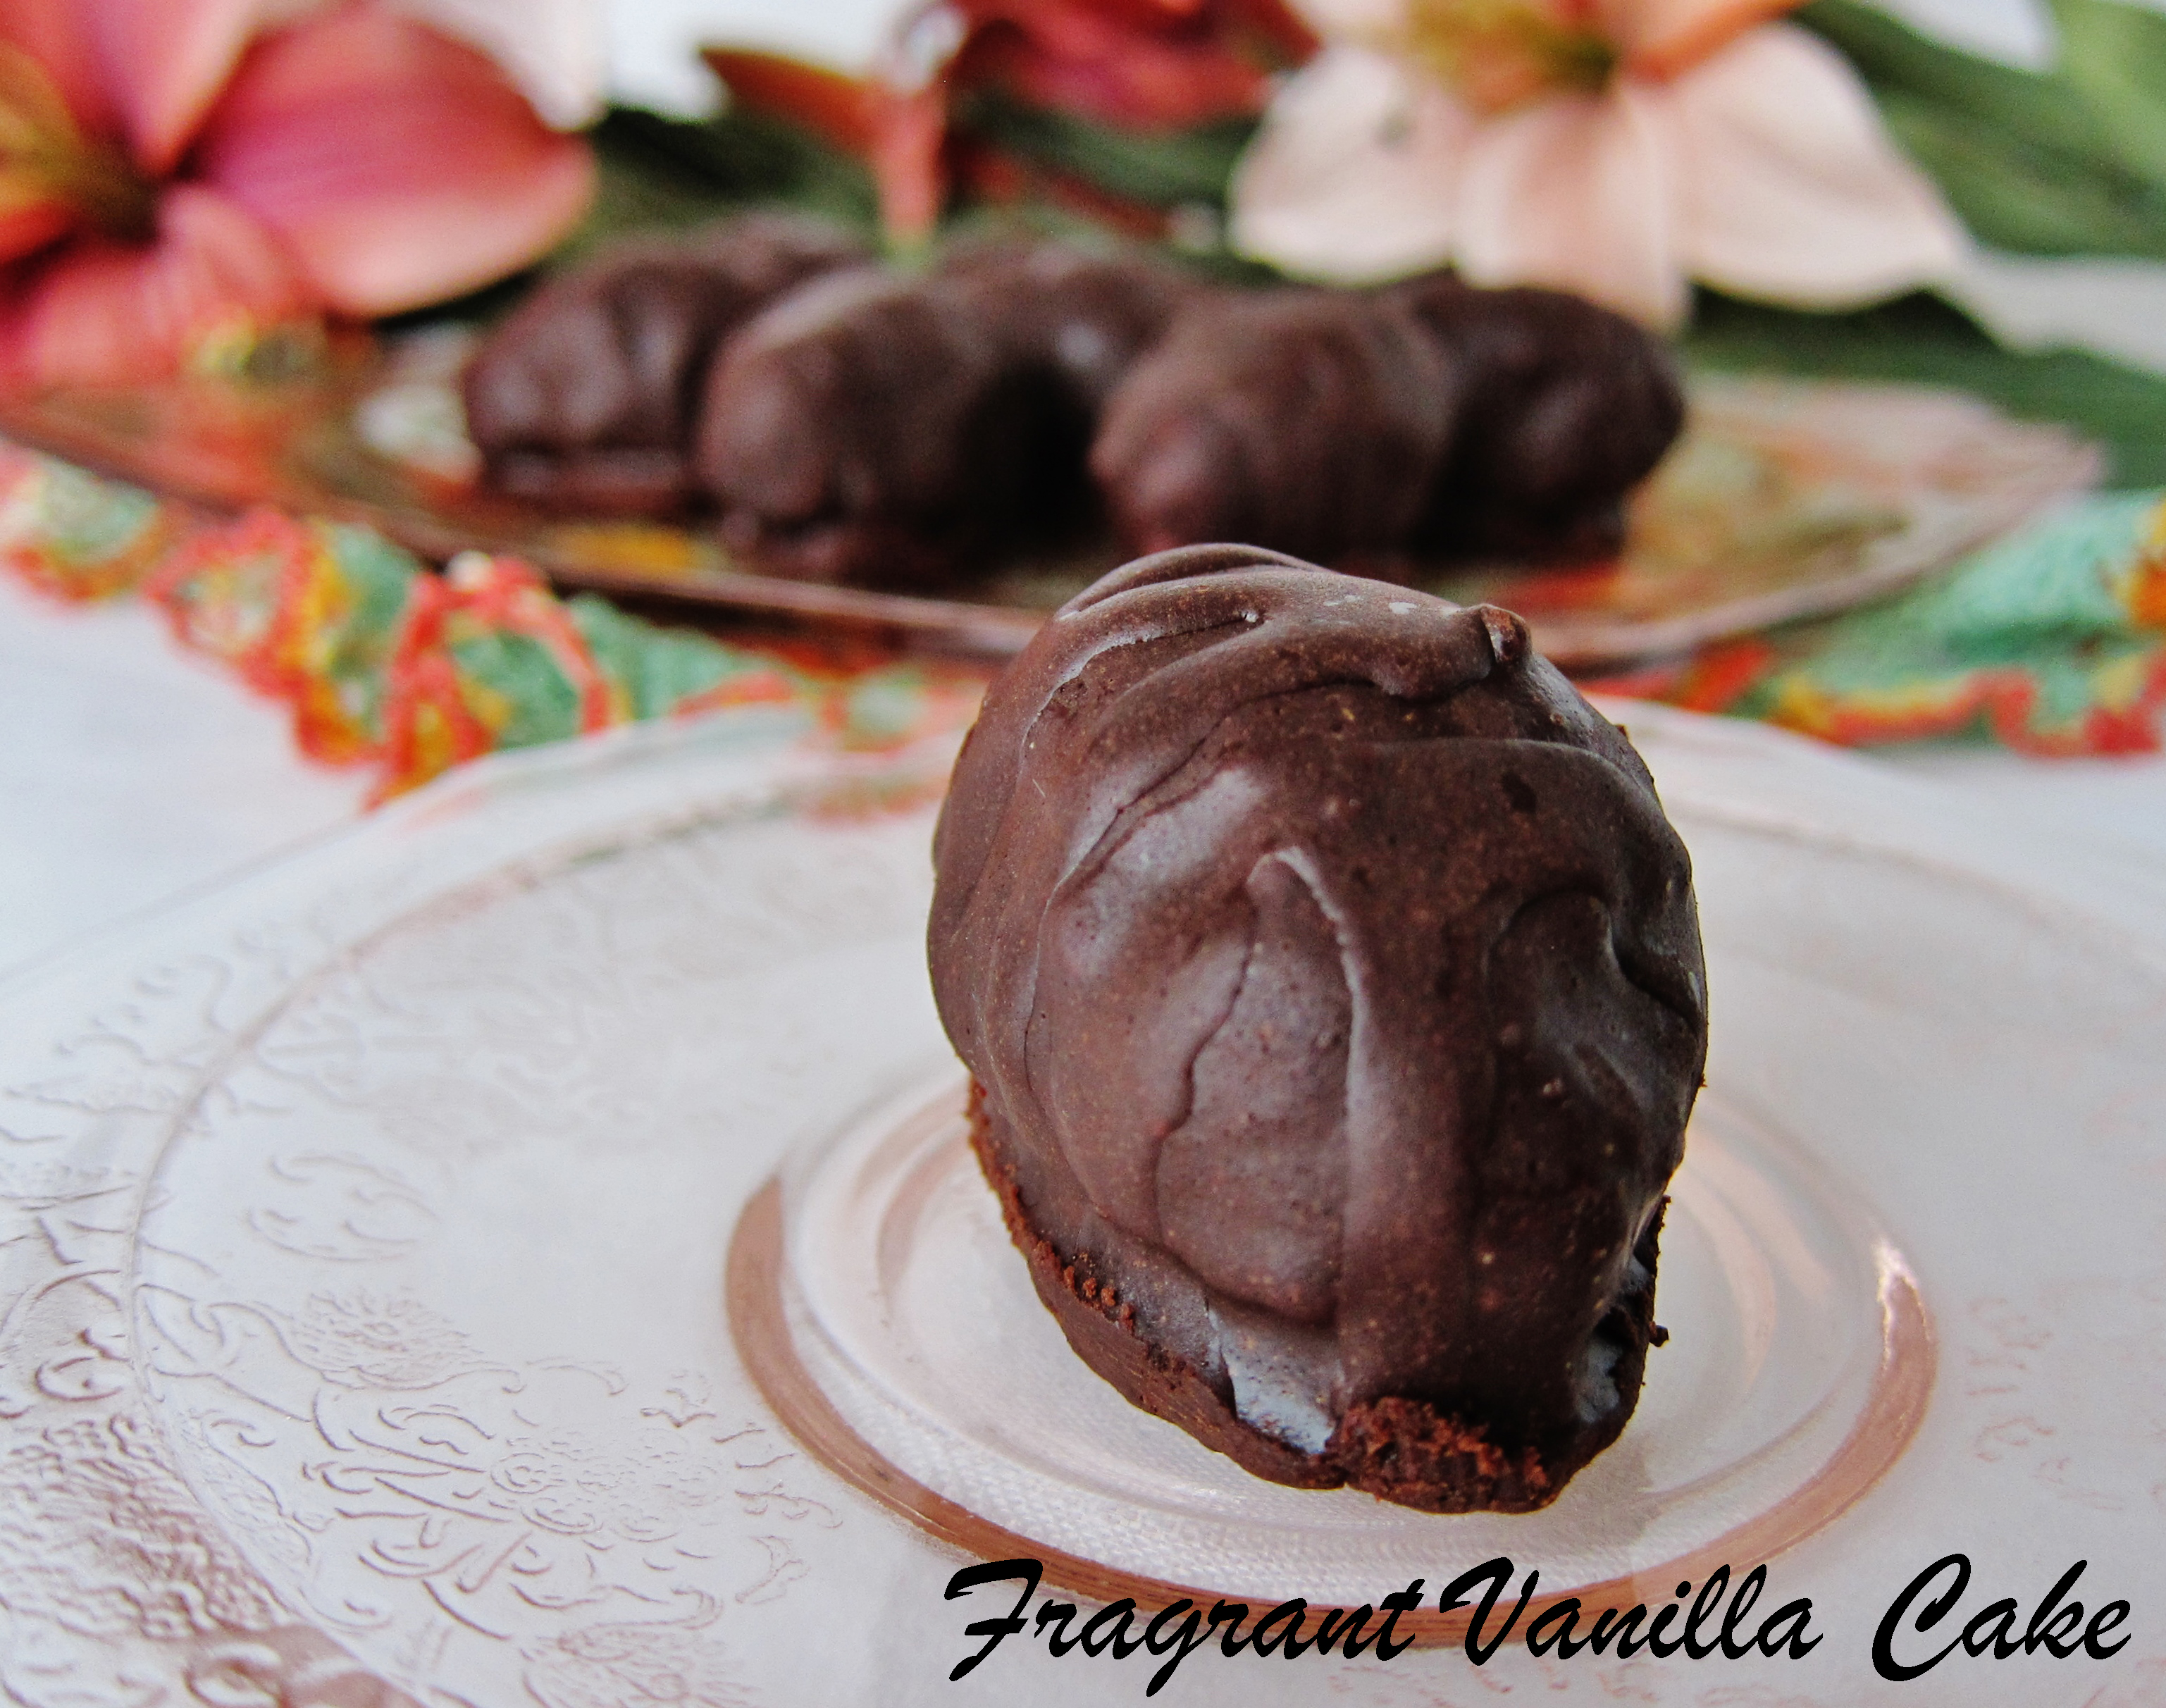
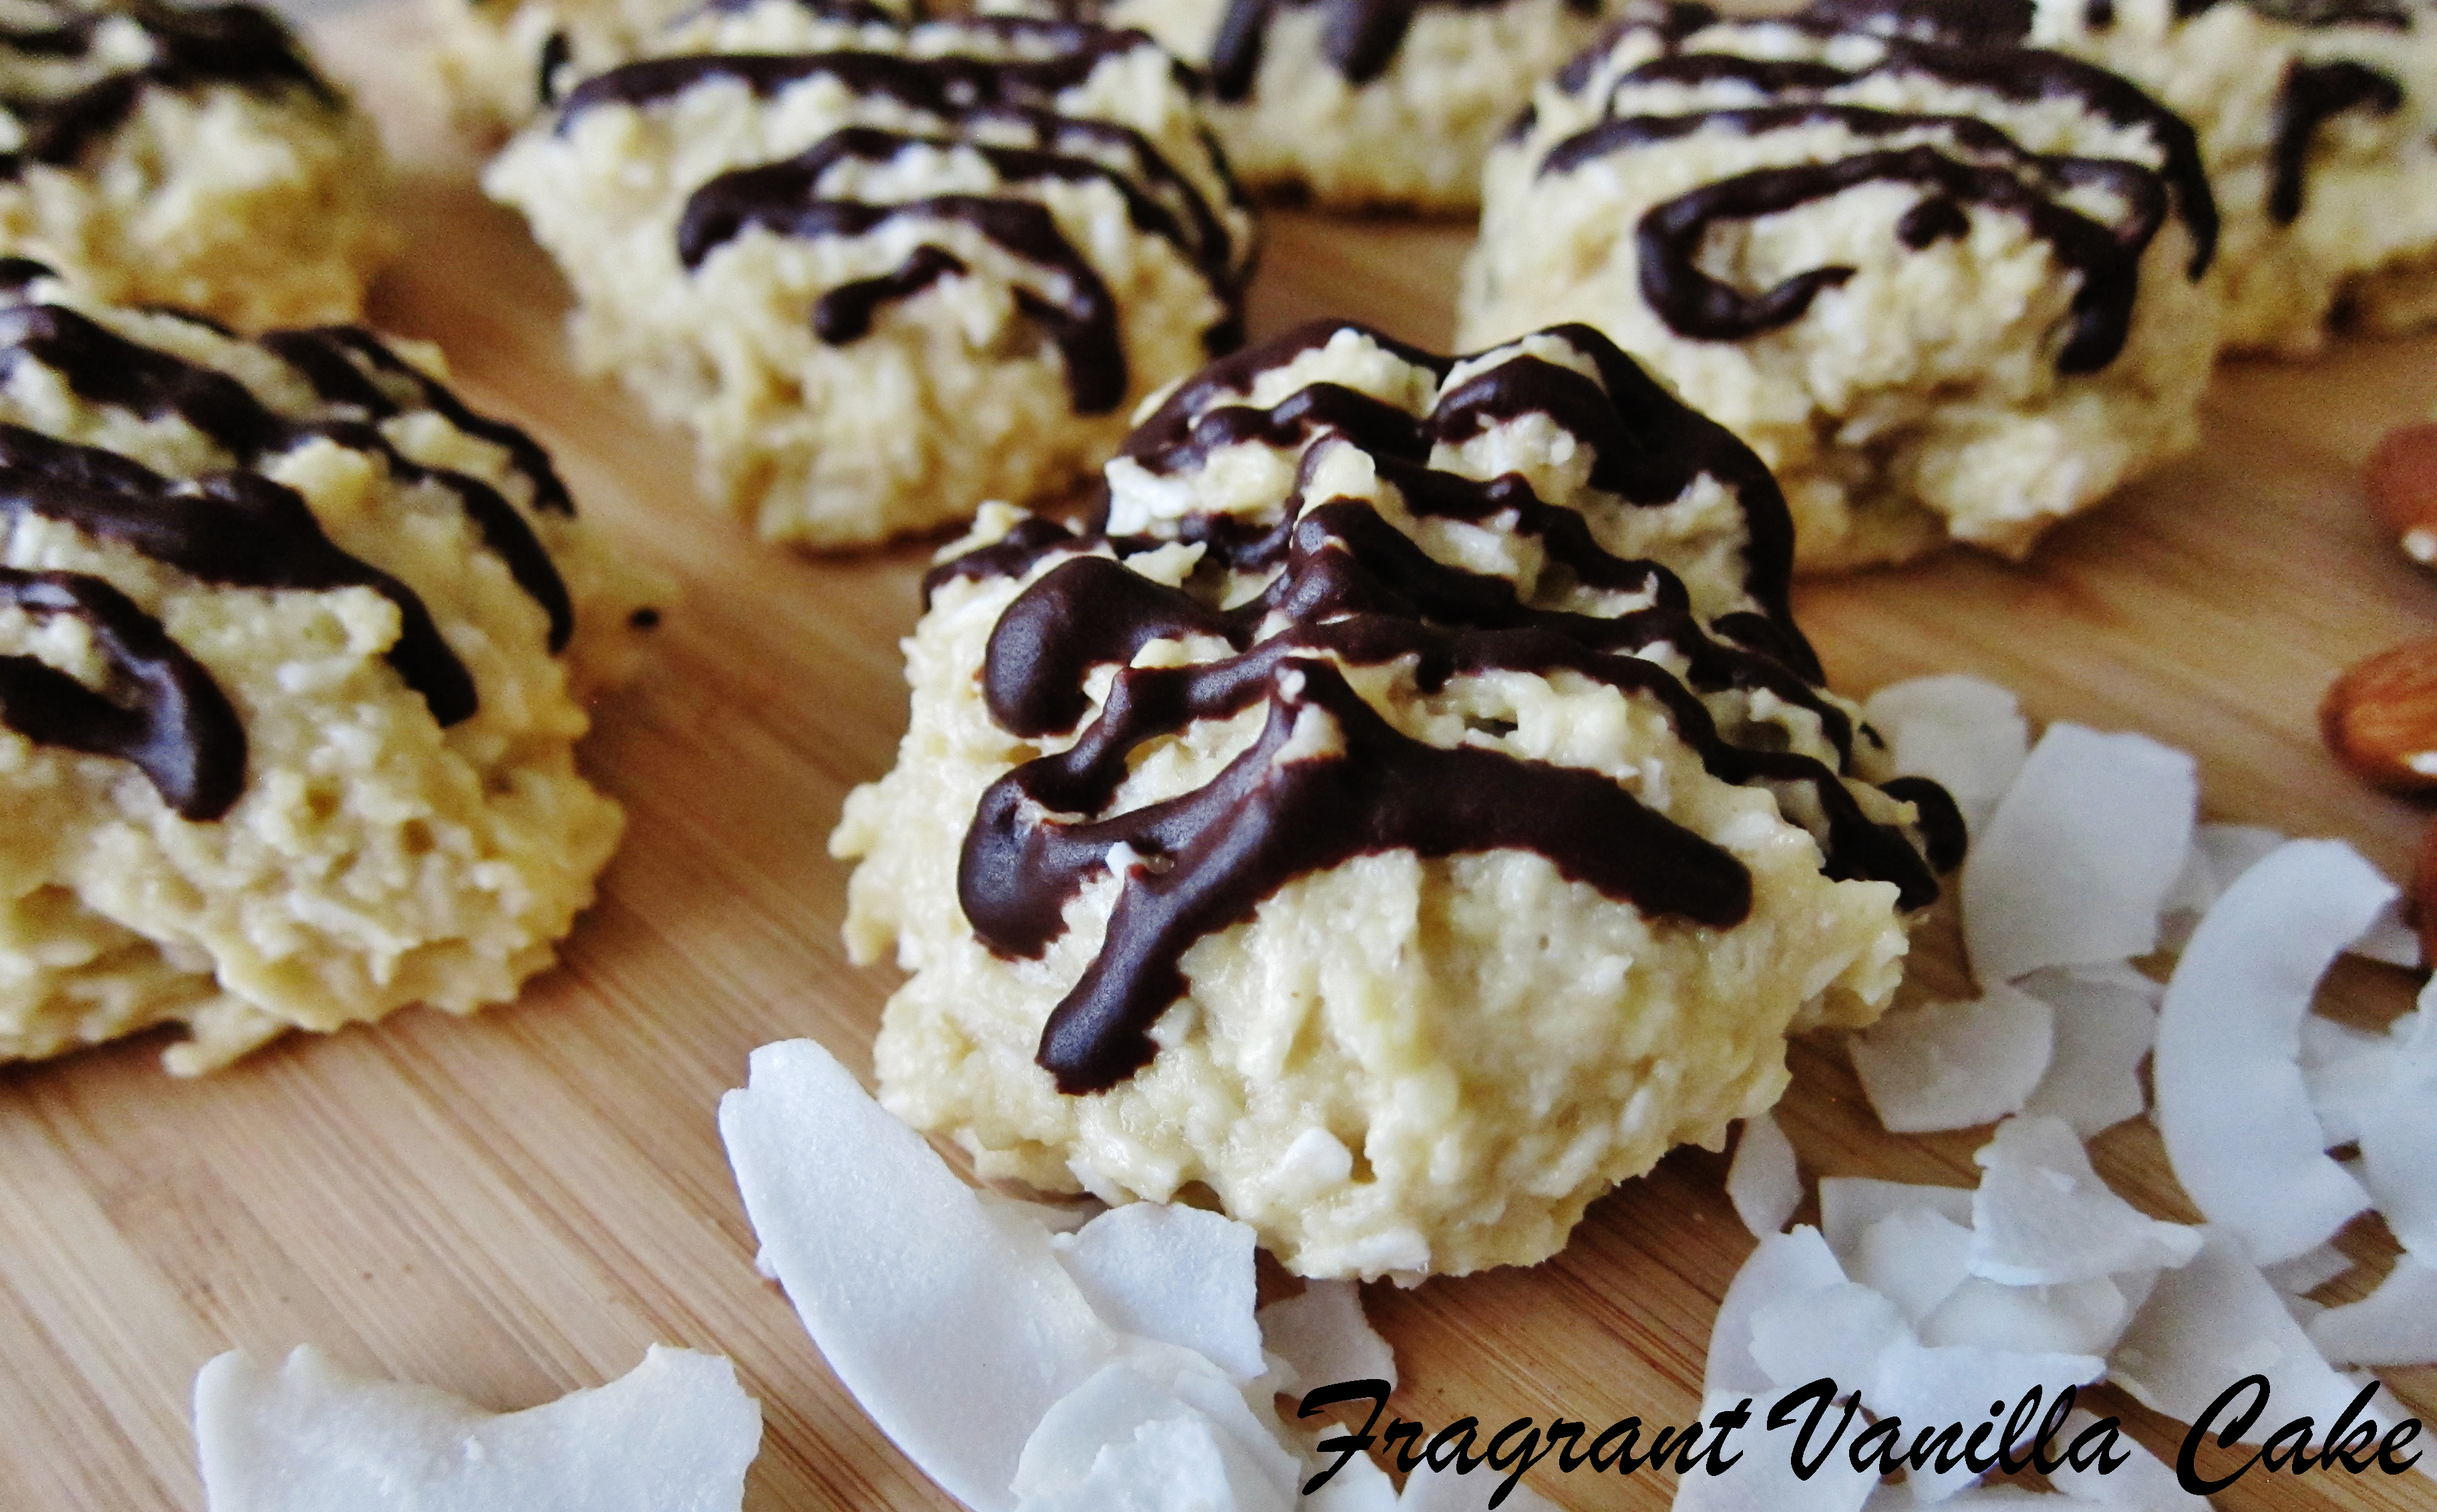
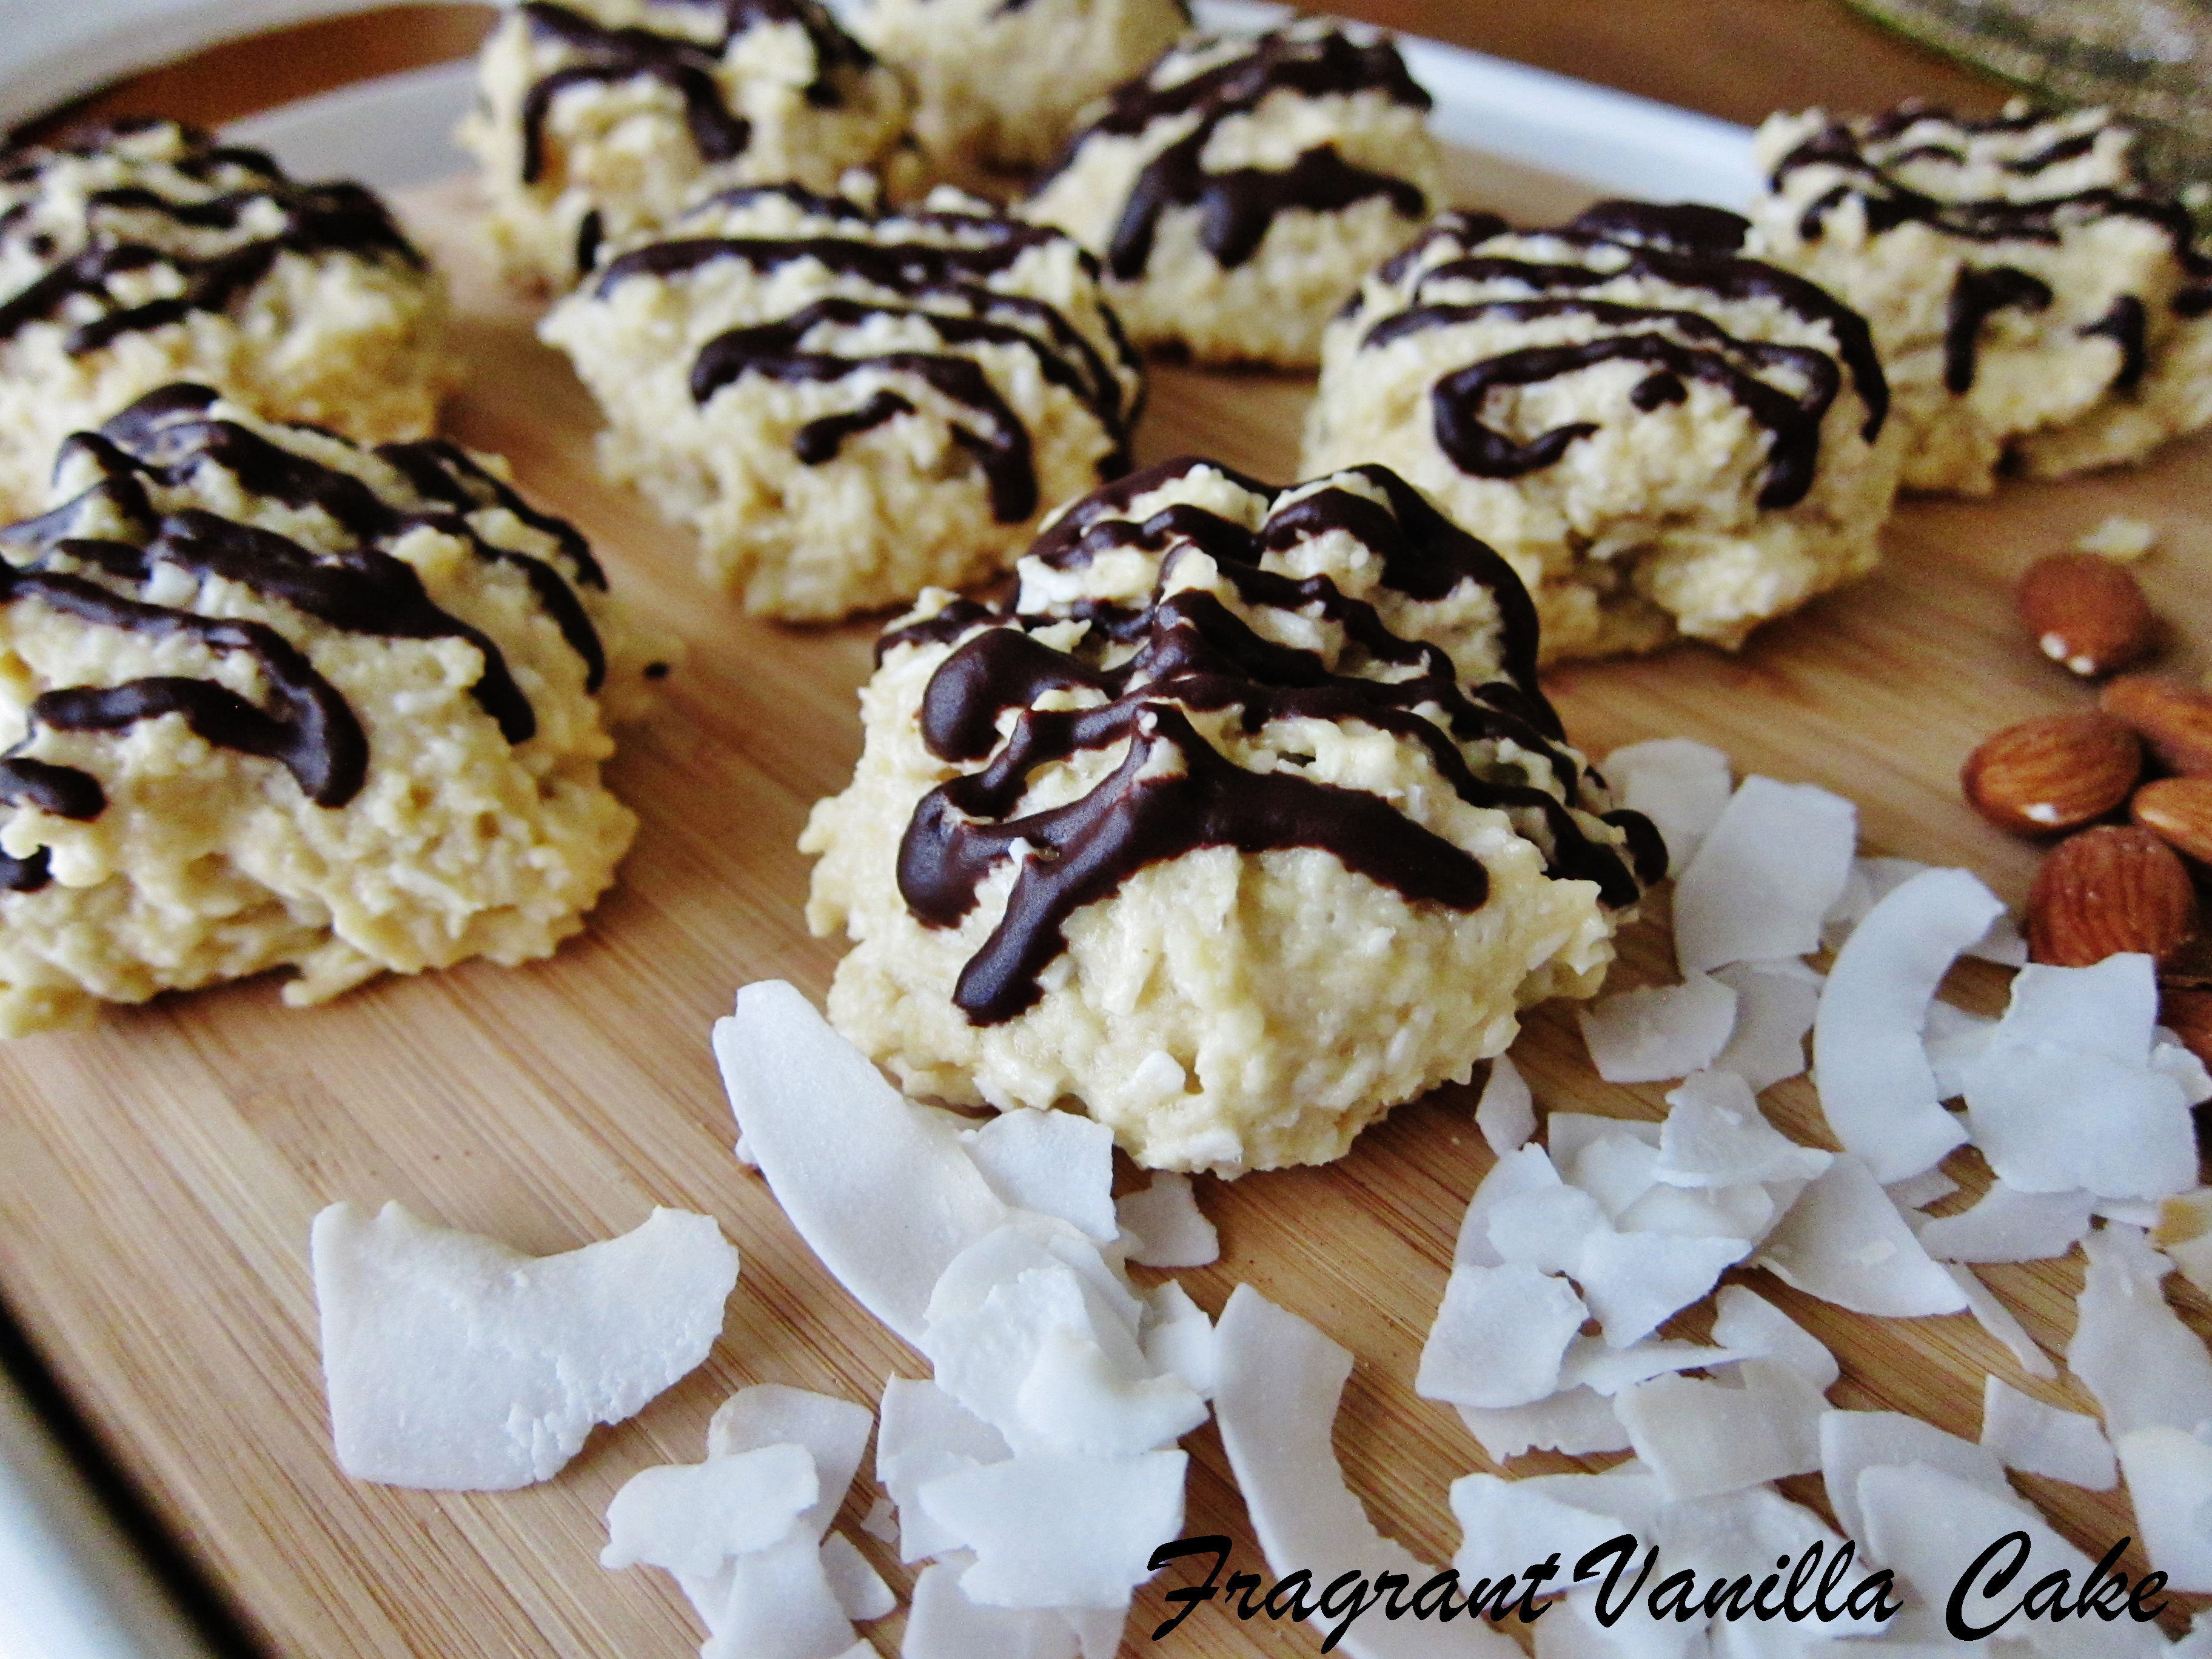
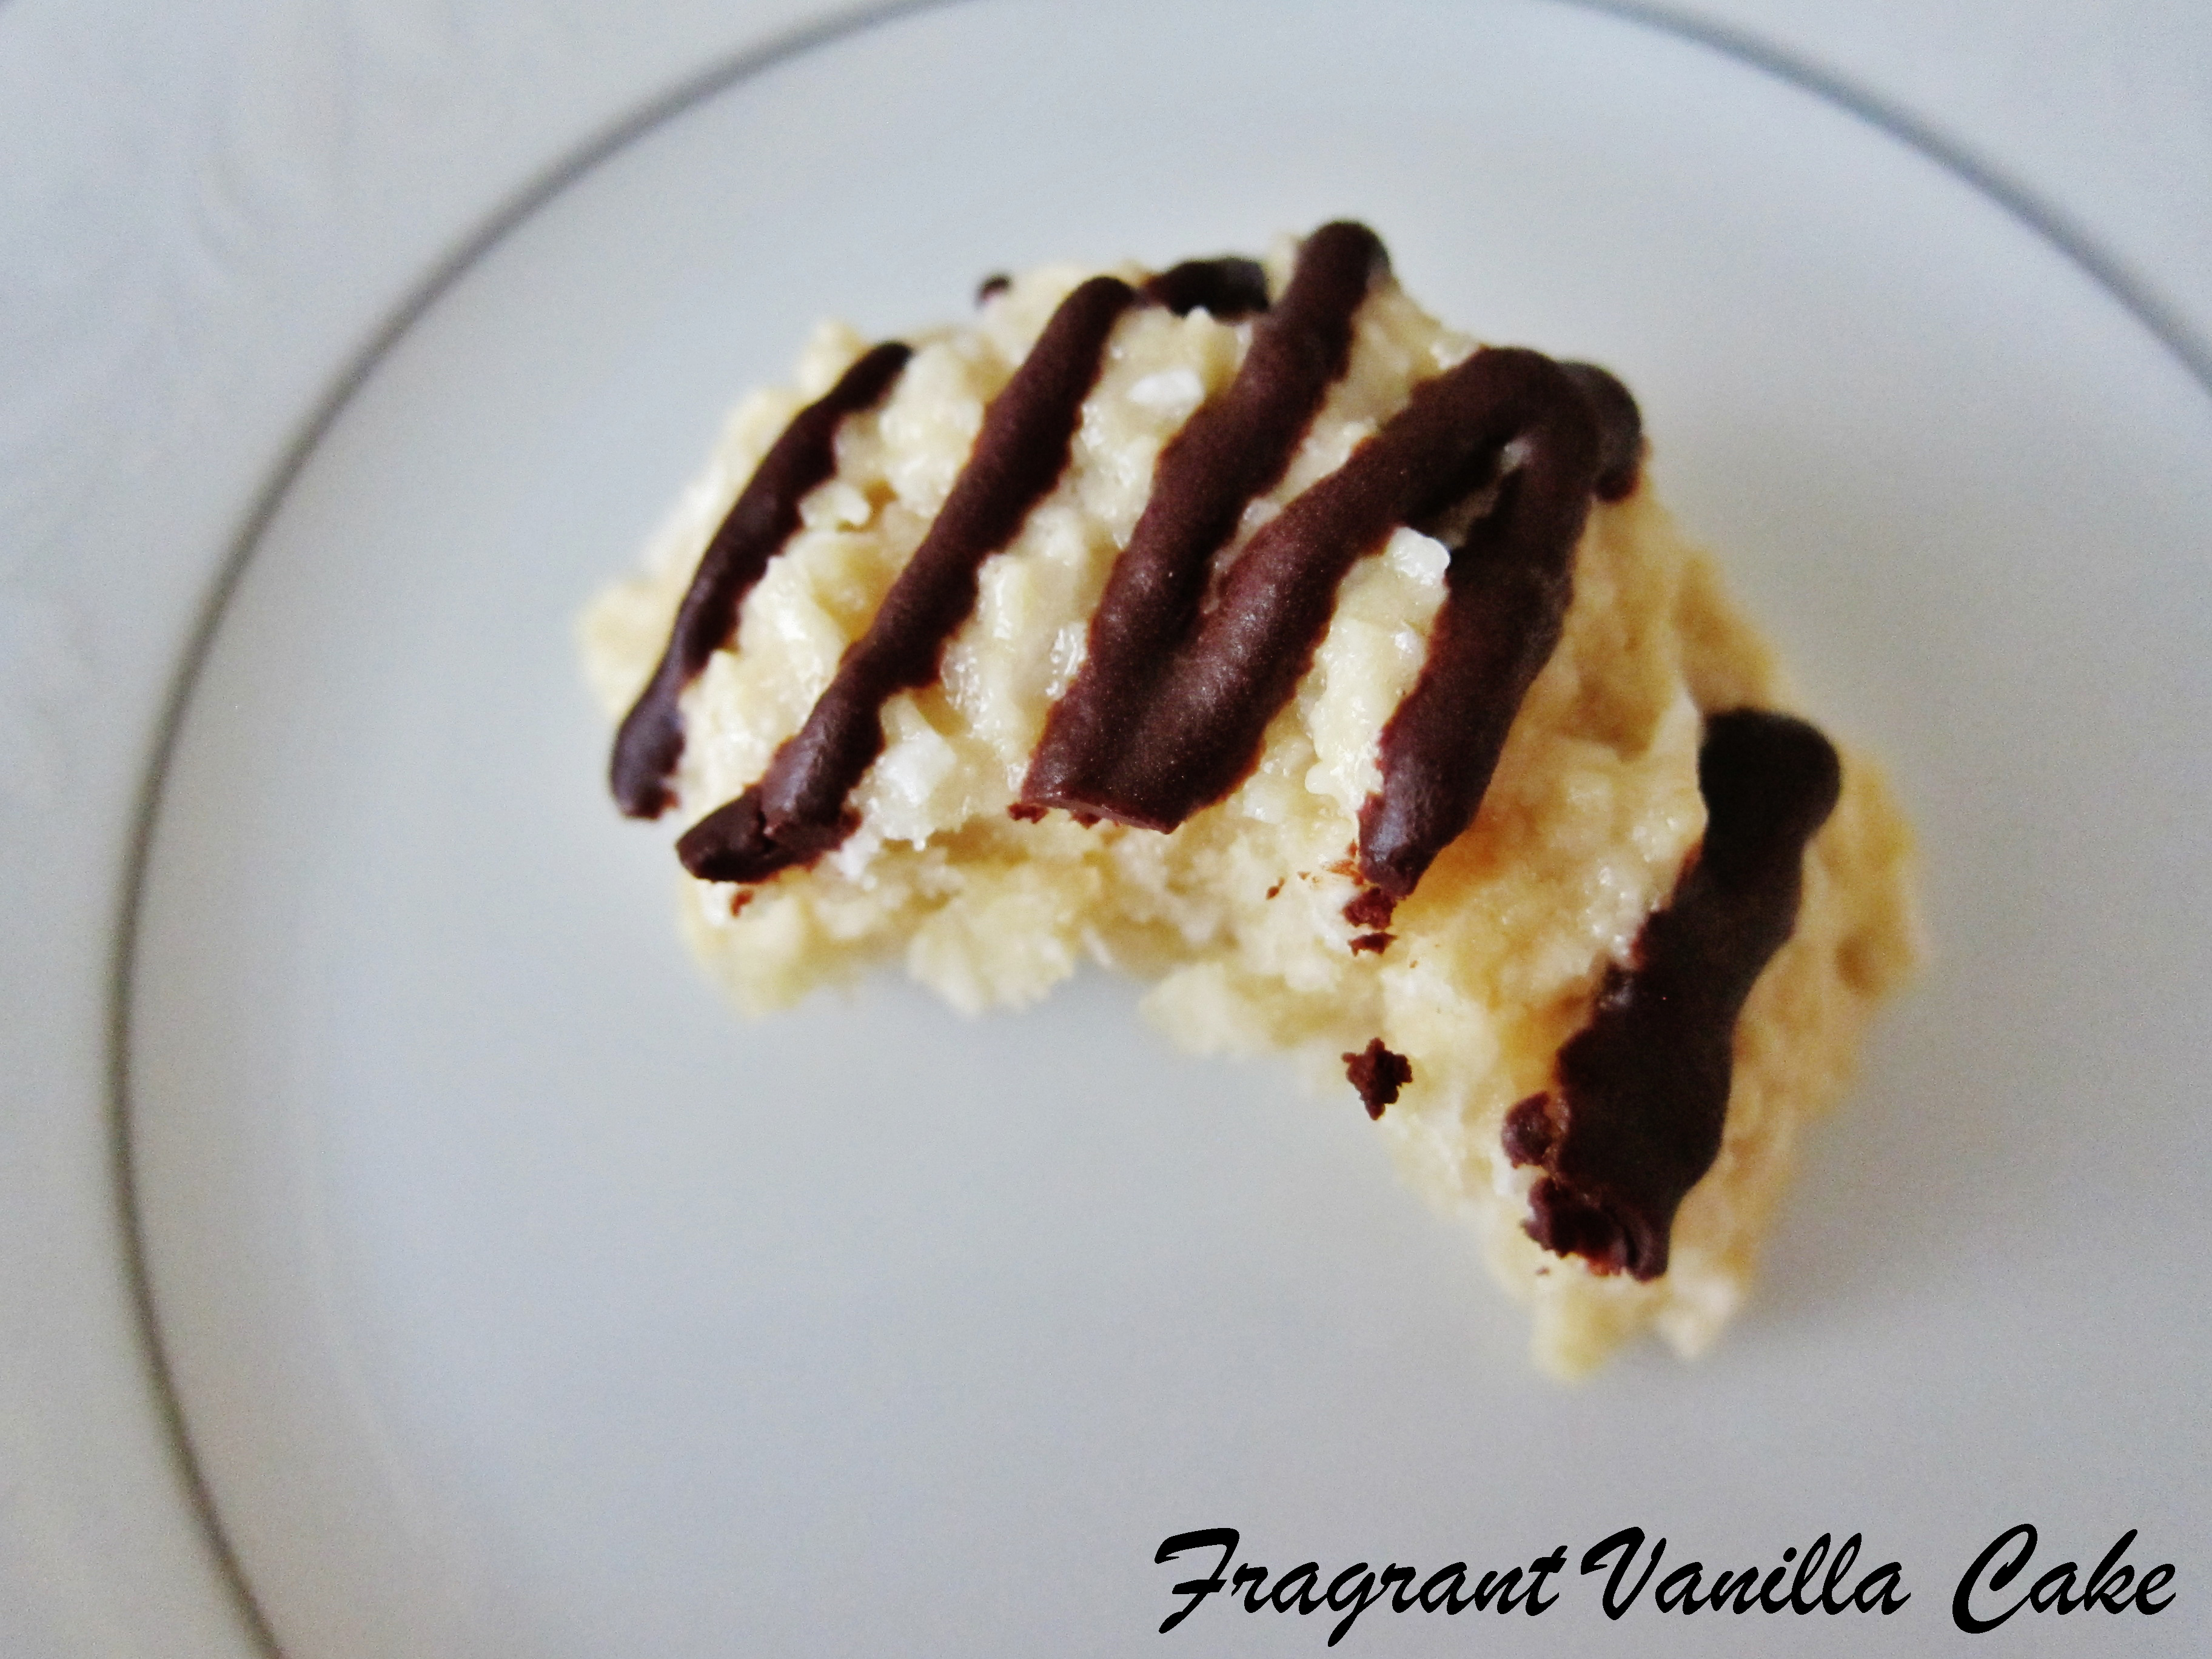
    I dehydrated them overnight, and in the morning what I was left with was delicious macaroons that tasted just like the ones with eggs and sweetened condensed milk that I had eaten before my non-vegan days!  Definitely a win here.  I decided to drizzle them with dark chocolate to make them even better, and they were wonderful!  If you don’t have a dehydrator, I imagine they would work in the oven at a similar temp. (or take less time to bake at a little higher temp) but you might have to experiment with the time for the baking (since I have not tried it yet, being oven less for the time being).

    Macaroons 4

    Vegan Coconut Almond Macaroons

    Makes 12 large macaroons

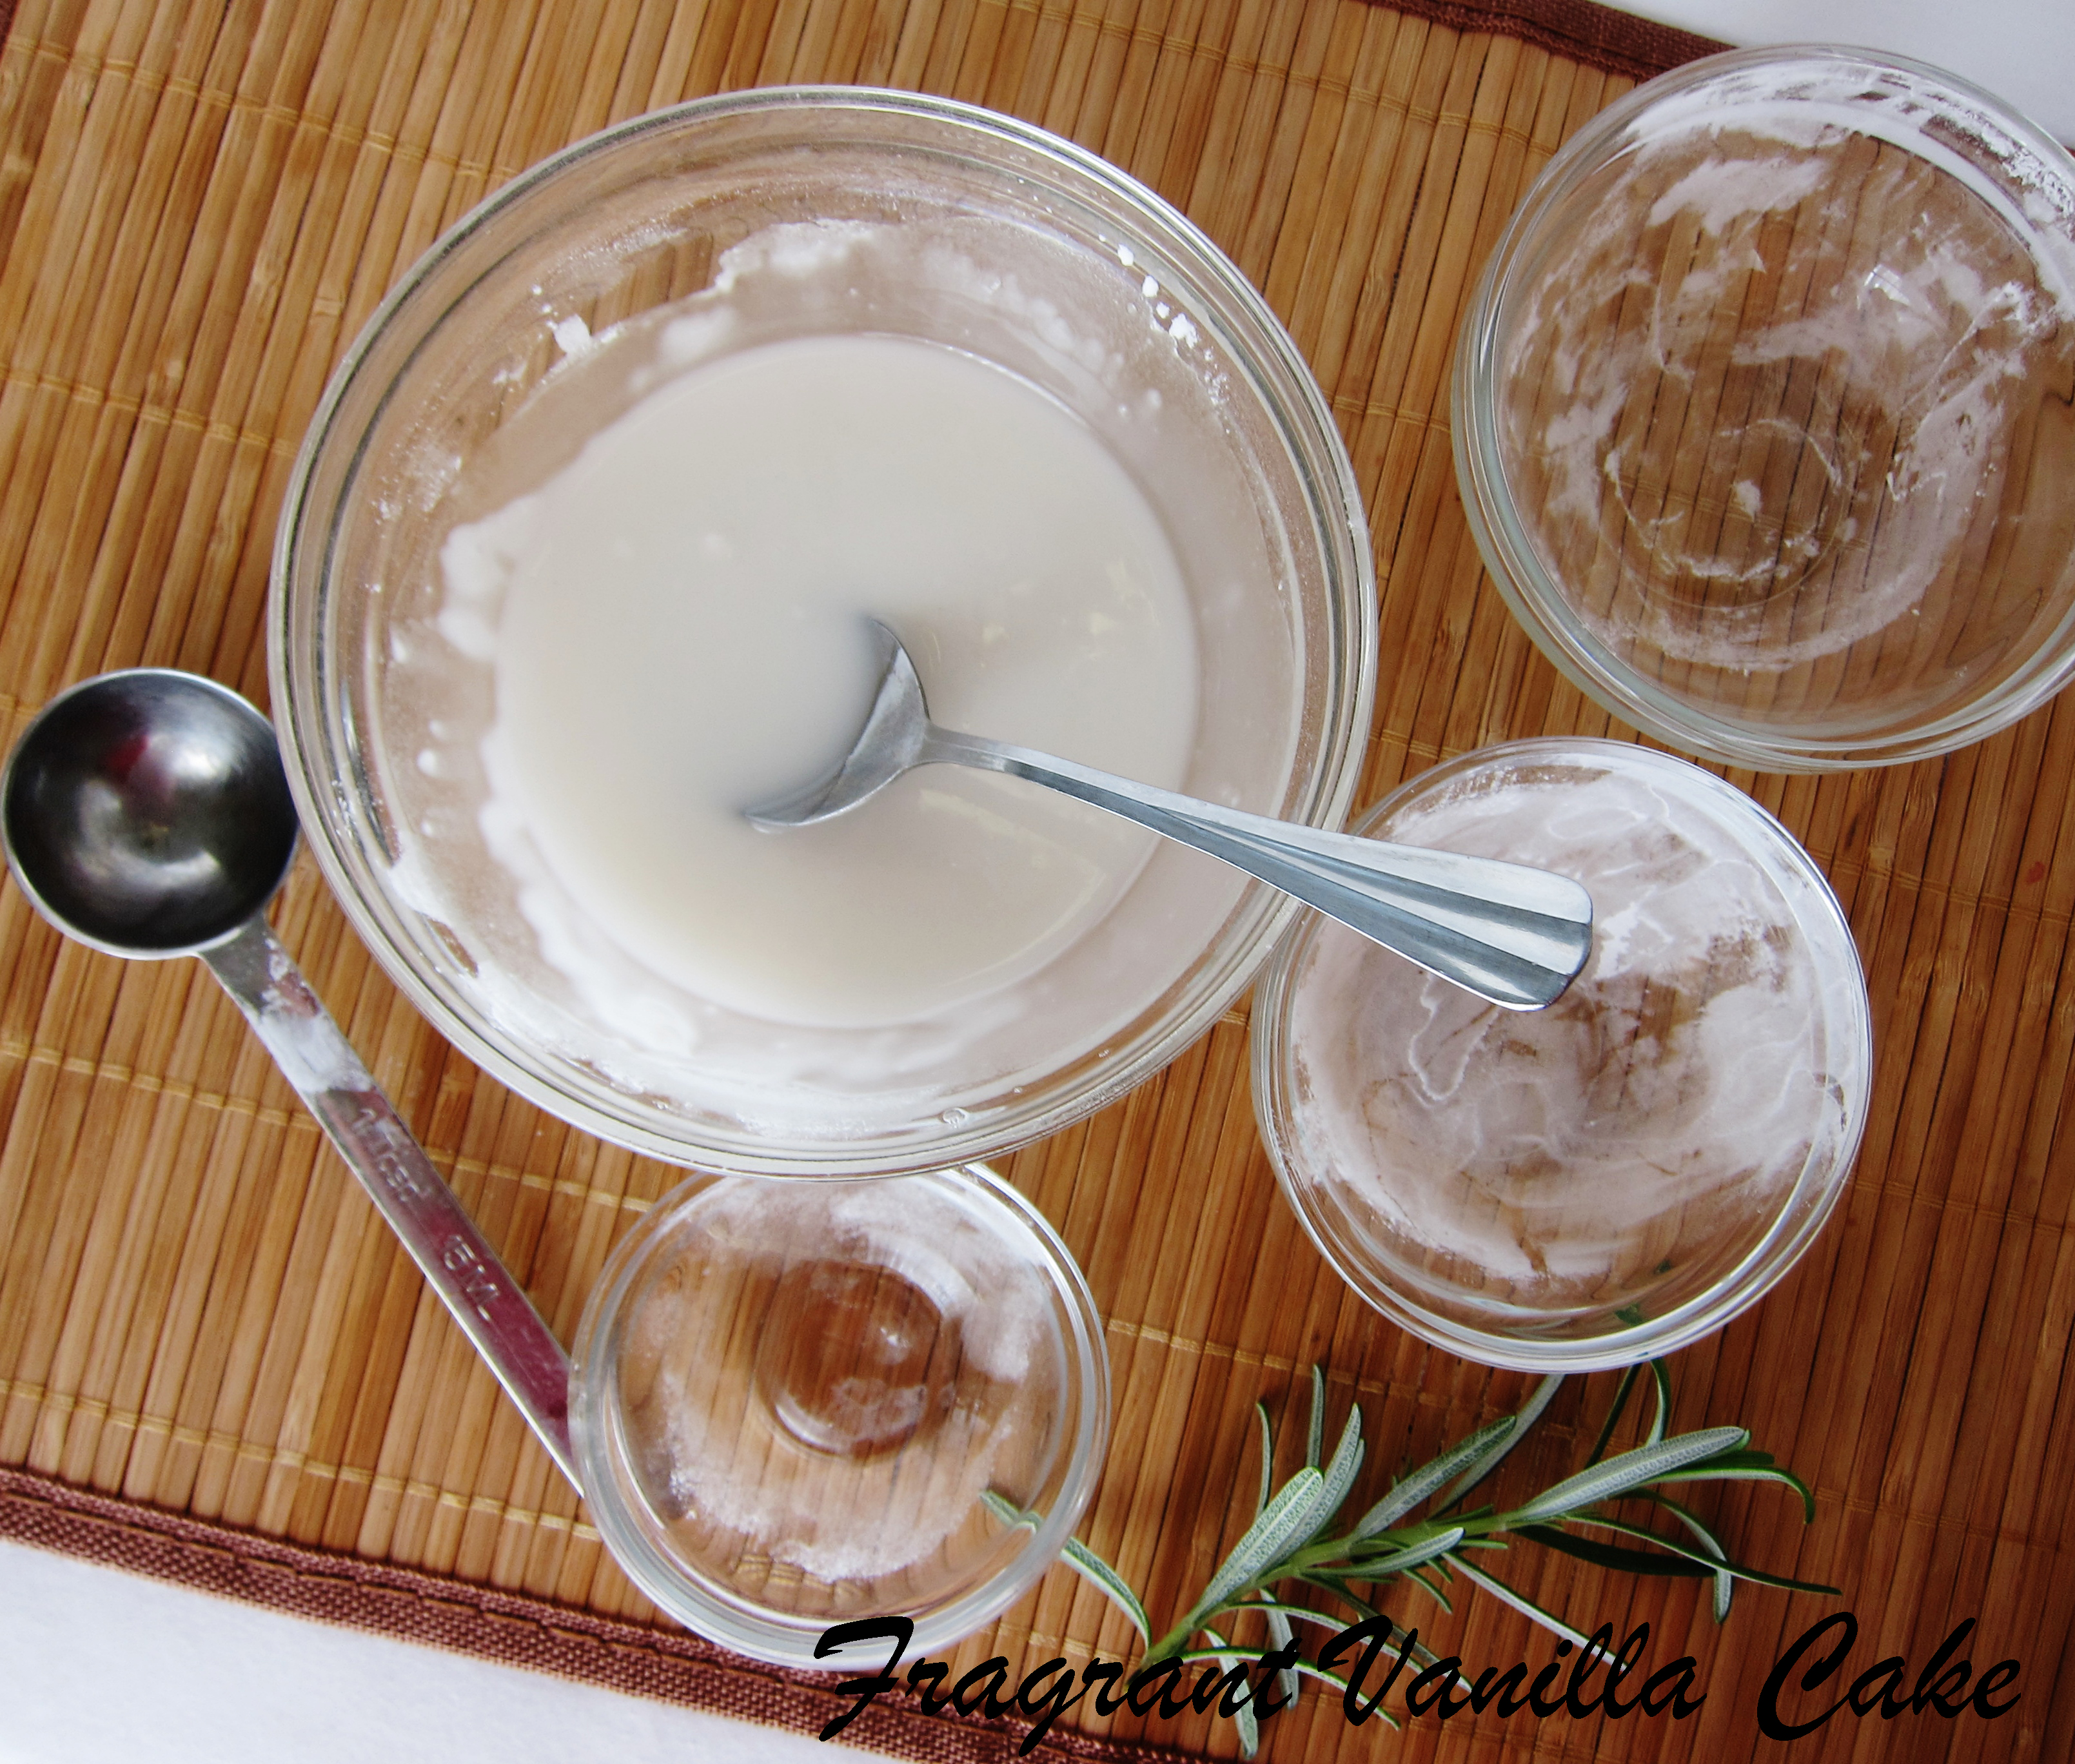
    1 cup reduced aquafaba* (you want it the consistency of egg whites)

    1 tsp guar gum or xanthan gum

    1/4 tsp sea salt

    1 cup xylitol or coconut sugar, divided**

    2 tsp pure vanilla extract

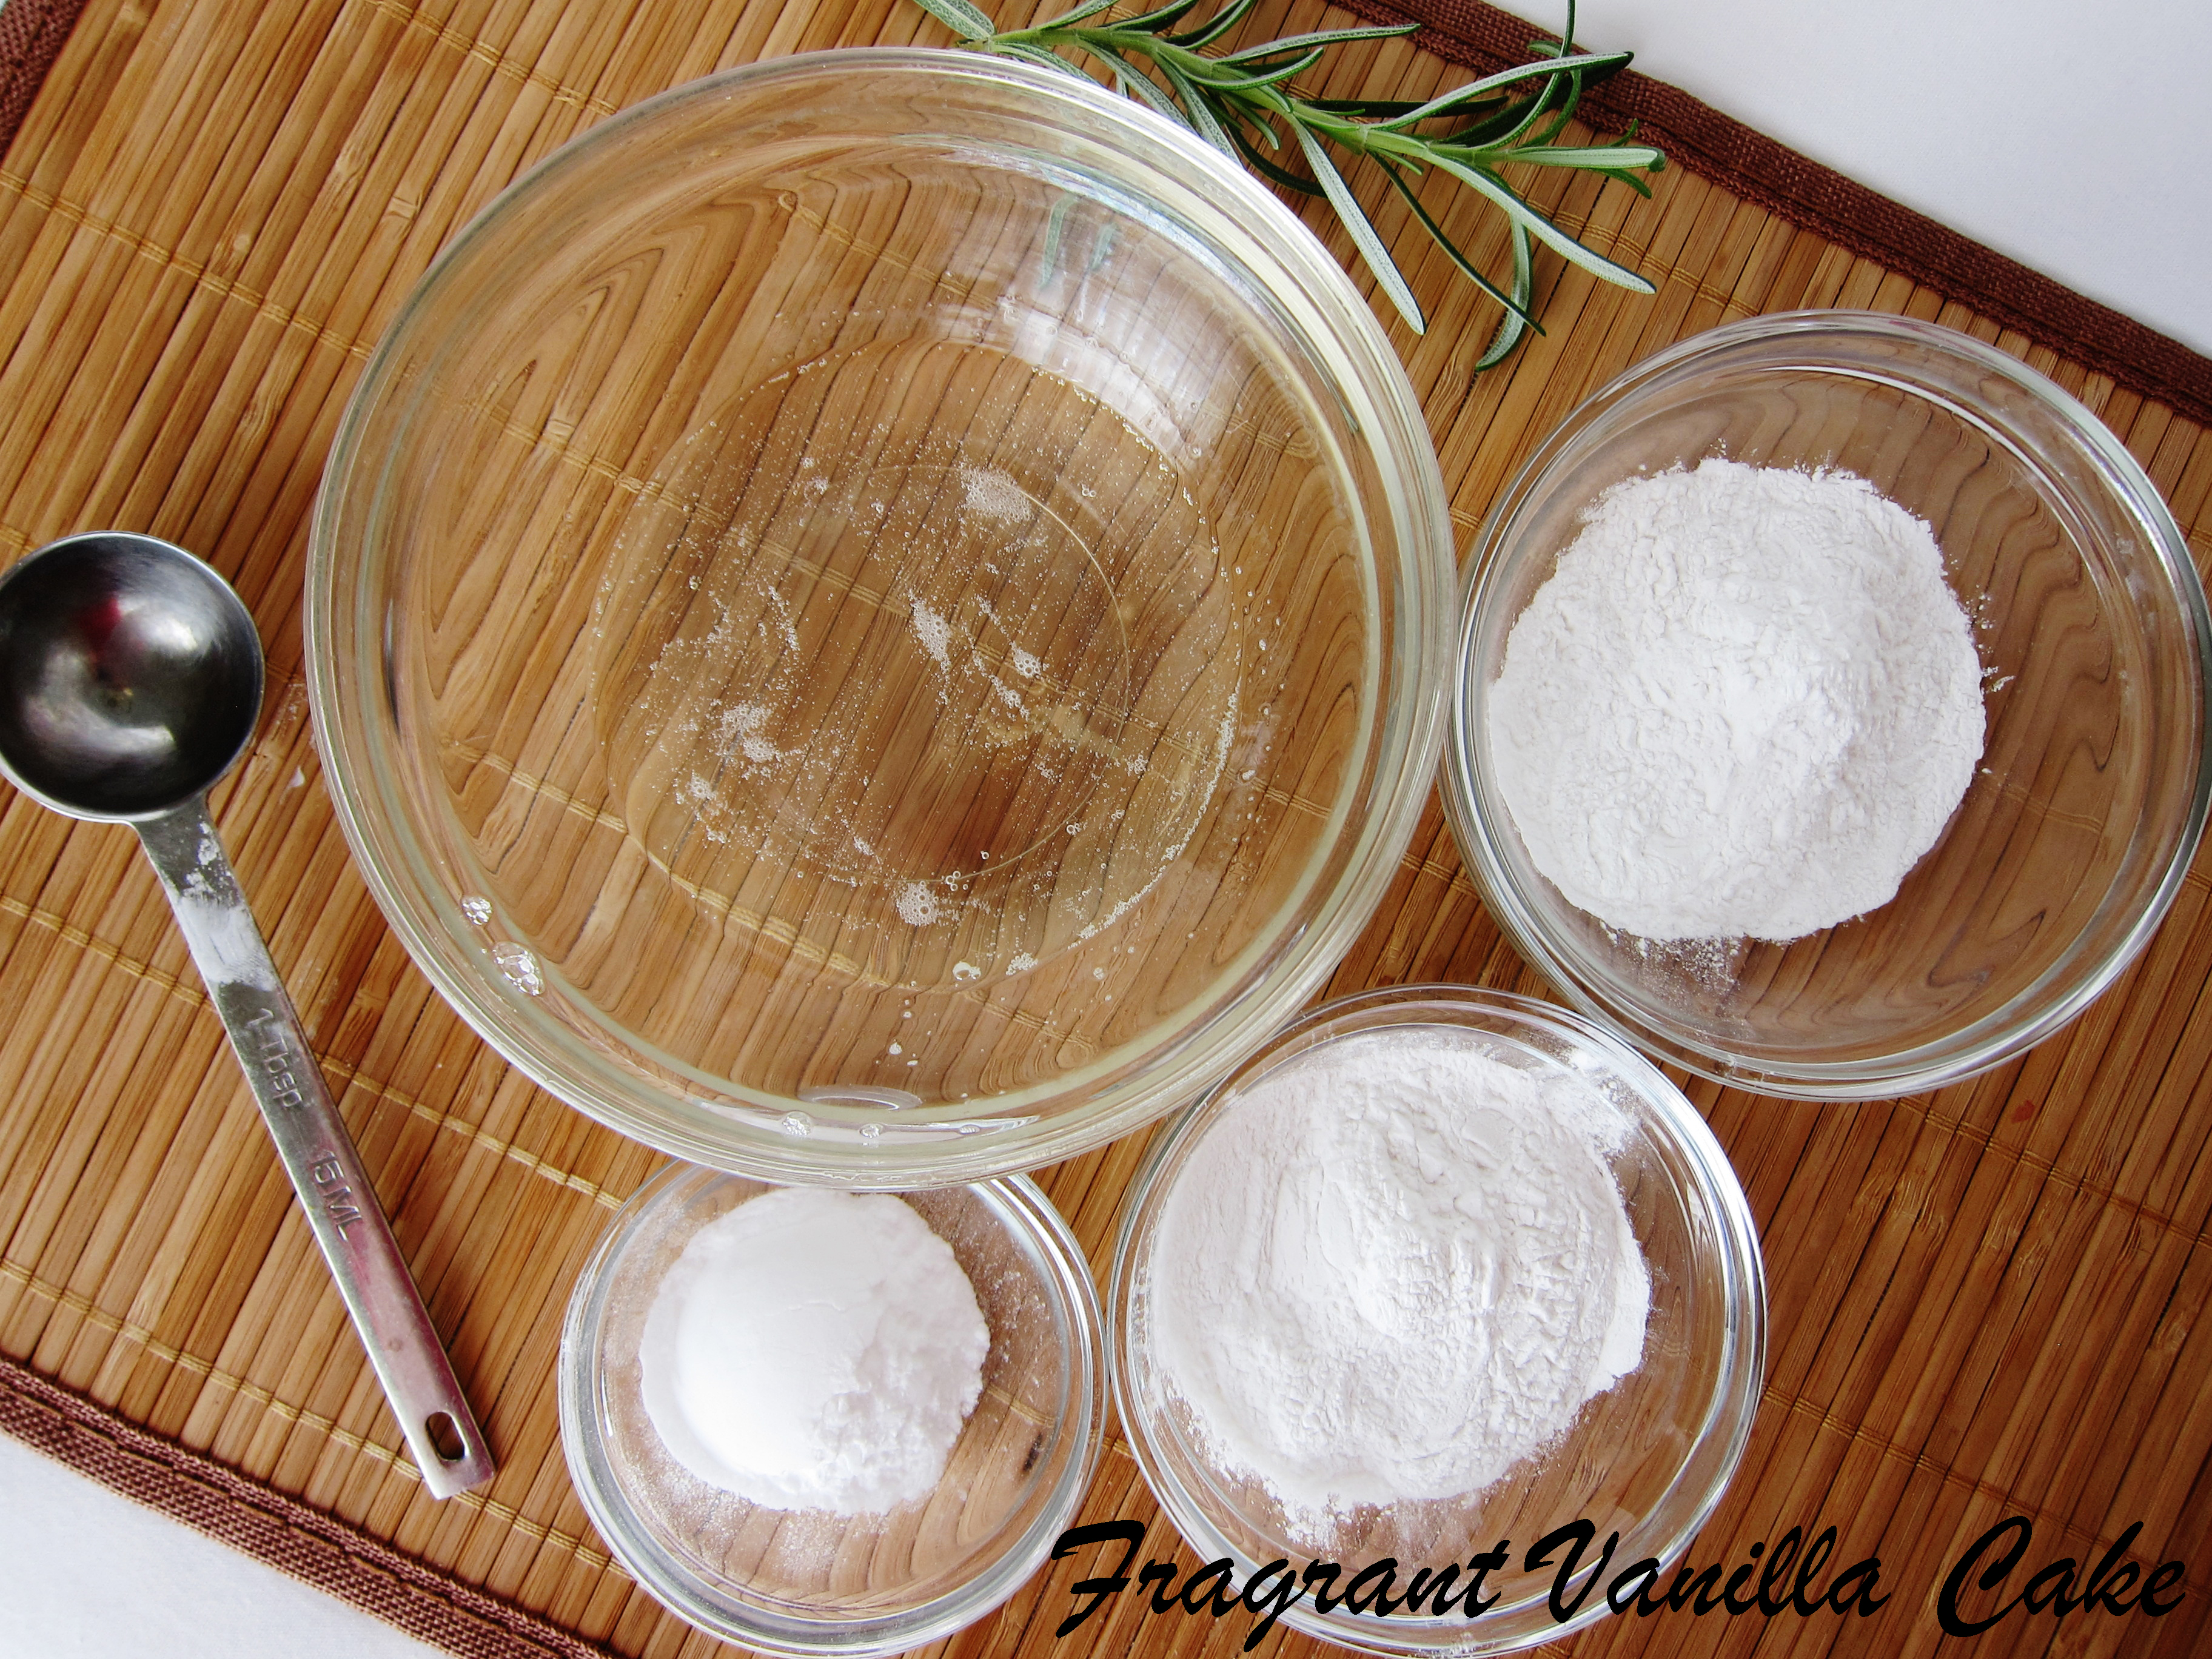
    2 1/2 cups almond meal

    1  1/2 cups finely shredded, unsweetened dried coconut

    1/4 cup vegan dark chocolate, chopped

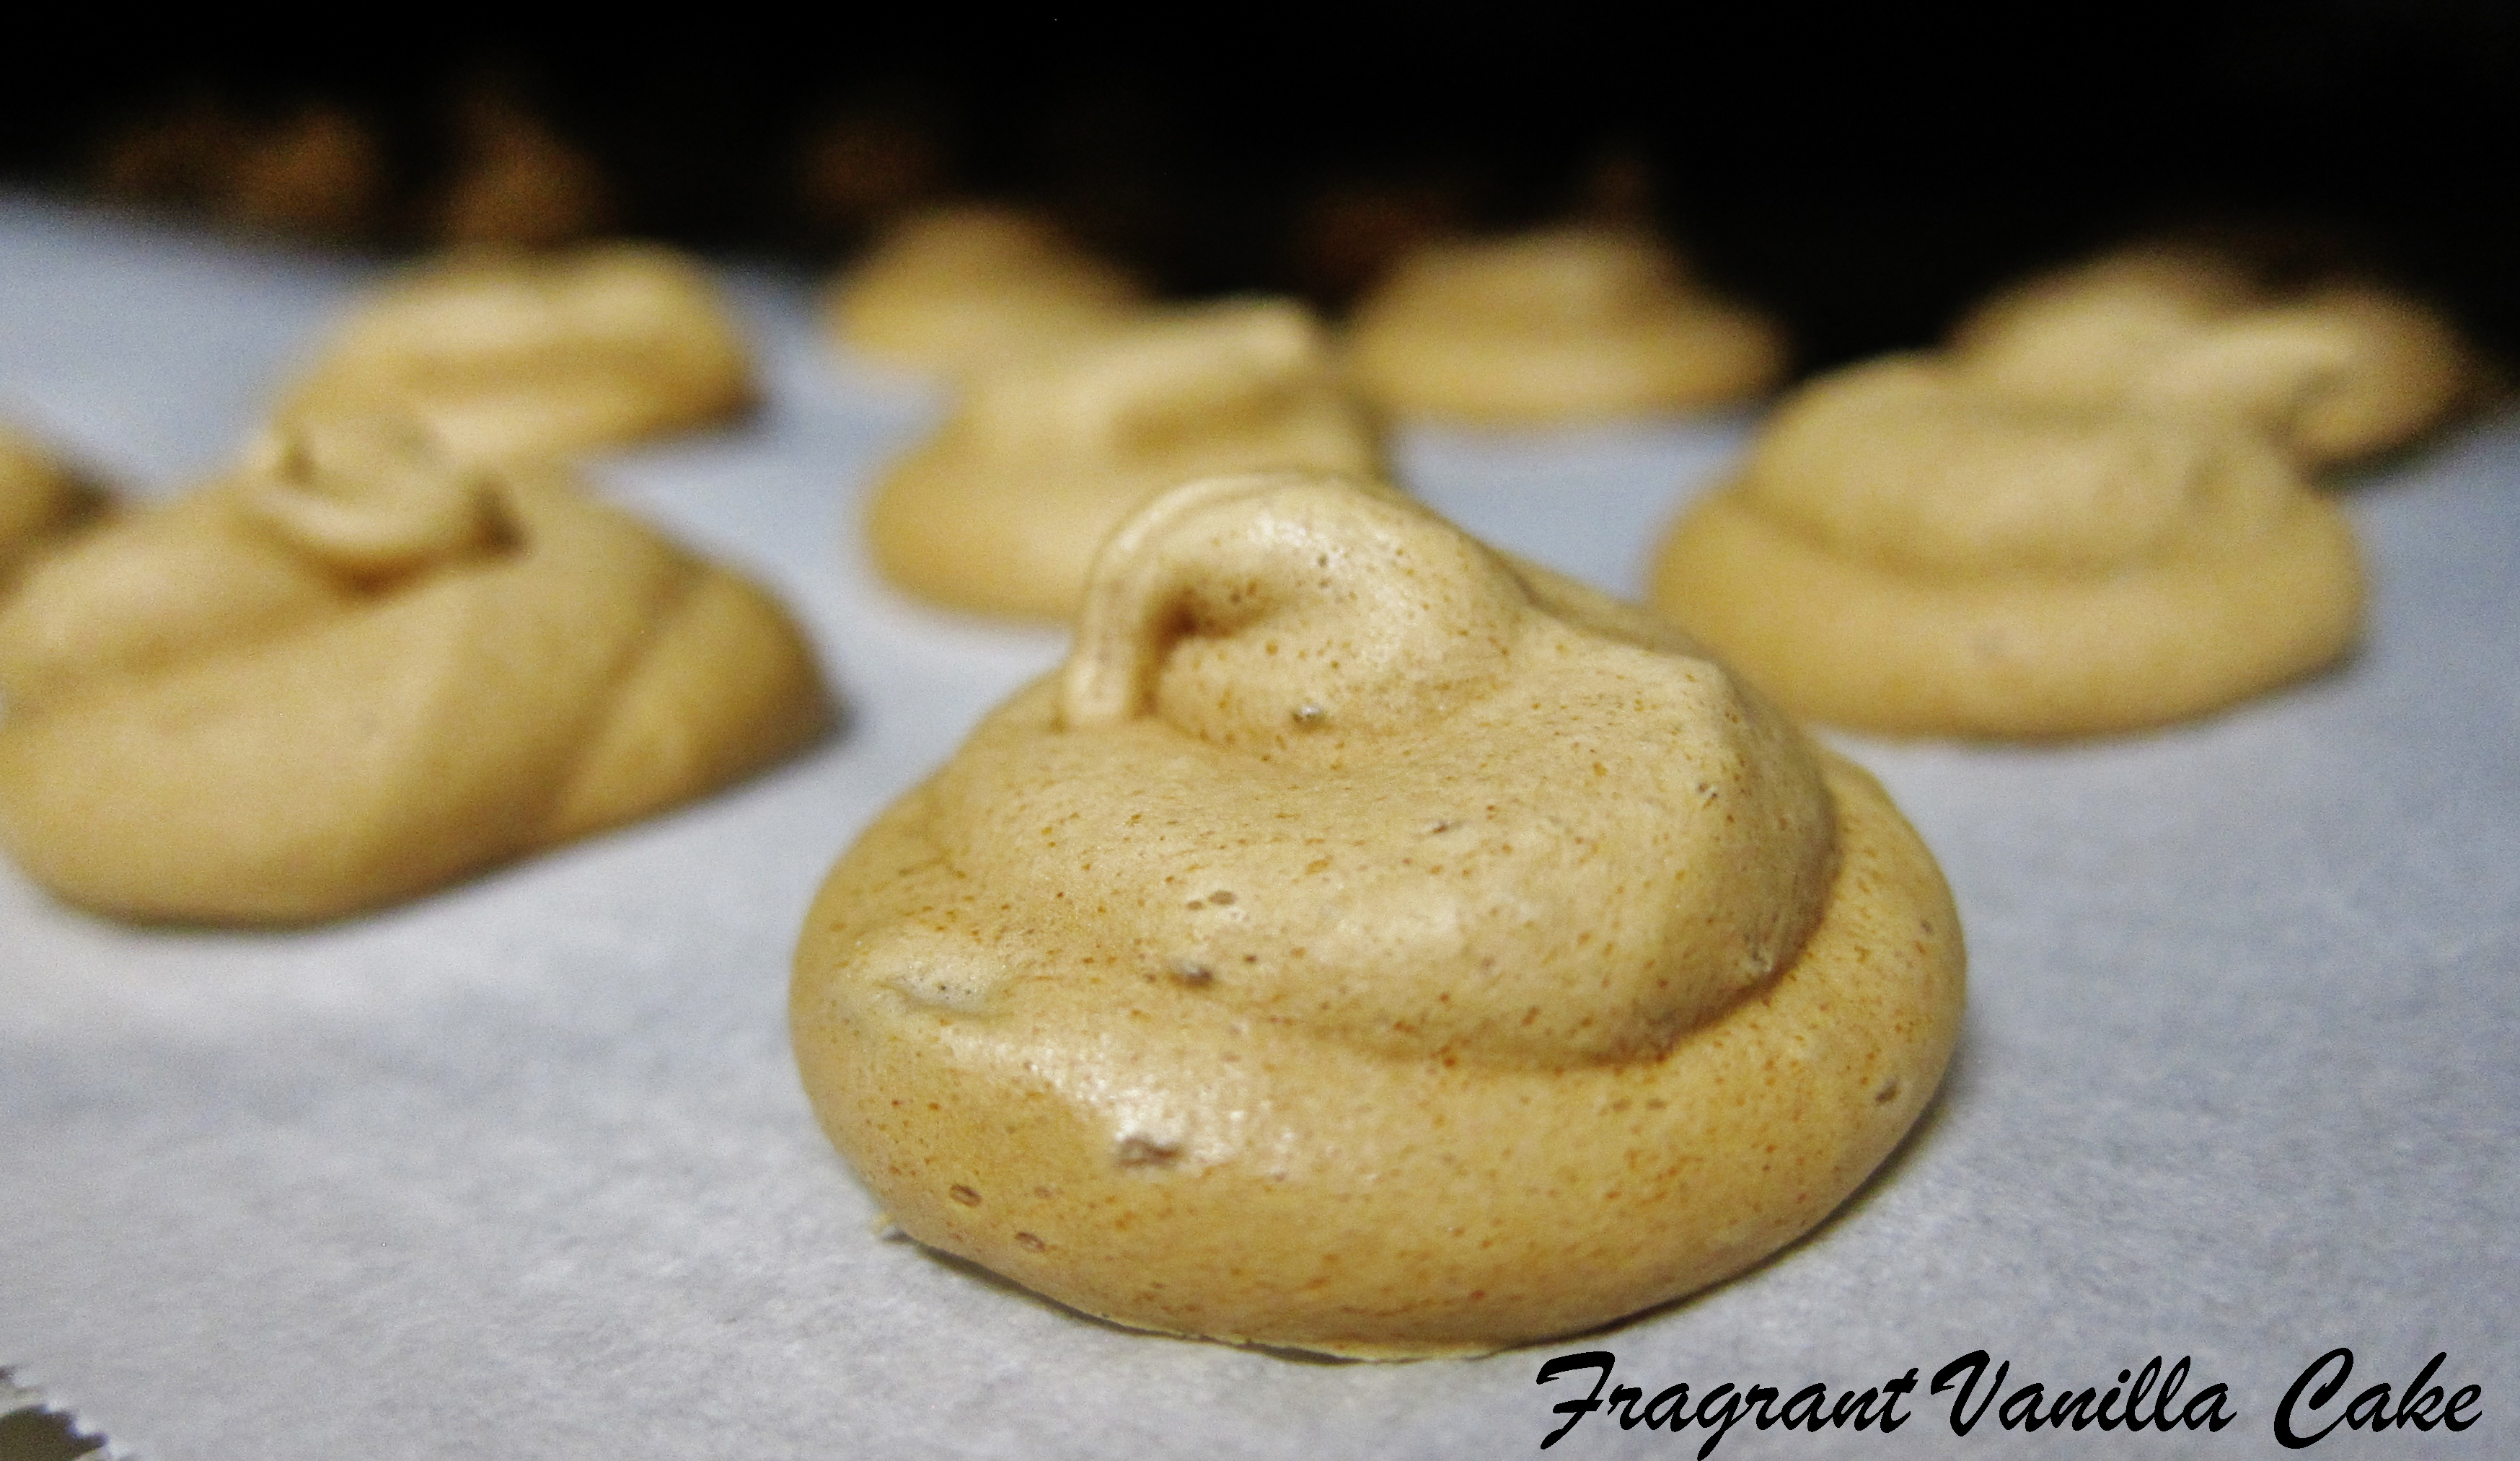
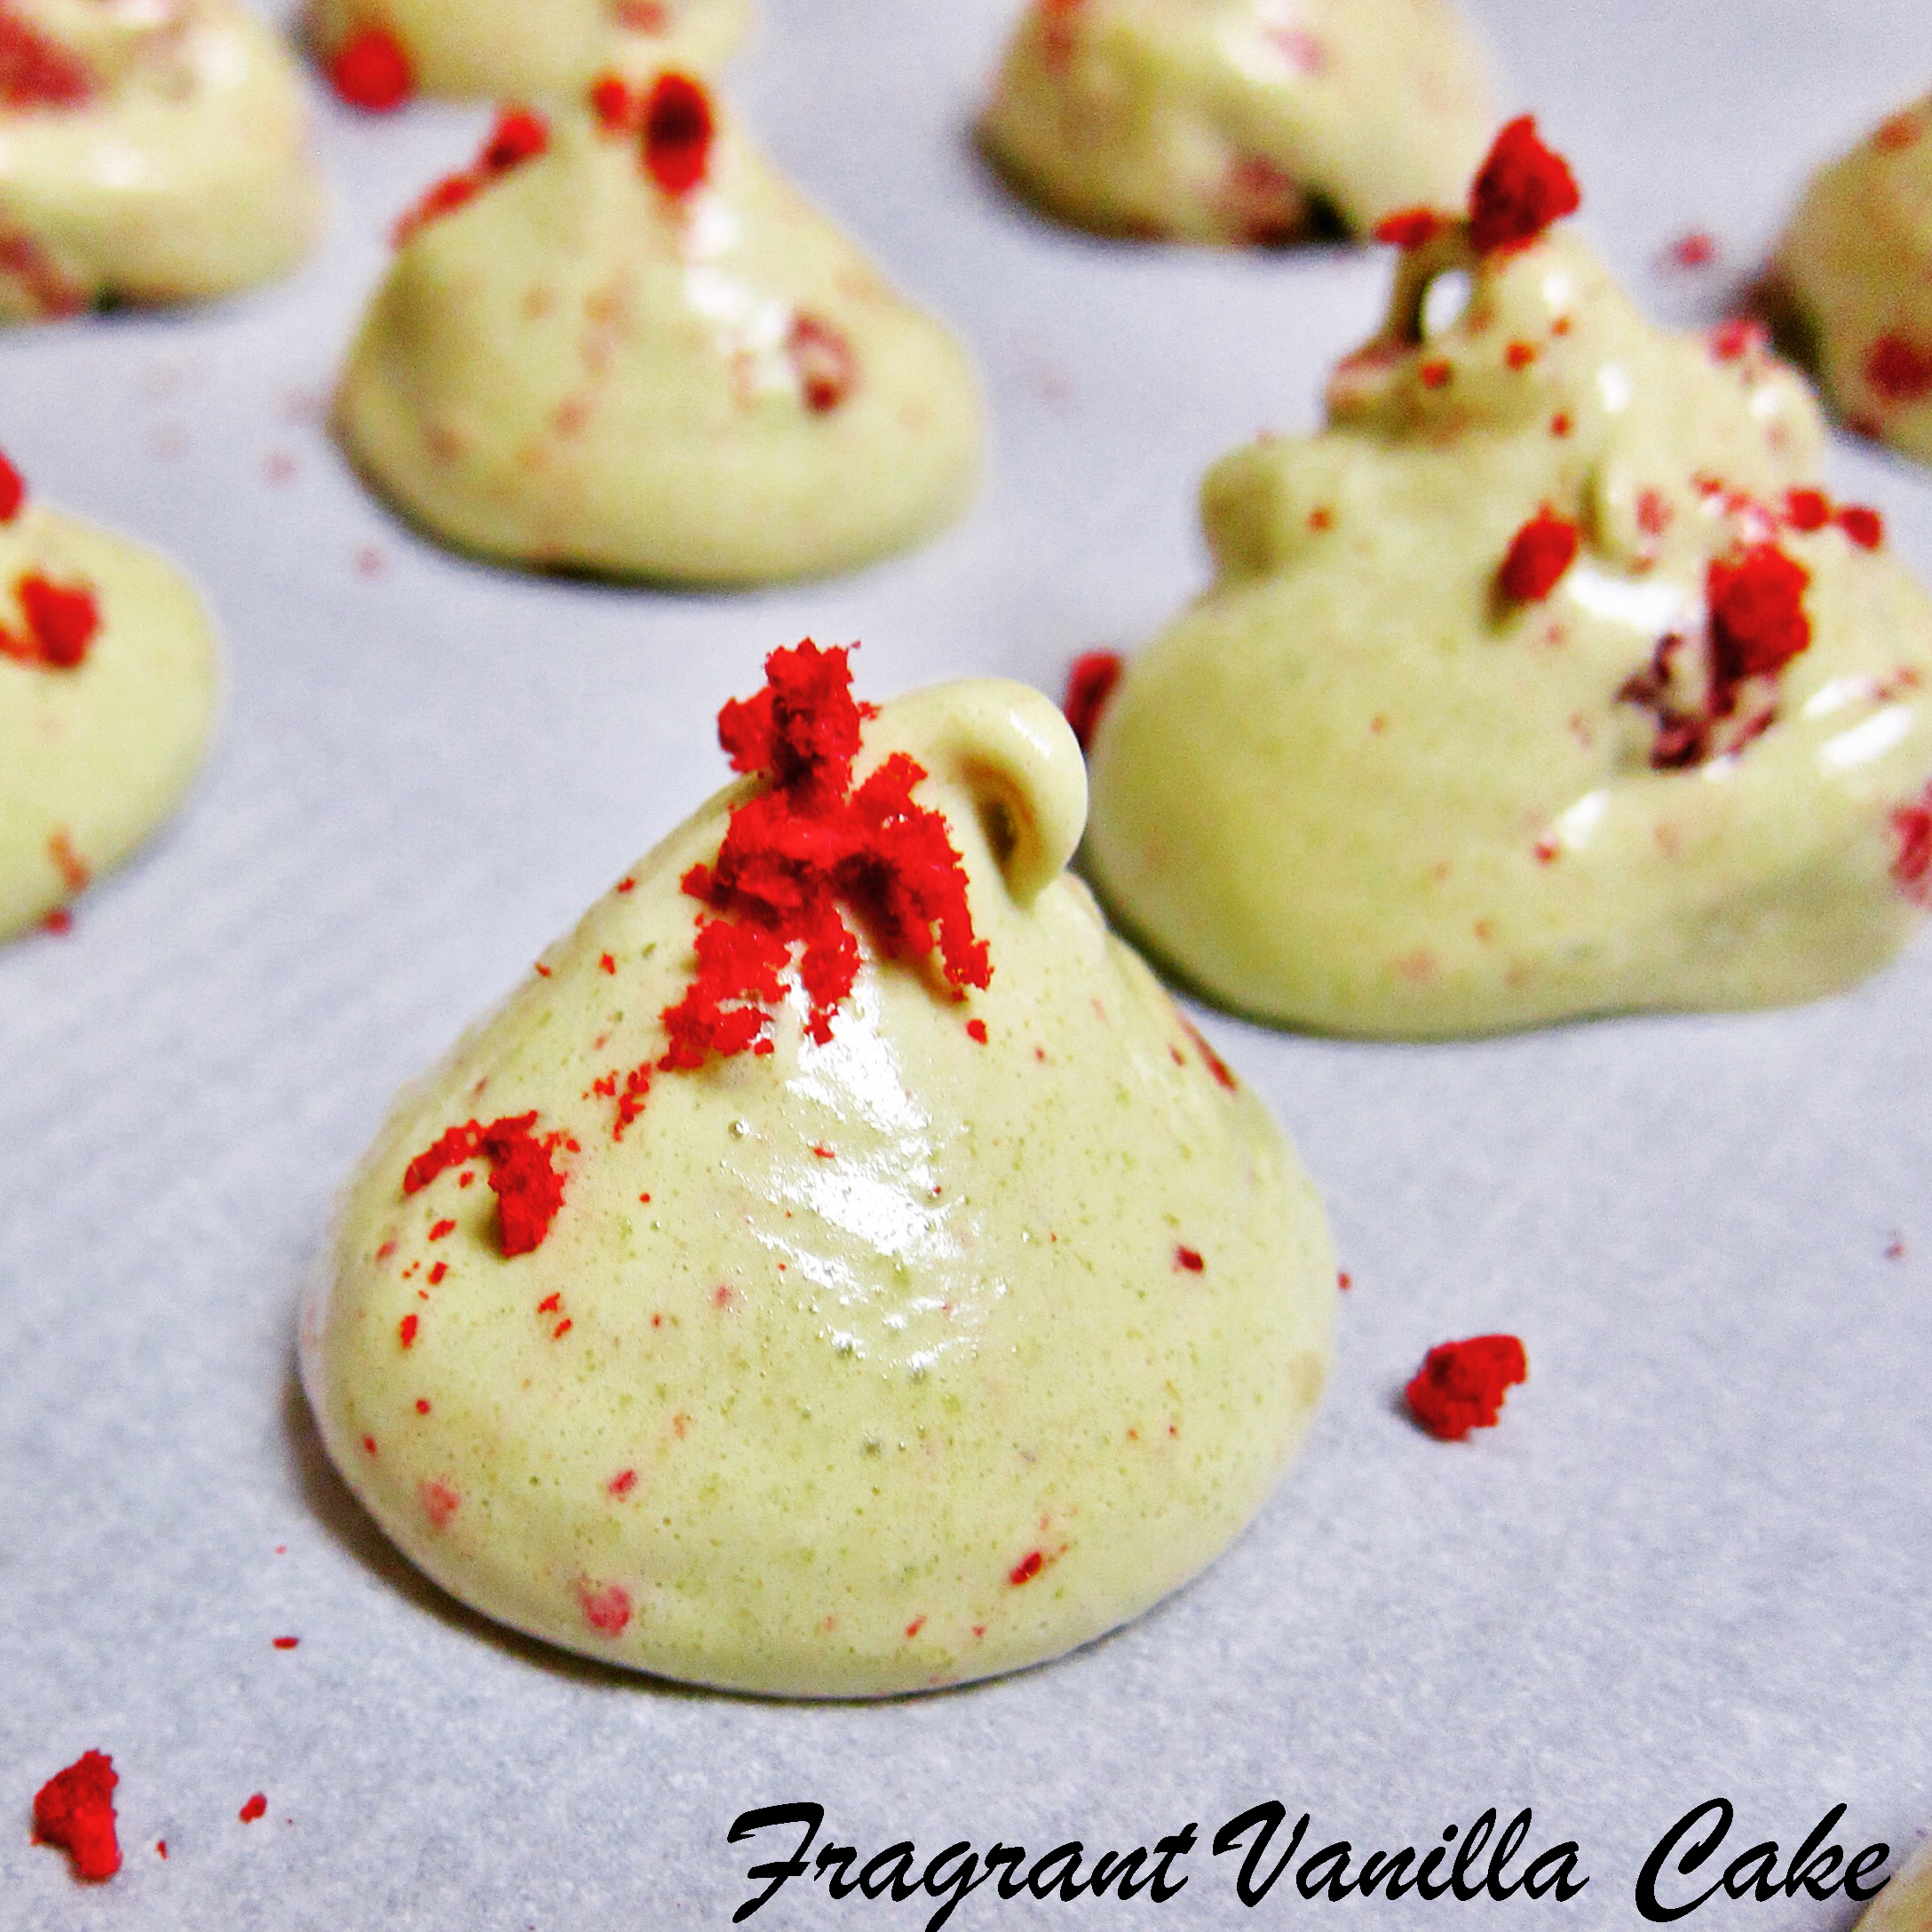
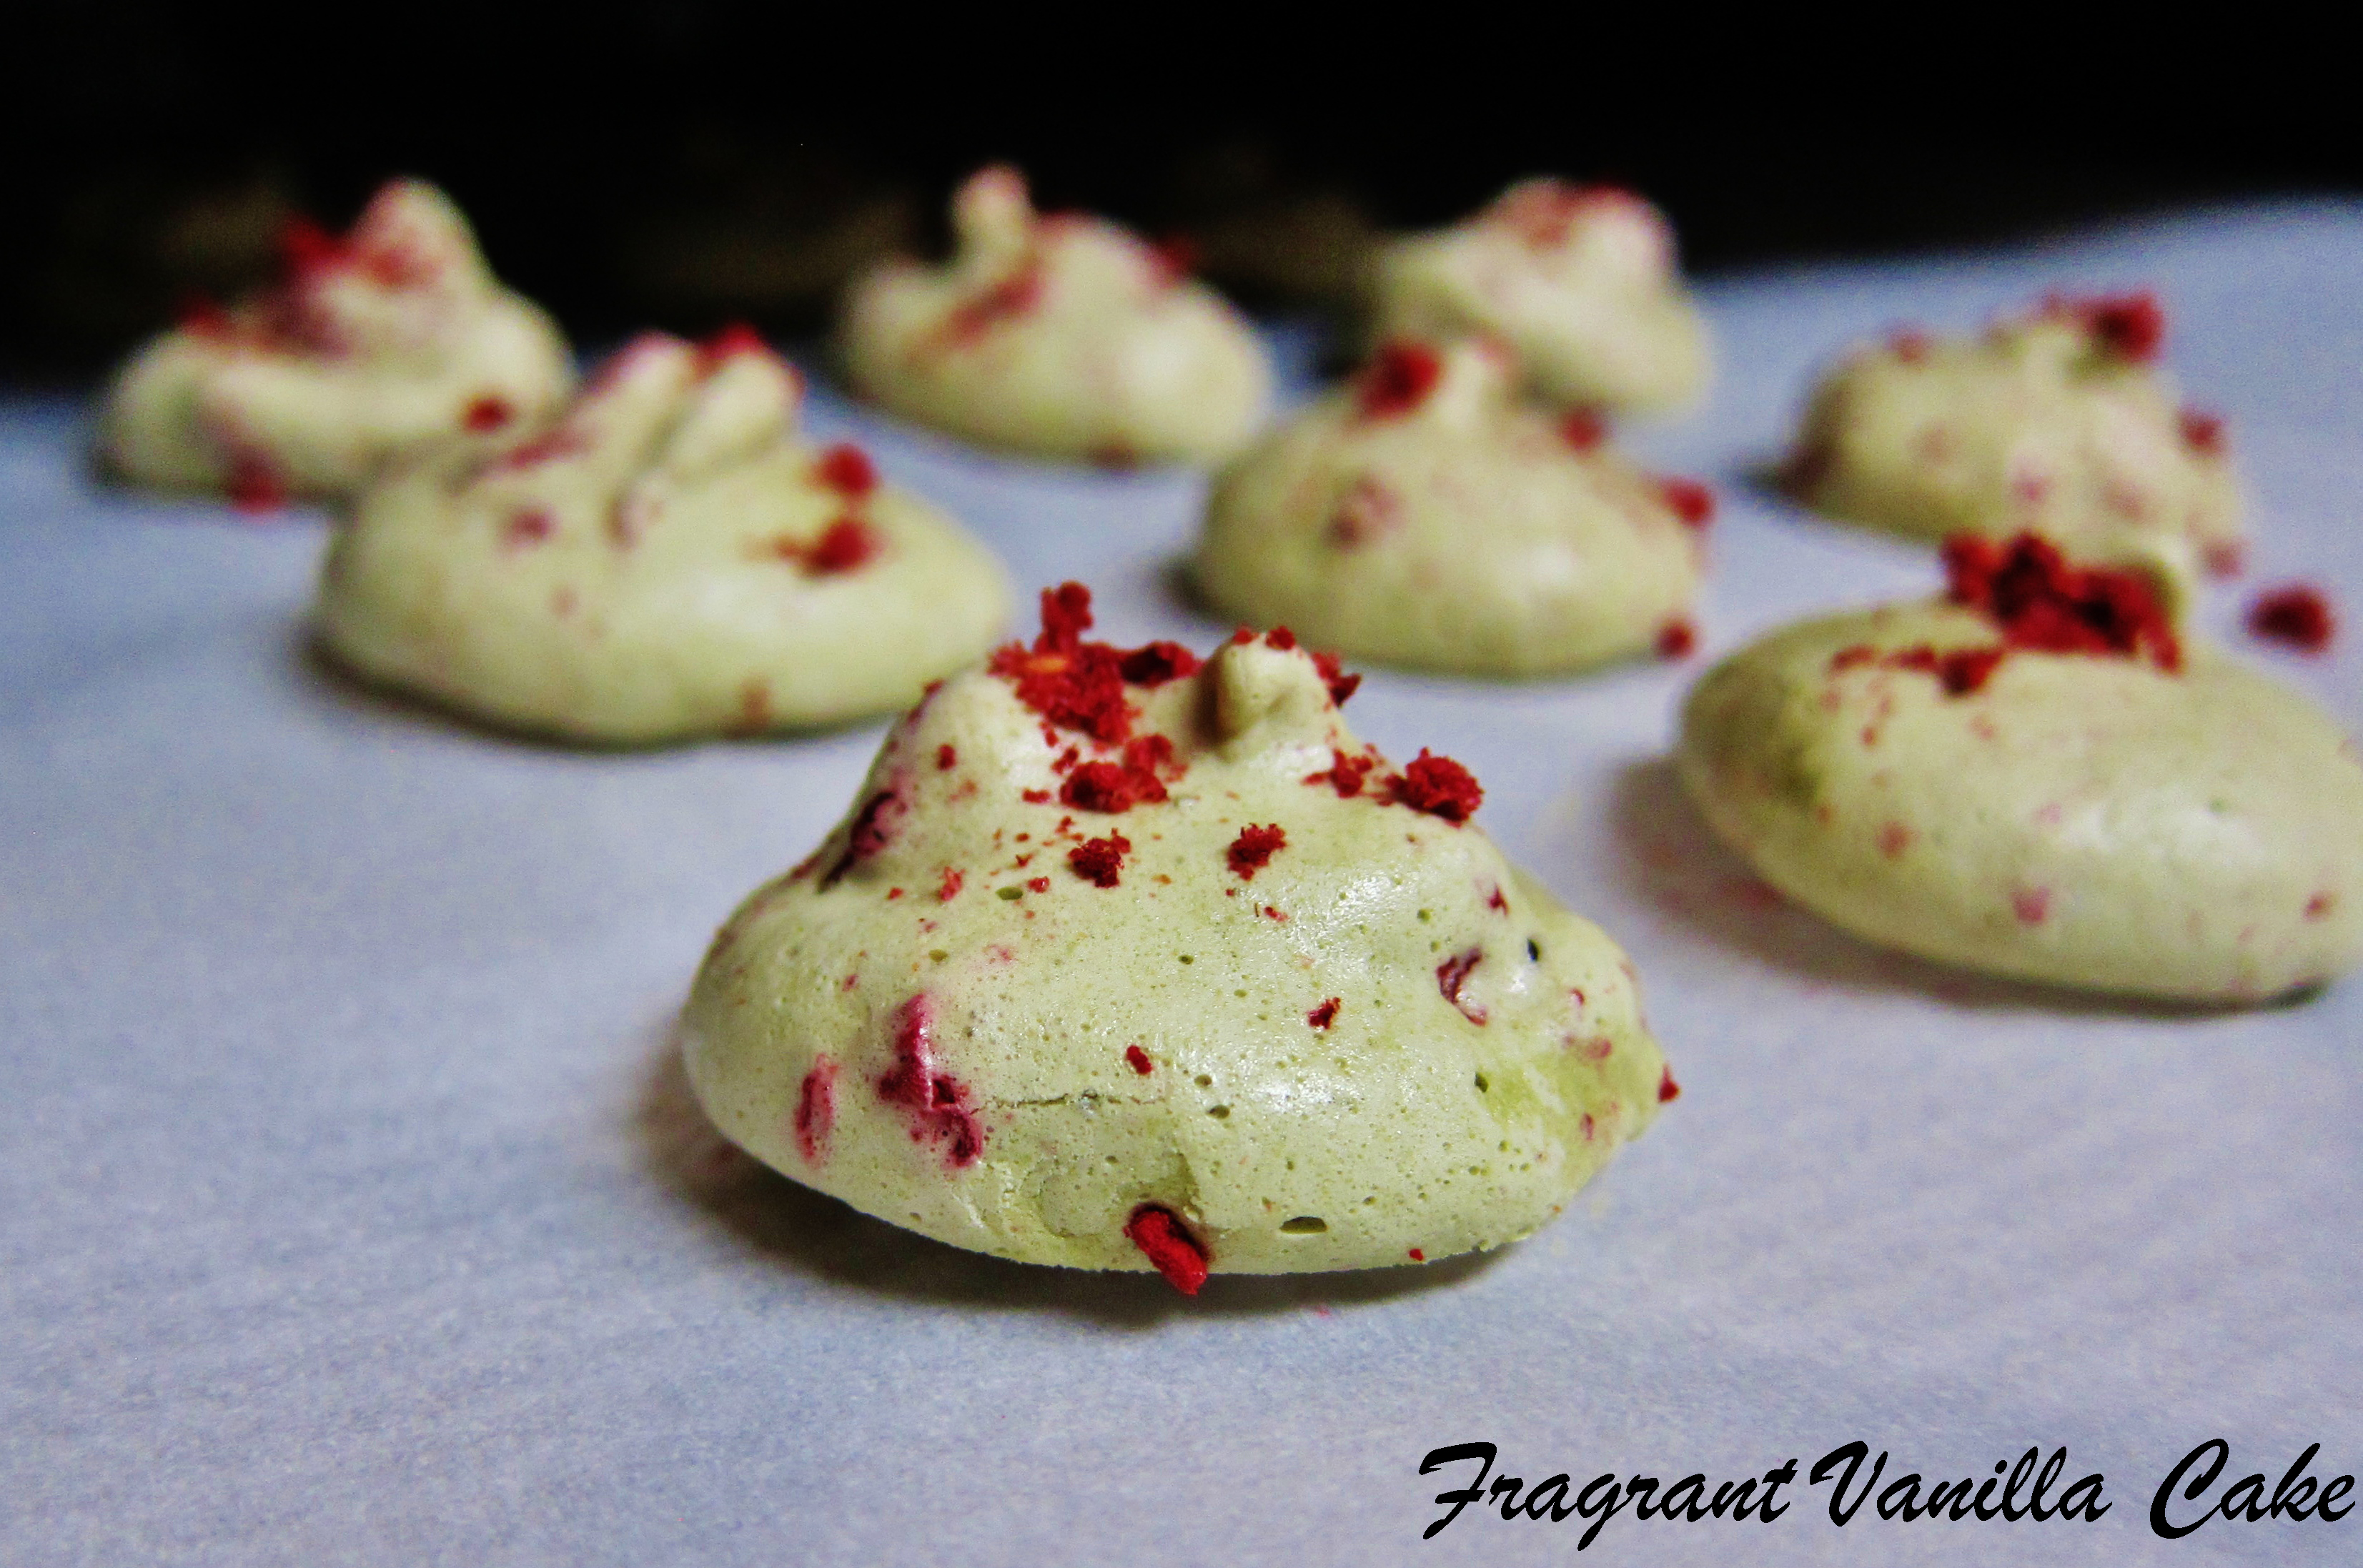
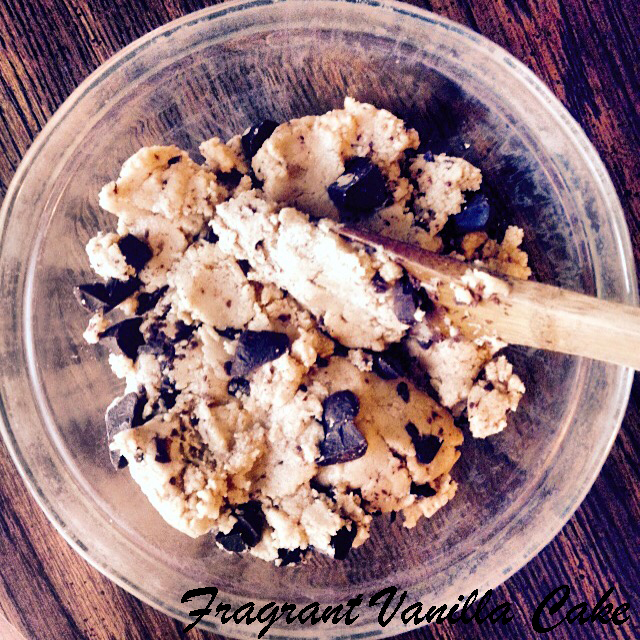
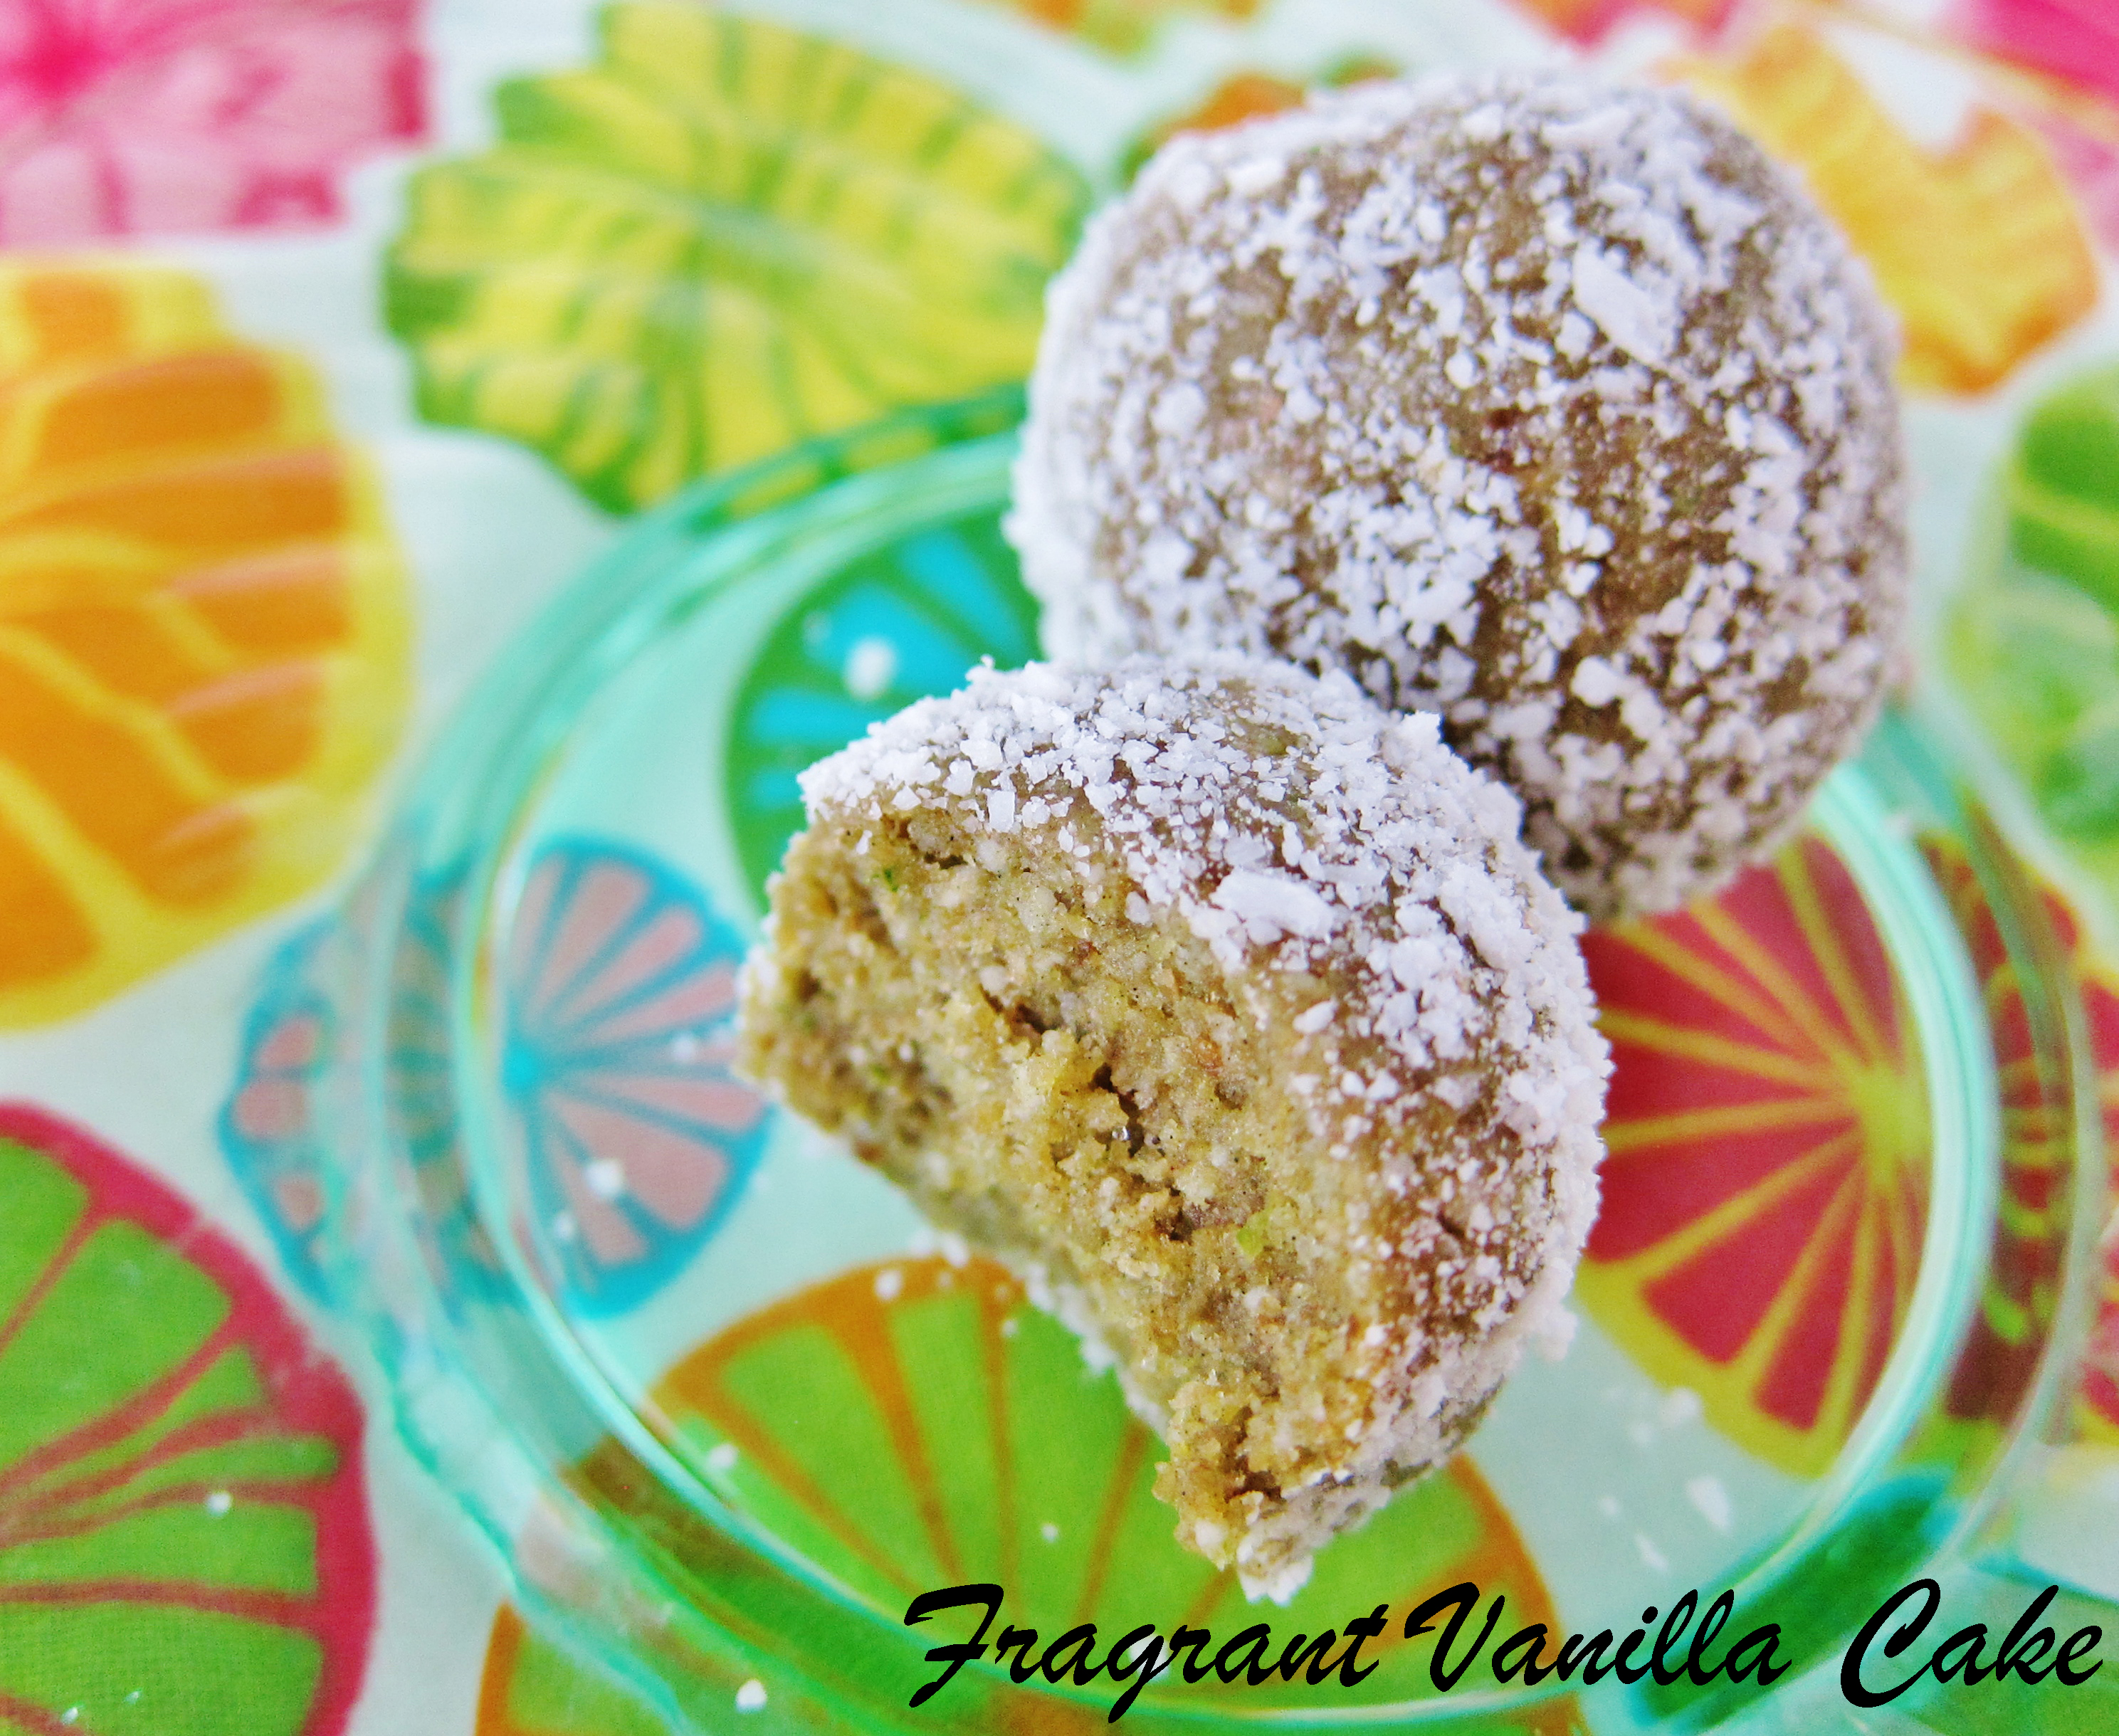
    In a food processor (you may also use a stand mixer for this, I just do not have one), whip the aquafaba to until thick, then add the guar gum and continue to whip or process to stiff peaks.  Add the sea salt, and the xylitol or sugar a little at a time through the feed tube until it is incorporated, then continue to whip until the mixture is shiny and the sugar has dissolved.  Add the vanilla, and blend until incorporated.  Add the almond meal and the coconut a little at a time, pulsing until incorporated (you can fold it in by hand, but I didn’t and it still worked out.  But if you are using a mixer with a whisk attachment you may want to so it doesn’t get all stuck in the whisk).  Scoop out the dough by the rounded Tbsp, and place on a dehydrator tray.  Dehydrate at 155F degrees for about 13-14 hours or until firm on the outside but still soft in the middle. Let cool.

    Melt the chocolate (I like to just pop mine in a bowl in the dehydrator, but if you prefer the double boiler, by all means, use that) in a bowl, and drizzle over the macaroons.  Allow to set, and enjoy!  These keep well for a couple of weeks in the refrigerator in a sealed container.

    *Aquafaba is the liquid from cooked or canned chickpeas.  If you are using liquid from the cooked, you want to make sure it is thick, not watery.

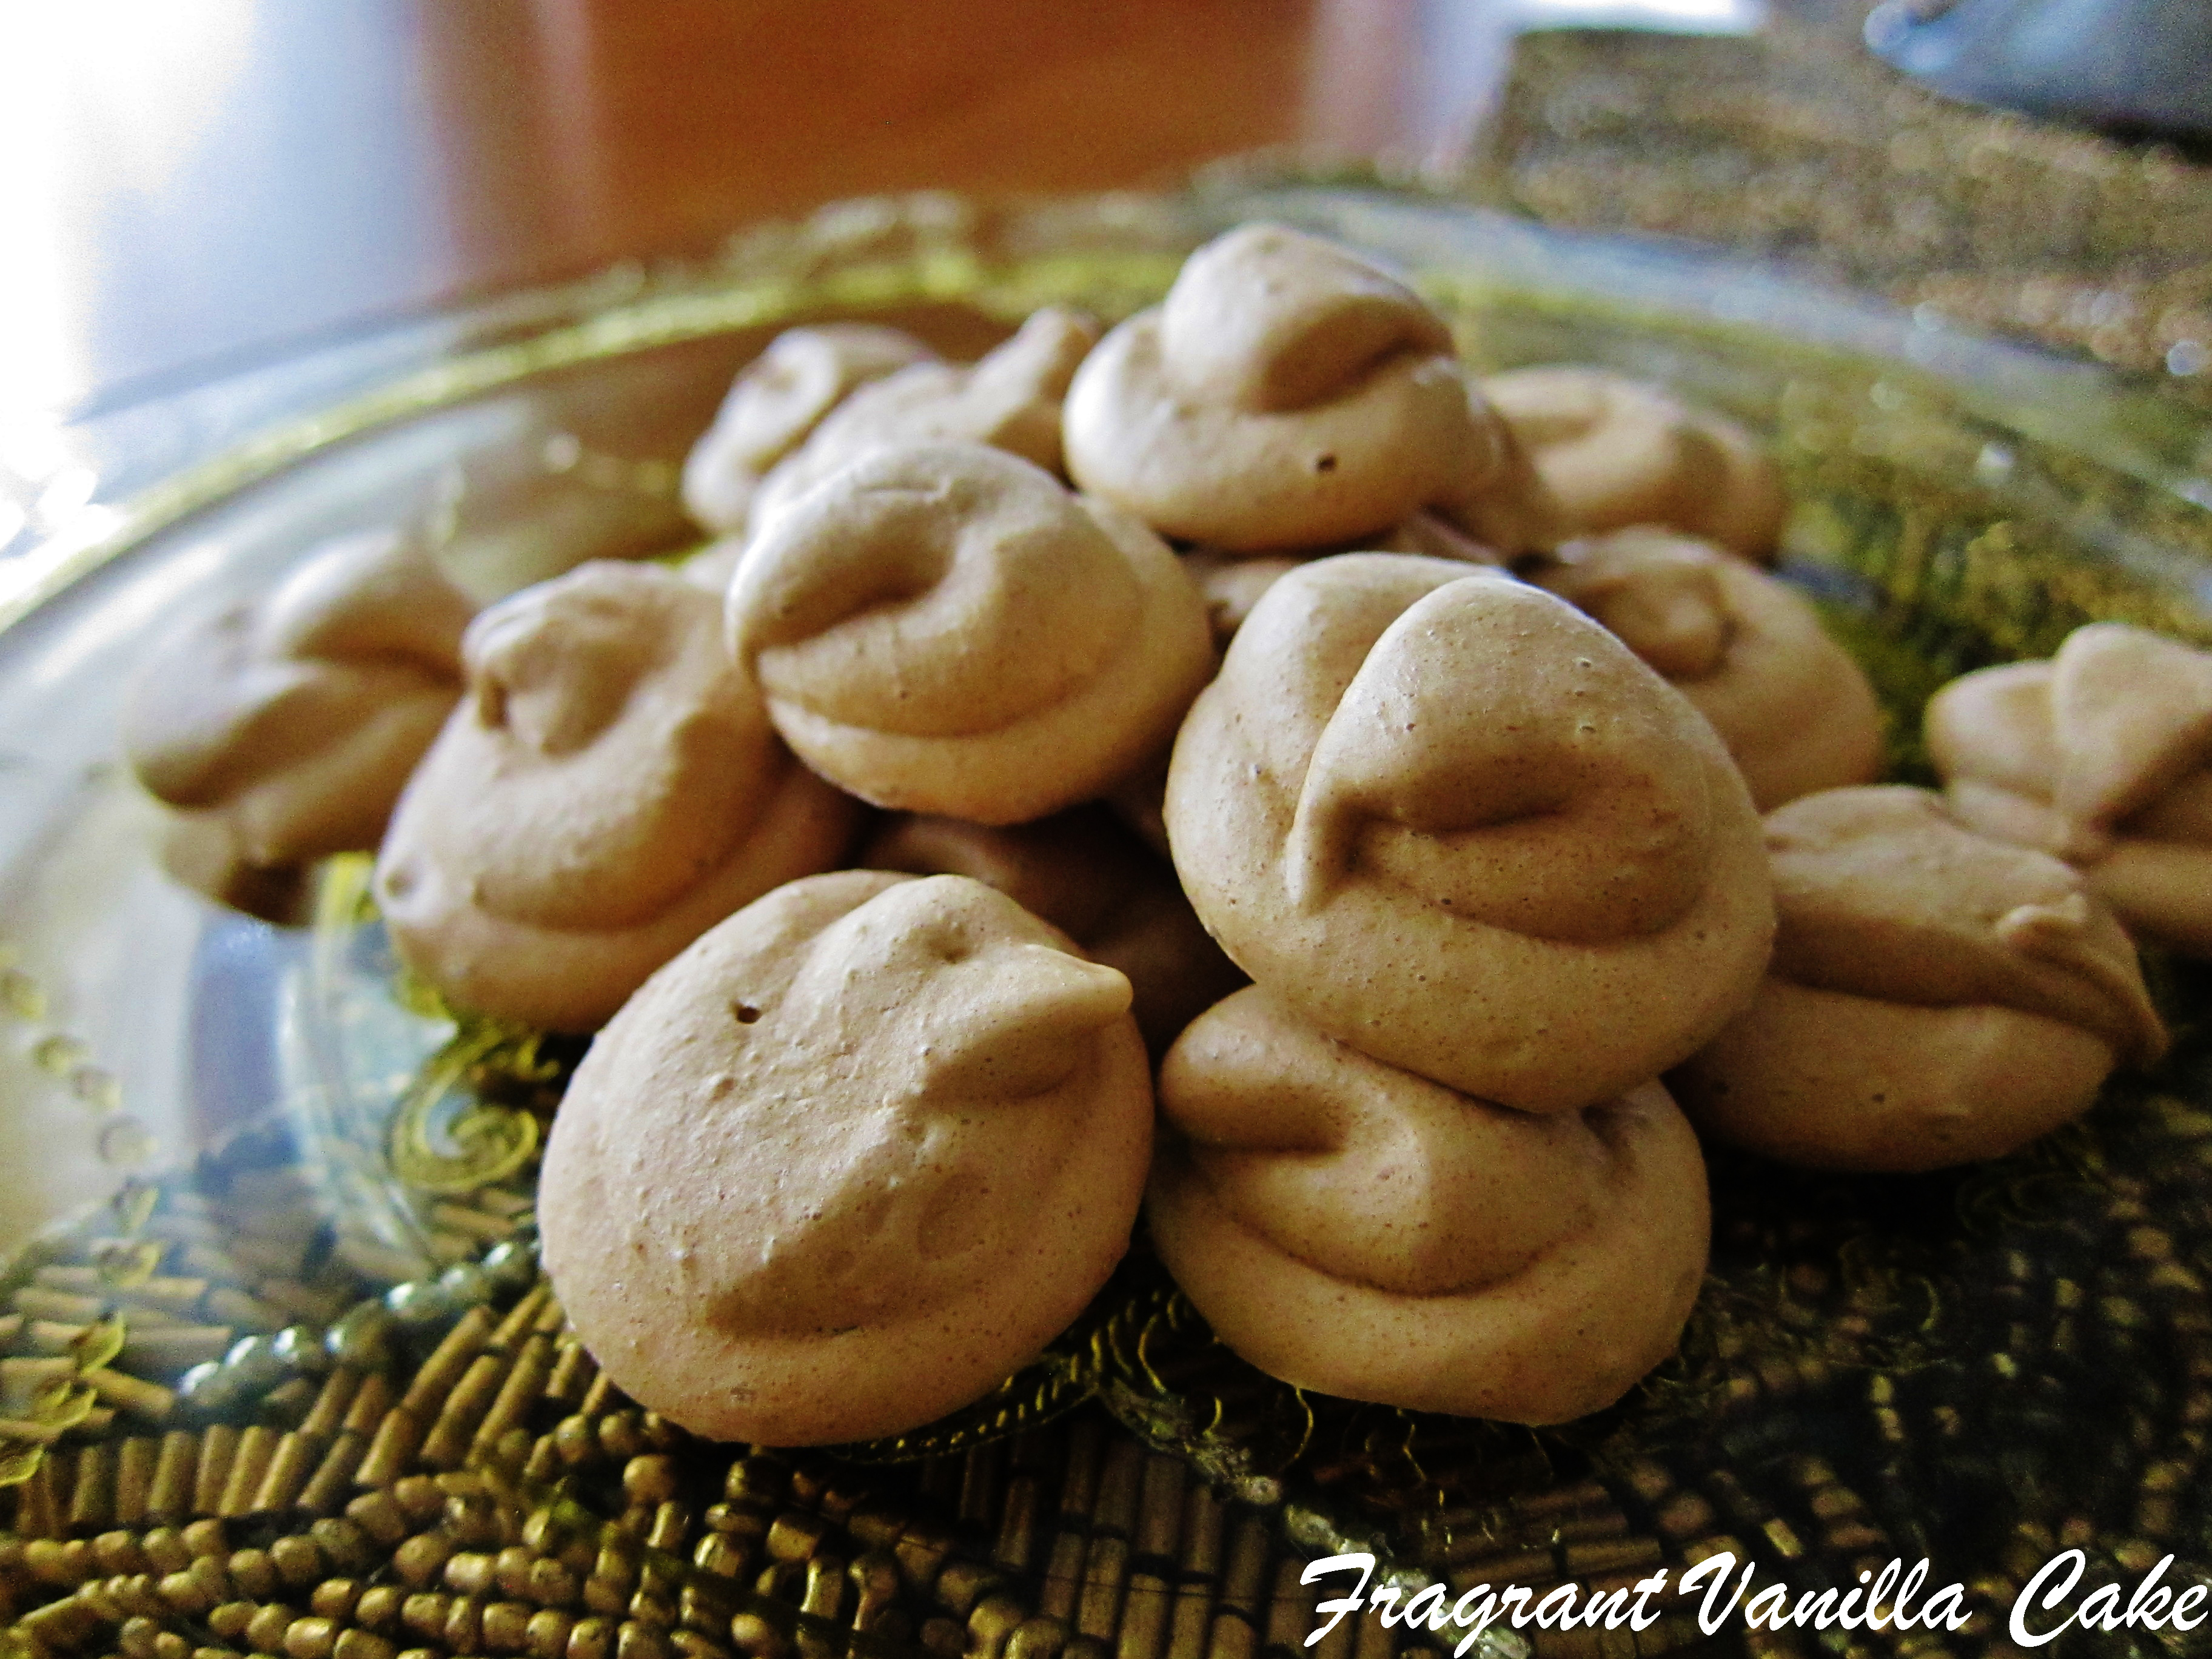
    **You want the sugar to be fine so it dissolves faster and does not deflate the mixture.  I buzz mine in the blender before using if it is a more coarse sugar. If using the coconut sugar or maple sugar, it will turn your cookies light brown.  Xylitol is toxic to dogs the same way chocolate is, so if you use it as your sweetener, do not let your dog get ahold of these cookies.


  • Raspberry Basil Mint Salsa and Spicy Lentil Chips

    Raspberry Basil Mint Salsa and Spicy Lentil Chips

    Raspberry Salsa

    My Mom always tells me about these pinto bean chips that she buys that she loves so much.  I decided to try one, and they were pretty good, but I decided that I could make something similar at home.  I do love crunchy salty snackables after all. I decided to make mine with lentils though.  Just 5 ingredients, one of them being chipotle powder because I wanted a little kick. They turned out good!  They would definitely not win any beauty contest with their looks, but I didn’t care as long as they were tasty.  The salsa I made to go with them more than made up for the ugly but tasty chips though, it was beautiful and colorful.

    Raspberry Salsa 2

    I had some raspberries, mint and onions from the farmer’s market and some basil from a pot on my patio, and I combined it all plus a few more things to create one of the most delicious salsas I have ever eaten.  It was sweet and tart with a little kick, and so refreshing from the herbs!  Both of these recipes I had to share with you, so enjoy! For the chips I have directions for both cooked and raw so everyone can make them.

    Raspberry Salsa

    Spicy Lentil Chips

    Makes about 4 cups

    1 cup green lentils

    filtered water

    1/3 cup filtered water (or as needed)

    2 Tbsp ground flax seed

    1/2 tsp sea salt

    1/2 tsp ground chipotle powder

    Rinse the lentils, then place in a pan covered by a few inches of water.  Bring to a boil, then lower to a simmer and cook until the lentils are tender, about 3-40 minutes.  Drain, then add to a food processor along with other ingredients. Process until smooth (adding a little more water if too thick, you want to be able to spread it into a thin layer).

    Spread out on a lined dehydrator tray, and dehydrate for about 4 hours at 155F until crispy.

    If you would like to make these chips raw, then sprout your lentils.  Soak them in filtered water for 8 hours in a sprouting jar, then drain well and let sit and sprout for about 2-3 days until little tails appear (rinsing them 2 times a day and draining well). Continue with the blending and spreading out on a tray like in the above recipe, but when it comes to dehydrating, dehydrate at 115F for 20-24 hours until crispy.

    Both chips store in an airtight container for a month at room temperature.

    Raspberry Basil Mint Salsa

    Makes about 2 1/2 cups

    2 cups fresh organic raspberries

    2 scallions, sliced

    1 jalapeno, minced

    1/4 cup diced red onion

    1 garlic clove, minced

    1/4 cup fresh mint, chopped

    1/4 cup fresh basil, chopped

    3 Tbsp lime juice

    sea salt to taste

    Combine all ingredients in a bowl, and mix until combined. Keeps in the refrigerator for up to a week.


  • Savory Vegan Zucchini Cakes with Creamy Roasted Tomato Sauce

    Savory Vegan Zucchini Cakes with Creamy Roasted Tomato Sauce

    Savory Zucchini Cakes 2

    I got a huge zucchini in my CSA box, and I had to make something with it.  My oven was broken, so zucchini cake or bread was out of the question.  But what else could I make?  I really did not want to make something sweet anyhow, I thought using it for dinner was a good idea.  I could have made raw zucchini noodles but I didn’t feel like that.  Finally after thinking about it all day at work, it dawned on my while I was out walking (my best time to think).  Savory pancakes!  I have made them with other shredded veggies in the past, but not zucchini.

    Savory Zucchini Cakes 1

    I ended up using chickpea flour for the batter because I love the flavor it has in dishes like this, and I wanted a good dose of protein in my dinner.  I used aquafaba (chickpea liquid in place of the usual eggs to keep it light as well. I also threw in some garlic and onions which were also in my CSA box, along with some basil. The pancakes were awesome!  I served them with a luscious roasted tomato cream, and it was the perfect hearty dinner.  Yes, I like breakfast for dinner.  I could go for these any time of the day though, and if you happened to make them for breakfast they would hold you and energize you for quite a while!

    Savory Zucchini Cakes 3

    Savory Vegan Zucchini Cakes with Creamy Roasted Tomato Sauce

    Serves 3-4

    Sauce:

    2 medium tomatoes, cut into wedges

    3/4 cup full fat coconut milk (from the top of the can)

    1/4 tsp sea salt (or to taste)

    Pancakes:

    1 3/4 cups chickpea flour

    1 cup aquafaba (chickpea liquid)

    1/4 cup chopped onion

    2 garlic cloves, minced

    1/2 tsp sea salt

    1/4 tsp ground chipotle powder

    1/4 cup chopped fresh basil

    3 cups shredded zucchini

    olive oil for cooking

    Place the tomatoes in the oven on an oiled sheet pan, and roast at 400F degrees until soft and starting to brown, about 20 minutes.  Or, you may use the dehydrator, and “roast” them for 4 hours until soft if you do not want to heat up the oven (which is actually what I ended up doing since my oven was broken). To make the sauce, combine the tomatoes and all other sauce ingredients in a food processor and process until smooth. Set aside.

    To make the pancakes, whisk  the aquafaba a little at a time into the chickpea flour until smooth.  Add the onion, garlic, sea salt, chipotle, basil, and whisk until combined.  Stir in the zucchini until well incorporated.

    Pre heat your oven (or see dehydrator option below) to 150F-200F, and heat a pan over medium heat.  Add a little olive oil to the pan, then 1/3 cup batter.  Cook for about 3-4 minutes on the first side, until browned, then flip and repeat with the second.  Place in the oven to keep warm while you do the rest (alternatively you may place them in a 155F degree dehydrator on the trays, which is what I did since my oven was broken). Once your pancakes have finished cooking, serve them warm with the sauce!


  • Vegan Chocolate Dipped Basil Mint Sugar Cookies (gluten free)

    Vegan Chocolate Dipped Basil Mint Sugar Cookies (gluten free)

    Basil Mint Sugar Cookies 1

    I had lots of beautiful basil and mint from my CSA box, and I wanted to make something delicious with it. Sure, some of it made its way into salads, but I wanted something sweet as well. I couldn’t get my mind off of sugar cookies.  Eric and I had spent most of the day at the Minnesota Landscape Arboretum walking and it was really hot and humid, so you would think the last thing I would want to do was heat up an oven…but it sounded relaxing.

    Basil Mint Sugar Cookies 2

    I decided to just go for it with the sugar cookies, and include the basil and mint.  I have seen mint cookies before which were a beautiful green, but unfortunately it was artificial.  So, I wanted to create a version of my own with real mint and add in some basil as well as my own twist.  I used xylitol in these in place of my usual coconut sugar in order to insure that they stayed green.  I did not know if they would or not, since I have baked things with natural color ingredients and they faded…so I had my fingers crossed on this one.  The dough was sooo good!  And luckily, they baked up beautiful!  The color stayed in tact!

    Basil Mint Sugar Cookies 3

    I decided to dip them in chocolate to make them even more delicious than they already were.  These were pretty fragrant cookies, and even better tasting with the refreshing mint and aromatic basil.  If you are apprehensive about the use of basil in cookies, trust me on this one, it is amazing.  Maybe you have an over abundance of these herbs in your garden and are looking for uses.  In that case, I envy you and you need to try these out!

    Basil Mint Sugar Cookies 4

    Vegan Chocolate Dipped Basil Mint Sugar Cookies (gluten free)

    Makes 16 large cookies
    2 Tbsp ground flax seed
    1/4 cup plus 2 Tbsp filtered water
    1 cup virgin coconut oil, warmed to liquid
    1 cup fresh mint leaves
    1 cup fresh basil leaves
    1 1/2 cups xylitol (coconut sugar may be used but keep in mind the cookies will not be the same pretty green color)
    1 teaspoon vanilla extract
    1 teaspoon baking soda
    1/2 teaspoon sea salt
    3 1/2 cups all purpose gluten free flour
    In a small bowl, whisk together the flax seed and filtered water.  Set aside in the refrigerator for 15 minutes.
    Meanwhile, Combine the xylitol, mint and basil in a food processor and process until uniform in color and the herbs have blended into the xylitol. In a large bowl, coconut oil with xylitol and mix until well combined.
    Mix in the vanilla extract and flax mixture until well combined.
    Add the baking soda and salt then the flour, a cup at a time, mixing between each addition, until well combined.
    To bake, Preheat your oven to 350 degrees. Line 2 large baking sheets with parchment paper. Roll balls into about 2 inch balls, and place on prepared cookie sheets a couple inches apart. Bake for about 10-12 minutes, until puffed and just starting to brown slightly.  Remove from the oven and let cool on the pan a few minutes, then remove to a wire rack to cool.  Repeat with remaining cookies and let cool completely.
    Melt the chocolate in the top of a double boiler (or your preferred method), and dip half of each of the cookies into the chocolate allowing the excess to drain off.  Set on a parchment lined tray to set the chocolate (it will set faster if you pop them in the freezer for about 5 minutes).


  • Vegan Strawberry Shortcake Shooters

    Vegan Strawberry Shortcake Shooters

    Strawberry Shortcake Shooters 1

    The strawberries are amazing this year!  I have been eating them up like crazy, but I like to do a little something special with them once in a while in the form of dessert too.  Last week I wanted to make something easy and fun with them and Eric suggested shooters.  Like alcohol shots. Since I am not into that sort of thing, I compromised and made my type of shooters.  Dessert ones.  He was happy anyway, because they were delicious.  I ended up making strawberry shortcake shooters…so much less work than regular strawberry shortcake from scratch, and they tasted just as good.

     Strawberry Shortcake Shooters 3

    I made a simple “cake” base to line the bottom of the glasses, and it was delicious, just like cake but not so much sugar and hard work.  I then topped it off with some strawberry whipped coconut cream and a fresh strawberry.  Keeping it simple, so we could enjoy them faster.  No excuse not to make these babies…so easy!  I think they would be perfect for entertaining as well, pulling out a tray of these would be pretty classy!

    Strawberry Shortcake Shooters

    Vegan Strawberry Shortcake Shooters

    Makes 6

    Cake:

    1/4 cup finely shredded, dried coconut

    1/4 cup raw almond meal

    3 large soft medjool dates, pitted

    pinch sea salt

    few tsp filtered water as needed

    Filling:

    1 can full fat organic coconut milk, chilled

    3 Tbsp maple syrup or raw coconut nectar

    pinch sea salt

    1 tsp pure vanilla extract

    1/3 cup plus 3 Tbsp raw coconut butter, warmed to liquid

    1/2 cup fresh organic strawberries

    In a food processor, combine all of the cake ingredients and process until they are crumbs that hold together slightly. Spoon into the bottoms of 6 shot glasses.

    For the filling, combine all ingredients but the coconut butter in a food processor and process until smooth. Add the coconut butter slowly with the motor running until incorporated.  (If at any time the mixtures become runny, it means they have become too warm, if so, place in the freezer in a bowl, and chill until thickened, or if they become clumpy it is because the fats have separated. If this happens, place in a high speed blender and blend until smooth, then do the chilling as just mentioned). Place in a bowl in the fridge.  In the food processor, process the strawberries until chopped into small pieces, then fold this into the cream you had set aside in the refrigerator. Place the  cream mixture in a pastry bag and pipe into the shot glasses over the crust (you may just spoon them as well if you don’t have a pastry bag).  Garnish the top with a strawberry. Serve chilled.

    Strawberry Shortcake Shooters 2


  • Matcha Almond Fig Overnight Oats

    Matcha Almond Fig Overnight Oats

     Matcha Overnight Oats 2

    I got my hands on some gorgeous figs, and although I enjoyed some plain, some made it into my breakfast as well.  I have been making special variations of overnight oats on the weekend.  During the week I am pretty boring, just the same old spices that are cheap and quick.  But on the weekends I feel like I can play around a bit and make something special.  The one that I made with the figs, contained green tea as well.  I like to have some matcha during the day for a boost, but I figured, why not include it in my oatmeal along with the figs and some almonds?

    Matcha Overnight Oats 1

    It was a lovely colored and delicious combination.  This gave me energy for hours!  With the tea, fiber and protein (I included some vanilla powder). I need to eat things like this after a run in order to refuel and stay energized throughout the day. If you are lucky enough to get your hands on figs, you must try this.  I always kind of consider figs special because I do not find them often here.

      Matcha Overnight Oats

    Matcha Almond Fig Overnight Oats

    Serves 1-2

    1/2 cup gluten free steel cut oats or rolled oats (if you want this to be raw use raw rolled oats)

    1 1/2 cups filtered water

    2 scoops Sprout Living Epic Vanilla Lucuma Protein Powder*

    1 Tbsp chia seeds

    1 tsp pure vanilla extract

    1/2 tsp pure almond extract

    1 Tbsp matcha powder

    stevia or maple syrup to taste

    1 cup fresh figs, quartered

    1/4 cup chopped raw almonds

    In a jar, combine all ingredients, and stir to mix together.  Let sit in the refrigerator covered overnight.  Enjoy in the morning!

    *If you do not wish to add protein powder, then simply use your favorite non dairy milk reduced to 1 cup in this recipe.


  • Vegan Fluffernutter Sandwich Cookies

    Vegan Fluffernutter Sandwich Cookies

    Fluffernutter Cookies 1

    Ever since I discovered vegan marshmallow fluff made with aquafaba, I have wanted to make something fluffernutter.  Mostly because I have never actually had anything fluffernutter…and it is a fun word to say, and the combination sounds delicious to someone craving salty and sweet. Also, I have had really good luck with my marshmallow fluff, since it is easier to make than something you would have to bake made with the meringue.

    Fluffernutter Cookies 2

    I decided last Monday that what sounded really good to make with it were Fluffernutter  Sandwich Cookies with peanut butter cookies as the outer part. I was all excited about it, and unfortunately my oven was broken, so I had to go over to Eric’s to bake them.  He didn’t mind though…any opportunity to be there and maybe get a taste of what I am baking in the process he is in.  The dough was amazing by the way.  I could have eaten that with a spoon.

    Fluffernutter Cookies 3

    Once  the cookies were all baked and cooled and I had the fluffy sweet meringue made, I could not wait to try them.  Let me tell you, they were heavenly. I admit I felt like a little kind eating one, because they seem like something I would have begged my parents for.  Waaayyy healthier than any of the stuff I ate as a child though.  This is an awesome use for vegan marshmallow fluff, and if you love peanut butter too, you must try these. They are really pretty simple to make besides the fact that there are two components.

    Fluffernutter Cookies 4

    Vegan Fluffernutter Sandwich Cookies

    Makes 6 sandwich cookies

    1 Tbsp ground flaxseed

    3 Tbsp filtered water

    1 cup coconut sugar

    3/4 cup peanut butter

    1/4 cup coconut oil, warmed to liquid

    1 tsp pure vanilla extract

    1 1/4 cups gluten free all purpose flour or quinoa flour*

    3/4 tsp baking soda

    1/2 tsp baking powder

    1/2 tsp sea salt

    Marshmallow fluff:

    1/2 cup aquafaba**

    1 1/2 tsp xanthan gum or guar gum

    1/2 cup powdered xylitol, maple sugar or coconut sugar***

    1/4 tsp sea salt (if your chickpea liquid has no salt)

    1/4 tsp pure vanilla extract

    In a small bowl, whisk together the flax seed and water.  Place the bowl in the fridge for 15 minutes, this is your flax egg.

    In a large bowl, with a wooden spoon, mix together the sugar, peanut butter, coconut oil, vanilla and flax egg, until smooth.  Then mix in the flour, soda, baking powder, and sea salt in until the mixture is smooth.

    Preheat the oven to 375F degrees.  Line a sheet pan with parchment.

    Shape the cookie dough into 2 inch balls, place on your baking sheet a few inches apart and flatten with a fork, like you would with peanut butter cookies.

    Place in the oven and bake at 375 for 12 minutes or so, until lightly browned and set.  Allow to cool completely on a rack.

    Meanwhile, In a food processor (which is what I used, or you may use a stand mixer with a whisk attachment), whip up the chickpea liquid until it has reached pretty stiff peaks. This will take about 2 minutes in the food processor.  Add the guar gum and process until incorporated.  Add the sea salt and sugar and with the motor running, a little at a time through the feed tube (so you do not deflate it), then allow to process until the sugar is completely dissolved and the meringue is smooth, shiny and thick.  Add the vanilla, and blend until uniform in color.

    Flip half the cookies upside down, and spread some of the marshmallow fluff onto each one.  Top with another cookie.

    *If you do not want to make these gluten free, you can use whole wheat pastry flour.

    **Aquafaba is the liquid from cooked or canned chickpeas.  If you are using liquid from the cooked, you want to make sure it is thick, not watery.

    ***If using the coconut sugar or maple sugar, it will turn your marshmallow fluff light brown.  Xylitol is toxic to dogs the same way chocolate is, so do not let your dog get ahold of this marshmallow fluff.


  • Vegan Jalapeno Cheddar Mashed Potatoes

    Vegan Jalapeno Cheddar Mashed Potatoes

    Jalapeno Cheddar Taters 1

    Who doesn’t like mashed potatoes?!  They are after all one of the quintessential comfort foods. I remember when I was little I loved them…especially when my Mom made them out of a box.  Sad, I know.  But my 5 year old self did not have the best tastes.  Funny because she made them the old fashioned way too, but I did not like those. My tastes changed as I got older though and I loved my Grandma’s home made mashed potatoes.  She knew what she was doing making them!  They were perfect clouds of fluffy warm rich delicious goodness that I could not wait to dive into on the Holidays. I now make my own mashed potatoes, and I think they are pretty tasty.  I had made some last Thanksgiving for my family and my Mom said that they were even better than Grandmas.  Which was a big complement.  Grandma would have been proud had she still been alive to try mine.

    Jalapeno Cheddar Taters 2

    I do not save them just for holidays though.  I had a craving for them recently, and I decided to make a version that was kicked up a notch. Not only were they fluffy and delicious, they had spicy bits of jalapeno, savory scallions, and the flavor of cheese.  Pretty awesome if you ask me.  They are a wonderful side dish for a non-meat loaf…or just as a midnight snack.  Crave worthy I tell you!  I need to create a new shepard’s pie recipe just so I can use these to top it.

    Jalapeno Cheddar Taters 3

    6 medium russet potatoes or Yukon gold potatoes peeled and cut into large cubes

    1 clove garlic, minced

    3 scallions, sliced

    1 jalapeno, minced

    sea salt to taste

    1/4 cup nutritional yeast

    1/2 cup coconut milk or other non dairy milk or as needed

    Place the potatoes in a large pot of salted water (the potatoes should be completely covered), and bring to a boil.  Lower to a simmer, and cook for about 10 minutes until the potatoes are very tender when pierced with a fork.  Drain, and put through a ricer (if you do not have a ricer, it is ok, they will still work just might not be as smooth) into a bowl.  If you do not have a ricer, simply use a potato masher.  Stir in all remaining ingredients, whipping the potatoes with a wooden spoon until they are light and fluffy, adding a little more milk if necessary.  Serve right away!


  • Raw Hemp Seed Cacao Fudge

    Raw Hemp Seed Cacao Fudge

    Hemp Fudge 3

    Windy City Organics sent me some Dastony Hemp Seed Butter to create recipes with, and although I love it in savory applications, sweet is wonderful too.  I love to include hemp seeds in my brownies sometimes, so I thought the butter might just make amazing fudge.

    Hemp Fudge2

    So, I created a simple fudge recipe with it.  We are all busy, and some days have only a little bit of time to prepare things in the kitchen, but I can guarantee you have time to make this!  It requires no special equipment either! So no excuses for you! After I mixed the ingredients together and tasted it…omg, simply heavenly.  I could have sat there with a spoon and eaten it all in one sitting but we all know that would be gluttony and what would I look forward to then?

    Hemp Fudge 1

    Once it set up the texture was perfect, way better than any other fudge I have had Side note, I used to love my fudge as a child…we would buy it from shops up north and I would polish off a pound in no time.  This is better that that!  I wasn’t selfish, I shared some with family members and they loved it as well.  The best part about this recipe besides it being easy and delicious is that you get your healthy omega 3 oils too!

    Hemp Fudge

    Raw Hemp Seed Cacao Fudge
    Makes 12 pieces

    3/4 cup melted coconut butter (not oil)

    1 cup Dastony Raw Hemp Seed Butter

    1/4 cup filtered water

    1 tsp pure vanilla extract

    3 Tbsp raw coconut nectar

    a pinch sea salt

    1/4 cup raw cacao powder

    In a food processor, combine the coconut butter, hemp seed butter, water, vanilla, coconut nectar, sea salt and cacao powder and process until smooth.  Spread out onto a pan lined with parchment in a 3/4 inch thick square.  Sprinkle with hemp seeds. Place in the freezer for about an hour or more until firm.  Cut into 12 squares and enjoy!  Store in the fridge.


  • Raw Peanut Butter and Jelly Cream Pie

    Raw Peanut Butter and Jelly Cream Pie

    PB and J Pie 2

    Today I turn 30.  But I still feel 21. I know I have done a lot of growing up in the last 10 years, but I don’t think I will ever think of myself as my actual age.  I still enjoy things like wearing Hello Kitty Bandaids, running through sprinklers (even if it is during my run to cool off), and watching The Little Mermaid on occasion.  These are things that have stuck with me since I was little.  The other thing that has stuck with me is finding something to be passionate about and sticking with it. It used to be art, then running competitively, and now it is creating recipes to share with you all.  That is one of my passions at the moment.  I love it. It makes me forget all about things like having a bad day, when I can escape to my kitchen and create something.  What makes me really happy is when I share it, then people tell me that they have made it.  I love hearing from you all.

    PB and J Pie

    One of the most important things I have learned in the last 10 years that I did not get when I was 20, is how to be happy with yourself, and make sure you are doing the things that make you happy. Not to let others determine your happiness.  So now, as I turn 30 I will continue to embrace that.  I struggle sometimes with this, but it is important to always be kind to yourself.  You deserve it.

    PB and J Pie 4

    This year I decided to make something a little unconventional for my Birthday.  Raw Peanut Butter and Jam Cream Pie.  I may be an adult, but I love all things PB and J.  Your 30th Birthday is supposed to be a special one right?  So I wanted something special.  I have made cakes every other year, and they are usually nothing unusual. I let out my inner child when thinking of this one.

    PB and J Pie 5

    I made a crunchy peanut butter cookie crust, then for the filling a luscious peanut butter mousse that I could have just eaten then and there by the spoonful.  I swirled it with raspberry jam, and more peanut butter, then topped it off with fluffy coconut cream.  It was sooo good!  I have to say, this is one of the best pies I have ever made! It was definitely Birthday worthy, I did not miss cake at all.  You should totally make this, even if it is not a special occasion.  Because everyone needs to indulge every once in a while, right?  I have included filling for both the raw pie, and a vegan version in case you want to use canned coconut milk and regular peanut butter instead because I want this to be accessible to everyone to make.  Looking forward to creating even more delicious recipes for you all in my 30th year!

    PB and J Pie 6

    Raw Peanut Butter and Jelly Cream Pie
    Makes one 8 inch pie

    1 8 inch pie plate

    Crust:

    3/4 cup finely shredded dried coconut

    3/4 cup raw jungle peanuts

    1/2 cup ground flaxseed

    1 cup soft pitted medjool dates

    1/4 tsp sea salt

    Raspberry Jam:

    1 1/2 cups raspberries

    1 Tbsp coconut nectar or maple syrup (optional, I did not need it because my berries were very sweet)

    Filling and  Topping:

    4 cups fresh young coconut meat packed

    1/2 cup fresh coconut water

    1/4 cup plus 2 Tbsp raw coconut nectar, or your choice of raw liquid sweetener

    1/4 tsp himalayan salt or sea salt

    1/2 Tbsp pure vanilla extract and seeds of  a vanilla bean

    3/4 cup raw coconut butter (warmed to liquid)

    3/4 cup jungle peanut butter plus additional for swirling

    jungle peanuts and raspberries for topping

    For the crust, combine all ingredients in the food processor until finely chopped and starting to hold together when squeezed (if it doesn’t you may need a few more dates).  Press the mixture into a 8 inch pie pan or spring form pan greased with coconut oil.

    For the jam, buzz the raspberries in the blender or food processor until they are smooth (seeds are ok).  Set aside.

    To make the cream filling and topping, combine the coconut, coconut water, coconut nectar, sea salt, and vanilla in a food processor and process until smooth.  Add 3/4 cup coconut butter with the motor running and process for a minute. Remove 2 cups of the cream and set aside. Add the 3/4 cup peanut butter to the cream in the food processor and blend until smooth.
    To assemble the pie, spread a thin layer of the raspberry jam over the crust. Next, pour the peanut butter cream filling filling over that, then drop some peanut butter and the jam over that by the tsp.  then swirl with a knife.  Place in the freezer to firm up (about 2 hours). Place the other bowl (the plain cream) in the freezer for about 45 minutes and chill until it is the consistency of whipped cream (once it is the proper consistency, place in the fridge until the filling is ready.)
    Once the filling and the cream have chilled long enough, top the filling with the plain cream, and top off with a little more of the jam, jungle peanuts and raspberries before serving.

    For the non-raw filling:

    2 cans full fat organic coconut milk, chilled

    1/4 cup plus 2 Tbsp maple syrup or raw coconut nectar

    pinch sea salt

    2 tsp pure vanilla extract

    2/3 cup plus 3 Tbsp raw coconut butter, warmed to liquid

    3/4 cup peanut butter plus additional for swirl

    peanuts and raspberries for topping

    Use the same crust and raspberry jam recipe for the raw pie.

    For the cream, combine all ingredients but the coconut butter in a food processor and process until smooth. Add the coconut butter slowly with the motor running until incorporated. Remove 2 cups of the cream and set aside in a bowl, covered in the refrigerator.  To the remaining in cream the processor, add the 3/4 cup peanut butter and blend until smooth.

    To assemble the pie, spread a thin layer of the raspberry jam over the crust. Next, pour the peanut butter cream filling filling over that, then drop some peanut butter and the jam over that by the tsp.  then swirl with a knife.  Place in the freezer to firm up (about 2 hours).

    Once the filling has chilled long enough, top the filling with the plain cream, and top off with a little more of the jam, peanuts and raspberries before serving.

    PB and J Pie 1


  • Spicy Jalapeno Mint Hummus

    Spicy Jalapeno Mint Hummus

    Tahini

    Windy City Organics had sent me some nut butters to try including some Dastony Sesame Tahini.  I am pretty picky about tahini, and I have to say theirs is wonderful!  Smooth and perfect for drizzling over things like roasted veggies.  I was super excited to use it in recipes!  I was not sure exactly what I wanted to make, then one night last week, it was a super hot day and I wanted nothing more than to eat something cooling for dinner that did not need a lot of prep time.  I had just picked up my CSA box, and I was blessed with loads of beautiful produce! I thought about a raw chopped veggie salad with a tahini dressing, but what I really wanted was a giant bowl of hummus to dip my fresh veggies in. So…I ended up making hummus.  And delicious hummus it was!

    Spicy Jalapeno Hummus 1 

    I love a little spice and heat, so I was going to put some jalapenos I had sitting on my counter to use as well.  I ended up making a spicy jalapeno mint hummus. It was both cooling and spicy at the same time, a beautiful sensation.  the tahini made it extra creamy and silky.  I loaded up my plate with veggies, and dug into that hummus.  It was the perfect dinner.  My Mom used to say I eat enough veggies for a meal as a family of four would for a meal.  I think she is right, but I wouldn’t have it any other way. 

    Spicy Jalapeno Hummus 2 

    Spicy Jalapeno Mint Hummus

    Makes about 2 cups

    1 1/2 cups cooked chickpeas

    1/4 cup Dastony Sesame Tahini

    2 jalapenos, diced (and seeded if you want it less spicy)

    juice of 2 large lemons (1/4 cup)

    sea salt to taste

    2 tsp ground cumin

    3 Tbsp fresh mint leaves

    filtered water as needed

    Combine all ingredients in a food processor and process until smooth (adding filtered water as needed).


  • Vegan Chocolate Mint Gelato

    Vegan Chocolate Mint Gelato

    Chocolate Mint Gelato 1

    It has been quite warm here lately which has me thinking about ice cream a lot.  Not that I don’t like ice cream year round, because I enjoy it in the winter too, but now nice cool desserts sound amazing after coming inside from a hot humid day, or working in a hot kitchen.  I wanted to make something rich, smooth and chocolaty last week, and what I ended up making was some amazing ch0colate mint gelato.

    Chocolate Mint Gelato

    I am calling it gelato at least, because that is what the texture of the finished ice cream reminded me of.  It was super simple to make which is always a plus and it had the most amazing silky texture.  I achieved this texture by using coconut milk and avocado…it is like mousse ice cream sooo good!  Not low fat at all…but I don’t care.  I am not  fat phobic and these are healthy fats our bodies need to function and absorb nutrients.  The flavor was wonderful, like truffles.  The mint makes it even more cooling which is perfect for summer.  If you are craving something rich, delicious and cool, this is your recipe!

      Chocolate Mint Gelato 3

    Vegan Chocolate Mint Gelato

    Makes about 4 cups

    Ingredients:

    3 ripe avocadoes, diced

    1 can full fat coconut milk (if you want to make it raw, use raw coconut milk, 1 1/2 cups)

    1/4 cup filtered water

    1/2 cup maple syrup

    pinch sea salt

    1 tsp pure vanilla extract

    1/2 cup fresh mint leaves or 1/2 tsp peppermint extract

    3/4 cup cacao powder

    In a high speed blender or food processor, combine all ingredients and blend until smooth.  Pour into an ice cream maker, and process according to directions.  Once churned, pour into a freezer safe container with a lid, cover and chill until scoopable (mine took about 6 hours, it depends on how firm it is out of the ice cream maker).


  • Vegan S’mores Brownies

    Vegan S’mores Brownies

     Smores Brownies 2

    Ever since I discovered aquafaba, I have been badly wanting to make something s’mores.  I had been putting it off since I wasn’t quite sure if I could make it hold up to broiling and sitting for a while, but I finally just went for it last week on my day off.  I know I made just made other brownies with aquafaba last week…but these are different.  Not only did I use aquafaba in the brownie part itself, but in the marshmallow topping as well.  I do after all have an abundance of it since I happen to work in a deli that cooks lots of chickpeas.

    Smores Brownies 1

    These brownies had a few steps to them, but really they came together faster than I thought.  For the crust I used a combination of buckwheat crispies (which I always keep on hand in the freezer in a big bag), dates, coconut and flax seed with a hint of cinnamon and sea salt to make it graham cracker like.  This is one of my raw crust recipes I use frequently to replace graham cracker crusts.  If you have a different graham cracker crust you would rather use, by all means go ahead in this recipe, but this was easiest for me to make (plus no refined sugars).

    Smores Brownies 3


    Smores Brownies 4

    The marshmallow fluff was lovely and airy.  Perfect to eat just as was.  But I was worried it would deflate once it sat…let alone went into the oven to brown.  Luckilly, when I went for it, I was pleasantly surprised. I had spooned a test marshmallow onto a piece of foil and baked it, and it turned into the most lovely delicious toasted marshmallow I have eaten (I have not had a marshmallow toasted in over 10 years…it was heaven).  So, I topped my brownies with the rest of it and popped them in the oven. Not only did the marshmallow fluff brown perfectly like a meringue on a pie would, it held up!  It never deflated! I was so happy you have no idea. These brownies tasted wonderful. The first real s’mores thing I have had in forever it seems.  Pretty excited now!

    Smores Brownies 5

    Vegan S’mores Brownies

    Makes 20 small brownies

    Crust:

    3/4 cups finely shredded dried coconut

    3/4 cup sprouted buckwheat groats (or additional shredded coconut)

    1/2 cup soft medjool dates, pitted

    1/2 tsp cinnamon

    1/4 tsp himalayan salt

    2 Tbsp ground flaxseed

    Brownies:

    1 1/4 cups all purpose gluten free flour*

    2/3 cup raw cacao powder or unsweetened cocoa powder

    1 cup coconut sugar

    1/4 tsp sea salt

    1/2 cup coconut oil, warmed to liquid

    1 cup aquafaba*

    2 tsp pure vanilla extract

    Marshmallows:

    1/2 cup aquafaba**

    1 1/2 tsp xanthan gum or guar gum

    1/2 tsp cream of tartar

    1/2 cup powdered xylitol, maple sugar or coconut sugar***

    1/4 tsp sea salt (if your chickpea liquid has no salt)

    1/4 tsp pure vanilla extract

    For the crust, combine all ingredients in the food processor and process until small crumbs and starting to hold together.
    Press into an 8×8 inch square baking pan lined with foil or parchment and oiled with coconut oil (for easy removal).

    Preheat the oven to 350F degrees.

    In a large bowl, whisk together the flour, cacao powder, sugar and salt until well combined.  Add the coconut oil, aquafaba, and vanilla and whisk until smooth and well combined.  Pour the batter into the baking pan over the crust layer and place in the oven.  Bake  for 20-25 minutes until just set (you do not want to over bake). Let cool.

    Meanwhile, In a food processor (which is what I used, or you may use a stand mixer with a whisk attachment), whip up the chickpea liquid until it has reached pretty stiff peaks. This will take about 2 minutes in the food processor.  Add the guar gum and cream of tartar and process until incorporated.  Add the sea salt and sugar and with the motor running, a little at a time through the feed tube (so you do not deflate it), then allow to process until the sugar is completely dissolved and the meringue is smooth, shiny and thick.  Add the vanilla, and blend until uniform in color.

    Spread the marshmallows over the brownies, then place them under the broiler for about 2 minutes until the meringue is toasted and starting to brown on top (watch it closely, it could easily burn fast).  Let cool completely before cutting.

    *If you do not want to make these gluten free, you can use whole wheat pastry flour.

    **Aquafaba is the liquid from cooked or canned chickpeas.  If you are using liquid from the cooked, you want to make sure it is thick, not watery.

    ***If using the coconut sugar or maple sugar, it will turn your marshmallow fluff light brown.  Xylitol is toxic to dogs the same way chocolate is, so do not let your dog get ahold of this marshmallow fluff.


  • Roasted Vegetable and Lentil Salad with Lemon Hemp Seed Dressing and Mint

    Roasted Vegetable and Lentil Salad with Lemon Hemp Seed Dressing and Mint

    026

    Windy City Organics sent me some Dastony hemp seed butter to try out and create a recipe with. I was super excited because I love hemp seeds, and I use them in my salads often, or mix them into the nut butters I make at home. However, I have never made hemp seed butter myself because it would be a bit spendy.  So, this was my opportunity to try it!  I knew I wanted to try it out in a savory dish, and I ended up making a delicious dressing with it.

    Roasted Veggie Lentil Salad 1

    I made a roasted vegetable salad with the freshest and most colorful veggies I could find…tomatoes, potatoes, zucchini, bell pepper and yellow squash.  I included lentils for protein as well, because I was craving something hearty.  The dressing was the silky hemp seed butter, lemon juice, a touch of cumin and sea salt and a dash of red pepper flakes.  So simple, yet so good.  I drizzled this over the salad, and sprinkled it all with local fresh mint. It was such a delicious combination!  I think this may become one of my go to dressings for salads this summer!  If you are a fan of hemp seeds too, check out the Dastony Hemp Seed Butter over at the Raw Guru Store.

    Roasted Veggie Lentil Salad 2


    Roasted Vegetable and Lentil Salad with Lemon Hemp Seed Dressing and Mint

    Serves 2

    1/2 cup French lentils

    sea salt

    4 medium potatoes, cut into cubes

    2 tomatoes, cut into large thick wedges

    2 zucchini, sliced thickly

    1 yellow summer squash, sliced thickly

    1 orange bell pepper, cut into large dice

    Dressing:

    1/4 cup Dastony Raw Hemp Seed Butter

    2 Tbsp lemon juice

    3 Tbsp filtered water

    1/4 tsp red pepper flakes

    1/4 tsp cumin powder

    sea salt to taste

    2 Tbsp fresh mint, coarsely chopped for serving

    In a pot, combine the lentils and enough water to cover by 3 inches.  Bring to a boil, then lower to a simmer. Simmer until lentils are tender, about 20-25 minutes.  Drain well, and season with sea salt.

    Pre heat the oven to 400F.  Toss the potatoes with just enough olive oil to coat and spread out on a sheet pan.  Season with a little sea salt.  Do the same with the rest of the veggies on another sheet pan.  Roast the potatoes for about 30 minutes or until starting to brown and tender.  Roast the other veggies for about 20 minutes until tender and starting to brown.  Let veggies and potatoes cool to room temperature, and toss together in a bowl.

    To make the dressing, whisk together all ingredients until well combined (if you think it is too thick add a little more water.  Too thin a little more butter).

    When ready to serve, spread out the veggies on plates or a platter, and drizzle with the dressing.  Scatter the fresh mint over that.


  • Vegan Salted Caramel Maple Meringues

    Vegan Salted Caramel Maple Meringues

    Caramel Meringues

    The first meringues I ever tried to make had coconut sugar in them.  The ones that fell flat as I popped them into the oven making my heart sink.  I had so much hope for them!  The problem was that the aquafaba (chickpea liquid used to make vegan meringue) had not been whipped long enough and the sugar was not added carefully causing them to deflate.  Plus they had nothing to stabilize them.  Which I figured out after trying a few times to make them.  I figured out how to make xylitol meringues in the dehydrator (my Matcha Raspberry Meringues), my only success for crunchy ones so far because the others I tried  never dried out in the oven or they fell flat.  So…anyways, this is my success with using coconut sugar, the recipe I am sharing today. 

    Caramel Meringues 1

    What I did differently was to buzz it to powder first before adding it to the whipped chickpea liquid, and using stabilizers.  I am calling them salted caramel maple, because the nature of the coconut sugar is caramel flavored, I added a touch of maple extract, and a pinch extra of sea salt.  Hence the salted caramel which is what these taste exactly like!  If you would like these to be maple through and through, you can use maple sugar in place of the coconut sugar (I just use that more sparingly because it costs more) it works, I tested that out as well.  These are delicious little bites of goodness, which are simple which is just what some of us need when venturing into the art of vegan meringue.  Now to experiment with more meringue!  I have loads of chickpea liquid from work just begging to be made into something fabulous!

    Caramel Meringues 2 

    Vegan Salted Caramel Maple Meringues

    Makes 12

    1/2 cup aquafaba*

    1/2 tsp guar gum or xanthin gum

    1/2 tsp cream of tartar

    1/2 cup powdered maple sugar or coconut sugar**

    1/4 tsp sea salt (if your chickpea liquid has no salt)

    2 Tbsp arrowroot powder

    1/4 tsp maple extract

    1/2 tsp pure vanilla extract

    In a food processor (which is what I used, or you may use a stand mixer with a whisk attachment), whip up the chickpea liquid until it has reached pretty stiff peaks. This will take about 2 minutes in the food processor.  Add the guar gum and cream of tartar and process until incorporated.  Add the sea salt, sugar and arrowroot with the motor running, a little at a time through the feed tube (so you do not deflate it), then allow to process until the sugar is completely dissolved and the meringue is smooth, shiny and thick.  Add the vanilla and maple extract, and blend until uniform in color.

    Carefully place the meringue mixture into a pastry bag with a large tip, and pipe into meringues on a parchment paper lined dehydrator tray.

    Dehydrate at 155F for 16-20 hours, or until crisp (the time may vary according to your dehydrator and the moisture in the air).  Remove from the dehydrator and store in an airtight container.

    *Aquafaba is the liquid from chickpeas.  You may either use the liquid from canned chickpeas, or liquid from chickpeas you have cooked yourself (if it is thick enough).

    **I buzzed the sugar in the blender until fine before using in the recipe, this makes it less likely to deflate the meringue.


  • Raw Banoffee MylkShake and Raw Cherry Mylkshake

    Raw Banoffee MylkShake and Raw Cherry Mylkshake

    CHerry Shake

    Windy City Organics was kind enough to send me some of their Dastony nut butter to try, one of which was a brazil nut butter.  I love brazil nut butter because it is neutral and makes awesome nut mylk. All you need to do is whisk some of it into filtered water, I like to do 1 1/2 Tbsp per cup of water. Or, if I want it richer, then two.  So my first thought was to whip some of that nut mylk up, then make some delicious shakes out of it!  Because it is summer and vegan mylk shakes are in season!

    004 (7)

    I am a huge fan of banana cream pie, but even more so of banoffee pie!  You know, that pie that has a coffee cream, bananas and caramel? If you don’t then you are missing out, if you do, then this shake recipe may make you happy.  I have made lots of banoffee desserts such as banoffee pie ice cream, banoffee cheesecake, and banoffee bars. So, it was about time I made a banoffee pie shake too.  The brazil nut mylk was perfect in this shake, both in the caramel I made, and the mylk I added to it.  Allowing the flavor of the bananas and caramel to shine.

    CHerry Shake 1

    The next shake recipe I made, was a simple cherry milkshake.  I had lots of ripe cherries on hand, and I could not think of anything more lovely and refreshing to use them in at the time. The brazil nut mylk was a perfect addition too!  Keeping it simple.  I shared some with my Mom and she loved it, and couldn’t believe how good it was for being vegan and sugar free.

    CHerry Shake 2

    I hope you all enjoy these two recipes, and definitely check out the Raw Dastony Brazil Nut Butter and all of their other butters.  They are amazingly smooth, and they make wonderful sauces and dressings besides nut mylk.

    Raw Brazil Nut Mylk

    Makes about 4 1/2 cups

    4 cups filtered water

    1/4 cup plus 2 Tbsp Tbsp Dastony Raw Brazil Nut Butter

    1 tsp pure vanilla extract

    pinch sea salt

    Sweetener of choice if desired

    Combine all ingredients in a blender and blend until smooth.  Keep in a covered container in the refrigerator.

    *note, if a richer mylk is desired add more butter.

    005 (2)

    Raw Banoffee Mylkshake

    Serves 2

    Caramel:

    10 large soft medjool dates

    1 Tbsp raw Dastony brazil nut butter

    filtered water as needed

    1 tsp pure vanilla extract

    1/8 tsp Himalayan salt

    Shake:

    6 large bananas, frozen and cut into pieces

    1/4-1/2 cup brazil nut mylk (depending on how liquidy you like it, I like mine thick so I add less)

    1 Tbsp coffee extract, or espresso powder 1 Tbsp raw lucuma powder (optional)

    1 tsp pure vanilla extract

    1 tsp maple extract

    3 Tbsp raw Dastony brazil nut butter

    1/3 cup pitted dates, soaked in water until soft

    For the caramel, combine all ingredients in a high speed blender and blend until smooth (adding filtered water as needed until it is a desired consistency).  Set aside. For the shake, combine banana, mylk, coffee extract, vanilla, maple, butter, and dates in a blender and blend until smooth, using the tamper to press the mixture into the blades. Pour half into glasses, then top with half the caramel.  Pour over the other half of the smoothie in the glasses and top off with more caramel, and swirl it in.  Serve!

    Raw Cherry Mylkshake

    Serves 2

    Shake:

    4 cups frozen cherries

    1 cup brazil nut mylk (depending on how liquidy you like it, I like mine thick so I add less)

    1 tsp pure vanilla extract

    2 Tbsp raw Dastony brazil nut butter

    1/3 cup pitted dates, soaked in water until soft

    Combine all ingredients in a blender and blend until smooth, using the tamper to press the mixture into the blades. Pour into 2 glasses.  Serve!


  • Vegan Chocolate Dipped Hazelnut Butter Cookies with Raspberries and a Giveaway!

    Vegan Chocolate Dipped Hazelnut Butter Cookies with Raspberries and a Giveaway!

    Hazelnut Butter

    Windy City Organics was kind enough to send me some Dastony Nut Butters to create recipes with, and I could not have been more excited.  In case you haven’t noticed before I am in love with all things nut butter.  I have at least 6 types in my pantry at all times.  One of the nut butters they sent me was Raw Hazelnut Butter.  Let me tell you, it was the silkiest smoothest hazelnut butter I have ever tried.  It is delicious to enjoy by the spoonful on its own, or swirled into your morning porridge, or added to a smoothie to make it silky, but I wanted to make some cookies out of it.

    Hazelnut Raspberry Cookies 1

    I love peanut butter cookies, so I thought I would make some hazelnut butter cookies.  Sounds upscale doesn’t it.  Well it is kind of special, at least in my mind since hazelnut butter is more unusual than peanut butter.  I made a dough the way I would with peanut butter, but it was extra sweet and delicious thanks to the hazelnut butter.  I decided to add in some dried raspberries for a sort of PB and J effect, and it made it even better.  The tart berries contrasting the sweet cookie dough perfectly.  They smelled amazing while baking.

    Hazelnut Raspberry Cookies 2

    Once they were cooled I could not leave well enough alone, and I decided to dip them in dark chocolate.  OMG…were these ever good!  This is a heavenly combination, and I shared a few with my family who insisted I not share them with anyone else but them.  Trust me, you need to try making these gems.

    Hazelnut Raspberry Cookies

    If this hazelnut butter is sounding pretty good to you right now, I totally understand, and I have the solution.  You can either buy yourself some over at the Raw Guru Store, where they have 15% off all Dastony nut butter flavors if you use the special promo code: davanillacake15 and it is good from now until Monday 7/13!  So you can get a deal on any of the Dastony Nut butters, including the Hazelnut Butter! Not only that, I am giving away a prize pack including one Dastony Sesame Tahini and one Dastony Hazelnut Butter courtesy of Windy City Organics. Just scroll down below the recipe to enter my giveaway! (Open to the USA only, sorry.)

    Hazelnut Raspberry Cookies 4

    Vegan Chocolate Dipped Hazelnut Butter Cookies with Raspberries

    Makes 12 cookies

    1 Tbsp ground flaxseed

    3 Tbsp filtered water

    1 cup coconut sugar

    3/4 cup Dastony hazelnut butter

    1/4 cup coconut oil, warmed to liquid

    1 tsp pure vanilla extract

    1 1/4 cups gluten free all purpose flour

    3/4 tsp baking soda

    1/2 tsp baking powder

    1/2 tsp sea salt

    1 cup dried raspberries

    1/2 cup chopped vegan dark chocolate

    In a small bowl, whisk together the flax seed and water.  Place the bowl in the fridge for 15 minutes, this is your flax egg.

    In a large bowl, with a wooden spoon, mix together the sugar, hazelnut butter, coconut oil, vanilla and flax egg, until smooth.  Then mix in the flour, soda, baking powder, and sea salt in until the mixture is smooth.  Stir in the dried raspberries.

    Preheat the oven to 375F degrees.  Line a sheet pan with parchment.

    Shape the cookie dough into 2 inch balls, place on your baking sheet a few inches apart and flatten with a fork, like you would with peanut butter cookies.

    Place in the oven and bake at 375 for 12 minutes or so, until lightly browned and set.  Allow to cool completely on a rack.

    Melt the chocolate in the top of a double boiler (or your preferred method), and dip half of each of the cookies into the chocolate allowing the excess to drain off.  Set on a parchment lined tray to set the chocolate (it will set faster if you pop them in the freezer for about 5 minutes).

    Hazelnut Raspberry Cookies 5

    a Rafflecopter giveaway

  • Garlicy Kale Salad with Roasted Potatoes and Chickpeas

    Garlicy Kale Salad with Roasted Potatoes and Chickpeas

    Kale and Potatoes 3

    I always try to think of what I can make out of ingredients I already have at home to save on money and not waste things.  So, last week I had lots of kale and potatoes.  I thought about making a soup or vegan frittata or something, but what I ended up really wanting was a salad.  It had been a really hot day, I never really cooled down from my morning run, working in a kitchen and sweating all day, so salad sounded wonderful.  You know, something that didn’t make me more hot.

    Kale and Potatoes 1

    I roasted the potatoes until they were perfect and crispy, then combined them with the kale, some cherry tomatoes, and some chickpeas for protein.  I dressed it all with this luscious garlicy lemony creamy dressing I made quickly in the blender.  It was so good I could have eaten it with a spoon, but then I would have had no dressing for my salad.  Once it was combined, it was delicious!  Just what I had been hoping for! It was so good, I had to share the recipe with you all, so you can enjoy it too!

       Kale and Potatoes

    Garlicy Kale Salad with Roasted Potatoes and Chickpeas

    Serves 2-4

    Potatoes:
    4 medium red or yellow potatoes, cut into cubes
    olive oil

    Dressing:
    1 cup raw macadamia nuts, pine nuts, or cashews, soaked for 4 hours and drained
    2/3 cup filtered water
    1/4 cup lemon juice
    1 Tbsp organic lemon zest
    1/4 tsp sea salt or to taste
    2 garlic cloves

    2 bunches kale, torn or cut into bite sized pieces
    1 cup cherry tomatoes
    1 1/2 cups cooked chickpeas (one 15 oz can drained will work)

    To prepare the potatoes, pre heat the oven to 400F degrees.  Toss the potatoes with just enough olive oil to coat, and sprinkle with sea salt.  Spread out on the pan and roast in the oven until they are starting to brown and are tender about 30 minutes.  Remove from the oven and let cool slightly.

    Meanwhile, to make the dressing, combine all ingredients in a high speed blender or food processor and blend until smooth. Set aside.

    In a large bowl combine the potatoes, kale, tomatoes, chickpeas, and dressing and toss to combine.  Serve at room temperature.


  • Vegan Mocha Walnut Brownies

    Vegan Mocha Walnut Brownies

    Mocha Walnut Brownies

    On at least one of my days off every week I need to spend time with just myself. Maybe it is the introvert in me, but that is something I look forward to and it is very important.  I do things like go for a walk, bike ride, or run (sometimes all three if I feel the need) my favorite time to think about the past week, think about the coming week and just think in general about things like what kind of recipes I want to make and what not.  I find my best inspiration there, when I am outdoors in my own little world, but still present enough to hear the birds chirping and wind whistling through the trees around me.  Last week I got to enjoy some time to go for a walk, and I decided that I wanted to make brownies, and I also harvested some wild mulberries while I was out.  I finally remembered to bring a container.  I walk there often, and I usually just grab a few.  But this time I figured bring some home for later.  I figured they would make a perfect garnish for my brownies!

    Mocha Walnut Brownies 1

    Who doesn’t like to do things like brownies on their day off?!  Crazy people if you don’t.  Just kidding. I know not everyone is a baker but that is what I am here for, to make them and share with you.  Anyways, I decided that I wanted mocha walnut brownies.  I wanted them to be fudgy and moist.  That is the way I like my brownies.

      Mocha Walnut Brownies 3

    I have been experimenting with aquafaba lately (which is liquid from canned chickpeas if you are not familiar with the term).  Trying to make vegan meringues and marshmallow fluff because that is what it is good for surprisingly.  There have been a lot of some flops and some successes.  But I wanted to try something with the aquafaba besides the meringue type stuff…so I decided to try making some brownies with it (which is where I am going with this whole aquafaba thing) because I heard it is wonderful in baked goods.  Luckilly this one ended up being a win!

    Mocha Walnut Brownies 4

    You can use it as a substitute for eggs, so that is what I did!  The brownies turned out fabulous.  Fudgy and delicious, rich and dark studded with crunchy walnuts.  I topped them off with more fudgy goodness in the form of frosting.  Trust me, you need these babies in your life. Don’t discard that chickpea liquid next time, make some brownies!


    Mocha Walnut Brownies 5


    Vegan Mocha Walnut Brownies

    Makes 20 small brownies

    1 1/4 cups all purpose gluten free flour

    2/3 cup raw cacao powder or unsweetened cocoa powder

    1 TBsp espresso powder

    1 cup coconut sugar

    1/4 tsp sea salt

    1/2 cup coconut oil, warmed to liquid

    1 cup aquafaba (the liquid from canned chickpeas)

    2 tsp pure vanilla extract

    1/2 cup chopped raw walnuts

    frosting:

    1/3 cup raw walnut butter

    1/3 cup maple syrup

    2/3 cup cacao powder

    1 tsp espresso powder

    pinch sea salt

    1 Tbsp coconut oil, warmed to liquid

    filtered water as needed

    Preheat the oven to 350F degrees.  In a large bowl, whisk together the flour, cacao powder, espresso powder, sugar and salt until well combined.  Add the coconut oil, aquafaba, and vanilla and whisk until smooth and well combined.  Stir in the walnuts.  Pour the batter into a lined and oiled 8×8 inch square baking pan and place in the oven.  Bake  for 20-25 minutes until just set (you do not want to over bake). Let cool.

    Meanwhile, to make the frosting, whisk together all ingredients in a bowl until smooth adding a little bit of filtered water if necessary.  You want the consistency of a spreadable fudgy frosting.  Spread over the cooled brownies, and cut into squares.


  • Vegan Double Berry Rhubarb Galette

    Vegan Double Berry Rhubarb Galette

    Galette 1

    I have been really craving pie lately.  A delicious fruit pie with a jammy filling, crisp rich crust, and sweet fruit inside.  I’m not very picky when it comes to the fruit.  It is all good…peaches, cherries, berries.  They all are amazing in a pie in my opinion.  So, I made a sort of pie last weekend.  A lazy person’s pie.  A galette.  So, a tart and a pie made free form, not picky at all and perfect for the mood I was in and the time frame I had.

    Galette 3

      I had about an hour after work to make it, so a non fussy free form crust was ideal. Only rolling out one circle and not having to do anything cutesy with it (not that there is anything wrong with cutesy, I love cutesy but not when I have little time).  I used my gluten free pie crust, and enclosed inside was the most delicious filling combination. Sweet blueberries, tart rhubarb from my Dad’s garden, and some flavorful, jammy strawberries.  Once it had baked and the aroma had permeated the air in my home and it was all bubbly and delicious looking, I was quite excited.

    Galette 5

    It was pure delicious goodness.  The first day I enjoyed it unadorned and I was reminded of how wonderful galettes are.  and the second day, I served some of it with some coconut whipped cream and it was the perfect accompaniment.  I am one of those people who usually always has to have ice cream or whipped cream with their fruit pie, but I was a little lazy the first day.  It was wonderful anyhow even without it.  If you want a delicious pie, but not all the fuss, you must try this.

    Galette 6

    Vegan Double Berry Rhubarb Galette

    Crust:

    2 1/2 cups all purpose gluten free flour*

    1/4 tsp sea salt

    1/4 cup coconut sugar

    7 Tbsp coconut oil in solid state, cut into chunks

    1 Tbsp organic lemon zest

    1 tsp pure vanilla extract

    5-6 Tbsp ice water

    Filling:
    2 cups organic rhubarb, sliced

    1 cup organic strawberries, quartered

    1 cup organic blueberries

    2 Tbsp lemon juice

    1 Tbsp organic lemon zest

    2 tsp pure vanilla extract

    1/4 cup arrowroot starch

    1/2 cup coconut sugar

    pinch of sea salt

    Coconut sugar for sprinkling

    To make crust, combine flour, sea salt, sugar and coconut oil in a bowl, and use a pastry blender to cut into the mixture until it resembles pea sized chunks (you can also use your hands).  Add zest, and vanilla and water and mix into the dough.  Knead a few times until it comes together (you may need to add an additional Tbsp more water).  Shape into and roll out into a 1/4 inch thick circle on a sheet of parchment (you will want to dust the parchment underneath with a little flour and dust the rolling pin too to avoid sticking. If the dough has gotten too warm, place in the refrigerator).  Preheat oven to 375 degrees.

    Place rhubarb and berries, lemon juice, zest, vanilla, arrowroot, sugar and sea salt in a large bowl and toss to combine. Arrange fruit mixture on top of dough on each round, leaving a  1 1/2-inch border all the way around. Fold border over the fruit mixture, overlapping where necessary and pressing gently to adhere the folds (it doesn’t have to be perfect, it is rustic). Brush edges of dough with water, sprinkle with sugar, and bake until crust is deep golden brown and juices are bubbling, 45 minutes or so. Transfer baking sheet to a wire rack to cool the galette. Serve warm or at room temperature.
    *You may use whole wheat pastry flour if you do not wish to make this gluten free.
    Galette 4


  • Vegan Matcha Raspberry Meringues

    Vegan Matcha Raspberry Meringues


    With all of the vegan meringues that have been popping up lately on social media I had to try my hand at making some.  I admit that these types of things have always intimidated me a bit, especially macarons which I used to love before I stopped eating animal products.  Funny because I like to make lots of different desserts, but I tend to make what I know well.  Time for me to step outside the box though.  I need that every once in a while, keeps life interesting.  So, I figured I would start off with something simple. I used the aquafaba method for meringue making which in case you haven’t heard is using the brine from canned chickpeas. It whips up into a beautiful meringue!  I do not have a stand mixer, so I used my food processor to whip the liquid up.  It worked so much faster than everyone says a stand mixer does.  I admit I had a few fails, about 4.  The first time, I added the sugar too fast, and it was not fine enough, and it turned into liquid.  The second, it whipped up into a beautiful marshmallow fluff, but I had no stabilizers in it so when I put it in the oven it ran to flat pancakes.  The third, they didn’t get hard enough in the oven even after 3 hours they were like marshmallows. Luckilly I have a lot of access to chickpea liquid since I make loads of them at my work in the deli.  I am sure if I were using the usual refined sugar in my recipes like everyone else, they would have turned out.  But that is not something I keep in my home, or want to eat. So…I have been working with coconut sugar and xylitol.  I saw a post on the FB group Vegan Meringue- Hits and Misses about someone dehydrating xylitol meringues so I figured I would try my own version of that.

    Green Tea Meringues 4

    Every time I have used the xylitol it whipped up nicely.  So, the question was would it stay nice in the dehydrator since I did not have success with the oven the first time I tried that.  The meringue was lovely, shiny and perfect. I decided to add in a little matcha powder with the vanilla just to make it more interesting.  I can never leave things plain…my brain just doesn’t work that way.  I also folded in tart freeze dried raspberries because I love berries with green tea, and I thought the red and the pale green would be lovely.

    Green Tea Raspberry Meringues

    I popped them in the dehydrator, and crossed my fingers, and prayed they would turn out.  24 hours later, I ended up with delicious little meringues!  I was so happy they actually turned out you have no idea. The earthy sweet green tea base was perfect with the flecks of tart raspberry. I have included the recipe if you have a dehydrator and want to try this too.  I am not done experimenting yet with my meringues, and I have another experiment baking as I type this.  Stay tuned.

    Green Tea Raspberry Meringues 2

    Vegan Matcha Raspberry Meringues

    Makes 12

    1/2 cup aquafaba*

    1/2 tsp guar gum

    1/2 tsp cream of tartar

    1/2 cup powdered xylitol sugar**

    pinch sea salt (if your chickpea liquid has no salt)

    2 Tbsp arrowroot powder

    1 Tbsp matcha powder

    1 tsp pure vanilla extract

    1/2 cup freeze dried raspberries, crushed up into smaller pieces

    In a food processor (which is what I used, or you may use a stand mixer with a whisk attatchment), whip up the chickpea liquid until it has reached pretty stiff peaks. This will take about 2 minutes in the food processor.  Add the guar gum and cream of tartar and process until incorporated.  Add the sea , sugar and arrowroot with the motor running, a little at a time through the feed tube (so you do not deflate it), then allow to process until the sugar is completely dissolved and the meringue is smooth, shiny and thick.  Add the vanilla and matcha, and blend until uniform in color. fold in the raspberries.

    Carefully place the meringue mixture into a pastry bag with a large tip, and pipe into meringues on a parchment paper lined dehydrator tray.

    Dehydrate at 155F for 24 hours, until crisp.  Remove from the dehydrator and store in an airtight container.

    *Aquafaba is the liquid from chickpeas.  You may either use the liquid from canned chickpeas, or liquid from chickpeas you have cooked yourself (if it is thick enough).

    **I buzzed the xylitol in the blender until fine before using in the recipe, this makes it less likely to deflate the meringue. Xylitol is toxic to dogs the same way chocolate is, so do not let your dog get ahold of this marshmallow fluff.

    ***Please note, if it is very humid where you are and your meringues get a little soft, just place them in the fridge in the container you store them in and they will become more crunchy.

    Green Tea Raspberry Meringues 1


  • Raw Berry Almond Tart

    Raw Berry Almond Tart

    Berry Almond Tart 2

    My Mom liked to make berry desserts on to celebrate the 4th of July.  She made a frozen cake topped off with berries that looked like a flag, and a tart with cream and berries which was my favorite.  I decided this year that I needed to make a version of a berry tart with cream.  Raspberries and blueberries are so festive on their own there is no artificial color needed here!  If I had made a cake, I wouldn’t need to use any either not that I ever do.  I love that nature provides us with such beauty and color naturally.

    Berry Almond Tart

    Back to the tart, I could have made just a vanilla cream, but I went for a vanilla almond cream since this was kind of my version of a tart my Mom used to make and in her desserts that would typically be vanilla she liked to add a touch of almond extract.  I have come to love that flavor combination as well. It almost makes it sweeter.

    Berry Almond Tart 3

    The tart turned out yummalicious!  A crunchy crust with a hint of almond, a silky fluffy vanilla almond filling that melted in your mouth, and topped off with sweet and tart berries.  It was super festive!  The berries kind of reminded me of a firework on top of the tart which wasn’t planned but it was awesome.  This is simple to make, and if you serve it on the 4th your guests will love it!  I have included 2 versions of the cream, one raw, and one with canned coconut milk so that you all can make this no matter what you have access to and you can pick the one that suits you best.

    Berry Almond Tart 4

    Raw  Almond Cream Tart with Berries

    Makes one 8 inch tart

    8 inch tart pan

    crust:

    1/2 cup sprouted, dehydrated buckwheat groats (or raw almonds)

    1/2 cup finely shredded, dried coconut

    1/4 cup ground flax seed

    3/4 cup soft, medjool dates, pitted (if they are not soft, soak them in water for 30 minutes and drain well first)

    1/8 tsp sea salt

    2 Tbsp raw almond butter

    Filling:

    2 cups young coconut meat*

    1/2  cup coconut water

    3 Tbsp raw coconut nectar or agave nectar

    1/4  tsp sea salt

    seeds of one vanilla bean, or 1 Tbsp pure vanilla extract

    1/2 tsp pure almond extract

    1/4 cup plus 2 Tbsp raw coconut butter, warmed to liquid**

    Organic raspberries and blueberries for topping

    To make the crust, combine all ingredients in a food processor and process until finely chopped and holds together when squeezed (if it doesn’t add a few tsp water and pulse until it does).  Press into an 8 inch round tart pan with a removable bottom (I like to oil mine with coconut oil first). Set aside.

    Meanwhile, to make the filling, combine all ingredients but the coconut butter in a food processor and process until smooth.  With the motor running, add the coconut butter and process a minute more.  Pour into the prepared crust, and let sit in the freezer for about 1 1/2 hours until firm.

    When ready to serve, garnish the top of the tart with fresh berries. Store cake in the refrigerator.

    * 1 cup raw cashews, soaked for 4 hours and drained can be substituted for the coconut meat if unavailable.

    **If your young coconut meat is especially soft and watery, you will need to add at least a few Tbsp more coconut butter.

    ***If you like, you can also make this with coconut milk for a non-raw version. The rest of the recipe is the same, but here it the filling:

    For the non-raw filling:

    2 cans full fat organic coconut milk, chilled

    1/4 cup plus 2 Tbsp maple syrup or raw coconut nectar

    pinch sea salt

    2 tsp pure vanilla extract

    1/2 tsp pure almond extract

    2/3 cup plus 3 Tbsp raw coconut butter, warmed to liquid

    For the cream, combine all ingredients but the coconut butter in a food processor and process until smooth. Add the coconut butter slowly with the motor running until incorporated. Spoon into the tart and smooth the top. Place in the refrigerator to set for a few hours before serving. Top with berries before serving.


  • Raw Strawberry Rhubarb Cheesecake Bars

    Raw Strawberry Rhubarb Cheesecake Bars

    Straw Rhu Bars 1

    I was over at my Dad’s house on Father’s Day and I picked  a whole bunch of rhubarb.  I almost left without it, but Eric reminded me it was there, and I was all like… “Are you wanting me to bake something with it, or is that a hint?” Of course it was, and he had a point. Rhubarb is delicious.  Especially when used in desserts, and paired with some sort of berries.  Which is what I decided to do this time.

    Straw Rhu Bars 3

    The next day I thought about it long and hard and what sounded the absolute best to me were some strawberry rhubarb bars.  I had seen a baked version on Pinterest a while back and said to myself, “I need to rawify and veganize those!” That was a couple months ago though, so it was about time I did, and now I finally had more rhubarb to do so!

    Straw Rhu Bars 2

    I wanted these to be intensely strawberry rhubarb. Sometimes when you make a cheesecake the filling takes away from the flavors of the fruit, but not mine.  I used strawberries and rhubarb both in the creamy filling and in a jammy swirl that marbled throughout the bars.  They were pure delicious goodness!  Tart and sweet just how strawberry rhubarb desserts should be not overly sweetened (I feel some people use too much sweetener with rhubarb and it is not tart enough anymore).  Perfectly balanced.  It is the height of strawberry rhubarb season, and if you love the combo like I do, you must try these.

    Straw Rhu Bars 4

    Raw Strawberry Rhubarb Cheesecake Bars 
    Makes 12

    Crust:

    1 cups finely shredded dried coconut

    1 cup sprouted buckwheat groats (or additional shredded coconut)

    1/2 cup soft medjool dates, pitted

    1/4 tsp himalayan salt

    2 Tbsp ground flaxseed

    Filling:

    2 cups young coconut meat, packed

    1/4 cup raw coconut nectar or maple syrup

    1 tsp vanilla extract

    pinch sea salt

    1 cup organic strawberries

    1 cup diced organic rhubarb

    1/2 cup plus 2 Tbsp raw coconut butter or oil, warmed to liquid

    Swirl:

    1/2 cup organic strawberries

    1/2 cup diced organic rhubarb

    1 Tbsp raw coconut nectar or maple syrup

    2 tsp raw coconut butter, warmed to liquid

    For the crust, combine all ingredients in the food processor and process until small crumbs and starting to hold together.
    Press into an 8×8 inch (or 9×9 inch if you want the bars thinner) pan lined with foil or parchment and oiled with coconut oil (for easy removal).  Set aside in the freezer.
    For the filling, combine all ingredients but the coconut butter in a high speed blender or food processor and blend until smooth. Add the coconut butter and blend until smooth.  Set aside in a bowl.

    To make the swirl, blend all ingredients in a blender until smooth.  Set aside.

    To assemble the bars, drop some of the swirl by the tsp over the crust, then pour the filling over that.  Drop the rest of the swirl by the tsp over that, then swirl with a knife.
    Place in the freezer to set, about 2 hours.  Cut into bars and serve!
    Store any extra bars in the refrigerator.


  • Blueberry Muffin Batter Overnight Oats

    Blueberry Muffin Batter Overnight Oats

    Blueberry Muffin Batter Oats 1

    This may sound kind of odd, but I like blueberry muffin batter even more than regular cake batter.  I know it is slightly less sweet but that is what I love about it.  That and the few berries that I may or may not have purposely left behind in the bowl so I could enjoy them wink wink.  It is good stuff!  And, if you are making vegan batter as I always do, then no risk for salmonella contamination. My Dad would always warn me of that when I begged to lick the bowl as a child when he would make muffins on Saturday mornings.  But I never listened.  So as much as I love blueberry muffin batter, when I was making my overnight oats last weekend, and I had some blueberries…it had to be blueberry muffin batter flavor.

    Blueberry Muffin Batter Oats 2

    I gave it the flavor of blueberry muffin batter by including a bit of vanilla and cinnamon, but also some Sprout Living Epic Vanilla Lucuma Protein Powder. For some reason, when I mix it into things it reminds me of muffin batter, so it was perfect. And not only that, I needed an extra boost of protein.  I always add chia seeds in my overnight oats as well for a hit of omega 3 oils.  This stuff was delicious!  Like blueberry muffin batter and oatmeal got married and had a child.  The best part is, it is simple to make and all you need to do the next morning is enjoy!

    Blueberry Muffin Batter Oats 3

    Blueberry Muffin Batter Overnight Oats

    Serves 1-2

    1/2 cup gluten free steel cut oats or rolled oats (if you want this to be raw use raw rolled oats)

    1 1/2 cups filtered water

    2 scoops Sprout Living Epic Vanilla Lucuma Protein Powder*

    1 Tbsp chia seeds

    1 tsp pure vanilla extract

    1/4 tsp cinnamon

    stevia or maple syrup to taste

    1 cup fresh blueberries

    In a jar, combine all ingredients, and stir to mix together.  Let sit in the refrigerator covered overnight.  Enjoy in the morning!

    *If you do not wish to add protein powder, then simply use your favorite non dairy milk, 1 cup instead of the 1 1/2 cups water in this recipe (the protein powder adds heft and richness, so you milk instead of water gives it this).


  • Vegan Mississippi Mud Cookies

    Vegan Mississippi Mud Cookies

    Mud Cookies 1
    I was watching one of my coworkers drizzling chocolate over the freshly baked cookies at work and I decided that I had to make something with chocolate when I got home.  Chocolate cookies.  Because that was what I was suddenly craving after smelling that chocolate.  I didn’t want to make something I had made before, I was up for something new and exciting.
      Mud Cookies 3
    While I was out for my walk after work it came to me.  Mississippi Mud Cookies!  It was kind of muddy out, my shoes were not happy, but my tummy would be after gaining this inspiration.  Funny how the weirdest things give me ideas sometimes.  Why Mississippi mud?  Well I do live in Minnesota and I enjoy being around the Mississippi river.  I have visited the point where it starts, and it is quite beautiful down here in the cities as it winds its way south.
    Mud Cookies 4
    Anyways back to the cookies…I know there are versions of Mississippi mud cookies out there, but this is my version. I wanted there to be lots of chocolate.  So I made a gluten free chocolate dough, and added big chocolate chunks. I also wanted there to be crunchy nuts included.  I added almonds, walnuts, and pecans for plenty of crunch.  They were decadently delicious.  Sort of like brownie cookies.  This is the type of mud you want in your life, trust me.
    Mud Cookies 5

    Vegan Mississippi Mud Cookies (gluten free)

    Makes 16 large cookies
    2 Tbsp ground flax seed
    1/4 cup plus 2 Tbsp filtered water
    1 cup virgin coconut oil, warmed to liquid
    1 1/2 cups coconut sugar
    1 teaspoon vanilla extract
    1 Tbsp espresso powder (or very finely ground good quality coffee)
    1/2 cup cacao powder
    1 teaspoon baking soda
    1/2 teaspoon sea salt
    3 cups all purpose gluten free flour
    3/4 cup chopped almonds
    3/4 cup chopped walnuts
    3/4 cup chopped pecans
    In a small bowl, whisk together the flax seed and filtered water.  Set aside in the refrigerator for 15 minutes.
    Meanwhile, in a large bowl, coconut oil with sugar and mix until well combined.
    Mix in the vanilla extract and flax mixture until well combined.
    Add the cacao powder, espresso powder, baking soda and salt then the flour, a cup at a time, mixing between each addition, until well combined.
    Mix in the almonds, walnuts, pecans, and chocolate chunks.
    To bake, Preheat your oven to 350 degrees. Line 2 large baking sheets with parchment paper. Roll balls into about 2 inch balls, and place on prepared cookie sheets a couple inches apart. Bake for about 10-12 minutes, until puffed and just starting to brown slightly.  Remove from the oven and let cool on the pan a few minutes, then remove to a wire rack to cool.  Repeat with remaining cookies and let cool completely.
    *If you are using home made chocolate as I often do, hold off on mixing it into the dough, and press it into the cookies just as they come out of the oven.  This prevents it from melting all over.
    Mud Cookies


  • Sunshine Curried Chickpea Stew

    Sunshine Curried Chickpea Stew

     Chickpea Soup 2

    Love is about taking care of those who are close to you when they are having trouble taking care of yourself. We all need a little help sometimes, and you never know when it might be you that needs it.  At least that is how I feel.  Eric wasn’t feeling the greatest last week, like he might have picked up a touch of something so I thought I would make him some warming soup with things that help you stay healthy in it.  It was a little chillier day than the rest, rain falling in the afternoon, so a good day for soup.  I included plenty of veggies, some chickpeas for protein, and most importantly ginger, turmeric, alliums and hot peppers.  All for immunity and anti-inflammatory purposes.  I added in some coconut milk at the end for richness as well since this soup had no other fats in it.  It turned out delicious, warming and the most beautiful sunshine color fit to brighten anyone’s day.  Eric loved it, since he didn’t feel like cooking for himself at that point.  You never know when you will have the opportunity to help someone out, but when you do, you should take it.

    Chickpea Soup

    Sunshine Curried Chickpea Stew

    Serves 2-3

    1 small onion, diced

    2 carrots, halved and sliced

    2 celery stalks, sliced

    2 garlic cloves, minced

    2 medium red potatoes, diced

    1 yellow bell pepper, diced

    1 jalapeno, minced

    1 Tbsp fresh ginger, minced

    1 tsp turmeric

    1 tsp ground cumin

    1/2 tsp sea salt or to taste

    3 cups filtered water (or as needed to cover veggies)

    1 1/2 cups cooked chickpeas (or a 15 oz can will do)

    1/2 cup full fat coconut milk

    3 Tbsp arrowroot starch dissolved in 3 Tbsp filtered water

    Combine all ingredients but the chickpeas, coconut milk, and arrowroot in a pot and bring to a boil.  Lower to a simmer, and let cook for 20 minutes, or until the veggies are all tender and the flavors have combined.  Add the chickpeas, coconut milk and arrowroot and stir in until the coconut milk has dissolved and the soup is thickened.


  • Vegan Banana Split Parfait

    Vegan Banana Split Parfait

      Banana Split Parfait

    Sometimes I run into writer’s block in the recipe department when I have a lot of other things going on in my life.  Luckilly though I have a few special people around me that help to inspire me when I am feeling a little uninspired.  I asked Eric what I should make last week, and he said banana split, and parfait.  Now, banana split was a bit too much work considering it was a work night and I had only about an hour to make something (ice cream has to chill and you have to make several different kinds and what not).  But parfait I could do.  Then it came to me…banana split parfait!  Less work than making ice cream, but still just as delicious.  Eric liked that idea too so I went with it.

    Banana Split Parfait 3

    I made a coconut banana cream for the creamy part of the parfait, and it was dreamy. I figured instead of just sliced bananas, including them in the cream would make it easier and also a little lighter than just having plain coconut cream.  I made the classic sauces for a banana split, pineapple, strawberry, and fudge.  The fruit did not even need sweetener it was so flavorful.  Eric got his banana split, and parfait, and we both got to enjoy a delicious dessert!  It was a win all around!

    Banana Split Parfait 2

    Vegan Banana Split Parfait

    Serves 3

    Coconut Banana Whipped Cream:

    4 organic bananas 2 cans full fat coconut milk, chilled (just the top thick part, discard the water)

    1 Tbsp pure vanilla extract

    1/4 cup coconut nectar or maple syrup pinch sea salt

    1 cup coconut butter warmed to liquid

    Pineapple sauce: 1 cup fresh organic pineapple, diced

    1 Tbsp raw coconut nectar or maple syrup (optional)

    Strawberry Sauce: 1 1/4 cups fresh organic strawberries

    1 Tbsp raw coconut nectar or maple syrup (optional)

    Fudge Sauce:

    3 Tbsp raw coconut nectar or maple syrup

    1 Tbsp raw coconut oil, warmed to liquid

    1/4 cup raw cacao powder, sifted

    pinch sea salt

    1 tsp pure vanilla extract

    1 Tbsp filtered water (or as needed)

    Chopped vegan dark chocolate or a cherry for topping

    To make coconut banana whipped cream, combine the bananas, coconut milk, vanilla, maple syrup, and sea salt in a high speed blender or food processor and blend until smooth. With the motor running, slowly add the coconut butter (so that it does not clump up.  But if it does, just continue to blend at high speed until smooth and you will just have to chill it longer).  Place in the freezer and chill until the consistency of whipped cream (about 30 minutes if it did not get very warm, and about an hour if it had to be blended longer and was more liquid).  Once it is the proper consistency, set aside in the refrigerator.

    To make the pineapple sauce, blend the pineapple until chopped up but still chunky in the food processor (adding the optional maple syrup if your pineapple is not sweet).  Set aside.

    To make the strawberry sauce, blend the strawberries until chopped up but still chunky in the food processor (adding the optional maple syrup if your strawberries are not sweet).  Set aside.

    To make the fudge sauce, whisk together all ingredients until smooth (adding a little water if too thick, or more cacao powder if too thin).  Set aside.

    To assemble, put some of the coconut banana whipped cream into the bottoms of 3 glasses, followed by the chocolate sauce, then more coconut cream, then the pineapple sauce, then more coconut cream, then the strawberry sauce. Then the last bit of coconut cream.  Top off with more of the sauces if you have extra, and garnish with chopped vegan chocolate or a cherry if you have one.


  • Raw Raspberry Dream Pie

    Raw Raspberry Dream Pie

    Raspberry Pie

    Cream pies are the perfect thing for summer as far as I am concerned.  But I guess I consider them somewhat of a special thing to make since I don’t make the often.  There was no special occasion last weekend, but I decided to make it special and make a cream pie.  Raspberry cream pie to be precise.  I had the most beautiful raspberries and they were just begging to be used in something magnificent.

    Raspberry Pie 1

    Although the pie might look a little fussy, it is nothing of the sort.  Rather easy to make.  A simple crunchy crust buzzed together in the food processor with few ingredients, and a coconut cream based filling that has little hands on time and just needs to chill before enjoying.

    Raspberry Pie 3

    Let me tell you…this tastes like heaven!  This was my dessert Sunday night and it put me in my happy place.  Vanilla and raspberry scented fluffy cream that melted in my mouth with that crunchy sweet crust and tart fresh berries…the perfect combination.  If you are having a summer party, bring this out, and your guests will love you.

    Raspberry Pie 4

    Raw Raspberry Dream Pie
    Makes one 6 inch pie

    1 six inch deep dish pie plate

    Crust:

    3/4 cup finely shredded dried coconut

    3/4 cup sprouted, dehydrated buckwheat groats

    1/2 cup ground flaxseed

    1 cup soft pitted medjool dates

    1/4 tsp sea salt

    Filling and  Topping:

    4 cups fresh young coconut meat packed*

    1/2 cup fresh coconut water

    1/4 cup plus 2 Tbsp raw coconut nectar, or your choice of raw liquid sweetener

    1/4 tsp himalayan salt or sea salt

    1/2 Tbsp pure vanilla extract and seeds of  a vanilla bean

    3/4 cup raw coconut butter (warmed to liquid)

    2 cups fresh organic raspberries, divided

    2 Tbsp coconut butter

    Additional raspberries for topping

    For the crust, combine all ingredients in the food processor until finely chopped and starting to hold together when squeezed (if it doesn’t you may need a few more dates).  Press the mixture into a 6 inch pie pan or spring form pan greased with coconut oil.

    To make the cream, combine the coconut, coconut water, coconut nectar, sea salt, and vanilla in a food processor and process until smooth.  Add 3/4 cup coconut butter with the motor running and process for a minute. Divide between 2 bowls. Add one back to the food processor and add 1 1/2 cups raspberries, along with 2 Tbsp coconut butter and blend until smooth.  Stir in the remaining 1/2 cup raspberries. Pour the raspberry filling filling over the prepared crust and place in the freezer to firm up (about 2 hours). Place the other bowl in the freezer for about 45 minutes and chill until it is the consistency of whipped cream (once it is the proper consistency, place in the fridge until the filling is ready.
    Once the filling and the cream have chilled long enough, top the filling with the plain cream, and top off with raspberries before serving.
    *If you do not mind this pie not being nut free, and coconut meat is unavailable, you may use 4 cups raw cashews, soaked for 4 hours and drained instead.


  • 4 Ingredient Banana Cream Pie Popsicles

    4 Ingredient Banana Cream Pie Popsicles

    Banana Pops 1

    Although I am all about the fancy desserts sometimes, other times I am all about the super easy ones.  And nothing beats popsicles for easy in the summer.  Don’t get me wrong, I love my elaborate ice cream flavors, but it is nice to simply blend something, pop it in the freezer and half a day later be able to enjoy it.  Plus, who doesn’t love popsicles?!  They are n essential part of a hot summer day, whether you are a kid or an adult!  Sometimes, Eric and I like to grab one as we head out for our walk on a hot day, and enjoy it along the way to cool off.  I recently made some Banana Cream Pie ones, and they were wonderful, so I had to share the recipe with you all.

    Banana Pops 3

    At only 4 ingredients, there is no excuse not to make these.  Don’t have any molds?  Use paper cups to freeze them in old school style.  I remember making popsicles like those back in the day.  These taste just like banana cream pie, but are a lot friendlier on the waistline.  If you have 5 minutes, you can make these, and trust me you will be happy you did the next day when it is hot and you want something sweet and delicious!

    Banana Pops 4

    4 Ingredient Banana Cream Pie Popsicles

    Makes 4

    1 15 oz can organic full fat coconut milk (or 1 1/2 cups raw coconut milk if you want these raw)

    2 ripe organic bananas

    1 tsp pure vanilla extract

    1 Tbsp maple syrup or to taste (stevia may also be used, a few drops to taste)

    Blend all ingredients together in a blender until smooth, then pour into popsicle molds  and place in the freezer for at least 6 hours (or when they are firm) or overnight to set up.

    Banana Pops 2


  • Exciting Nut Butter Recipes You Need To Try!

    Exciting Nut Butter Recipes You Need To Try!

    I don’t know about you but I am in love with nut butter.  Of course it started as a child when my Mother would make me peanut butter and raspberry jam sandwiches.  I loved those.  I refused to eat sandwiches with lunch meat (even then I was meant to be vegan).  Or when she used to make almond butter toast when that began to become popular.  Funny how only those two nut butters were available here at that time, and the natural peanut butters and almond butters you bought at the store was nowhere near the smooth texture of the stuff you can get now.  Now you can buy all kinds of nut butters.  But I really prefer to  make my own.  At the rate I go through it, it is just more cost effective to do so and not only that, I can create new delicious flavors!  Sure I keep a jar of pecan butter, peanut butter, walnut butter, cashew butter and tahini in the fridge at all times (I am a bit of a nut butter hoarder), but I like to have something special I can have for a sweet treat too.  So that is where all the fun novelty nut butters come in.  Every few weeks, I make something sweet to drizzle over bananas or spread on my flax crackers, or just eat straight up with a spoon for a sweet bedtime snack.  I have compiled a list of 10 delicious recipes that I love for you to enjoy, just in case you love nut butter as much as I do.  So you do not have to search my site, they are all here in one place.  If you have a high speed blender, these guys are a piece of cake!  Enjoy!

    Gingerbread Almond Butter

    Cookie Butter

    Raw Sugar Cookie Dough Butter

    Raspberry White Chocolate Chunk Peanut Butter

    Hazelnut Pecan Cinnamon Chocolate Chip Butter

    Strawberries and Cream Butter 1

    Raw Strawberries and Cream Nut Butter

    Marbled-2BCake-2BBatter-2BButter-2B3

    Marble Cake Batter Nut Butter

    Raspberry Pecan Butter 4

    Raw Raspberry Pecan Butter

    Blueberry Muffin Batter Butter 2

    Raw Blueberry Muffin Batter Almond Butter

    Brownie Butter 1

    Raw Walnut Hemp Brownie Fudge Butter

    Pumpkin-2BSeed-2BButter-2B1

    Raw Maple Cinnamon Pumpkin Seed Butter

    Chocolate Chunk Swirled Peanut Butter

    Chocolate Chunk Swirled Peanut Butter

    Brownie Batter Butter 2

    Raw Brownie Batter Pecan Butter

    Cookie Dough Butter FV

    Raw Chocolate Chunk Cookie Dough Nut Butter

    White Chocolate Hazelnut Pecan Butter

    MacPineCoco Butter

    Raw Macadamia, Pine Nut Coconut Butter

    Makes about  2 cups

    1 ¼ cups raw macadamia nuts

    1 ¼  cups raw pine nuts

    1 ¼ cups finely shredded coconut

    ½ tsp sea salt or to taste

    In a high speed blender, combine all ingredients and blend until very smooth, using the tamper to push the mixture down into the blade.  It will take about 2-3 minutes.  If you do not have a high speed blender, you can make this in the food processor as well, but keep in mind it could take 10-12 minutes to get a smooth butter so be patient.  Store in a jar in the fridge.


  • Vegan Double Berry Lemon Doughnuts

    Vegan Double Berry Lemon Doughnuts

    Berry Doughnuts

    Ever since I made my German Chocolate Doughnuts last week with my new pan, I have been wanting to make more doughnuts.  Something about the idea of baking healthier doughnuts is pretty amazing in my mind.  I guess because I have never had a doughnut pan before.  So anyways, I got these beautiful berries on sale at the store this week and I decided that double berry doughnuts would be lovely.  I have never actually had real berries baked into doughnuts, just those doughnuts with the fake jam as a kid, so I was pretty excited.

     Berry Doughnuts 2

    I knew these were going to be really good first off because the berries were very flavorful.  It helps that they are in season which is when I try to buy them.  Another reason why summer makes me happy, berries are my favorite fruit.  And here in Minnesota you only have a few short months when they are really good.  So I combined these fruity beauties with some tart lemon in the doughnuts and it was a delicious combination!

    Berry Doughnuts 1

    They were soft and cakey, lemony and studded with jammy little berries. So delicious as they were. But I decided to make them even better and include a raspberry lemon glaze as well.  Because why not?!  If you have some fresh berries on hand, and happen to have a doughnut pan…go for it! You will be happy you did, trust me.

      Berry Doughnuts 4

    Vegan Double Berry Lemon Doughnuts

    Makes 12 large doughnuts

    Batter:

    3 cups all purpose gluten free flour

    1 cup coconut sugar

    2 Tbsp ground flax seed

    1/4 tsp sea salt

    1 1/2 tsp baking powder

    1/4 cup plus 2 Tbsp filtered water

    1 cup applesauce

    1/2 cup lemon juice

    2 Tbsp lemon zest

    1/2 cup filtered water

    1/4 cup plus 2 Tbsp coconut oil, warmed to liquid

    2 tsp pure vanilla extract

    1 cup organic blueberries

    1 cup organic raspberries

    Glaze:

    1/2 cup coconut butter (not oil)

    2 Tbsp mashed raspberries

    2 Tbsp maple syrup

    1/4 cup lemon juice

    filtered water as needed

    Pre heat the oven to 350F degrees, and oil a standard sized doughnut pan.  In a bowl, whisk together the  flour, sugar, flax seed, sea salt, and baking powder.  Whisk in all the wet ingredients until smooth. Stir in the berries.

    Spoon into the holes in the prepared pan, filling them 3/4 full.  Place in the oven and bake for 20 minutes, or until the doughnuts are cooked through. Remove from the oven and allow to cool.  Once cool, pop out of the pan.

    To make the glaze, whisk together all ingredients until smooth (adding a little filtered water if too thick.  You want to be able to spoon it over the doughnuts and have a thin layer).  Spread over the doughnuts to create a thin glaze.  Allow to set up.


  • Spicy Pink Jalapeno Saurkraut

    Spicy Pink Jalapeno Saurkraut

    Spicy Saurkraut 2

    An unhappy tummy is an unhappy person. At least with my personal experience.  Which is why I like to keep my gut happy.  Eating probiotics is one way to help with that.  So why is it important to have a healthy gut?  Well, a lot of your immunity lives in your gut. The healthy bacteria are important for you to stay healthy.  An unhealthy gut can cause inflammation in your body, acne, fatigue and cause your immunity to go down so you can be more susceptible to illness.  And I don’t want that.  So I enjoy eating things rich in probiotics like sauerkraut.  I make my own at home and it is really easy.  I don’t always make the same kind because I like to keep things interesting.

    Spicy Saurkraut 1

    Using purple cabbage is my favorite though because it makes the most beautiful pink saukraut!  The last batch I made was a spicy jalapeno and it was so good I figured some of you might enjoy it too so I decided to share the recipe.  I like this on top of my lunch salad as an added flavor or just on its own.  I have always been a fan of sauerkraut since I was young, but this is the best stuff I have had!  In case you would like a few more probiotic rich recipes, check these out:

    003

    Blackberry Lavender Kombucha

    Raspberry Coconut Yogurt

    Raw Raspberry Coconut Yogurt

    Spicy Saurkraut 3

    Spicy Pink Jalapeno Saurkraut

    Makes 2 32 oz jars

    1 large head red cabbage, 3 outer leaves reserved whole, and the rest thinly sliced or shredded

    1 Tbsp sea salt

    1 large carrot, cut julienne

    1 garlic clove, sliced

    2 tsp cumin seeds

    2 tsp coriander seeds

    4 jalapeno or chili peppers, seeded

    filtered water as needed

    1 large 8 cup jar with a wide mouth

    In a large bowl, combine the sliced cabbage with the sea salt.  Massage with your hands, squeezing it until you get a good amount of water out of the cabbage at the bottom of the bowl and it is softened a little.  Mix in the carrot, garlic, cumin, coriander, jalapeno.  Place in the 8 cup jar, pressing out any air, and pour in the extra water at the bottom of the bowl.  Top with the reserved cabbage leaves.  If the water does not rise above the cabbage in the jar, pour filtered water over it so it does (you want all the cabbage completely submerged).  Put a weight on top of the cabbage leaves so that they stay submerged (I used a small prep bowl that fit inside the jar) you do not want the cabbage exposed to the air.  Cover the jar with a towel and place it somewhere where it will not be disturbed like in a closet (and you may want to set it on a tray in case it leaks a little).  Check it every few days to make sure it does not have any mold on the top, and if it does simply remove it with a spoon (the rest is ok as long as it is in the brine). After 7 days, it should be ready (or when it is fermented to your liking, I just find that mine is usually done after 7).  Place in jars and store in the fridge.


  • Raw Chocolate Raspberry Thumb Print Cookies

    Raw Chocolate Raspberry Thumb Print Cookies

    Thumbprint 1

    I really enjoyed dress up when I was a little kid.  I was always putting on weird combinations of clothes that I thought would look pretty, even though most of the time I looked ridiculous.  My own clothes were fun, but the most interesting clothes were at Grandma’s house.  I would dig through her boxes of fabric and make “dresses” for myself draping them decoratively and securing them with a belt.  Her scarves also made great accessories.  They were colorful and beautiful and my Grandma was always a good sport never getting mad at me for trying on her things.  Even letting me wear her lipstick and clip on earrings sometimes.  I remember one time I didn’t want to take them off and I wore them to a pre-school program we were doing.  I was up in front of everyone wearing those ridiculous dangly earrings.  But it was awesome to my 4 year old self.  Sometimes I would pretend to have a tea party with some of my dolls once I was all dressed up and of course I was the princess.  Because queens were too old (at least that was my reasoning).  I would have pretend food, but if I had real food I imagine thumb print cookies would be on the menu.

    Thumbprint 2

    To me thumb prints make me think of tea parties. Not sure why.  Maybe because they seem little and delicate.  I decided that I needed to make some last week because I remembered how cute they were.  Yes that is a valid reason for making cookies. But I didn’t want to make the same ones I used to make.  It was a really hot day and I did not want to bake, so I made raw ones.  But not just raw ones. Chocolate with raspberry chia jam.  I am absolutely in love with chia jam lately.  I love the texture, since I am a fan of jam with seeds, and it is simple and easy to make.

    Thumbprint 3

    These cookies were really simple altogether to make, and I made them in less than half an hour which is always a plus.  They were delicious as well.  Fudgy and rich cookies the perfect contrast to the sweet light jam.  These are definitely tea party material or just devour material…if you are not feeling lady like which I wasn’t really when I made them.  If you are looking for a simple raw cookie recipe, this is it! No hard to find ingredients or tough techniques here!

    Thumbprint 4

    Raw Chocolate Raspberry Thumb Print Cookies
    Makes 10

    Cookies:
    3/4 cup soft dates, pitted (if not soft, soak them in filtered water 30 minutes and drain well first)
    1/2 cup raw pecan butter or raw almond butter
    1/4 tsp sea salt
    1 tsp pure vanilla extract
    4 Tbsp filtered water
    1/3 cup raw cacao powder
    3/4 cup raw coconut flour*

    Jam:
    1 1/4 cups organic raspberries
    4 soft dates, pitted (if not soft, soak them in filtered water 30 minutes and drain well first)
    pinch sea salt
    2 Tbsp chia seeds

    In a food processor, combine the dates, pecan butter, sea salt, vanilla extract and water and blend until smooth.

    Next, add the cacao powder and coconut flour and blend until well combined and smooth dough (if it is a little dry (since dates can vary in moisture) add another Tbsp water).

    Shape the dough into 10 round balls, press them down, and put an indentation into the center with your finger.

    To make the jam, combine the raspberries and dates in the food processor and process until dates are very fine.  Add the chia seeds and pulse a few times to mix in.  Let sit for 10 minutes.
    Spoon the jam into the centers of the cookies (you will have extra for another use).

    Store the cookies in an airtight container in the refrigerator.


    *I prefer to make my own coconut flour since I find that storebought tends to be too dry. To do so, simply buzz finely shredded dried coconut in a blender until fine flour (but not too long you don’t want butter). Raw oat flour may also be used for this recipe if you do not want to use coconut.


  • Vegan Lemon Corncakes (gluten free) with Raspberry Rhubarb Sauce

    Vegan Lemon Corncakes (gluten free) with Raspberry Rhubarb Sauce

    Pancakes

    Last week, I had some beautiful raspberries and rhubarb just begging to be used in some sort of delicious dish.  Although just dessert would have been wonderful, I thought something a little more substantial and meal oriented might be a good idea.  It was after work, I was hungry and I was talking to Eric about what I could possibly make.  I had pancakes on my mind, but I hadn’t mentioned it to him yet when he said pancakes.  With a delicious sauce.  Yes!  I thought.  It was perfect, we were both thinking the same thing so I had to make it.  This seems to happen a lot. Great minds think alike I guess.  I was just going to make regular old gluten free pancakes but since when do I make regular old anything.  My recipes are always ev0lving. So I kicked it up a notch a bit.  Cornmeal goes so wonderful with berries and adds delicious texture to pancakes, so I made corncakes.

     Pancakes 2

    I also added in some Sprout Living Epic Vanilla Lucuma Protein Powder for an extra boost since I was extra hungry.  The pancakes tasted amazing, but the sauce made them even better.  It was super simple to make, no cooking required.  It tasted like the most delicious jam, and I added in some chia seeds to give it a little something extra.  I am one of those people that likes chunky jam.  None of that smooth seedless jelly stuff for me.  These tasted like dessert, and I suppose they sort of were but there is nothing like having breakfast AND dessert for dinner.  Eric was a happy man as well. He is a big pancake fan.

    Pancakes 1

    Vegan Lemon Corncakes (gluten free) with Raspberry Rhubarb Sauce
    Serves 2

    Ingredients:
    Sauce:

     1 cup organic rhubarb
    2 Tbsp maple syrup
    1 cup organic raspberries
    1 Tbsp chia seeds

    Pancakes:
    2 Tbsp ground flax seed
    1/2 cup cornmeal
    1 tsp aluminum-free baking powder
    1/4 tsp sea salt
    1/2 cup applesauce
    1 cup filtered water
    1/4 cup lemon juice
    2 Tbsp lemon zest
    2 tsp pure vanilla extract
    2-3 Tbsp maple syrup (depending on how sweet you like them)

    To make the sauce, combine the rhubarb and maple syrup in a food processor and process until smooth.  Add the raspberries and chia seeds and pulse until blended but still a little chunky.
    Whisk together the flaxseed, flour, cornmeal, protein powder, baking powder and sea salt in a large bowl.
    Whisk in all the remaining wet ingredients until smooth.
    To cook pancakes, preheat oven to 200 degrees. Heat a large non-stick pan over medium heat and add a little coconut oil to coat the bottom. Once hot, add the batter in 1/4 cup amounts (I did 4 at a time, but it depends on your pan), and let cook for about 2-3 minutes on the first side until set and starting to brown, then flip with a spatula and cook another 2-3 minutes on the other side. When cooked, place on a plate and keep warm in the oven while you repeat the process with the remaining pancakes.

    Pancakes 3


  • Peach Melba Overnight Oats

    Peach Melba Overnight Oats

    Peach Melba Oats 2

    I ate oatmeal every day for 10 years straight in a row from the time I was in high school to a few years back.  It was my go to meal every morning, I loved it and I never tired of it.  Adding in goodies sometimes like peanut butter or fruit.  It always tasted good and comforting to me and I looked forward to it.  It got me through my workouts and races fueling me good without me feeling heavy.  I took a break from it a few years back when I was eating totally raw, swapping it for chia porridge or sprouted buckwheat, but now I am back to it again for the most part.  It is economical which is important to me since I am on a budget, it fills me up and is easy to make.  Surprisingly though, I have never until this past week tried overnight oats!

    Peach Melba Oats 3

    I have been drooling over recipes for them just about forever so it was about time I did. I see people making all these delicious creative combinations that would make me really exited for breakfast so I had to make some of my own.  I went simple this time and used ingredients I had on hand.  Peach Melba Oats was what resulted.  I had peaches and raspberries and I love the combination and couldn’t think of anything more delicious in oatmeal at that point, so I went for it. I used steel cut oats because I like a little more texture to mine but you can feel free to use raw rolled oats if you want it raw or just regular rolled oats if you like it smoother.

    Peach Melba Oats

    I added in a touch of cinnamon and used some of my home made coconut milk, and added in some chia seeds for extra protein and healthy omega 3 oils.  What resulted was pure delicious goodness.  Probably the most tasty bowl of oatmeal I have had since I usually go pretty plain with it.  The best part was, it was all ready to go for me.  Just grab and eat, no cooking required which is important when I am in a hurry in the morning before work.  I will definitely be making more overnight oats in the future!

    Peach Melba Overnight Oats

    Serves 1-2

    1/2 cup gluten free steel cut oats or rolled oats (if you want this to be raw use raw rolled oats)
    1 cup raw coconut milk or almond milk (I make my own see how HERE)

    1 Tbsp chia seeds

    1 tsp pure vanilla extract

    1/4 tsp cinnamon

    stevia or maple syrup to taste

    1/2 cup diced peaches

    1/2 cup raspberries

    In a jar, combine all ingredients, and stir to mix together.  Let sit in the refrigerator covered overnight.  Enjoy in the morning!


  • Vegan Chocolate Chip Cookie Dough

    Vegan Chocolate Chip Cookie Dough

     Cookie Dough 2

    Sometimes my boyfriend Eric just looks at me and says “You are weird.” and I say “So are you.” Usually because I am doing something like making a funny face at him randomly or something.  We love it and that is what we appreciate about each other.  No judging going on here, I never worry what he thinks. Conventional things are boring.  I tend not to go that route when it comes to the things I enjoy.  I know cookies are meant to be baked.  But I still love the dough way more than the actual baked cookies.  I have thought many times about making a huge batch of dough just to eat it since I end up eating so much of it anyway while I make cookies.  So, finally I something a little different and just made the dough for the sole purpose of eating it.

    Cookie Dough 3

    I know some of you totally know where I am coming from.  Those of you that love the dough more than the cookies as well. Just not the same once it is baked and hard you know?  That soft, craveable texture that melts slowly in your mouth is simply heavenly! I made the classic chocolate chip dough this time.  Because that is what my Grandma who was a cookie expert always made and I always sampled as a kid.  It always makes me happy.

    Cookie Dough

    Good thing this dough is simple to make with few ingredients.  No slaving over a recipe here.  I actually used something a little unusual in it, sweet potato.  Why?  Because it is soft, sweet (so less sweetener added), and you will never even notice it is in this recipe since I used the white variety.  I used only the dates and sweet potato to sweeten this and it turned out plenty sweet.  You would have no idea this is vegan if I fed it to you and did not tell you.  It tastes so rich and delicious.  Enjoy with a spoon a little at a time (it keeps well for a week in the fridge), or maybe share if you are nice.

    Cookie Dough 4 

    Vegan Chocolate Chip Cookie Dough

    Makes about 1 cup

    1/2 cup cooked sweet potato (I used Japanese sweet potato with white flesh)*

    1/2 cup soft medjool dates, pitted

    1/4 cup raw pecan butter or almond butter

    2 tsp pure vanilla extract

    1/4 tsp sea salt

    1 1/2 cups brown rice flour (or gluten free oat flour)

    3/4 cup vegan chocolate chunks home made or you can buy them HERE

    In a food processor, combine the sweet potato, dates, pecan butter, vanilla and sea salt and process until completely smooth.  Add the rice flour and process until well combined and smooth.  Scoop into a bowl, and stir in the chocolate chunks.  Enjoy!

    *I cooked my sweet potato by poking holes in it, then roasting in a 400F degree oven for an hour (time for roasting varies depending on how big the potato is).


  • Vegan Chickpea Flour Pancakes and Spiced Lentil Potato Hash

    Vegan Chickpea Flour Pancakes and Spiced Lentil Potato Hash

    Indian Kitchen

    I have always loved Indian food since the first time I tried it back when I was in college.  I loved it so much I used to get cookbooks from the library and look for traditional recipes to make at home so I could enjoy it all the time, not just when I went out to eat somewhere.  There is a vegetarian Indian restaurant by my house that was always my favorite since I did not have to worry about any meat being included. I enjoyed everything I ordered there, but my favorite were always the dosa with filling, or the chana masala.

    Indian Kitchen 4

    When I saw Richa Hingle of the blog Vegan Richa was coming out with a new cookbook, “Vegan Richa’s Indian Kitchen” I had to get myself a copy. I am always drooling over her recipes whenever I get them in my inbox or see them on Facebook.  Everything she makes looks delicious from the desserts to the traditional Indian food so I knew this cookbook was going to be good.

    Indian Kitchen 2

    It has so many different recipes in it I could eat Indian food for a year and never tire of it.  Everything from the dosa to veggie dishes, sweets and even breakfast.  Her recipes are simple and anyone could follow them and end up with delicious results. The first recipe I decided to try was the Vegan Chickpea Flour Pancakes. I had all of the ingredients on hand so it was perfect!  They were super simple to make and so delicious.

    Indian Kitchen 3

    I served them with a Spiced Lentil Potato Hash I made.  I am calling it hash because I sautéed it at the end with the spices but I made it a little lower fat and deeper in flavor by roasting the veggies instead of just frying them.  They were delicious and so comforting along with the pancakes.  I am including my recipe for the hash in this post of course, as well as a link to the recipe for Richa’s Vegan Chickpea Flour Pancakes. But you should definitely get yourself a copy of her book: Vegan Richa’s Indian Kitchen!

    Vegan Chickpea Flour Pancakes (Besan Chilla) by Vegan Richa

    Spiced Lentil Potato Hash

    Serves 4

    4 medium red potatoes, diced

    2 large carrots, sliced

    2 small red bell peppers, diced

    olive oil

    1/2 cup French lentils

    filtered water

    1 garlic clove minced

    1 jalapeno, minced

    1 tsp corinander seeds

    1 tsp cumin seeds

    sea salt to taste

    Preheat the oven to 400F degrees and oil 2 sheet pans.  Toss the potatoes with just enough oil to coat, and spread out on one sheet pan.  Do the same with the carrots and peppers and spread out on the other.  Roast the potatoes for about 30-35 minutes until tender and starting to brown.  Roast the carrots and peppers for about 20-25 minutes until tender and starting to brown.  Remove from the oven.

    Meanwhile, to cook the lentils, cover with water in a medium saucepan, and bring to a boil.  Lower to a simmer and cook for about 20 minutes until tender but not falling apart.

    Heat 1 Tbsp olive oil in a skillet and add the garlic, jalapeno, coriander seeds, cumin seeds.  Saute for a minute until the spices and garlic are fragrant.  Add the potatoes, carrots and peppers and lentils and salt to taste sauté a few minutes more until it is all well blended.  Stir in some spinach at the last minute.  Serve warm.


  • Raw Blueberry Muffin Batter Almond Butter

    Raw Blueberry Muffin Batter Almond Butter

    Blueberry Muffin Batter Butter 1

    Blueberry muffins were a regular occurrence on Saturday mornings at my Dad’s house growing up.  I always looked forward to making them even though my Dad was no baker (no offense Dad, still love you anyhow) and used a boxed mix.  I would always lick the bowl clean of batter every time after we had spooned the rest of the batter into the tins and I was waiting for them to bake. It was good stuff.  Almost as good as the baked muffins.  As an adult I still am always licking the batter from the bowl and it is much tastier than that boxed mix stuff.  I am a fan of most kinds of batter…including the blueberry muffin obviously, which got me to thinking it might be a good flavor for nut butter.

    Blueberry Muffin Batter Butter

    I recently saw a blueberry muffin flavored taffy in a store, and I have made a blueberry muffin batter smoothie bowl, so why not?! I used an almond butter base this time, because blueberries love almonds an it is slightly sweet.  I added in a few pecans though to make it a little softer and more runny since almond butter tends to be more stiff sometimes, along with some flax oil.  Just a little coconut sugar and vanilla to sweeten, then once the blueberries were added it was amazing!

    Blueberry Muffin Batter Butter 3

    I even blended in some of the blueberries partially to mimic the smushed berry swirls you kind of get sometimes in your muffin batter.  This stuff is pretty addictive, be warned.  It is good wherever sweet almond butter would apply.  But I love it most straight up, just like real batter!

    Blueberry Muffin Batter Butter 4
    Raw Blueberry Muffin Batter Almond Butter

    Makes about 3 cups

    3 cups raw almonds

    1 cup raw pecans

    1/4 tsp sea salt

    1 tsp pure vanilla extract

    2-3 Tbsp raw flax seed oil

    1 cup dried blueberries

    In a high speed blender, combine all ingredients but the blueberries and blend until smooth, using the tamper to push the mixture down into the blades (if you would like it more runny, add a little more flax seed oil).  Remove 2-3 of the mixture and stir in 2/3 of the blueberries. To the mixture in the blender add the other 1/3  of the blueberries and buzz briefly to blend them up a little. Stir this mixture into the other mixture. Pour into a jar with a lid.  Keep refrigerated.


  • Vegan Peanut Butter Banana Blondie Tart

    Vegan Peanut Butter Banana Blondie Tart

     Peanut Butter Blondies

    Someone recently asked me what my guilty pleasure food is.  You might be surprised when you hear it was not cake, or ice cream or French fries…it was peanut butter.  Yes peanut butter.  I could eat a whole jar if I could.  That stuff is so addictive.  Luckilly though I am satisfied with a few Tbsp at a time and don’t have to resort to the jar.  Stuff you can buy is good, but I make my own.  Eric recently bought some store bought, then asked me if I would make him some because it was just not as good as mine.  I make mine with just peanuts and salt most of the time.  Sometimes raw jungle peanuts, and sometimes organic roasted peanuts.  So good.  When I had a hankering for blondies last weekend, I decided that they would have to include peanut butter too.

     Peanut Butter Blondies 3

    I was actually making banana blondies, and since bananas, peanut butter and chocolate chunks are friends, it worked.  I made them in a tart pan, just to be different and a bit more elegant.  Plus bigger pieces because I was in that kind of mood.  You can cut them as large or as small as you like if you make it though, I won’t judge.  It was delicious with the peanut butter, giving it that happy flavor that I so much love in just about everything.  These are fast to make too, so you can make them and eat them in under an hour! They are best warm of course.

    Peanut Butter Blondies 2

    Vegan Peanut Butter Banana Blondie Tart

    Makes one 8 inch tart, 12 slices

    Ingredients:

    1  Tbsp ground flax seed

    3 Tbsp filtered water

    ½ cup virgin coconut oil, melted

    1 cup coconut sugar

    2 tsp pure vanilla extract

    ¼ tsp salt

    1 tsp baking powder

    1 1/2 cups all purpose gluten free flour or quinoa flour

    1/2 cup peanut butter

    ½ cup mashed banana (1 medium banana)

    1 cup vegan chocolate chunks
    Preheat oven to 350°. Oil a 8 inch removable bottom tart pan with coconut oil. Set aside.
    Whisk together flax seed and water in a bowl, and set aside in the fridge for 15 min.
    Next, in a big bowl, combine melted coconut oil and sugar. Mix until combined. Add in flax mixture and vanilla and continue mixing until incorporated. Stir in salt, flour, peanut butter and banana until batter is smooth and even. Stir in the chocolate chunks. Spread in prepared pan. Bake for 25-30 minutes until center is set. Transfer pan to wire rack to cool. Cut into 12 wedges (or less if you are like me and like big pieces).


  • Vegan German Chocolate Doughnuts

    Vegan German Chocolate Doughnuts

    German Doughnut 2

    I never turned down a doughnut when I was younger. I mean come on…who doesn’t think they are delicious?!  But when I started to eat healthier as I got older I didn’t enjoy any knowing what is in most of the commercially made ones. I didn’t really miss them or crave them, but I have made quite a few raw versions of doughnuts just because they sounded good to me at the time and that took care of any inkling of craving I might have.  They were delicious after all.  But the texture of course was nothing like a traditional doughnut. Which got me to thinking, gluten free vegan baked ones might be awesome.  I have always wanted a doughnut pan, because it seemed like a fun thing making your own healthier versions of doughnuts.  I was never one to want to break out the oil and fry them.  Too scary, too much oil and too messy in my kitchen in my opinion.  Baked suits me just fine.  So I finally ordered a doughnut pan.

    German Doughnut

    It came in the mail a few days back and I was so excited I decided that I had to make some right away.  It was national doughnut day too so very appropriate. I could actually make some instead of seeing other’s photos of theirs and wishing I had one.  I decided to make something chocolaty and it evolved from there.  A chocolate based doughnut. I almost just glazed it with more chocolate, but then I realized how delicious it would be with caramel and some texture so they became German Chocolate Doughnuts after I made some caramel frosting with coconut and walnuts added.  Were these ever good!

    German Doughnut 3

    My first baked doughnuts made at home were a successful experiment!  Not so heavy like the raw ones, cakey and the chocolate doughnut was awesome with the gooey caramel coconut walnut frosting.  Perfect textures together. I cannot wait to create new and exciting doughnuts now that I have this pan! If you do not have one, and you love doughnuts…what are you waiting for?  Why not create your own healthier doughnuts at home?!

    German Doughnut 4 

    Vegan German Chocolate Doughnuts

    Makes 6 large doughnuts

    Batter:

    1 1/2 cups all purpose gluten free flour

    1/2 cup cacao powder

    1 cup coconut sugar

    2 Tbsp ground flax seed

    1/4 tsp sea salt

    1 1/2 tsp baking powder

    1/4 cup plus 2 Tbsp filtered water

    1 cup applesauce or pureed banana

    1/4 cup plus 2 Tbsp coconut oil, warmed to liquid

    2 tsp pure vanilla extract

    Caramel:

    1 cup soft medjool dates, pitted soaked in water and drained if not soft

    3 Tbsp pecan butter, warmed to liquid

    3 Tbsp maple syrup

    2 tsp pure vanilla extract

    1/4 cup filtered water

    1/4 tsp sea salt

    1/4 cup shredded coconut

    1/4 cup chopped walnuts

    Pre heat the oven to 350F degrees, and oil a standard sized doughnut pan.  In a bowl, whisk together the  flour, cacao powder, sugar, flax seed, sea salt, and baking powder.  Whisk in all the wet ingredients until smooth.

    Spoon into the holes in the prepared pan, filling them 3/4 full.  Place in the oven and bake for 15 minutes, or until the doughnuts are cooked through. Remove from the oven and allow to cool.  Once cool, pop out of the pan.

    To make the frosting, combine the dates, pecan butter, maple syrup, vanilla, water, and sea salt in a high speed blender or food processor and blend until smooth (adding a little more water if you think it is too thick).  Stir in the coconut and walnuts.  Spread the frosting over the doughnuts.


  • Red Velvet Smoothie

    Red Velvet Smoothie

    Red velvet cake 4

    I love Red Velvet Cake. Or Red Velvet anything dessert…like doughnuts, or ice cream sandwiches or strawberry shortcake. The classic cake cented with vanilla, such a beautiful eye popping color, and creamy frosting…heavenly.  My favorite flavor is after all vanilla.  No offense to chocolate.  In all of my red velvet desserts I always use beets to color, so it is an even more lovely pinkish red than the original cake.  I was craving some red velvet deliciousness recently but also in need of a nutritious smoothie post workout, so I thought, why not make a red velvet smoothie?

    Red Velvet SMoothie 1

    I added in the beets I always do for my red velvet along with the bananas and the classic red velvet flavorings and it was delicious!  Tasted like red velvet cake batter.  I even added in some Sprout Living Epic Vanilla Lucuma Protein Powder for an extra boost and I think it made it taste even more like cake.  I left the top part of the smoothie just plain white like the frosting on the classic cake and it was lovely.  Who says you can’t have red velvet for breakfast?!

    Red Velvet SMoothie

    Red Velvet Smoothie

    Serves 2

    1 cup raw coconut milk

    1 tsp pure vanilla extract

    ½ tsp almond extract

    Stevia to taste (optional)

    1 scoop Sprout Living Epic Vanilla Lucuma Protein Powder

    6 bananas, frozen and cut into pieces

    2 cups cut up raw beets

    In a high speed blender, combine all ingredients but the beets and puree until smooth, using the tamper to press the shake down into the blades.  Remove ¼ of the mixture, and set aside in a glass or bowl, then blend the beets into the rest of it.  Pour the red mixture into 2 tall glasses, then the plain mixture and serve!


  • Roasted Beet and Quinoa Salad with Chickpeas

    Roasted Beet and Quinoa Salad with Chickpeas

    Beet Salad 1

    Sometimes I just make things on the fly when I get home for dinner, and sometimes I spend my day at work thinking about them.  The salad I am sharing with you today was the latter.  Truth is I made 2 beet salads, at work, spent a chunk of my day working with beets, tasted a few and decided that was what I wanted for dinner.  Although I could eat a big pile of just plain beets, I thought a substantial salad with plenty of protein would do the trick.

    Beet Salad 3

    I was quite hungry after a busy day so I needed that.  The first thing that came to mind to pair the beets with was quinoa.  I had enjoyed a quinoa salad with beets once and it was amazing. I was going to make something even better.  I also added in chickpeas because I love them and because they are awesome with quinoa.  It needed some other flavors too, so I tossed it with lemon and fresh mint.  Simple, but so good.  All that it needed.  But I added a bit of coconut chevre I had on hand just because and it was over the top wonderful!  I shared some with Eric and it was the perfect size meal for two hungry adults.  The best part about this salad besides it tasting wonderful?  The beautiful pink color.  I love it.

    Roasted Beet and Quinoa Salad with Chickpeas

    Serves 2

    Coconut Chevre:

    1 1/4 cups young coconut meat*

    1/3 cup coconut water*

    1/2 cup plus 2 Tbsp coconut butter (not oil), warmed to liquid

    1/8 tsp sea salt

    1 tsp powdered probiotics

    4 medium sized red beets

    1 cup quinoa, rinsed

    2 cups filtered water

    1 1/2 cups cooked chickpeas

    1/4 cup lemon juice

    1 Tbsp lemon zest

    sea salt to taste

    1/2 cup chopped fresh mint

    For the chevre, combine the coconut meat, milk, sea salt, coconut butter, and probiotics in a high speed blender and blend until smooth.
    Pour into a container with a lid, and set in a warm place overnight.
    Once it has become tangy in flavor, place in the refrigerator to chill completely.

    To roast the beets, wrap them in foil, and roast them in a 400F degree oven for about an hour to an hour and a half depending on how big they are until they are tender when pierced with a knife.  Once roasted, allow to cool, peel and cut into large dice. Meanwhile, to prepare the quinoa, place quinoa and water in a medium saucepan and bring to a boil. Reduce to a simmer, cover and cook until all the water is absorbed about 15 minutes, or when all the grains have turned from white to transparent, and the spiral-like germ has separated. Drain, and set aside.

    To assemble the salad, combine all ingredients in a bowl except the chevre, and toss together until well combined.  When ready to serve, sprinkle with the chevre (you will have more left over for another use).

    *If you do not have access to young coconut meat, you may used a can of full fat coconut milk in this recipe in place of the coconut meat and water.


  • 30+ Delicious Vegan Peanut Butter and Chocolate Recipes!

    30+ Delicious Vegan Peanut Butter and Chocolate Recipes!

    The first time I ever ate a Reese’s peanut butter cup as a child, I was in love.  The combination of the rich decadent chocolate melting in my mouth with the gooey salty peanut butter was something I would always look forward to from then on.  Peanut butter and chocolate were just meant to be together…more than peanut butter and jelly maybe even.  As an adult I have grown to love the combination even more.  And the other day when I was cruising my past recipes, I realized there is a lot of chocolate and peanut butter love going on here on the blog.  So I thought that I would bring my favorites together in one post in case you love the combination just as much as I do.  So here you go, all you peanut butter and chocolate lovers out there…20 recipes just for you!

    Chocolate PB Bliss Bowl 2

    Chocolate PB Bliss Smoothie Bowl

    Chocolate Chunk Swirled Peanut Butter

    Chocolate Chunk Swirled Peanut Butter

    Double Chocolate Peanut Butter Cups 2

    Double Chocolate Peanut Butter Cups

    inside-out-pb-cups-1

    Vegan Inside Out Peanut Butter Cups

    Maple Maca Crunch PB Cups 2

    Maca Maple Crunch Peanut Butter Cups

    Raw Black and White Peanut Butter Cups

    PB stuffed peppers 2

    Chocolate Covered Peanut Butter Stuffed Chili Peppers


    Tag Alongs

    Raw Tag-Along Cookies

    Dark Chocolate Peanut Butter Sandwich Cookies 2

    Vegan Dark Chocolate Peanut Butter Sandwich Cookies

    Vegan Peanut Butter Chocolate Pancakes 

    Raw Peanut Butter Chocolate Chip Energy Bars

    Raw Peanut Butter Buckwheat Crispy Bars

    Vegan Salted Caramel Peanut Butter Brownies 6

    Vegan Salted Caramel Peanut Butter Brownies

    Peanut Butter Dream Bars 4

    Raw Peanut Butter and Chocolate Dream Bars

    pb-chocolate-popcorn-1

    PB and Chocolate Dessert Popcorn

    PB Banana Chocolate Chip Bread 3

    Vegan Peanut Butter Banana Chocolate Chip Bread

    pb-cup-cupcakes-2

    Vegan Peanut Butter Cup Cupcakes

    Vegan Cookie Dough Peanut Butter Cheesecakes 3

    Vegan Mini Peanut Butter Chocolate Chip Cookie Dough Cheesecakes

    Raw Chocolate PB Cream Filled Cupcakes 2

    Raw Chocolate Peanut Butter Cream Filled Cupcakes

    Banana Chocolate Chunk Muffins 4

    Vegan Peanut Butter Banana Chocolate Chunk Cupcakes

    molten-pb-chocolate-cakes-1

    Vegan Peanut Butter Lava Cakes

    dark-chocolate-peanut-butter-roll-cake

    Vegan Dark Chocolate Peanut Butter Roll Cake

    banana-cake-3

    Vegan Chocolate Chip Banana Cake with Peanut Butter Fudge Frosting

    Raw PBCup Cake

    Raw Peanut Butter Cup Ice Cream Cake

    PB Chocolate Mousse Tart 4

    Raw Peanut Butter Chocolate Mousse Tart

    Tag Along Tart 3

    Raw Tag-Along Tart

    Vegan S'mores Peanut Butter Pie 3

    Vegan Peanut Butter S’mores Mousse Pie

    Chocolate Banana PB Cream Pies 1

    Mini Raw Chocolate Banana Peanut Butter Cream Pies

    Jungle Cake 6

    Raw Jungle Peanut Cacao Banana Dream Cake

    Peanut Butter Cake 4

    Vegan Peanut Butter Cup Cake

    Peanut Butter Mocha Cake 9 (500x434)

    Raw Peanut Butter Brownie Mocha Cake

    PB Cup Cake

    Raw Peanut Butter Cup Dream Cake


  • Vegan Gluten Free Sugar Free Raspberry Cupcakes

    Vegan Gluten Free Sugar Free Raspberry Cupcakes

    Raspberry Cupcakes

    Since my Gluten Free Sugar Free Vegan Marble Cupcakes that I recently made turned out so good, I decided to try making some more sugar free cupcakes last weekend. This time though, it was raspberry.  I had raspberries on hand and I had thought about making muffins…but when I talked to Eric about it he said that something topped off with a sweet glaze would be awesome so I made cupcakes.  The glaze sounded good to me as well since I felt like making something simpler than frosting.

    Raspberry Cupcakes 2

    I used my basic gluten free sugar free vanilla cake batter for these and it tasted amazing before it was even baked.  Just sayin’.  But once it was all baked up with the raspberries…oh my was it heavenly.  The raspberries became almost jammy suspended  in the sweet vanilla cake, and once I topped it off with a lemon glaze, even better.  The best part is these are gluten free, sugar free, and vegan so no need to worry about getting a sweet overload on them and feeling ill later.  What they will do it make you happy, and satisfy your sweet craving without spiking your blood sugar!

    Raspberry Cupcakes 3

    Vegan Gluten Free Sugar Free Raspberry Cupcakes

    Makes 16
    Cake:
    • 1 3/4 cups all purpose gluten free flour*
    • 1  1/2 tsp baking soda
    • 1 tsp baking powder
    • 1/2 tsp sea salt
    • 2 tsp liquid stevia
    • 1/2 cup virgin coconut oil, warmed to liquid
    • 1 cup applesauce
    • 1/2 cup filtered water
    • 1 Tbsp pure vanilla extract
    • 2 Tbsp organic lemon zest
    • 2 Tbsp lemon juice
    • 2 cups fresh organic raspberries
    glaze:
    • 1/4 cup coconut butter, warmed to liquid
    • 1/4 cup lemon juice
    • 1/2 tsp liquid stevia
    • 1 tsp pure vanilla extract
    • 1/4 tsp beet powder (optional for color)
    • filtered water as needed

    Preheat the oven to 375 degrees and position rack in center of oven. Line 16 muffin tins with liners.

    Whisk flour, baking soda, sea salt, together in a large bowl to blend well.
    Whisk stevia, oil, applesauce, and vanilla extract together in small bowl to blend well, then whisk into the flour mixture until well blended. Whisk in lemon juice until bubbles form. Fold in the raspberries.
    Transfer batter to prepared tins, alternating between chocolate and vanilla spooning the batter by the Tbsp into the them. Place in the oven and bake cupcakes until tester inserted into center comes out clean, about 20 minutes.
    Cool cupcakes completely.

    To make the glaze, whisk together all ingredients but the water until smooth, then add a little water at a time until a runny but not to thin glaze is formed.

    Spread a little of the glaze over each of the cupcakes, then allow to set (if you want it to set quicker, place them in the freezer for about 10 min).

    *Note, if you do not want to make this recipe sugar free, you may use 1 cup coconut sugar in place of the stevia in the batter, and 2 Tbsp coconut nectar or maple syrup in the frosting .
     
    Raspberry Cupcakes 4


  • Vegan French Silk Pie Shooters

    Vegan French Silk Pie Shooters

    French Silk Shooters 1

    French Silk Pie has always been a classic as far as I am concerned. My Dad used to pick one up from Baker’s Square whenever there was a special occasion.  I always got quite excited about it.  Whats not to love after all about a pie with a chocolate mousse like filling, graham cracker crust and loads of sweet whipped cream and chocolate shavings on top? Nothing.  Except for the fact that there is a lot of artificial things in that pie, and dairy so I wouldn’t enjoy it knowing that now.  But it was awesome then.  Luckilly I am pretty good at making my own desserts (or at least I like to think) now and can make a veganized healthified version of that pie.

    French Silk Shooters 2 

    Last weekend I did just that, and in a super simple and super cute variation.  Shooters!  Just because individual desserts are so cute, and I was sharing these and what better way to serve them than in pretty little shot glasses?  No cracking of coconuts here, I use chilled coconut milk to keep it easy for you.  And it makes amazing whipped cream I might add.  These little shooters are just as tasty as a regular French Silk Pie.  They would be perfect to serve at a party where you want to be a little elegant and serve something fuss free for dessert.  You can enjoy the pie but not need to cut it for your guests.

      French Silk Shooters

    Vegan French Silk Pie Shooters

    Makes 6

    Crust:

    1/4 cup finely shredded, dried coconut

    1/4 cup soaked or sprouted, dehydrated buckwheat groats (or raw walnuts if you don’t have them and don’t mind it not being nut free)

    3 large soft medjool dates, pitted

    pinch sea salt

    Filling:

    1 can full fat organic coconut milk, chilled

    3 Tbsp maple syrup or raw coconut nectar

    pinch sea salt

    1 tsp pure vanilla extract

    1/3 cup plus 1 Tbsp raw coconut butter, warmed to liquid

    1/4 cup raw cacao powder

    chopped raw dark chocolate

    In a food processor, combine all of the crust ingredients and process until they are crumbs that hold together slightly. Spoon into the bottoms of 6 shot glasses.

    For the filling, combine all ingredients but the coconut butter and cacao powder in a food processor and process until smooth. Add the coconut butter slowly with the motor running until incorporated.  Remove 1/3 of the mixture and set aside in the fridge in a bowl.  Add the cacao powder to the remaining mixture in the food processor and process until uniform in color.  (If at any time the mixtures become runny, it means they have become too warm, if so, place in the freezer in a bowl, and chill until thickened). Place the chocolate in a pastry bag and pipe into the shot glasses over the crust, then place the vanilla mixture in a pastry bag and pipe over that (you may just spoon them as well if you don’t have a pastry bag.  Garnish the top with chopped chocolate. Serve chilled.

    French Silk Shooters 4


  • 2 Delicious Gluten Free Chocolate Chip Cookie Recipes!

    2 Delicious Gluten Free Chocolate Chip Cookie Recipes!

    One of my favorite memories from being a little girl was spending time with my Grandma in her kitchen. She made lots of things, but one of my favorites was her chocolate chip cookies.  They must have been a weekly thing, because it seemed like she made them quite a lot. I would stand behind her as she mixed the dough, just waiting to steal some.  Because my favorite thing was the dough.  I mean, who doesn’t love cookie dough?  She always warned me that I could get sick from eating too much, or because it had raw eggs…but I never did.  After the dough, the warm and gooey cookies a few minutes out of the oven were my favorite. Grandma was the greatest cookie maker I know, and I think I get my love of baking from her.
    banana cookies 2
    On a rainy day last weekend, I decided that it was going to be chocolate chip cookie baking time.  I had gone for my run, and it was pretty humid outdoors, but luckily it didn’t start raining until after I got in.  I was pretty beat from the humidity, but not too tired to bake cookies!  Rainy days are the best days to spend the day in the kitchen and bake!
    banana cookies 1
    Chocolate chip cookies are the classic American cookie as far as I am concerned and I love them as I mentioned earlier, so that is what I decided to make.  2 different kinds!  The first is an old recipe of mine that I revamped to suit my current way of eating.  It is a recipe for Banana Chocolate Chip Cookies.  They taste like banana bread in cookie form!
    Banana Cookies 3
    For these I used some mini vegan chocolate chips I had been given recently and had been waiting to use in a recipe.  I changed the sweetener and the fats from my old recipe and they turned out wonderful!  Soft on the outside, crunchy on the inside just how I like them. The recipe is at the end of the post!
    cookie dough
    The second chocolate chip cookie I made was one I had recently seen Brandi over at The Vegan 8 post, Oat Free Vegan Classic Chocolate Chip Cookies. I had some rice flour on hand, and wasn’t sure how I wanted to use it but Brandi’s recipe made up my mind for me.  I used peanut butter in place of almond butter just because I am a big sucker for peanut butter and chocolate chip anything.  They turned out delicious though, and the dough was very addictive.
    Chocolate Chip
    I used my home made chocolate chunks in these ones because I used all of the other chocolate chips in the banana chocolate chip cookies, so they were a bit runny once baked (because they melt very quickly) and I probably should have just pressed them in at the end…but who doesn’t love gooey chocolate in cookies?!
    Chocolate Chip 1
    Also, I made my cookies twice as big as Brandi’s because maybe just maybe I am a bit of a cookie glutton sometimes.  But they still turned out delicious!  I would recommend you all head over to The Vegan 8 and try her recipe for Oat Free Vegan Classic Chocolate Chip Cookies!
    Chocolate Chip 4
    Vegan Banana Chocolate Chip Cookies

    makes 1 1/2 dozen

    Cookies:

    1 cup coconut sugar

    1/2 cup plus 1 Tbsp unrefined coconut oil

    2 medium very ripe organic bananas (about 1/2 a cup), pureed (or mashed very well)

    1 Tbsp pure vanilla extract
    1/2 cup maple syrup
    2 1/2 cups all purpose gluten free flour
    1 Tbsp baking powder
    1 tsp sea salt
    1 12 oz vegan chocolate chips

    In a large bowl, combine coconut oil with sugar and mix until well combined. mix in the bananas, vanilla extract, and maple syrup until well combined. In a smaller bowl, whisk together flour, salt, baking powder, then add to the large bowl, and mix until well combined. Mix in the chocolate and place in the fridge to chill until firm. To bake, Preheat your oven to 375 degrees. Line 2 large baking sheets with parchment paper. Roll balls into about 2 inch balls, and place on prepared cookie sheets a couple inches apart (refrigerate unused dough while baking the other trays). Bake for about 15 minutes, until puffed and just starting to brown slightly. Remove from the oven and let cool on the pan a few minutes, then remove to a wire rack to cool. Repeat with remaining cookies.


  • My Foods Journey

    My Foods Journey

    me

    I have been asked by quite a few people to share what I eat on a daily basis, so I thought it was about time to share a post with you about it.  But first, I thought I would share my background with you, so you know why I choose to live my life and eat the way I do currently.  I was not always the healthiest when it came to choosing foods.

    I grew up eating the standard American diet.  Although my Mother tried to get me to eat healthy things like lots of veggies, I didn’t always choose to eat them.  What I mean to say is I ate them when I was at home when she served them (I wasn’t a very picky child), but when I got older and I was given the choice I often bought fast food.  Taco Bell, Wendy’s and Pizza Hut were visited often after school activities.  I would munch on a bag of chips between school and sports, and not think twice about eating multiple candy bars or drinking sodas.  Although I was an athlete in high school I thought it was ok to eat poorly because I worked out a lot.  I began to gain a bit of weight however during my Junior year and my clothes were not fitting so I decided that maybe it was time to do something about it and eat healthier.   I ate a bit healthier my Senior year of high school trying to add in more veggies and cutting out soda, but I had a ways to go when it came to eating healthy.  I fell into the low fat anything is good mind set and did not read food labels at that point.  After a while though I started reading labels and realizing that real food is better than low fat food with fake ingredients.

    When I started college I became a vegetarian and had eliminated most refined sugars and grains from my diet.  The difference was remarkable and I lost about 20 lbs.  I stuck with this way of eating and it got me through competitive running in my early 20s.  I was running faster than ever and I knew my healthier diet was the reason.  I ate this way for a long time, but then when I was 27 I began to question consuming dairy and eggs and decided to try a vegan and raw diet.  I felt really good when I began eating this way. I had increased energy, slept better, and my skin had never been clearer. Eliminating the dairy got rid of my gas and bloating problem, and food seemed to digest better. I ate only raw food for 2 years after that, but it was last year that I began to not feel as radiant as I once did when I started the raw diet.

    Energy is important to me and I discovered that my body needed some cooked food in order to function better.  So, I have added back in cooked foods but my diet remains vegan.  I eat a large amount of salads and raw foods, but for dinner many times I enjoy things like baked sweet potatoes or chickpeas. I used to think that everything had to be extreme, like all or none with the raw foods, but I feel better not being so rigid and like I enjoy life better not being that way.  Any amount of raw foods in your diet is beneficial in my opinion.  I still remain a vegan after 3 years though not just because I feel better without dairy and eggs but because I do care about animals and the way they are treated.  When you hear about some of the horrendous things that are done to animals in our food industries it makes you completely lose your appetite for eating anything animal based.

    So what do I eat in a day?  Well, it usually starts out with either a bowl of oatmeal with chia seeds and flax, a little cinnamon, nutmeg and turmeric or chia porridge (which can be as simple as chia seeds soaked in coconut water, or more elaborate like the Matcha Almond Chia Porridge with Pomegranate pictured below. If it is my day off, I also enjoy a good smoothie bowl!

    matcha chia

    For lunch, it is always a salad filled with veggies.  Sometimes a Simple Hemp Noodle Salad, and sometimes a more elaborate one like this Spicy Peanut Slaw with Edamame.

    Hemp Noodles 3

    Spicy Slaw

    After work I always have a bowl of fruit for a snack.  Just whatever happens to be around.  But berries and peaches are my favorite when they are in season.  For dinner, I usually have a big salad like this Roasted Sweet Potato and Chickpea Salad or if I want something warm then something like this Spicy Veggie Lentil Soup with a green salad on the side.

    Yam and Chickpea Salad

    Veggie Lentil Soup 2

    As far as dessert goes, I have some every day.  How could I not?  I am after all making recipes to share with you and tasting them as I go along.  But I do practice moderation most of the time and just have a piece of something.  Unless it is really good and it is the weekend and in that case I go back for more.  I save the elaborate ones like cakes for once or twice a week, but on a daily basis my two favorites are simpler small things. Like flavored nut butter drizzled over bananas (like the Raw Strawberries and Cream Nut Butter pictured below).  Or something small like Raw Fudgy Matcha Mint Brownies, or Raw Dark Chocolate Glazed Coconut Almond Doughnuts.  I eat whatever I happen to be making or is around for dessert, so never the same thing every day.

    Strawberries and Cream Butter 1

    Matcha Mint Brownies


    As far as random snacks go, like if I am going to be gone a long time and need to grab one quick, I like something like my Raw Raspberry Lemon Doughnut Holes or Raw Green Kingdom Energy Bites.  I keep things like this in the freezer so they are ready to go when I need them.

    Raspberry Lemon Doughnut Holes 3

    Green Kingdom Bites 2

    Eating these foods, I never feel like I am lacking, since I really enjoy them.  I always felt like I was being a little deprived of something back before I became vegan and hadn’t yet discovered how delicious natural foods free of preservatives and animal products can be, but I never do now.  Back when I thought I had to eat fat free yogurt and ice cream to be healthy.  Now I know that I can enjoy coconut yogurt and raw ice cream I make myself and still feel good. Things like baked yam fries are WAY tastier than deep fried french fries in my opinion and avocado is better spread on things than dairy butter.  When you eat the things your body craves then you are satisfied.  At least that is how I feel. These healthy foods are the foods I crave.


  • Vegan Strawberry Rhubarb Mini Pies with Lemon Crust

    Vegan Strawberry Rhubarb Mini Pies with Lemon Crust

    Strawberry Rhubarb Pies 3
    I had tons of strawberries and tons of rhubarb on hand last weekend, and I had a serious craving for strawberry rhubarb pie.  So I had to make some.  Strawberry rhubarb pie has been a favorite of mine ever since I had it in a diner with my Mom when I was about 5.  That sweet tart flavor is not like any other pie, and I was in love after my first piece.  I always ordered that same pie every time I went back there.  Now as an adult I am usually lazy and I just make a strawberry rhubarb crumble if I am going to bake.  But I wanted a pie last weekend.  A double crusted pie. One that I had to roll out the dough.  So I went for it.  I had never used gluten free flour for pie dough before since it has actually been about 3 years since I actually baked a pie (sad I know), but I gave it a go this time.  I made the crust lemon scented since lemon loves strawberries and rhubarb. 
    Strawberry Rhubarb Pies
    Strawberry Rhubarb Pies 1 Strawberry Rhubarb Pies 2
    It was actually pretty simple to make and it came together quick.  It looked perfect when it went into the oven but was cracked and had lots of character when it came out.  Just as a pie should be.  Bubbling filling oozing from it just begging to be eaten once cool enough to handle.  And it was delicious!  Even without any ice cream (which is what I usually have to top it off with but I didn’t have time to make any last week) it was wonderful.  Enjoy this still a little warm from the oven and you will be set! 
       Strawberry Rhubarb Pies 5 
    Vegan Strawberry Rhubarb Mini Pies with Lemon Crust
    four mini pies
     
    Crust:
    2 1/2 cups all purpose gluten free flour
    3 Tbsp coconut sugar
    1 tsp sea salt
    14 Tbsp coconut oil, in its solid form
    1 Tbsp pure vanilla extract
    1 Tbsp lemon zest

    about 7-8 Tbsp cold lemon juice

    Filling:
    2 cups sliced rhubarb
    2 cups quartered strawberries
    1/3 cup coconut sugar
    1 Tbsp pure vanilla extract
    the seeds of one vanilla bean
    juice of one small lemon
    a pinch of sea salt
    3 Tbsp arrowroot starch

    coconut milk, for brushing
     coconut sugar, for topping

    To make the crust, in a large bowl, mix together flour, sugar, sea salt, and lemon zest.  Cut in coconut oil with a pastry blender or 2 knives until it is in pea sized pieces.  Mix in vanilla and just enough lemon juice to create a smooth dough that holds together but isn’t too sticky.  Add a touch of water if needed, and knead slightly until a smooth dough is created.  Divide into 8 pieces and shape into rounds. 
    Roll each out into a 5-6 inch round using parchment underneath and floured rolling pin.  Place bottom crust into four 4 inch pie pans and fit to edges (being careful since gluten free dough is more fragile). If it tears, no worries, just press it back together anc patch it up.
    Preheat oven to 400 degrees.  To make filling, mix together all ingredients in a large bowl.  Pour filling into bottom crust, then carefully place top crust over and press together.  Cut vents into the top crust with a knife. Brush top crust with a little coconut milk, and sprinkle with sugar.  Place in the oven.  Bake for 45 minutes (checking after 20 and if they are very brown, if they are tent with foil) until bubbling and fruit is tender.  Remove from oven and let cool on a wire rack for at least and hour. 
    Strawberry Rhubarb Pies 7


  • Raw Walnut Hemp Brownie Fudge Butter

    Raw Walnut Hemp Brownie Fudge Butter

    Brownie Butter 1

    Brownies will never get old.  I mean who doesn’t love a brownie?!  So after I made some brownies last week, and it was time to make my weekly nut butter (I have to have some sort of delicious nut butter on hand at all times for snacking), an idea popped into my head.  Those brownies were so good I wanted more…so I made a brownie fudge nut butter!  I love walnut butter, so that is what I was making.  But with the added bonus of heart healthy hemp seeds!  Might as well get some of my daily omega 3 oils with my delicious nut butter after all.

    Brownie Butter 2

    This is super simple to make, and so good.  Enjoy right out of the jar (like I often do, and you might as well because a spoonful is like delicious brownie fudge). Or, spread on whatever your heart desires!  I like mine on flax crackers if I want some crunch with my chocolate craving.  Nobody should ever feel guilty for eating chocolate…especially not this type!

    Brownie Butter 3

    Raw Walnut Hemp Brownie Fudge Butter
    Makes about 3 cups

    3 cups raw walnuts

    1 cup raw shelled hemp seeds

    1/2 cup raw cacao powder

    1/4 tsp sea salt

    1/2-3/4  cup raw coconut sugar (depending on how sweet you like it)

    2-3 Tbsp raw hemp oil

    In a high speed blender, combine all ingredients and blend until smooth, using the tamper to push the mixture down into the blades (if you would like it more runny, add a little more hemp oil).  Pour into a jar with a lid.  Keep refrigerated.


  • Spicy Roasted Potatoes with Tahini Cheddar Sauce

    Spicy Roasted Potatoes with Tahini Cheddar Sauce

    Cheesy Potatoes 2

    Sometimes you just need a little comfort food.  Which is exactly why I decided to make some roasted potatoes last week.  To me, roasted potatoes are comfort food. Just like mashed potatoes are to some people. But they have more texture because the middle is soft and the outside is crispy so I can not resist them. Just plain with olive oil and sea salt and I am a happy girl.  But sometimes I elaborate on that.  If I have more time and if I am in the mood.  And that is what these potatoes last week were…elaborated on.  I spiced them up and gave them a kick with chili powder and chipotle, then smothered them in a creamy and slightly spicy tahini “cheddar” sauce.

    Cheesy Potatoes

    Because I was thinking nachos would be good…but potatoes would be better.  I was one of those kids who used to love nachos and cheese. Which is ok when you have vegan cheese made from real ingredients.  It was all delicious!  The crunchy spicy potatoes and the silky smooth cheese cascading over them with a little kick and some freshness from the peppers and chives I scattered over it…MMM…cloud nine! Never deprive yourself of a comfort food craving when you can make it from healthful and real ingredients.  Trust me it is worth the time making something good for yourself!

    Cheesy Potatoes 3

    Spicy Roasted Potatoes with Tahini Cheddar Sauce

    Serves 4

    Potatoes:

    6 cups cubed red or Yukon gold potatoes

    olive oil

    1 tsp cumin

    1 Tbsp chili powder

    1/2-1  tsp chipotle powder (depending on how spicy you want it)

    1/2 tsp sea salt

    Sauce:

    1/2 cup raw tahini*

    1/2 cup filtered water

    1/2 cup chopped carrot

    1/4 cup nutritional yeast

    1 garlic clove

    1/4 tsp sea salt or to taste

    1 Tbsp white miso

    1 Tbsp cider vinegar

    1/4 tsp chipotle powder

    Sliced hot or sweet peppers

    sliced chives or scallions

    Pre-heat the oven to 425F degrees. Toss the potatoes with just enough olive oil to coat in a bowl with the spices and sea salt and spread out onto an oiled sheet pan. Roast in the oven for about 20-30 minutes (depending on your oven) until starting to brown and tender when pierced with a fork.
    Meanwhile, to make the sauce, combine all ingredients in the blender and blend until smooth (adding a little water if you would like it thinner, you want to be able to drizzle it).
    Serve the potatoes with the cheese drizzled over and peppers and chives scattered over that.

    *If you are not a fan of tahini raw cashew butter may be used


  • Raw Strawberry Rhubarb Bars

    Raw Strawberry Rhubarb Bars

    rhubarb

    My Grandma always had a large amount of rhubarb growing behind her garage.  And she knew just what to do with it.  She made the most amazing strawberry rhubarb sauce and I looked forward to it every year.  She made jars and jars of it to give away, I feel like most of it went to me and I was very happy to receive it. I think maybe I get my love of preparing food for others from her.  I can remember her spending lots of time in the kitchen and she never complained about it.

    Strawberry Rhubarb Bars

    Anyways, back to the sauce.  I ate it straight out of the jar and she would always tell me not to eat too much or I would get a tummy ache.  But I never did.  It was the perfect balance of sweet and tart.  So to this day, I think about that sauce and I still love strawberry rhubarb.  I make my own version now without processed sugar and it is just as good.  But I also like to be creative sometimes and make other desserts with strawberries and rhubarb too.  I made some bars this week and they were wonderful.  Just the right amount of tart and sweet just like Grandma’s sauce.

    Strawberry Rhubarb Bars 2

    They had to have a crumble topping so that they would taste like little squares of strawberry rhubarb crumble pie which is what I was going for.  I think they turned out quite heavenly.  My Grandma is no longer around to share them with but I think she would have approved. I shared them with my Mom and she loved them! I think I may just have to make more strawberry rhubarb desserts soon because these were so good!

    Strawberry Rhubarb Bars 3

    Raw Strawberry Rhubarb Bars 
    Makes 12

    Crust:

    1 1/2 cups finely shredded dried coconut

    1 1/2 cup sprouted buckwheat groats (or additional shredded coconut)

    1 cup soft medjool dates, pitted

    1/2 tsp himalayan salt

    1/4 cup ground flaxseed

    Filling:

    2 cups chopped rhubarb

    1 cup fresh strawberries

    1/2 cup pitted medjool dates

    1 tsp vanilla extract

    pinch sea salt

    1/2 cup raw coconut butter, warmed to liquid

    For the crust, combine all ingredients in the food processor and process until small crumbs and starting to hold together. Remove 1/3 of the mixture and place in a bowl.
    Press into a 7X7 or 8×8 inch pan lined with foil or parchment and oiled with coconut oil (for easy removal).  Set aside in the freezer.
    For the filling, combine ingredients in a food processor and blend until smooth. Spread out over the prepared crust, then sprinkle with the remaining crust mixture.
    Place in the freezer to set, about 30 minutes.  Cut into bars and serve!
    Store any extra bars in the refrigerator.


  • Raw Strawberries and Cream Truffles

    Raw Strawberries and Cream Truffles

    Strawberry Truffles

    We have all had one of those days.  You know, the ones where you wake up on the wrong side of the bed, repeatedly drop things, ruin things…like spilling something that stains on your favorite pair of shoes or burn a huge pot of soup and have to throw it out. Or have to face rude people throughout the day.  Although days like that are tough, it is always nice to know that at the end of the day you can do things to make yourself feel better.  After one of those days, I like to relax, maybe watch something funny, or make a new delicious recipe.  Involving chocolate is best.  Brownies are awesome, but truffles are faster. So, I had a tough day last week and made some truffles.

    Strawberry Truffles 2

    I chose strawberry white chocolate filling, because it sounded heavenly.  And it was.  I admit I sampled a couple truffles worth while making them because it was that good. With the dark chocolate coating even better.  You could not possibly be in a bad mood while enjoying one of these babies.  This recipe is a keeper for special occasions by the way.  I would definitely recommend it for Valentine’s Day next year.  But don’t wait until then to make these, enjoy them now!

    Strawberry Truffles 3

    Raw Strawberries and Cream Truffles

    makes about 10

    Filling:

    1/4 cup raw coconut nectar or maple syrup

    1/2 cup fresh strawberries

    1/2 tsp pure vanilla extract

    1/4 tsp sea salt

    1/2 cup raw coconut butter, warmed to liquid

    1/4 cup raw cacao butter, warmed to liquid

    Chocolate:

    3/4 cup melted cacao butter (or you may use coconut oil)

    1/4 cup plus 2 Tbsp maple syrup at room temperature

    heaping 3/4 cup raw cacao powder

    a good pinch of sea salt

    In a high speed blender, combine the coconut nectar, berries, vanilla, and salt and blend until smooth. Add the coconut butter and cacao butter and blend until combined.  Pour into a bowl, and place in the freezer until firm enough to scoop, about an hour.

    Once the filling is firm enough to scoop, scoop out little 1 1/2 inch balls, and set on a parchment lined sheet pan or tray.  Freeze until firm, about 1 hour.

    Meanwhile, when the truffles are almost ready, to make the chocolate, melt the cacao butter in the top of a double boiler with simmering water beneath (being careful not to let the chocolate mixture on top get above 115F degrees).  Or alternatively you can melt it in the dehydrator as I often do, it just takes a little longer.  Once the cacao butter is melted, whisk in all other ingredients until smooth.

    When ready to dip the truffles, place one on a fork, drop it into the chocolate, then lift it out, letting the excess drain off back into the bowl.  Place back on the tray, and repeat with the others.  Once they are all done, allow the chocolate to set (which will happen faster if you pop them in the freezer for about 10 minutes).

    Store candies in the refrigerator in an airtight container.


  • Vegan Piña Colada Scones

    Vegan Piña Colada Scones

    Pina Colada Scones 2

    I remember the first time I ever had a Piña Colada.  I was about 8 or so, and my Mom had just taken me to a play which was in and of itself exciting, then we were going out to eat at a fancy Asian restaurant where they cooked your food at your table.  I was pretty excited.  Then I ordered a  Piña Colada (virgin of course).  Which made it even more exciting to my 8 year old self.  It tasted wonderful!  I fell in love with that flavor combination and even now as an adult I love it.  I have had a lot of pineapple on hand lately and the first thing that happened to come to mind to make was Piña Colada scones.  It might have had something to do with me smelling freshly baked scones at work that day, but also my love for Piña Colada.

    Pina Colada Scones 1

    So, I whipped up a batch of gluten free vegan Piña Colada scones and they were wonderful!  These are a lazy Saturday morning treat.  Or in my boyfriend Eric’s case, breakfast.  If you are a fan of pineapple and coconut together these are for you.  They taste like summer in scone form.  They are quick to make as well and nothing beats warm goodness from the oven!

    Pina Colada Scones 3

    Vegan Piña Colada Scones
    Makes 8

    3 cups all purpose gluten free flour

    1/2 cup coconut sugar

    2 1/2 tsp baking powder

    1/4 tsp salt

    1/2 cup virgin coconut oil, cut into chunks

    1 cup cold full fat orgainc canned coconut milk (whisked until smooth if chunky)

    1 Tbsp pure vanilla extract

    2 cups fresh organic pineapple cut into small chunks

    1/2 cup large flake dried coconut

    coconut milk for topping

    coconut sugar for sprinkling

    Preheat oven to 425 with the rack set at the middle position. Line a baking sheet with parchment. In a large bowl, combine the flour, sugar, baking powder, and salt. Cut in the coconut oil with a pastry blender or 2 knives until the mixture starts to clump into pea sized pieces. In a small bowl, stir the vanilla into the coconut milk. Add the coconut milk to the dough, and stir a few times, but do not overmix. The dough should hold together when squeezed, but still be clumpy. fold in pineapple and coconut until evenly distributed. place dough on a floured work surface, and shape into a 4 inch wide log. Use a bench scraper to cut into trianges. There should be about 8. Place scones on the prepared baking sheet, reshaping slightly if necessary. Brush the tops lightly with the coconut milk (only if they seem dry, you want the sugar to stick), and sprinkle with coconut sugar. Bake for about 20 minutes or until golden brown (after about 15 minutes you may need to reshape with 2 bench scrapers if the scones are spreading, then place back in the oven). Cool on a wire rack.


  • Wild Rice Salad with Chickpeas and Asparagus

    Wild Rice Salad with Chickpeas and Asparagus

    Wild Rice Salad

    Wild rice is big here in Minnesota.  It is a bit spendy, but worth it. It tastes like nothing else, sort of earthy and savory perfect for hearty dishes and it is classic to use in casseroles.  But it is not limited to warm dishes.  It makes wonderful substantial salads as well.  I made a salad last week with it since it happened to be what I saw when I opened my cupboard when looking for things to compose dinner with.  I thought it would go perfectly with the fresh tender asparagus I had bought at the store with the intention of using it in something new and delicious.  I also added in chickpeas for a bit of protein as well as walnuts and some red bell peppers and celery since you can never have too many veggies in your meals as far as I am concerned.  I tossed it with a simple dressing and it was all that it needed to be delicious.  This keeps well and makes a wonderful thing to take with you to work for lunch the next day.

    Wild Rice Salad 1

    Wild Rice Salad with Chickpeas and Asparagus

    Serves 4

    3 cups cooked wild rice

    1 1/2 cups cooked chickpeas (you may use canned)

    2 stalks celery, diced

    1 red bell pepper, diced

    2 cups asparagus, cut into 2 inch pieces

    1/2 cup raw walnuts

    2 Tbsp cider vinegar

    2 Tbsp olive oil

    1 tsp dried thyme

    1/4 tsp sea salt or to taste

    2 cloves garlic, minced

    In a large bowl, combine all ingredients, and toss together until well combined.  Serve at room temperature.

    *To cook wild rice, rinse it well, then place in a pot of water covering by a few inches and bring to a boil.  Lower to a simmer and cook until the rice begins to flower or split apart and is tender about 1 hour and 15 minutes to an hour and a half (depending on which type you have).  Cook the chickpeas in a similar fashion, they take about an hour and a half.


  • Raw Fudgy Matcha Mint Brownies

    Raw Fudgy Matcha Mint Brownies

    Matcha Mint Brownies 4

    Matcha makes me happy. That happy color along with the earthy aroma and flavor is something that I love.  I have always been a green tea fan, ever since I was young which is odd because I didn’t always like other types of tea, just green.  I knew I enjoyed drinking a warm cup of it, and now as an adult I still do.  It is a comforting flavor.  Savory almost, but it goes so well with sweet if you pair it with the right things. Matcha is more spendy than just plain old green tea so I treat it like a treasure, something that is a treat since I buy the good quality stuff.  To me a cup of matcha tea is a luxury, but using matcha in a dessert is also special.  So when I wanted to make some fancy brownies last week, I decided to invite matcha to the party.

     Matcha Mint Brownies 2

    I had some fresh mint, and I included that as well for another flavor note.  Just a little, not so much as to overpower the matcha.  The two flavors married well with the dark chocolate of the brownies.  In my raw brownies, I don’t usually add raw chocolate to the batter, just cacao powder but this time I did and it made them extra delicious. They may look like ordinary brownies, but put one in your mouth, and bam!  You have devoured it and are searching for more.  They are that good.  The earthy matcha, fresh mint and rich chocolate are a match made in heaven.

    Matcha Mint Brownies 3 

    Raw Fudgy Matcha Mint Brownies

    Makes 16 small brownies

    Ingredients:

    1 cup finely shredded, dried coconut

    1 cup raw pumpkin seeds

    1/2 cup ground flax seed

    1/4 tsp sea salt

    1 1/4 cups pitted soft medjool dates (if they are not soft, soak them in water 30 minutes and drain well before using)

    1/2 cup raw cacao powder

    1/4 cup fresh peppermint leaves (or 1/4 tsp fresh peppermint extract)

    1 Tbsp matcha powder (plus more for sprinkling on top)

    3/4 cup chopped raw chocolate


    Combine the coconut, pumpkin seeds, flax seed, and sea salt in a food processor and process until very finely ground.

    Add the dates, and process until they are fine as well.

    Add the remaining ingredients and process until smooth and dough like.

    Press into a 1/2 inch thick square on a parchment lined tray, dust with matcha, and enjoy at room temperature, or chill if you would like them firmer.

    Store any extras in the refrigerator.


  • Raw Raspberry Lemon Doughnut Holes

    Raw Raspberry Lemon Doughnut Holes

    IMG_1372

    I love, love, love this time of the year.  It is the perfect temperature in the morning 50 degrees for running, in the afternoon 70 degrees for chilling out or walking.  Plus nature has dressed itself up beautifully.  The tulips are opening, the wild violets are blooming and the trees are clothed in the most beautiful colors. My favorite are the ones covered in fragrant pink blossoms.  It is only for a few short weeks of the year we get to enjoy this beauty and I make sure I get outdoors every day to do so.  God is the greatest artist when it comes to beautiful things.

    Raspberry Lemon Doughnut Holes

    I have been spending a lot of time outside, so I have been making simpler recipes that do not require quite so much time.  Such as these beautiful pink doughnut holes I made last week.  Raspberry Lemon Doughnut Holes to be exact.  I was in the mood for doughnut holes so I had to make some.  These come together quick, so no excuse not to make them.

    Raspberry Lemon Doughnut Holes 2

    I added in some Sprout Living Vanilla Lucuma Protein Powder for an extra boost, and plenty of tart lemon along with the raspberries.  They were the perfect balance of tart and sweet, and in a way refreshing. I imagine myself sitting out on the patio with some lemonade and these just enjoying the fresh air. If I had a hammock and a patio…but for now eating them in the kitchen is just fine and they are delicious!

    Raspberry Lemon Doughnut Holes 3

    Raw Raspberry Lemon Doughnut Holes

    Makes 12

    doughnut holes:

    2 cups finely shredded dried coconut

    1 cup ground flaxseed
    1/2 cup dried organic raspberries
    1/2 cup soft medjool dates, pitted (if not soft, soak them for 30 minutes in filtered water and drain well)

    1/4 tsp sea salt

    1 tsp pure vanilla extract
    1/3 cup lemon juice (or as needed)
    2 Tbsp lemon zest
    coconut “powdered sugar”*
    Combine coconut and flaxseed in the food processor and process until well blended and the consistency of flour.  Add the raspberries, dates, lemon juice and zest, sea salt, extract and protein powder and process until smooth and starting to hold together when squeezed (if it is not holding together add a little more juice). Roll into 12 balls. Roll in the coconut powdered sugar, and enjoy!  Store extra in the fridge.
    *To make coconut powdered sugar, add 1 cup finely shredded, dried unsweetened coconut to a high speed blender and blend until it is powder (but not too long or you will get butter)


  • Raw Key Lime Pie Shooters

    Raw Key Lime Pie Shooters

    Raw Key Lime Pie Shooters 3

    I am a big key lime pie fan.  It is one of my all time favorite desserts. It has to be the perfect balance of tart and sweet though and not too sweet.  My Mom used to make a really good traditional key lime pie that I loved.  I have since veganized it though, and we both like my new version just as much.  I usually use avocadoes when making key lime pie now to create a silky texture and lovely green color.  I thought some key lime pie sounded good last week, but I was in a time crunch so I didn’t want to make a whole pie, plus I only had one person to share with so…enter key lime pie shooters!

    Raw Key Lime Pie Shooters 1

    My Mother has been telling me that I should make some sort of dessert shooters, since she had some salted caramel mousse ones at a restaurant recently and loved them (that sounds like something I need to recreate sometime too).  So when I was being a little lazy about the key lime pie, it was the perfect solution.  They ended up being super simple to make, and tasted just as good as my key lime pie.  I think these would be perfect for a summer party for dessert!

    Raw Key Lime Pie Shooters 2

    Raw Key Lime Pie Shooters

    Makes 6

    Crust:

    1/4 cup finely shredded, dried coconut

    1/4 cup soaked or sprouted, dehydrated buckwheat groats (or raw walnuts if you don’t have them and don’t mind it not being nut free)

    3 large soft medjool dates, pitted

    pinch sea salt

    1/4 tsp cinnamon


    Filling:

    1 large avocado (1 1/4 cups)

    3 Tbsp maple syrup or raw coconut nectar

    1/3 cup fresh lime juice

    1 Tbsp organic lime zest

    pinch sea salt

    1 tsp pure vanilla extract

    3 Tbsp raw coconut butter, warmed to liquid

    In a food processor, combine all of the crust ingredients and process until they are crumbs that hold together slightly. Spoon into the bottoms of 6 shot glasses.

    For the filling, combine all ingredients in a food processor and process until smooth. Place in a pastry bag and pipe into the shot glasses over the crust.  Serve chilled (best served soon after making because the avocado might start to turn brown after 1 day).

    Raw Key Lime Pie Shooters

  • Raw Raspberry Pecan Butter

    Raw Raspberry Pecan Butter

    Raspberry Pecan Butter 2

    I am a big nut butter of any kind fan in case you haven’t noticed. I love peanut butter, I would eat the whole jar if I could, and macadamia nut butter and pecan butter make me swoon.  Walnut butter is a staple for savories in my house, and cashew butter is always on hand for creamy sauces.  I also make nut butters that in and of themselves could be a dessert, straight out of the jar.  I made one like that just last week and it was so good I just had to share the recipe with you so you could try it as well.  Raspberry pecan butter.  OMG…so heavenly.  Tasted like peanut butter and jelly sandwich with pecan instead of the peanuts and so rich and creamy.

    Raspberry Pecan Butter 4

    I suppose if you wanted to make it with peanuts, then it would be a PB and J but I chose the pecans because I wanted a special treat.  I used dried raspberries, along with raw pecans a bit of coconut sugar and a pinch of sea salt. That simple and so good.  This is awesome drizzled into porridge or oatmeal, or drizzled over fruit. One of my favorite simple desserts.

    Raspberry Pecan Butter 3

    Raw Raspberry Pecan Butter

    Makes about 2 1/2 cups

    3 cups raw pecans

    2 cups dried raspberries*

    1/2 cup raw coconut sugar

    1/4 tsp sea salt

    In a high speed blender, blend the raw pecans at high speed, using the tamper to press them into the blades until they are smooth.  Add the remaining ingredients, and blend until smooth.  Store in a jar in the fridge.

    *I made my own dried raspberries.  To do so, spread them out on a lined dehydrator sheet at 115F for about 24 hours until no moisture remains.  If you cannot make your own, use freeze dried not the sugar sweetened soft raspberries because they will gum up your blender.

    Raspberry Pecan Butter

  • Gluten Free Sugar Free Vegan Marble Cupcakes

    Gluten Free Sugar Free Vegan Marble Cupcakes


    Marble Cupcake

    Last weekend a reader sent me a message asking me to try and find her diabetic friendly cupcake recipe for her parents 50th wedding anniversary.  Since I didn’t have one to share with her at that time, and I am always up for a challenge, I decided to make some!  Marble cake is always a classic served at any sort of special occasion, pleasing both the chocolate and vanilla lovers, so I went with marble cupcakes.

    Marble Cupcake 1

    I have always loved marble.  I made my classic gluten free cake batter, which has a bit of applesauce in place of some of the oil to keep these moist and lower in fat (you can not tell it is there).  But in place of the usual coconut sugar, I used stevia.  To be honest, I did not know how stevia would react in these.  After all, you are taking out volume from the sugar.  And, although I love stevia and I often use it in my smoothies because I don’t want added sugar, it tends to sometimes have a funny after taste.  I was a little worried about that here, but I gave it a go anyhow and I was pleasantly surprised with delicious tasting cupcakes!

    Marble Cupcake 3

    I topped them off with some vanilla frosting made from coconut milk, and they were wonderful!  You could not tell that they were gluten free, dairy free, egg free and sugar free.  I could call these allergen free, because there was no nuts in them either.  Anyways, they tasted delicious!  I am happy I made this recipe, not only for the woman who asked me for the recipe to try, but if there are others out there who have specific dietary restrictions they need to follow.  I am always happy to be able to share recipes so people can still enjoy the things they love even when they have allergies or are on special diets.

    Marble Cupcake 6

    These would make wonderful Birthday cupcakes or cake in addition to being perfect for a wedding anniversary or other special occasion.  But if you want to make them now for no reason at all, but just to eat cupcakes, that is perfectly acceptable too in my book!

    Marble Cupcake 5

    Gluten Free Sugar Free Vegan Marble Cupcakes

    Makes 16 cupcakes
    Cake:
    1 3/4 cups all purpose gluten free flour*
    1  1/2 tsp baking soda
    1 tsp baking powder
    1/2 tsp sea salt
    2 tsp liquid stevia
    1/4 cup virgin coconut oil, warmed to liquid
    1/4 cup applesauce

    1 cup thin coconut milk or filtered water

    1 Tbsp pure vanilla extract

    2 Tbsp unsweetened cacao or cocoa powder

    2 Tbsp cider vinegar

    Frosting:
    2 cans organic Thai Kitchen full fat coconut milk, chilled
    1 tsp liquid stevia
    1/4 tsp sea salt
    1 Tbsp pure vanilla extract
    1/2 cup coconut butter, warmed to liquid

    Preheat the oven to 375 degrees and position rack in center of oven. Line 16 muffin tins with liners.

    Whisk flour, baking soda, and sea salt together in a large bowl to blend well.
    Whisk stevia, oil, applesauce, and vanilla extract together in small bowl to blend well, then whisk into the flour mixture until well blended. Divide between 2 bowls, and whisk the cacao powder into own of them. Whisk 1 Tbsp cider vinegar into each bowl until bubbles form.
    Transfer batter to prepared tins, alternating between chocolate and vanilla spooning the batter by the Tbsp into the them. Place in the oven and bake cupcakes until tester inserted into center comes out clean, about 20 minutes.
    Cool cupcakes completely.

    Meanwhile, to make the frosting, combine all ingredients in a high speed blender or food processor and blend until smooth.  Pour the frosting into a bowl and let sit in the freezer until the consistency of whipped cream, whisking every 15 minutes (this may take anywhere from 1/2 hour to an hour depending on how warm it has gotten).
    Whisk together syrup ingredients in a small bowl.
    When ready to frost, either spread the frosting over the cupcakes, or place it in a pastry bag and pipe it over them.
    *Note, if you do not want to make this recipe sugar free, you may use 1 cup coconut sugar in place of the stevia in the batter, and 1/4 cup coconut nectar or maple syrup in the frosting reducing the coconut butter by 2 Tbsp.
    *Note, if you wish to make a layer cake, bake the batter in 2 6 inch pans, baking for 30 minutes, and frost the cake as you would a 2 layer cake.
    Marble Cupcake 2
  • Spicy Simple Veggie Lentil Soup

    Spicy Simple Veggie Lentil Soup

    Veggie Lentil Soup 1

    I am trying to teach my Man the habit of healthy eating, showing him recipes that are delicious, easy to make and simple, so that he can make them for himself during the week when he is not working.  Things using staples like lentils for protein that require little cooking time compared to beans.  I made this simple veggie lentil soup just for him, to show him that even with only a few things you can have a delicious meal.  I know he would rather me just cook for him, but I am not always there, and nothing is sexier than a Man who can cook for himself right?!

    Veggie Lentil Soup

    I have an organic lentil mix with beluga, red and green and it is wonderful in soups or stews so I thought this was just the soup to use it in.  I combined it with beet, carrot, celery, bell pepper and garlic, keeping it simple then added in some spice Mexican style. Although Eric likes his food smoking hot and spicy, I kept this just spicy enough so you could taste the other flavors. It ended up being delicious, and he loved it as well.  A total of 20 minutes cooking time is all you need here.  No sautéing necessary, this is a low fat dish as well if you are into that.  All that mattered to me is it was tasty and we both liked it and that is exactly how it turned out!  I thought I would share it with you all in case you need to make a quick hearty and tasty dinner sometime too.  Feel free to use the veggies you have on hand, tomatoes or sweet potatoes would be good in here as well.

    Veggie Lentil Soup 2

    Spicy Simple Veggie Lentil Soup

    Serves 3

    1 cup mixed lentils (I used a mix of beluga, red, and green)

    4 cups filtered water

    2 garlic cloves, minced

    1 medium beet, diced small

    2 carrots, sliced

    2 stalks celery, sliced

    1 bell pepper, diced

    1/4 tsp ground chipotle powder

    1/2 tsp red pepper flakes

    1 tsp chili powder

    1 tsp ground cumin

    1/2 tsp sea salt or to taste

    Combine all ingredients in a medium saucepan, and bring to a boil.  Lower to a simmer and cook for about 15-20 minutes until the veggies and lentils are tender.  Serve warm.


  • Raw Almond Joy Bark

    Raw Almond Joy Bark

    Almond Joy Bark 1.

    I am so thankful for my Mom, I love her so much.  I have never wanted to change anything about her.  She has always been there for me, no matter what I have decided to go after in life, following me to my track meets in school, road races as an adult. Helping me find a job that best suit me where I can make delicious food, trying my recipes that I make to share with you all, giving me advice, praying for me, always supporting me. She has been a best friend, as well as taught me to be the strong woman I am today.  Teaching me values, right and wrong and how to care for others. She is wise, and although I didn’t always listen to her advice, I know it was good advice now as an adult, and I learn from it. I hope when I get to be her age, I can be as wonderful as her.

    FullSizeRender

    She even inspires me sometimes to make recipes for this blog.  Since it is Mother’s Day, I made her some raw chocolate bark with the flavors of one of her favorite candies, Almond Joy.  A layer of dark chocolate, then a layer of coconut white chocolate, swirled with coconut and almonds.

    Almond Joy Bark 3.

    It is simply heavenly.  My Mom loved it, and that is what truly counts to me.  She is my biggest critic when it comes to food, and if she likes it, then it passes the test and is really good.  Happy Mother’s Day to all of the Moms out there, I hope you all feel loved and have a wonderful day!

    Almond Joy Bark 2. 

    Raw Almond Joy Bark

    Makes 10 large pieces

    Dark Chocolate:

    1/2 cup raw cacao butter or coconut oil, warmed to liquid

    1/2 cup raw cacao powder

    1/4 cup raw coconut nectar or maple syrup

    pinch sea salt

    Coconut White Chocolate:

    1/3 cup raw coconut butter, warmed to liquid

    1/3 cup raw cacao butter or coconut oil, warmed to liquid

    2 Tbsp raw coconut nectar or maple syrup

    pinch sea salt

    1/2 cup large flake coconut

    1/2 cup raw almonds

    Line an 8 inch square pan with foil or parchment paper going up the sides as well.

    Whisk all of the dark chocolate ingredients together until smooth.  Then pour into the prepared pan, reserving a few Tbsp.

    Whisk all of the coconut white chocolate ingredients together until smooth, then pour in lines over the dark chocolate mixture in the pan. Then drizzle the reserved dark chocolate over that.  Swirl with a knife to create marbling.  Sprinkle the top with the large flake coconut and almonds.

    Place the pan in the freezer until the bark is set, about 30-45 minutes depending on how warm it was.  When the bark is hard, break into pieces.  Store in an airtight container in the refrigerator.


  • Vegan Black Forest Cookies

    Vegan Black Forest Cookies

    Black Forest Cookies 1

    My Mom gave me a bag of dried cherries, and asked me if I would make her some cookies.  They were really good ones.  Not those flavorless super sweet sugary dried cherries but the natural ones with a pop of tart with the sweet. What came to mind immediately was black forest cookies. Chocolate cookie, studded with chocolate chunks and the sweet tart cherries.  The idea of them was simply heavenly.  I asked her what she thought and she agreed so they had to be made.

    Black Forest Cookies 2

    The dough was crave worthy, me being a dough girl more than a baked cookie girl.  But they smelled amazing while baking and were delicious once ready to indulge in.  Like black forest cake without the layers in cookie form.  Besides eating the dough, there is nothing like a warm freshly baked cookie with the chocolate still warm and gooey.

    Black Forest Cookies 3

    Vegan Black Forest Cookies

    Makes 16 large cookies
    Ingredients:
    • 2 Tbsp ground flax seed
    • 1/4 cup plus 2 Tbsp filtered water
    • 1 cup virgin coconut oil, warmed to liquid
    • 1 1/2 cups coconut sugar
    • 1 teaspoon vanilla extract
    • 1/2 cup cacao powder
    • 1 teaspoon baking soda
    • 1/2 teaspoon sea salt
    • 3 cups gluten free all purpose flour
    • 1 cup dried cherries
    • 1/2 cup vegan chocolate chunks


    Instructions:

    1. In a small bowl, whisk together the flax seed and filtered water.  Set aside in the refrigerator for 15 minutes.
    2. Meanwhile, in a large bowl, coconut oil with sugar and mix until well combined.
    3. Mix in the vanilla extract and flax mixture until well combined.
    4. Add the cacao powder, baking soda and salt then the flour, a cup at a time, mixing between each addition, until well combined.
    5. Mix in the cherries, and chocolate chunks. Place in the fridge while you heat the oven.
    6. To bake, Preheat your oven to 350 degrees. Line 2 large baking sheets with parchment paper. Roll balls into about 2 inch balls, and place on prepared cookie sheets a couple inches apart (refrigerate unused dough while baking the other trays).  Bake for about 10-12 minutes, until puffed and just starting to brown slightly.  Remove from the oven and let cool on the pan a few minutes, then remove to a wire rack to cool.  Repeat with remaining cookies and let cool completely.
  • Vegan Strawberry Lavender Scones

    Vegan Strawberry Lavender Scones

    Strawberry Scones

    They make the most delicious smelling scones in the deli where I work, and since my work station is next to the baked goods cooling rack, I get to enjoy the heavenly aroma.  It is one of the happiest smells in the world.  If I am having a bad day, and there are some there, I need just take a deep breath through my nose, and it is better.  I am one of those people who associates smells strongly with memory, and those bring back good memories.  The strawberry ones smell like strawberry shortcake, which is a classic that I love.  So after a bunch of scone smelling last Friday, I decided I wanted some.  I had some fresh organic strawberries, and I decided that they would be awesome in the scones along with some lavender.  Berries and lavender are a match made in heaven and I love them together.

    Strawberry Scones 2

    These smelled absolutely amazing while they were baking, and since I knew I got to enjoy one they made me even more happy than the scones at work.  Eating one of these babies makes me think of a lazy Saturday morning, sleeping in late and sitting out on the porch for breakfast with one of these and some tea (since I don’t drink coffee).  I don’t ever sleep in on Saturdays, and I don’t have a porch, but a girl can dream! Maybe someday!

    Strawberry Scones 3

    Vegan Strawberry Lavender Scones
    Makes 8

    • 3 cups all purpose gluten free flour
    • 1/2 cup coconut sugar
    • 2 1/2 tsp baking powder
    • 1 Tbsp dried lavender flowers (make sure they are very fresh)
    • 1/4 tsp salt
    • 1/2 cup virgin coconut oil, cut into chunks
    • 1 cup cold full fat organic canned coconut milk (whisked until smooth if chunky)
    • 1 Tbsp pure vanilla extract
    • 2 cups fresh organic strawberries cut into chunks
    • coconut milk for topping
    • coconut sugar for sprinkling


    Preheat oven to 425 with the rack set at the middle position. Line a baking sheet with parchment. In a large bowl, combine the flour, sugar, baking powder, and salt. Cut in the coconut oil with a pastry blender or 2 knives until the mixture starts to clump into pea sized pieces. In a small bowl, stir the vanilla into the coconut milk. Add the coconut milk to the dough, and stir a few times, but do not over-mix. The dough should hold together when squeezed, but still be clumpy. fold in strawberries and lavender until evenly distributed. place dough on a floured work surface, and shape into a 4 inch wide log. Use a bench scraper to cut into triangles. There should be about 8. Place scones on the prepared baking sheet, reshaping slightly if necessary. Brush the tops lightly with the coconut milk (only if they seem dry, you want the sugar to stick), and sprinkle with coconut sugar. Bake for about 20 minutes or until golden brown (after about 15 minutes you may need to reshape with 2 bench scrapers if the scones are spreading, then place back in the oven). Cool on a wire rack.
  • Raw Lentil Tostadas with Pineapple Salsa

    Raw Lentil Tostadas with Pineapple Salsa

    Tostadas 2

    Happy Cinco de Mayo everyone!  Last week, I made these delicious raw tostadas, and I thought, they would be the perfect thing to share with you today. I have been on a Mexican food kick lately (more so than usual, although I always love it), and these were on the menu for me and Eric.  He loves Mexican food as well, but he puts up with my non-traditional versions, since he is used to the real thing being from Arizona originally.

    Tostadas 1

    I didn’t make the shells with corn this time, since I did not have any on hand, but instead went for a crispy flax seed crust.  I topped it off with a sprouted lentil and walnut “refried” beans, then some flavorful sweet pineapple salsa and guacamole.  They may sound like a few different components to make and they are, but it all comes together pretty quickly once the shells are done and you have the lentils sprouted (if you do not wish to wait for them to sprout and do not mind a little cooked food, you can cook them instead of sprouting them).  I hope you all get to enjoy some delicious Mexican inspired food today :)!

    Tostadas

    Raw Lentil Tostadas with Pineapple Salsa

    Makes 6

    Flax Tortillas:

    2/3 cup ground flaxseed

    1/3 cup whole flax seed

    1/3 cup chia seeds

    1/2 tsp sea salt

    2 tsp chili powder

    2 tsp cumin

    1 cup filtered water

    Lentil “Refried Beans”:

    1 1/4 cups sprouted red or green lentils

    1 cup raw walnuts

    1 Tbsp nutritional yeast (optional)

    1 Tbsp chili powder

    2 tsp cumin

    1/8 tsp chipotle powder

    1 garlic clove

    sea salt to taste

    filtered water as needed

    Salsa:

    1 1/2 cups diced pineapple

    1 red bell pepper, diced

    2 scallions, sliced

    1 garlic clove, minced

    1 jalapeno, seeded and minced

    sea salt to taste

    juice of 2 limes

    1/4 cup chopped cilantro

    Guacamole:

    2 ripe avocadoes

    1 garlic clove

    sea salt to taste

    juice of one large lime

    To make the tortillas, whisk together all ingredients in a bowl, and then spoon out onto lined dehydrator trays in 6 circles (if it seems too runny at first, let it sit a few minutes).  Dehydrate for 24 hours at 115F until crispy, flipping half way through.  These can be made ahead and stored in an airtight container.

    To make the beans, combine all ingredients in a food processor and process until smooth, adding a little water as necessary to achieve a refried bean consistency (you want to be able to spread them onto the tortillas).  Set aside.

    To make the salsa, combine all ingredients in a bowl, and stir together until combined.  Set aside.

    To make the guacamole, combine all ingredients in a food processor and puree until smooth.

    To assemble the tostadas, spread some of the beans on each tortilla, then spoon some of the salsa over that, then spoon some of the guacamole over. Serve at room temperature.

    *To sprout the lentils, soak them overnight in a sprouting jar, then rinse and drain well.  Allow to sit for 2 days or until tails start to appear on them in a well lit area, rinsing twice a day so that they do not get moldy.  Once the sprouts appear they are ready to use.  Alternatively, if you would like to use cooked lentils in the recipe that would work as well if you do not mind a recipe with some cooked food along with the raw.

  • Raw Coconut Lime Doughnut Holes

    Raw Coconut Lime Doughnut Holes

    Coconut Lime Doughnut Holes

    Doughnut holes were treasure when I was a child.  It was pretty awesome picking one up, and getting all full of powdered sugar while doing so.  Enjoying the sweet cakey doughnut, then licking the powdered sugar off of my fingers.  At that point in my life, the more sugar the better as far as my 8 year old mind was concerned.  They made great weapons in a food fight as well, leaving marks.  Although, who would want to waste a perfectly good doughnut hole?!  Now as an adult, those are fond memories, but traditional doughnut holes are way to sweet, and very refined and I am not talking about them being classy (you know, as in no nutritional value).  So, I now create my own to suit my tastes and nutritional needs.  I made some delicious coconut lime ones last week with some Sprout Living Epic Green Kingdom Protein Powder for an extra energy boost.  I like to add in  a little protein sometimes to my desserts so they do double duty.

    Coconut Lime Doughnut Holes 1

    They were delicious.  Like key lime pie and coconut doughnuts had a child together.  The best part is they are pretty simple to make, they come together quick, and no dehydration required!  I enjoy these so much more than the doughnut holes I used to eat when I was young. They are still a little messy with the coconut powdered sugar I added to them, but it could not be left out, it is tradition!

    Coconut Lime Doughnut Holes 3

    Raw Coconut Lime Doughnut Holes

    Makes 12

    doughnut holes:

    2 cups finely shredded dried coconut

    1 cup ground flaxseed
    1/2 cup soft medjool dates, pitted (if not soft, soak them for 30 minutes in filtered water and drain well)

    1/4 tsp sea salt

    1 tsp pure vanilla extract
    1/2 cup lime juice (or as needed)
    2 Tbsp lime zest
    coconut “powdered sugar”*Combine coconut and flaxseed in the food processor and process until well blended and the consistency of flour.  Add the dates, lime juice and zest, sea salt, and extract and process until smooth and starting to hold together when squeezed (if it is not holding together add a little more juice). Roll into 12 balls. Roll in the coconut powdered sugar, and enjoy!  Store extra in the fridge.*To make coconut powdered sugar, add 1 cup finely shredded, dried unsweetened coconut to a high speed blender and blend until it is powder (but not too long or you will get butter)

  • Raw Matcha Almond Tart with Berries

    Raw Matcha Almond Tart with Berries

    Green Tea Tart 2

    The weather here has been glorious lately.  Waking up to about 45 degrees, running in the cool morning air, taking in the aroma of the few spring blossoms that have decided to start blooming and listening to the song of the excited birds is pretty amazing in the morning.  Then in the afternoon it is warm enough to sit outdoors and chill or go for a walk to get my daily dose of vitamin D.  I get excited when it is shorts weather from morning until evening, and no extra clothes layers are needed.  I am craving warmer weather things as well, like fresh berries. So I bought a few last weekend and enjoyed some plain, but the rest ended up on a delicious matcha almond tart I made.

    Green Tea Tart 3

    I love all things matcha and especially with sweet almond.  I discovered this combination when making matcha tea with almond milk.  It is sooo good!  So I thought a tart with a creamy matcha almond filling would be amazing with the fresh berries and a crunchy crust.  It was so refreshing and light, yet satisfying.  Just the way I like my desserts, and perfect for Spring! If your Mom is a matcha fan, I think this would be perfect for Mother’s Day.

    Green Tea Tart 4

    Raw Matcha Almond Tart with Berries

    Makes one 8 inch tart

    8 inch tart pan

    crust:

    1/2 cup sprouted, dehydrated buckwheat groats

    1/2 cup finely shredded, dried coconut

    1/4 cup ground flax seed

    3/4 cup soft, medjool dates, pitted (if they are not soft, soak them in water for 30 minutes and drain well first)

    1/8 tsp sea salt

    2 Tbsp raw almond butter

    Filling:

    2 cups young coconut meat*

    1/2  cup coconut water

    3 Tbsp raw coconut nectar or agave nectar

    1/4  tsp sea salt

    2 tsp matcha powder

    seeds of one vanilla bean, or 1 Tbsp pure vanilla extract

    1/2 tsp pure almond extract

    1/4 cup plus 2 Tbsp raw coconut butter, warmed to liquid**

    fresh organic strawberries and blueberries for garnish

    raw almonds for garnish

    To make the crust, combine all ingredients in a food processor and process until finely chopped and holds together when squeezed (if it doesn’t add a few tsp water and pulse until it does).  Press into an 8 inch round tart pan with a removable bottom (I like to oil mine with coconut oil first). Set aside.

    Meanwhile, to make the filling, combine all ingredients but the coconut butter in a food processor and process until smooth.  With the motor running, add the coconut butter and process a minute more.  Pour into the prepared crust, and let sit in the freezer for about 1 1/2 hours until firm.

    When ready to serve, garnish the top of the tart with fresh berries and raw almonds. Store cake in the refrigerator.

    * 1 cup raw cashews, soaked for 4 hours and drained can be substituted for the coconut meat if unavailable.

    **If your young coconut meat is especially soft and watery, you will need to add at least a few Tbsp more coconut butter.

    Green Tea Tart


  • Roasted Yam and Black Bean Tacos

    Roasted Yam and Black Bean Tacos

    Roasted Yam and Black Bean Tacos 1

    I have been craving a lot of Mexican inspired food lately.  Maybe it has something to do with the fact that Cinco de Mayo is next week, or just that the weather has been warm and perfect here lately.  Whatever the case, I made some delicious roasted yam and black bean tacos last week, that were so good, I wanted to share the recipe with you all.

    Roasted Yam and Black Bean Tacos 2

    Yams are a staple in my diet lately.  They are so delicious with anything!  So I paired them with black beans, and a salsa filled with lots of fresh veggies, and some avocado for my tacos.  They were so flavorful and tasty!  My boyfriend Eric who is originally from Arizona always tells me though that none of the Mexican food in Minnesota is authentic, including my Mexican food.  But that doesn’t matter to me as long as it is damn good and I like it! That said, he really enjoyed the tacos, even if they were my Mexican inspired food.  And so did I!

    Roasted Yam and Black Bean Tacos 3

    Roasted Yam and Black Bean Tacos

    Makes 4, serves 2

    1 medium garnet yam, diced

    olive oil

    1/2 small onion, diced

    1 garlic clove, minced

    1 cup cooked black beans

    1/2 tsp cumin

    1/2 tsp chili powder

    1/8 tsp ground chipotle powder

    sea salt to taste

    Salsa:

    1 medium, ripe organic tomato

    4 scallions, sliced

    1 bell pepper, sliced

    1 jalapeno, seeded and diced

    juice of one large lime

    1/4 cup chopped fresh cilantro

    1 garlic clove, minced

    sea salt to taste

    1 cup diced avocado

    4 sprouted corn tortillas

    Preheat the oven to 375F.  Toss the yams with just enough oil to coat, and spread them out on an oiled sheet pan.  Roast the yams for about 25 minutes until starting to brown and tender.

    Meanwhile, sauté the onion in the olive oil in a medium pan over medium heat until translucent, about 5 minutes.  Add the garlic, beans, spices, and sea salt and cook a few minutes more.  When the yams have finished roasting, toss them with this mixture.

    To make the salsa, mix together the tomato, scallions, bell pepper, jalapeno, lime juice, cilantro, garlic and sea salt in a bowl.

    To assemble the tacos, spoon some of the yam and black bean mixture onto each shell, then some of the salsa, then some avocado.  Serve!

    Roasted Yam and Black Bean Tacos

  • Raw Peanut Butter Buckwheat Crispy Bars

    Raw Peanut Butter Buckwheat Crispy Bars

    Buckwheat Crispy Bars 1

    Last week my Mom and I were discussing rice crispy bars.  I was saying that the best kind when I was young were the ones with the peanut butter in the crispy part topped off with chocolate.  I could have cared less about the regular ones with just marshmallows, it had to be the special ones.  One of the kids on my cross country team had a Mom that always made those and brought them to the meets.  I looked forward to those after my race.  I said to myself, I have got to recreate a raw version of those sometime with buckwheat crispies.  But it was on the backburner.  Until I asked Eric if he had an opinion on what would be good to make next and he said rice crispy bars with peanut butter.  I knew it had to be made now, it was meant to be because all three of us thought about them.

    Buckwheat Crispy Bars

    They ended up super simple to make since I always have a supply of soaked and sprouted buckwheat groats on hand (something that is smart to do if you make a lot of raw desserts, make a large batch and freeze them in containers).  I just mixed them with coconut butter, peanut butter, coconut nectar and sea salt and that was all they needed.  Plus the dark chocolate on top of course.  Were they ever amazing!  I like these even more than the ones I remember as a child.  Be warned, they are pretty addictive.  I cut them into small bars, and I can’t stop at just one.

    Buckwheat Crispy Bars 2

    Raw Peanut Butter Buckwheat Crispy Bars

    Makes 18 bars

    6 cups soaked and dehydrated buckwheat

    2 cups raw jungle peanut butter (or regular PB for not raw)

    1 cup raw coconut butter, warmed to liquid

    1 cup raw coconut nectar or maple syrup

    1/2 tsp sea salt

    Chocolate Topping:

    1/2 cup melted coconut oil or raw cacao butter

    1/2 cup raw cacao powder

    1/4 cup raw coconut nectar or maple syrup

    pinch sea salt

    Place the buckwheat in a large bowl. In a medium bowl, whisk together the peanut butter, coconut butter, coconut nectar, and sea salt until combined.  Stir into the buckwheat until it is evenly coated.  Press the mixture into the bottom of a 7×7 or 8×8 inch square pan lined with parchment (for easy removal).  Chill for at least 30 minutes until firm.

    To make the topping, whisk together all ingredients until smooth, then pour over the chilled bars.  Place back in the freezer until set, about 5-10 minutes.

    Cut into 18 bars. Store extra bars in an airtight container in the fridge.

    Buckwheat Crispy Bars 3


  • Vegan Mushroom Walnut “Meatballs” with Gravy and Mashed Potatoes

    Vegan Mushroom Walnut “Meatballs” with Gravy and Mashed Potatoes

    Mushroom Meatballs

    My Mom’s Birthday was a few weeks back, and she didn’t ask for a cake, but instead vegan meatballs.  You see, I have made mushroom meatballs before and my Mom loved them so much she requests them every so often for special occasions. I made some for Christmas last year.  I usually make them with red sauce, but this time she wanted them in a gravy. Also, she wanted mashed potatoes.  She loves my mashed potatoes so much she says they are even better than my Grandma’s, which is a huge compliment. I don’t know if I agree, but coming from her it means a lot.

    Mushroom Meatballs 1

    What I ended up making was a mushroom gravy with the mashed potatoes, because I feel like mushrooms add so much delicious flavor, and it echoed the flavor of the meatballs themselves.  For the mashed potatoes, I made them creamy and fluffy with coconut milk.  I served it with peas because it seemed right for this veganized classic comfort food meal.  Mom loved it, and that made me happy!

    Mushroom Meatballs 2

    Vegan Mushroom Walnut “Meatballs” with Gravy and Mashed Potatoes
    Serves 3-4

    Meatballs:
    1 Tbsp olive oil
    1 cup chopped red onion
    3 cups chopped crimini mushrooms
    1 1/2 cups toasted walnuts
    1 1/2 cups gluten free rolled oats, or as needed
    3 Tbsp nutritional yeast
    2 tsp sea salt

    Mashed Potatoes:
    4 cups cubed russet potatoes
    sea salt to taste
    1/4 cup coconut milk or as needed
    Gravy:
    1 tsp olive oil
    1 garlic clove, minced
    1 cup mushrooms, sliced
    2 cups filtered water
    1 1/2 Tbsp tamari
    1 Tbsp nutritional yeast
    1 Tbsp white miso
    3 Tbsp arrowroot starch dissolved in 3 Tbsp water
    1 Tbsp coconut butter
    Preheat the oven to 400F.  To make meatballs, heat 1 Tbsp olive oil in a large non-stick skillet over medium heat.  Add onion, and saute until softened, about 5 minutes, then add the mushrooms and saute until soft, about 3 minutes.  Add garlic and saute another minute until fragrant, then remove from heat.  Place mixture in a food processor along with walnuts, oats, nutritional yeast, and sea salt.  Process until smooth.  Add a little more oats if too sticky, then shape into 16 little balls and place on a baking sheet lined with foil and sprayed with non-stick spray.  Bake for about 15-20 minutes until heated through, and starting to brown.
    Meanwhile, place the russets in a large pot of salted boiling water on the stove, and bring to a boil. Cook until the potatoes are tender, and drain. Add sea salt to taste, along with the coconut milk and mash until soft, adding a little more milk if desired.
    To make the gravy, sauté the mushrooms and garlic in the olive oil over medium heat, then add the remaining ingredients except the arrowroot starch and coconut butter. Bring to a simmer, and simmer for about 10 minutes.  Add the arrowrootstarch mixture and cook until thickened, whisking.  Then add the coconut butter and whisk until melted.
    Once the meatballs have finished cooking, place them in the gravy and toss to coat.  Serve with the mashed potatoes.


  • Vegan Piña Colada Waffles

    Vegan Piña Colada Waffles

    Pina Colada Waffles

    Sleep in, workout, enjoy the fabulous weather and sunshine and make waffles.  Sounds like the perfect weekend day to me! Kind of how it went down one day last weekend, just randomly decided to make Vegan Piña Colada Waffles because I had time, and I knew my boyfriend who I happened to be spending time with would love them as well. Also, my oven was broken at the time, and something a little sweet and baked sounded good…so waffles were the perfect compromise!

    Pina Colada Waffles 2

    Any type of waffles are special in my opinion.  But I had lots of pineapple on hand so I thought why not make special waffles with it, add in coconut and voila!  Piña colada deliciousness!  I added coconut and pineapple into the waffles themselves, but to keep the theme and deliciousness going, I made a pineapple syrup and sprinkled the waffles with coconut.  Were they ever yummalicious!  If you have the time, this is the perfect lazy day weekend treat.

    Pina Colada Waffles 3

    Vegan Piña Colada Waffles

    Makes 3 Belgian Waffles

    2 Tbsp ground flax seed

    1/4 cup plus 2 Tbsp filtered water

    1/2 cup finely shredded dried coconut

    1 3/4 cups gluten free all purpose flour

    3/4 tsp sea salt

    1 tsp baking powder

    1/4 tsp baking soda

    1/2 cup coconut sugar

    1 1/2 cups thin coconut milk  at room temperature

    3 Tbsp melted virgin coconut oil warmed to liquid

    1 cup fresh pineapple chunks

    Pineapple Syrup:

    1 cup fresh pineapple

    3 Tbsp maple syrup

    1/2 cup fresh pineapple chunks

    In a small bowl, whisk together the flax seed and water, and set in the fridge for 15 minutes until the mixture is gel like.
    Meanwhile, whisk together the coconut, flour, salt, baking powder, baking soda, and coconut sugar in a large bowl.  Whisk in the coconut milk and oil until combined, then the flax eggs (flax water mixture) until combined. Stir in the pineapple chunks.
    Cook according to belgian waffle iron directions (like to keep my waffles warm in a low heat oven (200F) while I cook the others).

    Meanwhile, combine the 1 cup fresh pineapple and 3 Tbsp maple syrup in a high speed blender and blend until smooth.  Stir in the 1/2 cup pineapple chunks.
    Serve the waffles hot with the pineapple syrup.

    Pina Colada Waffles 1

  • Raw Pineapple Chili Truffles

    Raw Pineapple Chili Truffles

    Thai Pineapple Truffles 2

    My boyfriend Eric is always telling me I should make desserts with fruit and heat in the form of chilies added to them.  One time he asked me to make him a smoothie with berries and ghost peppers in it.  That is how much he loves hot peppers.  Probably because he is originally from Arizona and doesn’t have the milk Minnesotan palate.  But I am Minnesotan and I love my chilies as well. Maybe because I should actually be living somewhere warm, but I like it here.  He is right about the fruit and hot pepper combination though, it is delicious.  So when I had lots of pineapple last weekend, and decided to make pineapple truffles, for Eric I added in a bit of chilies.

    Thai Pineapple Truffles

    They tasted like piña colada with a little kick and when paired with the chocolate I dipped them in, even better.  They were smooth, silk and delicious.  Not just your run of the mill truffles.  If you like a bit of heat, then you will love these. Want to be extra daring, add more pepper flakes.  I went modest in the recipe below but feel free to adjust to your tastes.

    Thai Pineapple Truffles 3

    Raw Pineapple Chili Truffles

    makes about 10

    Filling:

    1/4 cup raw coconut nectar or maple syrup

    1/2 cup diced fresh pineapple

    1/2 tsp red chili flakes

    1/2 tsp pure vanilla extract

    1/4 tsp sea salt

    1/2 cup raw coconut butter, warmed to liquid

    1/4 cup raw cacao butter, warmed to liquid

    Chocolate:

    3/4 cup melted cacao butter (or you may use coconut oil)

    1/4 cup plus 2 Tbsp maple syrup at room temperature

    heaping 3/4 cup raw cacao powder

    a good pinch of sea salt

    chili flakes for sprinkling

    In a high speed blender, combine the coconut nectar, pineapple, chili flakes, vanilla, and salt and blend until smooth. Add the coconut butter and cacao butter and blend until combined.  Pour into a bowl, and place in the freezer until firm enough to scoop, about an hour.

    Once the filling is firm enough to scoop, scoop out little 1 1/2 inch balls, and set on a parchment lined sheet pan or tray.  Freeze until firm, about 1 hour.

    Meanwhile, when the truffles are almost ready, to make the chocolate, melt the cacao butter in the top of a double boiler with simmering water beneath (being careful not to let the chocolate mixture on top get above 115F degrees).  Or alternatively you can melt it in the dehydrator as I often do, it just takes a little longer.  Once the cacao butter is melted, whisk in all other ingredients until smooth.

    When ready to dip the truffles, place one on a fork, drop it into the chocolate, then lift it out, letting the excess drain off back into the bowl.  Place back on the tray, and repeat with the others.  Sprinkling each with chili flakes as you go.  Once they are all done, allow the chocolate to set (which will happen faster if you pop them in the freezer for about 10 minutes).

    Store candies in the refrigerator in an airtight container.

    Thai Pineapple Truffles 1

  • Rosemary Orange Coconut Deodorant and Reducing Chemicals in My Daily Life

    Rosemary Orange Coconut Deodorant and Reducing Chemicals in My Daily Life

    This is not a food related post, but it is something that is important to me, and I would like to share for all who would like to read it.  I recently read a book by Anna Victoria Rodgers called Toxic World Toxic People and it opened my eyes to the many chemicals we are exposed to in our everyday lives which can be harmful to our health.  So, I have made some changes since then to try and eliminate some of them that I can control.  You should all read her book by the way if you are interested at all in feeling your best and being your healthiest.

    At this point in my life I am always trying to do what I can in order to improve my health, so that I can feel my best.  I wasn’t always that way though.  When I was in high school, I could have cared less what I put into and on my body.  I ate junk food all the time, and wore lots of synthetic chemicals on my body.  I started to become aware of these things being harmful when my Mom was diagnosed with fibromyalgia.  She started to eat organic foods, buy more natural products free of scents  and chemicals for cleaning and body care.  I didn’t listen at first, but then she said some of the stuff I was using was making her ill, so I switched to the more natural stuff myself. I also started shopping for organic veggies, and eliminating processed foods with fake ingredients and this is part of where my interest in health food started.  Eliminating those chemicals helped both of us a lot.  I have since done many more little things to improve my health, but it did not dawn on me that I was still using lots of things which could in the long run be harmful to me.

    My makeup for one.  I have worn makeup since I was in middle school, and I had never given any second thought to what was in it or that it might be harmful.  There are tons of preservatives, heavy metals and chemicals in many of the large commercially made cosmetic brands. I looked at the ingredients on my cosmetics after I had learned what they were and I was shocked.  These are things that are absorbed through the skin and into our blood stream. Luckilly I found a cosmetic company that sells clean cosmetics, Revescent.  Their products make your skin look as beautiful as the other toxic brands and you are using a safe product on your skin. I feel like my skin is much happier after switching from the old makeup I had been using to chemical free makeup.

    me

    I am now also very careful reading ingredient labels on things like lotions and hair products.  I have always had sensitive skin. Back in high school, I was getting mysterious rashes on my shoulders and back.  When I went to the doctor he said it was most likely from sweating during cross country practice.  When they didn’t go away after the season ended, I knew something was up.  I ended up switching shampoos for some reason and the rash disappeared.  Turns out it was the heavily artificially scented shampoo I was using that caused the skin condition.  Also I have had a few instances where I used a new product with artificial chemicals and scents and my face broke out in hives so bad that I had to go to the doctor for it.  Since then I have been really careful about what I buy.  Least ingredients is best as far as I am concerned and ingredients that I can pronounce and know what they are.  Acure is a good skin care brand that I have found works for me. I also make my own body butter, bronzer, lip balm, and deodorant (the recipes or links below).  It is fun and easy to make your own body care items, and you will know what is in them!

    If you want to feel your best, I would urge you to be kind to your body and be very careful what you put on it!  You can eat the best organic foods and be doing everything else healthy but still be bombarding yourself with chemicals every day.  Every little change for the better you make matters!

    Deoderant

    deodororant

    Rosemary Orange Coconut Deodorant
    Recipe adapted from Mind Body Green 

    1/4 cup raw coconut oil, warmed to liquid
    1/8 cup cornstarch
    1/8 cup arrowroot powder
    10 drops orange essential oil
    6 drops rosemary essential oil
    1 Tbsp baking soda*

    In a small bowl, whisk all ingredients together, then pour into an empty deodorant container, or a glass jar (I just set it on my counter, remove about 1/4 tsp with my hands and rub it into my armpits when I want to apply) and set in the fridge until solid (if your home is cool enough, you can store it on the counter, which is what I do and it is soft enough to rub in, but if your house is warmer than about 75F, then you should store it in the fridge (and if you are using a jar, you will have to chip out pieces to use).
    *Note, some people are sensitive to baking soda on their skin, if this is you, leave it out.

    Bronzer

    DIY Bronzer

    ground Cinnamon

    ground Nutmeg

    cacao powder

    Mix the three together in a blend that matches your skin tone.  For mine, I use just the cinnamon and nutmeg because I have a fairly light complexion. About 2 tbsp. cinnamon, and 2 tsp nutmeg.  If you have a darker complexion or want more definition, use the cacao powder.

    Citrus Cacao Butter Lip Balm

    Vanilla Bean Rose Body Frosting

  • Roasted Sweet Potato and Chickpea Salad

    Roasted Sweet Potato and Chickpea Salad

    Yam and Chickpea Salad 3

    Since it is Earth Day, I thought sharing a beautiful salad was in order.  Why a salad?  Well, eating lots of veggies and going vegan instead of consuming lots of meat is good for the planet.  Did you know plant based food production uses a lot less land and water?  Or that is produces less pollution and feeds more people with less resources?  Well it does, and not only that you are leaving the animals of the world in peace to live their lives because they deserve to be happy too.  If people reduced their meat consumption it would make a huge difference for the planet.  So, even if you are not ready to go full fledged plant based, why not try it a few days a week.  And why not celebrate Earth Day with a delicious salad?!

    Yam and Chickpea Salad 1

    This salad I am sharing with you was actually my dinner last night.  I had no intention of sharing it when I started making it, but it ended up being so good I just had to.  I was going to make some yam fries, but I wanted a salad, so I decided to cube up the yams and put them on my salad.  Along with some chickpeas for protein, red bell peppers, romaine lettuce, pumpkin seeds, toasted aromatic seeds, and marjoram.  All drizzled with a creamy pumpkin seed dressing that is a staple in my fridge at all times.  OMG…was it ever delicious!  The sweet yams, briny chickpeas, savory spices and garlicky dressing were a party in my mouth. Not to mention all of the wonderful textures.  I am a textural person and this was wonderful!  I hope you try it so you can enjoy it too!  Happy Earth Day!

    Yam and Chickpea Salad 2 

    Roasted Yam and Chickpea Salad

    Serves 2

    1 large yam, diced

    olive oil

    sea salt

    Dressing:

    3 Tbsp pumpkin seed butter

    3 Tbsp filtered water (or as needed)

    1 small garlic clove, minced

    1/2 tsp cumin

    1/8 tsp ground chipotle pepper or cayenne pepper

    sea salt to taste

    Salad:

    1 cup cooked chickpeas

    1 red bell pepper, diced

    1/4 cup raw pumpkin seeds

    toasted cumin seeds and coriander seeds

    fresh marjoram leaves

    Preheat the oven to 400F degrees.  Toss the yams with just enough olive oil to coat and sprinkle with sea salt, then spread out onto the pan.  Roast for about 20-30 minutes until softened and browning at the edges.  Once the yams have finished cooking let them cool to room temperature.

    Meanwhile, to make the dressing, combine all ingredients in a bowl, and whisk together until smooth (or, I like to use an immersion blender in a tall glass measuring cup if you have that).

    To assemble the salad, scatter the greens on the bottom of the plates, then top with the chickpeas, yams, bell pepper. Drizzle with the dressing, then sprinkle with the pumpkin seeds, cumin, coriander and marjoram.

    Yam and Chickpea Salad


  • Chocolate Chunk Swirled Peanut Butter

    Chocolate Chunk Swirled Peanut Butter

     Chocolate Chunk Swirled Peanut Butter

    I love my peanut butter.  One of my favorite simple desserts/snacks is sliced banana drizzled with peanut butter and it tastes as good to me as a piece of cake that is how much I love it.  Add in some chopped raw chocolate, and even better.  Which got me to thinking, what if I made some peanut butter with a bit of chocolate in it? It sounded so good, it had to happen!  So the next batch of peanut butter I made included a swirl of sweet chocolate peanut butter as well AND raw chocolate chunks. 

    Chocolate Chunk Swirled Peanut Butter 2

    Talk about heavenly.  I was a fan of Nutella growing up, but I am an even bigger fan of this chocolate chunk swirled peanut butter. It is a dessert in and of itself, and I love it drizzled over bananas, like I said. I think strawberries would be wonderful dipped in it as well, sort of like a pb & j with chocolate.  If peanuts are not your thing, try almonds or whatever your favorite nut may be.  I have a feeling it will be just as delicious!

    Chocolate Chunk Swirled Peanut Butter 3

    Chocolate Chunk Swirled Peanut Butter
    Makes about 3 cups

    3 1/2 cups toasted organic peanuts*

    1/4 tsp sea salt

    1/2 cup vegan chocolate chunks (if they are larger, chop them a bit)

    2 Tbsp raw cacao powder

    1/4 cup raw coconut sugar

    In a high speed blender, combine the peanuts and sea salt and blend until smooth, using the tamper to push the mixture down into the blades.  Remove half the mixture to a glass measuring cup with a spout, and stir in the chocolate chunks.  Add the cacao powder and coconut sugar to the other half of the peanut mixture in the blender and blend until well incorporated.  Pour the 2 nut mixtures into a glass jar alternating the two into a jar to create layers.

    *If you would like to make a raw peanut butter with jungle peanuts just swap out the regular peanuts for raw jungle peanuts.

    Chocolate Chunk Swirled Peanut Butter 1

  • Raw Walnut Thyme Cheese Flatbreads with Sun Dried Tomatoes

    Raw Walnut Thyme Cheese Flatbreads with Sun Dried Tomatoes

    Walnut Chevre Tomato Flatbreads 1

    I love nut cheeses, they always turn out delicious and in my opinion better than real cheese.  Plus my stomach is happier than if I had eaten the traditional. But I tend to make the same ones every time, either macadamia nut or cashew.  Which are amazing.  But since I am one that likes variety I decided that I needed to change it up and make one with another type of nut.  I know other people use almonds, but I love walnuts since they have a high ratio of omega 3 to omega 6 oils and they are so buttery and rich tasting.  So I decided to try them in a cheese. My Mom had just given me a pot of herbs for Easter, since she knows me better than anyone, and she knows that I love receiving a bouquet of herbs more than flowers…so I thought I would use some in the cheese and make it herbed with thyme. 

    Walnut Chevre

    It turned out wonderful!  The color was a little like pate or something, but don’t let that keep you from trying it out, it tasted amazing. I added in a little garlic as well, and probiotics as I often do in cheeses to give them the tang of traditional goat cheese.  It is wonderful on crackers, but I made little flatbreads with it (using my cracker recipe), topping them with the cheese, some sun dried tomatoes and fresh thyme.  It was altogether delicious! 

    Walnut Chevre Tomato Flatbreads 2

    Raw Walnut Thyme Cheese Flatbreads with Sun Dried Tomatoes
    Makes 12

    Walnut Thyme Cheese:

    2 1/2 cups raw walnuts, soaked for 4 hours and drained

    1 garlic clove

    1 Tbsp fresh thyme

    1/8 tsp sea salt

    1 tsp powdered probiotics

    Crust/Crakers:

    1 cup ground flaxseeds

    3/4 cup whole flaxseeds

    4 scoops Sprout Living Simple Signature Pumpkin Seed Protein Powder

    1/2 tsp sea salt

    1 3/4 cups filtered water

    1 cup sun dried tomatoes, rehydrated

    2 tsp olive oil

    1 Tbsp lemon juice

    zest of one large organic lemon

    pinch sea salt

    fresh thyme leaves

    For the chevre, combine all ingredients in a high speed blender and blend until smooth.
    Pour into a container with a lid, and set in a warm place overnight.
    Once it has become tangy in flavor, place in the refrigerator to chill completely.
    For the crust, whisk together all ingredients in a large bowl until well blended, then spread out on a lined dehydrator tray in a big square about 1/8 inch thick.
    Dehydrate at 115F for 2 hours, then score into 12 squares with a knife.  Continue to dehydrate until completely dry, about 22 more hours.
    Toss tomatoes in a bowl with the olive oil, lemon juice and zest and a little sea salt.
    To assemble the flatbreads, spread some of the chevre onto each flatbread,
    Top with the tomatoes, making sure they are drained well, then top with a little of the fresh thyme.
    Serve immediately!

    Walnut Chevre Tomato Flatbreads

  • Raw 7 Layer Bars, My Way!

    Raw 7 Layer Bars, My Way!

    7 Layer Bars 1 

    I decided last week that I wanted to make some 7 layer bars.  I have been wanting to do so for a long time, but I just kept forgetting about it until now.  They make them in the deli I work in, so every time I see those I think about them and this time I decided that I wanted my own vegan version.  I know what the typical bars have in them, but I wanted mine to be different.  In case you haven’t heard of them, the classic ones have a graham cracker crust, chocolate chips, white chocolate chips, butterscotch (or peanut butter) chips, walnuts, coconut and sweetened condensed milk poured over them before baking.  Lots of sugar, but I loved these as a child.  I enjoyed the idea, but I tweaked it for mine using creative license.

    7 Layer Bars

    In mine, I wanted a date caramel layer as one of the layers and also a peanut butter layer both on top of a graham cracker like crust.  The two layers sort of melded together, which was delicious! This was the glue of the bar and delicious glue it was.  Then raw jungle peanuts, coconut and chocolate chunks were scattered over that, because the beauty of these bars is all of the texture.  To set everything together I drizzled a coconut butter mixture over that, the sweetened condensed milk of the recipe if you will.  Omg…these bars turned out epically amazing.  Crave worthy would be an under statement. All of my favorite things in one bar, can’t go wrong with that.

    7 Layer Bars 3

    Raw 7 Layer Bars

    Makes 16

    Crust:

    1/2 cup sprouted, dehydrated buckwheat groats

    3/4 cup finely shredded dried coconut

    1/4 cup ground flax seed

    3/4 cup soft, pitted medjool dates (if they are not soft, soak them in filtered water for 30 minutes and drain well before using).

    large pinch sea salt

    Caramel:

    1 cup soft, pitted medjool dates

    1/4 cup raw coconut butter (not oil), warmed to liquid

    1 Tbsp maple syrup or raw coconut nectar

    1/4 cup filtered water

    pinch sea salt

    1 tsp pure vanilla extract

    3/4 cup raw jungle peanut butter* or roasted PB if not raw

    1/2 cup large flake dried coconut

    1/2 cup raw jungle peanuts

    1/2 cup chopped raw chocolate, or raw chocolate chunks

    Coconut drizzle:

    1/3 cup raw coconut butter, warmed to liquid

    1 Tbsp maple syrup or raw coconut nectar

    pinch sea salt

    1 tsp pure vanilla extract

    1/4 cup filtered water

    In a food processor, combine the buckwheat groats, shredded coconut, dates, and sea salt and process until finely ground and starting to hold together when squeezed (if it is not holding together add a few more dates or a touch of water).  Press into the bottom of an 8X8 inch square pan lined with parchment.

    Next, to make the caramel, combine the dates, coconut butter, syrup, water, sea salt, and vanilla in a food processor or high speed blender and process until smooth.  Spread out over the prepared crust.

    Next, spread the jungle peanut butter over that (see note below).

    Scatter the coconut, peanuts, and chocolate chunks over that.

    To make the coconut drizzle, whisk together all ingredients until smooth then drizzle over the bars in the pan.

    Place the pan of bars in the freezer for at least an hour to set up before cutting.

    Note: if your jungle peanut butter is runny at all, whisk in 2-3 Tbsp melted raw coconut butter or your bars may be softer in the inside.

    7 Layer Bars 2

  • Quinoa Veggie Bowl with Lemon Almond Sauce

    Quinoa Veggie Bowl with Lemon Almond Sauce

    Quinoa Bowl
    My dinners many times come together based on what I have on hand in the kitchen.  I come up with some of my favorite things that way and it forces me to think outside of the comfortable box of the things I know well.  I recently bought some quinoa because it was on sale and because I have been craving some for a while now, and I figured now would be the time to use it on the night I wasn’t sure what to make for dinner.  I usually don’t plan out my dinners ahead of time.  What I ended up making was a quinoa bowl, with veggies and chickpeas topped off with a silky almond lemon sauce.
     Quinoa Bowl 2
    Omg was it ever good!   Satisfying and filling yet light and a balance of cooked and raw foods perfect for a Spring dinner.  I have made it a couple times since with variations on the veggies depending on what I have on hand and it is always good.  That is why I needed to share the recipe with you all. As far as I am concerned, every meal should include a plate full of colorful veggies. This is my kind of comfort food.  The kind that is healthy and delicious!
    Quinoa Bowl 1
    Quinoa Veggie Bowl with Lemon Almond Sauce
    Serves 2-3
    Ingredients:
    • 2 cups water
    • 1 garlic clove minced
    • 1/4 tsp sea salt
    • 1 cup quinoa, rinsed
    • 1 cup cooked chickpeas
    • 3/4 cup asparagus, cut into 1 inch pieces
    • 1 red bell pepper, cut julienne
    • 1 medium beet, cut julienne
    • 1 medium carrot, cut julienne
    • 3/4 cup sliced mushrooms
    • sliced jalapenos


    Sauce:

    • 1/2 cup almond butter
    • 1/4 cup lemon juice
    • 1/4 cup filtered water (or as needed)
    • 1 garlic clove, minced
    • 1 tsp ground cumin
    • 1/8 tsp cayenne pepper
    • sea salt to taste


    Instructions:

    1. Place quinoa and water in a medium saucepan and bring to a boil. Reduce to a simmer, cover and cook until all the water is absorbed about 15 minutes, or when all the grains have turned from white to transparent, and the spiral-like germ has separated. Drain, and let cool.
    2. Spoon the quinoa into bowls, then top with the quinoa and veggies.
    3. Whisk together the sauce ingredients, adding water to achieve your desired consistency. Drizzle the sauce over the veggies and bowl.  Serve!
  • Raw Green Kingdom Energy Bites

    Raw Green Kingdom Energy Bites

    Green Kingdom Bites

    When I am running a lot, I tend to need a little extra protein.   Although throwing it into a smoothie or just dissolving it in water is fine, sometimes I like to add it to tasty little snacks or treats so I can enjoy my snack and get quick protein as well.  Green Kingdom Epic Protein  Powder by Sprout Living is hands down the best tasting protein I have had, and I recently I decided to use it in a snack that I could grab quick and enjoy, some energy bites.  Many health food stores sell energy bites but I like to make my own, because they are super easy to make and so they can include the exact ingredients I want.

    Green Kingdom Bites 1

    The ones I made last week were rich in omega 3 oils, including walnuts, hemp seeds, and chia seeds.  With just dates to sweeten, which I love.  The Green Kingdom Protein Powder not only gives the bites extra protein, but includes greens as well and gives them a wonderful flavor.

    Green Kingdom Bites 2

    I have been enjoying these for a snack for the last week in the afternoons, and I have to say they keep me from reaching for the candy because they are just sweet enough to satisfy that craving.  Don’t get me wrong, I love my raw chocolates but when I need a protein boost, they fall short so these are perfect for my sweet craving and protein needs!

    Green Kingdom Bites 3

    Raw Green Kingdom Energy Bites

    Makes 20

    1 cup raw walnuts

    1 cup raw pumpkin seeds

    1/4 cup chia seeds

    1/3 cup hemp seeds

    1 1/4 cups soft medjool dates, pitted

    1/4 tsp sea salt

    1/4 cup raw coconut butter (not oil), warmed to liquid

    4 scoops Sprout Living Epic Green Kingdom Protein Powder

    First, In a food processor, combine the walnuts, pumpkin seeds, chia seeds, hemp seeds, and dates and process until very finely chopped. Next, add the coconut butter, protein powder, and process until well blended. Lastly, roll into balls, then roll in raw cacao powder.  Store in the refrigerator.

  • Raw Tutti Frutti Ice Cream

    Raw Tutti Frutti Ice Cream

    Tutti Frutti Ice Cream 4

    Sprout Living was kind enough to send me some more of their Green Kingdom Epic Protein powder to use in recipes.  In case you didn’t catch my other post about it a few months back, this stuff is awesome!  Honestly, it is my all time favorite protein powder.  It is delicious as well as packed with nutrients including greens, it has a good texture, and most importantly it helps me refuel after a workout and feel good.  So what all is in this stuff?  Well, a blend of sprouted brown rice, yellow pea, sacha inchi, and cranberry proteins as well as superfoods  and greens.  It is raw, vegan, and organic.  I love it just plain with water mixed in (not all protein powders taste good that way, but theirs does).  And it is wonderful in smoothies and shakes like the Raw Green Berry Layered Shake I made recently. It has a fruity flavor to it, so I thought why not add it to a tropical ice cream recipe!

    Tutti Frutti Ice Cream

    I ended up making what I called Tutti Frutti Ice Cream.  I am not sure what the original or traditional tutti frutti ice creams had in them, but this tasted tutti frutti to me!  So delicious, a blend of mango, pineapple and banana with the sweet fruity protein and marbled with a strawberry swirl plus a plain fruit blend swirl for a pretty effect.  It was sooo good!

    Tutti Frutti Ice Cream 3

    Why not have your ice cream and get some protein too!  The protein powder enhanced the flavor and made it taste even better. Plus you get some of your daily greens in your ice cream!  If you have not tried the Sprout Living Green Kingdom Epic Protein Powder, you should definitely get on it.  I am super picky about protein powders and I love it.

    Tutti Frutti Ice Cream 1

    Raw Tutti Frutti Ice Cream 

    Makes 4 cups

    1 cup ripe mangoes

    1 cup ripe pineapple

    1 cup mashed banana

    2 cups young coconut meat

    3/4 cup coconut water

    2 tsp pure vanilla extract

    1/4 tsp sea salt

    1/2 cup raw coconut nectar

    3/4 cup coconut butter

    2 scoops Sprout Living Epic Green Kingdom Protein Powder

    Swirl:

    1/2 cup fresh strawberries

    1 Tbsp coconut nectar

    In a high speed blender or food processor, combine all ingredients for the ice cream until smooth.  Remove 1/3 cup of the mixture and set aside.  Add the protein powder to the remaining mixture in the blender and blend until smooth.  Pour the mixture with the protein powder into an ice cream maker, processing according to the package directions.
    Meanwhile, to make the swirl, combine all ingredients in a high speed blender or food processor until smooth, and set aside until the ice cream is done. 
    Pour 1/3 of the finished ice cream into a freezer safe container, then drop some of the swirl by the Tbsp over that, as well as the plain mixture, then half the remaining ice cream, then more swirl and plain mixture, then the last of the ice cream and more swirl and plain mixture, and swirl with a knife to marble.  Let chill in the freezer for about 4 hours or overnight until more firm before scooping (if it becomes too hard, let sit out about 15-20 minutes before serving.  

    Tutti Frutti Ice Cream 2

  • Raw German Chocolate Chia Porridge

    Raw German Chocolate Chia Porridge

    German Chocolate Chia Porridge

    I always have some sort of porridge for breakfast during the week, whether it be oatmeal or chia porridge.  I am pretty plain with it most of the time, with the chia porridge simply using coconut water and topping it off with bananas and ground flax seed.  But sometimes I like to give it a little pizazz and make something that will make me excited for breakfast.  Like chia seed porridge with a flavor!  Like German chocolate!  Which is what I decided to make last week.  Something a little decadent and something that would be more exciting than my usual bland breakfast.  The best part is it can be made the night before so no rushing in the morning to prepare it!

    German Chocolate Chia Porridge 1

    I used a coconut milk base made chocolaty with raw cacao and sweetened with date paste for a little bit of a caramel flavor.  Then I topped it off with the things I would use in German chocolate cake, walnuts and coconut like in the frosting, plus more cacao nibs for some intense chocolate crunch action.  I am a big texture person, so it was important for me to have crunch topping off my soft chia porridge for me to really enjoy this as much as I possibly could.  It was simply heavenly.  I will leave it at that!

    German Chocolate Chia Porridge 2

    Raw German Chocolate Chia Porridge

    Serves 2-3

    2/3 cup chia seeds

    2 cups raw coconut milk

    1/2 cup raw cacao powder

    3 Tbsp raw date paste or maple syrup

    1 tsp pure vanilla extract

    Toppings:

    raw walnuts, large flake coconut and raw cacao nibs

    Whisk together the chia seeds, coconut milk, cacao powder, maple syrup, and vanilla in a bowl until well combined.  Let sit at least 30 minutes at least or cover and refrigerate overnight.  When ready to serve, top with walnuts, coconut and chia seeds!

    German Chocolate Chia Porridge 3


  • Raw Carrot Cake For Two

    Raw Carrot Cake For Two

    Carrot Cake 4 2

    Being in a relationship isn’t about everything being perfect and like a fairytale.  It is about appreciating the little things like never having to worry about what he thinks about your embarrassing habits and loving you anyway.  Or how he will drop everything to help you when you need it or give you a hug and tell you it is alright when you need a shoulder to cry on.  Or when you do fight, being able to forgive quickly admit to each other you were wrong and make up for it later.  It is about sharing those special moments together as well.  Exploring a new place together, cuddling when it is chilly out, appreciating the same piece of art in a huge museum, watching the clouds float by and picking out what they look like.  Being a best friend.

    Carrot Cake 4 2 1

    And sharing with each other.  I can’t imagine a better way to do this than sharing a dessert together.  Like this Raw Mini Carrot Cake for Two.  It is pretty simple to make, and if you have a lot of juice pulp left over if you juice a lot, then it is a use for that as well. I hate wasting things. It requires no dehydration or cracking of young coconuts, so you can enjoy it sooner!  The filling is simple with a hint of spice, that allows the carrot to shine, and the frosting coconutty and creamy.

    Carrot Cake 4 2 2

    Sitting down with this and two forks = very romantic.  I think if you pulled this out for your significant other, they would love it.  Unless they hate carrot cake, but who hates carrot cake?! It is one of the most delicious things ever! Or, you could make this for your Mother for Mother’s Day next month, and she would have her own individual little cake.  It is always important to show the ones you love that you love them daily!

    Carrot Cake 4 2 3

    Raw Carrot Cake For Two 
    Makes one 4 inch 2 layer cake

    Cake:

    1/2 cup soft medjool dates, pitted (if not soft, soak them in filtered water 30 minutes and drain well)

    2 tsp pure vanilla extract

    1 tsp cinnamon

    1/2 tsp powdered ginger

    1 tsp cardamom

    1/4 tsp nutmeg

    1/8 tsp sea salt

    3/4 cup ground flaxseed

    1 1/4 cups finely shredded, dried coconut

    1 1/2 cups raw carrot pulp

    Frosting:

    1 1/2 cups filtered water

    1/3 cup soft medjool dates, pitted (if not soft, soak them in filtered water 30 minutes and drain well)

    a pinch sea salt

    1 tsp pure vanilla extract

    3/4 cup plus 2 Tbsp raw coconut butter (not oil), warmed to liquid

    For the cake, combine dates, vanilla, spices sea salt, flax, and coconut in a food processor and process until it is well combined and very finely chopped.  Add the pulp, and process until smooth and well combined.  On a parchment or foil lined tray, shape into two 4 inch circular cake layers. Place in the freezer for about 30 minutes to chill.
    Meanwhile, to make the frosting, combine the water, dates, sea salt and vanilla in the food processor and process until smooth.  Add the coconut butter and process until smooth (if it is clumpy at all, it probably needs to warm up a little, so process until it is not lumpy).  You will be using the frosting right away before it starts to set up (if it has gotten too warm and seems too runny, place in the freezer for a short while, stirring often until it is thicker).
    To frost the cake, place one layer on a plate, and top with about 1/2 cup of the frosting.  Spread out to cover the layer. Top with the other cake layer, then spread the frosting over the top and sides of the cake, smoothing it out.  Extra frosting may be placed in a pastry bag and piped around the top and bottom edges of the cake (optional).  Place in the fridge for about 30 minutes to set the frosting, then enjoy!  Store any extra cake in the fridge.


  • Raw Mango Berry Coconut Yogurt Cake

    Raw Mango Berry Coconut Yogurt Cake

    Berry Mango Cake 5

    I used to eat tons of yogurt as a kid.  It was packed into my lunch as a child, because I was pretty picky, and it was something that I would actually eat. And, it was my go to snack.  Usually strawberry.  That was my favorite.  This habit continued until a few years back when I decided to eliminate dairy, and at that point I was eating about 2 cups of Greek yogurt a day.  I loved the stuff!  But it didn’t love me back.  I never knew why I had so much discomfort before I gave it up.  My stomach felt so much better after I replaced it with chia seed porridge to go with my fruit instead of the dairy filled yogurt.  I admit, I missed it a little, which is why I was thrilled when I discovered I could make my own probiotic rich yogurt with young coconuts last year. Since then not only is it a treat to enjoy alone but a wonderful thing to use in recipes.

    Berry Mango Cake

    Like the Raw Mango Berry Coconut Yogurt Cake I made last weekend.  OMG…was it ever good!  If you miss dairy, and are looking for that tang in your cheesecakes that the traditional ones have, you have got to try this.  I used to always add yogurt to my cheesecakes before I started making dairy free ones, and adding the coconut yogurt does the trick too.  It is really quite simple to make, just involves starting the day before and allowing your coconut yogurt to ferment overnight with the probiotics.

    Berry Mango Cake 3

    The berries and mango added to the yogurt in the cake is a simply heavenly combination!  Plus it makes for a pretty colored design in the cake.  I felt as if it was Summer while enjoying this, and it definitely put me in my happy place!  The best part is my stomach felt happy after eating it too! I felt light and satisfied. Which is not something I could say if I had eaten one of my original cheesecakes from years ago.

    Berry Mango Cake 2

    Raw Mango Berry Coconut Yogurt Cake
    Makes one 6 inch cake

    Ingredients:

    Crust:

    • 2/3 cup raw sprouted buckwheat groats (or additional coconut)
    • 1/3 cup ground flax seed
    • 3/4 cup dried finely shredded coconut
    • 1/8 teaspoon sea salt
    • 10-12 soft medjool dates, pitted and chopped (if they are not soft, soak them in water until they are and drain them well)


    Filling:

    • 4 cups young coconut meat*
    • 1/2 cup coconut water
    • 1 tsp powdered probiotics (you can open capsules and pour them in)
    • juice and zest of one lime
    • 2/3 cup raw coconut nectar, or maple syrup
    • 1/2  teaspoon sea salt
    • 1 Tbsp pure vanilla extract and seeds from half a vanilla bean
    • 3/4 cup raw coconut butter (warmed to liquid)
    • 1/2 cup fresh organic mangoes
    • 1/2 cup fresh organic strawberries
    • 1/2 cup fresh organic blackberries


    Topping:

    • Fresh strawberries and blackberries decorating


    Instructions:

    1. Lightly coat a 6 inch spring form removable bottom pans with coconut oil. To prepare the crust, process flax, coconut, buckwheat and sea salt in a food processor until fine crumbs, then add the dates and process until the mixture holds together when squeezed between your fingers (if not holding together, add more dates). Firmly press crust into the bottom of the prepared pan, and set aside.
    2. To make the filling, in a high speed blender or food processor, combine coconut meat and water, and puree until smooth.  Mix in the probiotic powder, place in a bowl, and let sit out on the counter overnight.
    3. The next day, add to a high speed blender with the lime juice and zest, coconut nectar, sea salt, and vanilla in a food processor and blend until smooth and creamy. With the processor running, add the coconut butter and and process for a minute until blended.
    4. Divide the mixture into three bowls.  Add one back to the food processor and add the mango.  Blend until smooth.  Place back in the bowl. Add the next bowl contents to the food processor. Add the strawberries, and blend until smooth.  Place back in the bowl.  Add the next bowl to the food processor and add the blackberries and blend until smooth.  Place back into the bowl.
    5. To assemble cheesecake, drop the three fillings over the crust alternating the colors.
    6. Once the pan is full, tap the bottom on the counter to level, and swirl with a knife in a spiral from the outside in to the center, then a toothpick if you want more intricate swirls.
    7. Place in the freezer for about 4 hours to firm up.
    8. Garnish the top with fresh berries before serving.


    *If you do not have access to young coconut meat and you do not mind the recipe not being nut free, you can substitute 4 cups raw cashews soaked for 4 hours and drained in the filling.

    Berry Mango Cake 4

  • Raw Veggie Paella

    Raw Veggie Paella

     Veggie Paella

    I used to make a lot of dishes with Arborio rice, like risotto, or paella.  There was just something so delicious and comforting about it when paired with the right ingredients. So satisfying and hearty.  I have found a grain free way to create rice dishes that I enjoy just as much using celeriac instead of the starchy rice.  The texture is slightly different, but I don’t mind.  It lends itself well to whichever flavor I pair it with and I always finish it off feeling satisfied and happy not heavy.

    Veggie Paella 2

    Last week, I decided to make a veggie paella, since I had lots of brightly colored veggies on hand.  I added in the typical tomatoes and peppers, some mushrooms for meatiness, and edamame in place of the usual peas for a bit of protein.  It was delicious!  I ate the entire recipe in one sitting myself, but I think this could easily be shared if you do not have the monstrous appetite that I do.  The best part about it is it is quick to make, took me about 15 minutes, so you have more time to relax and enjoy dinner!

    Veggie Paella 1

    Raw Veggie Paella

    Serves 1-2

    1 large celeriac

    1 clove garlic

    1/4 tsp sea salt or to taste

    1/2 tsp turmeric

    1/2 tsp smoked Spanish paprika

    2 Tbsp nutritional yeast

    1 1/2 cups cherry tomatoes, halved or regular tomatoes, diced

    1 cup diced bell peppers or sliced mini sweet peppers

    1 cup shelled edamame or peas

    1 cup sliced mushrooms

    In a food processor, combine the celeriac, garlic, sea salt, turmeric, smoked paprika and nutritional yeast, and pulse until everything is combined and the celeriac is chopped into the size of rice grains.  Add 1/2 cup of the cherry tomatoes, and pulse a few times until chopped.  Mix in all other ingredients, and serve at room temperature.


  • Raw Strawberries and Cream Doughnuts

    Raw Strawberries and Cream Doughnuts

    Strawberry Doughnuts 2

    I have been all about the strawberries lately. Mostly because I have been missing them all winter and suddenly they reappear looking so delicious and begging me to buy them and make something delicious with them.  I was going to make some strawberries and cream scones last week with some, but that didn’t work out because of the lack of an ingredient I needed so I decided to make raw strawberries and cream doughnuts instead!

    Strawberry Doughnuts 1

    Although I loved frosted doughnuts as a child, there was something beautiful about the glazed ones to me.  I was a big fan of Crispy Cream in high school.  Now I know that stuff would be way too sugary and sweet for me, but my home made doughnuts are just right. So I decided to go the glaze route this time with the doughnuts.

    Strawberry Doughnuts

    Were they every delicious! The dough was quite addictive as I was making them.  Hey, I had to taste it and make sure it was just perfect before shaping and dehydrating them right?! It was just sweet enough, with double the strawberry goodness since I used some dried ones I had prepared as well as fresh.  Once they were dehydrated I made a simple coconut butter strawberry glaze and it was perfect with the sweet doughnuts!  I am so happy Spring is here and has brought strawberries along to the party as well!

    Strawberry Doughnuts 4

    Raw Strawberries and Cream Doughnuts

    Makes 10

    Doughnuts:
    1 cup pitted medjool dates

    1/4 cup fresh chopped strawberries

    1/2 cup filtered water

    1/2 cup raw cashew butter

    2 tsp pure vanilla extract

    1/2 tsp sea salt

    4 cups finely shredded, dried coconut

    2 cups raw sprouted oat flour

    3/4 cup dried strawberries, chopped*

    Glaze:

    1/2 cup raw coconut butter, warmed to liquid

    1 Tbsp raw coconut nectar (or your choice liquid raw sweetener)

    1/2 cup pureed fresh strawberries

    1 tsp pure vanilla extract

    To make the doughnuts, combine the dates, strawberries, water, cashew butter, vanilla and sea salt and process until smooth.  Place the shredded coconut in a high speed blender and buzz to fine flour consistency (about 20-30 seconds but not too long or you will get butter).  Add to the mixture in the food processor, along with the oat flour and process until smooth and holding together.  Knead in the strawberries. Shape into 10 balls, and then shape into doughnuts and place on a dehydrator sheet.  Dry for about 5-6 hours at 115F or until not sticky.

    To make the glaze, whisk together all ingredients until smooth (it may seem clumpy at first, but it will thin out). Add a little water if it is too thick.  You want it to be runny enough to create a thin coat on the doughnuts once you dip them in but not so runny that it remains sticky.

    Dip each doughnut top side down into the glaze, then place right side up to dry.  Allow the glaze to set before serving.

    *To make dried strawberries, slice them thinly and place them on a lined dehydrator tray.  Dehydrate for 24 hours at 115F until very dry.

    Strawberry Doughnuts 3

  • Raw Strawberry Lemon Chia Seed Granola

    Raw Strawberry Lemon Chia Seed Granola

    Strawberry Lemon Granola

    I sometimes tend to get weird looks when I tell people about a dream of mine, or an idea I have for something I want to create.  Maybe that would bother most people, but not me. After all, no one who created anything great ever thought inside the box, and inside the box thinking is not for me.  I have never considered myself conventional and that is ok.  I love it.

    Strawberry Lemon Granola 2

    I get up early to run every morning before the sun is up, I don’t eat meat, I would rather spend time alone relaxing than go to a party, I still enjoy Hello Kitty band-aids even though I am almost 30, I eat my cake first, then the frosting, and I don’t like to make the same recipe twice when it comes to desserts or sweet things.  Maybe because I will get bored if I do.

    Strawberry Lemon Granola 1

    I make a lot of granola, and it is never the same.  This time, since it is Spring, and since strawberries and lemon are the essence of Spring, I made strawberry lemon chia seed granola.  Was it ever heavenly!  A little tart, sweet, and crunchy, with a hint of coconut…this is the perfect snacky snack as far as I am concerned.  It is wonderful as is, or on top of a smoothie bowl. It would be a sad day when I stopped creating new flavors for things like my granola, because then I would never be able to taste delicious combinations like this!

    Raw Strawberry Lemon Chia Seed Granola
    Makes about 8 cups

    2 cups raw buckwheat groats

    1 1/2 cups dried large coconut flakes

    1/2 cup chia seeds

    1/3 cup raw coconut nectar, or maple syrup (or more if you prefer sweeter)

    1/4 cup raw coconut butter

    1/2 tsp sea salt

    1 Tbsp pure vanilla extract

    1/4 cup organic lemon juice

    2 Tbsp lemon zest

    2 cups strawberries, thinly sliced

    Soak buckwheat for 30 minutes, rinse very well (as it has a slimy coating that needs to be removed) and drain. Place in a large jar and set in a well lit area (natural light, but not in direct sunlight). Let sit for a couple days, or until little sprouts begin to emerge from the buckwheat, rinsing 2 times a day. Once sprouted, drain well, and place in a large bowl, along with the coconut, and seeds. In a food processor, combine the coconut nectar, coconut butter, sea salt, vanilla, lemon  juice and zest. Process until smooth and pour the mixture over the granola, add the strawberries and mix well with your hands. Spread out on 2 lined dehydrator, and dry for about 12 hours or until crispy. Can be stored in an airtight container for a few weeks at room temperature.

  • Raw Coconut Cream Tartlette for Two

    Raw Coconut Cream Tartlette for Two

    Coconut Tart

    My Mom and I used to go to this restaurant when I was younger that had the most amazing coconut cream tart. It was smooth and creamy on the inside with a flavor that was crave worthy.  I was thinking about that tart last week, and I thought I might try and make my own version of it for my Mom since her Birthday is coming up.

    Coconut Tart 4

     The recipe turned out to be quite simple actually.  No cracking of young coconuts required because I wanted everyone to be able to make this recipe (and have it be nut free so no cashew replacement needed).  For the crust, a simple crunchy mixture of buckwheat, coconut, flax seeds and dates.  My usual nut free crust that goes awesome with coconut anything.  For the filling, I used coconut butter for the base (not oil), with a little maple syrup to sweeten and of course a touch of vanilla.

    Coconut Tart 3

    Simple is what my Mom likes most of the time, and she loved this tart!  It was creamy, smooth, sweet and coconutty.  I topped it off with some pistachios and dried roses along with more coconut for color.  This is the perfect treat for 2 people to share, or one very hungry person who loves coconut.

    Coconut Tart 1


    Raw Coconut Cream Tartlette for Two
    Makes one 4 inch tart

    Crust:
    1/3 cup sprouted buckwheat
    1/2 cup shredded coconut
    2 Tbsp ground flax seed
    1/4 cup soft, pitted medjool dates
    pinch sea salt

    Filling:
    1/4 cup plus 2 Tbsp raw coconut butter (NOT oil) warmed to liquid
    1/4 cup plus 2 Tbsp filtered water
    1 1/2 Tbsp raw coconut nectar or maple syrup
    1 tsp vanilla extract
    pinch sea salt

    1/4 cup finely shredded, dried coconut

    Chopped pistachios and large flake coconut for garnish
    In a food processor, combine all crust ingredients, and process until fine crumbs that hold together when squeezed.  Press into the bottom of a 4 inch removable bottom tart pan oiled with coconut oil for easy removal.  Set aside.
    For the filling, combine all ingredients except shredded coconut in a high speed blender and blend until smooth.  Pour into the crust, and smooth the top. Place in the refrigerator until set, about an hour.  Serve topped with chopped pistachios and coconut if desired.

    Coconut Tart 2

  • Raw Almond Maple Crunch Truffles

    Raw Almond Maple Crunch Truffles

    Almond Crunch Truffles 2

    There is just something so delicious about the combination of chocolate, nut butter and crunch.  Sure, smooth plain dark chocolate or silky truffles are good sometimes, but I decided to go a little different route with my last batch of truffles.  Ever since I made some Raw Butterfinger Eggs for Easter, I have been loving chocolate and crunch. Plus I ate most of those and I didn’t share and people were bummed that I didn’t.  So I had to make something else which was crunchy, nutty and chocolaty to please everyone including myself.  The best thing about making your own candy is getting exactly what you want.  You could not find this candy I made in stores.

    Almond Crunch Truffles

    I made the most delicious addictive truffles with a raw almond butter base, sweetened by dates and maple, with crunchy buckwheat included. Which was wonderful just as it was.  It reminded me of these rice crispy treats that I used to enjoy as a kid which had nut butter in them.  But of course this was better.  Then to make it even better, they were bathed in dark chocolate.  Let me tell you, these are crave worthy!  Just try and stop at just one.  Bet you can’t.

    Almond Crunch Truffles 1

    Raw Almond Maple Crunch Truffles
    Makes 20

    Filling:
    1 cup raw almond butter

    1 cup soft medjool dates, pitted

    2 Tbsp maple syrup

    2 tsp pure vanilla extract

    1 tsp maple extract

    1/2 tsp sea salt

    1 1/2 cups sprouted, dehydrated buckwheat groats

    1 1/2 cups chopped raw dark chocolate

    In a food processor, combine the almond butter, dates, maple syrup, vanilla, maple extract, and sea salt, and blend until smooth.  Add the buckwheat groats and pulse until chopped and it is all combined and holds together when squeezed (if it doesn’t add a little more almond butter).  Shape into 20 small truffles (you will need to squeeze the mixture as it may be a little crumbly), and place on a foil lined tray, then place in the freezer to chill, about an hour.

    When truffles are ready, melt the chocolate in a bowl (I like to set mine in a bowl in the dehydrator until it is melted).  Then set the chocolate next to the tray and dip each chocolate into it letting the excess drain off before setting it back onto the tray (I use a fork, setting the chocolate on top of it, to let the excess drain off).  Once the chocolates are all dipped, place in the freezer to set the chocolate, about 5 minutes.  Store in the fridge.

    Almond Crunch Truffles 3


  • Vegan Mango Carrot Cake

    Vegan Mango Carrot Cake

    Mango Carrot Cake 4

    You know what makes me happy?  Spending the day with someone I love doing simple things.  I am not one of those types of people who needs to spend lots of money in order to be happy.  A day spent outdoors exploring, walking and enjoying the fresh air with one special person is enough to please me.  What makes that even better is if it is springtime and the flowers are starting to pop up out of the ground.  The happy tulips, crocus and daffodils are so beautiful and such a contrast to the dead leaves and brown grass everywhere else.  They announce spring is finally here.

    Mango Carrot Cake

    To top off that perfect Spring walk, coming home to a delicious carrot cake would be nice.  To me, carrot cake is the essence of Spring.  Probably because it is always a staple around Easter time here. I made one last weekend, and it was delightful.  I wanted to make something a little different than the usual carrot cake, maybe add in some fruit. My Mom always put pineapple in her carrot cake, so I thought, why not mango?  Mangoes were on sale, and they were so sweet I knew they would be wonderful in the carrot cake.

    Mango Carrot Cake 3

    I added them in the form of puree to keep the cake moist and sweeten it as well as some diced in the batter for little pockets of mango goodness within the sweet carrot cake.  For the frosting, I did something that I have been doing a lot lately, adding in vegetables or fruits (carrots in this case) along with the rich coconut milk for volume as well as color.  You could not taste them, but they made the frosting this lovely bright yellow hue the color of daffodils. How appropriate for Spring!

    Mango Carrot Cake 5

    The cake tasted wonderful!  Nice and sweet thanks to the mangoes and carrots and the creamy carrot coconut frosting was perfect to top it off and fill it.  This was one happy cake, not just because it was cheery, but because it tasted amazing.  I shared some with my loved ones and I know it made them happy too.

    Mango Carrot Cake 2

    Vegan Mango Carrot Cake (gluten free)

    Makes 1 6 inch 4 layer cake
    2 6 inch cake pans
    Cake:
    1 1/2 cups All Purpose Gluten Free Flour (or GF oat flour works here as well)
    1 cup coconut sugar
    1 1/2 tsp baking soda
    1 tsp baking powder
    1/2 tsp sea salt
    1 tsp ground cinnamon
    1 cup pureed fresh mango
    1/4 cup virgin coconut oil
    1 Tbsp pure vanilla extract
    1/4 cup + 2 Tbsp fresh orange juice at room temperature
    2 Tbsp apple cider vinegar
    1/2 cup diced mango
    1 1/4 cups shredded carrots
    Frosting:
    2 cans organic full fat coconut milk, chilled
    2 cups chopped carrots
    3/4 cup raw coconut nectar, maple syrup or agave nectar
    1/2  tsp sea salt
    2 tsp pure vanilla extract
    1 3/4 cups coconut butter, warmed to liquid

    Preheat the oven to 375 degrees and position rack in center of oven. Line two six-inch-diameter cake pans with 2-inch-high sides with parchment paper. Coat parchment paper and pan sides lightly with coconut oil so that the cake doesn’t stick and line the bottom of the pan with a piece of parchment fit to the pan. Whisk flour, baking powder, baking soda, sea salt, cinnamon and sugar in a large bowl to blend well. Whisk mango puree, oil, orange juice, and vanilla extract together in small bowl to blend well, then whisk into the flour mixture until well blended. Whisk in the cider vinegar until bubbles form. Mix in the diced mango and carrots.    Transfer cake batter to prepared pans and bake cakes until tester inserted into center comes out clean, about 30 minutes. Cool cakes completely in pan on rack, about 1 hour. Cut around sides of pan to loosen. Turn cakes out onto platter; peel off parchment paper. Let cool completely, then place in the fridge to chill until very cold to make slicing easier. When chilled, slice cakes horizontally in half so that you have 4 layers.

    Meanwhile, to make the frosting, combine all ingredients but the coconut butter in a high speed blender or food processor and blend until smooth.  With the motor running, add the coconut butter and process a minute more.  Pour the frosting into a bowl and let sit in the freezer until the consistency of whipped cream (this may take anywhere from 1/2 hour to an hour depending on how warm it has gotten).  When ready to frost, place one cake layer on a plate. spread frosting about 1/2 inch thick over the first layer, then top with the second.  Repeat the frosting, then another cake layer, then more frosting then the last cake layer. Spread frosting over the top and down the sides of the cake.
    Place extra frosting in a pastry bag and pipe decoratively on the cake if desired.
    Store any leftover cake in the refrigerator.
    ***if you would like a 4 layer 9 inch cake, double this entire recipe and bake in two 9 inch cake pans.
    Mango Carrot Cake 1
  • Key Lime Pie Smoothie

    Key Lime Pie Smoothie

    Key Lime Pie Shake

    I have been enjoying a lot of limes lately.  Just been craving the flavor for some reason.  Especially key lime pie. So I made some Key Lime Pie Bites, and those were wonderful, but I wanted to bring that flavor to my smoothie as well!  Smoothies are actually a treat for me when I have time to make them on the weekends for an after workout snack, and I like them to taste like delicious dessert, so key lime pie fit!

    Key Lime Pie Shake 2

    Aside from the typical smoothie ingredients I use like bananas and protein powder, I actually used something interesting to make this smoothie green and give it more heft without adding more bananas…zucchini!  You could not even taste it in there!  I am all for adding veggies to anything possible.  I added plenty of lime because I like my key lime pie tart.  This was delicious!  Drinkable key lime pie. I had some finger limes, and I had fun garnishing the top with those. They are like little fruity lime caviar!  If you are a fan of key lime pie, you should definitely put this smoothie on your list to try!

    Key Lime Pie Shake 1

    Key Lime Pie Smoothie

    Serves 2

    1 cup lime juice

    2 Tbsp organic lime zest

    1 tsp pure vanilla extract

    4 bananas, frozen and cut into pieces

    2 medium zucchini, diced

    2 scoops Sprout Living Epic Original Protein Powder (optional)

    Stevia to taste (or your choice sweetener)

    In a high speed blender, combine all ingredients and puree until smooth, using the tamper to press the shake down into the blades.  Pour into 2 tall glasses, and serve!


  • Vegan Strawberry Chocolate Chunk Oatmeal Cookies

    Vegan Strawberry Chocolate Chunk Oatmeal Cookies

    Strawberry Oatmeal Cookies 2

    I recently had a good amount of strawberries, and I decided to dry some.  I thought the intensely flavored strawberries would be wonderful in recipes like granola.  But I was craving some oatmeal cookies, and I didn’t want to just make the usual (I never do, it has to have a twist on it).  So, I decided to make strawberry chocolate chunk.

    Strawberry Oatmeal Cookies

    I am in the mood for strawberries, since I have been deprived of them all winter long and spring is finally here, so they are ending up in many of the sweets I make lately. I know you usually find raisins in oatmeal cookies, not strawberries, but they ended up being pretty awesome in the cookies.  Especially with the chocolate chunks, because chocolate loves strawberries.  These are simply heavenly. If you are bored of the same old oatmeal cookies, give these a go!

    Strawberry Oatmeal Cookies 1

    Vegan Strawberry Chocolate Chunk Oatmeal Cookies
    Makes about 4 dozen

    1 cup virgin coconut oil, warmed to liquid
    1 1/2 cups coconut sugar
    2 flax eggs*
    1 Tbsp pure vanilla extract
    1 1/2 cups gluten free oat flour
    1 tsp baking soda
    3/4 tsp sea salt
    3 cups gluten free old fashioned rolled oats
    2 cups vegan chocolate chunks
    2 cups dried strawberries**

    In a large mixing bowl, mix together the coconut oil and sugar until well blended. Add flax eggs, vanilla, and beat until well combined (the mixture will become very thick). Mix in the flour, soda, and sea salt until well blended. Mix in the oats until well combined, then add chocolate and strawberries and mix until evenly distributed throughout the dough. Heat the oven to 350 degrees with the rack set at the middle position. Line 2 baking sheets with parchment paper. Roll the dough into 12 large balls, and spread them out on the 2 cookie sheets with plenty of room in between. Bake for 13-15 minutes or until golden, but not overbaked. Let cool on sheet a few minutes, then remove to a wire rack lined with parchment to cool.

    *Whisk together 2 Tbsp ground flax seed, 1/4 cup and 2 Tbsp water in a small bowl.  Allow to sit in the fridge for 15 minutes until the mixture has set up (or become kind of thick).

    **I made my own dried strawberries. To make them, simply slice the strawberries thin, and place them on a lined dehydrator tray.  Dry at 115F for about 24 hours until very dry.

    Strawberry Oatmeal Cookies 3
  • Raw Green Tea Ice Cream with Strawberry Swirl

    Raw Green Tea Ice Cream with Strawberry Swirl

    Green Tea Strawberry Ice Cream 3
    When I was enjoying a cup of warm matcha recently, I admired the lovely green color in my mug and I thought, how lovely would it be to make a matcha ice cream with a strawberry swirl?  The green contrasting the red, and the earthy matcha paired with the sweet berries.  I had to make it.  I have always been a fan of matcha ice cream, ever since I tasted some as an 8 year old in a Japanese restaurant.  At that point, I felt like I was eating something exotic and special.

    Green Tea Strawberry Ice Cream

    I still love it.  Especially when made with coconut based ice cream, because that flavor is perfect with the matcha.  That is exactly what I used for this recipe.  The base tasted wonderful, even before I put it in the ice cream maker.  Once frozen and swirled with a simple strawberry sauce, it was simply heavenly.  I don’t care if it is not summer yet, I love my ice cream.  And this is the perfect spring ice cream!
     Green Tea Strawberry Ice Cream 2

    Raw Green Tea Ice Cream with Strawberry Swirl
    Makes about 6 cups

    Ice Cream:

    1 cup coconut water

    2 Tbsp matcha powder

    4 cups young coconut meat*

    1/2 cup raw coconut nectar or maple syrup

    seeds of one vanilla bean or 2 tsp pure vanilla extract

    a pinch of sea salt

    1/2 cup coconut oil, warmed to liquid

    Swirl:

    1 1/2 cups fresh organic strawberries

    2 Tbsp raw coconut nectar

    pinch sea salt
    Add coconut water to a high speed blender or food processor, along with matcha, coconut, coconut nectar, vanilla, and sea salt. Process until smooth, then with the processor running, add the coconut oil slowly and process until well incorporated, about a minute. Pour the strained mixture into an ice cream maker and process according to directions.

    Meanwhile, to make the strawberry swirl, combine all ingredients in a high speed blender or food processor and blend until smooth.  Set aside.

    When ice cream has finished churning, remove from ice cream maker, and pour 1/3 of it into a freezer safe container with a lid. Then spoon some of the swirl over. Then half the remaining ice cream, then more swirl, then remaining ice cream, then swirl.  Swirl the ice cream through with a knife to marble it.  Cover.  Let sit in the freezer for at least four hours or overnight to firm up to scoopable consistency.

    *If young coconut meat is unavailable, you may substitute 4 cups raw cashews, soaked 4 hours and drained.

    Green Tea Strawberry Ice Cream 1

  • Raw Peanut Butter Chocolate Chip Energy Bars

    Raw Peanut Butter Chocolate Chip Energy Bars

     Peanut Butter Chocolate Chip Energy Bars 2 

    I never leave the house without a snack on hand if I know I am going to be somewhere long. I guess I take after my Grandma, who always brought us kids snacks whenever we would go anywhere.  She was always prepared.  We would never go hungry with Grandma around.  And it wasn’t just unhealthy stuff either, she would have grapes, or pretzels, or nuts and other stuff of the sort.  So now as an adult, I never like to go more than 4 hours without eating, and I always have something to keep me energized.  Sometimes it is fruit, and sometimes something I have made. My boyfriend on the other hand, is more like me as a child.  Forgets to eat before he goes out all the time and starts to get low blood sugar.  And so sometimes I make him things that he can just grab and eat fast.  Because I know not everyone likes to plan ahead with their food and I have to take care of my Man.

    Peanut Butter Chocolate Chip Energy Bars 1

    So last week, I made him some energy bars with two of his (and my) favorite things, peanut butter and chocolate.  I used a crunchy buckwheat base held together with peanut butter and dates, added in some chia seeds and hemp seeds for extra protein, and some cacao nibs and chocolate chunks.  I drizzled them with a little more raw chocolate just because. OMG…were they ever good!

    Peanut Butter Chocolate Chip Energy Bars

    I shared one with my Mom as well, since she wanted a protein boost, and although she tends to not like peanut butter, she loved it!  These are kid friendly, and of course adult friendly.  If you don’t do peanut butter, almond butter or walnut butter would work in these as well!

    Peanut Butter Chocolate Chip Energy Bars 3

    Raw Peanut Butter Chocolate Chip Granola Bars

    makes 12

    Filling:
    1 1/4 cups raw jungle peanut butter or regular peanut butter (not raw)

    1 cup soft medjool dates, pitted

    2 tsp pure vanilla extract

    1/2 tsp sea salt

    2 Tbsp ground flaxseed

    1/4 cup filtered water

    2 cups sprouted, dehydrated buckwheat groats

    1/4 cup shelled hemp seeds

    1/4 cup chia seeds

    1/2 cup raw cacao nibs

    1/4 cup raw chopped chocolate

    1/4 cup melted raw chocolate

    In a food processor, combine the peanut butter, dates, vanilla and se salt, flax seed, and water and blend until smooth.  Add the buckwheat groats, hemp seeds, and chia seeds and pulse until chopped and it is all combined and holds together when squeezed (if it doesn’t add a little more peanut butter).  Mix in the cacao nibs and chopped chocolate. 

    Press and shape into a 1/2 inch thick rectangle on a sheet of parchment paper.  Score into 12 bars, then place them in the dehydrator at 115F and dehydrate for about 4 hours until they are dry, but still soft. 

    You can melt the raw chocolate in the dehydrator when the bars are almost ready, just place it in a bowl and stir about every 10 minutes until melted.  

    Drizzle the melted chocolate over the bars once they have finished dehydrating (I like to put it in a ziplock bag with the corner cut off and squeeze it out).  Let the chocolate set until dry (this will happen faster if you put the tray in the freezer for about 15 minutes).  Store bars in the refrigerator.   


  • Raw Pistachio Rosewater Truffles

    Raw Pistachio Rosewater Truffles

     Pistachio Truffles

    I am sooo ready for green to appear outside.  Green grass, green leaves sprouting from the trees, and green tulip leaves sprouting up from the ground to say Spring has arrived!  It is still pretty brown here, and although buds are appearing on the trees, it is not green quite yet.  Probably because it recently snowed.  I am not complaining about the weather, because after winter I will always take anything above 30F.  But I just want some color!  Since there is no color outside yet, I have been bringing some to my desserts lately.  Even a touch of that green I so desire to see, in some delicious pistachio rosewater truffles.

    Pistachio Truffles 1

    To me, pistachios are a treat since they tend to be a bit spendy, especially the raw shelled ones that I buy.  So, I save them for special occasions.  Like Easter, which is why I made these besides the fact that they have a lovely green color.  Pistachios make me think of Spring and Easter so I thought it was appropriate.  These are mostly pistachio, which is what makes them special.  None of that just green color and pistachio flavor stuff going on…like in that instant pudding I used to have as a kid.  I combined them with rosewater in a creamy heavenly filling fit for a princess (or prince), and then dipped them in raw dark chocolate.

    Pistachio Truffles 3

    These are the more adult version of all of the Easter egg candies I have been making.  I left them round this time like regular truffles, partly because I was lazy, and partly because I wanted these to apply to more than just Easter and be for Spring as well.  Their color just made me happy, and taking a bite of one put me in my happy place!

    Pistachio Truffles 4

    Raw Pistachio Rosewater Truffles

    makes about 10

    Filling:

    1 cup raw pistachios

    1/4 cup raw coconut nectar or maple syrup

    1/4 cup filtered water

    1/2 tsp pure vanilla extract

    1/2 tsp rosewater

    1/4 tsp sea salt

    1/4 cup raw coconut butter, warmed to liquid

    Chocolate:

    3/4 cup melted cacao butter (or you may use coconut oil)

    1/4 cup plus 2 Tbsp maple syrup at room temperature

    heaping 3/4 cup raw cacao powder

    a good pinch of sea salt

    In a high speed blender, combine the pistachios, coconut nectar, water, vanilla, rosewater, and salt and blend until smooth. Add the coconut butter and blend until combined.  Pour into a bowl, and place in the freezer until firm enough to scoop, about an hour.

    Once the filling is firm enough to scoop, scoop out little 1 1/2 inch balls, and set on a parchment lined sheet pan or tray.  Freeze until firm, about 1 hour.

    Meanwhile, when the truffles are almost ready, to make the chocolate, melt the cacao butter in the top of a double boiler with simmering water beneath (being careful not to let the chocolate mixture on top get above 115F degrees).  Or alternatively you can melt it in the dehydrator as I often do, it just takes a little longer.  Once the cacao butter is melted, whisk in all other ingredients until smooth.

    When ready to dip the truffles, place one on a fork, drop it into the chocolate, then lift it out, letting the excess drain off back into the bowl.  Place back on the tray, and repeat with the others.  Sprinkling each with chopped pistachios as you go.  Once they are all done, allow the chocolate to set (which will happen faster if you pop them in the freezer for about 10 minutes).

    Store candies in the refrigerator in an airtight container.

    Pistachio Truffles 2


  • Vegan Hummingbird Cake

    Vegan Hummingbird Cake

    Hummingbird Cake 5 Best

    I have always wanted to make a hummingbird cake.  I have been hearing about them for years, and the old fashioned southern layer cake appealed to me. In case you haven’t heard of them, they are a moist banana and pineapple cake, spiced with cinnamon, studded with pecans, and topped off with cream cheese frosting. What’s not to love about that?  It sounded like something my Grandma might have made back in the day for a special occasion.  Because this is definitely a special occasion cake.  Since Easter is coming up, I thought also that if this turned out, it would make a perfect Easter cake to serve as a finale to the meal.

    Hummingbird Cake 1

    So, I went for it and made one.  Í used a gluten free vegan banana cake base that I have used in the past, and I swapped out pineapple juice for the coconut milk to make it extra sweet, and added in chunks of pineapple as well along with the pecans and cinnamon that were a must to make this cake traditional.  It smelled like heaven as it baked, and I couldn’t wait to finish it off with the frosting!

    Hummingbird Cake 3

    For the frosting I used a simple coconut base with a little lemon juice to give it a slight tang reminiscent of cream cheese.  It was fluffy and delicious and perfect with the moist cake!  I topped it off with more pecans, keeping it simple as far as decorating went this time.  OMG was it good.  The texture was perfect, the cake was moist and sweet with a little bit of fruitiness, and the pecans gave it a nice crunch.  I shared some with my boyfriend Eric, and the piece was all gone pretty fast which should say something.  I think this would be perfect for Easter if you wanted something elegant and traditional.  Don’t let the layers fool you, this is a pretty easy cake to make.

    Hummingbird Cake 2

    Vegan Hummingbird Layer Cake (gluten free)
    Makes 1 6 inch 4 layer cake

    Cake:
    1 1/2 cups Bob’s Red Mill Gluten Free All Purpose Flour
    1 cup coconut sugar
    1 1/2 tsp baking soda
    1 tsp baking powder
    1/2 tsp sea salt
    1 tsp ground cinnamon
    1 cup mashed bananas
    1/4 cup virgin coconut oil
    1 Tbsp pure vanilla extract
    1/4 cup + 2 Tbsp pineapple juice at room temperature
    2 Tbsp apple cider vinegar
    1/2 cup chopped pineapple
    1/3 cup chopped pecans

    Frosting:

    2 15 oz cans organic full fat coconut milk (the whole can, cream and water), chilled
    2 cups raw cashews, soaked for 4 hours and drained
    3/4 cup raw coconut nectar, or maple syrup
    1/2  tsp sea salt
    2 tsp pure vanilla extract
    juice of one lemon (about 3 Tbsp)
    1 3/4 cups coconut butter, warmed to liquid

    Preheat the oven to 375 degrees and position rack in center of oven. Line two six-inch-diameter cake pans with 2-inch-high sides with parchment paper. Coat parchment paper and pan sides lightly with coconut oil so that the cake doesn’t stick and line the bottom of the pan with a piece of parchment fit to the pan.
    Whisk flour, baking soda, sea salt, cinnamon and sugar in a large bowl to blend well.
    Whisk bananas, oil, pineapple juice, and vanilla extract together in small bowl to blend well, then whisk into the flour mixture until well blended. Whisk in the cider vinegar until bubbles form. Mix in the pineapple and pecans.
    Transfer cake batter to prepared pans and bake cakes until tester inserted into center comes out clean, about 25-30 minutes.
    Cool cakes completely in pan on rack, about 1 hour. Cut around sides of pan to loosen. Turn cakes out onto platter; peel off parchment paper. Let cool completely, then place in the fridge to chill until very cold to make slicing easier. When chilled, slice cakes horizontally in half so that you have 4 layers.
    Meanwhile, to make the frosting, combine all ingredients but the coconut butter in a high speed blender or food processor and blend until smooth.  With the motor running, add the coconut butter and process a minute more.  Pour the frosting into a bowl and let sit in the freezer until the consistency of whipped cream (this may take anywhere from 1/2 hour to an hour depending on how warm it has gotten).
    When ready to frost, place one cake layer on a plate. spread frosting about 1/2 inch thick over the first layer, then top with the second.  Repeat the frosting, then another cake layer, then more frosting then the last cake layer. Spread frosting over the top and down the sides of the cake.
    Garnish the cake with chopped pecans.
    Store any leftover cake in the refrigerator.

    ***if you would like a 4 layer 9 inch cake, double this entire recipe and bake in two 9 inch cake pans.

    Hummingbird Cake

  • Raw Strawberries and Cream Nut Butter

    Raw Strawberries and Cream Nut Butter

    Strawberries and Cream Butter 1

    I have been wanting to make this nut butter for a while, but I waited until spring.  Because spring means strawberries are more flavorful and tasty.  I make my own interestingly flavored nut butters all the time.  To me plain nut butters are usually just for use in recipes.  But when I add things like dark or white chocolate, maple and spices they begin to become an indulgence all on their own. So this week, I made Raw Strawberries and Cream Nut Butter.

    Strawberries and Cream Butter

    If I were rich, I would have used macadamia nuts, because they are so dreamy, but since I am on a budget (I am sure you can probably relate), and I did not happen to have any macadamias because I always pounce on them when I am gifted some or get them on sale, I used cashews.  Which turned out amazing in the nut butter so it was still a win.  I combined them with some home made dried strawberries, vanilla, coconut sugar, and a bit of sea salt and OMG was it ever heavenly!

    Strawberries and Cream Butter 2

    And it was so simple to make! I enjoy this by the spoonful like some sort of truffle filling without a shell, or I like to warm it in the dehydrator slightly and drizzle it over fruit. But of course any way you use other nut butter you could use this too.   Spring is here, bring on the strawberries!

    Strawberries and Cream Butter 3


    Raw Strawberries and Cream Nut Butter

    Makes about 2 1/2 cups

    3 cups raw cashews (macadamia nuts or pine nuts will also work)

    2 cups dried strawberries*

    1/2 cup raw coconut sugar

    1 tsp pure vanilla extract

    1/4 tsp sea salt

    In a high speed blender, blend the raw cashews at high speed, using the tamper to press them into the blades until they are smooth.  Add the remaining ingredients, and blend until smooth.  Store in a jar in the fridge.

    *I made my own dried strawberries.  To do so, slice strawberries thinly and place on a lined dehydrator sheet at 115F for about 24 hours until no moisture remains.  If you cannot make your own, use freeze dried not the sugar sweetened soft strawberries because they will gum up your blender.


  • Red Lentil, Yam and Mushroom Stew

    Red Lentil, Yam and Mushroom Stew

    Red Lentil Yam Mushroom Stew 2

    Last Sunday was a full but wonderful day for me!  I woke up, had a wonderful workout, made a delicious cake, and then decided to go downtown with Eric to see the Macy’s Art in Bloom Flower Show and walk the skyways.  We saw some beautiful flowers, and it was a nice taste of spring, since it happened to be snowing outdoors.

    IMG_1741 IMG_1745 IMG_1749 IMG_1750

    We walked the skyways afterwards, and it was fun to people watch and go for a walk and see the city from above out of the chilly snow outdoors.  When we arrived home, we were both pretty hungry, so I decided to make something hearty for dinner.  Something that I have been making so often lately I could do it in my sleep practically, a red lentil, yam and mushroom stew that makes me forget all about the fact that it is cold outside.  It is hearty, cost effective to make, delicious and warming.  Eric told me that it is one of the best dinners I have made lately, and I have to agree, I love this stuff!  Which is why I thought I needed to share it with you! I will be enjoying this often until it warms up here again.

    Red Lentil Yam Mushroom Stew

    Red Lentil, Yam and Mushroom Stew

    Serves 2

    2 tsp coconut oil

    4 garlic cloves, minced

    1 tsp dried thyme

    3 cups sliced crimini mushrooms

    2/3 cup red lentils

    3 1/2 cups filtered water (or as needed)

    1/2 tsp sea salt or to taste

    3 cups diced yams

    2 large handfuls spinach or other greens

    In a medium pot, over medium heat, warm the coconut oil.  Add the garlic and thyme, and cook for 30 seconds, until fragrant.  Add al remaining ingredients but the kale, and bring to a simmer.  Simmer until the lentils are tender and starting to fall apart and the yams are tender, about 10 minutes.  Add the spinach just before serving.

    Red Lentil Yam Mushroom Stew 1


  • Raw Butterfinger Eggs

    Raw Butterfinger Eggs

    Butterfinger Eggs 1

    I have made Raw Maca Peanut Butter Eggs, Raw Raspberry Cream Eggs, and Raw Vanilla Bean White Chocolate Eggs…but I did not want to stop there.  What other candy eggs could I make?  Then it came to me.  Butterfinger eggs!  I loved the mini ones that they used to have when I was little, and why not recreate them! I haven’t had a Butterfinger in probably about 12 years, so I thought it would be fun to enjoy one again.  But a rawified veganized version of course.   Free of refined sugars!

    Butterfinger Eggs

    Butterfinger is sort of a tough thing to recreate in a raw version, since it is super crunchy.  I think I did a pretty good job with the flavor, it was as I remembered butterfingers, but they were just slightly less crunchy than the original.  I didn’t care though, they were deliciously addictive!

    Butterfinger Eggs 2

    To make the Butterfinger part, I took a cue from Brandi over at The Vegan 8 who has an awesome Butterfinger Bar recipe you can find HERE.  She used white mulberries in hers, and I loved that idea!  Genius!  For my filling I used a peanut butter and date base with a pinch of sea salt and vanilla to make it caramelly and give it that flavor of a butterfinger, then I added in the white mulberries along with some sprouted, dehydrated buckwheat for crunch.  The filling was really hard to stop tasting.  I guess I still love the flavor of Butterfingers.

    Butterfinger Eggs 4

    I shaped the filling into eggs, well more like squeezed it because I didn’t want to add too much gooeyness to it to keep them crunchy.  Then I dipped them in raw dark chocolate.  Omg…were they ever fabulous!  I don’t think I would ever eat a real Butterfinger again having enjoyed these babies!  Sooo tasty!  I would be really happy if someone made a batch of these and put them in my Easter basket!

    Butterfinger Eggs 3

    Raw Butterfinger Eggs
    Makes 20

    Filling:
    1 1/4 cups raw jungle peanut butter or regular peanut butter (not raw)

    1/2 cup soft medjool dates, pitted

    2 tsp pure vanilla extract

    1/2 tsp sea salt

    1 cup dried white mulberries

    1 cup sprouted, dehydrated buckwheat groats

    1 1/2 cups chopped raw dark chocolate

    In a food processor, combine the peanut butter, dates, vanilla and se salt, and blend until smooth.  Add the mulberries and buckwheat groats and pulse until chopped and it is all combined and holds together when squeezed (if it doesn’t add a little more peanut butter).  Shape into 20 small eggs (you will need to squeeze the mixture as it may be a little crumbly), and place on a foil lined tray, then place in the freezer to chill, about an hour.

    When eggs are ready, melt the chocolate in a bowl (I like to set mine in a bowl in the dehydrator until it is melted).  Then set the chocolate next to the tray and dip each chocolate into it letting the excess drain off before setting it back onto the tray (I use a fork, setting the chocolate on top of it, to let the excess drain off).  Once the chocolates are all dipped, place in the freezer to set the chocolate, about 5 minutes.  Place some of the remaining melted dark chocolate in a pastry bag (or a ziplock bag with the corner cut off), and drizzle over the eggs for decoration.  Place in the freezer to set again, then they will be ready to serve.  Store in the fridge.

  • Raw Spring Sugar Cookies

    Raw Spring Sugar Cookies


    Sugar Cookies

    When I was in college, I used to love to make sugar cookies. You know, the ones you could decorate with all of the fun frostings.  I used my Grandma’s sugar cookie recipe, which was amazing, topped off with buttercream in all sorts of shades of eye popping colors.  Now gone are the days of me making refined sugar and bleached flour cookies with artificial dye frostings (I know, it sounds so appetizing when I put it that way, but just being honest).  But I am not missing those cookies, because I have made new recipes for sugar cookies that are just as delicious, including the one I am sharing with you today.

    Sugar Cookies 1

    These date sweetened babies are even better than my Grandma’s recipe (sorry Grandma, still love you, and you gave me a passion for creating delicious food which I appreciate).  Can I even call them sugar cookies if there is no sugar?  Well too bad I am going to because they taste like it.  The dough is freaking awesome, and being a cookie dough girl, I could eat it just in gobs right out of the food processor.  But that is not nearly as pretty as shaping it into cookies.

    Sugar Cookies 3

    So once the cookies were cut into pretty Spring shapes (I wanted an excuse to use my flower and butterfly cookie cutters), I topped them off with colorful coconut frosting.  No artificial colors here, just beet juice, spinach juice and carrot juice which make lovely colors!  Don’t worry, you can’t taste the veggies, just the sweet coconutty goodness. It was perfect with the sugar cookies!  Vanilla all the way though, just how I like them, and my Grandma would have been proud.  If you are a fan of sugar cookies, but not the refined sugar, these are meant for you!

    Sugar Cookies 2

    Raw Spring Sugar Cookies
    Makes 12

    2 cups finely shredded dried coconut
    1 cup raw gluten free sprouted oat flour
    1/4 cup ground flaxseed
    1 cup pitted, soft medjool dates (if they are not soft, soak them in water 30 minutes, and drain very well before using in recipe)
    1/4 tsp sea salt
    2 tsp pure vanilla extract
    3/4 cup raw coconut butter, warmed to liquid

    Vanilla Frosting:
    1/2 cup raw coconut butter, warmed to liquid
    1 heaping Tbsp raw coconut nectar (or your choice liquid raw sweetener)
    1/3 cup filtered water and as needed
    1 tsp pure vanilla extract

    For color: about 1 tsp each carrot juice, spinach juice, beet juice

    In a high speed blender, buzz the coconut to fine flour (but not too long or you will get butter). Add to a food processor with the oat flour, flax seed, dates, sea salt, and process until well combined.  Add the vanilla, coconut butter, and process until smooth and dough like (if it seems too dry add a little more water 1 tsp at a time).

    Roll out the dough on a sheet of parchment paper 1/4 inch thick, and cut out with medium sized spring cookie cutters (if it is too warm, pop it in the freezer for a few minutes to make it easier to work with). Once the cookies are all cut out, place them in the freezer to chill for about 30 minutes.

    To make the vanilla frosting, whisk together all ingredients until smooth, adding a little filtered water as needed (it may seem clumpy at first, but it will smooth out, you want it to be the consistency to pipe over the cookies, so not too runny, not too thick). You can tint the frosting with the beet juice, carrot juice and spinach juice.  I divided mine into 3 bowls, and added the color.

    To decorate, place the frostings in small pastry bags, or  ziplock bags with the corner cut off and pipe decoratively over the cookies.  Let the frosting set (it will happen faster if you pop them in the freezer for about 5 minutes).  Store leftover cookies in a sealed container in the refrigerator.

    *Note, if you want these to be drier cookies, you can dehydrate them for 2-3 hours at 115F instead of chilling them.

  • Raw Tag-Along Tart

    Raw Tag-Along Tart

    Tag Along Tart 2

    I made some Raw Tag-Alongs  since it is Girl Scout season, and they were so good that I thought I should make another Tag Along dessert as well. I never tire of the chocolate and peanut butter combo, I am in love with it.  I thought the Tag Alongs deserved some more time in the spotlight since I have quite a few Samoa dessert recipes on my website.  Like a Raw Samoa Cake, Raw Samoa Mousse Bars, and Raw Samoa Coconut Macaroons.

    Tag Along Tart

    I always make a lot of cakes, so I thought I would change it up this time and make a Raw Tag-Along Tart! For the crust, I used a mixture of ingredients that tasted like peanut butter cookies but crunchier.  It was crave worthy all on its own, but this dessert is about being a bit over the top, so the filling had to be equally as delicious!

    Tag Along Tart 1

    For the filling, I made a raw peanut butter mousse, which I could have eaten by the bowlful.  But it made it into the crust, and then I topped it off with a fudgy chocolate ganache to give it that classic Tag Along Chocolate covered peanut butter thing going on.

    Tag Along Tart 4

    I had to top it off with more tag alongs as well because why not?!  It was sinfully good.  So rich and decadent, and that crunchy crust with the silky peanut butter filling and gooey rich topping…omg pure bliss!  This is definitely a special occasion dessert, and so worth making!

    Tag Along Tart 5

    Raw Tag Along Tart
    Makes one 10 inch Tart

    Crust:
    1/2 cup sprouted dehydrated buckwheat
    1 cup raw jungle peanuts*
    1/4 cup ground flaxseed
    2 cups finely shredded, dried coconut
    1/8 teaspoon sea salt
    1 cup soft medjool dates, pitted and chopped (soaked in filtered water 30 minutes if not soft, and drained well)
    1/3 cup raw cacao powder

    Peanut Butter Filling:
    2 cups  young coconut meat**
    1/2 cup coconut water
    2 cups raw jungle peanuts*, soaked 4 hours and drained
    1/2 cup raw coconut nectar, or maple syrup
    1/2  teaspoon sea salt
    1 Tbsp pure vanilla extract and seeds from half a vanilla bean
    1/4 cup raw jungle peanut butter*
    1/2 cup plus 2 Tbsp  raw coconut butter (warmed to liquid)

    Fudgy Ganache:
    1 1/2 cups soft medjool dates (if not soft, soak in water until soft and drain before using)
    1/2 c filtered water
    1/4 cup plus 2 Tbsp raw cacao powder
    2 Tbsp raw coconut oil, warmed to liquid
    a large pinch sea salt

    Raw Tag-Alongs for garnish (optional)

    In a food processor, combine the buckwheat, peanuts, flaxseed, coconut, sea salt, and dates, and process until finely chopped and starting to hold together when squeezed.  Press into a 10 inch round tart crust with a removable bottom oiled with coconut oil.  Place in the freezer while you prepare the filling.
    To make the peanut butter filling, combine coconut meat, peanuts, juice, coconut nectar, sea salt, vanilla, peanut butter, and coconut butter in the food processor and blend until smooth and creamy. Pour over the crust and smooth out.

    For the ganache, combine all ingredients in a high speed blender and blend until smooth, then pour over the peanut butter layer.  Place the tart in the freezer and allow to set for a few hours.

    Garnish the tart with Raw Tag Alongs if desired when ready to serve.

    *If you wish to use regular natural peanut butter, that will work as well.

    **If you do not have access to young coconuts, you may substitute 2 cups raw cashews soaked 4 hours and drained for the young coconut meat.


  • Raw Tag-Along Cookies

    Raw Tag-Along Cookies

    Tag Alongs

    I like to make Girl Scout cookie inspired desserts sometimes.  Maybe it is because I loved those things as a child and I have good memories of enjoying them.  I know if I ate them as an adult it would not quite be the same though since my taste buds and body are no longer used to refined sugar and flours and they would probably rebel.  But luckily I can make my own versions of these tasty treats. Last week I decided to make Raw Tag-Alongs.  They were one of my favorites next to the Samoas and Thin Mints.  This is actually a recipe that is in my book Fragrant Vanilla Cake: Sweet and Savory, but since I was making them again I decided to share it on my blog in case you don’t own the book.

    Tag Alongs 3

    I think this raw version is even better than the original.  Crunchy cookie topped off with gooey peanut butter which I leave unsweetened because the rich dark chocolate is nice and sweet and it is the perfect balance.  When eating them I am instantly brought back to my childhood and remembering that peanut butter and chocolate always rules.  Sorry Girl Scouts, you got nothing on my raw version of these!  What is your favorite girl scout cookie?

    Tag Alongs 2

    Raw Tag-Along Cookies

    Makes 10

    Crust:

    1 cup raw buckwheat groats, sprouted and dried

    1 1/2 cups dried shredded coconut

    1/2 cup ground flaxseed

    3/4 cup soft medjool dates, pitted (soaked in water 30 minutes if not soft and drained well)

    1/8 tsp sea salt

    10 heaping Tbsp. raw jungle peanut butter or regular natural peanut butter

    Raw Chocolate:

    ½ cup raw coconut oil, warmed to liquid

    ¾ cup raw cacao powder

    ¼ cup raw maple syrup or raw coconut nectar

    A pinch sea salt

    For the crust, combine all ingredients in a food processor, and process until finely ground and holding together when squeezed.  Roll out on a lined sheet pan ¼ inch thick, and cut into 10 circles.  Spread a heaping Tbsp. peanut butter over each one, and place in the freezer until frozen hard, about an hour.  Meanwhile, whisk together all the chocolate ingredients in a bowl.

    Dip each of the cookies into the chocolate, and let the excess drain off (use a fork to make it easier), and set back on the foil. Dip the remaining cookies, and then place in the freezer to harden (about 10 minutes).  Store in the refrigerator.

    Tag Alongs 1