Tag: holidays

  • Vegan Gingerbread Cupcakes

    Vegan Gingerbread Cupcakes

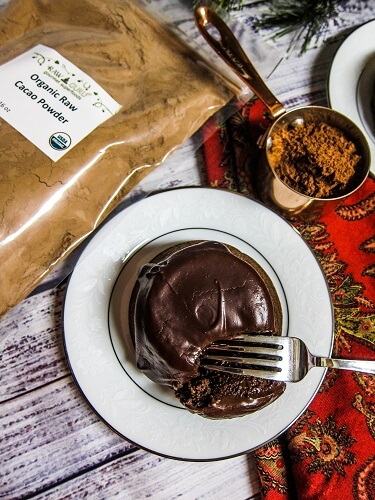
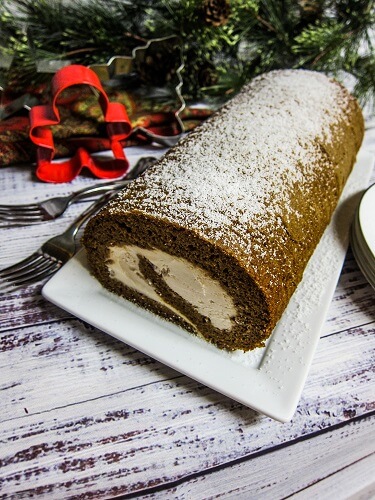
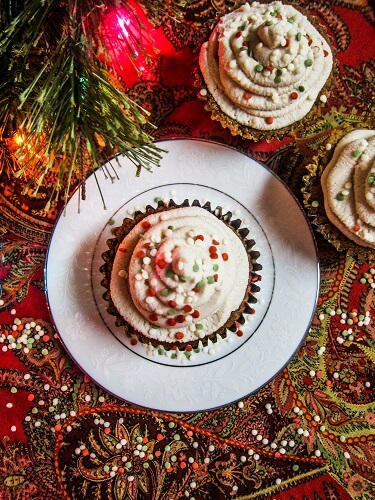
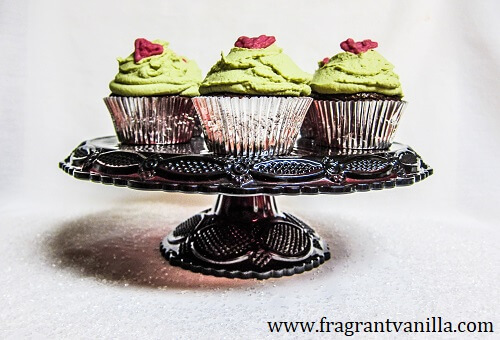
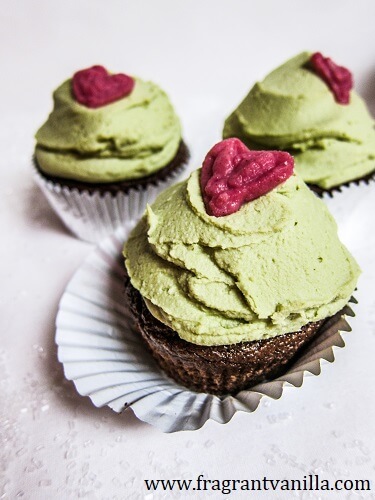
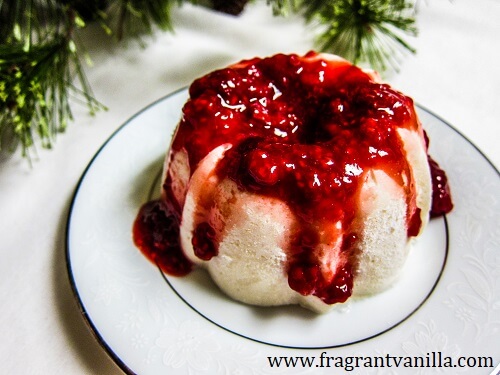
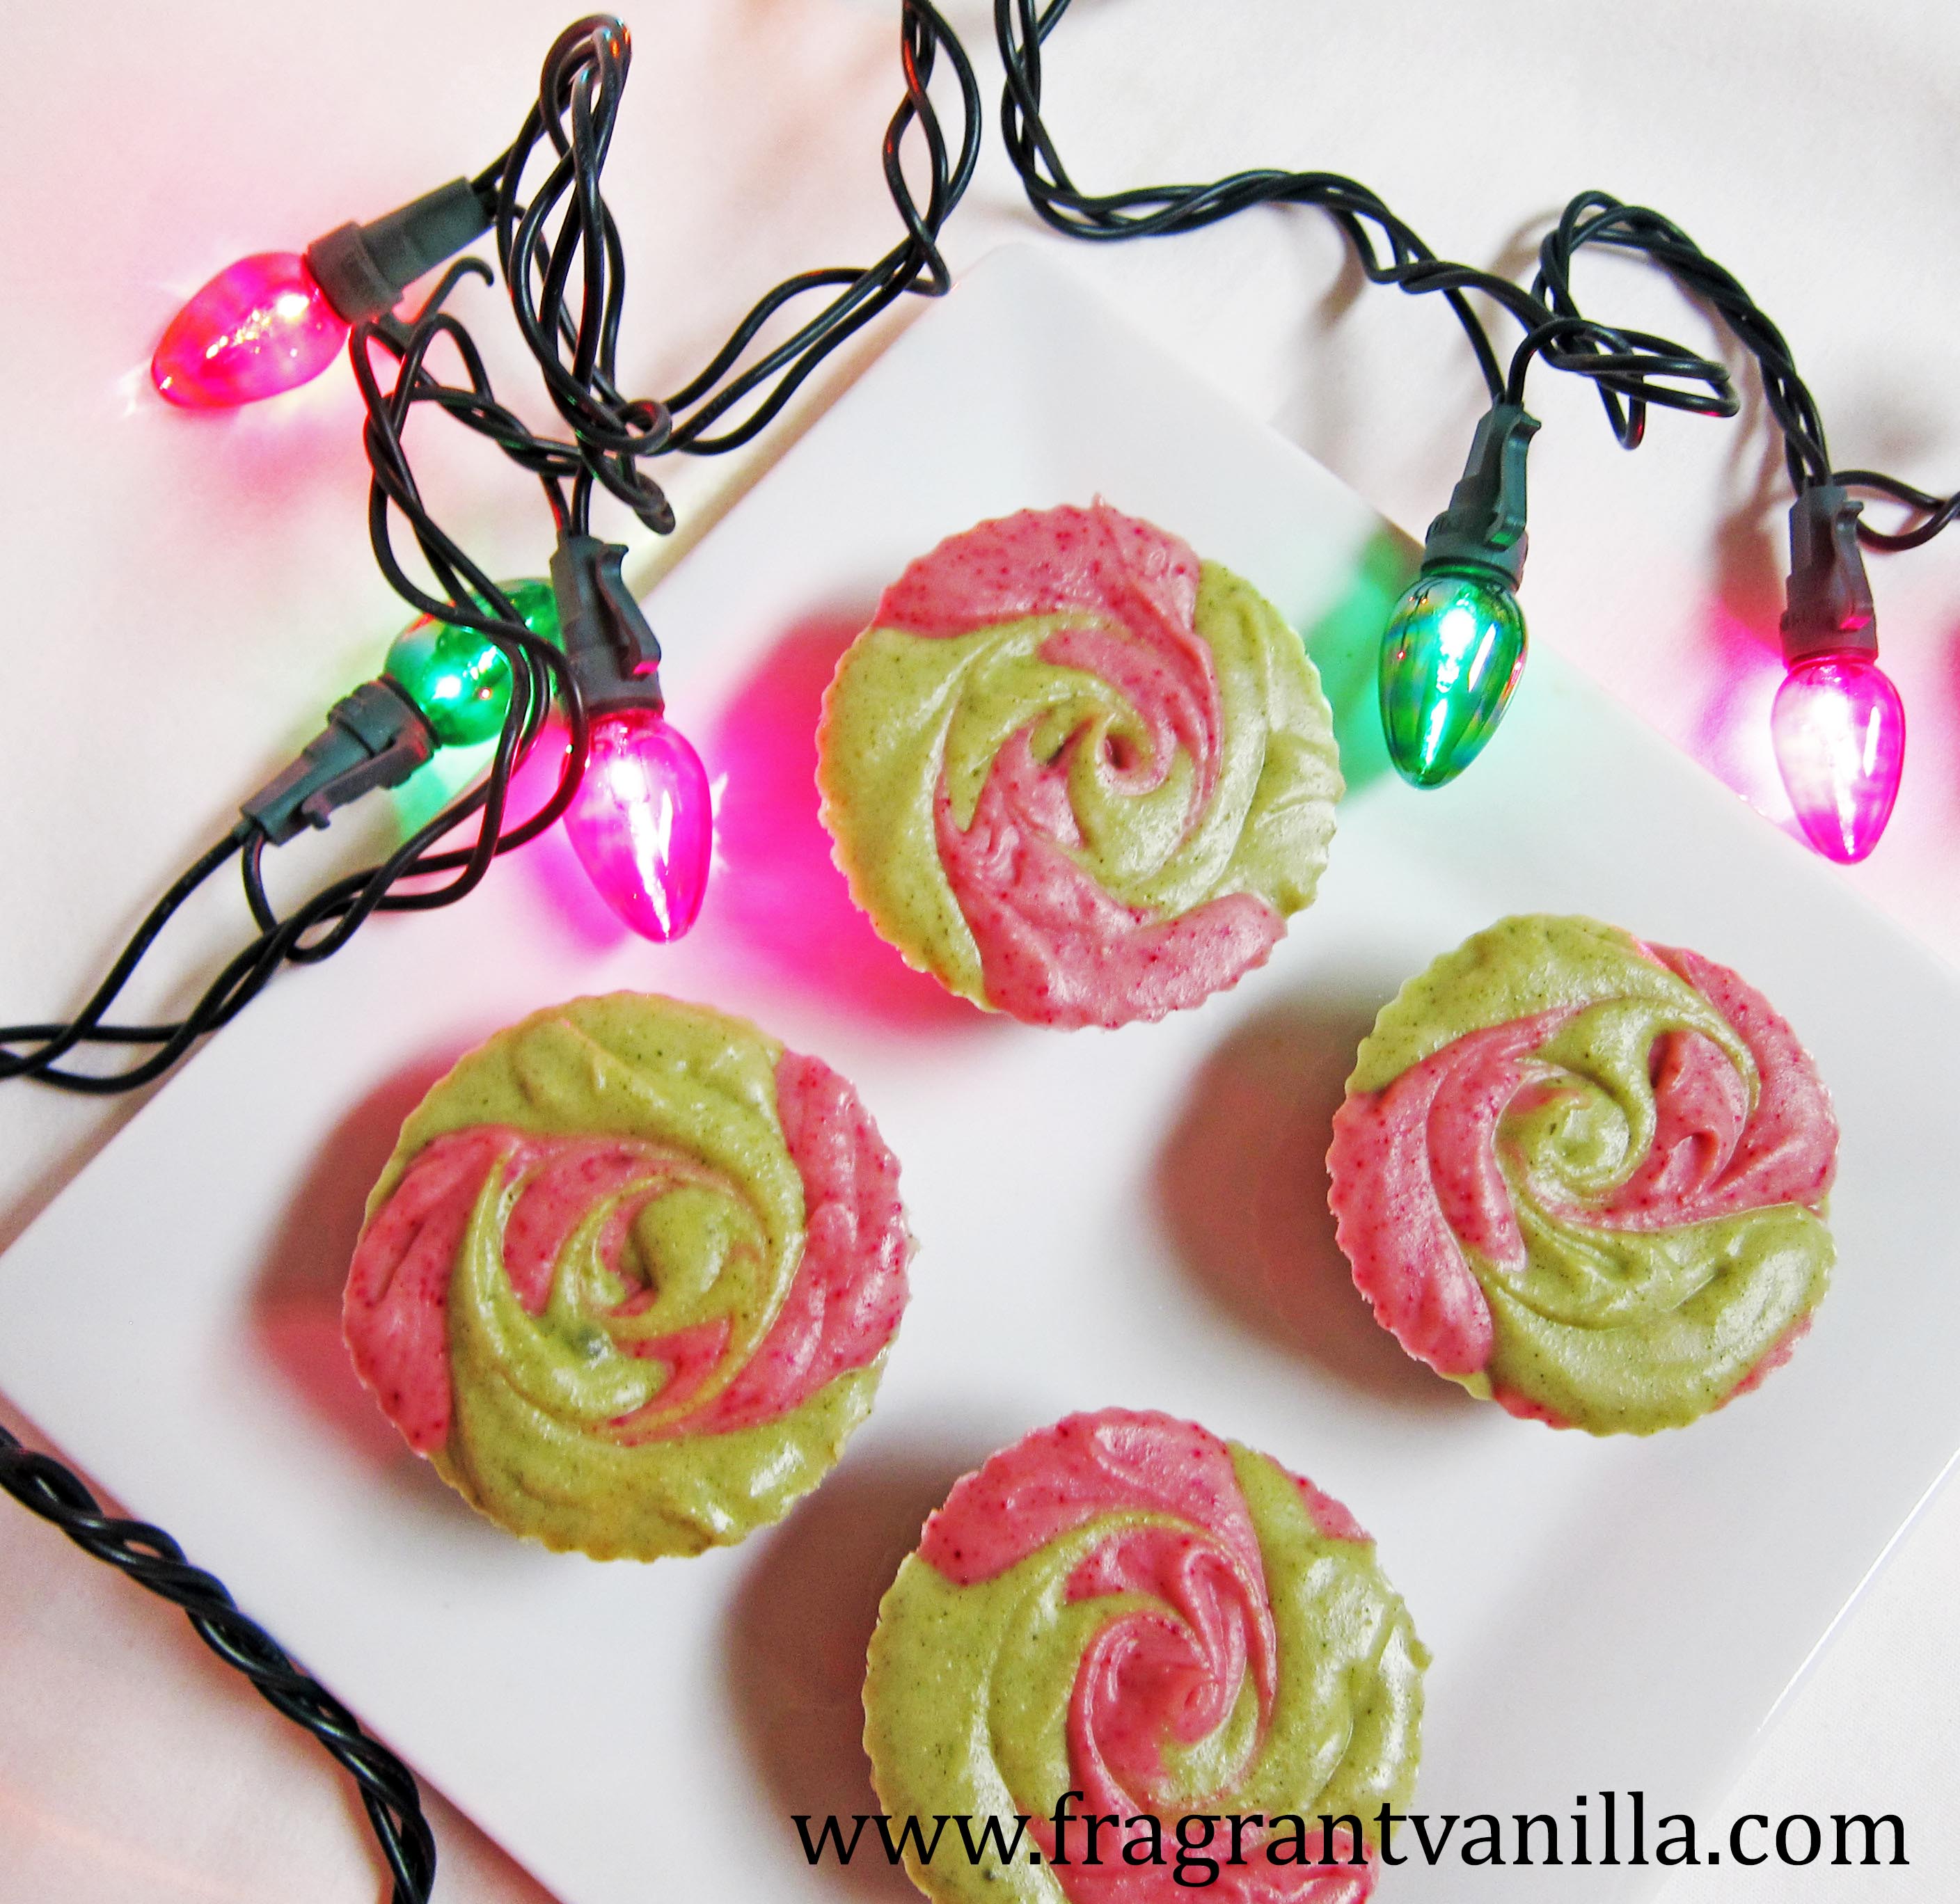
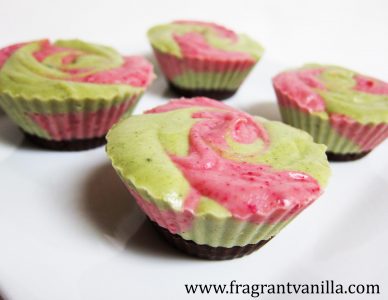
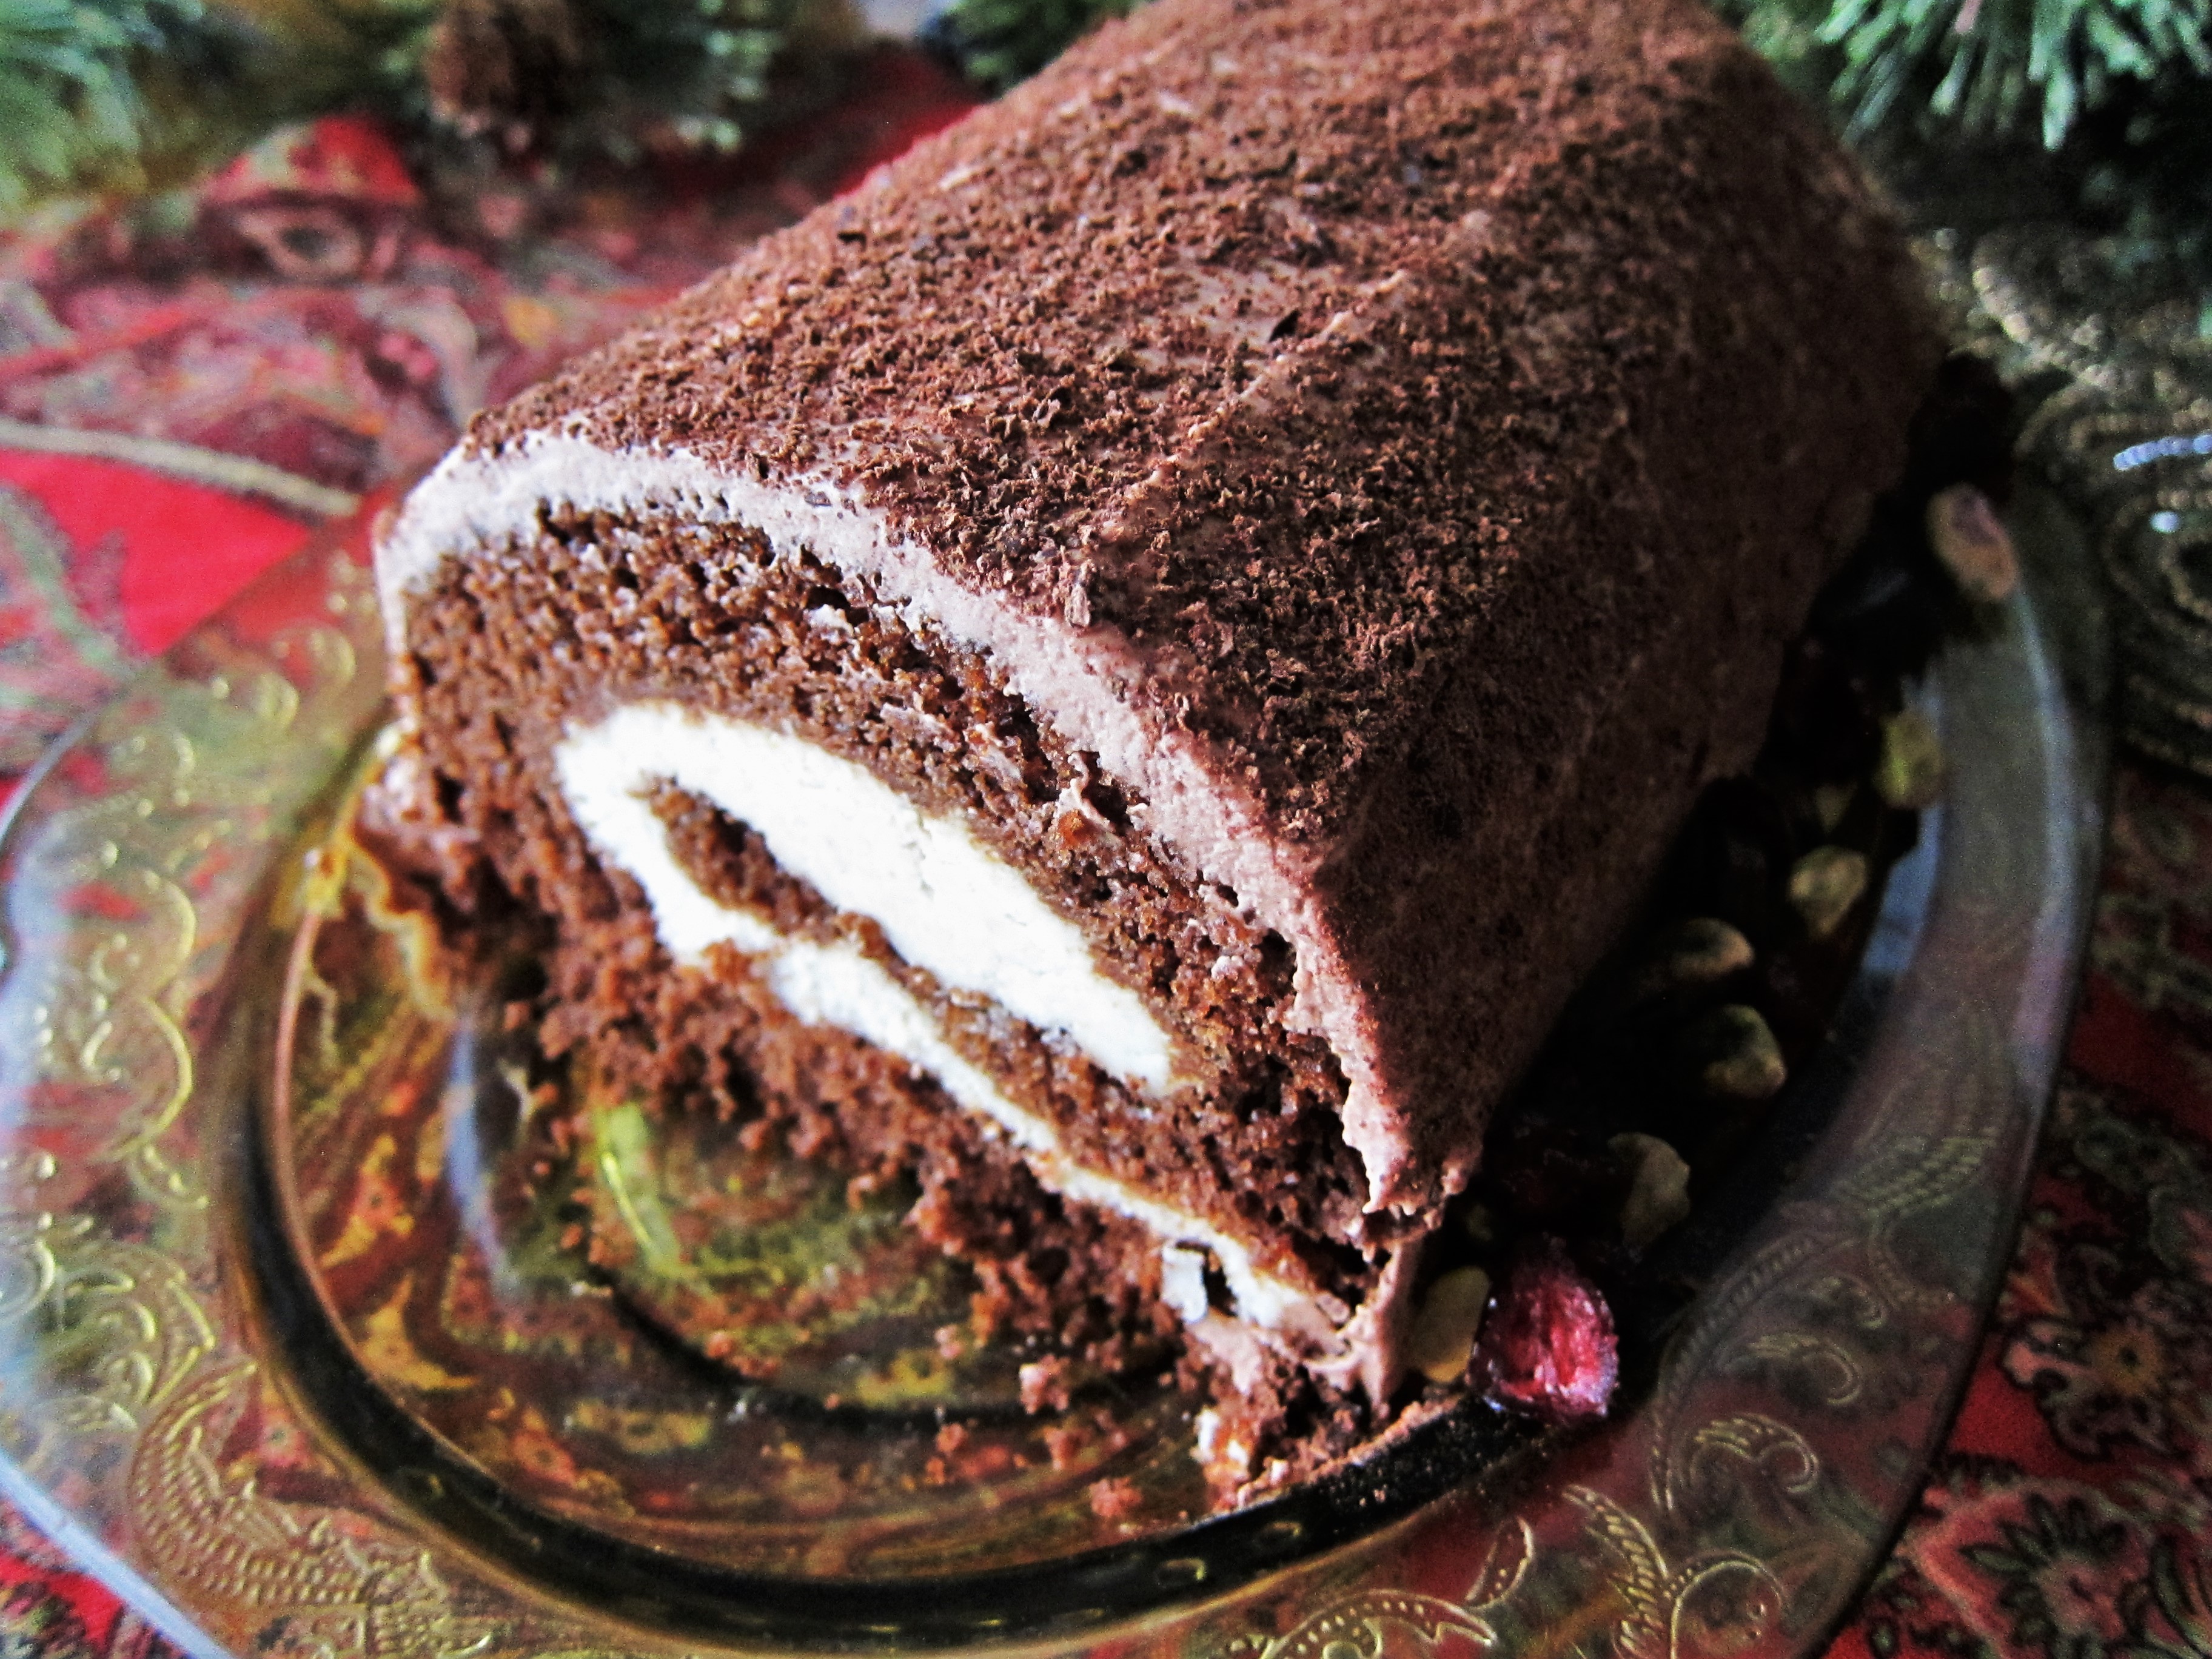
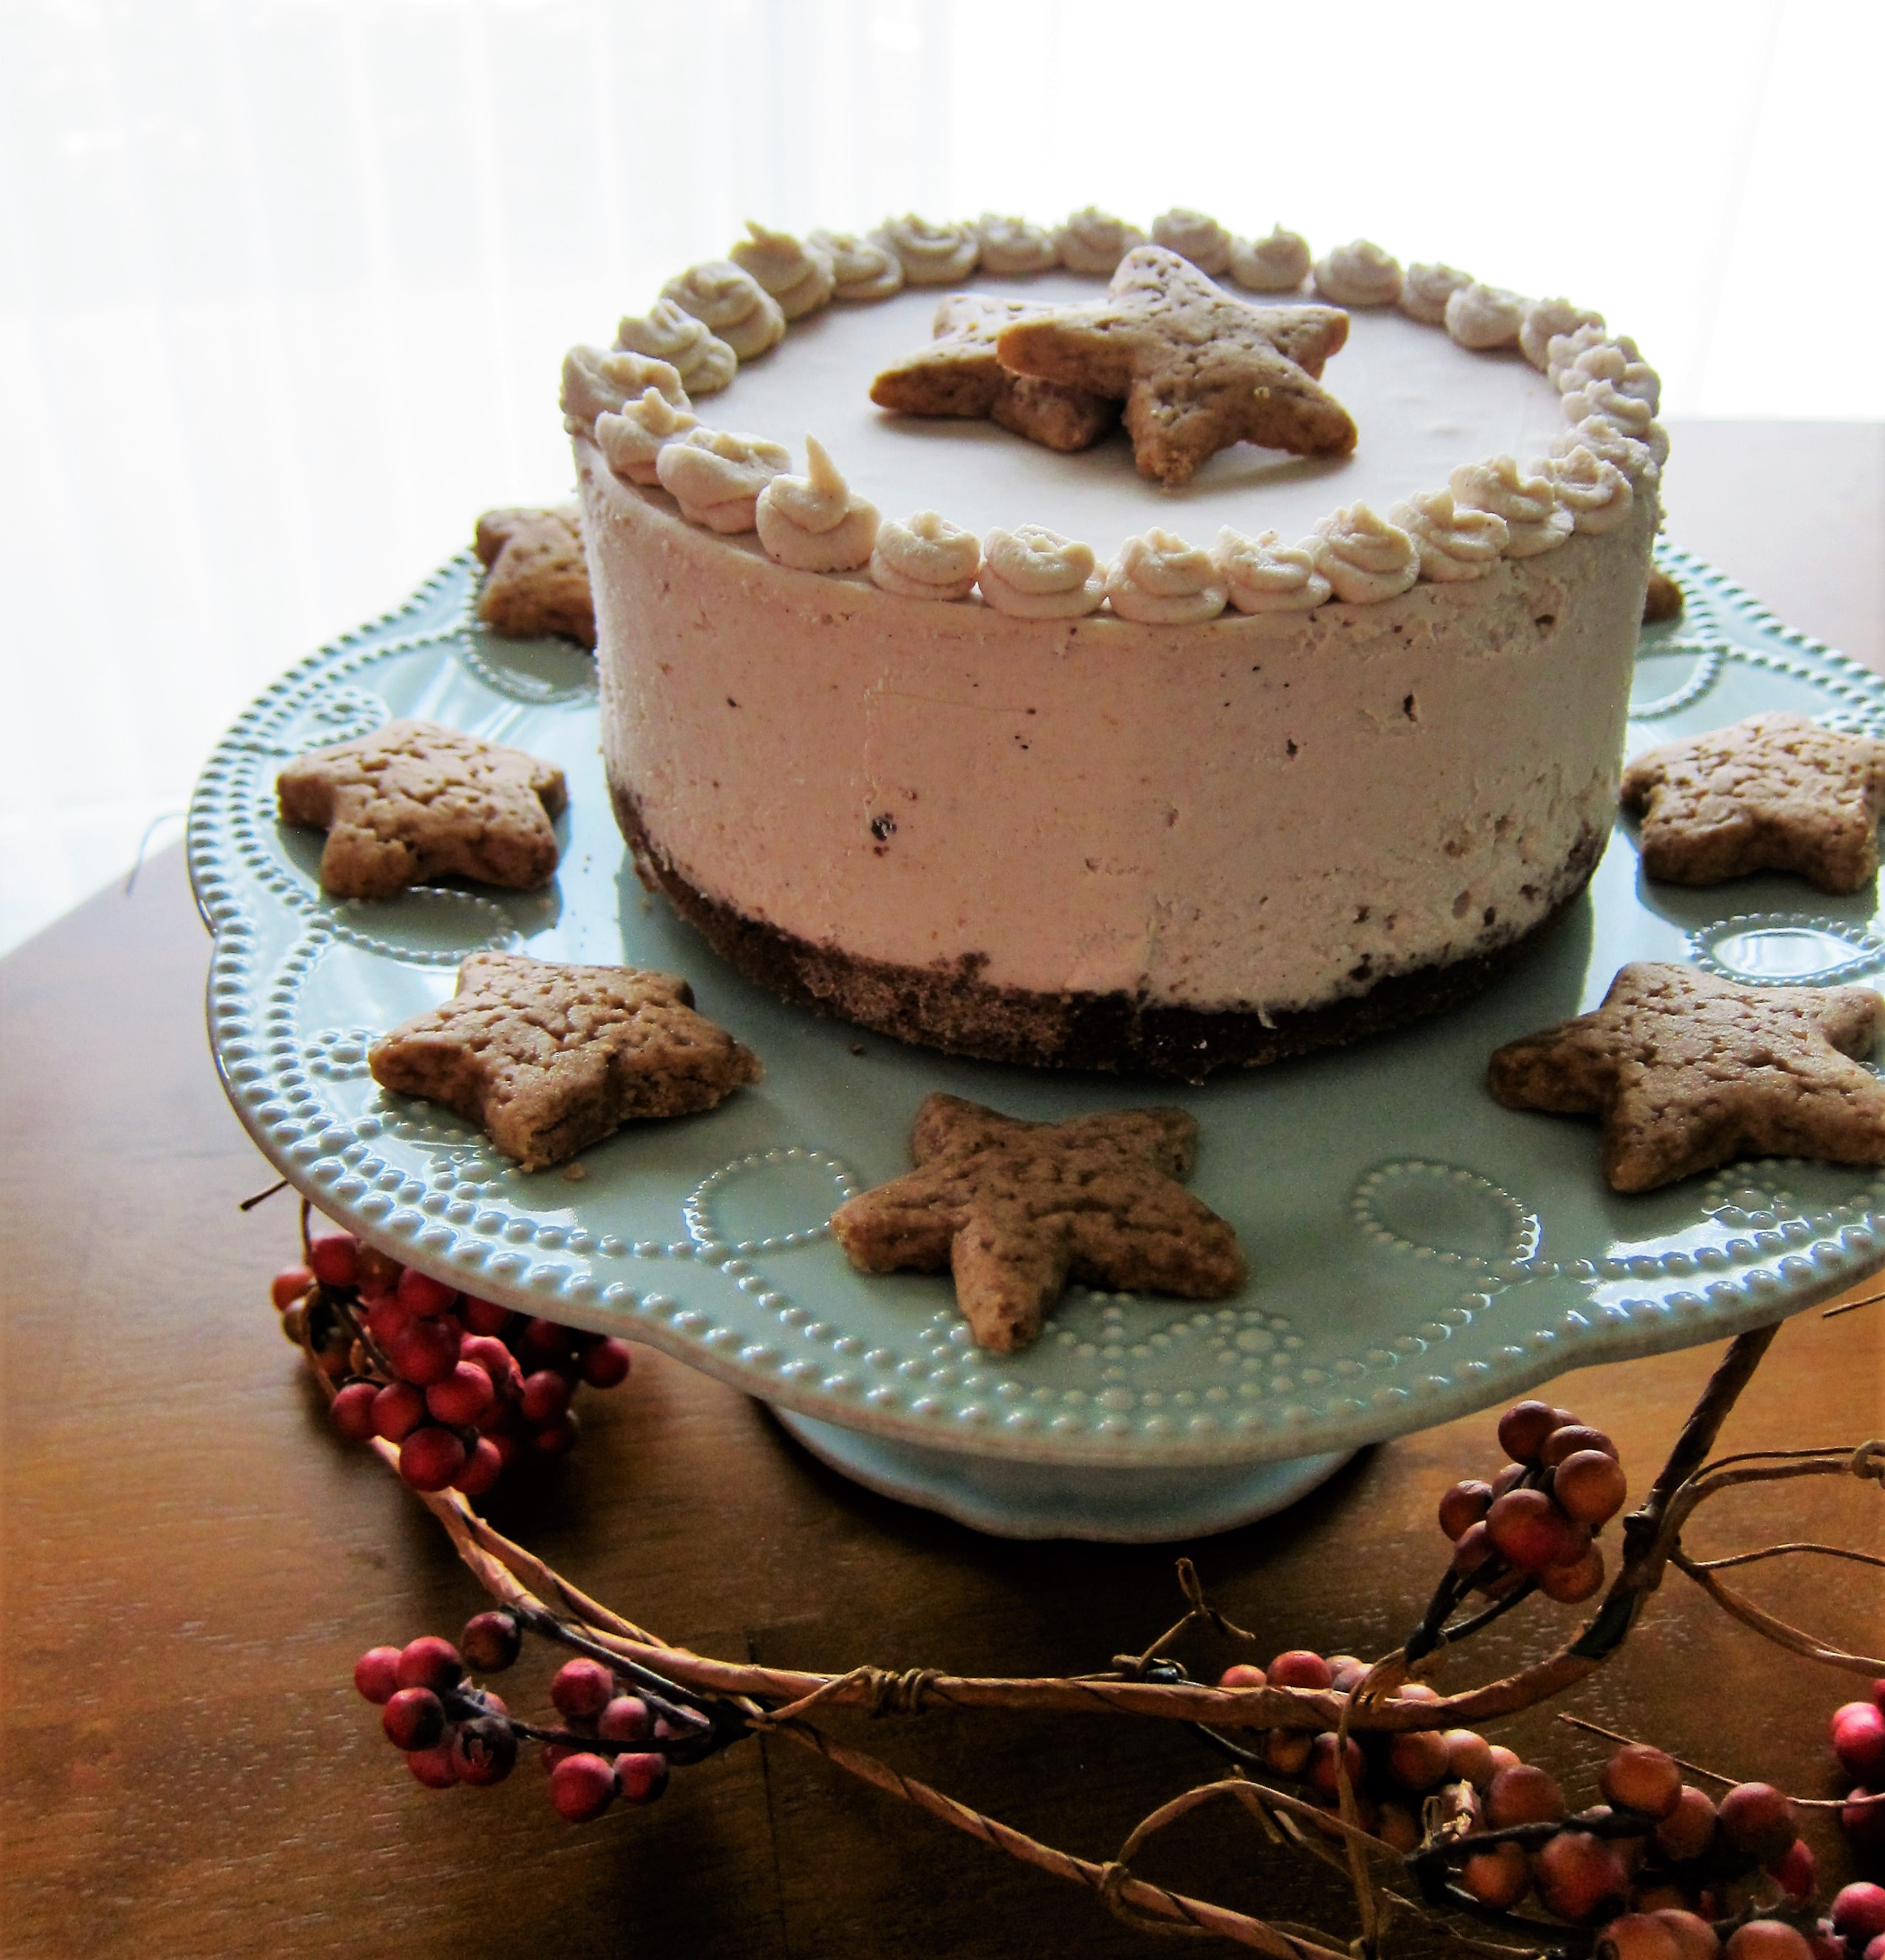
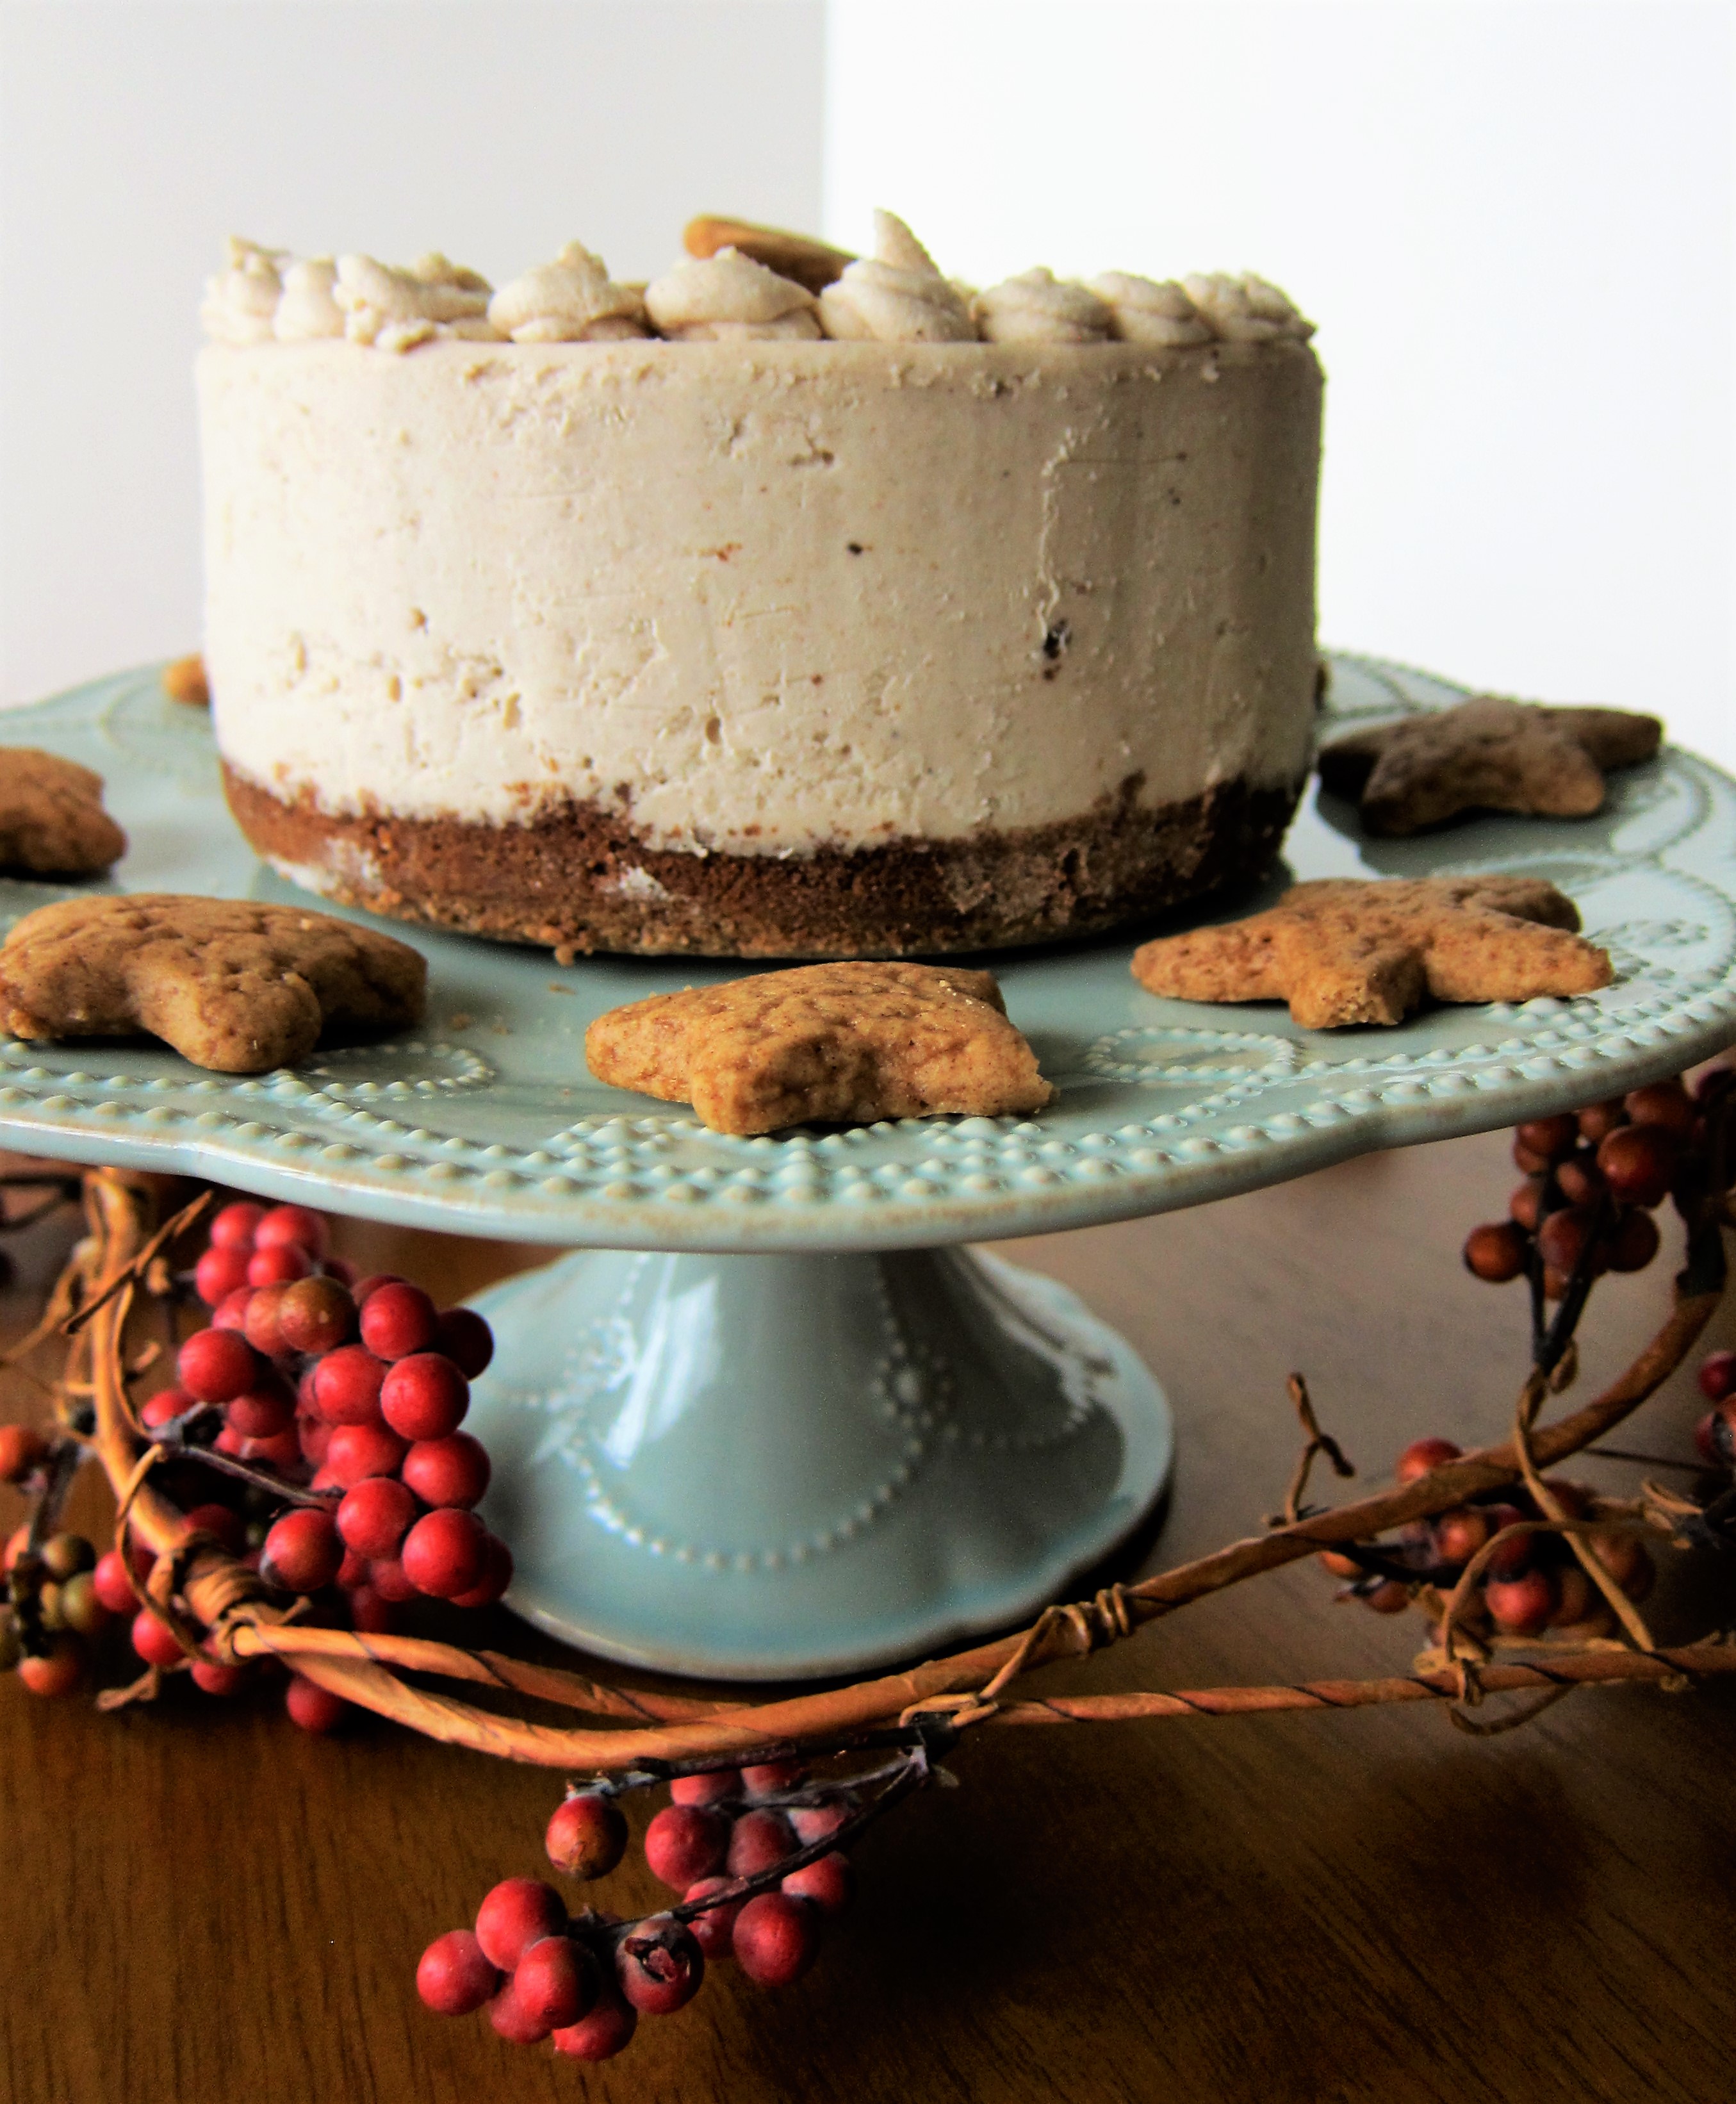
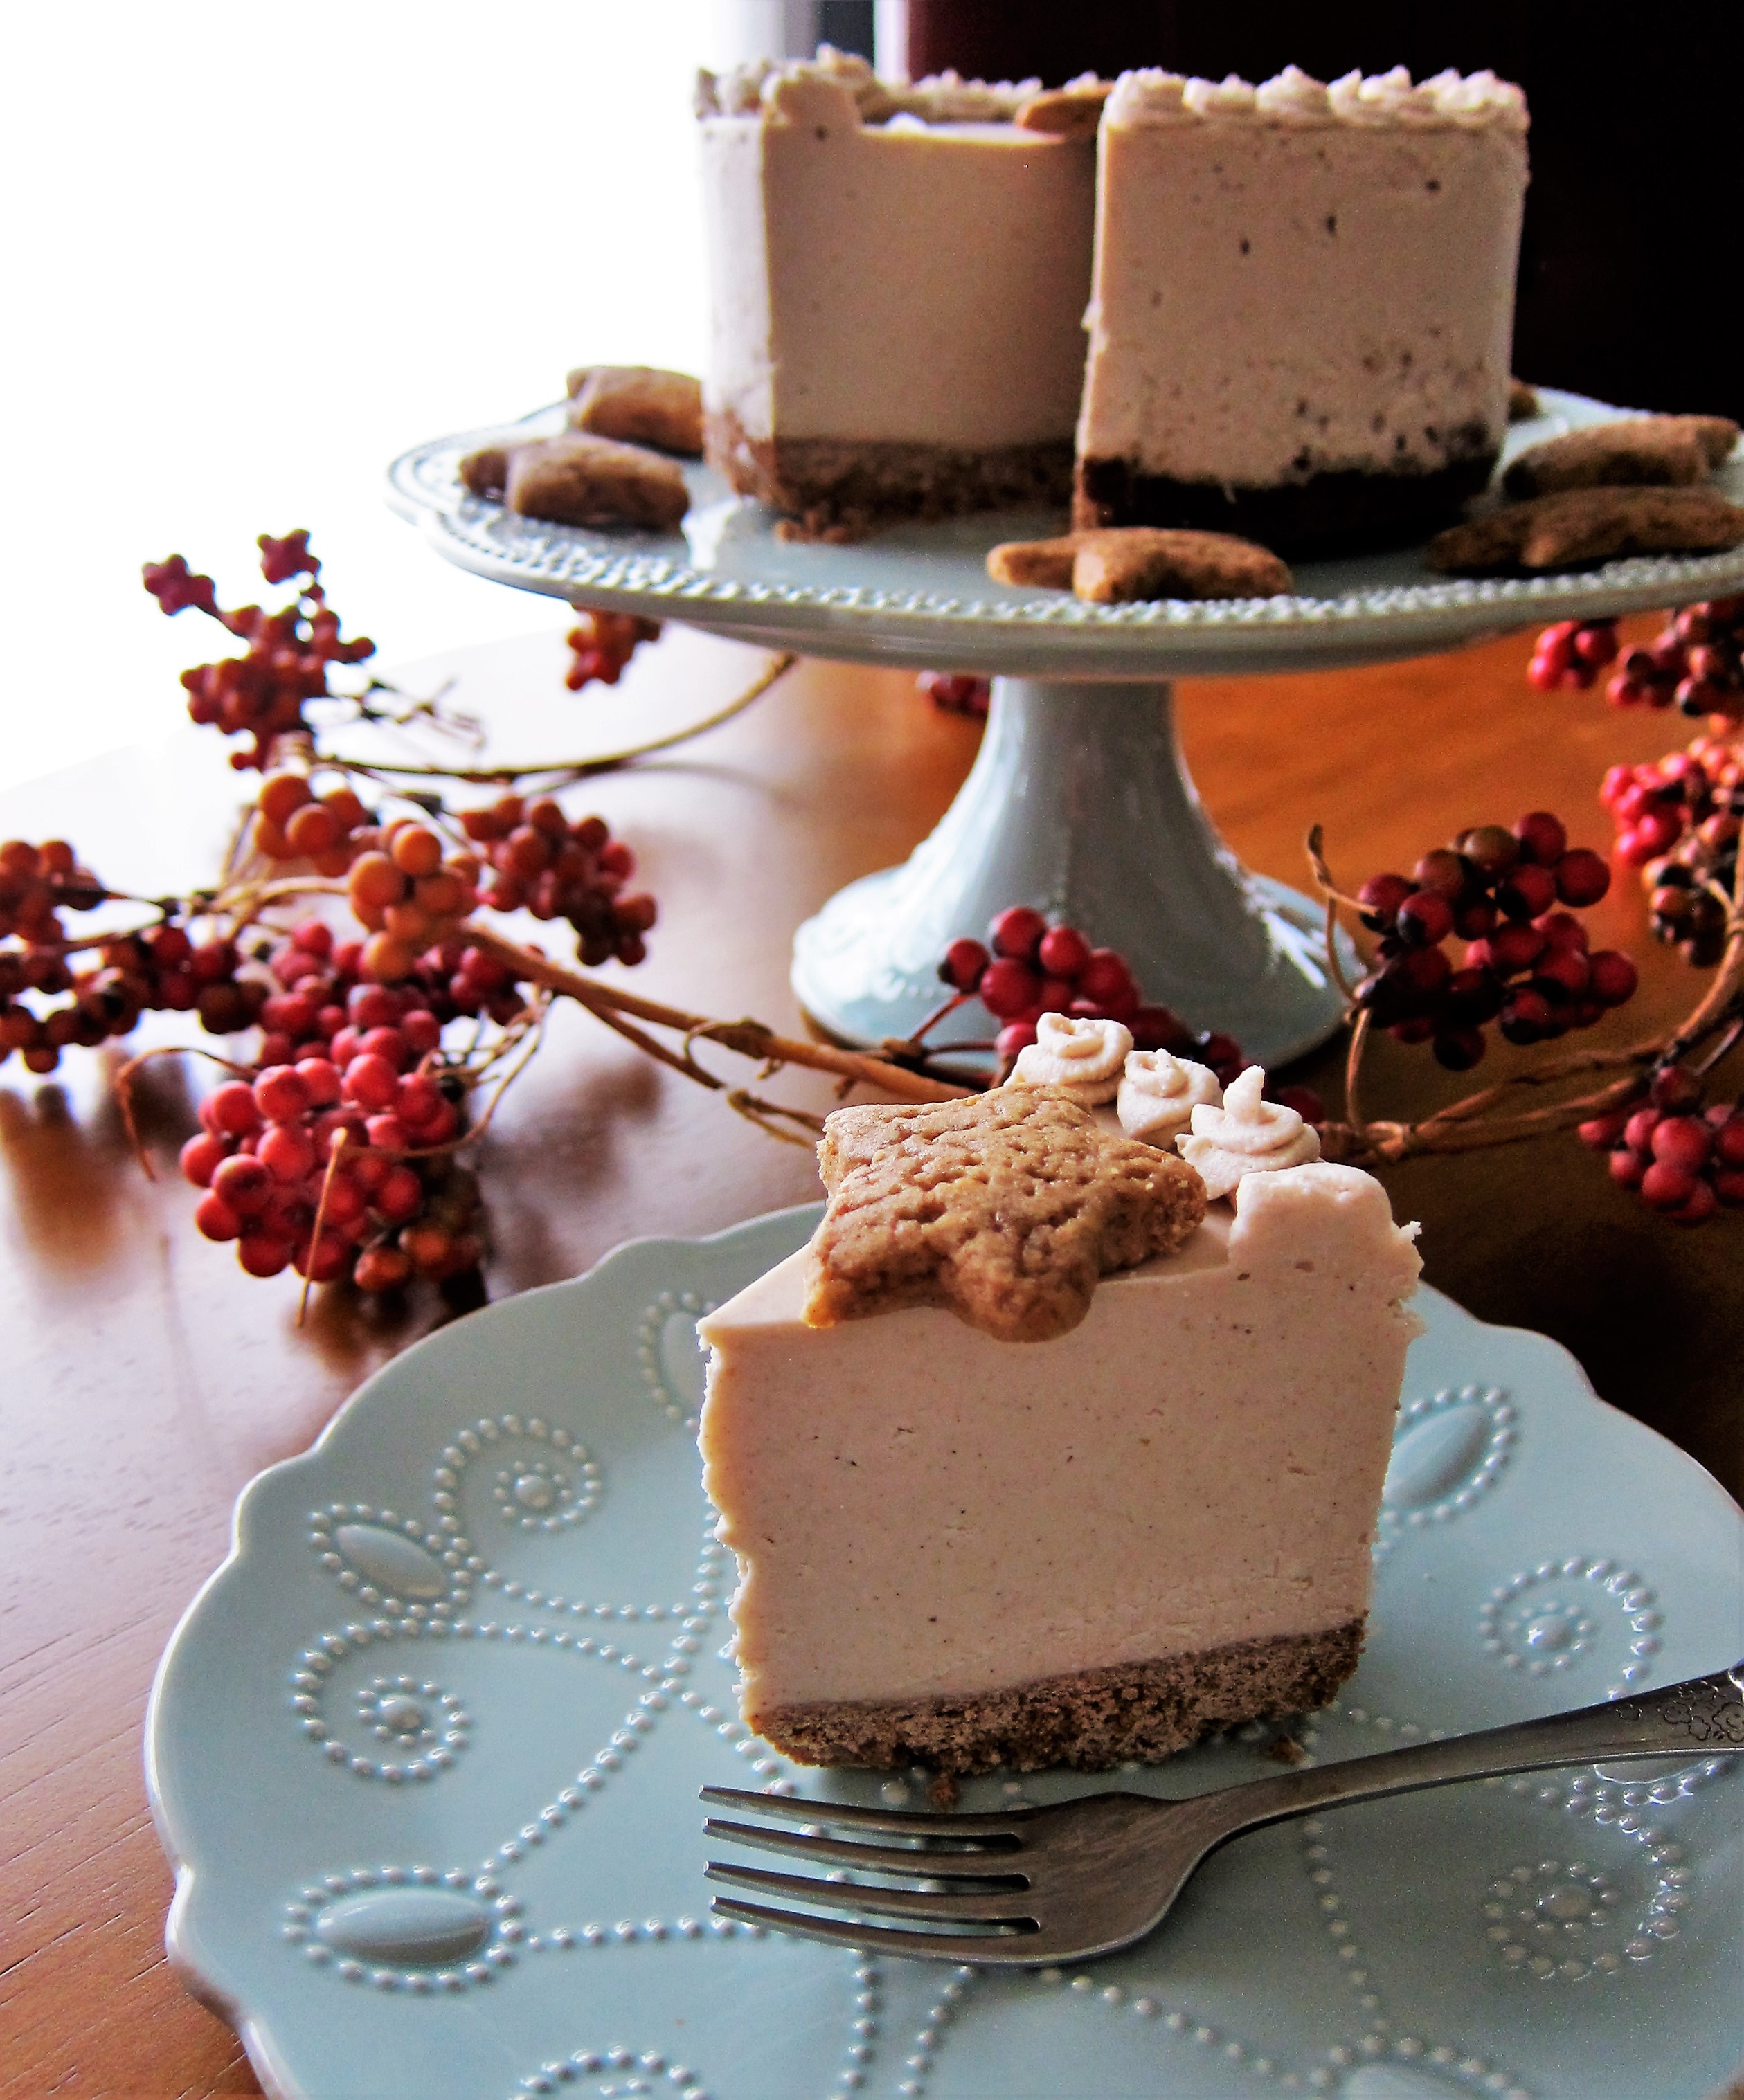
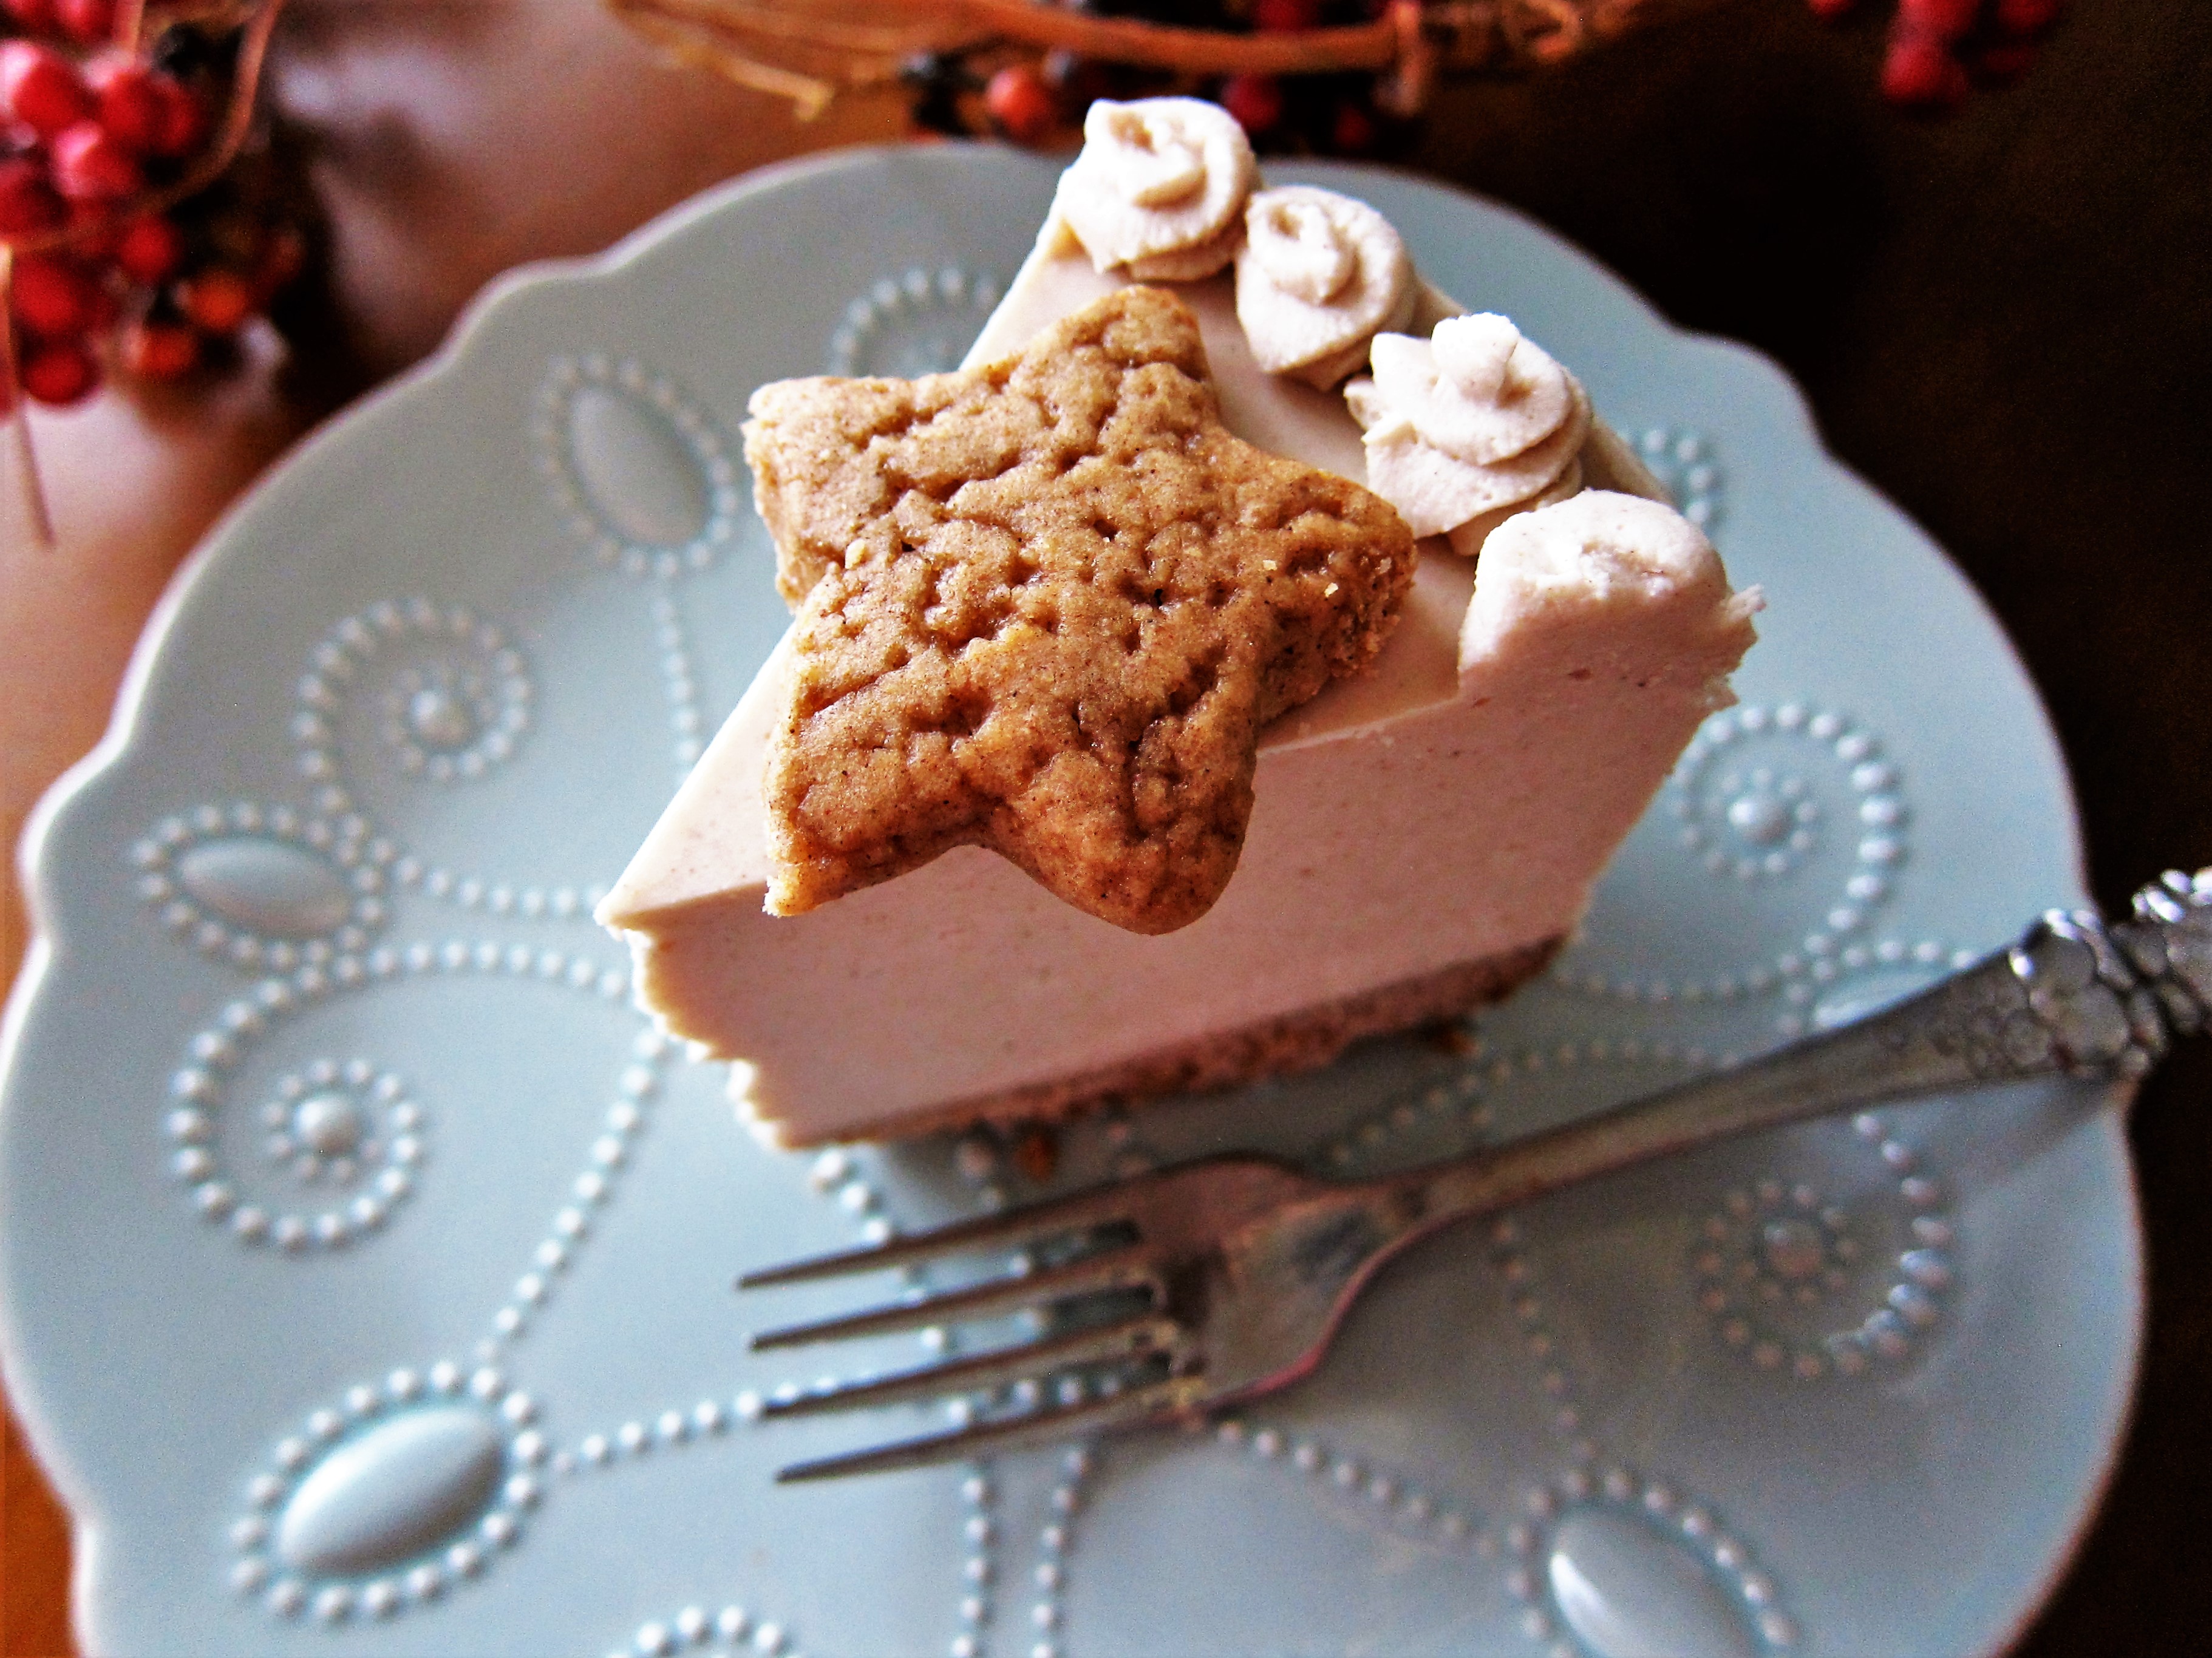
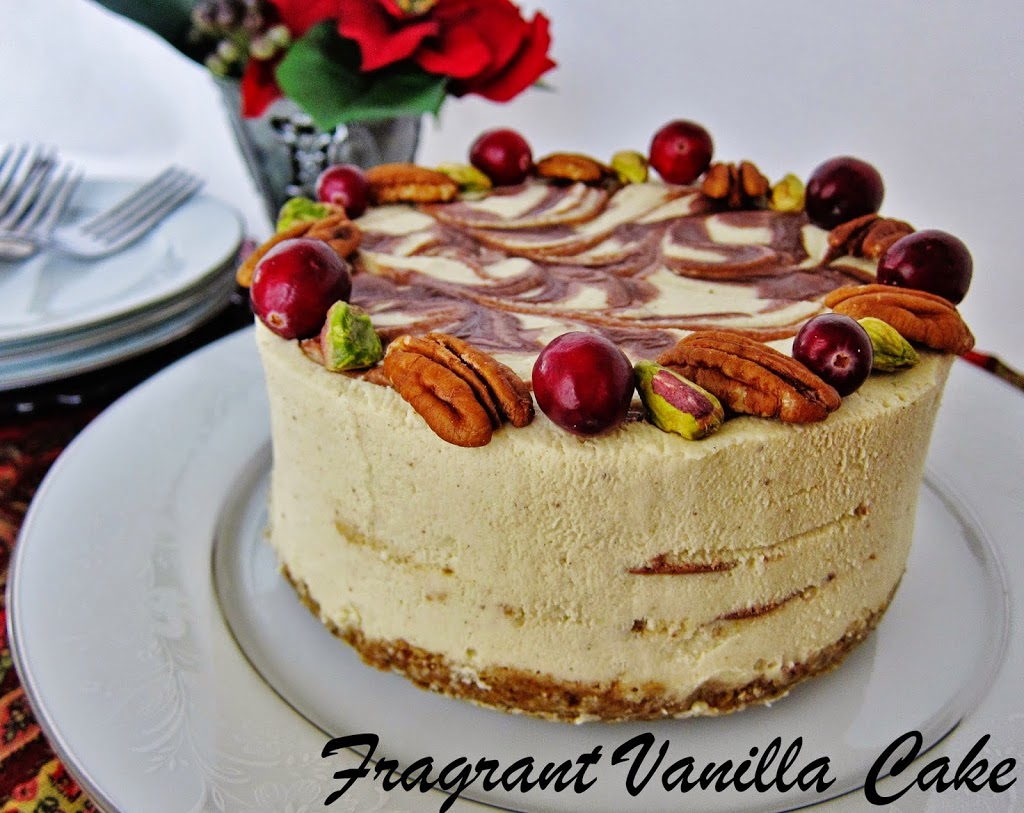
    It is finally looking a bit like Christmas around here with a bit of snow on the ground and not so brown outside.  So I have been baking some festive treats! Of course I made some Christmas cookies, but also I have been craving gingerbread so I decided that I needed to make some.  As much as I like gingerbread cookies, I wanted it in the form of cake, one with luscious frosting!  So I made some Vegan Gingerbread Cupcakes last weekend!  They are easier to make than a big cake and perfect for sharing!

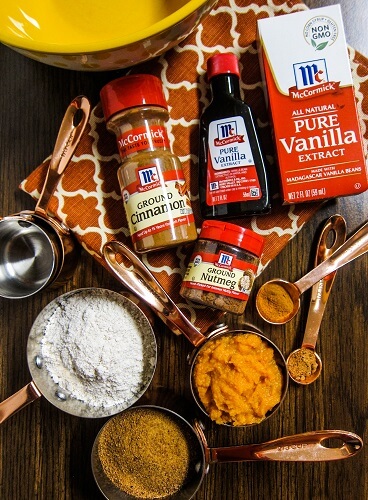
    These cupcakes are plenty flavorful with the warming spices of ginger, cinnamon, cardamom and nutmeg in them plus sweet molasses to give them that traditional gingerbread flavor. I also included a bit of vanilla since I feel like most desserts need a touch of it!  For the flour I used whole wheat pastry flour but if you wanted to regular all purpose flour or even a gluten free all purpose baking flour (such as Bob’s Red Mill gluten free all purpose baking flour which I have used before with success) for a gluten free version.  I used flax eggs in these because I always have good results in my cakes with them.

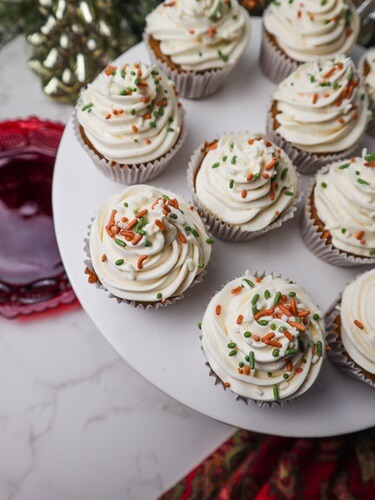
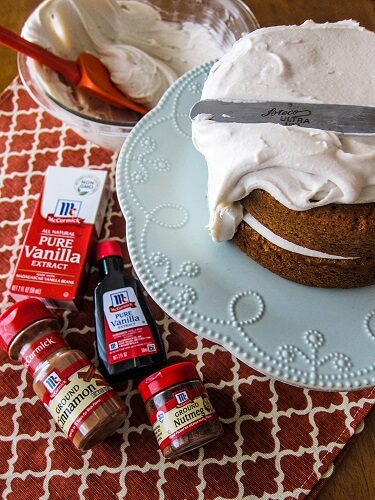
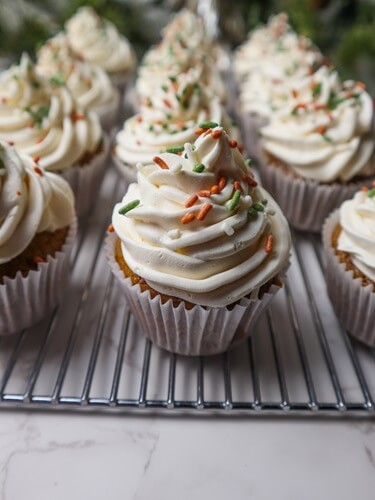
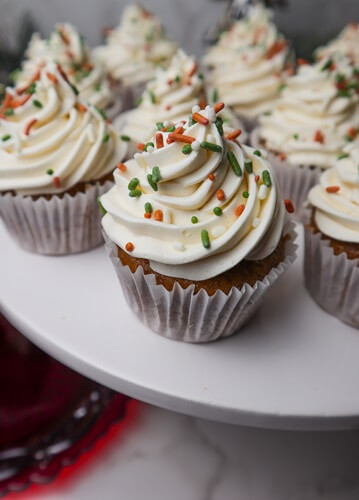
    For the frosting I wanted something luscious, rich and creamy so I went with a simple vegan vanilla buttercream.  It’s just vegan butter, powdered sugar vanilla and milk but it is sooo good! I like my cupcakes with a good cake to frosting ratio too, so I made plenty!  It was the perfect topper for the cupcakes. I topped them off with vegan naturally colored sprinkles too!

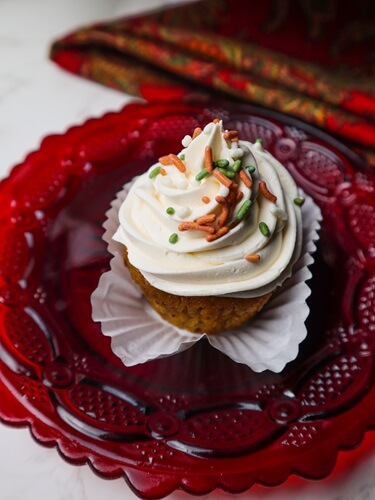
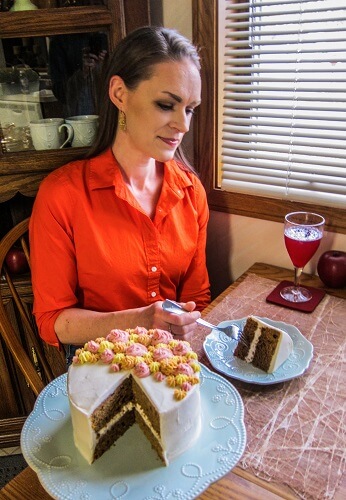
    These cupcakes were so delicious!  They were soft and sweet, lightly spiced and aromatic, the smooth rich vanilla scented frosting the perfect addition to them!  I shared a few of them, and everyone I shared them with seemed to enjoy them, but I am saving plenty for myself because cake is my favorite!  If you are in the mood for something sweet and delicious, definitely give these Vegan Gingerbread Cupcakes a try!

    Vegan Gingerbread Cupcakes

    Makes 12

    Ingredients:

    Cake:

    • 1 1/2 cups all purpose flour
    • 3/4 cup plus 2 Tbsp granulated sugar
    • 1 tsp cinnamon
    • 1 1/2 tsp ground ginger
    • 1/2 tsp cardamom
    • 1/2 tsp nutmeg
    • 1 Tbsp molasses
    • 3/4 tsp baking powder (1/2 tsp plus 1/4 tsp)
    • 1/2 tsp sea salt
    • 2 flax eggs (2 Tbsp golden ground flax seed mixed with 1/4 cup plus 2 Tbsp filtered water, allowed to sit 15 minutes)
    • 1/4 cup plus 2 Tbsp avocado oil or other neutral oil
    • 1/2 cup plant based milk
    • 1 1/2 tsp pure vanilla extract


    Frosting:

    • 1 cup vegan butter, I used Earth Balance (at room temperature)
    • 1-2 Tbsp oat milk (I used Oatly, but you can use what you prefer), add 3 then if needed add another if frosting comes out too stiff
    • 1 tsp pure vanilla extract
    • 3 cups powdered sugar

    Decoration:

    • Vegan sprinkles (optional)

    Instructions:

    1. Preheat oven to 350F degrees, and a 12 hole muffin tin with liners
    2. In a large bowl, combine the flour, sugar, spices, and baking powder and sea salt and whisk to blend.
    3. Add the flax eggs, molasses, avocado oil, oat milk, and vanilla and beat with an electric mixer for about a minute (or 3 minutes if doing it by hand with a whisk).
    4. Pour the batter into the prepared tins, filling them 2/3 full.
    5. Place the cupcakes in the oven and bake for about 15-20 minutes until the cakes are done in the center (you are able to insert a toothpick into the center and it comes out almost clean with a few moist crumbs).
    6. Remove from the oven and let cool 20 completely.
    7. To make the frosting, beat the butter with the milk, and vanilla and lemon extracts until fluffy.
    8. Add the powdered sugar 1 cup at a time, and beat until completely mixed and light and fluffy (if the frosting is too stiff add that other Tbsp of milk).
    9. When ready to frost, Place the frosting in a pastry bag and pipe onto the cupcakes.
    10. Sprinkle with sprinkles.
    11. Serve the cupcakes and enjoy!
  • Vegan White Chocolate Peppermint Cookies

    Vegan White Chocolate Peppermint Cookies

    Christmas cookie baking season has always been one of my favorite times of the year, since I was a little kid making cookies with my Mom.  We would always pick out several different kinds to make that sounded good to us or old favorites, make batches of them and freeze them to enjoy throughout the season or to later share!  I decided I wanted to bake something Christmasy last weekend and I happened to have some candy canes on hand, so I decided to bake some Vegan White Chocolate Peppermint Cookies to kick off the holiday cookie baking this year!

    These are really simple and easy to make and I used my chocolate chip cookie dough base because it always comes out so perfect!  I used coconut oil for the fat in these, but if you do not care for coconut oil, you could use melted vegan butter instead.  These use apple sauce for the vegan egg replacement and it gives them a perfect chewy satisfying texture!  For the flour I used whole wheat pastry flour but you could use all purpose flour instead if you prefer, or even a gluten free all purpose flour (such as Bob’s Red Mill gluten free all purpose baking flour which I have used with good results).

    For the flavoring in these I used both vanilla and mint.  I used vanilla bean powder, but if you don’t have that you could use extract instead.  I feel like I gave these just enough peppermint extract to flavor them but not overpower as the balance was perfect! I used chopped candy canes in these but if you wanted to use those round peppermints chopped up those would work as well, just make sure that they are vegan. For the white chocolate I used Pascha vegan white chocolate chips.

    These cookies smelled amazing while baking and they tasted even better!  I mean the dough tasted amazing too, but the soft warm cookies with the gooey white chocolate chips and crunchy peppermints were simply heavenly!  If you are in the mood for some delicious cookies, definitely give these Vegan White Chocolate Peppermint Cookies a try!

    Vegan White Chocolate Peppermint Cookies

    Makes 16

    Ingredients:

    • 3/4 cup melted coconut oil
    • 1 1/2 cups granulated sugar
    • 1/2 cup applesauce at room temperature
    • 1 tsp vanilla bean powder or pure vanilla extract
    • 1/2 tsp peppermint extract
    • 1 tsp sea salt
    • 1 tsp baking soda
    • 1/2 tsp baking powder
    • 2 1/2 cups whole wheat pastry flour or all purpose flour (for a lighter colored cookie)
    • 1/2 cup chopped candy canes
    • 1 cup vegan white chocolate chips


    Instructions:

    1. Preheat the oven to 350F degrees, and line two sheet pans with parchment.
    2. In a large bowl, mix together the coconut oil, sugar, apple sauce and vanilla and peppermint extracts until well blended.
    3. Mix in the salt, baking soda and baking powder then the flour until smooth.
    4. Stir in the candy canes and white chocolate until they are evenly distributed.
    5. Form the dough into 1 1/2 inch balls, and place on the cookie trays about 2 inches apart.
    6. Press the dough balls down slightly.
    7. Place the pans in the oven and bake for about 7 minutes, then rotate them and bake another 7 or so until the cookies are done and lightly brown at the edges.
    8. Remove from the oven and let cool at least 15 minutes before enjoying.
  • Vegan Chocolate Chip Pecan Pie Bars

    Vegan Chocolate Chip Pecan Pie Bars

    I can not believe how fast this Fall is going. It seemed like it had just started, and now it is dark outside early, the leaves have fallen off the trees and we are way into November and Thanksgiving is this week!  So I am thinking about the Thanksgiving desserts.  I don’t usually make pecan pie any other time of the year.  It was my favorite Thanksgiving dessert growing up. My Mom and Grandma were big pecan pie lovers, and I think I inherited that too.  Not that I didn’t always take a piece of the pumpkin and apple pie that we always had as well, dessert was my favorite part, and I saved room.  I was thinking about that pecan pie this week and how good it was and decided that I needed to make something similar.  So I made Vegan Chocolate Chip Pecan Pie Bars!

    One of my favorite pecan pies that I have made (I tend to make different variations to keep it interesting), was one with chocolate chips or chunks. I did not want to make a big pie right now though, so I went with pecan pie bars.  I like making bars, because they are a good thing to store in my freezer and pull out when the craving strikes.  Plus they are easy to share!

    For these, I made sort of a short bread type crust, because I figured it would go so well with the pecans. Instead of using straight flour, I used a mixture of flour and tapioca flour to give it a nice melt in your mouth texture. If you don’t have tapioca flour though, you can use cornstarch instead with good results. For the filling, instead of making a corn syrup or sugar and egg filled filling like in the original, I made a gooey vanilla date caramel.  I love date caramel!  It tastes just as good as regular to me but is way less processed. Dates are about as natural as it gets when it comes to sweetener if you blend them up yourself.

    I added plenty of pecans to this, and of course the dark chocolate chunks.  I could not wait to try these bars.  They smelled so heavenly while baking!  I had to wait until the next day though, since I was making them at night, and I wanted them to cut nicely which requires complete cooling. They turned out sooo good!  I think I like these even better than the uber sweet pecan pie I grew up eating, these have more of a true pecan flavor along with the sweet caramel!  If you are a pecan pie fan, give these Vegan Chocolate Chip Pecan Pie Bars a try!

    Vegan Chocolate Chip Pecan Pie Bars

    Makes 16

    Crust:

    • 3/4 cup organic whole wheat pastry flour*
    • 1/4 cup tapioca flour (or cornstarch would work as well)
    • 1/4 cup granulated sugar
    • 1/8 tsp sea salt
    • 6  Tbsp vegan butter (such as Earth Balance)


    Filling:

    • 1 cup soft pitted medjool dates (if they are not soft, soak them in filtered water for 30 minutes and drain well
    • before using)
    • 1/4 cup pecan butter (or raw cashew butter or almond butter)
    • 1 Tbsp maple syrup, plus more for brushing the top of the pie
    • 1/8 tsp sea salt
    • 1 tsp pure vanilla extract
    • 1/3 cup filtered water
    • 1 Tbsp coconut oil
    • 2 cups toasted pecans, plus more for top of bars
    • 3/4 cup chopped vegan dark chocolate, plus more for top of bars
    • maple syrup for brushing bars


    Directions:

    1. Preheat oven to 375F degrees.
    2. To make the crust, in a large bowl, mix together flour, tapioca flour,  sugar, and sea salt. Mix in butter and stir (or use your hands and knead) until a smooth dough is created. Press into the bottom of an 8×8 inch square pan.
    3. Place in the oven and bake for 15 minutes or until just starting to brown.  Remove from the oven.
    4. To make filling, combine all ingredients in a high speed blender or food processor except the pecans and chocolate chunks. Process until smooth, then scrape into a bowl and stir in the pecans and chocolate chunks. Spread the filling over the crust, and top with more pecans and chocolate chunks. Brush the top lightly with maple syrup. Place in the oven.
    5. Bake for about 20 minutes until it is starting to brown lightly.
    6. Remove from oven and let cool completely before serving.


    *If you prefer regular AP flour, that will work as well. Or if you would like to make these gluten free, you can swap the whole wheat flour for a gluten free flour blend like Bob’s Red Mill AP baking flour (I have had success with this brand).

  • Vegan Peanut Butter Truffle Blossom Cookies

    Vegan Peanut Butter Truffle Blossom Cookies

    Every Christmas my Grandma would make tons of cookies and treats of different varieties then gift people tins or plates of them.  She would always make spritz cookies, rosettes, krumkake, divinity, and peanut blossoms.  The peanut blossoms were my favorite.  They were also my Dad’s favorite, I think he could have just eaten a whole plate of just those, but I still loved the variety and how pretty the cookies all looked together.  I don’t make most of them anymore, mostly because I don’t have a spritz maker, or a krumkake iron, or a rosette iron.  But I still make the easiest of them all and my favorite, the peanut blossoms.


    I have veganized them, and make them a little bit more suited to my grown up tastes however. For the base, I have traded in the Skippy and Jif we used to make them with for my home made peanut butter that just contains peanuts and a little bit of sea salt.  I always have it on hand because I am obsessed with peanut butter, and I love making my own.  Honestly I go through a jar a week.  If you would like to make your own too, just blend up 3-4 cups dry roasted peanuts in a high speed blender, pressing the nuts down into the blade with the tamper until they become butter (or alternatively you can use a food processor, it just won’t get as smooth, will take longer and you will have to stop it a few times to scrape it down).

    I used maple sugar for the sweetener in the cookies, but you could also use coconut sugar or (or a mixture of half granulated half brown sugar if you prefer that).  I just like that the maple sugar gives the cookies a slight maple flavor!  For the flour I used organic whole wheat pastry because that is what I had on hand and prefer, but if you wanted to make these gluten free, you could swap it for Bob’s Red Mill Gluten Free All Purpose baking flour 1:1.  I have used it before and know it works well.

    Lastly, once the cookies were all baked and delicious, instead of pressing in a Hershey’s Kiss like the traditional ones (since they are not vegan and I prefer more real chocolate), I pressed a hole into the center and made my own peanut butter chocolate truffle filling!  Trust me it is sooo much more delicious!  They are amazing! If you are a fan of peanut blossoms (or just chocolate and PB in general), definitely give these Vegan Truffle Blossom Cookies a try!

    Vegan Peanut Butter Truffle Blossom Cookies

    Ingredients:

    Cookies:

    • 1 cup brown sugar, maple sugar or coconut sugar
    • 1/2 cup creamy peanut butter
    • 1/2 cup melted coconut oil
    • 1 Tbsp ground flax seed mixed with 3 Tbsp filtered water (allowed to sit 15 minutes before using)
    • 1 1/2 cups organic whole wheat pastry flour*
    • 3/4 tsp baking soda
    • 1/2 tsp baking powder


    Filling:

    • 3/4 cup chopped vegan dark chocolate
    • 1/4 cup cup plus 2 Tbsp smooth peanut butter (you want PB that is not too thick, just smooth and spreadable, the kind with just peanuts and salt).


    Instructions:

    1. Preheat the oven to 350F degrees, and line a sheet 2 pans with parchment.
    2. In a large bowl, mix together the sugar, coconut oil, and flax seed mixture until smooth.
    3. Add the flour, soda and powder and mix until well combined and uniform in color. Roll the dough into 1 inch balls, and place on the prepared cookie sheets 2 inches apart.
    4. Place the cookies in the oven and bake for about 13 minutes or until lightly brown and set.
    5. Remove from the oven and press the round handle end of a whisk or wooden spoon (or something similar in size) lightly into the center of each of the cookies right away to make an indentation in each one (where you will put the truffle filling).  Let the cookies cool completely.
    6. To make the truffle filling, in the top of a double boiler melt the chocolate until smooth then add the peanut butter and whisk until well combined.  Place in a pastry bag (or a ziplock bag with the corner cut off), and pipe into the center of each cookie.
    7. Place in the freezer until set, about 20 minutes.
    8. Enjoy!

    Cookies keep for about 1 week in an airtight container on the counter or 3 weeks refrigerated, or 4 months in the freezer.

    *If you would prefer to make these gluten free, swap the organic whole wheat pastry flour 1:1 with Bob’s Red Mill Gluten Free All Purpose Baking Flour (I have tried this brand and know it works well).

  • Gingerbread Oatmilk Latte

    Gingerbread Oatmilk Latte

    As much as I like to go to local coffee shops and make fancy drinks, it gets a bit expensive to do so more than once a week, so I like to make my own at home sometimes on my days off.  My drink of choice lately has been a Gingerbread Oatmilk Latte! I saw one on a menu and decided to recreate it at home. I have been making it for the past few weeks and it is so delicious I thought I would share it with you all!

    I made a gingerbread syrup, which is the flavoring element for this drink and it is super easy to make.  You just mix everything together in a jar and keep it in the refrigerator for when you want to make yourself a delicious drink! For my coffee syrups, I like to use a maple syrup base which is what I did for this one as well, since it goes so well with the flavors of gingerbread.  I also added in a little molasses which is one of the flavoring elements of gingerbread cookies.  For the spices I use ginger, cinnamon, cloves, nutmeg and allspice which is the same as the blend I use to make gingerbread cookies.  I also add a touch of vanilla.  The combination smells amazing!

    When I want to make a latte, I add it to a cup, add my coffee, some hot steamed oatmilk and sometimes if I am feeling really fancy, some whipped cream and cinnamon on top.  Sometimes I leave it off, but it is so darn delicious!  I have been using an almond milk whipped cream from Aldi lately and it works perfect for drinks!

    This is so heavenly!  Just sweet enough for me with the warming flavors of gingerbread, the richness of oatmilk and whipped cream and it is so wonderful with the coffee! This Gingerbread Oatmilk Latte is the perfect thing to sip on while you decorate the Christmas tree and listen to Christmas music! Which is exactly what I did on my day off last week.  I am loving this time of year, and I hope you are as well!

    Gingerbread Oatmilk Latte

    Gingerbread Latte Syrup

    Makes 3/4 cup of syrup (enough for 12 lattes)

    Ingredients:

    • 1/2 cup maple syrup
    • 2 Tbsp molasses
    • 1 tsp ground ginger
    • 1 tsp cinnamon
    • 1/4 tsp cloves
    • 1/4 tsp nutmeg
    • 1/4 tsp allspice
    • 1/4 cup filtered water
    • 1 tsp pure vanilla extract


    Whisk together all ingredients, and pour into a jar. Store in the refrigerator for up to 2 weeks.


    For Latte:

    • 1/2 cup steamed oat milk or your favorite plant based milk
    • 1 Tbsp pumpkin spice latte syrup (recipe above) or a little more if you like things more sweet
    • 8 oz hot coffee
    • Plant based whipped cream


    Instructions:

    1. Pour the syrup into a mug, then pour in the coffee.
    2. Froth the steamed milk then pour over the hot coffee mixture.
    3. Top with whipped cream, sprinkle with cinnamon and enjoy!
  • Vegan Almond Praline Cake

    Vegan Almond Praline Cake

    Around the holidays I like to make candy, things like peanut brittle and almond praline brittle are one of my husband Eric’s favorites! I made some almond praline brittle last weekend, because I thought it sounded good, then I thought about how good it might be as an element of texture included in a cake!  It is so delicious and flavorful, like crunchy almond vanilla scented caramel.  So I decided to make a Vegan Almond Praline Cake!

    I already had the almond praline made.  It is really simple, you just melt sugar and add almonds, salt and vanilla and you get the most delicious crunchy candy once it hardens!  Next, for the cake, I made my classic vanilla cake recipe with almond added and I knew it would be perfect with the almond praline! I used whole wheat pastry flour for my cake batter but if you like to use all purpose flour that would work as well.  Or even a gluten free flour blend like Bob’s Red Mill gluten free all purpose baking flour (which I have used before and know works for a recipe like this).  While I normally use avocado oil in my cakes in this one I happened to use almond because we had some on hand. I thought I might as well keep with the almond theme.  These cakes always smell so heavenly while they bake!

    For the frosting I made a simple vanilla buttercream.  This is honestly my favorite frosting and my go too frosting because it is so easy to make and always tastes so good.  I used Earth Balance sticks this time.  I have been making this frosting recipe so long that it is actually from the non-vegan one my Grandma taught me, when I went vegan I just swapped the butter for vegan butter and it tastes just as good!  I kept the frosting simple because I knew I would be including the praline on top of the cake and in the middle layer. I chopped up some of the praline to put in the center layer of the cake and it worked out perfect!

    I could not wait to try the finished cake!  Even Eric wanted to try a piece as soon as I was done taking my photos of it and he isn’t a big cake person like me. It was so delicious!  Sweet, soft vanilla almond scented cake sandwiched together with luscious vanilla buttercream, and crunchy almond praline! I am in love with this combo!  If you are in the mood for something sweet, definitely give this Vegan Almond Praline Cake a try!

    Vegan Almond Praline Cake

    Makes one 2 layer 6 inch cake

    Ingredients:

    Cake:

    • 1 1/2 cups organic whole wheat pastry flour or all purpose flour
    • 3/4 cup plus 2 Tbsp granulated sugar
    • 3/4 tsp baking powder (1/2 tsp plus 1/4 tsp)
    • 1/2 tsp sea salt
    • 2 flax eggs (2 Tbsp golden ground flax seed mixed with 1/4 cup plus 2 Tbsp filtered water, allowed to sit 15 minutes)
    • 1/4 cup plus 2 Tbsp almond oil or other neutral oil
    • 1/2 cup plant based milk
    • 1 1/2 tsp pure vanilla extract
    • 1/2 tsp almond extract

    Almond Praline:

    • 1 cup granulated sugar
    • 1/8 tsp sea salt
    • 2/3 cup chopped almonds
    • 1 tsp pure vanilla extract

    Frosting:

    • 1 1/2 cups vegan butter, I used Earth Balance (at room temperature)
    • 3-4 Tbsp oat milk (I used Oatly, but you can use what you prefer), add 3 then if needed add another if frosting comes out too stiff
    • 1 tsp pure vanilla extract
    • 1/2 tsp pure almond extract
    • 4 cups powdered sugar


    Instructions:

    1. Preheat oven to 350F degrees, and line 2 6 inch round cake pans with parchment on the bottom and oil the sides.
    2. In a large bowl, combine the flour, sugar, baking powder and sea salt and whisk to blend.
    3. Add the flax eggs, avocado oil, oat milk, and vanilla and beat with an electric mixer for about a minute (or 3 minutes if doing it by hand with a whisk).
    4. Pour the cake batter into the prepared pans, dividing evenly between them.
    5. Place the cakes in the oven and bake for about 30 minutes until the cakes are done in the center (you are able to insert a toothpick into the center and it comes out almost clean with a few moist crumbs).
    6. Remove from the oven and let cool 20 minutes, then remove the cakes from the pans by cutting around the sides, placing a plate on top then inverting it and tapping on it.  Allow them then to cool completely once they are out of the pans.
    7. To make the praline, in a non-stick pan, melt the sugar and salt until completely smooth and liquid over medium heat (this should take about 5 minutes), add the almonds and vanilla (it will foam slightly so be careful), stir until mixed in well, then pour onto a sheet of parchment or foil and allow to cool completely.  Once it has cooled, break into small pieces
    8. Chop up about 1/3 cup of the brittle to smaller pieces and save the rest for decorating the cake (and eating).
    9. To make the frosting, beat the butter with the milk and vanilla until fluffy.
    10. Add the powdered sugar 1 cup at a time, and beat until completely mixed and light and fluffy (if the frosting is too stiff add that other Tbsp of milk).
    11. When ready to frost, Place one cake layer on a plate, spread about 1/2 inch thick layer of the frosting over it, then top with the chopped brittle.
    12. Spread a thin layer of frosting on what will be the bottom of the other cake layer, then place on top of the brittle.
    13. Spread the remaining frosting on the top and down the sides of the cake evenly, then place the rest of the frosting in a pastry bag and use it to decorate the top and the remaining brittle pieces.  This frosting recipe makes enough that you should be able to do some generous piping decorations on top, because I like a lot of frosting!
    14. Serve the cake and enjoy!


  • Vegan Hot Cocoa Cookies

    Vegan Hot Cocoa Cookies

    A snow day is the perfect time to do some baking! And, we definitely just got a lot of snow dumped on us here in Minnesota.  It was about time though, nobody wants a brown Christmas! I made some Holiday cookies at work last week, they were double chocolate mint, and we all loved them so much that one of my coworkers suggested I make hot cocoa cookies too.  I can’t make any more varieties of cookies right now at work though, since I already have enough things to make and not enough time, so I decided to give making some a go at home instead.  Why not?  They did sound really good after all.

    For the cookies, I actually used the same cookie base as the one I use at work, just with slightly more whole ingredients, like whole wheat pastry flour instead of regular AP, and maple sugar instead of granulated.  But they come out the same either way if you do need to use the more standard ingredients.  Another note about the flour used, if you wanted to make this gluten free, you could use a gluten free baking flour blend as well.  I like the Bob’s Red Mill gluten free all purpose baking flour, I have used it and swapped 1:1 with success.  This cookie base is delicious!  It tastes kind of like brownie batter, only with a cookie dough consistency (which is my favorite).  I added in a touch of vanilla and mint and it tastes like cocoa!

    It needed a few add ins though, even though the dough was delicious by itself I added mini marshmallows and chocolate chunks!  Dandies has some vegan mini marshmallows that are seriously the most delicious marshmallows I have tasted, even better than the ones that were not vegan that I ate as a kid.  These ones have a vanilla flavor and just the right amount of sweetness!  I used to always have marshmallows in my hot chocolate as a kid, so I had to add them to these cookies.  I added in the chocolate chunks because I wanted there to be gooey chocolate in them while I enjoyed them warm (the best way after eating the dough as far as I am concerned).

    They baked up beautifully and smelled amazing! I could not wait to try one!  They were soft and chewy, with a flavor just like peppermint hot cocoa, and the soft marshmallows, and gooey chocolate made them heavenly!  Eric loved them as well, and I brought some to work to share and they got good reviews, so I am not the only one that thought they were yummy.  These would be amazing with a hot cup of coffee or of course hot chocolate if you have a big sweet tooth!

    Vegan Hot Cocoa Cookies

    Makes 2 dozen large cookies

    Ingredients:

    • 1 1/2 cups coconut oil, warmed to melted
    • 3 cups maple sugar or granulated sugar
    • 1 cup applesauce
    • 1 tsp pure vanilla extract
    • 1 tsp peppermint extract
    • 1 tsp sea salt
    • 2 tsp baking soda
    • 1 tsp baking powder
    • 1/2 cup cocoa powder
    • 4 1/2 cups whole wheat pastry flour
    • 1 cup chocolate chunks
    • 1 cup vegan marshmallows


    Instructions:

    1. Preheat the oven to 350F degrees, and line 3 large sheet pans with parchment.
    2. In a large bowl, combine the coconut oil, sugar, applesauce, vanilla and peppermint and mix until completely incorporated (the oil too, it should be completely mixed in).
    3. Mix in the sea salt, soda, and baking powder.
    4. Mix in the cocoa powder, then flour 1 cup at a time until completely mixed in.
    5. Mix in the marshmallows and chocolate chunks.
    6. Scoop the cookies out and roll them into 2 inch balls.  Place them on baking sheets, a couple inches apart, and press down slightly.
    7. Place in the oven and bake the trays of cookies for about 12-15 minutes (turning the pans half way through), until lightly browned and cooked through (but not overbaked).  Remove trays from the oven , and let cool 15 minutes before enjoying.


  • Vegan Peppermint Mocha Cake

    Vegan Peppermint Mocha Cake

    It was looking a bit brown and grey outside here in Minnesota, since it has been pretty cloudy lately, it gets dark early and all of the greenery has died plus we had no snow.  That is until this weekend!  I woke up to a blanket of fresh snow on the ground and honestly it was lovely to admire on my morning run! Sure it is a bit annoying to drive on, but you have to admit it is pretty and beats the brown.  Now that is is finally looking like December I am in the mood for cozy holiday treats!  I love a good peppermint mocha, so I thought why not turn it into a cake?!  So I made a Vegan Peppermint Mocha Layer Cake!  I had just bought a new cake stand that I really wanted to use too so it was perfect! Eric was telling me we should go pick up some coffee and cake to enjoy together and I told him I could do him one better, since I was in the process of making this cake!

    For the cake portion, I made my plain chocolate cake which is a really simple mix and bake recipe, nothing fussy. But I added in some peppermint extract and espresso powder to give it that peppermint mocha flavor.  Coffee and chocolate go so well together in cake!  One note on this recipe, use full fat coconut milk, the kind with cream, because it is the fat in this cake recipe and what gives it a nice texture.  Also, it must be at room temperature otherwise the cake baking time will get messed up and it may bake unevenly.  I learned these things the hard way with other cakes, but if you use the right milk at the right temperature it comes out just right!

    The batter tasted amazing and the cake baked up beautifully! My kitchen smelled amazing like peppermint brownies!  I let my cakes cool overnight since I was making them after work, and did not have time to frost them that night.  I often times do this because I know for sure they will be cool when I frost them and they seem to be easier to handle.  Plus it isn’t such a big project for one day.  Eric requested I make the cakes with a different frosting than the coconut based one I usually use, one that is more like the cake we buy at the local bakery so I made a vegan buttercream.

    I know I usually don’t use refined sugars in my recipes but for a request from my husband and an occasional treat I thought why not?! So I used Earth balance to make a creamy fluffy vegan chocolate mint buttercream and it was sooo good!  It tasted just like the frosting from our favorite bakery!  Eric even ate the extra I had after decorating.  The thing about this recipe is you will have plenty to decorate with which I love, since I like a good amount of frosting on my cakes.  Has to be the right ratio of frosting to cake, and if you mess up that way you have a little extra.

    This cake turned out lovely and frosted nicely, I was very pleased with the result!  It was heavenly, and just the right texture.  The cake was soft and light, rich with dark chocolate flavor and coffee plus that hint of peppermint and the smooth creamy frosting was the perfect pairing with it!  If you are a fan of peppermint mochas and cake, definitely give this a try!

    Vegan Peppermint Mocha Cake
    Makes one 6 inch cake

    Ingredients:

    two 6 inch cake pans

    Cake:

    • 1 1/2 cups organic whole wheat pastry flour
    • 1/4 cup plus 2 Tbsp cacao powder
    • 2 Tbsp espresso powder
    • 1 1/2 tsp baking soda
    • 1 tsp baking powder
    • 1/2 tsp sea salt
    • 1 cup maple sugar
    • 2 cups full fat coconut milk (the thick kind that is mostly cream, I prefer Thai Kitchen brand) at room temperature
    • 2 tsp pure vanilla extract
    • 1 tsp peppermint extract
    • 2 Tbsp cider vinegar


    Frosting:

    • 1 1/2 cups vegan butter, I used Earth Balance (if using the sticks, 3 sticks)
    • 3 Tbsp plant based milk
    • 1 tsp pure vanilla extract
    • 1 tsp peppermint extract
    • 1 cup cacao powder
    • 4 cups organic powdered sugar


    Instructions:

    1. Preheat the oven to 350F degrees and position rack in center of oven.
    2. Oil two 6 inch round baking pans and line them with parchment at the bottom so it will not stick.
    3. Whisk flour, cacao powder, espresso powder, baking soda, sea salt, and sugar in a large bowl to blend well.
    4. Whisk coconut milk, peppermint  and vanilla extract together in small bowl to blend well, then whisk into the flour mixture until well blended.
    5. Whisk the cider vinegar into the batter.
    6. Transfer the cake batter to prepared pans.
    7. Place in the oven, and bake cake until tester inserted into center comes out clean with just a few moist crumbs attached, about 25 minutes.
    8. Remove from the oven and let cool completely, then un-mold, by cutting around the edges if they are stuck at all, then putting  plate over the top, then flipping it onto that plate then placing a plate on the bottom and flipping it upright onto that plate.
    9. To make the frosting, beat the butter in a large bowl with the milk, vanilla and mint until fluffy.
    10. Add the cacao powder and beat until well incorporated (scraping the sides down), then add the powdered sugar 1 cup at a time until completely mixed and light and fluffy.
    11. When ready to assemble, spread about 3/4 cup frosting over the first layer of the cake, then top with the other cake layer.  Spread the remaining frosting over the top and down the sides of the cake.  Use the remaining frosting to decorate the top of the cake if desired.
    12. Enjoy!


    Cake keeps stored in the refrigerator, covered for up to 1 week.

    Notes:

    If you would rather use coconut sugar or granulated sugar for this, it will work in place of the maple sugar.

    If you prefer to use regular AP flour in this in place of the whole wheat pastry that will work as well.

    If you would like to make a 9 inch round cake, double the entire recipe, and bake it in two 9 inch round pans, increasing the baking time to 50 minutes to 1 hour (depending on your oven).

    This cake can be made gluten free by swapping out the whole wheat pastry flour for Bob’s Red Mill gluten free all purpose baking flour (this is a brand I have used before and have tested it in cakes with great results).

  • Vegan Chocolate Pecan Mousse Pie 

    Vegan Chocolate Pecan Mousse Pie 

    Growing up, for Thanksgiving my Grandma always had pumpkin, pecan and apple pie for dessert.  I would always take a slice of each, but the pecan was my favorite.  It was my Grandma’s favorite and Mom’s favorite too, although there was always more left of it at the end because some of my family does not like nuts (and they were totally missing out).  More for us I guess!  I always thought of pecan pie as kind of special because you don’t really get it any other time of the year, or I didn’t at that point in my life when I was not baking my own pies.  We didn’t usually have it for Christmas, just Thanksgiving.  Well, I like to keep the pecan pie tradition going, and I know it is my Mom’s favorite so I usually try to make some.  Although it usually ends up not being traditional. Like this year, I had just received some Rawmio cacao butter and Rawmio cacao powder from Raw Guru and I wanted to incorporate them into the pie, because who doesn’t love chocolate after all.

    I have made a chocolate pecan pie before, so I wanted something a little more different and fancy.  What I decided to make was a combined version of two of my favorite holiday pies, a Vegan Chocolate Pecan Mousse Pie!  I love pecan pie, and I love a chocolate mousse or french silk pie (something we would serve at Christmas), so I went and combined the two!  Yes, this pie has a few steps to make it and takes a little time but it is so worth it!  And it was something I made after a long day at work when I was tired (over the course of two days) but it wasn’t as much work as I thought it would be.  Sometimes I like to divide my dessert making between two days if something has to cool or has a few steps (since I feel like life is busy and I have less free time).  So in this case, I baked the bottom layer and the crust, let it cool outside for a while, while I made the mousse layer, then let it sit overnight in the fridge and made the whipped cream topping.  It worked perfect!

    To make the Vegan Chocolate Pecan Mousse Pie, I made a classic coconut oil crust, which comes out rich and flakey and is always easy to make.  Next, to make the pecan pie layer, instead of using corn syrup as traditional pecan pie does, I blended up dates to make a gooey chocolaty caramel which included some of the Rawmio cacao powder.  That baked up nicely and while it cooled I made a rich chocolate mousse filling with full fat coconut milk and the cacao powder and Rawmio cacao butter to give it plenty of chocolate flavor.  If you wanted to make this with coconut butter (not oil though) instead of the cacao butter, that works as well! It was heavenly!

    For the topping, I used more coconut milk and the Rawmio cacao butter to thicken it as well.  As a side note, for the topping and filling of this pie, it is important that you use thick coconut milk that is mostly cream, like 3/4 of the can thick cream or just canned coconut cream (but not the sweetened kind) or it will not firm up.  I cannot stress this enough, and I hate to see people’s desserts not turn out because they didn’t use the proper ingredients so I needed to mention this.

    The pie looked beautiful and I could not wait to try it!  Of course I had to photograph it first (the one downfall to being a food blogger no diving right into something like a pie since it needs to look pretty for pics) and my mouth was watering the whole time.  When I showed Eric a piece while I was photographing it, he said “That pie is legit!” meaning it looks pretty impressive, which it does with its three layers.  It is totally heavenly too, and perfect for a holiday dessert!  It has a buttery crust, a crunchy, sweet and gooey pecan layer which is the perfect partner for the rich chocolate mousse and mellow creamy vanilla topping!  If you are looking for an impressive pie for the Holidays this Vegan Chocolate Pecan Mousse Pie is it!  If you are in need of cacao products, check out the Raw Guru website for the Rawmio cacao butter and powder.  They also have some amazing chocolate products and nut butters too that I love!


    Vegan Chocolate Pecan Mousse Pie 
    Makes one 8 inch pie

    Ingredients:

    Crust:

    • 1 1/4 cups organic whole wheat pastry flour
    • 2 Tbsp coconut sugar or maple sugar
    • 1/4 tsp sea salt
    • 1/4 cup plus 2 Tbsp coconut oil in its solid state
    • about 3-4 Tbsp cold water


    Pecan Filling:

    • 1 cup soft pitted medjool dates (if they are not soft, soak them in filtered water for 30 minutes and drain well
    • before using)
    • 1/4 cup pecan butter or almond butter
    • 2 Tbsp Rawmio cacao powder
    • 1 Tbsp maple syrup, plus more for brushing the top of the pie
    • 1/8 tsp sea salt
    • 1 tsp pure vanilla extract
    • 1/3 cup filtered water
    • 1 Tbsp Rawmio cacao butter or coconut oil
    • 2 cups toasted pecans


    Mousse Filling:

    • 1 15 oz can coconut cream or full fat coconut milk that is thick (you want at least 3/4 of the can to be cream or this recipe will not work)
    • 1/4 cup cacao powder
    • 1/3 cup maple syrup
    • 1 tsp vanilla
    • pinch sea salt
    • 3/4 cup melted Rawmio cacao butter or Raw Guru coconut butter


    Topping:


    Directions:

    1. Preheat oven to 375F degrees.
    2. To make the crust, in a large bowl, mix together flour, sugar, and sea salt. Cut in coconut oil with a pastry blender or 2 knives until it is in pea sized pieces. Mix in  just enough water to create a smooth dough that holds together but isn’t too sticky. Add more water if needed, and knead slightly until a smooth dough is created. Roll out into a 10 inch circle using floured parchment underneath and floured rolling pin. Transfer dough to an 9 or 9 1/2 inch pie pan (don’t worry if it tears, just patch it up and nobody will know).  Flute the edges, or crimp them.  Set aside in the refrigerator.
    3. To make filling, combine all ingredients in a high speed blender or food processor except the pecans. Process until smooth, then scrape into a bowl and stir in the pecans. Spread the filling over the crust, spreading it out evenly, and place in the oven.
    4. Bake for about 30-35 minutes until the crust is starting to brown lightly. Remove from oven and let cool completely.
    5. To make the mousse filling, combine all ingredients in a high speed blender and blend until smooth, then pour into a bowl and place in the freezer, stirring every so often until it thickens slightly, about 1/2 an hour to 45 minutes depending on the temperature it was.
    6. Pour the mousse over the pecan layer, and place in the freezer until set, at least 1 hour.
    7. To make the coconut whipped cream topping, combine all ingredients in a high speed blender until smooth, then place in the freezer until it thickens to the consistency of whipped cream, about 45 minutes to 1 hour.
    8. Spread the cream over the top of the pie, sprinkle with pecans and dark chocolate and enjoy!
  • Vegan Chocolate Peppermint Roll Cake

    Vegan Chocolate Peppermint Roll Cake

    For Christmas this year I thought I would make a yule log.  Because they are so festive and so pretty!  But I have to admit, roll cakes are something that I like to make year round because to me they are easier than layer cakes but you get just as much delicious filling!  I like chocolate and peppermint around the holidays, so that is what I flavored this one with. In my book “Just Vegan Cakes” I had a chocolate peppermint cake that was heavenly, and I wanted to make this one taste the same, only rolled and with a slightly different batter.

    Since I wrote that book, I have realized that date sweetened cake batter works best for roll cakes because it keeps the cake nice and pliable.  For this one, I used a cacao and mint laced date sweetened batter, and it was heavenly!  Yes, I always have to sample the cake batter lol.  This cake batter also happens to be oil free, because I use nut butter in place of oil and it works out beautifully!

    It baked up nicely and my kitchen smelled amazing!  It deserved a delicious filling, so  I used a coconut milk base, with cashew butter, and cacao butter to thicken it and make it rich.  It tasted like white chocolate mousse!  Even better once I added the peppermint extract and vanilla. I decided to tint it pick to make it prettier. I knew it would be heavenly with the dark chocolate!

    For the outside of the cake I could have just dusted it with some coconut powdered sugar but I decided to make a dark chocolate ganache to finish it off.  It was so heavenly! Rich and sweet cake with a aromatic smooth vanilla mint cream filling and decadent ganache on the outside!  This was the perfect thing to make for Christmas!

    Vegan Chocolate Peppermint Roll Cake
    Makes one 15 inch long roll cake

    Ingredients:

    10×15 inch jelly roll pan

    Cake:

    • 1 1/2 cups organic whole wheat pastry flour
    • 1/4 cup cacao powder or unsweetened cocoa powder
    • 1 1/2 tsp baking soda
    • 1 tsp baking powder
    • 1/2 tsp sea salt
    • 1 1/4 cups packed soft medjool dates, pitted, soaked in water for 30 minutes and drained
    • 1/4 cup cashew butter or your preferred nut butter (just make sure it is smooth)
    • 2 tsp pure vanilla extract
    • 1 tsp peppermint extract
    • 2 cups filtered water
    • 2 Tbsp apple cider vinegar


    Filling:

    • 1 15 oz can organic full fat coconut milk, such as Thai Kitchen chilled (you want to make sure it is a brand that is 3/4 of the can cream or it will not work)
    • 1/2 cup raw cashew butter
    • 1/3 cup maple syrup
    • 1/4 tsp sea salt
    • 1 tsp pure vanilla extract
    • 1 tsp peppermint extract
    • 1 tsp beet powder
    • 1/2 cup plus 2 Tbsp melted cacao butter or coconut butter (NOT OIL), warmed to liquid


    Ganache:

    • 3/4 cup chopped vegan dark chocolate
    • 1/4 cup plus 2 Tbsp full fat coconut milk


    Directions:

    1. Preheat the oven to 350F degrees and position rack in center of oven.
    2. Line a 15 x 10 inch jellyroll pan with parchment paper.
    3. Whisk flour, cacao powder, baking powder, baking soda, and sea salt in a large bowl to blend well.  Set aside.
    4. Place dates, water, almond butter, and vanilla extract into a blender, and blend until smooth, then whisk this blended mixture into the flour mixture until well blended. Whisk in the cider vinegar until bubbles form.
    5. Transfer cake batter to prepared pan and bake cake until tester inserted into center comes out clean, about 15-18 minutes.
    6. Cool cake completely.
    7. To make the filling, combine all ingredients in a high speed blender and blend until completely smooth.
    8. Pour into a bowl and place in the freezer until the consistency of stiffly whipped cream (about 30-45 minutes depending on how warm it has gotten.  Once it is ready place in the refrigerator until ready to assemble.
    9. When ready to assemble, spread filling over the top of the cake, then roll up jellyroll style starting with the short side and using the parchment to assist you in rolling.  Be careful because the cake is fragile, but if it cracks as you roll it no worries, keep rolling because the cake will be covered.  Let chill in the freezer once rolled for a few hours before topping with the ganache.  Once it has chilled, cut off the ends to make it nice and even.
    10. To make the ganache, melt the chocolate in the top of a double boiler, then whisk in the coconut milk until smooth.  Pour over the cake and smooth out over the top and sides (but leaving the pretty ends exposed).
    11. Chill until the ganache has firmed up, and serve!

    *If you would like to make this gluten free, swap the whole wheat flour for Bob’s Red Mill Gluten Free All Purpose Baking Flour (I have tested this brand and know it works, but have not tried other brands so I am not sure if they would turn out the same).

  • Vegan Winter Lentil Shepherd’s Pie

    Vegan Winter Lentil Shepherd’s Pie

    I made shepherd’s pie for Thanksgiving this year, and I might make it again for Christmas because I love it so much! It is a dish that takes a little bit of time and love so it is for special occasions.  Since I tend to make quick recipes for dinner most of the time.  I made a new recipe with lentils this time for Christmas, and winter veggies, so I thought I would share the recipe.

    If you think that shepherd’s pie has to be rich and meat filled think again.  I remember having it as a kid with ground beef, and a generic blend of veggies like peas, corn, and carrots in a meat gravy and it was ok, but not my favorite thing.  The mashed potatoes were the only part I really enjoyed at that point.  I have never been a meat lover, always choosing veggies first even before I became vegan.  So when I make my shepherd’s pies, I use ingredients I love and veggies that add flavor instead of just being there.

    Things like leeks, squash and mushrooms plus a few others for color.  I just make the cooking broth into a sort of a gravy to keep it more simple, and it works perfect!  This time I used lentils where the meat would be.  Normally I use tempeh, but I figured I would make a recipe for those who are soy free, and I like to switch things up sometimes.  It was delicious and hearty!  I actually made a larger batch of this recipe a few days before Thanksgiving, to serve on Thanksgiving day day since I knew I wouldn’t have time to cook. These reheat beautifully in an oven.  If you are going to serve the next day, skip the oven part after assembly, cover with foil, and refrigerate.  Pop in the oven for about 45 minutes to 1 hour (uncovering the last 10-15), and you have delicious dinner!

    Vegan Winter Lentil Shepherd’s Pie

    Makes 4 Pies (or one large pie to serve 4-6)

    Ingredients:

    • 1 1/3 cups uncooked French lentils
    • filtered water

    Veggies:

    • Extra virgin olive oil
    • 2 large leeks sliced
    • 2 cloves garlic, minced
    • 2 cups diced butternut squash
    • 2 cups sliced carrots
    • 2 cups sliced celery
    • 1 tsp dried thyme
    • 1 1/2 cups crimini mushrooms, sliced
    • 1/2 cup peas (frozen is fine)
    • 2 cups flavorful veggie stock, store bought or homemade*
    • 2 Tbsp tamari
    • ¼ cup arrowroot starch dissolved in 1/4 cup filtered water


    Topping:

    • 6 russett potatoes, peeled and cut into 2 inch chunks
    • sea salt to taste
    • 1 Tbsp coconut butter (optional)
    • 1/4 cup coconut milk  (or as needed, you may also add water, and it will still be good)


    Instructions:

    1. Cover the lentils with the filtered water by a few inches. Bring to a boil, then lower to a simmer and cook until the lentils are tender, about 30 minutes.  Drain well, season with sea salt to taste and set aside.
    2. Heat the olive oil in a large stockpot, and add the leeks, garlic, thyme, squash, carrots, and celery, and cook until they have softened a bit, then add the garlic, mushrooms, peas, tamari, and stock and bring to a boil.  Lower to a simmer, and place the lid on the pot.  Let cook until the veggies are tender, about 10 minutes.  Once they are tender, add the arrowroot mixture, and let cook a few more minutes while stirring until it has thickened. Remove from the heat.
    3. Meanwhile, place the russets in a large pot of salted boiling water on the stove, and bring to a boil.  Cook until the potatoes are tender, and drain.  Add sea salt to taste, along with the coconut oil and milk and mash until soft, adding a little more milk if desired.
    4. To assemble, spoon the veggie mixture into 4 ovenproof bowls (or one big baking dish if you prefer), then top with the lentils, and lastly with the mashed potatoes.
    5. Place the pies in the oven and cook for about 10 minutes until bubbling.  Let cool slightly before serving.


    *Veggie Stock

    Makes about 1 1/2 quarts

    Ingredients:

    • 1 large onion (or about an onions worth of onion trimmings)
    • 2 stalks celery (or 2 cups celery trimmings)
    • 6 garlic cloves
    • 1 cup sliced mushrooms
    • filtered water

    Instructions:

    Add the onion, celery, garlic, and water to a 2 1/2 quart stockpot and bring to a boil.  Lower to a simmer and cook for a few hours until the veggies have released their flavors.  Strain into a container, pressing the veggies against the strainer to extract all the juices.  Let cool, and store in the refrigerator for up to a week, or freeze.


  • Vegan Sugar Cookie Wreaths

    Vegan Sugar Cookie Wreaths

    I can’t believe Christmas is 2 weeks away!  Where has the time gone this year?  Also, it has been warmer here lately in Minnesota and we have no snow on the ground so it doesn’t seem like winter is on the doorstep.  But I am still in a Christmas cookie baking mood! Baking a bunch of different kinds of cookies this time of the year is one of my favorite parts of the season!  When I was little my Mom and I used to make our old favorites plus a few new ones we wanted to then freeze some of them in a big container to enjoy for the holiday season plus share some with others.  My grandma also had a similar tradition, only she mainly made the cookies to pack into tins to give as gifts.  I always loved the variety she made. I enjoyed the cookie making process, plus the heavenly aroma of cookies that filled our home always made me happy!

    Some cookies were easy to make, and some were a bit more tedious, but I think the tedious ones ended up being my favorite usually. The ones like the sugar cookies or gingerbread that I was able to decorate and add a personal touch to.  Last weekend I decided to make some sugar cookies.  I saw some non-vegan sugar cookie wreaths on Pinterest, and decided that I would try to make my own version!

    Sometimes when baking I use coconut oil in my cookies, but this time I decided to use Earth Balance buttery sticks because it was what I had on hand.  I used maple sugar to sweeten them and whole wheat pastry flour for the base, so they are a little darker than traditional sugar cookies.  But if you wanted them lighter you could go with the AP flour and granulated sugar.  The dough was super delicious even before the cookies were baked.  Yes, I was eating the scraps as I rolled them out!

    They smelled heavenly while baking and cooling and they deserved a just as heavenly decoration on top!  Instead of making a traditional powdered sugar glaze, I made a coconut butter maple glaze tinted green with a bit of spinach powder, then topped them off with crunchy pistachios and sweet cranberries. They turned out sooo good!  They were buttery and sweet, that coconut glaze the perfect topping with the salty crunchy pistachios and chewy cranberries! I would be proud to include these on any gifted cookie plate or in a cookie tin.  They are so cute and taste so good!

    j,,

    Vegan Sugar Cookie Wreaths

    Makes about 3 dozen cookies

    Ingredients:

    • 1 cup Earth Balance vegan butter, softened (or your favorite plant based butter)
    • 1 cup maple sugar (coconut sugar or granulated sugar will also work)
    • 1 Tbsp ground flax seed mixed with 3 Tbsp filtered water
    • 2 Tbsp thin coconut milk
    • 1 tsp pure vanilla extract
    • 3 cups organic whole wheat pastry flour
    • 3/4 tsp baking powder
    • 1/4 tsp sea salt


    Icing:

    • ¼ cup plus 2 Tbsp coconut butter, warmed to liquid
    • ¼ cup plus 2 Tbsp filtered water (or as needed)
    • 1 Tbsp maple syrup
    • 1/2 tsp pure vanilla extract
    • 1/2 tsp spinach powder or matcha powder
    • chopped pistachios
    • dried cranberries


    Instructions:

    1. Preheat the oven to 350F degrees, and line two sheet pans with parchment.
    2. In a bowl, mix together the butter and maple sugar until well combined.  Add the flax mixture and 2 Tbsp coconut milk, and vanilla and mix until combined. Add the flour, baking powder and sea salt and mix until the dough has formed. It should be smooth and pliable, if it seems too stiff add a touch more coconut milk.
    3. Turn the dough onto a sheet pf parchment and roll out 1/4 inch thick.  Use cookie cutters (1 larger round and one smaller round) to cut out wreath shapes and move to parchment lined trays (if the dough seems too soft to manage, pop into the refrigerator for a few minutes).  Re-roll any scraps and repeat.  Set at least 1/2 inch apart on baking trays.
    4. When the cookies are all on the trays, place them in the oven and bake for about 12-13 minutes until set and just starting to brown. Remove from the oven and let cool.
    5. Mix together the coconut butter, maple syrup, vanilla and spinach powder until smooth adding a touch more filtered water if it is too thick (you want it a thick glaze consistency).
    6. Spread or pipe a thin layer of the icing over the cookies, and sprinkle with the pistachios and cranberries.  Set the glazed cookies in the freezer for about 5-10 minutes until set.


    Store any leftover cookies in an airtight container in the refrigerator or freezer.  Cookies keep up to 2 weeks refrigerated, or 4 months frozen


  • Vegan Pink Peppermint Truffles

    Vegan Pink Peppermint Truffles


    I have been seeing lots of mint flavored treats around lately for the holiday season, and they all sound good to me so I thought I would make one of my own!  I am not big on candy canes, but what I do love is the chocolate mint combo. So, I decided to make some peppermint truffles!  I like to make both cookies and candy around Christmas to enjoy so I figured I would get started on the candy part.  I had all of the ingredients I needed on hand, and I was super excited! 

    For the filling, I wanted it to be creamy, rich and have a little bit of a white chocolate flavor, so I started with a cacao and coconut butter base.  I also added in some raw cashew butter to give it that soft creamy texture that I love about truffles.  I added in vanilla as well along with a good amount of peppermint extract because I love those two flavors together.  Sometimes I tint my peppermint stuff green with matcha or spinach powder but this time I decided to tint them pink, my favorite color.  Of course you can do the green if you prefer.  But I love anything pink! 


    Truffles are kind of tedious to make, but they are well worth it. It is even kind of fun rolling the filling into balls like play dough!  I always end up sampling a bit though.  It is hard not to because it smells so good and it is so delicious! Once they are all shaped I freeze them for a bit so that they hold their shape when dipping.  I didn’t used to be as good at making truffles when I started, they came out a bit wonky and sometimes not evenly dipped in the chocolate but I have had a bit of practice now.  They are not perfect, but much better than they used to be! 

    I dipped them in vegan dark chocolate to finish them off.  They turned out super delicious!  Soft and smooth, with the mellow sweet scent of vanilla and cool peppermint, the perfect match for the rich dark chocolate coating! If you are a peppermint fan, definitely give these a try! 

    Vegan Pink Peppermint Truffles

    Makes 16

    Ingredients:

    Filling:

    • 1/2 cup cacao butter, warmed to liquid
    • 1/4 cup plus 2 Tbsp raw cashew butter at room temperature
    • 3/4 cup coconut butter, warmed to liquid
    • 1 tsp beet powder
    • 1 tsp pure vanilla extract
    • 1 tsp peppermint extract
    • 1/4 cup maple syrup
    • 1/4 cup filtered water


    Dark Chocolate:

    • 2 cups chopped vegan dark chocolate or vegan dark chocolate chips


    Directions:

    1. Combine all of the filling ingredients in a bowl, and whisk until smooth.
    2. Place in the freezer for about 15-20 minutes until it is firm enough to scoop. Scoop into 14 balls, rolling them with your hands.   Place on a parchment lined tray, and place back into the freezer until firm, about 30 minutes.
    3. Meanwhile,  melt the dark chocolate in a double boiler until smooth.
    4. Once the filling has firmed up, dip each chocolate into the dark chocolate, being sure to let the excess drain off, and place back onto the tray (I like to set mine on a fork to allow it to drain better). Once they are all dipped, set them in the freezer until hardened.
    5. Store any leftover truffles in the refrigerator.
  • Gingerbread Granola

    Gingerbread Granola

    The Christmas music everywhere has begun!  Not that it is a bad thing, it gets me in the mood for the season, and I have a few songs that I really like.  But then there are the over-played ones with 5 different versions of the same song that I hear over and over on the satellite radio at work many times a day that get a bit old.  When I am at home though, I create a playlist of the good ones to listen to while doing things like holiday baking or present making!  Now that Thanksgiving is over, I am craving more Christmasy flavors like gingerbread. I will definitely be baking some cookies soon, but I decided to make gingerbread granola last week! I like to keep granola on hand at all times in my pantry for when the snack craving hits.  My favorite are those made with aromatic spices, like this one!

    For the base, I always like to use a combination of oats and coconut to start, because the coconut gives the granola a nice sweetness along with the crunchy oats.  I added 5 different types of nuts to this one, because at Christmas when I was little, we always had a bowl of nuts in the shell on the counter, and a nutcracker so we could enjoy them.  So a variety like this makes me think of Christmas time and I thought it fit in my Christmasy gingerbread granola.

    To coat the mixture I used a combination of nut butter, apple sauce, maple syrup, molasses and spices.  Yes, that is right, no oil.  I used to think that you could not get crunchy granola without oil but I was totally wrong and now I usually use either apple sauce, pumpkin or sweet potato puree, or banana in its place with great results.  Once you bake it, it gets nice and crispy! It smelled sooo good while baking, like a batch of delicious cookies!

    I could not wait to try it!  But first I added in some dried cranberries for color.  It was sooo good!  It was crunchy and aromatic with the scent of Christmas cookies!  I could not stop sampling it as I walked by, be warned this stuff is addictive and may not last long in your home!  If you are a granola fan, definitely give this a try!  If you always buy store bought especially give it a try, because once you make your own you will never go back!

    Vegan Gingerbread Granola
    Makes 6 cups

    Ingredients:

    • 3 cups organic gluten free old fashioned rolled oats
    • 1 cup raw pecans
    • 1 cup raw walnuts
    • 1/2 cup raw almonds
    • 1/2 cup pistachios
    • 1 cups finely shredded, dried unsweetened coconut
    • 1/2 cup organic apple sauce
    • 1/4 cup maple syrup
    • 1/2 cup pecan butter or almond butter
    • 2 Tbsp molasses
    • 1 tsp cinnamon
    • 1 tsp ginger
    • 1/2 tsp cloves
    • 1/4 tsp nutmeg
    • 1/2 tsp sea salt
    • 1 tsp pure vanilla extract
    • 1 cup dried cranberries


    Instructions:

    1. Line a large baking sheet with non-stick foil, and spray with cooking spray.
    2. Preheat the oven to 350F and set rack at the medium position
    3. In a large bowl, combine oats, nuts, and coconut, and set aside.
    4. In another bowl, whisk together apple sauce, maple syrup, nut butter, molasses, spices, sea salt, and vanilla extract until well combined, then pour over oat mixture and toss to coat until completely blended.
    5. Pour out onto prepared baking sheet, and spread out evenly.
    6. Bake for 35 minutes, stirring about every 10 minutes or so until the granola is evenly browned. Remove from oven and let cool.
    7. Stir in cranberries, and enjoy!

    Keeps for up to 1 month in the refrigerator in an airtight bag, or at cooler room temperature for up to 2 weeks.

  • Mini Vegan Bourbon Pecan Tartlettes 

    Mini Vegan Bourbon Pecan Tartlettes 

    This year for Thanksgiving instead of making one giant pie, I decided to make mini pecan tartlettes.  My family really hasn’t had big gatherings for Thanksgiving in years, since my Grandparents stopped being able to host years ago so we have always tried to keep it simple. Now that both of my grandparents are now gone, and we are dealing with quarantine this year it is going to be just 3 of us, so I thought I would make smaller portions, and tartlettes are perfect for that!  If I have leftovers I can easily freeze them as well for my Mom to have later (since I chose pecan pie because it is her favorite).

    Since my Mom, Eric and I all like the flavor of bourbon, I decided to make some bourbon pecan tartlettes!  I had made a large one with these same flavors years ago before I went vegan, and I have been wanting to make one ever since. This was the perfect opportunity!  I just gave them a classic coconut oil pie crust, because that is my go to, and it always turns out so delicious and buttery!

    For the filling, I used my date caramel.  Since I discovered date caramel when I was raw vegan for a few years I have never gone back to making refined sugar caramel. Date caramel is so good and it is about as natural as you can get when it comes to caramel.  Dates are nature’s candy after all! I just blend them up with some nut butter and a few other things and I could seriously eat that caramel with a spoon!  It makes amazing pie filling!

    Once the pecans and bourbon were mixed in and they were baking they filled my home with the most heavenly aroma!  I could not wait to try one, but of course they had to cool first.  They were super delicious!  That sweet gooey date caramel with a hint of bourbon and vanilla flavor was so good with the toasted pecans and buttery crust!  These will be perfect for Thanksgiving this week!

    Mini Vegan Bourbon Pecan Tartlettes 
    Makes 6 small tartlettes

    Ingredients:

    Crust:

    • 1 1/4 cups organic whole wheat pastry flour
    • 2 Tbsp coconut sugar or maple sugar
    • 1/4 tsp sea salt
    • 1/4 cup plus 2 Tbsp coconut oil in its solid state
    • about 3-4 Tbsp cold water


    Filling:

    • 1 cup soft pitted medjool dates (if they are not soft, soak them in filtered water for 30 minutes and drain well
    • before using)
    • 1/4 cup pecan butter (or almond or cashew butter)
    • 1 Tbsp maple syrup, plus more for brushing the top of the tart
    • 1/8 tsp sea salt
    • 1 tsp pure vanilla extract
    • 1/3 cup filtered water
    • 1 Tbsp bourbon
    • 1 Tbsp coconut oil
    • 2 cups toasted pecans, chopped plus more for top of tart


    Directions:

    1. Preheat oven to 375F degrees.
    2. To make the crust, in a large bowl, mix together flour, sugar, and sea salt. Cut in coconut oil with a pastry blender or 2 knives until it is in pea sized pieces. Mix in  just enough water to create a smooth dough that holds together but isn’t too sticky. Add more water if needed, and knead slightly until a smooth dough is created. Divide dough into 6 pieces, and press into the bottom and up the sides of 6 4 inch inch tart pans.  Set aside in the refrigerator.
    3. To make filling, combine all ingredients in a high speed blender or food processor except the pecans. Process until smooth, then scrape into a bowl and stir in the pecans. Spread the filling over the crusts, and top with more pecans. Brush the tops lightly with maple syrup. Place on a baking tray, then place the tray in the oven.
    4. Bake for about 25 minutes until the crust is starting to brown lightly. Remove from oven and let cool before serving.
  • Vegan Pumpkin Pie Cheesecake

    Vegan Pumpkin Pie Cheesecake

    For Thanksgiving, part of the tradition at my house is to always have some fabulous desserts. Pumpkin pie is traditional, but sometimes I like to switch it up a little bit with the pumpkin desserts.  I made some pumpkin creme caramel before and pumpkin cakes, and this year I decided that a vegan pumpkin pie cheesecake would be amazing!  Cheesecake happens to be one of my all time favorite desserts after all, so why not combine it with the classic Thanksgiving dessert!

    I have had pumpkin cheesecake before, but it was less pumpkiny and more just cheesecake flavored.  Which there is nothing wrong with, but I really wanted this one to taste like creamy pumpkin pie.  So, there would be plenty of pumpkin and spices in it!  For the crust, usually for my no bake cheesecakes, I use a no bake oat crust, but this time I decided to make a pie crust style one.  Just to kind of go with the pumpkin pie theme.  It was hard to stop sampling!

    Once the cheesecake was all set up, I topped it off with a coconut cream.  I piped mine on, but you could just spread it on if you wanted and it would be just as good! This cheesecake was sooo good!  It tasted like pumpkin pie but in cheesecake form, and the amount of aromatic spices was perfect!  The crust was nice and buttery and crunchy which I loved with the cheesecake as well!  If you are looking for a delicious dessert to make for Thanksgiving consider this cheesecake!

    Vegan Pumpkin Pie Cheesecake

    Makes 1 6 inch cheesecake

    Ingredients:

    Crust:

    • 1/4 cup plus 2 Tbsp organic whole wheat pastry flour*
    • 2 Tbsp tapioca flour (or cornstarch would work as well)
    • 2 Tbsp maple sugar
    • pinch tsp sea salt
    • 3 Tbsp vegan butter (such as Earth Balance)


    Filling:

    • 1 cup full fat coconut cream (I used the thick part of a can of Thai Kitchen organic full fat coconut milk*)
    • 3/4 cup canned pumpkin
    • 1/4 cup maple syrup
    • 1 tsp pure vanilla extract
    • 1/8 tsp sea salt (or to taste
    • 3/4 cup melted coconut butter


    Topping:

    • 1 1/4 cups canned full fat coconut milk (you want to use a brand that is at least 3/4 of the can thick cream or it will not work for this recipe, I like Thai Kitchen brand)
    • 2 Tbsp maple syrup
    • 1/8 tsp sea salt
    • 1/4 cup plus 2 Tbsp melted coconut butter (not coconut oil), warmed to liquid


    Instructions:

    1. Preheat oven to 375F degrees.
    2. To make the crust, in a large bowl, mix together flour, tapioca flour,  sugar, and sea salt. Mix in butter and stir (or use your hands and knead) until a smooth dough is created. Press into the bottom of a 6 inch round spring form pan.
    3. Place in the oven and bake for 25-30 minutes or until just starting to brown and set.  Remove from the oven, and let cool completely.
    4. Meanwhile, to make the filling, combine all ingredients in a high speed blender or food processor and blend until smooth.
    5. Pour the filling over the prepared crust and smooth the top.
    6. Place cheesecake in the freezer until it is set for about 4 hours (or overnight in the refrigerator if you are not in a hurry).
    7. Remove from the freezer, and set in the refrigerator while you make the topping.
    8. To make the topping, combine all ingredients in a high speed blender and blend until completely smooth.  Pour into a bowl and place in the freezer until the consistency of stiffly whipped cream (about 30-45 minutes depending on how warm it has gotten).
    9. Pipe or spread the topping over the cake.
    10. un-mold and enjoy!  Store any leftover cake in the refrigerator.


    *I use Thai Kitchen full fat coconut milk.  If you are using a different brand, just make sure it is the thick type, 2/3 of the can at least should be very thick cream or it will not work in this recipe.

  • Vegan Pumpkin Pie in a Mug

    Vegan Pumpkin Pie in a Mug

    I love a good pumpkin pie.  It is the essential fall dessert, and is actually somewhat healthy compared to many other pies (not that I always care, but I like to get my veggies in sometimes with dessert).  I make it in some form every year whether it be mini ones, or a fancy larger one, maybe with a pecan or apple layer on the bottom. But sometimes I just want a smaller serving of it just for myself for a few days (the mini pies make a lot of servings so those don’t quite count).  Which is where pumpkin pie in a mug comes in!  I had made one about 10 years ago that was really good, but it wasn’t vegan and I have been telling myself ever since that I need to veganize it.

    Well, I finally got around to it this year. I wanted to make something pumpkin pie that was simple and quick with not a lot of servings so I went for it, and it turned out really good!  A good pumpkin pie has to have good texture as far as I am concerned.  I have had a few that seemed overcooked and mealy in texture and I was not a fan.  So I make mine with ingredients that when blended together come out silky smooth like custard.  Which is technically what pumpkin pie filling is. For my filling I use a mixture of organic pumpkin puree (canned is fine too), coconut milk, a little coconut butter and maple syrup with just a bit of maple syrup to sweeten it.  It comes out much nicer than the pie filling I used to make that had eggs and dairy.

    The filling also had to have just the right amount of spices.  I don’t care for pies that have way too much spice so you can’t taste the flavor of the pumpkin, or ones that don’t have enough so it tastes somewhat bland. I feel like I achieved the perfect balance here, and added just the right amount of maple syrup so the sweetness is nice and balanced too.  Plus the maple goes so well with the spices.  I feel like also, because I don’t use any granulated sugar here it helps the pie come out smoother as well.

    I poured the filling into little mugs, it made 3 which is perfect because I could share one and keep 2 for myself!  They baked up beautifully and made my kitchen smell amazing.  The only bad thing about it is you can’t enjoy it until it cools down.  But I got to enjoy some after work which was a win!  I topped it with a little coconut cream and it was perfect!  I really didn’t miss the crust because the filling is my favorite part anyhow.  If you are the same way, definitely give these a try!

    Vegan Pumpkin Pie in a Mug

    Makes 3 8 oz pies

    Ingredients:

    Filling:

    • 2 cups organic cooked pumpkin (canned is ok too), packed
    • 1/3 cup pure maple syrup
    • 3/4 cup full fat organic coconut milk
    • 2 tsp coconut butter
    • 1 1/4 teaspoon ground cinnamon
    • 1 teaspoon ground ginger
    • 1 /4 teaspoon ground nutmeg
    • 1/4 tsp ground cloves
    • 1/4 teaspoon salt
    • 1 1/2 tablespoons cornstarch
    • 3/4 teaspoon agar powder


    Instructions:

    1. Preheat oven to 350F degrees.
    2. Place all ingredients in a high speed blender and blend until smooth.
    3. Pour into 3 1 cup mugs or ramekins, and place in the oven.
    4. Bake until set, about 40 minutes, then remove from the oven and let cool.
    5. Top with coconut whipped cream, and enjoy!
  • Chocolate Pecan Pie Cups

    Chocolate Pecan Pie Cups

    It was incredibly nice last weekend, so I didn’t spend much time in the kitchen. Instead, I spent lots out time outdoors, because how often is it 70F degrees in November?!  But we got snapped back to reality yesterday when it rained all day, then today when it snowed a few inches, plus ice pellets.  Winter is knocking on the door, but that means it is the perfect time to create deliciousness in the kitchen!  I am kind of on a pecan desserts kick lately.  Well, pecan pie specifically.  I made some pecan pie chocolate chunks bars last week and they were so good that I thought I might try making that flavor combination into a candy!

    I really wanted more of that gooey pecan pie filling after eating those bars, but with more of a caramel filling and chocolate ratio minus the crust (sorry crust, not that you weren’t good, but I am obsessed with the filling), so I thought making some chocolate cups sounded amazing!  I used a very similar filling to the bars.  Only I didn’t add the coconut oil and water, and I upped the maple syrup slightly since these are candies. The filling was a date caramel, my favorite caramel because it is way less processed than the kind made with sugar.

    This caramel whips up fast, and in fact I made twice the amount called for in the recipe, just so I would have extra to enjoy!  I mixed some toasted pecans into the half that I was using for the filling and it was super delicious!  This stuff is really hard to stop tasting. Luckily I had that extra caramel on the side so I had plenty left for the chocolate cups! I like chocolate cups as opposed to something you have to shape and dip sometimes because they are easier, and work well for more gooey fillings.

    These turned out so heavenly!  The caramel was rich, scented with vanilla and gooey with those crunchy toasted pecans and dark chocolate, it was hard to just eat one.  But I saved some for later so I had something to look forward to enjoying.  Needless to say, I didn’t end up sharing any of these and that doesn’t happen often!  If you are a pecan pie fan, definitely give these a try!

    Chocolate Pecan Pie Cups

    Makes 6

    Ingredients:

    Filling:

    • 1/2 cup soft pitted medjool dates (if they are not soft, soak them in filtered water for 30 minutes and drain well
    • before using)
    • 2 Tbsp pecan butter (or raw cashew butter or almond butter)
    • 1/8 tsp sea salt
    • 1 tsp pure vanilla extract
    • 2 Tbsp maple syrup
    • 1/2 cup toasted pecans, chopped


    Chocolate:

    • 1 1/2 cups chopped vegan dark chocolate


    Instructions:

    1. To make filling, combine all ingredients in a high speed blender or food processor except the pecans. Process until smooth, then scrape into a bowl and stir in the pecans.
    2. Melt the dark chocolate in the top of a double boiler until smooth.
    3. Pour enough chocolate into each of 6 silicone baking cups, or large PB cup molds to cover the bottom by 1/4 inch. Place in the freezer until firm.
    4. Spoon about 1 Tbsp of the filling into each cup on top of the chocolate trying not to touch the edges with it, and smoothing the top down a little so it doesn’t stick up too high.
    5. Pour the remaining chocolate over the fillings, and then place them in the freezer until the chocolate has set, about 20 minutes.
    6. Remove from the molds, and enjoy!


  • Vegan Chocolate Peppermint Lava Cakes

    Vegan Chocolate Peppermint Lava Cakes

    After a hectic week last week, I decided that I needed to bake something chocolaty.  Brownies or chocolate cake sounded good, maybe with peppermint.  I had seen someone making some peppermint brownies on a morning show I was watching and the combo of chocolate and peppermint sounded amazing at the time.  I didn’t however want to bake a big pan of brownies or make a large layer cake that would have been more work than I was willing to put in after being at work in a kitchen all day, so I went for some mini lava cakes!  I had made some similar ones before and I knew they were nice and easy and I could enjoy some delicious cake quickly. 

    Raw Guru had recently sent me some cacao powder, so it was perfect!  It was just begging to be used in a recipe like this one!  For the base, I started out with quinoa flour which is naturally gluten free.  But you could of course use whole wheat pastry flour if you prefer that and it will work just as well.  Next, I added in the cacao powder of course to make it nice and chocolaty.  For the sweetener, instead of sugar I used dates because they keep the cake nice and moist and soft but not to heavy.  You would never guess that this is fruit sweetened. 

    It also happens to be oil free, because I use full fat coconut milk instead of oil and it comes out perfect!  Lastly a good amount of peppermint was important for that holiday twist!  For the filling I made a quick ganache so it would be nice and gooey and rich inside when you cut into it to enjoy it.  They smelled amazing while baking! I could not wait to try one!  

    I only had to wait 10 minutes.  I poured some of the extra ganache over it and it was amazing!  Gooey and rich as lava cake should be with a hint of peppermint and tons of dark chocolate flavor!  The only thing that would have made this even better is if I had some vegan ice cream on hand which I did not but it was still crave worthy!  If you are a big chocolate fan, definitely give these a try!

    Vegan Chocolate Peppermint Lava Cakes

    Makes 4

    Ingredients:

    Filling:

    • 1 cup chopped vegan dark chocolate or vegan chocolate chips (I like this brand)
    • 3/4 cup full fat coconut milk 


    Cake:

    • 3/4 cups quinoa flour (or all purpose gluten free flour)*
    • 2 Tbsp Raw Guru cacao powder or unsweetened cocoa powder
    • 3/4 tsp baking soda
    • 1/2 tsp baking powder
    • 1/4 tsp sea salt
    • 3/4 cup packed soft medjool dates, pitted, soaked in water for 30 minutes and 1/2 cup of the water reserved
    • 1 tsp pure vanilla extract
    • 1 tsp peppermint extract
    • 3/4 cup full fat coconut milk (the thick part from the top of the can)
    • 1 Tbsp apple cider vinegar


    Instructions:

    1. Preheat the oven to 375F degrees and position rack in center of oven.
    2. Oil four 1 cup custard dishes or ramakins with oil.
    3. To make the ganache filling, place the chocolate and coconut milk in the top part of a double boiler, whisking them, and heat until they are melted and blended together and smooth. Turn off the heat but leave over the warm water.
    4. To make the cake batter, whisk flour, baking powder, baking soda, sea salt in a large bowl to blend well.
    5. Place dates, reserved water, peppermint, coconut milk, and vanilla extract into a blender, and blend until smooth, then whisk this blended mixture into the flour mixture until well blended. Whisk in the cider vinegar until bubbles form.
    6. Transfer half of the cake batter to prepared dishes filling them half full, then drop 2 Tbsp of the ganache into each in the center. Spoon the remaining batter over each one, place on a tray, and place in the oven.
    7. Bake cakes until they are set, but not over-baked about 15-18 minutes.  Remove from oven, let cool for about 10 minutes.
    8. Rewarm the extra ganache if it has solidified (if it is too thick or clumpy once it has warmed, whisk in a little water until it thins it will smooth out).
    9. When the cakes have sat 10 minutes, un-mold, pour the extra ganache over and enjoy warm.


    *If you prefer to use whole wheat pastry flour instead of the quinoa or gluten free flour, it can be used as well. 

  • Peppermint Vanilla Vegan White Chocolates

    Peppermint Vanilla Vegan White Chocolates

    The holidays are always hectic.  After all, everyone is rushing to buy presents, making plans going to parties, and planning out the food for their holiday gatherings.  It is always a bit of a stressful time, but I feel like it is even more so this year.  A few weeks back I had my car broken into and they caused a good amount of damage and it was in the shop for just over 2 weeks.  So I was dealing with that, and then there is the fact that I work in the food industry and we are a bit short right now at my work and I feel like I am running around like a crazy lady sometimes trying to squeeze everything into my day that I need to get done.  So I am all about the easy recipes right now for the holidays.  Because I am still in a good mood and grateful for the good things in my life despite the hectic stuff going on and I still want to make delicious treats!  Just not super time consuming ones.   That is where this white chocolate recipe comes in.

    This is a super easy recipe but it is sooo good!  I have always loved white chocolate.  Maybe it is because I am more of a vanilla than a chocolate person most of the time. If there was a vanilla cupcake and a chocolate one to choose from I would always go for the vanilla.  So when I was little I would go for the white chocolate.  The problem with a lot of commercial white chocolate now though is it isn’t really white chocolate at all because they have removed the cacao butter and replaced it with some sort of cheaper oil.  Which is no good as far as I am concerned, I want the real stuff!

    So I melt real cacao butter as the base for mine and trust me it makes all the difference in terms of flavor and aroma.  It smells sooo good while you melt it! Next, I add in coconut butter and cashew butter to make it nice and creamy.  Raw Guru recently sent me some so it was perfect! Their nut butters are silky smooth, so just the thing to use in recipes like this!  Next, a bit of vanilla and maple syrup to sweeten it. It is sooo good!

    But since it is the holidays I decided to add in a bit of peppermint and a little color to make these festive!  For the red I used beet powder, and for the green spinach powder.  They turned out so cute!  But more importantly they were super delicious!  Mellow and smooth, melt in your mouth white chocolate with the aromas of vanilla and peppermint!  If you are a white chocolate fan, definitely give these a try!

    Peppermint Vanilla Vegan White Chocolates

    Makes 16

    Ingredients:

    White Chocolate:


    Instructions:

    1. Combine cacao butter, cashew butter, vanilla, peppermint, maple syrup,  and sea salt over a double boiler, and whisk until smooth.
    2. Divide between 2 bowls (or glass measuring cups for easier pouring.
    3. Whisk the spinach powder into one, and the beet powder into the other bowl of white chocolate.
    4. Pour into chocolate molds, and place in the freezer until heard, which can take 30 minutes to 1 hour depending on how warm it is.
    5. Pop chocolate out of molds and enjoy!


    Store in the refrigerator for a month or an airtight container in the freezer for up to three months.


  • Vegan Gingerbread Roll Cake

    Vegan Gingerbread Roll Cake

    I made some gingerbread cookies a few weeks back, and ever since then I have been craving the flavor in the form of cake.  Not that there is anything wrong with cookies, but I am a cake kind of girl!  I was thinking a gingerbread layer cake with vegan “cream cheese” frosting, revamping one of my old recipes I had made a few weeks back.  But then the week got a bit hectic, it is Christmas time after all, and I have a lot going on.  So I decided that a rolled cake would be easier and simpler to make than a frosted cake, but just as delicious.  I guess this is the year of the rolled cake for me.  I made a pumpkin roll cake in the fall and a chocolate roll cake for Eric’s birthday last month, and now I decided to make one again.  What can I say?  I fell in love with them.  They are so much faster to make than a layered one that I have to take the time to carefully frost.

    For the base, I used my date sweetened cake batter to start.  I know it is a nice soft cake that bends a little more than one sweetened with sugar so it is perfect for this!  Plus, I just like sweetening things with dates in general.  They are nature’s candy after all, like little caramels, and they give the cake a caramel flavor.  Next, I added gingerbread spices, ginger, cinnamon, nutmeg and cloves and it smelled amazing.  I also added in a little molasses because it is kind of essential for classic gingerbread flavor as far as I am concerned.

    The cake baked up beautifully and my kitchen smelled amazing!  I had to make an equally as delicious filling for it.  I used a mixture of full fat coconut milk and raw cashew butter to make it nice and creamy to mimic a real cream cheese frosting.  I think it is actually even better than the real stuff honestly.  I sweetened it with a bit of maple syrup and vanilla and it was heavenly!

    It spread nicely onto the cooled cake and I was very pleased with how it rolled.  I let it chill overnight because by then it was pretty late and I knew it would slice nicer, so I had to wait until after work the next day to try it.  It was well worth the wait though!  I dusted it with a bit of coconut powdered sugar and it was lovely!  It was heavenly with the sweet and spicy soft gingerbread cake and creamy luscious cream cheese frosting!  This would be the perfect finale to your holiday meal, so if you are a gingerbread fan, definitely give this a try!

    Vegan Gingerbread Roll Cake
    Makes one 15 inch long roll cake

    Ingredients:

    10×15 inch jelly roll pan

    Cake:

    • 1 1/2 cups organic whole wheat pastry flour
    • 1 1/2 tsp cinnamon
    • 1 1/2 tsp ginger
    • 1/2 tsp cloves
    • 1/4 tsp nutmeg
    • 1 1/2 tsp baking soda
    • 1 tsp baking powder
    • 1/2 tsp sea salt
    • 1 1/4 cups packed soft medjool dates, pitted, soaked in water for 30 minutes and drained
    • 1/4 cup almond butter or your preferred nut butter (just make sure it is smooth)
    • 1 Tbsp molasses
    • 2 tsp pure vanilla extract
    • 2 cups filtered water
    • 2 Tbsp apple cider vinegar


    Filling:

    • 1 15 oz can organic full fat coconut milk, such as Thai Kitchen chilled (you want to make sure it is a brand that is 3/4 of the can cream or it will not work)
    • 1/2 cup raw cashew butter
    • 1/3 cup maple syrup
    • 1/4 tsp sea salt
    • 1 tsp pure vanilla extract
    • 1/2 cup plus 2 Tbsp melted coconut butter (NOT OIL), warmed to liquid


    Directions:

    1. Preheat the oven to 350F degrees and position rack in center of oven.
    2. Line a 15 x 10 inch jellyroll pan with parchment paper.
    3. Whisk flour, spices, baking powder, baking soda, and sea salt in a large bowl to blend well.  Set aside.
    4. Place dates, water, almond butter, molasses, and vanilla extract into a blender, and blend until smooth, then whisk this blended mixture into the flour mixture until well blended. Whisk in the cider vinegar until bubbles form.
    5. Transfer cake batter to prepared pan and bake cake until tester inserted into center comes out clean, about 15-18 minutes.
    6. Cool cake completely.
    7. To make the filling, combine all ingredients in a high speed blender and blend until completely smooth.
    8. Pour into a bowl and place in the freezer until the consistency of stiffly whipped cream (about 30-45 minutes depending on how warm it has gotten.  Once it is ready place in the refrigerator until ready to assemble.
    9. When ready to assemble, spread filling over the top of the cake, then roll up jellyroll style starting with the short side and using the parchment to assist you in rolling.  Be careful because the cake is fragile, but if it cracks as you roll it no worries, keep rolling.  Let chill in the freezer once rolled for a few hours before topping with the powdered coconut sugar.


    *If you would like to make this gluten free, swap the whole wheat flour for Bob’s Red Mill Gluten Free All Purpose Baking Flour (I have tested this brand and know it works, but have not tried other brands so I am not sure if they would turn out the same).

  • Vegan Maple Pecan Cookies

    Vegan Maple Pecan Cookies

    I have only made one Christmas cookie this year so far, and I only have 3 more weeks, so I am getting on it making some! When I was little my Mom and I would pick out a bunch of cookies to make every year then store them in the freezer to enjoy throughout the holiday season.  We had our favorites from my Grandma’s recipes or church cookbooks, but we also liked to go to the library and get cookbooks to find recipes in. I still like to continue on this tradition of making a variety of cookies to enjoy for a month or two from the freezer and to give as gifts.  At one point we had made some really good pecan sugar type cookies, and I was craving them the other day so I decided to whip up a veganized batch.  I had just bought some maple sugar so it was perfect!

    I based them off of my vegan sugar cookie recipe using the maple sugar instead of regular sugar or coconut sugar to give them a bit of a maple flavor to start.  I love maple sugar because it is more delicate than coconut sugar and dissolves a little better in a recipe like these cookies. Plus I just love the flavor.  It is basically maple syrup turned into granules. I also added a bit of vanilla extract and maple extract to make these smell heavenly!  Lastly some toasted pecans for crunch.

    This cookie dough is actually really easy to make, just mix, roll into balls, and bake!  None of that whipping the dough for a while, or chilling or cutting out or all that jazz.  In the extra time you save since they are so easy to make I highly recommend sampling the dough, it is amazing!  I could not stop tasting it in fact.  But eating cookie dough is my favorite part of the cookie making process.  They baked up beautifully!  I could not wait to try them.

    But I wanted to add something to make them even more delicious first, a maple pecan glaze!  I whisked together a bit of pecan butter, maple syrup and coconut butter and it was perfect on the cookies!  If you don’t have pecan butter you could use another nut butter like cashew or almond.  The cookies were sooo good!  They tasted rich buttery and delicious with the aroma of maple and crunch of toasted pecans!  If you are a big maple fan like me, definitely give these a try!

    Vegan Maple Pecan Cookies

    Makes 28 cookies
    Ingredients:
    • 2 Tbsp ground flax seed
    • 1/4 cup plus 2 Tbsp filtered water
    • 1 cup coconut oil, warmed to liquid
    • 1 1/2 cups maple sugar
    • 1 teaspoon vanilla extract
    • 1 tsp maple extract
    • 1 teaspoon baking soda
    • 1/2 teaspoon sea salt
    • 3 1/2 cups organic whole wheat pastry flour*
    • 1 cup chopped toasted pecans


    Instructions:

    1. Preheat your oven to 350F degrees.
    2. In a small bowl, whisk together the flax seed and filtered water.  Set aside in the refrigerator for 15 minutes.
    3. In a large bowl, mix coconut oil with sugar and mix until well combined.
    4. Mix in the vanilla extract, maple extract and flax mixture until well combined.
    5. Add the baking soda, salt, then the flour, a cup at a time, mixing between each addition, until well combined.
    6. Mix in the pecans.
    7. Roll dough into about 1 1/2 inch balls, and place on prepared cookie sheets a couple inches apart, pressing them down slightly to flatten a bit.
    8. Place in the oven and Bake for about 13 minutes, until puffed and just starting to brown slightly.  Remove from the oven and let cool on the pan a few minutes, then remove to a wire rack to cool.
    9. Repeat with remaining cookies and let cool completely before you make the glaze.

    *If you want to make these gluten free, swap the whole wheat pastry flour 1:1 with Bob’s Red Mill All Purpose Baking Flour.  I have tried this brand and know it works well (I can not say the same for all other brands as I have not tried them).

  • Vegan Hot Chocolate CBD Cupcakes 

    Vegan Hot Chocolate CBD Cupcakes 

    This post is sponsored by Weller CBD but the content and opinions expressed here are my own.

    Tis’ the season for baking holiday treats, and although I love cookies, I thought some cupcakes were in order last weekend. We had just survived a snowstorm that lasted almost 3 days, and the sun was finally back out again so it was something to celebrate!  Not only that, this is my favorite time of year for baking, why not come in from outside and warm up the kitchen with something delicious baking in the oven.  Weller CBD recently sent me some of their CBD powdered drink mix to try and I loved it so I thought why not incorporate it into a baked good?!  I decided on some peppermint hot chocolate CBD cupcakes but more on those in a bit.  I love that Weller’s CBD Drink Mix can be added to any of your favorite drinks or recipes.  I had never heard of any CBD product like that.  Sometimes other brand’s oils and such have a strong flavor but this one doesn’t which is awesome for using in things like these cupcakes, or even just something like freshly squeezed orange juice!

    Not only do they carry CBD Powder, they also carry Sparkling Water and Coconut Bites as other fun ways to get in your daily dose of CBD.  The Sparkling water has 25mg of CBD per serving and the coconut bites have 5mg so whatever your dosage they have something for everyone!  All of their products are US grown, vegan and gluten free which is important to me as well, and why I love supporting companies like this one.  I use CBD daily in the morning and at night, usually in the form of oil so I was super excited about the Weller CBD Drink Mix as a new way to get my daily dose.   Each 1/4 tsp scoop has 10mg of CBD, so if you have a couple a day it is perfect!  I like to enjoy CBD daily for a sense of calm and overall well being.  It is an easy way to do something good for myself.

    Back to those cupcakes.  To start off I made a chocolate cake base that is really easy.  You just whisk it all together in a bowl, add a little apple cider vinegar to help it rise and pour it into the cupcake pans.  I added enough CBD powder so that each cupcake would have a 10mg serving of CBD. Also, I added a touch of peppermint for a seasonal twist, and because peppermint is so amazing with hot chocolate and just chocolate in general.  The batter tasted amazing even before I baked them.

    Once they were out of the oven, and my kitchen smelled so good I could not wait to try them.  But of course I had to let them cool first and add a delicious frosting.  Good frosting is essential to cupcakes after all, and I love mine piled high.  I made a rich and creamy frosting with coconut milk and cashew butter with a bit of cacao powder to make it chocolate plus some mint and it was sooo good!  But it was even better on the cupcakes.  They were heavenly!  Moist, soft chocolate cake with a luscious creamy chocolate frosting and a hint of mint, it is hard to eat just one.  Plus you get your daily dose of CBD in too!  Definitely give these a try and if you are interested in checking out the Weller CBD Products, you can do so on their website!

    Vegan Hot Chocolate CBD Cupcakes 

    Makes 16 cupcakes

    Ingredients:

    16 hole muffin pan, 16 silicone muffin tins, or foil muffin tins

    Cake batter:

    • 1 3/4 cups whole wheat pastry flour*
    • 1 Tbsp plus 1 tsp Weller CBD drink mix 
    • 1 1/2 baking soda
    • 1 tsp baking powder
    • 1/2 tsp sea salt
    • 1 cup coconut sugar
    • 2 cups full fat coconut milk (the thick kind, I prefer Thai Kitchen brand) at room temperature
    • 1 tsp peppermint extract
    • 2 Tbsp unsweetened cocoa powder
    • 2 Tbsp cider vinegar


    Frosting:

    • 1 1 15 oz can full fat organic coconut milk, at room temperature*
    • 1/2 cup raw cashew butter (or additional coconut cream from the top of the can for a nut free version)
    • 1/4 cup cacao powder or unsweetened cocoa powder
    • 1/4 cup maple syrup
    • pinch sea salt
    • 1/2 tsp peppermint extract
    • 1/2 cup plus 2 Tbsp coconut butter or melted cacao butter (NOT coconut OIL), warmed to liquid


    For Decorating:

    • Vegan Marshmallows
    • Vegan Chocolate Chips


    Instructions:

      1. Preheat the oven to 350F degrees and position rack in center of oven.
      2. Set out 16 muffin tins.
      3. Whisk flour, baking soda, sea salt, and sugar in a large bowl to blend well.
      4. Whisk coconut milk and peppermint extract together, then pour into the flour mixture and whisk until well blended.  Whisk in the cider vinegar until bubbles form
      5. Transfer cake batter to prepared tins and bake cakes until tester inserted into center comes out clean, about 15-20 minutes.  Remove from the oven and let cool completely.
      6. For the frosting, combine all ingredients in a blender and blend until completely smooth. Pour into a bowl and place in the freezer until it is thick like whipped cream (whisking every so often), about 45 minutes to one hour.
      7. Spread the frosting on top of the cupcakes, top with marshmallows and chocolate chips and serve!


    *If you want to make these gluten free, swap the whole wheat pastry flour 1:1 with Bob’s Red Mill All Purpose Baking Flour.  I have tried this brand and know it works well (I can not say the same for all other brands as I have not tried them).

    *For the coconut milk, you want a brand of coconut oil that is at least 2/3 to 3/4 of the can coconut cream or a can of unsweetened coconut cream or it will not work for the recipe.

  • Vegan Gingerbread Cookies

    Vegan Gingerbread Cookies

    I used to make gingerbread cookies a lot back in the day.  In fact, when I was a senior in college, I made gingerbread cookie sculptures for my senior art show.  Things like a gingerbread sculpture of my car, my house, and household items like a bed and table with chairs.  I really enjoyed it, it was a lot of fun being able to work with cookies and do art at the same time.  I have gingerbread cookies since then, but I haven’t attempted to make a vegan gingerbread cookie house surprisingly enough.  Maybe sometime when I have a lot of free time which doesn’t seem to happen in recent years around the holidays.  I do like to make gingerbread cookies though.  Now that Thanksgiving is over I thought I would whip up a batch!  Tis the season!  There is snow on the ground, and we are expecting more so it is the perfect time to stay cozy inside and do some baking.

    I admit I usually stay away from cookies that need to be rolled and frosted because I don’t have time to make fussy cookies after work on a weeknight, but since I had the day after Thanksgiving off it gave me plenty of time.  And these were really not all that fussy.  They start with a spiced molasses base with ginger, cinnamon, nutmeg and cloves and it smells amazing.  It is a delicious soft dough.  I should know I tasted enough. I mean eating cookie dough is one of my favorite parts of baking cookies.

    This is almost my original recipe that I made back in the day except for the flax eggs that I swapped in for the real ones. It works just as well, I don’t even notice the difference.  Another change I made is I used Raw Guru coconut sugar instead of the brown sugar I used to use and it tastes just as good.  This dough actually chills a lot faster than the original dough too because I used coconut oil instead of butter like in the original one. It gets hard pretty quick. This is one of the easier doughs to work with so long as you don’t chill it too long (or it will be hard).

    I cut them into cute little gingerbread men, stars and trees because why not?  I haven’t actually made any gingerbread men in a while I opted for stars the last few times.  When they were all cool, I decided to top them off with a cream cheese “icing” I say icing in quotes because it is not made with powdered sugar, it is made with healthier things like cashew butter and coconut butter with a touch of maple syrup.  These cookies turned out sooo good!  If you are in the mood for some classic holiday cookies, definitely give these a try!  In place of the glaze melted dark chocolate piped onto them would also be good if that is more your jam.

    Vegan Gingerbread Cookies

    Makes about 42 cookies

    Ingredients:

    Dough:

    • 3 cups organic whole wheat pastry flour*
    • 1 tsp baking soda
    • 1 tsp ground cinnamon
    • 1 tsp ground ginger
    • 1/2 tsp cloves
    • 1/4 tsp nutmeg
    • 1/2 tsp sea salt
    • 3/4 cup melted coconut oil
    • 1/2 cup Raw Guru coconut sugar
    • 2/3 cup molasses
    • 1 Tbsp ground flax seed mixed with 3 Tbsp filtered water allowed to sit 15 minutes before using


    Icing:


    Instructions:

    1. Preheat the oven to 350F degrees.
    2. In a medium bowl, whisk together the flour, soda, spices, and sea salt.
    3. In a large bowl, whisk together the coconut oil, coconut sugar, molasses and flax mixture until smooth.
    4. Add the dry ingredients to the wet and mix until smooth.
    5. Divide the dough into 2 balls, place each on a parchment lined tray, and roll out until 1/4 inch thick (if it is too sticky to roll, pop it in the freezer for a few minutes first.  Place in the freezer for about 5-10 minutes until more firm (but not hard, coconut oil hardens pretty fast), then cut into shapes and place on a parchment lined baking tray. Pop back into the freezer until completely firm, about 10 minutes.
    6. Place in the oven and bake for about 12 minutes or until set (but not dried out).
    7. Remove from the oven and let cool completely.

    *If you want to make these gluten free, swap the whole wheat pastry flour 1:1 with Bob’s Red Mill All Purpose Baking Flour.  I have tried this brand and know it works well (I can not say the same for all other brands as I have not tried them).

  • Vegan Chocolate Hazelnut Silk Pie

    Vegan Chocolate Hazelnut Silk Pie

    Pumpkin, pecan and apple were always staples at Thanksgiving growing up, and I made pumpkin and apple pies before Thanksgiving this year earlier in the season, but this year I decided to make a chocolate hazelnut pie specifically for Thanksgiving.  I was thinking something similar to French silk pie but with hazelnut because chocolate sounded so good to me at the time, and Raw Guru had sent me some of their Dastony Hazelnut Butter.  My family liked the idea too so I went for it!  I have a confession to make, I have decided I am not making much in the way of food for Thanksgiving this year, since we are going out to dinner the following weekend, but I am making dessert!  I get a little bit burnt out on making Thanksgiving food since I work in a deli and it is really busy this time of the year making all of the Thanksgiving dishes.  So I like a break on the actual holiday sometimes.

    But back to the pie which is the important part of this post!  I wanted it similar to French silk, so a classic buttery tasting pie crust.  For that, I used my classic coconut oil pie crust.  It has just 5 ingredients, whole wheat pastry flour, coconut oil, coconut sugar, and sea salt plus cold water.  It always tastes nice and rich, and bakes up nicely.  If you wanted to make it gluten free, you could swap Bob’s Red Mill gluten free all purpose baking flour for the whole wheat pastry.  I have tried it before with good results (but I have not tested other brands so I can’t say the same for how they would turn out).

    For the filling, it needed to be rich and delicious almost like a chocolate mousse with hazelnut so I used a combination of full fat coconut milk (mostly cream) combined with the Dastony Hazelnut butter, and coconut butter for a crave worthy concoction.  Once I added the maple syrup and cacao powder it was heavenly!  I could not stop tasting it!  It is really easy to make though, you just buzz everything in the blender and pour it into the crust and chill.

    Lastly, I wanted to top it off with some coconut whipped cream and hazelnuts to make it pretty.  I could not wait to try it!  I had to wait until the next day for it to chill but it was well worth the wait.  It was crave worthy!  Rich, smooth chocolate hazelnut filling (way better than any Nutella I ate growing up), a buttery tasting crust and vanilla whipped coconut cream and crunchy hazelnuts!  Just the sort of thing you want to go back for a second slice of!  If you are in the mood for something rich and chocolaty, definitely give this a try!

    Vegan Chocolate Hazelnut Silk Pie

    makes one 8 inch pie

    Crust:

    • 1 1/4 cups organic whole wheat pastry flour*
    • 3 Tbsp maple sugar or coconut sugar
    • 1/4 tsp sea salt
    • 1/4 cup plus 2 Tbsp coconut oil in its solid state
    • about 3-6 Tbsp cold water


    Filling:


    Cream Topping:


    Garnish:

    • toasted hazelnuts


    Instructions:

    1. To make the crust, in a large bowl, mix together flour, sugar, sea salt, and spices. Cut in coconut oil with a pastry blender or 2 knives until it is in pea sized pieces. Mix in  just enough water to create a smooth dough that holds together but isn’t too sticky. Add more water if needed, and knead slightly until a smooth dough is created. Roll out into a 10 inch circle on a sheet of parchment paper, then use the paper to help you transfer it to an 8 inch pie dish.  Flute the edges, and set aside in the refrigerator until solid.
    2. Pre-heat the oven to 350F degrees. Place foil inside the pie crust, and weight down with pie weights or dried beans.  Place the pie in the oven and bake for 30 minutes, then remove the weights and foil and bake 10-15 minutes more or until lightly browned. When it is done baking, let cool completely.
    3. For the filling, combine all ingredients in a high speed blender and blend until smooth. Pour into the crust.
    4. Place in the freezer until set, about 2 hours.
    5. Meanwhile, for the cream topping, combine all ingredients in a blender and blend until completely smooth. Pour into a bowl and place in the freezer until it is thick like whipped cream (whisking every so often), about 20-30 minutes.
    6. Once the cream is ready, place it in a pastry bag and pipe around the sides of the pie (and serve with the extra if desired) or just spread it over the top in the center.  Garnish with hazelnuts, enjoy!

    Pie keeps up to 1 week in the refrigerator, covered or in a container.

    *If you wanted to make the crust gluten free, you could swap Bob’s Red Mill gluten free all purpose baking flour for the whole wheat pastry. I have tried this brand and know it will turn out well.

    *For the coconut milk, you want the kind that is 3/4 full of cream in the can, or it will not work and turn out runny, I used Thai Kitchen full fat milk, but their unsweetened canned coconut cream would work as well.

  • Vegan Chocolate Roll Cake

    Vegan Chocolate Roll Cake

    I had just made a rolled pumpkin cake and it turned out so well, I asked Eric if I could make him a chocolate rolled cake for his birthday. His birthday happens to land on Thanksgiving this year so we are kind of celebrating on different days before and after it since most places will be closed. I still wanted him to have a cake though, even though he will probably be enjoying some pie on his actual birthday.  It is tradition I make him a birthday cake or dessert every year.  Five out of the seven years we have been together it has been a chocolate cake because he is the biggest chocolate lover I know.  I have made raw cheesecakes, baked layer cakes, molten chocolate cakes but not a rolled chocolate cake yet.  I told Eric the idea for the cake and he liked it, especially when I described it as being like a giant Hoho cake.  But it would be way better than those little snack cakes we ate growing up because it would be made with better real ingredients.  I always thought those tasted a little bit off.

    For the cake portion, I made my fruit sweetened chocolate cake.  First, because I like to make fruit sweetened cakes as much as possible because they are better for you, and second because they always stay nice and moist.  When I make fruit sweetened cakes, I make them with dates usually blended up in the batter.  They give it a little bit of a caramel flavor too which is amazing with chocolate.  I have been making them this way for a few years now and they always turn out lovely!  I figured it would be good for a rolled cake too since you don’t want anything too dry.  This cake also happens to be oil free too because I use nut butter in place of oil, but you would never guess by tasting it!  The batter tasted fabulous even before baking!

    It baked up beautifully and while it was cooling in the garage (it is like 30 degrees in there right now, so I put it in there to cool faster), I whipped up the filling.  I wanted it to be rich, smooth and luscious so I used a mixture of coconut milk and Dastony Macadamia Nut Butter from Raw Guru in it and the texture was fabulous!  The macadamia nut butter is similar to cashew butter in recipes, but I like it even better!  I also added in a bit of maple syrup and vanilla and it tasted good even before it was on the cake!

    It rolled up beautifully, but I wanted to top it off with something so it looked prettier.  I thought about frosting, but a ganache sounded better.  After all, this was supposed to be chocolate decadence.  So I melted some dark chocolate together with coconut milk and viola!  Delicious ganache!  We could not wait to try the cake.  It was super delicious, the cake was nice and moist, with rich chocolate flavor, the perfect partner for the smooth vanilla cream, and decadent ganache!  If you are a chocolate fan, definitely give this a try!

    Vegan Chocolate Roll Cake
    Makes one 15 inch long roll cake

    Ingredients:

    10×15 inch jelly roll pan

    Cake:

    • 1 1/2 cups organic whole wheat pastry flour
    • 1/4 cup cacao powder or unsweetened cocoa powder
    • 1 1/2 tsp baking soda
    • 1 tsp baking powder
    • 1/2 tsp sea salt
    • 1 1/4 cups packed soft medjool dates, pitted, soaked in water for 30 minutes and drained
    • 1/4 cup almond butter or your preferred nut butter (just make sure it is smooth)
    • 2 tsp pure vanilla extract
    • 2 cups filtered water
    • 2 Tbsp apple cider vinegar


    Filling:


    Ganache:

    • 3/4 cup chopped vegan dark chocolate
    • 1/4 cup plus 2 Tbsp full fat coconut milk


    Directions:

    1. Preheat the oven to 350F degrees and position rack in center of oven.
    2. Line a 15 x 10 inch jellyroll pan with parchment paper.
    3. Whisk flour, cacao powder, baking powder, baking soda, and sea salt in a large bowl to blend well.  Set aside.
    4. Place dates, reserved water, almond butter, and vanilla extract into a blender, and blend until smooth, then whisk this blended mixture into the flour mixture until well blended. Whisk in the cider vinegar until bubbles form.
    5. Transfer cake batter to prepared pan and bake cake until tester inserted into center comes out clean, about 15-18 minutes.
    6. Cool cake completely.
    7. To make the filling, combine all ingredients in a high speed blender and blend until completely smooth.
    8. Pour into a bowl and place in the freezer until the consistency of stiffly whipped cream (about 30-45 minutes depending on how warm it has gotten.  Once it is ready place in the refrigerator until ready to assemble.
    9. When ready to assemble, spread filling over the top of the cake, then roll up jellyroll style starting with the short side and using the parchment to assist you in rolling.  Be careful because the cake is fragile, but if it cracks as you roll it no worries, keep rolling because the cake will be covered.  Let chill in the freezer once rolled for a few hours before topping with the ganache.  Once it has chilled, cut off the ends to make it nice and even.
    10. To make the ganache, melt the chocolate in the top of a double boiler, then whisk in the coconut milk until smooth.  Pour over the cake and smooth out over the top and sides (but leaving the pretty ends exposed).
    11. Chill until the ganache has firmed up, and serve!

    *If you would like to make this gluten free, swap the whole wheat flour for Bob’s Red Mill Gluten Free All Purpose Baking Flour (I have tested this brand and know it works, but have not tried other brands so I am not sure if they would turn out the same).

  • Vegan Pumpkin Cake Roll with Cream Cheese Filling

    Vegan Pumpkin Cake Roll with Cream Cheese Filling

    Cake rolls and jelly roll cakes were something that intimidated me for a long time growing up.  So for a long time I was scared to make one, until finally a couple of years ago I made a vegan chocolate chestnut yule log for Christmas and it wasn’t that bad.  In fact, it turned out fabulous!  I have since made a few other cake rolls, but it has been a while so I decided to make one last weekend.  I have been wanting to make a pumpkin cake roll for a while since I saw a non vegan one on Pinterest, and I knew I could make it just as delicious!

    Don’t let the idea of a rolled cake intimidate you (like it used to for me), I found that this cake was actually a lot easier and less fussy to make than a layer cake that needs to be frosted!  For the batter, I wanted something that would remain nice and soft when rolled, so along with the pumpkin I used dates to sweeten it, and  to keep it moist.  They give it an almost caramel like flavor and I love the idea of healthier fruit sweetened cakes.  This batter is easy to make, you just need a blender to make it nice and smooth. I added in plenty of pumpkin spices as well, and it tasted amazing even before I baked it.

    It smelled heavenly while baking!  Kinda like pumpkin pie, but sweeter.  I put it out in the garage to cool once it was done (since it is about 32F degrees right now out there) so I could frost it faster and it did the trick!  It was ready in about 45 minutes, normally it would have been a few hours.  Meanwhile I had to make a filling that was fit for such a delicious flavorful cake!  I wanted to make a vegan cream cheese frosting type filling and I had recently received some Dastony Raw Cashew Butter from Raw Guru so I figured that would make the perfect addition to my frosting to give it the cream cheese flavor.

    I added it to full fat coconut milk with a bit of maple syrup, and it tasted just like cream cheese frosting!  The cake rolled up nicely and I could not wait to try it!  But first, I dusted it with a little bit of coconut “powdered sugar” to make it pretty.  Yes you could use regular powdered sugar but I don’t have that on hand.  The cake was super delicious as well!  It was soft and light lightly spiced with the flavor of pumpkin and caramel and the rich cream cheese frosting was the perfect thing to pair it with!  If you are in need of a pretty dessert for Thanksgiving definitely give this a try, it is good for making ahead of time, and in fact better if you let it sit covered overnight before serving.

    Vegan Pumpkin Cake Roll with Cream Cheese Filling
    Makes one 15 inch long rolled cake, serves 8-10

    Ingredients:

    15×10 inch jelly roll pan

    Cake:

    • 1 1/2 cups organic whole wheat pastry flour*
    • 1 1/2 tsp baking soda
    • 1 tsp baking powder
    • 1/2 tsp sea salt
    • 1 Tbsp cinnamon
    • 1 tsp ginger
    • 1/2 tsp nutmeg
    • 1/2 tsp cloves
    • 1 1/4 cups packed soft medjool dates, pitted, soaked in water for 30 minutes and 1 cup of the soaking water reserved
    • 1/4 cup almond butter
    • 1 Tbsp pure vanilla extract
    • 1 cup pumpkin puree
    • 2 Tbsp apple cider vinegar


    Frosting:

    • 1 15 oz can full fat organic coconut milk  (you want a brand that is mostly the thick cream like Thai Kitchen full fat coconut milk or coconut cream or it will not work), chilled
    • 1/2 cup Dastony raw cashew butter
    • 1/4 cup maple syrup
    • 1 tsp pure vanilla extract
    • 1/4 tsp sea salt
    • 1/4 tsp cider vinegar
    • 3/4 cup melted coconut butter (warmed to liquid)


    To finish:

    • 1/2 cup finely shredded dried coconut
    • 1 Tbsp maple sugar or coconut sugar


    Directions:

    1. Preheat the oven to 350F degrees and position rack in center of oven.
    2. Line a 15 x 10 inch jellyroll pan with parchment paper.
    3. Coat parchment paper and pan sides lightly with oil so that the cake doesn’t stick.
    4. Whisk flour, baking powder, baking soda, spices and sea salt in a large bowl to blend well.  Set aside.
    5. Place dates, reserved water, almond butter, pumpkin puree, and vanilla extract into a blender, and blend until smooth, then whisk this blended mixture into the flour mixture until well blended. Whisk in the cider vinegar until bubbles form.
    6. Transfer cake batter to prepared pan and bake cake until tester inserted into center comes out clean, about 15-20 minutes.
    7. Cool cake completely.
    8. To make the filling, combine all ingredients in a high speed blender and blend until completely smooth.  Pour into a bowl and place in the freezer until the consistency of stiffly whipped cream (about 30-45 minutes depending on how warm it has gotten.  Once it is ready place in the refrigerator until ready to assemble.
    9. When ready to assemble, spread filling over the top of the cake, then roll up jellyroll style starting with the short side and using the parchment to assist you in rolling.  Be careful because the cake is fragile, but if it cracks as you roll it no worries, keep rolling.  Let chill in the freezer once rolled for a few hours before serving.
    10. To make the coconut powdered sugar, buzz the coconut and maple sugar in a high speed blender until fine, then sift over the finished cake just before serving.

    Keeps for up to 1 week covered in the refrigerator.

    *If you would like to make this gluten free, swap the whole wheat flour for Bob’s Red Mill Gluten Free All Purpose Baking Flour (I have tested this brand and know it works, but have not tried other brands so I am not sure if they would turn out the same).


  • Vegan Sweet Potato Casserole and Vegan Sweet Potato Maple Cake with McCormick Spices!

    Vegan Sweet Potato Casserole and Vegan Sweet Potato Maple Cake with McCormick Spices!

    This post is sponsored by McCormick® but the content and opinions expressed here are my own.

    There are so many things to be excited about around the holidays!  Seeing friends and family you might not normally see the rest of the year because they live far away, the celebrations, and of course the amazing food!  I have to say, ever since I was a little kid, the food has always been pretty important to me, even when I did not make it myself.  I loved helping my Mom and Grandma in the kitchen, preparing the meals and desserts for the holidays!  I am so happy I get to continue the tradition of making food for my loved ones around the holidays, even if my Grandmas are no longer around to celebrate with me.  I know they would love the things I am making.  Good recipes start with good ingredients, which is why I love McCormick® Spices.  They are really good quality (they know a thing or two about making spices since they have been around for over 100 years) and they are affordable which is important to me!  Also, you can find them at Walmart, which is where I bought mine, in the baking aisle with all of the other seasonings and baking goodies!  I don’t know about you, but it is one of my favorite aisles.  Maybe I am biased because I love to bake!

    I picked up some McCormick® vanilla (one of my most used ingredients in my recipes), nutmeg and cinnamon at Walmart. I planned on making a dish that my family loves, Sweet Potato Casserole!  We have always been fond of sweet potatoes, and although back in the day my Grandma used to make the casserole with the marshmallows, our tastes have changed a bit and we now prefer it a little simpler and less sweet (but still plenty sweet enough).  It is really simple to make, and so good!  I just take sweet potatoes or yams and roast them into sweet flavorful perfection in the oven, then scoop out the flesh and mash it until it is light and fluffy with a bit of McCormick® cinnamon, nutmeg and maple syrup, then top it off with crunchy pecans and a little bit of maple sugar!  When it is all baked and the topping is all crispy it is heavenly!  The perfect side dish for your holiday meal!  Recipe follows post.

    If you happen to have leftovers from the casserole, I also have a delicious Maple Sweet Potato Cake that I made with them.  Don’t have time to make something right away with them?  Put them in a container and freeze them for later.  Just thaw before using in your recipe.  I love leftover sweet potatoes in general, there is so much you can do with them.  Make pancakes, muffins, bread, or the cake that I just mentioned if you want to be a little more over the top.  I love making cakes, so of course that is what I chose.  Not only that, it is perfect for Holiday entertaining as well!  Who doesn’t love cake?  I know my family does.  My Grandma and Mom passed down their love of maple to me, so that is what gave me the idea to pair the sweet potatoes with maple in this!  Not only that, I already had the McCormick® spices and flavors on hand I would need for it!  So wins all around!

    I know some people like to make pie for the holidays, and we do as well, but I like cake even more because it just seems so festive!  For this one, I made a flavorful batter with the leftover mashed sweet potatoes, plus maple sugar and of course McCormick® cinnamon, nutmeg and vanilla for an aromatic cake.  Let me tell you, it fills your home with the most heavenly aroma! What you get is a soft, moist but light and fluffy cake with a slight caramel maple flavor and sweet spices!  It would be good on its own, but I decided to make a luscious faux cream cheese frosting for it!

    That has always been my favorite type of frosting after all.  I was so happy when I figured out how to veganize it!  I use a coconut cream base with a bit of cashew butter to give it a nice texture along with maple syrup to sweeten, and this time I added some McCormick® pure vanilla extract to it!  Like I said earlier in the post, it is my most used flavor ingredient in my recipes.  The frosting was heavenly alone but I knew it would be even better on the cake!  Once it was all frosted and ready to go we couldn’t wait to try it!  It was sooo good, the soft sweet spiced cake with a hint of sweet potato and maple flavor plus the luscious creamy frosting!

    I hope you give these recipes a try this holiday season, my family loved them and I have a feeling you will too!  Definitely check out the McCormick® Spices next time you are in Walmart, or on their website HERE. They are just what you need for making super delicious holiday recipes, and so convenient!

    Vegan Sweet Potato Casserole

    Serves 8-10

    Sweet Potatoes:


    Topping:


    Instructions:

    1. Preheat the oven to 425F degrees.
    2. Prick sweet potatoes with a fork all over, and place in the oven on a baking sheet. Roast until tender, about 1 hour. Remove from the oven and cool until cool enough to handle.
    3. Remove the skins, place in a bowl, and add the maple syrup, coconut milk, McCormick Sea Salt, and McCormick® Ground Cinnamon and Nutmeg. Mash together with a potato masher or a large fork, and then place in an oiled 8 or 9 inch square baking dish (or two smaller casserole dishes).
    4. Sprinkle the pecans over the top, drizzle with the maple syrup and mix together the sugar and McCormick® Ground Cinnamon and sprinkle over the casserole.
    5. Lower the oven temperature to 375F degrees, and place the dish in. Bake for 20 minutes until warmed through and the topping is toasted and lightly brown.
    6. Remove from the oven and cool slightly before serving.
    7. Enjoy!

    Keeps refrigerated for up to 1 week, when kept in an airtight container and the leftovers are perfect for using in my maple sweet potato cake recipe (see below)!


    Vegan Maple Sweet Potato Cake
    Makes 1 6 inch 2 layer cake
    2 6 inch cake pans
    Cake:


    Frosting:


    Instructions:

    1. Preheat the oven to 350F degrees and position rack in center of oven.
    2. Line two six-inch-diameter cake pans with 2-inch-high sides with parchment paper. Coat parchment paper and pan sides lightly with oil.
    3. Whisk flour, baking soda, McCormick® Ground Cinnamon, McCormick® Ground Nutmeg, McCormick® Sea Salt, and sugar in a large bowl to blend well.
    4. Whisk sweet potato, pecan butter, McCormick® Maple Extract, McCormick® Vanilla Extract, and water together in small bowl to blend well, then whisk into the flour mixture until well blended.
    5. Whisk in cider vinegar until pale bubble swirls form in the batter and it is well combined (but don’t over mix).
    6. Fold in pecans.
    7. Transfer cake batter to prepared pans and bake cakes until tester inserted into center comes out almost clean with a few moist crumbs attached, about 25-30 minutes.  Remove from oven.
    8. Cool cakes completely in pan on rack, about 1 hour. Cut around sides of pans to loosen. Turn cakes out onto platter; peel off parchment paper.
    9. Meanwhile, to make the frosting, combine all ingredients but the coconut butter, in a high speed blender or food processor and blend until smooth.  With the motor running, add the coconut butter and process a minute more (if it starts to get lumpy at all during the process it is just the fat separating because it is 2 different temperatures.  Just continue to blend until it is smooth, and it will get warm so it will just have to chill longer).
    10. Pour the frosting into a bowl and let sit in the freezer until the consistency of whipped cream, whisking every 15 minutes (this may take anywhere from 15 minutes to hour to an hour depending on how warm it has gotten and which appliance you used).
    11. When ready to frost, place one cake layer on a plate. spread frosting about 1/2 inch thick over the first layer, then top with the second. Spread remaining frosting over the top and down the sides of the cake. You can tint the remaining frosting with natural food coloring if you wish and decorate the top, or just decorate with pecans.
    12. Refrigerate for at least 1 hour before serving.

    Store any leftover cake in the refrigerator, keeps in an airtight container for up to 1 week.

  • Vegan Eggnog Cupcakes 

    Vegan Eggnog Cupcakes 

    I wanted to make a festive cake for Christmas this year, but I had a lot going on, so I opted for festive cupcakes instead since they are quite a bit less time consuming but every bit just as delicious as cake.  Plus the frosting to cake ratio is perfect when I pile it high.  I am one of those people who likes almost as much frosting as cake.  I already made some gingerbread cake this year, and I have made a lot of chocolate mint stuff lately, so I decided on eggnog cupcakes.  Funny thing I didn’t really like eggnog growing up because my Dad called it “egg snag” because he didn’t like it and I assumed it was gross.  When I finally did try it as an adult it was actually soy nog the vegan version and I actually enjoyed it!  Ever since then I do love the eggnog flavor profile when it comes to desserts.

    I made this cake batter a little more traditional than most of my cake batters.  I use dates a lot to sweeten my cakes, but that is mostly when I want a caramel flavor or don’t mind a caramel flavor, which is not what I wanted for this particular cake.  I wanted it to have a more vanilla eggnog type of flavor.  So I used coconut milk and avocado oil (which has a buttery flavor) to keep it moist and soft.  It also had to have a hint of cinnamon and nutmeg and of course bourbon, which are my choice of flavorings when making my own home made eggnog.  The cupcakes baked up beautifully, and they smelled amazing.  But they needed an equally amazing frosting.

    The frosting had to be rich and creamy like eggnog.  So I made it with coconut milk and cashew butter for a super creamy luscious base, with vanilla, bourbon, cinnamon and nutmeg.  It was so good I could have eaten it with a spoon like mousse.  But then I wouldn’t have had any for the cupcakes!  I frosted them piled high, because that is how I like them, and topped them off with some vegan sprinkles I recently bought.  They were so good!  They tasted like eggnog, but in cupcake form!  The cake was the perfect consistency.  I am super picky, it can’t be too dry or too wet and dense, these were just right.  Not only that they were so much less time consuming to make than a cake, but just as delicious!  I hope you are all having a wonderful holiday!

    Vegan Eggnog Cupcakes 
    Makes 8 cupcakes

    Cake:

    • 3/4 cup plus 2 Tbsp Bob’s Red Mill all purpose gluten free flour
    • 3/4 tsp baking soda
    • 1/2 tsp baking powder
    • 1/4 tsp sea salt
    • 1/2 tsp cinnamon
    • 1/4 tsp nutmeg
    • 1 cup xylitol or maple sugar or coconut sugar (the last two yield a more brown cupcake)
    • 1/4 cup avocado oil
    • 1/2 cup almond milk or coconut milk at room temperature
    • 1 tsp pure vanilla extract
    • 1 Tbsp bourbon
    • 1 Tbsp lemon juice


    Frosting:

    • 3/4 cup full fat coconut milk at room temperature (you want the kind that is mostly thick, I used Thai kitchen organic)
    • 1/4 cup raw cashew butter
    • 1 tsp lemon juice
    • 3 Tbsp maple syrup
    • 1/4  tsp sea salt
    • 1/4 tsp cinnamon
    • 1/8 tsp nutmeg
    • 1 tsp pure vanilla extract
    • 1 Tbsp bourbon
    • 1/4 cup plus 2 Tbsp coconut butter, warmed to liquid


    For decorating:

    • Vegan sprinkles


    Instructions:

    1. Preheat the oven to 350F degrees and position rack in center of oven. Line 8 muffin tins with liners.
    2. Whisk flour, baking soda, baking powder, cinnamon, nutmeg, and sea salt in a large bowl to blend well.
    3. Whisk sugar, oil, milk, vanilla extract and bourbon together in small bowl to blend well, then whisk into the flour mixture until well blended. Whisk in vinegar and stir quickly.
    4. Transfer cake batter to prepared tins, then place in the oven, and bake until set and a toothpick inserted into the center comes out almost clean, about 20 minutes.  Remove from oven, let cool completely before frosting.
    5. Meanwhile, to make the frosting, combine all ingredients but the coconut butter in a food processor and process until smooth.  With the motor running, add the coconut butter and process a minute more.  Pour the cream into a bowl and let sit in the fridge until the consistency of whipped cream.
    6. Pipe the frosting on the cupcakes, sprinkle with sprinkles and enjoy!
    7. Store cake in the fridge.


    *If you make these with the xylitol do not feed them to dogs, as it is toxic to them.

  • Vegan Peanut Butter Cup Presents

    Vegan Peanut Butter Cup Presents

    I am obsessed with chocolate and peanut butter, it is no secret as I have probably 40 recipes featuring the combo on my blog.  But you know what my favorite chocolate and peanut butter dessert is? Just plain old PB cups.  Well, not plain, it is actually a party in my mouth when I eat one.  So for every holiday pretty much I find excuses to make some festive ones.  I have been seeing Reese’s peanut butter cups and peanut butter trees commercials, so that made me want some too.  But I don’t just got to the store and buy them, I make them at home because not only is it easy, they taste so much better in my opinion.   Well, I thought it might be nice to gift some as well this year, so I whipped up a batch.  I wanted to make them cute though, so I decided to make little peanut butter presents using square molds (well, actually it is a silicone mini brownie pan but same deal).

    These didn’t take long to make at all!  I melted down some good quality dark vegan chocolate to keep it simple, but of course if you wanted to make your own, by all means go right ahead (you can find a recipe to make your own HERE, just double the recipe, and leave out the hazelnuts and hazelnut butter).  I used my own home made peanut butter as well, and since I like a salty and sweet combo I didn’t even sweeten the filling at all, because the chocolate is sweet enough and I like the peanut butter just as is.  Of course if you like things a little sweeter, feel free to add a dash of maple syrup to it.

    The little chocolates came out lovely and I made some quick white chocolate colored with beet powder and matcha powder to pipe into bows on top of them so that they looked like little presents.  Don’t worry, you can’t taste the powders they just give them a lovely pastel color.  These peanut butter cups were so good!  The rich dark chocolate with the salty peanut butter is amazing, but that little dash of white chocolate on top makes them a little more mellow and creamy. I almost didn’t want to share.  Yes, and this recipe makes 20.  But of course, I am not greedy so I shared some.  If you know someone who loves peanut butter cups, impress them and make these for them for the Holidays!  Or maybe just for yourself, that is ok too. I would love to be gifted a box of these!

    Vegan Peanut Butter Cup Presents
    Makes about 20 candies

    Chocolate:


    Filling:

    • about 1/4 cup organic peanut butter refrigerated


    White Chocolate Bow:

    • 1 Tbsp raw cashew butter at room temperature
    • 2 Tbsp Dastony coconut butter warmed to liquid
    • 1/4 tsp pure vanilla extract
    • 1 1/2 tsp maple syrup at room temperature
    • pinch sea salt
    • red beet powder or matcha green tea powder for coloring


    Instructions:

    1. Melt the dark chocolate in the top of a double boiler until smooth.
    2. Spoon a little chocolate into the bottoms of 20 small square candy molds set on a tray, filling them about 1/4-1/3 full.  Place in the freezer until hard, about 10 minutes.
    3. Place the peanut butter in a pastry bag (or ziplock bag with the tip of corner cut off) and pipe into the center of the hardened dark chocolate layer (not too much though or it will ooze to the sides), then pour the remaining dark chocolate over it in the cups until the peanut butter is covered, and tap the tray on the counter to level it.  Place in the freezer to harden for about 15-20 minutes. Once hard, unmold and place back in the freezer while you prepare the white chocolate.
    4. To make the white chocolate bow, combine coconut butter, cashew butter, vanilla, maple syrup,  sea salt, and either a little bit of beet powder or matcha powder to color it (start with about 1/4 tsp and add more if you want it darker) in a bowl, and whisk until smooth.
    5. Take the white chocolate and put it in a ziplock bag, and cut off the corner to create a small hole.  Pipe the white chocolate into a bow onto the top of each square of chilled chocolate.
    6. Place them in the freezer until set, about 5 minutes.
    7. Enjoy! Store any extra in the refrigerator.


  • Vegan White and Green Bean Casserole

    Vegan White and Green Bean Casserole

    Casserole sounds so sophisticated, but in Minnesota we usually call things baked in the oven hot dishes.  So I find it funny that we don’t call green bean casserole green bean hot dish here! Green bean casserole is a Holiday staple, it was pretty much at every Thanksgiving and Christmas when I was little.  But I haven’t had it in many years because It usually isn’t vegan, and I am not a fan of using cream of mushroom soup in things.  Surprising I haven’t veganized it until now, but this year after Thanksgiving my Mom asked me if I could veganize them for her.  Also, she had a specific recipe she wanted me to veganize that had a mixture of green beans and white beans.  Because one can never have too many beans, and they have always been a big part of cooking for me and my Mom.  We used to always use them in soups and stews growing up, as well as on salads, or with pasta.  Pretty much a lot of our meals.  White beans were what we used the most, so this recipe is fitting for her.

    I veganized the recipe as well as made a few upgrades to make it even more delicious.  The original recipe had a bechemel sauce, but I made a creamy sauce from coconut milk and cashew butter with garlic, shallots, white wine, nutritional yeast, a touch of lemon and thyme.  It was super flavorful and delicious and you would swear that it had dairy in it!  It was perfect with the green and white beans, and tasted so much better than any cream of mushroom soup would have.

    Instead of the usual fried onions, the recipe I was veganizing had bread crumbs on top.  But I decided just bread crumbs were kind of boring, and so I used my home made bread crumbs mixed with hazelnuts and nutritional yeast.  It made for a satisfying crunchy topping!  The casserole turned out super delicious!  The green bean casserole I grew up eating was just ok.  But this one was so incredibly good.  I consider this a full meal in and of itself.  I mean, you have protein and fiber from the beans, plus they are a vegetable, and why not eat them in a creamy sauce like mac and cheese and call it a dinner?  Well, my Mom loved it as well, and I think this might end up being something that we make every year for the Holidays!  If you are still looking for a delicious side dish for this Christmas and Holidays, definitely consider this!

    Vegan White and Green Bean Casserole
    Serves 2-4

    Ingredients:

    • 2 tsp avocado oil, or olive oil
    • 2 small shallots, diced
    • 2 garlic cloves, minced
    • 1/2 tsp dried thyme
    • 2 Tbsp white wine
    • 3/4 cup full fat coconut milk at room temperature
    • 3/4 cup raw cashew butter*
    • 2 Tbsp nutritional yeast
    • 1 tsp lemon juice
    • 1/2 tsp sea salt (or to taste)
    • 1/4 tsp freshly ground black pepper
    • pinch of cayenne (optional)
    • 1 1/2 cups cooked cannelini beans
    • 16 oz frozen green beans, thawed (or fresh green beans, blanched)


    Topping:

    • 1 cup breadcrumbs
    • 1/2 cup chopped hazelnuts
    • 2 Tbsp nutritional yeast
    • 2 Tbsp avocado oil
    • 1/4 tsp sea salt


    Instructions:

    1. Preheat the oven to 375F degrees.
    2. In a large ceramic pan, heat the oil, and add the onions.  Sautee until soft and tender, about 10 minutes. Add the garlic, thyme and white wine and cook until the wine has evaporated.
    3. Whisk together the coconut milk, brazil nut butter, nutritional yeast, lemon juice, pepper, and cayenne in a bowl, then pour over the onions and cook until heated.
    4. Add the beans, and stir to combine.  Pour into a 2 quart oven proof baking dish.
    5. Mix the breadcrumbs with the hazelnuts, nutritional yeast, avocado oil and sea salt in a bowl for the topping.
    6. Sprinkle the breadcrumbs over the top of the beans, and place in the oven.  Bake until the top is browned, about 10-15 minutes.
    7. Serve!


  • Vegan Pfeffernusse Cookies

    Vegan Pfeffernusse Cookies

    One of my Mom’s all time favorite Christmas cookies is Pfeffernusse.  If you haven’t heard of them, the name means “pepper nut” but they don’t have nuts in them, they are just delicious little spice cookies rolled in powdered sugar.  And they are darn delicious!  Also, they are not too difficult to make.  No fancy piping or anything required!  Funny story though, when I was still in high school and college, my Mom and I used to go to the library and check out cook books and make recipes from them back in the days before everyone just googled recipes.  This included Christmas cookie recipes, and one time we chose to make a new recipe for pfeffernusse.  We were all excited for it, but it turned out to be a horrible flop.  The dough was way too dry and hard to roll and they baked up like rocks.  I think it was one of our worst cookie fails.  But that didn’t stop us from still loving the pfeffernusse, we just stuck to our other recipe from then on.

    I had never actually made a vegan version though.  Until last weekend that is.  I am surprised I haven’t, but I guess I was sort of afraid that they wouldn’t turn out the same as the originals.  Well, my Mom asked me if I could recreate them and I couldn’t say no.  I mean, what was the worst that could happen?  They couldn’t possibly be worse than the ones I made back in the day that were a fail.  So I went for it.  I looked at a many different recipes for them, then did my best to create a winning version.  Luckily it worked out the first time!  I love when that happens.

    The cookie base for these is filled with so many good aromatic spices, it smells wonderful when you are making them.  What keeps the dough soft is the molasses that they include in them.  Instead of the butter in the classic recipe, I used a mixture of coconut oil and avocado oil because I wanted them to stay soft at room temperature (coconut oil alone gets too hard sometimes in certain cookies).   It worked out just as I wanted!  The cookies baked up beautifully!

    They had to have the classic powdered sugar as well, but since that is not something I keep on hand since I try to stay away from refined sugars for the most part, I made my own powdered sugar concoction.  I used a mixture of finely shredded, dried coconut, xylitol (to keep it white), and cornstarch blended up really fine.  It worked out perfect and tasted so good on the cookies!  I think I actually like this version of the pfeffernusse better than the original, and my Mom loved them as well because of course I had to share them with her since they are one of her favorites! If you are a fan of any sort of molasses or spice cookies, you will love these!

    Vegan Pfeffernusse Cookies
    Makes about 18

    Ingredients:

    Cookies:

    • 2 1/2 cups gluten free all purpose flour
    • 1/2 tsp baking soda
    • 1 tsp cinnamon
    • 1 tsp ginger
    • 1/4 tsp ground cloves
    • 1/4 tsp ground cardamon
    • 1/4 tsp ground nutmeg
    • 1/2 tsp ground anise
    • 1/4 tsp ground black pepper
    • 1/4 tsp sea salt
    • 1/4 cup coconut oil (warmed to liquid)
    • 1/4 cup avocado oil
    • 3/4 cup xylitol or maple sugar or coconut sugar
    • 1/4 cup molasses
    • 1 Tbsp ground flax seed mixed with 3 Tbsp filtered water and allowed to sit for 15 minutes before using
    • 1 tsp pure vanilla extract


    Coating:

    • 1/2 cup finely shredded, dried unsweetened coconut
    • 1/4 cup xylitol or maple sugar or coconut sugar*
    • 1 1/2 Tbsp cornstarch or arrowroot starch


    Instructions:

    1. Preheat the oven to 350F degrees, and line a sheet pan with parchment.
    2. In a bowl, mix together the flour, baking soda, cinnamon, cloves, cardamom, nutmeg, anise, pepper, and sea salt.
    3. In a smaller bowl, whisk together the two oils, sugar, molasses, flax mixture, and vanilla.
    4. Mix the wet ingredients into the dry until well combined, and a uniform dough.
    5. Roll the dough into balls and set on a tray.  Place in the freezer for 20 minutes, until they are more firm.
    6. Remove from the freezer and place on the prepared baking sheet a few inches apart.
    7. Place the baking sheet in the oven and bake for about 15 minutes until the cookies are set.
    8. Meanwhile, while they are baking, to make the coating, combine the coconut, sugar, and cornstarch in a high speed blender and blend until smooth.  Put through the holes of a fine meshed strainer if there are any remaining lumps.  Place the coating in a bowl.
    9. When the cookies have finished baking, remove them from the oven, let cool a minute or two, then carefully roll each in the coating then place back on the tray.
    10. Let cool, and dust with a little more sugar if you wish (I just put it in a fine meshed strainer and tapped it to dust them).
    11. Enjoy!
  • Vegan Chocolate Mint Hazelnut Thumb Print Cookies 

    Vegan Chocolate Mint Hazelnut Thumb Print Cookies 

    I love making Christmas cookies.  When I was little, my Mom and I would always pick out many different kinds then spend the day in the kitchen listening to Christmas music making them and afterwards we would put them all in a big container to enjoy for the Holidays and to give away.  We would always make the classics, like pecan tassies, frosted vanilla sugar cookies, gingerbread cookies and pfeffernüsse (German “pepper nut” cookies, or spiced cookies rolled in powdered sugar), but we would also pick some new ones every year to try.  That was the most exciting part for me.  We used to get cook books at the library and page through them looking for new recipes.  I like to keep that tradition going.  Make a few favorites and whip up some new ones.  The only difference is that I usually come up with my own new recipes instead of finding them in cook books.  I still share them with my Mom though, she loves having cookies on hand to enjoy with her coffee mid-morning.

    Raw Guru recently sent me some goodies including some Rawmio Chocolate Mint Hazelnut Spread and I thought it would be just the thing to use in some Christmas cookies. I mean, mint kind of screams holidays.  Plus I love nut butter in cookies, it makes them rich, chewy and delicious!  What I ended up making were some delicious thumb print cookies.  I haven’t made any in a few years and in the past I have filled them with jam, but I thought the chocolate mint spread would be perfect as a filling!

    For the cookie dough, I modified the dough I use for my peanut blossom cookies swapping some hazelnut butter for the usual peanut butter and adding in cacao powder to make them chocolaty rich and delicious!  It was some bomb tasting dough too!  I always taste my cookie dough.  Not just because I love it and it is the best part of baking cookies, but to make sure I am not missing any ingredients.  Funny story, last week I was making some cookies and I was somewhat distracted and I ended up forgetting to add the sugar. It was a good thing I tasted the dough because I prevented having to throw away the batch of cookies!  Luckily I was still able to add it.  I make mistakes too sometimes so don’t feel bad if you ever have an off day in the kitchen!

    Back to the cookies though, they smelled amazing while baking!  As soon as they came out of the oven, I filled them with the Rawmio Chocolate Mint Hazelnut Spread and I could not wait to try them!  They looked so good!  I admit I did try one while they were warm and the filling was all oozy and gooey and it was amazing!  But if you want them to look nice I recommend waiting until they cook and the centers solidify completely.  They are soft, chewy, rich and chocolaty, and minty fresh!  These make perfect Christmas cookies!  If you are a chocolate fan definitely give these a try!

    Vegan Chocolate Mint Hazelnut Thumb Print Cookies 
    Makes about 14 cookies

    • 3/4 cups maple sugar or coconut sugar
    • 3/4 cups Dastony hazelnut butter
    • 1/4 cup coconut oil, melted
    • 1 Tbsp ground flax seed, and 3 Tbsp filtered water mixed together and allowed to sit for 15 minutes before using in the recipe
    • 1/2 tsp peppermint extract
    • 1 1/4 cups Bob’s Red Mill all purpose gluten free baking flour*
    • 1/4 cup Raw Guru cacao powder or unsweetened cocoa powder
    • 3/4 tsp baking soda
    • 1/2 tsp baking powder
    • Rawmio chocolate mint hazelnut spread (warmed to liquid if solid)*


    Instructions:

    1. Preheat the oven to 375F degrees. In a large bowl, whisk together the sugar, hazelnut butter, and coconut oil until well combined.  Add the flax mixture, peppermint extract, and whisk until smooth.
    2. Stir in all the remaining ingredients with a spoon, except for the hazelnut spread until smooth. The dough will be thick and soft.
    3. Form into 1 1/2 inch balls, and place on lined baking sheets a few inches apart.
    4. Place in the oven and bake for about 12 minutes until set.
    5. Remove from the oven and immediately press your thumb or the bottom of a small 1/2 tsp measuring spoon into the center of each to create an indentation (before they cool otherwise it won’t work).
    6. Spoon or pipe a little of the chocolate mint hazelnut spread into the center of each.  Allow to cool completely.


    *If you can not get the Rawmio spreads where you live, you can substitute 1/4 cup melted vegan dark chocolate whisked together with 2 Tbsp hazelnut butter, and 1/4 tsp peppermint extract until smooth.

    Notes:

    If you don’t like hazelnuts or can’t get hazelnut butter or make it, then you could use your favorite nut or seed butter, like almond butter for this recipe where the hazelnut is required.

    If you are not gluten free, you may use the same amount of whole wheat pastry flour in place of the GF flour.


  • Vegan Chocolate Hazelnut Swirled Pumpkin Pie

    Vegan Chocolate Hazelnut Swirled Pumpkin Pie


    I made a double chocolate pecan pie last weekend, and saved half in the freezer for Thanksgiving, and I thought I should make a pumpkin pie too, since it wouldn’t be right not to have both.  I don’t know about you, but when I was a kid, I thought that the dessert was the best part of the Thanksgiving meal, and I would always have a slice of each pie.  Usually pumpkin, pecan and apple. Now I usually make the apple pies earlier in the Fall and just make pecan and pumpkin because they seem more special and Thanksgiving exclusive.  This year I seem to have a chocolate theme going on.  I made the pecan pie with the chocolate I mentioned earlier and Raw Guru sent me some Dastony hazelnut butter and I was inspired to make some chocolate hazelnut pecan pie.  Their hazelnut butter is super silky and perfect for using in desserts.  Plus I figured “nutella” and pumpkin sounded amazing together so why not try it?!

    First, I made my classic pie crust using gluten free flour and coconut oil for the fat.  This always turns out good for me, and the coconut oil gives it a nice sweetness that is perfect for pie.  For the hazelnut part, I wanted a combination that was rich, creamy and delicious so I whisked together the hazelnut butter with some coconut cream and cacao powder plus a little maple syrup to sweeten and it was heavenly!  Before being baked, it tasted like smooth hazelnut mousse. Sooo good.  Yes, I always have to sample all of the elements of my desserts to make sure they are good before baking.  I am mainly testing to see if they are sweet enough or spiced enough in the case of the pumpkin part of this pie, plus it is kind of a little treat that only the baker gets to enjoy.  Same thing with licking the bowls. Best part of baking next to enjoying the finished product. You may be wondering how you get a pumpkin pie to set up without eggs, well for this one it is a combination of cornstarch and agar powder and it works wonders once the pie cools.  It sets up beautifully into a smooth custard.

    This pie smelled heavenly while baking.  The aromas of chocolate, nuts and spice filling my kitchen!  Unfortunately I had to wait until the next day to enjoy it because I baked it at night and it had to cool completely and set.  But it was well worth the wait!  This was seriously one of the best pumpkin pies I have tried/made.  I know I say that every year, but this was amazing!  A silky smooth texture, a layer of rich creamy chocolate filling, and sweet spiced pumpkin filling in a buttery tender crust!  Sooo good!  This is so much better than I remember pumpkin pie tasting when I was younger.  It was probably my least favorite of the 3 we always ate (pumpkin, pecan, apple), but now I think they are all tied. If you haven’t made your pumpkin pie for Thanksgiving yet, consider making this one.  I have a feeling you and your family will love it!

    Vegan Chocolate Hazelnut Pumpkin Pie
    Makes one 9 inch pie

    Crust:


    Chocolate filling:


    Filling:

    • 2 cups organic cooked pumpkin (canned is ok too), packed
    • 1/3 cup pure maple syrup
    • 3/4 cup full fat organic coconut milk
    • 2 tsp coconut oil
    • 1 1/4 teaspoon ground cinnamon
    • 1 teaspoon ground ginger
    • 1 /4 teaspoon ground nutmeg
    • 1/4 tsp ground cloves
    • 1/4 teaspoon salt
    • 1 1/2 tablespoons cornstarch
    • 3/4 teaspoon agar powder


    Instructions:

    1. To make the crust, in a large bowl, mix together flour, sugar, sea salt, and spices. Cut in coconut oil with a pastry blender or 2 knives until it is in pea sized pieces. Mix in  just enough water to create a smooth dough that holds together but isn’t too sticky. Add more water if needed, and knead slightly until a smooth dough is created. Roll out into a 10 inch circle on a sheet of parchment paper, then use the paper to help you transfer it to an 8 inch pie dish.  Flute the edges, and set aside in the refrigerator.
    2. Pre-heat the oven to 350F degrees.
    3. To make the chocolate filling, whisk together all ingredients until smooth and set aside.
    4. To make the pumpkin filling, place all ingredients in the blender and blend until smooth.
    5. To assemble the pie, pour most of the chocolate hazelnut filling layer over the crust (reserving about 1/4 cup), then pour the pumpkin filling over that.  Drop the remaining chocolate filling over the pumpkin filling in about 1/2 tsp amounts and swirl with a knife to create a pretty design.
    6. Place in the pre-heated oven and bake for about 1 hour and 20- 1 hour and 30 min. until the edges of the crust are lightly brown, and pie is still jiggly in the center but set at the edges (it will firm up once cool).  Allow to cool completely, then chill in the refrigerator for a few hours at least before serving (I chilled mine in the refrigerator overnight).
    7. Store any leftovers in the refrigerator.


  • Vegan French Silk Pie

    Vegan French Silk Pie

    When I was little, French silk pie was one of my favorite things ever. Luscious mousse like chocolate filling covered in fluffy whipped cream and chocolate it was heavenly!  And, at that point in my life I would always choose a cream pie over a fruit one any day.  They are about equal now, but nothing beat a cream pie back then.  It felt special because it wasn’t something I ate a lot, it was something that my family would buy for special occasions. I surprisingly have never made a vegan version, but I decided it was about time because I was craving one last weekend.  I knew I could make something even better than the original, and I went for it!  Perfect timing too because this is just the sort of thing you would want to include with your Easter meal if you wanted to go the more traditional route and didn’t want a cake.

    It wasn’t difficult to make at all, and I had all of the ingredients on hand.  Which is another reason I chose to make it last weekend.  I don’t know about you, but if I can make something without having to buy anything and it saves me money that makes me happy!  This pie has a press in no-bake crust, which makes it easier to make.  I don’t always like to fuss with blind baking crusts, so this is the route I usually take.  I made a chocolate crust for this one, because why not make it extra chocolaty!  One can never have too much chocolate, right?!  This crust is actually gluten free too, because I used buckwheat in the crust instead of oats.  But if you prefer oats and that is what you have on had, you can use those instead.  Or walnuts will work as well (as noted below).  The crust comes together in about 2 minutes and it tastes kind of like chocolate cookie dough.  The filling has a coconut milk cashew base and it is heavenly once the cacao powder is added.  Pretty much like a rich chocolate mousse, and I could eat it just like that.

    But I added a layer of fluffy whipped coconut cream like the original pie had, and sprinkled it with mini chocolate chips.  It was sooo good!  I enjoyed this version even better than the one I had as a kid, because it tasted better to me, and I still felt good after eating it.  Not like I was going to go into a sugar coma.  I think this would be the perfect addition to your Easter feast if everyone is a chocolate fan!  I hope you all are having a wonderful Spring so far!

    Vegan French Silk Pie
    Makes one 8 inch pie

    1 9 inch pie plate or 1 9 inch round removable bottom tart pan

    Crust:

    • 3/4 cup finely shredded dried coconut
    • 1 cup sprouted, dehydrated buckwheat groats, or raw walnuts
    • 1/4 cup raw cacao powder or unsweetened cocoa powder
    • 1 cup soft pitted medjool dates (if they are not soft, soak them 30 minutes and drain well before using)
    • 1/4 tsp sea salt
    • filtered water as needed


    Filling:


    Cream Topping:


    Topping:


    Instructions:

    1. For the crust, combine all ingredients in the food processor until finely chopped and starting to hold together when squeezed (if it doesn’t you may need to add a little filtered water 1 Tbsp at a time).
    2. Press the mixture into a 9 inch removable bottom tart pan or pie pan greased with coconut oil.
    3. For the filling, combine all ingredients in a high speed blender and blend until smooth. Pour into the crust.
    4. Place in the freezer until set, about 2 hours.
    5. Meanwhile, for the cream topping, combine all ingredients in a blender and blend until completely smooth. Pour into a bowl and place in the freezer until it is thick like whipped cream (whisking every so often), about 45 minutes.
    6. Once the cream is ready, spread over the top of the pie.
    7. Scatter chocolate chips or chocolate chunks over the top, and serve!
    8. Pie keeps refrigerated for 1 week in a container.
  • Vegan Grinch Cupcakes

    Vegan Grinch Cupcakes

    Everyone has their favorite classic Holiday movie.  I have a few that I have to watch every year, including “White Christmas”, “Charlie Brown Christmas” and “How the Grinch Stole Christmas”.  The latter of which is my favorite.  There are so many things that I love about it.  How happy the Whos are in Whoville, how they get so excited to celebrate every year, and how they all seem to be filled with joy and love to start with.  Also, the Grinch himself is pretty comical, and his song even more so…”You’re a mean one, Mr. Grinch…” you know the one.  And the story has a happy ending with the Grinch’s heart growing and him finally accepting Christmas.  But I only like the old version of the movie, the old classic animated one.  The new one with Jim Carey is ok, but the animation on the old one is what makes it so much more awesome.  They just don’t make animated movies like they used to.  I mean, it is pretty impressive that was all drawn by hand and not computer generated like it is now.  Anyways, this year I decided to make some Grinch cupcakes in honor of my favorite Holiday movie.

    I thought I might as well make them delicious as well, so I flavored them chocolate, mint and matcha.  It is a heavenly combination.  I drink matcha daily so I always have it on hand. Peppermint kind of seems essential this year, and chocolate I don’t need to explain, it is always good no matter what it is in dessert-wise. For the cupcakes, I baked up my classic date sweetened chocolate cake because it is quick and easy to make in a blender, and I can not resist anything sweetened with dates.  It was just the right consistency once baked. Moist, soft and light as cupcakes should be if you bake them the right amount of time.  To make these “Grinch” cupcakes, I needed to color the frosting green, which is why I chose matcha.  Now, of course I could have used food coloring or spinach powder but that doesn’t give them the lovely flavor that matcha has. I added in some peppermint as well and it was so good!  I use a combination of coconut milk and cashew butter in my frosting, and it turns out like buttercream frosting, which was always classic go-to before going vegan.

    They were a lovely green color, but in order to complete them, they needed the red heart, the one that grew 3 sizes in the movie.  So, I tinted some white chocolate red, and made cute little hearts to top them off.  They were super delicious!  Rich dark chocolate cake, fluffy minty frosting scented lightly with matcha…right up my alley, I was very pleased with how they turned out.  These would even make the Grinch happy I think!  I hope you are all having a wonderful Holiday season!

    Vegan Grinch Cupcakes  (Chocolate Matcha Mint Cupcakes)
    Makes 16 cupcakes

    Ingredients:

    2 8 hole muffin tins

    16 cupcake liners

    Cake:

    • 1 1/2 cups Bob’s Red Mill Gluten Free All Purpose Flour
    • 1/4 cup cacao powder or unsweetened cocoa powder
    • 1 1/2 tsp baking soda
    • 1 tsp baking powder
    • 1/2 tsp sea salt
    • 1 1/4 cups packed soft medjool dates, pitted, soaked in water for 30 minutes and drained
    • 1/4 cup almond butter
    • 1 tsp pure vanilla extract
    • 1 tsp peppermint extract
    • 2 cups filtered water
    • 2 Tbsp apple cider vinegar


    Frosting:

    • 1 15 oz cans full fat organic coconut milk, at room temperature
    • 1/2 cup raw cashew butter
    • 1/4 cup maple syrup
    • 1/8 tsp sea salt
    • 1 tsp pure vanilla extract
    • 1/2 tsp peppermint extract
    • 3 Tbsp matcha powder (or as needed)
    • 1/2 cup plus 2 Tbsp raw coconut butter (NOT OIL), warmed to liquid


    Candy hearts:

    • 1/4 cup vegan white chocolate, chopped
    • natural vegan red food coloring


    Directions:

    1. Preheat the oven to 375F degrees and position rack in center of oven.
    2. Line muffin tins with cupcake liners.
    3. Whisk flour, cocoa powder, baking powder, baking soda, and sea salt in a large bowl to blend well.
    4. Place dates, water, almond butter, and vanilla extract into a blender, and blend until smooth, then whisk this blended mixture into the flour mixture until well blended. Whisk in the cider vinegar until bubbles form.
    5. Pour the cake batter into prepared tins, and place in the oven.
    6. Bake cakes until set and a toothpick inserted into the center comes out almost clean, about 12-15 minutes.  Remove from oven, and let cool completely.
    7. Meanwhile to make the frosting, combine all ingredients in a blender and blend until smooth.  Pour into a bowl and place in the freezer allowing it to chill until the consistency of whipped cream, (which usually takes about 45 minutes depending on how warm it has gotten) whisking about every 15 minutes.
    8. Meanwhile, to make the hearts, melt the white chocolate, and whisk in the food coloring.  Place in a pastry bag or ziplock bag with the corner cut off and pipe into little hearts on a piece of parchment.  Place in the freezer to harden.
    9. Place the frosting in a pastry bag once it has chilled, and pipe over the cupcakes (or spread it over if you don’t prefer to pipe).  Place a heart on top of each one.  Enjoy!
    10. Store any leftover cupcakes in a covered container in the refrigerator.


  • Vegan Chocolate Gingerbread Bourbon Balls

    Vegan Chocolate Gingerbread Bourbon Balls

    Sometimes you have those days where you are a disaster in the kitchen and in fact you should probably stay far away from it.  But unfortunately sometimes you don’t have a choice, you have to get things done, even if you are a clutz or super forgetful that day because you have other stuff on your mind or maybe are just trying to work too fast.  Well, I have those days sometimes.  The ones where I spill an entire thing of protein powder on the floor, burn my quinoa, and accidentally touch part of the oven on my arm and burn it.  You know, those types.  Well, I was having a bad cooking day a few week back when I decided to make some molasses spice (or cheater gingerbread) cookies.  The dough turned out wonderful  and they were baking up beautifully but then I got distracted and they got over baked.  No, they were not burnt, simply just super hard when they cooled down.  I hate cookies that are too hard. Molasses cookies should be somewhat soft, so I was super disappointed.  But not to fret, I figured I would save them and use them for something.  And I figured out just the thing.  Bourbon balls!  Back in the day I made several different types of liquor balls around the Holidays.  You know, like rum balls, bourbon balls etc.  I even made a cherry vodka ball which was really good.  But my favorite were always the bourbon balls.  Well, it has been a really long time, like maybe 7 years since I have made them so I figured it was about time this year.

    So, I blended up the cookies to a fine powder, and they were the perfect base for bourbon balls.  I decided that these needed to be chocolate bourbon balls, because those are my favorite so I added some cocoa powder too.  Plenty of bourbon, some maple syrup for a little more sweetness and the “dough” it made was really delicious. I had to have a little shot of bourbon while I was making them too, because why not?  I should have just made a hot toddy in the style my Mom used to with bourbon, because tis the season but I was feeling a little lazy.  I rolled them into little balls, chilled them for a while in the freezer and they were ready for their coating.

    I mean, yes I could have coated them with cocoa powder, but dark chocolate is so much better. So I melted down my favorite brand and they took a bath in it.  Once they were all set, they were lovely.  They tasted wonderful too.  Boozy and rich and chocolaty with the warming spices of gingerbread.  These are very warming little treats between the bourbon and the spices.  If you over baked your gingerbread cookies, now you know what to do with them!  But even if you didn’t these are delicious so maybe you should sacrifice a few for this treat.

    Vegan Chocolate Gingerbread Bourbon Balls
    Makes 10

    Ingredients:

    • 2 cups vegan gluten free gingerbread cookie crumbs (or molasses cookie crumbs)
    • 1/4 cup cocoa powder
    • 2 Tbsp bourbon (make sure it is vegan on Barnivore)
    • 2 Tbsp maple syrup
    • 1 1/2 cups chopped vegan dark chocolate


    Directions:

    1. Place the gingerbread crumbs and cocoa powder in a food processor and process until very fine like flour.
    2. Add the bourbon and maple syrup and blend until smooth and the consistency of dough.
    3. Roll into balls, and place on a parchment lined tray.  Place in the freezer and freeze until firm, about an hour.
    4. Melt the dark chocolate in the top of a double boiler, and then dip the balls one by one into it, letting the excess drain off (I like to set them on a fork to do so), then place them back on the tray.  When they are all done, place the tray in the freezer until they are set.
    5. Store them in the refrigerator for up to 1 month.
  • Mini Vegan Swedish Rice Rings with Raspberry Sauce

    Mini Vegan Swedish Rice Rings with Raspberry Sauce

    When I was little, my Mom used to make one of the most delicious desserts for the Holidays, a Swedish rice ring. No, we are not Swedish, my Mom’s side of the family is German in fact, but she got the recipe from a coworker back in the day and it was a keeper. It was like the most delicious rice pudding, scented with vanilla and almond, shaped into a beautiful ring with a bundt pan. It was topped off with sweet raspberry sauce, which made it even better.  Both me and my Mom’s favorite fruit is raspberries.  So, I would beg her to make it every year.  She made it from the time I was little, until at least high school.  I never actually watched her make it, I just enjoyed the results.  It kind of went by the wayside, being replaced with other things, like cookies I wanted to make and whatnot, but last week I thought about it, and how good a vegan version of it might be.  Funny I haven’t thought to veganize it until now, because it was fairly easy to do so.

    I am not sure what kind of rice my Mom used, but I went for the jasmine rice I had in the cupboard.  It has a sweet aromatic aroma and it was perfect for the rice pudding.  Bonus, it cooks up way faster than brown rice, and this had to have a white rice in it as was tradition.  I combined it with a coconut cream mixture I usually use for “whipped cream”, thickened it with coconut butter, and it was perfect!  It was so delicious with the almond extract and vanilla, and it smelled amazing!  I could have eaten it just like that, all fluid and whatnot like a bowl of sweet risotto, but I poured it into mini molds.  Mini molds because I don’t have a lot of people to feed it to, so they were perfect for sharing.  The longest part of this recipe is simply waiting for it to firm up in the refrigerator. But it is so worth the wait!

    I made a simple raspberry sauce to top it off with and it was lovely once drizzled with it! It was sweet and delicious just like my Mom’s rice ring but without all of the animal products.  The original one had milk, butter, gelatin and whipping cream. But I did not even miss it, the vegan version was so good!  I had to share it with my Mom of course, and she loved it as well.  If you are looking for a Holiday dessert that is a little different, give these a try!

    Mini Vegan Swedish Rice Rings with Raspberry Sauce
    Makes 6

    Ingredients:

    Rice ring:

    • 1 1/4 cups jasmine rice
    • 1 3/4 cup filtered water
    • 1 15 oz can full fat organic coconut milk
    • 3 Tbsp maple syrup
    • pinch sea salt
    • 1 tsp pure vanilla extract
    • 1 tsp almond extract
    • 3/4 cup plus 2 Tbsp coconut butter, warmed to liquid


    Raspberry Sauce:

    • 1 1/2 cups fresh or frozen (and thawed) organic raspberries
    • 2 Tbsp maple syrup


    Instructions:

    1. To cook the rice, combine it with the water in a pot, and bring to a simmer.  Cover, and cook until all of the water is absorbed and the rice is really soft, about 15-20 minutes or so.
    2. Stir in the coconut milk, maple syrup, sea salt, vanilla and almond extracts, and coconut butter, and stir until very well blended.  Remove from heat.
    3. Grease 6 mini bundt pans (mine are silicone, and I recommend it), and pour the rice mixture into it.  Place in the freezer for a few hours until they are set up completely.
    4. Meanwhile, to make the raspberry sauce, mash the berries with the maple syrup in a bowl until the consistency of jam.
    5. Unmold the rice rings from the pans, and arrange them on plates, flat side down.
    6. Pour the raspberry sauce over them, and enjoy!
    7. Store any extras in the refrigerator, covered.
  • Vegan Dark Chocolate Cranberry Pistachio Brownie Cookies

    Vegan Dark Chocolate Cranberry Pistachio Brownie Cookies

    Making Christmas cookies with my Mom when I was little was one of my favorite parts of the Holidays.  We would have the old family favorites like the pfeffernusse cookies, or my Grandma’s sugar cookie recipe (which was the most delicious I had ever tasted), or the pecan tassies, which were my Mom’s favorite.  But often times we would try new ones as well.  We would check out cookbooks at the library filled with cookie recipes, or browse through old ones we had at home and find something exciting and new.  Some of the new cookie recipes were not so good or didn’t turn out sometimes, so we never made them again. But other times they turned out awesome and we decided to add them to our list of things to make for the next year.  A couple of Martha Stewart’s cookie recipes stuck, like her gingerbread and cranberry noels (which were little butter cookies with cranberries and pecans).  I still love trying new cookie recipes around the holidays, and there are just a few I make every year, like peanut blossoms, and molasses spice cookies, because those two are my favorites.  But now, instead of browsing cookbooks for new cookie ideas I come up with ideas in my head and then try to make them.  They usually turn out, and those are the ones I share with you.  I too have flops sometimes though that end up in the garbage and it makes me sad because I hate wasting ingredients, but I don’t want to eat something that isn’t good.

    Well, luckily that hasn’t happened to me for a while, and the cookies I made a few days back were a big success!  I always like to make something chocolaty too, so I decided to make some Vegan Dark Chocolate Pistachio Brownie Cookies!  They are like chocolate chocolate chip cookies basically, so soft and delicious, but a little crispy at the edges and definitely decadent.  I call them brownie cookies, because they taste like brownies, and if you don’t over-bake them they have sort of a brownie like texture.  This dough contains plenty of cacao powder so it is intense and rich.  I sweetened it with coconut sugar and it gave it almost a caramel flavor too.  I stirred in dark chocolate chips too because I can not resist warm cookies with gooey chocolate chips.  But let me tell you the dough was delicious even before I baked them, and eating cookie dough is the best part of baking cookies as far as I am concerned.  Eating the warm cookies is second best.

    My kitchen smelled amazing while these baked, like the aroma of brownies or chocolate cake. It is such a happy smell!  These cookies are really easy to make, and in fact it took me only about 30 minutes to make them from start to finish not including cooling time.  Not that I let them cool long, because they are so good warm. These would make a great edible gift for anyone that loves chocolate, or as part of a Holiday cookie tray.  I hope you are all having a wonderful holiday season, and getting to enjoy baking some delicious things.  And, of course I hope you try out these cookies!

    Vegan Dark Chocolate Cranberry Pistachio Brownie Cookies
    Makes 2 dozen cookies

    Ingredients:
    • 2 Tbsp ground flax seed
    • 1/4 cup plus 2 Tbsp filtered water
    • 1 cup virgin coconut oil, warmed to liquid
    • 1 1/2 cups coconut sugar
    • 1 teaspoon vanilla extract
    • 1 cup cacao powder
    • 1 teaspoon baking soda
    • 1/2 teaspoon sea salt
    • 2 1/2 cups all purpose gluten free flour
    • 1/2 cup pistachios
    • 1/2 cup dried cranberries
    • 1 cup vegan dark chocolate chips

    Instructions:

    In a small bowl, whisk together the flax seed and filtered water.
    Meanwhile, in a large bowl, coconut oil with sugar and mix until well combined.
    Mix in the vanilla extract and flax mixture until well combined.
    Add the cacao powder, baking soda and salt then the flour, a cup at a time, mixing between each addition, until well combined.
    Mix in the pistachios, cranberries, chocolate chunks.
    To bake, Preheat your oven to 350 degrees. Line 2 large baking sheets with parchment paper. Roll balls into about 1 inch balls, and place on prepared cookie sheets a couple inches apart. Bake for about 10-12 minutes, until puffed and just starting to brown slightly.  Remove from the oven and let cool on the pan a few minutes, then remove to a wire rack to cool.  Repeat with remaining cookies and let cool completely.
  • Vegan Christmas Tree Pizza

    Vegan Christmas Tree Pizza

    The ground is covered in snow, and I am listening to Christmas music all day at work, all of my Christmas presents are bought, but for some reason I still can’t believe Christmas is almost here!  The year went by so fast, it seems like it was just Summer.  Anyways, I am trying to be festive and making fun stuff, so I decided to make a Christmas tree pizza a few nights ago on my day off.  We will get to that in a minute though.  Pizza was a big part of my life before going vegan.  There was a point in time where pizza was made every week at my house, soon after I was gifted a pizza stone.  I would choose different toppings every week, almost never repeating them to keep it interesting.  Some were just ok, but other combinations were amazing.  I learned that I liked fruit on pizza, especially strawberries and pineapple because they become sweet and delicious when roasted and it is a wonderful contrast with the salty cheese.  I also learned that I love lots of veggies on pizza. I have tried almost every kind, and one of my favorites is winter squash.  No plain cheese pizza for me, which is funny because that was my favorite as a child, with extra cheese always.  Back to that Christmas tree pizza, I made it using ingredients that I had on hand that were colorful.

    I figured I might as well include the cooked squash I had on hand, since it is my favorite.  But that wasn’t enough on it’s own, it needed more.  So I made a quick simple chunky tomato sauce to go on it as well.  And, I had to add something healthy and green, so I added arugula after baking.  It is my favorite green, so I always have some on hand in my refrigerator and try to eat it daily.  On a side note, it is awesome stirred into your soup just before serving.   The pizza had to have cheese as well, so I used some home made vegan mozzarella I had on hand. I often times make a batch, then freeze half and use it later.  It makes the pizza making process a little faster the second time around.

    I made a simple gluten free dough, and shaped it into a tree.  It looked lovely with the red and green very festive!  But most importantly, it baked up nicely and it was super delicious.  I don’t even miss regular pizza with dairy cheese, this type of pizza is so much better! Not only that, your tummy will be happier after eating it because it is easier to digest than dairy.  As a side note, if you don’t prefer to make this gluten free, you can swap it with whole wheat pastry flour.  I hope you give this pizza a try, and I hope you are all having a wonderful Holiday season!

    Vegan Christmas Tree Pizza
    Makes one 14 inch pizza

    Vegan Mozzarella Cheese:

    • 1 15 oz can full fat organic coconut milk
    • 2 Tbsp arrowroot starch
    • 1/4 plus 1 Tbsp filtered water
    • 3 Tbsp agar flakes or 1 Tbsp agar powder
    • 1 Tbsp lemon juice
    • 1 tsp sea salt or Himalayan salt
    • 1 Tbsp virgin coconut oil
    • 1 tsp guar gum


    To make the cheese, heat the coconut milk in a saucepan until it comes to a simmer.  Meanwhile, dissolve the arrowroot starch in the water and set aside.Once the coconut milk has come to a simmer, add the agar flakes, and heat until they are dissolved (mine took about 8 minutes, if you are using the powder, it should dissolve within one minute). Next, add the lemon juice and sea salt to the coconut milk.  Mix the coconut oil with the guar gum so that the guar gum does not clump up.  Turn off the heat and add the arrowroot mixture, guar gum and coconut oil. Whisk for about 30 seconds, then pour into a silicone mold (I used a loaf pan, but if you had another shape you would like to use go ahead). Refrigerate for a few hours until firm, then pop out of the mold. You will need half the cheese for this recipe, reserve the other half for another use in the fridge, wrapped in an airtight container.  Shred the half you will be using into a bowl, and keep in the refrigerator until ready to use.


    Tomato Sauce:

    • 2 tsp olive oil
    • 2 garlic cloves, minced
    • 1 1/2 cups organic diced tomatoes (canned is fine)
    • 1/2 tsp each basil and oregano
    • sea salt to taste


    Heat the olive oil over medium heat in a small pan, add the garlic and allow to cook until fragrant, about 30 seconds.  Add the tomatoes, herbs and sea salt and cook for about 10 minutes until the tomatoes have started to break down.  Remove from heat and set aside.


    Pizza Dough:

    • 1 1/2 cups organic whole wheat pastry
    • 1 Tbsp olive oil
    • 1/2 tsp sea salt
    • 1/2 cup plus 1 Tbsp filtered water


    To make the pizza crust, combine the flour, and sea salt in a bowl, and whisk until well blended. Add the oil and water, and mix in until you have a soft dough.  Turn out onto a sheet of parchment paper with a light dusting of flour, and roll out into Christmas tree shape.  Set aside.


    For Pizza Assembly:

    • olive oil
    • 1 cup cooked butternut squash, cubed
    • fresh arugula leaves


    Pre-heat the oven to 400F degrees.  Set a pan on the center rack with an upside down sheet pan, or a pizza stone set on it. Brush the crust with olive oil, sprinkle with sea salt, and slide the parchment with the crust on it onto the stone.  Bake crust for 10 minutes, then remove the crust from the oven (still on the parchment). Top with the tomatoes and squash, then the cheese, making sure it is all evenly distributed.  Place the pizza in the oven, turn up the temperature to 475F and bake for 20-25 minutes until the cheese is bubbling and starting to brown (keep an eye on it after 15 as some ovens cook faster than others). Remove the pizza and parchment from the oven, slide pizza onto a cutting board or plate, scatter arugula over the top, slice and enjoy!

  • Vegan Peppermint Swirl Ice Cream Cake

    Vegan Peppermint Swirl Ice Cream Cake

    I know it is Winter, and it is chilly outside, but I still love to enjoy ice cream when I am home and all nice and warm in my pjs.  So, I still make ice cream year round, because it is fun to come up with new and exciting flavors, and I need something to serve with my fruit crisp, or pie.  It dawned on me though, I haven’t made a Winter ice cream cake in a long time.  You know, like a Dairy Queen ice cream cake with the crunchy bottom and smooth ice cream filling.  I used to love those as a kid.  Well, mostly just the crunchy bottom and fudge crunch layer in the middle that they had because their vanilla ice cream did not taste like real vanilla to me.  So, anyways, last weekend I decided to be ambitious and make an ice cream cake instead of just scoop-able ice cream. I thought it should have a Holiday theme, and I had 3 ideas of flavors to make, gingerbread, eggnog, or peppermint, but I decided on the peppermint because I thought I could have more fun with color.  Plus, I haven’t made anything peppermint in a while, and I love it this time of the year. I even put peppermint oil in my diffusers in the car and in my house because it smells so festive and happy.

    So, I thought it was the perfect flavor for my cake.  I made a crunchy crust for this ice cream cake with no refined ingredients, unlike the ones I enjoyed as a kid. I know it is traditional to use Oreos or something, but I  have never really been a fan of those, they have lots of artificial ingredients in them.  I also did not want to make cookies simply to crush them up because that was just too much work. So I used ingredients I had on hand to make a chocolate crust which was pretty much what I use for my raw cheesecakes sans the cacao powder.  It is the perfect thing to showcase an ice cream cake on, and it is easy and fast to make.  For the filling, I used a mixture of coconut milk and cashew butter to give it a silky smooth texture like real ice cream.  I sweetened it with maple syrup, and added vanilla and peppermint extracts and it was super delicious even before I froze it.  I mixed beet powder into half of it to give it a candy cane swirl look once finished and it turned out lovely!  If you don’t have beet powder for this recipe, you can use red food coloring, just make sure it is natural.

    Lastly, I wanted this cake to have a fudge element, so I topped it off with a gooey sweet chocolate fudge.  It was the type of thing you would make a delicious ice cream sundae with.  I then sprinkled the cake with some peppermint white chocolate and it turned out even more lovely than I thought it would!  Originally I was going to buy some candy canes just for garnish but I really don’t even care for them and they are pretty sugary and I didn’t want to buy a whole pack just to use one.  So I made the white chocolate instead.  It was a good choice because it tasted wonderful with the cake! The cake was heavenly!  Just the right amount of peppermint and vanilla, sweet, creamy and delicious that gooey fudge, rich white chocolate and crunchy crust the perfect additions.  If you are in the mood for ice cream for your Holiday dessert, give this a try!

    Vegan Peppermint Swirl Ice Cream Cake
    Makes One 8 inch cake

    Crust:

    • 3/4 cup organic gluten free rolled oats
    • 3/4 cup finely shredded dried unsweetened coconut
    • 3 Tbsp unsweetened cocoa powder
    • 3/4 cup soft pitted medjool dates (soaked in filtered water if not soft for 30 minutes and drained well.)
    • 3 Tbsp almond butter
    • 1/4 tsp sea salt


    Ice Cream:

    • 2 15 oz can full fat coconut milk
    • 1 cup raw cashew butter
    • 2/3 cup maple syrup (or to taste)
    • 1 tsp peppermint extract
    • 1/4 tsp sea salt
    • 1 tsp pure vanilla extract
    • 2 Tbsp beet powder or a few drops natural vegan red food coloring


    Fudge:

    • 1/3 cup almond butter
    • 1/4 cup maple syrup
    • 1/4 cup unsweetened cocoa powder
    • 1/4 tsp sea salt
    • 2 Tbsp filtered water (or as needed)


    Assembly:

    • vegan white chocolate*
    • vegan chocolate chips


    Instructions:

    1. Oil a 8 inch spring form pan and line with parchment paper.
    2. To make the crust, combine all ingredients in a food processor and process until fine and starting to hold together when squeezed. Once it is at that stage, press it into the bottom of the prepared pan.  Set aside.
    3. To make the ice cream, combine all ingredients but the beet powder in a high speed blender or food processor and blend until very smooth (if you are using a food processor and it still has little bits you may want to strain it through a fine meshed strainer to remove them).
    4. Pour into a bowl and place in the freezer for about 30 minutes or until chilled, whisking after 15.
    5. Divide between 2 bowls, and whisk the beet powder into one of them.
    6. To assemble the cake, pour the two different colors of filling into the center of the pan by the 1/4 cup, alternating between the two until it is full.
    7. Place in the freezer until firm, about 6 hours.
    8. Whisk together the fudge until smooth (if it is too thick add a little more water, too thin a little more cocoa powder, you want it pour-able but not too runny).
    9. When ready to serve, pour the fudge over it, sprinkle with the white chocolate and chocolate chips, and enjoy!
    10. Store any leftover cake in the freezer in an airtight container.


    *You may use store bought vegan white chocolate or make your own, this is the white chocolate recipe I used:

    Vegan Peppermint White Chocolate

    • 1/4 cup cacao butter (2 oz)
    • 3 Tbsp raw cashew butter
    • 1/3 cup coconut butter
    • 1 tsp pure vanilla extract
    • 1/2 tsp peppermint extract
    • 3 Tbsp maple syrup (or to taste)
    • 1/8 tsp sea salt
    • 1 Tbsp beet powder, or a few drops natural vegan red food coloring


    Instructions:

    1. Combine cacao butter, cashew butter, vanilla, peppermint, maple syrup,  and sea salt over a double boiler, and whisk until smooth.
    2. Divide in half, and whisk the beet powder or food coloring into one bowl until even in color.
    3. pour the two different colored chocolates into the pan, alternating between the two and swirl them, then place them in the freezer to set.
    4. Chop into pieces.
    5. Store in an airtight container in the freezer for up to a few months.

  • Cinnamon Maple Chestnut Pecan Butter

    Cinnamon Maple Chestnut Pecan Butter

    We have all heard the Holiday song with the line “Chestnuts roasting on an open fire…” but how many of us have actually tried chestnuts?  I admit, I did not try them until I was about 21 when I saw them at the local co op, and decided to be adventurous and try them.  I am all for trying any fruit, vegetable nut etc. that is completely vegan.  I had no idea how to prepare them and I had to look it up in a cookbook, which ended up being the Martha Stewart Holiday cookbook I had gotten from the library.  I roasted them in the oven, no open fires at my house.  They smelled really delicious and ended up being really yummy!  I was hooked, and for the rest of the season, I was buying them every week to enjoy.  I still buy them when I see them at the store because they are sort of a special seasonal treat, and you only get them for a few months here.  I had never actually bought them pre-cooked, I usually roast my own, but my Mom gifted me with a container of roasted chestnuts she bought at Trader Joes.  They were actually really good and tasted just like the ones I make myself, just not as warm and toasty.  But, perfect for using in recipes when you don’t want to mess with cooking them (which can be kind of tedious since you have to cut an x in the top of each one before roasting to let the steam escape).

    So what to do with them?  I usually use them in a dessert, but I wasn’t in a dessert mood that day so I decided to make a nut butter out of them.  I figured since they are a lower fat nut, I would combine them with pecans which are rich in fat to make a smooth and delicious nut butter. A lot of times I do mix the nuts in my nut butter to achieve a smoother nut butter, or a certain flavor.  I sometimes like my nut butters more savory and leave them with just a little sea salt, but I decided to add a little cinnamon and maple to this one.  It blended up nicely and the combination was super yummy.  I already love pecan butter for its caramel like flavor, but this one was even more delicious with the chestnuts.

    This is simply heavenly for snacking with a spoon.  But it would also be awesome on apple slices, stirred into your oatmeal, or on toast…you get the idea!  If you happen upon some chestnuts, be sure to give them a try.  If you want to make them yourself, here is how you do it.  Preheat the oven to 400F degrees, and cut an X in the top of each chestnut with a knife.  Spread them out on the sheet pan, and place them in the oven.  Bake them until they start to smell fragrant and the insides are looking toasted, about 10-15 minutes depending on your oven.  Remove them from the oven, and let cool until you can handle them.  Then, remove the shell by pressing down on them (it usually cracks in half if they have roasted long enough). Trust me, it is something you must make at least once in your life, they are super delicious even just plain and fresh roasted!

    Cinnamon Maple Chestnut Pecan Butter
    Makes about 2 cup

    Ingredients:

    • 12 oz roasted chestnuts
    • 3 cups chopped pecans
    • 1/4 cup maple sugar
    • 1 tsp cinnamon
    • 1/4 tsp sea salt


    Directions:

    1. Place all ingredients in a high speed blender and blend until smooth.
    2. Pour into a jar.  Store in the refrigerator for 1 month.


  • Chocolate Covered Chestnut Caramels

    Chocolate Covered Chestnut Caramels

    My Grandma used to give us grand kids boxes of chocolate on Holidays.  The assorted ones that had at least 15 different chocolates, and you did not know what they were.  I would always try to guess.  I loved the ones that were all chocolate, caramel, or raspberry cream.  But then sometimes I would bite into one that I totally did not like, maybe a cherry cordial or orange cream (sorry if those are your favorites).  You could usually tell the caramels because they were square.  I really didn’t care if they were dark chocolate or milk chocolate, the caramels were my favorite!  I was thinking about those boxes of chocolates recently and I thought to myself, why not make some chocolate coated caramels?!  I could have a whole batch of my favorite!  I thought I could give them a festive twist though, and I added chestnuts to them.  I love chestnuts this time of the year, they are a delicious snack, that does not get enough attention because I don’t think people know how to cook them. You can usually buy them in the produce section at the store this time of the year.  I have included instructions for making them at the bottom of this post.  Anyways, I think they have kind of a nutty buttered popcorn flavor.  They have a different texture from other nuts that is worth trying out.  You might just get hooked like I am!

    So back to those caramels, I actually had some cooked chestnuts on hand, so I blended them up with some gooey dates to make a delicious caramel.  Date caramel is something that is completely essential if you are a vegan who is trying to eat unprocessed foods.  I mean, technically if you are craving caramel you could just eat a date because they are nature’s caramel, but if I did that here, I could not get that smooth texture and combine them with the delicious chestnuts.  I added some coconut oil to the caramel to help it firm up enough to hold the square caramel shape and it was so silky smooth and luscious!  I could have just eaten it with a spoon, but instead I chilled it and cut it into caramels.

    I melted my favorite dark chocolate for coating these, but you can use your favorite brand. If you are looking for a good quality vegan dark chocolate with good ingredients and no refined sugars, I recommend Lily’s chocolate chips, Luv dark chocolate chunks, or Zimt baking chocolate. Once the caramels were all dipped and set up I was so excited to try one! They were super delicious!  Rich buttery creamy sweet gooey caramel with a thin layer of dark chocolate!  So heavenly!  I would take these over those ones in the boxes of candy I had as a kid any day.  If you are a big caramel fan, or looking for a recipe to include some chestnuts in, give these a try!

    Chocolate Covered Chestnut Caramels
    Makes 16

    Ingredients:

    • 2 cups soft pitted medjool dates (soak them in water 30 minutes until soft if not soft, and drain well before using in recipe)
    • 1 cup roasted chestnuts, finely chopped*
    • 1/2 cup filtered water
    • 1/4 cup melted coconut oil (at room temperature)
    • 1 tsp pure vanilla extract
    • 1/4 tsp sea salt
    • 1 1/2 cups chopped vegan dark chocolate or dark chocolate chips


    Instructions:

    1. To make the caramel filling, combine the dates, chestnuts, water, coconut oil, vanilla, and sea salt in a high speed blender and blend until smooth.  Spread out onto a parchment lined tray in a square about an inch thick.  Set in the freezer for a few hours until completely firm. Cut into 16 squares, separate them, then place back into the freezer until they are completely hard (if they have warmed up at all).
    2. Melt the chocolate in the top of a double boiler until smooth.
    3. Dip each caramel into the chocolate, coating it completely and allowing the excess to drain off (I like to set mine on a fork to do so), and place back onto the tray.  When they are all done, put them back into the freezer to harden the chocolate if it isn’t set yet.
    4. Store caramels in the refrigerator for up to a month in an airtight container with a lid.


    *For Roasted Chestnuts:

    Preheat the oven to 400F degrees, and cut an X in the top of each chestnut with a knife.  Spread them out on the sheet pan, and place them in the oven.  Bake them until they start to smell fragrant and the insides are looking toasted, about 10-15 minutes depending on your oven.  Remove them from the oven, and let cool until you can handle them.  Then, remove the shell by pressing down on them (it usually cracks in half if they have roasted long enough).

  • Loaded Baked Potato Bites

    Loaded Baked Potato Bites

    I was watching a cooking show recently with a football game foods theme and they were making potato skins.  They looked delicious and it got me to thinking, I haven’t eaten potato skins since I was about 10 probably.  I mean, it isn’t something I really see often at the restaurants I go to and it isn’t like I ever made them at home.  But I love the idea of them.  They are usually loaded up with some pretty greasy stuff at most restaurants like bacon, cheese and sour cream so even if they were on a menu somewhere they are most likely not at all vegan or something I would eat.  But you know me, I like to veganize things and make them a bit healthier, so I decided to do just that.  Well, kind of.  Let me explain, what I made wasn’t exactly skins because I instead sliced the potatoes and made little loaded baked potato bites.  You know the concept of sweet potato toast?  Well I thought why not use it with regular potatoes.  I thought about making large ones and slicing the potato lengthwise, which you can totally do if you are having these for dinner or something and you want them more like actual potato skins without all of the work of scooping flesh (plus no wasting this way).  But, I thought since it is the Holiday season, why not make them little bites perfect for serving at parties?

    So, I sliced a few potatoes thinly into cute little rounds, and roasted them with some olive oil to create delicious little potato disks.  Now, I thought about making a vegan sour cream to top them off with but I instead decided on using guacamole.  After all, it is creamy, delicious, AND healthy.  Already winning over those traditional potato skins.  I wanted to top them with bacon too.  No greasy animal products here though.  I made a crispy coconut bacon to top them off.  Trust me, if you have never tried coconut bacon it is something you have to try.  It is the most delicious vegan bacon substitute I have had and perfect for crumbing over things like salads or popcorn or these little bites.  Don’t do it until the last minute before serving though because you want them to stay nice and crispy not absorb moisture (this is not an appetizer that should be assembled more than an hour before serving).   Lastly, I sprinkled scallions and red pepper flakes over them.

    They looked adorable, but not only that, they were super delicious.  If I were at a party, I would be the one that kept coming back and eating all of them.  You know what I mean.  I was kind of like that as a kid with anything involving cheese.  No cheese here though, just vegan deliciousness.  These are not only vegan, but they happen to be completely gluten free and nut free too, so they are perfect if you are serving guests with allergies to those things.  Happy Holiday season!


    Loaded Baked Potato Bites
    Serves 12

    Ingredients:

    Potatoes:

    • 4  yukon gold potatoes, sliced into 1/4 inch thick slices
    • olive oil
    • sea salt to taste

    Coconut Bacon:

    • 1 1/2 cups large flake coconut
    • 2 Tbsp tamari
    • 2 Tbsp liquid smoke
    • 1 Tbsp maple syrup

    For topping:

    • 1  cup guacamole
    • 2 scallions, sliced
    • red pepper flakes


    Instructions:

    1. Preheat the oven to 400F degrees, and oil a sheet pan.
    2. Toss the potatoes with just enough olive oil to coat, and sea salt.  Spread the potatoes out on the sheet pan, place in the oven and roast until golden brown, about 25 minutes depending on your oven.  Remove from the oven and let cool until just warm or at room temperature.
    3. To make the coconut bacon, preheat the oven to 350F degrees, and line a sheet pan with parchment.
    4. Toss the large flake coconut with the tamari, liquid smoke and maple syrup and spread out on the pan.  Place in the oven and bake for about 12-15 minutes (depending on your oven), keeping a close eye at the end and checking it in the final minutes because it burns fast.  Remove from oven and let cool.
    5. Spoon some of the guacamole onto each potato slice.  Place a little coconut bacon and scallions on each toast and sprinkle them with a little red pepper flakes.  Arrange on a plate and serve!


  • Vegan Eggnog Caramel Tart

    Vegan Eggnog Caramel Tart

    It doesn’t feel like December here yet, it was 50 degrees this weekend and yesterday, perfect weather to get out running and biking in.  I know some people are missing the snow, but I love that it is warm still. I know it is going to snowy here soon enough, but for now I will enjoy the ideal weather while it lasts.  I still am getting into the Holiday spirit though despite the weather, and I am in the mood to listen to Christmas music and drink eggnog.  The first time I actually had eggnog, it wasn’t even the real dairy kind.  I actually bought soy nog, because one of my coworkers said it was amazing.  So I tried that in my mid 20s and it was delicious.  I understood why people loved it so much. And, adding a little bourbon to it made it even better.  I was actually scared to try eggnog as a kid, which is why soy nog was my first exposure to it.  Because my Dad made fun of it and called it “egg-snag”  when I was little which did not sound very appetizing, and I thought that it must be gross. To be honest, the idea of the dairy kind grosses me out now, because of all of the eggs and milk.  I don’t know why but I can’t even stand the smell of eggs and milk anymore, or the idea of where they came from.  But luckily now actually make my own home made vegan eggnog because it is easy and healthier and less sugary than the store bought and I am sure it is way better than the dairy version.  I don’t usually use soy though, I make a coconut milk based one.  Since it is the eggnog season, and I was craving it I decided that I wanted to make an eggnog dessert last weekend.

    I mean, yes I could have just made eggnog.  But hot much more fun is it to make a Vegan Eggnog Caramel Tart!  Which is actually what I decided to make.  I have made a raw eggnog cheesecake before, and this filling ended up tasting like that, but it was easier to make.  I thought about making a baked crust, but decided that I wanted to make something faster and easier so I made a coconut oat crust which was perfect!  It is kind of like my quick graham cracker crust substitute for pies and tarts.  It is sweet, delicious and the perfect base for just about anything!  For the filling, I used a mixture of coconut milk and cashew butter to make a super smooth luscious base that tasted like eggnog once I added the maple syrup to sweeten, salt, nutmeg and bourbon.  It was heavenly before I even poured it into the tart.  I thought about leaving it just like that and topping it off with whipped cream, but instead opted for a bourbon caramel.

    Yes, this tart is a little boozy.  If you aren’t into that substitute water.  But the bourbon in this is awesome!  I know some people use rum and brandy in their eggnog, but bourbon is just what i usually use.  Feel free to swap in what you like! Once it was all set and ready to enjoy I could not wait to dive in.  It was super delicious!  Like a creamy eggnog cheesecake ribboned with boozy caramel.  This would make the perfect Holiday dessert if you are an eggnog fan (or even if you aren’t it might win you over).

    Vegan Eggnog Caramel Tart
    Makes one 8 inch pie

    1 9 inch pie plate or removable bottom tart pan

    Crust:

    • 3/4 cup finely shredded dried coconut
    • 3/4 cup Bob’s Red Mill gluten free rolled oats
    • 1 cup soft pitted medjool dates (if they are not soft, soak them 30 minutes and drain well before using)
    • 1/4 tsp sea salt
    • filtered water as needed


    Filling:

    • 1 1 15 oz can full fat organic coconut milk, chilled
    • 1/3 cup maple syrup
    • 1/4 tsp sea salt
    • 1 tsp pure vanilla extract
    • 3 Tbsp bourbon
    • 1/8 tsp nutmeg
    • 1/2 cup raw cashew butter
    • 1 cup coconut butter warmed to liquid


    Caramel:

    • 1 cup soft, pitted medjool dates (soaked in water 30 minutes, and drained well before using if not soft)
    • 1/4 cup pecan butter or almond butter
    • 1/4 cup plus 3 Tbsp filtered water
    • 1 Tbsp bourbon
    • 1 tsp pure vanilla extract
    • pinch sea salt


    Instructions:

    1. For the crust, combine all ingredients in the food processor until finely chopped and starting to hold together when squeezed (if it doesn’t you may need to add a little filtered water 1 Tbsp at a time).
    2. Press the mixture into a 9 inch pie crust, or a 9 inch removable bottom tart pan or pie pan greased with avocado oil (or other oil that doesn’t harden when chilled).
    3. For the filling, combine all ingredients in a high speed blender and blend until smooth. Pour into the prepared crust.
    4. For caramel, place all ingredients in a high speed blender and blend until smooth.  Drop the caramel over the filling by the heaping teaspoon, then swirl it with a knife or toothpick to marble it.  Place in the freezer until set, about 2 hours.
    5. Tart keeps refrigerated for 1 week in a container.


  • Vegan 5 Spice Peanut Butter Cookies

    Vegan 5 Spice Peanut Butter Cookies

    When I was younger I used to like to go to a local spice shop and walk around and open all of the sample jars and smell them.  Even if I had already smelled them before, it was all part of the experience of shopping there.  Some things smelled better than others of course, and I especially had a thing for the baking spices.  Cinnamon was one of my favorites, as was Chinese 5 spice powder.  It is a sweet heavenly aroma.  If you have never heard if it, it is a mixture of star anise, cloves, cinnamon, Sichuan pepper and fennel.  It smells sweet and a little like licorice and of course cinnamon.  Just the thing to use in Christmas cookies, even though it does have lots of savory applications as well.  I had made 5 spice peanut butter cookies back when I was in college because I had thought it sounded good and it totally was.  But sadly they were not vegan so I haven’t made it in a long time.  But I decided that it was about time I veganize it.  I have been waiting several weeks to do so actually until I had time after Thanksgiving.  Because the last few weeks have been super busy I feel like with food prep and getting together with people and stuff going on.  So, finally Monday I had time to relax and bake.

    Peanut butter cookies are already pretty simple to make, so it is not a hard recipe to veganize.  I just substitute ground flax seed mixed with water for the eggs and coconut oil for butter and it works just as well.  Everything else is pretty much the same, except I have swapped out coconut sugar for the brown sugar. I added in a generous tablespoon of the 5 spice powder and the dough was delicious!  I have to say, I like cookie dough even more than actual cookies, and I do “sample” a lot of it when I make them. It is kind of tradition, and what makes baking the cookies so enjoyable!  That, and the warm ones when they come out of the oven.

    These smelled amazing while baking!  The sweet aroma of 5 spice, coconut oil and peanut butter filling my kitchen.  I did not wait until they cooled completely to try them, they had to be warm and still very soft.  I love that.  They were sweet, yummy, and just as good as the non-vegan version I made back in the day.  If you are a peanut butter cookie fan and want to try a jazzed up version give these a try!

    Vegan 5 Spice Peanut Butter Cookies 
    Makes 12 cookies

    Ingredients:

    Cookies:

    • 1 Tbsp ground flax sseed
    • 3 Tbsp filtered water
    • 1 cup coconut sugar
    • 1 Tbsp 5 Chinese 5 spice powder
    • 3/4 cup organic peanut butter
    • 1/4 cup coconut oil, warmed to liquid
    • 1 tsp pure vanilla extract
    • 1 1/4 cups gluten free all purpose flour
    • 3/4 tsp baking soda
    • 1/2 tsp baking powder
    • 1/2 tsp sea salt


    Instructions:

    1. In a small bowl, whisk together the flax seed and water.  Place the bowl in the fridge for 15 minutes, this is your flax egg.
    2. In a large bowl, with a wooden spoon, mix together the sugar, 5 spice powder, peanut butter, coconut oil, vanilla and flax egg, until smooth.  Then mix in the flour, soda, baking powder, and sea salt in until the mixture is smooth.
    3. Preheat the oven to 375F degrees.  Line a sheet pan with parchment.
    4. Shape the cookie dough into 2 inch balls, place on your baking sheet a few inches apart and flatten with a fork, like you would with peanut butter cookies.
    5. Place in the oven and bake at 375 for 12 minutes or so, until lightly browned and set.  Allow to cool on a rack.
    6. Enjoy!
  • Vegan Gingerbread Cookie Dough Truffles

    Vegan Gingerbread Cookie Dough Truffles

    I am a planner.  I like to plan things ahead and know what is going on before I dive into things so I know what to expect.  A lot of times I go through a bunch of different scenarios in my head before I carefully pick which one that I think is best then go with it.  But sometimes things go a little differently than I had hoped, and in the last few years I think I have learned to adapt more.  Like yesterday when I was looking forward to baking some gingerbread cookies all day, and day dreaming about them at work.  But then stuff happened and I ended up staying late at work and not having enough time to make and decorate them.  So I adapted and decided to make an easier faster recipe some gingerbread truffles.  It actually worked out perfect, because I love decorating gingerbread cookies, and they are delicious but not as delicious as the cookie dough.  I have a thing for cookie dough, and it is always my favorite part of baking cookies, getting to eat it.  It stems from the days of when I was a little kid baking cookies with my Grandma in the kitchen.  I would steal a little cookie dough each time she was not looking and I became a cookie dough loving girl for life.  Now, you may not thing gingerbread dough is as good as chocolate chip cookie dough, or peanut butter cookie dough, but think again. It is good stuff, and that spicy flavor is perfect for this time of the year.

    There wasn’t any actual real dough in these though, I used almond butter as a base, because I figure eating a truffle made of nut butter at least has some redeeming health qualities like protein and all of the benefits of nuts like fiber and nutrients.  The almond butter made a smooth crave worthy rich base, and all I needed to add to it was maple syrup, a little coconut butter to firm it up so it could hold shape, and some sea salt along with traditional gingerbread spices.  Ginger, cinnamon, nutmeg and cloves smell and taste simply heavenly together!  It honestly tastes just like gingerbread cookie dough!  Now, you could eat the “dough balls” just like this, but I wanted them to be dipped in dark chocolate.

    Because chocolate is amazing with gingerbread. I admit I thought about dipping them in white chocolate, but I ended up going with the dark because it was easier and I was more in a rich dark chocolate sort of mood.  These came together fast, and I could not wait to try them!  They were crave worthy!  They honestly turned out even better than I imagined, just the right amount of sweet, tasting like cookie dough, and that dark chocolate on the outside was the perfect addition!  These would make a great Holiday food gift, if they make it out of your kitchen…but it is so tempting to eat them all yourself, so you may have to make a double batch.

    Vegan Gingerbread Cookie Dough Truffles
    Makes 16

    • 1 cup almond butter
    • 2 Tbsp melted coconut butter (or 3 if your almond butter is especially runny)
    • 1/4 cup maple syrup
    • 2 tsp ground ginger
    • 2 tsp ground cinnamon
    • 1/2 tsp ground cloves
    • 1/4 tsp nutmeg
    • 1/4 tsp sea salt
    • 1 1/2 cups chopped vegan dark chocolate


    Instructions:

    1. in a bowl, mix together the almond butter, coconut butter, maple syrup, ginger, cinnamon, cloves, and nutmeg until smooth.
    2. Roll the mixture into 1 1/2 inch balls, and place on a parchment lined tray.  Place in the freezer for about 15 minutes (or until firm).
    3. Meanwhile, melt the chopped dark chocolate in the top of a double boiler until smooth, stirring often.
    4. Once the chocolate is ready, dip each of the gingerbread fillings into the chocolate letting the excess drain off (I like to set it on a fork to do so) and place back onto the tray.  Repeat with the remaining truffles, and place back into the freezer until the chocolate is hard, about 10 minutes.
    5. Store truffles in an airtight container in the refrigerator, they keep for 1 month.


  • Vegan Sweet Potato Pecan Pie

    Vegan Sweet Potato Pecan Pie

    We always had 3 different types of pie at Thanksgiving gatherings at my Grandparent’s house when I was little.  It was always apple, pecan and pumpkin.  I would always take some of each as was tradition, but really the pecan was my favorite.  It was my Mom’s favorite and my Grandma’s favorite too, so maybe that was hereditary.  I mean, I could enjoy apple pie at other times of the year, because it was something my Mom liked to make, but pecan we only enjoyed that one day of the year.  There was just something about that gooey caramelly nutty pecan goodness that was amazing.  I still feel that way, but I now make my pecan pies refined sugar free.  No corn syrup in sight, I usually do a date caramel now, because I love fruit sweetened deliciousness.  In fact I think for the past 10 years or so I have made pecan pie in some form for Thanksgiving, because my Mom always requests it.  Grandma is no longer around, but if she were, I know she would love them.  Well, this year my Mom asked me to make a sweet potato pecan pie to bring to Thanksgiving.

    Of course I was happy to make one!  It sounded good to me too!  Sweet potatoes are my favorite in any form, and I love them in desserts.  Plus, I think that they are even more delicious in pie than pumpkin because they have a naturally sweeter flavor.  Not that I don’t like pumpkin pie, it is a classic, but I just prefer sweet potatoes if I have a choice.  And, they can be used in the same manor. Just FYI, if you ever want a pumpkin style pie but only have yams or sweet potatoes on hand, if you cook them and puree them they can be swapped for an even more delicious pie.  For this pie, I wanted a gooey layer of pecan pie on the bottom.  Just like the traditional stuff.  So I made a sweet gooey date caramel with pecan butter and stirred in plenty of chopped pecans.  It was so good I wanted to keep sampling it, but I had to stop so that there would be enough for the pie.

    For the filling, I used my pumpkin pie recipe, and it was super delicious even before being baked.  It tasted like delicious sweet potato pudding.  As the pie baked it filled my home with the most heavenly aroma!  Spice and caramel and a buttery smell from the crust….I was super excited!  But, I  had to wait until it cooled which was unfortunately overnight since I made it in the evening.  Once I was able to try it though, it was simply heavenly!  The crunchy pecans suspended in gooey caramel filling and creamy spiced sweet potato filling on top of the buttery crust were just what I was hoping for!  I am proud to share it with my family, and you would never know it is vegan because it tastes like it is rich and traditional.  If you are looking for a new pie to make this Holiday season, give this a try!

    Vegan Sweet Potato Pecan Pie

    Makes one 9 inch pie

    Crust:


    Pecan Layer:

    • 2 cups soft, pitted medjool dates
    • 1/2 cup pecan butter (or almond butter if you can not get pecan)
    • 1/4 cup filtered water
    • 3 Tbsp maple syrup
    • 1 Tbsp coconut oil
    • 1 tsp pure vanilla extract
    • 2 cups chopped pecans


    Filling:

    • 2 cups cooked sweet potato (canned is ok too), packed
    • 1/3 cup pure maple syrup
    • 3/4 cup full fat organic coconut milk
    • 2 tsp coconut oil
    • 1 1/4 teaspoon ground cinnamon
    • 1 teaspoon ground ginger
    • 1 /4 teaspoon ground nutmeg
    • 1/4 tsp ground cloves
    • 1/4 teaspoon salt
    • 1 1/2 tablespoons cornstarch
    • 3/4 teaspoon agar powder


    1. To make the crust, in a large bowl, mix together flour, sugar, sea salt, and spices. Cut in coconut oil with a pastry blender or 2 knives until it is in pea sized pieces. Mix in  just enough water to create a smooth dough that holds together but isn’t too sticky. Add more water if needed, and knead slightly until a smooth dough is created. Roll out into a 10 inch circle on a sheet of parchment paper, then use the paper to help you transfer it to a 9 inch pie dish.  Flute the edges, and set aside in the refrigerator.
    2. Pre-heat the oven to 375F degrees.
    3. To make pecan filling, blend all of the ingredients except the pecans in a blender until smooth, then stir in the pecans.  Pour into the crust and smooth the top.
    4. To make the sweet potato filling, place all ingredients in the blender and blend until smooth.
    5. Pour the sweet potato filling over the pecan layer and smooth out the top.
    6. Place in the pre-heated oven and bake for about  50 min. until the edges of the crust are lightly brown, and pie is set.  Allow to cool completely before serving (I chilled mine overnight in the refrigerator).
    7.   Store any leftovers in the refrigerator.


  • Butternut Squash and Cranberry Casserole

    Butternut Squash and Cranberry Casserole

    Squash is one of my favorite things ever, and I get super excited when it comes into season.  There was a point in my life when I was younger when I used to eat it almost every day for pretty much the Fall and Winter seasons in different ways for dinner. My skin even started to take on a little squash like hue that my Mom called my “squash tan”.  I don’t go quite to that extreme now, but I do enjoy it a couple of times a week.  After all, it is not around all year (well at least not the good tasting kind that only come when in season) so it is special and deserves to be enjoyed.  I love it stuffed, roasted in cubes in salads, or even mashed sometimes.  I can’t believe as a little kid I thought it was gross because I had been told that it was by a family member and I didn’t want to try it.  I was missing out.  I started to enjoy it though, when my Mom served the roasted kind stuffed with apples.  It turned me around and got me over my fear.  I have mostly  been roasting it cubed up this year for salads because it gets nice and crispy, but sometimes I roast it cut in half, which is what I did the other night when I happened to have a lot of extra squash.  I thought I could use it for other recipes.  You know, you can replace canned pumpkin in desserts with it, and it tastes even more sweet and delicious!  But this time I decided to make a savory side fit for the Thanksgiving table.

    Everyone makes sweet potato casserole, and that is fine, I love sweet potatoes, but I thought why not make a squash casserole?  I have not seen one before (I am sure they are out there, I have just never tried one), and I thought it would be delicious.  I also had a package of cranberries in my refrigerator waiting to be used in a recipes, so I decided to make this a double layer casserole with the cranberries.  I cooked them into a jammy sauce.  Not that nasty stuff from the can type of sauce, but the good kind that can only come from real cranberries.  I like them a little chunky.  Trust me, butternut squash and cranberries are a delicious combination for those that are skeptical.  Plus you get two of your Thanksgiving sides in one!

    Lastly, I wasn’t going to leave the casserole just like that, because in Minnesota casserole, (or really “Hot Dish” as we call it), should have some sort of crispy topping sprinkled on top that can be browned.  So, I made an oat streusel.  The whole thing smelled amazing while baking! Kind of like dessert, but it is definitely a savory Thanksgiving side.  It was super delicious!  The squash was sweet and delicious, the cranberries slightly tart, aromatic with orange and jammy, and the struesel was the perfect touch, crunchy and satisfying.  If you are looking for a new dish to try this Thanksgiving, give this a go!

    Butternut Squash and Cranberry Casserole
    Serves 12

    Ingredients:

    Squash:

    • 2 large butternut squash, halved
    • 1 tsp cinnamon
    • 2 Tbsp maple syrup
    • 1/4 tsp sea salt


    Craberries:

    • 2 7.5 oz packages fresh organic cranberries
    • 1/2 cup maple syrup (or to taste)
    • 1/4 cup orange juice
    • 1/4 tsp sea salt


    Topping:

    • 1/2 cup gluten free rolled oats
    • 2 Tbsp gluten free all purpose flour
    • 1/4 cup coconut sugar
    • 1/4 tsp sea salt
    • 1/2 tsp cinnamon
    • 2 Tbsp coconut oil


    Instructions:

    1. Preheat the oven to 400F degrees and oil a sheet pan, or line it with parchment.
    2. Cut the squash in half lengthwise and remove the seeds.  Place cut side down on the tray, and place in the oven.  Roast for about an hour until the squash is tender.  Remove from the oven and scoop out the flesh into a bowl.
    3. Add the maple syrup, cinnamon, and sea salt, and mash the squash with them until there are not any big lumps.  Spoon into an 8×8 square pan, or two smaller casserole pans (which is what I did).
    4. To make the cranberries, combine them with the syrup, orange juice, and sea salt in a saucepan and bring to a boil.  Lower to a simmer and cook until the cranberries are tender and thickened, about 15 minutes.  Remove from heat, and pour over the squash in the pan.
    5. To make the topping, combine all ingredients in a bowl, and mix together with your hands until it is small clumps that hold together when squeezed.  Scatter over the cranberries evenly.
    6. Place the pan (or pans) in the oven and bake until the topping is browned about 15-20 minutes.
    7. Remove from the oven and serve!
  • Vegan Cheesy Potato Casserole

    Vegan Cheesy Potato Casserole

    My Mom used to make a really delicious cheesy potato casserole when I was young to serve at family gatherings. Usually brunch type occasions, like when she hosted Easter at our house, or maybe a Christmas special request from me.  I used to ask her to make it a lot because it was so good!  I think it filled most of my plate when it was served over all else.  I could have cared less about the meat of course, and I always took my token amount of veggies, and a roll, but the potatoes were the star to me.  I mean, what’s not to like about layers of creamy cheese and potatoes!  I have been saying to myself for a while now, you have to make a vegan version.  So this past week, I finally got around to it.  I had extra potatoes on hand, and some cheese sauce left over from some mac and cheese that I had made, so it was perfect!  My Mom used to use frozen hash browns in hers, but I decided to be a little different with mine since I don’t think I have ever bought frozen hash browns, and I had fresh potatoes to use up.

    I guess this was sort of in the style of a cheesy potatoes one of my coworkers at the deli used to make, crossed with my Mom’s potatoes. My coworker always just used large diced potatoes in her casserole and a little kick.  My Mom’s was more mellow and just creamy and delicious.  Combining the two ended up being awesome.  Of course both of these dishes had tons of cheese, butter, flour and cream.  I think my Mom’s had heavy cream in fact, because this dish was considered a treat.  But my cheesy potatoes actually have a healthy cheese sauce made from a secret ingredient that gives them their lovely yellow color.  Winter squash!  I like to hide veggies in my dishes, and lighten things up with them, so that was the idea here.  I guess I can’t bring myself to make vegan mac and cheese without including veggies in the sauce, so why would I not include them with the potatoes?  Don’t worry, the sauce is super delicious.  I added cashew butter to give it a little richness and volume so it has more of the texture of cheese, along with things like miso, nooch (nutritional yeast), salt, mustard and garlic to give it a wonderful savory flavor.  It may sound like a weird combo but it is so good once it is done!

    Once combined with the cooked potatoes it is bomb!  I could eat a giant bowl of these potatoes (just like I used to when I was little), but I would not feel bad about doing so or get a tummy ache after because these are so much healthier than the original version.  I love recreating old dishes from my childhood and making them vegan!  Often times they turn out even better!  If you are looking for a delicious side dish, or maybe you are just craving potatoes and cheese, which is totally legit too, give these a try!

    Vegan Cheesy Potato Casserole

    Serves 6-8

    Cheese Sauce:

    • 2 cups mashed cooked butternut squash or sweet potato*
    • 1 cup hot filtered water (or as needed)
    • 1/3 cup raw cashew butter or almond butter
    • 1 medium garlic clove
    • 2 tsp yellow mustard or stone ground mustard
    • 1 Tbsp apple cider vinegar
    • 1 Tbsp white miso (optional)
    • 1/4 cup plus 2 Tbsp nutritional yeast
    • 1/8 tsp cayenne pepper
    • 3/4 tsp sea salt (or to taste)


    Potatoes:

    • 3 lbs yukon gold potatoes, cut into 1 inch cubes
    • filtered water
    • sea salt


    Topping:

    • 3 Tbsp nutritional yeast
    • paprika for sprinkling


    Instructions:

    1. To make the cheese sauce, combine the squash, water, cashew butter, garlic, mustard, cider vinegar, yeast, cayenne, sea salt and turmeric in a high speed blender and blend until smooth and the consistency of cheese (if it is too thick add a little more water).  Set aside.
    2. Preheat the oven to 375F degrees.
    3. To make the potatoes, put them in a large pot, and cover with filtered water by 1 inch.  Add a few tsp sea salt to the water.  Bring to a boil, and then lower to a simmer.  Allow the potatoes to cook until tender, about 10-12 minutes.  Drain, then add back to the pot.
    4. Stir in the cheese sauce, then pour into a baking dish.
    5. Sprinkle the potatoes with the nutritional yeast, and place in the oven for about 15 minutes.  Sprinkle with paprika and serve!

    *To cook the squash, I like to roast them in the oven.  Cut one medium squash in half top to bottom, and remove the seeds.  Place cut side down on a sheet pan lined with parchment and bake for about an hour at 400F degrees or until tender.  Remove from oven and let cool before removing the skin and mashing.

  • Vegan Cinnamon Roll Cookies

    Vegan Cinnamon Roll Cookies

    cinnamon-roll-cookies

    I can’t believe it is 2017!  Last year flew by so fast, I feel like it just turned 2016.  The Holidays were fun, but I am ready to get back into everything being on a regular schedule.  Since I had extra days off last weekend, due to New Years, I thought I would do some baking.  I made a really good White Chocolate Grapefruit Cake to celebrate New Years, and also some delicious cookies, which I will be sharing with you in this post.  Now I know people are on their diets, and new years resolutions to give up sweets and what not…but I am not.  I am of the mindset that I eat healthy most of the time, and indulge every once in a while (like 80% healthy, 20% naughty).  That way the majority of what I am eating is good for me.  I have to say though, when it comes to naughty food it is pretty much all home made, and refined sugar and flour free so I don’t get that icky feeling that comes from eating processed stuff.  I feel good and that is what counts!  Anyways, back to these cookies I mentioned earlier, I had seen some cinnamon roll cookies on Pinterest and said to myself, “I need to veganize those!”  So that was my Monday project.

    cinnamon-roll-cookies-5

    I used my classic go to sugar cookie recipe for the base and it worked out perfect!  These are actually pretty easy to make.  Yes, they involve rolling out and rolling up but they are essentially a slice and bake cookie. I used the most fragrant cinnamon in these, Vietnamese cinnamon.  In case you have never noticed, there are several types of cinnamon.  Vietnamese I find to be the most sweet, aromatic lovely smelling flavorful cinnamon.  Don’t believe me?  Go into Penzey’s Spices (or even the bulk spice section of your health food store where they often have several different types), and open up the different cinnamon jars and smell them.  These cookies smelled amazing while baking.  With that aromatic cinnamon and fragrant vanilla.  This is a smell that makes me happy.  It reminds me of being in my Grandma’s kitchen while she baked.

    cinnamon-roll-cookies-4

    cinnamon-roll-cookies-3

    Once the cookies were all cooled (well, mostly cooled, because I like warm cookies), I glazed them with a sweet coconut vanilla frosting.  Because proper cinnamon rolls need a frosting right?!  Well I think so.  They were super delicious!  A cinnamon roll cookie hybrid, with all of the best qualities of both.  If you are not on a New Years diet, you need to give these a try next time you have a cookie craving.  So delicious!

    cinnamon-roll-cookies-1

    Vegan Cinnamon Roll Cookies
    Makes 28 cookies

    Ingredients:
    Cookies:
    • 2 Tbsp ground flax seed
    • 1/4 cup plus 2 Tbsp filtered water
    • 1 cup virgin coconut oil, warmed to liquid
    • 1 1/2 cups xylitol (coconut sugar may be used but keep in mind the cookies will not be light in color)
    • 1 teaspoon vanilla extract
    • 1 teaspoon baking soda
    • 1/2 teaspoon sea salt
    • 3 1/2 cups Bob’s Red Mill Gluten Free All Purpose Flour
    • 2 Tbsp cinnamon


    Glaze:

    • 1/4 cup plus 2 Tbsp coconut butter
    • 1 tsp pure vanilla exract
    • 3 Tbsp maple syrup
    • 1/3 cup filtered water or as needed


     Directions:
    1. In a small bowl, whisk together the flax seed and filtered water.  Set aside in the refrigerator for 15 minutes.
    2. In a large bowl, mix coconut oil with xylitol and mix until well combined.
    3. Mix in the vanilla extract and flax mixture until well combined.
    4. Add the baking soda, salt, then the flour, a cup at a time, mixing between each addition, until well combined.  Refrigerate for 5-10 minutes until the dough is a little less soft and more manageable.
    5. To bake, Preheat your oven to 350 degrees. Line 2 large baking sheets with parchment paper.
    6. On a piece of parchment dusted with a little flour, roll out the dough int0 2 10×13 inch rectangles.  Sprinkle each with cinnamon, and roll up from the top down.  Cut into 28 rounds, and place on prepared cookie sheets a couple inches apart, pressing down just ever so slightly. Bake for about 15-18 minutes, until puffed and just starting to brown slightly.  Remove from the oven and let cool on the pan a few minutes, then remove to a wire rack to cool.
    7. To make the glaze, whisk together all ingredients until smooth, adding water a little at a time until it is pourable (but not too thin).  Drizzle over the cookies, then place them in the freezer until the glaze is set, about 15 minutes.


  • Vegan Mini Chocolate Cinnamon Pecan Pies

    Vegan Mini Chocolate Cinnamon Pecan Pies

    mini-chocolate-cinnamon-pecan-pies-3

    Ever since Thanksgiving, when I had made a really good pecan tart with chocolate chunks and coconut, my Mom has been asking me to make her a pecan pie or tart with cinnamon and dark chocolate.  Well, I did not get it made for Christmas.  Luckilly there were plenty of other good desserts to go around.  But I did get it made before New Years!  I don’t go back on promises, and it sounded good to me as well!  I decided to make mini pies though, because my Mom is a big fan of mini desserts.  She always told me, if you make the desserts small, you can have more than one, and you can have several different kinds.  This was applied to the many batches of Christmas cookies we used to make, but I think it can apply to these little pies as well, especially if they are being served as part of a Holiday spread or New Years Eve buffet.

    mini-chocolate-cinnamon-pecan-pies-4

    These were pretty easy to make, I used my classic gluten free coconut oil pie crust, because it always turns out perfect for me, and tastes good but also allows the flavors of the filling to shine.  For the filling, I used a date caramel with a hit of chocolate in two forms to make it extra good, cocoa powder, and dark chocolate chips.  I included plenty of pecans as well as pecan butter and was it ever delicious!  I could have eaten that with a spoon. But luckily I restrained myself and most of it made it into the crusts.

    mini-chocolate-cinnamon-pecan-pies-2

    They smelled amazing while baking!  I could not wait to try them, but of course they had to cool a bit.  I recommend eating these warm, even if it is slightly more difficult to get them out of the pan at that stage.  Because the filling is gooey and amazing when they are not completely cool.  These are decadent, chocolaty, and sooo good!  They were just as good as I imagined, and my Mom loved them as well which was the important part since they were her idea.  These would be perfect as part of a New Years Eve buffet, because they are small and easy to serve!

    mini-chocolate-cinnamon-pecan-pies

    Vegan Mini Chocolate Cinnamon Pecan Pies
    Makes 16

    Ingredients:

    Crust:


    Filling:

    • 2 cups soft pitted medjool dates (if they are not soft, soak them in filtered water for 30 minutes and drain well before using)
    • 1/2 cup raw pecan butter (almond butter will also work if you do not have pecan)
    • 2 Tbsp maple syrup
    • 1/4 tsp sea salt
    • 2 tsp pure vanilla extract
    • 1/2 cup filtered water
    • 2 Tbsp coconut butter or oil
    • 1/2 tsp cinnamon
    • 1 Tbsp plus 1 tsp unsweetened cocoa powder
    • 1 1/2 cups toasted pecans, plus more for pie tops
    • 1/2 cup vegan chocolate chips

    Instructions:

    1. To make the crust, in a large bowl, mix together flour, sugar, and sea salt. Cut in coconut oil with a pastry blender or 2 knives until it is in pea sized pieces. Mix in  just enough water to create a smooth dough that holds together but isn’t too sticky. Add more water if needed, and knead slightly until a smooth dough is created. Roll out into a rectangle using floured parchment underneath and floured rolling pin. Cut into 16 circles.
    2. Oil a muffin pan well with coconut oil and fit the dough circles into the holes. Shape the edges that stick out if desired (I fluted mine).
    3. Preheat oven to 375F degrees.
    4. To make filling, combine all ingredients in a high speed blender or food processor except the pecans. Process until smooth, then scrape into a bowl and stir in the pecans and chocolate chips. Spoon the filling into the crusts in the pie tin, and top with more pecans to make the tops look pretty.
    5. Place pies in the oven. Bake for about 30 minutes until the crusts are starting to brown lightly. Remove from oven and let cool on a wire rack until warm (if you want them warm when serving so the chocolate is nice and gooey) or cooled (for easier removal).

    mini-chocolate-cinnamon-pecan-pies-1

  • 20+ Vegan New Years Party Recipes

    20+ Vegan New Years Party Recipes

    When I was in high school, every year I would have a New Years Ever party with my friends to ring in the new year.  Of course we would play fun games and listen to good music while going a little crazy, but what always had to be included was really good food.  There had to be a giant spread, a table filled with goodies and snacks.  We never really ate dinner, just snacked all night.  We would have all sorts of chips, layered dips, popcorn, sweets, and veggie trays.  Of course we were not old enough to drink yet, but we still had festive punch or faux wine.  I do not throw parties anymore, but if I did, there would definitely still be lots of good food of the vegan variety.  In case you are having a gathering, or maybe going to one where you need to bring a dish, I thought I would share some of my favorite party snack ideas with you!  Even if you are staying in for New Years with your family which is what I plan on doing, you can still have good food! So, enjoy!  I hope you are all having a wonderful end of the year!

    Spicy Jalapeno Hummus

    Spicy Jalapeno Mint Hummus

    006

    Macadamia Chevre Stuffed Dates with Pomegranate Seeds

    cranberry-relish-and-chevre-1

    Pine Nut Chevre with Cranberry Pear Relish


    cheesy-squash-tots-1

    Cheesy Squash Tots with Cranberry Chipotle Ketchup

    IMG_1878

    Vegan Mexican Black Bean Jalapeno “Meatballs” with Cheese Sauce

    carrot-flatbreads

    Raw Carrot Chevre Flat Breads

    IMG_1924

    Mini Mashed Potato Cakes

    stuffed-celery-2

    Raw Cheese Stuffed Celery

    goodfoods-guac-4

    Roasted Sweet Potato and Avocado Crostini

    Vegan Roasted Red Peppers Stuffed with Basil Chevre 1

    Vegan Roasted Red Pepper Basil Chevre Roll Ups

    italian-walnut-stuffed-mushrooms-3

    Italian Walnut Stuffed Mushrooms

    cheeseball-fv

    Raw Spicy Holiday Cheeseball

    img_1768-1024x768

    Sweet and Spicy Nuts

    pb & j popcorn 4

    Vegan PB & J Popcorn

    Dark Chocolate Sea Salt Popcorn 4

    Vegan Dark Chocolate Sea Salt Popcorn

    cheddar-2bstuffed-2bjalapenos-2b1

    Raw Cheddar Sun Dried Tomato Stuffed Jalapenos

    winter-sushi-1

    Raw Winter Vegetable Rolls

    Vegan Sharp Cheddar 2

    Vegan Sharp Cheddar Cheese

    brownie-brittle

    Raw Brownie Brittle

    017

    White Christmas Martini

    012

    Black Forest Martini

    img_1896

    Sparkling Pomegranate Cocktail


  • Vegan Chocolate Peppermint Popcorn

    Vegan Chocolate Peppermint Popcorn

    chocolate-mint-popcorn-4

    When I was recently at a mall in New Orleans, a store filled with popcorn caught my eye.  They must have had about 100 different flavors, all sorts of things like birthday cake, pizza, cheesecake, and cotton candy.  I didn’t buy any for myself, but it did inspire me to think up some new popcorn flavors when I got home.  I love making popcorn!  Of course the classic organic white popcorn with a little coconut oil and sea salt is a favorite and made often in my Whirly Pop, but sometimes I like to go a little decadent and make it more dessert than savory.  Eric is one of the biggest popcorn lovers I know, so I know he is always game to try out the new flavors I make as well. One of my favorite sweet flavors of popcorn is a dark chocolate sea salt, so I thought I would make something dark chocolate but seasonal this time.  Chocolate Peppermint Popcorn!

    chocolate-mint-popcorn-3

    I make my own dark chocolate to coat this popcorn out of a few simple ingredients, but if you are making this and you prefer, you may use premade vegan dark chocolate.  I just find that it is more cost effective to make it like this.  I tossed the popcorn with my dark chocolate and a hint of mint, and it was amazing!  But I decided to make it even better, and drizzle it with some vegan mint white chocolate as well!  Let me tell you…once this was cooled and the chocolate was set, it was really hard for me to stop eating it.  It is kind of addictive.  So, you have been warned!  Good stuff!

    chocolate-mint-popcorn-1

    Trust me, this is way better than any store bought popcorn you will buy, since most of that has things like refined sugars, fake oils, and artificial flavors.  None of that here.  To be honest, it tastes like Andes Mint popcorn.  I was always a fan of those mints growing up.  That little addition of the white chocolate was what made them so good. If you are looking for a super delicious Holiday treat that isn’t cookies, give this popcorn a go!

    chocolate-mint-popcorn

    Vegan Chocolate Peppermint Popcorn
    Makes 8 cups

    Ingredients:

    • 8 cups organic popped corn

    Dark chocolate coating:

    • 1/2 cup virgin coconut oil (or cacao butter if you prefer) warmed to liquid*
    • 2/3 cup cacao powder, or unsweetened cocoa powder
    • 1/4 cup maple syrup
    • 1/4 tsp sea salt
    • 1/2 tsp peppermint extract


    White chocolate mint drizzle:

    • 1/4 cup raw cacao butter, warmed to liquid*
    • 2 Tbsp raw cashew butter
    • 1/4 cup coconut butter, warmed to liquid*
    • 1 tsp pure vanilla extract
    • 2 Tbsp raw coconut butter, or maple syrup (or to taste)
    • 1/4 tsp spinach powder (for green color) optional
    • 1/2 tsp peppermint extract

    Instructions:

    1. Place popcorn in a large bowl. Whisk together all dark chocolate ingredients and pour them over the popcorn.  Toss popcorn with dark chocolate until evenly coated. Spread out on a parchment lined sheet pan, and place in the freezer until the chocolate has set.
    2. Whisk together the white chocolate ingredients in a bowl or glass measuring cup, and drizzle over the dark chocolate. Place back in the freezer until set, about 15 minutes. Enjoy!

    *I like to melt my ingredients in the top of a double boiler.

  • Vegan Dark Chocolate Orange Cake

    Vegan Dark Chocolate Orange Cake

    img_4925

    When I was little, one year I got a chocolate orange in my stocking.  If you have had one before, you know what I am talking about, but for those who don’t it is a whole normal sized orange made out of chocolate that you whack on the counter to release the wedges.  The type of thing you could eat in one sitting if you are really craving chocolate if you are not careful.  It was delicious!  Ever since then I have appreciated the fact that chocolate and orange are a match made in heaven, especially in the Winter when citrus is plentiful.  Of course, I live in Minnesota where we have to have the citrus flown or driven in, since nothing grows here this time of the year, but I still enjoy it.

    img_4933

    I decided last weekend that a chocolate orange cake sounded lovely.  I have never actually made one, so I gave it a go!  I wanted a classic chocolate layer cake with the aroma and flavor of orange.  Because you taste partly with your nose after all.  So, when I made the cake layers, I included plenty of orange zest.  If you have ever zested an orange, you know what I mean.  That amazing smell that fills your kitchen as you grate into the skin.  It is a happy smell.  I used my classic chocolate cake layers for this, the ones sweetened with dates and it worked perfect!  The batter tasted and smelled of orange, just as I had hoped and after it baked it none of the flavor was lost.

    img_4936

    I frosted it with a fudgy chocolate frosting that you would swear was bad for you but it was actually pretty healthy!  I used sweet potatoes to replace some of the nut butter I usually use in my fudge frosting and it made it naturally sweeter without you even knowing they were in there!  It was honestly so good you would want to eat it with a spoon, but I resisted, because I wanted to have enough to frost the cake.  The cake was delicious once assembled!  Moist chocolate cake, gooey fudgy frosting and the aroma and flavor of orange! Sooo good!  This would be good all Winter while oranges are in season, so definitely put it on your to make list!

    img_4939

    Vegan Dark Chocolate Orange Cake
    Makes one 2 layer 6 inch cake

    Ingredients:

    2 6 inch cake pans

    Cake:

    • 1 1/2 cups Bob’s Red Mill Gluten Free All Purpose Flour
    • 1/4 cup cacao powder or unsweetened cocoa powder
    • 1 1/2 tsp baking soda
    • 1 tsp baking powder
    • 1/2 tsp sea salt
    • 1 cup packed soft medjool dates, pitted, soaked in water for 30 minutes and 1 cup of the water reserved
    • 1/4 cup raw pecan butter (or almond butter)
    • 2 tsp pure vanilla extract
    • 2 Tbsp organic orange zest
    • 1  cup orange juice
    • 2 Tbsp apple cider vinegar


    Frosting:

    • 3/4 cup mashed sweet potatoes*
    • 3/4 cup soft pitted medjool dates (soaked in water for 30 minutes and drained before using if not soft)
    • 3 Tbsp raw pecan butter (or almond butter)
    • 3/4 cup orange juice (plus filtered water as needed)
    • 1/2 cup unsweetened cocoa powder
    • 1 tsp pure vanilla extract
    • 1/4 tsp sea salt


    Directions:

    1. Preheat the oven to 375F degrees and position rack in center of oven.
    2. Oil two 6 inch round cake pan with coconut oil and line the bottom with parchment.
    3. Whisk flour, cocoa powder, baking powder, baking soda, sea salt in a large bowl to blend well.
    4. Place dates, reserved water, pecan butter, orange juice and zest, and vanilla extract into a blender, and blend until smooth, then whisk this blended mixture into the flour mixture until well blended. Whisk in the cider vinegar until bubbles form.
    5. Pour the cake batter into prepared pans, and place in the oven.
    6. Bake cakes until set and a toothpick inserted into the center comes out almost clean, about 25-30 minutes.  Remove from oven, let cool completely, then unmold onto a plate.
    7. To make the frosting, combine all ingredients in a blender and blend until smooth (adding water a little at a time if you think it is too thick).  Pour into a bowl.
    8. To frost the cake, place one layer on a plate, and spread with about 3/4 cup of the frosting.  Top with the next cake layer, and spread the frosting over the top and down the sides of the cake.  Serve!

    *I like to roast my sweet potatoes (just prick with a fork to release steam) in a 400F degree oven set on a sheet pan for about an hour until softened.

    img_4934

  • Vegan Gingerbread Waffles

    Vegan Gingerbread Waffles

    It was below zero yesterday, and all I could think about all day at work was getting warm when I got home. I work in a kitchen, so you would think it would be warm there, but not so much when the drafts come in from the front of the store. I even used my treadmill that morning instead of running outside, because I didn’t feel like dressing like the kid in “A Christmas Story”. One of my coworkers had baked some molasses cookies, and I thought to myself. Mmm warm gingerbread something sounds good! So I decided that I would make something of the gingerbread variety when I got home. I decided on waffles. I have never made gingerbread waffles before, and I hadn’t made waffles in a while. The funny thing about me and waffles is they rarely get made for breakfast, always in the evening for dinner.

    gingerbread-waffles

    My Mom made breakfast for dinner sometimes, and I liked that idea. But you can make these whenever your little heart desires. Make them at midnight if you have a craving for waffles and feel like it! My boyfriend Eric works an overnight shift, so he is eating his lunch at midnight. He isn’t picky what time of the day he eats his waffles. Anyways, these are really simple to make. Just whisk together the batter, cook them (I like to keep mine warm in the oven while I cook the others until they are all done), and enjoy! I made these on my cute little Frozen (as in the Disney movie) waffle maker I got from my Dad last year. He knows I love anything cute that has to do with food prep. It makes the most adorable little snowflake waffles. I think it is meant for kids, since they are smaller, but I am one big kid.

    gingerbread-waffles-2

    They smelled amazing while cooking, like gingerbread cookies! You can serve these with whatever you prefer, like the classic maple syrup, or drizzle them with chocolate fudge syrup like I did! I hope you are all staying warm this winter!

    gingerbread-waffles-3

    Vegan Gingerbread Waffles

    makes 10-12 depending on your waffle maker

    Batter:
    2 cups gluten free all purpose flour
    1/4 cup coconut sugar
    1/2 tsp baking soda
    1 tsp baking powder
    2 tsp cinnamon
    2 tsp ginger
    1/4 tsp nutmeg
    1/4 tsp cloves
    1 tsp sea salt
    1/2 cup plus 1 Tbsp aquafaba*
    1 1/2 Tbsp molassess
    2 Tbsp melted coconut oil
    2 cups thin coconut milk

    Whisk together all of the dry ingredients, then whisk in the wet ingredients.  Pre-heat waffle iron. Once it is heated, add about 1/3 cup waffle batter to the iron and close it (the size of the scoop of batter you need may change if you have a larger iron, mine is smaller).  Cook according to waffle iron package directions.  Keep warm in an oven at low heat (150F degrees) until serving.

    *Aquafaba is chickpea liquid.  You may used canned, or if you are using the liquid from home cooked chickpeas, reduce it to the consistency of egg whites.  Alternatively, you may use 3 flax eggs for the recipe (3 Tbsp ground flaxseed, whisked together with 1/2 cup plus 1 Tbsp filtered water).

    *For the chocolate fudge syrup I served them with, whisk together unsweetened cocoa powder, a pinch of sea salt, and maple syrup until smooth, (I start with equal parts, about 3 Tbsp each) adding more syrup if too thick, more cocoa powder if too thin until you get a consistency you like.

  • Vegan Matcha Mint Sugar Cookies

    Vegan Matcha Mint Sugar Cookies

    matcha-mint-sugar-cookies-1

    My Grandma had this amazing sugar cookie recipe, and I used to like to make it for every Holiday, and just switch up the sugar color on top or frost them with colored buttercream frosting. They were the most melt in your mouth delicious things, not surprising since they had loads of butter, eggs and powdered sugar.  I used to make these for people a lot, and on a few occasions people told me they ate the whole plate in one day.  It was usually the frosted ones, they were pretty addictive and irresistible.  I still like to make sugar cookies, but I have since revamped the recipe so that it fits in with my being vegan.

    matcha-mint-sugar-cookies-3

    I had to make some for Christmas, it being the cookie baking time of the year, but instead of just plain ones, I decided to make some matcha mint ones!  Mint is an essential flavor of the Holidays, and I love matcha!  I have always been a big green tea fan, but matcha is even more vibrant!  Matcha lattes are amazing!  So anyways, back to the cookies. I used granulated xylitol in these instead of regular sugar because I don’t use plain old regular sugar ever (unless I am making kombucha or sugar scrub), and I wanted the cookies to be a pretty green color and not brown.  Which they would have been had I used coconut sugar, which is usually my granulated sugar of choice.  The dough tasted wonderful!  I am a big cookie dough sampler…I like it more than baked cookies sometimes.  Once baked they filled my kitchen with the aroma of cheerful peppermint and sweet vanilla.

    matcha-mint-sugar-cookies-4

    They would have been good just as is, but I couldn’t resist drizzling them with dark chocolate.  White chocolate would have been good too, but I am in a dark chocolate sort of mood lately.  They turned out festive and delicious!  Melt in your mouth buttery (thanks to the coconut oil), and sweet!  Just what I look for in a Christmas cookie!  Definitely add them to your Holiday baking to make list!

    matcha-mint-sugar-cookies-2

    Vegan Matcha Mint Sugar Cookies

    Makes 28 cookies
    2 Tbsp ground flax seed
    1/4 cup plus 2 Tbsp filtered water
    1 cup virgin coconut oil, warmed to liquid
    1 1/2 cups xylitol (coconut sugar may be used but keep in mind the cookies will not be the same pretty green color)
    1 teaspoon vanilla extract
    1 tsp peppermint extract
    1 teaspoon baking soda
    1/2 teaspoon sea salt
    3 1/2 cups all purpose gluten free flour
    In a small bowl, whisk together the flax seed and filtered water.  Set aside in the refrigerator for 15 minutes.
    In a large bowl, mix coconut oil with xylitol and mix until well combined.
    Mix in the vanilla extract and flax mixture until well combined.
    Add the baking soda, salt, matcha, then the flour, a cup at a time, mixing between each addition, until well combined.
    To bake, Preheat your oven to 350 degrees. Line 2 large baking sheets with parchment paper. Roll balls into about 1 1/2 inch balls, and place on prepared cookie sheets a couple inches apart. Bake for about 15-18 minutes, until puffed and just starting to brown slightly.  Remove from the oven and let cool on the pan a few minutes, then remove to a wire rack to cool.  Repeat with remaining cookies and let cool completely.
    Melt the chocolate in the top of a double boiler (or your preferred method), and drizzle it over the tops of the  cookies.  Set on a parchment lined tray to set the chocolate (it will set faster if you pop them in the freezer for about 5 minutes).
  • Vegan Chocolate Dipped Salted Almond Butter Cookies 

    Vegan Chocolate Dipped Salted Almond Butter Cookies 

    salted-almond-butter-cookies

    When I was little, my Mom and I would bake many different types of Christmas cookies, then keep them all in a big container in the freezer to either share with others or enjoy later.  There were the favorite cookies, like the pfeffernusse, classic sugar cookies, and pecan tassies.  But we would always try a few new recipes as well.  We would get cookbooks from the library, because this was before we had the internet at home to look up recipes (although I prefer to page though books still) and we would pick a few to make that caught our eye.  I still enjoy making cookies around this time of the year, warming up the kitchen and filling the house with a heavenly aroma.

    salted-almond-butter-cookies-1

    salted-almond-butter-cookies-2

    My Mom was showing me some cookie recipes that she thought I could maybe veganize, because now she just asks me to make the cookies that sound good to her since I love baking. One of them was a salted cashew shortbread.  We both thought a salted nut butter cookie sounded good, but I like my nut butter cookies soft like peanut butter cookies, so I decided to make a salted nut butter cookie in peanut butter cookie fashion (soft and chewy).  I did not use cashew butter or peanut butter though, I used almond, because it is Mom’s favorite and it sounded good to me too.  We both have a thing for roasted almond butter.  I make my own at home, and I go through about a jar a week.

    salted-almond-butter-cookies-4

    The dough for these cookies tasted fabulous, and I am sure I would end up with a couple more cookies if I did not eat so much (don’t worry, the yield amount for the recipe is correct, since I based this off my PB cookie recipe).  But enough of them made it into the oven to share!  Once they were baked and cooled, I dipped them in dark chocolate and sprinkled them with some fleur de sel.  OMG were they ever good!  My Mom much approved as well, as they had some of her favorite ingredients in them.  Add these babies to your Holiday baking to make list!

    salted-almond-butter-cookies-5

    Vegan Chocolate Dipped Salted Almond Butter Cookies 
    Makes 12 cookies

    Ingredients:

    Cookies:

    • 1 Tbsp ground flaxseed
    • 3 Tbsp filtered water
    • 1 cup coconut sugar
    • 3/4 cup organic almond butter
    • 1/4 cup coconut oil, warmed to liquid
    • 1 tsp pure vanilla extract
    • 1 1/4 cups gluten free all purpose flour
    • 3/4 tsp baking soda
    • 1/2 tsp baking powder
    • 1/2 tsp sea salt


    For dipping:

    • 1/2 cup chopped vegan dark chocolate
    • fleur de sel for sprinkling


    Instructions:

    1. In a small bowl, whisk together the flax seed and water.  Place the bowl in the fridge for 15 minutes, this is your flax egg.
    2. In a large bowl, with a wooden spoon, mix together the sugar, almond butter, coconut oil, vanilla and flax egg, until smooth.  Then mix in the flour, soda, baking powder, and sea salt in until the mixture is smooth.
    3. Preheat the oven to 375F degrees.  Line a sheet pan with parchment.
    4. Shape the cookie dough into 2 inch balls, place on your baking sheet a few inches apart and flatten with a fork, like you would with peanut butter cookies.
    5. Place in the oven and bake at 375 for 12 minutes or so, until lightly browned and set.  Allow to cool completely on a rack.
    6. Melt the chocolate in the top of a double boiler (or your preferred method), and dip half of each of the cookies into the chocolate allowing the excess to drain off, then sprinkle with the fleur de sel.  Set on a parchment lined tray to set the chocolate (it will set faster if you pop them in the freezer for about 5 minutes). Enjoy!
  • Holiday Entertaining! Mini Sweet Potato Avocado Crostini and GOODFOODS Guacamole

    Holiday Entertaining! Mini Sweet Potato Avocado Crostini and GOODFOODS Guacamole

    goodfoods-guac

    The Holidays are a beautiful time of the year.  Getting together with loved ones you haven’t seen in ages, sparkling snow and twinkling lights, and choosing the perfect thoughtful Christmas presents for friends and family.  But they can also be hectic, and stressful if you are the one hosting the get together, or maybe you are working a lot and don’t have a lot of time to prepare.  You want to make sure you are taking care of yourself this time of the year and eating healthy so you have enough energy to enjoy all of the Holiday traditions, but maybe you do not have a lot of time to prepare foods.  This is where GOODFOODS Guacamole comes in!

    goodfoods-guac-1

    It is my go-to snack as of lately and it is available in so many stores nationwide so you should not have a hard time finding it.  I bought it at my local Super Target in the produce section.  Why do I love it so much?  Many reason!  First off, it is made with good ingredients.  And by good, I mean Nothing you can’t pronounce, no preservatives, chemicals or additives.  Just avocadoes, and veggies which is really important to me!  I want to be fueling my body with good things, and GOODFOODS guacamole is a good thing!  This stuff is packed with nutrients to keep you feeling good, and it is always fresh, never heated because they use a special process. Not only is it made with good ingredients, but these guys care about the environment as well, they compost all of their avocado skins and pits and hope to become a zero waste to landfill facility! It is not often you hear about companies that do that.  For a healthy snack, I like to mix it into black beans and then use it as a dip for veggies or organic corn chips (made with healthy oils of course).  This is my favorite thing in the afternoon lately after work to eat lately!  Not only that though, GOODFOODS Guacamole is an essential addition to home made tacos, the perfect dip for my sweet potato fries, and even a great addition to appetizers for Holiday parties!  Like the recipe I am sharing with you today!

    goodfoods-guac-4

    Sweet potato toast is all the rage lately with vegans like myself, because I am not a big bread fan and I love sweet potatoes.  Also, avocado toast is always filling my Instagram feed and it always looks so good.  So, I thought why not combine the two, and make a healthier Holiday crostini with smaller sweet potato toasts and the GOODFOODS Guacamole, because they pair so well together!  Low carb, healthy and delicious! All you need to do is roast your sweet potato slices in the oven until golden, top off with the GOODFOODS Guacamole, and then sprinkle with some festive pomegranate seeds, cilantro and jalapenos (or be creative and add your own colorful things)!  Talk about simple and delicious!  They look so festive too!  I always love it when Holiday snacks are healthy, guilt free, AND good. You do not find that at parties often.  I tried both the Pineapple Poblano Guacamole and the Chunky Guacamole for this recipe and they are both good in it so pick the one that sounds best to you!  Even if you don’t try my recipe, I encourage you to find some GOODFOODS guacamole in your area!  You can locate a store near you that carries them on their website HERE. They are in many stores including Target, Costco and Walmart among others, it is not hard to get your hands on.  Make this guacamole part of your Holidays!  Share the Goodness with GOODFOODS!

    goodfoods-guac-5

    Mini Sweet Potato Avocado Crostini with GOODFOODS Guacamole
    Serves 12

    Ingredients:

    Instructions:

    1. Preheat the oven to 400F degrees, and oil a sheet pan.
    2. Toss the sweet potatoes with just enough olive oil to coat, the chipotle powder and sea salt.  Spread the sweet potatoes out on the sheet pan, place in the oven and roast until golden brown, about 45 minutes depending on your oven.  Remove from the oven and let cool until just warm or at room temperature.
    3. Spoon some of the GOODFOODS guacamole onto each sweet potato toast.  Place a slice of jalapeno, a cilantro leaf and a few pomegranate seeds onto each toast.  Arrange on a plate and serve!


  • Vegan Mini Peppermint Swirl Cheesecakes

    Vegan Mini Peppermint Swirl Cheesecakes

    peppermint-cheesecakes-2

    One of the things I love about living in Minnesota is the beautiful scenery we get with the changes of the seasons.  Sure, it gets really cold here in the winter sometimes.  But you have to admit that waking up to a world of sparkling white outside your window is beautiful!  I had to get out and enjoy it last weekend, and I bundled up (but not too much because it was not below 30) and went for a run on the fresh powder.  I love how soft it is, and that squeaking sound my shoes make as they compact it with every footstep.  I also love being the first one on a trail to make the footprints.  So peaceful and serene.  The snow really put me in the mood for Christmas. Although I have been hearing Christmas music around in the stores, and people have their Christmas lights up and whatnot, I hadn’t really felt in the Christmas mood before that.

    peppermint-cheesecakes-4

    So, I put on some Christmas music, and decided to make something festive!  Something red and green and delicious!  Some Vegan Peppermint Cheesecakes! I have been using peppermint a lot in my diffuser, because it smells like candy canes.  And to be honest, that is what gave me the idea!  I am not a big candy cane fan (I have never liked sugary hard candy), but I love peppermint and vanilla together in desserts!  I made mini cheesecakes because they are easier and faster to make than one big one, and great for sharing!  I love sharing treats this time of the year!  And of course shocking people by telling them that they are vegan after they say they are delicious after tasting them.

    peppermint-cheesecakes-3

    These are simple to make, don’t let the swirls and color fool you.  For the crust, I chose a chocolate with a cookie dough like texture and a hint of mint.  It was so good I could have just eaten it like that (the big cookie dough fan that I am), but I wanted there to be enough for the cheesecakes! I used a rich coconut milk and cashew base, which always tastes the best in cheesecakes in my opinion.  For the colors, I went the natural route using matcha (green tea) powder, and beet powder to give them those beautiful hues.  Once they were all chilled and set, I could not wait to taste them!  They were super delicious, the mellow scent of vanilla and fresh peppermint the perfect flavors for the luscious creamy filling and rich chocolate crust! I highly recommend making these for your Holiday parties!  Sooo good!

    peppermint-cheesecakes-1

    Vegan Mini Peppermint Swirl Cheesecakes
    Makes 8

    Ingredients:

    Crust:

    • 1/4 cup plus 2 Tbsp gluten free organic oat flour
    • 2 Tbsp unsweetened cocoa powder
    • 2 Tbsp organic raw cashew butter
    • 2 Tbsp coconut butter, warmed to liquid
    • 1 Tbsp maple syrup
    • 1/2 tsp pure peppermint extract
    • 1/8 tsp sea salt


    Cheesecake Filling:

    • 1 cup full fat organic coconut milk at room temperature
    • 1/4 cup organic raw cashew butter
    • 3 Tbsp maple syrup
    • 1/8 tsp sea salt
    • 1 tsp pure vanilla extract
    • 1/2 cup plus 2 Tbsp coconut butter, warmed to liquid
    • 1 tsp matcha (green tea) powder or spinach powder*
    • 1 tsp beet powder*


    Instructions:

    1. To make the crust, stir together all ingredients in a bowl, and then press into the bottoms of 8 silicone muffin tins, and set them on a tray.  Place in the freezer while you make the filling.
    2. To make the filling, combine all ingredients but the matcha powder and beet powder in a blender and blend until smooth.
    3. Divide the filling between two bowls, and mix the matcha into one bowl, and the beet powder into the other.
    4. Drop the filling over the crust in the tins by the tsp, alternating the two colors until you have the tins full, then swirl with a toothpick to create marbling.
    5. Place cheesecakes in the freezer to firm up for 1-2 hours or until firm (depending on how warm the filling was).  Once they have firmed up, unmold them and place them on a tray to serve!
    6. Store any leftover cheesecakes in the refrigerator for up to 1 week.

    *If you would like to use natural food colorings or spinach or beet juice instead of the powders, go right ahead!  Just add a little at a time until you reach the desired color.  Note that if you add a lot of liquid, you may need to add 1 Tbsp or more extra coconut butter to firm these up.

  • Vegan Chocolate Gingerbread Caramel Lava Cakes

    Vegan Chocolate Gingerbread Caramel Lava Cakes

    chocolate-ginger-caramel-molten-lava-cakes-5

    Everywhere you go now you hear Christmas music, there is a chill in the air (at least where I live), and people are wearing their cozy sweaters and hats.  Tis the season for all things gingerbread!  Also, all things warm, because I don’t know about you, but I need all of the warmth I can get this time of the year.  So, I decided that some warm cake would be lovely!  I decided to combine two delicious desserts, molten chocolate cake and gingerbread.  Bonus, the filling was a caramel!  Because all of those things are so delicious together!  I was in the mood for a quick recipe too, and this fit the bill.

    chocolate-ginger-caramel-molten-lava-cakes-3

    I used my usual date sweetened chocolate cake recipe along with the flavors of gingerbread, molassess and spice and upon tasting the cake batter, and discovering it was super delicious I knew these would bake up well!  These are actually oil free, because I am enjoying nut butter in my cakes in place of oil lately.  For the caramel filling I made a quick nut butter caramel with my pecan butter because it has an almost caramel like flavor when mixed with maple syrup.  Lastly, I added some chocolate chips to the cake too, because gooey little bits of chocolate in warm cake are always welcome.

    chocolate-ginger-caramel-molten-lava-cakes

    These baked up quick, and from start to finish, they were done in under 45 minutes plus the 10 minute cooling time which is always awesome!  Because then you get to enjoy them faster!  These smelled amazing as I pulled them from the oven! Once cool enough to unmold, I topped them off with a little more of the caramel, and they were so delicious!  Rich, gooey, chocolaty, fudgy, caramelly, gingery and everything I imagined they would be!  Give these a try next time you want a quick comfort food winter dessert!

    chocolate-ginger-caramel-molten-lava-cakes-2

    Vegan Chocolate Gingerbread Caramel Lava Cakes
    Makes  four 1 cup cakes

    Ingredients:

    4 1 cup custard dishes

    Cake:

    • 3/4 cups quinoa flour (or all purpose gluten free flour)
    • 2 Tbsp cacao powder or unsweetened cocoa powder
    • 3/4 tsp baking soda
    • 1/2 tsp baking powder
    • 1/4 tsp sea salt
    • 1 tsp ginger
    • 1 tsp cinnamon
    • 1/8 tsp nutmeg
    • 1/8 tsp cloves
    • 1/2 cup packed soft medjool dates, pitted, soaked in water for 30 minutes and 1/2 cup of the water reserved
    • 2 Tbsp raw pecan butter (or almond butter)
    • 1 Tbsp molassess
    • 1 tsp pure vanilla extract
    • 1/2  cup filtered water
    • 1 Tbsp apple cider vinegar


    Caramel Filling:

    • 1/2 cup raw pecan butter (or almond butter)
    • 1 Tbsp maple syrup
    • 2 Tbsp filtered water (or more if needed)
    • pinch sea salt
    • 1 tsp pure vanilla extract

    1/4 cup vegan dark chocolate chips or chunks

    Directions:

    1. Preheat the oven to 375F degrees and position rack in center of oven.
    2. Oil four 1 cup custard dishes or ramakins with coconut oil.
    3. Whisk flour, baking powder, baking soda, sea salt in a large bowl to blend well.
    4. Place dates, reserved water, pecan butter, molasses, water, and vanilla extract into a blender, and blend until smooth, then whisk this blended mixture into the flour mixture until well blended. Whisk in the cider vinegar until bubbles form.
    5. Whisk together the caramel ingredients until smooth (adding more water if you think it is too thick).
    6. Transfer half of the cake batter to prepared pans filling them half full, then sprinkle some chocolate chips over each one, and drop 1 Tbsp of the pecan butter caramel mixture into each in the center. Sprinkle more chocolate chips over that.  Spoon the remaining batter over each one, place on a tray, and place in the oven.
    7. Bake cakes until they are set, but not overbaked about 15-18 minutes.  Remove from oven, let cool for about 10 minutes, then unmold, drizzle with more of the caramel, and enjoy warm.
  • Vegan Gingerbread Crepes

    Vegan Gingerbread Crepes

    Thanksgiving has come and gone, so that means Christmas, Christmas everywhere!  Pretty soon you won’t be able to go anywhere without hearing Christmas music, or seeing festive decorations.  Sometimes I think people go a little overboard, with big decorations but you know what?  Whatever makes them happy!  My Mom was always kind of a minimalist when it came to decorating our home growing up, classic white lights, nature decorations like pine cones and boughs, and I guess that is what I have grown to like.  But you know, what makes me much more happy than Christmas music and decorations, is Christmas goodies!  I love baking cookies this time of the year of course, and gifting them, but this time of the year means making things with the flavors of the season like gingerbread!  Which I don’t believe should be limited to just cookies.  So, since it is Christmas time, I made some gingerbread crepes.  I have been wanting to make crepes for a few weeks now, and since I can finally make the fun Holiday flavored ones I went for it!

    gingerbread-crepes-3

    They were super easy and quick to make! Just whisk together the ingredients, cook them and enjoy!  They smell like gingerbread cookies while cooking!  It is one of the things about the Holidays that I love, all of the good smells.  Reminds me of when my Mom and I used to bake a lot of cookies, fill a big tin and enjoy them for the next few months after.  Gingerbread was usually included.  Anyways, once they were finished, I simply dusted them with a little coconut sugar, served them with a little coconut whipped cream, and they were sooo good!

    gingerbread-crepes-2

    If you are looking for a special little treat to make for Holiday brunch, or an indulgent weekend breakfast, these are perfect!  I think they would be good with some cranberry sauce or jam included too (not the canned stuff though, the good home made stuff).  Or, even topped with chocolate fudge…because chocolate and ginger are amazing together too!  That is the thing I love about crepes, you can stuff them with whatever you want, or keep them really simple with sugar on top.

    gingerbread-crepes-1

    Vegan Gingerbread Crepes
    Makes 14

    Crepes:

    1/4 cup ground flaxseed
    3/4 cup filtered water
    1 1/2 cups gluten free all purpose flour
    3 Tbsp coconut sugar
    2 tsp cinnamon
    2 tsp ginger
    1/4 tsp nutmeg
    1/4 tsp cloves
    pinch sea salt
    2 Tbsp molassess
    1/4 cup melted coconut oil
    1 1/2 cups light coconut milk
    1 tsp pure vanilla extract

    coconut sugar and coconut whipped cream for serving

    To make the crepes, mix together the flaxseed and water in a bowl, and set aside in the refrigerator for 15 minutes until it is the consistency of egg whites.

    Meanwhile, whisk together the coconut sugar, flour, and sea salt in a bowl, then whisk in the coconut oil. Slowly whisk in the milk little by little to make sure the mixture stays free of lumps. Next, whisk in the vanilla, followed by the flax mixture you had set aside.

    Heat a non-stick 6 inch pan over medium heat, then pour in 1/3 cup batter, and swirl the pan so that it spreads out to the edges.  Cook for about 3 minutes on the first side, then flip over and cook the second side. Once the crepe is done, set aside on a plate.  Repeat with the remaining batter, separating the crepes with parchment paper on the plate so that they don’t stick together. Once you have finished allow them to cool completely.

  • Vegan Coconut Chocolate Chunk Pecan Tart

    Vegan Coconut Chocolate Chunk Pecan Tart

    pecan-coconut-chocolate-chunk-tart-5

    My Mom used to ask me to make nut tarts for nearly every Holiday a while back, and they were always a hit!  They are her favorite, and they were pretty darn delicious so I was happy to make them!  We made all sorts of different kinds, pecan chocolate chunk, pine nut caramel, macadamia coconut…and they were all crave worthy!  The secret to why these were so good was the butter and brown sugar.  Loads of it.  So needless to say, it has been a while since I have made any.  I don’t know why I have never veganized them, but I decided to this week, just in time for Thanksgiving, because I knew my Mom would appreciate it.

    pecan-coconut-chocolate-chunk-tart-6

    I saw a recipe for coconut chocolate chunk pecan pie on Pinterest, and that was my inspiration.  It wasn’t vegan at all, but I knew I could make an even better version!  I made it in tart form though, because it bakes up faster but tastes just as good.  The filling for this pie had to have caramel of course, because that is what makes a pecan pie so good.  Since the days when I used to make those tarts, I have discovered date caramel.  It has been my go to caramel for a while now, and my body feels so much better indulging in it than the caramel with dairy and refined sugar I used to eat.  Dates are about as natural as you can get after all when it comes to sweeteners. So I made a delicious date caramel for the filling!

    pecan-coconut-chocolate-chunk-tart-1

    Once the pecans, coconut and chocolate were added, I knew this was going to be delicious!  It smelled amazing while baking, and I couldn’t wait to try it!  But of course, I had to wait until it cooled properly first, which was hard.  It turned out super delicious and my Mom loved it too!  I think I like this tart even better than the ones I used to make!  This would be a perfect dessert addition to your Holiday table!

    pecan-coconut-chocolate-chunk-tart-2

    Vegan Coconut Chocolate Chunk Pecan Tart
    Makes one 8 inch tart

    Ingredients:

    Crust:

    • 1 1/4 cups all purpose gluten free flour
    • 2 Tbsp coconut sugar or maple sugar
    • 1/4 tsp sea salt
    • 1/4 cup plus 2 Tbsp coconut oil in its solid state
    • about 3-4 Tbsp cold water


    Filling:

    • 1 cup soft pitted medjool dates (if they are not soft, soak them in filtered water for 30 minutes and drain well
    • before using)
    • 1/4 cup pecan butter
    • 1 Tbsp maple syrup
    • 1/8 tsp sea salt
    • 1 tsp pure vanilla extract
    • 1/3 cup filtered water
    • 1 Tbsp coconut butter or oil
    • 1 cup toasted pecans, plus more for top of tart
    • 1/2 cup vegan chocolate chunks, plus more for top of tart
    • 1/2 cup large flake coconut, plus more for top of tart


    Directions:

    1. Preheat oven to 375F degrees.
    2. To make the crust, in a large bowl, mix together flour, sugar, and sea salt. Cut in coconut oil with a pastry blender or 2 knives until it is in pea sized pieces. Mix in  just enough water to create a smooth dough that holds together but isn’t too sticky. Add more water if needed, and knead slightly until a smooth dough is created. Roll out into a 9 inch circle using floured parchment underneath and floured rolling pin. Transfer dough to an 8 inch tart pan (don’t worry if it tears, just patch it up and nobody will know).  Set aside.
    3. To make filling, combine all ingredients in a high speed blender or food processor except the pecans, coconut and chocolate. Process until smooth, then scrape into a bowl and stir in the pecans, coconut and chocolate. Spread the filling over the crust, and top with more pecans, coconut and chocolate. Place in the oven.
    4. Bake for about 30 minutes until the crusts are starting to brown lightly. Remove from oven and let cool completely before serving.

    pecan-coconut-chocolate-chunk-tart-4

  • Vegan Molasses Spice Cookies

    Vegan Molasses Spice Cookies

    molassess-spice-cookies-2

    When I was younger, my Mom and I would go to the library, pick out cook books and make a few recipes that we had chosen. I had a few favorite books, most of them were dessert books, including a cookie book with over 100 recipes, and the most beautiful photos! I tried many of the recipes from that book, especially around the Holidays when we did more baking. One recipe in particular my Mom loved, and that was the Joe Froggers. Funny name for a cookie, but they were the most delicious soft molasses cookies we had ever tasted! They were soft, a little chewy, just sweet enough, rich with butter, and aromatic thanks to the spices used in them. Not to mention super easy to make, which is good when you are hungry for cookies. They make your home smell amazing!

    molassess-spice-cookies-4

    So, I decided last week that I needed to veganize them, since I have actually never done so! Surprising I know, and it was about time! In place of the brown sugar I used lower glycemic coconut sugar which did the trick! They tasted plenty sweet with that and the molasses together. In place of the butter I used a combination of coconut oil and pecan butter which worked out perfect! If you don’t have pecan butter though, you may use almond butter. These have a nice amount of spice, cinnamon, nutmeg, ginger, and cloves and they smell simply heavenly as you mix and bake them. The dough is quite addictive as well, as I had to have several (several cookies worth that is) tastes. I have always been a cookie dough kind of girl, since I was in my Grandmas kitchen, knee high and stealing dough when she turned her back. She would always warn me I might get a tummy ache…but I never did.

    molassess-spice-cookies-1

    These cookies smelled wonderful while baking! If you are having guests over, bake these, the aroma is super comforting. Especially around the holidays! So did they stack up to the old recipe I made when I was young? Yes! They were super delicious and didn’t leave me in a sugar coma like the old ones did. I had to share some with my Mom of course, since they were one of her favorites, and she approved! I love spending time in the kitchen baking when the weather turns cooler and being able to share with friends and family!

    molassess-spice-cookies

    Vegan Molasses Spice Cookies
    Makes 24

    Ingredients:

    • 1 cup coconut sugar plus more for rolling cookies.
    • 1/4 cup coconut oil, warmed to liquid
    • 1/2 cup pecan butter (or almond butter)
    • 1/4 cup molasses
    • 1 flax egg (1 Tbsp ground flax seed mixed with 3 Tbsp filtered water)
    • 2 cups Bob’s Red Mill all purpose gluten free flour
    • 2 tsp baking soda
    • 1 tsp cinnamon
    • 1 tsp ginger
    • 1/2 tsp cloves
    • 1/4 tsp nutmeg
    • 1/4 tsp sea salt


    Directions:

    1. Preheat the oven to 350F degrees.
    2. Line a large sheet pan with parchment paper.
    3. In a bowl, mix together the coconut sugar, coconut oil, pecan butter and molasses until smooth.
    4. Add the flax egg and mix until combined.
    5. Mix in the flour, baking soda, and spices until smooth.
    6. Place some coconut sugar in a small bowl.  Roll the cookie dough into 1 inch balls, then roll in coconut sugar and set on the prepared tray, 2 inches apart.
    7. Place tray in the oven and bake for 12-15 minutes until set. Remove from oven, and let cool before enjoying.
  • Vegan Pumpkin Cream Cheese Pie

    Vegan Pumpkin Cream Cheese Pie

    pumpkin-cream-cheese-pie-4

    I can not believe how beautiful it has been here lately!  It was 60F degrees yesterday, and normally it is 40.  I will take it, the snow will fly here soon enough! It is Minnesota after all. So, I took full advantage yesterday, a nice 10 mile run to enjoy the beautiful morning and rising sun, and a nice hike at a local state park in the afternoon with Eric.  It is kind of nice to get off of the paved trails sometimes and walk through the woods with all of the fallen crunchy leaves.  All of that activity made my hungry, so luckily the day before I had made a delicious pie to indulge in later that night.  It was a new pie recipe, indulgent, and to be honest, it would be just perfect for Thanksgiving.  It was a special pumpkin pie with a layer of cream cheese, then a layer of regular pumpkin pie, and topped off with fluffy billowy whipped cream.  OMG was it GOOD!!!

    pumpkin-cream-cheese-pie-1

    I had seen a photo of a pie like this on Pinterest, and it looked amazing and perfect, but it was not vegan or healthy by any stretch.  It was filled with things like cool whip (i.e. chemicals and fake stuff), dairy, loads of sugar and butter.  So, I decided that I needed to make this beautiful pie vegan and healthier so I could enjoy it!  It was not hard to make, I just used my classic pie crust recipe, usual pumpkin pie filling, and a coconut milk and cashew mixture for the cream cheese, and topped it off with the whipped cream I always make (one that doesn’t melt so much at room temperature).  Yes, it is a few steps, but I made the bottom part  the night before, and the topping the next day to make it easier (and this is what I would do if I were serving it for the Holidays too).

    pumpkin-cream-cheese-pie-3

    OMG was it ever heavenly!  It was even better than I had dreamed, and I am sure way better than that pie in the picture was.  I love veganizing stuff!  If you are looking for the perfect Thanksgiving pie, give this a try.  You and your guests will be happy you did!  to be honest, when I was little pumpkin pie was never my favorite at Thanksgiving, but this pie would have won me over and changed my mind.

    pumpkin-cream-cheese-pie-2

    Vegan Pumpkin Cream Cheese Pie

    Makes one 9 inch pie

    Crust:


    Cheesecake:

    • 3/4 cup thick organic coconut milk (from the top of a chilled can)
    • 3/4 cup cashew butter
    • 2 Tbsp maple syrup
    • 1/8 tsp sea salt
    • 1 tsp pure vanilla extract
    • 1/2 tsp cider vinegar
    • 2 Tbsp arrowroot starch or cornstarch


    Filling:

    • 2 cups organic cooked pumpkin (canned is ok too), packed
    • 1/3 cup pure maple syrup
    • 3/4 cup full fat organic coconut milk
    • 2 tsp coconut oil
    • 1 1/4 teaspoon ground cinnamon
    • 1 teaspoon ground ginger
    • 1 /4 teaspoon ground nutmeg
    • 1/4 tsp ground cloves
    • 1/4 teaspoon salt
    • 1 1/2 tablespoons cornstarch
    • 3/4 teaspoon agar powder

    Coconut Whipped Cream:

    • 1 15 oz can full fat organic coconut milk, chilled*
    • 3 Tbsp maple syrup
    • pinch sea salt
    • 1 tsp pure vanilla extract
    • 1/2 cup plus 2 Tbsp coconut butter, warmed to liquid


    1. To make the crust, in a large bowl, mix together flour, sugar, sea salt, and spices. Cut in coconut oil with a pastry blender or 2 knives until it is in pea sized pieces. Mix in  just enough water to create a smooth dough that holds together but isn’t too sticky. Add more water if needed, and knead slightly until a smooth dough is created. Roll out into a 10 inch circle on a sheet of parchment paper, then use the paper to help you transfer it to an 8 inch pie dish.  Flute the edges, and set aside in the refrigerator.
    2. Pre-heat the oven to 375F degrees.
    3. To make the cream cheese, whisk together all ingredients until smooth and set aside.
    4. To make the pumpkin filling, place all ingredients in the blender and blend until smooth.
    5. To assemble the pie, pour the cheesecake layer over the crust, then pour the filling over that.
    6. Place in the pre-heated oven and bake for about  50 min. until the edges of the crust are lightly brown, and pie is set.  Allow to cool completely.
    7. For the whipped cream, combine all ingredients in the blender and blend until smooth, then pour into a bowl. Place in the freezer, and allow to chill for about 30-45 minutes until the consistency of whipped cream.
    8. Spoon the whipped cream on top of the cake and spread almost to the sides.  Serve!  Store any leftovers in the refrigerator.

    *If your coconut milk is especially runny (since some brands vary in texture), you may want to add a few Tbsp more coconut butter.

  • Vegan Italian Walnut Stuffed Mushrooms

    Vegan Italian Walnut Stuffed Mushrooms

    From time to time, my Mom brings me veggies and asks me to make something with them for her, or to veganize a classic recipe and I am more than happy to do so!  She has been trying to eat more plant based lately, and I am proud of her for that!  She brought me some mushrooms this week, and asked if I would make stuffed mushrooms for her because they were so beautiful.  They sounded good to me to, so I was all for it!  This Italian restaurant we used to go to had stuffed mushrooms, and I thought I would make something similar to those.  Those mushrooms tasted good, but my Mom had said they would be better with a less bready stuffing.  They also had cheese, so I had to figure out how to give them a cheesy flavor as well.

    italian-walnut-stuffed-mushrooms-2

    I decided on a walnut stuffing, because in the past I have made walnut meat for things (in my fully raw days) and it is always a hit.  It is usually a substitute for beef, but I thought it would be good here because it would taste similar to meat balls.  I mixed in my typical Italian herbs along with some arugula, tomato paste and some nutritional yeast to give it a cheesy flavor, and it did taste like really good meat balls (but better since it was vegan).  I knew these guys were going to be good!

    italian-walnut-stuffed-mushrooms-1

    I stuffed all of the mushrooms, popped them into the oven, and couldn’t wait to try them once they were baked.  They smelled amazing while baking, enough to make anyone really hungry.  They tasted even better than I had hoped, but most importantly, my Mom thought they were delicious as well!  These would make a great appetizer for a Holiday party! But they make a wonderful snack, or light dinner with a salad as well.

    italian-walnut-stuffed-mushrooms

    Vegan Italian Walnut Stuffed Mushrooms
    Serves 6 as an appetizer

    Ingredients:

    • 1  1/4 cups raw walnuts
    • 1/4 cup nutritional yeast
    • 1/2 tsp dried basil
    • 1/2 tsp dried oregano
    • 1 garlic clove
    • 1/4 tsp sea salt, or to taste
    • 2 Tbsp tomato paste
    • 1 hanful arugula or spinach
    • 8 oz crimini mushrooms, stems removed


    Directions:

    1. Preheat the oven to 400F degrees, and line a sheet pan with parchment.
    2. Combine the walnuts, yeast, basil, oregano, garlic and sea salt in the food processor and process until chopped and walnuts are small pieces. Add the tomato paste and arugula and pulse until blended and arugula somewhat chopped.
    3. Spoon into the mushroom caps so that they are heaped full.  Place in the oven, and bake for about 30 minutes until the mushrooms are tender.  Remove from the oven, garnish with basil, and serve!


  • Vegan Yule Log Cake with Chestnut Cream Filling

    Vegan Yule Log Cake with Chestnut Cream Filling

    IMG_1834

    I have always wanted to make a yule log cake.  I have been telling myself for years that I would make one that year, and now finally this year I decided to.  I had a less than successful experience trying to make a raw one a few years back and it broke all over the place and I have been scared ever since.  I guess I was feeling confident this week.  That and the fact that Eric was telling me I should make a roll cake with chocolate.  That was my little shove.

    IMG_1838

    I tried looking for other vegan recipes for inspiration, but there really aren’t many so I just went with my usual chocolate cake recipe for this, crossing my fingers that it would work.  It smelled amazing and the scraps I trimmed off were so good I knew this was going to be delicious even if it just turned out to be a delicious mess.  For the filling, I decided to include chestnuts because I had some on hand, and they are in season. They are so good, and I like to just eat them but they are special so I thought they deserved some of the spotlight.

    IMG_1843

    The filling was heavenly.  I could have just ate it like mousse, but it was even better when paired with the chocolate cake.  I prayed before I rolled that cake…and it didn’t break all over the place!  I was so happy, you have no idea.  I decided to frost the outside with chocolate frosting, and it was perfect!  Sometimes you just have to take a little leap of faith and take a chance to try making something new putting your fears behind you.

    IMG_1842

    Now, I have a really spectacular cake to serve for Christmas!  I hope you are all having a wonderful Holiday season!

    IMG_1849

    Vegan Yule Log Cake with Chestnut Cream Filling

    Makes one jellyroll style cake

    12 1/2 x 9 1/2 inch jellyroll pan

    Cake:
    1 1/2 cups gluten free all purpose flour
    1/3 cup cacao powder or unsweetened cocoa powder
    1 tsp baking soda
    1/2 tsp sea salt
    1 cup coconut sugar
    1/2 cup olive oil
    1 cup light coconut milk or almond milk
    1 Tbsp pure vanilla extract
    2 Tbsp apple cider vinegar

    Filling:
    1 15 oz can organic full fat coconut milk, chilled (the whole can)
    3/4 cup roasted chestnuts*, soaked for 2 hours and drained
    1/4 cup plus 2 Tbsp raw coconut nectar or maple syrup
    1/4  tsp sea salt
    2 tsp pure vanilla extract
    1/2 cup coconut butter, warmed to liquid

    Frosting:
    1 15 oz can organic full fat coconut milk, chilled (the whole can)
    1/4 cup plus 2 Tbsp raw coconut nectar or maple syrup
    1/3 cup cacao powder or unsweetened cocoa powder
    1/4  tsp sea salt
    2 tsp pure vanilla extract
    1/2 cup plus 1 Tbsp coconut butter, warmed to liquid

    Shaved vegan dark chocolate for topping the cake

    Preheat the oven to 375 degrees and position rack in center of oven. Line a jelly roll pan with parchment paper. Coat parchment paper and pan sides with olive oil. Whisk flour, cocoa powder, baking soda, salt, and sugar in a large bowl to blend well. Whisk oil, coconut milk, and vanilla extract together in small bowl to blend well, then whisk into the flour mixture until well blended. Whisk in cider vinegar and stir quickly (pale swirls will be in the batter, which is the baking soda reacting with the vinegar, which allows the cake to rise since there are no eggs). Transfer cake batter to prepared pan and bake cakes until tester inserted into center comes out clean, about 15-20 minutes (do not overbake though, you don’t want it to be too dry and crumbly). Cool cake completely in pan on rack, about 1 hour. Leave on the parchment paper.

    Meanwhile, to make the filling, combine all ingredients but the coconut butter, in a high speed blender and blend until smooth.  With the motor running slowly, add the coconut butter and process a minute more (if it starts to get lumpy at all during the process it is just the fat separating because it is 2 different temperatures.  Just continue to blend until it is smooth, and it will get warm so it will just have to chill longer). If you do not have a high speed blender and you want the filling extra smooth, strain through a fine meshed strainer to remove any chestnut chunks before chilling. Pour the frosting into a bowl and let sit in the freezer until the consistency of whipped cream, whisking every 15 minutes (this may take anywhere from 15 minutes to hour to an hour depending on how warm it has gotten).

    Once the cream has chilled enough, spread over the top of the cake, then roll up jellyroll style starting with the short side and using the parchment to assist you in rolling.  Be careful because the cake is fragile, but if it cracks as you roll it no worries, keep rolling, you will be covering the outside in frosting anyhow.  Let chill in the freezer once rolled for a few hours.

    Meanwhile, to make the frosting, combine all ingredients but the coconut butter, in a high speed blender and blend until smooth. With the motor running, add the coconut butter and process a minute more (if it starts to get lumpy at all during the process it is just the fat separating because it is 2 different temperatures. Just continue to blend until it is smooth, and it will get warm so it will just have to chill longer). Pour the frosting into a bowl and let sit in the freezer until the consistency of whipped cream, whisking every 15 minutes (this may take anywhere from 15 minutes to hour to an hour depending on how warm it has gotten).

    Spread the frosting over the finished cake, then sprinkle with chocolate shavings.  Serve!

    *To roast chestnuts, poke and X into the top of each one with a knife, and spread them out on a baking sheet.  Roast in a 400F degree oven for about 20-30 minutes until toasted and fragrant.  Allow to cool, and remove the shells.

    ***If you want to make a rectangular layer cake and not a roll cake (which is easier), cut the cake into 3 rectangles, and stack them, frosting 2 of them with the filling, then frosting the outside with the frosting. Or, if you want to make a round layer cake, bake the cakes in 2 6 inch pans for about 25 minutes, then once the cakes are cooled completely, slice the cake layers in half horizontally, and fill the cake layers with the filling.


  • Raw Spicy Holiday Cheeseball

    Raw Spicy Holiday Cheeseball

    IMG_1814

    After I made a successful cheese log last week, I decided that I wanted to make a cheese ball as well.  But this one was going to have a lot more zip and pizazz to it. I had a jalapeno, and I wanted to use that in there.  After all, jalapenos and cheese are a match made in heaven.  This was a use what I had on hand kind of a thing, but it turned out so good.  It had beautiful flecks of color on the inside, and green pumpkin seeds on the outside.  It was rather festive looking once cut into.  For the cheese I used a mixture of cashew butter and coconut because that has been my favorite base when it comes to soft cheese as of lately, and instead of just my usual lemon juice I added lime as well.  I did not use probiotics this time, because I wanted it to be ready the same day, but I gave it a cheesy flavor with some nutritional yeast.

    IMG_1815

    It ended up tasting almost like cheddar.  I added jalapeno for a kick, scallions, garlic and sun dried tomatoes for a savory flavor, and cranberries for a little sweetness.  I rolled it in pumpkin seeds, because I thought they would be prettier than nuts.  It ended up being so good!

    IMG_1820

    Raw Spicy Holiday Cheeseball

    Serves 6-8

    1/2 cup young coconut meat, packed (or 1/2 cup soaked cashews or macadamia nuts if coconut unavailable)

    1/2 cup raw cashew butter or macadamia nut butter

    1/4 tsp sea salt

    juice of one large lemon

    juice of one large lime

    1/4 cup nutritional yeast

    1 garlic clove

    1 jalapeno, seeded, and minced

    1/2 cup sun dried tomatoes, chopped

    1/4 cup dried cranberries

    3/4 cup raw pumpkin seeds

    In a food processor or high speed blender, combine the coconut meat, cashew butter, sea salt, lemon and lime juice, nutritional yeast and garlic, and blend until smooth.  Scoop into a bowl, stir in all remaining ingredients except the pumpkin seeds and cover.  Let sit in the refrigerator until chilled. Once chilled, scoop onto a sheet of plastic wrap, and use it to shape into a ball (kind of rolling it on the inside of the plastic).  Spread out pumpkin seeds on a plate, and then roll the cheese ball in it using the plastic to assist you so it does not stick to your hands.  Place in the refrigerator for a few hours to firm up before serving. Keeps for about 1 week in the refrigerator.


  • Vegan Peppermint Cheesecake Brownies

    Vegan Peppermint Cheesecake Brownies

    IMG_1800

    I was in a big brownie sort of mood on my day off.  It was raining and sleeting outside, it was dark and dreary…but I was in a good mood!  Because I was in my kitchen in my pjs listening to Christmas music and whipping up a batch of brownies!  Now who wouldn’t be in a good mood with that?!  Anyways, I didn’t just want to make plain old brownies.  I wanted to make something festive with a bit of color.  I decided on peppermint cheesecake.

    IMG_1802

    I love how pretty candy canes look on top of brownies and such, but I am not a fan of what goes into them.  Loads and loads of processed sugar.  So, I was going to add a bit of natural green color in the cheesecake portion of my brownies.  I made this luscious mint cheesecake mixture from cashew butter and coconut milk, and it was divine!  My special ingredient that no one need know about was a bit of spinach for color.  Don’t worry you could not taste it.  It just makes the loveliest hue of green.

    IMG_1803

    I poured it over my favorite brownie batter recipe, and was super excited about this.  They smelled heavenly!  There is just something very happy about the aroma of brownies.  I topped them off with dark chocolate chunks and I could not wait for them to cool so I could do a taste test.  Not that I hadn’t already tasted the batter, the cheesecake part and the chocolate chunks…because everything needs to be quality control tested right?  Anyways, they were wonderful once they had cooled.

    IMG_1804

    Fudgy, rich, and minty.  Christmasy, but these could really be made any time of the year when you are feeling in the brownie making mood.  I hope you are all having a wonderful Holiday season!

    IMG_1806

    Vegan Peppermint Cheesecake Brownies

    Makes 16

    Cheesecake swirl:

    3/4 cup thick coconut milk (from the top of a chilled can)

    1/2 cup cashew butter

    2 Tbsp maple syrup

    1/8 tsp sea salt

    1 tsp mint extract

    1 tsp pure vanilla extract

    1 handful spinach leaves

    2 Tbsp arrowroot starch or cornstarch

    Brownies:

    1/2 cup plus olive oil

    3 Tbsp applesauce

    1 1/3 cups coconut sugar

    1/4 cup plus 2 Tbsp reduced aquafaba or 2 flax eggs*

    2 teaspoon vanilla extract

    1 tsp peppermint extract

    1 cup gluten free all-purpose flour

    1/2 cup cacao powder or unsweetened cocoa powder

    1/4 teaspoon sea salt

    1/2 cup vegan chocolate chunks

    To make the swirl, combine all ingredients in a blender and blend until smooth.  Pour into a bowl and set aside.

    To make the brownies, pre-heat the oven to 375F degrees. Whisk together the sugar, olive oil and applesauce until well combined and the sugar is starting to break down.  Add the aquafaba, mint and vanilla and beat until smooth.  Add the flour, cacao powder and sea salt and beat until smooth.  Scrape the batter into a greased 8×8 inch pan, then pour the swirl over it.  Scatter the chocolate chunks over that. Place in the oven, and Bake for about 30 minutes or until set (but do not over bake).  Let cool before cutting into bars.

    *The aquafaba is the liquid from cooked or canned chickpeas.  You want it to be thick like egg whites.  If you are wanting to make flax eggs, simply mix together 2 Tbsp ground flax seeds, and 6 Tbsp filtered water and let sit in the refrigerator for 15 minutes before using in the recipe.


  • Festive Pomegranate Slaw

    Festive Pomegranate Slaw

    It has been really unseasonably warm here lately.  It is supposed to be almost winter, and normally we have lots of snow on the ground by now and I am running in a Winter wonderland with solid lakes and sparkling icicles hanging from the trees, but instead it is brown.  Don’t get me wrong, I wish it never got below 40F degrees in Minnesota and I could live without the snow but it is just weird not to have it. And I am craving more non-wintery foods too.  I whipped up a salad to pack in my lunches this week, and it was festive, yet fresh.  Kind of goes with the weather we are experiencing at the moment.  But I think this might actually be something that would be lovely to serve at the Holidays too since we often times serve lots of rich foods and this would be good to offset that.

     IMG_1725

    It is a simple salad, yet so good.  Shredded red cabbage, pomegranate seeds, scallions, cranberries and parsley in a citrus vinaigrette.  So tasty, and it is actually detoxifying thanks to all of the healthful ingredients.  I enjoyed it with some baked tempeh, but you can serve it with whatever you like.  Now I have something to be excited about in my lunches this week.  The best part about this besides it tasting good, is how quick it is to make!

    IMG_1726

    Festive Pomegranate Slaw

    Serves 2-4

    1/2 head red cabbage, shredded

    4 scallions, thinly sliced

    1/4 cup chopped fresh parsley

    1 cup pomegranate seeds

    1/2 cup dried cranberries

    Dressing:

    2 Tbsp lemon juice

    2 Tbsp orange juice

    2 tsp each orange and lemon zest

    1 Tbsp maple syrup

    2 Tbsp olive oil

    sea salt to taste

    In a large bowl, combine all ingredients, and toss well to coat the veggies with the dressing.  Serve!


  • Vegan Eggnog Waffles

    Vegan Eggnog Waffles

    My Dad gave me a “Frozen” (as in the Disney movie) waffle maker last week, and I was pretty excited about it.  Mainly because the waffle mold inside is shaped like a snowflake, and it is now snowing here and practically Winter. Yes, I know I am a kid sometimes getting excited about things, but I mean come on…it is so cute! And who doesn’t like fun waffles?!  Or just waffles in general.  They were always a treat growing up, and my Mom had a pretty great recipe that always turned out perfect.  I liked mine with just a bit of butter and strawberries the best.

    IMG_1656

    I venture out a bit more now in the waffle world.  Rarely do I make just plain old waffles. Not that there is anything wrong with those, but I like to think outside the box flavor wise.  I had just made a batch of vegan eggnog, and I decided it would be awesome in waffles.  Eric has been mentioning eggnog quite a bit, since he loves the stuff and gets excited every year when it is eggnog season (like so excited he drank an entire batch one time, like a gallon).  So, I knew he would love it too if I made eggnog waffles too.

    IMG_1655

    I kind of created a new waffle recipe here, it is different than the one I usually use but it turned out awesome.  I used aquafaba as the eggs, and eggnog in place of the milk, and these turned out crispy on the outside and fluffy in the middle just as waffles should be! I dusted them with a bit of powdered sugar then just served with a little maple syrup.  Call me weird, but this is dessert, as well as breakfast. I actually ate these for dessert, because they were so good. These would make the perfect treat for a chilly Winter weekend morning when you don’t feel like going, out, just staying in and staying warm.  And, just in case you have any leftovers, they freeze well.  Just pop them in the toaster!  I saved some that way for Eric, since I ended up making more than I had intended.

    IMG_1659

    Vegan Eggnog Waffles

    makes 10-12 depending on your waffle maker

    Batter:

    2 cups gluten free all purpose flour

    1/4 cup coconut sugar

    1/2 tsp baking soda

    1 tsp baking powder

    1 tsp sea salt

    1/2 cup plus 1 Tbsp aquafaba*

    2 Tbsp melted coconut oil

    2 cups vegan eggnog (recipe follows)

    coconut powdered sugar for serving (optional)**

    Whisk together all of the dry ingredients, then whisk in the wet ingredients.  Pre-heat waffle iron. Once it is heated, add about 1/3 cup waffle batter to the iron and close it (the size of the scoop of batter you need may change if you have a larger iron, mine is smaller).  Cook according to waffle iron package directions.  Keep warm in an oven at low heat (150F degrees). Dust waffles with coconut powdered sugar if desired before serving.

    *Aquafaba is chickpea liquid.  You may used canned, or if you are using the liquid from home cooked chickpeas, reduce it to the consistency of egg whites.  Alternatively, you may use 3 flax eggs for the recipe (3 Tbsp ground flaxseed, whisked together with 1/2 cup plus 1 Tbsp filtered water).

    **To make coconut powdered sugar, buzz 1/2 cup finely shredded, dried coconut and 1/4 cup coconut sugar or xylitol in a high speed blender for about 30 seconds until fine like flour.

    Amy’s Vegan Eggnog

    Makes about 4 cups

    2 cups full fat coconut milk (you may use light if you would prefer it less rich)

    2 cups filtered water

    1/3 cup maple syrup (or a few dropperfuls stevia for sugar free)

    1 cup macadamia nuts or cashews, soaked in filtered water for 4 hours, and drained

    2 Tbsp nutritional yeast

    2 tsp pure vanilla extract

    1/2 tsp cinnamon

    1/2 tsp nutmeg

    pinch sea salt

    Combine all ingredients in a high speed blender and blend until smooth.  Serve!


  • Vegan Gingerbread Cheesecake and a L. C. Finns Extract Giveaway!

    Vegan Gingerbread Cheesecake and a L. C. Finns Extract Giveaway!

    IMG_1629

    When L. C. Finns contacted me and asked if I would like to try their line of flavor extracts I was excited.  I looked on their website and discovered that they make all of their extracts small batch by hand, and they are made with real ingredients!  Heck yes I wanted to try them.  And even better, they are located very close to where I live!  I am always up for supporting local companies, especially ones like this one that use real stuff in their products.

    IMG_1545

    Another thing that caught my eye was the flavors that they make.  Of course there was the vanilla extract, but they also have coffee, cardamom, anise, hibiscus, cinnamon, and ginger. I don’t think I have ever seen these flavors in natural form elsewhere.  When the box arrived I could not wait to open it.  I immediately had to smell them.  They smelled amazing.  The beautiful aromas making my nose happy. And, they were all full sized bottles, how generous!  I was very grateful to receive such a gift.

    IMG_1627

    I had to test them out in a few recipes, my Vegan Mocha Pumpkin Bread, and my Vegan Hazelnut Cardamom Chocolate Chunk Cookies.  They contributed lovely flavors to both!  I decided that I needed to create something even more spectacular with them, so I made a Vegan Gingerbread Cheesecake! About 10 years ago, I had made a gingerbread cheesecake for Christmas, and it was so good.  I have never attempted to veganize it until now.

    IMG_1640

    I was excited about this.  I could use four of the flavor extracts in it, the vanilla, the cinnamon, the ginger and the anise. I made little vegan gingerbread cookies, then used those as the base of the cheesecake, then made a luscious cheesecake filling from coconut milk flavored with the same aromatic ingredients.  This was going to be sooo good!

    IMG_1641

    The extracts added a special little aromatic note to the cake, it was beautiful!  Are you intrigued yet about these lovely extracts?  Well, guess what? L. C. Finns was kind enough to let me do a giveaway of their products.  One lucky winner will get a set of all seven extracts!  So, scroll to the bottom of the page to enter (US residents only please)!  Or, if you would like, you can purchase the extracts for yourself L. C. Finns website HERE.  These would be perfect for Christmas presents or Christmas baking.

    IMG_1642

    Vegan Gingerbread Cheesecake
    Makes one 6 inch cake

    Crust:

    1 cup crushed vegan gingerbread cookies (recipe follows)
    1 1/2 Tbsp coconut oil, melted

    Filling:

    1 cup gingerbread crumbs
    2 15 oz cans full fat coconut milk
    2/3 cup maple syrup
    1/4 tsp sea salt
    2 tsp each L.C. Finns cinnamon, ginger, vanilla and anise extracts
    2 tsp cinnamon
    1 Tbsp ginger
    1/2 tsp nutmeg
    1/2 tsp cloves
    1 1/2 cups coconut butter (not oil), warmed to liquid

    Preheat the oven to 375F degrees. To make the crust, place the 2 cups gingerbread cookies in a food processor, and process until crumbs.  Add the coconut oil, and pulse until it is well incorporated. Press the crust into the bottom of a 6 inch round deep springform cake pan.  Place in the oven and bake for about 10 minutes until it is browning a little and set. Remove from the oven and let cool completely.

    Meanwhile, to make the filling, combine all ingredients but the coconut butter, in a high speed blender or food processor and blend until smooth. With the motor running, add the coconut butter and process a minute more (if it starts to get lumpy at all during the process it is just the fat separating because it is 2 different temperatures. Just continue to blend until it is smooth, and it will get warm so it will just have to chill longer). Pour the filling over the prepared crust, and place in the freezer to set for about 4 hours. Decorate with extra gingerbread cookies.

    Mini Vegan Gingerbread Cookies
    Makes about 50 mini cookies

    1 Tbsp ground flax seed
    3 Tbsp filtered water
    2 1/4 cups gluten free all purpose flour
    1/3 cup coconut sugar
    2 tsp cinnamon
    2 tsp ground ginger
    1/4 tsp nutmeg
    1/4 tsp cloves
    1/4 tsp baking soda
    1/4 tsp sea salt
    1/3 cup maple syrup
    1/2 cup melted coconut oil
    1 tsp each L.C. Finns cinnamon, ginger, vanilla and anise extracts

    In a small bowl, whisk together the flax seed and water and set aside.
    In a large bowl, whisk together the flour, sugar, cinnamon, ginger, nutmeg, cloves, baking soda, and sea salt.
    Whisk in the remaining ingredients, and the flax mixture until smooth. Scoop dough onto a piece of parchment, and sort of flatten with your hands. Place in the freezer for about 30-45 minutes, or until it is more firm and rollable.
    Pre-heat the oven to 350F When ready to roll, flour a rolling pin, and roll the dough out 1/8 inch thick on a sheet of parchment. Cut into small shapes with a cookie cutter and place on two parchment lined baking sheets. Re-roll any scraps and cut them out as well (if at any time it gets too warm and sticky, place back in the freezer for 5-10 min).
    Place cookies in the oven and bake for about 15 minutes until set, a little crispy, and starting to brown at the edges. Let cool completely. You will need to crush up 2 cups for the recipe, but reserve the rest for decorating or eating.

    IMG_1644


    a Rafflecopter giveaway

  • Vegan Cheddar Thyme Biscuits

    Vegan Cheddar Thyme Biscuits

    I haven’t made biscuits in ages, and I know I have never made vegan biscuits, so I decided to make some last Monday on my day off.  Honestly, I had seen someone making some on a cooking show and they started to sound really good to me.  I told Eric I was going to make them, and he said that his favorite biscuits were always the ones at Red Lobster.  They were mine too growing up.  I am sure they were from a boxed mix and none of us would eat them now, but they were sure good back then.  So, I decided to make my biscuits cheddar.

    IMG_1601

    I wanted something herb in them, so I decided on thyme, because it is my favorite herb in the chillier months.  Plus, cheddar thyme is a delicious combination.  I ended up making basically a savory version of my scone dough, because I know it turns out flaky and tender when handled properly.  I did not use vegan butter in these, but instead coconut oil, because it sort of behaves like butter and I am not a big fan of fake butter.

    IMG_1599

    They smelled amazing while baking, and tasted even better.  I enjoyed them much more than typical non-vegan biscuits.  Just goes to show that vegan foods are just as delicious.  I think these would be a wonderful addition to your Holiday table.

    IMG_1600

    Vegan Cheddar Thyme Biscuits
    Makes 8

    2 cups all purpose gluten free flour
    1 cup organic cornmeal
    1/4 cup nutritional yeast
    2 Tbsp dried thyme
    2 1/2 tsp baking powder
    1/4 tsp salt
    1/2 cup virgin coconut oil, cut into chunks
    1 cup cold full fat organic canned coconut milk (whisked until smooth if chunky)

    Preheat oven to 425 with the rack set at the middle position. Line a baking sheet with parchment. In a large bowl, combine the flour, baking powder, and salt. Cut in the coconut oil with a pastry blender or 2 knives until the mixture starts to clump into pea sized pieces.
    Add the coconut milk to the dough, and stir a few times, but do not overmix. The dough should hold together when squeezed, but still be clumpy (do not overmix, you want chunks of the oil in the dough or it will become tough). Press the dough into a 1 1/2 inch thick rectangle, then cut out the biscuits with round cookie cutter.  Reshape the scraps into a rounds too but try not to handle the dough too much or the biscuits will become tough.
    Place scones on the prepared baking sheet, reshaping slightly if necessary. Bake for about 20 minutes or until golden brown. Cool on a wire rack.


  • Vegan Cranberry Pear Pie with Walnut Crumble Topping

    Vegan Cranberry Pear Pie with Walnut Crumble Topping

    IMG_1570
    When I was little, I thought cranberries came in a can, jiggled and nothing more.  I was not a big fan, and usually didn’t take any on Thanksgiving.  They just seemed to me like they were part of the tradition but nobody really ate them.  Thank goodness I have since been exposed to good cranberries.  I love buying fresh ones this time of the year and making them into something delicious.  Especially when used in a baked dessert where they can be allowed to become almost jammy.  So when I saw some at the store last week, I had to pick them up.
    IMG_1574
    I decided to bake one of those delicious desserts, a vegan cranberry pear pie.  Pears are sweet, cranberries are tart, so it is the perfect pairing! I am on a huge pie kick lately.  My favorite is with a crumble topping. It is a bit less fussy, and even more delicious and crunchy. I am a big texture person so the jammy filling with a crunchy topping is perfect in my book.  Especially when paired with coconut whipped cream or ice cream.
    IMG_1575
    I used an equal of cranberries and pears in the filling to balance it out nicely.  Some orange zest and juice joined the show since it is a lovely flavor with cranberry. I was getting excited about this!  I made a crunchy walnut crumble topping, and I knew this was going to be good.  Once it was smelling all wonderful and baked to jammy perfection I could not wait to dive in.
    IMG_1577
    I always have to cut myself a pretty large piece.  It was wonderful.  Sweet, tart, crunchy, melt in your mouth, heavenly.  No reason to be sad about summer fruit being out of season when you have this type of deliciousness!  Cranberries to the rescue!  This would be the perfect addition to a Holiday table!
    IMG_1578
    Vegan Cranberry Pear Pie with Walnut Crumble Topping

    Makes 1 9 inch pie

    Crust:
    1 1/2 cups all purpose gluten free flour
    3 Tbsp coconut sugar
    1/4 tsp sea salt
    6 Tbsp coconut oil, in its solid form
    about 2-3 Tbsp cold water

    Filling:
    3 cups diced ripe pears
    3 cups fresh or frozen organic cranberries (if they are frozen, thaw them first, and drain off any liquid)
    juice and zest of one small orange
    1/4 cup coconut sugar
    2 Tbsp arrowroot powder or all purpose gluten free flour
    2 tsp pure vanilla extract
    1/4 tsp cinnamon
    pinch sea salt

    Topping:
    3/4 cup gluten free all purpose flour
    3 Tbsp coconut sugar
    1/4 cup melted coconut oil
    1/2 cup gluten free rolled oats
    3/4 cup chopped walnuts
    pinch sea salt

    To make the crust, in a large bowl, mix together flour, sugar, sea salt.  Cut in coconut oil with a pastry blender or 2 knives until it is in pea sized pieces.  Mix in just enough water to create a smooth dough that holds together but isn’t too sticky.  Add a 2-3 Tbsp water as needed, and knead slightly until a smooth dough is created.
    Roll out into about a 9 inch round using parchment underneath and floured rolling pin.  Place dough into an 8 inch pie pan and fit to edges (being careful since gluten free dough is more fragile). If it tears, no worries, just press it back together and patch it up. Flute the edges, or crimp with a fork. Set aside in the refrigerator.
    To make the topping, combine all ingredients in a bowl, and mix together and squeeze together until it is clumping up a bit.  Set aside.

    Pre-heat the oven to 400F degrees. In a large bowl, toss together the filling ingredients. Spoon into crust.  Scatter the topping over that. Bake for 1 hour in the middle rack of the oven until pears are cooked through, cranberries have burts and it is and bubbling (after 15 minutes check it and if it is getting too dark, tent it with foil for the rest of the time in the oven).

    Remove from oven and let cool until warm, and top with some ice cream or coconut vanilla whipped cream and enjoy!


  • Vegan Sweet Potato Cranberry Pancakes

    Vegan Sweet Potato Cranberry Pancakes

    IMG_1457

    Last Thursday, It was a rather chilly day, and Eric and I had just arrived back from a walk in the in the dark. It was sleeting, which had made it even more chilly, and all I could think about was what sort of warm comfort food I was going to make when I arrived home.  My first thought was waffles, and so I went for it.  Sweet potato cranberry waffles.  Sounded really good.  I had lots of cooked sweet potatoes on hand.  I whipped up the batter, poured it into the iron and they were smelling amazing.  Only one problem.  When I went to open the iron, they were sticking really bad.  A total flop.  Yes, I have some flops I just don’t usually share them with you all.  It was sort of funny, and sort of sad at the same time.  Also a little irritating since I hate wasting ingredients.  I tossed the flops out though, and decided pancakes would be fail proof.

    IMG_1458

    I made them sweet potato cranberry as well, and they came out lovely.  This made me pretty happy after the flop.  Eric was teasing me about my flop waffles, but I still shared some pancakes with him.  They turned out really delicious!  They smelled wonderful while cooking, thanks to the aromatic spices I included and sweet potatoes.

    IMG_1459

    I topped them off with a maple pecan syrup, and it was all in all a delicious combination!  Breakfast for dinner is a treat sometimes, and needed sometimes.  Kind of makes me feel like a little kid again, because I always loved it when my Mom made pancakes or waffles for dinner when I was young.  These would also be perfect on a chilly weekend morning when you have time to relax and enjoy the day!

    IMG_1461

    Vegan Sweet Potato Cranberry Pancakes

    Makes 3 Belgian Waffles

    2 Tbsp ground flax seed

    1/4 cup plus 2 Tbsp filtered water

    2 cups gluten free all purpose flour

    3/4 tsp sea salt

    1 tsp baking powder

    1/4 tsp baking soda

    1/2 cup coconut sugar

    1 1/4 cups thin coconut milk  at room temperature

    3/4 cup sweet potato puree

    3 Tbsp melted virgin coconut oil warmed to liquid

    1/2 cup dried cranberries

    Maple Pecan Syrup Drizzle:

    2 Tbsp maple syrup

    1/4 cup pecan butter

    1-2 Tbsp filtered water or as needed

    In a small bowl, whisk together the flax seed and water, and set in the fridge for 15 minutes until the mixture is gel like.
    Meanwhile, whisk together the flour, salt, baking powder, baking soda, and coconut sugar in a large bowl.  Whisk in the coconut milk, sweet potato and oil until combined, then the flax eggs (flax water mixture) until combined. Stir in the cranberries.

    To cook pancakes, preheat oven to 200 degrees. Heat a large non-stick pan over medium heat and add a little coconut oil to coat the bottom. Once hot, add the batter in 1/4 cup amounts (I did 3 at a time, but it depends on your pan). Let the pancakes cook for about 2-3 minutes on the first side until set and starting to brown, then flip with a spatula and cook another 2-3 minutes on the other side. When cooked, place on a plate and keep warm in the oven while you repeat the process with the remaining pancakes.

    To drizzle, whisk together all ingredients until smooth (if it is too thick to drizzle, whisk in a little more filtered water), then drizzle over the pancakes before serving.


  • Raw Cranberry Pecan Truffles

    Raw Cranberry Pecan Truffles

     IMG_1393

    It is the time of year when I find myself adding cranberries to everything.  Salads, desserts, savory dishes…they are so pretty, like little red jewels, plus they are delicious.  I am one of those people who likes tart things.  Anyways, I decided last week one night that some cranberry pecan truffles sounded amazing.  I love pecans as well, they are so buttery and delicious and I thought they would go perfect with the tart berries.

    IMG_1395

    I wasn’t sure exactly how I was going to make them when I started, and just started adding things to the food processor, and what I ended up with was pure deliciousness.  I was going to add cacao powder into the mixture, but I decided I liked it as it was with the pecans and cranberries as the stars and the main thing that I tasted.  I did however dip them in raw chocolate because I wanted a little chocolate to go with them but still be able to taste the delicate flavors.

    IMG_1397

    I think these would make lovely holiday gifts, but you could of course make a batch for yourself, because you deserve to enjoy delicious things and feel special.  These are easy to make, so no excuses not to try them!

    IMG_1398

    Raw Cranberry Pecan Truffles

    makes 12

    1 cup dried cranberries

    1/2 cup soft, pitted medjool dates

    2 cup raw pecans

    1 cup finely shredded, dried coconut

    1 tsp cinnamon

    1 Tbsp orange zest

    1/8 tsp sea salt

    1/2 cup raw chocolate, chopped

    Combine all ingredients in a food processor and process until the mixture holds together when squeezed. Shape into 12 balls, and place in the freezer for 15 minutes.

    Melt the raw chocolate either over a double boiler (not letting it get above 115F degrees), or pop it into the dehydrator at 115F degrees, and stir about every 10 minutes until it melts.

    Dip each cranberry pecan ball into the melted chocolate and set on a foil or parchment lined tray (I like to use a fork to set it on and dip it to let the excess drain off). Allow to set, place in the freezer for 15 minutes.  Store in an airtight container in the refrigerator for 2 weeks.


  • Raw Eggnog Cheesecake with Chocolate Swirl and Gingerbread Crust

    Raw Eggnog Cheesecake with Chocolate Swirl and Gingerbread Crust

    Tis the season for Eggnog, which is exactly why I decided to make an eggnog cheesecake!  What could be better than one of my favorite Holiday drinks combined with my favorite dessert? Raw Guru and Windy City Organics had just sent me some new spreads and nut butters to try, one of which was a chocolate coconut.  I thought it would be marvelous swirled into the cheesecake.  I have never had eggnog and chocolate before so why not try it?

    To make the cake even better, I thought why not make a gingerbread crust for it as well and go all out with the Holiday theme.  For the filling, I used something you would not expect in a cheesecake…yellow squash (the type that is similar to zucchini).  It kept it light, but it tasted just as rich and you would not have any idea it was in there had I not told you.  I made the cake taste a little more like eggnog with the addition of nutritional yeast, cinnamon and nutmeg as well as vanilla which I consider an essential ingredient in all my cakes.

    The filling tasted heavenly, even before I assembled and chilled the cake.  Like thick eggnog. The Rawmio Chocolate coconut was marvelous swirled in as well and it paired perfectly with the eggnog and gingerbread flavors!  I think this cake would be perfect as the finale to any Holiday meal, but it was awesome as an early December treat as well because one needs no occasion to eat cake, it is good every day!

    Raw Eggnog Cheesecake with Chocolate Swirl and Gingerbread Crust
    Makes one 6 inch cake

    Crust:
    2/3 cup raw sprouted buckwheat groats (or additional coconut)
    1/3 cup ground flax seed

    3/4 cup dried finely shredded coconut

    1/8 teaspoon sea salt
    2 tsp cinnamon
    1 Tbsp fresh ginger
    1/4 tsp nutmeg
    1/2 tsp cardamom
    10-12 soft medjool dates, pitted and chopped (if they are not soft, soak them in water until they are and drain them well)

    Filling:
    3 cups young coconut meat*
    2 cups diced yellow squash (yellow zucchini)**
    1/3 cup coconut water

    2/3 cup raw coconut nectar, or maple syrup
    1/2  teaspoon sea salt
    1 Tbsp nutritional yeast
    2 tsp cinnamon
    1/2 tsp nutmeg
    1 Tbsp pure vanilla extract and seeds from half a vanilla bean
    3/4 cup raw coconut butter (warmed to liquid)

    1/2 cup Rawmio Chocolate Coconut Butter warmed to liquid

    Fresh cranberries, pistachios and pecans for garnish

    Lightly coat a 6 inch spring form removable bottom pans with coconut oil. To prepare the crust, process flax, coconut, buckwheat and sea salt in a food processor until fine crumbs, then add the dates and process until the mixture holds together when squeezed between your fingers (if not holding together, add more dates). Firmly press crust into the bottom of the prepared pan, and set aside.
    To make the filling, in a high speed blender or food processor, combine coconut meat, water, coconut nectar, sea salt, nutritional yeast, nutmeg, cinnamon and vanilla in a food processor and blend until smooth and creamy. With the processor running, add the coconut butter and process for a minute until blended.
    To assemble cheesecake, 1/3 of the filling over the crust, then drop some of the chocolate spread over it by the tsp and swirl with a knife to create marbling. Pour half the remaining filling over that, and drop more of the spread by the tsp over that. Then pour the remaining filling over and more of the spread, then swirl with a knife to create marbling. Place in the freezer for about 4 hours to firm up. Garnish the top with cranberries, pistachios and pecans before serving.

    *If you do not have access to young coconut meat, you can substitute 3 cups raw cashews soaked for 4 hours and drained.
    **If you do not want to use yellow squash, you can use additional coconut.