Tag: brunch

  • Vegan Carrot Cake Waffles

    Vegan Carrot Cake Waffles

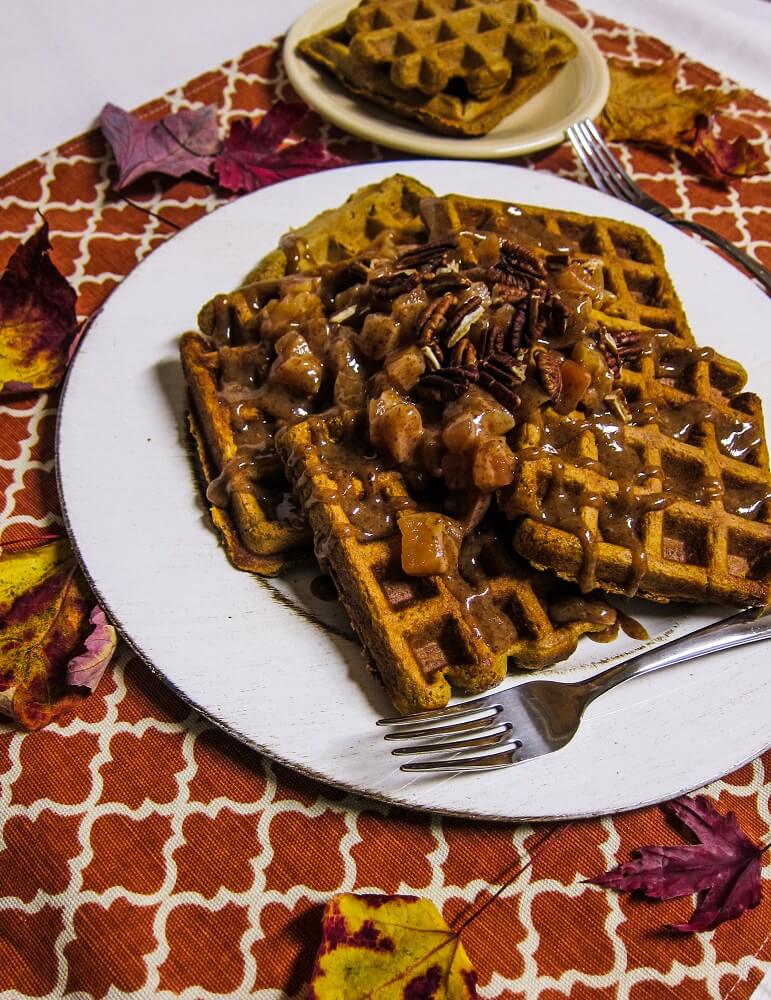
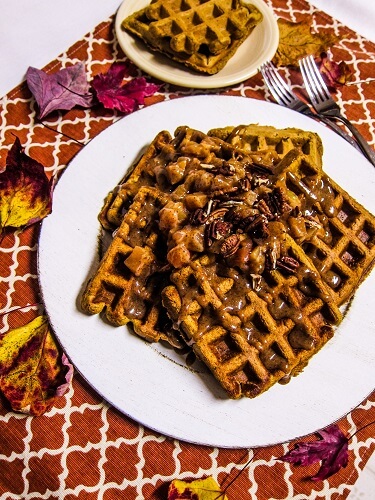
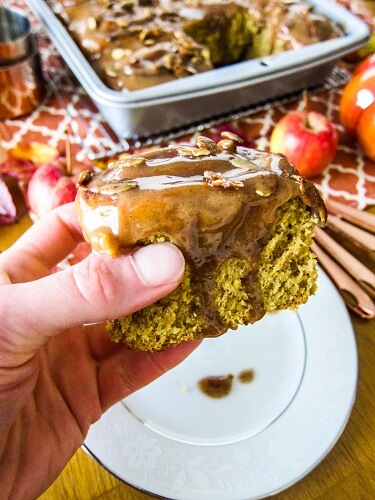
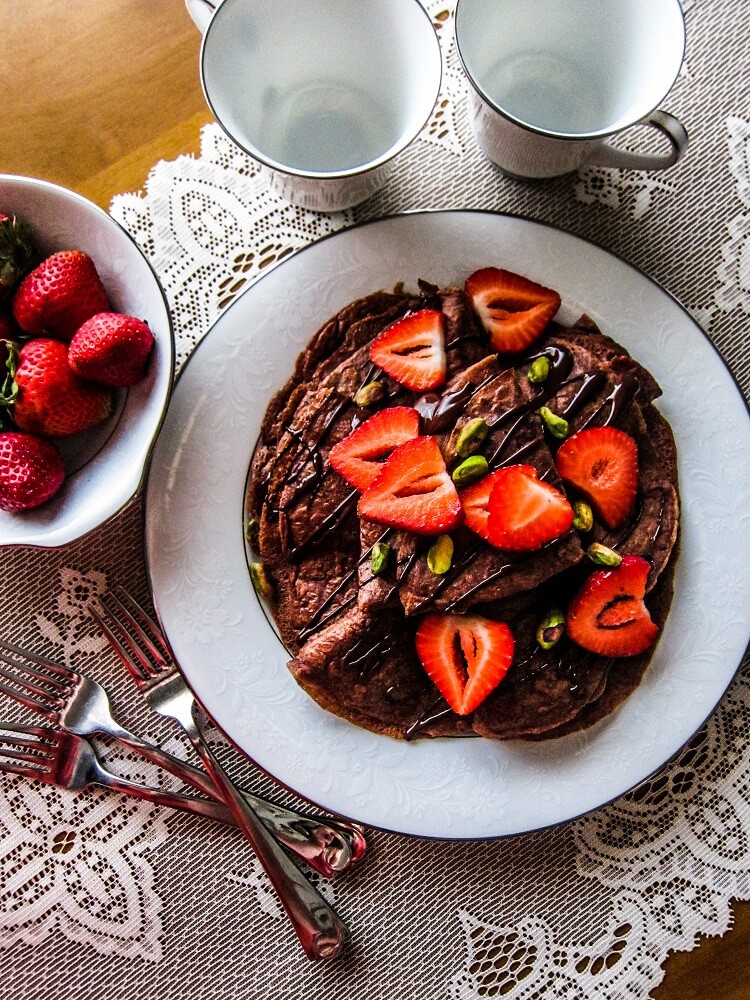
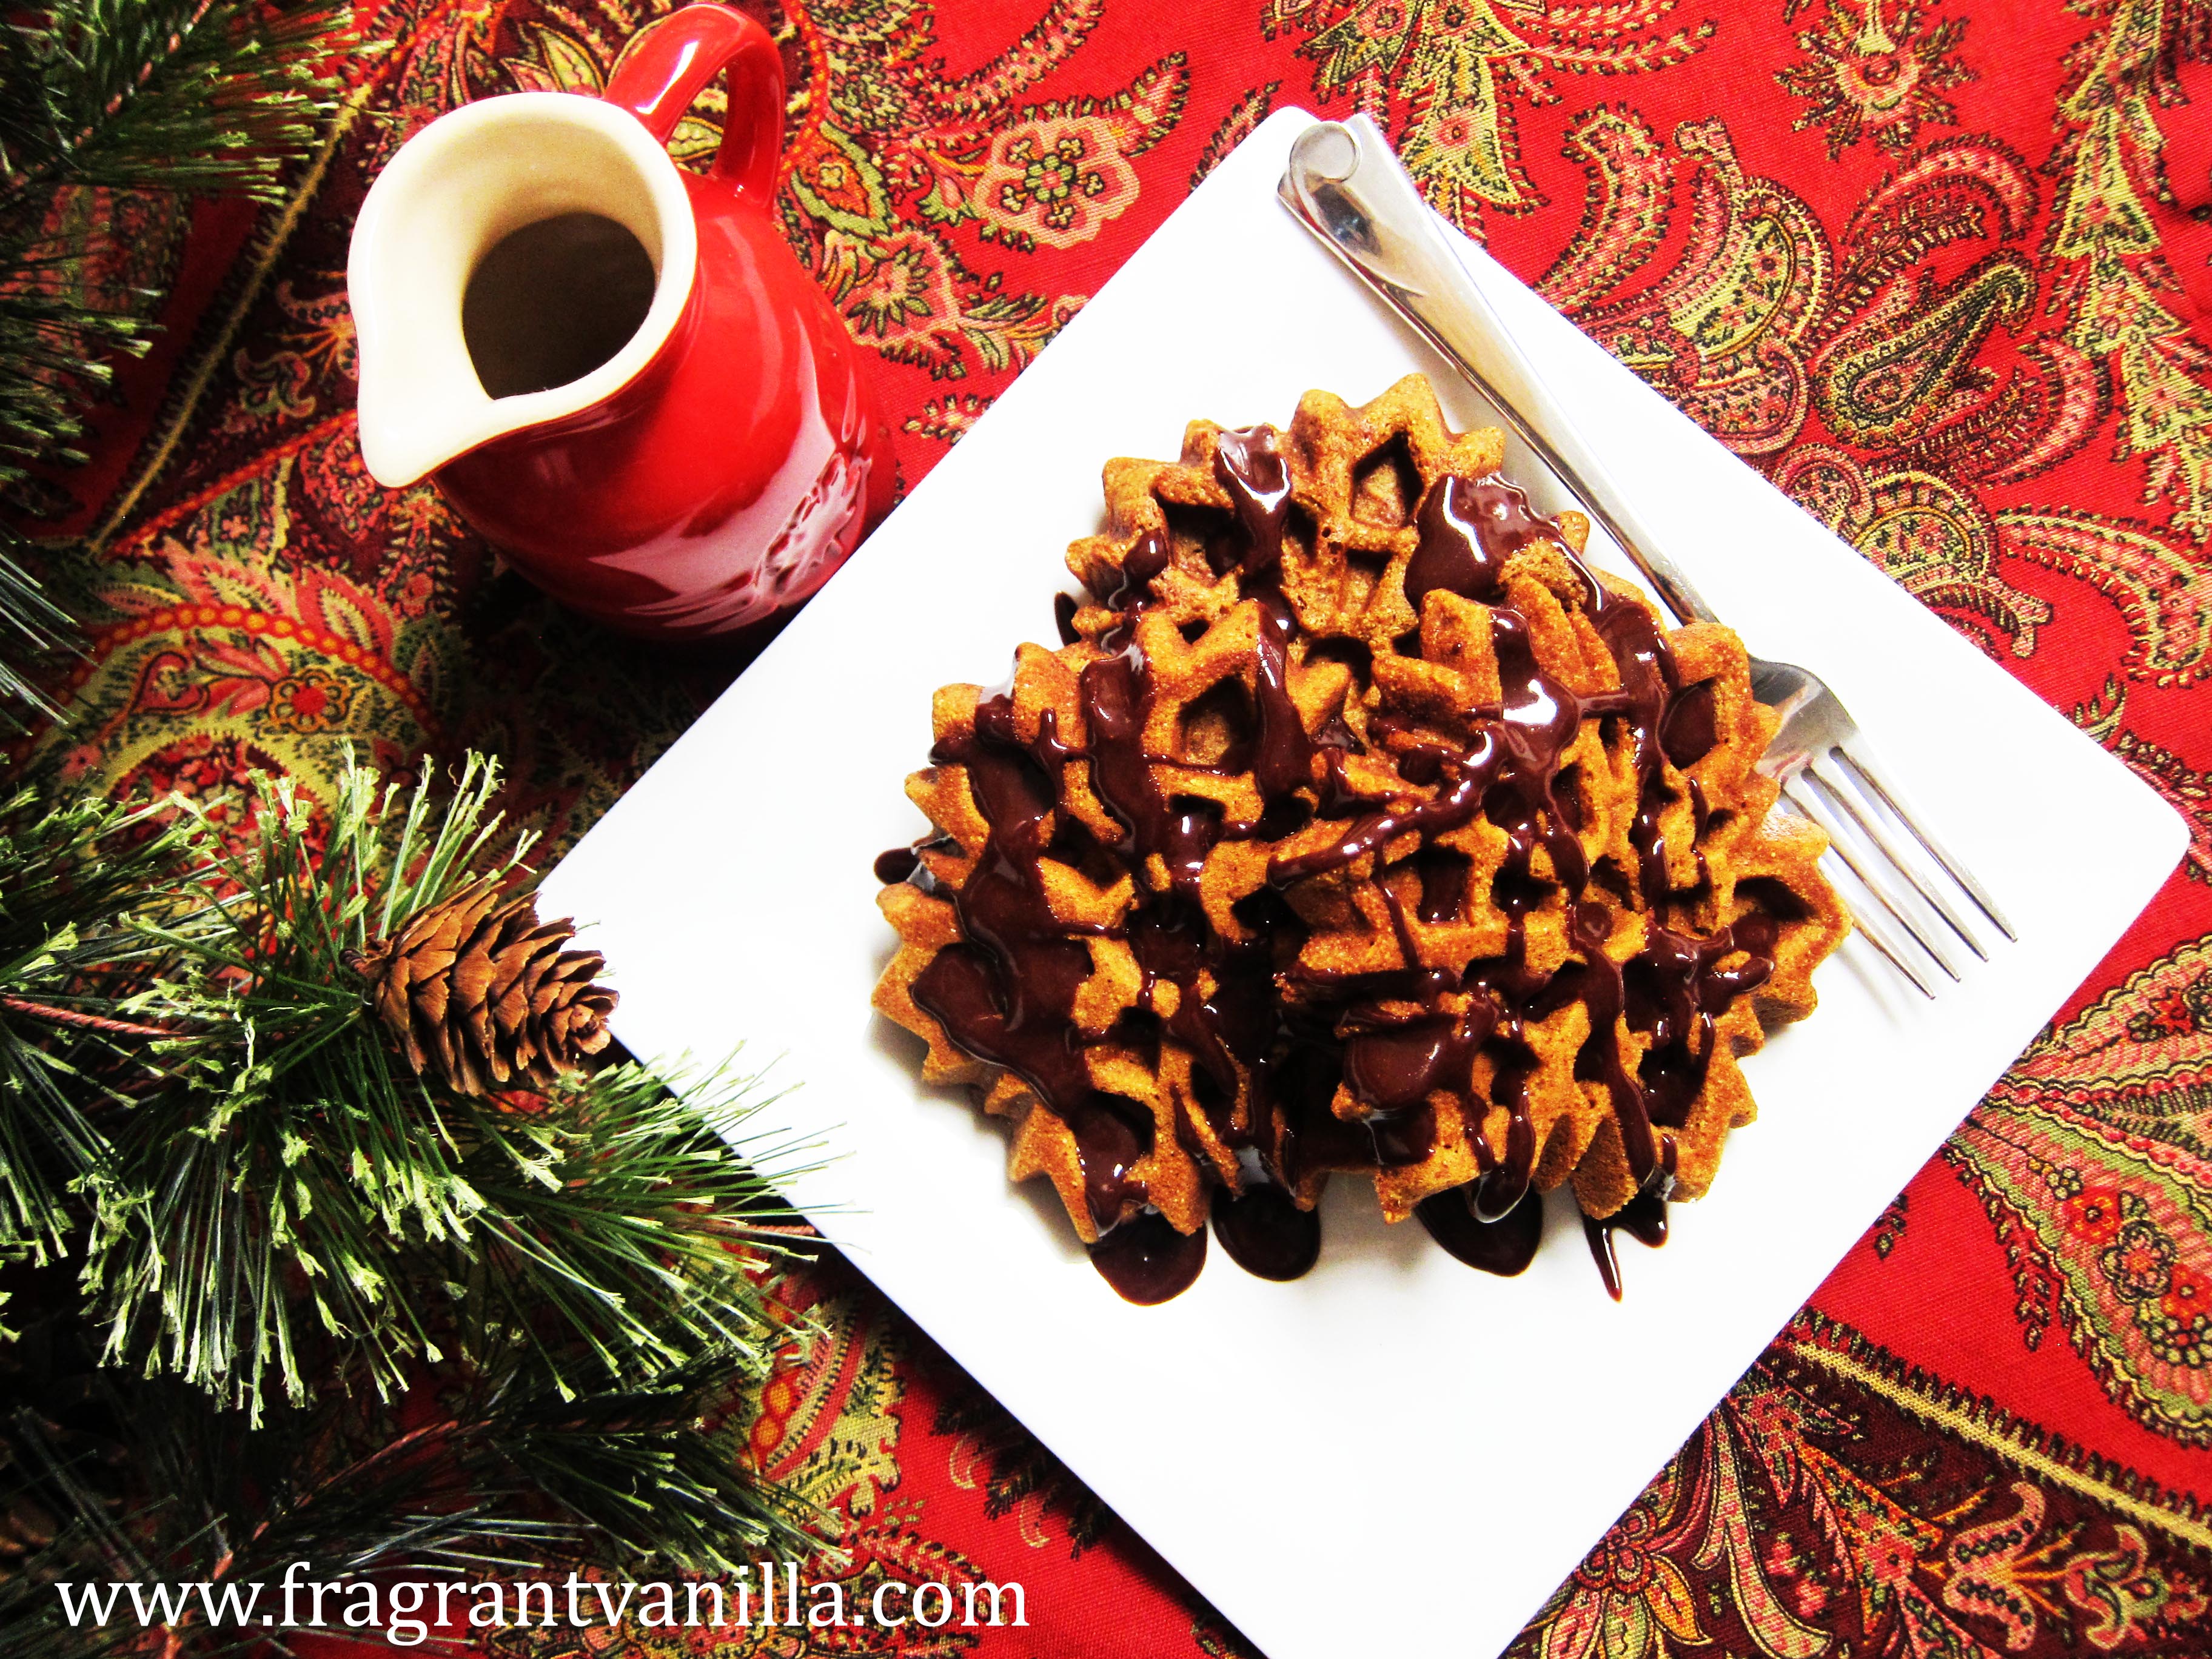
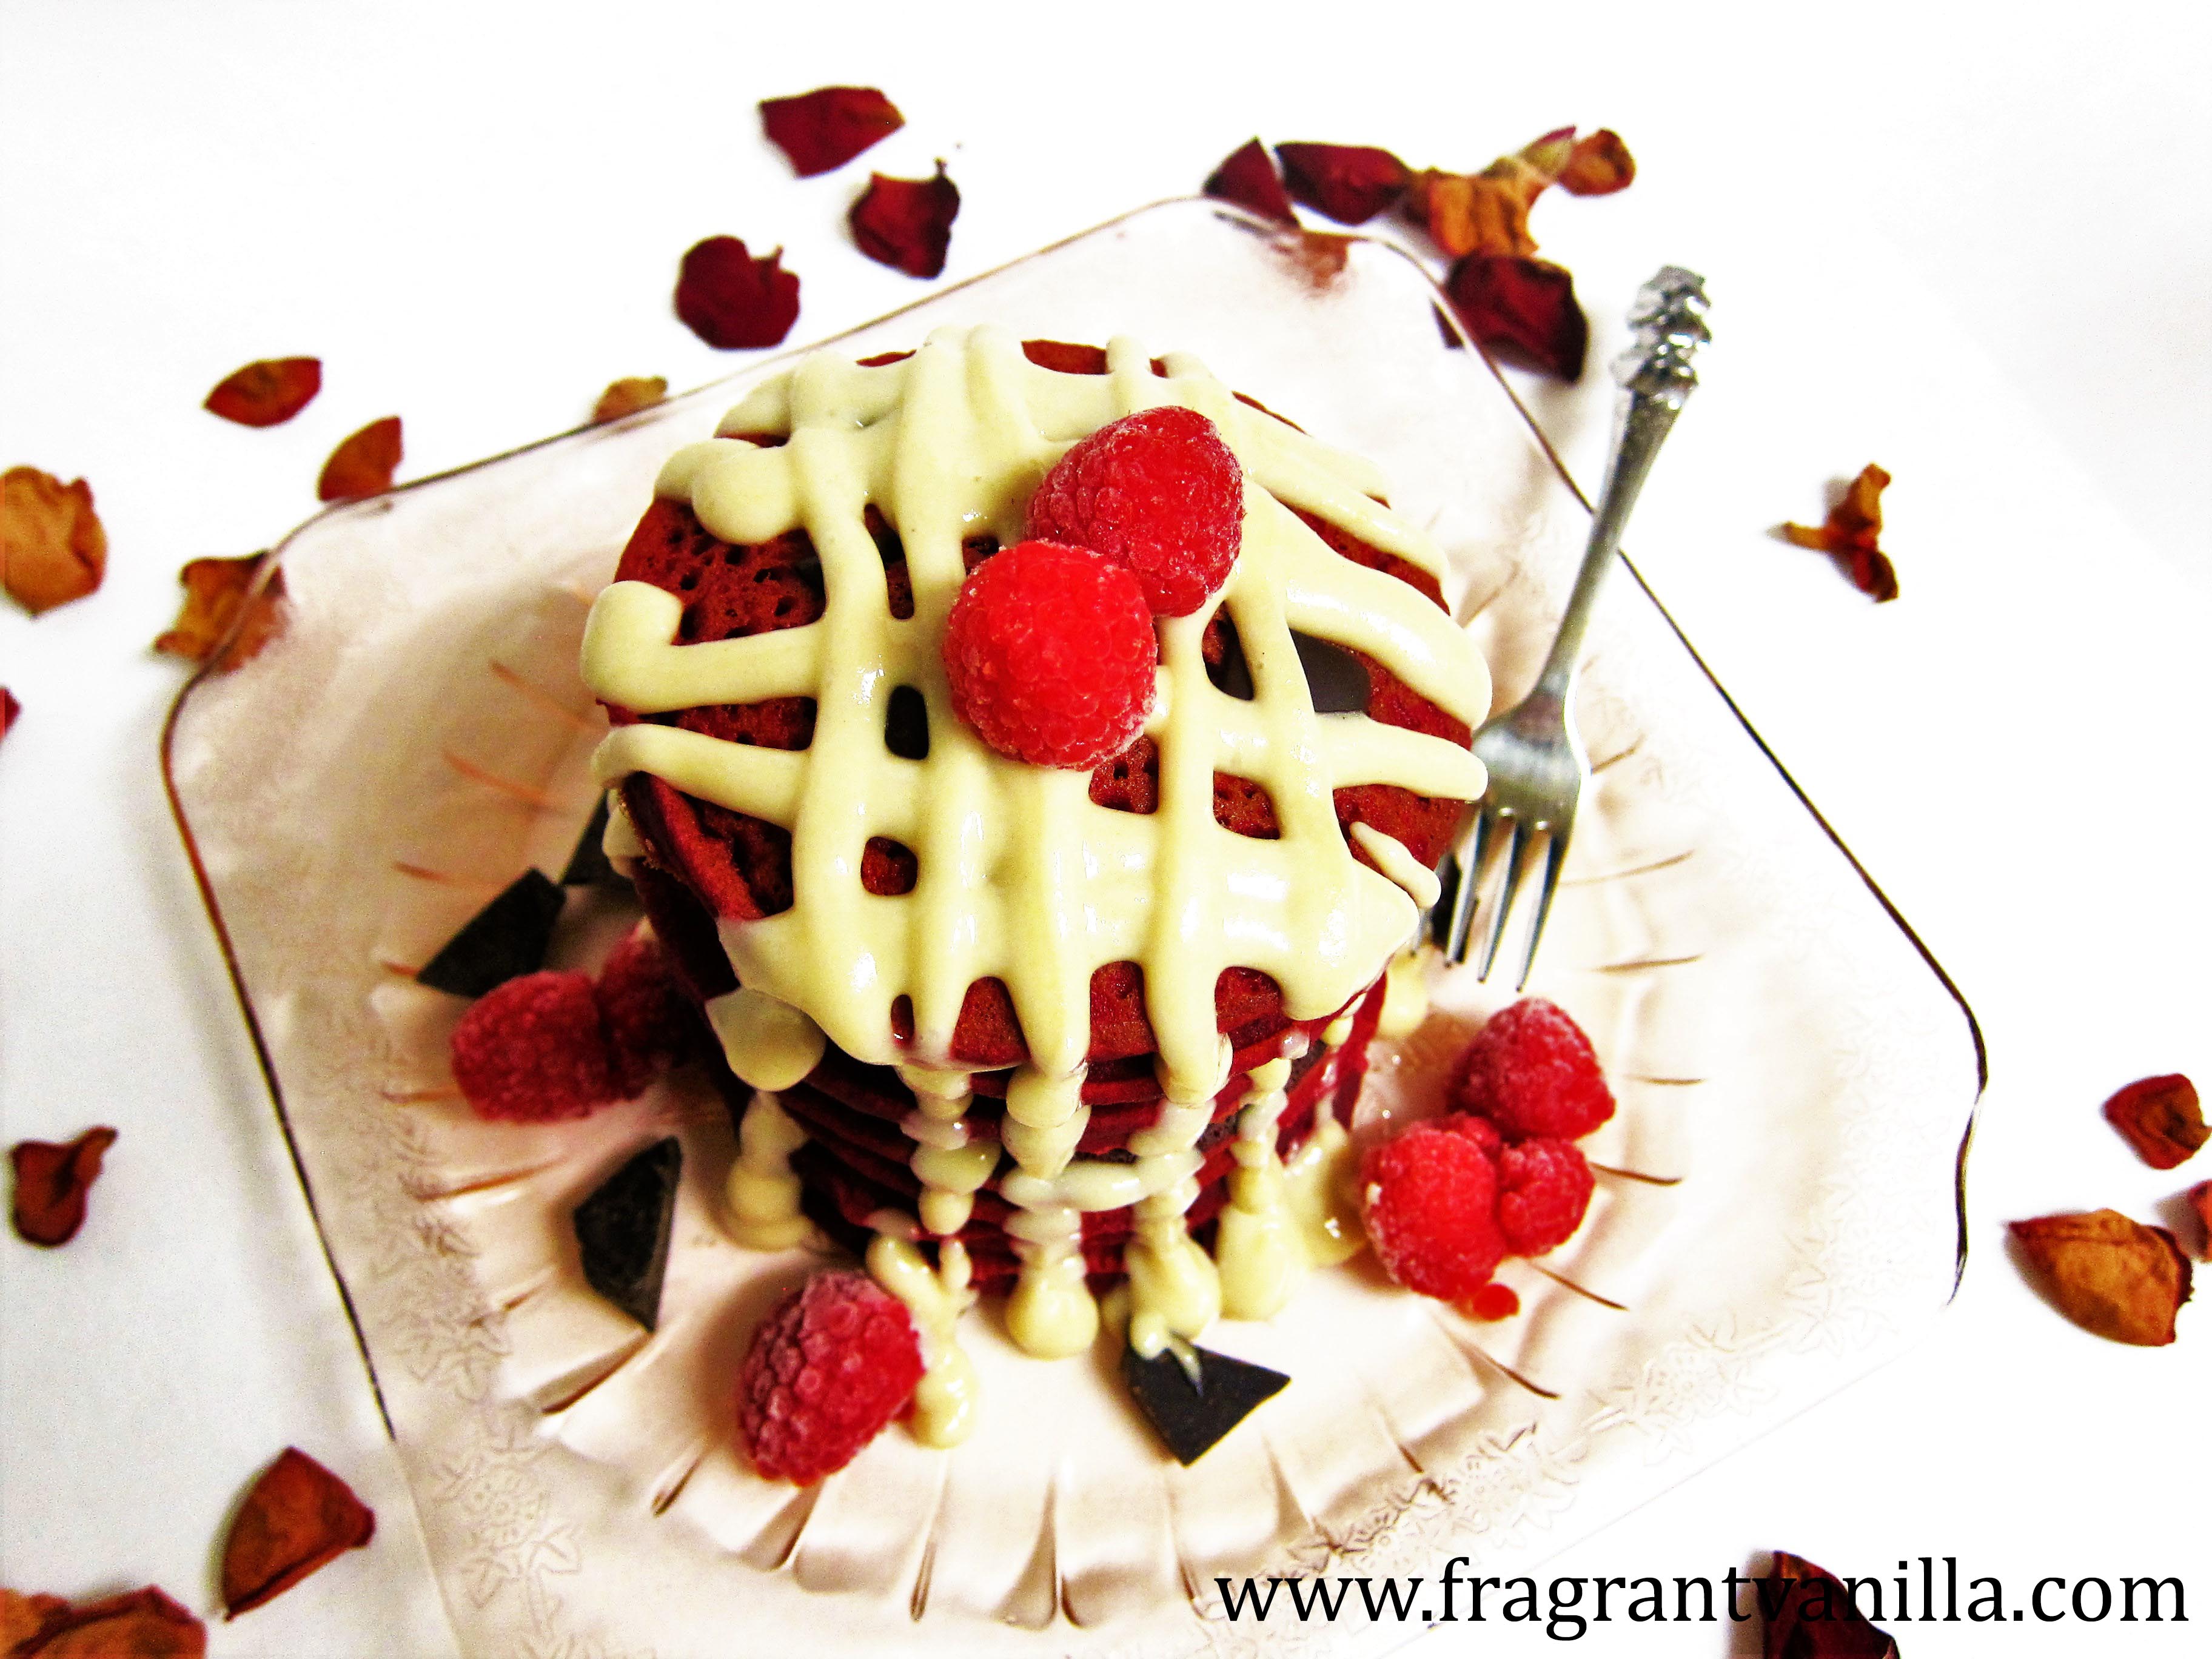
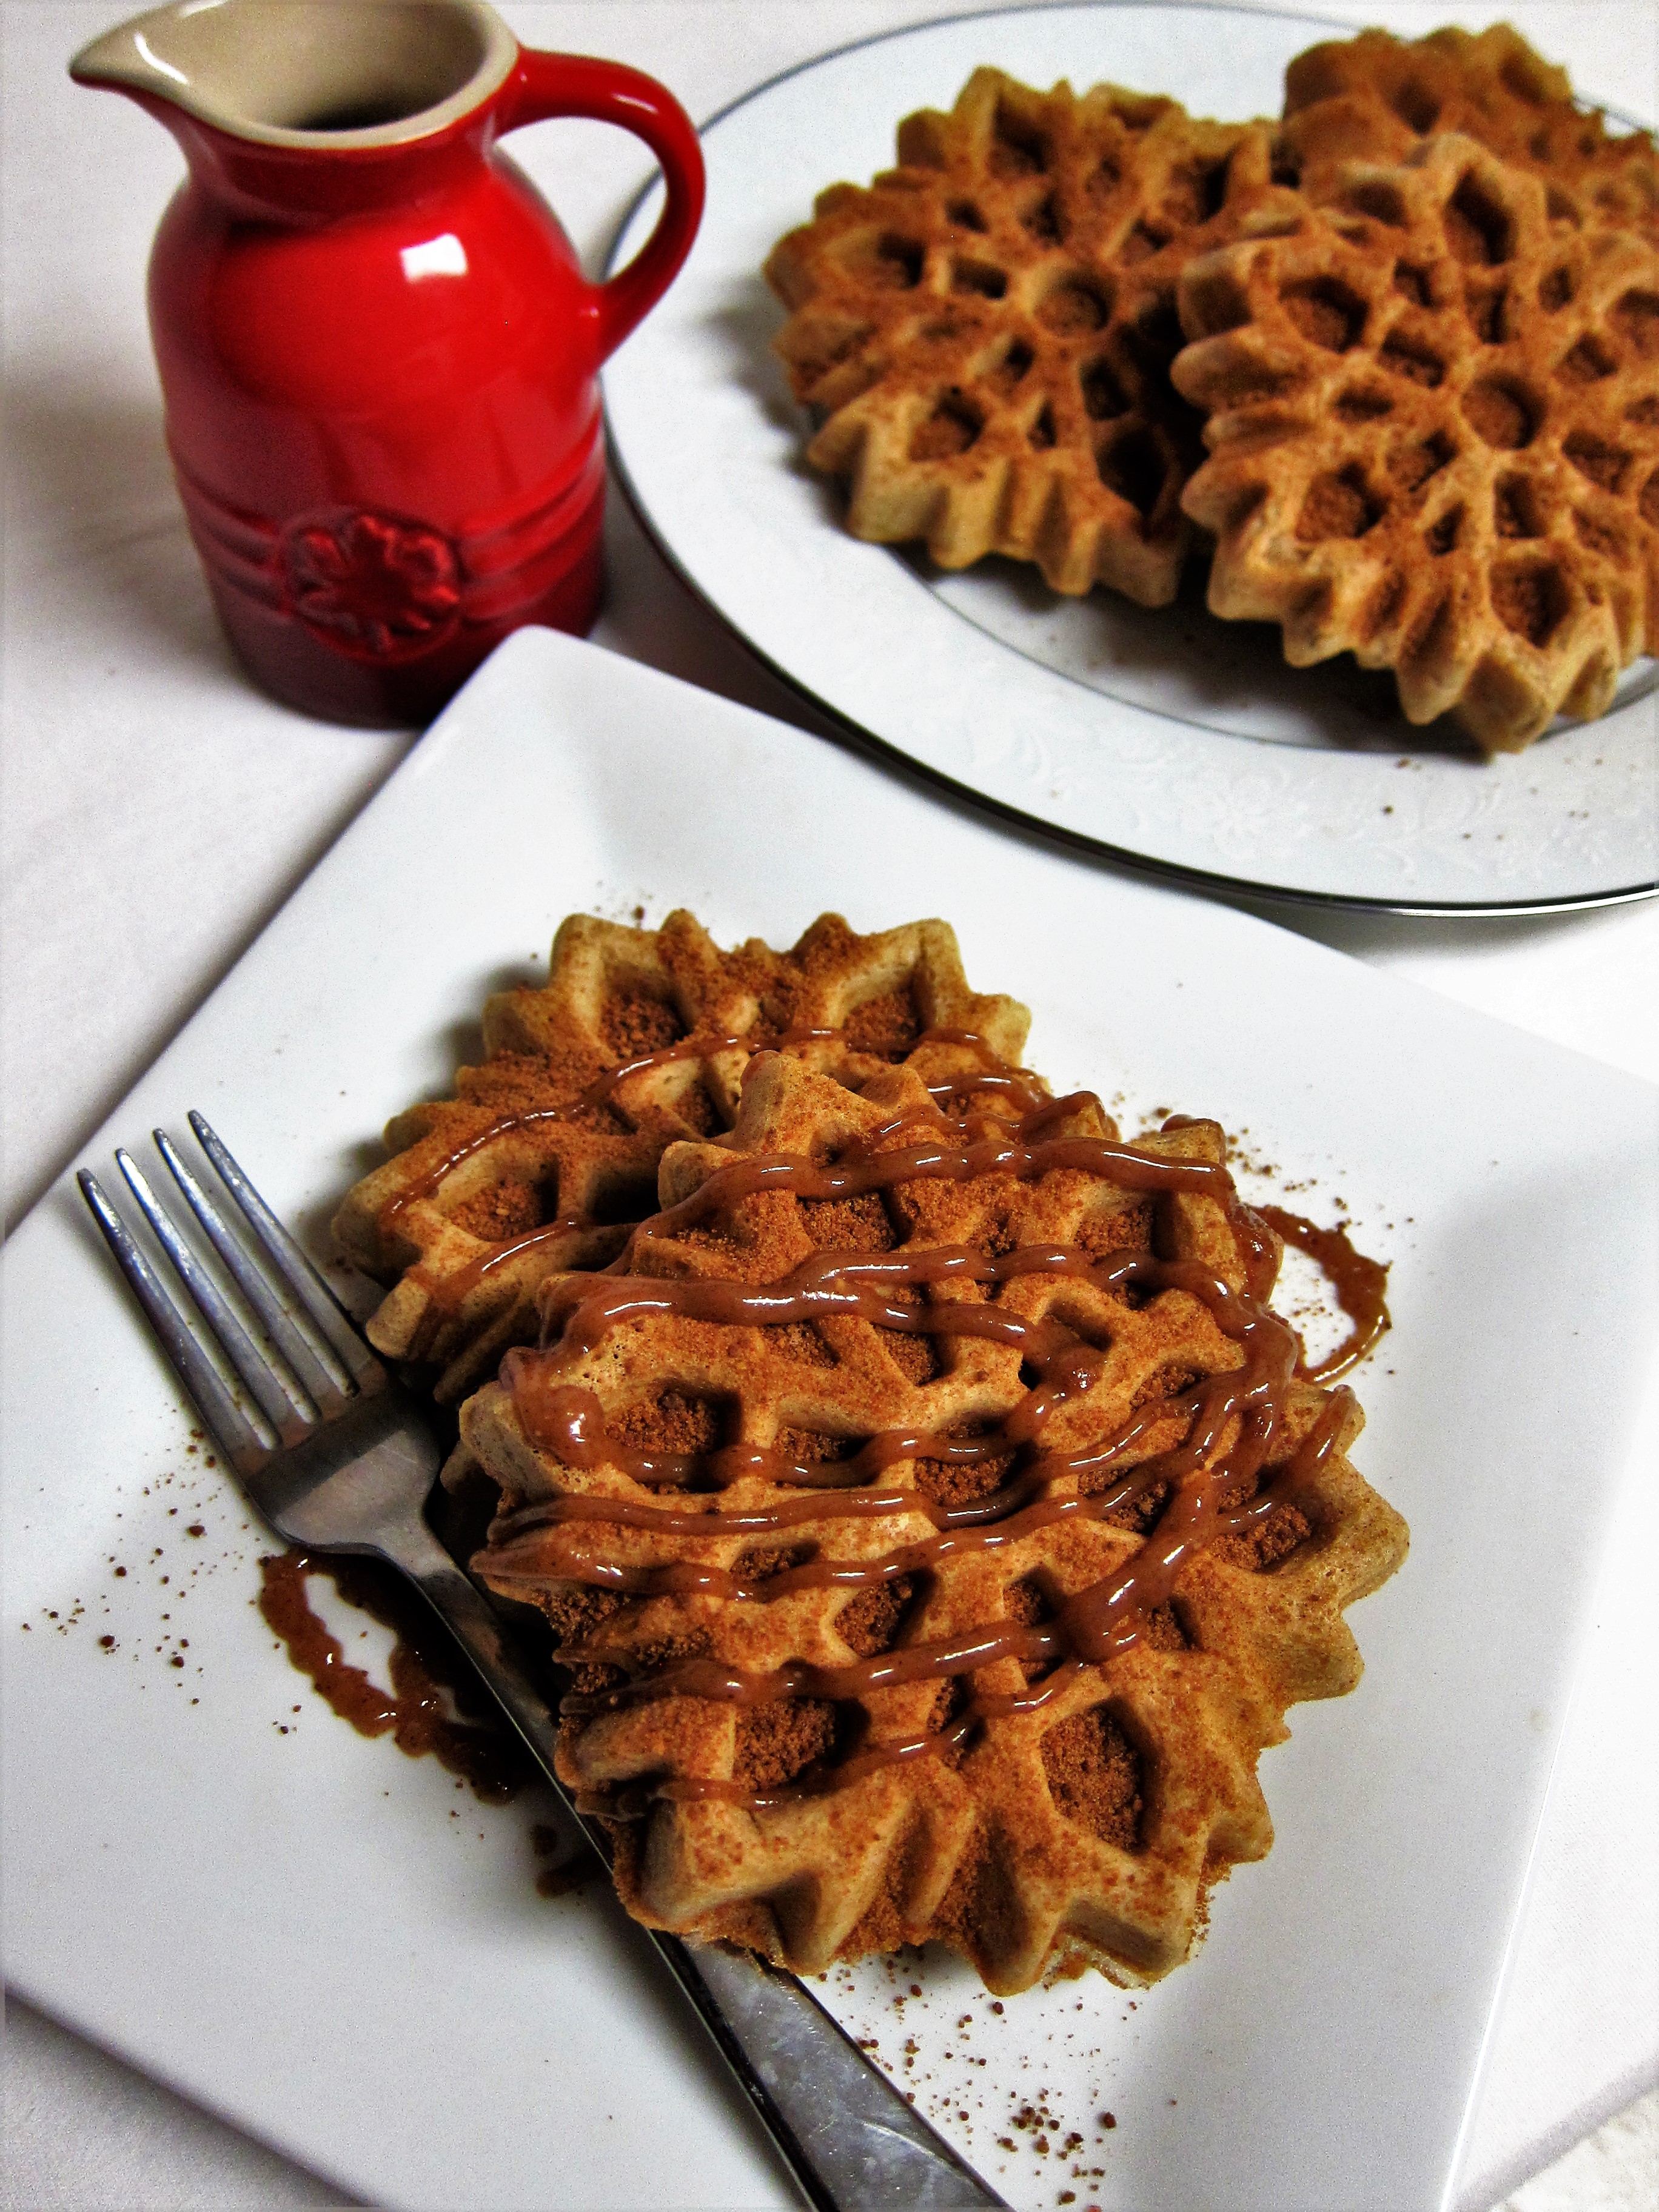
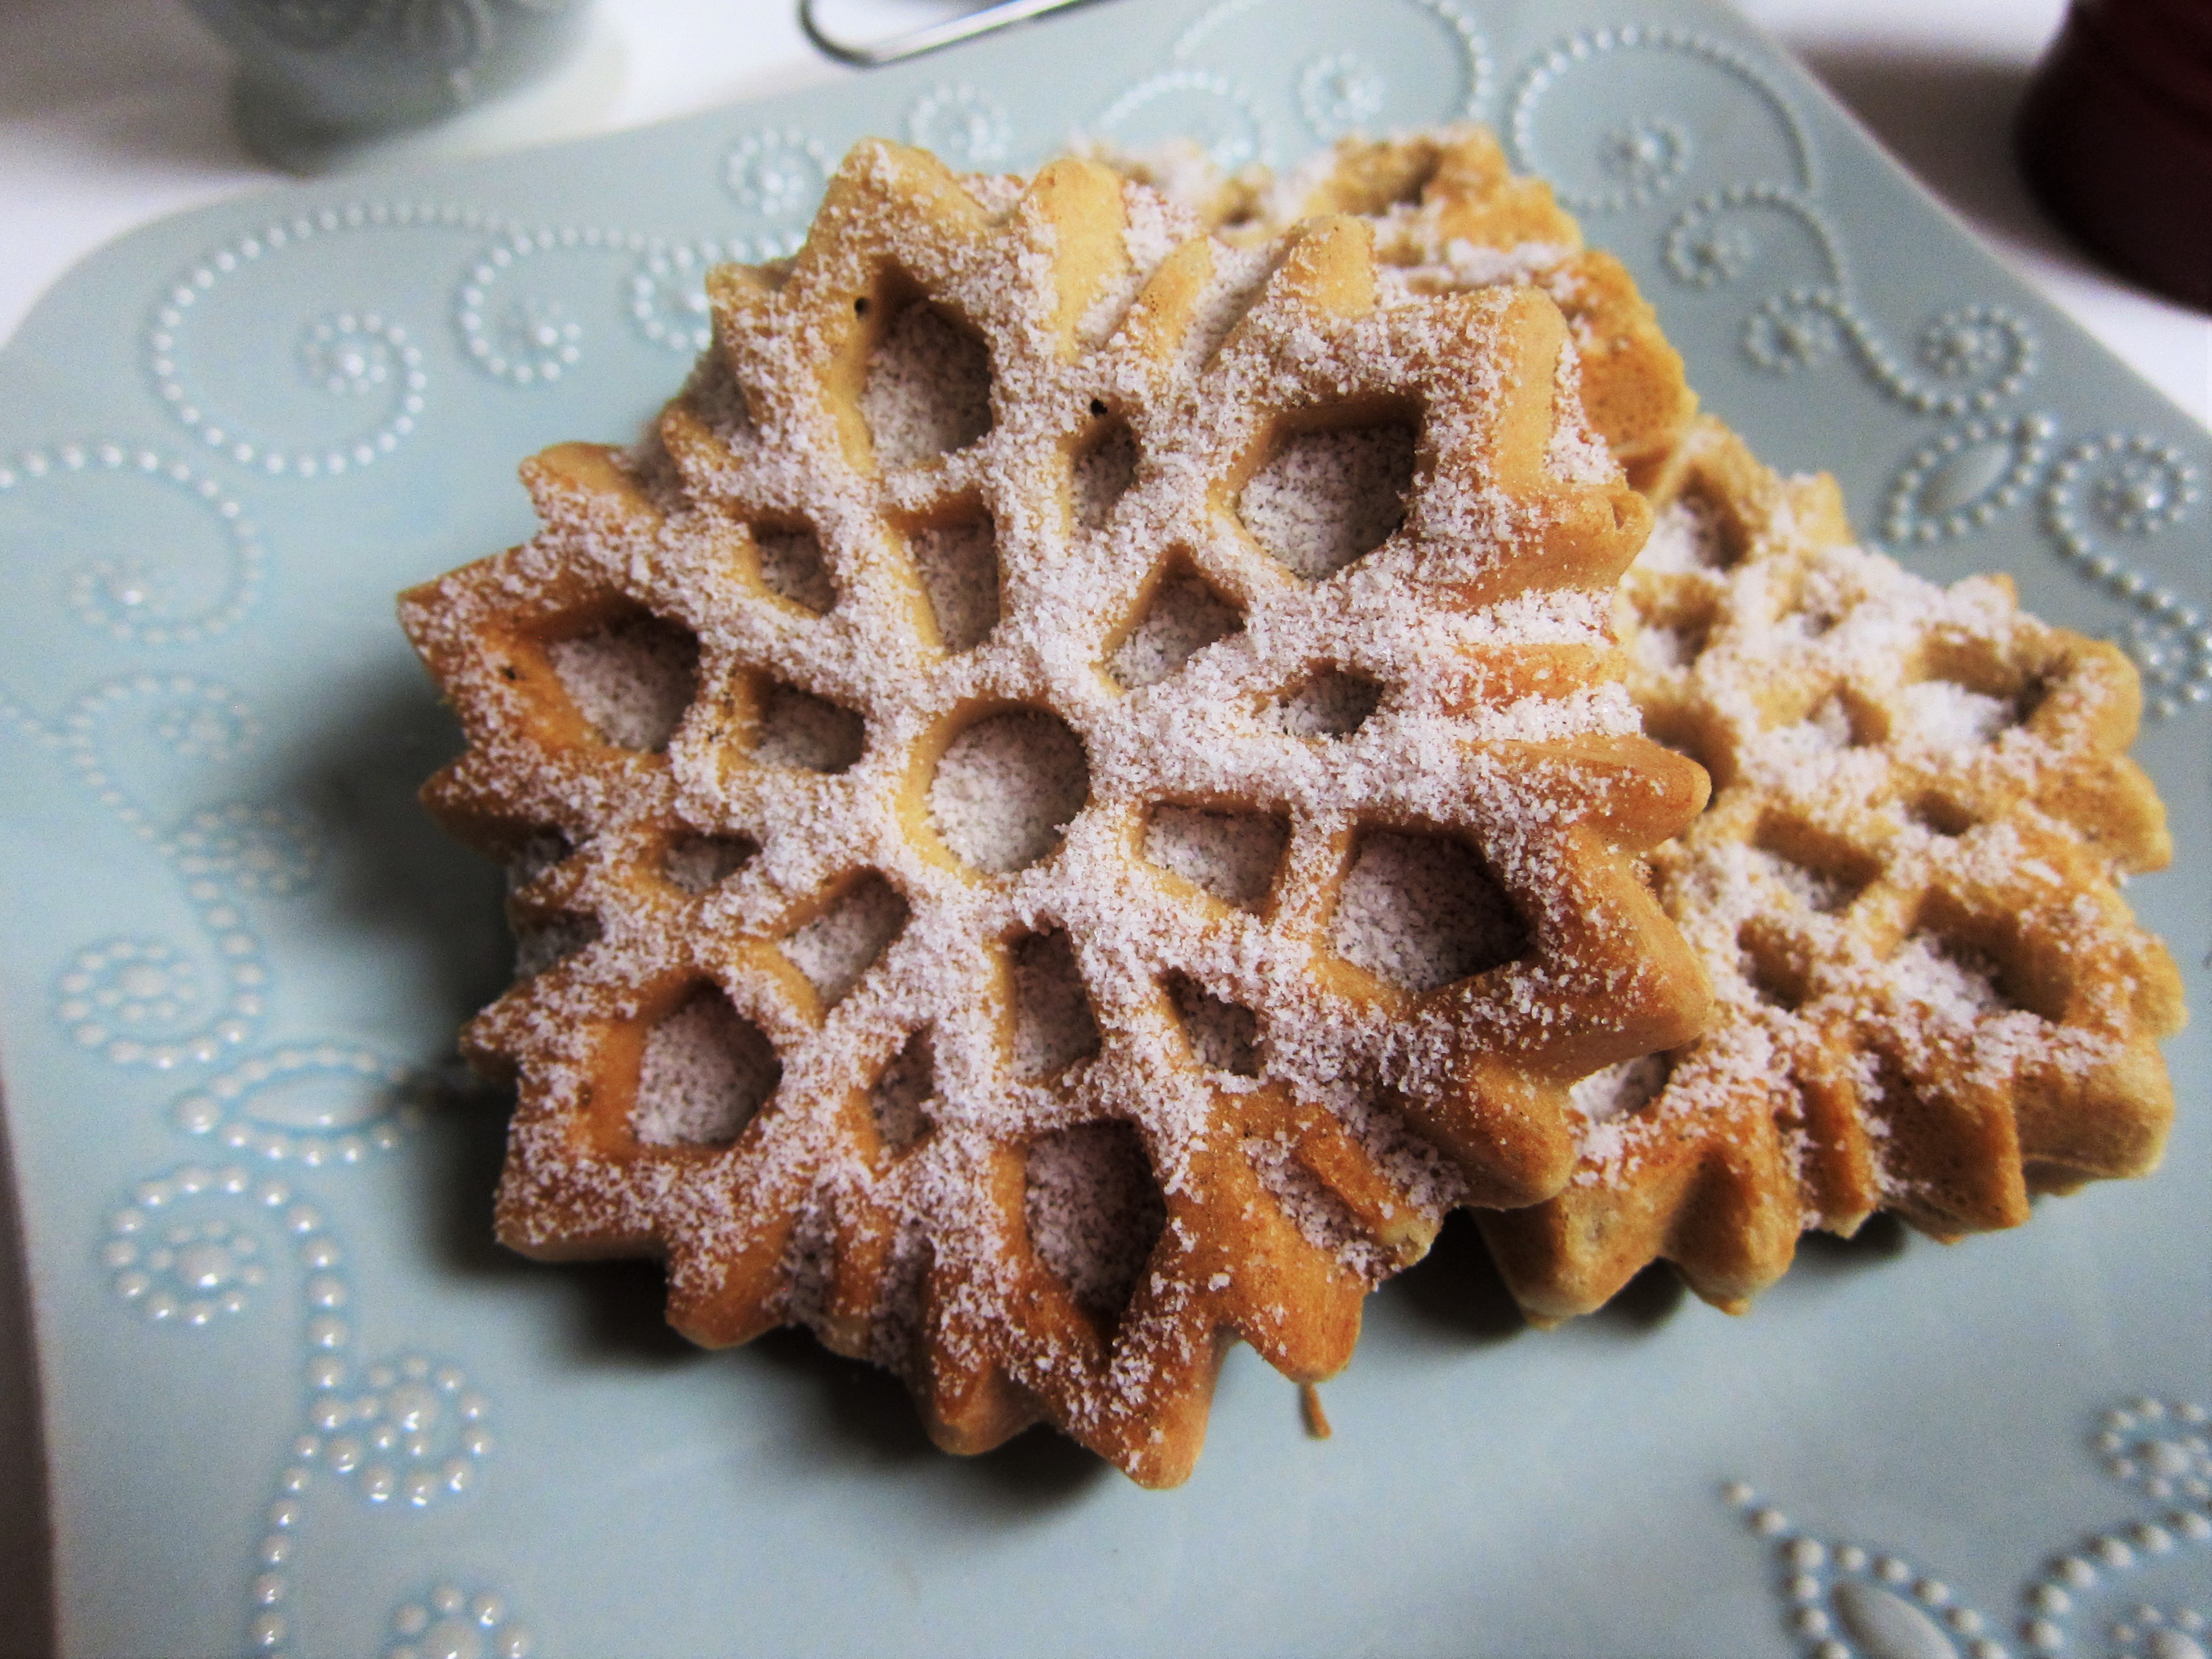
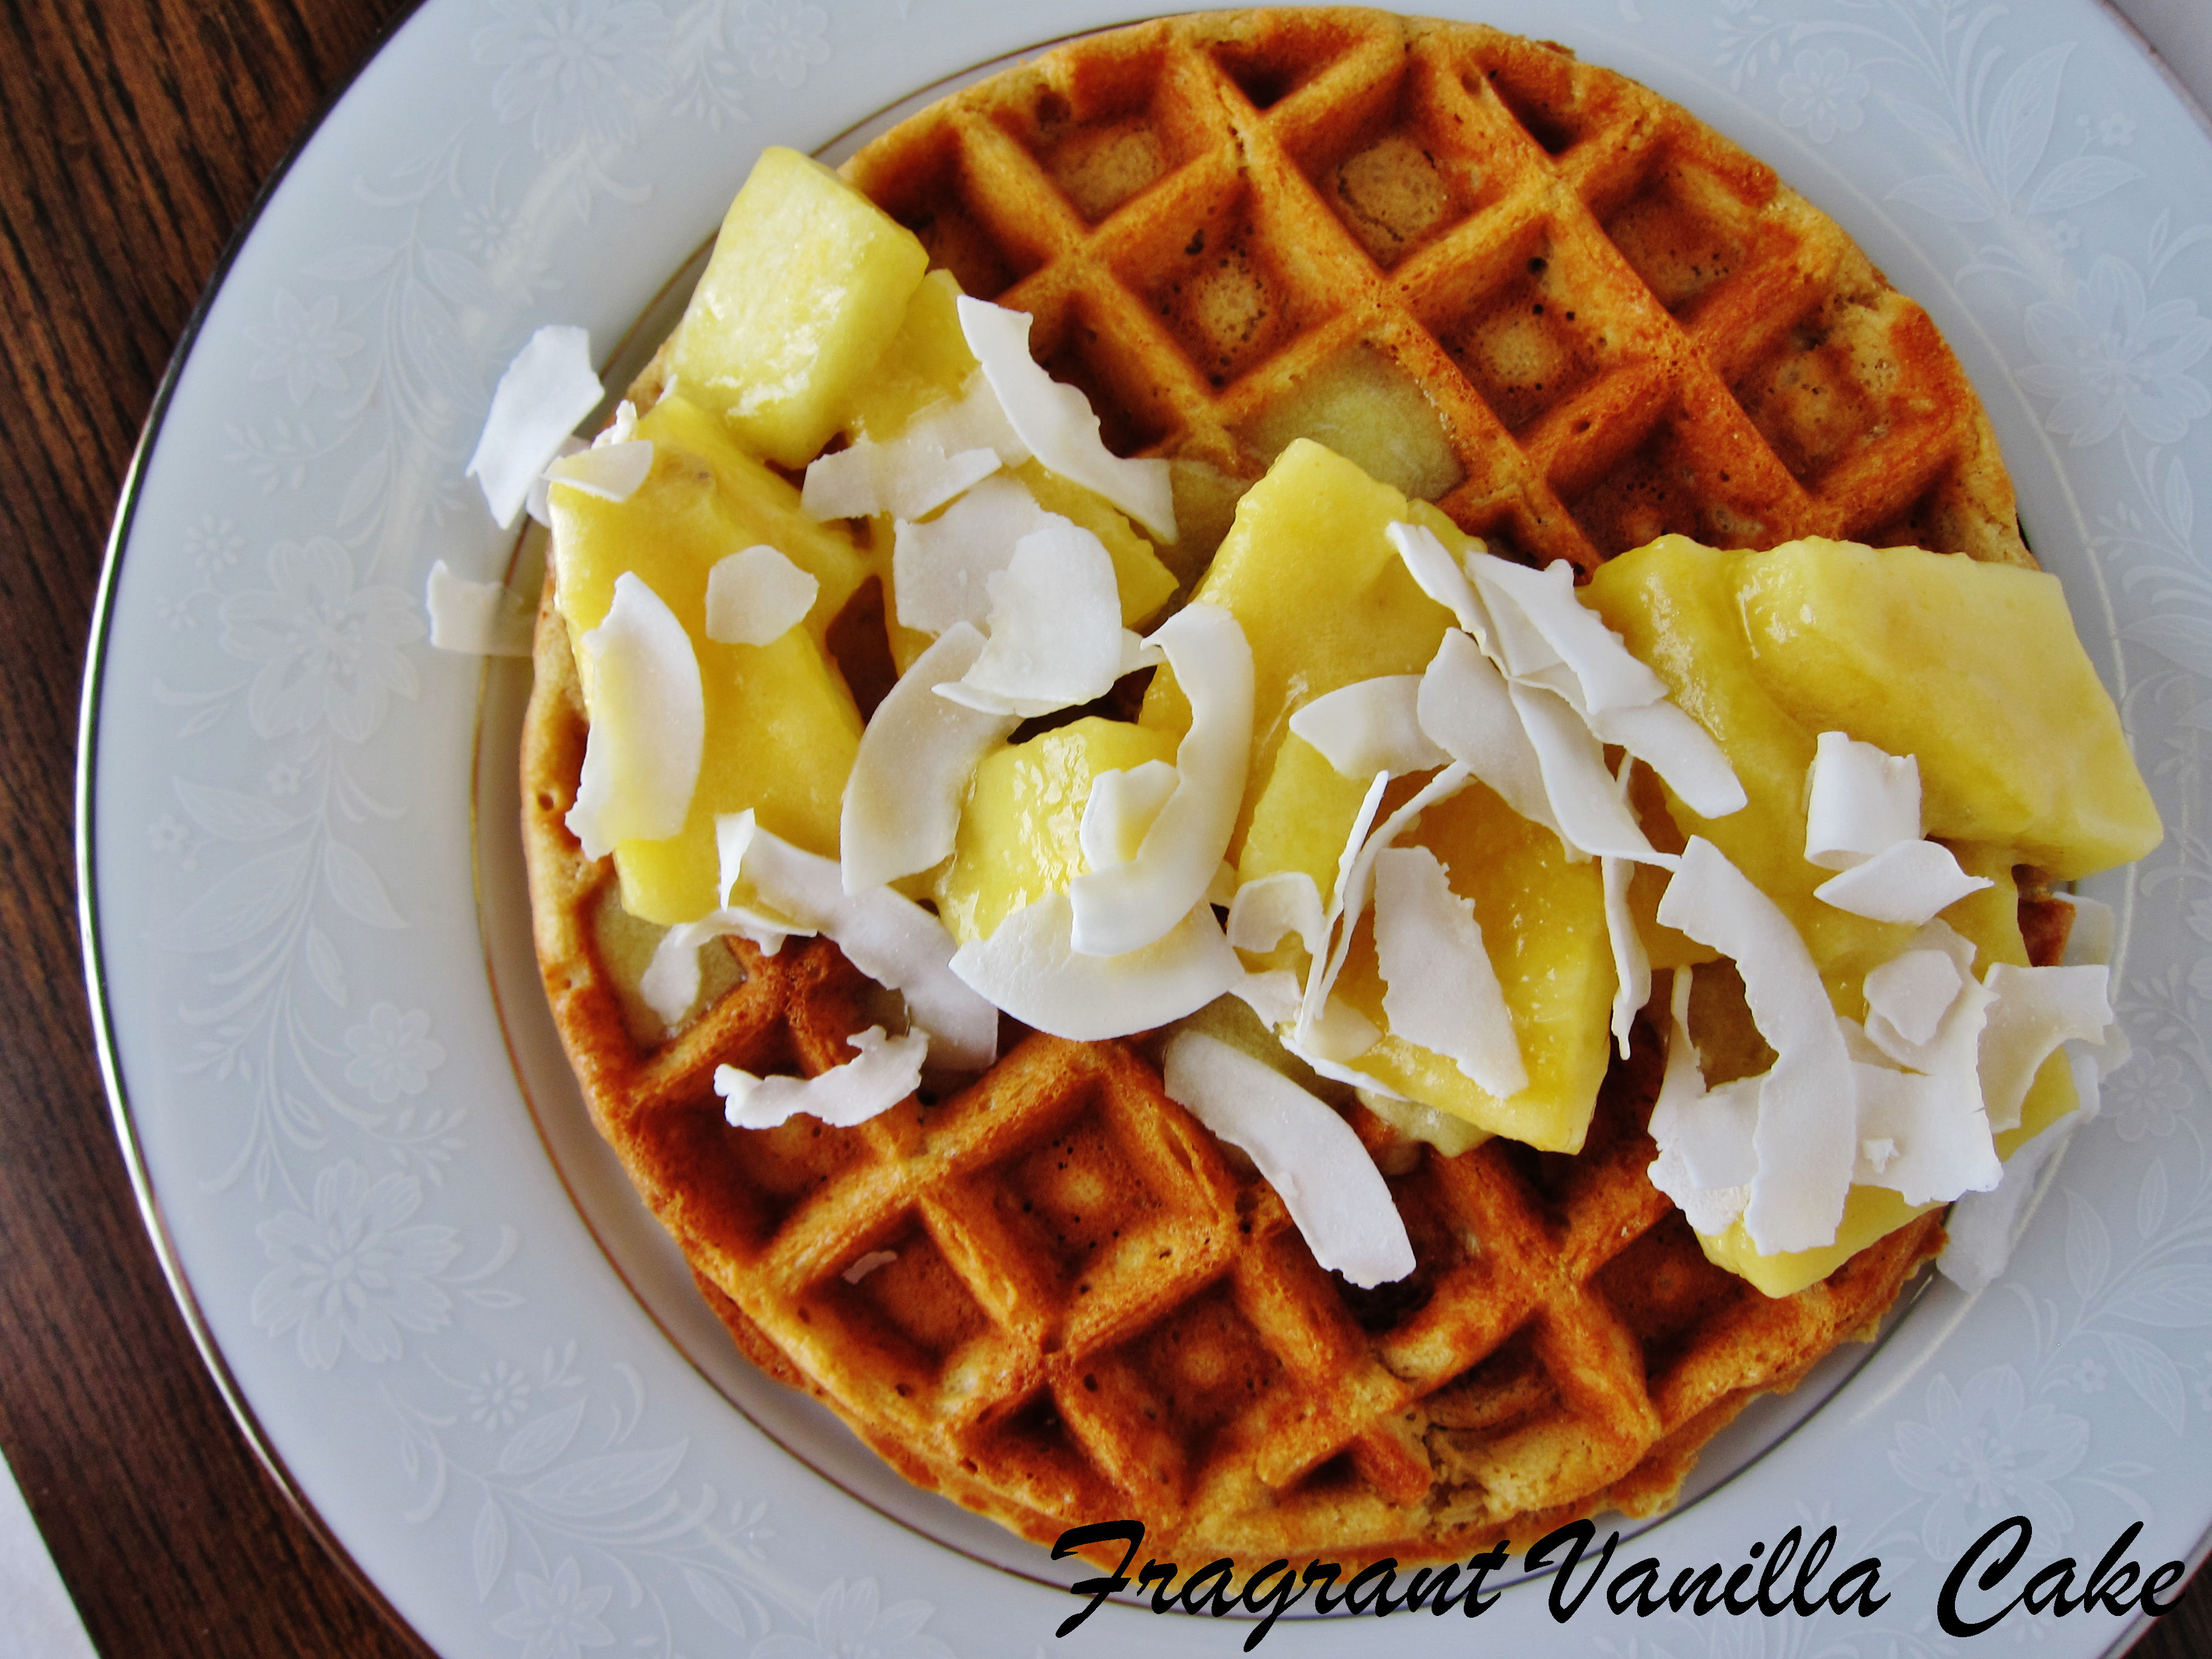
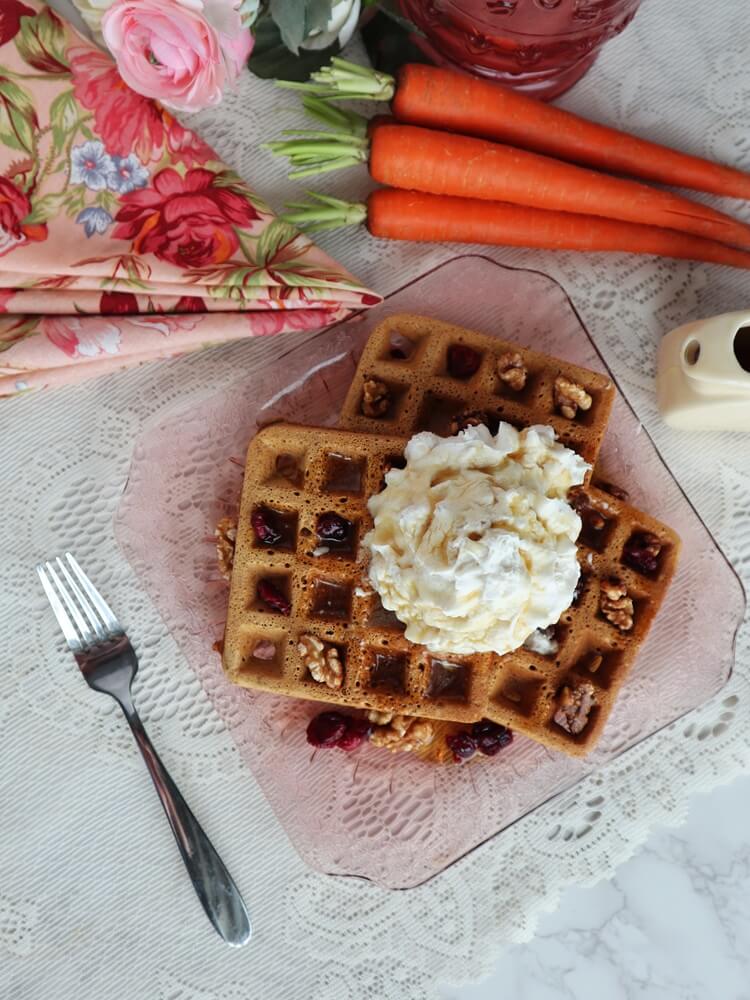
    When I was little, I loved it when my Mom would make Belgian waffles.  They were light and fluffy and so delicious!  She made a recipe that used egg whites folded into the batter and they always came out just right.  Now as an adult I still enjoy making waffles, and make them quite a bit actually because my husband enjoys them as well. I have come up with a vegan recipe that makes light and fluffy delicious waffles just as delicious as the ones I enjoyed as a kid!  Last weekend I decided to combine one of my favorite spring desserts with the waffles and I made Vegan Carrot Cake Waffles.  It was a snowy day and neither of us wanted to go out so it was perfect, especially for dreaming about spring!

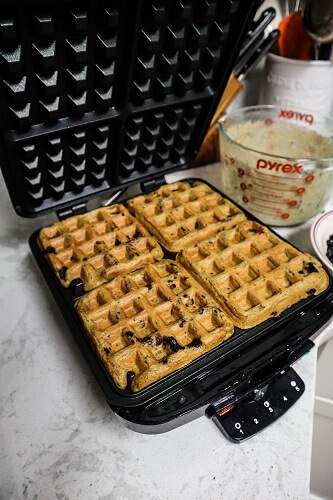
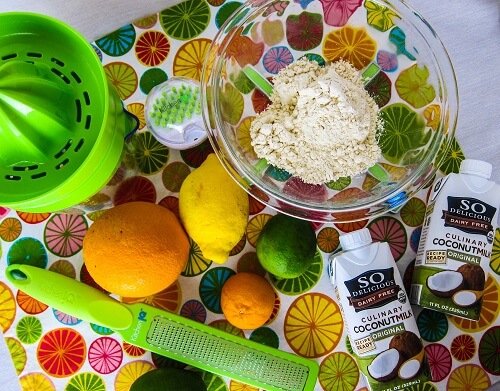
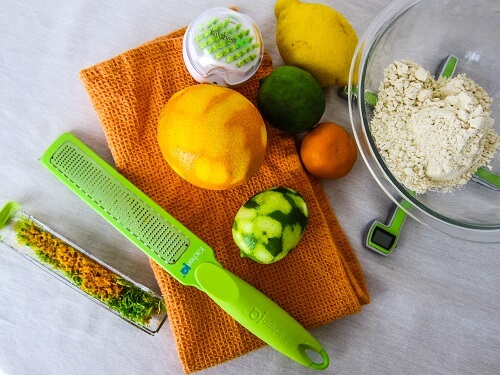
    These waffles are pretty easy to make and so good!  You just whisk everything together and cook them off in the waffle maker! I used whole wheat pastry flour for these, but if you wanted to use regular all purpose flour if you had that on hand or a gluten free all purpose flour such as Bob’s Red Mill gluten free all purpose baking flour that would work as well for a gluten free option (I have used this brand before with success). 

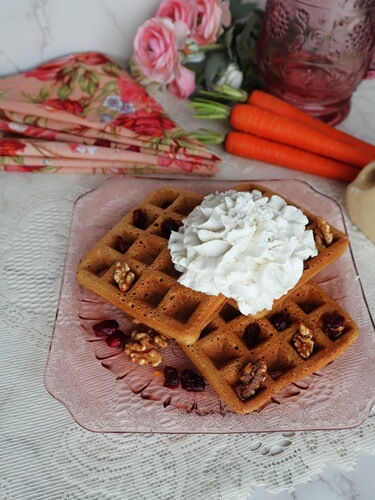
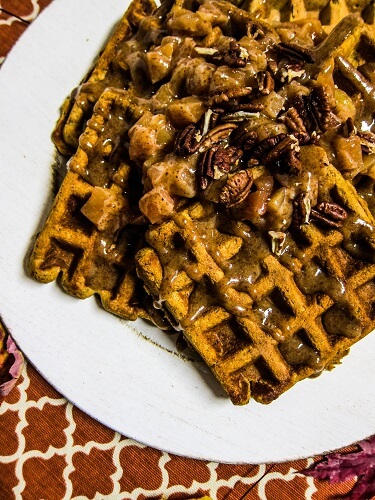
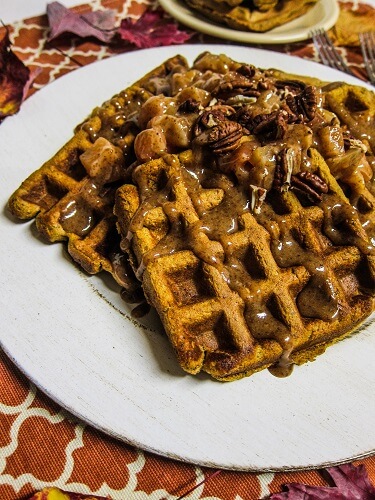
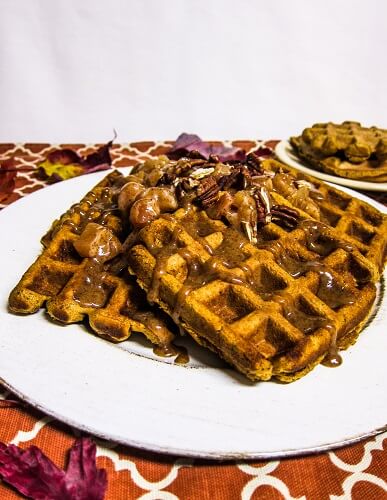
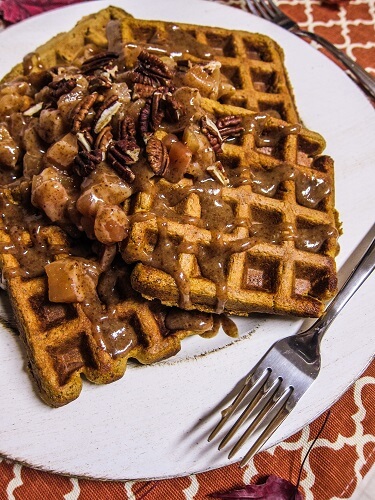
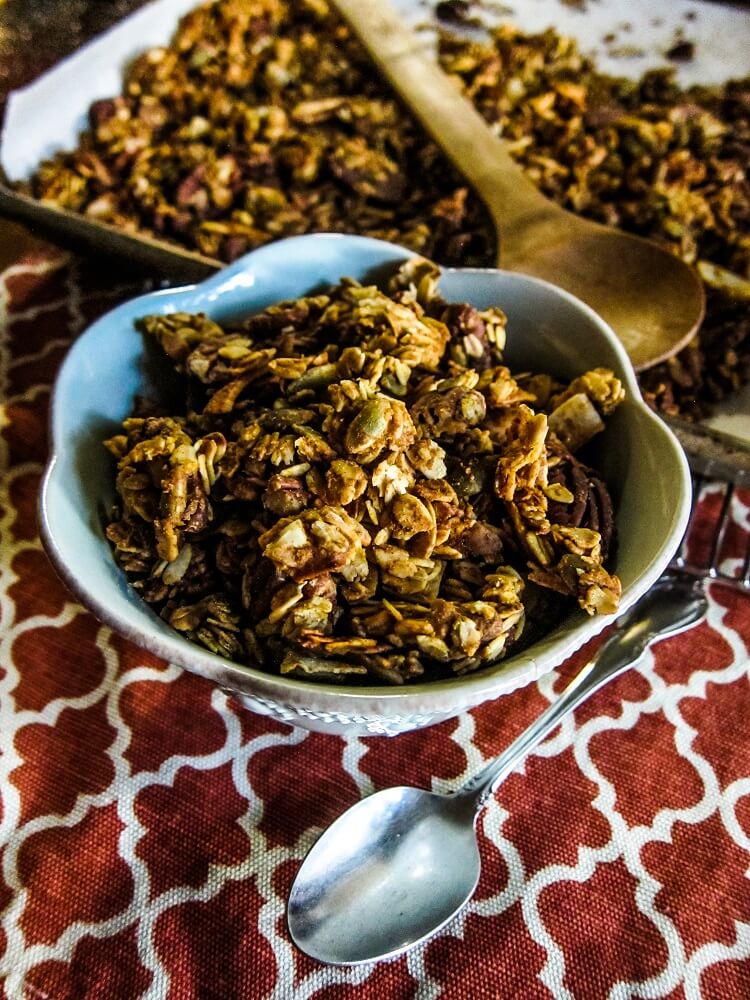
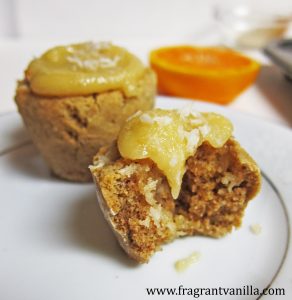
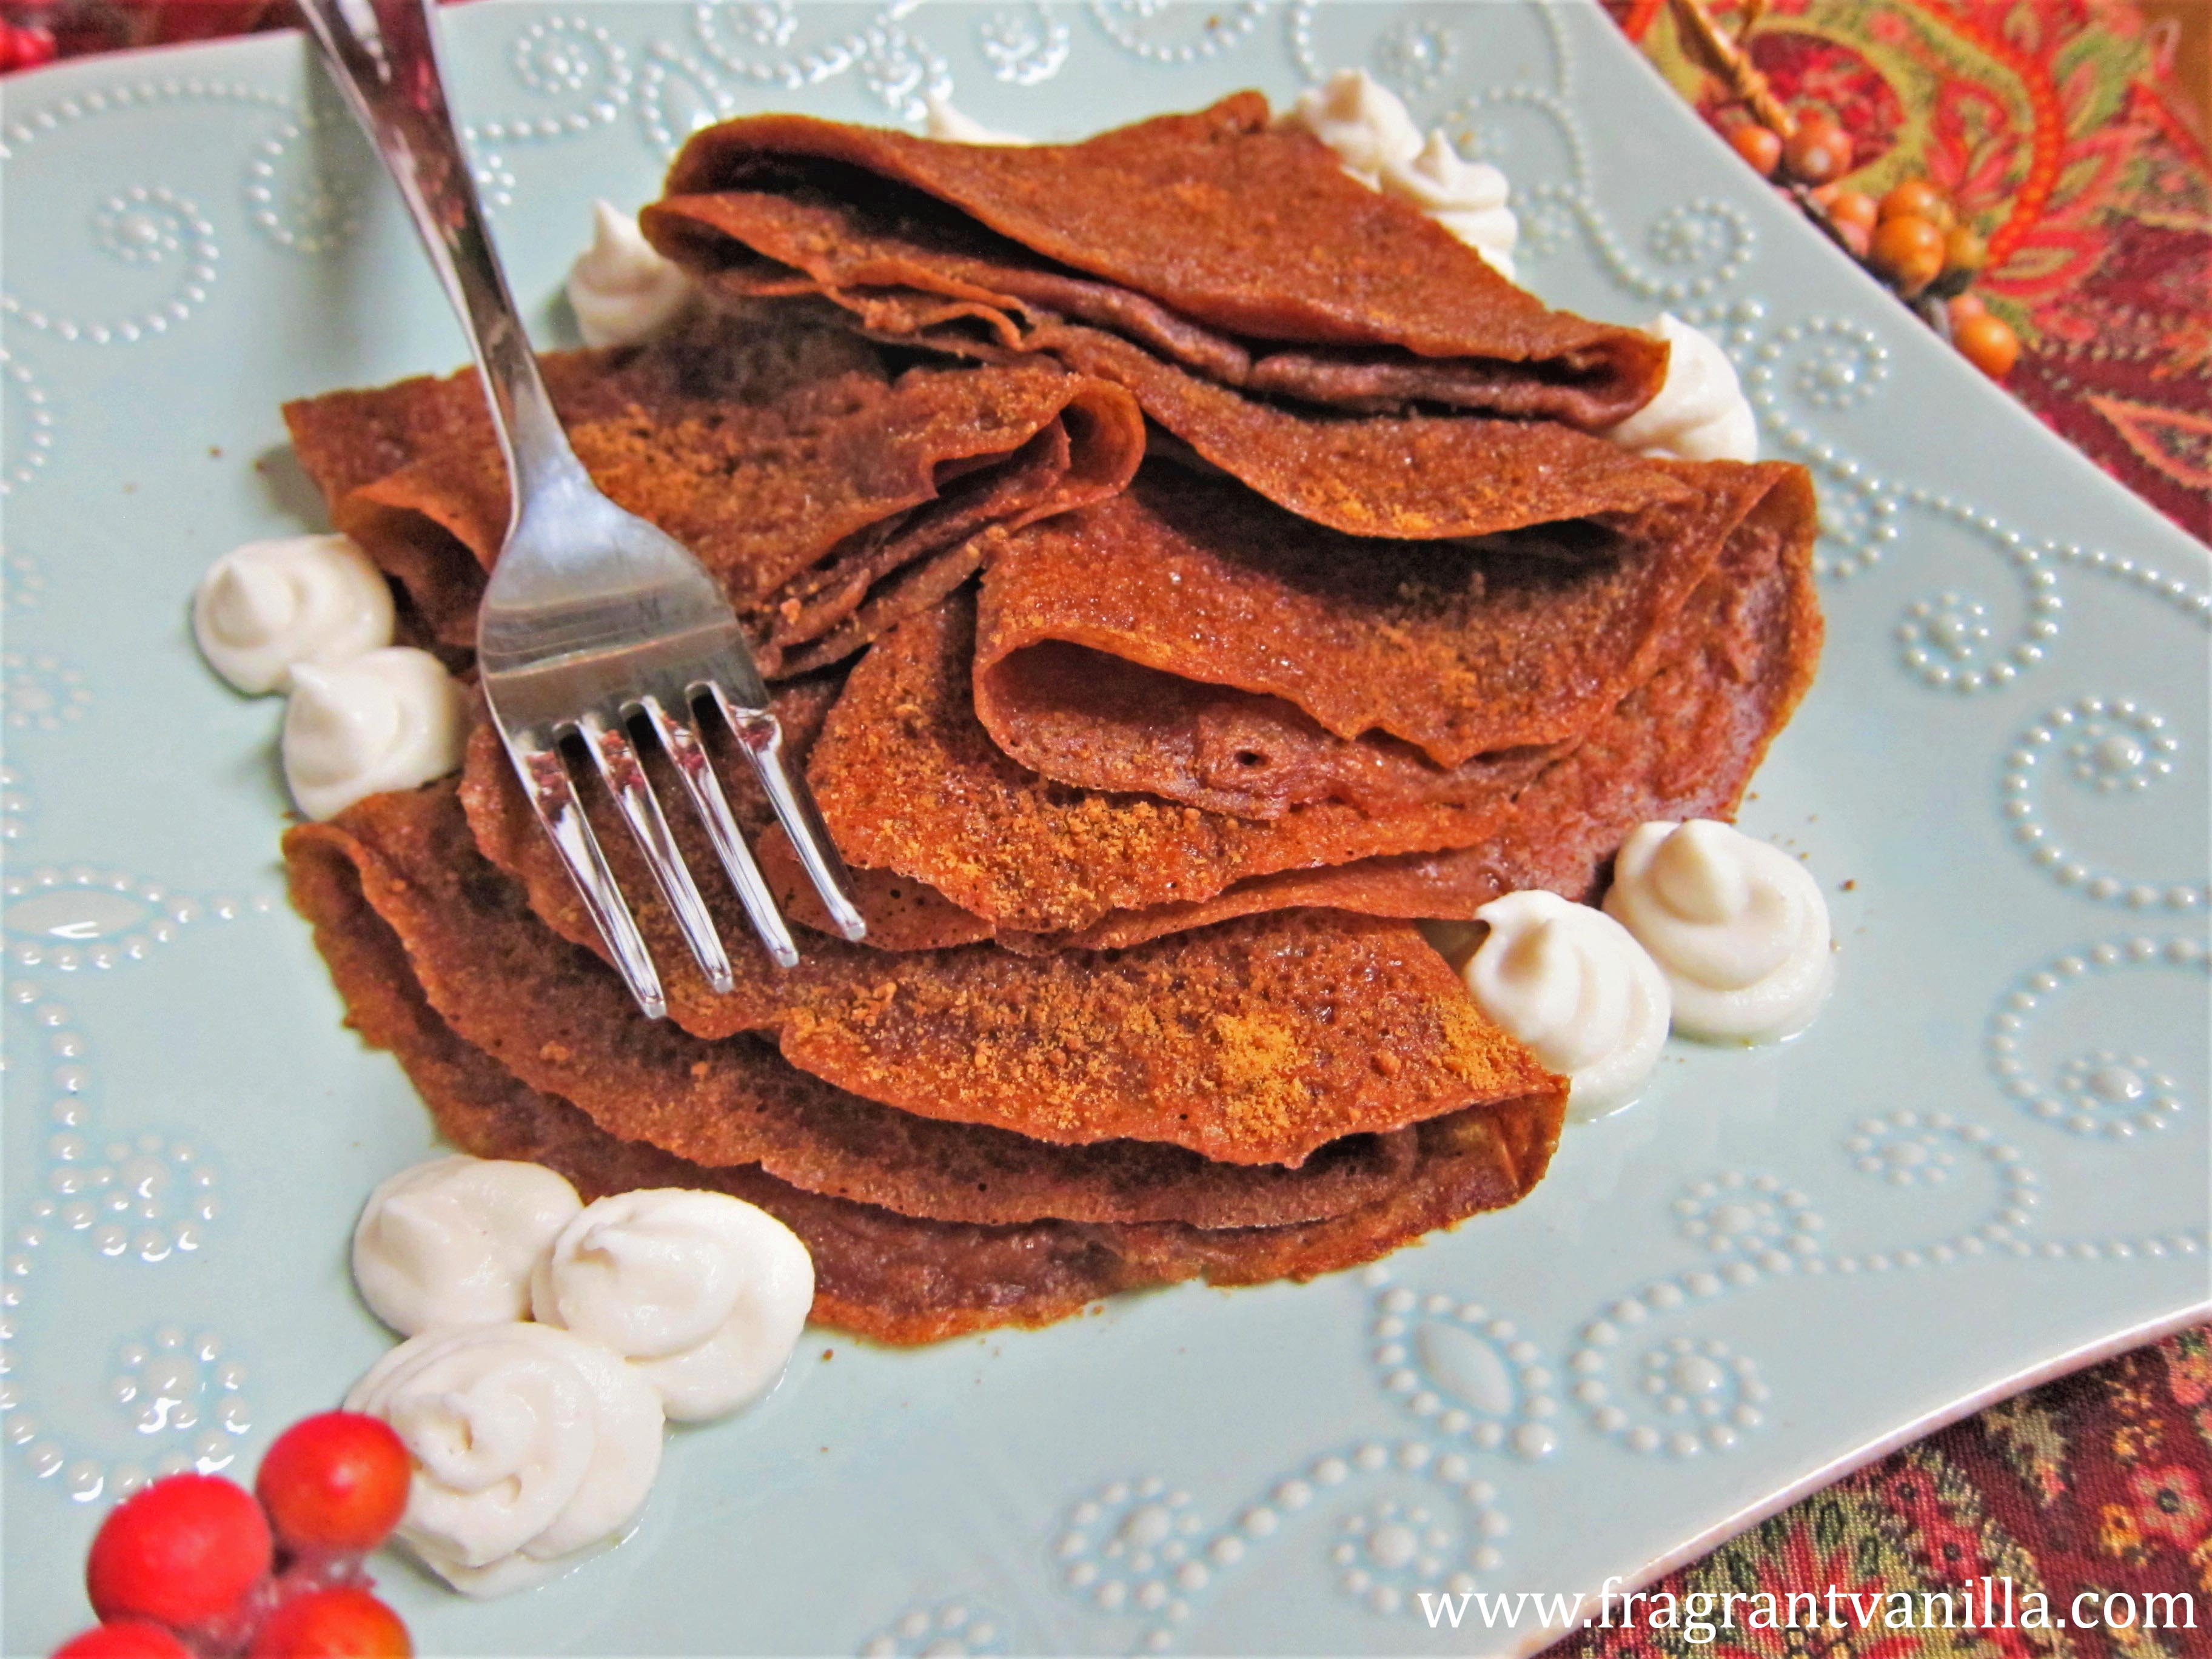
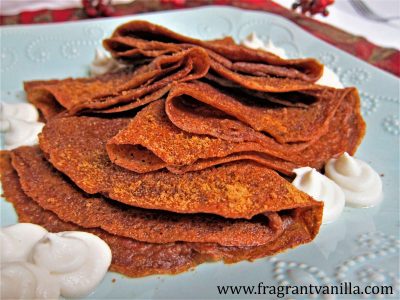
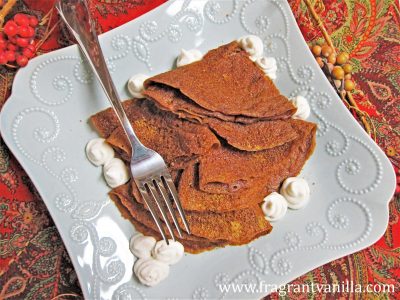
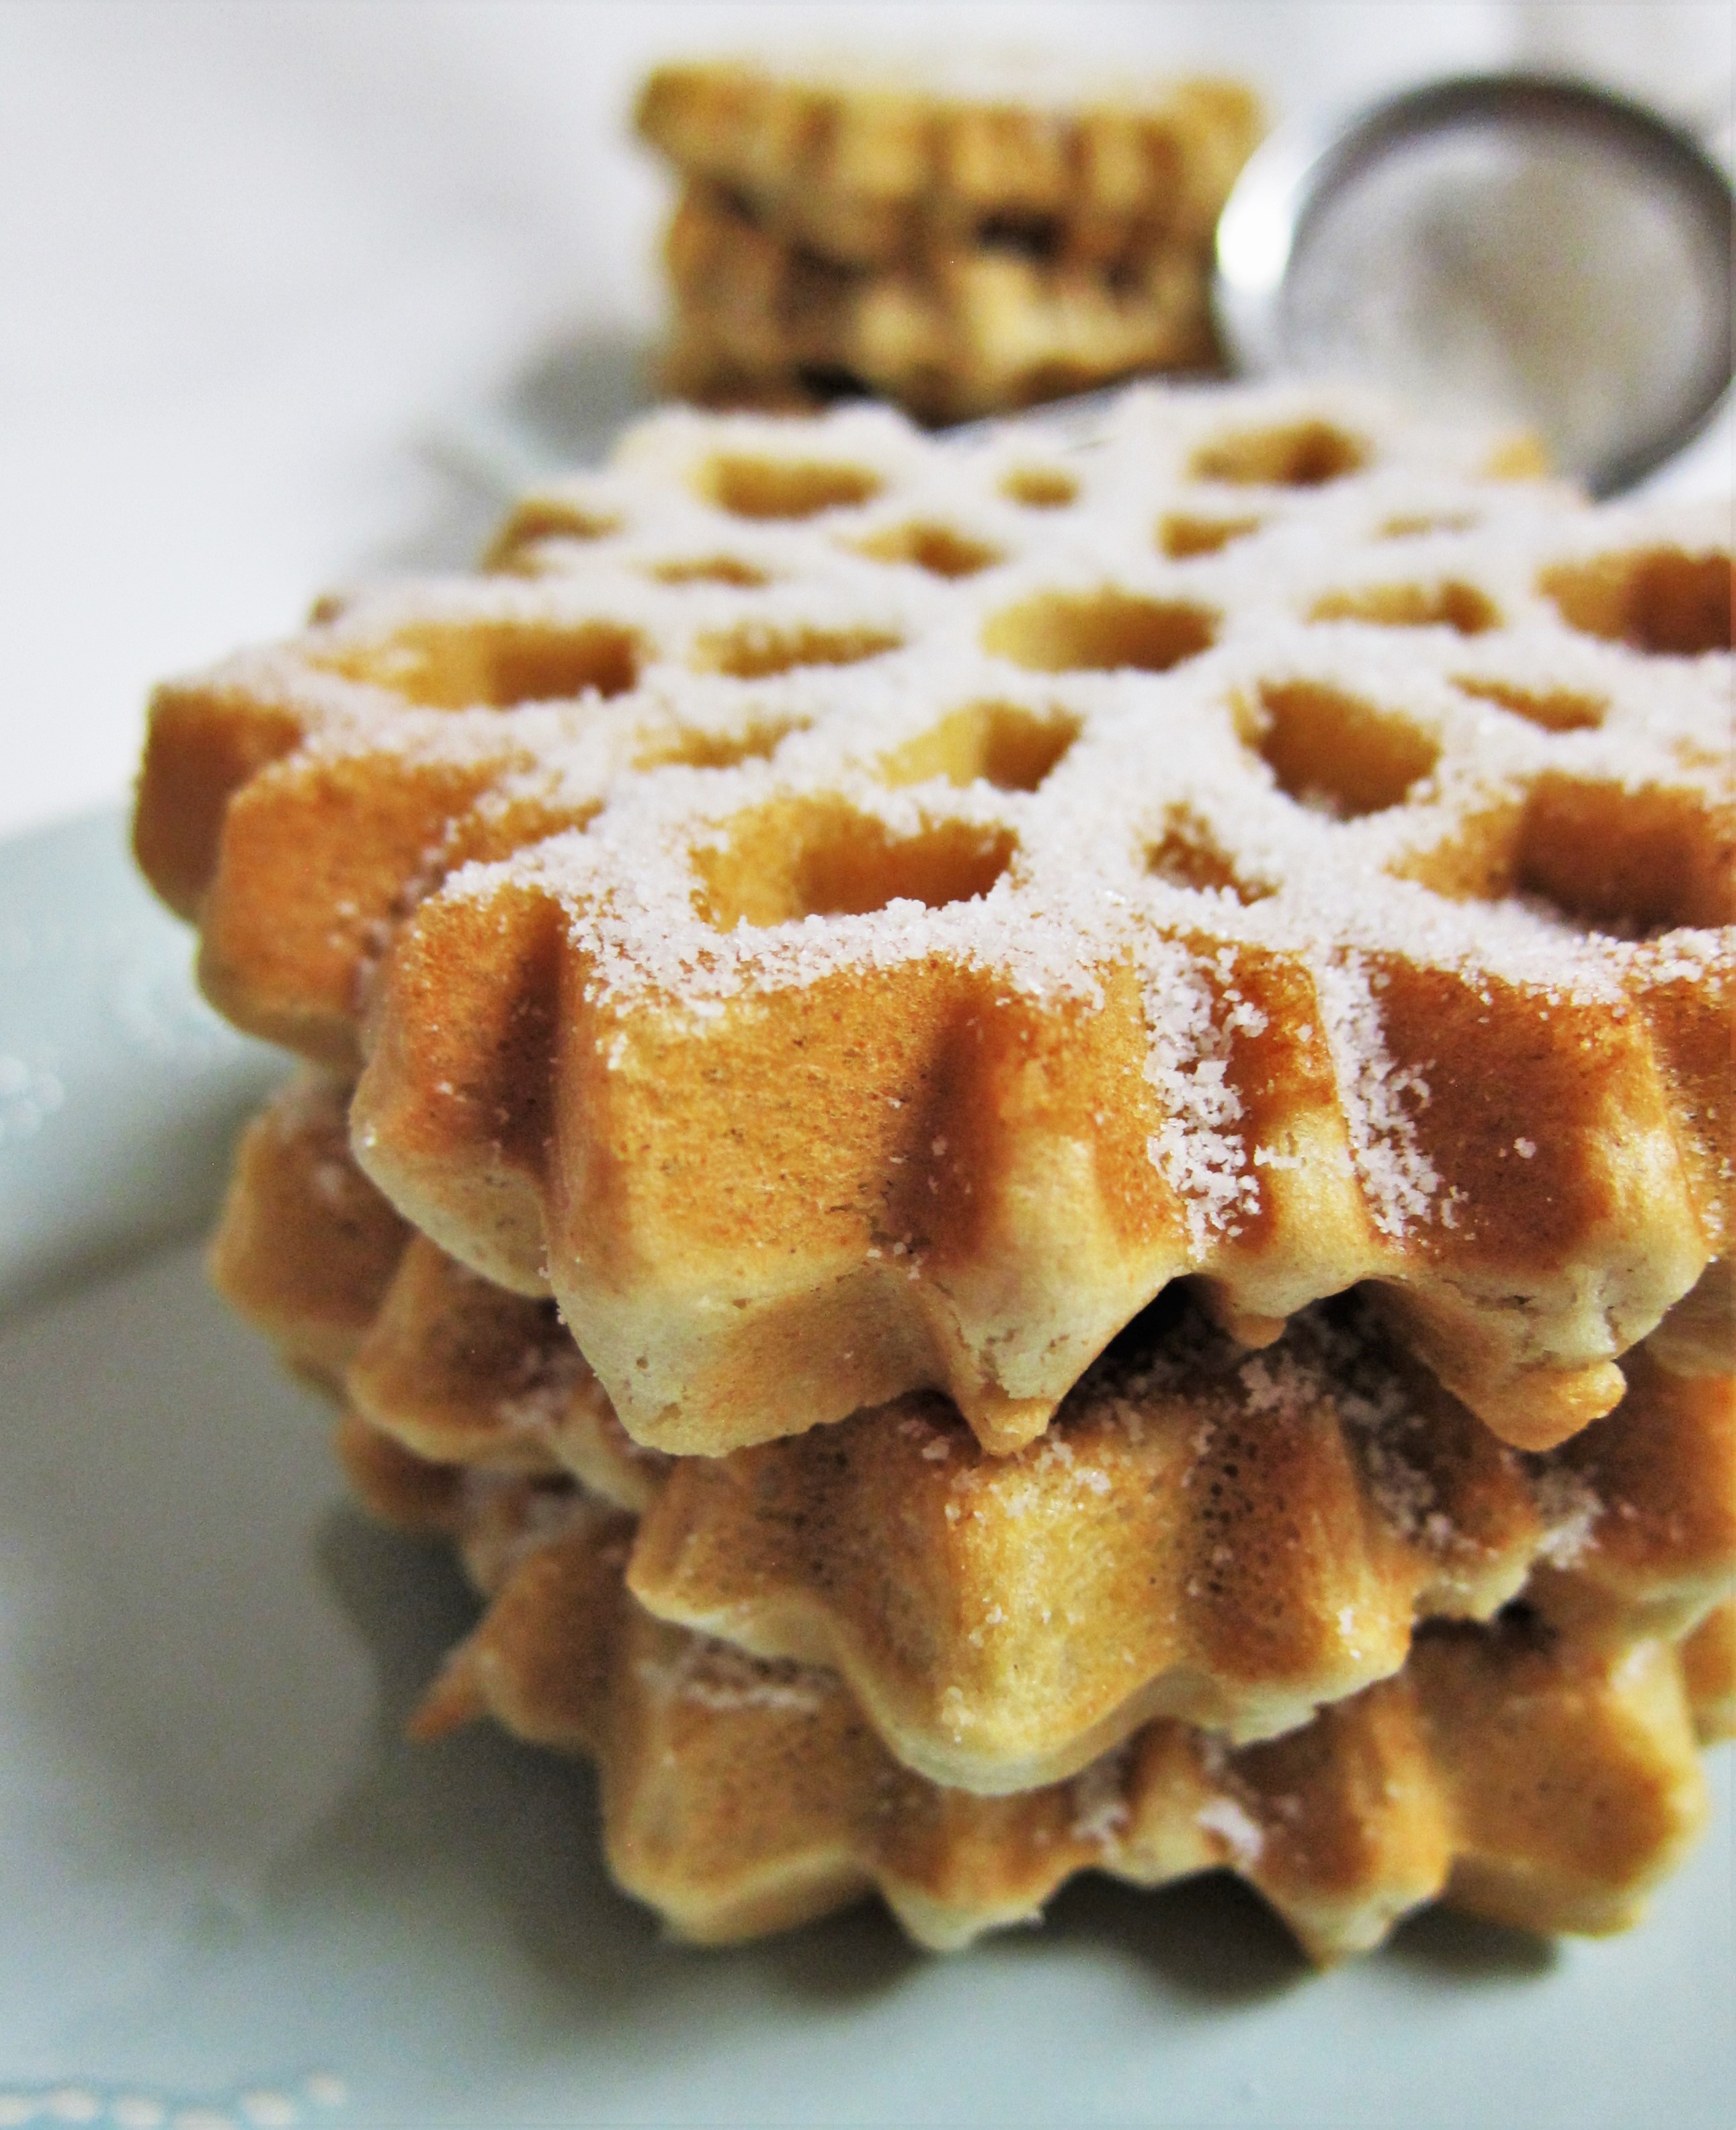
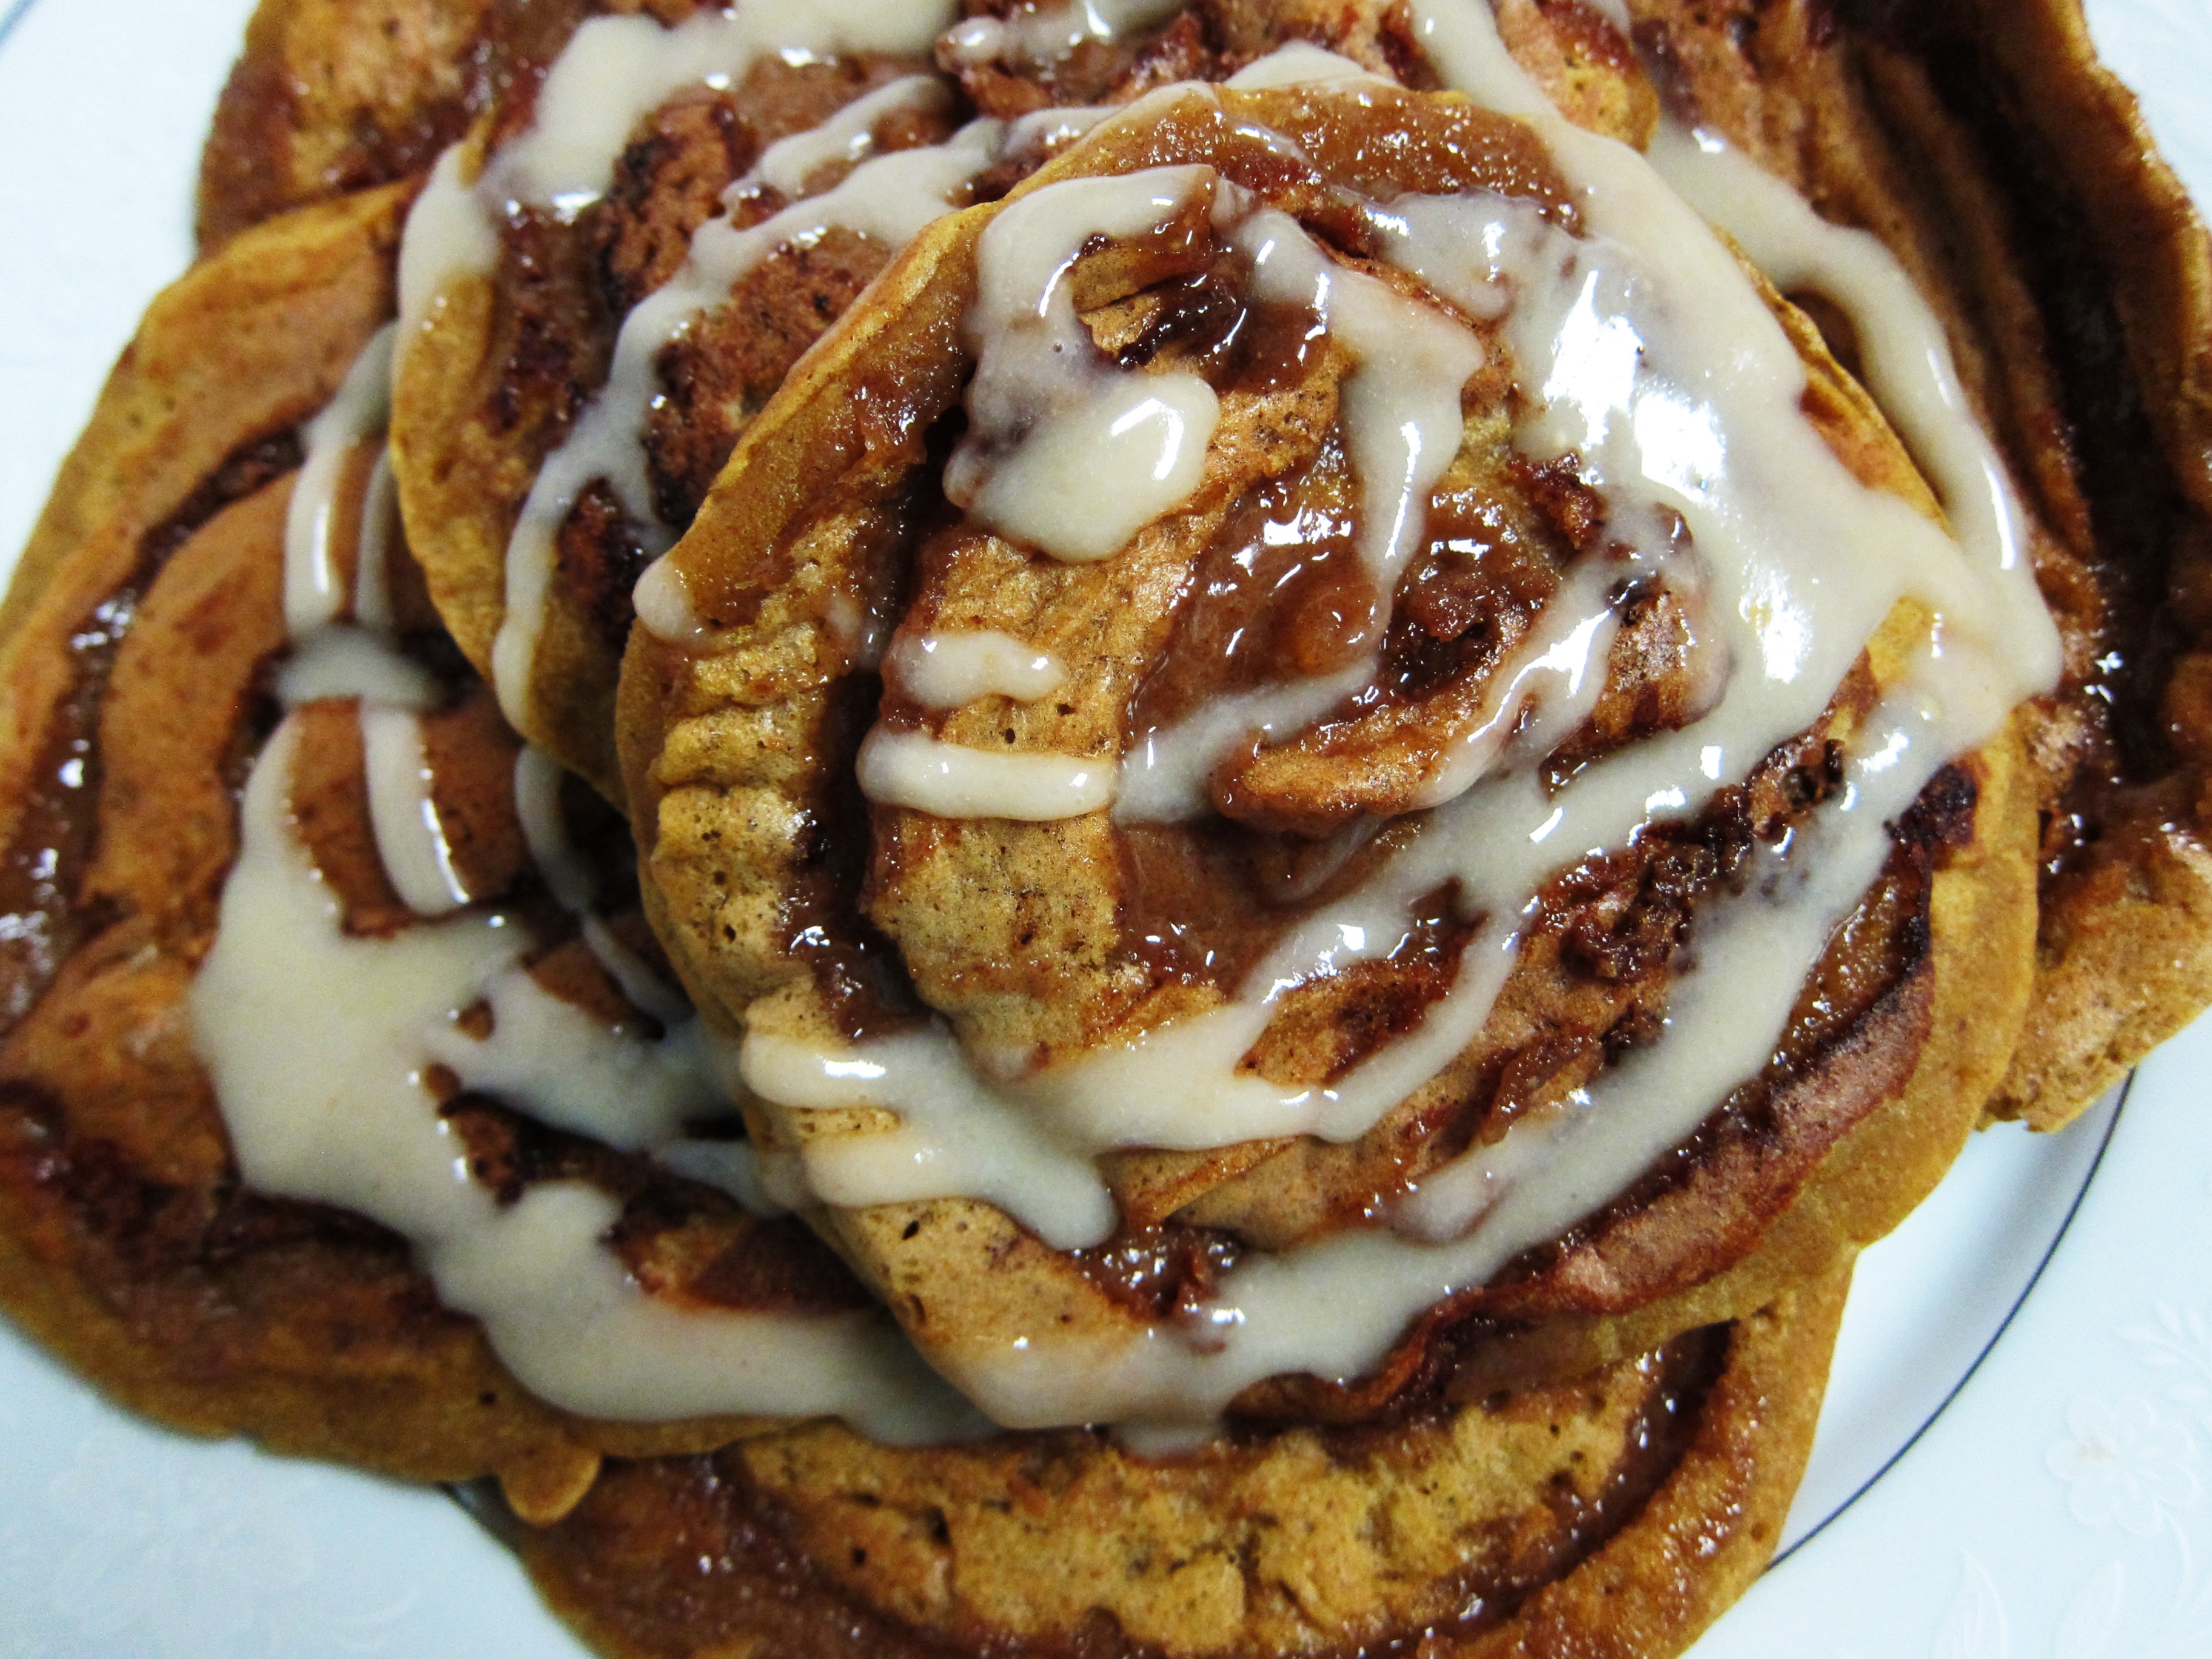
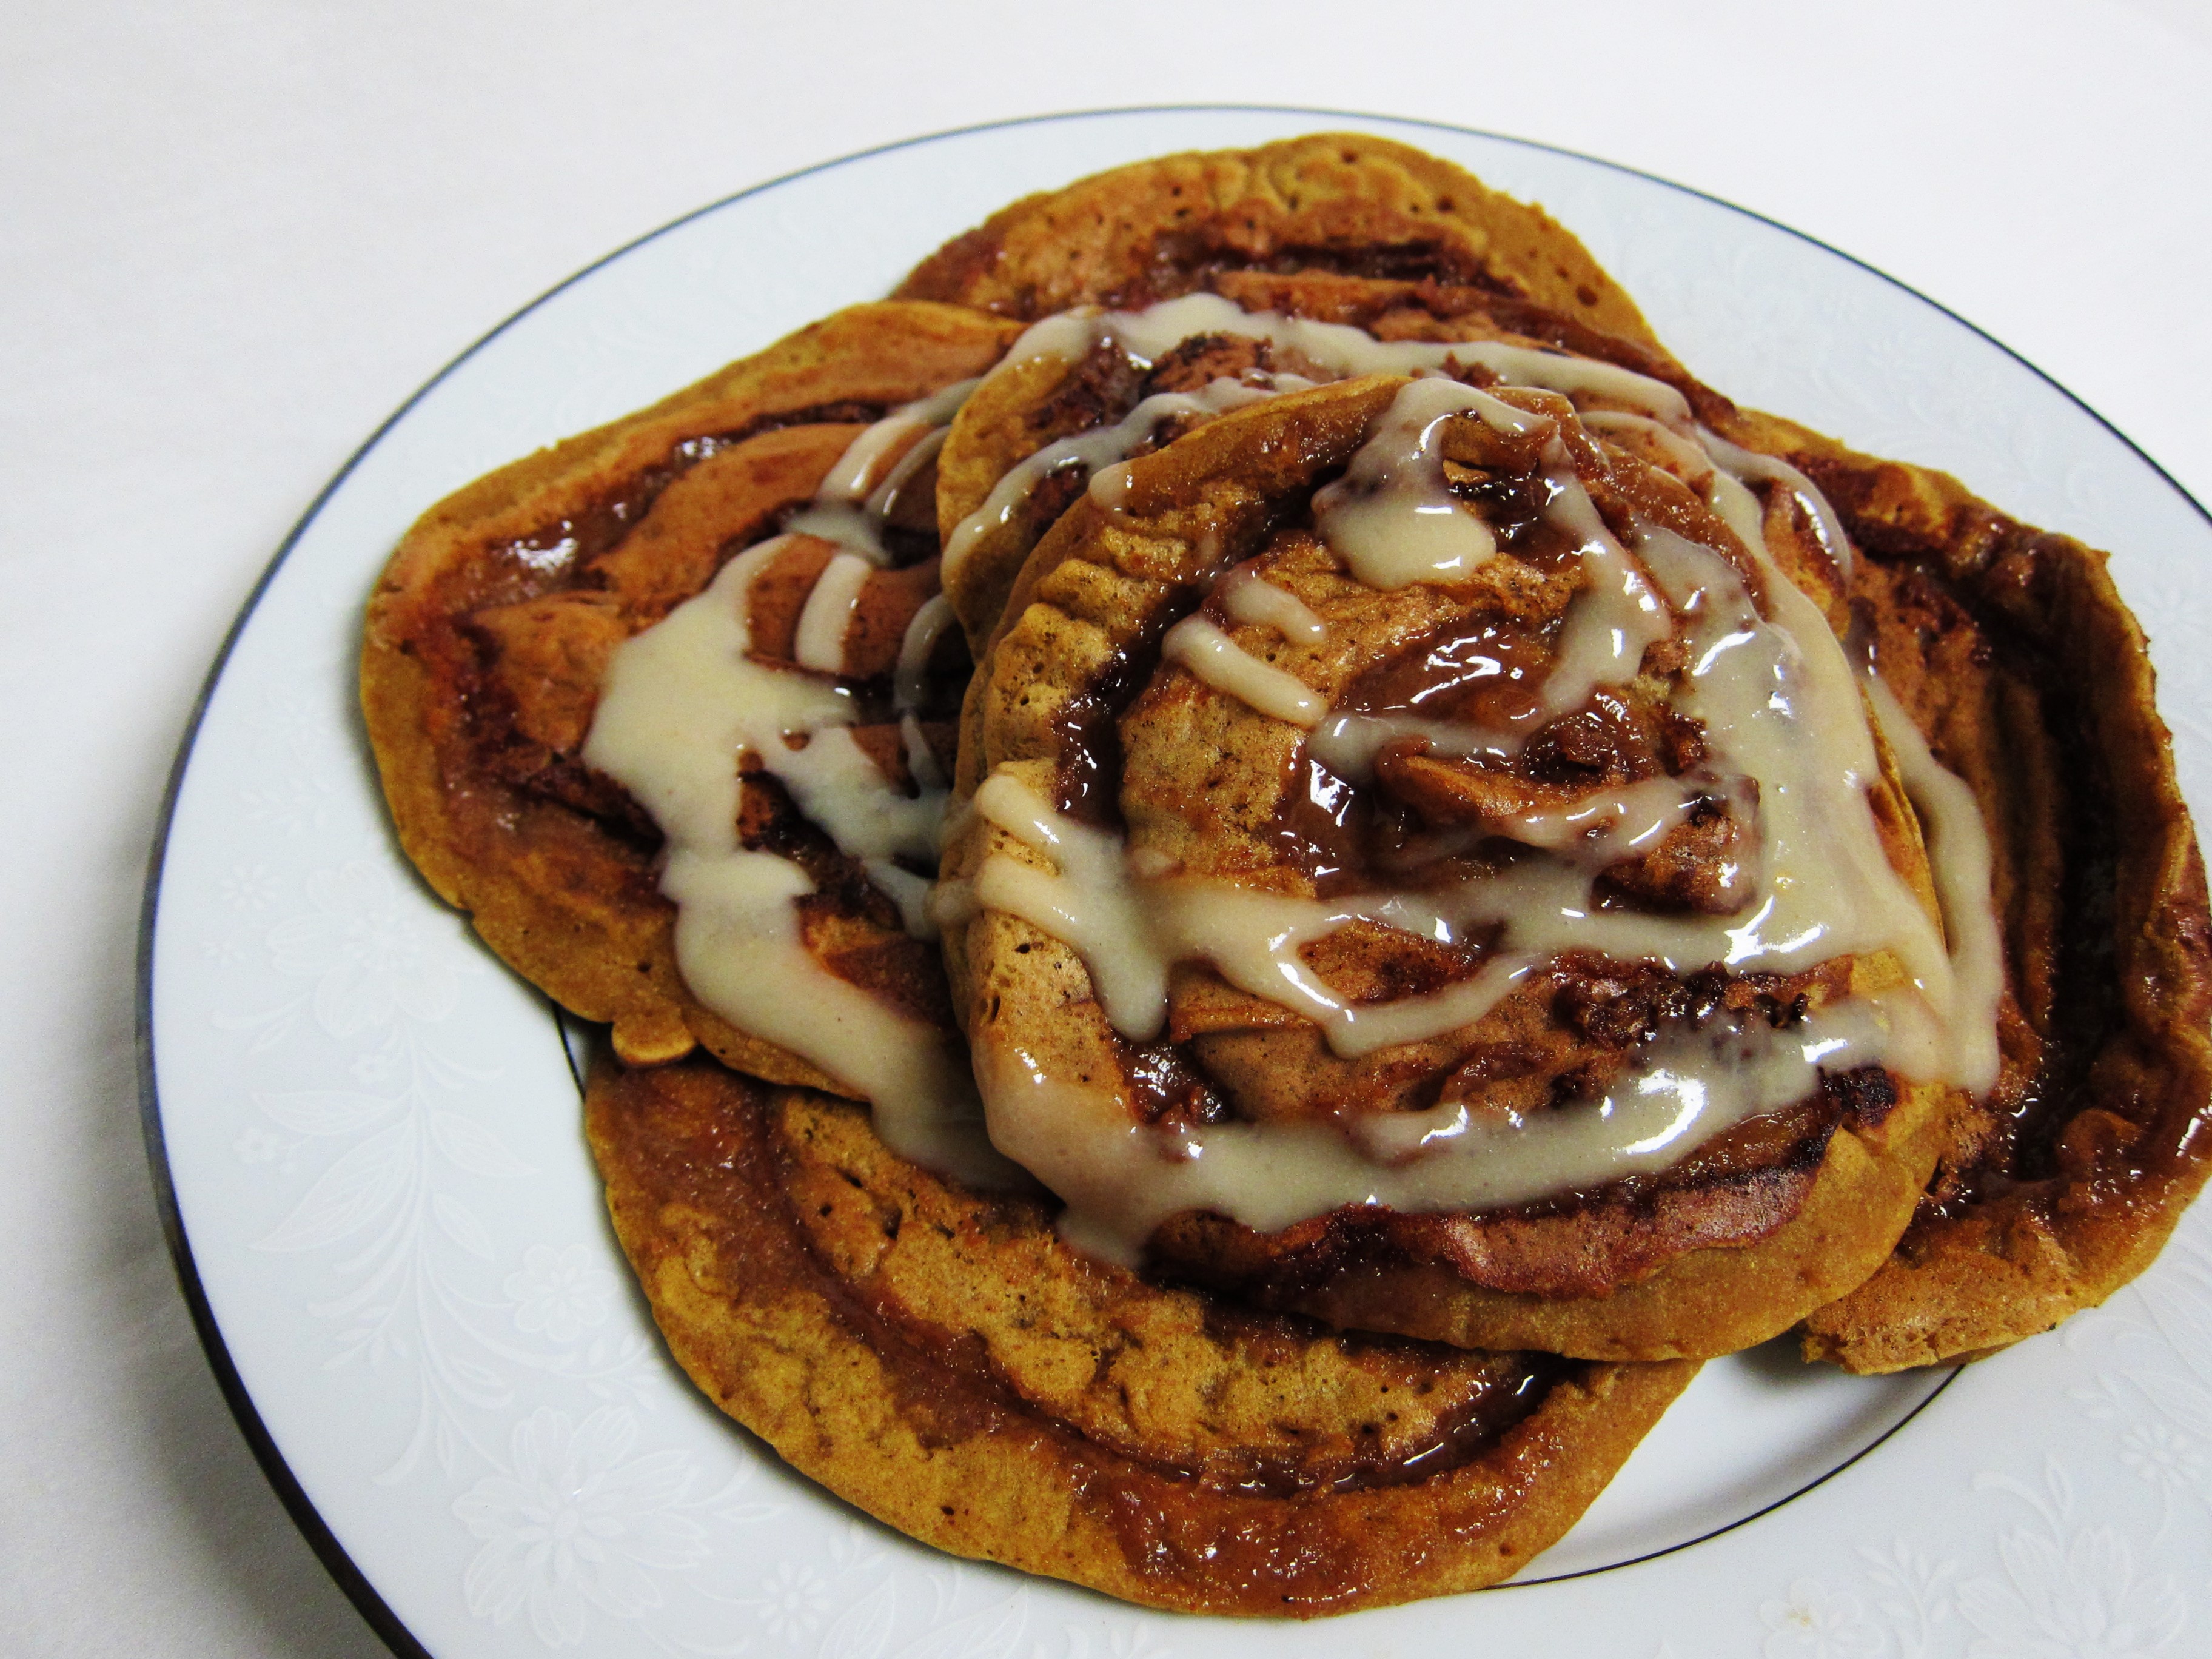
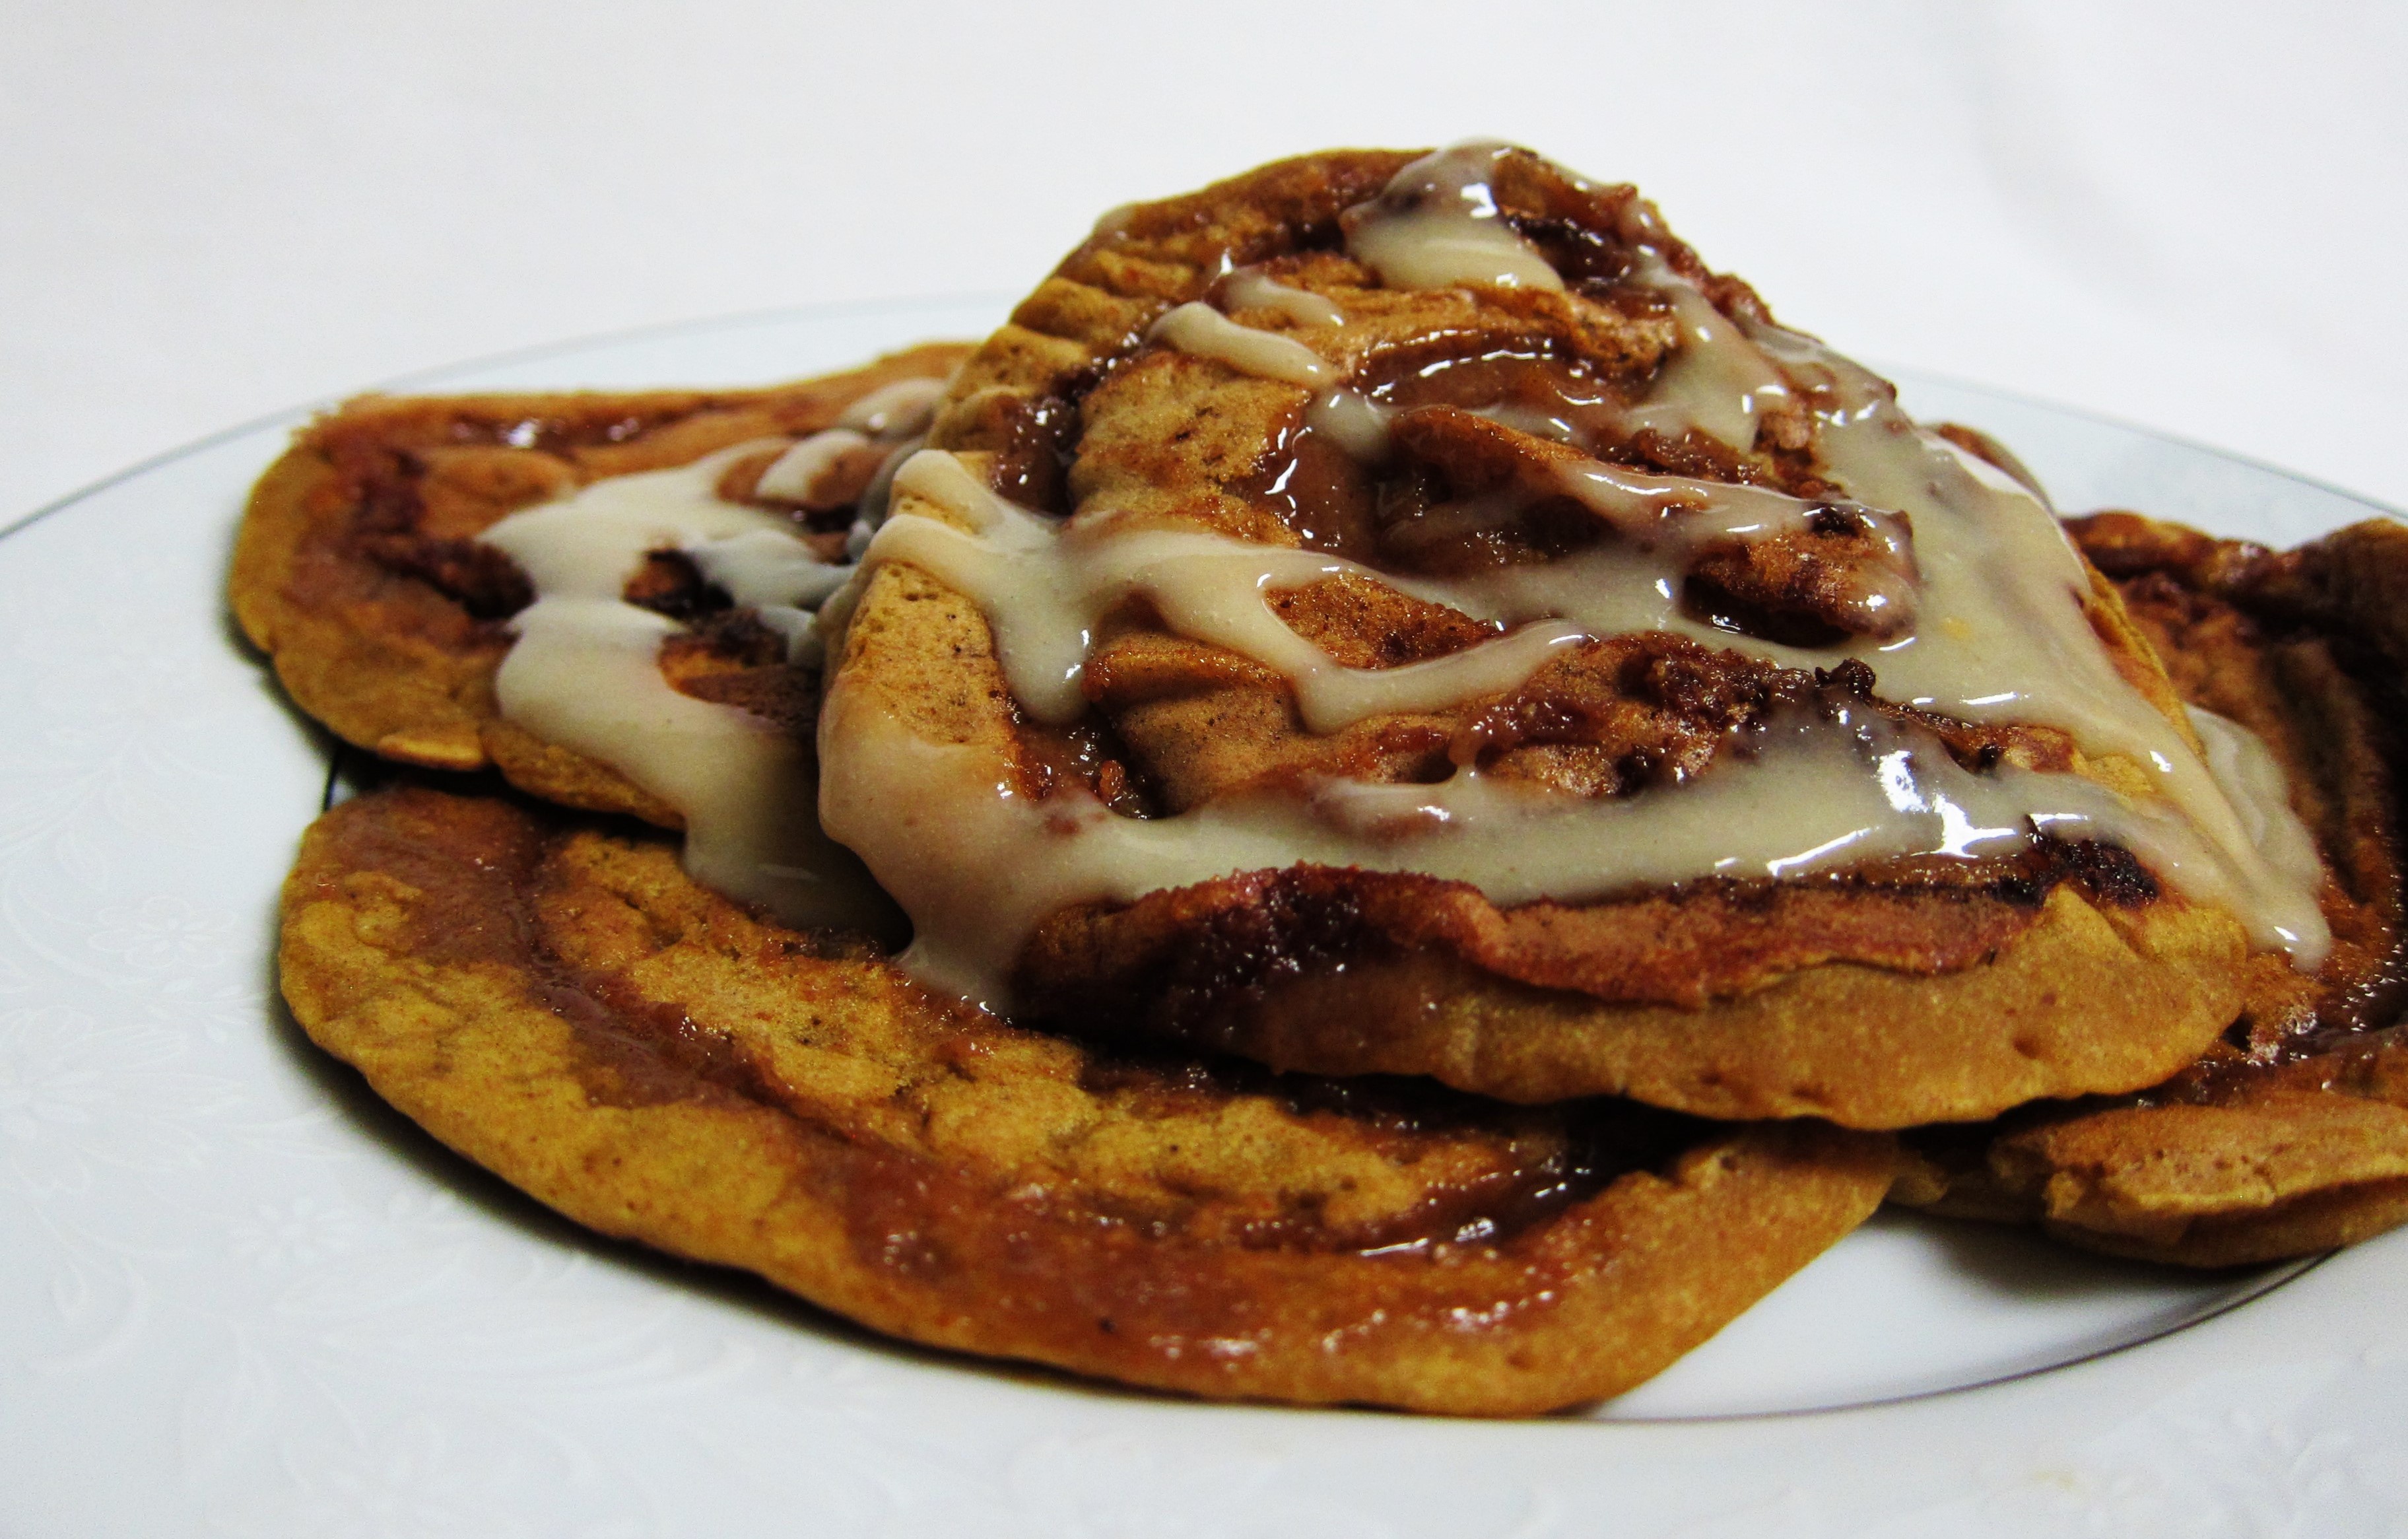
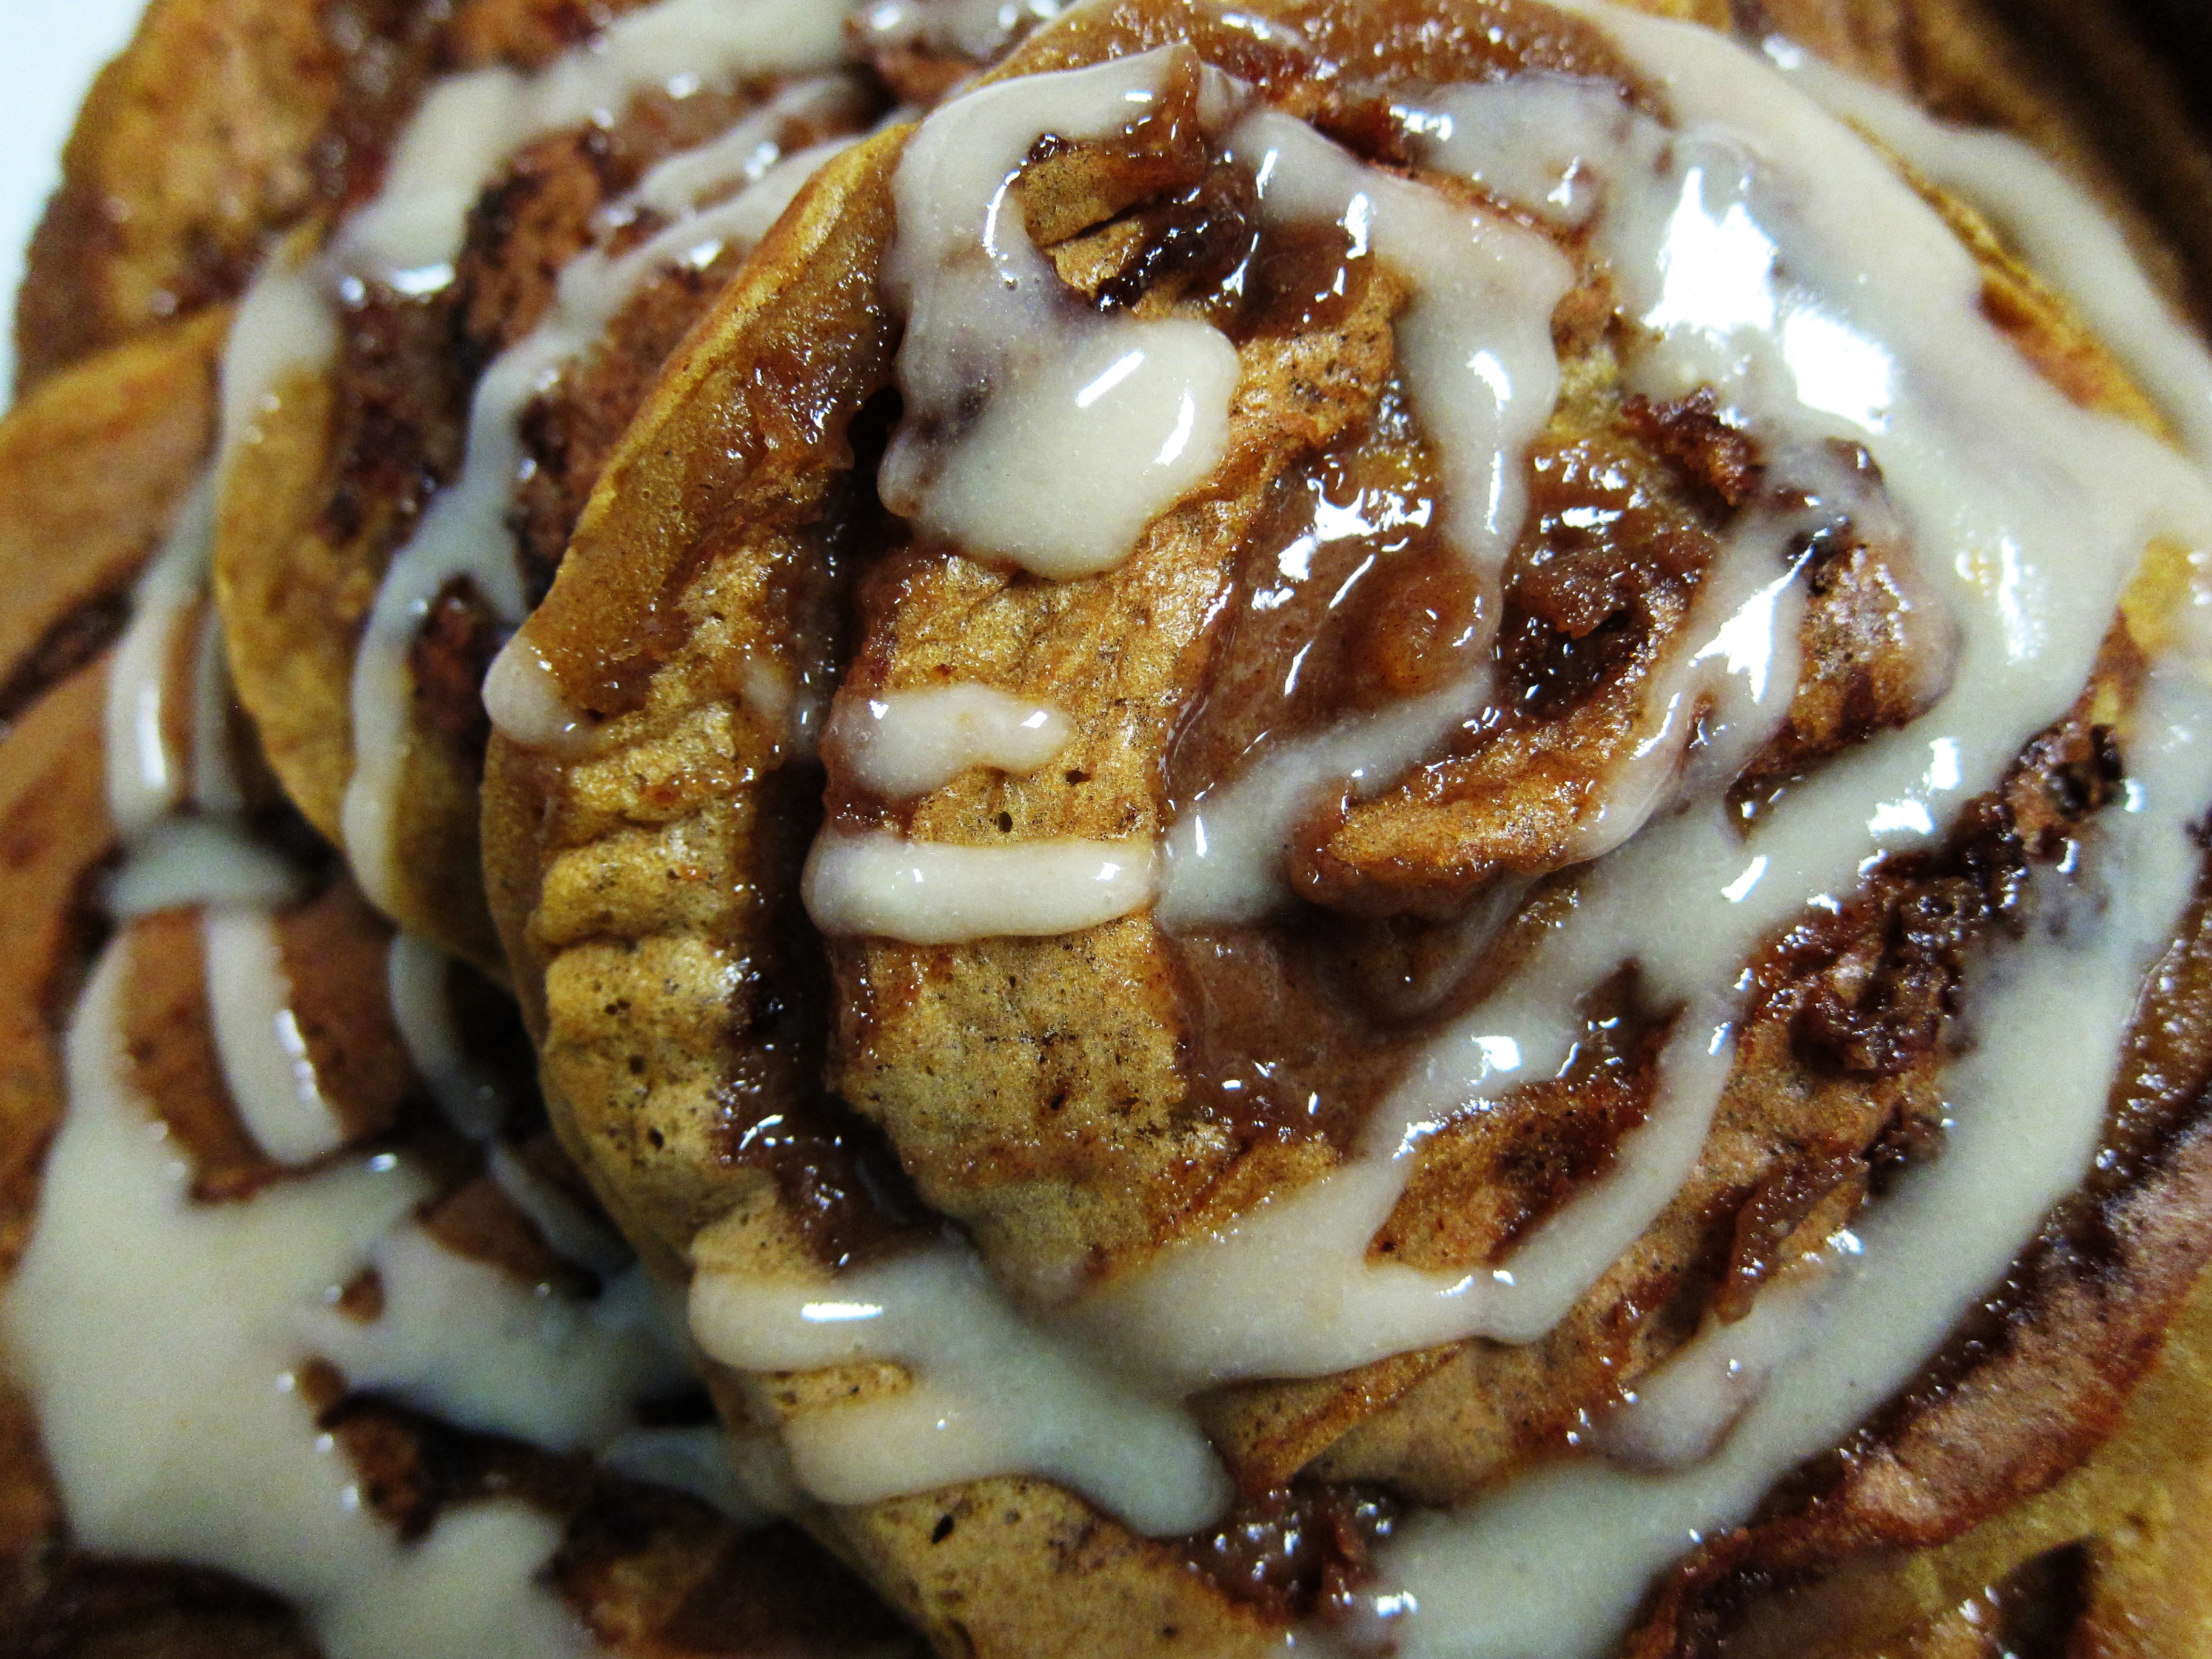
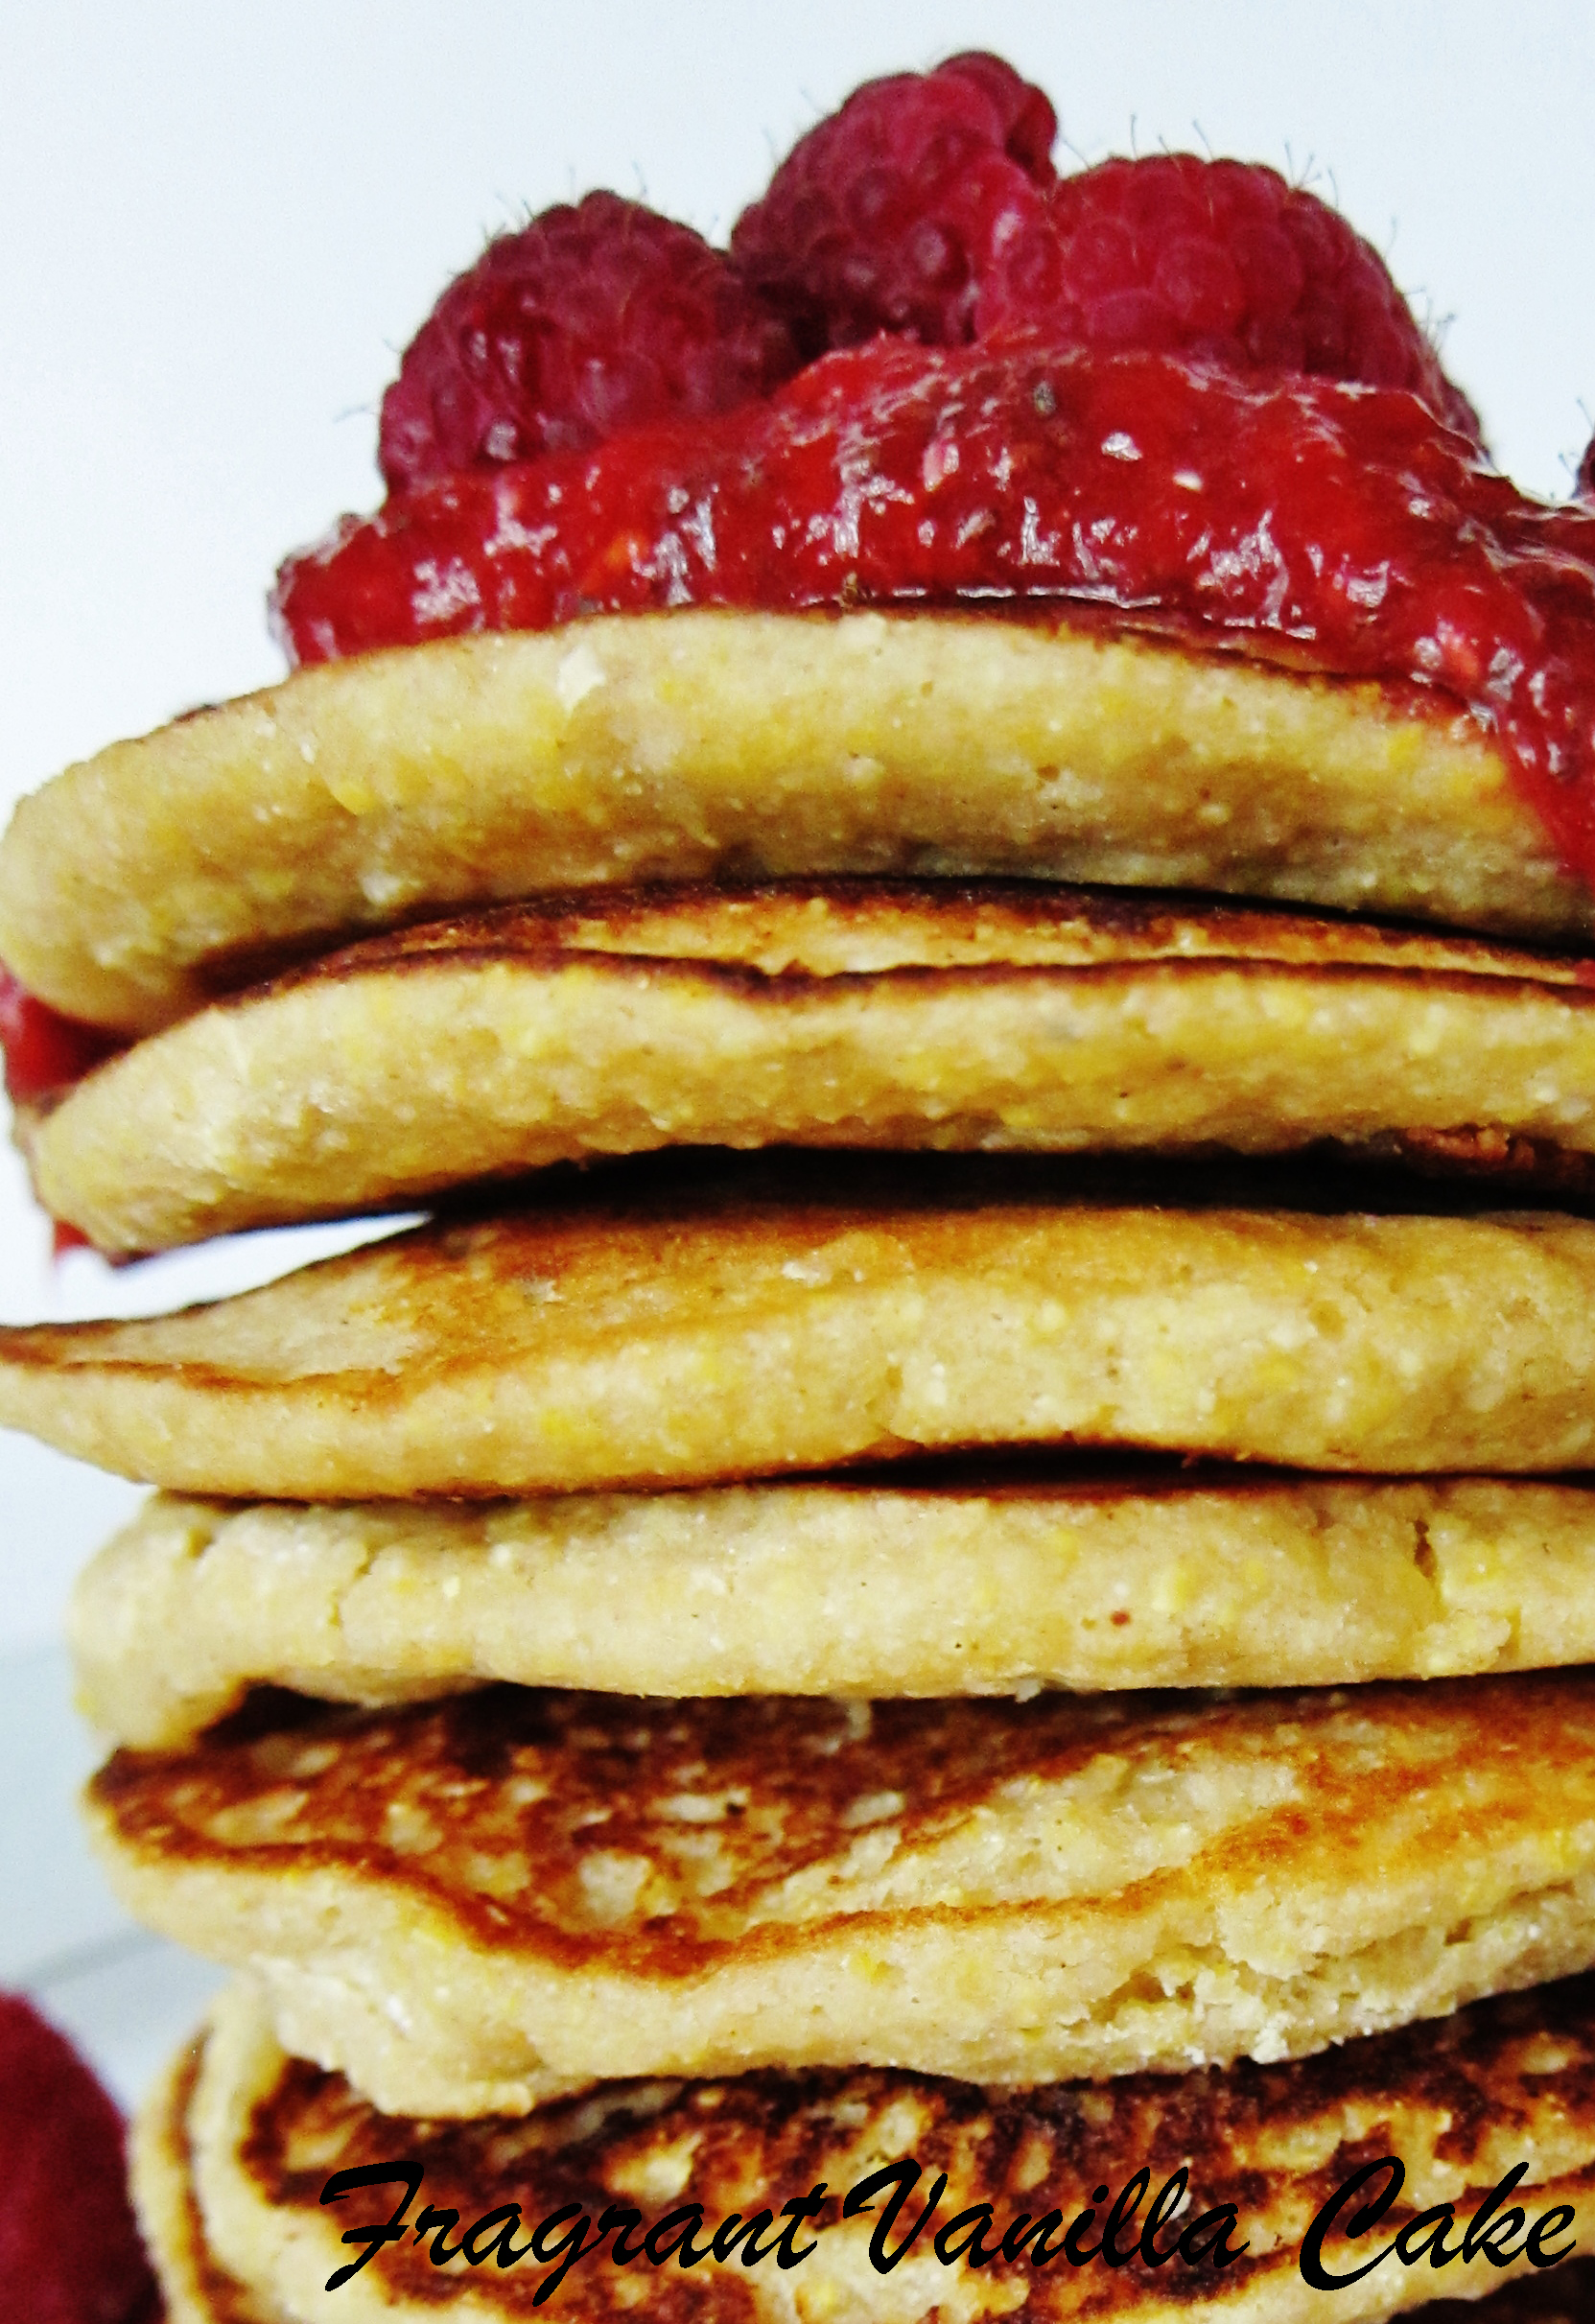
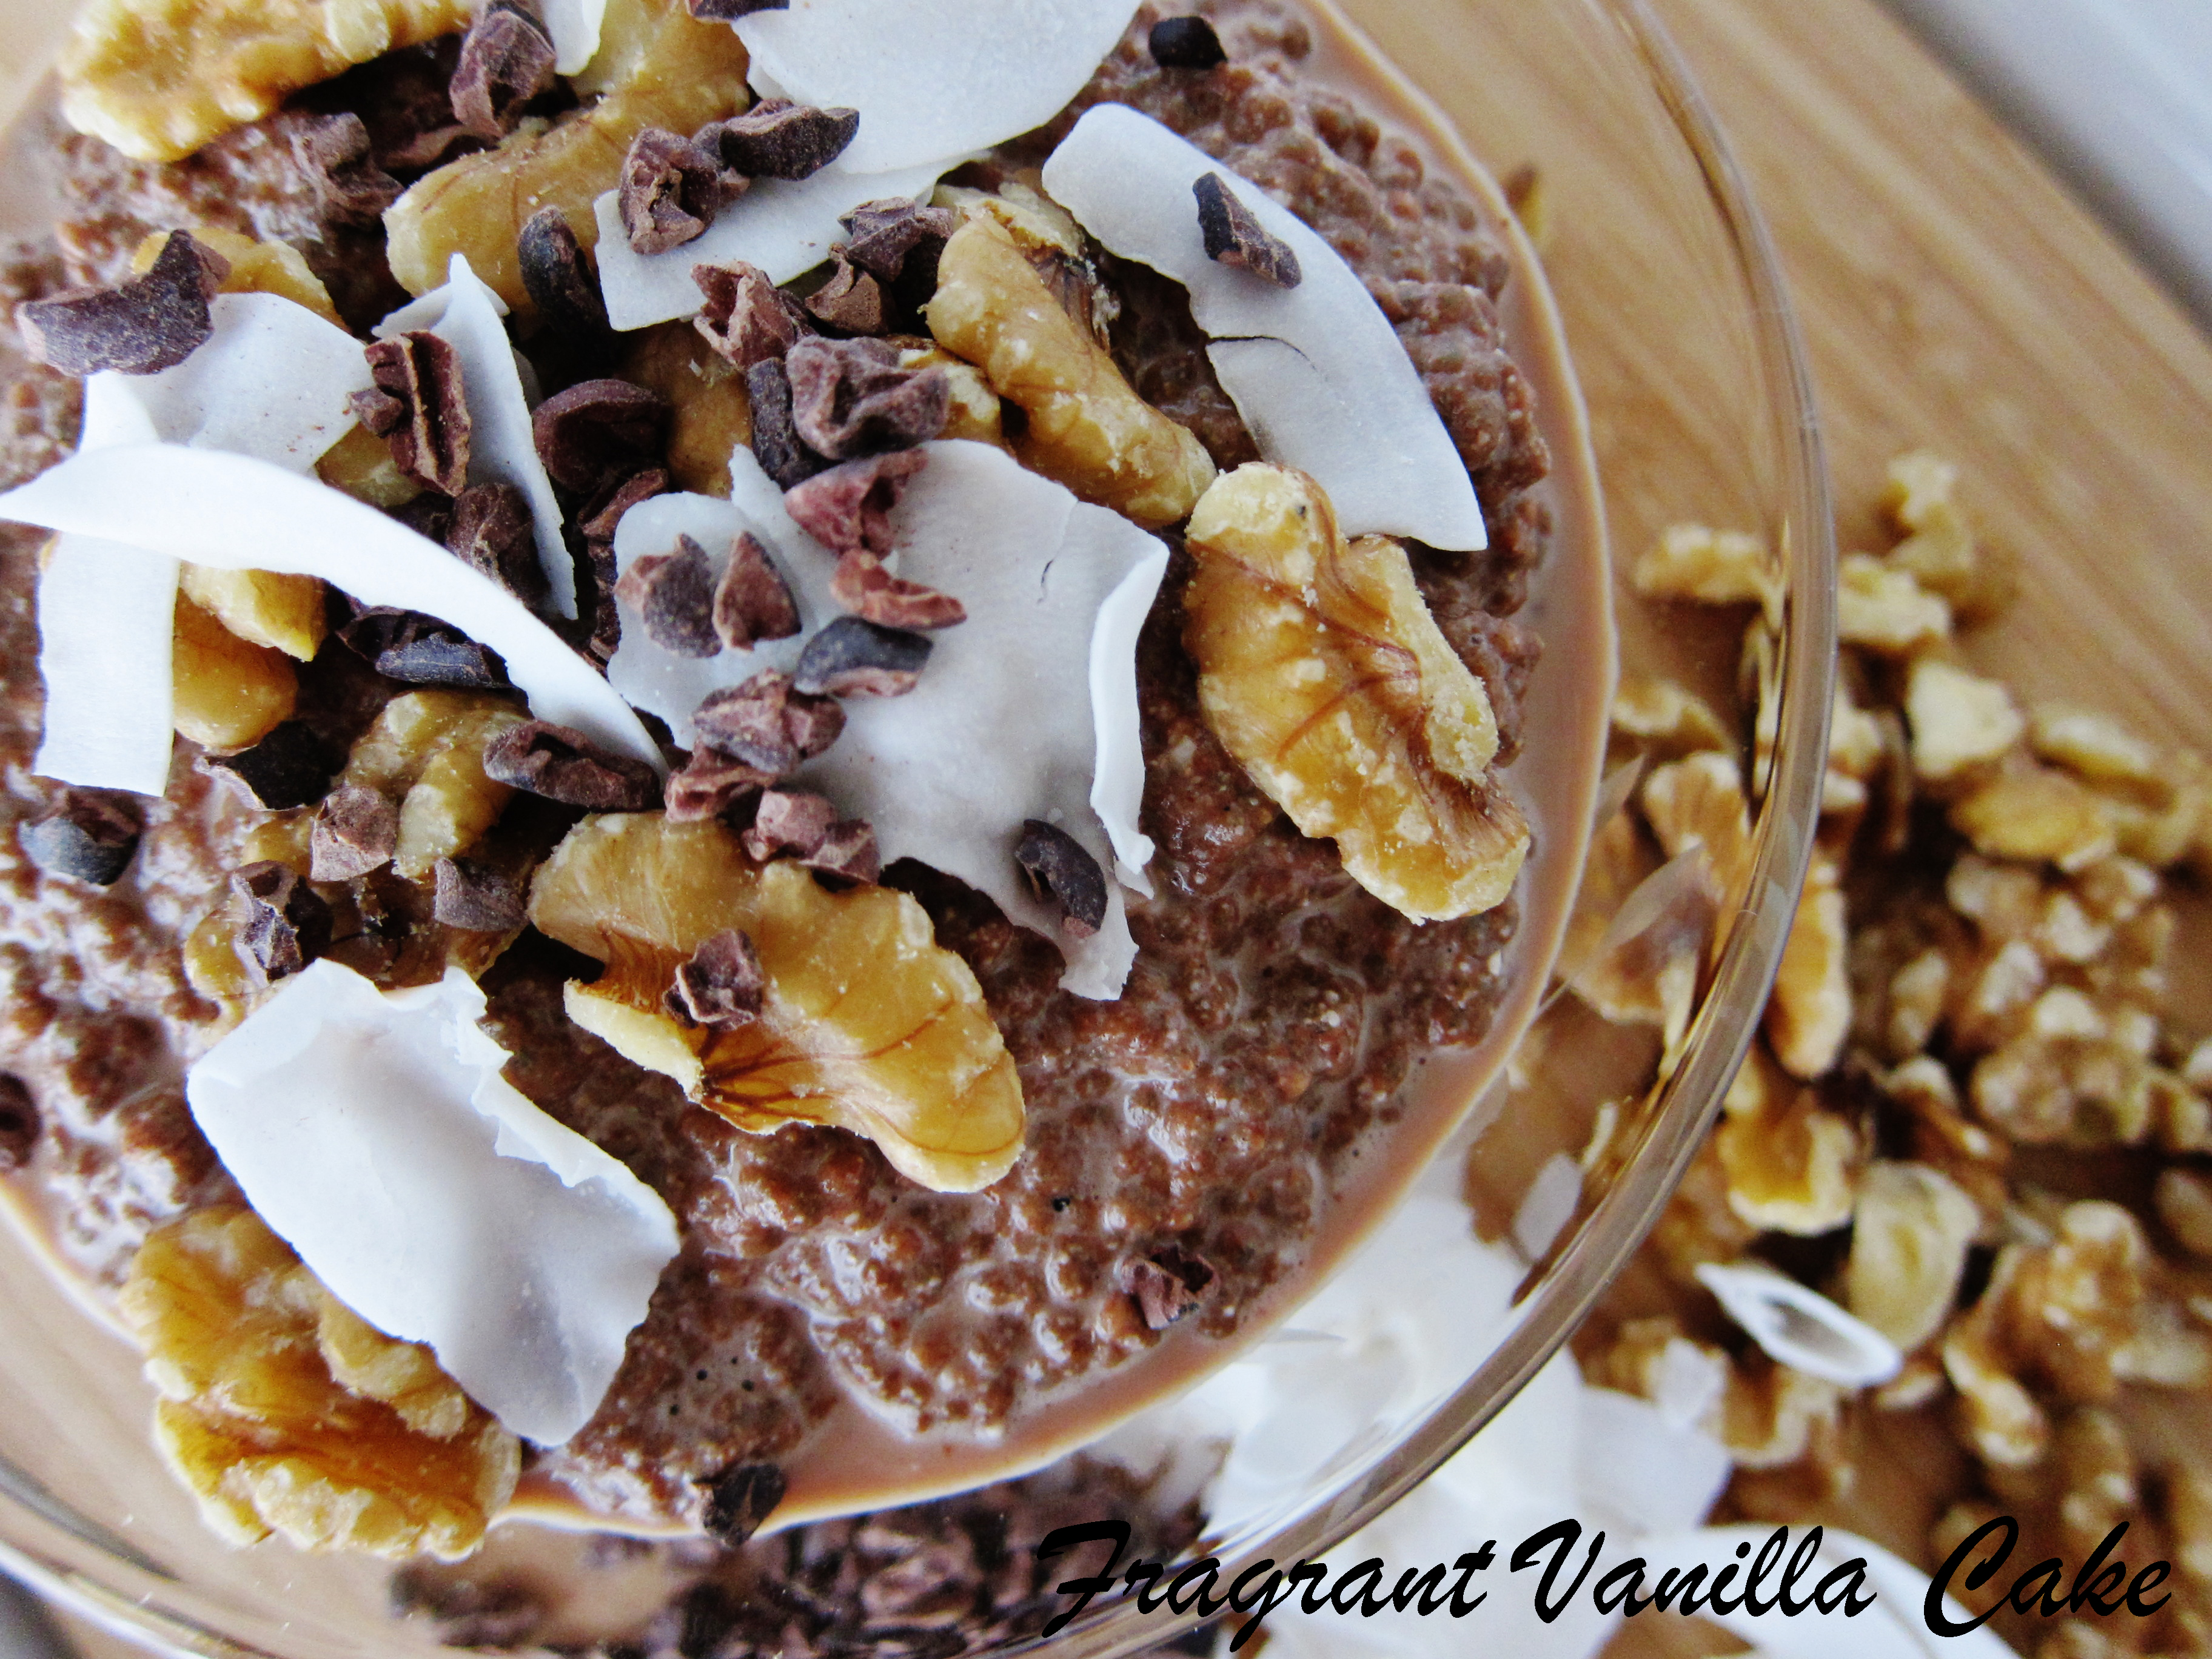
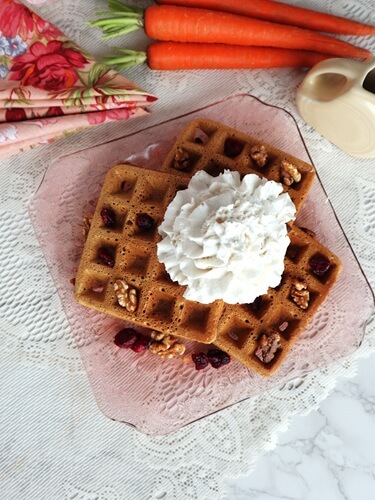
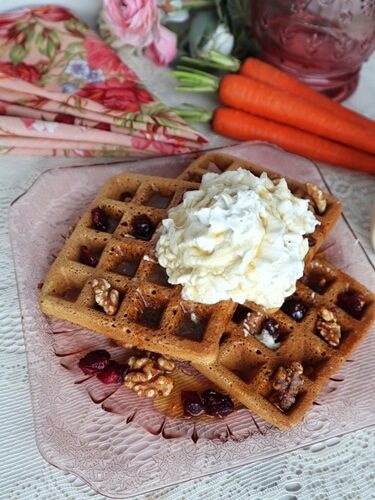
    I included some warming spices I like to use in my carrot cake for these, ginger, cardamom, cinnamon and nutmeg as well as some vanilla so that it had the scent of delicious cake.  And I used shredded carrots as well.  I sometimes include nuts and dried fruit in my carrot cake, but I saved that for the topping on these because I didn’t want to mix them in. 

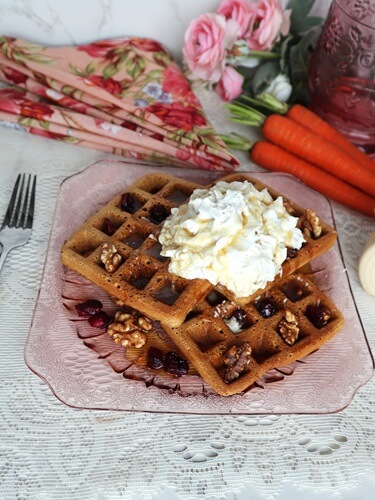
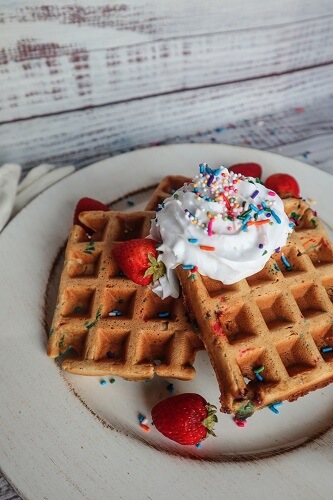
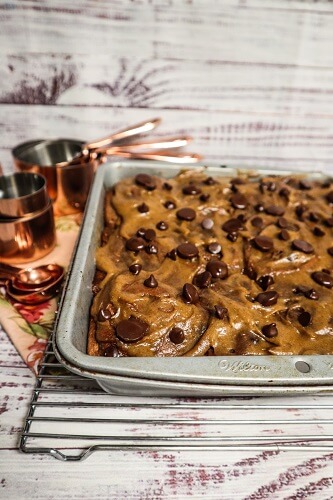
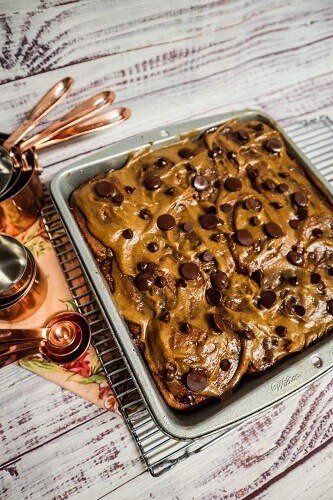
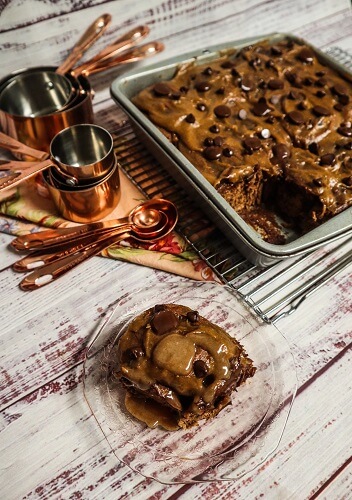
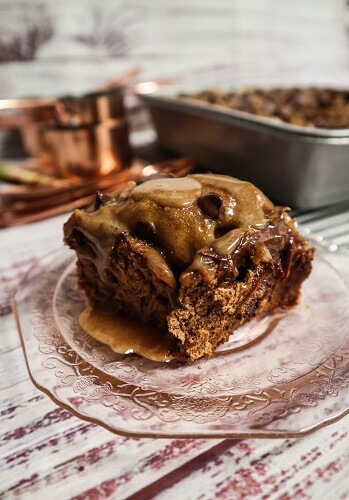
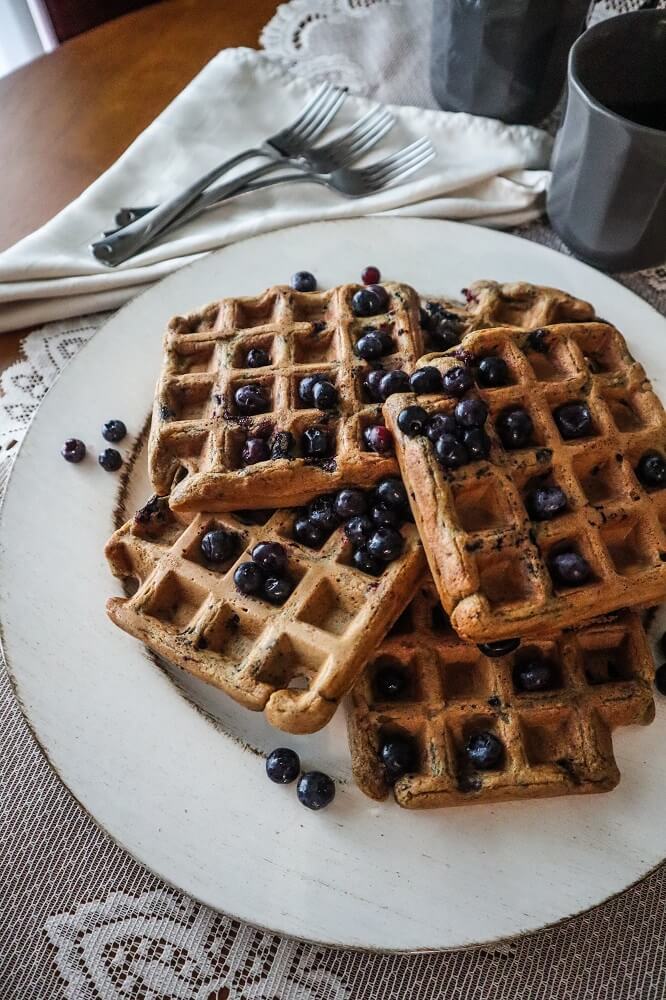
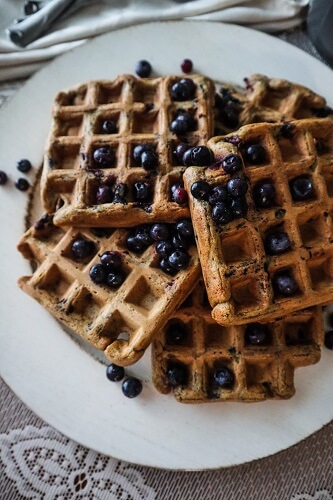
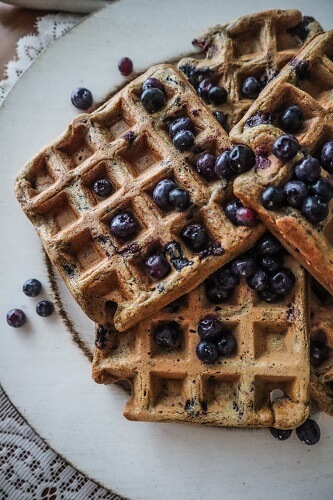
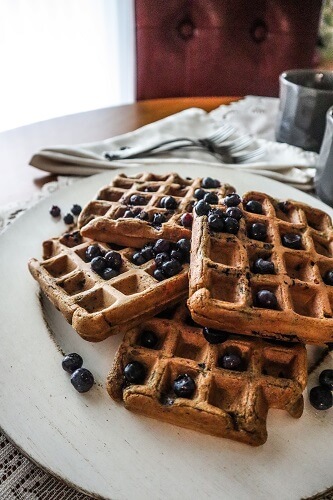
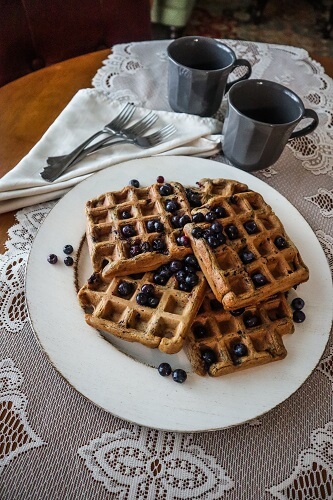
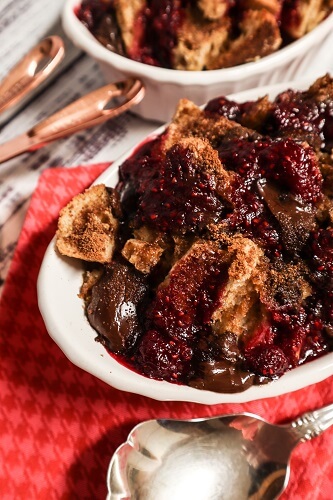
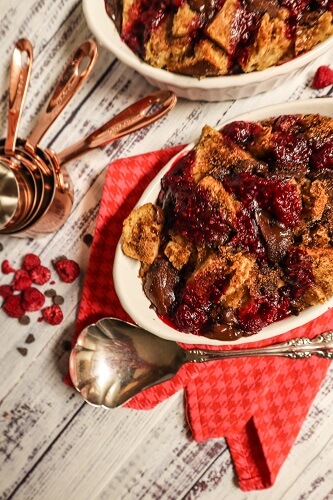
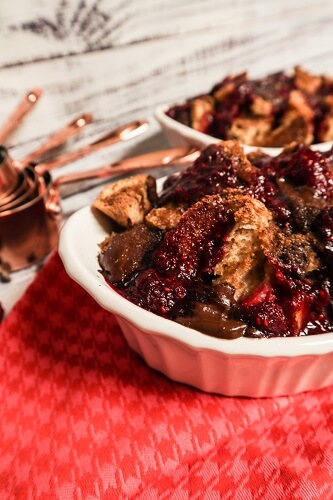
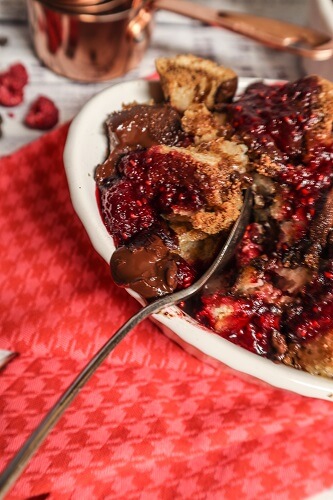
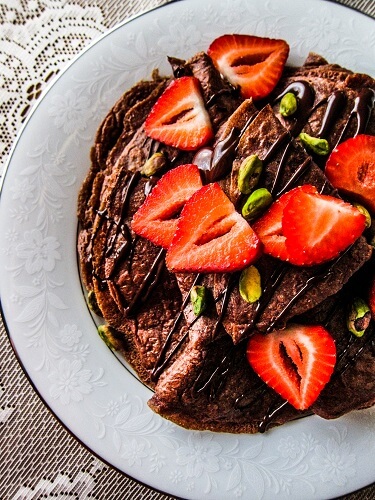
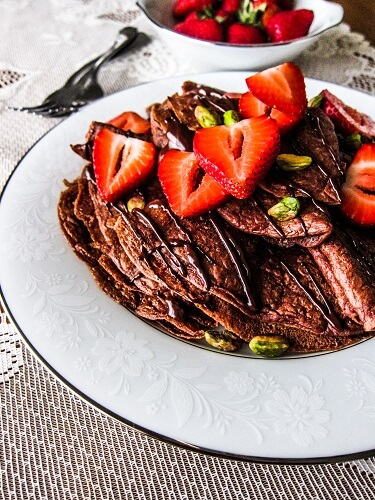
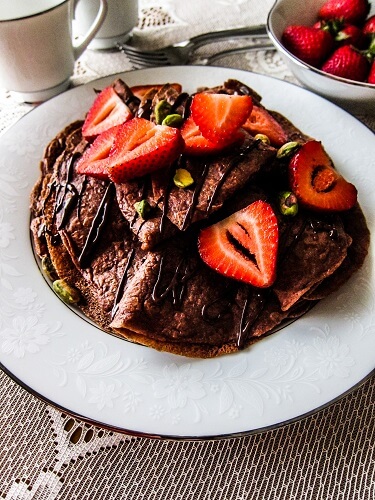
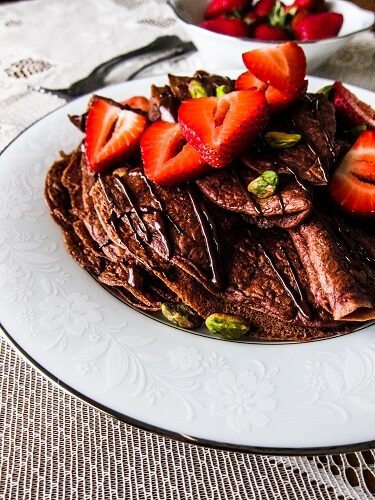
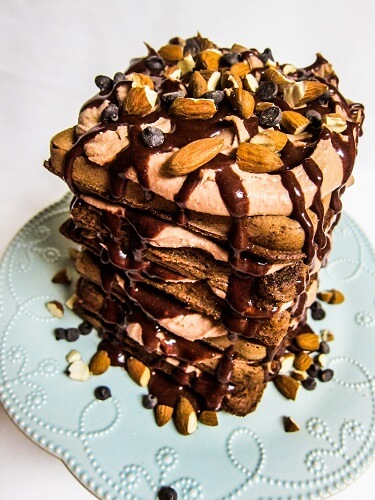
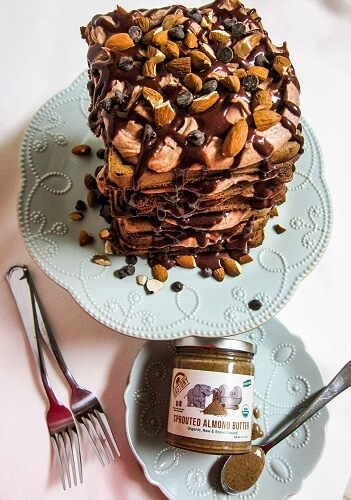
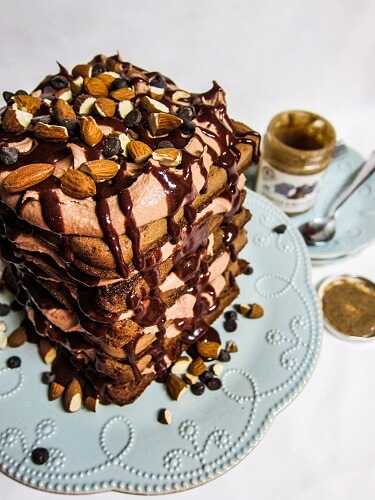
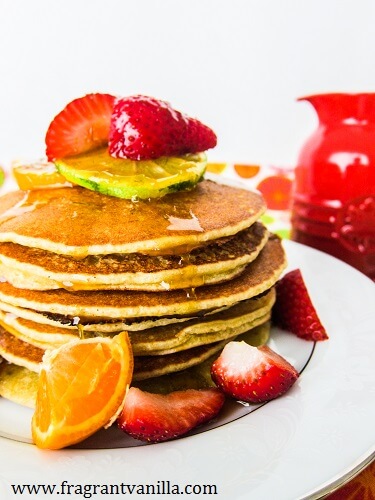
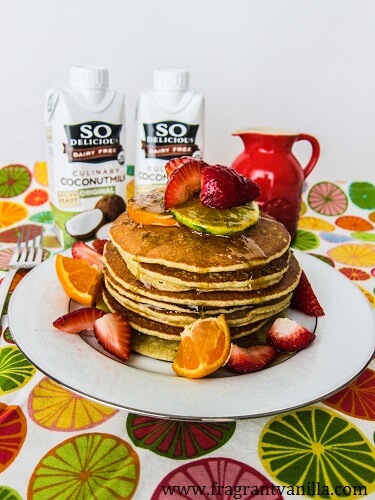
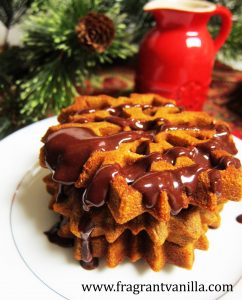
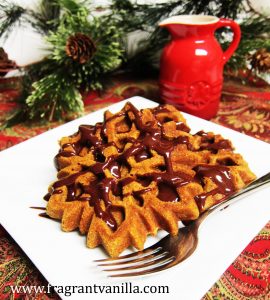
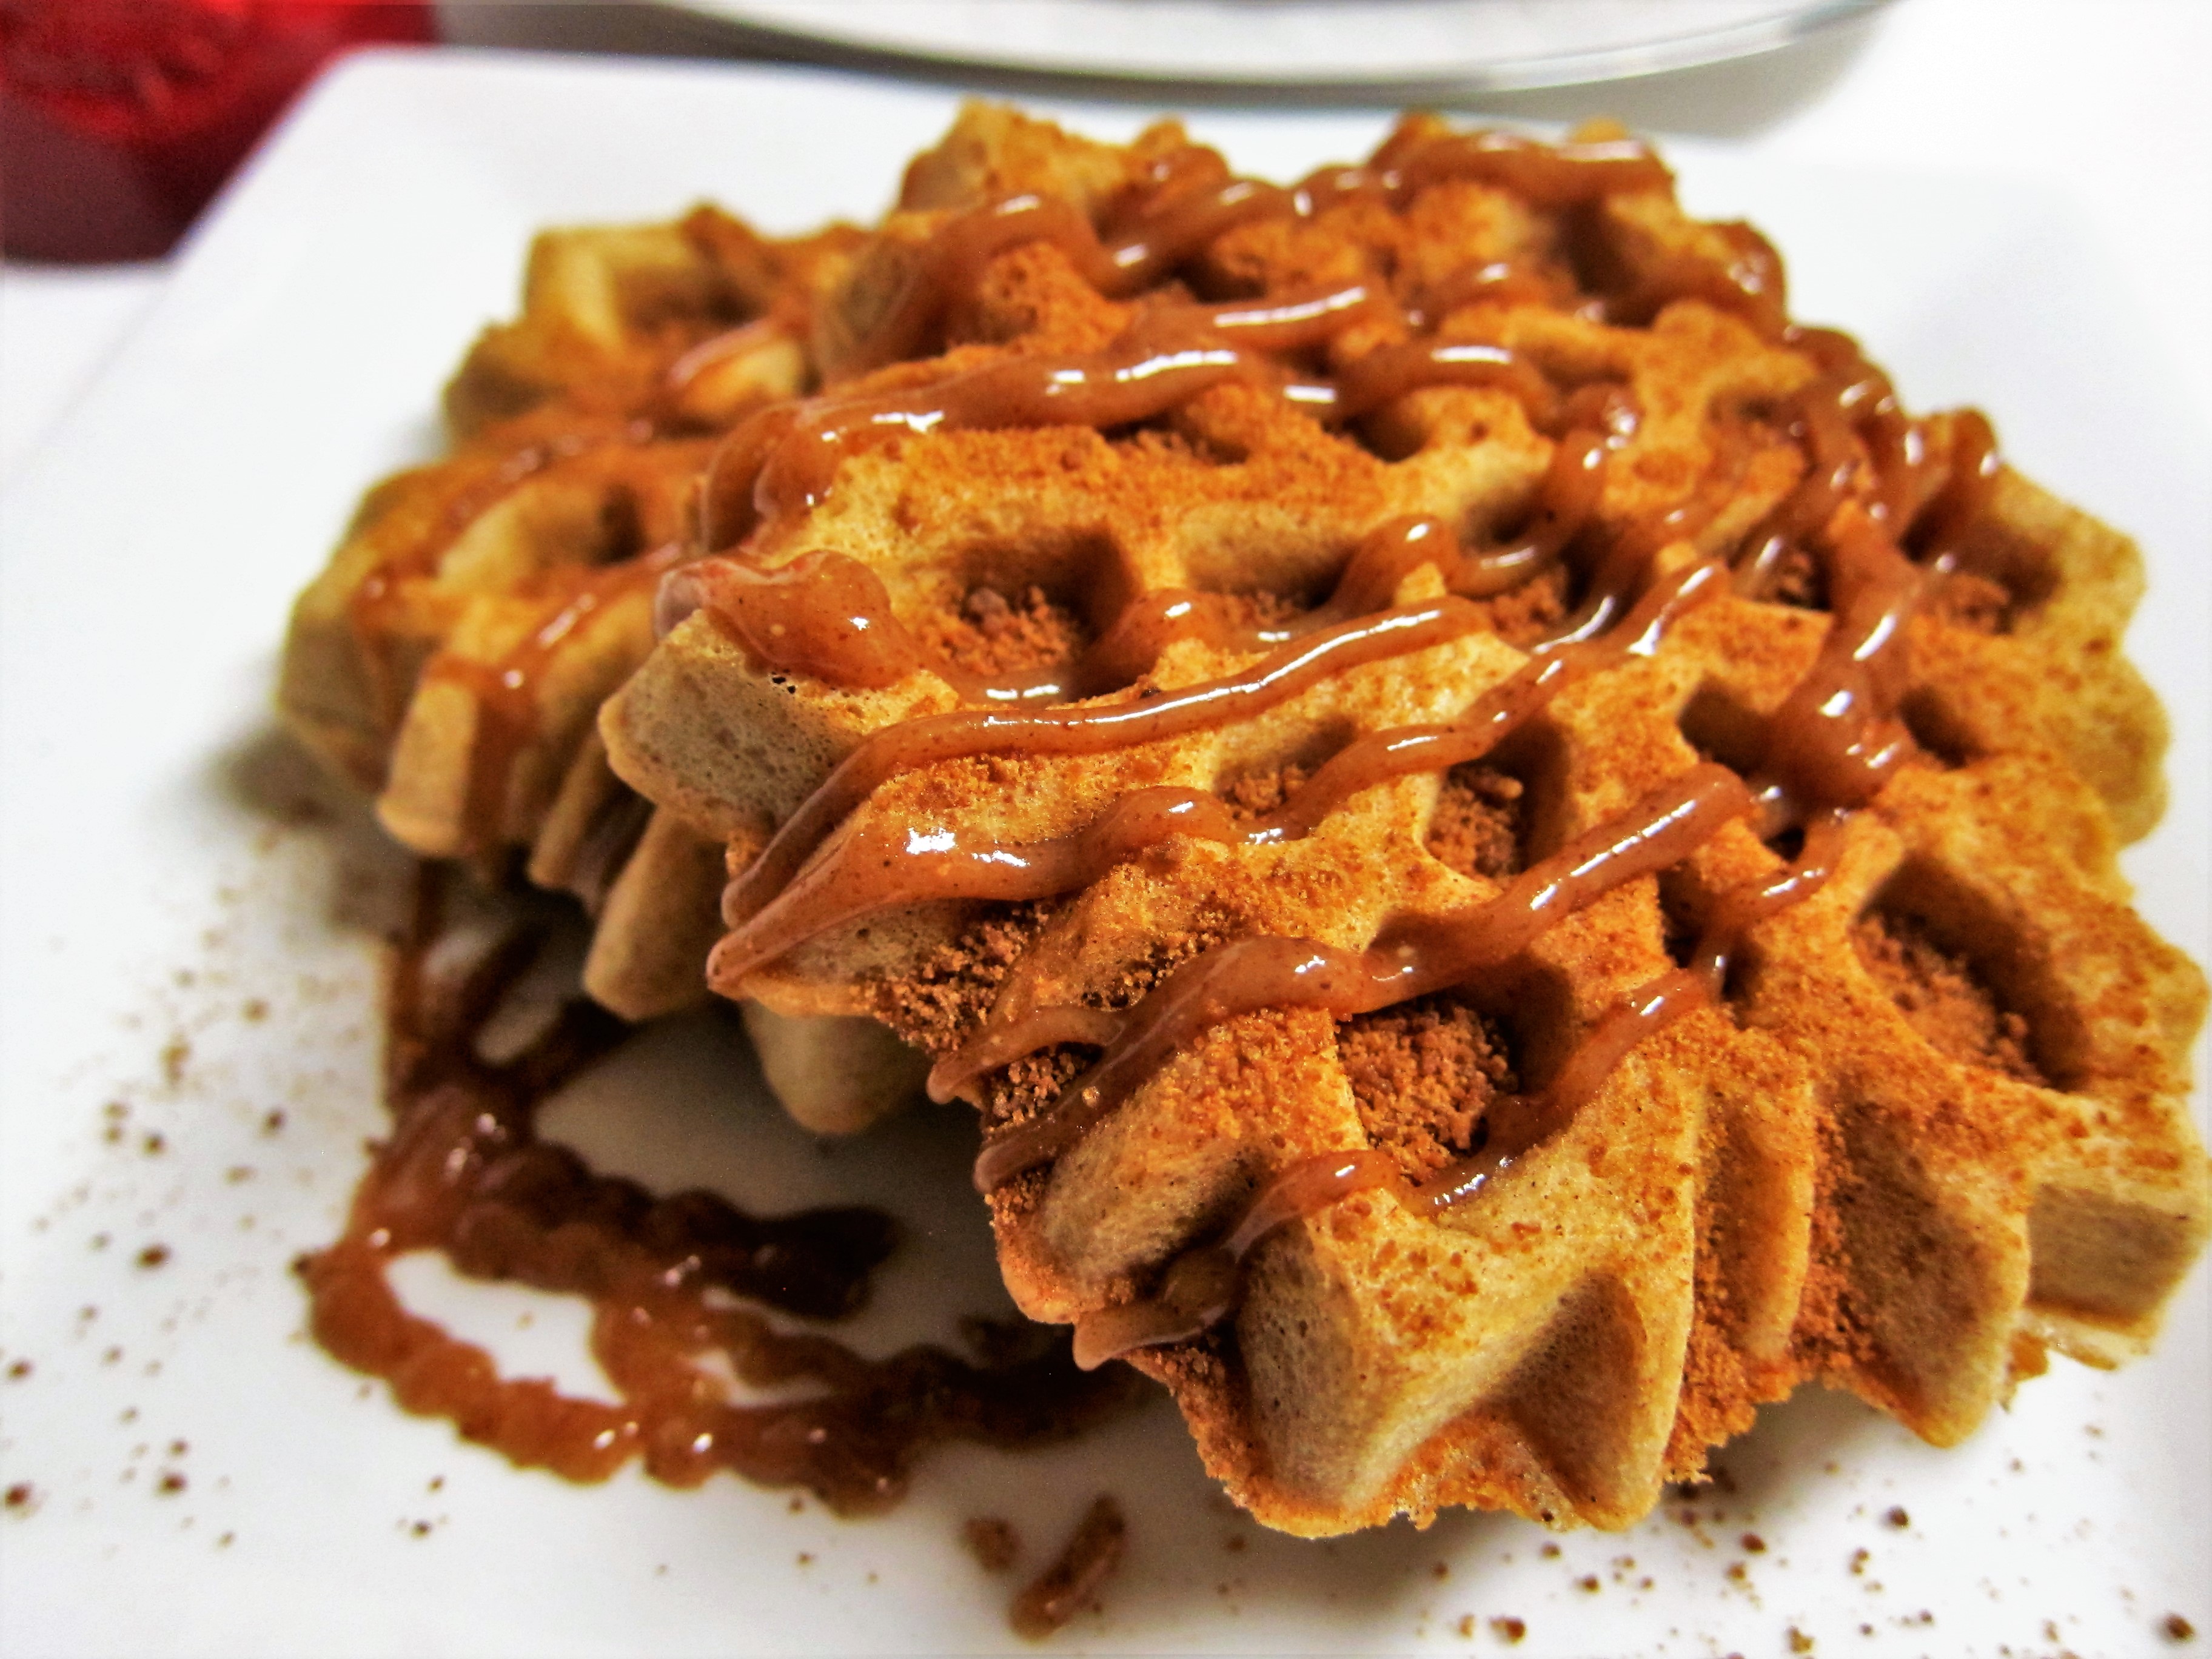
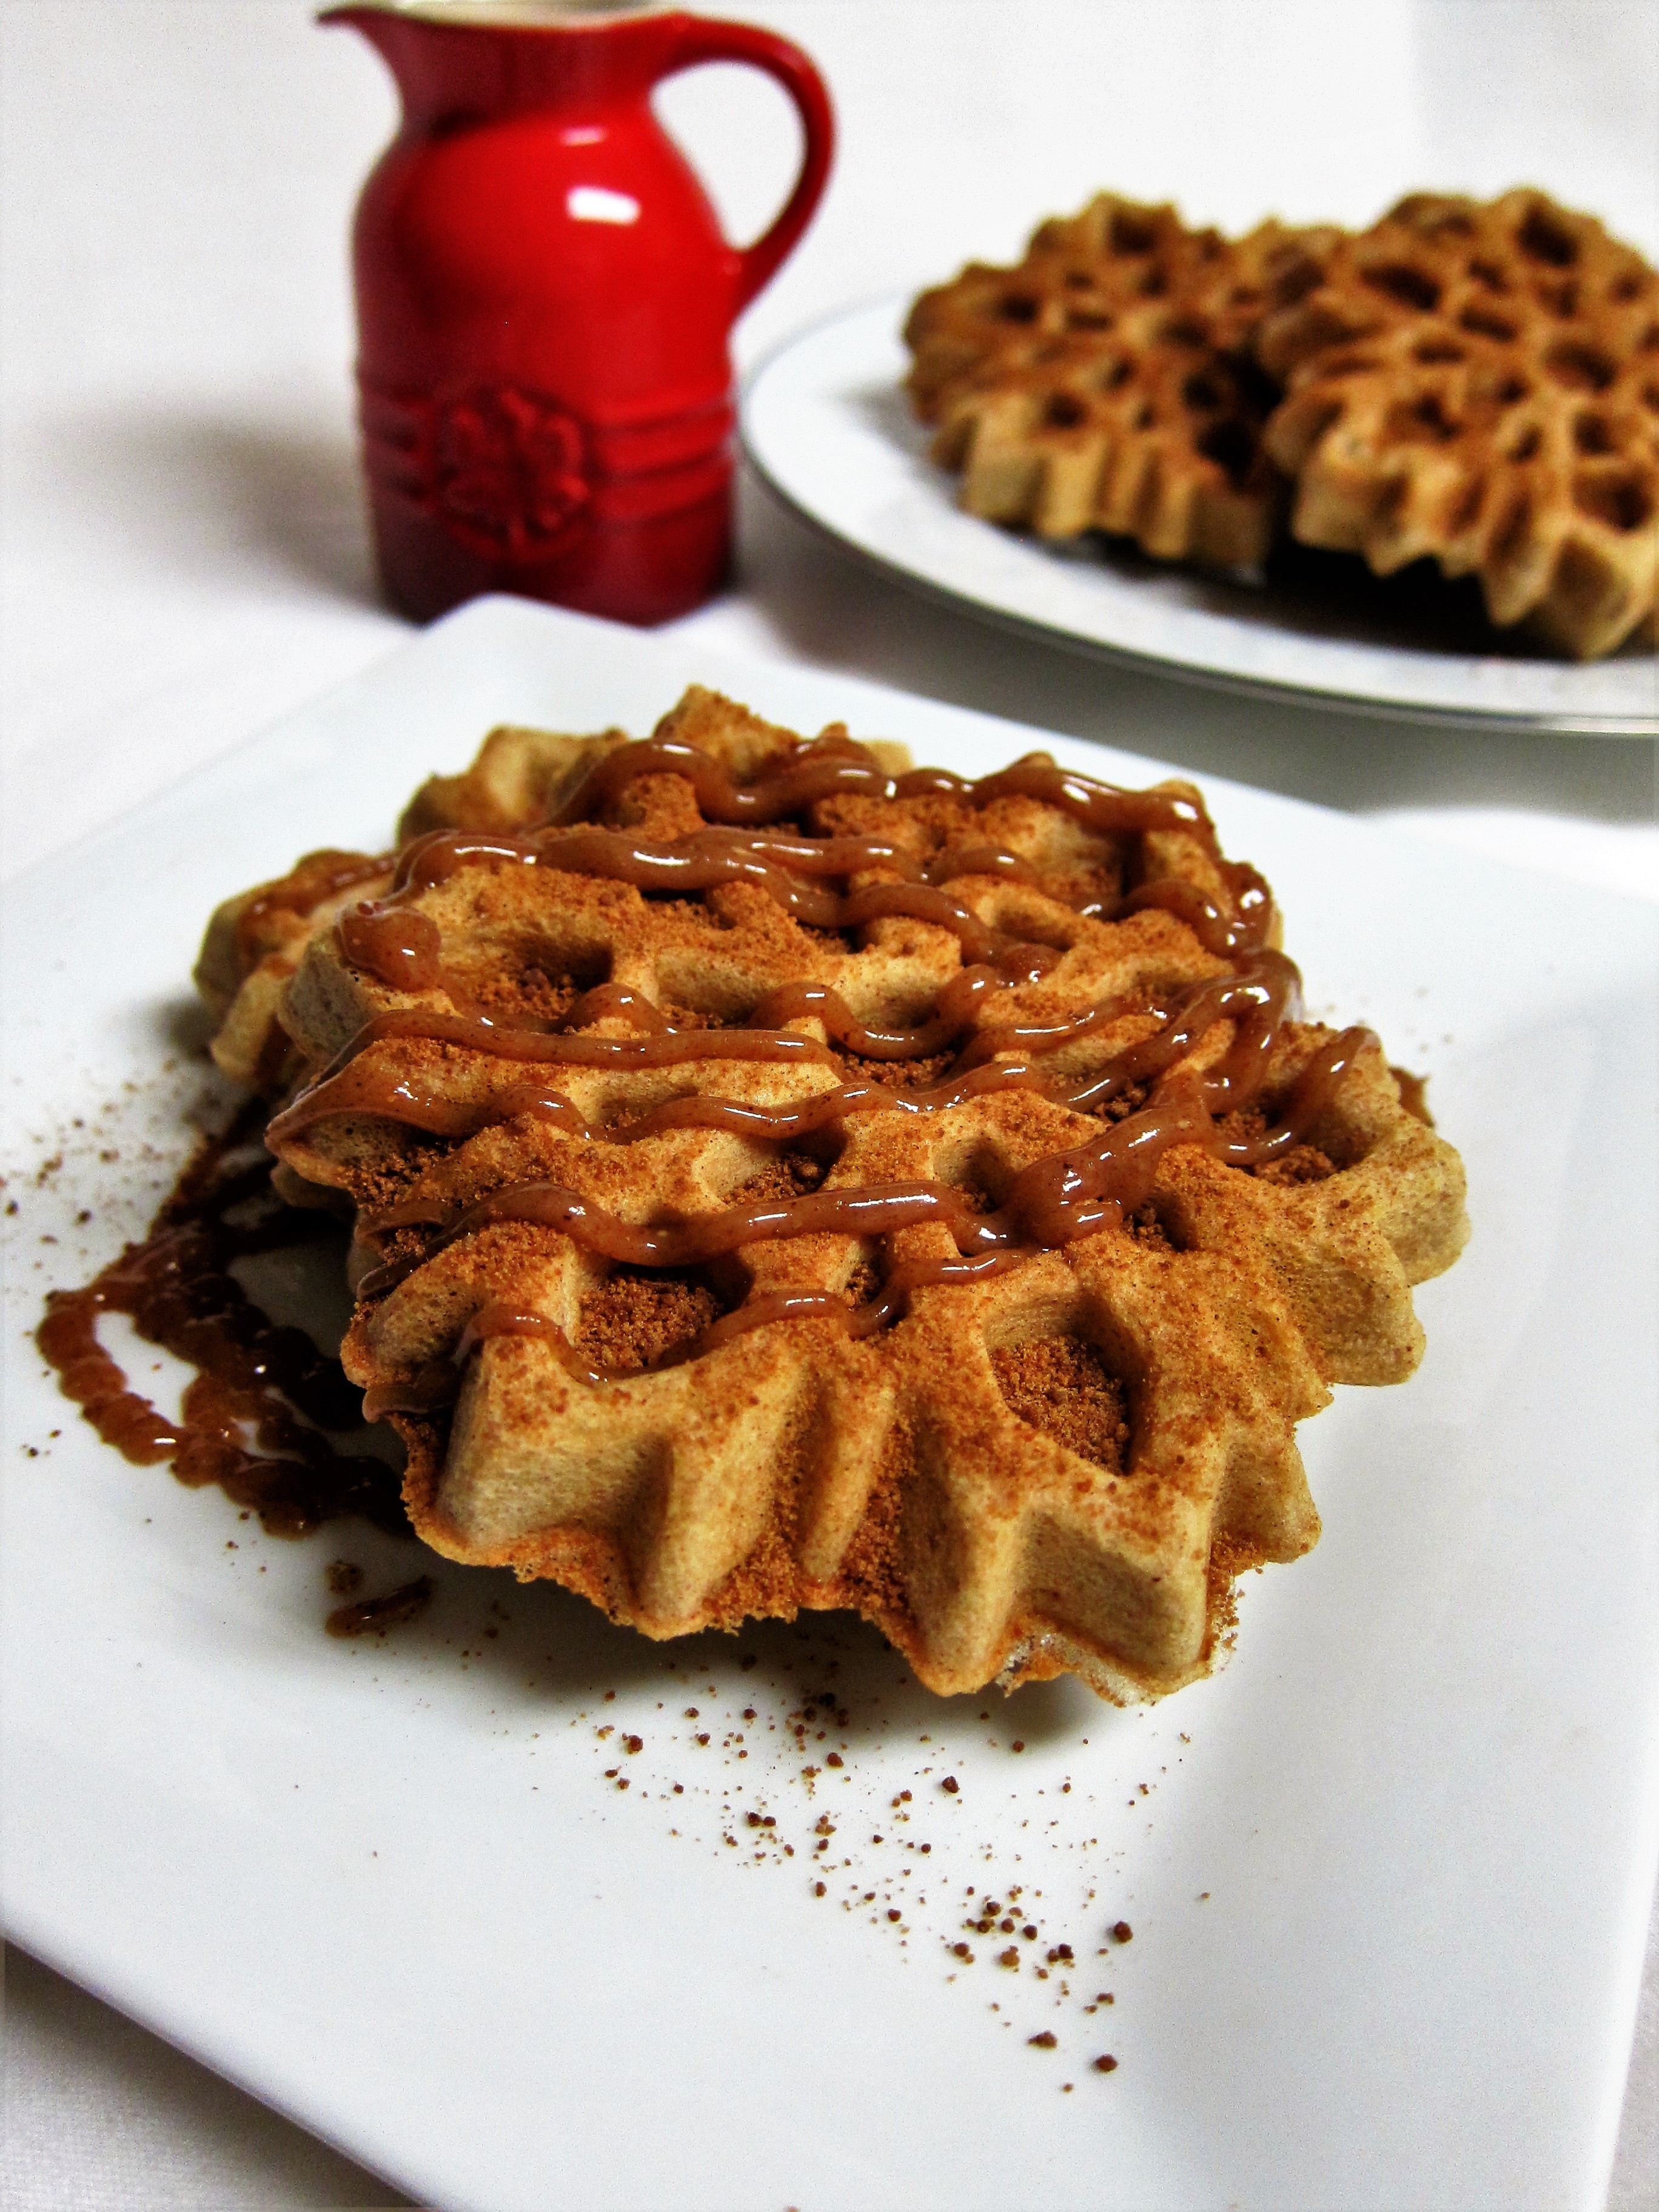
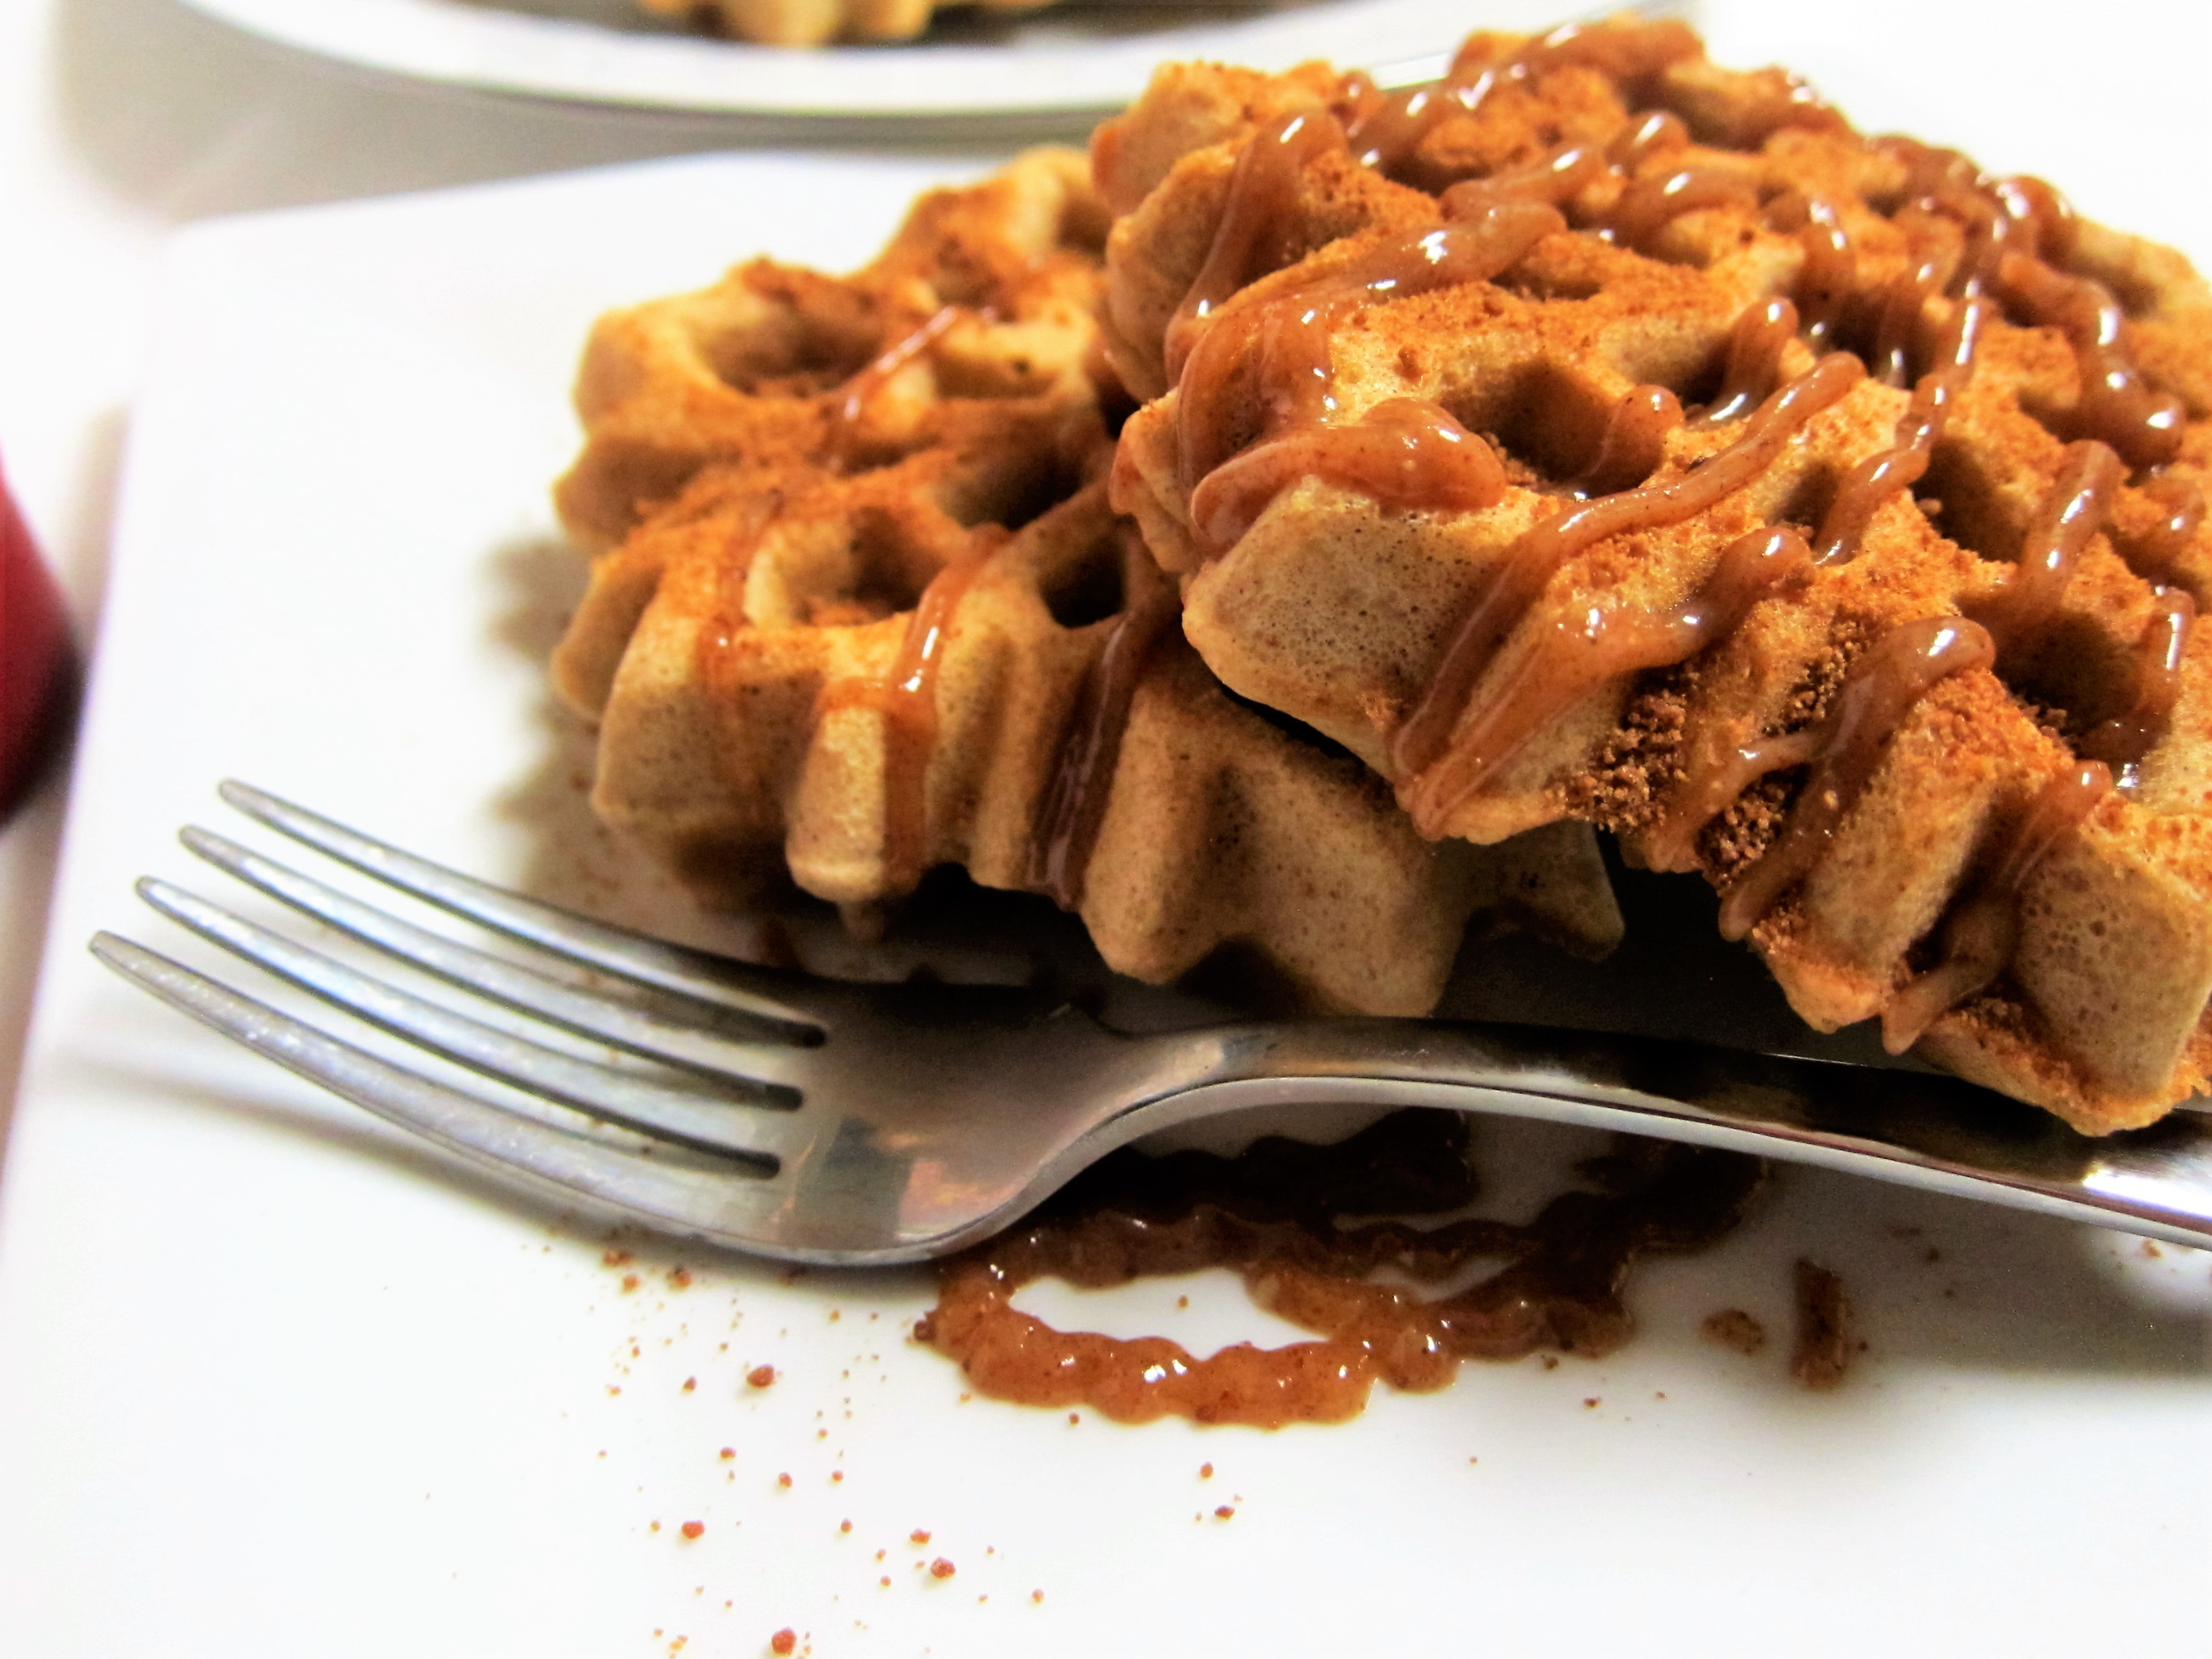
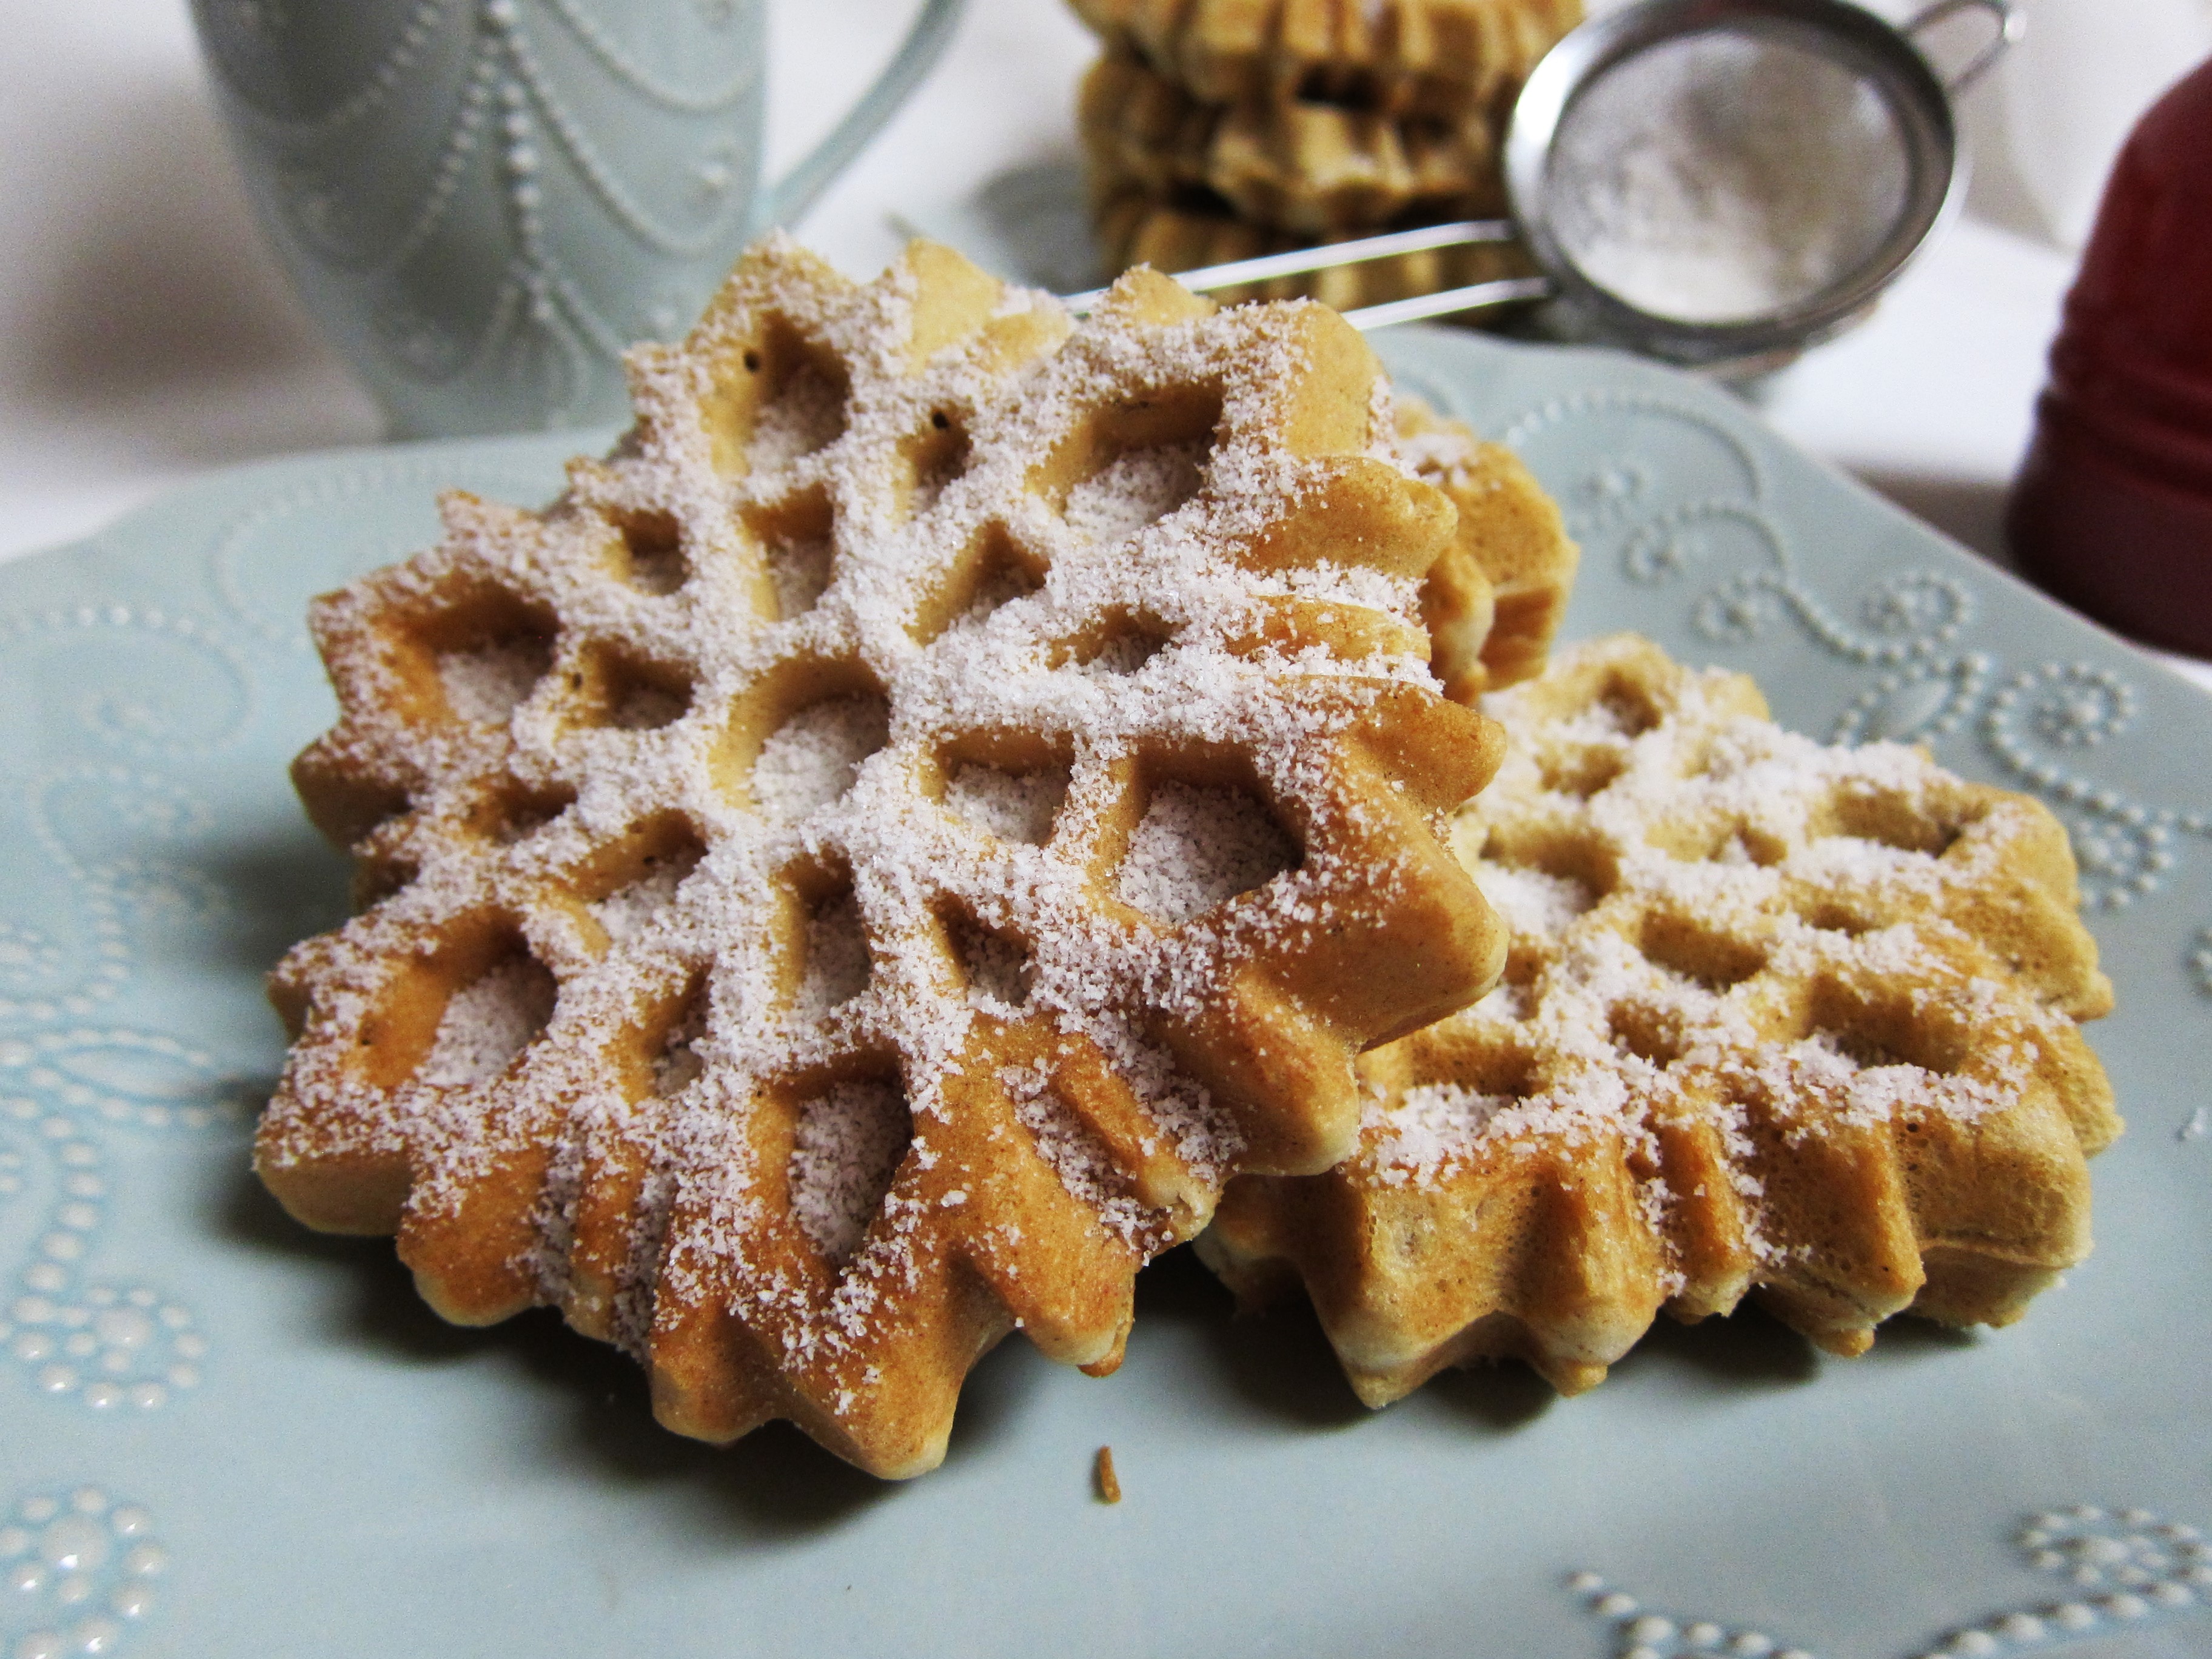
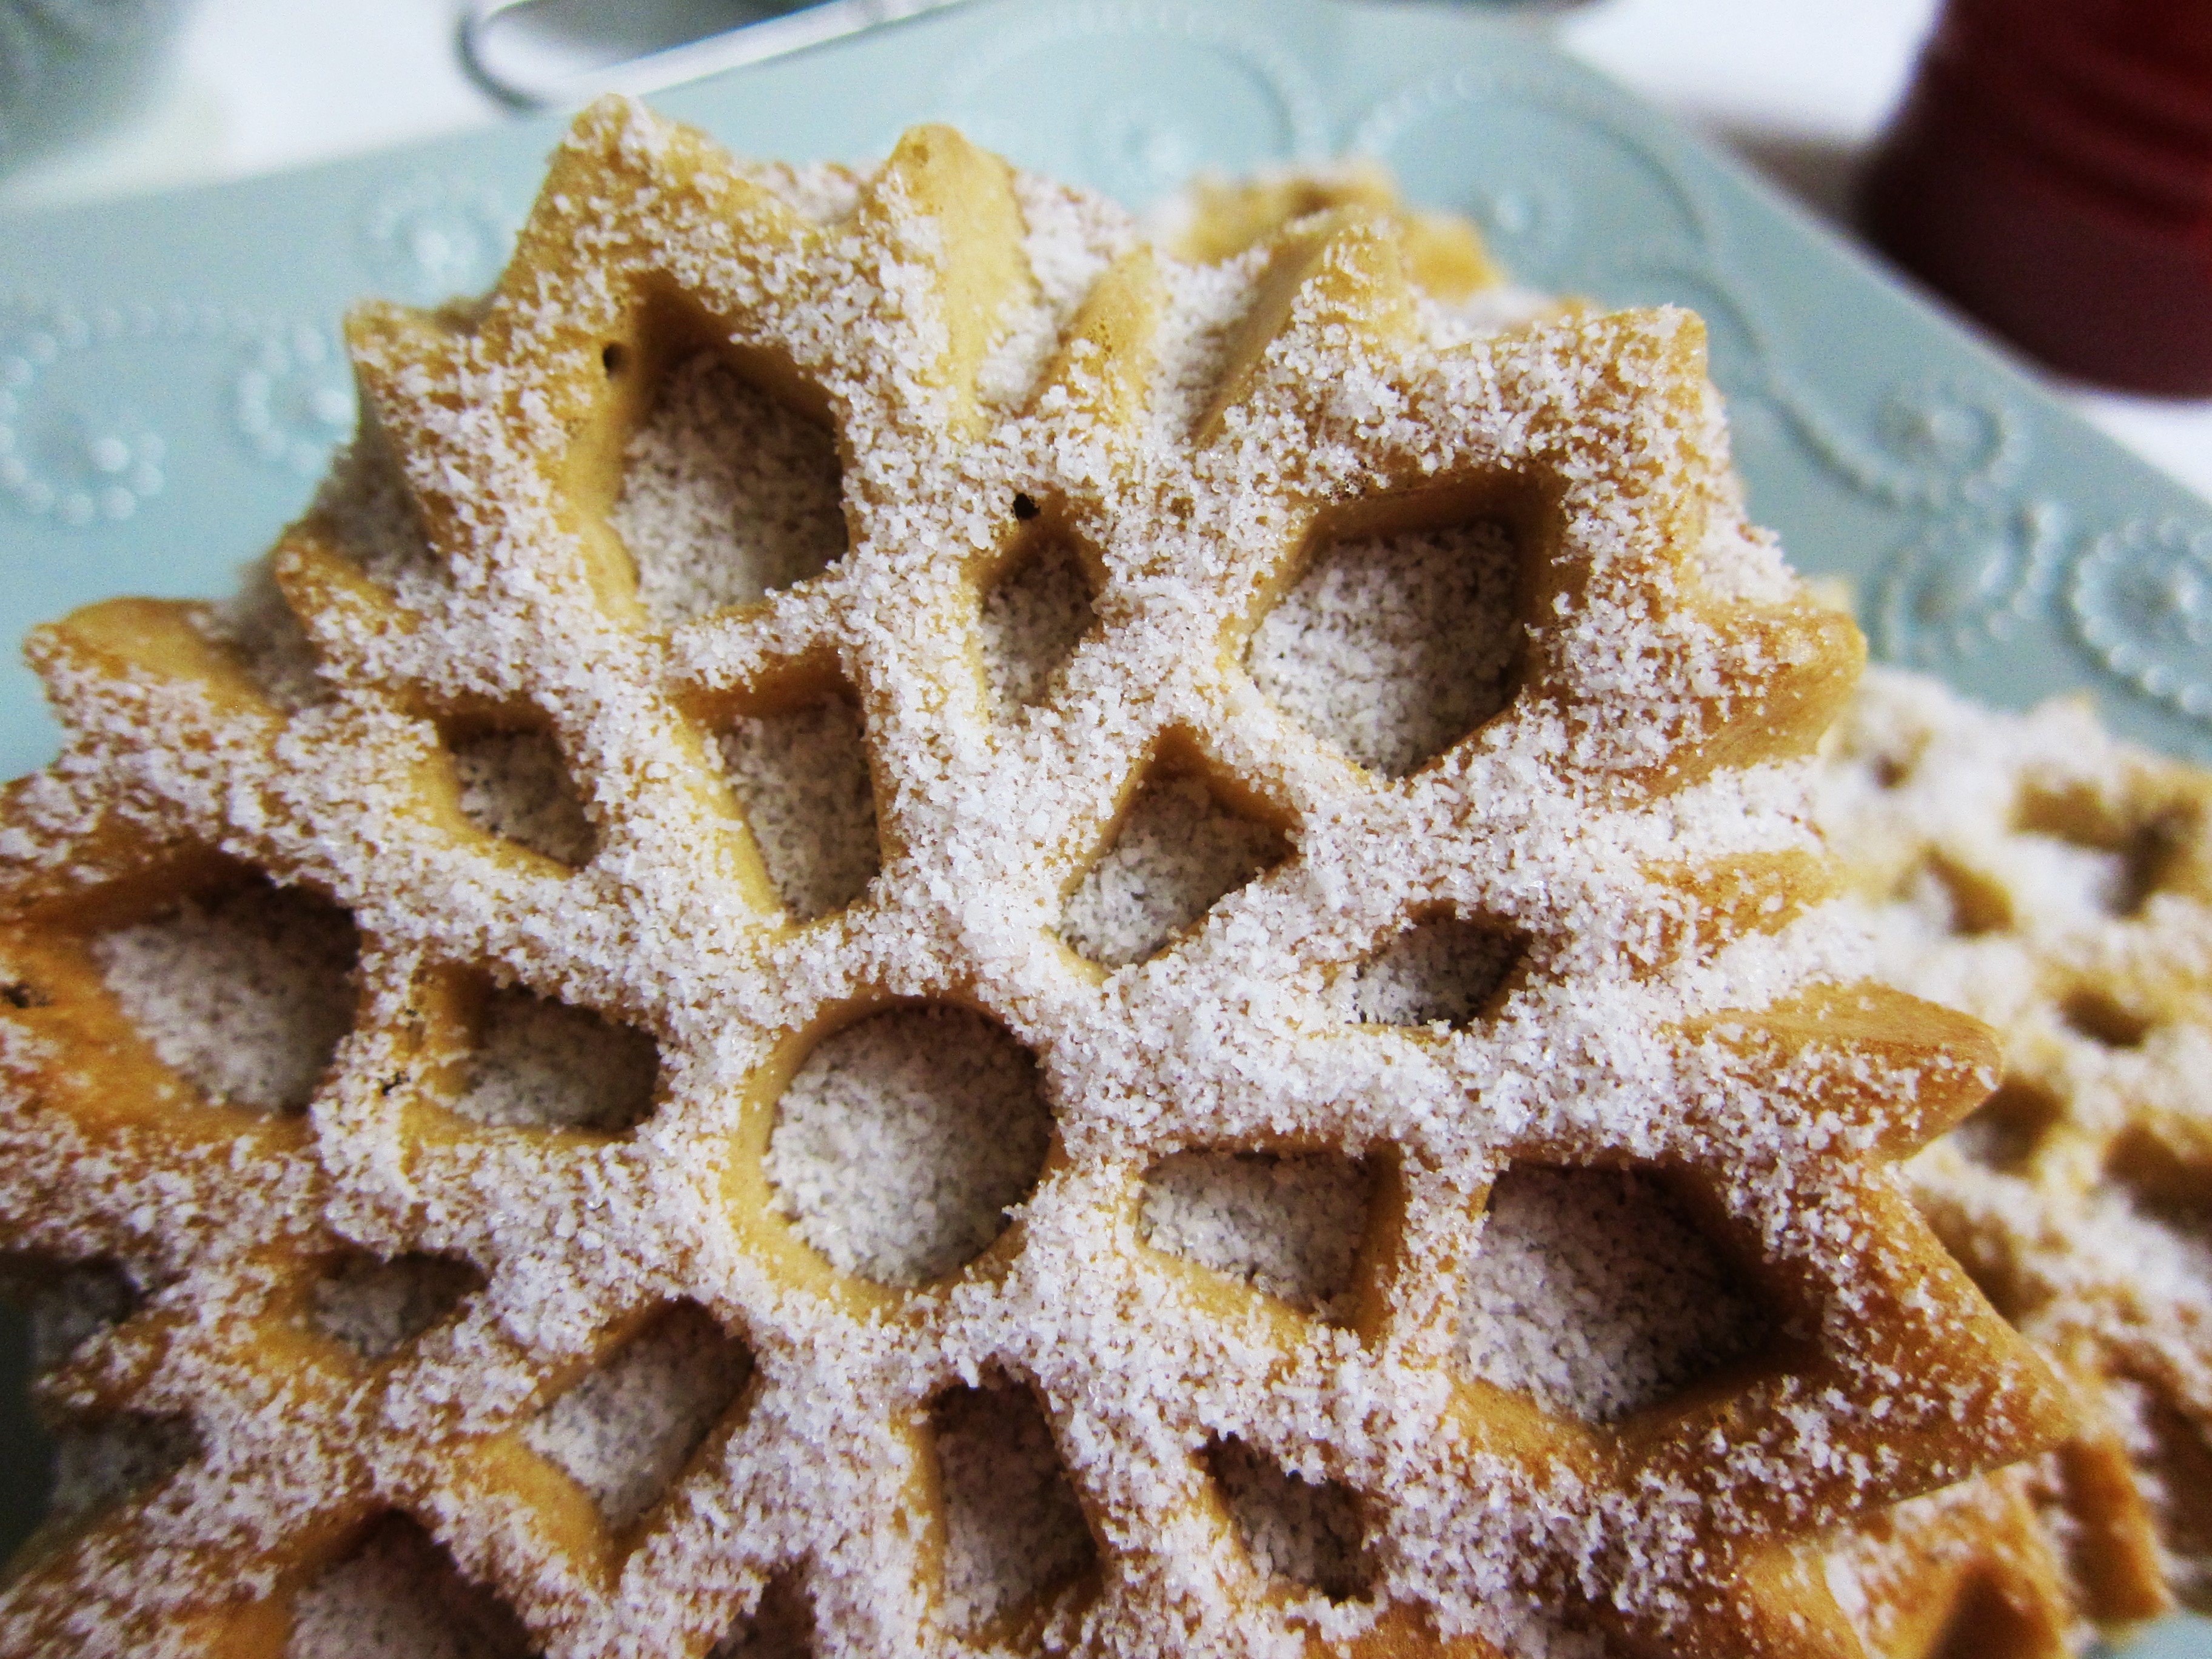
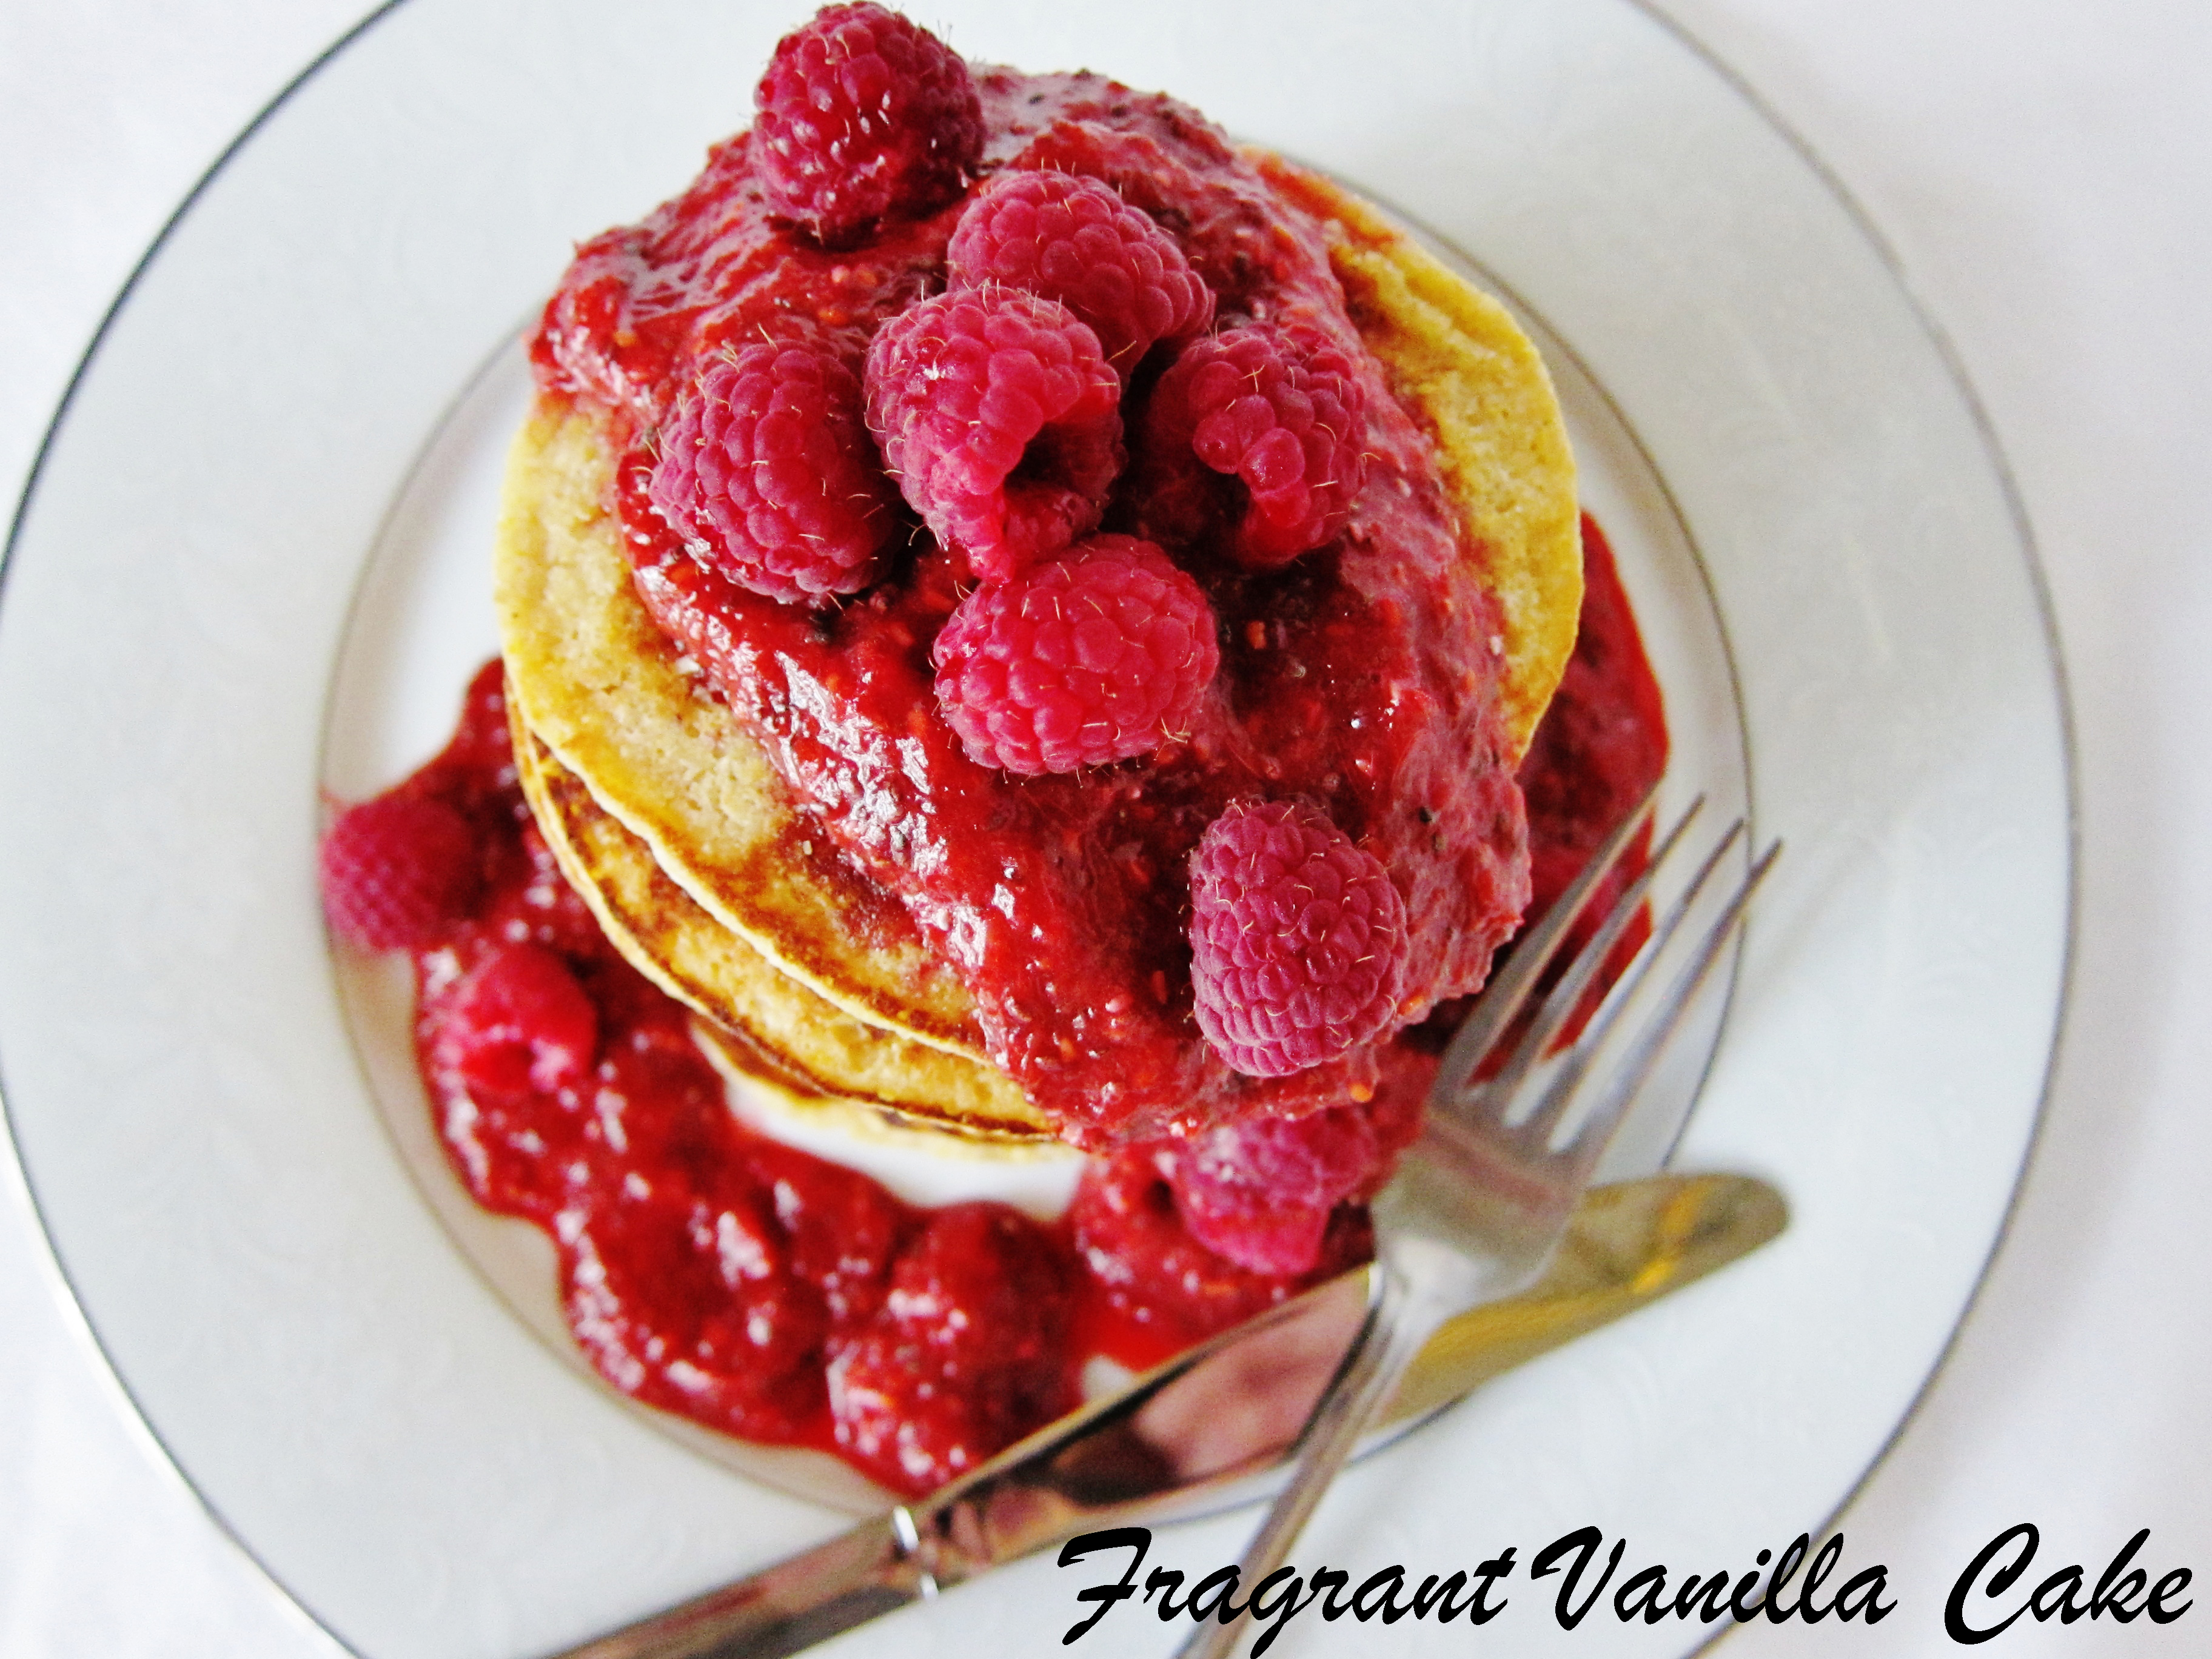
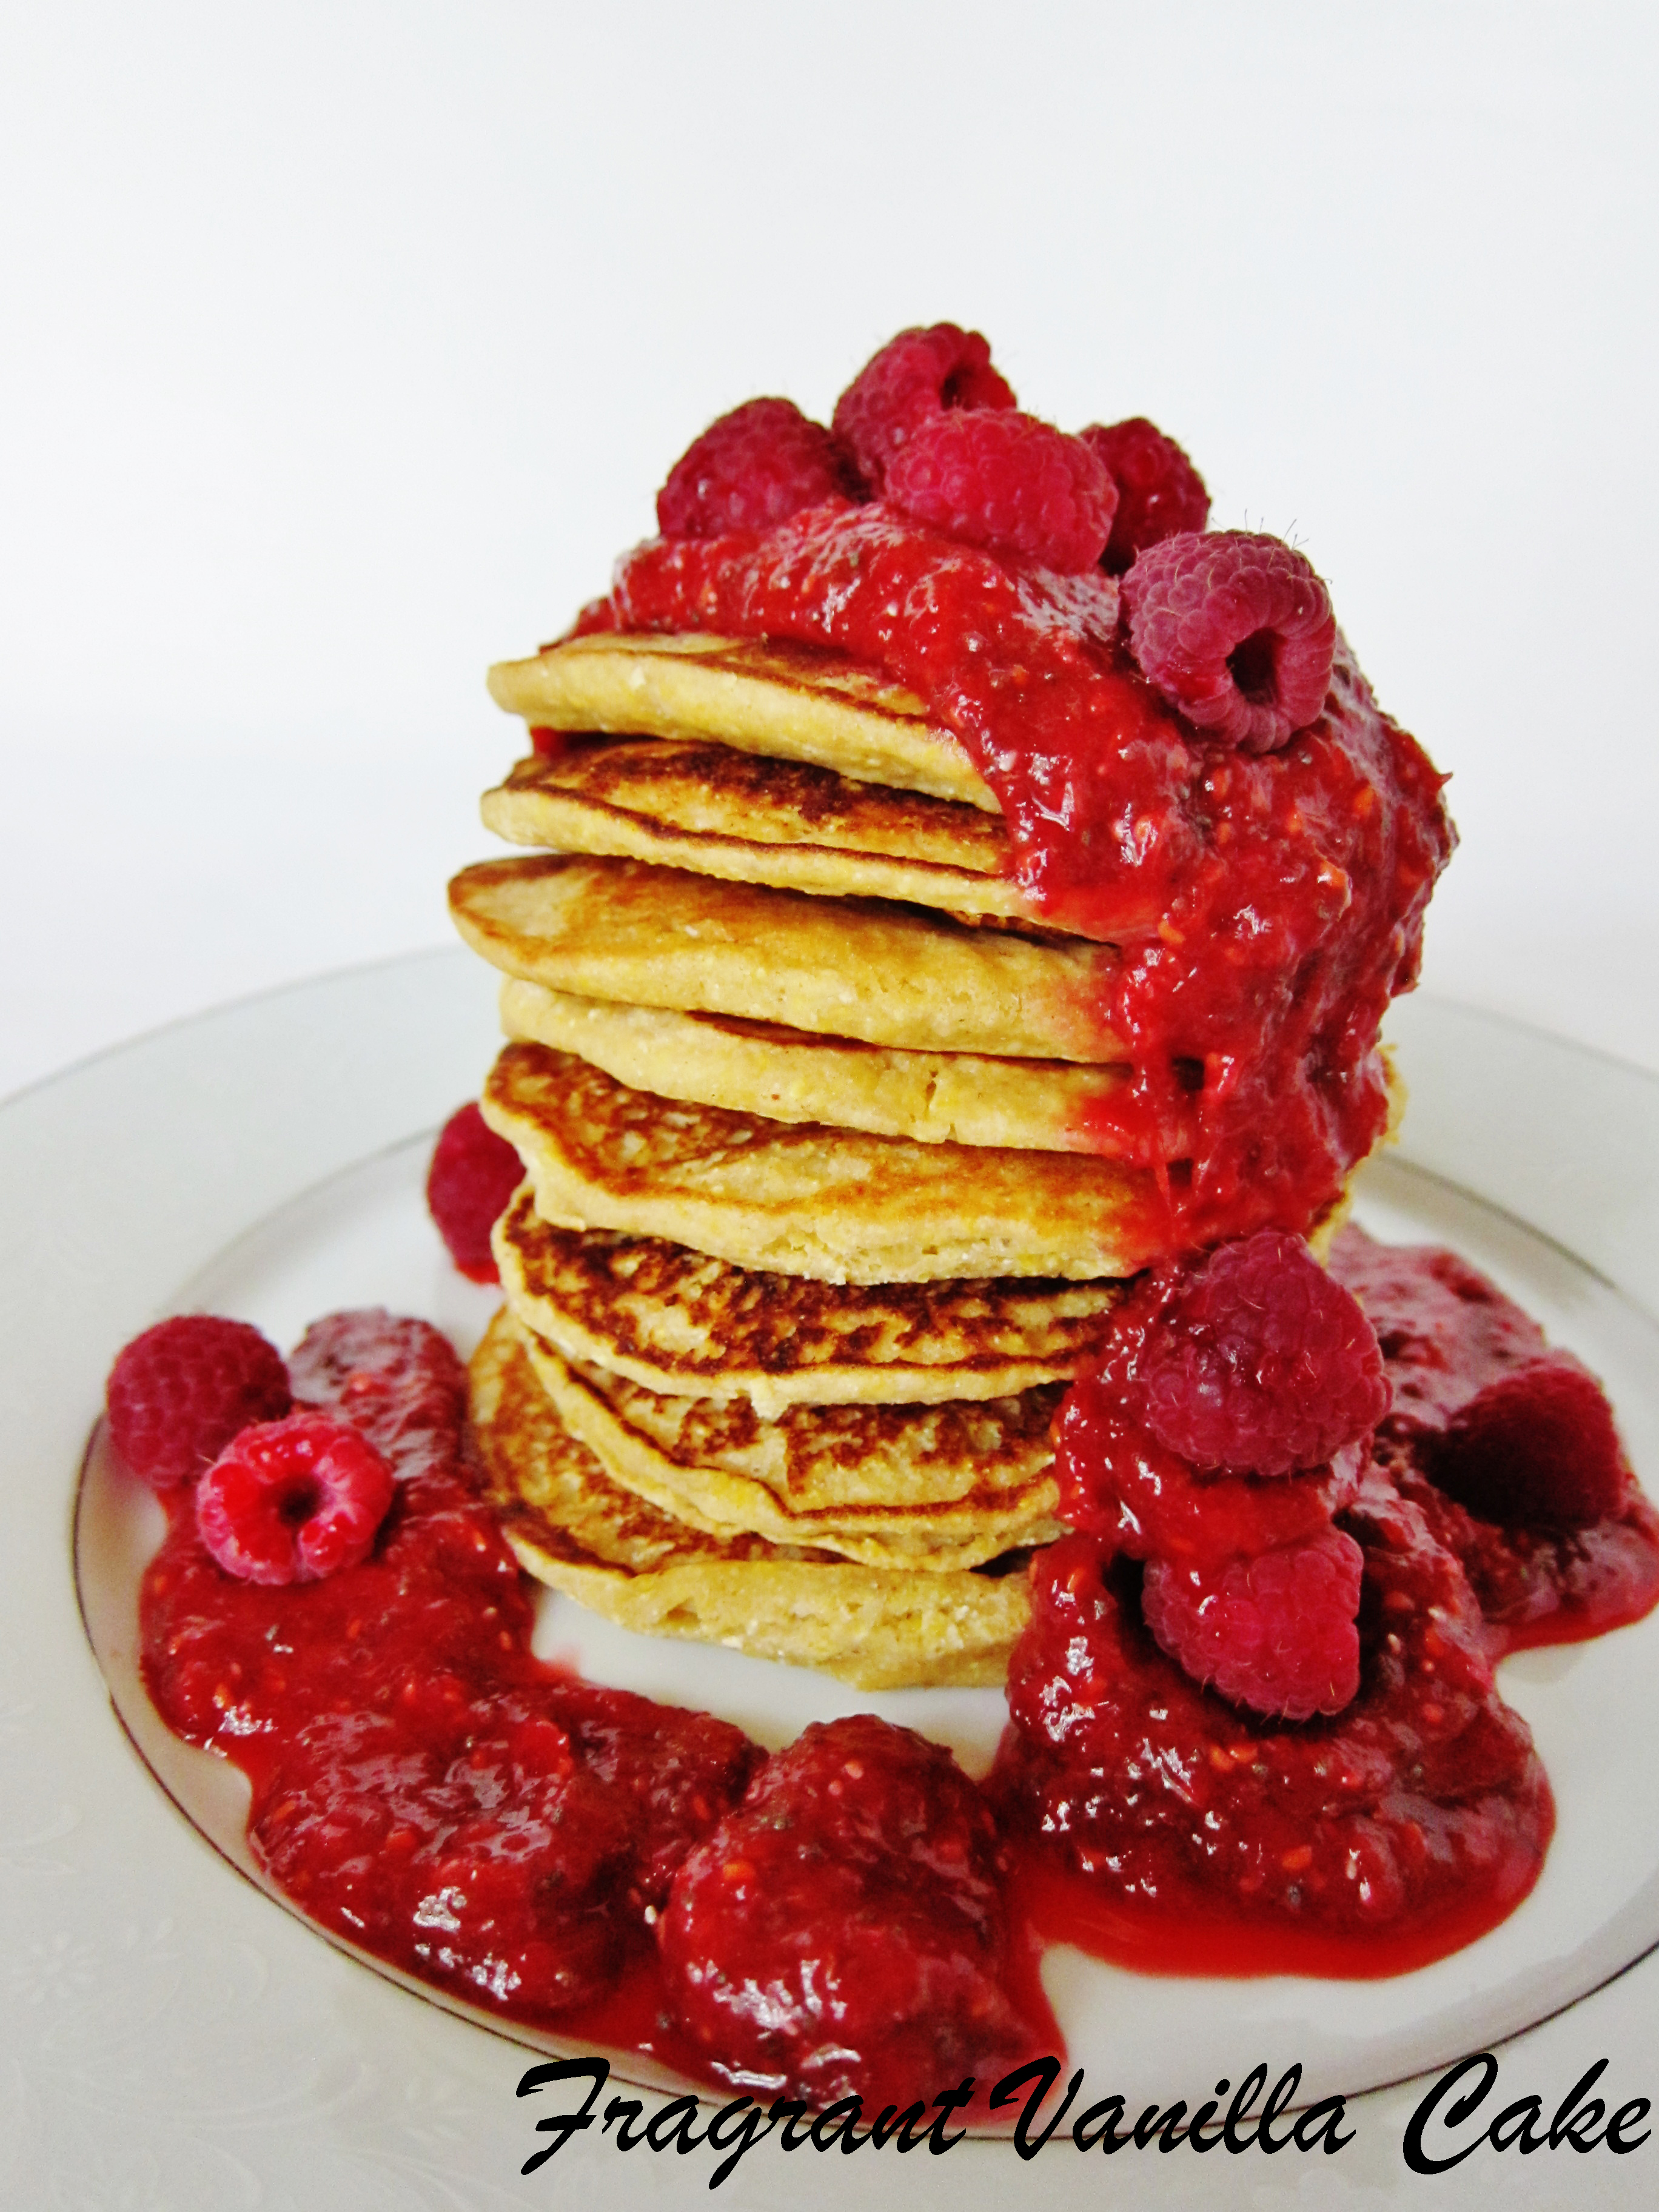
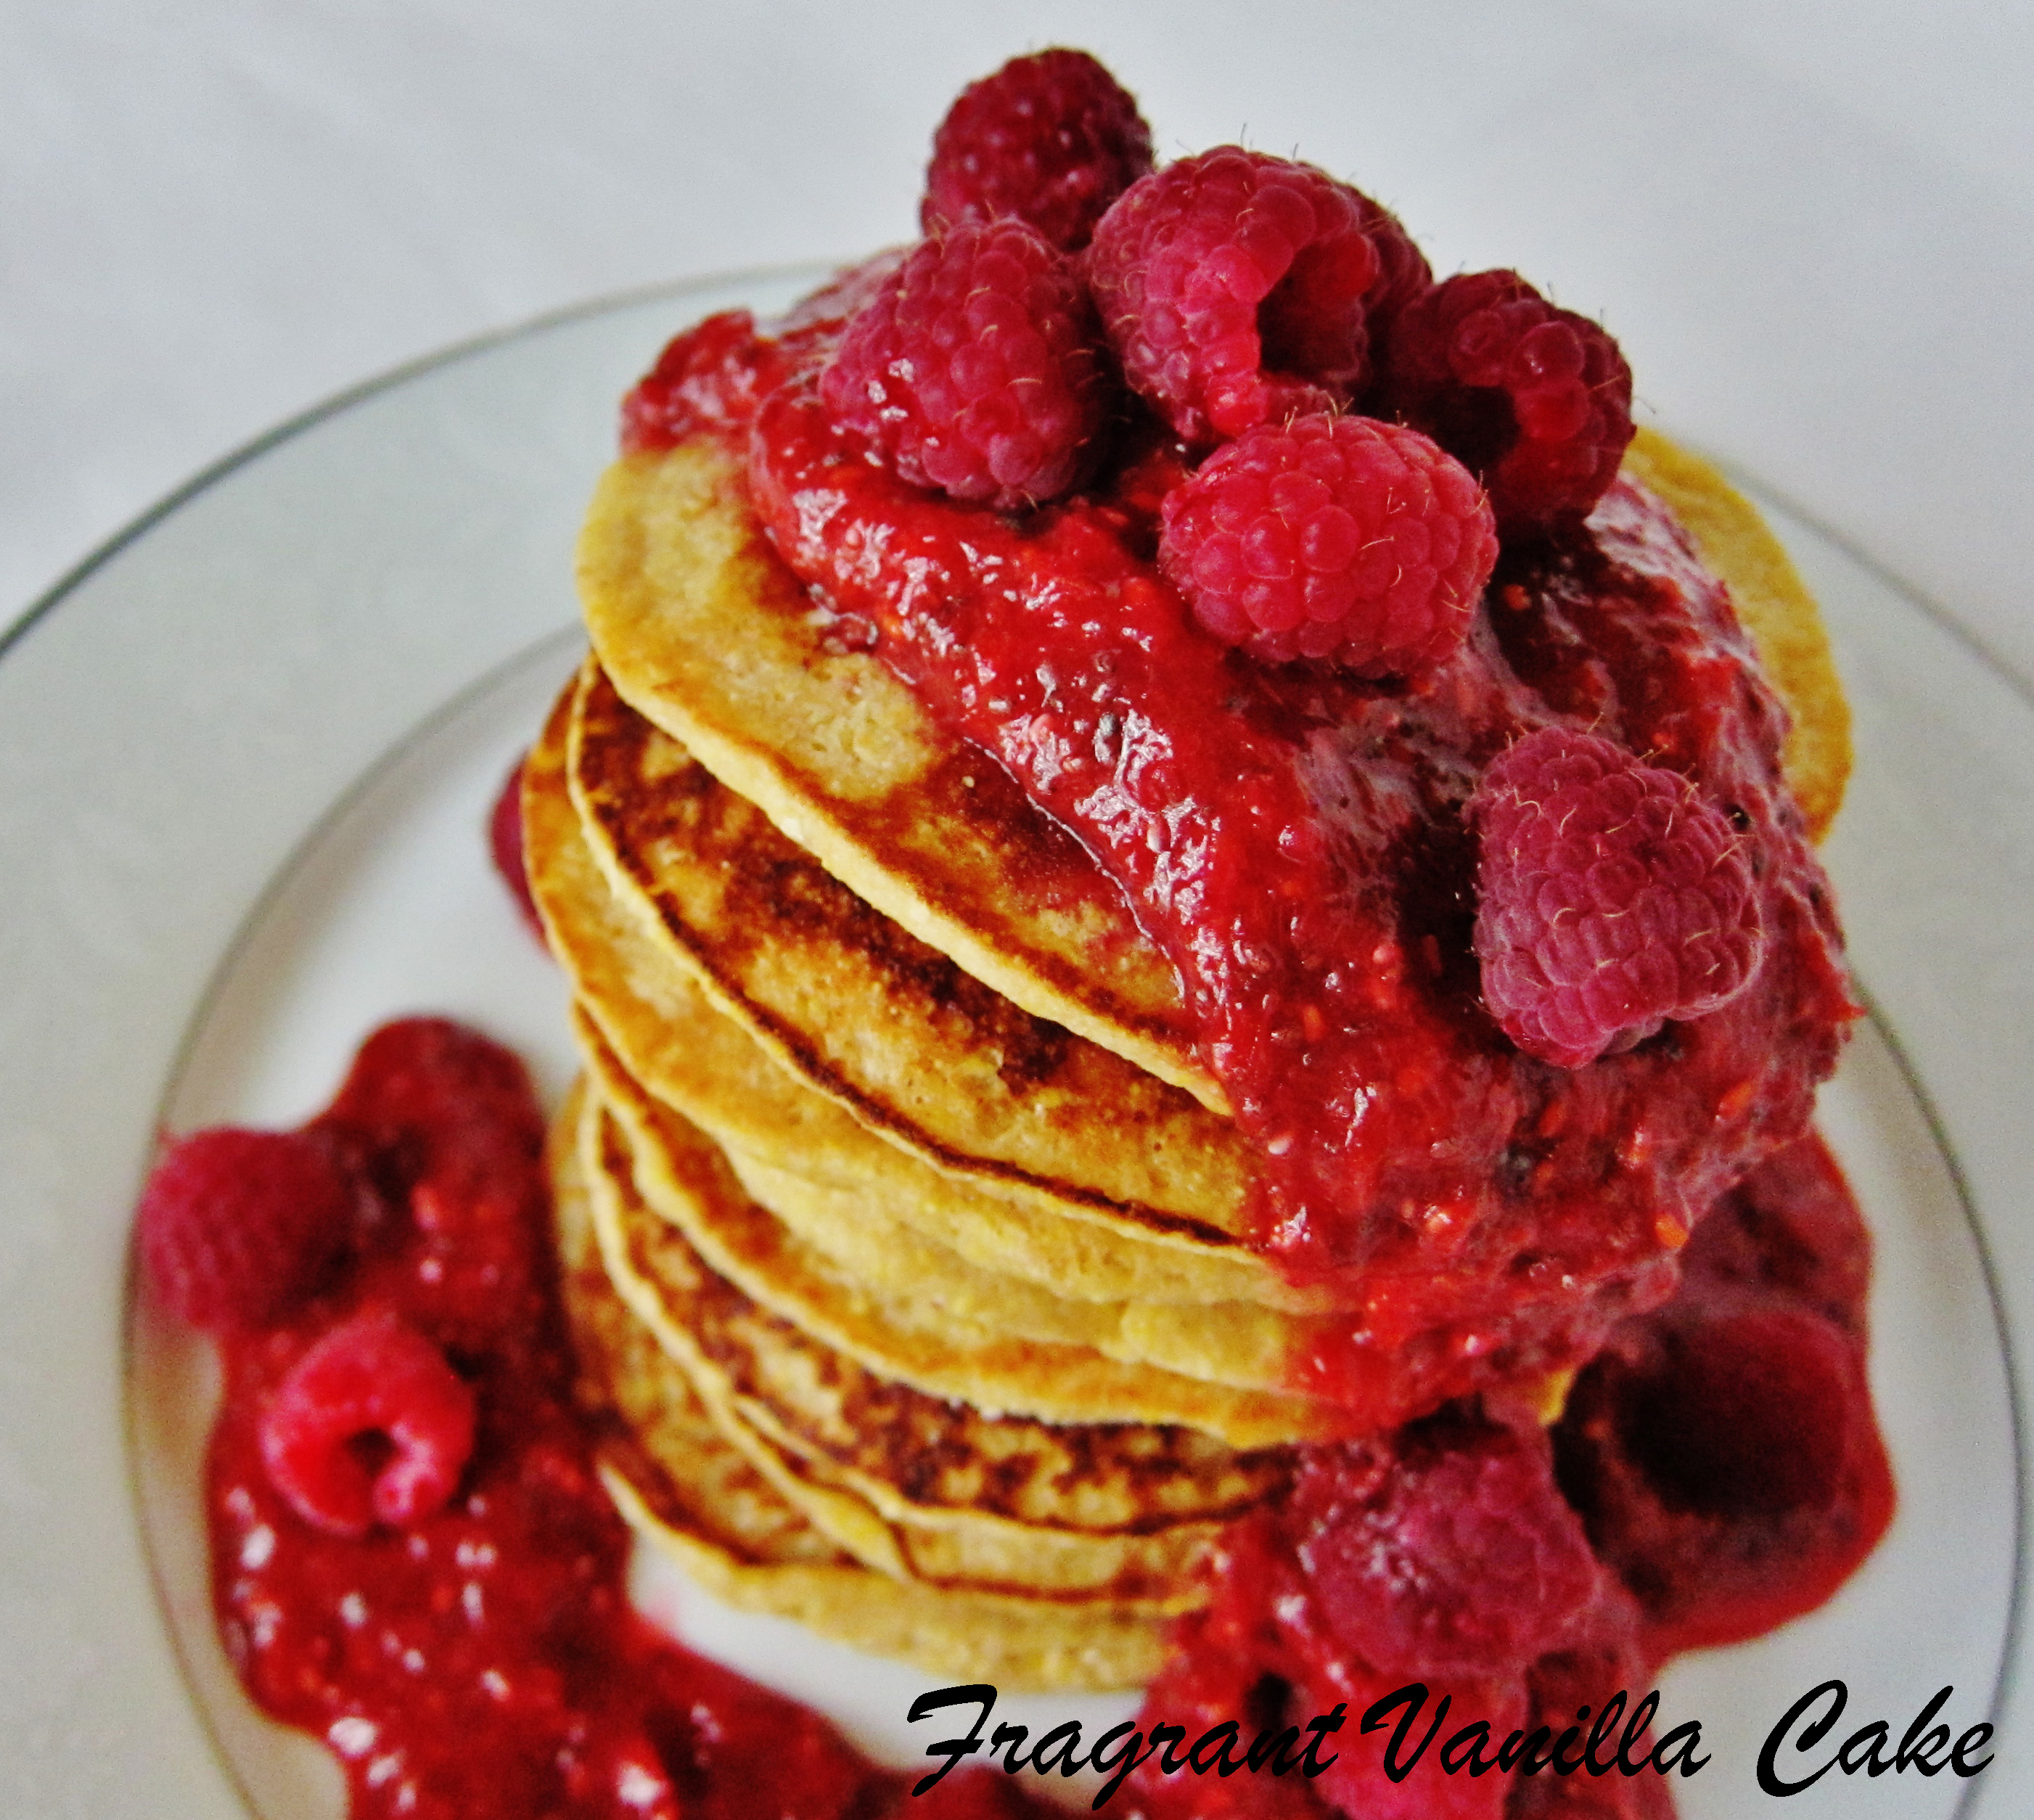
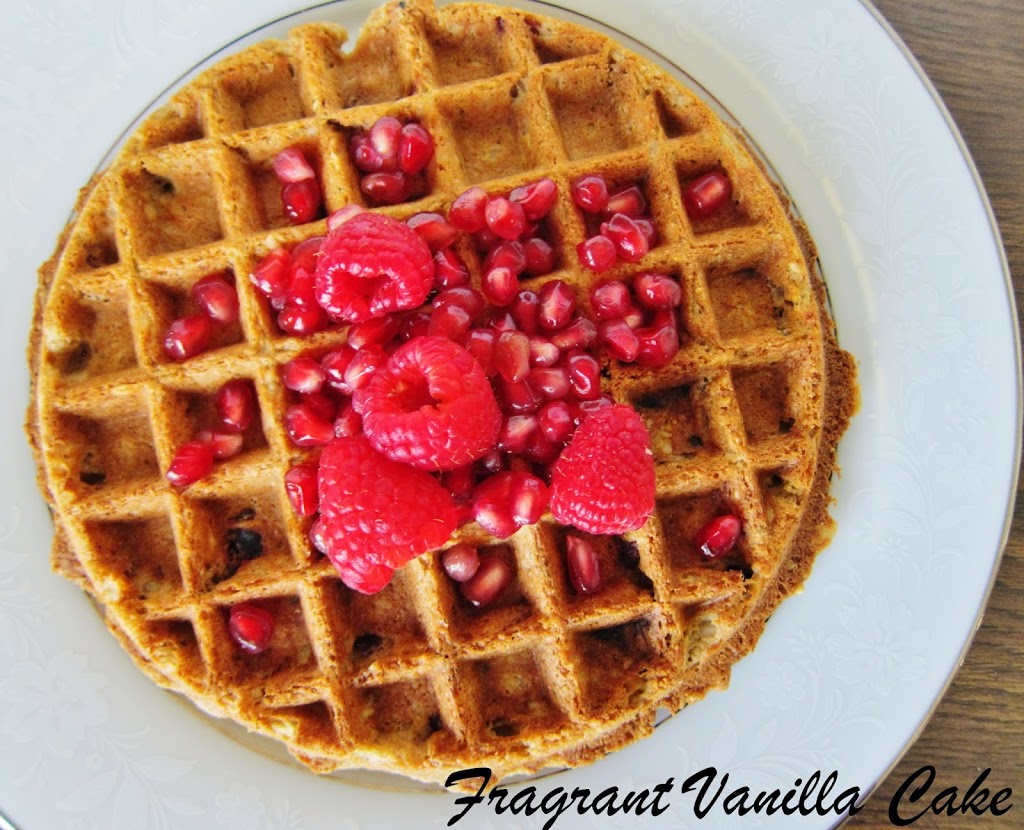
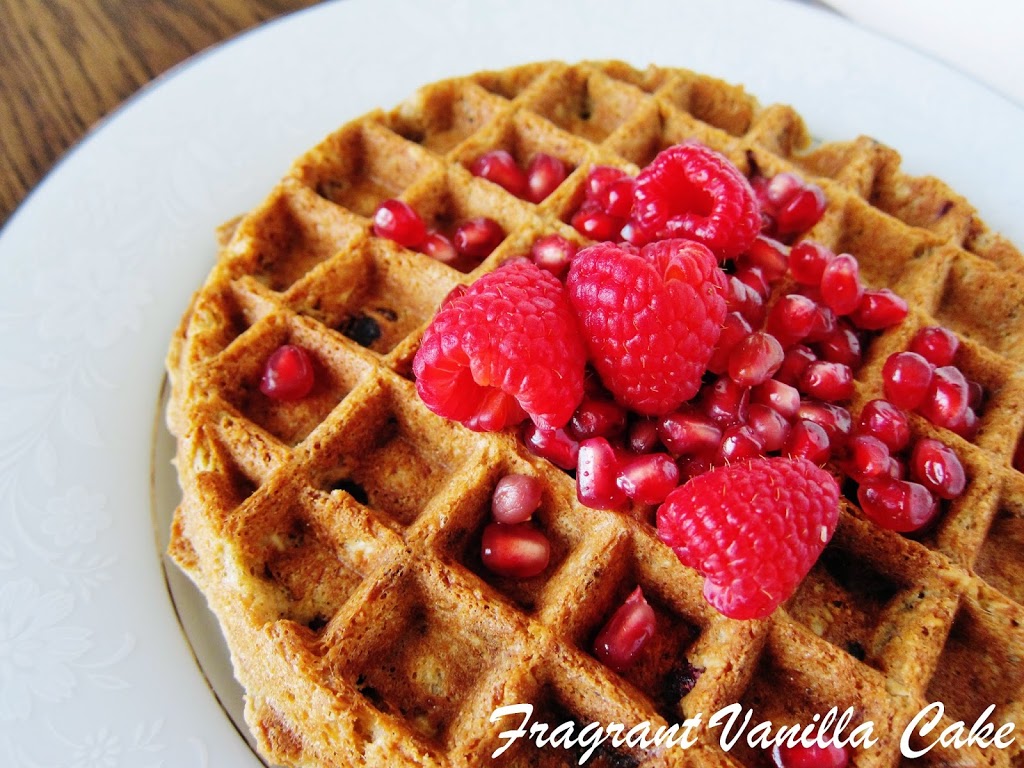
    They smelled amazing while cooking, just like the cake!  I could not wait to try them!  I topped them off with coconut whipped cream, some toasted walnuts and cranberries, as well as maple syrup.  They were so delicious!  Sweet and fluffy, with warming carrot cake spices, the fluffy whipped cream instead of frosting.  We loved them!  If you are looking for a spring brunch treat, definitely give these Vegan Carrot Cake Waffles a try soon! 


    Vegan Carrot Cake Waffles

    makes 8 medium sized belgian waffles

    Batter:

    • 2 cups organic whole wheat pastry flour
    • 1/4 cup granulated sugar
    • 1/2 tsp baking soda
    • 1 tsp baking powder
    • 1/2 tsp sea salt
    • 1 tsp pure vanilla extract
    • 1 tsp cinnamon
    • 1/2 tsp ground ginger
    • 1/2 tsp cardamom
    • 1/4 tsp nutmeg
    • 3 Tbsp ground flax seed, whisked together with 1/2 cup filtered water
    • 2 Tbsp avocado oil or another neutral oil
    • 2 cups light coconut milk
    • 3/4 cup shredded carrots


      Toppings:

    • dried cranberries
    • toasted walnuts
    • coconut whipped cream
    • maple syrup


    Instructions:

    1. To make the waffles, whisk together the flour, sugar, baking soda, baking powder and sea salt in a large bowl.
    2. Then whisk in the spices,  flax mixture, vanilla extract, oil, and coconut milk together until smooth. Whisk in the carrots.
    3. Heat your oven to 150F degrees and oil, and pre-heat waffle iron. Once it is heated, pour about 1/3 cup batter onto the waffle iron or until the iron is just covered (but not so much that it will ooze out) and close it.  Cook according to waffle iron package directions.  Remove from the waffle maker and keep warm in the oven while you make the others.  If you have a waffle maker the size of mine (regular belgian waffles), you may have more than 8 waffles.
    4. Serve the waffles with toasted walnuts, dried cranberries, coconut cream and maple syrup!
  • Vegan Marbled Banana Coffeecake with Pistachio Streusel

    Vegan Marbled Banana Coffeecake with Pistachio Streusel

    Having over ripe bananas is always fun, because it allows me to think of something interesting to make with them! Banana bread is a go to but I thought I’d be a little more creative when I had some recently and make some Vegan Banana Marble Coffeecake with Pistachio Streusel! It turned out so yummy I had to share!

    I chose marble because both chocolate and vanilla sounded good and I wanted the best of both worlds so didn’t want to have to choose between them. Marble cake was always a favorite of mine for birthday cake growing up. This cake is actually pretty simple to make despite it being marble, you just divide the batter on two and mix cacao powder into one half.

    I used whole wheat pastry flour in this but if you prefer all purpose flour or even a gluten free all purpose baking flour (such as Bobs Red Mill Gluten Free All Purpose Baking Flour which I have used with good results) you could use either of those instead.

    Coffee cake needs a good streusel so I made one with vegan butter and pistachios and it made the so delicious! It smelled amazing while baking and I couldn’t wait to try it! When it was all cooled down and ready to go we dove in and it was amazing! Sweet and delicious with the vanilla and chocolate swirled banana cake and crunchy buttery streusel with nutty pistachios! This is wonderful with a cup of coffee. If you are in the mood for something of the baked banana variety, definitely give this Vegan Banana Marble Coffeecake with Pistachio Streusel a try!

    Vegan Marbled Banana Pistachio Coffeecake

    Makes one 9×9 inch one layer cake

    Ingredients:

    Streusel:

    • 1 1/4 cups all-purpose flour
    • 1/2 cup brown sugar
    • 1/2 teaspoon cinnamon
    • 3/4 teaspoon salt
    • 1/2 cup plus 2 Tbsp cold vegan butter, cut into small pieces
    • 1/2 cup chopped pistachios


    Cake:

    • 3 cups whole wheat pastry flour
    • 1 1/2 cups maple sugar or brown sugar
    • 1 1/2 tsp baking powder
    • 1 tsp sea salt
    • 1/4 cup ground flax seed
    • 3/4 cup filtered water
    • 1/4 cup avocado oil
    • 1/2 cup mashed banana
    • 1 cup oat milk or other plant based milk
    • 1 Tbsp pure vanilla extract
    • 1/4 cup unsweetened cocoa powder


    1. Preheat oven to 350F degrees, and line a 9×9 inch square cake pan with parchment on the bottom and oil the sides.
    2. For the streusel, combine the flour, sugar, cinnamon, vegan butter and sea salt and scrunch together with your hands until it has clumped together into pea sized pieces.  Mix in the pistachios and set aside in the refrigerator.
    3. In a large bowl, combine the flour, sugar, baking powder and sea salt and whisk to blend.
    4. Mix together the ground flax seed, and water.
    5. Add the flax mixture, avocado oil, banana, oat milk, and vanilla to the flour mixture and beat with an electric mixer for about a minute (or a little longer if doing it by hand with a whisk).
    6. Divide between 2 bowls. Whisk the cocoa powder into one of the bowls.
    7. Spoon the cake batters into the prepared pan by the heaping Tbsp alternating between the two.  When they are all spooned into the pan, swirl with a knife.
    8. Pour the streusel over the cake, spreading it out evenly.
    9. Place the cake in the oven and bake for about an hour to an hour and 5 minutes until the cake is done in the center (you are able to insert a toothpick into the center and it comes out almost clean with a few moist crumbs).
    10. Remove from the oven and let cool at least 30 minutes before cutting.
    11. Enjoy!


  • Vegan Strawberry Lemon Scones

    Vegan Strawberry Lemon Scones


    I used to work at a natural foods store that made all of their baked goods from scratch.  They made the best scones, that were very popular with the customers, and we would always make different flavors.  I learned how to make them from a lady that worked there before me, and then came up with a veganized version to sell there as well.  Sadly the store is no longer open, but I still love to make my own veganized version of the scones at home!  The other day I was thinking that some Vegan Strawberry Lemon Scones sounded amazing so I made a batch! 

    Scones are actually quite simple to make, and they will turn out well as long as you are careful how you mix up the dough.  You always want to start with the dry ingredients, mix them together well, then mix in the fat with your hands, leaving good sized chunks of it to create flakey pockets in your scones.  I use coconut oil in these because it is what we used to use there, since it was cost effective, but you could use vegan butter instead if you are not a fan of coconut oil.  After your dough is clumpy with the fat added, you mix in the full fat coconut milk until just barely mixed but still pretty clumpy.  You want the coconut milk to be chilled, because it is important the dough doesn’t get too warm or things will mix too much.  You do not want a smooth dough for these or they will be very dense which is not the goal here.  I also added in vanilla and lemon with the coconut milk in these.

    Next, you want to just fold in the strawberries so that they are evenly distributed before you shape them.  You want to pat the dough into a round, not handling it too much, then cut it into wedges and place them on a parchment lined tray.  I then drizzle them with a little more coconut milk and sprinkle them with a bit of sugar to create a nice crunchy outside.  These smell amazing while baking!  So heavenly!

    These scones are super delicious!  These are rich and delicious, melt in your mouth with sweet jammy berries baked into them throughout, scented with aromatic lemon and vanilla!  They are perfect with a cup of coffee or tea for a mid morning snack!  If you are in the mood for a delicious fresh baked scone that is way better than the ones you will find in most coffee shops, give these Vegan Strawberry Lemon Scones a try!


    Vegan Strawberry Lemon Scones

    Makes 8

    Ingredients:


    • 3 cups organic whole wheat pastry flour* or organic all purpose flour
    • 3/4 cup granulated sugar
    • 2 1/2 tsp baking powder
    • 1/4 tsp salt
    • 3/4 cup solid virgin coconut oil, cut into chunks (if your house is above 65F degrees, chill it first)
    • 1 1/2 cups (or as needed) cold full fat organic canned coconut milk (whisked until smooth if chunky)
    • 1 Tbsp lemon juice plus 2 Tbsp lemon zest
    • 1 Tbsp pure vanilla extract
    • 1 tsp lemon extract
    • 2 cups strawberries, quartered (or cut into eighths if large)
    • coconut milk for topping (if needed)
    • graulated sugar for sprinkling


    Instructions:

    1. Preheat oven to 375F degrees with the rack set at the middle position.
    2. Line a baking sheet with parchment.
    3. In a large bowl, combine the flour, sugar, baking powder, and salt. Cut in the coconut oil with a pastry blender or 2 knives until the mixture starts to clump into pea sized pieces. In a small bowl, stir the vanilla and lemon juice and zest and lemon extract into the coconut milk. Add the coconut milk to the dough, and stir a few times, but do not over-mix. The dough should hold together when squeezed, but still be clumpy.
    4. Fold in peaches until evenly distributed.
    5. Place dough on a floured work surface, and shape into a 4 inch wide log. Use a bench scraper to cut into 8 triangles.
    6. Place scones on the prepared baking sheet, reshaping slightly if necessary.
    7. Brush the tops lightly with the coconut milk (only if they seem dry, you want the sugar to stick), and sprinkle with granulated sugar.
    8. Place in the oven and bake for about 20 minutes , then after about 20 minutes you may need to reshape with 2 bench scrapers if the scones are spreading. Turn them then place back in the oven and bake 10-15 minutes more until they are lightly browned and cooked throughout.
    9. Cool on a wire rack.
    10. Enjoy!

    *If you prefer to make these gluten free, you can swap the whole wheat pastry flour for an all purpose baking flour like Bob’s Red Mill Gluten Free All Purpose Baking flour (I have tried this brand with success).

  • Vegan Samoa Doughnuts

    Vegan Samoa Doughnuts

    Samoas were always my favorite Girl Scout cookies growing up, what’s not to love about a vanilla cookie with chewy caramel, coconut and chocolate?!  So now I love making desserts with that same flavor profile.  I have made cakes, cupcakes, replica cookies, granola, energy balls.  This time I decided to make Vegan Samoa Doughnuts!  I have been buying a lot of vegan doughnuts lately so I thought why not make some of my own.  These turned out so delicious I decided to share them with you all!

    I love having a doughnut pan, so I can make different flavors of doughnuts at home!  Plus it is a bit healthier than buying fried doughnuts.  For these I made vanilla cake doughnuts, since the samoas have a vanilla cookie, and they smelled so delicious while baking I knew these were going to be good! I needed a caramel to top them off with and I decided on making a simple coconut milk brown sugar caramel that always turns out well and is perfect for topping things like these with since it thickens a lot when it cools.  I then stirred finely shredded coconut into it to create the samoa topping. You want to use unsweetened dried shredded coconut for these.

    I dipped the doughnuts into the coconut caramel, let it set, then I drizzled them with vegan dark chocolate.  Once the chocolate had set as well I could not wait to try them!  These turned out so delicious with a sweet vanilla cake portion for the doughnut, gooey coconut caramel and rich dark chocolate!  They had all of the flavors of a samoa cookie!  If you are a fan of Samoa Girl Scout Cookies, definitely give these Vegan Samoa Doughnuts a try!

    Vegan Samoa Doughnuts

    Makes 10

    Ingredients:

    Cake:

    • 1 1/2 cups all purpose flour
    • 3/4 cup plus 2 Tbsp granulated sugar
    • 3/4 tsp baking powder (1/2 tsp plus 1/4 tsp)
    • 1/2 tsp sea salt
    • 2 flax eggs (2 Tbsp golden ground flax seed mixed with 1/4 cup plus 2 Tbsp filtered water, allowed to sit 15 minutes)
    • 1/4 cup plus 2 Tbsp avocado oil or other neutral oil
    • 1/2 cup plant based milk
    • 1 1/2 tsp pure vanilla extract


    Caramel:

    • 3/4 cup brown sugar
    • 1 cup coconut cream
    • 1/4 tsp sea salt
    • 1 tsp pure vanilla extract
    • 3/4 cup finely shredded dried unsweetened coconut


    Chocolate Drizzle:

    • 3/4 cup vegan dark chocolate, chopped


    Instructions:

    1. Preheat oven to 350F degrees, and oil a doughnut pan.
    2. In a large bowl, combine the flour, sugar, baking powder and sea salt and whisk to blend.
    3. Add the flax eggs, avocado oil, oat milk, and vanilla and beat with an electric mixer for about a minute (or 3 minutes if doing it by hand with a whisk).
    4. Pour the batter into the prepared doughnut pan filling the holes 3/4 full.
    5. Place the in the oven and bake for about 15-20 minutes until the doughnuts are done in the center (you are able to insert a toothpick into the center and it comes out almost clean with a few moist crumbs).
    6. Remove from the oven and let cool 20 minutes, then remove the doughnuts from the pans by tapping on the counter. Place the doughnuts in the freezer, until they are frozen (about an hour) to make them easier to work with (the caramel will set faster).
    7. To make the caramel sauce, combine all ingredients in a sauce pan and bring to a boil.  Lower to a simmer and cook for about 15 minutes until it starts to thicken.  Remove from heat and let cool about 15 minutes.  Stir in the coconut.
    8. Dip each doughnut into the caramel on one side to coat it, then place on a wire rack.  Repeat until all of the doughnuts have been dipped.  Place them on the rack in the refrigerator until the caramel has set, about 15 minutes.
    9. Melt the dark chocolate in the top of a double boiler until smooth, then place in a pastry bag and pipe/drizzle over the doughnuts or drizzle over with a spoon it just won’t look as neat).  Place doughnuts on rack in the refrigerator until the chocolate has set, about 10 minutes.
    10. Enjoy!  Store any leftover doughnuts in the refrigerator in a container for up to 1 week.
  • Vegan Peach Muffins

    Vegan Peach Muffins

    One of my favorite things to eat on weekends when I was little were muffins that my Dad made.  Yes, they happened to come from a box, but there is just something so delicious about fresh baked muffins on a lazy weekend morning!  I loved muffins in general as a kid.  I would eat the bottom first, then the top because it was my favorite part (and still do, because it still is).  I have not made muffins in a really long time but last weekend on a whim I decided to.  I had some ripe peaches on hand and I have never made Vegan Peach Muffins before so I thought why not?!

    I love that muffins are so easy to make quickly. Even without a box mix.  The only effort it really takes is to measure everything but it is so worth it! It took me all of 10 minutes to whip these up and I was enjoying warm muffins within 45 minutes! for these I kept them simple, with just sweet vanilla batter.  I used whole wheat pastry flour but you can use all purpose, or for gluten free you can use a gluten free all purpose flour (I recommend Bob’s Red Mill all purpose baking flour because I have used it before with good results in my cakes and baked goods).

    For the oil I used coconut this time because it was what I had on hand but I also like to use avocado oil in a recipe like this because it has a buttery flavor.  For the milk I used coconut because it gives these a richer texture.  I mixed plenty of peaches into the batter, and it was so delicious!  One of my favorite parts of baking muffins when I was little was licking the leftover batter from the bowl and that hasn’t changed!

    They baked up beautifully and smelled amazing!  There is nothing like enjoying fresh, warm muffins in your own kitchen!  These were so delicious!  Soft and sweet scented with vanilla and jammy peaches throughout! If you have some ripe peaches on hand, definitely give these Vegan Peach Muffins a try!  They are super easy to make!

    Vegan Peach Muffins

    Makes 16

    Ingredients:

    • 1 1/2 cups whole wheat pastry flour or all purpose flour
    • 3/4 cup plus 2 Tbsp granulated sugar or maple sugar
    • 3/4 tsp baking powder (1/2 tsp plus 1/4 tsp)
    • 1/2 tsp sea salt
    • 2 flax eggs (2 Tbsp golden ground flax seed mixed with 1/4 cup plus 2 Tbsp filtered water, allowed to sit 15 minutes)
    • 1/4 cup plus 2 Tbsp coconut oil or avocado oil
    • 1/2 cup coconut milk or other plant based milk
    • 1 1/2 tsp pure vanilla paste or extract
    • 1 cup chopped peaches
    • Turbinado sugar


    Instructions:

    1. Preheat oven to 350F degrees, and line muffin tins with 16 standard sized liners.
    2. In a large bowl, combine the flour, sugar, baking powder and sea salt and whisk to blend.
    3. Add the flax eggs, oil, milk, and vanilla and beat with an electric mixer for about a minute (or 3 minutes if doing it by hand with a whisk).
    4. Stir in peaches.
    5. Spoon into the muffin tins filling them 3/4 full.
    6. Sprinkle with turbinado sugar.
    7. Place the tins in the oven and bake for about 15-20 minutes until the muffins are done in the center (you are able to insert a toothpick into the center and it comes out almost clean with a few moist crumbs).
    8. Remove from the oven and let cool 15 minutes before enjoying.


    Muffins keep in a container in the refrigerator for a week or the freezer for a few months.

  • Vegan Strawberry Shortcake French Toast Casserole

    Vegan Strawberry Shortcake French Toast Casserole


    I always loved french toast as a kid.  It was sweet and delicious and it always seemed like a treat!  Sweet breakfast to me has always seemed like dessert, even if it is what a lot of people typically eat.  And I still feel that way!  So often times when I make breakfast items that are sweet like french toast I still treat it like dessert.  I still love making french toast, but now when I make it I usually make french toast casserole because it is so quick and easy and just as delicious!  Plus I love the texture it has even more than regular french toast.  Last weekend I decided to make some and this time I thought it would be wonderful to use strawberries and make a Vegan Strawberry Shortcake French Toast Casserole!

    I have always loved strawberry shortcake, and I thought it would make an awesome french toast flavor!  I made the french toast casserole with some really good sourdough bread that I had on hand.  This has become my favorite bread for french toast!  Plus if I buy some, I usually eat about half and have some leftover so it is perfect! Instead of the usual milk and egg mixture in french toast, I used flax eggs and oat milk in mine and it was perfect! I added in a touch of vanilla because it belongs in pretty much everything sweet and it was just right.

    I added in strawberries both in fresh and jam form.  This was strawberry shortcake after all!  I am so excited for strawberry season by the way, which is right around the corner here in Minnesota!  The combination of strawberries as well as strawberry jam in this was just what it needed in order to be packed with flavor! I sprinkled it with some maple sugar and it baked up beautifully!

    I could not wait to try it!  But it needed some whipped cream on top in order to be truly strawberry shortcake flavor!  This was so heavenly!  The bottom part was tender and light and soft, packed with jammy berries and gooey sweet jam, scented with vanilla and with a nice crunchy sugar top.  It was even better with the whipped cream!  If you are a strawberry shortcake fan and are in the mood for brunch, and something sweet but not overly sweet, definitely give this Vegan Strawberry Shortcake French Toast Casserole a try!

    Vegan Strawberry Shortcake French Toast Casserole

    Serves 4-6

    Ingredients:

    Bread Pudding:

    • 2 Tbsp ground flax seed, mixed with 6 Tbsp filtered water
    • 1 3/4 cups oat milk (or your favorite plant based milk, you can use full fat coconut for more richness)
    • 1/4 cup maple syrup
    • 1/4 tsp sea salt
    • 1 tsp pure vanilla extract
    • 6 cups lightly packed cubed sourdough bread
    • 1/2 cup quartered strawberries
    • 1 cup strawberry jam
    • 2 Tbsp maple sugar (or coconut sugar)


    For serving:

    • coconut whipped cream


    Instructions:

    1. Preheat the oven to 350F degrees, and oil a two quart baking dish or 8×8 inch square pan.
    2. In a bowl, whisk together the flax seeds and water mixture, oat milk, maple syrup, sea salt, and vanilla until well combined, then add the bread crumbs and berries toss to coat in the mixture.
    3. Transfer half the mixture to the prepared baking dish, then spoon half the strawberry jam over it by the teaspoon.  Pour the remaining mixture over that (including the liquid, pour it over them), then drop the rest of the jam over it as you did the first time. Sprinkle with the maple sugar.
    4. Place in the oven on a tray, and bake for about 30 minutes or until the top is starting to brown and the liquid has absorbed at the bottom.
    5. Remove from oven.
    6. Serve with coconut whipped cream on top!
  • Vegan Date Cinnamon Swirl Bread

    Vegan Date Cinnamon Swirl Bread


    I always loved cinnamon bread growing up, especially for toast!  It was amazing with some butter on it for a breakfast treat!  I preferred the plain cinnamon, not the cinnamon raisin because I am not a big raisin fan.  But I was thinking recently, you know what would make cinnamon raisin swirl bread better?  If you replaced the raisins with dates and made Vegan Date Cinnamon Swirl Bread!  So I decided to make some and try it out, and it ended up being a wonderful idea!

    I love baking bread, it is so relaxing kneading the dough!  I haven’t made much sandwich style yeast bread, in the past I usually just make things like baguettes that are free form.  But I have been on a sandwich style bread kick lately making a strawberry swirl bread and then this one!  For this one I used a mixture of whole wheat flour and white flour to give it a bit more heartiness and I enjoyed the result!  This dough is sweetened with a bit of maple syrup and vanilla and it is just enough to give it a hint of sweetness but not make it overly sweet.  For the swirl I used a mixture of cinnamon, maple, and gooey dates and it worked out perfect!  This bread smelled so amazing while baking!

    If you don’t have time to bake this bread after making the dough, you are in luck!  After placing it into the pan you can refrigerate it overnight and let it rise slowly, then bring it up to room temperature the next day for 1 hour and bake it then!  How convenient is that?!  I sometimes do this because if I am making something after work I just have time for half the process and it works great. 

    I could not wait to try the bread!  It was so delicious, the dates baked into gooey little caramelly pockets and the maple sugar caramelized with them to create deliciousness!  This bread is so good I can eat it plain!  But it is even more delicious with some vegan butter.  It is waaayyy better than cinnamon raisin bread!  If you are a cinnamon bread fan, give this Vegan Date Cinnamon Swirl Bread a try!  It makes the perfect Saturday morning treat!

    Vegan Date Cinnamon Swirl Bread

    Makes 1 loaf

    Dough:

    • 1/2 cup warm water ( 105-110F degrees)
    • 1 packet active dry yeast (1/4 oz)
    • 3/4 cup warm full fat coconut milk (I warmed it up on the stove)
    • 1/4 cup maple syrup
    • 1 tsp pure vanilla extract
    • 1 tsp sea salt
    • 1 Tbsp ground flax seed, mixed with 3 Tbsp filtered water
    • 1 1/2 cups organic all purpose flour
    • 2 cups whole wheat flour
    • coconut oil for brushing


    Filling:

    • 1 cup chopped pitted dates
    • 1 Tbsp cinnamon
    • 2 Tbsp maple syrup
    • 1 1/2 Tbsp coconut sugar or brown sugar

    Instructions:

    1. To make the dough, combine the yeast and the warm water (about 110F degrees, you don’t want to kill the yeast) plus a pinch of maple sugar and stir to dissolve. Let sit 5-10 minutes until it starts to foam.
    2. In a large bowl, combine the coconut milk, sugar, vanilla extract, salt and flax mixture and mix together to combine.
    3. Add the yeast, and 2 cups of flour and mix to combine.
    4. Add the remaining 1 1/2 cups of flour and mix until you have a smooth dough (you may need to use your hands at the end to mix it in).
    5. Turn out onto a lightly floured surface, and knead for 5-10 minutes until smooth and supple. If it is too sticky add a little flour but you want to add as little as possible because if you add too much the dough gets tough.
    6. Place in an oiled bowl, and cover. Let rise for about 1 1/2 hours until doubled in size.
    7. When it is ready, turn out onto the counter or a board and roll out into a 16×20 inch rectangle.
    8. Mix together the cinnamon and maple syrup.
    9. Spread the mixture evenly over the dough, leaving a 1 inch boarder.  Then sprinkle with coconut sugar.
    10. Sprinkle the dates over that randomly.
    11. Roll it up, starting with the short end, then pinch the ends shut and the seam along the side.
    12. Place seam side down into an 8 1/2 x 4 1/2 inch greased loaf pan.
    13. Cover and let rise for 45 minutes.
    14. Meanwhile heat the oven to 350F degrees.
    15. When the bread has risen for 45 minutes, brush it with coconut oil, and place it in the preheated oven and bake for about 1 hour until the internal temperature is 190F degrees or higher and the bread is cooked through.  You may need to tent it with foil partway through if it gets too brown, I tented mine at 30 minutes because it was just right.
    16. Remove from the oven and let cool.
    17. Enjoy!


    This bread keeps covered at room temperature for up to 3 days, or refrigerated for up to 1 week. You can also freeze it, tightly wrapped or in an airtight container for a few months.

  • Vegan Blueberry Maple French Toast Casserole

    Vegan Blueberry Maple French Toast Casserole

    One of my favorite things to do with a bunch of leftover bread is french toast casserole!  I will often times put bread in the freezer if we don’t eat it all in a couple days because I don’t want it to get stale.  But sometimes I forget it is in there.  I had a bunch of sourdough bread in my freezer I had bought from a couple times when we had soup, and I decided it would make a wonderful Vegan Blueberry French Toast Casserole!  At first I was just going to make a plain french toast casserole, but I remembered I had some blueberry jam on hand so I thought I would make it blueberry!

    This is actually really easy to make!  For regular french toast you would toss the bread with an egg and milk mixture, but for mine, I use flax eggs (ground flax seed mixed with filtered water), and plant based milk which happened to be oat milk this time because it was what I had on hand. If you wanted it a little more rich you could use coconut milk instead, I have used that before also. I sweetened the milk mixture with maple syrup and vanilla and it was just right!  I also added in a touch of maple extract since I wanted it to be more maple flavored but if you can’t find this ingredient, it is optional.

    You just toss the bread with the mixture briefly, and it is ready to go.  I also added in some blueberries because I wanted double blueberry goodness! I dropped the jam randomly into the casserole so there would be plenty of blueberries throughout.  This jam was some that Eric’s Dad made and it is just the right amount of sweet.  If you can not find blueberry jam you could use another flavor of jam or just leave it out and use a few extra blueberries.  It will still be delicious!  A note on the blueberries, I used frozen and thawed (drained well) because it is winter where I live and the fresh are outrageously expensive this time of year but you can use either.

    I sprinkled the casserole with a little more sugar before throwing it into the oven to create a crispy top and in it went!  It smelled heavenly while baking, like french toast and blueberry muffins!  This turned out so delicious!  It has kind of a soft and fluffy texture on the inside, is crispy on top and the pockets of sweet blueberries and scent of vanilla and maple make it totally crave worthy!  You can top it off with maple syrup if you like, which is what my husband did because he likes things pretty sweet, but I enjoyed mine with a little coconut whipped cream and it was fabulous!  If you are looking for something delicious to make for brunch, give this Vegan Blueberry Maple French Toast Casserole a try!

    Vegan Blueberry Maple French Toast Casserole

    Serves 4-6

    Ingredients:

    Bread Pudding:

    • 2 Tbsp ground flax seed, mixed with 6 Tbsp filtered water
    • 1 3/4 cups oat milk (or your favorite plant based milk)
    • 1/4 cup maple syrup
    • 1/4 tsp sea salt
    • 1 tsp maple extract (optional)
    • 1 tsp pure vanilla extract
    • 6 cups lightly packed cubed sourdough bread
    • 1/2 cup blueberries
    • 1 cup blueberry jam
    • 2 Tbsp maple sugar (or coconut sugar)


    For serving:

    • Maple syrup (optional)


    Instructions:

    1. Preheat the oven to 350F degrees, and oil a two quart baking dish or 8×8 inch square pan.
    2. In a bowl, whisk together the flax seeds and water mixture, oat milk, maple syrup, sea salt, and maple extract, and vanilla until well combined, then add the bread crumbs and blueberries toss to coat in the mixture.
    3. Transfer half the mixture to the prepared baking dish, then spoon half the blueberry jam over it by the teaspoon.  Pour the remaining mixture over that (including the liquid, pour it over them), then drop the rest of the jam over it as you did the first time. Sprinkle with the maple sugar.
    4. Place in the oven on a tray, and bake for about 30 minutes or until the top is starting to brown and the liquid has absorbed at the bottom.
    5. Remove from oven.
    6. Serve with maple syrup if desired!


  • Vegan Berry Swirl Bread

    Vegan Berry Swirl Bread

    I am so ready for spring!  It felt like Spring here in Minnesota for about a week with temperatures in the high 30s and 40s and the snow was melting.  So I spent as much time outside as possible when I could and dreamed about actual spring and decided that making something with strawberries sounded good since they are a late spring fruit here.  I have been wanting to make a yeast bread for a few weeks now so I finally went for it!  Originally I thought a cinnamon swirl bread sounded good, but once I started to think about those strawberries I thought a berry swirl sounded even better!  Everyone makes cinnamon bread after all, but I have never seen a Vegan Berry Swirl Bread!

    Yes, I decided to mix strawberries and raspberries because I had both types of jam and I love berries in general.  They remind me of spring and summer and are my favorite fruits! I had some of Eric’s Dad’s home made jam on hand so it was perfect!  When I make yeast bread, I don’t usually go for a loaf, I make something like cinnamon rolls, or french baguettes or something that doesn’t need a pan for shape, but I thought I would branch out.  The dough for these is a sweet, yeasted vanilla dough.  I used full fat coconut milk to give it a bit of richness without adding too much straight oil, and I used flax eggs in place of eggs typically used in a bread like this.  It is just slightly sweet as it just has a little bit of sugar.  But I think it is the perfect amount of sweetness with the sweet jam swirl. 


    I just used organic all purpose flour for this because it was what I had on hand, but if you wanted to use whole wheat flour you could if that is what you prefer, it would just be a little more heavy.  I don’t know about you but there is something so satisfying about kneading yeast bread!  Don’t let it intimidate you as it did me when I was younger, it is not hard to make at all!  You just need to give it a little love and rising time.  The bread smelled amazing while it baked!  But I had to let it cool down because I wanted to give it a little glaze to make it pretty. 

    I gave it a coconut vanilla glaze, topped it off with some freeze dried berries and it was perfect!  So soft and pillowy and heavenly the texture, with the gooey sweet jam and smooth glaze it was so delicious!  It is nice because you don’t need to spread jam on this, since it is already there and honestly I thought it needed no adornment.  If you are looking for something delicious to make this weekend, definitely give this Vegan Berry Swirled Bread a try!

    Vegan Berry Swirl Bread

    Makes 1 loaf

    Dough:

    • 1/2 cup warm water ( 105-110F degrees)
    • 1 packet active dry yeast (1/4 oz)
    • 3/4 cup warm full fat coconut milk (I warmed it up on the stove)
    • 1/4 cup granulated sugar, maple sugar or coconut sugar
    • 1 tsp pure vanilla extract
    • 1 tsp sea salt
    • 1 Tbsp ground flax seed, mixed with 3 Tbsp filtered water
    • 3 1/2 cups organic all purpose flour
    • coconut oil for brushing


    Filling:

    • 1 cup strawberry jam and/or raspberry jam (I mixed the two together)


    Glaze:

    • 1/4 cup coconut butter (not oil)
    • 3 Tbsp thin coconut milk or as needed
    • 1 tsp pure vanilla extract
    • 1/4 tsp sea salt


    Topping:

    • freeze dried strawberries and/or raspberries


    Instructions:

    1. To make the dough, combine the yeast and the warm water (about 110F degrees, you don’t want to kill the yeast) plus a pinch of maple sugar and stir to dissolve. Let sit 5-10 minutes until it starts to foam.
    2. In a large bowl, combine the coconut milk, sugar, vanilla extract, salt and flax mixture and mix together to combine.
    3. Add the yeast, and 2 cups of flour and mix to combine.
    4. Add the remaining 1 1/2 cups of flour and mix until you have a smooth dough (you may need to use your hands at the end to mix it in).
    5. Turn out onto a lightly floured surface, and knead for 5-10 minutes until smooth and supple. If it is too sticky add a little flour but you want to add as little as possible because if you add too much the dough gets tough.
    6. Place in an oiled bowl, and cover. Let rise for about 1 1/2 hours until doubled in size.
    7. When it is ready, turn out onto the counter or a board and roll out into a 16×20 inch rectangle.
    8. Spread the jam evenly over the dough, leaving a 1 inch boarder.
    9. Roll it up, starting with the short end, then pinch the ends shut and the seam along the side.
    10. Place seam side down into an 8 1/2 x 4 1/2 inch greased loaf pan.
    11. Cover and let rise for 45 minutes.
    12. Meanwhile heat the oven to 350F degrees.
    13. When the bread has risen for 45 minutes, brush it with coconut oil, and place it in the preheated oven and bake for about 1 hour until the internal temperature is 190F degrees or higher and the bread is cooked through.  You may need to tent it with foil partway through if it gets too brown, I tented mine at 45 minutes because it was just right. 
    14. Remove from the oven and let cool.
    15. Whisk the glaze ingredients together, adding a little bit more coconut milk if it seems too thick.
    16. Pour the glaze over the top of the bread, sprinkle with the freeze dried berries, and allow the glaze to set for a while before cutting until it is more firm. 
    17. Enjoy!


    This bread keeps covered at room temperature for up to 3 days, or refrigerated for up to 1 week. You can also freeze it, tightly wrapped or in an airtight container for a few months.

  • Vegan Apple Cinnamon Sweet Rolls

    Vegan Apple Cinnamon Sweet Rolls


    Apple season is in full swing!  Although I have yet to make it to the apple orchard this year, I really want to go soon, I love going there are picking my own apples!  However I did recently buy some apples at a farm market when we visited Door County Wisconsin recently.  They were the first of the season, and they were delicious!  I had just enough left to make something, so I decided to make some Vegan Apple Cinnamon Sweet Rolls!  I have been wanting to make these for a while, I got the idea last year but didn’t get around to it so I had to do it this year!  I made these after work one day last week because they just sounded good!

    I actually really like making yeasted dough when I have the time, it is kind of relaxing and satisfying to knead it!  To think I used to be intimidated by it back in the day, but it is really nothing to worry about so long as your yeast is fresh, and you don’t add overly hot water to it. I had a foods class in high school, and the teacher would always say, add warm water but not too hot, you don’t want to kill the yeasty beasties!  I still say that to myself now lol when I am adding the water. It should be about 105-110F degrees but not hotter. Another note on the yeast, if you choose to use rapid rise yeast in this recipe, then it rises in about half the time, so keep an eye on it, and it should be done rising in half the noted time. I have made my rolls with it before and it works just as well.

    I scented the dough with cinnamon and vanilla, and I used granulated sugar this time because it was what I happened to have on hand, but you could use maple sugar, coconut sugar or even brown if you prefer.  Also, I used whole wheat pastry flour because it is what I had but if you wanted to use regular all purpose flour, that works too, I have used the same amount in my roll recipes before with good results (I use the same base roll recipe for most of my sweet rolls and just change the flavorings). For the filling, I used a combination of chopped apples, apple jam that Eric’s Dad made, and some maple syrup and it was just the right amount of sweet!

    Lastly, I topped these off with a vegan cream cheese frosting, because cinnamon rolls have to have a good frosting!  I used a combination of vegan butter and cream cheese with a little vanilla and powdered sugar to sweeten it.  If you wanted a less sweet topping, you could use the glaze that I used on my Strawberry Sweet Rolls instead, it is made with coconut butter and no refined sugar.  Anyways, these rolls turned out sooo good!  They were soft and fluffy, the sweet cinnamon apple filling tart and sweet and flavorful, the perfect partner for the rich cream cheese frosting!  If you are loving apple desserts as much as I am right now, definitely give these Vegan Apple Cinnamon Sweet Rolls a try!

    Vegan Apple Cinnamon Sweet Rolls

    Makes 12

    Dough:

    • 1/2 cup warm water ( 105-110F degrees)
    • 1 packet active dry yeast (1/4 oz)
    • 3/4 cup warm full fat coconut milk (I warmed it up on the stove, but you want to keep it below 105 degrees)
    • 1/4 cup granulated sugar, maple sugar or coconut sugar
    • 1 tsp pure vanilla extract
    • 1 tsp sea salt
    • 1 Tbsp ground flax seed, mixed with 3 Tbsp filtered water
    • 1/2 tsp cinnamon
    • 3 1/2 cups whole wheat pastry flour or as needed


    Filling:

    • 1 cup finely chopped apples
    • 1 cup apple jam or apple butter
    • 2 Tbsp maple syrup
    • 1/2 tsp cinnamon


    Frosting:

    • 1/2 cup vegan butter (I used Earth Balance, one stick), softened
    • 8 oz vegan cream cheese (I used Kite Hill)
    • 1 tsp pure vanilla extract
    • 2 cups powdered sugar


    Instructions:

    1. To make the dough, combine the yeast and the warm water (about 110F degrees, you don’t want to kill the yeast) plus a pinch of maple sugar and stir to dissolve. Let sit 5-10 minutes until it starts to foam.
    2. In a large bowl, combine the yeast, coconut milk, sugar, vanilla extract, salt and flax mixture, cinnamon and mix together to combine.
    3. Add 2 cups of flour and mix to combine.
    4. Add the remaining 1 1/2 cups of flour and mix until you have a smooth dough (you may need to use your hands at the end to mix it in).
    5. Turn out onto a lightly floured surface, and knead for 5-10 minutes until smooth and supple. If it is too sticky add a little flour but you want to add as little as possible because if you add too much the dough gets tough.
    6. Place in an oiled bowl, and cover. Let rise for about 1 1/2 hours until doubled in size.
    7. When it is ready, turn out onto the counter or a board and roll out into a 9×15 inch rectangle.
    8. Mix together the filling ingredients and spread it evenly over the dough.
    9. Roll it up, then cut the roll into 12 pieces.
    10. Oil a 9×9 inch square baking pan, and place them in the pan.
    11. Cover and let rise for 45 minutes.
    12. Meanwhile heat the oven to 350F degrees.
    13. When the rolls have risen for 45 minutes, place them in the preheated oven and bake for about 30 minutes until starting to brown and cooked through.
    14. Remove from the oven and let cool 15 minutes.
    15. To make the frosting, beat together the butter, cream cheese and vanilla until smooth, then beat in the powdered sugar 1 cup at a time until smooth.
    16. Spread the frosting over the rolls, and enjoy!

    These keep covered and refrigerated for up to 1 week.

  • Vegan Peaches and Cream Scones

    Vegan Peaches and Cream Scones

    On weekends, I like to enjoy a treat with my coffee.  Whether that be a slice of cake, a brownie, or something more brunchy like a cinnamon roll or a scone.  I do love scones with coffee!  But they have to be good scones, I am really picky.  The deli I formerly worked in made scones that our customer loved, and the lady that originally made them and taught me how to make them had a technique for making them the perfect texture!  You didn’t want to mix the dough too much just enough to make it hold together and leave it a little lumpy.  This created pockets of the fat you used (she used butter in hers, I use coconut oil), and flakey scones that were tender on the inside and just the right amount of crunch on the outside (but not dry like some scones).  I used her technique to create my own vegan scone recipe which I think is pretty darn good.  I used to sell a lot of mine at the deli!  But I still like to make them at home. So this past weekend, I made some Vegan Peaches and Cream Scones!

    I had a bunch of ripe peaches on hand and I like to make goodies with them besides just eat them.  I was missing the work scones, since I do not make them at my new job so I whipped some up just in time for my weekend!  I used whole wheat pastry flour for the base of these which differs from the work ones, since they used all purpose flour.  But if you wanted them to be more bakery style by all means use the all purpose, or if you want them to be gluten free, I can recommend Bob’s Red Mill gluten free all purpose baking flour as a good substitute (1:1).  I have used it before with good results.  The scones are pretty simple ingredient wise, just the flour, baking powder a touch of salt, and sugar for dry ingredients. You can use either white sugar, maple sugar, brown sugar or even coconut sugar (the latter though is probably my least favorite because it doesn’t blend in as well).  Maple and brown are my favorite!

    Then you mix in the coconut milk and vanilla and fold in the peaches. Like I mentioned earlier, the secret to these is all in the mixing. You do not want to over mix these like a cake batter or something, you want to mix the dry ingredients, leave pockets of coconut oil (like pea sized pockets or slightly larger), then just mix until combined and lumpy when you add the wet ingredients and peaches.  Don’t worry if it looks weird, it will all melt together beautifully in the oven while baking!  They smell so heavenly as they bake too!

    You might need to reshape with two bench scrapers, to keep the nice shape since they spread a little but they come out so nice at the end! These scones are scrumptious!  Flakey and tender on the inside with jammy peaches, scented with vanilla and a crispy sugar coating on the outside thanks to the turbinado I sprinkle on them before baking!  They are perfect with mid morning coffee or tea!  It is 100% worth it to make your own scones versus just buying most of the store bought ones. I can honestly say the ones at the deli I used to work at, the ones I sold are hands down the best I have had compared to the dry dense ones you buy at other places!  If you want to enjoy some delicious scones, give these Vegan Peaches and Cream Scones a try!

    Vegan Peaches and Cream Scones

    Makes 8

    Ingredients:


    • 3 cups organic whole wheat pastry flour* or organic all purpose flour
    • 3/4 cup maple sugar or brown sugar
    • 2 1/2 tsp baking powder
    • 1/4 tsp salt
    • 3/4 cup solid virgin coconut oil, cut into chunks (if your house is above 65F degrees, chill it first)
    • 1 1/2 cups (or as needed) cold full fat organic canned coconut milk (whisked until smooth if chunky)
    • 1 Tbsp pure vanilla extract
    • 2 cups sliced ripe peaches
    • coconut milk for topping (if needed)
    • turbinado sugar for sprinkling


    Instructions:

    1. Preheat oven to 375F degrees with the rack set at the middle position.
    2. Line a baking sheet with parchment.
    3. In a large bowl, combine the flour, sugar, baking powder, and salt. Cut in the coconut oil with a pastry blender or 2 knives until the mixture starts to clump into pea sized pieces. In a small bowl, stir the vanilla into the coconut milk. Add the coconut milk to the dough, and stir a few times, but do not over-mix. The dough should hold together when squeezed, but still be clumpy.
    4. Fold in peaches until evenly distributed.
    5. Place dough on a floured work surface, and shape into a 4 inch wide log. Use a bench scraper to cut into 8 triangles.
    6. Place scones on the prepared baking sheet, reshaping slightly if necessary.
    7. Brush the tops lightly with the coconut milk (only if they seem dry, you want the sugar to stick), and sprinkle with coconut sugar.
    8. Place in the oven and bake for about 15 minutes , then after about 15 minutes you may need to reshape with 2 bench scrapers if the scones are spreading. Turn them then place back in the oven and bake 15 minutes more until they are lightly browned and cooked throughout.
    9. Cool on a wire rack.
    10. Enjoy!

    *If you prefer to make these gluten free, you can swap the whole wheat pastry flour for an all purpose baking flour like Bob’s Red Mill Gluten Free All Purpose Baking flour (I have tried this brand with success).

  • Vegan Strawberry Rhubarb Scones

    Vegan Strawberry Rhubarb Scones


    Strawberries and rhubarb are one of my all time favorite combinations!  I think it all started when I was little.  My Grandma used to grow a row of giant rhubarb plants behind her garage, and she would use them to make this really delicious strawberry rhubarb sauce which she would give to us in large jars.  It was so good I would eat it by the large bowl full just by itself.  I remember my Grandma telling me not to eat so much at a time or I would get a tummy ache, but I never did.  It was wayyy better than applesauce!  It had the perfect balance of tart and sweet.  So good over ice cream also for a sundae!  I still like to make strawberry rhubarb desserts now as an adult.  Last weekend I decided to make some Vegan Strawberry Rhubarb Scones!  This is something I have been baking a lot at work lately because we have a giant box of rhubarb, and the customers seem to love them so I wanted some for myself at home! 

    I have actually never made strawberry rhubarb scones at home so this seemed like the perfect opportunity.  I have only made strawberry and knew I loved those.  I made a couple of changes though from the ones I make at work, such as using whole wheat pastry flour instead of the ap flour we use there so they are a little darker in color.  If you wanted to make these gluten free, you could use Bob’s Red Mill all purpose baking flour swapped 1:1 for the flour I have used.  I have used it before and it comes out successfully.  Also, I used maple sugar instead of granulated sugar because that is what I prefer to use at home, but you can also use either brown sugar, white sugar or even coconut sugar if you prefer those and they will still be delicious!

    Other than that, the ratios of oil and coconut milk I used are similar  and work well so I did not change them.  No these are not a low fat scone, I developed them to make them the best texture and flavor and we could all use a nice treat once in a while lol!  I love scones even more than muffins because they are a little less sweet, but they have that crunchiness on the outside and tenderness in the middle.  For these, just mixing the dough until combined and leaving lumps of coconut oil is best for the lovely texture. You do not want to over-mix, you want to handle these just enough to create the tender texture kind of like you would treat a biscuit dough.   I have made them so many times I know how it should feel, and if it is your first time you may be tempted to mix it until smooth but don’t do it!

    These smelled so lovely while baking!  I could not wait to try one! They are definitely something that should be enjoyed still slightly warm from the oven because it brings out the flavor!  They are just sweet enough with a tender texture, and pockets of jammy sweet berries and tart rhubarb throughout, with a crisp sweet coating on the outside!  If you are looking for a treat for brunch or just because, definitely give these Vegan Strawberry Rhubarb Scones a try!

    Vegan Strawberry Rhubarb Scones

    Makes 8

    Ingredients:

    • 3 cups organic whole wheat pastry flour* or organic all purpose flour
    • 3/4 cup maple sugar or brown sugar
    • 2 1/2 tsp baking powder
    • 1/4 tsp salt
    • 3/4 cup solid virgin coconut oil, cut into chunks (if your house is above 65F degrees, chill it first)
    • 1 1/2 cups (or as needed) cold full fat organic canned coconut milk (whisked until smooth if chunky)
    • 1 Tbsp pure vanilla extract
    • 1 cup fresh rhubarb sliced into 1/4 inch slices
    • 1 cup fresh or frozen strawberries, cut into quarters or sliced
    • coconut milk for topping (if needed)
    • turbinado sugar for sprinkling


    Instructions:

    1. Preheat oven to 375F degrees with the rack set at the middle position.
    2. Line a baking sheet with parchment.
    3. In a large bowl, combine the flour, sugar, baking powder, and salt. Cut in the coconut oil with a pastry blender or 2 knives until the mixture starts to clump into pea sized pieces. In a small bowl, stir the vanilla into the coconut milk. Add the coconut milk to the dough, and stir a few times, but do not over-mix. The dough should hold together when squeezed, but still be clumpy.
    4. Fold in strawberries and rhubarb until evenly distributed.
    5. Place dough on a floured work surface, and shape into a 4 inch wide log. Use a bench scraper to cut into 8 triangles.
    6. Place scones on the prepared baking sheet, reshaping slightly if necessary.
    7. Brush the tops lightly with the coconut milk (only if they seem dry, you want the sugar to stick), and sprinkle with coconut sugar.
    8. Place in the oven and bake for about 15 minutes , then after about 15 minutes you may need to reshape with 2 bench scrapers if the scones are spreading. Turn them then place back in the oven and bake 15 minutes more until they are lightly browned and cooked throughout.
    9. Cool on a wire rack.
    10. Enjoy!

    *If you prefer to make these gluten free, you can swap the whole wheat pastry flour for an all purpose baking flour like Bob’s Red Mill Gluten Free All Purpose Baking flour (I have tried this brand with success).


  • Vegan Strawberry Sweet Rolls

    Vegan Strawberry Sweet Rolls

    Spring has arrived in full force, the trees are blossoming, the grass is vibrant green, and the birds are singing.  I love it!  And, I am inspired to make desserts that have spring ingredients, like these Vegan Strawberry Sweet Rolls! Minnesota strawberries won’t be here for a little while, they are in their flowering stage, or at least the wild ones are. I have seen quite a few while hiking, so there should be plenty later in the season.  But for now I will settle for the store bought and frozen.  I have been wanting to make these rolls for quite a while, and I finally bought some yeast and found the time to do so.  Funny story, I popped them in the oven and the sirens started sounding for a tornado warning, so we had to go downstairs, but luckily by the time the storm passed, they were just about done baking and they turned out just right. 

    I love making sweet rolls, or any kind of bread dough for that matter, it is so relaxing kneading it!  For this dough, I used my recipe for cinnamon rolls but modified.  It has full fat coconut milk to give it a little richness, and flax eggs in place of the eggs used in regular roll recipes. I scented it with vanilla and sweetened it with maple sugar.  If you didn’t have maple sugar you could use brown sugar or granulated sugar instead and it will still turn out delicious! I used whole wheat pastry flour but you could also use all purpose flour for these if a lighter crumb and dough is desired.

    I filled the rolls with some jam that we received from Eric’s Dad.  He makes the best jam we have ever tasted!  He grows his own berries, and the jam is perfectly balanced.  Not too sweet like some store bought jams that just taste like sugar, this has just the flavor of real fresh strawberries.  It is perfect in things like these rolls!  I used plenty of it in the filling, so they were oozing a bit while baking, but that is just how I like them!  My kitchen smelled so heavenly when I pulled them from the oven!

    I frosted them with a faux cream cheese frosting made out of raw cashew butter, coconut butter, and coconut milk and it was the perfect thing to top them off with!  They turned out so heavenly!  Soft and sweet, gooey jammy berries and that rich “cream cheese” frosting!  If you are looking for a treat to make for brunch this weekend, definitely give these Strawberry Sweet Rolls a try!


    Vegan Strawberry Sweet Rolls

    Makes 12

    Dough:

    • 1/2 cup warm water ( 105-110F degrees)
    • 1 packet active dry yeast (1/4 oz)
    • 3/4 cup warm full fat coconut milk (I warmed it up on the stove)
    • 1/4 cup maple sugar or coconut sugar
    • 1 tsp pure vanilla extract
    • 1 tsp sea salt
    • 1 Tbsp ground flax seed, mixed with 3 Tbsp filtered water
    • 3 1/2 cups whole wheat pastry flour or as needed


    Filling:

    • 3/4 cup strawberry jam
    • 1 cup sliced (or frozen, thawed and drained) strawberries


    Glaze:

    • 1/4 cup raw cashew butter
    • 1/4 cup coconut butter (not oil)
    • 1/4 cup coconut milk or as needed
    • 1 tsp pure vanilla extract
    • 1/2 tsp lemon juice
    • 1/4 tsp sea salt


    Instructions:

    1. To make the dough, combine the yeast and the warm water (about 110F degrees, you don’t want to kill the yeast) plus a pinch of maple sugar and stir to dissolve. Let sit 5-10 minutes until it starts to foam.
    2. In a large bowl, combine the coconut milk, maple sugar, vanilla extract, salt and flax mixture and mix together to combine.
    3. Add the yeast, and 2 cups of flour and mix to combine.
    4. Add the remaining 1 1/2 cups of flour and mix until you have a smooth dough (you may need to use your hands at the end to mix it in).
    5. Turn out onto a lightly floured surface, and knead for 5-10 minutes until smooth and supple. If it is too sticky add a little flour but you want to add as little as possible because if you add too much the dough gets tough.
    6. Place in an oiled bowl, and cover. Let rise for about 1 1/2 hours until doubled in size.
    7. When it is ready, turn out onto the counter or a board and roll out into a 9×15 inch rectangle.
    8. Mix together the filling ingredients and spread it evenly over the dough.
    9. Roll it up, then cut the roll into 12 pieces.
    10. Oil an 8×8 inch square baking pan, and place them in the pan.
    11. Cover and let rise for 45 minutes.
    12. Meanwhile heat the oven to 350F degrees.
    13. When the rolls have risen for 45 minutes, place them in the preheated oven and bake for about 30 minutes until starting to brown and cooked through.
    14. Remove from the oven and let cool 15 minutes.
    15. Whisk the glaze ingredients together, adding a little bit more coconut milk if it seems too thick.
    16. Pour the glaze over the rolls, and enjoy!

    These keep covered at room temperature for up to 3 days, or refrigerated for up to 1 week.

  • Vegan Matcha Mint Doughnuts

    Vegan Matcha Mint Doughnuts

    I can’t believe it is already Christmas this week!  Time has flown, and as always this time of year is busy, so instead of making a cake this week when I felt like making a treat, I decided to make doughnuts instead!  I like to enjoy doughnuts with my coffee sometimes on the weekends, and when I make a batch, I always freeze some for future enjoyment. I wanted to make some Vegan Matcha Mint Doughnuts this time, and I recently received some Dastony coconut butter from Raw Guru which is my main ingredient in my doughnut glazes!

    I like making my own baked doughnuts because they are healthier than buying store bought ones, and I use good quality ingredients.  For the cake portion, I used my vanilla cake recipe, which is really simple to mix!  I flavored it with a bit of matcha powder, vanilla extract and peppermint extract.  The batter itself tasted delicious.  I always give it a try, to make sure I don’t forget something (one time I forgot the sugar…oops!  but luckily I tried it and figured it out before dumping it into the pans). A note on the flour in this, if you prefer to use gluten free flour, Bob’s Red Mill gluten free all purpose baking flour will work well, I have tried it before with good results.

    They baked up beautifully and my kitchen smelled amazing!  Once they had cooled down and were all ready to glaze, I was getting more excited.  Like I mentioned earlier, I use Dastony coconut butter from Raw Guru as a base, instead of the usual powdered sugar.  Not only is it healthier, but it sets nice just like a powdered sugar glaze, and I prefer the sweetness level.  I find powdered sugar glaze to be a little too sweet sometimes because there is not much in it to cut the sweetness.

    The Vegan Matcha Mint Doughnuts turned out sooo good!  They were sweet and soft with a hint of vanilla, matcha and mint, and just enough sweetness in the glaze!  I enjoyed them with my coffee and it was such a delicious pairing, but I am going to try them next with a matcha latte because they are matcha after all and I love that too!  If you are a matcha fan definitely give these a try!  If you would like to get some Dastony coconut butter from Raw Guru you can find it on their website.

    Merry Christmas!  I hope you all have a wonderful holiday week!

    Vegan Matcha Mint Doughnuts
    Makes 6 Doughnuts

    Ingredients:

    one 6 hole doughnut pan

    Cake:

    • 3/4 cup plus 2 Tbsp organic whole wheat pastry flour
    • 2 tsp matcha powder
    • 3/4 tsp baking soda
    • 1/2 tsp baking powder
    • 1/4 tsp sea salt
    • 1/2 cup maple sugar
    • 1 cups full fat coconut milk (the thick kind, I prefer Thai Kitchen brand) at room temperature
    • 1 tsp peppermint extract
    • 1 tsp pure vanilla extract
    • 1 Tbsp cider vinegar


    Icing:

    • 1/2 cup melted Dastony coconut butter
    • 2 Tbsp maple syrup
    • 1/2 tsp pure vanilla extract
    • 3-4 Tbsp filtered water or as needed
    • 1/4 tsp matcha powder


    Instructions:

    1. Preheat the oven to 350F degrees and position rack in center of oven.
    2. Oil a doughnut pan.
    3. Whisk flour, matcha, baking soda, sea salt, and sugar in a large bowl to blend well.
    4. Whisk coconut milk, peppermint and vanilla extract together in small bowl to blend well, then whisk into the flour mixture until well blended.
    5. Whisk the cider vinegar into the batter.
    6. Transfer the batter to prepared pan.
    7. Place in the oven, and bake cake until tester inserted into center comes out clean with just a few moist crumbs attached, about 20-25 minutes.  Remove from oven and let cool completely.
    8. To make the glaze, whisk together all ingredients except the water.  Then whisk in the water until smooth and uniform.  If it is a little too thick add just a few tsp more water until it is a pour-able consistency.
    9. Spoon the glaze over the doughnuts.
    10. Allow glaze to set, then enjoy!

    Doughnuts keep stored in the refrigerator, covered for up to 1 week.

    Notes:

    *If you would rather use coconut sugar or even just granulated sugar for this, either will work in place of the maple sugar. (if you use the granulated it will be more green)

    *This cake can be made gluten free by swapping out the whole wheat pastry flour for Bob’s Red Mill gluten free all purpose baking flour (this is a brand I have used before and have tested it in cakes with great results).

  • Vegan Pumpkin Cinnamon Roll Cake

    Vegan Pumpkin Cinnamon Roll Cake

    Pumpkin is my jam ever since fall started.  I make so many pumpkin cookies and scones at work lately and they always sell really fast so apparently  I am not the only one.  I have been making cookies, cakes, and pumpkin spice lattes at home, but what I I have really been craving lately that I haven’t gotten around to making yet is pumpkin cinnamon rolls.  I have seen a few in my news feed, and wanted to make some last week, but by the time I got home from work it was late and seemed like to lengthy of a process to let them rise and roll them out and whatnot, plus I didn’t have any yeast on hand (I thought I still had some), so it seemed like a losing battle to make them, but then I remembered that a while back I made a cinnamon roll cake, that was simple but still had all of the delicious flavor of cinnamon rolls, so I decided to make a pumpkin version, Vegan Pumpkin Cinnamon Roll Cake!

    I love changing recipes with the seasons and putting a twist on them! I knew pumpkin spices would be perfect in a cinnamon roll cake (or cinnamon rolls), and I could not wait to whip this up!  For my batter, I based it off of my Cinnamon Roll Cake recipe, but added in plenty of pumpkin puree and pumpkin pie spices instead of the usual cinnamon.  The batter was super delicious!  I always have to sample the batter, ever since I was a kid, it is tradition!  And one time it even saved my cake, because when I tasted it I realized that I had forgotten to add the sugar.  It would have been one disgusting cake if I didn’t taste it and add it in before pouring it into the pan.  Don’t worry I am not usually that spacey but we all have those days.   This batter was perfect, just the right amount of spices and it is easy to make.  The batter It happens to be oil free, because I use full fat coconut milk in it in place of the oil.

    For the swirl, which is essential to cinnamon rolls of course, I used a mixture of sugar, maple syrup and pumpkin pie spices, and spiraled it in the cake to give it a ribbon of sweet spiced goodness! I know cinnamon rolls don’t have a streusel topping, but I gave this one just that because I had put one on my other cinnamon roll cake, and this is sort of a mixture between a coffeecake and cinnamon roll.  Plus I think it is so lovely and so delicious!  I love the contrast of the crunch on the soft cake!  This smelled so amazing when I pulled it out of the oven I could not wait to try it!

    But of course I let it cool first so it could come out of the pan nicely.  I gave it a nice decorative drizzle on top, to make it more reminiscent of cinnamon rolls and it was perfect!  This pairs so well with coffee, it is soft, sweet, scented with pumpkin spices, has a nice sugary crunch on top and you may just have to go back for seconds, just sayin’.  If you have some leftover canned pumpkin this is the perfect use for it!  Maybe I will get around to making real cinnamon rolls soon, but this cake is darn delicious and maybe even better than the rolls, so definitely give it a try!

    Vegan Pumpkin Cinnamon Roll Cake
    Makes one 6 inch cake

    Ingredients:

    one 6 inch cake pan

    Cake:

    • 3/4 cup organic whole wheat pastry flour
    • 3/4 tsp baking soda
    • 1/2 tsp baking powder
    • 1/4 tsp sea salt
    • 1/2 cup maple sugar
    • 1/2 cup full fat coconut cream (the thick kind, from the top of the can) at room temperature
    • 1/2 cup pumpkin puree
    • 1 tsp pure vanilla extract
    • 2 tsp pumpkin pie spices
    • 1 Tbsp cider vinegar


    Swirl:

    • 2 Tbsp maple syrup at room temperature
    • 2 Tbsp maple sugar
    • 2 tsp pumpkin pie spices


    Topping:

    • 1/4 cup organic whole wheat pastry flour
    • 2 Tbsp maple sugar
    • 1/8 tsp sea salt
    • 1/4 tsp pumpkin pie spices
    • 3 Tbsp coconut butter, warmed to liquid


    Drizzle:

    • 1 Tbsp coconut butter
    • 1 tsp maple syrup
    • 1 Tbsp filtered water, or as needed


    Instructions:

    1. Preheat the oven to 350F degrees and position rack in center of oven.
    2. Oil a 6 inch round baking pan and line it with parchment at the bottom so it will not stick.
    3. Whisk flour, baking soda, sea salt, and sugar in a large bowl to blend well.
    4. Whisk coconut milk and vanilla extract together in small bowl to blend well, then whisk into the flour mixture until well blended.
    5. Whisk the cider vinegar into the batter.
    6. Mix together swirl ingredients in a small bowl.
    7. Transfer half the cake batter to prepared pan then place the swirl mixture in a ziplock bag with the corner cut off and pipe it into a swirl from the center out.  Pour the rest of the cake batter over it, then do the same with more of the swirl. marble the swirls with a knife.
    8. Mix together the streusel ingredients in a bowl with your hands until it starts to clump together, then sprinkle over the cake.
    9. Place in the oven, and bake cake until tester inserted into center comes out clean with just a few moist crumbs attached, about 25 minutes.
    10. Remove from the oven and let cool for at least 30 minutes, then un-mold, by cutting around the edges if they are stuck at all, then putting  plate over the top, then flipping it onto that plate then placing a plate on the bottom and flipping it upright onto that plate.
    11. Whisk together the coconut butter, maple syrup and water until smooth (adding a little more water if it is too thick to drizzle).
    12. Drizzle the coconut butter mixture over the cake, and serve!

    Cake keeps stored in a container on the counter for up to 1 week, or can be frozen for up to 4 months.

    Notes:

    If you would rather use coconut sugar or even just granulated sugar for this, either will work in place of the maple sugar.

    If you would like to make a 9 inch round cake, double the entire recipe, and bake it in a 9 inch round pan, increasing the baking time to 50 minutes to 1 hour (depending on your oven).

    This cake can be made gluten free by swapping out the whole wheat pastry flour for Bob’s Red Mill gluten free all purpose baking flour (this is a brand I have used before and have tested it in cakes with great results).

  • Vegan Cookies and Cream Doughnuts

    Vegan Cookies and Cream Doughnuts

    I don’t normally buy store bought cookies, but since I was gifted a more “natural” version of some Oreo type cookies, and they tasted good, I decided it would be the perfect opportunity to make something cookies and cream with them!  It was funny, because I had the unopened package sitting in the cupboard and was planning on making something with them, but then I discovered Eric had eaten half of them, so I knew there probably wouldn’t be enough for a recipe with a crust and the cookies mixed in, so I was thinking cupcakes or doughnuts.  I have been wanting doughnuts a little more so that is what I went with.

    I was debating whether or not to make the cake base chocolate or vanilla (or maybe swirl the two together), but I ultimately decided that a vanilla batter would be best because it would showcase the cookie crumbles in the batter.  I made a batter similar to my usual vanilla cake batter, and whisked in crumbled cookies for a cookies and cream flavor.  The batter was super delicious!  Yes, I had to sample it (a few times wink wink).

    They baked up nicely in my doughnut pan, and took less time than most other cupcakes or cake I make so that was a plus.  I didn’t know if I would get much use out of my doughnut pan when I bought it, but it has been nice to be able to make vegan cake doughnuts whenever I want at home so it was worth it!  I have a silicone pan so it makes it a lot easier to get them out than a metal one. They smelled so good while baking!

    I couldn’t wait to try them, but first they needed a glaze.  So I whipped up a white chocolate vanilla glaze, and sprinkled it with more crushed up cookies.  They were sooo good!  I enjoyed one with my coffee and it was the perfect pairing!  If you have chocolate sandwich cookies on hand, definitely give these a try!

    Vegan Cookies and Cream Doughnuts
    Makes 6 Doughnuts

    Ingredients:

    one 6 hole doughnut pan

    Cake:

    • 3/4 cup plus 2 Tbsp organic whole wheat pastry flour
    • 3/4 tsp baking soda
    • 1/2 tsp baking powder
    • 1/4 tsp sea salt
    • 1/2 cup maple sugar
    • 1 cups full fat coconut milk (the thick kind, I prefer Thai Kitchen brand) at room temperature
    • 1 tsp pure vanilla extract
    • 1 Tbsp cider vinegar
    • 1/2 cup crushed vegan chocolate sandwich cookies


    White Chocolate Icing:

    • 1/4 cup plus 2 Tbsp melted coconut butter
    • 2 Tbsp melted cacao butter
    • 2 Tbsp maple syrup
    • 1/2 tsp pure vanilla extract
    • 3-4 Tbsp filtered water or as needed


    For Garnish:

    • crushed vegan chocolate sandwich cookies


    Instructions:

    1. Preheat the oven to 350F degrees and position rack in center of oven.
    2. Oil a doughnut pan.
    3. Whisk flour, baking soda, sea salt, and sugar in a large bowl to blend well.
    4. Whisk coconut milk and vanilla extract together in small bowl to blend well, then whisk into the flour mixture until well blended.
    5. Whisk the cider vinegar into the batter.
    6. Transfer the batter to prepared pan.
    7. Place in the oven, and bake cake until tester inserted into center comes out clean with just a few moist crumbs attached, about 20-25 minutes.  Remove from oven and let cool completely.
    8. To make the glaze, whisk together all ingredients except the water.  Then whisk in the water until smooth and uniform.  If it is a little too thick add just a few tsp more water until it is a pour-able consistency.
    9. Spoon the glaze over the doughnuts, and sprinkle with cookie crumbles.
    10. Allow glaze to set, then enjoy!

    Doughnuts keep stored in the refrigerator, covered for up to 1 week.

    Notes:

    *If you would rather use coconut sugar or even just granulated sugar for this, either will work in place of the maple sugar.

    *This cake can be made gluten free by swapping out the whole wheat pastry flour for Bob’s Red Mill gluten free all purpose baking flour (this is a brand I have used before and have tested it in cakes with great results).

  • Vegan Blueberry Muffins

    Vegan Blueberry Muffins


    When I was little, on weekends my Dad would sometimes bake blueberry muffins, and I thought it was one of the greatest things ever.  I got super excited when he let me mix the batter and eat the excess batter out of the bowl that didn’t make it into the tins. They were always so good when they were fresh from the oven, and completed our Sunday brunch.  Never mind that they were from a boxed mix, they tasted good to me!  I didn’t actually make non boxed mix blueberry muffins until I was in college so I never knew the difference.  

    I now make my own, because it is just as easy to just make your own when you have everything on hand and I like to use quality ingredients.  I decided to make some last weekend because they sounded really good and I haven’t made any in forever!  I had also been smelling some blueberry scones I made at work next to my work station for a good chunk of the day at work, that might have had something to do with the craving!

    I had fresh blueberries on hand, so it was perfect!  For these, instead of oil  I used a mixture of apple sauce and cashew butter, and it made them taste just as rich and creamy as regular muffins, but without the refined oils.  I added a touch of vanilla and the batter tasted even better than that muffin mix  I grew up eating.  I still love eating muffin batter, and I don’t think I will ever grow out of that!  They smelled amazing while baking, and as I pulled them out of the oven.  I could not wait to taste one!  

    Once they were cool enough to try I took a big bite.  They were sooo good!  Soft and sweet, scented with vanilla with jammy gooey blueberries and a soft cake texture.  I shared them with Eric and he enjoyed them too!  If you are in the mood for some really good classic blueberry muffins, give these a try! 

    Vegan Blueberry Muffins

    Makes 18

    Ingredients:

    • 1 cup maple sugar
    • 1/2 cup cashew butter
    • 1 cup apple sauce
    • 1 ½ Tbsp ground flax seed mixed with 4 ½ Tbsp filtered water
    • 1 tsp pure vanilla extract
    • 1 1/2 cups organic whole wheat pastry flour
    • ½ tsp sea salt
    • ½ tsp baking soda
    • 1 tsp baking powder
    • 1 cup blueberries


    Instructions:

    1. Preheat the oven to 350F degrees, and line 12 muffin tins with liners.
    2. Whisk together the sugar, cashew butter, apple sauce, flax mixture and vanilla extract in a large bowl.
    3. Add the flour, sea salt, baking soda and baking powder and whisk until smooth.
    4. Add the blueberries, and mix in until well distributed.
    5. Spoon into the muffin tins.
    6. Place in the oven and bake for about 25 minutes or until a toothpick inserted into the center comes out almost clean with a few moist crumbs attached.
    7. Let cool on a rack for at least 20 minutes before enjoying.


  • Vegan Birthday Cake Waffles

    Vegan Birthday Cake Waffles


    July was my birthday month, so in addition to a cake I made a few other birthday treats like these fun Birthday cake waffles!  Yes, my birthday was actually a few weeks back, but I just got around to typing it up now, and I feel like these can be made even when it is not your birthday as a pick me up!  Who doesn’t love delicious waffles on a lazy weekend morning?!  I didn’t just make these for myself, I made them for my fiance Eric who had been asking me to make waffles for a few weeks.

    I like waffles, because you can make them any time of the day and they are easy to whip up from ingredients you already have on hand.  I even like them for just dessert as well since I usually make them sweet.  These ones have a vanilla and almond flavored batter, because my Grandma used to like to add almond to her vanilla birthday cakes. I have tweaked this waffle batter to be just how I like it so the waffles come out the right texture.  Since soggy waffles before they even get the syrup is no fun. 

    I mixed in sprinkles to make them Birthday cake also, and the batter was delicious!  Yes, I sampled it. They smelled amazing while they were cooking!  Like really good cake, but a lot easier to make!  No cooling required before enjoying either!  I could not wait to try them out!  

    But first, they needed some vegan coconut whipped cream, more sprinkles to make them extra pretty and some maple syrup.  They were perfect!  Light and fluffy on the inside, crispy on the outside, a little sweet, with the scents of vanilla and almond, so heavenly with the toppings!  If you want to treat yourself, give these a try!

    Vegan Birthday Cake Waffles

    makes 8 medium sized belgian waffles

    Ingredients:

    Batter:

    • 2 cups organic whole wheat pastry flour
    • 1/4 cup maple sugar or coconut sugar
    • 1/2 tsp baking soda
    • 1 tsp baking powder
    • 1/2 tsp sea salt
    • 1 tsp pure vanilla extract
    • 1 tsp almond extract
    • 3 Tbsp ground flax seed, whisked together with 1/2 cup filtered water
    • 2 Tbsp avocado oil or another neutral oil
    • 2 cups light coconut milk
    • 2 Tbsp vegan sprinkles


    Toppings:

    • coconut whipped cream 
    • maple syrup 
    • vegan sprinkles


    Instructions:

    1. To make the waffles, whisk together the flour, sugar, baking soda, baking powder and sea salt in a large bowl.
    2. Then whisk in the flax mixture, oil, and coconut milk together until smooth. Fold in the sprinkles.
    3. Heat your oven to 150F degrees and oil, and pre-heat waffle iron. Once it is heated, pour about 1/3 cup batter onto the waffle iron or until the iron is just covered (but not so much that it will ooze out) and close it.  Cook according to waffle iron package directions.  Remove from the waffle maker and keep warm in the oven while you make the others.  If you have a waffle maker the size of mine (regular belgian waffles), you may have more than 8 waffles.
    4. Serve the waffles with coconut cream, maple syrup and more sprinkles!
  • Vegan Chocolate Caramel Rolls

    Vegan Chocolate Caramel Rolls


    I have been telling myself that I wanted to make some sort of sweet rolls since before the Holidays, and I finally got around to it last weekend.  They are a bit of a project, since the dough requires rising time and whatnot and time is something I have not had a lot of lately. It has now calmed down though, and so I am happy I get to make more fun things like sweet rolls! I have never made them with chocolate before, so I thought I would try it this time!  I decided on caramel rolls, because I love the chocolate and caramel combo.

    Don’t let the yeast dough intimidate you. I admit, it used to intimidate me back in the day because it wasn’t something I had a lot of experience with, but once I started using it, I was pleasantly surprised that it was pretty easy! There is something kind of enjoyable and relaxing about kneading bread dough that I love!  I used the dough I normally make my sweet rolls with and added in a bit of cacao powder to make them chocolate. 

    For the caramel, I know I could have made a traditional caramel with vegan butter and brown sugar, but I prefer date caramel, because it has more nutritional benefits to it.  I am obsessed with dates, they are like nature’s caramel!  I can’t believe that I didn’t want to eat them when I was little because I thought they looked weird.  Man I was missing out!  Anyways, they make the most amazing caramel when blended up with a few other ingredients.  

    I wanted these rolls to have another chocolate element as well, so I rolled chocolate chips into them, and sprinkled some on top. Because melty chocolate chips are amazing in baked goods! These smelled so good while baking, I could not wait to try them!  I waited just long enough to cool then I had to have one!  They were sooo good!  Chocolaty, and gooey with plenty of caramel and melty chocolate chips!  These would make the perfect weekend brunch treat! 

    Vegan Chocolate Caramel Rolls 

    Makes 12

    Dough:

    • 1/2 cup warm water ( 105-110F degrees)
    • 1 packet active dry yeast (1/4 oz)
    • 1/4 cup cacao powder
    • 3/4 cup warm coconut milk (I warmed it up on the stove)
    • 1/4 cup maple sugar or coconut sugar
    • 1 tsp pure vanilla extract
    • 1 tsp sea salt
    • 1 Tbsp ground flax seed, mixed with 3 Tbsp filtered water
    • 3 1/2 cups whole wheat pastry flour or as needed


    Caramel Filling/Topping:

    • 1 1/2 cups soft, pitted medjool dates (if not soft, soak them in filtered water 30  minutes and drain well before using)
    • 3/4 cup pecan butter (raw cashew butter or almond butter would also work if you don’t have pecan)
    • 1/2 cup filtered water (or as needed)
    • 1/4 cup maple syrup
    • 1 tsp pure vanilla extract
    • 1/4 tsp sea salt


    To Finish: 

    • 1/2 cup vegan dark chocolate chips


    Instructions:

    1. To make the dough, combine the yeast and the warm water (about 110F degrees, you don’t want to kill the yeast) plus a pinch of maple sugar and stir to dissolve. Let sit 5-10 minutes until it starts to foam.
    2. In a large bowl, combine the coconut milk, maple sugar, vanilla extract, salt and flax mixture and mix together to combine.  Add the yeast, and 2 cups of flour and mix to combine.  Add the remaining 1 1/2 cups of flour and mix until you have a smooth dough (you may need to use your hands at the end to mix it in).
    3. Turn out onto a lightly floured surface, and knead for 5-10 minutes until smooth and supple. If it is too sticky add a little flour but you want to add as little as possible because if you add too much the dough gets tough.
    4. Place in an oiled bowl, and cover. Let rise for about 1 1/2 hours until doubled in size.  When it is ready, turn out onto the counter or a board and roll out into a 9×15 inch rectangle.
    5. Meanwhile to make the caramel, add all ingredients to a blender or food processor and blend until completely smooth (if it is too thick, add a touch more water, you want it spreadable at this point, but will add more liquid later for topping the rolls with half the mixture).
    6. When it is ready, turn out onto the counter or a board and roll out into a 9 x 15 inch rectangle.
    7. Spread about half the caramel evenly over the dough, and sprinkle with 3/4 cup chocolate chips 
    8. Roll it up, then cut the roll into 12 pieces.
    9. Oil an 8×8 inch square baking pan, and place them in the pan.
    10. Cover and let rise for 45 minutes.
    11. Meanwhile heat the oven to 350F degrees.
    12. When the rolls have risen for 45 minutes, place them in the preheated oven and bake for about 30 minutes until starting to brown and cooked through.
    13. Remove from the oven and let cool 15 minutes.
    14. Whisk a little more maple syrup or water into the remaining caramel if it seems too thick to pour over the rolls.
    15. Pour the caramel over the rolls, sprinkle with more chocolate chips and enjoy!

    These keep covered at room temperature for up to 3 days, or refrigerated for up to 1 week.

  • Vegan Chocolate Caramel Pecan Bread Pudding 

    Vegan Chocolate Caramel Pecan Bread Pudding 

    Over the New Years holiday, we got a bit of snow and it was chilly for a few days before it warmed up again so I figured it was the perfect time to make some sweet comfort food.  Not only that, why not make something delicious to celebrate?!  I had a loaf of somewhat stale sourdough bread and I decided to make my favorite bread recipe, bread pudding! But I thought why not make it extra decadent and delicious this time and make a chocolate bread pudding with chocolate chunks. Now that would have been delicious on its own, but I decided to go over the top and add pecans and caramel as well and make it a turtle bread pudding.

    I did not call it turtle in the title though, because when I do I always get plenty of questions as to what turtle is or why I am putting an animal product that sounds like it doesn’t fit in my recipe in there (man actual turtle bread pudding sounds absolutely horrid lol). In case you have never heard of turtles, they were a caramel dipped in chocolate with pecans pressed into it (that looked like a turtle hence the name) but it now also refers to the chocolate, caramel and pecan combo.  So if I ever mention turtle this is what I mean and it is one of the best combos ever!

    Anyways, back to the point of this post, the bread pudding.  I started out with a good amount of that crusty sourdough, and then made a mixture of oat milk, flax eggs, maple syrup and cacao powder for a chocolaty batter.  It soaked into the bread beautifully, and I mixed it with pecans and poured it into the casserole super excited for the results!  It smelled amazing while baking like the best brownies or chocolate cake!

    It was lovely when I took it out of the oven, the top nice and crispy, and if you dove into it, a tender layer of pudding revealed!  I topped it off with some quick pecan caramel, more pecans and it was perfect!  It was one of the most delicious desserts I have had lately, the perfect sweet comfort food. I shared some with my Mom and she loved it so much, she wanted me to save some extra for her for the next day.  If you are a chocolate fan, and you have some stale bread on hand, definitely give this a try! Also, since this is technically my first post of the new year, HAPPY NEW YEAR EVERYONE!  Lets hope 2021 is an amazing year and certainly less crazy than the last. Wishing you all the best, and happiness!

    Vegan Chocolate Caramel Pecan Bread Pudding 

    Serves 4-6

    Ingredients:

    Bread Pudding:

    • 2 Tbsp ground flax seed, mixed with 6 Tbsp filtered water
    • 1 3/4 cups oat milk (or your favorite plant based milk)
    • 1/4 cup maple syrup
    • 1/4 cup unsweetened cacao powder
    • 1/4 tsp sea salt
    • 1 tsp pure vanilla extract
    • 6 cups lightly packed cubed sourdough bread
    • 1/2 cup chopped chocolate or chocolate chips
    • 1/2 cup chopped toasted pecans
    • 2 Tbsp maple sugar (or coconut sugar)


    Caramel:

    • 1/2 cup pecan butter, cashew butter or almond butter
    • 1/4 cup maple syrup
    • 2-3 Tbsp filtered water, or as needed
    • 1 tsp pure vanilla extract
    • 1/8 tsp sea salt


    Instructions:

    1. Preheat the oven to 350F degrees, and oil two 1 quart baking dishes (or see bottom of post for other baking dish options).
    2. In a bowl, whisk together the flax seeds and water mixture, oat milk, maple syrup, cacao powder, sea salt, and vanilla until well combined, then add the bread crumbs and toss to coat in the mixture.  Mix in chocolate.
    3. Transfer the mixture to the prepared baking dishes, (including the liquid, pour it over them). Sprinkle with the maple sugar.
    4. Place in the oven on a tray, and bake for about 25-30 minutes (see bottom for other pan sizes baking times), or until the top is starting to brown and the liquid has absorbed and baked into pudding at the bottom.
    5. Remove from oven.
    6. Whisk together the caramel sauce ingredients, drizzle over the pudding then let cool about 10 minutes and enjoy warm!

    For 6 small ramakins: bake 15 minutes

    For 1 8×8 inch square pan or 2 quart baking dish: bake 30-40 minutes

  • Gingerbread Granola

    Gingerbread Granola

    The Christmas music everywhere has begun!  Not that it is a bad thing, it gets me in the mood for the season, and I have a few songs that I really like.  But then there are the over-played ones with 5 different versions of the same song that I hear over and over on the satellite radio at work many times a day that get a bit old.  When I am at home though, I create a playlist of the good ones to listen to while doing things like holiday baking or present making!  Now that Thanksgiving is over, I am craving more Christmasy flavors like gingerbread. I will definitely be baking some cookies soon, but I decided to make gingerbread granola last week! I like to keep granola on hand at all times in my pantry for when the snack craving hits.  My favorite are those made with aromatic spices, like this one!

    For the base, I always like to use a combination of oats and coconut to start, because the coconut gives the granola a nice sweetness along with the crunchy oats.  I added 5 different types of nuts to this one, because at Christmas when I was little, we always had a bowl of nuts in the shell on the counter, and a nutcracker so we could enjoy them.  So a variety like this makes me think of Christmas time and I thought it fit in my Christmasy gingerbread granola.

    To coat the mixture I used a combination of nut butter, apple sauce, maple syrup, molasses and spices.  Yes, that is right, no oil.  I used to think that you could not get crunchy granola without oil but I was totally wrong and now I usually use either apple sauce, pumpkin or sweet potato puree, or banana in its place with great results.  Once you bake it, it gets nice and crispy! It smelled sooo good while baking, like a batch of delicious cookies!

    I could not wait to try it!  But first I added in some dried cranberries for color.  It was sooo good!  It was crunchy and aromatic with the scent of Christmas cookies!  I could not stop sampling it as I walked by, be warned this stuff is addictive and may not last long in your home!  If you are a granola fan, definitely give this a try!  If you always buy store bought especially give it a try, because once you make your own you will never go back!

    Vegan Gingerbread Granola
    Makes 6 cups

    Ingredients:

    • 3 cups organic gluten free old fashioned rolled oats
    • 1 cup raw pecans
    • 1 cup raw walnuts
    • 1/2 cup raw almonds
    • 1/2 cup pistachios
    • 1 cups finely shredded, dried unsweetened coconut
    • 1/2 cup organic apple sauce
    • 1/4 cup maple syrup
    • 1/2 cup pecan butter or almond butter
    • 2 Tbsp molasses
    • 1 tsp cinnamon
    • 1 tsp ginger
    • 1/2 tsp cloves
    • 1/4 tsp nutmeg
    • 1/2 tsp sea salt
    • 1 tsp pure vanilla extract
    • 1 cup dried cranberries


    Instructions:

    1. Line a large baking sheet with non-stick foil, and spray with cooking spray.
    2. Preheat the oven to 350F and set rack at the medium position
    3. In a large bowl, combine oats, nuts, and coconut, and set aside.
    4. In another bowl, whisk together apple sauce, maple syrup, nut butter, molasses, spices, sea salt, and vanilla extract until well combined, then pour over oat mixture and toss to coat until completely blended.
    5. Pour out onto prepared baking sheet, and spread out evenly.
    6. Bake for 35 minutes, stirring about every 10 minutes or so until the granola is evenly browned. Remove from oven and let cool.
    7. Stir in cranberries, and enjoy!

    Keeps for up to 1 month in the refrigerator in an airtight bag, or at cooler room temperature for up to 2 weeks.

  • Vegan Blueberry Sweet Rolls

    Vegan Blueberry Sweet Rolls


    We are at the tail end of summer, so I am enjoying all of the berry deliciousness that I can!  Which includes desserts, and other creations besides just eating them plain.  Like these vegan blueberry rolls! When we visited Eric’s Dad in July he sent us home with lots of his home made jam, and I had something specific in mind for the blueberries.  These rolls!  I love sweet rolls of any kind.  Of course everyone thinks to make the caramel rolls or cinnamon rolls but I like to switch it up and use other fillings sometimes.  I have been wanting to make blueberry for a while because they just sounded good. 

    It is funny, back in the day the thought of making sweet rolls intimidated me. Or just yeast breads in general, because they are a little more work than a quick bread and whatnot. But I soon got used to them and actually enjoy making them now!  They are so worth the effort, especially sweet rolls like these babies. I made my dough with a little coconut milk to give it a bit of richness and sweetened it with maple sugar since it goes so well with blueberries. The dough came together and kneaded up nicely!  

    I used that blueberry jam from Eric’s Dad along with some fresh blueberries and they were so pretty with the colorful filling even before baking! They smelled so good I could not wait to try one when they came out of the oven. But I had to put a glaze on them first, because what is a sweet roll without a little glaze?  At least I think it is important. So I made a sweet blueberry glaze with Dastony coconut butter and raw cashew butter from Raw Guru.  It is a cream cheese style glaze, and you would swear it has dairy because it tastes rich and creamy. 

    These rolls turned out sooo good!  I love gooey sweet blueberry jam inside of a soft, warm sweet roll!  These are a nice switch up from cinnamon or caramel rolls when it is blueberry season. I am going to have to try making them with other fruit as well. Maybe some apple ones, since apple season is now here! Anyways, if you are looking for a sweet weekend treat, why not whip up a batch of these blueberry rolls! 

    Vegan Blueberry Sweet Rolls

    Makes 12

    Dough:

    • 1/2 cup warm water ( 105-110F degrees)
    • 1 packet active dry yeast (1/4 oz)
    • 3/4 cup warm coconut milk (I warmed it up on the stove)
    • 1/4 cup maple sugar or coconut sugar
    • 1 tsp pure vanilla extract
    • 1 tsp sea salt
    • 1 Tbsp ground flax seed, mixed with 3 Tbsp filtered water
    • 3 1/2 cups whole wheat pastry flour or as needed


    Filling:

    • 3/4 cup blueberry jam
    • 1 cup fresh (or frozen, thawed and drained) blueberries 


    Glaze:


    Instructions:

    1. To make the dough, combine the yeast and the warm water (about 110F degrees, you don’t want to kill the yeast) plus a pinch of maple sugar and stir to dissolve. Let sit 5-10 minutes until it starts to foam.
    2. In a large bowl, combine the coconut milk, maple sugar, vanilla extract, salt and flax mixture and mix together to combine.
    3. Add the yeast, and 2 cups of flour and mix to combine.
    4. Add the remaining 1 1/2 cups of flour and mix until you have a smooth dough (you may need to use your hands at the end to mix it in).
    5. Turn out onto a lightly floured surface, and knead for 5-10 minutes until smooth and supple. If it is too sticky add a little flour but you want to add as little as possible because if you add too much the dough gets tough.
    6. Place in an oiled bowl, and cover. Let rise for about 1 1/2 hours until doubled in size.
    7. When it is ready, turn out onto the counter or a board and roll out into a 9×15 inch rectangle.
    8. Mix together the filling ingredients and spread it evenly over the dough.
    9. Roll it up, then cut the roll into 12 pieces.
    10. Oil an 8×8 inch square baking pan, and place them in the pan.
    11. Cover and let rise for 45 minutes.
    12. Meanwhile heat the oven to 350F degrees.
    13. When the rolls have risen for 45 minutes, place them in the preheated oven and bake for about 30 minutes until starting to brown and cooked through.
    14. Remove from the oven and let cool 15 minutes.
    15. Whisk the glaze ingredients together, adding a little bit more coconut milk if it seems too thick.
    16. Pour the glaze over the rolls, and enjoy!

    These keep covered at room temperature for up to 3 days, or refrigerated for up to 1 week. 

  • Vegan Blueberry Vanilla Waffles

    Vegan Blueberry Vanilla Waffles

    Last month when Eric and I visited his Dad in Michigan we went blueberry picking and ended up with loads of berries to bring home.  I ate a bunch right away, but froze about half for using later, since I always like to have frozen fruit on hand for recipes.  I have been wanting to make waffles with some of them ever since I got back because blueberry waffles used to be something I enjoyed when I was younger. Even if they were the frozen kind.  I figured I could make a way better version now!

    I finally got around to it on my day off earlier this week.  Waffles just sounded good. The funny thing is, I never actually make them for breakfast, usually just for a snack, or dessert, or even dinner. My Mom used to sometimes make pancakes or waffles for dinner when I was little and I always thought that was awesome. So I made these in the late afternoon to enjoy.  I wasn’t exactly sure how they would come out since I used frozen and thawed berries, but they were a success!

    I made a vanilla scented waffle batter and used coconut milk since it tends to be a little richer to help the waffles get that nice crunch on the outside. Plus a touch of avocado oil to give them that buttery flavor. If you wanted to make them oil free, you could just leave it out, but then use full fat coconut milk (in its liquid state mixed well) instead of the light. Also, these are not gluten free, but you can make them gluten free if you like, using Bob’s Red Mill Gluten Free AP Baking Flour instead of the whole wheat pastry. I have tested this brand in waffles and know it works well (if you have a favorite brand you know works though, go for it with that one).

    The batter tasted like blueberry muffin batter. Took me back to my childhood when my Dad used to make blueberry muffins on weekend mornings and I always wanted to lick the bowl.  These smelled amazing while cooking, and I could not wait to try them. The finished waffles actually tasted like blueberry muffins, and I served them with additional blueberries because one can never have too many when they are really delicious ones!  If you are in a waffle making sort of mood, give these a try!

    Vegan Blueberry Vanilla Waffles

    makes 8 medium sized belgian waffles

    Ingredients:

    Batter:

    • 2 cups organic whole wheat pastry flour
    • 1/4 cup maple sugar or coconut sugar
    • 1/2 tsp baking soda
    • 1 tsp baking powder
    • 1/2 tsp sea salt
    • 1 tsp pure vanilla extract
    • 3 Tbsp ground flax seed, whisked together with 1/2 cup filtered water
    • 2 Tbsp avocado oil or another neutral oil
    • 2 cups light coconut milk
    • 1 cup fresh blueberries (or frozen, thawed and drained well) plus more for serving


    Instructions:

    1. To make the waffles, whisk together the flour, sugar, baking soda, baking powder and sea salt in a large bowl.
    2. Then whisk in the flax mixture, oil, and coconut milk together until smooth. Fold in the blueberries.
    3. Heat your oven to 150F degrees and oil, and pre-heat waffle iron. Once it is heated, pour about 1/3 cup batter onto the waffle iron or until the iron is just covered (but not so much that it will ooze out) and close it.  Cook according to waffle iron package directions.  Remove from the waffle maker and keep warm in the oven while you make the others.  If you have a waffle maker the size of mine (regular belgian waffles), you may have more than 8 waffles.
    4. Serve the waffles with additional fresh blueberries!


  • Vegan Vanilla and Chocolate Pancake Cereal 

    Vegan Vanilla and Chocolate Pancake Cereal 

    I don’t know about you, but I am always drooling over other people’s food photos on Instagram.  One of the latest crazes that caught my eye was the pancake cereal I have seen a few people make.  I love pancakes, so it looked like it was right up my alley!  I was also kind of in the mood for doing something that would keep me occupied for a while on my day off, so it was perfect!  They are a bit tedious to make, but it is so worth it, trust me on this one!  Everyone else I have seen just made classic pancakes, but I thought they would be even more amazing if I did both chocolate and vanilla!  Because why not?!

    I am one of those people that likes to go the extra mile with things most of the time. I used my classic pancake batter as the base.  When I made normal sized pancakes they get nice and fluffy, so I thought it would work well here.  Plus it is just sweet enough, and tastes like the pancakes I loved growing up, but without all of the eggs and milk since these are vegan.  The batter is super simple to make, you just whisk it all together and Ta Da!! You are ready to make some!

    I mixed cacao powder into half of the batter to create the chocolate flavored ones.  Then came the tedious part.  Since these are mini pancakes and I don’t have some sort of contraption to distribute dots onto the pan, I placed the batter in a pastry bad, and piped it onto the griddle.  They cook up nice and fast! At first tried to flip a whole bunch with one giant spatula, which worked but they stuck together a bit.  So I used an offset spatula I normally use for cake decorating to flip a few at a time and it was perfect!

    They turned out so cute!  This recipe makes about 4 servings worth.  You could put them in a bowl and pour maple syrup over them, or you could go cereal style like I did and go for the oat milk.  Or of course feel free to add your favorite things to them, like say chocolate chips or berries, or even whipped cream maybe?  Why not?  The possibilities are endless!  The next time you have a little time on your hands and want to make something fun, give these a try!  They are sooo good!

    Vegan Vanilla and Chocolate Pancake Cereal 
    Makes 4 servings

    Ingredients:

    • 1 1/2 cups organic whole wheat pastry flour
    • 2 tsp baking powder
    • 1 1/2 cups oatmilk
    • 1/4 cup almond butter
    • 2 tsp pure vanilla extract
    • 1/4 tsp sea salt
    • 3 Tbsp maple syrup
    • 2 Tbsp cacao powder


    Directions:

    1. In a food processor, combine all pancake ingredients (except the cacao powder) and process until just blended (alternatively you can whisk it if you don’t have a food processor), divide between 2 bowls, and whisk the cacao powder into one of them.
    2. Place the vanilla batter into a pastry bag, and the chocolate batter into a separate one (or if you don’t have pastry bags, ziplock bags with the corner cut off with work well too).
    3. To cook pancakes, heat a large ceramic non-stick* pan over medium heat. Once hot, pipe 1/2 inch round pancakes onto the pan (I did about 15 each time), and let cook until the bottoms are done for about 2-3 minutes on the first side until set and starting to brown, then flip with a small offset spatula (or a spatula if you don’t mind them sticking together a little), and cook another minute or so on the other side.
    4. When cooked, place on a plate and keep warm in the oven while you repeat the process with the remaining pancakes and chocolate batter.
    5. To serve, place in a bowl and add your favorite add ins!  I poured oat milk over them!

    *Notes:

    If you want these to be gluten free, use Bob’s Red Mill all purpose gluten free baking flour in place of the whole wheat pastry. I have tested this one and know it works well.

    If you do not own a non-stick pan, you may need to lightly oil your pan to prevent sticking, if you do not mind these not being oil free.

  • Vegan Peanut Butter Chocolate Banana Granola

    Vegan Peanut Butter Chocolate Banana Granola

    I made a chocolate peanut butter roll cake last week, and it was so good that I am keeping the chocolate peanut butter theme going. Not with a dessert this time though, with a delicious snack!  My last batch of granola was running low, and it is something that I need to keep in my pantry at all times for when the craving hits!  So it was time to make a new batch. I did not want to have to buy ingredients to make, it so I used what I had on hand. I always of course have chocolate and peanut butter, and I decided to add banana to the mix, because why not?  It is such a heavenly combo!

    I have been making granola for about 15 years, ever since I discovered that home made was healthier than store bought, as well as fun because I can make my own flavors.  It is really easy to make as well!  I am a huge oat lover, so I always have plenty on hand to make stuff like this. I add coconut to the base as well to give it sweetness as well as extra crunch!  But of course if you are not a fan, you could just use additional oats.

    Instead of using oil to coat this granola like traditional granola, I prefer to use a nut butter and pureed fruit (or vegetable) mixture. In this case it was banana, but I have used pumpkin, apple and sweet potato purees before as well with good results! You wouldn’t think that it would get as crispy, because sometimes when you sub them for oil in things like cookies they are soft, but this granola crisps up nicely!  I sweetened it with maple syrup this time.

    It smelled so good while baking!  Like chocolate chip peanut butter oatmeal cookies, which were one of my favorites growing up.  I added chocolate chips as well once it had finished baking (since they melt).  It was sooo good! This is one of those things that you can’t stop sampling while it is cooling on the stove. Or at least I can’t. It is so munchable!  If you are a granola fan, definitely give this a try!

    Vegan Peanut Butter Chocolate Banana Granola
    Makes 6 cups

    Ingredients:

    • 3 cups organic gluten free old fashioned rolled oats
    • 1 1/2 cups peanuts
    • 1 cup pecans
    • 1 cups finely shredded, dried unsweetened coconut
    • 1/2 cup mashed bananas
    • 1/4 cup maple syrup
    • 1/2 cup peanut butter
    • 3 Tbsp cacao powder
    • 1/2 tsp sea salt
    • 1 tsp pure vanilla extract
    • 1 cup vegan dark chocolate chips


    Instructions:

    1. Line a large baking sheet with non-stick foil, and spray with cooking spray.
    2. Preheat the oven to 350F and set rack at the medium position
    3. In a large bowl, combine oats, nuts, and coconut, and set aside.
    4. In another bowl, whisk together banana, maple syrup, peanut butter, cacao powder, sea salt, and vanilla extract until well combined, then pour over oat mixture and toss to coat until completely blended.
    5. Pour out onto prepared baking sheet, and spread out evenly.
    6. Bake for 35 minutes, stirring about every 10 minutes or so until the granola is evenly browned. Remove from oven and let cool.
    7. Stir in chocolate chips.
    8. Enjoy!
  • Vegan Poppy Seed Rolls

    Vegan Poppy Seed Rolls


    Sweet rolls are for lazy weekend mornings, and days off.  So I decided to make some on my day off last Monday.  I know a lot of you may be feeling like there are a lot more of them lately with everything being shut down, so why not make some sweet rolls?  They always cheer me up. Maybe that is because they were considered a treat when I was little or reserved for special occasions. My Mom would make them on weekends occasionally and I loved it, or we would pick some up on a road trip or enjoy them on a holiday.  They were usually cinnamon rolls, orange coconut rolls, or caramel rolls and I love all of those but sometimes now I like to be creative and make new varieties. 

    Like the poppy seed ones I made last weekend.  Raw Guru recently sent me some of their Dastony poppy seed butter, and I thought it would make the perfect filling for rolls.  I have seen lots of lovely poppy seed bread on social media including swirled varieties, and that is what gave me the idea since it sounded so good. Plus that lovely black swirl would make them really pretty! 

    I used my classic roll dough that is the base for my caramel and cinnamon rolls, and although it uses yeast, it is easy to manage.  It kneads up nicely and rolls nicely.  I love kneading dough because it is a great stress reliever!  Too bad I don’t make bread and yeast recipes as often as I used to.  For the filling I took the poppy seed butter and mixed it with a bit of maple syrup for sweetness plus some whole poppy seeds for a little crunch.  So it was spreadable and crunchy. 

    The rolls baked up beautifully, and when they had cooled a bit from the oven, I added a cream cheese style glaze.  They were sooo good!  Like a poppy seed swirled bread but in sweet roll form!  If you are looking for something delicious and fun to make while you are stuck inside, definitely give these a try! 

    Vegan Poppy Seed Rolls

    Makes 12

    Dough:

    • 1/4 oz active dry yeast
    • 1/2 cup warm water ( 105-110F degrees)
    • 3/4 cup warm coconut milk (I warmed it up on the stove)
    • 1/4 cup maple sugar or coconut sugar
    • 1 tsp pure vanilla extract
    • 1 tsp sea salt
    • 1 Tbsp ground flax seed, mixed with 3 Tbsp filtered water
    • 3 1/2 cups whole wheat pastry flour or as needed


    Filling:


    Glaze:

    • 1/4 cup raw cashew butter
    • 1/4 cup coconut butter (not oil)
    • 1/4 cup coconut milk or as needed
    • 1 tsp pure vanilla extract
    • 1/2 tsp lemon juice
    • 1/4 tsp sea salt


    Instructions:

    1. To make the dough, combine the yeast and the warm water (about 110F degrees, you don’t want to kill the yeast) plus a pinch of maple sugar and stir to dissolve. Let sit 5-10 minutes until it starts to foam.
    2. In a large bowl, combine the coconut milk, maple sugar, vanilla extract, salt and flax mixture and mix together to combine.
    3. Add the yeast, and 2 cups of flour and mix to combine.
    4. Add the remaining 1 1/2 cups of flour and mix until you have a smooth dough (you may need to use your hands at the end to mix it in).
    5. Turn out onto a lightly floured surface, and knead for 5-10 minutes until smooth and supple. If it is too sticky add a little flour but you want to add as little as possible because if you add too much the dough gets tough.
    6. Place in an oiled bowl, and cover. Let rise for about 1 1/2 hours until doubled in size.
    7. When it is ready, turn out onto the counter or a board and roll out into a 9×15 inch rectangle.
    8. Mix together the filling ingredients and spread it evenly over the dough.
    9. Roll it up, then cut the roll into 12 pieces.
    10. Oil an 8×8 inch square baking pan, and place them in the pan.
    11. Cover and let rise for 45 minutes.
    12. Meanwhile heat the oven to 350F degrees.
    13. When the rolls have risen for 45 minutes, place them in the preheated oven and bake for about 30 minutes until starting to brown and cooked through.
    14. Remove from the oven and let cool 15 minutes.
    15. Whisk the glaze ingredients together, adding a little bit more coconut milk if it seems too thick.
    16. Pour the glaze over the rolls, and enjoy!

    These keep covered at room temperature for up to 3 days, or refrigerated for up to 1 week.

    *If you don’t have poppy seed butter, you can blend 1/2 cup poppy seeds with 1/4 cup raw cashew butter in a blender until combined and poppy seeds are breaking down to substitute for it. 

  • Vegan Chocolate Hazelnut Pop Tarts

    Vegan Chocolate Hazelnut Pop Tarts


    I loved Nutella as a kid.  I remember thinking it was pretty awesome that I could have chocolate on toast for breakfast (because it pretty much just tasted like chocolate with not much nut flavor since it is so sugary).  It is pretty much dessert after all.  My Mom wouldn’t let me eat it all the time for that reason, and so it felt like a treat.  I still love the chocolate hazelnut combination and even make my own nutella sometimes, but it is definitely a healthier version with hazelnuts as the first ingredient and not sugar.  

    There are a few vegan nutella brands that I like too, like the Rawmio Chocolate Hazelnut Spread and CBD Chocolate Hazelnut Butter from Raw Guru.   They are delicious just with a spoon or in recipes.  They recently sent me some of the CBD Chocolate Hazelnut Butter and I decided to make some pop tarts with it.  Pop tarts were another thing I loved growing up, and I enjoy making home made ones.  They are way better than the store bought versions ever were, more like mini hand pies because the crust actually tastes good. I thought nutella ones would be heavenly!

    So I made my classic flakey coconut oil pie crust for the outside, and used that hazelnut butter for the filling.  They actually were pretty quick and easy to make, since I already had the hazelnut butter.  But if you would rather make your own instead of using store bought I have included instructions at the bottom for that as well.  Don’t have hazelnut butter?  Use your favorite nut butter, it will still be amazing!  

    These smelled amazing while baking.  Like chocolate pie! I could not wait to try them!  But I let them cool down first, and then added a dark chocolate glaze.  Since pop tarts are just so much better with a glaze.  They were totally heavenly!  My 8 year old self would have loved them!  If you are a nutella fan, give these a try! 

    Vegan Chocolate Hazelnut Pop Tarts

    Makes 8

    Crust:

    • 2 1/2 cups organic whole wheat pastry flour
    • 1/4 cup coconut sugar
    • 1/2 tsp sea salt
    • 3/4 cup coconut oil in its solid state
    • about 6-7 Tbsp cold water (or as needed)


    Filling:


    Glaze:

    • 1/2 cup dark chocolate chips


    Instructions:

    1. To make the crust, in a large bowl, mix together flour, sugar, and sea salt. Cut in coconut oil with a pastry blender or 2 knives until it is in pea sized pieces. Mix in just enough water to create a smooth dough that holds together but isn’t too sticky. Add more water if needed, and knead slightly until a smooth dough is created.
    2. Roll out into a large rectangle and cut into 16 identical rectangles.  Chill if too soft before assembling.  You want the dough a little pliable, but not so warm that it will break. Preheat oven to 375F degrees. Put the dough in the refrigerator for a few minutes if it seems too soft. 
    3. To assemble the pop tarts, spread about 2 Tbsp of the hazelnut butter on half of the dough rectangles (leaving a boarder so you can attach the dough at the sides). Cover with the remaining pieces of dough (I used a small spatula to carefully move them), pressing the edges and crimping with a fork or the edge of something with a flat edge, like a spatula. Bake for about 30 minutes until the crusts are starting to brown lightly. Remove from oven and let cool on a wire rack until warm.
    4. Melt the dark chocolate for the glaze in the top of a double boiler. Spoon some of the dark chocolate over each pop tart, and smooth it out to cover the top. Let harden before serving.


    *If you would prefer to make your own filling, you can mix together 1 cup hazelnut butter with 1/4 cup unsweetened cocoa powder and 1/4 cup maple syrup (or to taste) and 1/4 tsp sea salt.


  • Vegan Maple Pecan French Toast Casserole 

    Vegan Maple Pecan French Toast Casserole 

    I always loved french toast growing up.  Even though it is something that is supposed to be made with leftover stale dry bread, I always thought it was special because I didn’t get to have it often. Yet, we always had the ingredients on hand. I thought that when I went vegan it would be harder to make delicious french toast, but I was wrong.  It is actually easy!  Especially if you go the route I did, and make it in a nice big casserole fit for a brunch feast!  Plus you don’t have all of the raw eggs and milk in it (which I am actually kind of grossed out by now, since I have been vegan for a while).

    I had a slightly stale good quality loaf of sourdough bread last week, and I decided that a fabulous french toast casserole sounded like the perfect way to use it. I could have gone the old fashioned route with french toast and made slices to cook individually, but since Easter is coming up, and Easter brunch is a big thing I thought why not develop a recipe that could feed more than a few people as a side. So I cubed up the bread and got to work on the soak for it. Traditionally it would have eggs, milk and a little sugar, but instead of the eggs, I used flax eggs (1 Tbsp ground flax seed plus 3 Tbsp filtered water per egg), oat milk and maple syrup instead.

    I let the bread soak in the mixture for a little bit and tasted a chunk and it had good flavor even before it was baked so I could not wait to try it!  I mixed in some pecans as well for texture and crunch and since they go so well with maple syrup and french toast. I lastly sprinkled it with some maple sugar so it would get nice and crispy on top.  It smelled amazing while baking.  The aroma of sweet maple filling the air!  Kind of like caramel rolls (because I like to use maple in mine).

    I could not wait to try it!  Once it cooled down a little I had to dive in.  It was totally crave worthy!  I haven’t had anything like this in years, and I have always wanted to make a french toast casserole. It was sweet, but just the right amount of sweet with a maple flavor throughout, with a tender soft texture at the bottom and crunch on top!  The crunchy pecans were a nice touch. If you are looking for a dish to share for Easter, this would be perfect!  Or just for a weekend treat, because you should definitely not wait to make this.

    Vegan Maple Pecan French Toast Casserole  

    Serves 4-6

    Ingredients:

    Casserole:

    • 2 Tbsp ground flax seed, mixed with 6 Tbsp filtered water
    • 1 3/4 cups oat milk (or your favorite plant based milk)
    • 1/4 cup maple syrup
    • 1/4 tsp sea salt
    • 1 tsp pure vanilla extract
    • 6 cups lightly packed cubed sourdough bread
    • 3/4 cup chopped pecans
    • 2 Tbsp maple sugar (or coconut sugar)


    Caramel:

    • 1/4 cup pecan butter (cashew or almond would also work)
    • 1/4 cup maple syrup
    • 1/4 tsp sea salt


    Instructions:

    1. Preheat the oven to 350F degrees, and oil a 1 1/2 or 2 quart baking dish (see bottom for other options).
    2. In a bowl, whisk together the flax mixture, oat milk, maple syrup, sea salt, and vanilla until well combined, then add the bread cubes and toss to coat in the mixture.  Toss the pecans with the bread.
    3. Transfer the mixture to the prepared baking dish, (including the liquid, pour it over it). Sprinkle with the maple sugar.
    4. Place in the oven on a tray, and bake for about 25-30 minutes (see bottom for other pan sizes baking times), or until the top is starting to brown and the liquid has absorbed and baked into pudding at the bottom.
    5. Remove from oven.
    6. Let cool about 10 minutes and enjoy warm!


    For 6 small ramakins: bake 15 minutes

    For 1 8×8 inch square pan or 2 quart baking dish: bake 30-40 minutes

  • Grandma’s Banana Bread Veganized

    Grandma’s Banana Bread Veganized

    My Mom made the best banana bread when I was little. It was my Great Grandma’s recipe, passed down to my Grandma, then to my Mom.  Written out on a recipe card, from a time long before we could look up recipes online. I have tried many different kinds, we often had some at church gatherings back in the day, or neighbors brought some over, or they had it at potlucks and whatnot, but my Great Grandma’s recipe was the best. It was moist, and soft but not too dense (some banana bread gets a bit too dense for my tastes).  She always made it with walnuts for a little crunch, then my Mom modified that to add chocolate chips, which I always loved growing up.

    The thing I love about this bread is it is so easy to make too.  Surprisingly I have never tried to veganize this recipe, but I was thinking about making some banana bread last weekend and I thought, why not?!  I have her old recipe card, and I veganize old recipes from back in the day all the time.  It was about time after all. I missed that banana bread recipe.

    It was actually really easy to veganize. Eggs, milk, and butter would need to be substituted.  I swapped out the eggs for flax eggs which are usually my go to egg replacer. I always have ground flax seed on hand, since I use some in my oatmeal.  To make a flax egg, you just mix together 1 Tbsp ground flax seed and 3 Tbsp filtered water and allow to gel 15 minutes.  It works perfect in recipes like this or cookies.  I used oatmilk instead of the sour milk in the original recipe, and added a little cider vinegar to this one (for the sour) and it worked perfect!  Instead of the butter I used avocado oil, because it has a buttery flavor.

    I added the walnuts and the chocolate chips, because I used to love them both in the recipe.  I know some people don’t like nuts, so they could leave them out but I enjoy some texture. The bread smelled amazing while baking and I could not wait to try it!  It rose nicely in the oven and it was beautiful!  Once it had cooled and we were able to dive in, it was super delicious!  It tasted just like the bread I grew up with, and I am sure Grandma would be proud if she were still here to try it.  She always enjoyed when I shared my baked goods with her when she was not able to bake anymore.  If you are looking for a really good classic banana bread recipe, give this one a try!

    Grandma’s Banana Bread Veganized

    Makes 1 loaf

    Ingredients:

    • 1 cup maple sugar*
    • 1 Tbsp ground flax seed mixed with 3 Tbsp filtered water (allowed to sit 15 min. before using)
    • 1/2 cup oat milk*
    • 2/3 cup mashed ripe bananas
    • 1/4 cup avocado oil*
    • 1 tsp pure vanilla extract
    • 1 1/2 cups organic whole wheat pastry flour*
    • 1 tsp baking soda
    • 2 tsp cider vinegar
    • 1/2 cup chopped walnuts
    • 1/2 cup vegan dark chocolate chips


    Instructions:

    1. Preheat the oven to 350F degrees, and oil an 8×4 inch loaf pan.
    2. In a large bowl, whisk together the sugar, flax mixture, oat milk, bananas, oil, and vanilla until smooth.
    3. Whisk in the flour and baking soda, then the vinegar until combined.
    4. Fold in the walnuts and dark chocolate chips until evenly distributed.
    5. Pour the batter into the prepared pan, place in the oven and bake for about 1 hour until a toothpick inserted into the center comes out almost clean with a few crumbs attached.
    6. Remove from the oven and let cool before removing from the pan.


    Bread keeps at room temperature for up to 3 days in an airtight container or wrapped, in the refrigerator for up to 1 week, or frozen for up to 4 months.

    *Notes:

    Instead of the maple sugar, you could also use coconut sugar or granulated sugar if you prefer those.

    You can use any type of unsweetened plant based milk in this recipe, such as soy, almond or coconut instead of the oat if that is what you have on hand.

    If you would like to make this oil free, use 1/4 cup almond butter ( or your favorite nut or seed butter) instead of the oil.

    If you would like to make a gluten free version of this bread, swap the whole wheat flour for Bob’s Red Mill gluten free all purpose baking flour (I have tried this brand and know it works well for recipes like this).

  • Vegan Banana Bread Granola

    Vegan Banana Bread Granola

    Store bought granola has nothing on home made.  It is so much fun picking your own flavors and ingredients.  Although I have my favorites, I try to switch it up a lot according to what I have on hand and try new things.  I always keep a bag of granola in my pantry at all times, so I end up making it a lot.  Last week, I decided to make a banana bread granola.  What I mean by banana bread, is the flavors and ingredients that would be in a good banana bread.  Because banana bread is kind of breakfasty and snacky like granola.  Also I just love all of the flavors in it.

    I had all of the ingredients on hand so it was perfect!  I always have a big stock pile of oats because I eat them for breakfast every day anyhow.  I added in walnuts and almonds for the nuts.  Walnuts are traditional in banana bread, at least in my family and I just wanted a variety so I went with the almonds. I also added in coconut for extra sweetness and crunch.  I like a hint of cinnamon and nutmeg in my banana bread as well, because that is what my Mom and Grandma used to add to theirs.

    For the coating on the granola, I went oil free, replacing the banana with oil.  I have done this the last few times I made granola (replacing the oil with fruit or veggies).  I used pumpkin and sweet potato before and it worked great so I figured why not banana?  It is a similar texture.  You wouldn’t think that it would get crispy but it totally does!  And, you have an oil free crunchy snack!  I figure there is enough richness from the nuts and coconut already.  I sweetened it with maple syrup and added in a bit of almond butter (also in place of some of the oil) as well and it was the perfect coating.

    It smelled so good while baking!  Just like banana bread!  I could not wait to try it!  I did try some warm, and it was amazing but I had to wait for it to cool to add my final touch, the vegan dark chocolate chips!  My Mom always put chocolate chips in her banana bread so they were a must for this!  It was sooo good! Crunchy, sweet, a touch of salty, and so addictive.  I could not stop sampling it. Instead of buying granola at the store next time, whip up a batch of your own, it is so worth it!

    Vegan Banana Bread Granola
    Makes 6 cups

    Ingredients:

    • 3 cups organic gluten free old fashioned rolled oats
    • 1 1/2 cups raw walnuts
    • 1 cup raw almonds
    • 1 cups finely shredded, dried unsweetened coconut
    • 1/2 cup mashed bananas
    • 1/4 cup maple syrup
    • 1/2 cup pecan butter or almond butter
    • 1 tsp cinnamon
    • 1/4 tsp nutmeg
    • 1/2 tsp sea salt
    • 1 tsp pure vanilla extract
    • 1 cup vegan dark chocolate chips


    Instructions:

    1. Line a large baking sheet with non-stick foil, and spray with cooking spray.
    2. Preheat the oven to 350F and set rack at the medium position
    3. In a large bowl, combine oats, nuts, and coconut, and set aside.
    4. In another bowl, whisk together banana, maple syrup, nut butter, spices, sea salt, and vanilla extract until well combined, then pour over oat mixture and toss to coat until completely blended.
    5. Pour out onto prepared baking sheet, and spread out evenly.
    6. Bake for 35 minutes, stirring about every 10 minutes or so until the granola is evenly browned. Remove from oven and let cool.
    7. Stir in chocolate chips.
    8. Enjoy!
  • Vegan Raspberry Chocolate Chunk Bread Pudding

    Vegan Raspberry Chocolate Chunk Bread Pudding

    When I have a lovely loaf of crusty bread, there are two things I love doing most with it.  Enjoying it with soup so I can dunk it in and soak up the goodness, and making bread pudding.  I usually end up doing both if it is a large loaf and I have enough.  I had a lovely loaf of sourdough bread that was getting a little dry since I had it for a few days, so I decided it was perfect for bread pudding.  Eric loves it too, so win win for both of us if I make a batch and share.  His Dad recently sent us a bunch of his home made jam, so I thought I would make a raspberry swirled bread pudding.  Back in the day my Mom and I used to go to a local restaurant that had the best raspberry bread pudding.  It was totally heavenly served warm with cool whipped cream and a sweet sauce.  I have always wanted to recreate it and now was my chance!

    It is weird, I never actually tried making home made bread pudding until this year.  Even though I have made home made bread a lot.  I was missing out!  It is so easy and so good!  In fact, the whole process of making this is done in less than 45 minutes. You could use whatever bread you like of course but it helps if it is a bit dry to soak up the batter.  I like a crusty bread also so that it holds its share somewhat and the top gets a little bit crispy.  For this one I used an organic wheat sourdough.

    For the batter I used oat milk because it is what I have on hand for my drinks like coffee and matcha lattes, but it works perfect because it is pretty neutral in flavor.  I mixed it with flax eggs, and maple and vanilla to sweeten and it was just right.  The bread soaked it up beautifully!  I put plenty of raspberry jam in the bread pudding, but I also added chocolate chunks because why not?!  Chocolate and raspberries are a match made in heaven after all!

    It smelled so good while baking!  I could not wait to try it.  It baked up beautifully into a french toast like consistency, crunchy on top and light and fluffy inside.  The gooey dark chocolate and sweet raspberries made it over the top amazing!  This would be perfect for Valentine’s Day!  Eric loved it too, the leftovers were gone in no time!  If you have some crusty bread that has sat for a few days, this is the perfect thing to make with it!

    Vegan Raspberry Chocolate Chunk Bread Pudding 

    Serves 4-6

    Ingredients:

    Bread Pudding:

    • 2 Tbsp ground flax seed, mixed with 6 Tbsp filtered water
    • 1 3/4 cups oat milk (or your favorite plant based milk)
    • 1/4 cup maple syrup
    • 1/4 tsp sea salt
    • 1 tsp pure vanilla extract
    • 6 cups lightly packed cubed sourdough bread
    • 1/2 cup chopped chocolate or chocolate chips
    • 1 cup raspberry jam
    • 2 Tbsp maple sugar (or coconut sugar)


    Instructions:

    1. Preheat the oven to 350F degrees, and oil two 1 quart baking dishes (or see bottom of post for other baking dish options).
    2. In a bowl, whisk together the flax seeds and water mixture, oat milk, maple syrup, spices, sea salt, and vanilla until well combined, then add the bread crumbs and toss to coat in the mixture.  Mix in chocolate.
    3. Transfer half of the mixture to the prepared baking dishes, (including the liquid, pour it over them). Then spoon half the jam over them by the Tbsp.  Top with the remaining bread mixture, and more jam.  Sprinkle with the maple sugar.
    4. Place in the oven on a tray, and bake for about 25-30 minutes (see bottom for other pan sizes baking times), or until the top is starting to brown and the liquid has absorbed and baked into pudding at the bottom.
    5. Remove from oven.
    6. Let cool about 10 minutes and enjoy warm!

    For 6 small ramakins: bake 15 minutes

    For 1 8×8 inch square pan or 2 quart baking dish: bake 30-40 minutes

  • Vegan Peanut Butter and Jelly Sweet Rolls

    Vegan Peanut Butter and Jelly Sweet Rolls


    I have made classic caramel rolls, and cinnamon rolls but I thought I would make something a little different last weekend as far as rolls went because I am always open to trying new things when it comes to making recipes! I has some of Eric’s Dad’s home made jam and I thought about making some strawberries and cream rolls, but then I thought peanut butter and jelly rolls sounded even more amazing so that is what I made!  It was the perfect day to do so because it was in the single digits outside, so perfect baking weather to stay inside warm and cozy.

    A while back sweet rolls intimidated me because of the whole yeast and letting it rise factor. But once you get the hang of it, it is really quite easy and simple!  These do take a bit of time, but it is the perfect weekend project, and you can enjoy the fruits of your labor after!  There is nothing more satisfying than making your own really good treat like these rolls! For the base, I used whole wheat pastry flour because it is what I have on hand and it worked perfectly!  Could you use regular AP flour?  Yes, if you prefer a lighter roll, I just like the whole wheat.  I added a bit of peanut butter and vanilla to it plus a bit of maple sugar to sweeten and it was just right. 

    It kneaded up and rose nicely.  For the filling, I gave it a layer of peanut butter and jelly because  just adding the peanut butter to the dough wasn’t enough peanut butter flavor for me.  They smelled amazing while baking! Once they emerged from the oven and had a little time to cool, I made a quick peanut butter maple topping that tasted like peanut butter caramel and drizzled that over them. 

    They were sooo good!  Soft textured rolls just as sweet rolls should be with gooey peanut butter and jam inside and that sweet glaze was just the thing to top them off with!  Kind of like a PB and J in roll form.  If you are a big PB and J fan like me, definitely give these a try!

    Vegan Peanut Butter and Jelly Sweet Rolls

    Makes 12

    Dough:

    • 1/4 oz active dry yeast
    • 1/2 cup warm water ( 105-110F degrees)
    • 3/4 cup warm coconut milk (I warmed it up on the stove)
    • 1/4 cup peanut butter
    • 1/4 cup maple sugar or coconut sugar
    • 1 tsp sea salt
    • 1 Tbsp ground flax seed, mixed with 3 Tbsp filtered water
    • 3 3/4 cups whole wheat pastry flour or as needed


    Filling:

    • 3/4 cup peanut butter
    • 3/4 cup strawberry or raspberry jelly


    Topping:

    • 1/4 cup peanut butter
    • 1/4 cup maple syrup
    • 1/8 tsp sea salt


    Instructions:

    1. To make the dough, combine the yeast and the warm water plus a pinch of maple sugar and stir to dissolve. Let sit 5-10 minutes until it starts to foam.
    2. In a large bowl, combine the coconut milk, maple sugar, salt and flax mixture and mix together to combine.
    3. Add the yeast, and 2 cups of flour and mix to combine.
    4. Add the remaining 1 3/4 cups of flour and mix until you have a smooth dough (you may need to use your hands at the end to mix it in).
    5. Turn out onto a lightly floured surface, and knead for 5-10 minutes until smooth and supple. If it is too sticky add a little more flour but you want to add as little as possible because if you add too much the dough gets tough.
    6. Place in an oiled bowl, and cover. Let rise for about 1 1/2 hours until doubled in size.
    7. When it is ready, turn out onto the counter or a board and roll out into a 9 x 15 inch rectangle.
    8. For the filling, spread the peanut butter evenly over the dough, then the jelly.
    9. Roll it up (the short side down, so you have a longer roll), then cut the roll into 12 pieces.
    10. Oil an 8×8 inch square baking pan, and place them in the pan.
    11. Cover and let rise for 45 minutes.
    12. Meanwhile heat the oven to 350F degrees.
    13. When the rolls have risen for 45 minutes, place them in the preheated oven and bake for about 30 minutes until starting to brown and cooked through.
    14. Remove from the oven and let cool 15 minutes.
    15. To make the topping, whisk the peanut butter and and maple syrup together until smooth with the sea salt.  Add a little more syrup if it seems too thick (since peanut butter varies in thickness) to pour over the rolls.
    16. Drizzle the peanut butter mixture over the rolls and enjoy!

    These keep covered at room temperature for up to 3 days, or refrigerated for up to 1 week.

  • Vegan Banana Hazelnut Chocolate Pancakes

    Vegan Banana Hazelnut Chocolate Pancakes

    When you get a bunch of free bananas, you make banana goodies. Or freeze them for smoothies, but I already had some in the freezer so I made some banana bread pudding earlier this week, and then these banana hazelnut chocolate chip pancakes this weekend.  I guess I am in the mood for brunchy banana deliciousness.  I haven’t made pancakes in at least a few months so it was about time.  I actually decided to make them because I had a hectic long day at work after the holidays playing catch up and pancakes sounded like the perfect thing to calm down with.  There is something comforting about making pancakes and enjoying them in your PJs!

    I was going to go with just banana pancakes with caramel or syrup, but then I remembered that I had some Veggimins CBD Chocolate Hazelnut Spread from Raw Guru that I could drizzle over them. So I went with a banana chocolate chip hazelnut flavor combo.  I am one of those people who can’t just make plain anything so it isn’t surprising.  I love that these pancakes are so quick and easy to make so you can enjoy them fast!

    For the base, I used Bob’s Red Mill all purpose gluten free baking flour because it is what I happened to have on hand, but you could use whole wheat pastry flour if you don’t want them gluten free.  Next I added in bananas and maple syrup for sweetness plus some hazelnut butter for richness instead of oil.  Yes, these are oil free, and you would never guess by tasting them.  Lastly I stirred in some chocolate chips because why not?!

    They cooked up beautifully and smelled amazing and I could not wait to try them.  But first, I topped them off with bananas, some chopped hazelnuts and of course the Veggimins CBD Chocolate Hazelnut Spread.  I love that stuff, it is so good, and why not get your daily dose of CBD in chocolate form!  The pancakes were heavenly!  Sweet, filled with banana chocolate and hazelnut flavors and fluffy on the inside with gooey chocolate chips!  If you have some ripe bananas on hand, you know what to make now!

    Vegan Banana Hazelnut Chocolate Pancakes
    Makes 12

    Ingredients:

    Toppings:


    Directions:

    1. In a food processor, combine all pancake ingredients (except the chocolate chips) and process until just blended (alternatively you can whisk it if you don’t have a food processor), stir in the chocolate chips, pour into a bowl and set aside.
    2. To cook pancakes, preheat oven to 110 degrees. Heat a large ceramic non-stick* pan over medium heat. Once hot, add the batter in 1/4 cup amounts (I did 3 at a time, but it depends on your pan), and let cook for about 2-3 minutes on the first side until set and starting to brown, then flip with a spatula, and cook another 2-3 minutes.
    3. When cooked, place on a plate and keep warm in the oven while you repeat the process with the remaining pancakes.

    *If you don’t have the Veggimins CBD chocolate hazelnut spread, you can whisk together 1/4 cup hazelnut butter (or almond butter or your choice of nut or seed butter) with 2 Tbsp unsweetened cocoa powder and 3-4 Tbsp maple syrup (or as needed to make it pourable), plus a pinch of sea salt instead.

    *Note: If you do not own a non-stick pan, you may need to lightly oil your pan to prevent sticking, if you do not mind these not being oil free.

  • Vegan Banana Bread Pudding with Caramel

    Vegan Banana Bread Pudding with Caramel

    I was gifted some really good sourdough bread and decided that it would be lovely in some bread pudding. I had made some pumpkin bread pudding a few months back with some sourdough bread and it was amazing and I have been wanting to make more ever since.  It was perfect timing!  I didn’t want to make it pumpkin this time though.  I figured since I had some really ripe bananas on hand I could make it banana bread pudding!  Bananas are a little bit naturally sweet so I knew they would be the perfect add in.  You would think that I would be all sweet treated out after Christmas but that is not the case.  I always up for vegan desserts!

    I had the day after Christmas off so it was the perfect time to make the bread pudding.  This is just the sort of thing to make after you sleep in late and have a relaxing morning at home.  I was feeling a bit stressed before Christmas, but I am feeling much better now after being able to relax, sleep in and make some fun things like this bread pudding.  For the soaking base I used oatmilk because that is what I happened to have on hand for making my lattes.  You could of course use your favorite plant based milk, but I recommend using something unsweetened.  If not you could always just cut back on the maple syrup in the recipe.

    Next I added in banana and some cinnamon and nutmeg to make it a little aromatic plus some maple syrup and vanilla to sweeten.  Not going to lie, I tasted some chunks of the soaked bread and it tasted good even before I baked it!  I mixed in some toasted hazelnuts, poured it into baking dishes and could not wait for it to be done baking.  It smelled amazing.  Like banana bread, but even better.

    When it came out of the oven, I wanted to top it with something good.  I love when bread pudding has a sauce, so I made a quick and easy gooey caramel sauce to top it with!  It was soooo incredibly good!  This has to be enjoyed warm, and it makes the perfect comfort food dish for a Winter day!  Eric loved it too, and ate even more than I did!  The only thing that would have made it even better is some cool vanilla ice cream on the side (but I didn’t have any at the time).  If you have some leftover sourdough bread, definitely give this a try!

    Vegan Banana Bread Pudding with Hazelnuts and Caramel

    Serves 4-6

    Ingredients:

    Bread Pudding:

    • 2 Tbsp ground flax seed, mixed with 6 Tbsp filtered water
    • 1 1/2 cups oat milk (or your favorite plant based milk)
    • 1/2 cup mashed banana
    • 3 Tbsp maple syrup
    • 1/2 tsp cinnamon
    • 1/8 tsp nutmeg
    • 1/4 tsp sea salt
    • 1 tsp pure vanilla extract
    • 6 cups lightly packed cubed sourdough bread
    • 2 Tbsp maple sugar
    • 1/2 cup chopped toasted hazelnuts


    Caramel:

    • 1/2 cup hazelnut butter, cashew butter or almond butter
    • 1/4 cup maple syrup
    • 2-3 Tbsp filtered water, or as needed
    • 1 tsp pure vanilla extract
    • 1/8 tsp sea salt


    Garnish:

    • additional toasted hazelnuts


    Instructions:

    1. Preheat the oven to 350F degrees, and oil two 1 quart baking dishes (or see bottom of post for other baking dish options).
    2. In a bowl, whisk together the flax seeds and water mixture, oat milk, mashed banana, maple syrup, spices, sea salt, and vanilla until well combined, then add the bread crumbs and toss to coat in the mixture.  Mix in hazelnuts.
    3. Transfer to the prepared baking dishes, (including the liquid, pour it over them). Sprinkle with the maple sugar.
    4. Place in the oven on a tray, and bake for about 25-30 minutes (see bottom for other pan sizes baking times), or until the top is starting to brown and the liquid has absorbed and baked into pudding at the bottom.
    5. Remove from oven.
    6. Whisk together the caramel sauce ingredients, drizzle over the pudding, sprinkle with hazelnuts, and enjoy warm!

    For 6 small ramakins: bake 15 minutes

    For 1 8×8 inch square pan or 2 quart baking dish: bake 30-40 minutes


  • Vegan Sweet Potato Waffles

    Vegan Sweet Potato Waffles

    Do you ever just scroll through people’s food photos on Instagram and just get really hungry?  I totally do, and I saw some waffles a few days back on someone’s feed that looked amazing.  I told myself, you have to make waffles soon!  It had been too long, and they just sounded really good.  Well, I had some leftover mashed sweet potatoes yesterday and I thought, why not make some sweet potato waffles?!  I love repurposing food and making it into something more delicious.  I hate wasting food also, not that the sweet potatoes ever would have been wasted since they are one of my all time favorite things, but it is always nice to make something different the next day with leftovers instead of the same!

    When I was younger, my Mom used to make waffles and pancakes for dinner sometimes instead of breakfast and I loved it.  So that is what I usually do!  Mostly because I don’t have time to make a fancy breakfast in the morning and I have more time after work.  I figured the flavorful sweet potatoes would be the perfect addition to waffles!  For the base of these I used my usual waffle base with flax eggs and whole wheat pastry flour sweetened with coconut sugar, and added plenty of sweet potato!  For richness, a bit of  coconut milk and coconut oil (also to prevent sticking).  If you would like to make these gluten free, see note at the bottom of the post.  Lastly some cinnamon and nutmeg because they go so well with sweet potato!

    They smelled heavenly while they were cooking!  The aroma of sweet potatoes and cinnamon filling the air!  That is one of the reasons I love making waffles, the house smells so good!  I always worry a little when I make new types of waffles, especially ones involving adding wet ingredients like sweet potatoes because I tried to make pumpkin waffles one time and they stuck to my waffle iron so bad that I had to throw it away.  But these turned out beautifully!

    I could not wait to try them!  Maple syrup is standard of course, but I made a quick maple pecan syrup to top them off with as well as some sauteed apples and crunchy toasted pecans!  They were heavenly.  Fluffy in the middle crispy on the outside. You know 10 years ago I never would have guessed I would have been able to make vegan waffles this good!  But I do and that makes me happy!  If you have leftover plain mashed sweet potatoes on hand, give these a try!

    Vegan Sweet Potato Waffles
    makes 12 regular sized waffles

    Ingredients:

    Batter:

    • 2 cups organic whole wheat pastry flour*
    • 1/4 cup coconut sugar
    • 1/2 tsp baking soda
    • 1 tsp baking powder
    • 1/2 tsp sea salt
    • 2 tsp cinnamon
    • 3 Tbsp ground flax seed, whisked together with 1/2 cup plus 1 Tbsp filtered water (and allowed to sit 15 min. before using)
    • 2 Tbsp melted coconut oil
    • 1 cup full fat coconut milk or oat milk
    • 1 cup smooth mashed sweet potatoes or sweet potato puree


    Instructions:

    1. Whisk together the flour, sugar, baking soda, baking powder, sea salt and spices in a large bowl.
    2. Then whisk the flax mixture, coconut oil, coconut milk and sweet potato until smooth.
    3. Oil, and pre-heat waffle iron. Once it is heated, pour about 3/4 cup batter onto the iron (or until the iron is just covered but not so much that it will ooze out) and close it.  Cook according to waffle iron package directions.  Remove from the waffle maker and keep warm in an oven at low heat (150F degrees).
    4. Serve with topped with whatever suits you!

    *If you would like to make these gluten free, you can sub Bob’s Red Mill gluten free all purpose baking flour (I have tested this flour and know it works well in this type of recipe).

  • Vegan Pumpkin Bread Pudding with Caramel

    Vegan Pumpkin Bread Pudding with Caramel

    Earlier this week, a coworker shared some of her home made sourdough bread with me.  It was amazing.  I am super picky when it comes to bread. It has to be a crusty bread, with good texture (I do not like regular sandwich bread unless it is toasted), and a good chew to it.  I am not a big bread person but this stuff was bomb.  I haven’t had bread like this in years.  I enjoyed some with my soup, and I also decided to make some bread pudding with it.  I haven’t actually had any bread pudding since I used to order it at a restaurant back when I was in school (it was one of my favorite things at that restaurant).  I have never actually made it at home, and I had told myself earlier this year I should make some since Eric had it at a restaurant we were at for a special occasion and really enjoyed it.  Got me thinking I need to make some vegan bread pudding so I can have some too.  I had just been waiting to find the right bread, and voila!  I finally had some to make it with.

    Since it is fall, I thought I would give it a fall flavor twist with some pumpkin.  I usually have cans of pumpkin open from one thing or another this time of the year, so it was perfect!  You know what I realized while making this?  Bread pudding is a lot easier to make than I thought.  Especially when it is vegan and you don’t have to mess with eggs and measurements are a little bit less fussy.  Instead of eggs in this one, I made some flax eggs, and mixed them with a bit of oat milk, my favorite plant based milk.  I like it because it is pretty neutral in flavor, and nice and creamy.  I added in the pumpkin of course since this was pumpkin bread pudding, and the soaking mixture was  nice and thick, just the way it would have been in traditional bread pudding.

    I added in some aromatic pumpkin spices, ginger, cinnamon, nutmeg and cloves to make it taste like pumpkin pie and it smelled amazing!  Lastly, some maple syrup to sweeten, because it goes so well with pumpkin and baked sweet bread dishes.  My kitchen was filled with the most heavenly aroma!  I could not wait to try it!  It got a nice crust on the top from the maple sugar I had sprinkled on it, but bread pudding deserves a sauce, at least as far as I am concerned, so I made one.

    I whipped up a quick caramel sauce that came together in about 30 seconds from just pecan butter, maple syrup, water, sea salt and vanilla.  If you don’t have pecan butter, feel free to use almond butter.  I usually make my own pecan butter and use it in recipes like this because it has a caramel like flavor.  After I drizzled the caramel over the pudding and sprinkled it with pecans, it was all ready to go.  OMG was it ever heavenly!  I think I like it even better than the bread pudding I remember eating when I was younger!  If you have some good crusty bread, or sourdough bread on hand, definitely give this a try!

    Vegan Pumpkin Bread Pudding with Caramel

    Serves 4-6

    Ingredients:

    Bread Pudding:

    • 2 Tbsp ground flax seed, mixed with 6 Tbsp filtered water
    • 1 1/2 cups oat milk (or your favorite plant based milk)
    • 1/2 cup canned pumpkin
    • 3 Tbsp maple syrup
    • 1/2 tsp cinnamon
    • 1/2 tsp ginger
    • 1/4 tsp cloves
    • 1/8 tsp nutmeg
    • 1/4 tsp sea salt
    • 1 tsp pure vanilla extract
    • 6 cups lightly packed cubed sourdough bread
    • 2 Tbsp maple sugar

    Caramel:

    • 1/2 cup pecan butter or raw almond butter
    • 1/4 cup maple syrup
    • 2-3 Tbsp filtered water, or as needed
    • 1 tsp pure vanilla extract
    • 1/8 tsp sea salt


    Topping:

    • 1/4 cup chopped toasted pecans


    Instructions:

    1. Preheat the oven to 350F degrees, and oil two 1 quart baking dishes (or see bottom of post for other baking dish options).
    2. In a bowl, whisk together the flax seeds and water mixture, oat milk, pumpkin puree, maple syrup, spices, sea salt, and vanilla until well combined, then add the bread crumbs and toss to coat in the mixture.
    3. Transfer to the prepared baking dishes, (including the liquid, pour it over them). Sprinkle with the maple sugar.
    4. Place in the oven on a tray, and bake for about 25-30 minutes (see bottom for other pan sizes baking times), or until the top is starting to brown and the liquid has absorbed and baked into pudding at the bottom.
    5. Remove from oven.
    6. Whisk together the caramel sauce ingredients, drizzle over the pudding, sprinkle with pecans, and enjoy warm!

    For 6 small ramakins: bake 15 minutes

    For 1 8×8 inch square pan or 2 quart baking dish: bake 30-40 minutes


  • Vegan Pumpkin Caramel Rolls

    Vegan Pumpkin Caramel Rolls

    Last weekend we drove up to Duluth MN and Gooseberry Falls State Park for the day, since I took some vacation from work and those are some of my favorite places to visit.  It is about a 2 hour drive to Duluth and another hour up to the park, so as you can imagine we have to stop a few times.  Mainly  because I can’t stand to sit too long but anyhow, we stopped at Tobie’s which is a restaurant/gift shop/gas station that we have been stopping at ever since I was a kid when we would drive up north, and on the way to the restroom we walked past some really amazing looking caramel rolls.  Eric had to buy one, but sadly they don’t have any vegan version so I did not try it.  I know they are good, because I used to get them back in the day before I went vegan and they were sticky sweet deliciousness.  I made a note to myself that I needed to make some later in the week since I was off work.

    The rest of the day went well, The fall colors were amazing on the drive up, especially the firey red and orange maple trees, but I like when there is some yellow and green in there as well for the full rainbow affect. Gooseberry Falls was beautiful, even though the water was a bit higher than normal and it was muddy it was nice to breath in the fresh cool fall air in a place outside of the city. We got in a good hike and when it was time for dinner we stopped at At Sarah’s Table Chester Creek Cafe since I love that place and they always have good vegan options, even desserts.  Even though I did a lot of driving that day, it really didn’t seem like a lot since I enjoyed the trip so much!

    Back to those rolls I talked about making.  I had been wanting to make some vegan pumpkin cinnamon rolls anyhow, so I changed that to caramel rolls since the dough would be the same, it is just the topping and filling that were different.  So, I made my usual cinnamon roll dough, and added pumpkin and spices in to make it super delicious.  For the caramel that would fill the rolls and top them, I did not want a traditional sugary caramel, I wanted one that had some nutritional value so I made it from dates, my go to vegan caramel source.  They are nature’s caramel after all, and when you blend them up with a few other key ingredients they make the most delicious healthier for you caramel.

    The rolls worked out nicely. I am always a bit nervous still when working with yeast, but they rose beautifully and baked up even better.  They gave off the most heavenly aroma while baking in the oven. I could not wait to try them!  But first, they had to be glazed with even more caramel, and I also topped them off with some toasted pumpkin seeds I had on hand.  They were so good!  Sweet, gooey and delicious with a soft, fluffy consistency and the flavors of pumpkin and spice!  These would make the perfect lazy weekend morning treat to enjoy with your coffee or tea!  I hope you are all having a great fall season so far!

    Vegan Pumpkin Caramel Rolls

    Makes 12

    Dough:

    • 1/4 oz active dry yeast
    • 1/2 cup warm water ( 105-110F degrees)
    • 1/2 cup warm coconut milk (I warmed it up on the stove)
    • 1/2 cup canned pumpkin
    • 1/4 cup maple sugar or coconut sugar
    • 1 tsp maple extract (optional)
    • 1 tsp sea salt
    • 1 Tbsp ground flax seed, mixed with 3 Tbsp filtered water
    • 1 tsp ground cinnamon
    • 1 tsp ground ginger
    • 1/4 tsp ground nutmeg
    • 1/4 tsp ground cloves
    • 3 3/4 cups whole wheat pastry flour or as needed


    Caramel Filling/Topping:

    • 1 1/2 cups soft, pitted medjool dates (if not soft, soak them in filtered water 30  minutes and drain well before using)
    • 3/4 cup pecan butter (raw cashew butter or almond butter would also work if you don’t have pecan)
    • 1/2 cup filtered water (or as needed)
    • 1/4 cup maple syrup
    • 1 tsp pure vanilla extract
    • 1/4 tsp sea salt


    Garnish:

    •  1/4 cup toasted pumpkin seeds for topping


    Instructions:

    1. To make the dough, combine the yeast and the warm water plus a pinch of maple sugar and stir to dissolve. Let sit 5-10 minutes until it starts to foam.
    2. In a large bowl, combine the coconut milk, pumpkin, maple sugar, maple extract, salt and flax mixture and mix together to combine.
    3. Add the yeast, spices and 2 cups of flour and mix to combine.
    4. Add the remaining 1 3/4 cups of flour and mix until you have a smooth dough (you may need to use your hands at the end to mix it in).
    5. Turn out onto a lightly floured surface, and knead for 5-10 minutes until smooth and supple. If it is too sticky add a little more flour but you want to add as little as possible because if you add too much the dough gets tough.
    6. Place in an oiled bowl, and cover. Let rise for about 1 1/2 hours until doubled in size.
    7. Meanwhile to make the caramel, add all ingredients to a blender or food processor and blend until completely smooth (if it is too thick, add a touch more water, you want it spreadable at this point, but will add more liquid later for topping the rolls with half the mixture).
    8. When it is ready, turn out onto the counter or a board and roll out into a 9 x 15 inch rectangle.
    9. Spread about half the caramel evenly over the dough.
    10. Roll it up, then cut the roll into 12 pieces.
    11. Oil an 8×8 inch square baking pan, and place them in the pan.
    12. Cover and let rise for 45 minutes.
    13. Meanwhile heat the oven to 350F degrees.
    14. When the rolls have risen for 45 minutes, place them in the preheated oven and bake for about 30 minutes until starting to brown and cooked through.
    15. Remove from the oven and let cool 15 minutes.
    16. Whisk a little more maple syrup or water into the remaining caramel if it seems too thick to pour over the rolls.
    17. Pour the caramel over the rolls, sprinkle with the pumpkin seeds and enjoy!

    These keep covered at room temperature for up to 3 days, or refrigerated for up to 1 week.

  • Vegan Pumpkin Spice Granola

    Vegan Pumpkin Spice Granola

    Fall is officially here, so I had to make something pumpkin spice.  I know everyone makes fun of people that like pumpkin spice and pumpkin spice lattes and whatnot, and while I agree that some things should not be pumpkin spice flavored (like certain savory items), most pumpkin spice is darn delicious and I love it.  Mostly I love making it at home though in the form of pumpkin treats.  Pumpkin treats make me happy, as does running through the crunchy leaves on crisp fall mornings, warm sweaters and bon fires. Which is why this is my favorite season. So back to that thing that I made.  I decided to whip up a batch of granola last weekend.

    Granola is something that I like to keep on hand at all times for snacking, and although I have my standard recipe that I usually make, being that I am excited for fall, I went with the pumpkin spice. I love that granola is such a blank palate for making delicious new flavors.  For this one I used oats as the base, added in pecans and pumpkin seeds, plus a bit of large flake coconut for crunch.  I know coconut might not be considered fall like but it is one of my favorite add ins for granola because it gets so nice and crispy and it is a little sweet.

    For the mixture to coat everything with I started with pumpkin of course, then added in maple syrup for sweetness and pecan butter for richness.  It might sound like an odd ingredient the pecan butter, but it is what I use to replace the oil because it is plenty rich (but you could use almond butter if you did not have it on hand or were not able to get it).  This granola does happen to be oil free!  I have been experimenting with a lot of oil free recipes lately with good results and turns out granola doesn’t actually need oil to be good and crispy.

    Lastly I added plenty of pumpkin spices into this granola, ginger, cinnamon, nutmeg, and cloves.  It smelled amazing while baking.  Like pumpkin pie crossed with spice cake or something.  I so could not wait to try it!  Luckily granola doesn’t have to set up, or cool so it doesn’t stick to the pan or anything so I didn’t have to wait long to try it.  It was amazing while still warm and fragrant!  Crunchy, crave worthy and delicious with just the right amount of spice and pumpkin flavor!  Do yourself a favor and whip up a batch to enjoy! Happy Fall!

    Vegan Pumpkin Spice Granola
    Makes 6 cups

    Ingredients:

    • 3 cups organic gluten free old fashioned rolled oats
    • 1 1/2 cups raw pecans
    • 1 cup raw pumpkin seeds
    • 1 cups finely shredded, dried unsweetened coconut
    • 1/2 cup organic canned pumpkin
    • 1/4 cup maple syrup
    • 1/2 cup pecan butter or almond butter
    • 1 tsp cinnamon
    • 1 tsp ginger
    • 1/2 tsp cloves
    • 1/4 tsp nutmeg
    • 1/2 tsp sea salt
    • 1 tsp pure vanilla extract


    Instructions:

    1. Line a large baking sheet with non-stick foil, and spray with cooking spray.
    2. Preheat the oven to 350F and set rack at the medium position
    3. In a large bowl, combine oats, nuts, and coconut, and set aside.
    4. In another bowl, whisk together pumpkin, maple syrup, nut butter, spices, sea salt, and vanilla extract until well combined, then pour over oat mixture and toss to coat until completely blended.
    5. Pour out onto prepared baking sheet, and spread out evenly.
    6. Bake for 35 minutes, stirring about every 10 minutes or so until the granola is evenly browned. Remove from oven and let cool.
  • Vegan Cinnamon Roll Cake

    Vegan Cinnamon Roll Cake

    At work in the deli last week, one of my coworkers decided to bake a cinnamon roll cake for our hot food bar.  We don’t usually make desserts for it but it is always nice to swap things up, and a lot of people have a sweet tooth.  Plus, who doesn’t like warm cinnamon scented cake? Anyways, the cake smelled amazing and sold well but sadly it wasn’t vegan so I could not try it.  So I decided that I was going to go home and make one of my own that was more suited to my tastes as well.  I prefer to make my desserts a bit less processed than traditional ones, so every time I veganize a recipe it becomes less processed as well. I was super excited about this one!

    I already love cinnamon rolls, but they are kind of a lot of work.  Cake is so much easier! And if I can get the same sweet cinnamony flavor, why not?!  For the cake base I started off with what I would use for my plain vanilla cake.  Cinnamon rolls have a vanilla base after all.  It was really quite simple to make, just whisked all together in a bowl!  Back in the day before I went vegan and I would make those vanilla cakes that you had to whip the eggs separately and cream the sugar and whatnot and you know what?  Honestly the texture of my vegan cakes is just as good and they are easier to make.  I used maple sugar to sweeten this one, because it goes so well with cinnamon.  Also, you may notice there is not any oil in this cake.  It actually doesn’t need it, because the coconut oil I use in the batter is plenty rich!

    I gave the inside of the cake cinnamon swirls as well, because cinnamon rolls have to have plenty of cinnamon!  I did swirls instead of just dropping it in because I figured it would be more evenly distributed that way.  Once it was all put together I wanted to make a streusel for the top like the one that was made at work.  I am a sucker for streusel after all.  I love it on anything dessert related.  I kept this one simple, just flour, sugar and coconut butter (not to be confused with coconut oil) plus some cinnamon and was looking forward to how crunchy and delicious it would get once baked!

    It smelled amazing while baking by the way.  Cinnamon reminds me of fall, which is appropriate since we are almost there!  I could not wait to try it, but I had to wait for it to cool a bit before un-molding.  As if it wasn’t already amazing how it was, I added some glaze like the cake at work had.  Except instead of making a powdered sugar glaze, I used coconut butter sweetened with a bit of maple syrup.  It was time to dive in.  The cake was soooo good!  It had a soft, light texture, and it was just the right amount of sweetness, with the perfect amount of cinnamon and vanilla.  That crunchy struesel topping made it crave worthy!  So the next time you are craving cinnamon rolls but don’t want to deal with yeast and kneading and whatnot, make this instead!

    Vegan Cinnamon Roll Cake
    Makes one 6 inch cake

    Ingredients:

    one 6 inch cake pan

    Cake:

    • 3/4 cup organic whole wheat pastry flour
    • 3/4 tsp baking soda
    • 1/2 tsp baking powder
    • 1/4 tsp sea salt
    • 1/2 cup maple sugar
    • 1 cup full fat coconut milk (the thick kind, I prefer Thai Kitchen brand) at room temperature
    • 1 tsp pure vanilla extract
    • 1 Tbsp cider vinegar


    Swirl:

    • 2 Tbsp maple syrup at room temperature
    • 2 Tbsp maple sugar
    • 2 tsp cinnamon


    Topping:

    • 1/4 cup organic whole wheat pastry flour
    • 2 Tbsp maple sugar
    • 1/8 tsp sea salt
    • 1/4 tsp cinnamon
    • 3 Tbsp coconut butter, warmed to liquid


    Drizzle:

    • 1 Tbsp coconut butter
    • 1 tsp maple syrup
    • 1 Tbsp filtered water, or as needed


    Instructions:

    1. Preheat the oven to 350F degrees and position rack in center of oven.
    2. Oil a 6 inch round baking pan and line it with parchment at the bottom so it will not stick.
    3. Whisk flour, baking soda, sea salt, and sugar in a large bowl to blend well.
    4. Whisk coconut milk and vanilla extract together in small bowl to blend well, then whisk into the flour mixture until well blended.
    5. Whisk the cider vinegar into the batter.
    6. Mix together swirl ingredients in a small bowl.
    7. Transfer half the cake batter to prepared pan then place the swirl mixture in a ziplock bag with the corner cut off and pipe it into a swirl from the center out.  Pour the rest of the cake batter over it, then do the same with more of the swirl. marble the swirls with a knife.
    8. Mix together the streusel ingredients in a bowl with your hands until it starts to clump together, then sprinkle over the cake.
    9. Place in the oven, and bake cake until tester inserted into center comes out clean with just a few moist crumbs attached, about 25 minutes.
    10. Remove from the oven and let cool for at least 30 minutes, then un-mold, by cutting around the edges if they are stuck at all, then putting  plate over the top, then flipping it onto that plate then placing a plate on the bottom and flipping it upright onto that plate.
    11. Whisk together the coconut butter, maple syrup and water until smooth (adding a little more water if it is too thick to drizzle).
    12. Drizzle the coconut butter mixture over the cake, and serve!

    Cake keeps stored in a container on the counter for up to 1 week, or can be frozen for up to 4 months.

    Notes:

    If you would rather use coconut sugar or even just granulated sugar for this, either will work in place of the maple sugar.

    If you would like to make a 9 inch round cake, double the entire recipe, and bake it in a 9 inch round pan, increasing the baking time to 50 minutes to 1 hour (depending on your oven).

    This cake can be made gluten free by swapping out the whole wheat pastry flour for Bob’s Red Mill gluten free all purpose baking flour (this is a brand I have used before and have tested it in cakes with great results).

  • Vegan Apple Streusel Muffins

    Vegan Apple Streusel Muffins

    I made apple scones earlier last week, and when I still had apples on hand, I decided that I needed to make some more apple goodies. I usually make apple crisps and apple pies and that sort of thing but this time muffins sounded good. I don’t make them often after all, and I was craving some. Also, I don’t think I have made apple muffins before. I was dreaming up some fragrantly spiced, sweet muffins packed with apple flavor and topped off with a crunchy streusel. I needed to make that happen.

    So, I blended up a few of my apples into some apple sauce, and used those for most of the wet ingredients in the muffins. They were sweet tart apples, so the flavor was perfect. I also added in some almond butter and a flax egg, and they provided just enough richness that you would never know these are oil free. Also, I added plenty of cinnamon, ginger and nutmeg and the spices went beautifully with the apple. I did not make these gluten free, because I had whole wheat pastry flour on hand but if you need to make them gluten free, I recommend using Bob’s Red Mill gluten free all purpose baking flour. I have used it in the past swapped with the regular flour and it works perfect!

    Lastly I topped them off with a crunchy oat streusel, because it is one of my all time favorite things especially on things that are spiced, and to top off muffins or a coffeecake. They smelled amazing while baking. Like that smell of the cinnamon apple doughnuts that wafts through the air at the apple orchard. I could not wait to try one! They were super delicious! Soft and sweet with a tender not heavy crumb and the lovely scent of fall spices.

    The streusel was crispy and the perfect pairing with it. I shared some with my Mom and she said they were some of the best muffins she ever had. That is a huge compliment considering she is not a muffin person usually. If you have apples or apple sauce on hand, definitely give these a try! They would be the perfect thing to bake on a cool fall morning and we are not far off from that!

    Apple Streusel Muffins

    Makes 16

    Ingredients:

    • 1 cup coconut sugar
    • 3/4 cup almond butter
    • 1 cup organic apple sauce
    • 1 ½ Tbsp ground flax seed mixed with 4 ½ Tbsp filtered water
    • 1 1/4 cups organic whole wheat pastry flour
    • 2 tsp ground cinnamon
    • 1 tsp ground ginger
    • 1/4 tsp nutmeg
    • ½ tsp sea salt
    • ½ tsp baking soda
    • 1/8 tsp baking powder


    Struesel:

    • 1/4 cup plus 2 Tbsp organic rolled oats
    • 3 Tbsp organic whole wheat pastry flour
    • 1/4 cup coconut sugar
    • pinch sea salt
    • 1/4 cup almond butter


    Instructions:

    1. Preheat the oven to 350F degrees, and line 16 muffin tins with liners.
    2. Whisk together the coconut sugar, apple, almond butter and flax mixture in a large bowl.
    3. Add the flour, spices, sea salt, baking soda and baking powder and whisk until smooth.
    4. Spoon into the muffin tins.
    5. Mix the streusel ingredients together with your fingers until they start to clump together. Sprinkle over the muffins.
    6. Place in the oven and bake for about 25 minutes or until a toothpick inserted into the center comes out almost clean with a few moist crumbs attached.
    7. Let cool on a rack for at least 20 minutes before enjoying.
  • Vegan Maple Cinnamon Rolls

    Vegan Maple Cinnamon Rolls

    Nothing beats the aroma of freshly baked cinnamon rolls. It is such a happy smell, and one can not possibly be in a bad mood when exposed to the heavenly scent! At least I can’t. I have always loved them, since I was a little kid. I used to like it when my Mom made the ones from a can with the cream cheese frosting even though they weren’t home made. But what I really loved were the ones that my Grandma always bought at a local bakery. They were giant, and so fluffy, sweet and packed with cinnamon flavor, and topped off with a cream cheese icing.

    Well, it has been a while since I have had a cinnamon roll. I have made caramel rolls since I went vegan, and other types of rolls but not plain cinnamon. I don’t know why because every time I see them I tell myself that I need to make some because I get hungry for them. Maybe it is partly because I get a little overwhelmed with yeasted goodies sometimes because they take longer to make than say a cake that you just whip up and bake without rising time. But I had a few free hours last Sunday and I decided that baking some cinnamon rolls was the perfect thing to do.

    The yeast wasn’t so bad. In fact, kneading bread or roll dough is kind of relaxing and the finished product is totally worth the rising time. I just went for a walk and did other things while the dough did its thing. I decided to use maple sugar in these because I love that in combination with the cinnamon and they smelled amazing while baking!

    They had to be topped with some luscious cream cheese style frosting too! So, I used a combination of Dastony coconut butter and macadamia nut butter from Raw Guru with a little maple syrup and vanilla and it was heavenly! The rolls were soft and they had plenty of cinnamon and maple flavor which was perfect with the creamy rich frosting! If you are a cinnamon roll fan, give these a try, they are totally worth the extra time!

    Vegan Maple Cinnamon Rolls

    Makes 12

    Dough:

    • 1/4 oz active dry yeast
    • 1/2 cup warm water ( 105-110F degrees)
    • 1/2 cup warm coconut milk (I warmed it up on the stove)
    • 1/4 cup maple sugar or coconut sugar
    • 1/4 cup avocado oil
    • 1 tsp maple extract (optional)
    • 1 tsp sea salt
    • 1 Tbsp ground flax seed, mixed with 3 Tbsp filtered water
    • 3 1/2 cups whole wheat pastry flour or as needed

    Filling:

    • 1/4 cup maple syrup
    • 1/2 cup maple sugar
    • 1 1/2 tsp cinnamon

    Glaze:

    Instructions:

    1. To make the dough, combine the yeast and the warm water plus a pinch of maple sugar and stir to dissolve. Let sit 5-10 minutes until it starts to foam.
    2. In a large bowl, combine the coconut milk, maple sugar, maple extract, avocado oil, salt and flax mixture and mix together to combine.
    3. Add the yeast, and 2 cups of flour and mix to combine.
    4. Add the remaining 1 1/2 cups of flour and mix until you have a smooth dough (you may need to use your hands at the end to mix it in).
    5. Turn out onto a lightly floured surface, and knead for 5-10 minutes until smooth and supple. If it is too sticky add a little flour but you want to add as little as possible because if you add too much the dough gets tough.
    6. Place in an oiled bowl, and cover. Let rise for about 1 1/2 hours until doubled in size.
    7. When it is ready, turn out onto the counter or a board and roll out into a 9×15 inch rectangle.
    8. Brush with the maple syrup so you have a thin coating of it for the sugar to stick to. Mix the cinnamon and sugar together, then sprinkle it evenly over the dough.
    9. Roll it up, then cut the roll into 12 pieces.
    10. Oil an 8×8 inch square baking pan, and place them in the pan.
    11. Cover and let rise for 45 minutes.
    12. Meanwhile heat the oven to 350F degrees.
    13. When the rolls have risen for 45 minutes, place them in the preheated oven and bake for about 30 minutes until starting to brown and cooked through.
    14. Remove from the oven and let cool 15 minutes.
    15. Whisk the glaze ingredients together, adding a little bit more coconut milk if it seems too thick.
    16. Pour the glaze over the rolls, and enjoy!

    These keep covered at room temperature for up to 3 days, or refrigerated for up to 1 week.

  • Vegan Peanut Butter and Dark Chocolate Pop Tarts

    Vegan Peanut Butter and Dark Chocolate Pop Tarts

    So last weekend I decided to make some chocolate peanut butter pop tarts. I know I just made raspberry pop tarts last week, but a friend asked me if I could make some involving chocolate too, so I couldn’t resist making them again. The other ones were so good after all and I did love chocolate Pop-Tarts almost as much as the strawberry and raspberry ones. Plus I have been in more of a pie making mood than a cake one lately, so it was perfect! Since they are basically hand pies.

    The pop tarts I ate growing up had a pretty bland weird tasting crust even if I thought it was good at the time. It really didn’t taste like pie crust at all. So when I make my home made pop tarts I want the crust to be delicious and actually taste like good pie crust. I made a whole wheat pastry flour based crust with coconut oil for the fat and it was perfect! You could of course use all purpose gluten free baking flour if you wanted to make these gluten free.

    For the filling I wanted it to have gooey peanut butter and chocolate, so I mixed my home made peanut butter with a rich dark chocolate ganache for the filling. I was super excited about these because I love all things chocolate and peanut butter and I could practically taste the finished product as I smelled them baking. But funny story, with the first batch, they started melting in the oven. I was super bummed, then I realized that I had measured the coconut oil wrong. I had to remake the whole thing!

    The second batch turned out perfect however with the correctly measured coconut oil. Why am I telling you this? Because I want you to know that I sometimes make mistakes too and stuff does not always come out perfect the first time. I decided to glaze the pop tarts with even more dark chocolate, because why not?! They were super delicious. Rich dark chocolate and peanut butter all soft and gooey on the inside and a flakey crust! So much better than the original Pop Tarts I grew up eating.

    Vegan Peanut Butter and Dark Chocolate Pop Tarts
    Makes 8

    Crust:

    • 2 1/2 cups organic whole wheat pastry flour
    • 1/2 tsp sea salt
    • 1/4 cup granulated sugar
    • 3/4 cup coconut oil in its solid state
    • about 6-7 Tbsp cold water (or as needed)


    Filling:

    • 3/4 cup vegan dark chocolate chips
    • 1/2 cup full fat coconut milk
    • 1/2 cup peanut butter


    Glaze:

    • 1/2 cup dark chocolate chips


    Instructions:

    1. To make the crust, in a large bowl, mix together flour, sugar, and sea salt. Cut in coconut oil with a pastry blender or 2 knives until it is in pea sized pieces. Mix in just enough water to create a smooth dough that holds together but isn’t too sticky. Add more water if needed, and knead slightly until a smooth dough is created.
    2. Roll out into a large rectangle and cut into 16 identical rectangles.  Chill if too soft before assembling.  You want the dough a little pliable, but not so warm that it will break. Preheat oven to 375F degrees. Set the dough aside in the refrigerator while you make the filling.
    3. Melt the chocolate in the top of a double boiler with the coconut milk and peanut butter until smooth. Remove from the heat and let cool slightly.
    4. To assemble the pop tarts, spread about 2 Tbsp of the peanut butter chocolate ganache half of the dough rectangles (leaving a boarder so you can attach the dough at the sides). Cover with the remaining pieces of dough (I used a small spatula to carefully move them), pressing the edges and crimping with a fork or the edge of something with a flat edge, like a spatula. Bake for about 30 minutes until the crusts are starting to brown lightly. Remove from oven and let cool on a wire rack until warm.
    5. Melt the dark chocolate for the glaze in the top of a double boiler. Spoon some of the dark chocolate over each pop tart, and smooth it out to cover the top. Let harden before serving.


  • Vegan Raspberry Pop-Tarts

    Vegan Raspberry Pop-Tarts

    It was hard for my Mom to get me to eat breakfast when I was little. I just wanted to go to school or daycare and hated cereal so I would either eat Nutrigrain bars or Pop-Tarts so I didn’t have to sit down and take a lot of time to eat. The Raspberry Pop-Tarts were my favorite. But looking back on it, now that I have had plenty of pastries and real fruit they really didn’t taste like real pastries or raspberry at all even if they were amazing at the time. They had sort of a weird raspberry paste inside. I did however like the fact that they were iced and had sprinkles.

    I probably haven’t eaten an actual Pop-Tart since high school, but I have made my own at home with some success. No raspberry ones though until last weekend surprisingly. I had some raspberries on hand and was thinking that it would be awesome to make home made raspberry pop-tarts that were way better than those store bought ones I grew up eating. I am all for veganizing things and making them better.

    I was excited about these! I made a gluten free classic pie crust and used some home made raspberry jam as the filling. But of course you could use store bought if you have a favorite brand. These are actually pretty simple to make, although they do involve some mixing dough correctly and rolling it out and cutting it. But that is the fun part! Besides eating the finished ones of course. I wanted to put a glaze on them too, like the ones I ate as a kid.

    So, I used some Dastony coconut butter from Raw Guru to make a simple but delicious glaze. The finished product was super delicious! Jammy, gooey raspberry filling and a flakey buttery crust with a sweet glaze! They were waaayyyy better than any of the Pop-Tarts I grew up eating! I definitely recommend you try these next time you are craving the Pop-Tarts of your childhood.

    Vegan Raspberry Pop-Tarts
    Makes 8

    Crust:

    Filling:

    • about 1/2 cup raspberry jam

    Glaze:

    • 3 Tbsp coconut butter, warmed to liquid
    • 1 Tbsp raspberry powder (I ground up freeze dried raspberries with a mortar and pestle)
    • 1 Tbsp maple syrup
    • pinch sea salt
    • 3-4 Tbsp filtered water or as needed

    Instructions:

    1. To make the crust, in a large bowl, mix together flour, sugar, sea salt, and spices. Cut in coconut oil with a pastry blender or 2 knives until it is in pea sized pieces. Mix in just enough water to create a smooth dough that holds together but isn’t too sticky. Add more water if needed, and knead slightly until a smooth dough is created.
    2. Roll out into a large rectangle and cut into 16 identical rectangles.  Chill if too soft before assembling.  You want the dough a little pliable, but not so warm that it will break. Preheat oven to 375F degrees.
    3. To assemble, spread about 2 Tbsp jam over half of the dough rectangles (leaving a boarder so you can attach the dough at the sides). Cover with the remaining pieces of dough (I used a small spatula to carefully move them), pressing the edges and crimping with a fork or the edge of something with a flat edge, like a spatula. Bake for about 30 minutes until the crusts are starting to brown lightly. Remove from oven and let cool on a wire rack until warm.
    4. Whisk glaze ingredients together until smooth (adding more water if too thick, you want it to be pour-able). Spoon some of the glaze over each pop tart, and smooth it out to cover the top. Let set before serving.

    *If you would rather not make these gluten free, just use the same amount of organic whole wheat pastry flour.

  • Vegan Chocolate Crepes

    Vegan Chocolate Crepes

    Last weekend Eric and I were at a cafe that served crepes and we just had time for lattes even though he really wanted some crepes. So, I decided that later that week I would make some crepes. Classic vanilla crepes are so good with just cinnamon and sugar but I figured I would be a bit more fancy and make some chocolate crepes! Since I had never made them before. I am all for trying new things when it comes to recipes and why not make them chocolate?!

    Crepes are really simple to make, which makes me love them even more. When I was in high school, one of the most exciting days in our French class was when the teacher brought crepe batter, and let us make our own crepes. That is how simple they are to make if we could make them with no experience. Your first one might turn out a little weird (like pancakes sometimes do if you are heating the pan) but it’s an easy process.

    For these ones I made my classic crepe batter and flavored it with cacao powder to make them nice and chocolaty. I actually made them gluten free, but if you want to make them not gluten free, you can sub organic whole wheat pastry flour for the gluten free flour and they will turn out the same. They came out lovely, and they would have been good with just cinnamon and sugar (since chocolate goes well with it too), but I decided to add some other toppings and make them pretty.

    Just a bit of melted dark chocolate, some fresh strawberries and pistachios, and they were perfect! If you are a fan of crepes, make some at home! Of course you can add your own toppings if you want and even make them more dessert like with some ice cream or coconut whipped cream. I hope you all have a wonderful weekend!

    Vegan Chocolate Crepes

    Makes 12

    Crepes:

    • 1/4 cup ground flax seed
    • 3/4 cup filtered water
    • 1 1/4 cups gluten free all purpose flour
    • 1/4 cup cacao powder
    • 3 Tbsp maple sugar or coconut sugar
    • pinch sea salt
    • 1/4 cup melted coconut oil
    • 1 1/2 cups light coconut milk
    • 1 tsp pure vanilla extract

    For Serving:

    • melted vegan dark chocolate
    • sliced organic strawberries
    • pistachios

    Instructions:

    1. To make the crepes, mix together the flax seed and water in a bowl, and set aside in the refrigerator for 15 minutes until it is the consistency of egg whites.
    2. Meanwhile, whisk together the coconut sugar, flour, cacao powder, and sea salt in a bowl, then whisk in the coconut oil. Slowly whisk in the milk little by little to make sure the mixture stays free of lumps. Next, whisk in the vanilla, followed by the flax mixture you had set aside.
    3. Heat a non-stick ceramic 6 inch pan over medium heat, then pour in 1/3 cup batter, and swirl the pan so that it spreads out to the edges.  Cook for about 3 minutes on the first side, then flip over and cook the second side. Once the crepe is done, set aside on a plate.  Repeat with the remaining batter, separating the crepes with parchment paper on the plate so that they don’t stick together.
    4. To serve the crepes, drizzle with the vegan dark chocolate, and sprinkle with strawberries and pistachios (or feel free to be creative with toppings).
    5. Enjoy!
  • Strawberry Pistachio Lemon Granola

    Strawberry Pistachio Lemon Granola

    When I was little I thought that granola was something that hippies ate that you got at the health food store. So in other words a health food. Little did I know that it was actually really delicious, which I discovered in college when I decided to make a granola recipe from a breakfast cookbook I had borrowed from the library. I made it and I was hooked. I loved that I could make different flavors and switch up the ingredients for interesting combinations. For a while I was making it every week, and I had a few friends who would actually request I make a bag of it for them it was that good. I don’t make it every week anymore, but I do make a big bag once a month to have on hand for when the granola craving strikes. I don’t usually have it for breakfast, it is usually a snack when I want something crunchy and slightly sweet. It is also awesome to top cut up fruit in a bowl off with.

    I ran out of my stash I keep in the refrigerator, and so I made some Strawberry Pistachio Lemon Granola last weekend. It was so good I just had to share the recipe with you all. I usually stick to pretty standard flavors lately but I felt like making something Spring like since it seems that Spring has finally sprung here with everything looking green and the flowers finally starting to show up. Strawberries are a must in the Spring for me so I figured they would be perfect to include!

    I had some pistachios on hand as well, and thought those would be lovely with the red strawberries. If you are looking for affordable shelled pistachios by the way, Aldi has them for a great price! Back to the granola though, lastly I wanted to add a bit of lemon and coconut, which I also like to include in my Spring desserts.

    OMG it smelled amazing while baking! That is one of the things I love about granola. That and eating it as it cools. A big portion of the pan is usually gone, because like pop corn, it is hard to stop snacking on. Especially if is calling to you in plain sight and smelling all delicious. If you have never made your own granola, you sooo need to try it!

    Strawberry Pistachio Lemon Granola
    Makes 6 cups

    Ingredients:

    • 3 cups organic gluten free old fashioned rolled oats
    • 1 cup shelled pistachios
    • 1 cups finely shredded, dried unsweetened coconut
    • 1/4 cup coconut oil, warmed to liquid
    • 1/4 cup maple syrup
    • 1/4 cup raw cashew butter or almond butter
    • 1 Tbsp organic lemon zest
    • 1 Tbsp lemon juice
    • 1/2 tsp sea salt
    • 1 tsp pure vanilla extract
    • 1 cup freeze dried strawberries

    Instructions:

    1. Line a large baking sheet with non-stick foil, and spray with cooking spray.
    2. Preheat the oven to 350F and set rack at the medium position.
    3. In a large bowl, combine oats, nuts, and coconut, and set aside.
    4. In another bowl, whisk together oil, maple syrup, cashew butter, lemon juice and zest, sea salt, and vanilla extract until well combined, then pour over oat mixture and toss to coat until completely blended.
    5. Pour out onto prepared baking sheet, and spread out evenly.
    6. Bake for 35 minutes, stirring about every 10 minutes or so until the granola is evenly browned. Remove from oven and let cool. Stir in strawberries and enjoy!
  • Vegan Chocolate Strawberry Scones

    Vegan Chocolate Strawberry Scones

    I am so happy it is finally getting comfortably warm outside! Eric and I went for a walk in the afternoon around the Stone Arch area of Minneapolis last weekend and it was so warm that I wore shorts and a tank top and was even sweating a little despite the breeze. Let me tell you, it is a nice change from the snow we had just a couple weeks ago. We decided when we got done walking that something cool sounded good and I had the idea to hit up Crepe and Spoon a vegan and crepe shop in the area. I have always wanted to try it, and the ice cream I had ended up being super delicious. I got the raspberry lemonade ice cream in a waffle cone. I haven’t had a waffle cone since I was a kid probably and I loved it! We will definitely be going back there, especially this Summer.

    It was a little chillier on my other day off, so I decided to do some baking. I had picked up some organic strawberries at Aldi for a good price, and I thought they would be lovely in some scones. I had made some chocolate strawberry scones a while back before I went vegan and they were really good so I decided to recreate those.

    Scones are actually a fairly quick and easy thing to make provided you have your coconut milk chilled (which I always do because I store it in the refrigerator since I mostly use it chilled). For the base, I used a mixture of whole wheat pastry flour and almond flour with coconut oil and full fat coconut milk to make it nice and rich, plus of course some cacao powder and vanilla. The secret to making these flakey and delicious is to not over-mix the dough. this dough is super delicious by the way, I had to sample it before baking of course.

    They smelled amazing while they baked almost like brownies, and they were lovely when I pulled them out of the oven. I decided to top them off with a bit of melted dark chocolate too though to make them even more pretty. They were delicious warm (the best way to eat scones) with plenty of chocolate flavor, gooey chocolate chips and jammy strawberries in a tender dough! If you have strawberries and chocolate on hand, give these a try!

    Vegan Chocolate Strawberry Scones
    Makes 8

    Ingredients:

    Scones:

    • 2 1/2 cups organic whole wheat pastry flour
    • 1/2 cup almond meal
    • 1/4 cup cacao powder or unsweetened cocoa powder
    • 1/2 cup coconut sugar
    • 2 1/2 tsp baking powder
    • 1/4 tsp salt
    • 1/2 cup virgin coconut oil, cut into chunks
    • 1 cup cold full fat organic canned coconut milk (whisked until smooth if chunky)
    • 1 Tbsp pure vanilla extract
    • 1 1/2 cup fresh organic strawberries, sliced
    • 3/4 cup vegan dark chocolate chips or chunks
    • coconut milk for topping (if needed)
    • coconut sugar for sprinkling

    Instructions:

    1. Preheat oven to 425F degrees with the rack set at the middle position.
    2. Line a baking sheet with parchment.
    3. In a large bowl, combine the flour, almond meal, cacao powder, sugar, baking powder, and salt. Cut in the coconut oil with a pastry blender or 2 knives until the mixture starts to clump into pea sized pieces. In a small bowl, stir the vanilla into the coconut milk. Add the coconut milk to the dough, and stir a few times, but do not over-mix. The dough should hold together when squeezed, but still be clumpy.
    4. Fold in strawberries and chocolate chips until evenly distributed.
    5. Place dough on a floured work surface, and shape into a circle, a few inches high. Use a bench scraper to cut into 8 triangles (like a pizza).
    6. Place scones on the prepared baking sheet, reshaping slightly if necessary.
    7. Brush the tops lightly with the coconut milk (only if they seem dry, you want the sugar to stick), and sprinkle with coconut sugar.
    8. Place in the oven and bake for about 20 minutes or until golden brown (after about 15 minutes you may need to reshape with 2 bench scrapers if the scones are spreading, then place back in the oven).
    9. Cool on a wire rack.
    10. Enjoy!
  • Vegan Matcha Waffles

    Vegan Matcha Waffles

    I am obsessed with matcha tea. I drink it every day at work in chilled form unadorned, and on the weekends I like to enjoy a matcha latte at a coffee shop. It is my treat lately since I usually make stuff like that at home, but I do enjoy when someone else makes it sometimes. It has to be made in a nice mug though, there is something more special about that experience and sitting there sipping it slowly than drinking it out of a paper one. It was so nice last weekend that after Eric and I went to Art In Bloom at the Minneapolis Institute of Art, we stopped and enjoyed a latte sitting outside on the patio. Let me just say what a difference a few days make in terms of weather here in Minnesota. It was literally snowing for 3 days last week and now it is lovely and feels like spring.

    Back to the matcha though, every time I have one of those lattes I then feel like going home and creating something with matcha. I have been wanting to make matcha waffles for a while, since I got my new waffle maker for Christmas, and I finally got around to it last weekend. I mentioned to Eric that I had the idea to make some matcha waffles and he said he was really hungry they sounded good and so I went for it.

    I made my classic gluten free vegan waffle recipe, but added in a good amount of matcha, as well as some vanilla and almond extracts, because that combination of flavors is simply heavenly! They smelled amazing while cooking, the heavenly aroma of waffles filling my kitchen! Once they were all done and ready to enjoy, I decided to top them off with a pumpkin seed butter maple drizzle, made with Dastony Pumpkin Seed Butter from Raw Guru because I thought the green color would look lovely with the green waffles. I am that weird person who loves to match things, and I love monochromatic color schemes sometimes.

    The waffles were sooo good! Crispy on the outside and tender in the middle with the scents of matcha, vanilla and almond and the maple pumpkin seed butter drizzle tasted almost like a maple caramel on top of them! If you haven’t tried Dastony pumpkin seed butter it is actually pretty amazing. I like it in savory things like dressing but it worked perfect to create a caramel drizzle for the waffles! If you are a matcha lover or if you are just craving waffles, give these a try!


    Vegan Matcha Waffles 

    Makes 8

    Waffles:

    • 2 cups Bob’s Red Mill gluten free all purpose baking flour*
    • 1/4 cup maple sugar or coconut sugar
    • 1 Tbsp matcha powder
    • 1/2 tsp baking soda
    • 1 tsp baking powder
    • 1/2 tsp sea salt
    • 1 tsp pure vanilla extract
    • 1/2 tsp almond extract
    • 3 Tbsp ground flax seed, whisked together with 1/2 cup filtered water
    • 2 Tbsp avocado oil or another neutral oil
    • 2 cups light coconut milk

    Pumpkin Seed Butter Maple Drizzle

    Instructions:

    1. To make the waffles, whisk together the flour, sugar, matcha, baking soda, baking powder, and sea salt in a large bowl.
    2. Then whisk the flax mixture, oil, and coconut milk together until smooth.
    3. Heat your oven to 150F degrees and oil, and pre-heat waffle iron. Once it is heated, pour about 1/3 cup batter onto the waffle iron or until the iron is just covered (but not so much that it will ooze out) and close it.  Cook according to waffle iron package directions.  Remove from the waffle maker and keep warm in the oven while you make the others.  If you have a waffle maker the size of mine (regular belgian waffles), you may have more than 8 waffles. 
    4. To make the pumpkin seed maple drizzle, whisk together all ingredients until smooth (adding a little more maple syrup if necessary to create a pour-able consistency.
    5. Serve the waffles with the syrup!

    *If you want to make these not gluten free, you can swap in organic whole wheat pastry flour or regular AP flour 1:1 for the gluten free. 

  • Vegan Lavender Lemon Waffles

    Vegan Lavender Lemon Waffles

    When I was little, my Mom made waffles for lunch or dinner more often than for breakfast. It makes sense to me, why not make them at night during the week when you have time to enjoy them, or for lunch on a weekend if you have things going on in the morning? So now I tend to make my waffles after work or in the evening as opposed to morning. Don’t get me wrong, I love the idea of brunch and elaborate breakfasts, but my mornings are usually busy with working out and getting ready to go somewhere so I don’t have time for a sit down meal. Waffles have always kind of seemed like a special thing to me also because it’s not something I make all the time and I always feel like I am enjoying dessert (which was awesome when I was little).

    So earlier this week, I decided that waffles sounded good. I have only used the Belgian waffle maker I got for Christmas once so far so it was about time! I have been loving citrus lately, so I decided on lavender lemon waffles. I love the flavor combination, and I figured the aromatic lavender was perfect for de-stressing after work.

    I used my classic waffle recipe, simplified slightly because I didn’t have one of the ingredients on hand, with the addition of both lemon zest and lemon juice. I wanted to be able to taste it and smell it in the waffles. Just a little lavender and vanilla as the additional flavors, and these were heavenly! My waffle maker makes 4 waffles at a time, so these were done in no time at all, and my kitchen smelled amazing!

    Although they tasted good just as they were, I wanted to make them a little more fancy so I whipped up some lemon cream to top them off with. They were heavenly! Crispy waffles with soft centers, the bright flavor of lemon and fragrant aroma of lavender in every bite, plus that rich lemon cream…OMG they tasted like dessert. And yes, they kind of are, but who doesn’t want dessert for their meal sometimes?!

    Vegan Lavender Lemon Waffles
    makes 8 medium sized belgian waffles

    Ingredients:

    Lemon Cream:

    • 3/4 cup thick canned full fat coconut milk (I used Thai Kitchen brand)
    • 2 Tbsp raw cashew butter
    • 1 Tbsp lemon juice
    • 1 tsp lemon zest
    • 1 1/2 Tbsp maple syrup
    • 1/3 cup Dastony coconut butter, warmed to liquid

    Batter:

    • 2 cups gluten free all purpose flour*
    • 1/4 cup maple sugar or coconut sugar
    • 1/2 tsp baking soda
    • 1 tsp baking powder
    • 1/2 tsp sea salt
    • 1 Tbsp dried lavender flowers
    • 1 Tbsp lemon zest
    • 2 Tbsp lemon juice
    • 1 tsp pure vanilla extract
    • 3 Tbsp ground flax seed, whisked together with 1/2 cup filtered water
    • 2 Tbsp avocado oil or another neutral oil
    • 2 cups light coconut milk

    Instructions:

    1. To make the cream for in between the waffles, combine all ingredients in a high speed blender or food processor until smooth.  Pour into a bowl, place in the freezer, and whisk every 15 minutes until it is thick like whipped cream (it will probably take about 45 minutes). Once it is thick enough move it to the refrigerator until you are ready to eat the waffles.
    2. To make the waffles, whisk together the flour, sugar, baking soda, baking powder, sea salt and lavender in a large bowl.
    3. Then whisk the lemon juice and zest, flax mixture, oil, and coconut milk together until smooth.
    4. Heat your oven to 150F degrees and oil, and pre-heat waffle iron. Once it is heated, pour about 1/3 cup batter onto the waffle iron or until the iron is just covered (but not so much that it will ooze out) and close it.  Cook according to waffle iron package directions.  Remove from the waffle maker and keep warm in the oven while you make the others.  If you have a waffle maker the size of mine (regular belgian waffles), you may have more than 8 waffles. 
    5. Serve the waffles with the lemon cream!

    *If you do not wish to make a gluten free waffles, whole wheat pastry flour will work as well!

  • Vegan Mocha Almond Chocolate Waffle Cake 

    Vegan Mocha Almond Chocolate Waffle Cake 

    When we get to the end of the year, sometimes I decide that I need to make a recipe that I have had in my head for a while, yet never got around to making.  Well, this year it was a waffle cake.  I have been wanting to make a waffle cake since last year around this time to be honest, but I either just decided on a standard cake, or for a while I was afraid to make Belgian waffles (the kind I would need for the cake) because every time I tried to make them in my old waffle iron they didn’t turn out. Then I finally ruined the waffle maker in the end when I messed up a recipe and added too much liquid (halving the rest of the recipe but forgot the liquid needed to be halved), and it ended up burning onto the iron so bad I had to toss it. It was about 30 years old because it was used when it was given to my Mom when I was little, so I didn’t feel too bad. But no chance for waffle cake without a maker.

    Well, luckily my Dad gave me a Belgian waffle maker for Christmas so I could make my waffle cake!  It is a nice Cuisinart waffle maker, and although the waffles are smaller than the ones my old maker made and are square instead of round, I like that I can make four at a time now.  It is so much more efficient and they come out beautifully!  No sticking! So I was super excited about the cake.  I couldn’t decide between flavors for a while, because fruit sounded good, but I figured I would save that for next Summer when berries are at their best.  So what I came up with was a mocha almond chocolate waffle cake!

    Raw Guru had recently sent me some Dastony sprouted almond butter and I knew it would work perfect in my recipe to give it a lovely almond flavor, as well as make some almond butter fudge with to drizzle over the cake, and I had plenty of cacao powder, so it was perfect!  Plus for some reason I have been making a lot of chocolate stuff lately.  I know the name of my blog has “vanilla” in it but I don’t discriminate!

    The waffles came out lovely, chocolate with a hint of coffee and almond and all they needed was some delicious things to layer them with for the cake.  I made a mocha almond cream, and the fudge I mentioned earlier to sandwich them together with and the combination was heavenly!  I also topped it all off with some crunchy toasted almonds and chocolate chips, because I love different textures!  If you don’t feel like actually heating up the oven and baking, this is a great way to make a cake, or if you want a really decadent indulgent waffle treat for brunch this would be awesome as well!  Hope you all are having a wonderful New Years eve, and I wish you all an amazing 2019!

    Vegan Mocha Almond Chocolate Waffle Cake 
    makes 1 6 layer waffle cake

    Ingredients:

    Batter:

    • 2 cups gluten free all purpose flour*
    • 1/4 cup maple sugar or coconut sugar
    • 1/2 tsp baking soda
    • 1 tsp baking powder
    • 1/2 tsp sea salt
    • 1/4 cup unsweetened cocoa powder
    • 3 Tbsp ground flax seed, whisked together with 1/2 cup plus 1 Tbsp filtered water
    • 2 Tbsp melted avocado oil or coconut oil
    • 1 cup freshly brewed coffee
    • 3/4 cup full fat coconut milk
    • 1/4 cup Dastony almond butter


    Fudge:

    • 1/2 cup Dastony almond butter
    • 1/2 cup maple syrup
    • 1/4 cup cacao powder
    • pinch sea salt
    • filtered water as needed


    Mocha Almond Cream:


    Topping:

    • toasted almonds
    • chocolate chips


    Instructions:

    1. To make the waffles, whisk together the flour, sugar, baking soda, baking powder, cayenne and cacao powder and sea salt in a large bowl.
    2. Then whisk the flax mixture, coconut oil, and coconut milk until smooth.
    3. Oil, and pre-heat waffle iron. Once it is heated, pour about 1/3 cup batter onto the waffle iron or until the iron is just covered (but not so much that it will ooze out) and close it.  Cook according to waffle iron package directions.  Remove from the waffle maker and let waffles cool completely on a wire rack.  If you have a waffle maker the size of mine (regular belgian waffles), you may have more than 6 waffles.  In that case, reserve 6 for the recipe, and enjoy the others!
    4. To make the cream for in between the waffles, combine all ingredients in a high speed blender or food processor until smooth.  Pour into a bowl, place in the freezer, and whisk every 15 minutes until it is thick like whipped cream (it will probably take about 45 minutes). Once it is thick enough move it to the refrigerator until you are ready to assemble the cake.
    5. To make the fudge, whisk together all ingredients until smooth (adding a little filtered water if too thick.  You want it to be pour-able).
    6. To assemble, place a waffle on a plate, spoon


    *If you do not wish to make a gluten free cake, whole wheat pastry flour will work as well!


  • Vegan Maple Pecan Scones

    Vegan Maple Pecan Scones

    The deli I work in makes the most delicious smelling scones.  I say delicious smelling because I have never actually tasted them since they aren’t vegan.  I don’t actually bake at work, surprising I know considering my blog.  But it keeps making desserts and baked goods enjoyable to me.  I am the one who makes all of the salads and the vegan soups, plus vegan hot food bar.  My work station is next to the cooling rack and as I am chopping my veggies, the heavenly aroma always makes me happy.  I mean, yes the cookies and everything else smells good too, but a couple of the scone flavors are my favorite smells.  In the Summer it is the strawberry, but in the Fall, it is the maple pecan.  Whenever my coworker makes them I always want to go home and bake some vegan ones so I can enjoy one.  Surprisingly though, I have never made them until this week.  I have been telling myself I should make some for years.  I have made other flavors but not the maple pecan.  Finally I got decided I had to.

    I actually learned the art of making scones from my coworker that makes the scones at work.  I have a pretty darn delicious vegan scone base I have developed over the years.  The trick is not to mix the dough too much, you don’t want it smooth, you want to leave clumps of coconut oil and to make sure that the milk and coconut oil are nice and cold before starting. For this specific scone dough, since I made pecan scones, I also added pecan meal to the dough.  It makes it extra rich and delicious!  I love adding nut meal to scones, and also pie crust sometimes for this reason.

    I didn’t actually use maple syrup in these, although you could brush them with it when they are done baking.  I used maple sugar because it has that same lovely maple flavor without the moisture.  The dough for these tasted amazing before they were baked, and I sampled quite a bit.  Yes I always have to test my dough for everything and give it a taste.  It is part of the fun of baking!  But they were even more amazing once they were done!  My kitchen smelled amazing, just like the scones at work.  Only this time I could eat them!  They have the most delicious tender buttery texture with crunchy nutty pecans and the scent of sweet maple. These would make the perfect addition to your weekend brunch!  Trust me, these aren’t your standard dry dense coffee shop scones, these are crave worthy deliciousness!

    Vegan Maple Pecan Scones
    Makes 8

    Ingredients:

    Scones:

    • 2 1/2 cups Bob’s Red Mill all purpose gluten free baking flour*
    • 1/2 cup pecan meal*
    • 1/2 cup maple sugar or coconut sugar
    • 2 1/2 tsp baking powder
    • 1/4 tsp salt
    • 1/2 cup solid virgin coconut oil, cut into chunks (if your house is above 65F degrees, chill it first)
    • 1 cup cold full fat organic canned coconut milk (whisked until smooth if chunky)
    • 1 Tbsp pure vanilla extract
    • 1 tsp maple extract (optional)
    • 1/2 cup chopped pecans
    • coconut milk for topping (if needed)
    • maple sugar or coconut sugar for sprinkling


    Instructions:

    1. Preheat oven to 425F degrees with the rack set at the middle position.
    2. Line a baking sheet with parchment.
    3. In a large bowl, combine the flour, pecan meal, sugar, baking powder, and salt. Cut in the coconut oil with a pastry blender or 2 knives until the mixture starts to clump into pea sized pieces. In a small bowl, stir the vanilla into the coconut milk. Add the coconut milk to the dough, and stir a few times, but do not over-mix. The dough should hold together when squeezed, but still be clumpy.
    4. Fold in pecans until evenly distributed.
    5. Place dough on a floured work surface, and shape into a 4 inch wide log. Use a bench scraper to cut into 8 triangles.
    6. Place scones on the prepared baking sheet, reshaping slightly if necessary.
    7. Brush the tops lightly with the coconut milk (only if they seem dry, you want the sugar to stick), and sprinkle with coconut sugar.
    8. Place in the oven and bake for about 20 minutes or until golden brown (after about 15 minutes you may need to reshape with 2 bench scrapers if the scones are spreading, then place back in the oven).
    9. Cool on a wire rack.
    10. Enjoy!


    *If you prefer to make these not gluten free, you can swap the gluten free flour for organic whole wheat pastry flour.

    *For the pecan meal, blend about 3/4 cup pecans in a blender or food processor just until ground finely, but not too long or they will become butter. This should give you enough for the recipe.

  • Vegan Snickerdoodle Crepes with Caramelized Apples 

    Vegan Snickerdoodle Crepes with Caramelized Apples 

    I had never tasted a snickerdoodle cookie until I was about 16 years old.  Surprising I know, I had tried most of the other classics, like chocolate chip, sugar, oatmeal, spice cookies, almond cookies etc.  But never the snickerdoodle. I tried one for the first time at a little coffee shop at a ski lodge up north I was at for a Nordic skiing training trip.  My friend  wanted to split one and I wasn’t about to say no to a cookie!  It was so delicious!  Like the sugar cookies that I grew up eating, but better thanks to the little sprinkle of cinnamon along with the sugar.  Perfect for Fall and Winter seasons when I am wanting cinnamon and spice.  After that I decided that I liked snickerdoodles and even made some of my own from time to time.  Cinnamon sugar is a great topping for things after all.  If you didn’t grow up with your Mom making you cinnamon sugar toast once in a while you have been deprived of something delicious.  Eric always asks me to make cinnamon sugar crepes, so I thought why not make some snickerdoodle crepes this week.  It is now Fall after all, and they just sounded good.   But me trying to always sneak fruits and veggies into everything decided that they needed an apple filling as well.

    I had bought 8 lbs of apples for some wine, but didn’t need them all, so I was looking for ways to use them in something delicious.  As excited as I was about the crepes, I was a little apprehensive because the last time I tried to make crepes about a month ago, they stuck to the pan, were all gummy and didn’t turn out.  I wasn’t sure why, and most likely it was because I forgot an ingredient or mis-measured or something but since I hate throwing things out, it made me sad.  So I prayed that these would turn out.  Lucky for me, they came out perfect this time!  This is a pretty simple crepe recipe that you just whisk all together and go for it, so it comes together fast!  I made them gluten free and nut free as well, because I know that is important to a lot of you and it was easy enough to make them that way.  They smelled amazing while cooking.  I didn’t just sprinkle the cinnamon on top, I put a little in the crepes as well, so the aromas of vanilla and cinnamon were in the air as they cooked.

    After they were done, I made some quick maple caramelized apples to fill them with. It was all super delicious once assembled and the cinnamon sugar was sprinkled on top!  If you wanted to go in more of a dessert direction with these, you could also serve them with coconut whipped cream warm with ice cream!  These would make the perfect weekend brunch treat, but of course don’t limit yourself to that, I won’t judge if you make them for dinner.

    Vegan Snickerdoodle Crepes with Caramelized Apples 

    Crepes:

    • 1/4 cup ground flax seed
    • 3/4 cup filtered water
    • 1 1/2 cups gluten free all purpose flour
    • 3 Tbsp maple sugar or coconut sugar
    • 1/4 tsp cinnamon
    • pinch sea salt
    • 1/4 cup melted coconut oil
    • 1 1/2 cups light coconut milk
    • 1 tsp pure vanilla extract


    Apples:

    • 2 medium organic sweet tart apples (honeycrisp or pink lady are good options), sliced
    • 1/4 cup maple syrup
    • 1/2 tsp cinnamon


    Topping:

    • 2 Tbsp coconut sugar mixed with 1/4 tsp cinnamon


    Instructions:

    1. To make the crepes, mix together the flax seed and water in a bowl, and set aside in the refrigerator for 15 minutes until it is the consistency of egg whites.
    2. Meanwhile, whisk together the coconut sugar, flour, and sea salt in a bowl, then whisk in the coconut oil. Slowly whisk in the milk little by little to make sure the mixture stays free of lumps. Next, whisk in the vanilla, followed by the flax mixture you had set aside.
    3. Heat a non-stick ceramic 6 inch pan over medium heat, then pour in 1/3 cup batter, and swirl the pan so that it spreads out to the edges.  Cook for about 3 minutes on the first side, then flip over and cook the second side. Once the crepe is done, set aside on a plate.  Repeat with the remaining batter, separating the crepes with parchment paper on the plate so that they don’t stick together.
    4. To make the apples, place them in the same pan you cooked the crepes in (wipe it out if necessary), and add the apples, maple syrup and cinnamon.  Cook over medium heat until the apples are soft, and the maple syrup has thickened.  Remove from heat.
    5. To serve the crepes, spoon some of the apples into the middle of each, fold them up, and sprinkle with the cinnamon sugar topping mixture.
    6. Enjoy!
  • Vegan Carrot Cake Scones

    Vegan Carrot Cake Scones

    The arrival of Spring has me in the mood for carrot cake. Because to me, it is the quintessential Spring dessert.  I mean, it is perfect for Easter celebrations, and carrots first come into season this time of the year (well not for a while in Minnesota, but in other parts of the country). I like plenty of aromatic spices in mine, and chopped pecans, and it has to have a cream cheese frosting or glaze.  Gosh, I am making myself hungry talking about it.  I had carrots on hand last weekend and it just seemed right to make carrot cake, but I didn’t have the ambition to bake a cake, make frosting, and frost it.  I wanted something a little more instant.  Scones sounded amazing as well, I was craving their flaky rich texture so, I decided to make carrot cake scones.  We make a carrot scone at the deli I work in, and I am always telling myself that I need to make a vegan version, so now was the time!  I can’t believe I have never made any carrot cake scones, I have been baking for a long time and they sounded amazing!

    These are actually pretty quick and easy to make, which is always a win!  You can be enjoying them much faster than actual carrot cake. I made a gluten free dough for them, and added in some pecan meal for richness and extra flavor.  Trust me, this little addition makes them so much better!  For spices, I added cinnamon, ginger and nutmeg and it was just enough to make them aromatic.  Yes, these have coconut oil and full fat coconut milk in them, they are not a low fat recipe, but it is so worth it!  It makes them flaky, delicious and crave worthy.  The trick to making them turn out perfect is to mix the dough just until it is starting to hold together with small lumps of coconut milk and coconut oil still in the dough, then you get those pockets of flaky perfection. I mixed in plenty of carrots and pecans and even the dough tasted good!  Yes, I eat this dough just like I do with cookie dough haha!

    They smelled amazing while baking, the sweet aroma of carrot cake spices filling my kitchen.  They baked up beautifully, and I could not wait to try them!  But first, since they were carrot cake, they needed a “cream cheese” glaze.  So I whipped one up in a minute and it was just what they needed.  These are heavenly! They have all of the flavor of sweet carrot cake, but they are rich, flaky and delicious!  That slightly tangy sweet glaze is the perfect addition. These would be perfect for an Easter brunch, but of course I recommend making them now, just because they are so good!

    Vegan Carrot Cake Scones
    Makes 8

    Ingredients:

    Scones:


    “Cream Cheese Glaze:

    • 1 Tbsp raw cashew butter at room temperature
    • 1 Tbsp coconut butter, warmed to liquid
    • 2 tsp maple syrup
    • pinch sea salt
    • 1/8 tsp cider vinegar


    Instructions:

    1. Preheat oven to 425F degrees with the rack set at the middle position.
    2. Line a baking sheet with parchment.
    3. In a large bowl, combine the flour, pecan meal, sugar, ginger, cinnamon, nutmeg, baking powder, and salt. Cut in the coconut oil with a pastry blender or 2 knives until the mixture starts to clump into pea sized pieces. In a small bowl, stir the vanilla into the coconut milk. Add the coconut milk to the dough, and stir a few times, but do not over-mix. The dough should hold together when squeezed, but still be clumpy.
    4. Fold in carrots and pecans until evenly distributed.
    5. Place dough on a floured work surface, and shape into a 4 inch wide log. Use a bench scraper to cut into 8 triangles.
    6. Place scones on the prepared baking sheet, reshaping slightly if necessary.
    7. Brush the tops lightly with the coconut milk (only if they seem dry, you want the sugar to stick), and sprinkle with coconut sugar.
    8. Place in the oven and bake for about 20 minutes or until golden brown (after about 15 minutes you may need to reshape with 2 bench scrapers if the scones are spreading, then place back in the oven).
    9. Cool on a wire rack.
    10. Whisk together the glaze ingredients until smooth, and drizzle over scones. Enjoy!


    *If you prefer to make these not gluten free, you can swap the gluten free flour for organic whole wheat pastry flour.

    *For the pecan meal, blend about 3/4 cup pecans in a blender or food processor just until ground finely, but not too long or they will become butter. This should give you enough for the recipe.

  • Vegan Banana Chocolate Chip Scones

    Vegan Banana Chocolate Chip Scones

    In the deli I work in, they make a lot of baked goods.  My work station is right next to the cooling rack, so I get to enjoy the aroma of freshly baked sweets all day long, and I admit it is certainly a mood booster.  Happy smells.  That is why I love baking so much at home too!  Yes, I know it is surprising that I don’t bake at work. I am actually the one who prepares all of the salads for our case and vegetarian and vegan soups and hot bar.  Plus, we don’t have any vegan baked goods prepared in house at the time, so I don’t eat them anyway.  I am hoping some day we do.  But in the mean time, I can still enjoy the baked goods delicious aroma at work.  Not only that, I am often times inspired to veganize them at home, and then share the recipes with you all!  One of my coworkers makes the most amazing scones. A long time ago I had tried them (before I went vegan, I have worked there 12 years), and they were the most delicious scones ever.  Perfect flaky texture, perfect amount of sweetness and super tender. And, I was lucky enough to have her teach me how to make scones, because she was making a big batch for a party and needed help.  So I learned how to properly mix the dough so that they turn out perfect.  The key is to leave clumps and not over-mix them.  I started making my own at home and they were just as delicious, and later I came up with the perfect vegan recipe.  It really wasn’t hard to veganize, swapping the butter for coconut oil, heavy cream for coconut cream, and leaving out the eggs made them even better in my opinion.

    So, the other day, she made banana chocolate chip scones, and there they sat, smelling amazing on the rack next to me.  I had to make a veganized version.  Surprisingly I have never made any banana scones before.  So it was a good time to try it!  I actually ended up making these twice, because the first attempt got over-mixed and slightly over baked.  And, I wanted them to be perfect to make sure they would be good if you all made them.  I make mistakes too sometimes, so don’t ever feel bad if you do!  Anyways, back to the scone recipe.  For the base, I used gluten free flour, coconut sugar to sweeten, and a touch of cinnamon and nutmeg.  Once I added in the coconut oil and full fat coconut milk, it was perfect!  Yes, I enjoy eating scone dough too.  Be sure to use full fat coconut milk for these by the way, you want the thick creamy part from the top of the can.  Because this is what replaces the heavy cream in classic scones.  No, these are not fat free, but hey, we all need a little fat sometimes in our diets and these are a treat.

    I mixed in the bananas and chocolate chips, and shaped them into little triangles and they looked so good even before I baked them!  They smelled amazing while baking, and I could not wait to try them.  But of course they needed to cool so I had to wait a bit.  But it was so worth the wait!  The scone was tender and flaky, with sweet bits of jammy banana and gooey rich chocolate chips (I had it warm).  I love veganizing recipes!  If you are looking for the perfect thing to bake on a lazy weekend morning, this is it!  After all, the smell of fresh baked goods in the morning will make you feel happy all day.

    Vegan Banana Chocolate Chip Scones
    Makes 8

    Ingredients:


    Instructions:

    1. Preheat oven to 425F degrees with the rack set at the middle position.
    2. Line a baking sheet with parchment.
    3. In a large bowl, combine the flour, sugar, cinnamon, nutmeg, baking powder, and salt. Cut in the coconut oil with a pastry blender or 2 knives until the mixture starts to clump into pea sized pieces. In a small bowl, stir the vanilla into the coconut milk. Add the coconut milk to the dough, and stir a few times, but do not over-mix. The dough should hold together when squeezed, but still be clumpy.
    4. Fold in bananas and chocolate chips until evenly distributed.
    5. Place dough on a floured work surface, and shape into a 4 inch wide log. Use a bench scraper to cut into 8 triangles.
    6. Place scones on the prepared baking sheet, reshaping slightly if necessary.
    7. Brush the tops lightly with the coconut milk (only if they seem dry, you want the sugar to stick), and sprinkle with coconut sugar.
    8. Place in the oven and bake for about 20 minutes or until golden brown (after about 15 minutes you may need to reshape with 2 bench scrapers if the scones are spreading, then place back in the oven).
    9. Cool on a wire rack.


    *If you prefer to make these not gluten free, you can swap the gluten free flour for organic whole wheat pastry flour.

  • Vegan Caramel Apple Pancakes

    Vegan Caramel Apple Pancakes

    As far as I am concerned, last weekend was the perfect Fall weekend here in Minnesota.  Cool and 40F degrees in the AM, which is perfect for running through the crunchy leaves (one of my favorite parts of fall), and 70F degrees and sunny in the afternoon, which is ideal weather for visiting the local apple orchard.  Which is exactly what I decided to do!  Eric and I hit up a local new winery, 7 Vines Vineyard for their grand opening first, because it was close to the apple orchard that we were going to go to, and why not enjoy some wine AND apples.  On the way to the winery, we saw a giant line of cars that was about a mile long trying to get into the apple orchard, so we decided that we should probably go to a different one on the way back.  I am one of those people who really can’t stand crowds, and did not want to wait in line an hour to get in.  Luckily, the winery was not as packed but still busy, and we got to enjoy some delicious red wines.  I know there are delicious wines from all over the world, but I like to try and support local businesses.  Plus, nothing beats sipping your wine with a view of the vineyard, especially on a day like that where the weather is perfect.  So, we ended up going to another smaller apple orchard, Victoria Valley Orchard on the way back and not the one with the traffic jam, and I was happy I did.  It is actually right up the street from where I work, so very convenient location for me to visit, and it is family owned.  Their apples are just as good as the other larger orchards, but you don’t have to fight the crowds.  We even ran into a flock of turkeys in there, which were probably thinking that they were the luckiest birds in the world getting to feast on apples that had fallen to the ground.  It was all in all a good day, and I got my apples so I was happy.

    So what am I going to do with all of the apples?  Well, I wanted to try making an apple wine, and of course I have to make some more apple desserts like pies and crisps. I know you can get apples year round, but when you can get fresh local apples they just always taste so much better. I also decided to make some Vegan Caramel Apple Pancakes.  Because I hadn’t made pancakes in a while and they just sounded so good!  For the batter I used applesauce, cinnamon and nutmeg to give them that spiced apple flavor and I planned to top them off with sauteed apples too.  I used almond butter in place of the oil because I actually prefer it.  So, these are actually oil free!  They smelled amazing while cooking, kind of like the apple doughnuts that you smell being made when you visit some of the local apple orchards.  I also made a gooey caramel to top them off instead of just syrup.

    They turned out so good!  This is the perfect lazy Saturday morning treat.  Or dinner treat…since I made them actually in the evening. My Mom made pancakes sometimes for dinner when I was little and I always felt like I was getting something special.  So, I like to carry on that tradition.  If you have a bunch of apples, and are looking for yummy ways to use them, give these delicious pancakes a try!

    Vegan Caramel Apple Pancakes
    Makes 12

    Ingredients:

    • 1 1/2 cups gluten free all purpose flour
    • 2 tsp baking powder
    • 1 tsp cinnamon
    • 1/8 tsp nutmeg
    • 1/2 cup applesauce
    • 3/4 cup filtered water
    • 1/4 cup almond butter
    • 2 tsp pure vanilla extract
    • 1/4 tsp sea salt
    • 3 Tbsp maple syrup


    Topping:

    • 2 large apples, sliced
    • 2 Tbsp maple syrup
    • 1/2 tsp cinnamon
    • pinch sea salt


    Caramel:

    • 1/4 cup almond butter
    • 1/4 cup maple syrup
    • 2 Tbsp filtered water (or as needed)
    • pinch sea salt
    • 1 tsp pure vanilla extract


    Directions:

    1. In a food processor, combine all pancake ingredients and process until just blended, pour into a bowl and set aside.
    2. Meanwhile, to make the apples, place them in a non-stick skillet over medium heat with the maple syrup, cinnamon and sea salt and sautee until they are tender and starting to turn translucent (stirring often), about 10 minutes. Set aside.
    3. To cook pancakes, preheat oven to 110 degrees. Heat a large ceramic non-stick pan over medium heat. Once hot, add the batter in 1/4 cup amounts (I did 3 at a time, but it depends on your pan), and let cook for about 2-3 minutes on the first side until set and starting to brown, then flip with a spatula, and cook another 2-3 minutes.
    4. When cooked, place on a plate and keep warm in the oven while you repeat the process with the remaining pancakes.
    5. To make the caramel, whisk all ingredients together until smooth (adding a little more water if too thick to pour) and set aside until you are ready to serve.
    6. To serve, stack the pancakes on a plate, top off with the apples and caramel, and enjoy!

    *Note: If you do not own a non-stick pan, you may need to lightly oil your pan to prevent sticking, if you do not mind these not being oil free.

  • Vegan Blueberry Pop-Tarts

    Vegan Blueberry Pop-Tarts

    Pop-tarts were all the rage when I was little.  I remember a few of my friends bringing them to school for a snack every morning, and begging my Mom to get some.  My Mom let me get some, but I wasn’t allowed to have too many, because she tried to get me to eat healthier.  The Pop-tarts were ok, I think I liked the cinnamon sugar ones more as opposed to the fruit ones because they tasted artificial to me. But what I ended up really liking were toaster streudels.  Those greasy little frozen fruit toaster pastries that you squeeze cream cheese glaze on after they come out of the toaster. I would have eaten a whole box if my Mom let me.  Anyways, I like the concept of Pop-tarts, they are portable and cute, and I have made some as an adult that were way better than any I had as a kid.  The latest of which was blueberry.

    I just randomly decided to make some after work on Wednesday.  It was a hectic day with lots of stress at work, and I wanted nothing more than to relax and bake something.  Pop-tarts are fun and delicious, so they were perfect.  I figured I could share some with Eric too since he always needs snacks to bring to work.  My pop-tarts are more like mini pies though than those flavorless ones I had as a kid.  They actually are made with my classic pie crust so the crust even tastes delicious and not just the filling.  For the filling though, I made a quick sort of simple cooked blueberry jam and it was perfect!

    It is kind of relaxing to sit and cut shapes out of dough that you have rolled out as long as you have the time.  Like at Christmas when you are making fun cookies.  These were free form cutting, but sometimes I find meticulous things that I have to rely on myself for accuracy relaxing.  Don’t worry, these are not complicated, just straight edges, and if you don’t trust yourself, you can always use a ruler to help.  They turned out super cute and more uniform than I expected.  I even glazed them with a purple blueberry coconut butter glaze to make them more pretty and sprinkled some crushed up dried blueberries over them as sort of natural “sprinkles”.  These are 100 times better than real Pop-tarts, just sayin’.  You can even freeze them in a bag for enjoyment later if you wish, or if they last that long.  Did you eat Pop-tarts as a kid?  If so, what was your favorite flavor?

    Vegan Blueberry Pop-Tarts
    Makes 6

    Crust:


    Filling:

    • 1 cup fresh organic blueberries
    • 1 Tbsp maple syrup
    • 1/2 Tbsp arrowroot powder (or cornstarch) dissolved in 1/2 tsp lemon juice


    Glaze:

    • 3 Tbsp coconut butter, warmed to liquid
    • 1 Tbsp blueberry juice
    • 1 Tbsp maple syrup
    • pinch sea salt
    • 3-4 Tbsp filtered water or as needed


    Instructions:

    1. To make the crust, in a large bowl, mix together flour, sugar, and sea salt. Cut in coconut oil with a pastry blender or 2 knives until it is in pea sized pieces. Mix in just enough water to create a smooth dough that holds together but isn’t too sticky. Add more water if needed, and knead slightly until a smooth dough is created.
    2. Roll out into a large rectangle and cut into 12 identical rectangles.  Chill if too soft before assembling.  You want the dough a little pliable, but not so warm that it will break. Preheat oven to 375 degrees.
    3. To make filling, heat the berries and maple syrup in a small saucepan over medium heat, and cook them until they start to burst, about 10 minutes.  Add the arrowroot and lemon juice and cook until thickened.  Remove from heat, and set aside.
    4. To assemble, spread about 2 Tbsp jam over half of the dough rectangles (leaving a boarder so you can attach the dough at the sides). Cover with the remaining pieces of dough (I used a small spatula to carefully move them), pressing the edges and crimping with a fork or the edge of something with a flat edge, like a spatula. Bake for about 30 minutes until the crusts are starting to brown lightly. Remove from oven and let cool on a wire rack until warm.
    5. Whisk glaze ingredients together until smooth (adding more water if too thick, you want it to be pour-able). Spoon some of the glaze over each pop tart, and smooth it out to cover the top. Let set before serving.
  • Vegan Blueberry Peach Anise Scones

    Vegan Blueberry Peach Anise Scones

    Have you ever been to a coffee shop or bakery, bought a scone, and it tasted dry, crumbly and just sugary without much other flavor? Well, I have.  Honestly, I thought that I did not like scones at all until I started working at my job in the deli and was taught by one of my coworkers how to properly make them.  Her scones are amazing.  They are rich, flaky, flavorful and delicious.  However they are not vegan so I no longer eat them, but I have been working there since before I became vegan so I had sampled some in the past.  The trick is not to over mix the dough or it will become tough and not delicate and buttery.  Also, it helps if your milk (or coconut milk in my case) and butter (or coconut oil in my case) are chilled so that they create pockets of deliciousness that melt only when baked.  A while back I came up with a veganized version of those work scones, and I think they are just as good and you feel better after eating them.  Mine also happen to be gluten free too, which is another win.

    I was in a scone making mood after work one day last week, and I had a ripe peach and some blueberries so I thought why not blueberry peach scones?! I decided to add in some oatmeal as well, since I love the texture, and some anise for sweetness.  It was a delicious combination, and I knew it would be good when I sampled the dough.  I always have to sample my dough for cookies, scones, and brownie and cake batters.  Not only is it delicious and part of the process that I enjoy, but it has prevented me from forgetting to add ingredients like the sugar or sweetener before. This scone dough was heavenly.

    They smelled amazing while baking as well, almost like pie because the fruit started to get a little jammy in the hot oven just as it should.   These turned out just right, not dry or too crumbly.  Just incredibly tender and delicious, the jammy sweet fruit suspended in the flaky rich fragrant dough.  If you are looking for the perfect lazy Saturday morning treat, this would be it!

    Vegan Blueberry Peach Anise Scones
    Makes 8

    Ingredients:


    Instructions:

    1. Preheat oven to 425 with the rack set at the middle position.
    2. Line a baking sheet with parchment.
    3. In a large bowl, combine the flour, oats, sugar, baking powder, anise and salt and whisk together.
    4. Add the coconut oil, and cut in with a pastry blender or 2 knives until the mixture starts to clump into pea sized pieces.
    5. In a small bowl, stir the vanilla into the coconut milk. Add the coconut milk to the dough, and stir a few times, but do not over-mix. The dough should hold together when squeezed, but still be clumpy. fold in fruit until evenly distributed.
    6. Place dough on a floured work surface, and shape into a 4 inch wide log. Use a bench scraper to cut into triangles. There should be about 8.
    7. Place scones on the prepared baking sheet, reshaping slightly if necessary.
    8. Brush the tops lightly with the coconut milk (only if they seem dry, you want the sugar to stick), and sprinkle with coconut sugar.
    9. Place in the oven and bake for about 20 minutes or until golden brown (after about 15 minutes you may need to reshape with 2 bench scrapers if the scones are spreading, then place back in the oven).  Remove from oven.
    10. Cool on a wire rack.
  • Vegan Citrus Margarita Pancakes with So Delicious and Kitchen I.Q.

    Vegan Citrus Margarita Pancakes with So Delicious and Kitchen I.Q.

    This is a sponsored post.  All opinions are my own.

    Pancakes are always good, no matter what meal you decide to make them for.  When I was younger my Mom used to make them for dinner sometimes, and I loved it!  Because I was never going to turn down pancakes.  Especially when fresh fruit was included.  Pancakes also remind me of lazy Saturdays, and brunches on Sundays after church. They are sort of a treat, or at least that is what I thought as  kid when I had them.  I had hit the jackpot!  When I make them now as an adult, they are usually not the standard plain with maple syrup.  I like to give them a little imagination and seasonal ingredients.  The ones I made last weekend were super delicious, they were Margarita Citrus Pancakes!  Just in time for patio brunch season.  I just had to share them with you all.  Not only were they good, I got to try out some new products while making them, which was exciting!

    So Delicious Dairy Free and Kitchen IQ were kind enough to send me some things to use for my recipe.  If you are vegan, no doubt you have heard of So Delicious Dairy Free products.  They carry yogurts, ice creams, milk, creamer and desserts among other things, and they are all darn delicious.  I was excited to try their culinary coconut milk, since I had never had it before, and let me tell you, I ended up liking it better than the previous brand I had been using.  It was super creamy and rich, perfectly emulsified and ready to use.  It worked perfect in my pancakes, and I can’t wait to try it in other things!  The Kitchen IQ products were really fun to use as well! They come in fun colors, mine were lime green which is perfect for Spring! I got a 3 in 1 mini prep multi tool, which worked well for cleaning the citrus since it has a brush on one side.  If you are using the zest in recipes you want to make sure it is clean.  It also has a peeler and chopper to be used for another recipe.  I was also sent the 3 in 1 prep and measure tool, which was perfect for juicing the citrus and measuring it out, and a V etched grater, which worked awesome for the zest in the recipe.  Zest is essential for citrus recipes because it gives them more flavor and fragrance, and this one is perfect because it catches the zest, and measures it out!  Their V etched spice grater worked wonderfully with some nutmeg, and lastly, the compact digital scale they sent was a great way to get accurately measured flour.  This is probably one of the coolest scales I have seen.  It folds up, and it works just as well as larger scales.  There is no better way to have accurate measurements than using a scale, so I was excited about this! The recipe came together fast, and was easy to make which is always a win!

    For the pancakes, I included plenty of citrus flavor since these were margarita pancakes, and they have to have lime and orange.  The grater came in handy because it supplied lots of super fragrant zest.  The grater that I used to have before this one kind of was a piece of junk (and it is in the garbage now since it was super dull), and I did not know what I was missing until I tried this new one by Kitchen IQ.  It works so much better.  I used the super creamy coconut milk from So Delicious Dairy Free in the batter and it gave them a delicious rich texture.  The pancake batter smelled wonderful, and they cooked up nicely and filled my kitchen with a wonderful aroma.  These were margarita pancakes…so they HAD to include some tequila as well.

    Not so much that it was overwhelming, but I thought a tequila citrus maple syrup would be perfect.  So, I reduced some citrus juice, and maple syrup, and added in some tequila, zest, and sea salt.  These pancakes were sooo good! Like a margarita in breakfast form. This would be a super fun brunch recipe for say…Mother’s Day!  I know my Mom would love them.  You could even serve them with margaritas if you wanted.  Why not?! So, if you are looking for a good brand of coconut milk, check out So Delicious Dairy Free Culinary!  I think it may just be my new go-to coconut milk!  Also, if you want to make cooking easier, and are looking for some new kitchen tools and toys, check out Kitchen IQ! Because, I don’t know about you, but I love trying new vegan products and kitchen tools!

    Vegan Citrus Margarita Pancakes
    Makes 12

    Pancakes:

    • 9.20 oz (about 1 1/2 cups) gluten free all purpose flour
    • 2 Tbsp organic lime zest
    • 1 Tbsp organic orange zest
    • 2 tsp baking powder
    • 1/8 tsp freshly grated nutmeg
    • 2 Tbsp lime juice
    • 1 Tbsp orange juice
    • 1/2 cup avocado oil
    • 1 1/4 cups So Delicious Original Culinary coconut milk
    • 2 tsp pure vanilla extract
    • 1/4 tsp sea salt
    • 3 Tbsp maple syrup


    Citrus Tequila syrup:

    • 1 cup orange juice
    • 1/2 cup lime juice
    • 1/4 cup maple syrup
    • 2 Tbsp silver tequila
    • 2 tsp lime zest
    • pinch sea salt


    Instructions:

    1. To make the pancakes, in a food processor, combine all pancake ingredients and process until just blended, pour into a bowl and set aside.
    2. To cook pancakes, preheat oven to 110 degrees. Heat a large non-stick pan over medium heat. Once hot, add the batter in 1/4 cup amounts (I did 3 at a time, but it depends on your pan), and let cook for about 2-3 minutes on the first side until set and starting to brown, then flip with a spatula, and cook another 2-3 minutes. When cooked, place on a plate and keep warm in the oven while you repeat the process with the remaining pancakes.
    3. To make the syrup, heat the orange juice, lime juice, and maple syrup in a saucepan, and bring to a boil.  Simmer for about 15 minutes or until the syrup has reduced to 1/3 of its original volume.  Stir in the tequila, lime zest and sea salt.
    4. Serve the pancakes with fresh fruit, and top the pancakes with the syrup!

    *Note: If you do not have a non-stick pan, go ahead and use a little oil when cooking the pancakes to prevent sticking.

  • Vegan Chocolate Quinoa Pancakes

    Vegan Chocolate Quinoa Pancakes

    I always think it is funny listening to people try to pronounce the word quinoa for the first time.  “Qhinwah?  Keenohah? Keen-way?  I am not sure how to say it…”  We have all been there honestly, and it is hard to pronounce for first timers. I first started making it when I started working at the health food store 11 years ago.  It became part of my diet because it is high in protein, and fiber and I am not a huge rice eater. I make quinoa a lot for dinner with things like quinoa bowls or quinoa salad, but I don’t often venture much beyond that in the realm of quinoa. So, I decided to make something a little different with it a few nights back.  Something sort of sweet, pancakes!  I was just in a pancake making mood, and I was going to make chocolate pancakes anyway (I had decided at work in the middle of the day when I was really hungry), so I thought why not add some quinoa for extra protein?  I was always a fan of whole grain pancakes, and although quinoa isn’t a grain (it is a seed), it has the same affect in pancakes, adding heft and deliciousness.

    For the pancake base, I used gluten free flour because it is what I always have on hand.  I like Bob’s Red Mill All Purpose Gluten Free, because I find that it works well, and it is made with bean flours which I appreciate.  I added a little apple sauce in place of the eggs and oil, so these were pretty light pancakes.  I have a really nice ceramic pan which worked beautifully for cooking them without having to oil.  I added in chocolate chips, because the little kid in me wanted to.  I mean, nothing was better than chocolate chip studded pancakes as a kid, right?  The quinoa kind of blended in and added texture and protein.  They smelled wonderful while cooking, like brownies. I decided to make a chocolate syrup to go over them, and it was the perfect addition because I wanted something really chocolaty.  These were just that.  Chocolate in 3 forms!  Dessert for dinner, sometimes you just have to do it.  Yes, I made these in the evening.  I usually don’t have time in the morning or the patience to make pancakes.  My mornings consist of going for a run, and heading off to work after showering and eating with little time in between.  But breakfast for dinner is awesome!

    If you wanted to be a little more healthy and less sweet with these, you could use a fruit puree instead of the syrup.  I think mashed raspberries would be awesome!  I love raspberries and chocolate together.  But anything goes!  Taylor these to your taste buds, maybe some just sliced fruit on top, or if you wanted to go the other direction and be more decadent, some coconut whipped cream!  The possibilities are endless!

    Vegan Chocolate Quinoa Pancakes
    Makes 12

    Ingredients:

    Pancakes:

    • 1 1/2 cups gluten free all purpose flour
    • 1/4 cup unsweetened cocoa powder
    • 2 tsp baking powder
    • 1/2 cup applesauce or mashed banana
    • 1 1/3 cups thin coconut milk
    • 2 tsp pure vanilla extract
    • 1/4 tsp sea salt
    • 1/4 cup maple syrup
    • 1 cup cooked quinoa
    • 3/4 cup vegan chocolate chips (optional)


    Chocolate Syrup:

    • 1/4 cup maple syrup
    • 1/4 cup unsweetened cacao powder
    • pinch sea salt


    Instructions:

    1. In a food processor, combine all pancake ingredients except quinoa and chocolate chips and process until just blended.  Pour into a bowl, stir in the quinoa and chocolate chips, and set aside.
    2. To cook pancakes, preheat oven to 110 degrees. Heat a large non-stick pan over medium heat. Once hot, add the batter in 1/4 cup amounts (I did 3 at a time, but it depends on your pan), and let cook for about 2-3 minutes on the first side until set and starting to brown, then flip with a spatula, and cook another 2-3 minutes. When cooked, place on a plate and keep warm in the oven while you repeat the process with the remaining pancakes.
    3. To make the topping, whisk together the syrup and cacao powder and sea salt until smooth (adding a little water if too thick, or more cacao powder if too thin).   Top the pancakes with it!

    *Note: If you do not have a non-stick pan, and don’t mind these not being oil free, go ahead and use a little coconut oil when cooking them to prevent sticking.

  • Vegan Peanut Butter Banana Chocolate Chip Pancakes

    Vegan Peanut Butter Banana Chocolate Chip Pancakes

    pb-banana-chocolate-chip-pancakes-5

    Banana pancakes were one of the first vegan recipes I made back in the day.  The Summer I was teaching myself to cook, and I had gotten a bunch of vegetarian and vegan cookbooks from the library to page through.  I was a pretty new vegetarian with not much cooking experience but I wanted to learn!  I made a different recipe every day.  The vegan pancakes seemed like a super easy recipe, and sounded really good so I went for it!  They were delicious!  I decided that those were one of the best uses for over ripe bananas.  To make them even more delicious I sometimes added chocolate chips.  A classic combo!  I thought to myself, vegan food isn’t so hard, and it is good too!  I admit back then it was sort of a foreign concept to me, and I didn’t understand why people went vegan (at the time oblivious to the fact that the meat, dairy and egg industry is horrible) besides just to eat healthier.  I was under the impression that vegan food was bland or gross, and everything needed cheese or dairy on it. Well, making recipes like the pancakes, got me to thinking otherwise and looking into it more.  I am really happy being vegan now, and I feel good too!  That is what counts.

    pb-banana-chocolate-chip-pancakes-1

    I have since made many vegan pancakes, and 99% of them have been delicious.  The other 1%?  I like to experiment with things and sometimes those experiments don’t work out.  I made some pancakes a few days back and they were definitely a win, so I thought I would share the recipe with you all.  A co-worker and I had been discussing how good banana pancakes sounded, so I went home and made some.  I hadn’t made any in a really long time.  I have come up with my own recipe since that first recipe I made so long ago, and I like to think it is really good.  They are oil free and quick and easy to make!  I decided to add peanut butter and chocolate chips this time, because it is such a delicious combo!  These are mixed in a blender, which makes them easier, and I like to cook them in a ceramic non-stick pan because then there is no need for oil.

    pb-banana-chocolate-chip-pancakes-2

    They smelled amazing while cooking, and I could not wait to try them. I decided to make a chocolate peanut butter fudge syrup to serve them with.  Talk about pure decadent deliciousness!  Of course if just plain old maple syrup is your jam go ahead and serve them with that. These are so good!  I think just about any adult or child would love them. I know my boyfriend Eric does.  If you are allergic to peanuts or not a fan, any other nut or seed butter will work in their place and give the recipe its own unique flavor.

    pb-banana-chocolate-chip-pancakes-3

    Vegan Peanut Butter Banana Chocolate Chip Pancakes
    Makes 12

    Ingredients:

    • 1 1/2 cups gluten free all purpose flour
    • 2 tsp baking powder
    • 1/2 cup mashed banana
    • 1 cup filtered water
    • 1/4 cup peanut butter
    • 2 tsp pure vanilla extract
    • 1/4 tsp sea salt
    • 3 Tbsp maple syrup
    • 1/2 cup vegan chocolate chips

    Directions:

    1. In a food processor, combine all pancake ingredients (except the chocolate chips) and process until just blended, pour into a bowl and set aside.
    2. To cook pancakes, preheat oven to 110 degrees. Heat a large ceramic non-stick pan over medium heat. Once hot, add the batter in 1/4 cup amounts (I did 3 at a time, but it depends on your pan), and let cook for about 2-3 minutes on the first side until set and starting to brown, then flip with a spatula, press a few chocolate chips into the top (if you mix them in before hand they get all gooey on your griddle this is why I press them in), and cook another 2-3 minutes.
    3. When cooked, place on a plate and keep warm in the oven while you repeat the process with the remaining pancakes.

    *Note: If you do not own a non-stick pan, you may need to lightly oil your pan to prevent sticking, if you do not mind these not being oil free.

  • Mini Vegan Coconut Orange Sweet Rolls

    Mini Vegan Coconut Orange Sweet Rolls

    coconut-orange-sweet-rolls-4

    When I was little, sometimes my Mom would buy take and bake sweet rolls.  I know everyone’s favorite is the caramel or cinnamon variety usually, but she would buy the orange, and add coconut to them to jazz them up a bit.  Now they may have been store bought rolls, but they were super delicious to my 8 year old self.  They remind me of lazy Saturday mornings when I would get up and watch cartoons with the cat in my princess outfit (I was lucky enough to have a Grandma that was very good at sewing and I would beg her to make me costumes), while I waited for the rolls to bake.  I was quite excited when they were cool enough to dive into.  The fact that they were not home made never dawned on me, I just thought they were a special treat.  One that I have not forgotten.  Now, I have made many varieties of sweet rolls as an adult, but for some reason never any with coconut and orange. Well, I decided that needed to change.

    coconut-orange-sweet-rolls-3

    I told my Mom I was going to make some, and she was excited too!  These would be home made, and just as good if not better than those ones we used to eat.  I used a quick sweet roll dough for these, because I don’t usually keep yeast on hand, plus I don’t like waiting around for dough to rise etc.  These come together and are served in less than 45 minutes, which is almost unheard of for sweet rolls.  I made them mini rolls, because I love cute little desserts, and they bake up faster.  I scented the dough with orange, and made a sweet coconut orange filling which got rolled up and baked into the soft dough.  These actually only take 10 minutes to bake!  And let me tell you, in those 10 minutes your kitchen will smell amazing!

    coconut-orange-sweet-rolls-1

    I topped them off with an orange coconut glaze, and they were just as I imagined they would be!  Sweet soft dough, fragrant with orange and coconut plus a hint of vanilla.   Just as good as those childhood rolls, but way healthier!  My Mom much approved as well telling me, “Since they are small, I can have 4 at a time right?”  Totally yes.  That is my mentality too.  These are perfect for making this time of the year when citrus is at its best and most flavorful, if you have a craving for something sweet and orange scented, give these a try!

    coconut-orange-sweet-rolls

    Mini Vegan Coconut Orange Sweet Rolls
    Makes 9

    Dough:

    Filling:

    • 2 Tbsp coconut butter, warmed to liquid
    • 2 Tbsp maple syrup
    • 1 Tbsp orange zest
    • 1/2 tsp pure vanilla extract
    • 1/4 cup finely shredded, dried unsweetened coconut

    Glaze:

    • 3 Tbsp coconut butter, warmed to liquid
    • 1 Tbsp maple syrup
    • 1/2 tsp pure vanilla extract
    • 3 Tbsp orange juice (or as needed)

    finely shredded, dried unsweetened coconut for topping

    Directions:

    1. Preheat the oven to 375F degrees.
    2. To make the dough, combine the flour, guar gum, baking powder, baking soda and salt in a bowl, and mix together. Mix in the orange juice, vinegar, and coconut oil until blended, then knead the dough lightly and place it on a sheet of parchment (dust it lightly with flour). Roll out 1/4 inch thick in a rectangle on the parchment in a rectangle 6 inches wide top to bottom.
    3. Mix together the filling ingredients, and spread over the dough (leaving a 1/2 inch boarder at the top and bottom). Roll up from the top down jelly roll style. Cut into 9 pieces, and place cut side up in a non-stick mini muffin tin.
    4. Place in the oven and bake for 10 minutes until puffed up and starting to brown a little (but do not overbake). Remove from the oven and let cool until warm.
    5. Whisk together glaze ingredients until smooth (adding a little more orange juice if you think it is too thick to spoon over nicely), and spoon over the tops of the rolls, sprinkle with coconut. Enjoy!


  • Vegan Gingerbread Waffles

    Vegan Gingerbread Waffles

    It was below zero yesterday, and all I could think about all day at work was getting warm when I got home. I work in a kitchen, so you would think it would be warm there, but not so much when the drafts come in from the front of the store. I even used my treadmill that morning instead of running outside, because I didn’t feel like dressing like the kid in “A Christmas Story”. One of my coworkers had baked some molasses cookies, and I thought to myself. Mmm warm gingerbread something sounds good! So I decided that I would make something of the gingerbread variety when I got home. I decided on waffles. I have never made gingerbread waffles before, and I hadn’t made waffles in a while. The funny thing about me and waffles is they rarely get made for breakfast, always in the evening for dinner.

    gingerbread-waffles

    My Mom made breakfast for dinner sometimes, and I liked that idea. But you can make these whenever your little heart desires. Make them at midnight if you have a craving for waffles and feel like it! My boyfriend Eric works an overnight shift, so he is eating his lunch at midnight. He isn’t picky what time of the day he eats his waffles. Anyways, these are really simple to make. Just whisk together the batter, cook them (I like to keep mine warm in the oven while I cook the others until they are all done), and enjoy! I made these on my cute little Frozen (as in the Disney movie) waffle maker I got from my Dad last year. He knows I love anything cute that has to do with food prep. It makes the most adorable little snowflake waffles. I think it is meant for kids, since they are smaller, but I am one big kid.

    gingerbread-waffles-2

    They smelled amazing while cooking, like gingerbread cookies! You can serve these with whatever you prefer, like the classic maple syrup, or drizzle them with chocolate fudge syrup like I did! I hope you are all staying warm this winter!

    gingerbread-waffles-3

    Vegan Gingerbread Waffles

    makes 10-12 depending on your waffle maker

    Batter:
    2 cups gluten free all purpose flour
    1/4 cup coconut sugar
    1/2 tsp baking soda
    1 tsp baking powder
    2 tsp cinnamon
    2 tsp ginger
    1/4 tsp nutmeg
    1/4 tsp cloves
    1 tsp sea salt
    1/2 cup plus 1 Tbsp aquafaba*
    1 1/2 Tbsp molassess
    2 Tbsp melted coconut oil
    2 cups thin coconut milk

    Whisk together all of the dry ingredients, then whisk in the wet ingredients.  Pre-heat waffle iron. Once it is heated, add about 1/3 cup waffle batter to the iron and close it (the size of the scoop of batter you need may change if you have a larger iron, mine is smaller).  Cook according to waffle iron package directions.  Keep warm in an oven at low heat (150F degrees) until serving.

    *Aquafaba is chickpea liquid.  You may used canned, or if you are using the liquid from home cooked chickpeas, reduce it to the consistency of egg whites.  Alternatively, you may use 3 flax eggs for the recipe (3 Tbsp ground flaxseed, whisked together with 1/2 cup plus 1 Tbsp filtered water).

    *For the chocolate fudge syrup I served them with, whisk together unsweetened cocoa powder, a pinch of sea salt, and maple syrup until smooth, (I start with equal parts, about 3 Tbsp each) adding more syrup if too thick, more cocoa powder if too thin until you get a consistency you like.

  • Vegan Gingerbread Crepes

    Vegan Gingerbread Crepes

    Thanksgiving has come and gone, so that means Christmas, Christmas everywhere!  Pretty soon you won’t be able to go anywhere without hearing Christmas music, or seeing festive decorations.  Sometimes I think people go a little overboard, with big decorations but you know what?  Whatever makes them happy!  My Mom was always kind of a minimalist when it came to decorating our home growing up, classic white lights, nature decorations like pine cones and boughs, and I guess that is what I have grown to like.  But you know, what makes me much more happy than Christmas music and decorations, is Christmas goodies!  I love baking cookies this time of the year of course, and gifting them, but this time of the year means making things with the flavors of the season like gingerbread!  Which I don’t believe should be limited to just cookies.  So, since it is Christmas time, I made some gingerbread crepes.  I have been wanting to make crepes for a few weeks now, and since I can finally make the fun Holiday flavored ones I went for it!

    gingerbread-crepes-3

    They were super easy and quick to make! Just whisk together the ingredients, cook them and enjoy!  They smell like gingerbread cookies while cooking!  It is one of the things about the Holidays that I love, all of the good smells.  Reminds me of when my Mom and I used to bake a lot of cookies, fill a big tin and enjoy them for the next few months after.  Gingerbread was usually included.  Anyways, once they were finished, I simply dusted them with a little coconut sugar, served them with a little coconut whipped cream, and they were sooo good!

    gingerbread-crepes-2

    If you are looking for a special little treat to make for Holiday brunch, or an indulgent weekend breakfast, these are perfect!  I think they would be good with some cranberry sauce or jam included too (not the canned stuff though, the good home made stuff).  Or, even topped with chocolate fudge…because chocolate and ginger are amazing together too!  That is the thing I love about crepes, you can stuff them with whatever you want, or keep them really simple with sugar on top.

    gingerbread-crepes-1

    Vegan Gingerbread Crepes
    Makes 14

    Crepes:

    1/4 cup ground flaxseed
    3/4 cup filtered water
    1 1/2 cups gluten free all purpose flour
    3 Tbsp coconut sugar
    2 tsp cinnamon
    2 tsp ginger
    1/4 tsp nutmeg
    1/4 tsp cloves
    pinch sea salt
    2 Tbsp molassess
    1/4 cup melted coconut oil
    1 1/2 cups light coconut milk
    1 tsp pure vanilla extract

    coconut sugar and coconut whipped cream for serving

    To make the crepes, mix together the flaxseed and water in a bowl, and set aside in the refrigerator for 15 minutes until it is the consistency of egg whites.

    Meanwhile, whisk together the coconut sugar, flour, and sea salt in a bowl, then whisk in the coconut oil. Slowly whisk in the milk little by little to make sure the mixture stays free of lumps. Next, whisk in the vanilla, followed by the flax mixture you had set aside.

    Heat a non-stick 6 inch pan over medium heat, then pour in 1/3 cup batter, and swirl the pan so that it spreads out to the edges.  Cook for about 3 minutes on the first side, then flip over and cook the second side. Once the crepe is done, set aside on a plate.  Repeat with the remaining batter, separating the crepes with parchment paper on the plate so that they don’t stick together. Once you have finished allow them to cool completely.

  • Mini Vegan Sweet Potato Pecan Sweet Rolls

    Mini Vegan Sweet Potato Pecan Sweet Rolls

    sweet-potato-pecan-sweet-rolls-5

    This is the time of the year when I like to spend more time baking delicious things in the kitchen!  I still venture outside even though it may be snowy to go for my runs, and it is kind of exhilarating to exercise in the cold air, but coming home to a warm kitchen is awesome and so comforting!  Something that I always used to love to bake, but haven’t made as much of lately is sweet rolls.  I used to make them a lot, back in the days when I had many bags of flour, and used cream cheese for icing, or real butter in my caramel.  I have veganized them before, but I guess I don’t always want to deal with yeast, and letting dough rise, so it went by the wayside.  But guess what?  I created a no yeast version based off an old recipe that tastes so good you won’t notice it does not have it.  And, it uses leftover Thanksgiving sweet potatoes (if you have mashed ones).  Sweet rolls just sounded good to me, and I love sweet potatoes, so why not combine them?!

    sweet-potato-pecan-sweet-rolls-2

    sweet-potato-pecan-sweet-rolls-3

    Sweet potato pecan sweet rolls, because sweet potatoes and pecans are a match made in heaven!  I ended up making these mini as well, because who doesn’t love bite sized little sweets?!  I do, you can have more than one because they are small!  These are actually really quick to make, mine were ready to eat in less than an hour.  I made these oil free, using pecan butter in place of the oil in my old recipe and they turned out soft and delicious!    I made a cinnamon sort of caramel filling out of pecan butter, cinnamon and maple syrup and I knew these were going to be delicious!  Combining maple syrup and pecan butter is my go-to quick caramel recipe by the way.  Because I don’t always have time to blend up dates and I always have the two on hand.

    sweet-potato-pecan-sweet-rolls-1

    These smelled amazing while baking, and I could not wait to try them!  Once they were cooled enough, I topped them off with more quick caramel and pecans and they were sooo delicious!  This would be the perfect lazy weekend recipe because baking on weekends is the best, but don’t count out weeknights if your heart desires sweet rolls, because they are fast to make!  I say skip Black Friday shopping in stores, stay home and make these!

    sweet-potato-pecan-sweet-rolls

    Mini Vegan Sweet Potato Pecan Sweet Rolls
    Makes 9

    Dough:


    Filling:

    • 2 Tbsp raw pecan butter
    • 2 Tbsp maple syrup
    • 1 tsp cinnamon
    • 1/4 cup chopped pecans


    Quick Caramel:

    • 3 Tbsp pecan butter
    • 3 Tbsp maple syrup
    • pinch sea salt


    Chopped pecans for topping

    Directions:

    1. Preheat the oven to 375F degrees.
    2. To make the dough, combine the flour, guar gum, baking powder, baking soda and salt in a bowl, and mix together. Mix in the water, vinegar, and pecan butter until blended, then knead the dough lightly and place it on a sheet of parchment (dust it lightly with flour). Roll out 1/4 inch thick in a rectangle on the parchment in a rectangle 6 inches wide top to bottom.
    3. Mix together the filling ingredients, and spread over the dough (leaving a 1/2 inch boarder at the top and bottom). Roll up from the top down jelly roll style. Cut into 9 pieces, and place cut side up in a non-stick mini muffin tin.
    4. Place in the oven and bake for 10 minutes until puffed up and starting to brown a little (but do not overbake). Remove from the oven and let cool until warm.
    5. Whisk together caramel ingredients, and spread over the tops of the rolls, sprinkle with pecans. Enjoy!


    *Note: If you do not have raw pecan butter, another nut butter may be used such as almond. Keep in mind though, nut butters vary in consistency, so you may need to thin it out a little with water if too thick for the caramel and filling.

  • Vegan Sweet Potato Cranberry Coffeecake

    Vegan Sweet Potato Cranberry Coffeecake

    cranberry-sweet-potato-coffeecake-4

    Most of us have Thanksgiving leftovers, and although you could just continue to eat them as they are and reheat them, it is fun sometimes to create new things with them!  Now of course some people just make a giant sandwich and pile it high with all the fixings, but I like to totally reinvent things, like taking something served as a savory side and make it into a sweet delicious dessert.  Because no, I did not get enough pie to be too much, and I like desserts even after Thanksgiving!  If you have leftover mashed sweet potatoes (or yams), or cranberry sauce, have I got a recipe for you!  Vegan Sweet Potato Cranberry Coffeecake!  Coffeecake is always delicious and the perfect thing to bake on a weekend morning, or Black Friday morning for that matter.  So, skip the crowds on Black Friday, stay home and make this coffeecake with your family!  No deja food, just food reinvented, and I know you will all just love it.

    cranberry-sweet-potato-coffeecake-3

    So, I took my classic coffeecake recipe, and included sweet potatoes to keep the cake a little moist (because it is actually oil free), added in some cinnamon to make it more aromatic, and this would have been delicious enough on its own, but I am a fan of coffeecakes with swirls of jammy and rich things.  Like cream cheese, and fruit.  So, I made a cream cheese layer in this cake, and then used my leftover chunky cranberry sauce for the fruit.  It worked perfect!  Now mind you, I did not use that gross processed cranberry sauce in a can that is all jelly and full of sugar, I used some of my home made stuff sweetened with maple syrup and orange.  But of course when you make this use the kind of sauce you like or what you made.

    cranberry-sweet-potato-coffeecake-2

    It baked up beautifully!  The bright cranberries so pretty peaking through the streusel on top.  And it smelled amazing.  I could not wait to try it!  It was one of the most delicious coffeecakes I have had!  This is a great use for those leftovers, and even better the second time around if you ask me.  My family very much approved as well, and I think yours will too!  Now you know what to do with those leftovers…

    cranberry-sweet-potato-coffeecake

    Vegan Sweet Potato Cranberry Coffeecake
    Makes 1 9 inch square cake

    Ingredients:

    9 inch square pan

    Cream Cheese:

    • 3/4 cup thick coconut milk (from the top of a chilled can)
    • 1/2 cup cashew butter
    • 2 Tbsp maple syrup
    • 1/8 tsp sea salt
    • 1 tsp pure vanilla extract
    • 1/2 tsp cider vinegar
    • 2 Tbsp arrowroot starch or cornstarch

    Streusel:

    Cake:

    • 1 1/2 cups Bob’s Red Mill Gluten Free All Purpose Baking Flour
    • 1 1/2 tsp baking soda
    • 1 tsp baking powder
    • 1/2 tsp sea salt
    • 1 tsp cinnamon
    • 1 cup packed soft medjool dates, pitted, soaked in water for 30 minutes and 1 cup of the soaking water reserved
    • 1/4 cup pecan butter or almond butter
    • 1 Tbsp pure vanilla extract
    • 1 cup sweet potato puree
    • 2 Tbsp apple cider vinegar


    Swirl:

    • 1 cup cooked chunky cranberries


    Directions:

    1. Preheat the oven to 375F degrees and position rack in center of oven. Line a 9 inch square pan with parchment paper at bottom. Coat parchment paper and pan sides lightly with oil so that the cake doesn’t stick and line the bottom of the pan with a piece of parchment fit to the pan.
    2. To make the cream cheese, whisk together all ingredients until smooth and set aside.
    3. To make the streusel, combine all ingredients in a bowl, and scrunch together with your hands until clumps are formed and everything is coated in the oil.
    4. To make the batter, whisk flour, baking powder, baking soda, cinnamon and sea salt in a large bowl to blend well.  Set aside.
    5. Place dates, reserved water, pecan butter, sweet potato puree, and vanilla extract into a blender, and blend until smooth, then whisk this blended mixture into the flour mixture until well blended. Whisk in the cider vinegar until bubbles form.
    6. Transfer half of the cake batter to prepared pan, then pour the cream cheese over it, then pour the remaining batter over that, and drop the cranberries over that in 1 Tbsp. amounts.  Then sprinkle with the streusel and place in the oven.  Bake cake until tester inserted into center comes out clean with a few moist crumbs attatched, about 50-60 minutes. Remove from the oven and let cool until warm before enjoying.
  • Vegan Blueberry Muffin Cake

    Vegan Blueberry Muffin Cake

    Blueberry Muffin Cake 1

    Blueberry muffins remind me of lazy Saturday mornings.  When I was little, I would beg my Dad to let me help him make them. It wasn’t that difficult…considering we used the ones from a box.  My Dad did not inherit my Grandma’s baking skills.  But I still loved the muffins anyhow.  Especially when still warm and occasionally with strawberry cream cheese which was another favorite thing of mine at that point in my life.  I could have cared less about the other breakfast foods, since meats were not appealing to me even at that age, but the muffins got me excited.  I always had to lick the batter from the bowl as well, even if it was raw and I was always warned against it.  Luckilly now when I make blueberry muffins, I can lick the bowl and know I am safe since I make vegan muffins that contain no raw eggs.  I still love blueberry muffins, and I have to say I don’t make them nearly enough.  Well, I had blueberries on hand, and I was going to make some last Monday on my day off.

    Blueberry Muffin Cake

    But I decided to make them into a delicious quick bread instead of individual muffins.  So, a muffin cake if you will, which is sometimes what my Mom would do with muffin recipes sometimes, make a loaf instead of muffins.  Sometimes a nice slice of sweet bread is nice spread with nut butter.  I made this bread fruit sweetened with dates, which also kept it nice and soft and moist.  They also gave it an almost caramel like flavor reminiscent of brown sugar without being refined.  That is why I love dates in things!  They are about as unprocessed as you can get when it comes to sweeteners, but they make things taste amazing.  I made this oil free also, choosing to use pecan butter instead of oil.  I have been doing that a lot lately, because it adds a bit of protein besides just oil, and gives the baked good a special flavor that leaves you wondering what is so good but you can’t quite pinpoint what it is.  I also added a touch of lemon for a pop of flavor and it was just what the bread needed to be extra delicious!

    Blueberry Muffin Cake 2

    It baked up lovely, filling my home with the most heavenly aroma of blueberry muffins.  A comforting aroma that reminded me of Saturday mornings past (even though I was baking these on a Monday night not Saturday morning).  I decided to glaze the bread with a light lemon glaze, and it was perfect!  The blueberries had baked into it as little jammy bursts of flavor in the soft moist cake.  It tasted like the most delicious blueberry muffins I had ever had!  This is really quite easy to make, so don’t reach for that boxed muffin mix…try this out instead!

    Vegan Blueberry Muffin Cake

    Makes 1 mini loaf

    Ingredients:

    Batter:

    • 1/2 cup soft, pitted medjool dates, soaked in filtered water for 30 minutes and drained
    • 3/4 cup filtered water
    • 2 Tbsp raw pecan butter or raw almond butter
    • 1 tsp pure vanilla extract
    • 1 Tbsp lemon zest
    • 1/4 tsp sea salt
    • 3/4 cup all purpose gluten free flour
    • 1/2 tsp baking powder
    • 1/2 tsp plus 1/4 tsp baking soda
    • 1 Tbsp lemon juice
    • 1 cup organic blueberries


    Glaze:

    • 3 Tbsp coconut butter, warmed to liquid
    • 1 Tbsp lemon juice
    • 1 Tbsp maple syrup
    • filtered water as needed


    1. Preheat the oven to 375F degrees, and oil a mini loaf pan*.
    2. To make the batter, combine the dates, water, pecan butter, vanilla, zest, and sea salt in a high speed blender and blend until smooth.  Add the flour, baking powder, baking soda, and blend until combined (but don’t overblend).  Add lemon juice, and blend slowly until bubbles form (you don’t want to go fast or you will deflate it).  Fold in the berries, and pour into the prepared pan.
    3. Place the pan in the oven and bake for about 35 minutes until a toothpick inserted into the cake comes out almost clean.  Let cool completely on a wire rack before unmolding.
    4. To make the glaze, whisk together all ingredients until smooth, adding just enough water to create a glaze that can be drizzled but isn’t too runny. Drizzle over the cake and serve.

    *My mini loaf pans are 5×3 inches and 2 1/2 inches tall.  If yours are smaller, you will get two loaves, and decrease the baking time by half.


  • Vegan Summer Berry Sweet Rolls with Cream Cheese Frosting

    Vegan Summer Berry Sweet Rolls with Cream Cheese Frosting

    Summer Berry Sweet Rolls 3

    My perfect summer day off involves going for a run in the morning and having it be cool and refreshing outside, then enjoying some berry picking and more time outside maybe going for a walk in the woods, and later making something fabulous with those berries, and afterwards relaxing with my favorite person and a glass of wine.  That was last Sunday, a really good day.  I picked some wild raspberries, and they were fabulous.  That is one of my favorite parts of Summer is the wonderful fruit and it actually being available locally.  I have yet to go to a strawberry farm, but I like the wild raspberries best anyhow.  I have been wanting to make sweet rolls for a long time, and since it was my day off, I finally got around to it.

    Summer Berry Sweet Rolls 4

    I used to make sweet rolls quite often a few years back actually, but the whole yeast thing and letting the dough rise, and flour that I used to use were all kind of off putting to me lately.  I don’t want to say that I have gotten lazier, just busier, and I now often times want things that require less time. Which is good for you all in a way because I know you do not want to spend all day in the kitchen either.  So, made my first gluten free (well non raw gluten free) sweet rolls.  They have baking soda and powder and cider vinegar to help them rise instead of the usual yeast and it works pretty slick!  I use Bob’s Red Mill gluten free flour because I feel like it has the best texture for baked goods.  I used the fresh raspberries along with some blueberries to fill these rolls, and they turned out awesome!

    Summer Berry Sweet Rolls 6

    They had to have a “cream cheese” topping of course, so I made a faux cream cheese that I have used in the past and it was perfect. They were delicious warm, with the gooey frosting and jammy berries inside.  Summer’s take on regular sweet rolls.  These only take about 15 minutes to bake, so they really don’t require much of your time before you can enjoy them!  If you are looking for the perfect weekend morning treat (because these were made for lazy Saturday mornings), you need to try these!

    Summer Berry Sweet Rolls

    Vegan Summer Berry Sweet Rolls with Cream Cheese Frosting
    Makes 4

    Dough:
    3/4 cup Bob’s Red Mill all purpose baking gluten free flour
    1/2 tsp guar gum
    1/2 tsp baking powder
    1/4 tsp baking soda
    1/8 tsp sea salt
    1/4 cup filtered water
    1 Tbsp maple syrup
    1 tsp cider vinegar
    2 Tbsp coconut oil, warmed to liquid plus extra for brushing

    Filling:
    1 cup fresh organic raspberries, mashed
    1 Tbsp maple syrup
    1 Tbsp chia seeds
    1/4 cup fresh organic blueberries

    “Cream Cheese” Frosting:
    1/4 cup raw cashew butter
    1/4 cup coconut milk (or as needed)
    1/4 tsp cider vinegar
    1/8 tsp sea salt
    1 Tbsp maple syrup

    Preheat the oven to 375F degrees, and line 4 muffin tins with coconut oil.
    To make the dough, combine the flour, guar gum, baking powder, baking soda and salt in a bowl, and mix together. Mix in the water, vinegar, and coconut oil until blended, then knead the dough lightly and place it on a sheet of parchment (dust it lightly with flour). Roll out 1/4 inch thick in a rectangle on the parchment.
    Mix together the filling ingredients, and spread over the dough (leaving a 1/2 inch boarder at the top and bottom). Roll up from the top down jelly roll style. Cut into 4 pieces, and place cut side up in an oiled muffin tin. Brush the tops with a little coconut oil. Place in the oven and bake for 15 minutes until puffed up and starting to brown a little (but do not overbake). Remove from the oven and let cool until warm.
    Whisk together frosting ingredients, and spread over the tops of the rolls. Enjoy!

    Summer Berry Sweet Rolls 2


  • Vegan Chocolate Hazelnut Scones

    Vegan Chocolate Hazelnut Scones

    Vegan Chocolate Hazelnut Scones 4

    I made some home made Nutella last week, and it got me wanting to make more hazelnut stuff.  It was just so good, so addictive.  Like you can’t have just one spoonful.  That is the problem with me and nut butter.  Anyways, I decided to make chocolate hazelnut scones.  I see my coworker making scones all the time at work and it makes me hungry for them.  So often times, I will make my own at home.  That way I can make whatever flavor I am craving as well, and of course know the scone is completely vegan.

    Vegan Chocolate Hazelnut Scones 2

    Anyways, back to these scones.  They were triple chocolate double hazelnut.  Because I used cacao powder in the dough as well as chocolate hazelnut butter, and chocolate chips.  They also had crunchy chopped hazelnuts.  This was such delicious dough, you have no idea.  I ALWAYS taste my dough or batter, no matter if I am making cookies, scones, or cake.  It has prevented me from forgetting to add sugar before, and not only that it is the home baker’s privilege to taste that deliciousness.

    Vegan Chocolate Hazelnut Scones 3

    I kind of left clumps of the chocolate hazelnut butter in them so it would create pockets of goodness in them once baked.  They baked up beautifully and smelled amazing when I pulled them from the oven.  They were tender and flaky as scones should be.  I would feed these to anyone skeptical that vegan baking is as good as traditional baking.  Sooo good.  These would make the perfect Saturday morning treat, baking them in your pjs and enjoying them while relaxing sounds perfect.  But of course you can make them right now too if you can’t wait.

    Vegan Chocolate Hazelnut Scones

    Vegan Chocolate Hazelnut Scones
    Makes 8

    2 3/4 cups all purpose gluten free flour
    1/4 cup raw cacao powder
    1/2 cup coconut sugar
    2 1/2 tsp baking powder
    1/4 tsp salt
    1/2 cup virgin coconut oil, cut into chunks
    1/4 cup chocolate hazelnut butter or hazelnut butter
    1 cup cold full fat organic canned coconut milk (whisked until smooth if chunky)
    1 Tbsp pure vanilla extract
    1/4 cup coconut sugar
    coconut milk for topping
    coconut sugar for sprinkling
    1 cup chopped, toasted hazelnuts
    1 cup vegan chocolate chips

    Preheat oven to 425F with the rack set at the middle position. Line a baking sheet with parchment.
    To a large bowl, add the flour, sugar, baking powder, and salt. Cut in the coconut oil with a pastry blender or 2 knives until the mixture starts to clump into pea sized pieces. In a small bowl, stir the vanilla into the coconut milk. Add the coconut milk to the dough, as well as the hazelnut butter, hazelnuts and chocolate chip, and stir a few times, but do not overmix. The dough should hold together when squeezed, but still be clumpy (you want pieces of coconut oil and hazelnut butter).
    Place dough on a piece of parchment, and shape (by patting and pushing together) into a circle. Cut into 8 wedges, and place on a parchment lined baking tray. Brush the tops lightly with the coconut milk (only if they seem dry, you want the sugar to stick), and sprinkle with coconut sugar. Bake for about 20 minutes or until golden brown. Cool on a wire rack.


  • Vegan Cinnamon Roll Scones

    Vegan Cinnamon Roll Scones

    All day at work in the deli yesterday, I was engulfed in the heavenly aroma of scones.  My work station is near the cooling rack, and my coworker had been making blueberry oatmeal and lemon poppy seed scones.  They smelled amazing. It is like free scent therapy.  You can not close your eyes and smell that and be in a good mood.  I was already in a good one though, because it was Friday, and everyone else seemed to be in a good mood.  You know they are when there is lots of laughter going on.  Anyways, smelling all these scones all day got me to thinking I should make some of my own when I got home.

    vegan cinnamon roll scones 2

    I thought long and hard about what kind I wanted to make, it had to be something I could make with ingredients I already had on hand because I didn’t want to have to buy anything (you know how it is, trying to make things on a budget).  Fruit was out of the question since I did not have any, and I wanted something other than chocolate chunk (as good as that is), so my mind kept going back to something cinnamon. Yes…cinnamon roll scones.  It was perfect.

    vegan cinnamon roll scones 3

    And very appropriate since this is Easter weekend.  I always think of cinnamon rolls around Easter thanks to my Kitty Grandma (I named her that when I was little because she had cats, and I love cats).  She would always bring cinnamon rolls to our Easter celebrations.  They were from a local bakery, and to be honest, they were the best part of the meal (I consider them dessert).  So I was excited about this scone cinnamon roll hybrid!

    vegan cinnamon roll scones 4

    They turned out wonderful, and smelled amazing while baking.  I drizzled them with a “cream cheese” glaze, and they were perfect! All the flavor of a cinnamon roll with the tenderness of a scone.  I think these would be great for serving with an Easter brunch spread (or really any time of the year since they are so good).

    vegan cinnamon roll scones

    Vegan Cinnamon Roll Scones
    Makes 8

    3 cups all purpose gluten free flour

    1/2 cup coconut sugar

    2 1/2 tsp baking powder

    1/4 tsp salt

    1/2 cup virgin coconut oil, cut into chunks

    1 cup cold full fat organic canned coconut milk (whisked until smooth if chunky)

    1 Tbsp pure vanilla extract

    1/4 cup coconut sugar

    1 1/2 tsp cinnamon

    coconut milk for topping

    coconut sugar for sprinkling

    Glaze:

    2 Tbsp raw cashew butter

    2 Tbsp coconut butter

    1/2 tsp cider vinegar

    2 Tbsp maple syrup

    1/8 tsp sea salt

    1/4 cup filtered water

    Preheat oven to 425F with the rack set at the middle position. Line a baking sheet with parchment.
    To a large bowl, add the flour, sugar, baking powder, and salt. Cut in the coconut oil with a pastry blender or 2 knives until the mixture starts to clump into pea sized pieces. In a small bowl, stir the vanilla into the coconut milk. Add the coconut milk to the dough, and stir a few times, but do not overmix. The dough should hold together when squeezed, but still be clumpy.
    Place dough on a piece of parchment, and shape (by patting and pushing together) into a rectangle about 4 inches tall by 15 inches long. Mix together the cinnamon and sugar, and sprinkle over the rectangle evenly. Roll up from the top down (using the parchment to squeeze it a little tight and help roll).  Cut into 8 rolls, and place cut side up on a parchment lined baking tray. Brush the tops lightly with the coconut milk (only if they seem dry, you want the sugar to stick), and sprinkle with coconut sugar. Bake for about 20 minutes or until golden brown (after about 15 minutes you may need to reshape with 2 bench scrapers if the scones are spreading, then place back in the oven). Cool on a wire rack.
    Whisk together the glaze ingredients, and drizzle over the scones, and serve!


  • Vegan Red Velvet Chocolate Chunk Pancakes

    Vegan Red Velvet Chocolate Chunk Pancakes

    red-velvet-chocolate-chunk-pancakes-3

    Red velvet cake is sexy.  That lovely color, that sweet flavor, and that luscious cream cheese frosting. Crave worthy.  And definitely Valentine’s day worthy.  But I know you all are not going to go bake a red velvet cake for you and your special someone. That is a lot more work than most of us are willing to commit to, plus some people are nervous about frosting.  Well, what if you could still enjoy red velvet on Valentine’s day in pancake form?  And, include chocolate?  Hell yes right?! Well that is what Eric would say.

    red-velvet-chocolate-chunk-pancakes

    He loves anything sweet or with chocolate or cake themed.  So, I made some Chocolate Chunk Red Velvet Pancakes the other night, because I was given some beets, and I thought this was the perfect use for them!  They are a lot less work than a cake, but still just as delicious.  I made a “cream cheese” drizzle for them as well, because they had to have the frosting in some form.  Frosting is an important part of the cake!

    red-velvet-chocolate-chunk-pancakes-4

    They cooked up pretty quickly, and I have to mention, I did not mix the chocolate chunks in, but instead pressed them into the tops of the pancakes.  Since my chocolate melts quickly, and I did not want it making my griddle messy with burning chocolate).  The chocolate was still plenty gooey, and it was rich against the sweet pancakes and gooey cream cheese drizzle.  They were simply heavenly.  I love making pancakes to share with a loved one, and these would be perfect to make on Valentine’s day morning.  Or whenever…because no one is going to turn down these made with love pancakes!

    red-velvet-chocolate-chunk-pancakes-1

    Vegan Red Velvet Chocolate Chunk Pancakes
    Serves 2-3

    Pancakes:
    1 1/2 cups gluten free all purpose flour
    2 tsp baking powder
    1/2 cup pureed red beets*
    1 1/4 cups thin coconut milk
    2 tsp pure vanilla extract
    1/4 tsp sea salt
    2 Tbsp maple syrup (or to taste)
    about 1/2 cup vegan dark chocolate chunks
    coconut oil for cooking pancakes

    Cream Cheese Drizzle:
    1/2 cup full fat coconut milk chilled until very cold (only the thick part from the top of the can)
    1/3 cup raw cashew butter
    1 Tbsp maple syrup
    1/2 tsp cider vineger
    2 tsp pure vanilla extract
    filtered water as needed

    In a food processor, combine all pancake ingredients but the chocolate chunks and process until just blended, pour into a bowl and set aside.
    To cook pancakes, preheat oven to 110 degrees.  Heat a large non-stick pan over medium heat and add a little coconut oil to coat the bottom.  Once hot, add the batter in 1/4 cup amounts (I did 3 at a time, but it depends on your pan), and let cook for about 2-3 minutes on the first side until set and starting to brown, then flip with a spatula, press some of the chocolate chunks into the top and cook another 2-3 minutes.  When cooked, place on a plate and keep warm in the oven while you repeat the process with the remaining pancakes (or you may serve them as you cook them, keep in mind, the chocolate may get runny the longer you keep them in there).
    To make cream cheese drizzle, mix together ingredients in a bowl, and whisk together until combined (if it is too thick add a little filtered water, you want to be able to drizzle it). Top the pancakes with the cream cheese drizzle to serve (I like to put mine in a ziplock bag with the corner cut off and squeeze it out).
    *I chopped it up, threw it in the high speed blender, and then used it in the recipe.


  • Vegan Snickerdoodle Waffles with Caramel Sauce

    Vegan Snickerdoodle Waffles with Caramel Sauce

    IMG_1883

    When I was little, waffles usually ended up being more of a weeknight occasional special breakfast for dinner rather than actual breakfast. We didn’t usually have time in the morning to make stuff like that, unless it was a quiet weekend, but I often times had stuff going on during weekends like school or church activities, so I was ok with having them for dinner.  I always felt like I was getting away with something because waffles are dessert like to me.  I still feel that way.  Funny thing is, now I actually eat them for dessert!  Weird I know, but they are sweet enough, and crave worthy enough when made the right way so why not?

    IMG_1884

    I made some last week, and they were so good I had to share the recipe with you all.  They can be dessert, or breakfast, or of course Brinner (breakfast+dinner) whatever floats your boat.  They were snickerdoodle waffles. Snickerdoodles are a Holiday thing to me, so I thought it appropriate.  Also, besides the cinnamon coconut sugar I dusted them with, I wanted to drizzle them with something too.  But not straight up maple syrup…I wanted date caramel instead.  Such a heavenly combination.

    IMG_1886

    These are every bit as good as the home made waffles my Mom used to make, even if they are gluten free and vegan.  If you have non-vegan guests over the Holidays, make these for them, and I assure you they will never know they are not regular waffles!

    IMG_1889

    Vegan Snickerdoodle Waffles with Caramel Sauce

    makes 10-12 depending on your waffle maker

    Batter:
    2 cups gluten free all purpose flour
    1/4 cup coconut sugar
    1/2 tsp baking soda
    1 tsp baking powder
    1 tsp cinnamon
    1 tsp sea salt
    1/2 cup plus 1 Tbsp aquafaba*
    2 Tbsp melted coconut oil
    2 cups coconut milk

    Topping:
    1/4 cup fine coconut sugar (I buzzed mine in the blender for a few seconds)
    2 Tbsp cinnamon

    Caramel Drizzle:
    1/2 cup date puree**
    2 Tbsp pecan butter
    2 Tbsp maple syrup
    1 tsp pure vanilla extract
    pinch sea salt
    filtered water as needed

    Whisk together all of the dry ingredients, then whisk in the wet ingredients.  Pre-heat waffle iron. Once it is heated, add about 1/3 cup waffle batter to the iron and close it (the size of the scoop of batter you need may change if you have a larger iron, mine is smaller).  Cook according to waffle iron package directions.  Keep warm in an oven at low heat (150F degrees). Mix together the topping ingredients, then dust waffles with it before serving.
    To make the caramel, whisk together ingredients in a bowl, adding enough water to make the caramel a drizzleable consistency. Drizzle caramel over waffles before serving.

    *Aquafaba is chickpea liquid.  You may used canned, or if you are using the liquid from home cooked chickpeas, reduce it to the consistency of egg whites.  Alternatively, you may use 3 flax eggs for the recipe (3 Tbsp ground flaxseed, whisked together with 1/2 cup plus 1 Tbsp filtered water).

    **Date Puree is just dates blended with water. To make it blend a 1:1 ratio of soft, pitted dates and water together until smooth.


  • Vegan Eggnog Waffles

    Vegan Eggnog Waffles

    My Dad gave me a “Frozen” (as in the Disney movie) waffle maker last week, and I was pretty excited about it.  Mainly because the waffle mold inside is shaped like a snowflake, and it is now snowing here and practically Winter. Yes, I know I am a kid sometimes getting excited about things, but I mean come on…it is so cute! And who doesn’t like fun waffles?!  Or just waffles in general.  They were always a treat growing up, and my Mom had a pretty great recipe that always turned out perfect.  I liked mine with just a bit of butter and strawberries the best.

    IMG_1656

    I venture out a bit more now in the waffle world.  Rarely do I make just plain old waffles. Not that there is anything wrong with those, but I like to think outside the box flavor wise.  I had just made a batch of vegan eggnog, and I decided it would be awesome in waffles.  Eric has been mentioning eggnog quite a bit, since he loves the stuff and gets excited every year when it is eggnog season (like so excited he drank an entire batch one time, like a gallon).  So, I knew he would love it too if I made eggnog waffles too.

    IMG_1655

    I kind of created a new waffle recipe here, it is different than the one I usually use but it turned out awesome.  I used aquafaba as the eggs, and eggnog in place of the milk, and these turned out crispy on the outside and fluffy in the middle just as waffles should be! I dusted them with a bit of powdered sugar then just served with a little maple syrup.  Call me weird, but this is dessert, as well as breakfast. I actually ate these for dessert, because they were so good. These would make the perfect treat for a chilly Winter weekend morning when you don’t feel like going, out, just staying in and staying warm.  And, just in case you have any leftovers, they freeze well.  Just pop them in the toaster!  I saved some that way for Eric, since I ended up making more than I had intended.

    IMG_1659

    Vegan Eggnog Waffles

    makes 10-12 depending on your waffle maker

    Batter:

    2 cups gluten free all purpose flour

    1/4 cup coconut sugar

    1/2 tsp baking soda

    1 tsp baking powder

    1 tsp sea salt

    1/2 cup plus 1 Tbsp aquafaba*

    2 Tbsp melted coconut oil

    2 cups vegan eggnog (recipe follows)

    coconut powdered sugar for serving (optional)**

    Whisk together all of the dry ingredients, then whisk in the wet ingredients.  Pre-heat waffle iron. Once it is heated, add about 1/3 cup waffle batter to the iron and close it (the size of the scoop of batter you need may change if you have a larger iron, mine is smaller).  Cook according to waffle iron package directions.  Keep warm in an oven at low heat (150F degrees). Dust waffles with coconut powdered sugar if desired before serving.

    *Aquafaba is chickpea liquid.  You may used canned, or if you are using the liquid from home cooked chickpeas, reduce it to the consistency of egg whites.  Alternatively, you may use 3 flax eggs for the recipe (3 Tbsp ground flaxseed, whisked together with 1/2 cup plus 1 Tbsp filtered water).

    **To make coconut powdered sugar, buzz 1/2 cup finely shredded, dried coconut and 1/4 cup coconut sugar or xylitol in a high speed blender for about 30 seconds until fine like flour.

    Amy’s Vegan Eggnog

    Makes about 4 cups

    2 cups full fat coconut milk (you may use light if you would prefer it less rich)

    2 cups filtered water

    1/3 cup maple syrup (or a few dropperfuls stevia for sugar free)

    1 cup macadamia nuts or cashews, soaked in filtered water for 4 hours, and drained

    2 Tbsp nutritional yeast

    2 tsp pure vanilla extract

    1/2 tsp cinnamon

    1/2 tsp nutmeg

    pinch sea salt

    Combine all ingredients in a high speed blender and blend until smooth.  Serve!


  • Vegan Pumpkin Pull Apart Bread

    Vegan Pumpkin Pull Apart Bread

    IMG_1433

    My Grandma used to make the most wonderful thing in the world (at least to my five year old self), monkey bread.  In case you have never heard of it, it is  bread that is shaped into little balls, all baked together with cinnamon sugar that becomes gooey and caramel like, and pecans.  It was good stuff, and I always got excited when Grandma had some sitting on her counter when I came over.  Which she often did.  I have since made a few versions of it as an adult, and I think they would have made Grandma proud.  I decided this week that I wanted to make some again, because I was craving it.  I had been given some lovely sprouted whole wheat flour  that I could use in my recipe too! I don’t use a lot of wheat in my baking, but when I do, I make sure it is organic.

    IMG_1434

    This time I made a pumpkin pull apart bread.  Since I had pumpkin on hand as well, and tis the season.  I wanted a smaller loaf than Grandma used to make, so I made the recipe about half as large, and baked it in a loaf pan instead of a bundt.  I used maple sugar and maple syrup  instead of all of the brown sugar, which also gave it an awesome maple flavor.  It smelled amazing, and the caramel lover that I am, I fully enjoyed this!  I think it would be the perfect treat for a weekend morning, especially if it is chilly and you want to warm the house while baking something delicious.

    IMG_1436

    Vegan Pumpkin Pull Apart Bread

    Makes one 8×4 inch loaf
    Dough:
    1 packet rapid rise yeast
    1 1/2 tsp maple syrup
    1/2 cup warm water
    1/2 cup coconut milk or almond milk

    1/2 cup plus 2 Tbsp maple sugar

    1/2 cup pumpkin puree or canned pumpkin

    2 Tbsp coconut oil

    1 Tbsp pure vanilla extract

    2 tsp maple extract

    1 1/2 tsp sea salt

    2 tsp cinnamon

    2 tsp ginger

    1/2 tsp nutmeg

    1/4 tsp cloves

    4 cups organic sprouted whole wheat flour (plus additional as needed)

    3/4 cup chopped pecans

    Coating:

    1/2 cup maple sugar

    1 1/2 tsp cinnamon

    Topping:

    2/3 cup pecan butter

    1/2 cup maple syrup

    1/2 cup maple sugar

    1/4 cup filtered water

    good pinch sea salt

    In a large bowl, combine yeast, 1 Tbsp maple syrup and water. Let sit 5 minutes, until yeast is foamy, then add coconut milk, maple sugar, pumpkin, coconut oil, maple extract, vanilla, and sea salt. Mix well, then add the flour 1 cup at a time until dough is not sticky. Place dough on a lightly floured surface, and knead until smooth and elastic, about 10 minutes. Place in an oiled bowl, cover with plastic wrap, and place in a warm area to rise for about an hour, or until doubled in bulk. Oil a 4×8 inch bread pan with coconut oil. Scatter some of the pecans into the bottom of the pan. When dough has risen, punch it down, and divide into 16 pieces, and cut each into quarters. Combine 1/4 cup maple sugar and 2 tsp cinnamon in a large ziplock bag. Place half dough balls in bag, zip up, and shake in bag to coat. Remove from bag and repeat with remaining balls. Place dough balls into the pan, scattering in pecans as you go as well. In small bowl, for topping, mix together ingredients. Whisk until well combined and sugar is dissolved. Pour half over the dough balls. Cover with plastic wrap and place in a warm place to rise. Let rise until almost doubled in bulk, about 35-45 minutes. Meanwhile, preheat oven to 375 degrees with the rack set at the middle position. Bake for 20-25 minutes, until golden brown and done in the center (keep a close watch as it browns quickly, and if it is brown after only 10 minutes, cover with foil and continue to bake until done). Remove from oven and let cool slightly, about a minute, then invert onto foil. Drizzle the remaining topping over it. Serve warm!


  • Vegan Pumpkin Cinnamon Roll Pancakes (gluten free)

    Vegan Pumpkin Cinnamon Roll Pancakes (gluten free)

     IMG_1378
    I asked Eric what I should make one night last week and he said cinnamon rolls.  But unfortunately it was a work night, and I didn’t have a lot of time to let those babies rise, so I couldn’t make them.  But they sounded really good to me too, so I thought I would find a way to make them…and I did.  Sort of.  You see, pancakes also sounded good to me so I told him I would make cinnamon roll pancakes.  He loved the idea so I went with it. They were sounding so good to me the more I thought about them.
    IMG_1376
    I had an open can of pumpkin, so I thought I would make them pumpkin as well, since it is fall and this time of the year pumpkin puree is my go to ingredient for keeping things moist and lowering fat in recipes.  I added pumpkin pie spices as well, because why not?  It was going to be pumpkin after all.  I also added flax and Sprout Living vanilla lucuma protein powder to the batter to give these a little extra protein boost. I made a little cinnamon swirl, and piped it over the pancakes in a spiral and they were transformed into a cinnamon roll pancake hybrid.
    IMG_1380
    The swirl sort of melted as they cooked but it worked!  Sort of like real cinnamon rolls where the cinnamon seeps into the dough as they bake. They smelled amazing. I drizzled them with a coconut milk based “cream cheese” icing and it was perfect!  All of the flavors in the cinnamon rolls me and Eric wanted but in pancake form.  I will have my cinnamon rolls when I get the time eventually, but until then I have this deliciousness to enjoy!
    IMG_1382
    Vegan Pumpkin Cinnamon Roll Pancakes (gluten free)
    Serves 2
    Ingredients:
    2 Tbsp ground flax seed
    1 tsp aluminum-free baking powder
    1 Tbsp cinnamon
    1 tsp ginger
    ¼ tsp nutmeg
    ¼ tsp cloves
    1/2 cup pumpkin puree
    1 cup filtered water
    2 tsp pure vanilla extract
    1/4 tsp sea salt
    2-3 Tbsp maple syrup (depending on how sweet you like them)
    Swirl:
    1/4 cup maple syrup
    2 Tbsp coconut sugar
    2 Tbsp pecan butter (or almond butter)
    1 Tbsp cinnamon
    Cream cheese drizzle:
    1/4 cup thick coconut milk
    2 Tbsp raw cashew butter
    2 tsp maple syrup
    pinch sea salt
    1 tsp cider vinegar
    In a food processor, combine all pancake ingredients and process until just blended, pour into a bowl and set aside (or whisk them together if you do not have a food processor).
    To make the swirl, whisk together all ingredients in a bowl, then place in a pastry bag with a small tip (or a ziplock bag with the corner cut off).
    To cook pancakes, preheat oven to 200 degrees. Heat a large non-stick pan over medium heat and add a little coconut oil to coat the bottom. Once hot, add the batter in 1/4 cup amounts (I did 3 at a time, but it depends on your pan), pipe the swirl over the pancake snail style from the outside to the inside in a spiral fashion. Let the pancakes cook for about 2-3 minutes on the first side until set and starting to brown, then flip with a spatula and cook another 2-3 minutes on the other side. When cooked, place on a plate swirl side up and keep warm in the oven while you repeat the process with the remaining pancakes.
    To make the cream cheese drizzle, whisk together all ingredients until smooth (if it is too thick to drizzle, whisk in a little more milk or filtered water), then drizzle over the pancakes before serving.


  • Vegan Lemon Corncakes (gluten free) with Raspberry Rhubarb Sauce

    Vegan Lemon Corncakes (gluten free) with Raspberry Rhubarb Sauce

    Pancakes

    Last week, I had some beautiful raspberries and rhubarb just begging to be used in some sort of delicious dish.  Although just dessert would have been wonderful, I thought something a little more substantial and meal oriented might be a good idea.  It was after work, I was hungry and I was talking to Eric about what I could possibly make.  I had pancakes on my mind, but I hadn’t mentioned it to him yet when he said pancakes.  With a delicious sauce.  Yes!  I thought.  It was perfect, we were both thinking the same thing so I had to make it.  This seems to happen a lot. Great minds think alike I guess.  I was just going to make regular old gluten free pancakes but since when do I make regular old anything.  My recipes are always ev0lving. So I kicked it up a notch a bit.  Cornmeal goes so wonderful with berries and adds delicious texture to pancakes, so I made corncakes.

     Pancakes 2

    I also added in some Sprout Living Epic Vanilla Lucuma Protein Powder for an extra boost since I was extra hungry.  The pancakes tasted amazing, but the sauce made them even better.  It was super simple to make, no cooking required.  It tasted like the most delicious jam, and I added in some chia seeds to give it a little something extra.  I am one of those people that likes chunky jam.  None of that smooth seedless jelly stuff for me.  These tasted like dessert, and I suppose they sort of were but there is nothing like having breakfast AND dessert for dinner.  Eric was a happy man as well. He is a big pancake fan.

    Pancakes 1

    Vegan Lemon Corncakes (gluten free) with Raspberry Rhubarb Sauce
    Serves 2

    Ingredients:
    Sauce:

     1 cup organic rhubarb
    2 Tbsp maple syrup
    1 cup organic raspberries
    1 Tbsp chia seeds

    Pancakes:
    2 Tbsp ground flax seed
    1/2 cup cornmeal
    1 tsp aluminum-free baking powder
    1/4 tsp sea salt
    1/2 cup applesauce
    1 cup filtered water
    1/4 cup lemon juice
    2 Tbsp lemon zest
    2 tsp pure vanilla extract
    2-3 Tbsp maple syrup (depending on how sweet you like them)

    To make the sauce, combine the rhubarb and maple syrup in a food processor and process until smooth.  Add the raspberries and chia seeds and pulse until blended but still a little chunky.
    Whisk together the flaxseed, flour, cornmeal, protein powder, baking powder and sea salt in a large bowl.
    Whisk in all the remaining wet ingredients until smooth.
    To cook pancakes, preheat oven to 200 degrees. Heat a large non-stick pan over medium heat and add a little coconut oil to coat the bottom. Once hot, add the batter in 1/4 cup amounts (I did 4 at a time, but it depends on your pan), and let cook for about 2-3 minutes on the first side until set and starting to brown, then flip with a spatula and cook another 2-3 minutes on the other side. When cooked, place on a plate and keep warm in the oven while you repeat the process with the remaining pancakes.

    Pancakes 3


  • Vegan Piña Colada Scones

    Vegan Piña Colada Scones

    Pina Colada Scones 2

    I remember the first time I ever had a Piña Colada.  I was about 8 or so, and my Mom had just taken me to a play which was in and of itself exciting, then we were going out to eat at a fancy Asian restaurant where they cooked your food at your table.  I was pretty excited.  Then I ordered a  Piña Colada (virgin of course).  Which made it even more exciting to my 8 year old self.  It tasted wonderful!  I fell in love with that flavor combination and even now as an adult I love it.  I have had a lot of pineapple on hand lately and the first thing that happened to come to mind to make was Piña Colada scones.  It might have had something to do with me smelling freshly baked scones at work that day, but also my love for Piña Colada.

    Pina Colada Scones 1

    So, I whipped up a batch of gluten free vegan Piña Colada scones and they were wonderful!  These are a lazy Saturday morning treat.  Or in my boyfriend Eric’s case, breakfast.  If you are a fan of pineapple and coconut together these are for you.  They taste like summer in scone form.  They are quick to make as well and nothing beats warm goodness from the oven!

    Pina Colada Scones 3

    Vegan Piña Colada Scones
    Makes 8

    3 cups all purpose gluten free flour

    1/2 cup coconut sugar

    2 1/2 tsp baking powder

    1/4 tsp salt

    1/2 cup virgin coconut oil, cut into chunks

    1 cup cold full fat orgainc canned coconut milk (whisked until smooth if chunky)

    1 Tbsp pure vanilla extract

    2 cups fresh organic pineapple cut into small chunks

    1/2 cup large flake dried coconut

    coconut milk for topping

    coconut sugar for sprinkling

    Preheat oven to 425 with the rack set at the middle position. Line a baking sheet with parchment. In a large bowl, combine the flour, sugar, baking powder, and salt. Cut in the coconut oil with a pastry blender or 2 knives until the mixture starts to clump into pea sized pieces. In a small bowl, stir the vanilla into the coconut milk. Add the coconut milk to the dough, and stir a few times, but do not overmix. The dough should hold together when squeezed, but still be clumpy. fold in pineapple and coconut until evenly distributed. place dough on a floured work surface, and shape into a 4 inch wide log. Use a bench scraper to cut into trianges. There should be about 8. Place scones on the prepared baking sheet, reshaping slightly if necessary. Brush the tops lightly with the coconut milk (only if they seem dry, you want the sugar to stick), and sprinkle with coconut sugar. Bake for about 20 minutes or until golden brown (after about 15 minutes you may need to reshape with 2 bench scrapers if the scones are spreading, then place back in the oven). Cool on a wire rack.


  • Vegan Piña Colada Waffles

    Vegan Piña Colada Waffles

    Pina Colada Waffles

    Sleep in, workout, enjoy the fabulous weather and sunshine and make waffles.  Sounds like the perfect weekend day to me! Kind of how it went down one day last weekend, just randomly decided to make Vegan Piña Colada Waffles because I had time, and I knew my boyfriend who I happened to be spending time with would love them as well. Also, my oven was broken at the time, and something a little sweet and baked sounded good…so waffles were the perfect compromise!

    Pina Colada Waffles 2

    Any type of waffles are special in my opinion.  But I had lots of pineapple on hand so I thought why not make special waffles with it, add in coconut and voila!  Piña colada deliciousness!  I added coconut and pineapple into the waffles themselves, but to keep the theme and deliciousness going, I made a pineapple syrup and sprinkled the waffles with coconut.  Were they ever yummalicious!  If you have the time, this is the perfect lazy day weekend treat.

    Pina Colada Waffles 3

    Vegan Piña Colada Waffles

    Makes 3 Belgian Waffles

    2 Tbsp ground flax seed

    1/4 cup plus 2 Tbsp filtered water

    1/2 cup finely shredded dried coconut

    1 3/4 cups gluten free all purpose flour

    3/4 tsp sea salt

    1 tsp baking powder

    1/4 tsp baking soda

    1/2 cup coconut sugar

    1 1/2 cups thin coconut milk  at room temperature

    3 Tbsp melted virgin coconut oil warmed to liquid

    1 cup fresh pineapple chunks

    Pineapple Syrup:

    1 cup fresh pineapple

    3 Tbsp maple syrup

    1/2 cup fresh pineapple chunks

    In a small bowl, whisk together the flax seed and water, and set in the fridge for 15 minutes until the mixture is gel like.
    Meanwhile, whisk together the coconut, flour, salt, baking powder, baking soda, and coconut sugar in a large bowl.  Whisk in the coconut milk and oil until combined, then the flax eggs (flax water mixture) until combined. Stir in the pineapple chunks.
    Cook according to belgian waffle iron directions (like to keep my waffles warm in a low heat oven (200F) while I cook the others).

    Meanwhile, combine the 1 cup fresh pineapple and 3 Tbsp maple syrup in a high speed blender and blend until smooth.  Stir in the 1/2 cup pineapple chunks.
    Serve the waffles hot with the pineapple syrup.

    Pina Colada Waffles 1

  • Raw German Chocolate Chia Porridge

    Raw German Chocolate Chia Porridge

    German Chocolate Chia Porridge

    I always have some sort of porridge for breakfast during the week, whether it be oatmeal or chia porridge.  I am pretty plain with it most of the time, with the chia porridge simply using coconut water and topping it off with bananas and ground flax seed.  But sometimes I like to give it a little pizazz and make something that will make me excited for breakfast.  Like chia seed porridge with a flavor!  Like German chocolate!  Which is what I decided to make last week.  Something a little decadent and something that would be more exciting than my usual bland breakfast.  The best part is it can be made the night before so no rushing in the morning to prepare it!

    German Chocolate Chia Porridge 1

    I used a coconut milk base made chocolaty with raw cacao and sweetened with date paste for a little bit of a caramel flavor.  Then I topped it off with the things I would use in German chocolate cake, walnuts and coconut like in the frosting, plus more cacao nibs for some intense chocolate crunch action.  I am a big texture person, so it was important for me to have crunch topping off my soft chia porridge for me to really enjoy this as much as I possibly could.  It was simply heavenly.  I will leave it at that!

    German Chocolate Chia Porridge 2

    Raw German Chocolate Chia Porridge

    Serves 2-3

    2/3 cup chia seeds

    2 cups raw coconut milk

    1/2 cup raw cacao powder

    3 Tbsp raw date paste or maple syrup

    1 tsp pure vanilla extract

    Toppings:

    raw walnuts, large flake coconut and raw cacao nibs

    Whisk together the chia seeds, coconut milk, cacao powder, maple syrup, and vanilla in a bowl until well combined.  Let sit at least 30 minutes at least or cover and refrigerate overnight.  When ready to serve, top with walnuts, coconut and chia seeds!

    German Chocolate Chia Porridge 3


  • Vegan Raspberry Pomegranate Oat Waffles

    Vegan Raspberry Pomegranate Oat Waffles

    You know what I think is sexy?  Staying home and enjoying a meal together for Valentine’s Day. Because going out that day is often over priced and over rated.  At least as far as my experience goes.  Plus being able to spend alone time together for dinner and be able to hear yourself talk with maybe a little bit of (your choice of) music in the background and not a loud restaurant is pretty romantic.  Or maybe you are more of a breakfast person.  Well, still applies, but in that case, I have just the recipe for you.  Vegan Raspberry Pomegranate Oat Waffles. I made these last week for two people who I love a lot and are very important to me, my Mom and boyfriend. And…I couldn’t help but think I should share this with you all on Valentine’s Day. Because they turned out beautiful, and topped off with all of that red fruit they were pretty sexy.  If get on making them right now you can still have them for breakfast, or maybe tomorrow for Sunday brunch with your family or significant other. Heck, surprise them with breakfast in bed with these!

    As good as these turned out, I admit I was a little scared when I started them as to whether or not they would turn out.  I was veganizing an old belgian oat waffle recipe that I used to make all the time in college, and subbing a lot of healthier ingredients that I didn’t use back then…so, I had my fingers crossed.  They smelled wonderful while cooking, so I knew I had that going for me, but how would they taste. That was the question. Of course you already know the answer because I am sharing them with you but oh boy…they turned out more yummalicious than I expected!  The berries and pomegranate seeds I added in were wonderful little bursts of flavor, and the sweet oats made these pretty substantial, but still light like a waffle should be.  I was so happy they turned out, and my Mom and boyfriend were happy I decided to make them.  My Mom has been asking me to make waffles for about a month now and Eric had just gotten home after working since 5 AM and was hungry, so they were both happy campers.  Show some love and make these waffles for someone (or yourself).  They will think you are awesome!

    Vegan Raspberry Pomegranate Oat Waffles
    Makes 3 Belgian Waffles

    2 Tbsp ground flax seed
    1/4 cup plus 2 Tbsp filtered water
    1 cup gluten free rolled oats
    1 1/2 cups gluten free oat flour
    3/4 tsp sea salt
    1 tsp baking powder
    1/4 tsp baking soda
    1/4 cup coconut sugar
    1 1/2 cups thin coconut milk or almond milk at room temperature
    3 Tbsp melted virgin coconut oil warmed to liquid

    1/2 cup dried raspberries
    1/2 cup pomegranate seeds

    Fresh raspberries, pomegranate seeds and maple syrup for serving

    In a small bowl, whisk together the flax seed and water, and set in the fridge for 15 minutes until the mixture is gel like.
    Meanwhile, whisk together the oats, oat flour, salt, baking powder, baking soda, and coconut sugar in a large bowl.  Whisk in the coconut milk and oil until combined, then the flax eggs (flax water mixture) until combined. Stir in the 1/2 cup raspberries, and 1/2 cup pomegranate seeds.
    Cook according to belgian waffle iron directions (like to keep my waffles warm in a low heat oven (200F) while I cook the others).
    Serve hot with raspberries, pomegranate seeds and maple syrup.