Tag: raspberry

  • Vegan Raspberry Shortbread Sandwich Cookies

    Vegan Raspberry Shortbread Sandwich Cookies

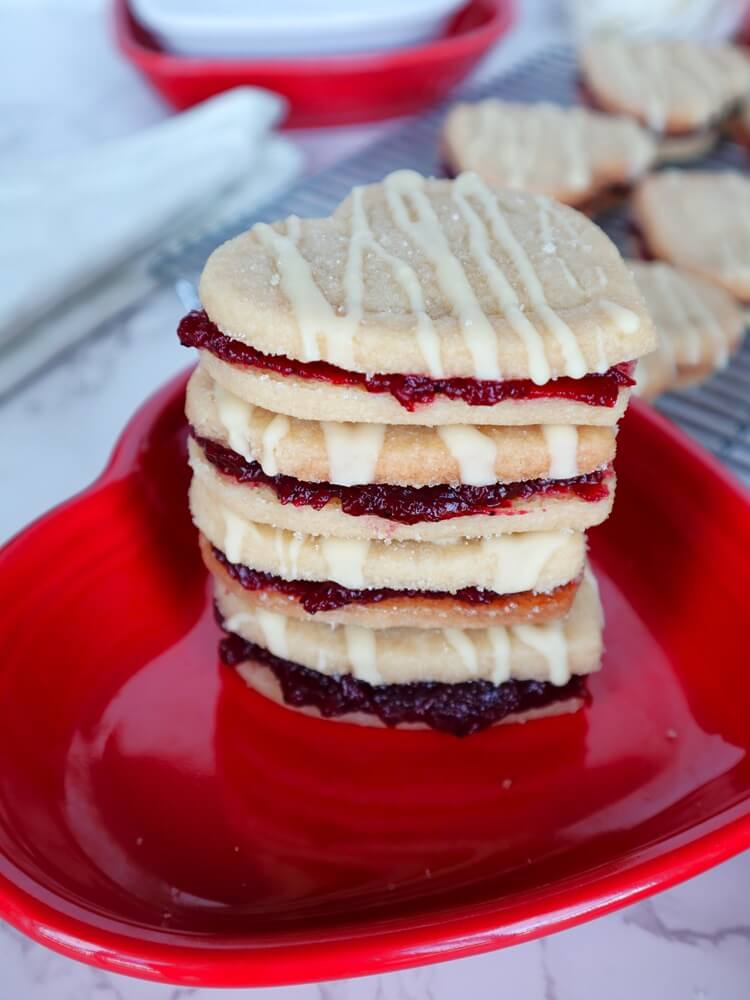
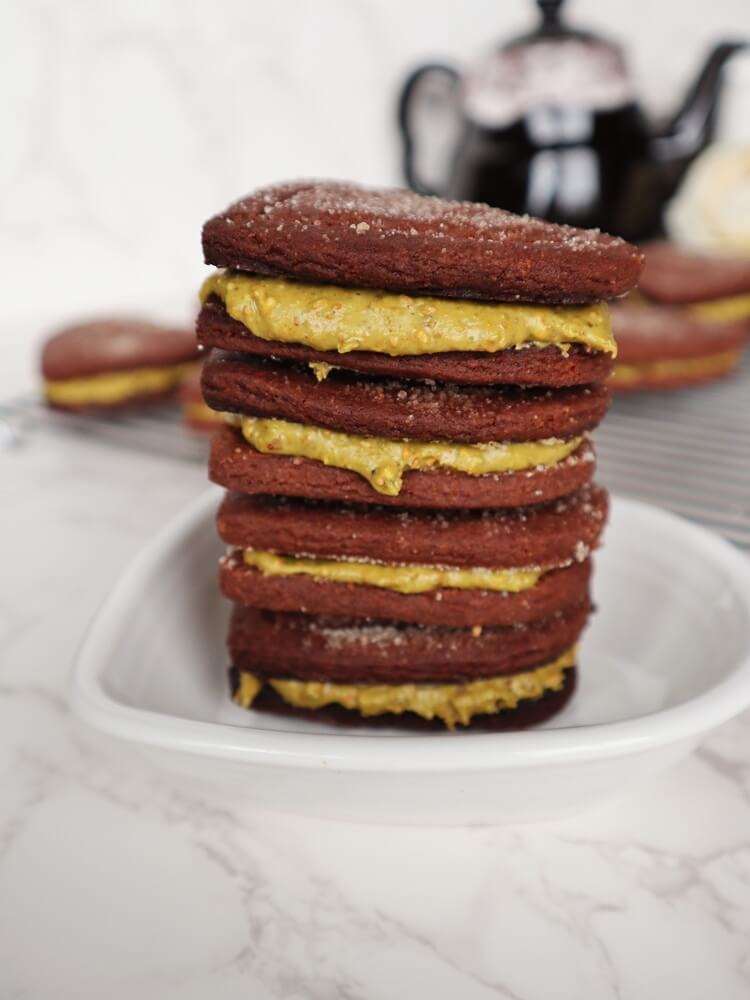
    I have been craving shortbread lately, so I recently made some chocolate orange shortbread cookies, but I thought something with vanilla might be good too!  Maybe something for upcoming Valentine’s Day with some raspberry jam!  So I made some heart shaped Vegan Raspberry Shortbread Sandwich Cookies!  I wasn’t sure how they would turn out, because although I have made variations of this shortbread dough many times, I wasn’t sure how it would behave as cut out cookies, since I am usually lazy and just bake it in a pan.  But it turned out perfect! Will definitely be doing this again.

    I used Earth Balance for the vegan butter in these, since shortbread needs a good amount of butter and it works well, but you can use whichever vegan butter you have on hand.  They have granulated sugar, but if you preferred something less processed like maple sugar that would be good as well, they will just be darker cookies.  For the flour I used whole wheat pastry flour because it is what I prefer, but if you don’t have any on hand regular all purpose flour would work as well.  Or even a gluten free all purpose baking flour for a gluten free option (I have use Bob’s Red Mill gluten free all purpose baking flour and it works well).  I used vanilla bean powder in these, but you can just use vanilla extract if you prefer, a tsp.

    I wanted to cut these into hearts, because I love cutesy Valentine’s Day stuff, it is one of my favorite holidays decoration wise.  I also just love hearts!  This dough rolled out pretty nicely, but if you find it is too soft, you can refrigerate it briefly.  I also recommend using a spatula to move the hearts once you cut them out to prevent stretching.

    These cookies smelled amazing while baking!  I knew they would be delicious!  To make them pretty and even tastier, I drizzled the top cookies with some vegan white chocolate!  I filled them with some really good raspberry jam that Eric’s Dad made and they were amazing!  I love the combination of a sweet tart raspberry filling with vanilla cookies or cake!  If you are in the mood for some delicious cookies, or something festive for Valentine’s Day, definitely give these Vegan Raspberry Shortbread Sandwich Cookies a try!

    Vegan Raspberry Shortbread Sandwich Cookies 

    Makes 14 larger sandwiches

    Ingredients:

    • 1 cup or 2 sticks Earth Balance or other vegan butter, softened
    • 1/2 tsp sea salt
    • 1 cup unbleached granulated sugar
    • 1 tsp vanilla bean powder
    • 1/2 tsp baking powder
    • 2 cups whole wheat pastry flour
    • granulated sugar for topping
    • 1/2 cup vegan white chocolate chips (I used Pascha brand)


    Filling:

    • 1 cup raspberry jam


    1. Preheat the oven to 350F degrees.
    2. In a large bowl, mix together the butter, sea salt, sugar, until the butter and sugar are well incorporated.
    3. Mix in the vanilla and baking powder until well incorporated.
    4. Mix in the flour until the flour is incorporated.
    5. Turn the dough out onto a sheet of parchment, and roll out to about 1/4 inch thick.  Place on a sheet pan and put in the refrigerator for 15 minutes.  Cut into medium sized heart cookies, and use a spatula to transfer them to a parchment lined tray (being careful not to stretch them).  Re-roll any scraps and cut also.  Sprinkle cookies with granulated sugar.
    6. Place in the oven and bake for about 15 minutes until set.
    7. Remove from the oven, and let cool completely.
    8. Lay out half of the cookies. Melt the vegan white chocolate in the microwave in 30 second intervals, or in the top of a double boiler.  Drizzle over half the cookies, and let set (it will set quicker if you set them in the refrigerator).  Once the white chocolate has set, spread the bottom side of the other half of the cookies with the jam, then top with the white chocolate drizzled cookies.
    9. Enjoy!


    Shortbread keeps for 1 week at room temperature in an airtight container or 4 months frozen in an airtight container.

  • Vegan Lavender Almond Raspberry Ice Cream

    Vegan Lavender Almond Raspberry Ice Cream

    I love making my own home made ice cream! It’s so fun to just think of a flavor and then be able to make it and put into it whatever you want at the time! Since we are still in prime hot weather ice cream season, I decided to whip up a batch last weekend! The flavor I decided on was a Vegan Lavender Almond Raspberry Ice Cream!

    For the base I used full fat coconut milk with almond butter to make it rich and delicious. I added in dates to sweeten it this time and a touch of vanilla and sea salt. I like the dates because I don’t always want to use regular sugar and they make it sweet without adding extra moisture (which would happen if I used a liquid sweetener). You just need a powerful blender with the dates like a Vitamix to get them really well blended.

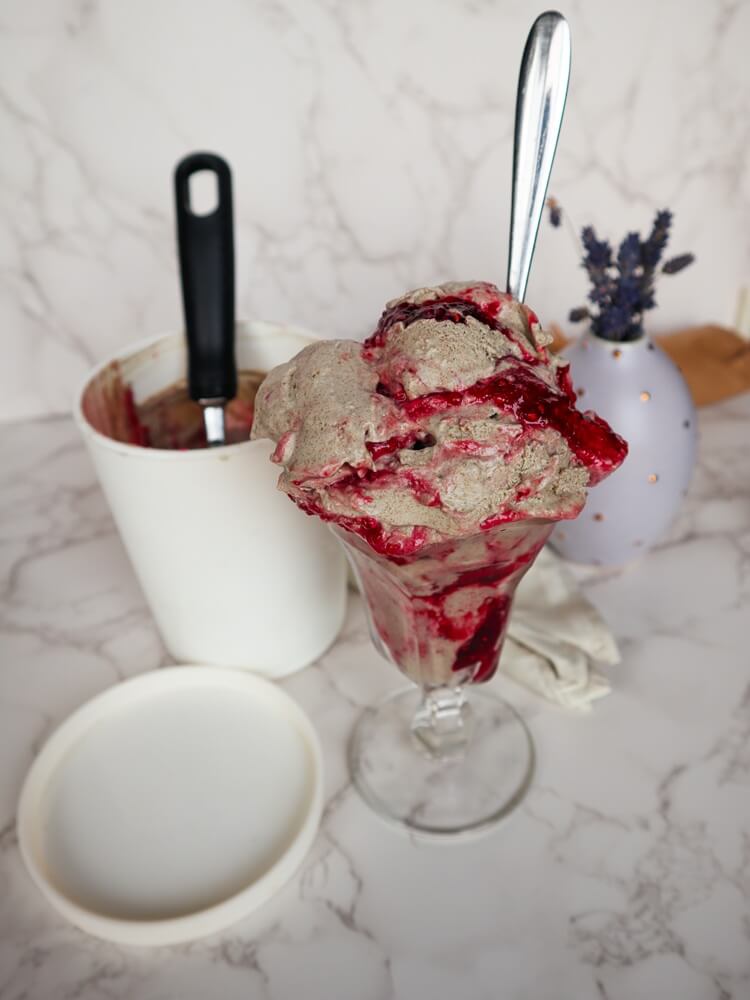
    I added lavender along with the other base ingredients. I love adding lavender to desserts lately, just a little. It is so fragrant and heavenly! After the ice cream was done churning, as I layered it into the container I added a sweet raspberry jam swirl!

    This ice cream was so heavenly! Rich, creamy and delicious, scented with vanilla, almonds and lavender which was perfect paired with the jammy raspberry swirl! If you are looking for a heavenly home made ice cream, definitely give this Vegan Lavender Almond Raspberry Ice Cream a try!

    Vegan Lavender Almond Raspberry Ice Cream
    Makes 3 cups

    Ingredients:

    • 2 cups full fat coconut milk
    • 2/3 cup smooth almond butter
    • 1 cup soft, pitted medjool dates (if they are not soft, soak them in filtered water for 30 minutes before using)
    • 1 tsp pure vanilla extract
    • 1 Tbsp dried lavender flowers
    • 1/4 tsp sea salt


    Swirl:

    • 3/4 cup raspberry jam


    Instructions:

    1. Combine the coconut milk, almond butter, 1 cup dates, vanilla, lavender and sea salt in a blender and blend until smooth.
    2. Pour into an ice cream maker and process according to directions.  Alternatively, if you do not have an ice cream maker, pour it into a bowl, and whisk every half hour until it is to the consistency of a thick malt.
    3. Spoon 1/3 into a freezer safe container with a lid, then drop 1/3 of the raspberry jam over that by the Tbsp.  Then pour the other 1/3 of the ice cream over that, then half the remaining jam, then the rest of the ice cream and rest of the jam and swirl with a knife.  Place the lid on and continue to freeze until firm enough to scoop (at least 4 hours or overnight). If it becomes too firm, simply let it sit out for 15 minutes before serving.
  • Vegan Key Lime Pie Raspberry Ice Cream

    Vegan Key Lime Pie Raspberry Ice Cream

    We are almost into summer and it’s been pretty warm here the last few weeks, so I am definitely craving ice cream! I could just go buy some vegan ice cream at the store, but I really enjoy making my own unique flavors. Last weekend I was thinking something citrusy sounded good, so I made some Vegan Key Lime Pie Raspberry Ice Cream!

    It was easy to make and so delicious! Getting your own ice cream maker is a really good investment if you are an ice cream lover! Then you can make your own fun flavors! For the base in this one to make it really creamy I used coconut milk and avocado as the base.

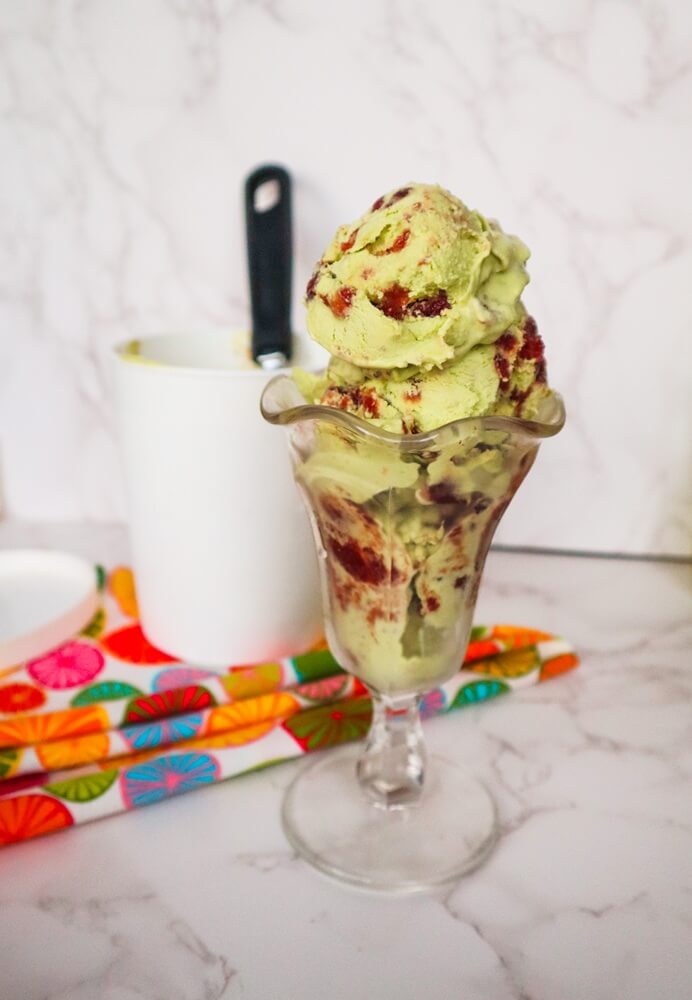
    I added in plenty of lime juice and zest to give it just the right of tartness, and used dates to sweeten it. Also just a touch of vanilla. Lastly some spinach for color (you could also use natural green food coloring). Once it was churned to creamy perfection I layered and swirled it with raspberry jam.

    It was so heavenly! Like rich key lime pie, a balanced tart sweet flavor and sweet jammy raspberries! This is perfect for summer! If you are in the mood for some ice cream definitely give this Vegan Key Lime Pie Raspberry Ice Cream a try!

    Vegan Key Lime Pie Raspberry Ice Cream
    Makes about 4 cups

    Ingredients:

    • 1 15 oz can full fat coconut milk
    • 2 medium avocados, seeds and skin removed
    • 3/4 cup soft pitted dates
    • 1/4 cup lime juice
    • 2 Tbsp lime zest
    • 1 handful spinach
    • 1/4 tsp sea salt
    • 1 tsp pure vanilla extract
    • 1/2 cup raspberry jam


    Instructions:

    In a blender combine everything but the raspberry jam and blend until smooth. Pour into an ice cream maker and process according to directions until thick and the consistency of soft serve. Alternatively if you don’t own an ice cream maker, pour it into a bowl
    And put it in the freezer, whisking it every so often until it is thick.
    Pour 1/3 into a freezer proof container, top with some of the jam, swirl it with a knife, then half the remaining ice cream, then more jam then the rest of the ice cream and swirl with a knife. Put the lid on and freeze until a little more firm and scoop-able, a few hours.
    Enjoy! If it becomes too firm let it sit out 15 minutes before scooping.
    Keeps for 4 months in the freezer.


  • Vegan Raspberry Lavender Cake

    Vegan Raspberry Lavender Cake

    Today is my Birthday, and the last couple weekends I have been choosing fun activities to celebrate it, because everyone gets a Birthday month right? So a couple of weekends ago we did something I have always wanted to do, visit a lavender farm!  We went to The Lavender Barnyard in Farmington MN, and it was such a magical experience!  I love using lavender in recipes, scenting my home with it and using it in personal care products so when I found out there was a local lavender farm I could visit I was all in!  This place is awesome, a little farm with rows of different varieties of lavender growing, and we picked our own bouquets.  They even had peaceful classical music playing in the background, it was therapeutic in a way.  Who wouldn’t want to hang out in a lavender field?

    We took the bouquets home and dried them, and I wanted to use some in a recipe.  This was an organic lavender farm after all, so it is perfect for that!  I had been dreaming of a lavender birthday cake, so I decided to make one this year! I love berries and lavender together, so what I decided on was a Vegan Raspberry Lavender Cake!  Which I knew would be totally delicious!

    For the cake layers, I used my vanilla cake recipe and added in some of the dried lavender.  This cake recipe is really easy to make, and always turns out nicely.  I use whole wheat pastry flour for the flour because it is what I prefer and have on hand but if you would like to use all purpose flour that would work as well, or even a gluten free all purpose flour if you wanted to make this gluten free.  I have used Bob’s Red Mill gluten free baking all purpose flour with success.

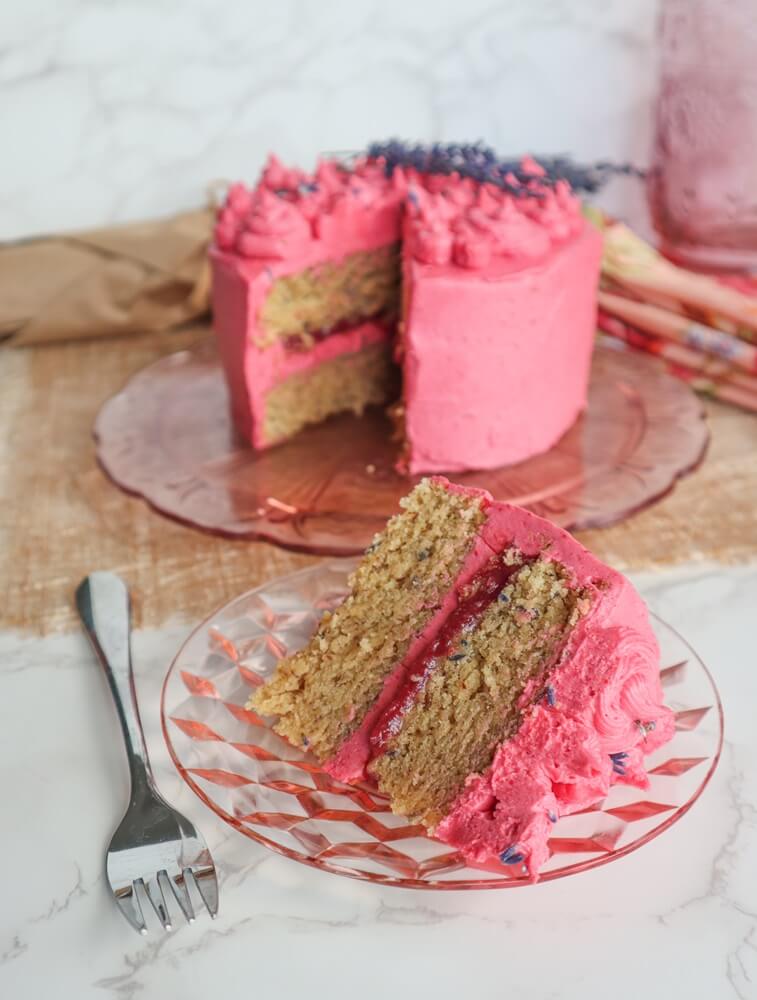
    The cake smelled so heavenly while baking!  Aromatic vanilla with a hint of lavender is one of the best smells ever!  This delicious cake deserved some delicious frosting and filling! For the frosting I made a simple vegan buttercream, and flavored it with freeze dried raspberries to give it an intense raspberry flavor.  I like the freeze dried ones because they don’t add excess moisture and they taste like the essence of raspberry!  Also they make the frosting a lovely color!  I just buzz them into a powder in the blender and add them to my frosting along with the powdered sugar.

    For the filling I used some of Eric’s Dad’s home made raspberry jam.  It is the perfect balance of tart and sweet and I knew it would be perfect in my cake! Raspberry filling with vanilla cake is my favorite! I could not wait to try the finished product, I even topped it off with some lavender flowers because they are so pretty!

    The cake was so heavenly! Soft and sweet, aromatic with vanilla and lavender so good with the sweet tart raspberry jam and luscious filling! It was everything I imagined it would be!  The perfect birthday cake for me this year!  If you are a fan of vanilla, raspberries and lavender, this is right up your alley!  Next time you feel like baking a cake, definitely give this Vegan Raspberry Lavender Cake a try!

    Vegan Raspberry Lavender Cake

    Makes one 2 layer 6 inch cake

    Ingredients:

    Cake:

    • 1 1/2 cups all purpose flour
    • 3/4 cup plus 2 Tbsp granulated sugar
    • 3/4 tsp baking powder (1/2 tsp plus 1/4 tsp)
    • 1/2 tsp sea salt
    • 2 flax eggs (2 Tbsp golden ground flax seed mixed with 1/4 cup plus 2 Tbsp filtered water, allowed to sit 15 minutes)
    • 1/4 cup plus 2 Tbsp avocado oil or other neutral oil
    • 1/2 cup plant based milk (I used Oatly but you can use what you prefer)
    • 1 1/2 tsp pure vanilla extract
    • 1 Tbsp dried lavender flowers


    Frosting:

    • 1 1/2 cups vegan butter, I used Earth Balance (at room temperature)
    • 2-3 Tbsp plant based milk (I used Oatly, but you can use what you prefer), add 3 then if needed add another if frosting comes out too stiff
    • 1 tsp pure vanilla extract
    • 2 Tbsp raspberry powder
    • 4 cups powdered sugar


    Filling:

    • 1/3 cup raspberry jam


    Instructions:

    1. Preheat oven to 350F degrees, and line 2 6 inch round cake pans with parchment on the bottom and oil the sides.
    2. In a large bowl, combine the flour, sugar, baking powder and sea salt and whisk to blend.
    3. Add the flax eggs, avocado oil, oat milk, vanilla and lavender and beat with an electric mixer for about a minute (or 3 minutes if doing it by hand with a whisk).
    4. Pour the cake batter into the prepared pans, dividing it evenly between the two of them.
    5. Place the cakes in the oven and bake for about 30 minutes until the cakes are done in the center (you are able to insert a toothpick into the center and it comes out almost clean with a few moist crumbs).
    6. Remove from the oven and let cool 20 minutes, then remove the cakes from the pans by cutting around the sides, placing a plate on top then inverting it and tapping on it.  Allow them then to cool completely once they are out of the pans.
    7. To make the frosting, beat the butter with the milk, vanilla and raspberry powder until fluffy.
    8. Add the powdered sugar 1 cup at a time, and beat until completely mixed and light and fluffy (if the frosting is too stiff add that other Tbsp of milk).
    9. When ready to frost, Place one cake layer on a plate, spread about 1/4 inch thick layer of the frosting over it.  Pipe a half inch thick line of frosting along the outside edge.  Spoon the raspberry jam into the center and spread out evenly inside the piped line.
    10. Place the next cake layer on top.
    11. Spread the remaining frosting on the top and down the sides of the cake evenly, then place the rest of the frosting in a pastry bag and use it to decorate the top.  This frosting recipe makes enough that you should be able to do some generous piping decorations on top, because I like a lot of frosting!
    12. Serve the cake and enjoy!
  • Vegan Raspberry Rose Mochi

    Vegan Raspberry Rose Mochi

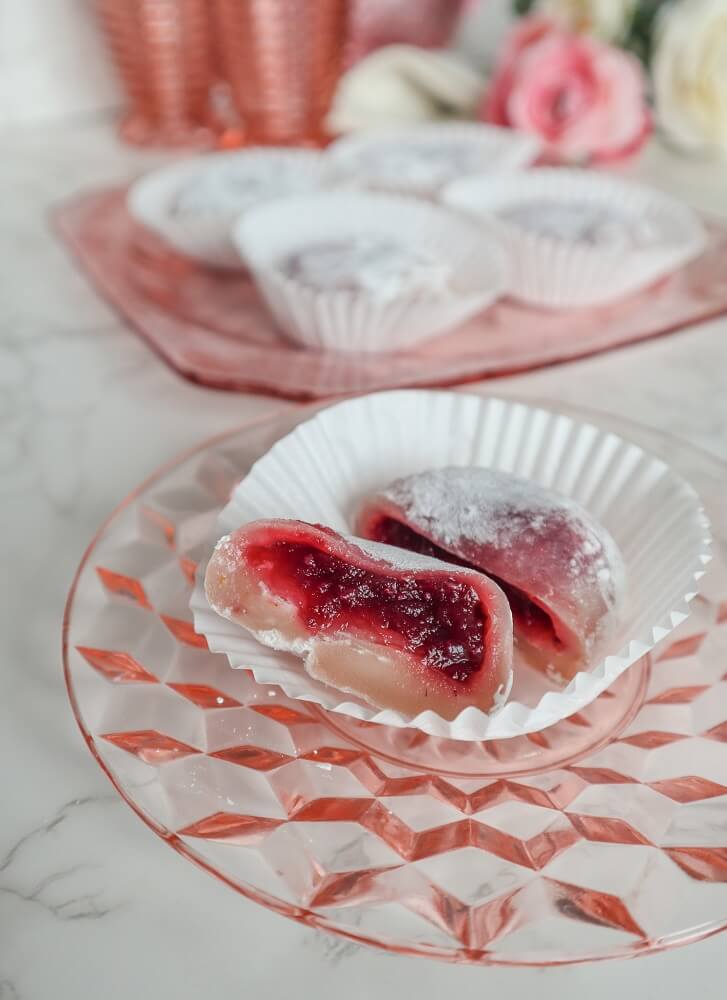
    Eric and I have bought a lot of mochi, my favorite flavors so far were the red bean filled and matcha.  But there was also a delicious ube mochi that was pretty bomb.  You have to read ingredients of course, because some are not vegan (especially a lot of the ice cream ones, but this post is about the non ice cream) but surprisingly a lot of the packages I checked are vegan! There really is nothing like mochi, it has a unique texture, chewy and pillowy at the same time, and not too sweet, but just sweet enough!   I have been wanting to try making my own for a long time, because I thought it would be fun to make new flavors and whatnot.  So I decided to try make my own last weekend! I figured I would start with something easy, so I made some Vegan Raspberry Rose Mochi!

    I looked at a ton of different recipes, before I decided how to make them and what ingredients to use, and I came up with what seemed best to me and it turned out well, which is why I am sharing it. If it had been a failure and not turned out it would have been back to the drawing board but I lucked out this time.  It is pretty clear that glutinous rice flour is a must as the main ingredient, it is what gives the mochi its unique texture!  The base of this one just has rice flour, water, sugar (I didn’t use too much because I didn’t want these over the top sweet), a touch of raspberry powder for extra raspberry flavor in the dough, and rosewater to give  them that heavenly rose aroma!

    They are not difficult or time consuming to make (at least I didn’t think so), and I used the microwave method which only requires about 4 minutes total to cook the dough.  One mistake I made was trying to scoop it out before it cooled down, which was a bad idea unless you like to burn yourself.  Once it cooled down though it was perfect! You need a generous coating of tapioca starch on whatever surface you are using to make the mochi so that it does not stick and I recommend dusting your hands as well.  If you do not have tapioca starch corn starch could also be used.

    I used a raspberry jam filling for the centers of these, a well balanced tart sweet raspberry jam that Eric’s Dad makes from his home grown raspberries.  You can use your favorite raspberry jam to suit your tastes. To make them easier to fill, so that the filling does not run from the center or ooze to the side before I have a chance to pinch it up, I used a little ingredient dish to fill them.  To do this you drape the mochi dough over it so that it hangs over the sides slightly then spoon the filling into the center and pinch it together. It worked out perfect! These turned out so delicious!  They had the chewy, soft, satisfying texture of the store bought mochi, a hint of rose and plenty of raspberry flavor!  I will definitely have to make more in different flavors, and it is one of my favorite things think about dreaming up new flavors for things!  If you are a raspberry fan, definitely give these Vegan Raspberry Rose Mochi a try!

    Vegan Raspberry Rose Mochi

    Makes 8

    Ingredients:

    • 1 1/3 cups glutinous rice flour
    • 1 Tbsp raspberry powder (freeze dried raspberries ground to powder)
    • 1 cup filtered water
    • 1 Tbsp rosewater
    • 1/4 cup sugar
    • 1/2 cup tapioca starch
    • 1/3 cup raspberry jam

    Instructions:

    1. In a microwave safe bowl, whisk together the rice flour and raspberry powder.
    2. Whisk in the water and rosewater, then the sugar until well combined.
    3. Place in the microwave and cook for 3 1/2 minutes covered in plastic wrap.
    4. Stir and microwave 3o seconds more.  Allow to cool until you are able to handle it.
    5. Generously dust a work surface with the tapioca starch, and scrape the mochi onto it, flip it over so both sides are coated.  Cut into 8 pieces and shape into circles.  Flatten each one so that it is about 1/4 inch thick and about 3 inches wide. Use a small 2 1/2 inch bowl ( I used an ingredients bowl) dusted with tapioca starch, stretch the circle over it so it overlaps the sides a little. Spoon 2 tsp raspberry jam into the center, then bring the sides together like a purse and pinch the top to seal it.  Roll in tapioca starch and set in a paper muffin liner. Repeat with the remaining mochi and filling.
    6. Refrigerate until cold, then enjoy!


    These keep refrigerated for 1 week, in a sealed container.

  • Vegan Raspberry Rose Gelato

    Vegan Raspberry Rose Gelato

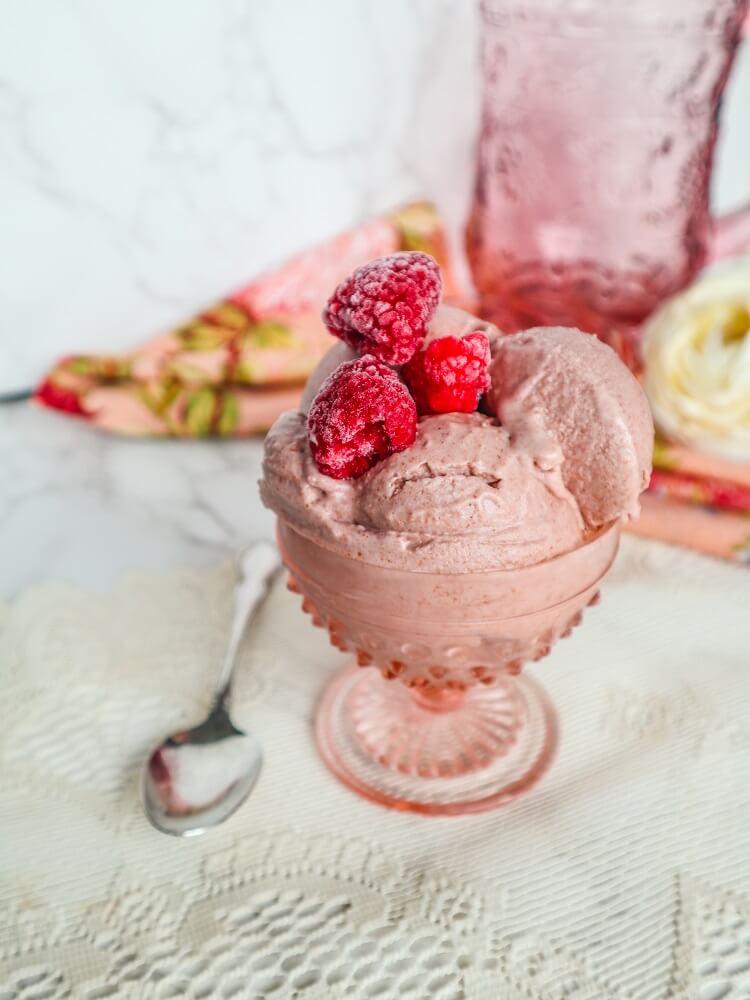
    It has been really hot and humid here in Minnesota lately and I couldn’t think of anything more lovely than some home made cooling ice cream, so I decided to make some yesterday!  Although popsicles and granitas are delicious and light, I really wanted some rich and creamy more along the lines of gelato.  Like something you would get in an ice cream shop!  I also wanted to use ingredients that I had on hand, so I decided to make a Vegan Rasberry Rose Gelato!

    The combination of sweet berries and rosewater is a match made in heaven!  Honestly it is a combo that I should use more often, especially in the summer!  I got my rosewater from a local business called House of Halva and it is a good sized bottle that has lasted me a while.  For this ice cream base, I used a combination of coconut milk and raw almond butter because it makes it so rich and creamy!  But if you preferred to make it with cashew butter that would also be delicious, I just didn’t happen to have any.  I had the almond because I make my own at home for other recipes.

    To sweeten the gelato, I used dates, because they are just the right amount of sweet and don’t add a bunch of moisture to the ice cream. They might tint the color a little more brown than vibrant but I don’t mind.  If you didn’t want to use dates, you could use about 1/3-1/2 cup maple syrup or agave nectar, it just might turn out a little more icy.  I used frozen berries this time, but you can use fresh or frozen, whichever you have on hand.  I scented this with the rosewater I mentioned earlier and a little vanilla and it was perfect! The ice cream base tasted delicious, and I could not wait to try it frozen!

    The ice cream turned out sooo heavenly!  Rich and creamy, just the right amount of sweetness and tartness from the raspberries with the heavenly aroma of vanilla and rosewater!  The texture was perfect too, it reminded me of a gelato, which is why I am calling it that (even though I know someone might come at me and claim that it is technically not because it doesn’t have eggs yada yada yada, but guess what?  This is a vegan page).  If you are looking for something to cool off with and indulge in this summer, definitely give this Vegan Raspberry Rose Gelato a try!

    Vegan Raspberry Rose Gelato
    Makes 3 cups

    Ingredients:

    • 1 15 oz can full fat coconut milk
    • 1/2 cup raw almond butter
    • 1 1/2 cups frozen or fresh organic raspberries
    • 3/4 cup soft, pitted medjool dates (if they are not soft, soak them in filtered water for 30 minutes before using)
    • 1 tsp pure vanilla extract
    • 1 Tbsp rosewater


    Instructions:

    1. Combine all ingredients in a blender and blend until smooth.
    2. Pour into an ice cream maker and process according to directions.  Alternatively, if you do not have an ice cream maker, pour it into a bowl, and whisk every half hour until it is to the consistency of a thick malt.
    3. Pour into a freezer safe container with a lid, and continue to freeze until firm enough to scoop (at least 4 hours or overnight). If it becomes too firm, simply let it sit out for 15 minutes before serving.
  • Vegan Raspberry Jam Bars

    Vegan Raspberry Jam Bars

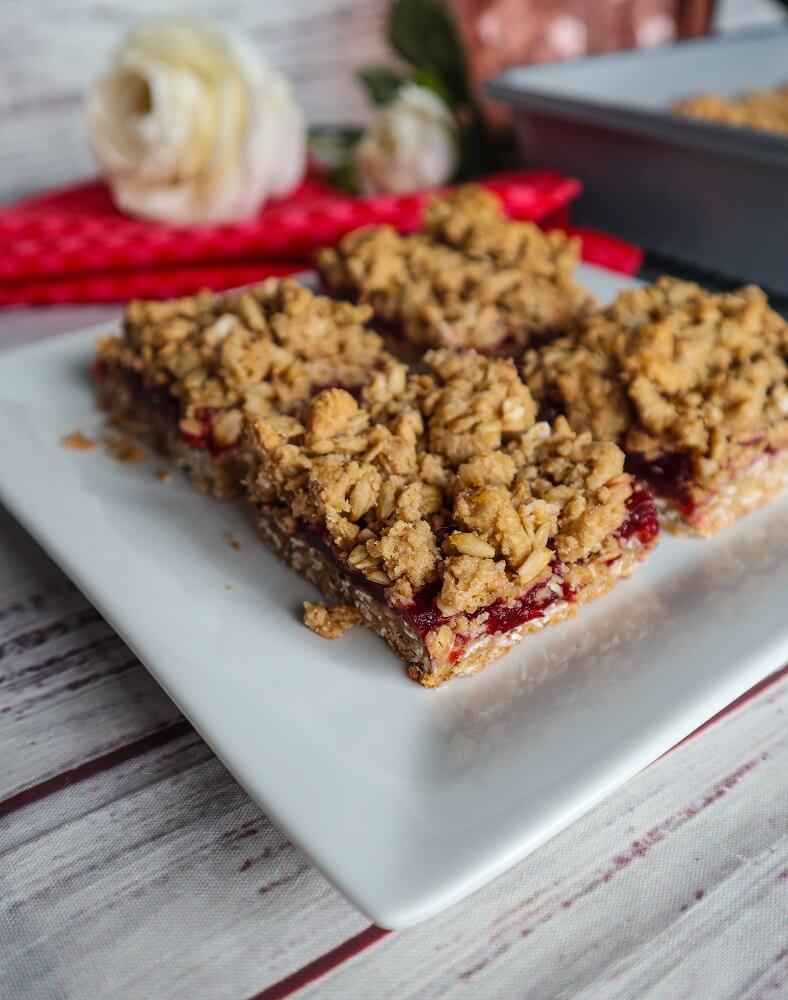
    I love any dessert with a crumbly streusel type topping, like fruit crisp or pie and these Vegan Raspberry Jam Bars! I have been wanting to make these for a while, since I have a good amount of Jam from Eric’s Dad.  He makes the best jam and he sent us a whole bunch! The raspberry is my favorite, he makes it with the berries he grows in his back yard.  We learned how to make some when we visited him last year (he lives a few states away), but he is the jam master. I used to love jam bars growing up so I thought I would make a veganized version. I have made other jam bars, but they were more complicated ones with nuts and whatnot in them, and I just wanted simple ones like the ones I remembered this time.

    I love these because they are easy to make. Bars are awesome in that way, there is no rolling required or anything.  Which is why my Mom turned a lot of her cookies into bars.  Th dough for these jam bars is almost like oatmeal cookie dough. I used a combination of whole wheat pastry flour and rolled oats for the base.  These are ingredients that I always have on hand, especially the oats because I have eaten oatmeal every day since I was in high school.  Plus I love oatmeal cookies.  If you don’t happen to have whole wheat pastry flour you can use regular all purpose flour and that will work just fine. I am all about trying to use what you have on hand and not make extra trips to the store.

    Instead of the butter that was in the original bars, I used coconut oil in these and it worked perfect!  It gives it a nice sweetness and the same amount of richness.  Instead of eggs I used flax eggs (1 Tbsp ground flax seed mixed with 3 Tbsp water  = 1 egg), because I use these a lot at work in my vegan baked goods with good results.  You can use either maple sugar or brown sugar in these, either are delicious.  The dough was delicious before I even added the jam!  Yes, I like to sample dough, that is one of the best parts of baking!

    I wanted a good thick layer of jam so I added 1 1/2 cups, because I feel like a lot of jam bars don’t have enough and it is important!  They are called jam bars after all. Once I added the jam, popped them in the oven and they were baking they smelled amazing!  I could not wait to try one.  But I waited until the next day since I made them at night and I wanted them to cut nicely.  They turned out super delicious!  Sweet, tart gooey raspberry jam, just the right amount with a buttery crunchy oatmeal topping and crust!  These are so simple but so good!  If you are in the mood for something sweet, give these Vegan Raspberry Jam Bars a try!

    Vegan Raspberry Jam Bars

    Makes 16

    Ingredients:

    • 1 1/2 cups rolled oats
    • 1 1/4 cups vegan whole wheat pastry flour
    • 1/2 tsp baking soda
    • 1/2 tsp sea salt
    • 1/2 cup melted coconut oil
    • 1 cup maple sugar or brown sugar
    • 1 Tbsp ground flax seed mixed with 3 Tbsp filtered water
    • 1 tsp pure vanilla extract
    • 1 1/2 cups raspberry jam


    Instructions:

    1. Preheat the oven to 350F, and line a 9×9 pan with parchment.
    2. In a large bowl, combine the oats, flour, baking soda, sea salt, and set aside.
    3. In another bowl, mix together the coconut oil, maple sugar, flax mixture and vanilla, then mix into the oat mixture until well combined. Set aside.
    4. Press 2/3 of the oat mixture into the 9×9 inch pan evenly, then spread the jam over it. Sprinkle with the remaining oat mixture and place in the oven.
    5. Bake for 30 minutes, then remove from the oven and let cool completely before cutting into 16 bars.
  • Vegan Raspberry Vanilla Cake

    Vegan Raspberry Vanilla Cake

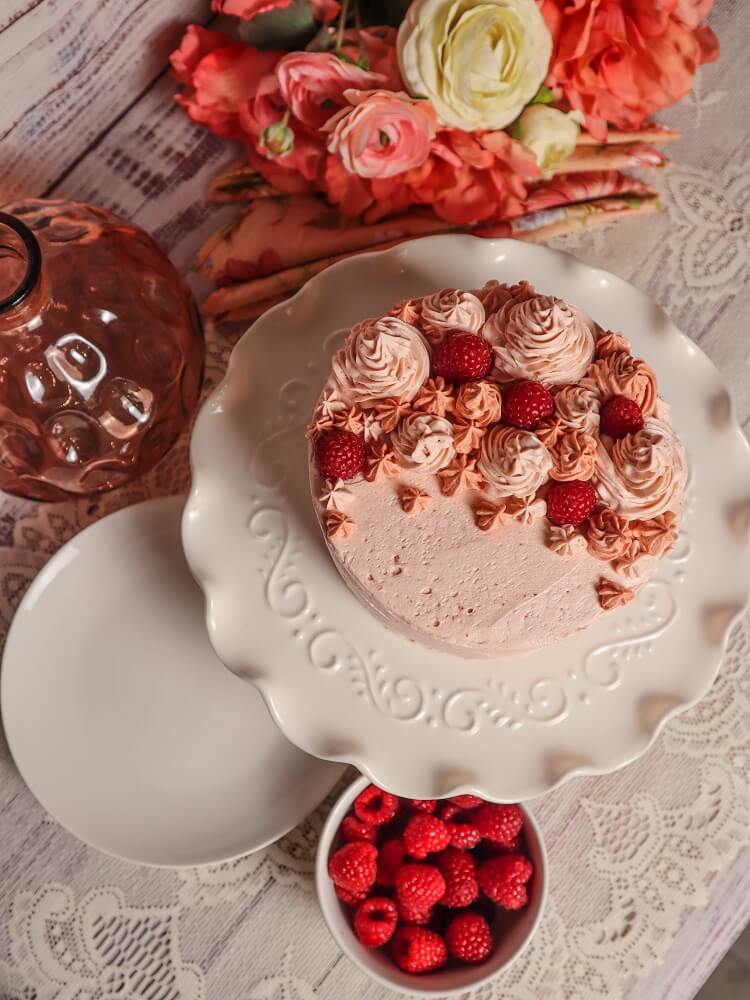
    If I were to pick a favorite cake flavor, this Vegan Vanilla Raspberry Cake would be it.  In fact, this is one of the flavors we ordered for our wedding cakes.  It was so heavenly, I told myself I would need to make one for myself at home sometime.  Well, that time has come, I figured why not make one for Valentine’s Day?! I do think of berries as being festive after all.  I do love some Valentine’s chocolate and I will definitely be eating some, but I made this cake last weekend because Eric and I celebrated the weekend before due to work schedules and I was even more excited about it than the chocolate.  I am a vanilla cake girl after all.

    If you are looking for the healthiest version of vegan vanilla cake, this is not it because I wanted it to taste as close to the bakery version as possible and I think I did pretty well in that respect.  I have plenty of other more whole food based cakes on this blog though if that is your thing!  I used my classic vanilla cake base for the cake layers and even the batter was yummy!  Yes, I love me some cake batter and I had to give it a sample before baking it.  Ever since I was a little girl in my Grandma’s kitchen I love sampling the cake batter or licking the excess that didn’t make it into the pan out of the mixing bowl!  It smelled so heavenly while baking, and I could not wait to make the rest of the cake, so I could sample it!

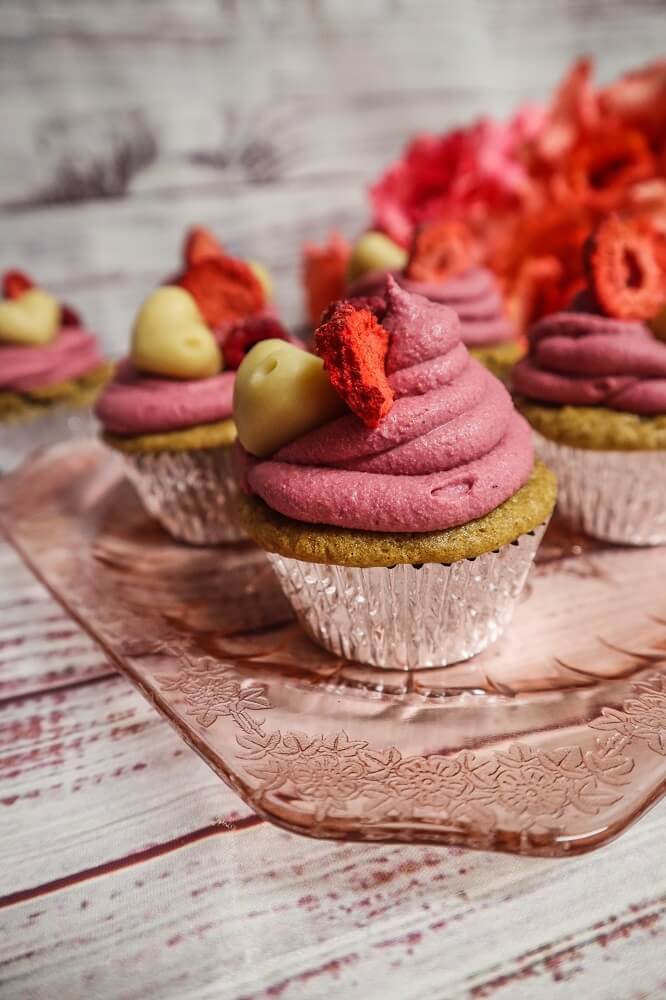
    For the frosting, I made this a bit different than our wedding cake, in that instead of vanilla frosting and a raspberry filling, I wanted to make a raspberry frosting too!  Why not make it even more delicious?!  I made a classic easy vegan buttercream frosting with vegan butter, powdered sugar and vanilla and added in raspberry powder to tint it a lovely pink color, plus give it a vibrant raspberry flavor.  I made the raspberry powder by taking freeze dried raspberries and pulverizing them to powder in the blender until they were the consistency of powdered sugar.  This is a great way to flavor your frosting if you want to give it a berry flavor (or another fruit flavor if you have a different freeze dried fruit) without adding excess moisture to the frosting.

    I filled the cake with some of Eric’s Dad’s raspberry jam, which is probably the best raspberry jam I have ever tasted.  Make sure you use good jam for the cake, it makes all the difference!  When it was finally time to taste the cake I was super excited!  Eric and I enjoyed some together and he even licked the plate clean of frosting it was that good (so did I for that matter).  It was heavenly!  Soft and sweet, scented with vanilla, the perfect partner for the sweet creamy raspberry filling and flavorful jam!  If you are looking for a delicious cake to make, give this Vegan Vanilla Raspberry Cake a go!  It tastes just like it came from a bakery!

    Vegan Raspberry Vanilla Cake 
    Makes one 6 inch cake

    Equipment: two 6 inch cake pans, a cake spreader and a pastry bag

    Ingredients:

    Cake:

    • 1 1/2 cups whole wheat pastry flour
    • 3/4 cup plus 2 Tbsp maple sugar or granulated sugar
    • 3/4 tsp baking powder (1/2 tsp plus 1/4 tsp)
    • 1/2 tsp sea salt
    • 2 flax eggs (2 Tbsp ground golden flax seed mixed with 1/4 cup plus 2 Tbsp filtered water, allowed to sit 15 minutes)
    • 1/4 cup plus 2 Tbsp avocado oil
    • 1/2 cup coconut milk or other plant based milk
    • 1 1/2 tsp pure vanilla extract


    Frosting:

    • 1 1/2 cups vegan butter, I used Earth Balance (at room temperature)
    • 3-4 Tbsp coconut milk or other plant based milk (add 3 then if needed add another if frosting comes out too stiff)
    • 1 tsp pure vanilla extract
    • 1/2 cup freeze dried raspberries, blended in a blender until they are fine powder
    • 4 cups powdered sugar


    Filling:

    • 1/3 cup vegan raspberry jam


    Instructions:

    1. Preheat oven to 350F degrees, and line 2 6 inch round cake pans with parchment on the bottom and oil the sides.
    2. In a large bowl, combine the flour, sugar, baking powder and sea salt and whisk to blend.
    3. Add the flax eggs, avocado oil, milk, and vanilla and beat with an electric mixer for about a minute (or a little longer if doing it by hand with a whisk).
    4. Pour the cake batter into the prepared pans, dividing evenly between them.
    5. Place the cakes in the oven and bake for 25-30 minutes until the cakes are done in the center (you are able to insert a toothpick into the center and it comes out almost clean with a few moist crumbs).
    6. Remove from the oven and let cool 20 minutes, then remove the cakes from the pans by cutting around the sides, placing a plate on top then inverting it and tapping on it.  Allow them then to cool completely once they are out of the pans.
    7. To make the frosting, beat the butter with the milk and vanilla until fluffy.
    8. Add the raspberry powder, and then powdered sugar 1 cup at a time, and beat until completely mixed and light and fluffy (if the frosting is too stiff add that other Tbsp of milk).
    9. When ready to frost, Place one cake layer on a plate, spread about 1/4 inch thick layer of the frosting over that, then pipe a frosting barrier around the edge of the cake so that the filling does not ooze (tall enough so that it will be thicker than the filling).
    10. Spoon the jam into the middle of it and spread out evenly to the barrier frosting.  Place the next cake layer on top.
    11. Spread the remaining frosting on the top and down the sides of the cake evenly, then place the rest of the frosting in a pastry bag and use it to decorate the top (I tinted half of mine with more berry powder to create two different colors).  This frosting recipe makes enough that you should be able to do some generous piping decorations on top, because I like a lot of frosting!
    12. Serve the cake and enjoy!

    Cake keeps stored in the refrigerator in a container or covered for up to 1 week.

    Notes:

    If you would like to make a 9 inch round cake, double the entire recipe, and bake it in two 9 inch round pans, increasing the baking time slightly until the cakes are baked through about 30-35 minutes.


  • Vegan Raspberry Truffle Swirl Brownies

    Vegan Raspberry Truffle Swirl Brownies

    Photo by Danielle Christensen Photography

    I apologize for my lack of new posts lately, but I was busy getting married!  I tied the knot last weekend, and now I am officially Amy Lyons O’Neil!  We had a lot of fun at our wedding, it was small, about 20 of our family members and closest friends.  We had planned on having it all outside but the weather had other plans with a downpour happening right before the ceremony so we held it inside the chapel at our church.  It was still lovely, and although we didn’t have the outdoor wedding we still took a lot of outdoor photos before it rained so I was thankful for that.

    Photo by Danielle Christensen Photography

    No, I did not make my own wedding cake, we bought two from Vegan East (a local bakery in Minnesota) and they were amazing! I highly recommend them if you live in the area, this is where Eric and I go to pick up cupcakes when I don’t feel like making them.  We had our wedding dinner at Nico’s Taco Bar on Como in St. Paul (Minnesota), and it was sooo good!  Tacos are our favorite and we love their food so it was the perfect place to have the reception.  I think everyone had a good time (including ourselves and that is what matters most.

    So now that the wedding is over I finally have some time to make recipes again.  When Eric’s dad was in town for the wedding he gave us some of his amazing home made jam, so I decided to make something with that first.  He actually grows his own raspberries for it and makes it from start to finish then sells it at the farmer’s market in Michigan where he lives.  It is seriously the best jam ever! I decided it would be awesome in some raspberry truffle brownies!

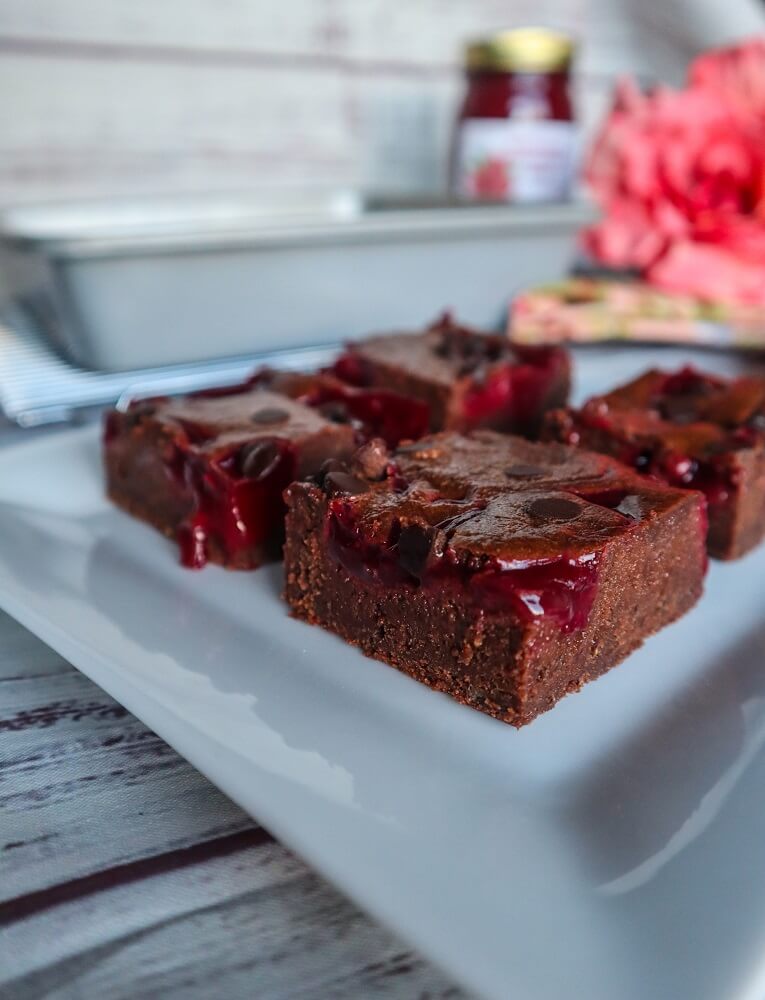
    I started out with my fudgy brownie base for these.  I am a fudgy brownie person all the way, to me a cakey brownie is just cake but don’t call it a brownie.  I like them fudgy and I like the inside pieces!  So I made my brownie base, then a layer of chocolate truffle/cheesecake.  I can’t really call it one or the other because I used my cheesecake swirl recipe for brownies but it tastes like truffle and has the right consistency.  I then swirled it with the raspberry jam and topped it off with chocolate chips for good measure.

    These smelled amazing while baking!  I could not wait to try one, but I had to wait over night because I wanted them to set so I could cut them nicely.  When I finally got to try one they were heavenly!  Rich and fudgy with a creamy truffle topping, so perfect with the gooey raspberry jam!  If you are a chocolate fan definitely give these a try!  Just be sure to use good quality raspberry jam it makes all the difference!

    Vegan Raspberry Truffle Swirl Brownies 
    Makes 16

    Truffle swirl:

    • 3/4 cup unsweetened coconut cream (from the top of a chilled can)
    • 1/2 cup almond butter
    • 2 Tbsp maple syrup
    • 2 Tbsp cornstarch
    • 1/8 tsp sea salt
    • 3 Tbsp cacao powder


    Brownies:

    • 1/4 cup avocado oil
    • 1/2 cup apple sauce
    • 1 cup coconut sugar 
    • 2 Tbsp ground flax seed mixed with 1/4 cup plus 2 Tbsp filtered water
    • 2 teaspoon vanilla extract
    • 1 cup organic whole wheat pastry flour
    • 1/2 cup cacao powder or unsweetened cocoa powder
    • 1/4 teaspoon sea salt
    • 1/2 cup raspberry jam
    • 1/4 cup vegan dark chocolate chips or chunks


    Ingredients:

    1. To make the truffle topping, combine all ingredients in a blender and blend until smooth.  Pour into a bowl and set aside.
    2. To make the brownies, pre-heat the oven to 375F degrees. Whisk together the sugar, avocado oil and applesauce until well combined and the sugar is starting to break down.
    3. Add the flax water mixture, and vanilla and beat until smooth.
    4. Add the flour, cacao powder and sea salt and beat until smooth.
    5. Scrape the batter into a greased 8×8 inch pan, then pour the swirl over it, then drop the jam by the tsp over that. Sprinkle with the chocolate chips or chunks.
    6. Place in the oven, and Bake for about 30 minutes or until set (but do not over bake).
    7. Let cool completely before cutting into bars.
  • Vegan Raspberry Bismark Cakes 

    Vegan Raspberry Bismark Cakes 

    When my Mom would take me to the bakery when I was little, one of our favorite things to get were the raspberry bismarks.  We loved the tart raspberry jam inside of the sweet fluffy doughnuts with a vanilla glaze.  We were talking about them the other day and how we hadn’t had any in a really long time.  For me, the last time was probably when I was in high school.  I haven’t seen any vegan ones, and eating a giant doughnut can be a bit rich, hence the not having any for that long.  But I thought, why not make something that tastes like them but isn’t so heavy and is easy to make at home. Like some mug cakes!  Or cakes in little ramakins the size of a doughnut.

    I made 1/4 of my vanilla cake recipe in ramakins.  It is a simple to mix batter that is made rich with coconut milk instead of oil, and it makes a great base for different flavors of cakes but I always love it just as is plain.  In the ramakins, it baked up lovely!  The heavenly scent of vanilla filled my kitchen and I knew these were going to be good!

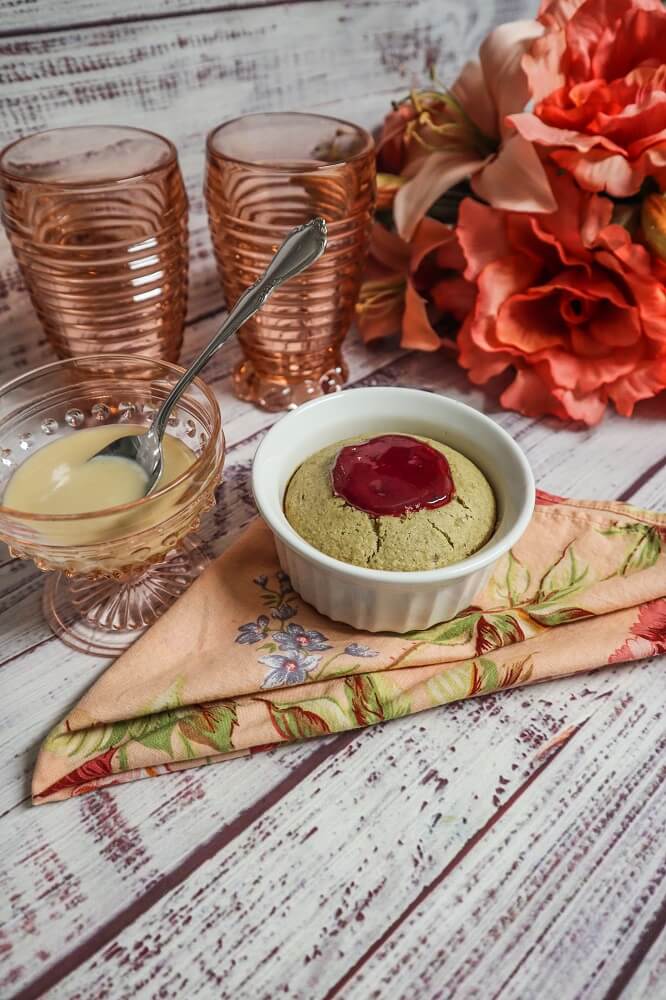
    Once they had cooled down a bit, I scooped some of the cake out of the center, and filled it with raspberry jam like the bismarks.  It wasn’t just any raspberry jam, it was some that Eric’s Dad makes with the raspberries he grows in his yard and it is amazing!  It is the perfect balance of tart and sweet and it was perfect in these cakes!  Yes, I could have spooned the jam in before baking instead of cutting cake out to spoon it in.  But I thought it might affect the texture of the jam and I wanted it to remain gooey and not soak too much into the cake.

    Lastly I made a vanilla glaze for the cakes, like the doughnuts had.  Would they be as good as the doughnuts?  I couldn’t wait to try them. They were so heavenly, and definitely as delicious as the doughnuts just with a different texture and less grease of course.  The sweet soft cake was heavenly with the tart sweet jam and vanilla scented glaze!  I shared one with my Mom and she loved it!  She said it tasted just like the bismarks!

    Vegan Raspberry Bismark Cakes 
    Makes 2 small cakes

    Ingredients:

    Two 1 cup ramakins

    Cake:

    • 1/4 cup plus 2 Tbsp organic whole wheat pastry flour
    • 1/4 tsp plus 1/8 tsp baking soda
    • 1/4 tsp baking powder
    • 1/8 tsp sea salt
    • 1/4 cup maple sugar
    • 1/2 cup full fat coconut milk (the thick kind, I prefer Thai Kitchen brand) at room temperature
    • 1/2 tsp pure vanilla extract
    • 1 1/2 tsp cider vinegar
    • 2 heaping Tbsp raspberry jam

    Glaze:

    • 2 Tbsp coconut butter
    • 1 Tbsp raw cashew butter
    • 1 Tbsp maple syrup
    • 1 tsp pure vanilla extract
    • 1 Tbsp filtered water (or as needed to achieve proper consistency)


    Instructions:

    1. Preheat the oven to 350F degrees and position rack in center of oven.
    2. Whisk flour, baking soda, sea salt, and sugar in a large bowl to blend well.
    3. Whisk coconut milk and vanilla extract together in small bowl to blend well, then whisk into the flour mixture until well blended.
    4. Whisk the cider vinegar into the batter.
    5. Transfer the cake batter to 2 1 cup ramakins
    6. Place in the oven, and bake cake until tester inserted into center comes out clean with just a few moist crumbs attached, about 15-20 minutes.
    7. Remove from the oven and let cool.
    8. Scoop about 1 Tbsp of cake from the top of each cake in the center, and fill with raspberry jam.
    9. In a small bowl, whisk together glaze ingredients until smooth (adding a touch more water if it is too thick), and pour this over each cake.
    10. Enjoy!

    Notes:

    If you would rather use coconut sugar or even just granulated sugar for this, either will work in place of the maple sugar.

  • Vegan Raspberry Cupcakes

    Vegan Raspberry Cupcakes


    I started this blog 11 years ago last week, and although it seems like I have been making recipes forever I still can’t believe it has been that long! I started this blog back in 2010 as a way to share recipes with others, since before that I had simply been posting them on Facebook and honestly I never thought so many people would appreciate them or make them!  Let me tell you, I appreciate all of you that enjoy my recipes and make them, I am so happy to be able to share with you! I used to make a lot more recipes, since I had more time back in the day, and now it is down to a few a week, but I am still enjoying sharing! 

    This year was a bit challenging since we remodeled my kitchen and I wasn’t able to use it for a while, and life happened and got busy, but I feel like I have still made some stuff that I hope you appreciated too! I will continue to make and post my recipes, since it is such a big part of my life, and I enjoy creating new things so I might as well document it and share it right?!  I decided to make some raspberry cupcakes for my blogaversary this year to celebrate!

    Because I love filled cupcakes, and I love raspberries and I haven’t made any in so long! Plus it just seemed perfect for Valentine’s Day! These are heavenly!  I made a simple vanilla cake for the base, which is really easy to make, just whisk it together, and bake!  It doesn’t have any oil, or butter just full fat coconut milk which is plenty rich for the cake to be moist. The thing I love about cupcakes is they bake up so much faster than actual cake.  These made my kitchen smell amazing!

    For the frosting, I used a coconut cream (basically just full fat coconut milk with lots of cream), and freeze dried raspberries to give it plenty of raspberry flavor.  It tasted like raspberry cheesecake!  Sooo heavenly!  I could not stop tasting it!  Lastly, I filled these cupcakes with raspberry jam!  They were so heavenly!  A vanilla and raspberry lover’s dream!  If you are a raspberry fan, definitely give these a try!

    Vegan Raspberry Cupcakes

    Makes 16 cupcakes

    Ingredients:

    16 silicone muffin tins, or foil muffin tins

    Cake:

    • 1 3/4 cups whole wheat pastry flour
    • 1 1/2 baking soda
    • 1 tsp baking powder
    • 1/2 tsp sea salt
    • 1 cup maple sugar or coconut sugar
    • 2 cups full fat coconut milk (the thick kind, I prefer Thai Kitchen brand) at room temperature
    • 1 Tbsp pure vanilla extract
    • 2 Tbsp cider vinegar


    Frosting:

    • 1 1 15 oz can full fat organic coconut milk, at room temperature
    • 1/2 cup raw cashew butter or macadamia nut butter (or additional coconut cream from the top of the can for a nut free version)
    • 3/4 cup freeze dried raspberries
    • 1/4 cup maple syrup
    • pinch sea salt
    • 1 tsp pure vanilla extract
    • 1/2 cup plus 2 Tbsp coconut butter (NOT OIL), warmed to liquid
    • natural vegan food coloring (optional), I used 1/2 tsp beet powder for pink

      Filling:

    • 3/4 cup raspberry jam (about)


    Instructions:

    1. Preheat the oven to 350F degrees and position rack in center of oven.
    2. Set out 16 muffin tins.
    3. Whisk flour, baking soda, sea salt, and sugar in a large bowl to blend well.
    4. Whisk coconut milk and vanilla extract together in small bowl to blend well, then whisk into the flour mixture until well blended.
    5. Whisk the cider vinegar into the batter until bubbles form.
    6. Transfer cake batter to prepared tins and bake cakes until tester inserted into center comes out clean, about 15-20 minutes.
    7. For the frosting, combine all ingredients in a blender and blend until completely smooth. Pour into a bowl and place in the freezer until it is thick like whipped cream (whisking every so often), about 45 minutes to one hour.
    8. Meanwhile, using a tsp or a knife, scoop a divet into the center of each cupcake (you can eat the scraps, you won’t need them for the rest of the recipe).
    9. Spoon the raspberry jam into the center of each cupcake.
    10. Pipe or spread the frosting on top of the cupcakes, and serve!


  • Vegan Raspberry Cheesecake Dessert Hummus

    Vegan Raspberry Cheesecake Dessert Hummus

    I am a huge hummus fan. When Eric and I went on vacation last month, almost every day for lunch I would buy hummus and vegetables to dip in it for lunch and it made me so happy. They are not all created equally though, some are definitely better than others.  We make a really good one at my work, that I think is one of the best I have tried.  It is a huge batch, starting off with 20 cups uncooked chickpeas so a big job to make, but I don’t mind doing it at all because I love the stuff!  I don’t just love savory hummus though, I love the sweet stuff too.

    Dessert hummus wasn’t really a thing until a few years back but from the first time I heard of it I loved the idea. Why not get your fiber and protein in your dessert?  I made some for myself and I was hooked. I think I made a chocolate one first, but I have since branched out to others, like chocolate chip cookie dough, salted caramel, chocolate cake batter, and cake batter. Last week, I decided to make a raspberry cheesecake flavored one.  Because cheesecake sounded good, but I hadn’t made a dessert hummus in a while, and also hummus is easier to make than a cake.

    This is super simple to make, you just throw everything in the blender, buzz it and voila!  Deliciousness!  I used chickpeas as a base, because I always have a large amount pre-cooked and portioned out in my freezer.  But you could use white beans if you wanted.  I added some coconut cream and cashew butter to give the hummus that creamy cheesecake feel, and it was so silky smooth and creamy!  For the sweetener I used maple syrup, because it blends in well, but if you wanted to you could use 1/2 cup of pitted medjool dates (I have done this before in my dessert hummus and it works well).

    Lastly I added in plenty of berries and a touch of lemon juice to give it that something extra.  It turned out super delicious!  I love this just with a spoon (which is how I ended up eating most of it) , or for dipping chocolate or brownies into, or fresh fruit if you wanted to keep it a bit lighter and more healthy.  If you still think dessert hummus sounds weird, just give it a try, I almost guarantee you will change your mind!

    Vegan Raspberry Cheesecake Dessert Hummus
    Makes about 3 cups

    Ingredients:

    • 1 1/2 cups cooked chickpeas
    • 1/3 cup maple syrup (or to taste, if you like it sweeter add 1/2 cup)
    • 1/2 cup coconut milk (or as needed)
    • 1 cup fresh or frozen raspberries
    • 1 Tbsp lemon juice
    • 1 Tbsp pure vanilla extract
    • 1/4 tsp sea salt
    • 1/2 cup raw cashew butter or almond butter


    Instructions:

    Combine all ingredients in a high speed blender or food processor and blend until smooth (adding a little more water if necessary).  Keeps in the refrigerator for about 1 week in a sealed container.


  • Vegan Chocolate Raspberry Roll Cake

    Vegan Chocolate Raspberry Roll Cake

    Sometimes you just feel like making a really good chocolate cake. I was in that sort of mood last weekend. So I decided to make one.  I had some raspberry jam on hand and I thought it would be perfect with a dark chocolate cake. I decided to make a roll cake, because a layer cake is a little more time consuming. You would think that roll cakes are more difficult but once you get the hang of them, they are actually surprisingly easy! I wanted a dark chocolate cake base with a raspberry cream and raspberry jam inside.

    For the cake part, I used my date sweetened dark chocolate cake.  It is always nice and pliable thanks to the dates, and happens to be fruit sweetened which I love as well. Also the dates give it a slight caramel like flavor along with the chocolate. I have tried making these sort of cakes with a sugar type base, but they just aren’t as forgiving with rolling as the fruit sweetened one is. While this was baking, my kitchen smelled like heavenly brownies!

    For the raspberry cream filling, I used a mixture of coconut cream and cashew butter to make a luscious base.  It is almost cheesecake mousse like.  To sweeten it and give it that raspberry flavor I used mostly raspberry jam.  It was a really delicious jam that Eric’s Dad made and it is just the perfect amount of sweet and tart with plenty of raspberry flavor.  You want to use a flavorful jam for this that you can really taste the raspberries in, not one that is simply just sweet.

    I spread a little bit of jam on top of the cream before I rolled the cake as well for extra raspberry flavor.  When it was all done and had had time to set, I finished it off with a layer of dark chocolate ganache on the outside.  That is my favorite way to decorate the outside of a chocolate roll cake.  It is almost like a really thick fudge, so yummy!  This cake as a whole was totally heavenly!  The rich vanilla raspberry cream and gooey jam on the inside were perfect with the soft dark chocolate cake and ganache!  If you are in a chocolate sort of mood, try this out sometime!

    Vegan Chocolate Raspberry Roll Cake

    Makes one 15 inch long roll cake

    Ingredients:

    10×15 inch jelly roll pan

    Cake:

    • 1 1/2 cups organic whole wheat pastry flour
    • 1/4 cup cacao powder or unsweetened cocoa powder
    • 1 1/2 tsp baking soda
    • 1 tsp baking powder
    • 1/2 tsp sea salt
    • 1 1/4 cups packed soft medjool dates, pitted, soaked in water for 30 minutes and drained
    • 1/4 cup raw cashew butter or almond butter (or your preferred nut butter, just make sure it is smooth)
    • 2 tsp pure vanilla extract
    • 2 cups filtered water
    • 2 Tbsp apple cider vinegar


    Filling:

    • 1 15 oz can organic full fat coconut milk or coconut cream, such as Thai Kitchen chilled (you want to make sure it is a brand that is 3/4 of the can cream or it will not work)
    • 1/2 cup raw cashew butter
    • 1/2 cup raspberry jam
    • 1/4 tsp sea salt
    • 1 tsp pure vanilla extract
    • 2/3 cup melted coconut butter (NOT OIL), warmed to liquid


    Ganache:

    • 3/4 cup chopped vegan dark chocolate
    • 1/3 cup plus 2 Tbsp full fat coconut milk


    Directions:

    1. Preheat the oven to 350F degrees and position rack in center of oven.
    2. Line a 15 x 10 inch jellyroll pan with parchment paper.
    3. Whisk flour, cacao powder, baking powder, baking soda, and sea salt in a large bowl to blend well.  Set aside.
    4. Place dates, water, almond butter, and vanilla extract into a blender, and blend until smooth, then whisk this blended mixture into the flour mixture until well blended. Whisk in the cider vinegar until bubbles form.
    5. Transfer cake batter to prepared pan and bake cake until tester inserted into center comes out clean, about 15-18 minutes.
    6. Cool cake completely.
    7. To make the filling, combine all ingredients in a high speed blender and blend until completely smooth.
    8. Pour into a bowl and place in the freezer until the consistency of stiffly whipped cream (about 30-45 minutes depending on how warm it has gotten.  Once it is ready place in the refrigerator until ready to assemble.
    9. When ready to assemble, spread filling over the top of the cake, then roll up jellyroll style starting with the short side and using the parchment to assist you in rolling.  Be careful because the cake is fragile, but if it cracks as you roll it no worries, keep rolling because the cake will be covered.  Let chill in the freezer once rolled for a few hours before topping with the ganache.  Once it has chilled, cut off the ends to make it nice and even.
    10. To make the ganache, melt the chocolate in the top of a double boiler, then whisk in the coconut milk until smooth.  Pour over the cake and smooth out over the top and sides (but leaving the pretty ends exposed).
    11. Chill until the ganache has firmed up, and serve!


    *If you would like to make this gluten free, swap the whole wheat flour for Bob’s Red Mill Gluten Free All Purpose Baking Flour (I have tested this brand and know it works, but have not tried other brands so I am not sure if they would turn out the same).

  • Vegan White Chocolate Mango Raspberry Cheesecake

    Vegan White Chocolate Mango Raspberry Cheesecake


    I can’t believe it is already July!  Time has flown this year with all that is going on, and I feel a bit out of sorts as to what month it is lately since I am not in my usual routine.  I haven’t done much cooking and baking lately because my kitchen has been in the process of being remodeled and it’s been hard to use it. Luckily it is about done, and since July is here, and it is hot, I thought it would be the perfect time to make a no bake cheesecake!  Which is honestly what I usually make anyway because they are just as delicious as the baked but easier.  Since mangoes are super delicious right now, and some at the store were calling my name, I decided to make a white chocolate mango raspberry cheesecake!

    For the base, I used my usual full fat coconut milk. I always have cans of it on hand, and it makes for luscious cheesecake.  I then usually add something like cashews or chickpeas to add bulk and a nice texture but this time I simply used a good amount of sweet mango since this was a mango cheesecake after all.  I also added in a bit of lime juice and vanilla for flavor plus maple syrup to sweeten it and it was heavenly!  Instead of the usual coconut butter I use to thicken my cheesecakes, I used melted cacao butter this time to give it the white chocolate flavor. 

    Although I could have made my raspberry swirl completely with raw raspberries, I mixed them with jam so that they would be a little less runny and more vibrant in color and it worked out perfectly.  That bright red against the pale yellow of the mango cheesecake was lovely! I could not wait to try it, but I had to wait until the next day because I was making it at night. 

    Once I finally unmolded it and got to dive in, it was heavenly!  Rich and creamy with a sweet mango flavor, a hint of lime, mellow white chocolate and jammy raspberries!  It tasted like summer, which is what I was going for, I didn’t have to heat up the oven to make it and it was easy to make!  If you are in the mood for cheesecake give this a try! 

    Vegan White Chocolate Mango Raspberry Cheesecake

    Makes one 6 inch cake

    Crust:

    • 1/4 cup almonds (for nut free version use finely shredded unsweetened dried coconut instead)
    • 3/4 cup organic gluten free rolled oats, or quinoa flakes
    • 1/4 cup pitted medjool dates (if not soft, soak them in filtered water first and drain well)
    • 1/8 tsp sea salt


    Filling:

    • 1 cup full fat coconut cream (I used the thick part of a can of Thai Kitchen organic full fat coconut milk*)
    • 3/4 cup cubed fresh mango
    • 1/4 cup maple syrup
    • 1 tsp pure vanilla extract
    • 3 Tbsp lime juice 
    • 1/8 tsp sea salt (or to taste
    • 3/4 cup melted cacao butter


    Swirl:

    • 2/3 cup organic raspberry jam mashed together with 1/3 cup fresh raspberries


    Instructions:

    1. Oil a 6 inch spring form pan, and line the bottom with parchment paper.
    2. To make the crust, place all ingredients in a food processor, and process until crumbs and starting to hold together (if they are not holding together when squeezed, add a few tsp filtered water and blend). Press into the bottom of the prepared pan.
    3. Meanwhile, to make the filling, combine all ingredients in a high speed blender or food processor and blend until smooth.
    4. Pour half the filling over the prepared crust  then drop some of the jam over than randomly (but spaced out) by the tsp as well. Swirl with a knife a few times. Repeat with the remaining filling and jam.
    5. Place cheesecake in the freezer until it is set for about 4 hours (or overnight in the refrigerator if you are not in a hurry).
    6. Remove from the freezer, un-mold and enjoy!  Store any leftover cake in the refrigerator.

    *I use Thai Kitchen full fat coconut milk.  If you are using a different brand, just make sure it is the thick type, 2/3 of the can at least should be very thick cream or it will not work in this recipe.

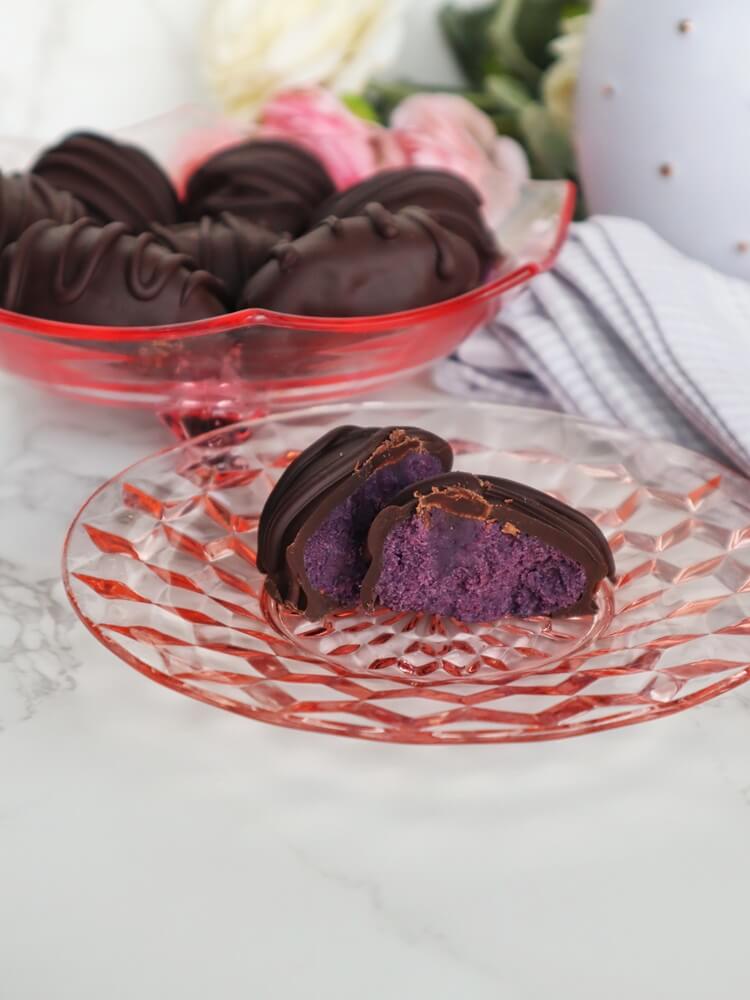
  • Vegan Raspberry Chocolate Eggs

    Vegan Raspberry Chocolate Eggs


    I loved Easter candy as a kid.  Those pastel wrappers and fun varieties of candy I couldn’t get the rest of the year, I loved opening up my Easter eggs from the hunt and finding out what was in them.  One of the Easter candies I got most excited for were the raspberry cream eggs. They were larger than the fun sized candy, and that filling was so good.  Kind of like raspberry marshmallows but better. So now I like to make my own home made veganized version that is probably healthier than the ones I ate as a kid.  It is the perfect time, since we are all spending a bit more time at home due to the Coronavirus quarantine.

    These are fun to make too!  For the filling I made it a white chocolate raspberry filling.  The white chocolate truffle filling being a combination of Raw Guru cacao butter and Dastony coconut butter and cashew butter.  This is what I use for my white chocolate usually in combination with a bit of vanilla and maple syrup to sweeten. For the raspberries I used freeze dried ones.  You may be asking why not fresh?  Well, they are spendy this time of the year, especially in Minnesota.  And, the freeze dried have plenty of flavor plus they don’t add excess moisture.

    This is why they are perfect for something like this!  I use them in frosting to make it raspberry flavored for that reason too.  The texture comes out lovely!  I could not stop sampling the filling because it was so good!  It was kind of fun to shape the little eggs, kind of like play dough!

    I dipped them in vegan dark chocolate and I could not wait to try one!  Once they had set, I dove in!  They were heavenly!  Rich, creamy sweet raspberry filling with a hint of vanilla and that decadent dark chocolate was perfect paired with it!  These are sooo much better than the ones I grew up eating! If you have a bit of extra time, why not try making your own Easter treats?!

    Vegan Raspberry Chocolate Eggs 
    Makes 6-8 large eggs

    Ingredients:

    Filling:


    Dark Chocolate:

    • 1 1/2 cups vegan dark chocolate, chopped or vegan chocolate chips


    Directions:

    1. Combine all of the filling ingredients but the berries and water over a double boiler, and whisk until smooth.
    2. Pulverize the berries in a blender until fine, then whisk into the white chocolate along with the water. Place in the freezer for about 15-20 minutes until it is firm enough to scoop. Scoop into 8 balls, rolling them with your hands and shaping them into eggs.   Place on a parchment lined tray, and place back into the freezer until firm, about 30 minutes.
    3. Meanwhile, melt the dark chocolate in a double boiler, and whisk until smooth.
    4. Once the filling has firmed up, dip each chocolate into the dark chocolate, being sure to let the excess drain off, and place back onto the tray (I like to set mine on a fork to allow it to drain better). Once they are all dipped, set them in the freezer until hardened.

    Store any leftover truffles in an airtight container in the refrigerator for up to 1 month.

  • Raspberry Rose White Chocolate Latte

    Raspberry Rose White Chocolate Latte

    Everyone has those little thing in life that make them happy. For me, one of those things lately is lattes.  Every weekend Eric and I stop and get a latte of some sort at a local coffee shop.  Sometimes it is just a plain oatmilk latte, other times a little something added like a hint of lavender and vanilla.  Or, maybe I am in the mood for a peppermint matcha latte or a pumpkin spice latte (when it was fall).  It is always something I look forward to, a treat for the weekend!  If we don’t have time to go though, I do enjoy making my own.  Sometimes they are even as good as the ones we order at the coffee shop. I saw an ad online for a white chocolate berry rose latte mix and said to myself, I need to make that. It was just a little spendy, and not something I could buy locally.  So I whipped up a latte with those same flavors last week. 

    I had all of the ingredients on hand to do so, even the cacao butter from Raw Guru to make the white chocolate flavor in it. It didn’t contain any caffeine, because there was no tea or coffee in this one, so it was suitable for me to make in the evening after work to relax with.  That is the only thing about tea and coffee lattes I don’t like sometimes, I can’t drink them later in the day or I won’t be able to sleep.  So I always have them earlier in the day.  This one however would be perfect for before bedtime to wind down with.

    I used oatmilk for the base, and added a bit of Raw Guru cacao butter to give it a white chocolate flavor and make it a little more rich.  I wanted this to have plenty of raspberry flavor, so I infused it with dried raspberries.  I always keep them on hand anyway for decorating or coloring things, or just giving them a super delicious berry flavor.  I also added in some dried lavender, just a little, because I wanted this tea to be aromatic.  Also a good splash of rosewater since this is a raspberry rose latte. I am really loving rosewater lately it makes everything smell amazing.  A touch of maple syrup to sweeten the latte and it was perfect!

    It smelled so good and I could not wait to try it!  I gave it a little froth on top and it was perfect!  Smooth, and rich tasting thanks to the cacao butter, aromatic with florals, and sweet with berries.  Simply heavenly!  The perfect thing to chill with in the evening, and even a bit comforting.

    Raspberry Rose White Chocolate Latte

    Makes 2

    • 2 cups thick unsweetened oat milk (I used Planet Oat)
    • 1 Tbsp Raw Guru Cacao Butter
    • 1 tsp dried lavender
    • 3 Tbsp dried raspberries
    • 1/4 tsp beet powder (optional for color)
    • 2 tsp maple syrup
    • 2 tsp rosewater


    Instructions:

    1. Bring the oat milk to a boil in a saucepan with the cacao butter, until it just comes to a boil and the cacao butter is melted then remove from the heat.
    2. Place the lavender and berries in a tea infuser and add to the pan, making sure it is submerged.  Add the beet powder as well, and stir in.
    3. Let the tea steep for at least 5 minutes to allow the flavors to infuse the tea.
    4. Remove the infuser, add the maple syrup and rosewater and froth with an immersion blender or frother. Pour into two cups and enjoy!
  • Vegan Raspberry Pistachio “Milk” Chocolate Bars

    Vegan Raspberry Pistachio “Milk” Chocolate Bars

    I have been seeing lots of ads for vegan chocolate bars online that look amazing.  But unfortunately I can’t afford to buy them right now, because they are a bit over my budget this month, and the shipping price is pretty high.  So, I decided to make my own instead!  I actually have some cool chocolate bar molds, and thought they would make nice gifts as well.  Also, then I can add in whatever I like and personalize them.  I usually make dark chocolate bars when I make them, but this time I wanted to try milk chocolate because that was the type I was seeing online that sounded so good.

    I am not sure what they use in their bars, some of the ones I wanted to try were oatmilk and coconut and I assume they don’t just put liquid milk into them.  I don’t have coconut milk powder (and I am not sure if oat milk powder exists), but I did have coconut butter on hand and thought that might work well so I went for it!  You could use whatever vegan dark chocolate or chocolate chips is your favorite for these, but I used Lily’s vegan dark chocolate chips.  I melted them in the top of a double boiler, and then whisked in the melted coconut butter and it was so good when I tried it even before I put it in the molds.  It tasted just like milk chocolate.

    I poured it into the molds, then added some crunchy freeze dried raspberries and pistachios. I recently made some raspberry truffles and loved them so I wanted to use that flavor profile again, and the crunchy green pistachios were so lovely with the raspberries!  I popped them into the freezer and waited for them to set (which luckily wasn’t long).  The ones I was gifting I put into little baggies and tied them with ribbons.  I really loved how they turned out!

    The chocolate was smooth and melt in your mouth like milk chocolate should be, a little more mellow than dark, and the tart sweet raspberries and crunchy salty pistachios were the perfect add ins!  By the way if you are looking for shelled pistachios for a reasonable price Aldi has them!  If pistachios and raspberries aren’t your jam, you could try other fruit and nut combos, like blueberry pecan or strawberry almond or even things like cacao nibs and lavender flowers.  Feel free to be creative with these!

    Vegan Raspberry “Milk” Chocolate Bars

    Makes 4

    Ingredients:

    • 2 cups good quality vegan dark chocolate, chopped
    • 1/2 cup coconut butter
    • 1/4 cup freeze dried raspberries, crushed
    • 1/4 cup chopped pistachios


    Instructions:

    1. In the top of a double boiler, melt the dark chocolate, then add the coconut butter, and whisk together until completely blended.
    2. Place the chocolate molds on a tray.  Pour the chocolate into the chocolate bar molds, and sprinkle them evenly with both the raspberries and pistachios.
    3. Place the tray in the refrigerator until the chocolate has set, which will take a 1-2 hours.
    4. Pop the chocolate out of the molds and enjoy!

    Store chocolate in the refrigerator for up to 1 month.

  • Vegan Raspberry Chocolate Chunk Bread Pudding

    Vegan Raspberry Chocolate Chunk Bread Pudding

    When I have a lovely loaf of crusty bread, there are two things I love doing most with it.  Enjoying it with soup so I can dunk it in and soak up the goodness, and making bread pudding.  I usually end up doing both if it is a large loaf and I have enough.  I had a lovely loaf of sourdough bread that was getting a little dry since I had it for a few days, so I decided it was perfect for bread pudding.  Eric loves it too, so win win for both of us if I make a batch and share.  His Dad recently sent us a bunch of his home made jam, so I thought I would make a raspberry swirled bread pudding.  Back in the day my Mom and I used to go to a local restaurant that had the best raspberry bread pudding.  It was totally heavenly served warm with cool whipped cream and a sweet sauce.  I have always wanted to recreate it and now was my chance!

    It is weird, I never actually tried making home made bread pudding until this year.  Even though I have made home made bread a lot.  I was missing out!  It is so easy and so good!  In fact, the whole process of making this is done in less than 45 minutes. You could use whatever bread you like of course but it helps if it is a bit dry to soak up the batter.  I like a crusty bread also so that it holds its share somewhat and the top gets a little bit crispy.  For this one I used an organic wheat sourdough.

    For the batter I used oat milk because it is what I have on hand for my drinks like coffee and matcha lattes, but it works perfect because it is pretty neutral in flavor.  I mixed it with flax eggs, and maple and vanilla to sweeten and it was just right.  The bread soaked it up beautifully!  I put plenty of raspberry jam in the bread pudding, but I also added chocolate chunks because why not?!  Chocolate and raspberries are a match made in heaven after all!

    It smelled so good while baking!  I could not wait to try it.  It baked up beautifully into a french toast like consistency, crunchy on top and light and fluffy inside.  The gooey dark chocolate and sweet raspberries made it over the top amazing!  This would be perfect for Valentine’s Day!  Eric loved it too, the leftovers were gone in no time!  If you have some crusty bread that has sat for a few days, this is the perfect thing to make with it!

    Vegan Raspberry Chocolate Chunk Bread Pudding 

    Serves 4-6

    Ingredients:

    Bread Pudding:

    • 2 Tbsp ground flax seed, mixed with 6 Tbsp filtered water
    • 1 3/4 cups oat milk (or your favorite plant based milk)
    • 1/4 cup maple syrup
    • 1/4 tsp sea salt
    • 1 tsp pure vanilla extract
    • 6 cups lightly packed cubed sourdough bread
    • 1/2 cup chopped chocolate or chocolate chips
    • 1 cup raspberry jam
    • 2 Tbsp maple sugar (or coconut sugar)


    Instructions:

    1. Preheat the oven to 350F degrees, and oil two 1 quart baking dishes (or see bottom of post for other baking dish options).
    2. In a bowl, whisk together the flax seeds and water mixture, oat milk, maple syrup, spices, sea salt, and vanilla until well combined, then add the bread crumbs and toss to coat in the mixture.  Mix in chocolate.
    3. Transfer half of the mixture to the prepared baking dishes, (including the liquid, pour it over them). Then spoon half the jam over them by the Tbsp.  Top with the remaining bread mixture, and more jam.  Sprinkle with the maple sugar.
    4. Place in the oven on a tray, and bake for about 25-30 minutes (see bottom for other pan sizes baking times), or until the top is starting to brown and the liquid has absorbed and baked into pudding at the bottom.
    5. Remove from oven.
    6. Let cool about 10 minutes and enjoy warm!

    For 6 small ramakins: bake 15 minutes

    For 1 8×8 inch square pan or 2 quart baking dish: bake 30-40 minutes

  • Raspberry Jalapeno Limeade

    Raspberry Jalapeno Limeade

    We are at the point in the Summer, right around my birthday where it is really hot here. Well, I consider it really hot. With the Minnesota humidity it is just downright sticky, and you start sweating within minutes of being outside. That doesn’t stop me from going out of course. I would much rather run and walk outside than workout indoors. I do tend to get super sweaty though, and if I stand in one place I start dripping sweat into puddles around me. I was at that point after my run last Wednesday and I decided that I wanted nothing more than an ice cold lemonade or limeade. Unfortunately I had to shower and get ready for work so I didn’t have time for that. But I told myself I would make one when I got home.

    I decided on limeade since I already had some limes on hand and wouldn’t have to buy anything to make it. I could have just made plain limeade, but where is the fun in that? I like fancy home made drinks. Especially ones involving citrus and berries. So I went for raspberry limeade since I had some raspberries as well.

    I love it when I have all of the things I need already for a recipe and don’t need to do any extra shopping. Raspberry limeade on its own would have been good but I threw some jalapeno in there for a kick as well. I love spicy things, and I love drinks that are infused with them, so I was super excited. Also, I should add this is sugar free, because I used stevia to sweeten it. So you will still feel good after drinking it no sugar high.

    It was really easy to make and within 5 minutes I was sipping on a super delicious fancy raspberry jalapeno limeade! It almost made me forget about being a bit too warm all day and made me feel refreshed! If you are craving something sweet and refreshing to quench your thirst, give this a try!

    Raspberry Jalapeno Limeade

    Makes 2 drinks

    Ingredients:

    • 1 cup fresh, organic raspberries
    • 4 slices fresh jalapeno
    • 4 cups filtered water
    • 2/3 cup fresh organic lime juice
    • 1 1/2 tsp liquid stevia (or to taste) or 2 Tbsp maple syrup if you don’t prefer stevia
    • ice and lime slices for garnish

    Instructions:

    1. Mash the raspberries with the jalapeno in the bottom of a large glass measuring cup with the handle end of a wooden spoon until they are smaller pieces (or alternatively, use an immersion blender to make it easier).
    2. Add the filtered water, the lime juice and the stevia (or maple syrup) and stir until well blended.
    3. Add desired amount of ice and lime slices to two tall glasses, and pour the limeade into them. If you would like it to be free of chunks of fruit, pour it through a fine meshed strainer first.
    4. Serve!
  • Vegan Chocolate Raspberry Jam Bars

    Vegan Chocolate Raspberry Jam Bars

    I recently had dinner with my Mom at a local cafe and we were looking at the dessert case on the way out. There were beautiful cakes and tarts but the thing that caught our eye were some raspberry chocolate bars. They had a crunchy chocolate streusel on top as well as chocolate chips and a raspberry jam filling. My Mom said to me, I bet you could make some of those at home! So, I decided that I would create my own version!

    I tend to do baking projects on my days off when I have more time, and they sounded really good so I went for it! I have made jam bars before and loved them, I have just never tried chocolate ones. I decided to even improve upon the idea and make them chocolate hazelnut raspberry jam bars. Because I normally use nut butter in my jam bars anyway to make them extra delicious and I happened to have hazelnut butter and hazelnut meal on hand.

    Chocolate and hazelnuts are an amazing combination anyhow add in raspberry and its even better! The crust is really easy to make, you just mix it all together, press half into the pan, top with the jam and then crumble the rest of the crust and chocolate chips over that! I admit, I did sample a bit of the crust while I was making it, because it was like super delicious cookie dough. I am one of those people who likes to sample what I am making all the way through and I am just a sucker for cookie dough and batter!

    Lastly I sprinkled on some chocolate chips before baking because one can never have too much chocolate in a chocolate dessert, right? They smelled amazing while baking. Too bad I had to wait until they cooled completely to cut them so they stayed pretty. It was well worth the wait though! They were heavenly! Rich, chocolaty hazelnut cookie crust and crumble plus the dark chocolate chips and gooey tart sweet jam…total deliciousness! So the next time you are craving a baked chocolate treat, give these a try instead of just brownies!

    Vegan Chocolate Raspberry Jam Bars
    Makes 16 bars

    Ingredients:

    Crust/topping:

    • 1/2 cup coconut oil, warmed to liquid
    • 3/4 cup coconut sugar
    • 3 Tbsp filtered water mixed with 1 Tbsp ground flax seed
    • 3/4 cup hazelnut butter
    • 3/4 cups whole wheat pastry flour
    • 1/2 cup hazelnut meal
    • 1/4 cup cacao powder or unsweetened cocoa powder
    • 1/2 tsp baking powder
    • 1/2 tsp sea salt

    Filling and Topping:

    • 3/4 cup vegan raspberry jam
    • 1/2 cup vegan dark chocolate chips

    Instructions:

    1. Preheat oven to 350F degrees with the rack set in the center position. Line a 9×9 inch square pan with parchment, and/or grease it with coconut oil.
    2. To make the crust, whisk the coconut oil and sugar together in a bowl with the flax mixture until the sugar starts to dissolve. Then add the hazelnut butter and mix until combined.
    3. Add the flour, cacao powder, hazelnut meal, baking powder, sea salt and stir in until well blended.
    4. Spread 2/3 of this mixture over the bottom of the pan, pressing it to the edges with your fingers.  Then spread the jam over that with a spoon or offset spatula. Drop chunks of the remaining dough over that and sprinkle with chocolate chips.
    5. Place in the oven. Bake for about 45 minutes until lightly browned and set.
    6. Remove from the oven and let cool completely before cutting into bars.
  • Vegan Raspberry Pop-Tarts

    Vegan Raspberry Pop-Tarts

    It was hard for my Mom to get me to eat breakfast when I was little. I just wanted to go to school or daycare and hated cereal so I would either eat Nutrigrain bars or Pop-Tarts so I didn’t have to sit down and take a lot of time to eat. The Raspberry Pop-Tarts were my favorite. But looking back on it, now that I have had plenty of pastries and real fruit they really didn’t taste like real pastries or raspberry at all even if they were amazing at the time. They had sort of a weird raspberry paste inside. I did however like the fact that they were iced and had sprinkles.

    I probably haven’t eaten an actual Pop-Tart since high school, but I have made my own at home with some success. No raspberry ones though until last weekend surprisingly. I had some raspberries on hand and was thinking that it would be awesome to make home made raspberry pop-tarts that were way better than those store bought ones I grew up eating. I am all for veganizing things and making them better.

    I was excited about these! I made a gluten free classic pie crust and used some home made raspberry jam as the filling. But of course you could use store bought if you have a favorite brand. These are actually pretty simple to make, although they do involve some mixing dough correctly and rolling it out and cutting it. But that is the fun part! Besides eating the finished ones of course. I wanted to put a glaze on them too, like the ones I ate as a kid.

    So, I used some Dastony coconut butter from Raw Guru to make a simple but delicious glaze. The finished product was super delicious! Jammy, gooey raspberry filling and a flakey buttery crust with a sweet glaze! They were waaayyyy better than any of the Pop-Tarts I grew up eating! I definitely recommend you try these next time you are craving the Pop-Tarts of your childhood.

    Vegan Raspberry Pop-Tarts
    Makes 8

    Crust:

    Filling:

    • about 1/2 cup raspberry jam

    Glaze:

    • 3 Tbsp coconut butter, warmed to liquid
    • 1 Tbsp raspberry powder (I ground up freeze dried raspberries with a mortar and pestle)
    • 1 Tbsp maple syrup
    • pinch sea salt
    • 3-4 Tbsp filtered water or as needed

    Instructions:

    1. To make the crust, in a large bowl, mix together flour, sugar, sea salt, and spices. Cut in coconut oil with a pastry blender or 2 knives until it is in pea sized pieces. Mix in just enough water to create a smooth dough that holds together but isn’t too sticky. Add more water if needed, and knead slightly until a smooth dough is created.
    2. Roll out into a large rectangle and cut into 16 identical rectangles.  Chill if too soft before assembling.  You want the dough a little pliable, but not so warm that it will break. Preheat oven to 375F degrees.
    3. To assemble, spread about 2 Tbsp jam over half of the dough rectangles (leaving a boarder so you can attach the dough at the sides). Cover with the remaining pieces of dough (I used a small spatula to carefully move them), pressing the edges and crimping with a fork or the edge of something with a flat edge, like a spatula. Bake for about 30 minutes until the crusts are starting to brown lightly. Remove from oven and let cool on a wire rack until warm.
    4. Whisk glaze ingredients together until smooth (adding more water if too thick, you want it to be pour-able). Spoon some of the glaze over each pop tart, and smooth it out to cover the top. Let set before serving.

    *If you would rather not make these gluten free, just use the same amount of organic whole wheat pastry flour.

  • Vegan Peanut Butter and Jelly Banana Bread

    Vegan Peanut Butter and Jelly Banana Bread

    Having over ripe bananas on your counter is a blessing as far as I am concerned.  You can freeze them and use them for smoothies, or of course do some baking.  There are so many things you can make! But I decided to go for an old classic banana bread when I had some ripe bananas this week.  I have always loved banana bread.  I am pretty sure it was the first thing I learned how to bake.  I know I made it in foods class in middle school as the first baked good we made, and I know before that my Mom had helped me make my Grandma’s recipe. I know some people like chopped nuts in theirs (add ins for banana bread can be a hot button debate like raisins or chocolate chips in oatmeal cookies are) but we usually just added chocolate chips, and it was amazing while still warm while they were gooey.  Well, this time I thought about making a more classic banana bread with chocolate chips, but decided to swirl the loaf with something instead.

    Peanut butter and jelly.  Why not?!  It is good slathered on banana bread as sort of a dessert like peanut butter and jelly sandwich, so I figured it would be good baked inside as well.  I had some raspberry jam and freshly home made peanut butter on hand, so it was perfect!  Not only that, this recipe is really easy to make, and I made it after work in a short amount of time.  You just whisk it all together in a bowl, then pour it into the pans, drop the swirl onto it, swirl it and bake!  I made mine in mini pans, because I like little individual breads. Nothing like having one all to yourself! 

    They smelled amazing while baking!  That is one of my favorite aspects of baking, the heavenly aroma that fills your home.  One can not possibly be in a bad mood while they are taking it in. I try to be positive, but sometimes we all get a little grouchy and I admit I was a little crabby before I started the process.  Some stuff at work kind of pushed my patience buttons, and I lost my garage door opener somehow between being at work and getting home (luckily I found it later), but I needed some baking and relaxing time. I felt so much happier and better after!  Not only that, I had banana bread to enjoy! It was super delicious!  Soft and sweet with plenty of banana flavor, gooey jam and peanut butter swirled throughout!  I might even like this even more than the chocolate chip banana bread and I thought that could never be topped!  If you have over ripe bananas in your home, you know what to make!

    Vegan Peanut Butter and Jelly Banana Bread

    Makes 4 small loaves

    Ingredients:

    • 4 mini loaf pans (8.7 in x 4.3 in x 2 in.)
    • 1 ½ cups organic whole wheat pastry flour
    • 1 cup Raw Guru coconut sugar
    • 1 ½ tsp baking soda
    • 1 tsp baking powder
    • ½ tsp sea salt
    • 1 cup pureed ripe banana
    • ½ cup organic smooth peanut butter
    • 1 tsp pure vanilla extract
    • ½ cup oat milk or other non-dairy milk
    • 2 Tbsp cider vinegar
    • ½ cup raspberry jam
    • ½ cup smooth organic peanut butter

    Instructions:

    1. Preheat the oven to 350F degrees, and oil four mini loaf pans. 
    2. In a larger bowl, whisk together the pastry flour, coconut sugar, baking soda, baking powder, and sea salt.
    3. In a smaller bowl, whisk together the banana, peanut butter, vanilla, and oat milk until smooth.
    4. Pour the liquid mixture into the solid, and whisk until smooth.
    5. Whisk in the cider vinegar until bubbles form, then pour half into the prepared pans.
    6. Spoon 3 tsp of the jam onto the batter in each pan, then 3 tsp of peanut butter.
    7. Pour the remaining batter over all of the other batter in the pans, then top each with another 3 tsp of jam and peanut butter. Swirl with a knife.
    8. Place in the oven and bake for about 35 minutes or until a toothpick inserted into the center comes out almost clean with a few moist crumbs attached.
    9. Let cool on a wire rack before enjoying.
    10. Keeps covered for up to 1 week in the refrigerator.
  • Vegan Chocolate Raspberry Lava Cakes

    Vegan Chocolate Raspberry Lava Cakes

    I had some leftover raspberry jam from another recipe, and I thought it would be amazing in a chocolate cake. But I didn’t really feel like making a big, tall layer cake. It had been a really crazy hectic week and something more low maintenance was more appealing. Don’t get me wrong, I love making layer cakes, they are so fun to decorate and it’s kind of relaxing to do so. But not when I don’t have a lot of time after work and don’t want to have to rush, because making desserts should never be rushed, it is supposed to be fun. So I came up with a way to enjoy some delicious chocolate raspberry cake that was actually quick and easy to make. I made lava cakes!

    I love lava cakes. After all, gooey filling in a warm chocolate cake is amazing. Not only that, they bake up in a short amount of time, because you want the filling to be a little gooey. These ones are ready in about 30 minutes, which I love! Not only that, I already had all of the ingredients on hand!

    For the cake, I use a batter made with dates instead of sugar because they keep the cake nice and moist but still light. The perfect texture. Also, this cake contains no oil in the batter (just for the dishes so they come out nicely), I use almond butter instead and it works great! For the filling I used a fruit sweetened raspberry jam to keep it easy instead of making a filling. I think my favorite fruit to pair with chocolate is raspberries.

    The cakes baked up beautifully and I could not wait to try one! They were so good! Rich, decadent soft dark chocolate cake with a gooey raspberry center and some molten chocolate chips because I added those in as well and you have to serve these warm! I even drizzled them with some fudge sauce to make them pretty! I did not have any coconut milk ice cream on hand, but if you did, it would be perfect with these! I love a warm dessert with a cool ice cream for a nice contrast! These would be perfect for Valentine’s Day next week. So if you want to impress someone, make these for them! Or just make them for yourself, that is ok too and totally acceptable!

    Vegan Chocolate Raspberry Lava Cakes
    Makes  four 1 cup cakes

    Ingredients:

    4 1 cup custard dishes

    Cake:

    • 3/4 cups quinoa flour (or all purpose gluten free flour)
    • 2 Tbsp cacao powder or unsweetened cocoa powder
    • 3/4 tsp baking soda
    • 1/2 tsp baking powder
    • 1/4 tsp sea salt
    • 1/2 cup packed soft medjool dates, pitted, soaked in water for 30 minutes and 1/2 cup of the water reserved
    • 2 Tbsp almond butter
    • 1 tsp pure vanilla extract
    • 1/2  cup filtered water
    • 1 Tbsp apple cider vinegar

    Filling:

    • 1/2 cup fruit sweetened raspberry jam
    • 1/4 cup vegan dark chocolate chips or chunks

    Chocolate fudge sauce:

    • 2 Tbsp almond butter
    • 2 Tbsp maple syrup
    • 2 Tbsp cacao powder
    • pinch sea salt
    • filtered water as needed

    Directions:

    1. Preheat the oven to 375F degrees and position rack in center of oven.
    2. Oil four 1 cup custard dishes or ramakins with coconut oil.
    3. Whisk flour, baking powder, baking soda, sea salt in a large bowl to blend well.
    4. Place dates, reserved water, almond butter, water, and vanilla extract into a blender, and blend until smooth, then whisk this blended mixture into the flour mixture until well blended. Whisk in the cider vinegar until bubbles form.
    5. Transfer half of the cake batter to prepared dishes filling them half full, then sprinkle some chocolate chips over each one, and drop 2 Tbsp of the jam mixture into each in the center. Sprinkle more chocolate chips over that.  Spoon the remaining batter over each one, place on a tray, and place in the oven.
    6. Bake cakes until they are set, but not over-baked about 15-18 minutes.  Remove from oven, let cool for about 10 minutes.
    7. Meanwhile, whisk together the fudge sauce ingredients until smooth (adding a little filtered water if necessary if too thick, I used about 2 Tbsp, you want it to be pour-able but not runny).
    8. When the cakes have sat 10 minutes, un-mold, drizzle with the fudge sauce and enjoy warm.
  • Vegan Dark Chocolate Raspberry Shortbread Cookies

    Vegan Dark Chocolate Raspberry Shortbread Cookies

    I have been all about making cute Valentine’s Day treats lately. After all, it is next week already. Maybe it is just because I am a true girly girl and I love all things pink and festive and heart shaped, or just that I love things with chocolate, or berry or any of the other sweet flavors associated with Valentine’s Day. The chocolates are my favorite of course, but I have been making cookies this week as well!

    I made some raspberry linzer cookies earlier in the week and more recently some dark chocolate short bread ones that I am sharing with you today! I had always wanted to make this type of cookies, the ones with the jam peeking out through the window in the top cookie of a sandwich. I made the classic ones to begin with because I wanted to see if they would work out, then made the non-traditional ones for my blog and they happened to be my favorite of the two.

    I made them with a dark chocolate shortbread base, so I am not calling them linzer cookies since that base has nuts and is typically vanilla. This base is super delicious though! I modeled it after a dark chocolate shortbread cookie I used to make back in the day before I went vegan that I loved and they turned out very similar!

    These are a little bit time consuming to make, I am not going to lie, after all they require rolling out dough, cutting it and chilling it then the assembly with the jam and being careful with the delicate top cookies. But it is all totally worth it, and I find doing activities like this calming. Maybe it is just the artist in me that likes to spend weeks on one painting or sculpture, but doing little detailed things makes me happy sometimes. These cookies turned out super delicious by the way, the rich, buttery dark chocolate cookies the perfect pairing for the gooey sweet raspberry jam! If you are in the mood for a Valentine’s Day project, give these cookies a try!


    Vegan Dark Chocolate Raspberry Shortbread Cookies 
    Makes about 16

    Ingredients:

    • 1 3/4 cups organic whole wheat pastry flour*
    • 1/4 cup cacao powder or unsweetened cocoa powder
    • 1/4 cup plus 2 Tbsp maple sugar
    • 1/4 tsp sea salt
    • 1/4 cup melted coconut oil
    • 1/4 cup avocado oil (or other neutral oil liquid at cool temperatures)
    • 1 Tbsp filtered water
    • 1 tsp pure vanilla extract
    • about 1/2 cup raspberry jam 

    Instructions:

    1. Preheat the oven to 325F degrees, and line three baking sheets with parchment.
    2. To make the dough, mix all ingredients together in a bowl until combined and smooth (it may be slightly crumbly, and that is ok, just squeeze it back together), then place on a piece of parchment paper and roll out 1/4 inch thick.  Cut into heart shapes with a medium sized cookie cutter (I used a heart shape) and place them onto two of the prepared pans. Re-roll any scraps squeezing them back together and rolling them out, and cutting into more shapes until all of the dough is used. 
    3. Place the cookies on the pans into the freezer to chill for 5 minutes (or until the dough is more firm but still slightly pliable), then remove one of the pans and cut smaller hearts out of the centers of the hearts on that pan. Remove the hearts and set them on the third pan. Place all of the pans back into the freezer until the cookies are completely firm, about 10 minutes.
    4. When they are firm enough, place the pans in the oven and bake for 15-20 minutes or until set and just barely beginning to brown at the edges.
    5. Remove the pans from the oven and let cool completely on wire racks.
    6. When the cookies have cooled completely, spread a thin layer of raspberry jam over each of the larger cookies without the holes, then place the cookies with the holes on top of them (being careful as they are fragile, I used a spatula to move them.
    7. Then spread jam over half of the smaller cookies and sandwich them together with the other half of the cookies.
    8. Enjoy!  Store any leftover cookies in an airtight container in the refrigerator or freezer.


  • Vegan Peanut Butter and Jelly Sandwich Cookies

    Vegan Peanut Butter and Jelly Sandwich Cookies

    When I was little, pretty much the only sandwiches I wanted to eat were grilled cheese, and peanut butter and jelly. I was not a fan of sandwiches with lunch meat. So my lunches were always peanut butter and jelly. I didn’t complain. It was always raspberry jam if my Mom made it and Strawberry if my Dad did, not any concord grape or anything adventurous. I considered the concord grape kind of special if I ever got that at my friend’s houses. I still love peanut butter and jelly or jam to this day. Even if I don’t make myself sandwiches anymore. I love it in the form of dessert. Because if you think about it, it kind of is dessert. Rich, creamy peanut butter, and sweet jam.

    So last weekend, I was craving peanut butter and jelly and I decided to make some PB and J sandwich cookies. It has been really cold here in Minnesota, below zero temps at night, and in the next few days we are supposed to have wind chills in the -30F and -15F actual temps so it is the perfect time to stay inside and bake. Don’t get me wrong, it is beautiful out in the Winter, but I don’t want to freeze my face off if I don’t have to.

    The cookies were actually pretty quick and easy to make too, which is always a win! I used my favorite vegan sandwich cookie recipe with my home made peanut butter, but made them smaller since I like my sandwich cookies to be cute and little. The dough was delicious and they smelled amazing while baking. I could not wait to try the finished product!

    Once they were all cooled I sandwiched them together with a fruit sweetened raspberry jam. I like the chunky jam with all the seeds! The cookies were so good with the rich, slightly salty peanut butter dough, and the gooey flavorful sweet jam! If you are feeling a little nostalgic and love peanut butter and jelly whip up a batch of these babies for yourself. Of course you can use whichever jam is your favorite!

    Vegan Peanut Butter and Jelly Sandwich Cookies
    Makes 10 sandwiches

    Ingredients:

    Cookies:

    • 1 Tbsp ground flax seed
    • 1/4 cup plus 1 Tbsp filtered water
    • 1 cup coconut sugar
    • 1 cup organic peanut butter (the plain with just peanuts and salt)
    • 1/4 cup coconut oil, warmed to liquid
    • 1 tsp pure vanilla extract
    • 1 cup gluten free all purpose flour
    • 3/4 tsp baking soda
    • 1/2 tsp baking powder
    • 1/2 tsp sea salt

    Filling:

    • Fruit sweetened raspberry jam

    Instructions:

    1. In a small bowl, whisk together the flax seed and water.  Place the bowl in the fridge for 15 minutes, this is your flax egg.
    2. In a large bowl, with a wooden spoon, mix together the sugar, peanut butter, coconut oil, vanilla and flax egg, until smooth.  Then mix in the flour, soda, baking powder, and sea salt in until the mixture is smooth.
    3. Preheat the oven to 375F degrees.  Line a sheet pan with parchment.
    4. Shape the cookie dough into 1 1/2 inch balls, place on your baking sheet a few inches apart and flatten with a fork, like you would with peanut butter cookies.
    5. Place in the oven and bake at 375F for 12 minutes or so, until lightly browned and set.  Allow to cool completely on a rack.
    6. Flip half of the cookies over, and spread about 1 tsp of jam over them. Top with the remaining cookies.
    7. Enjoy!
  • Vegan Raspberry White Chocolate Truffle Hearts

    Vegan Raspberry White Chocolate Truffle Hearts

    Valentine’s Day is a month away now, so I figure I can start making Valentine’s Day treats.  Because one can never have too many of those, right?  When I was little, I loved the candy part of Valentine’s Day the most.  I know, it should be about celebrating love and all, and that is what I most appreciate about it now, being able to spend time with the ones I love and not about receiving candy and flowers and what not.  But when you are 8 you just want to eat candy and don’t know much about love.  Valentines candy was awesome because in my school you would get a bunch from your classmates along with the Valentines in your box that you would all give to each other. Not only that, my Grandma also always gave me a nice big box of chocolates.  It was awesome to go through the box and try to guess what they were while eating them. I still like to make Valentine’s Day treats though.  Any excuse for me to make things that are heart shaped, or pink, or chocolate I am in. And I even sometimes share them, haha.

    So on my day off I decided to make some Vegan Raspberry White Chocolate Hearts.  I haven’t made any chocolates since Christmas and I am kind of missing them.  These are fun to make too. You get to shape the filling sort of like play dough.  Or at least that is what I do, because I don’t have the right size of fancy heart molds and I like plenty of filling.  For the filling on these I used some Raw Guru cacao butter for the base, as it is the foundation and the essential ingredient for white chocolate.  At least real white chocolate.  None of that fake other oil stuff going on here that you might find if you were buying store bought candy.  Trust me it makes all the difference if you use real cacao butter in your chocolate and white chocolate.  The Raw Guru cacao butter smells amazing too.

    Next, I added in a little cashew butter and Dastony coconut butter to make the filling creamy.  Lastly some freeze dried raspberries, vanilla and maple syrup.  You might be wondering why I use freeze dried berries and not fresh.  I do so because they don’t add extra moisture to the chocolates, they are really intensely flavored and it keeps these a little more shelf stable. I also use the freeze dried berries for things like a raspberry frosting where I want color and flavor but I don’t want any extra moisture.  They work perfect!  I get mine at Trader Joes, they have several different types of berries.

    The filling for these truffles was super delicious.  I could have eaten it with a spoon.  But of course then I wouldn’t have truffles. Once they were all shaped and set, I dipped them in a home made dark chocolate.  Now of course if you didn’t want to make your own, you could use your favorite store bought dark chocolate, but I had all of the ingredients to make it so I thought, why not?  These turned out super delicious.  They would be the perfect little treat to make for Valentine’s day for your loved ones.  If you can share them after you taste one that is.

    Vegan Raspberry White Chocolate Truffle Hearts
    Makes 10 chocolates

    Ingredients:

    White Chocolate:

    • 1/4 cup Raw Guru cacao butter (2 oz) or coconut oil if unavailable
    • 2 Tbsp raw cashew butter
    • 1/4 cup Dastony coconut butter
    • 1 tsp pure vanilla extract
    • 2 Tbsp maple syrup
    • 1 cup freeze dried raspberries
    • 1/4 cup filtered water


    Dark Chocolate:


    Directions:

    1. Combine all of the white chocolate ingredients but the berries and water over a double boiler, and whisk until smooth.
    2. Pulverize the berries in a blender until fine, then whisk into the white chocolate along with the water. Place in the freezer for about 15-20 minutes until it is firm enough to scoop. Scoop into 8 balls, rolling them with your hands and shaping them into little hearts.   Place on a parchment lined tray, and place back into the freezer until firm, about 30 minutes.
    3. Meanwhile, to make the dark chocolate, combine all ingredients in a double boiler, and whisk until combined and melted.
    4. Once the filling has firmed up, dip each chocolate into the dark chocolate, being sure to let the excess drain off, and place back onto the tray (I like to set mine on a fork to allow it to drain better). Once they are all dipped, set them in the freezer until hardened.
      Store any leftover truffles in the refrigerator.
  • Vegan Raspberry White Chocolate Cheesecake 

    Vegan Raspberry White Chocolate Cheesecake 

    I make my own Birthday cake every year, and half the time when I tell people that, they are baffled as to why.  I even had someone tell me that it was sad that I made my own, and someone else should make me one or buy me one.  But that is not how I feel at all.  My boyfriend or family would be happy to buy me one I am sure.  I mean, I grew up most of my life with other people making me cakes.  But at one point back when I was in college and I started baking a lot, I decided that I loved making my own, because then I could make something fun, something healthier probably than I would get at a bakery, and a cake that was exactly what I wanted.  Sometimes it was not cake at all, a few years  I made pies because I like those too and that was what I felt like. Even put candles in them and everything. Most years I have an idea of what I want way before hand.  Like last year,  I made a Vegan Snickers Pie.  It was bomb!  But this year I knew I wanted something with raspberries and vanilla and I went back and forth between cheesecake and a baked vanilla layer cake.

    I ended up deciding on the cheesecake, because I had a lot going on at the time, and I figured it would be easier to make, plus the heat index was 108F degrees that day and it was super humid, and I did not want to heat up the oven.  Also, I always know cheesecakes are going to be good and I hadn’t made one in a really long time.  They were my favorite dessert for a while a few years back when I ate only raw foods, and I made one almost every weekend. Now it is usually every few months, and whenever I make one I am reminded of how good they are.  Funny story, a raw vegan cheesecake was the reason I decided to go vegan. I made one, and it was so good, that I decided to never make a dairy cheesecake again, and that maybe I didn’t need dairy after all.  Because that was the main thing that was stopping me from being a vegan, the cheese and dairy products.  I became vegan after that and haven’t missed animal products. Anyways, back to the cake I made for my Birthday. I decided to make a raspberry white chocolate cheesecake.

    Raspberries are my favorite fruit, and back in the day when I was in school I would joke that if I ever owned my own restaurant I would name it “Raspberry”.  Yeah, that is not going to happen, but you get the idea, I really love raspberries.  I had plenty of cacao butter on hand, so a raspberry white chocolate cake was the perfect thing to make!  It is really quite simple to make a raw cheesecake too, don’t let this one fool you.  I made a raspberry filling and a vanilla filling, both containing the cacao butter for white chocolate, as well as a raspberry swirl. It turned out exactly how I wanted it!  So rich and delicious, creamy like dairy cheesecake, and scented with sweet raspberries, vanilla and white chocolate. This is the perfect cake for Summer!  So, if you have raspberries on hand, give it a try!

    Vegan Raspberry White Chocolate Cheesecake 
    Makes one 8 inch cake

    Crust:

    • 1/2 cup finely shredded coconut
    • 1/2 cup gluten free organic rolled oats
    • 1/2 cup pitted medjool dates (if not soft, soak them in filtered water first and drain well)
    • 1/4 tsp sea salt


    Filling:


    Instructions:

    1. Oil an 8 inch spring form pan, and line the bottom with parchment paper.
    2. To make the crust, place all ingredients in a food processor, and process until crumbs and starting to hold together (if they are not holding together when squeezed, add a few tsp filtered water and blend). Press into the bottom of the prepared pan.
    3. Meanwhile, to make the filling, combine the coconut milk, cashew butter, maple syrup, lemon juice and zest, vanilla and sea salt in a high speed blender or food processor and blend until smooth.  Add 1/2 cup of the coconut butter and cacao butter and process until smooth.  Divide the filling between 2 bowls.
    4. Add one bowl of filling back to the food processor and add 1 cup of raspberries and 2 Tbsp coconut butter and process until smooth.  Pour back into the bowl and set aside.
    5. Rinse out the food processor and puree the other 1/2 cup of raspberries until a loose jam consistency.
    6. To assemble the cake, Pour all but about 1/4 cup of the raspberry cheesecake filling over the crust, then drop some of the raspberry puree over that by the tsp, and swirl with a knife.  Then pour the vanilla filling over that, and drop the raspberry filling and raspberry jam over that by the tsp (you may have extra, but don’t add it if you have enough already on top of the cake or it will look messy) swirling it with a knife to make the top pretty.
    7. Place cheesecake in the freezer to set for about 4-5 hours (or overnight in the refrigerator if you are not in a hurry).
    8. Remove from the freezer, un-mold, and enjoy!  Store any leftover cake in the refrigerator.


    *I use Thai Kitchen full fat coconut milk.  If you are using a different brand, just make sure it is the thick type, 2/3 of the can at least should be very thick.


  • Vegan Chocolate Cake with Raspberry Frosting 

    Vegan Chocolate Cake with Raspberry Frosting 

    Today is my blogaversary!  8 years ago I decided to start a blog, just looking to share recipes with friends and family.  I had previously just been posting them to Facebook but I figured that wasn’t a very organized approach, and I wanted them all in one place, so I created a blog on Blogger.com.  I had a passion for creating new things and sharing them, but I never thought that I would go much beyond sharing things with only the people that I knew.  I also had no idea that basically anyone could create a blog.  It all had seemed so intimidating before that.  But soon, I joined some blog communities and as my followers grew, I thought to myself, this is fun and exciting and decided to stick with it.  It used to be so much easier to get your content out there on platforms like Facebook before they started making you pay to get views, and luckily I got in before that, so I gained much of my readers before they had that put in place.  Now, sometimes I feel like it is really hard to get my recipes out there because I can not afford to pay, and it becomes frustrating at times.  But I still keep going.  I no longer have my blog on Blogger, I have had my own website for the last 3 years and it is nice to have something to call my own.  Over the years my recipes have changed somewhat.  When I started out, I was a vegetarian, not vegan, but I still created many vegan recipes.  Finally though, back in 2012, I decided to go full vegan with the blog and remove all of the recipes with animal products, or revamp them.  It was a lot of work, but worth it!  Because I want you all to be able to come here and know that you will only see vegan recipes.  Also, when I first started my blog it was all desserts.  Because that is what I find the most joy in creating.  But I decided that I needed to share some savory things too, because I don’t just eat desserts of course, and you all asked for it!  So now here we are 8 years later, and I think that alone is worth celebrating.  The fact that I have been sharing recipes for 8 years, and it seems like it is so much a part of my life that I have been doing it forever.  I don’t know what I did with all my free time before I had a blog!

    So, I thought I would make a special cake to celebrate, because every Birthday deserves a fabulous dessert!  Also, everyone should have the perfect chocolate cake recipe.  So, I went with that.  A moist, rich chocolate cake that is date sweetened.  This is my tried and true chocolate cake base recipe, and it always turns out for me.  Moist and soft thanks to the dates, and just sweet enough.  I like the idea of things that are sweetened with fruit as well.  Now normally I would have gone for a chocolate fudge frosting to make a chocolate on chocolate cake, but I wanted something with color that could look festive.  I chose a pink frosting, since I love anything girly, and I actually flavored it with raspberries.  It was a sort of a vegan “cream cheese” frosting that was a rich mixture of coconut milk and cashews and it was super delicious with the raspberries added!  I actually used freeze dried berries because they are packed with flavor and they do not add any excess moisture to the frosting.  Trust me on this one.

    Lastly, I bought some vegan sprinkles just for this occasion.  They were cute, and pink and girly.  I just couldn’t resist.  I don’t eat or buy a lot of sprinkles, but this special occasion needed some.  If you don’t prefer to use sprinkles on your cake, feel free to decorate with fresh raspberries or even crush the dried ones and sprinkle them around the edge of the cake like sprinkles.  The cake turned out so delicious!  The sweet berry frosting the perfect pairing with the rich chocolate cake!  The combination kind of reminded me of the raspberry cream chocolate that was always included in my box of Valentine’s chocolates I would always get from my Grandma when I was little.  Those were always one of my favorites.  I think this cake would be perfect for Valentine’s day!  Here’s to another year of creating delicious recipes, and I want thank all of you that visit my website or follow my recipes!  You are the reason that I keep sharing!

    Vegan Chocolate Cake with Raspberry Frosting 
    Makes one 2 layer 6 inch cake

    Ingredients:

    6 inch cake pans

    Cake:

    • 1 1/2 cups Bob’s Red Mill Gluten Free All Purpose Flour
    • 1/4 cup cacao powder or unsweetened cocoa powder
    • 1 1/2 tsp baking soda
    • 1 tsp baking powder
    • 1/2 tsp sea salt
    • 1 1/4 cups packed soft medjool dates, pitted, soaked in water for 30 minutes and drained
    • 1/4 cup almond butter
    • 2 tsp pure vanilla extract
    • 2 cups filtered water
    • 2 Tbsp apple cider vinegar


    Frosting:


    For decoration:


    Directions:

    1. Preheat the oven to 375F degrees and position rack in center of oven.
    2. Oil two 6 inch round cake pans with coconut oil and line the bottom with parchment.
    3. Whisk flour, cocoa powder, baking powder, baking soda, sea salt in a large bowl to blend well.
    4. Place dates, water, almond butter, and vanilla extract into a blender, and blend until smooth, then whisk this blended mixture into the flour mixture until well blended. Whisk in the cider vinegar until bubbles form.
    5. Pour the cake batter into prepared pans, and place in the oven.
    6. Bake cakes until set and a toothpick inserted into the center comes out almost clean, about 25-30 minutes.  Remove from oven, let cool completely, then un-mold them onto two plates, cover and set aside.
    7. To make the frosting, combine all ingredients in a high speed blender and blend until completely smooth.  Pour into a bowl and place in the freezer until the consistency of stiffly whipped cream (about 30-45 minutes depending on how warm it has gotten.  Once it is ready place in the refrigerator until ready to assemble.
    8. To assemble, place one cake layer on a plate, and spread about 3/4 cup frosting over it.  Place the other cake layer over that, then spread the remaining frosting on the top and down the sides of the cake.
    9. Decorate with sprinkles and enjoy!


  • Vegan Raspberry Swirled Vanilla Cheesecake (Nut Free)

    Vegan Raspberry Swirled Vanilla Cheesecake (Nut Free)

    I have probably made over 200 cheesecakes since I started to love them at a young age.  I enjoyed them as a kid, but I never ate them very often because they were for special occasions in my family.  Then by the time I was in college, I was buying a slice at a local co-op bakery every weekend as a treat after my cross country races as a treat because they were so good.  I was hooked.  But then I thought to  myself, I like to bake.  Why not make my own?  So I did, and the weekend tradition was baking a cheesecake.  My cheesecakes were the best I had ever had too and I loved that I could make whatever flavor I felt like at the time.  Then I decided to go vegan and I thought I would never enjoy it again.   Boy was I wrong though.  One of my friends asked me to make him a raw cheesecake, and I was skeptical that it would be as good as the dairy ones I was used to in the past.  But it turned out amazing!  I started making cheesecakes again, and I was in love with vegan cheesecake.  In fact I have over 150 recipes for cheesecake in various forms on my blog, all of which are vegan.  So that just tells you how much I have to have it  in my life.  I don’t make it every weekend now, because I try to branch out and make other fabulous things like regular cakes and pies.  But when I do make it, I get pretty excited.  I have been wanting to make a nut free cheesecake for a while now, since before the Holidays and I finally got a chance last weekend.

    I do have some other nut free cheesecakes on my blog, and they are super delicious but they are raw cheesecakes and require the cracking open of coconuts.  Which I know not all of you want to do, and those darn coconuts can get spendy.  You need about 4 per cake and it is a lot of work.  So, I wanted to come up with a different nut free cheesecake base.  I came up with chickpeas and canned coconut milk.  Ok, I know it sounds like a weird and disgusting combination but trust me on this one.  Chickpeas work wonders in creating a silky smooth texture if you have a high speed blender.  I actually got the idea when I was making dessert hummus.  And, I have used chickpeas in an ice cream cake before so I knew it would work.  You can not taste them at all, and in fact, when mixed with the coconut milk, coconut butter, maple syrup and vanilla it tastes just like delicious vanilla cream.  I thought about making a plain vanilla cheesecake and just topping it off with berries, but instead I decided to swirl the berries in.

    Because then you get delicious hidden bites of berries throughout the cake.  I used a raspberry jam this time, because it is Winter here and fresh berries are super expensive.  Plus, Eric’s Dad gave us some of the best tasting raspberry jam ever and I wanted to use it in something special like this cake.  I just made a simple oat coconut date crust as a base for the cake and it was perfect!  The cheesecake turned out so good you would not even know it was vegan or had chickpeas in it.  The tart raspberry was the perfect partner for the sweet luscious vanilla scented creamy cheesecake!  The best part about this cake is it doesn’t require baking and it is relatively easy if you have a high speed blender.  So, if you are in the mood for cheesecake, give this baby a try!

    Vegan Raspberry Swirled Vanilla Cheesecake (Nut Free)
    Makes one 8 inch cake

    Crust:

    • 1/2 cup finely shredded coconut
    • 1/2 cup gluten free organic rolled oats
    • 1/2 cup pitted medjool dates (if not soft, soak them in filtered water first and drain well)
    • 1/4 tsp sea salt


    Filling:


    Instructions:

    1. Oil an 8 inch spring form pan, and line the bottom with parchment paper.
    2. To make the crust, place all ingredients in a food processor, and process until crumbs and starting to hold together (if they are not holding together when squeezed, add a few tsp filtered water and blend). Press into the bottom of the prepared pan.
    3. Meanwhile, to make the filling, combine all ingredients but the jam in a high speed blender or food processor and blend until smooth.
    4. Pour the 1/3 of filling over the prepared crust, then drop 1/4 cup of the jam over that by the tsp spreading it out so you have even little circles of it.  Swirl with a knife. Pour half the remaining filling over that, then another 1/4 cup of jam, dropping it in the same manor you did with the last 1/4 cup.  Pour the last 1/3 of the filling over that, and repeat with the jam, swirling it to make the top pretty.
    5. Place cheesecake in the freezer to set for about 4-5 hours (or overnight in the refrigerator if you are not in a hurry).
    6. Remove from the freezer, un-mold, and enjoy!  Store any leftover cake in the refrigerator.


    *I use Thai Kitchen full fat coconut milk.  If you are using a different brand, just make sure it is the thick type, 2/3 of the can at least should be very thick.

    **Make sure your jam is vegan and does not contain gelatin.  If your jam is too thick to be swirled into the cake with a knife, add a little water to it until it is.  Alternatively, if you do not want to use jam, you can make your own raspberry puree with 1 1/2 cups fresh or frozen (thawed and drained) raspberries, and 1 Tbsp maple syrup, blended in the blender.

  • Vegan Chocolate Raspberry Jam Cups

    Vegan Chocolate Raspberry Jam Cups

    I am in a chocolate making mood lately.  Probably because Valentine’s day is coming up, and I want to be able to give some as gifts, and enjoy some for myself.  So lots of chocolate goodies are essential.  I know people like to buy boxes of chocolates to give their significant others, but I like to make them myself, because I feel like if someone puts the time into making something special and thoughtful to me, it means more than if they just bought it.  Bonus points if it is my favorite flavor, or has ingredients that I really love in it.  Plus, I feel like there aren’t a lot of options out there for Vegan Valentine’s candy, at least not around here.  Well, you are in luck, I made something really simple but really delicious a few days back that your sweetheart might just really love. Some dark chocolate and white chocolate raspberry cups. So whether you and your significant other love chocolate, or vanilla I have you both covered.  These are what I would choose as a favorite next to peanut butter cups if I am in a fruit sort of mood. Because raspberries are my all time favorite fruit. And, although I would choose the white chocolate cups most days because I am a vanilla girl, the dark chocolate are amazing as well.

    Eric’s Dad sent us a big care package of his home made jam (a bunch of different flavors) and soap a few weeks back, and the raspberry is my favorite so I have been using some of it in my desserts. I figured this would be the perfect application for it to shine, and simplify my life significantly when making these cups so I don’t have to make a blend up a “jam”.  The white chocolate is luxurious, with a base of cacao butter, coconut butter and cashew butter.  It has that silky melt in your mouth thing going on that non-vegan chocolate has (or from what I can remember.  I like it better actually, since it is not super sugary, I add just enough maple syrup to sweeten it. I love also that it is vanilla scented, by favorite flavor, which smells heavenly before you even take a bite out of one of these babies.

    The chocolate is quite simple, only 4 ingredients plus the jam.  But of course if you didn’t want to make your own chocolate like I do, you could melt down your favorite vegan dark chocolate.  I just like to make my own because it is cheaper, and I control what sweetener goes into it.  If you are a dark chocolate person all the way, you will love these!  If you have some peanut butter cup molds, or even foil muffin tins, you can make these.  And, how much more special would it be if you made candy for your sweetheart than if you had bought it from the store for them this Valentine’s day?  If they are not a fan of raspberry jam, use their favorite instead.  Just make sure it is not too runny. I hope you are all having a wonderful week!

    Vegan White Chocolate Raspberry Cups
    Makes 6 large candies

    Ingredients:

    • 1/4 cup cacao butter (2 oz)
    • 2 Tbsp raw cashew butter
    • 1/4 cup coconut butter
    • 1 tsp pure vanilla extract
    • 2 Tbsp maple syrup (or to taste)
    • 1/8 tsp sea salt
    • about 1/3 cup vegan raspberry jam


    Instructions:

    1. Combine cacao butter, cashew butter, vanilla, maple syrup,  and sea salt over a double boiler, and whisk until smooth.  Pour into the bottoms of 6 larger peanut butter cup tins (or molds), then place them in the freezer to set.
    2. Once the bottom chocolate has set, spoon about a heaping 2 tsp of the jam onto the top of the set chocolate, then pour remaining melted chocolate over that.
    3. Place them in the freezer to set, about 15 minutes.
    4. Store in the refrigerator.


    Vegan Dark Chocolate Raspberry Cups
    Makes 6 large candies

    Chocolate:


    Filling:

    • about 1/3 cup raspberry jam


    Instructions:

    1. To make the chocolate, whisk together all ingredients until smooth.
    2. Spoon a little chocolate into the bottoms of 6 peanut butter cup molds, filling them about 1/4-1/3 full.  Place in the freezer until hard, about 10 minutes.
    3. Once the chocolate has hardened, spoon a heaping 2 tsp of jam over that.
    4. Pour more chocolate over the cups until the jam is covered, and place them in the freezer until set, about 20 minutes.
    5. Store any extra in the refrigerator.


  • Vegan Raspberry Rhubarb Cream Cheese Pie

    Vegan Raspberry Rhubarb Cream Cheese Pie

    I got a bunch of rhubarb from my Dad’s garden recently and made some strawberry rhubarb wine, but I decided that a dessert featuring rhubarb sounded really good as well.  I usually just go with the classic strawberry rhubarb combination, probably because one of my favorite things growing up was when my Grandma made strawberry rhubarb sauce. It was good on ice cream, vanilla cake, or just straight up!  But this time I went with raspberry rhubarb to be a little different and since I had the raspberries on hand. I usually like a creamy element whenever I make a fruit pie, either in the form of ice cream, or coconut cream, but this time I decided to add the creamy element to the pie itself with a cream cheese layer. My Dad used to buy a raspberry cream cheese pie from a local restaurant when I was little and it was amazing!  I knew I could make an even better vegan version.

    I made a simple pie crust with Bob’s Red Mill gluten free flour to allow the fillings to shine and it was perfect!  For the cream cheese, I used a mixture of coconut milk (the thick cream part) and cashew butter.  Once sweetened with a little maple syrup and vanilla it was simply heavenly!  A little arrowroot to thicken it while baking and voila!  Delicious cheesecake type filling.  I kept the raspberry rhubarb simple, using only the fruit, a little maple syrup and some arrowroot to thicken. Lastly, I was torn about the topping and couldn’t decide between whipped cream once the pie was cooled or an oat crumble topping, and my Mom helped me decide.  Crumb topping it was.  I have always been a sucker for that too.

    I have to admit I was unsure how exactly this was going to bake up.  if the fruit would become jammy or too watery, or if the cheesecake would set properly.  But it all worked out and it baked up perfect and beautiful!  The crust was buttery and rich, the creamy cheesecake a perfect compliment to the tart sweet jammy rhubarb filling and the salty sweet crumb topping the perfect partner for it all!  This pie was super delicious!  I will have to make it again before the Summer is over.

    Vegan Raspberry Rhubarb Cream Cheese Pie

    Makes one 9 inch pie

    Crust:

    Cream Cheese:

    • 3/4 cup thick organic coconut milk (from the top of a chilled can)
    • 3/4 cup cashew butter
    • 2 Tbsp maple syrup
    • 1/8 tsp sea salt
    • 1 tsp pure vanilla extract
    • 1/2 tsp cider vinegar
    • 2 Tbsp arrowroot starch or cornstarch

    Filling:

    • 3 cup organic raspberries
    • 2 cups organic rhubarb
    • 2 Tbsp maple syrup
    • 3 Tbsp arrowroot starch or cornstarch

    Topping:

    • 1/2 cup Bob’s Red Mill all purpose gluten free baking flour
    • 2 Tbsp coconut sugar
    • 3 Tbsp melted coconut oil
    • 3/4 cup gluten free rolled oats
    • pinch sea salt
    1. To make the crust, in a large bowl, mix together flour, sugar, sea salt, and spices. Cut in coconut oil with a pastry blender or 2 knives until it is in pea sized pieces. Mix in  just enough water to create a smooth dough that holds together but isn’t too sticky. Add more water if needed, and knead slightly until a smooth dough is created. Roll out into a 10 inch circle on a sheet of parchment paper, then use the paper to help you transfer it to an 9 inch pie dish.  Flute the edges, and set aside in the refrigerator.
    2. Pre-heat the oven to 375F degrees.
    3. To make the cream cheese, whisk together all ingredients until smooth and set aside.
    4. To assemble the pie, pour the cream cheese layer over the crust, then mix together the fruit filling ingredients and scatter them over the cream cheese filling.
    5. Place in the pre-heated oven and bake for about  25 min.
    6. Meanwhile, mix together the topping ingredients in a bowl and squeeze with your hands to form clumps.
    7. Scatter the topping over the pie and bake 25 min more until the edges of the crust are lightly brown, and pie is set.  Remove from the oven to a wire rack.
    8. Allow to cool completely before serving.
  • Vegan White Chocolate Raspberry Peanut Butter Cups

    Vegan White Chocolate Raspberry Peanut Butter Cups

    White Chocolate PB Raspberry Cups 4

    One of my favorite things about Summer is the raspberries.  Being able to buy fresh, local organic ones at the store or even better, finding them on my walks when I am in the woods.  It is like finding treasure when you come across raspberries, they are like little edible jewels!  I remember my Dad used to grow raspberries in his garden also, but the wild ones are always the tastiest.  I love raspberries in every form though, so I won’t complain when I get my hands on some.  Fresh are awesome, but I also like to keep dried ones on hand for when I want to make something more shelf stable, or color and flavor a frosting or whipped coconut cream without adding excess moisture.  I used some of those in the awesome candy I am sharing with you today, white chocolate raspberry peanut butter cups!

    White Chocolate PB Raspberry Cups

    I am a huge PB and J fan, and I was craving that in dessert form, so I made PB cups.  Back when I was in college, they had white chocolate Reese’s PB cups and I thought they were pretty awesome at the time.  I am sure I would find them way too sweet now, but that was kind of what I was going for with these, plus the raspberries of course which gave them a PB and J like flavor.  I made my favorite white chocolate recipe, which I think I have down pretty well now after some tweaking.  It is just the right amount of sweet and has a little vanilla added, because the good quality white chocolate bars with vanilla beans in them that actually smelled like vanilla were always my favorite.  For the filling, I did not sweeten the peanut butter, because I feel that these are sweet enough with the white chocolate and the salty peanut butter adds a nice contrast.  The raspberries added little pops of tart flavor.

    White Chocolate PB Raspberry Cups 2

    These were so freaking good!  They were way better than the white chocolate PB cups I ate back in the day, and the PB and J like twist on them with the raspberries put them over the top.  I even shared some with someone who is not a big fan of peanut butter and she loved them too.  If you are a PB and J fan, you must try these, they are worth the little bit of time to make them, and I must warn you hard to share.

    White Chocolate PB Raspberry Cups 1

    Vegan White Chocolate Raspberry Peanut Butter Cups
    Makes 6 large candies

    White Chocolate:
    1/4 cup cacao butter (2 oz)
    2 Tbsp raw cashew butter
    1/4 cup coconut butter
    1 tsp pure vanilla extract
    2 Tbsp maple syrup (or to taste)

    1/4 cup freeze dried raspberries

    1/4 cup organic peanut butter

    Combine all of the white chocolate ingredients over a double boiler, and whisk until smooth.  Pour into the bottoms of 6 larger peanut butter cup tins (or molds), then place them in the freezer to set.

    Mix the raspberries into the peanut butter, and set aside.

    Once the bottom chocolate has set, spoon about 1 heaping tsp of the peanut butter mixture onto the top of the set chocolate, then pour remaining melted chocolate over that. Place them in the freezer to set, about 15 minutes.


  • Raw Raspberry Marzipan Truffles

    Raw Raspberry Marzipan Truffles

    Raspberry Marzipan Truffles

    I have learned a few important things in the last few years. One, it doesn’t matter what others think of how I look or dress, or choose to live my life. I can wear whatever I choose to and be comfortable, do my makeup how I like, and be a vegan.  People can criticize me if they want to, but I am happy with who I am, and I feel like I am doing my best to be the kindest person I can be.  Two, there is always something to be learned from every experience in life good or bad. I could sit and complain about failed relationships or mistakes I have made, but instead I look back and think about how I would have never learned valuable lessons had they not happened.  Also, God always has a plan, and sometimes really good things come out of hard times or things we had to work harder for.  Three, your mood comes from within yourself, don’t try to blame it on others and say that they made you crabby.  The truth is, how you react to situations has to do with yourself and not others. If you are happy with yourself, you are less likely to take offense at things, or handle them better. Dwelling on negativity is never the answer.  That said too, if someone seems to be in a bad mood and lashes out at you, it is probably not you, it is them and something they are dealing with. So show them a little kindness. Just a few thoughts, I wish I had learned these things sooner.  If you are in a bad mood, one way to improve it is to spend some me time making some chocolate.  Just sayin.  In my personal experience that works.

    Raspberry Marzipan Truffles 2

    And boy, do I have the perfect recipe to remedy that bad mood and make you feel better.  Some Raw Raspberry Marzipan Truffles. These were inspired by my Mother, since she taught me to love marzipan.  She used to bake marzipan into things like apple pie, and cookies.  Her Birthday was this month, so I have made her a few goodies to enjoy.  One of which was these.

    Raspberry Marzipan Truffles 1

    Of course just marzipan dipped in chocolate to make truffles would have been good, but I decided to add raspberry because it goes so well with almond.  The flavor combination is heavenly once dipped in the chocolate.  These are really relatively easy to make, and if yours don’t turn out perfect on the outside, don’t fret.  Dipping chocolate is an art and I have had lots of practice.  My first truffles (years back when I was in college and just getting into making these sorts of things) dipped in chocolate looked like blobs in fact.  It was ok though, because they still tasted amazing! Anyways, I hope you all have a good week, and don’t forget to make time for yourselves…making truffles is always a good option for happy me time!

    Raspberry Marzipan Truffles 3

    Raw Raspberry Marzipan Truffles
    Makes 12

    Filling:
    2 cups finely shredded coconut
    1/4 cup raw almond butter
    1/2 cup coconut butter, warmed to liquid
    2 Tbsp raw coconut nectar, or maple syrup
    a pinch sea salt
    1 tsp pure almond extract
    1 tsp pure vanilla extract
    1/4 cup filtered water

    1/2 cup freeze dried raspberries

    Raw chocolate:
    1/2 cup raw cacao butter or raw coconut oil, warmed to liquid
    3/4 cup raw cacao powder
    1/4 cup raw coconut nectar or maple syrup
    a pinch sea salt

    In a high speed blender or food processor, buzz the shredded coconut to fine flour (only about 15-30 seconds in a high speed blender, do not do it too long or you will get butter).  Set aside in a bowl.  To a food processor, add the almond butter, coconut butter, coconut nectar, sea salt, extracts, raspberries and water and blend until smooth.  Add the reserved coconut and process until smooth like dough.  Freeze until firm, about 30 minutes.
    Whisk together all chocolate ingredients until smooth, then dip each marzipan ball into the chocolate one by one, let the excess drain off and set back on the foil (I like to set them on a fork to dip them). Set in the freezer until the chocolate hardens, about 5 minutes.


  • Vegan Raspberry White Chocolate Popcorn

    Vegan Raspberry White Chocolate Popcorn

    I have been making a lot of popcorn lately.  Because I have been craving crunchy snacks, and really, I prefer popcorn to chips unless there is hummus or salsa to go with those chips.  And, if I just  want something crunchy, popcorn is perfect. Plus, it is really fun to make flavored popcorn.  Yes, I love popcorn with a little coconut oil and sea salt, and that is how I usually make it, sometimes adding a little garlic powder and nutritional yeast to make it cheesy, but sometimes I want something a little different.  Maybe a bit sweet.  That is where the Vegan Raspberry White Chocolate Popcorn comes in.

    White Choc Raspberry Popcorn

    I remember having some sort of pink popcorn as a child (probably full of fake ingredients and flavors), and I think it was supposed to be berry.  I thought I would make that and expand upon it.  Using real raspberries and color and not the fake stuff.  Also, adding in a bit of vegan white chocolate to bind it all together and give it a bit of sweetness.  White chocolate and raspberries are a match made in heaven after all, and on crunchy popcorn even better!

    White Choc Raspberry Popcorn 1

    If you already have your popcorn made, this is super fast and easy to make.  It took me all of 10 minutes including the time to melt the white chocolate. I must warn you, it is super addictive.  Not that that is a bad thing, it just means it is really good!

    White Choc Raspberry Popcorn 3

    Vegan Raspberry White Chocolate Popcorn

    Makes 8 cups

    White Chocolate:

    1/4 cup cacao butter, melted

    2 Tbsp raw cashew butter

    1/4 cup coconut butter, warmed to liquid

    1 tsp pure vanilla extract

    2 Tbsp maple syrup (or to taste)

    8 cups plain popcorn

    1 cup organic freeze dried raspberries, crushed

    To make the white chocolate, whisk together all ingredients until smooth, then pour over the popcorn in a large bowl, and add the raspberries.  Toss together until all of the popcorn is coated, and the raspberries are evenly distributed. Allow to cool until the white chocolate dries (I put it in the freezer for 15 min).  Enjoy!


  • Vegan Raspberry Cheesecake Brownies

    Vegan Raspberry Cheesecake Brownies

    raspberry-cheesecake-brownies-2

    What do you do when you are stuck at home in a snowstorm? Bake brownies of course. Yesterday, we had a really snowy day where it dumped about 6 inches while I was at work and was still going the rest of the night, and it was a really scary drive home.  I drive like a granny in that type of weather.  Ever since I crashed my car a few years back because someone in a big truck drove me off the road in a snowstorm and it really freaked me out.  Better safe than sorry is my motto on slippery roads now.  Anyhow, after being somewhat stressed out from the driving, when I got home I decided that brownies sounded like a good stress reliever.

    raspberry-cheesecake-brownies-4

    Since Valentine’s day is coming up, I thought I would make some raspberry cheesecake brownies.  That just sounds sexy doesn’t it?  Well it is a delicious combination, downright crave worthy. I like my brownies fudgy, and these were just that thanks to apple sauce and avocado oil.  Avocado oil has been showing up in quite a few of my baked goods lately because it has a neutral flavor and bakes up wonderfully in cakes and brownies.

    raspberry-cheesecake-brownies-3

    I made a raspberry cheesecake filling with thick coconut milk and cashew butter enhanced with raspberries.  It was sooo good.  I could have eaten it with a spoon.  But luckily most of it ended up in the brownies.  I had to stir in a few more berries too, because I wanted these brownies to have lots of raspberry flavor.  They smelled amazing while baking, and when they were cool enough to enjoy, they tasted even better! What snowstorm?  I am too busy eating my brownies to notice…

    raspberry-cheesecake-brownies-1

    Vegan Raspberry Cheesecake Brownies

    Makes 16

    Cheesecake swirl:

    1/2 cup organic raspberries (fresh or frozen, if frozen, thaw them slightly first and drain off water before using)

    3/4 cup thick coconut milk (from the top of a chilled can)

    1/2 cup raw cashew butter

    2 Tbsp maple syrup

    1/8 tsp sea salt

    1 tsp pure vanilla extract

    2 Tbsp arrowroot starch or cornstarch

    Brownies:

    1/4 cup avocado oil

    1/2 cup applesauce

    1 cup coconut sugar

    1/4 cup plus 2 Tbsp reduced aquafaba or 2 flax eggs*

    2 teaspoon vanilla extract

    1 cup gluten free all-purpose flour

    1/2 cup cacao powder or unsweetened cocoa powder

    1/4 teaspoon sea salt

    1/2 cup organic raspberries (fresh or frozen, if frozen, thaw them slightly first and drain off water before using)

    To make the swirl, combine all ingredients in a blender and blend until smooth.  Pour into a bowl and set aside.

    To make the brownies, pre-heat the oven to 375F degrees. Whisk together the sugar, olive oil and applesauce until well combined and the sugar is starting to break down.  Add the aquafaba, and vanilla and beat until smooth.  Add the flour, cacao powder and sea salt and beat until smooth.  Stir in remaining berries. Scrape the batter into a greased 8×8 inch pan, then pour the swirl over it.  Place in the oven, and Bake for about 30 minutes or until set (but do not over bake).  Let cool before cutting into bars.

    *The aquafaba is the liquid from cooked or canned chickpeas.  You want it to be thick like egg whites.  If you are wanting to make flax eggs, simply mix together 2 Tbsp ground flax seeds, and 6 Tbsp filtered water and let sit in the refrigerator for 15 minutes before using in the recipe.


  • Vegan Mini Raspberry Fig Hand Pies

    Vegan Mini Raspberry Fig Hand Pies

    vegan-fig-and-raspberry-hand-pies-3

    I love any sort of pie with a flaky crust, filled with fruit, and sometimes I just want a little 2 bite serving.  Enter: the mini hand pie.  I kind of wanted pie, and I kind of wanted cookies, so I made little pies that were the size of cookies.  Mini hand pies.  2-4 bites of deliciousness.  I was craving something with jammy raspberries, but the dried figs I had bought were amazing too, so I made a raspberry fig filling. It was so sweet on its own, it didn’t even need any other ingredients!  I had extra and I ended up using it as a delicious jam.

    vegan-fig-and-raspberry-hand-pies-2

    For the crusts, I used my usual gluten free pie crust enhanced with a bit of pecan butter along with the coconut oil for a nice rich, nutty tasting dough.  It was delicious.  I cut the dough out into little hearts, and I felt kind of like a little girl playing with play dough.  Although a bit more careful since pie dough is more fragile.  I made the hearts into little mini pies, popped them into the oven, and they smelled amazing.

    vegan-fig-and-raspberry-hand-pies-1

    They turned out so cute and really they were easier to make than they probably look.  The filling was sweet and delicious and the crust flaky.  As I stood in my warm kitchen watching the sparkly snowflakes trickle to the ground outside and enjoyed my warm pie, I was happy.

    vegan-fig-and-raspberry-hand-pies

    Vegan Mini Raspberry Fig Hand Pies

    Makes 18

    Crust:
    2 1/2 cups all purpose gluten free flour
    1/4 cup coconut sugar or maple sugar
    1/2 tsp sea salt
    1/4 cup plus 2 Tbsp coconut oil in its solid state
    1/4 cup plus 2 Tbsp pecan butter
    about 6-7 Tbsp cold water (or as needed)

    Filling:
    2 cups raspberries
    1 cup dried figs, soaked in water for 45 minutes, and drained

    To make the crust, in a large bowl, mix together flour, sugar, sea salt, and spices. Cut in coconut oil with a pastry blender or 2 knives until it is in pea sized pieces. Mix in  just enough water to create a smooth dough that holds together but isn’t too sticky. Add more water if needed, and knead slightly until a smooth dough is created. Roll out into a large rectangle 1/8 inch thick using parchment underneath and floured rolling pin, and cut into 36 hearts with a cookie cutter. Preheat oven to 375 degrees.

    To make filling, combine raspberries and figs in a blender, and blend until smooth (if you prefer it a little sweeter add a tsp or two of maple syrup, but I like mine as is because the fruit is pretty sweet). Spoon the filling by the tsp onto half of the prepared little crust hearts, and cover with the top pieces of dough (I used a small spatula to carefully move them), pressing the edges and crimping with a fork. Bake for about 30 minutes until the crusts are starting to brown lightly. Remove from oven and let cool on a wire rack until warm.


  • Vegan Almond Lemon Raspberry Cookies

    Vegan Almond Lemon Raspberry Cookies

    Sometimes I get my recipe ideas from a craving I have or an idea I come up with as I daydream, but other times, I am asked if I could make something.  That was the case last weekend when my Mom asked if I could make her some lemon raspberry cookies with nut butter included in the dough.

    IMG_2032

    Of course I wanted to make them!  I am not one to turn down delicious sounding recipe ideas, and this one sounded especially good.  I love nut butter in all forms, and lemon and raspberry is one of my favorite combinations!  What wasn’t to love about this idea?! They were actually quite easy and simple to make, which was awesome.

    IMG_2039

    These are not one of those fussy cookies that you have to put a lot of ingredients into with lots of steps and chilling time etc. But instead simple mix, place on the pan, and bake, and half an hour later you have delicious cookies. They smelled absolutely amazing when baking, the lemon and raspberry filling my kitchen with the most heavenly aroma!

    IMG_2036

    They tasted wonderful as well!  My Mom approved, I think they were just what she was looking for. She likes to have some sort of cookies on hand as a snack to go with her tea or coffee.  I think these would be good with a hibiscus raspberry tea or something of the sort.

    IMG_2040

    Vegan Almond Lemon Raspberry Cookies
    makes about 10 cookies

    1/2 cup almond butter
    1/4 cup coconut oil, softened, but not liquid
    1/2 cup coconut sugar
    2 tsp pure vanilla extract
    1 Tbsp organic lemon zest
    1/4 cup lemon juice
    1/4 tsp sea salt
    1 cup gluten free all purpose flour
    1/2 cup dried raspberries

    Preheat the oven to 350F degrees, and line a sheet pan with parchment paper.
    In a large bowl, mix together the almond butter, coconut oil, sugar, vanilla, lemon zest and juice until well blended.  Add the sea salt and flour and mix until well combined. Stir in the raspberries.
    Shape the dough into 1 1/2 inch balls, and place a few inches apart on the prepared cookie sheet. Press down on them just slightly. Place in the oven and bake for about 15 minutes, or until they are starting to brown at the edges.
    Remove from oven and let cool.


  • Vegan Kumquat Raspberry Galette with Pecan Crust

    Vegan Kumquat Raspberry Galette with Pecan Crust

     Kumquats are like nature’s little sweet tarts.  They are so delicious, especially to me because I love anything that makes my lips pucker a little bit. I remember when I first bought some years ago in college.  I am always buying any sort of new and unusual fruits or veggies that I have not tried before simply because I am curious.  And with the kumquats, I wasn’t sure at first how to eat them.  Since other citrus you don’t generally eat the skin.  But once I tried one, bam!  I was hit with the delicious flavor and I loved it.  So now, every year I have to buy some when I first see them in the store.
     IMG_1948
    I bought some the other day, and I wanted to try using them in a way I hadn’t before. I often use them thinly sliced in salads, or just eat them as a snack, or as a garnish on top of cakes, but I had not tried them in many cooked applications. My Mom got me a pie book for Christmas, and all of the pies, tarts, and galettes looked so good to me I decided to make a galette.  Because I have been hard core craving one all week.
    IMG_1952
    Kumquats in a galette might sound a little unusual, but I am all for things that are not common in desserts.  I mixed them with sweet raspberries, and it ended up being sooo good!  I know raspberries are not in season, but I am missing that part of summer and I bought some frozen ones.  I made a pecan crust for the galette and it turned out wonderfully flaky and nutty.
    IMG_1954
    Just sayin’ maybe your resolution for the year should be to bake more vegan desserts.  You will definitely have a lot of fun in the process!  I know I do, and it keeps me happy!
    IMG_1956
    Vegan Kumquat Raspberry Galette with Pecan Crust
    1 galette
    Crust:
    1 1/2 cups all purpose gluten free flour
    1/2 cup pecan meal
    2 Tbsp cup coconut sugar
    1/2 tsp sea salt
    1/4 cup coconut oil, in its solid form
    2 Tbsp pecan butter
    filtered water as needed
    Filling:
    2 cups fresh raspberries (if using frozen, thaw out first, and drain off liquid)
    2 cups kumquats, sliced
    1/3 cup coconut sugar
    a pinch of sea salt
    1 1/2 Tbsp arrowroot starch

    coconut milk, for brushing
    coconut sugar, for topping

    To make the crust, in a large bowl, mix together flour, meal, sugar, and sea salt.  Cut in pecan butter and coconut oil with a pastry blender or 2 knives until it is in pea sized pieces.  Mix in just enough water to create a smooth dough that holds together but isn’t too sticky.  Add a touch of water if needed, and knead slightly until a smooth dough is created.  Shape into a round (if it is too soft, refrigerate for about 15 minutes to firm it up slightly.  You want it pliable, but not super soft or it will be hard to shape).
    Roll out into a 14 inch round using parchment underneath and floured rolling pin.  If it tears, no worries, just press it back together and patch it up.
    Preheat oven to 400F degrees.  To make filling, mix together all ingredients in a large bowl.  Pour filling into middle of dough rounds (leaving a 1 1/2 inch boarder), then carefully fold up edges to cover the edge of the fruit. Brush edges with a little coconut milk, and sprinkle with sugar.  Place in the oven.  Bake for 45 minutes (checking after 20 and if it is very brown, if it is, tent with foil) until bubbling and fruit is tender.  Remove from oven and let cool on a wire rack for at least an hour.


  • Vegan Apple Raspberry Pie with Almond Streusel Topping

    Vegan Apple Raspberry Pie with Almond Streusel Topping

     IMG_1476
    My Mom recently told me about a pie she had enjoyed at a restaurant that was so good.  It was an apple raspberry pie with an almond crumble topping.  It sounded so good to me, that I decided I wanted to enjoy some too, so I decided to create one myself. Apples are plentiful this time of the year, and I had some frozen raspberries on hand, so I had no excuses.
    IMG_1477
    I used my usual gluten free crust enhanced with a little almond flour for extra richness and flavor, a perfect carrier for the sweet tart filling that it was to hold.  I used honeycrisp apples, my favorite since they have a nice crunch, and the perfect balance of tart and sweet.  Although the raspberries were frozen, once baked into the pie you could not tell. I topped it all off with an almond oat streusel, piled high for extra deliciousness (I tend to steal pieces of the streusel to snack on as the pie cools).
    IMG_1480
    It smelled amazing while baking, and I could not wait to try it.  The streusel was sweet, crunchy, and a little salty, a perfect topping for the jammy apple raspberry filling.  I enjoyed mine warm, the perfect way to enjoy fruit pie if you ask me.  Top it off with vegan ice cream or coconut whipped cream and you have something pretty delicious there!  One of my favorite types of comfort food this time of the year!
    IMG_1482
    Vegan Apple Raspberry Pie with Almond Streusel Topping

    Makes 1 8 inch pie

    Crust:
    3/4 cups all purpose gluten free flour
    3/4 cup almond flour
    2 Tbsp coconut sugar
    1/4 tsp sea salt
    5 Tbsp coconut oil, in its solid form

    about 2-3 Tbsp cold water

    Filling:

    3 cups diced sweet tart apples (such as honeycrisp)

    3 cups fresh or frozen organic raspberries (if they are frozen, thaw them first, and drain off any liquid)

    juice of one lemon

    1/4 cup coconut sugar

    2 Tbsp arrowroot powder or all purpose gluten free flour

    2 tsp pure vanilla extract

    pinch sea salt

    Topping:

    3/4 cup gluten free all purpose flour

    3 Tbsp coconut sugar

    3 Tbsp melted coconut oil

    1/2 cup rolled oats

    3/4 cup chopped almonds

    pinch sea salt

    To make the crust, in a large bowl, mix together flour, sugar, sea salt.  Cut in coconut oil with a pastry blender or 2 knives until it is in pea sized pieces.  Mix in just enough water to create a smooth dough that holds together but isn’t too sticky.  Add a touch of water if needed, and knead slightly until a smooth dough is created.
    Roll out into about a 10 inch round using parchment underneath and floured rolling pin.  Place bottom crust into an 8 inch pie pan and fit to edges (being careful since gluten free dough is more fragile). If it tears, no worries, just press it back together and patch it up. Flute the edges, or crimp with a fork. Set aside in the refrigerator.
    To make the topping, combine all ingredients in a bowl, and mix together and squeeze together until it is clumping up a bit.  Set aside.

    Pre-heat the oven to 400F degrees. In a large bowl, toss together the filling ingredient. Spoon into crust.  Scatter the topping over that. Bake for 1 hour in the middle rack of the oven until apples are cooked through and bubbling (after 15 minutes check it and if it is getting too dark, tent it with foil for the rest of the time in the oven).

    Remove from oven and let cool until warm, and top with some ice cream or coconut vanilla whipped cream and…enjoy!

    IMG_1483


  • Vegan Hazelnut Chocolate Raspberry Biscotti

    Vegan Hazelnut Chocolate Raspberry Biscotti

    Chocolate Hazelnut Raspberry Biscotti 1

    There was a time when I made a lot of biscotti. It was back when I was in college and I had found some biscotti recipes in a magazine and decided to try them all, then make my own variations.  I loved the stuff.  Plus, it was a nice change from regular cookies, having a nice crunchy texture thanks to the twice baked treatment it gets. It had been quite a while since I had made it…probably at least 8 years, and I decided that it was time to change that.  I had seen some beautiful biscotti and it inspired me to create a healthier vegan version.  I thought long and hard about what flavor to make, and I ended up with chocolate hazelnut raspberry.

    Chocolate Hazelnut Raspberry Biscotti 2

    I used hazelnut flour in them as well as chopped hazelnuts for extra deliciousness.  And, a chocolate dough as well as chocolate drizzle on top for double chocolate. I added dried raspberries for little bursts of tart sweet flavor and it was all together a heavenly combination.  These do not have any oil in them, the fat comes from the hazelnuts, but they are so nice and crisp you would think they were richer than they are.  These would be perfect with coffee or tea for a mid morning relaxation break!

    Chocolate Hazelnut Raspberry Biscotti

    Vegan Hazelnut Chocolate Raspberry Biscotti

    Makes 2 dozen

    Dough:

    3 Tbsp ground flax seed

    1/2 cup plus 1 Tbsp filtered water

    1 3/4 cups all-purpose gluten free flour

    1/2 cup unsweetened cocoa powder

    1 cup hazelnut meal

    1 cup coconut sugar

    2 teaspoons baking powder

    1/4 teaspoon fine salt

    1 tablespoon pure vanilla extract

    1/4 cup coconut milk or almond milk

    1 cup hazelnuts, chopped into large pieces toasted

    1 cup dried raspberries

    1/2 cup chopped vegan dark chocolate

    In a small bowl, mix together the flax seed and water.  Set aside in the refrigerator for 15 minutes.

    Meanwhile, in a large bowl, whisk together the flour, cacao powder, hazelnut meal, coconut sugar, baking powder and sea salt until well blended.  Add the flax mixture, vanilla, milk, and stir until well blended and a soft dough.  Mix in the raspberries and hazelnuts.

    Form into 2 logs on a parchment lined baking sheet, and bake at 350F degrees 20-25 minutes, then let cool 20 on a rack.

    When cool, slice into 3/4 inch thick pieces on the diagonal, and place back on the sheet.  Bake for 30-35 minutes more until crisp and lightly browned at the edges.  Let cool completely.

    Melt the dark chocolate in a double boiler (or your preferred method), then place in a pastry bag (or a ziplock bag with the corner cut off) and drizzle over all the biscotti. Allow the chocolate to set before serving.

    Store in an airtight container in the refrigerator for up to 2 weeks.


  • Vegan Matcha Raspberry Meringues

    Vegan Matcha Raspberry Meringues


    With all of the vegan meringues that have been popping up lately on social media I had to try my hand at making some.  I admit that these types of things have always intimidated me a bit, especially macarons which I used to love before I stopped eating animal products.  Funny because I like to make lots of different desserts, but I tend to make what I know well.  Time for me to step outside the box though.  I need that every once in a while, keeps life interesting.  So, I figured I would start off with something simple. I used the aquafaba method for meringue making which in case you haven’t heard is using the brine from canned chickpeas. It whips up into a beautiful meringue!  I do not have a stand mixer, so I used my food processor to whip the liquid up.  It worked so much faster than everyone says a stand mixer does.  I admit I had a few fails, about 4.  The first time, I added the sugar too fast, and it was not fine enough, and it turned into liquid.  The second, it whipped up into a beautiful marshmallow fluff, but I had no stabilizers in it so when I put it in the oven it ran to flat pancakes.  The third, they didn’t get hard enough in the oven even after 3 hours they were like marshmallows. Luckilly I have a lot of access to chickpea liquid since I make loads of them at my work in the deli.  I am sure if I were using the usual refined sugar in my recipes like everyone else, they would have turned out.  But that is not something I keep in my home, or want to eat. So…I have been working with coconut sugar and xylitol.  I saw a post on the FB group Vegan Meringue- Hits and Misses about someone dehydrating xylitol meringues so I figured I would try my own version of that.

    Green Tea Meringues 4

    Every time I have used the xylitol it whipped up nicely.  So, the question was would it stay nice in the dehydrator since I did not have success with the oven the first time I tried that.  The meringue was lovely, shiny and perfect. I decided to add in a little matcha powder with the vanilla just to make it more interesting.  I can never leave things plain…my brain just doesn’t work that way.  I also folded in tart freeze dried raspberries because I love berries with green tea, and I thought the red and the pale green would be lovely.

    Green Tea Raspberry Meringues

    I popped them in the dehydrator, and crossed my fingers, and prayed they would turn out.  24 hours later, I ended up with delicious little meringues!  I was so happy they actually turned out you have no idea. The earthy sweet green tea base was perfect with the flecks of tart raspberry. I have included the recipe if you have a dehydrator and want to try this too.  I am not done experimenting yet with my meringues, and I have another experiment baking as I type this.  Stay tuned.

    Green Tea Raspberry Meringues 2

    Vegan Matcha Raspberry Meringues

    Makes 12

    1/2 cup aquafaba*

    1/2 tsp guar gum

    1/2 tsp cream of tartar

    1/2 cup powdered xylitol sugar**

    pinch sea salt (if your chickpea liquid has no salt)

    2 Tbsp arrowroot powder

    1 Tbsp matcha powder

    1 tsp pure vanilla extract

    1/2 cup freeze dried raspberries, crushed up into smaller pieces

    In a food processor (which is what I used, or you may use a stand mixer with a whisk attatchment), whip up the chickpea liquid until it has reached pretty stiff peaks. This will take about 2 minutes in the food processor.  Add the guar gum and cream of tartar and process until incorporated.  Add the sea , sugar and arrowroot with the motor running, a little at a time through the feed tube (so you do not deflate it), then allow to process until the sugar is completely dissolved and the meringue is smooth, shiny and thick.  Add the vanilla and matcha, and blend until uniform in color. fold in the raspberries.

    Carefully place the meringue mixture into a pastry bag with a large tip, and pipe into meringues on a parchment paper lined dehydrator tray.

    Dehydrate at 155F for 24 hours, until crisp.  Remove from the dehydrator and store in an airtight container.

    *Aquafaba is the liquid from chickpeas.  You may either use the liquid from canned chickpeas, or liquid from chickpeas you have cooked yourself (if it is thick enough).

    **I buzzed the xylitol in the blender until fine before using in the recipe, this makes it less likely to deflate the meringue. Xylitol is toxic to dogs the same way chocolate is, so do not let your dog get ahold of this marshmallow fluff.

    ***Please note, if it is very humid where you are and your meringues get a little soft, just place them in the fridge in the container you store them in and they will become more crunchy.

    Green Tea Raspberry Meringues 1


  • Raw Raspberry Dream Pie

    Raw Raspberry Dream Pie

    Raspberry Pie

    Cream pies are the perfect thing for summer as far as I am concerned.  But I guess I consider them somewhat of a special thing to make since I don’t make the often.  There was no special occasion last weekend, but I decided to make it special and make a cream pie.  Raspberry cream pie to be precise.  I had the most beautiful raspberries and they were just begging to be used in something magnificent.

    Raspberry Pie 1

    Although the pie might look a little fussy, it is nothing of the sort.  Rather easy to make.  A simple crunchy crust buzzed together in the food processor with few ingredients, and a coconut cream based filling that has little hands on time and just needs to chill before enjoying.

    Raspberry Pie 3

    Let me tell you…this tastes like heaven!  This was my dessert Sunday night and it put me in my happy place.  Vanilla and raspberry scented fluffy cream that melted in my mouth with that crunchy sweet crust and tart fresh berries…the perfect combination.  If you are having a summer party, bring this out, and your guests will love you.

    Raspberry Pie 4

    Raw Raspberry Dream Pie
    Makes one 6 inch pie

    1 six inch deep dish pie plate

    Crust:

    3/4 cup finely shredded dried coconut

    3/4 cup sprouted, dehydrated buckwheat groats

    1/2 cup ground flaxseed

    1 cup soft pitted medjool dates

    1/4 tsp sea salt

    Filling and  Topping:

    4 cups fresh young coconut meat packed*

    1/2 cup fresh coconut water

    1/4 cup plus 2 Tbsp raw coconut nectar, or your choice of raw liquid sweetener

    1/4 tsp himalayan salt or sea salt

    1/2 Tbsp pure vanilla extract and seeds of  a vanilla bean

    3/4 cup raw coconut butter (warmed to liquid)

    2 cups fresh organic raspberries, divided

    2 Tbsp coconut butter

    Additional raspberries for topping

    For the crust, combine all ingredients in the food processor until finely chopped and starting to hold together when squeezed (if it doesn’t you may need a few more dates).  Press the mixture into a 6 inch pie pan or spring form pan greased with coconut oil.

    To make the cream, combine the coconut, coconut water, coconut nectar, sea salt, and vanilla in a food processor and process until smooth.  Add 3/4 cup coconut butter with the motor running and process for a minute. Divide between 2 bowls. Add one back to the food processor and add 1 1/2 cups raspberries, along with 2 Tbsp coconut butter and blend until smooth.  Stir in the remaining 1/2 cup raspberries. Pour the raspberry filling filling over the prepared crust and place in the freezer to firm up (about 2 hours). Place the other bowl in the freezer for about 45 minutes and chill until it is the consistency of whipped cream (once it is the proper consistency, place in the fridge until the filling is ready.
    Once the filling and the cream have chilled long enough, top the filling with the plain cream, and top off with raspberries before serving.
    *If you do not mind this pie not being nut free, and coconut meat is unavailable, you may use 4 cups raw cashews, soaked for 4 hours and drained instead.


  • Raw Chocolate Raspberry Thumb Print Cookies

    Raw Chocolate Raspberry Thumb Print Cookies

    Thumbprint 1

    I really enjoyed dress up when I was a little kid.  I was always putting on weird combinations of clothes that I thought would look pretty, even though most of the time I looked ridiculous.  My own clothes were fun, but the most interesting clothes were at Grandma’s house.  I would dig through her boxes of fabric and make “dresses” for myself draping them decoratively and securing them with a belt.  Her scarves also made great accessories.  They were colorful and beautiful and my Grandma was always a good sport never getting mad at me for trying on her things.  Even letting me wear her lipstick and clip on earrings sometimes.  I remember one time I didn’t want to take them off and I wore them to a pre-school program we were doing.  I was up in front of everyone wearing those ridiculous dangly earrings.  But it was awesome to my 4 year old self.  Sometimes I would pretend to have a tea party with some of my dolls once I was all dressed up and of course I was the princess.  Because queens were too old (at least that was my reasoning).  I would have pretend food, but if I had real food I imagine thumb print cookies would be on the menu.

    Thumbprint 2

    To me thumb prints make me think of tea parties. Not sure why.  Maybe because they seem little and delicate.  I decided that I needed to make some last week because I remembered how cute they were.  Yes that is a valid reason for making cookies. But I didn’t want to make the same ones I used to make.  It was a really hot day and I did not want to bake, so I made raw ones.  But not just raw ones. Chocolate with raspberry chia jam.  I am absolutely in love with chia jam lately.  I love the texture, since I am a fan of jam with seeds, and it is simple and easy to make.

    Thumbprint 3

    These cookies were really simple altogether to make, and I made them in less than half an hour which is always a plus.  They were delicious as well.  Fudgy and rich cookies the perfect contrast to the sweet light jam.  These are definitely tea party material or just devour material…if you are not feeling lady like which I wasn’t really when I made them.  If you are looking for a simple raw cookie recipe, this is it! No hard to find ingredients or tough techniques here!

    Thumbprint 4

    Raw Chocolate Raspberry Thumb Print Cookies
    Makes 10

    Cookies:
    3/4 cup soft dates, pitted (if not soft, soak them in filtered water 30 minutes and drain well first)
    1/2 cup raw pecan butter or raw almond butter
    1/4 tsp sea salt
    1 tsp pure vanilla extract
    4 Tbsp filtered water
    1/3 cup raw cacao powder
    3/4 cup raw coconut flour*

    Jam:
    1 1/4 cups organic raspberries
    4 soft dates, pitted (if not soft, soak them in filtered water 30 minutes and drain well first)
    pinch sea salt
    2 Tbsp chia seeds

    In a food processor, combine the dates, pecan butter, sea salt, vanilla extract and water and blend until smooth.

    Next, add the cacao powder and coconut flour and blend until well combined and smooth dough (if it is a little dry (since dates can vary in moisture) add another Tbsp water).

    Shape the dough into 10 round balls, press them down, and put an indentation into the center with your finger.

    To make the jam, combine the raspberries and dates in the food processor and process until dates are very fine.  Add the chia seeds and pulse a few times to mix in.  Let sit for 10 minutes.
    Spoon the jam into the centers of the cookies (you will have extra for another use).

    Store the cookies in an airtight container in the refrigerator.


    *I prefer to make my own coconut flour since I find that storebought tends to be too dry. To do so, simply buzz finely shredded dried coconut in a blender until fine flour (but not too long you don’t want butter). Raw oat flour may also be used for this recipe if you do not want to use coconut.


  • Vegan Gluten Free Sugar Free Raspberry Cupcakes

    Vegan Gluten Free Sugar Free Raspberry Cupcakes

    Raspberry Cupcakes

    Since my Gluten Free Sugar Free Vegan Marble Cupcakes that I recently made turned out so good, I decided to try making some more sugar free cupcakes last weekend. This time though, it was raspberry.  I had raspberries on hand and I had thought about making muffins…but when I talked to Eric about it he said that something topped off with a sweet glaze would be awesome so I made cupcakes.  The glaze sounded good to me as well since I felt like making something simpler than frosting.

    Raspberry Cupcakes 2

    I used my basic gluten free sugar free vanilla cake batter for these and it tasted amazing before it was even baked.  Just sayin’.  But once it was all baked up with the raspberries…oh my was it heavenly.  The raspberries became almost jammy suspended  in the sweet vanilla cake, and once I topped it off with a lemon glaze, even better.  The best part is these are gluten free, sugar free, and vegan so no need to worry about getting a sweet overload on them and feeling ill later.  What they will do it make you happy, and satisfy your sweet craving without spiking your blood sugar!

    Raspberry Cupcakes 3

    Vegan Gluten Free Sugar Free Raspberry Cupcakes

    Makes 16
    Cake:
    • 1 3/4 cups all purpose gluten free flour*
    • 1  1/2 tsp baking soda
    • 1 tsp baking powder
    • 1/2 tsp sea salt
    • 2 tsp liquid stevia
    • 1/2 cup virgin coconut oil, warmed to liquid
    • 1 cup applesauce
    • 1/2 cup filtered water
    • 1 Tbsp pure vanilla extract
    • 2 Tbsp organic lemon zest
    • 2 Tbsp lemon juice
    • 2 cups fresh organic raspberries
    glaze:
    • 1/4 cup coconut butter, warmed to liquid
    • 1/4 cup lemon juice
    • 1/2 tsp liquid stevia
    • 1 tsp pure vanilla extract
    • 1/4 tsp beet powder (optional for color)
    • filtered water as needed

    Preheat the oven to 375 degrees and position rack in center of oven. Line 16 muffin tins with liners.

    Whisk flour, baking soda, sea salt, together in a large bowl to blend well.
    Whisk stevia, oil, applesauce, and vanilla extract together in small bowl to blend well, then whisk into the flour mixture until well blended. Whisk in lemon juice until bubbles form. Fold in the raspberries.
    Transfer batter to prepared tins, alternating between chocolate and vanilla spooning the batter by the Tbsp into the them. Place in the oven and bake cupcakes until tester inserted into center comes out clean, about 20 minutes.
    Cool cupcakes completely.

    To make the glaze, whisk together all ingredients but the water until smooth, then add a little water at a time until a runny but not to thin glaze is formed.

    Spread a little of the glaze over each of the cupcakes, then allow to set (if you want it to set quicker, place them in the freezer for about 10 min).

    *Note, if you do not want to make this recipe sugar free, you may use 1 cup coconut sugar in place of the stevia in the batter, and 2 Tbsp coconut nectar or maple syrup in the frosting .
     
    Raspberry Cupcakes 4


  • Raw Raspberry Lemon Doughnut Holes

    Raw Raspberry Lemon Doughnut Holes

    IMG_1372

    I love, love, love this time of the year.  It is the perfect temperature in the morning 50 degrees for running, in the afternoon 70 degrees for chilling out or walking.  Plus nature has dressed itself up beautifully.  The tulips are opening, the wild violets are blooming and the trees are clothed in the most beautiful colors. My favorite are the ones covered in fragrant pink blossoms.  It is only for a few short weeks of the year we get to enjoy this beauty and I make sure I get outdoors every day to do so.  God is the greatest artist when it comes to beautiful things.

    Raspberry Lemon Doughnut Holes

    I have been spending a lot of time outside, so I have been making simpler recipes that do not require quite so much time.  Such as these beautiful pink doughnut holes I made last week.  Raspberry Lemon Doughnut Holes to be exact.  I was in the mood for doughnut holes so I had to make some.  These come together quick, so no excuse not to make them.

    Raspberry Lemon Doughnut Holes 2

    I added in some Sprout Living Vanilla Lucuma Protein Powder for an extra boost, and plenty of tart lemon along with the raspberries.  They were the perfect balance of tart and sweet, and in a way refreshing. I imagine myself sitting out on the patio with some lemonade and these just enjoying the fresh air. If I had a hammock and a patio…but for now eating them in the kitchen is just fine and they are delicious!

    Raspberry Lemon Doughnut Holes 3

    Raw Raspberry Lemon Doughnut Holes

    Makes 12

    doughnut holes:

    2 cups finely shredded dried coconut

    1 cup ground flaxseed
    1/2 cup dried organic raspberries
    1/2 cup soft medjool dates, pitted (if not soft, soak them for 30 minutes in filtered water and drain well)

    1/4 tsp sea salt

    1 tsp pure vanilla extract
    1/3 cup lemon juice (or as needed)
    2 Tbsp lemon zest
    coconut “powdered sugar”*
    Combine coconut and flaxseed in the food processor and process until well blended and the consistency of flour.  Add the raspberries, dates, lemon juice and zest, sea salt, extract and protein powder and process until smooth and starting to hold together when squeezed (if it is not holding together add a little more juice). Roll into 12 balls. Roll in the coconut powdered sugar, and enjoy!  Store extra in the fridge.
    *To make coconut powdered sugar, add 1 cup finely shredded, dried unsweetened coconut to a high speed blender and blend until it is powder (but not too long or you will get butter)


  • Vegan Raspberry Pomegranate Oat Waffles

    Vegan Raspberry Pomegranate Oat Waffles

    You know what I think is sexy?  Staying home and enjoying a meal together for Valentine’s Day. Because going out that day is often over priced and over rated.  At least as far as my experience goes.  Plus being able to spend alone time together for dinner and be able to hear yourself talk with maybe a little bit of (your choice of) music in the background and not a loud restaurant is pretty romantic.  Or maybe you are more of a breakfast person.  Well, still applies, but in that case, I have just the recipe for you.  Vegan Raspberry Pomegranate Oat Waffles. I made these last week for two people who I love a lot and are very important to me, my Mom and boyfriend. And…I couldn’t help but think I should share this with you all on Valentine’s Day. Because they turned out beautiful, and topped off with all of that red fruit they were pretty sexy.  If get on making them right now you can still have them for breakfast, or maybe tomorrow for Sunday brunch with your family or significant other. Heck, surprise them with breakfast in bed with these!

    As good as these turned out, I admit I was a little scared when I started them as to whether or not they would turn out.  I was veganizing an old belgian oat waffle recipe that I used to make all the time in college, and subbing a lot of healthier ingredients that I didn’t use back then…so, I had my fingers crossed.  They smelled wonderful while cooking, so I knew I had that going for me, but how would they taste. That was the question. Of course you already know the answer because I am sharing them with you but oh boy…they turned out more yummalicious than I expected!  The berries and pomegranate seeds I added in were wonderful little bursts of flavor, and the sweet oats made these pretty substantial, but still light like a waffle should be.  I was so happy they turned out, and my Mom and boyfriend were happy I decided to make them.  My Mom has been asking me to make waffles for about a month now and Eric had just gotten home after working since 5 AM and was hungry, so they were both happy campers.  Show some love and make these waffles for someone (or yourself).  They will think you are awesome!

    Vegan Raspberry Pomegranate Oat Waffles
    Makes 3 Belgian Waffles

    2 Tbsp ground flax seed
    1/4 cup plus 2 Tbsp filtered water
    1 cup gluten free rolled oats
    1 1/2 cups gluten free oat flour
    3/4 tsp sea salt
    1 tsp baking powder
    1/4 tsp baking soda
    1/4 cup coconut sugar
    1 1/2 cups thin coconut milk or almond milk at room temperature
    3 Tbsp melted virgin coconut oil warmed to liquid

    1/2 cup dried raspberries
    1/2 cup pomegranate seeds

    Fresh raspberries, pomegranate seeds and maple syrup for serving

    In a small bowl, whisk together the flax seed and water, and set in the fridge for 15 minutes until the mixture is gel like.
    Meanwhile, whisk together the oats, oat flour, salt, baking powder, baking soda, and coconut sugar in a large bowl.  Whisk in the coconut milk and oil until combined, then the flax eggs (flax water mixture) until combined. Stir in the 1/2 cup raspberries, and 1/2 cup pomegranate seeds.
    Cook according to belgian waffle iron directions (like to keep my waffles warm in a low heat oven (200F) while I cook the others).
    Serve hot with raspberries, pomegranate seeds and maple syrup.