Tag: strawberry

  • Vegan Strawberry White Chocolate Lavender Truffles

    Vegan Strawberry White Chocolate Lavender Truffles

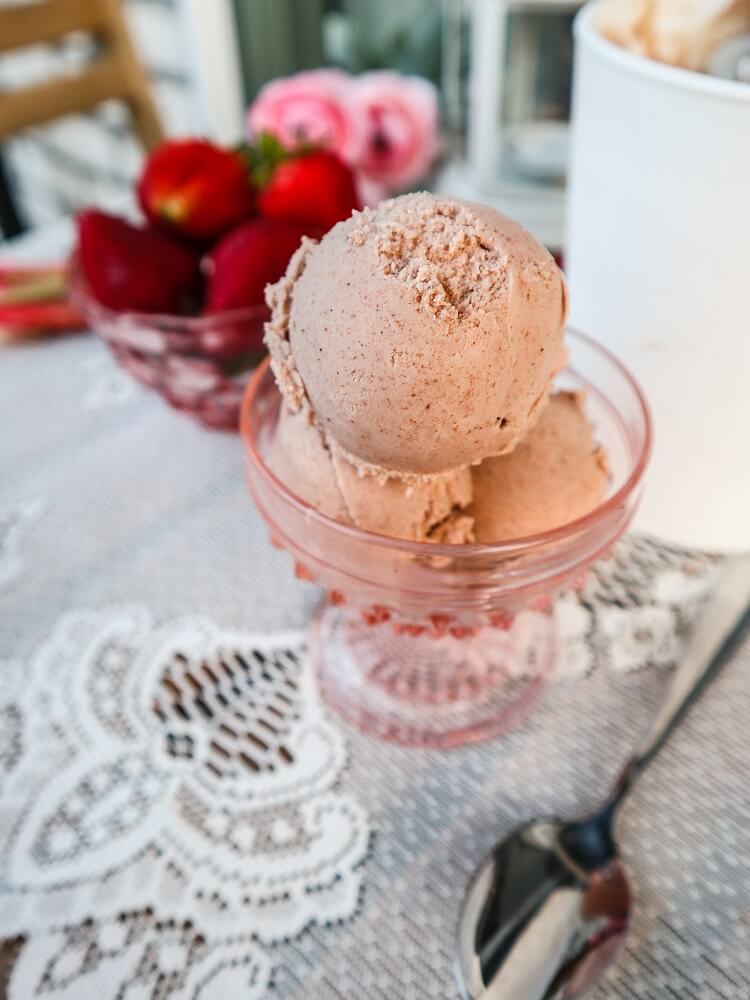
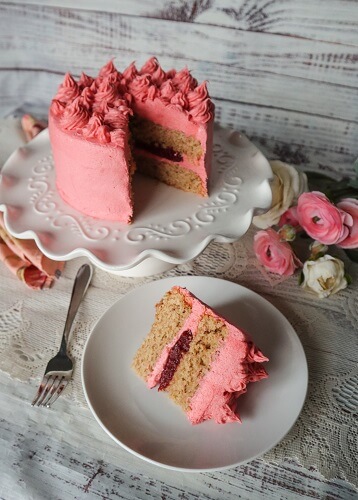
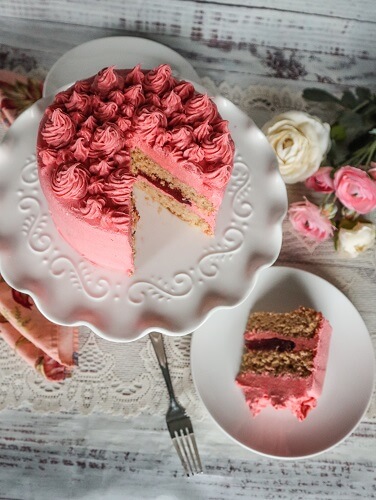
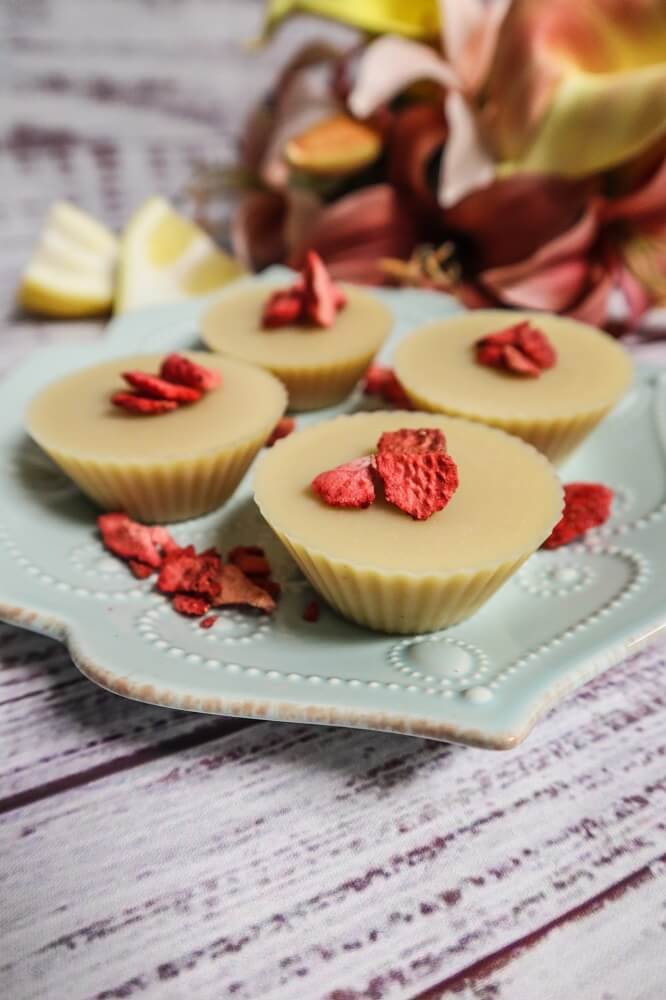
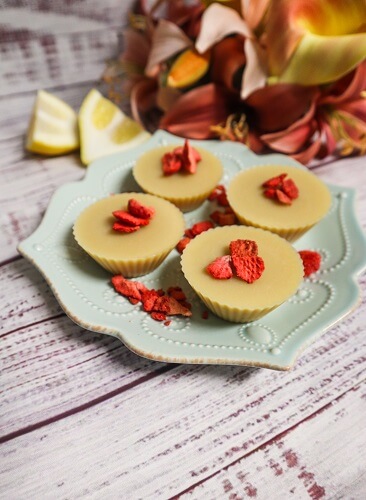
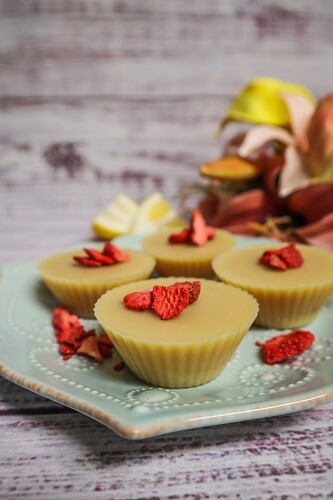
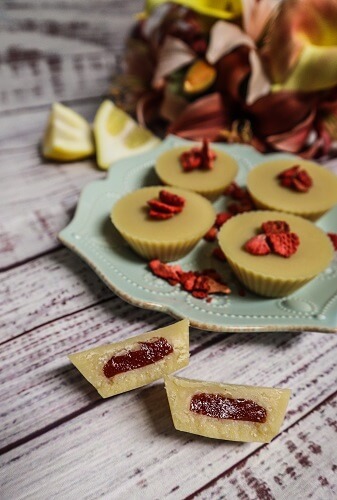
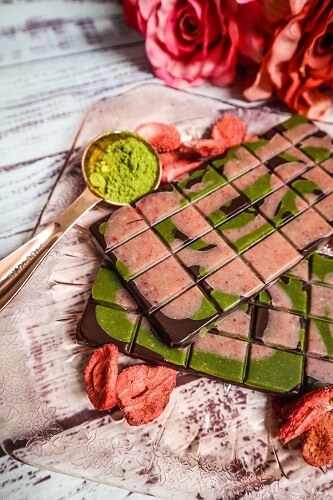
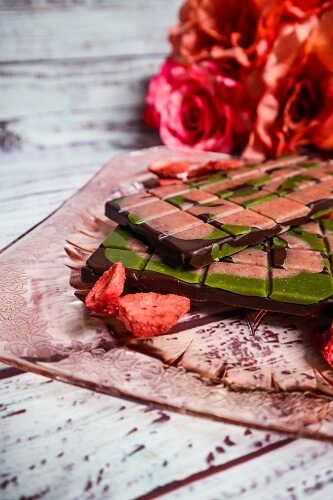
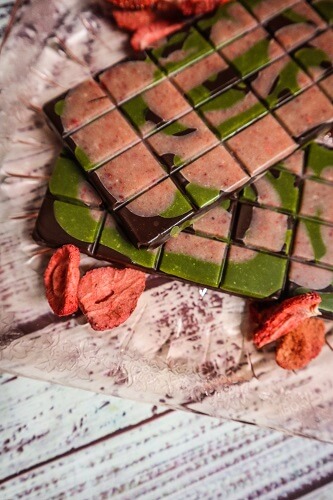
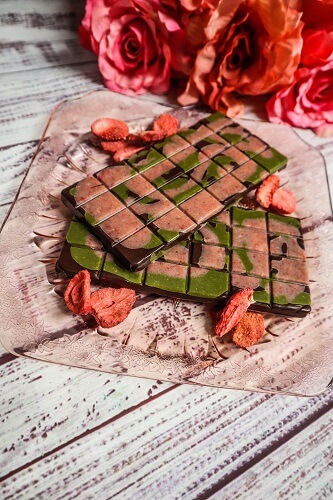
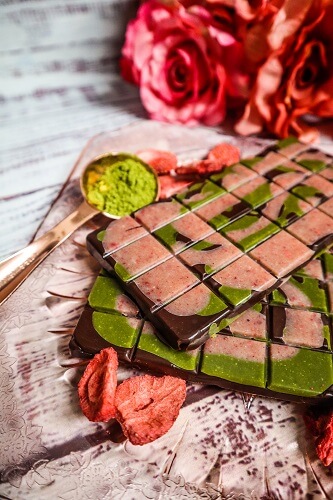
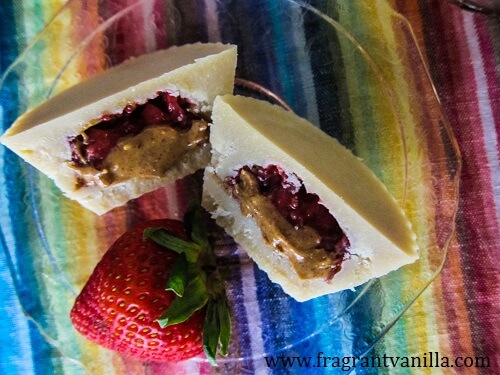
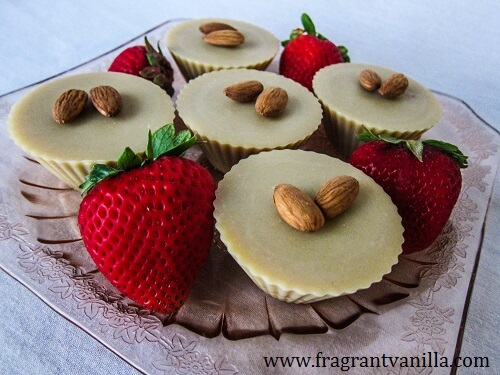
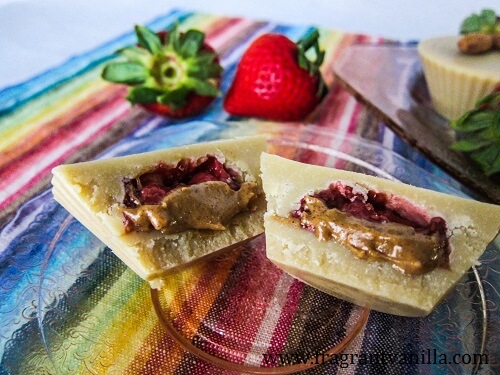
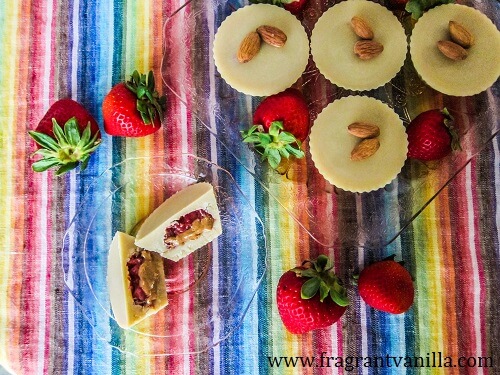
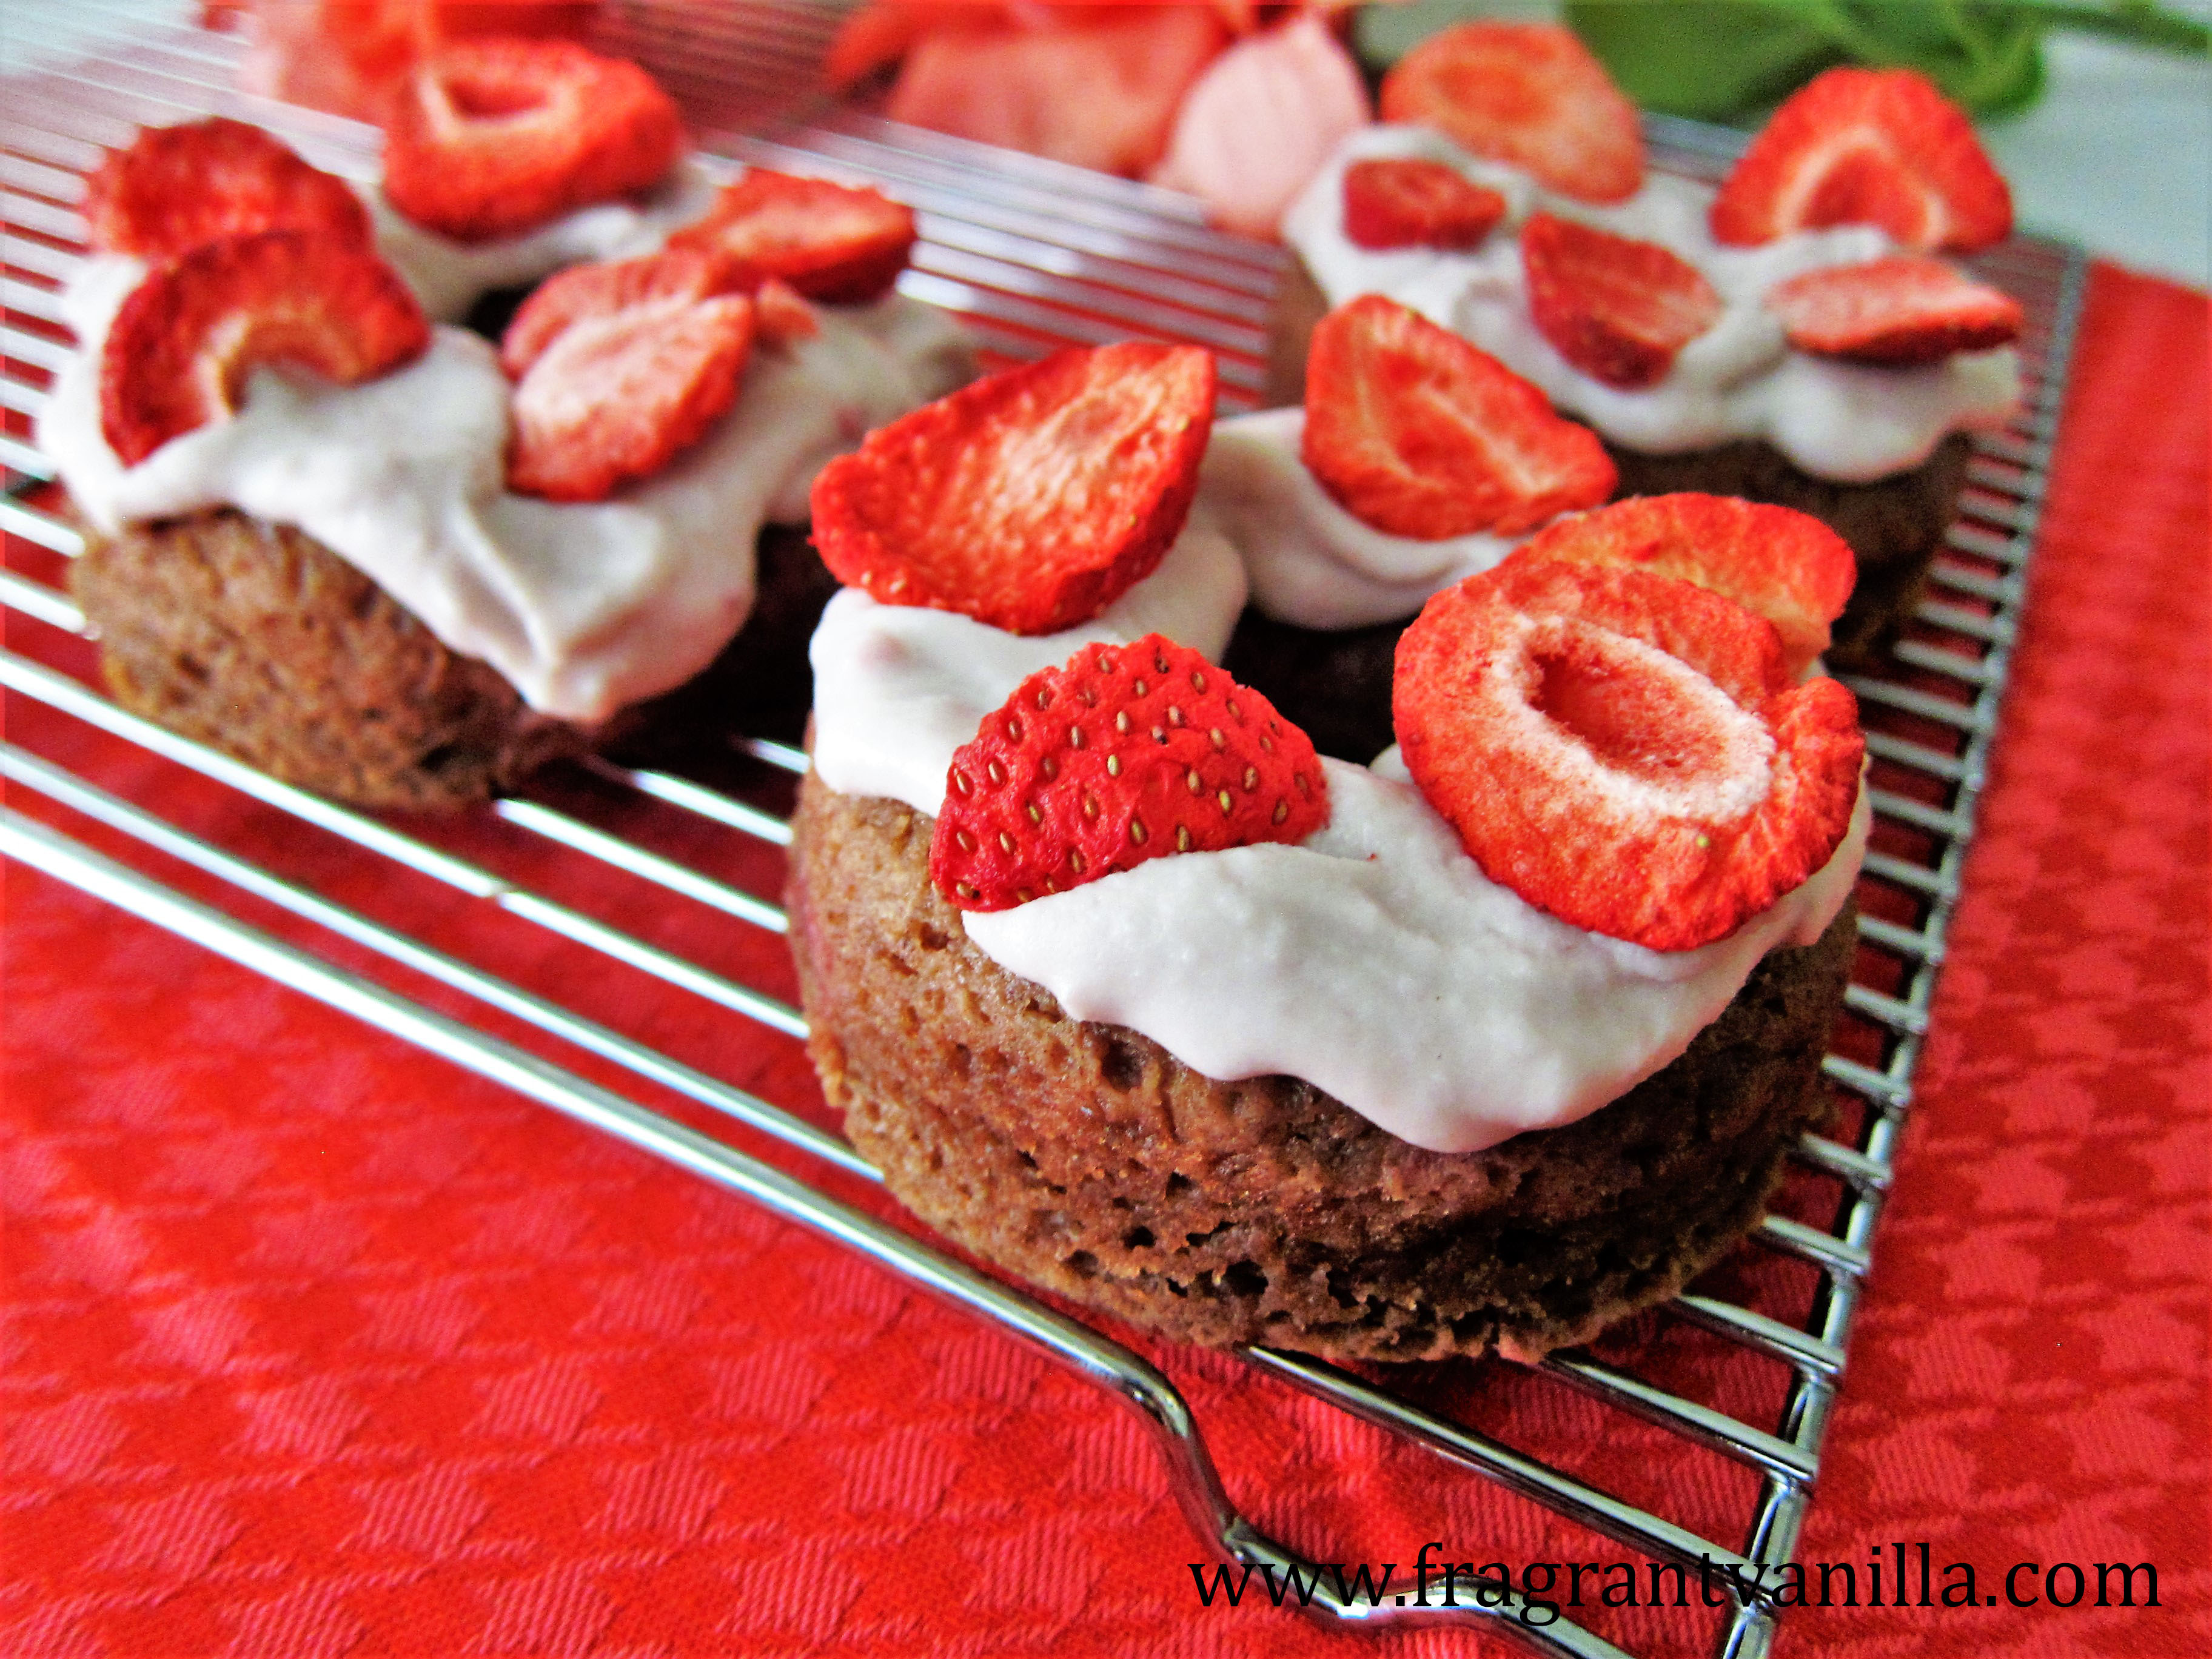
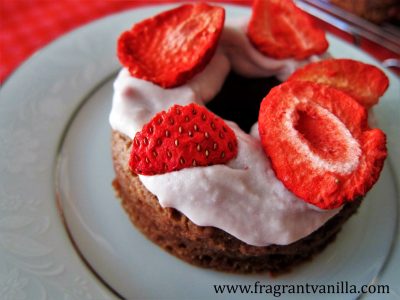
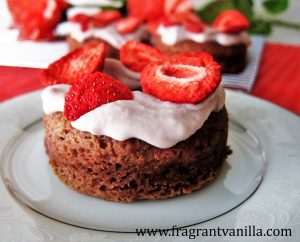
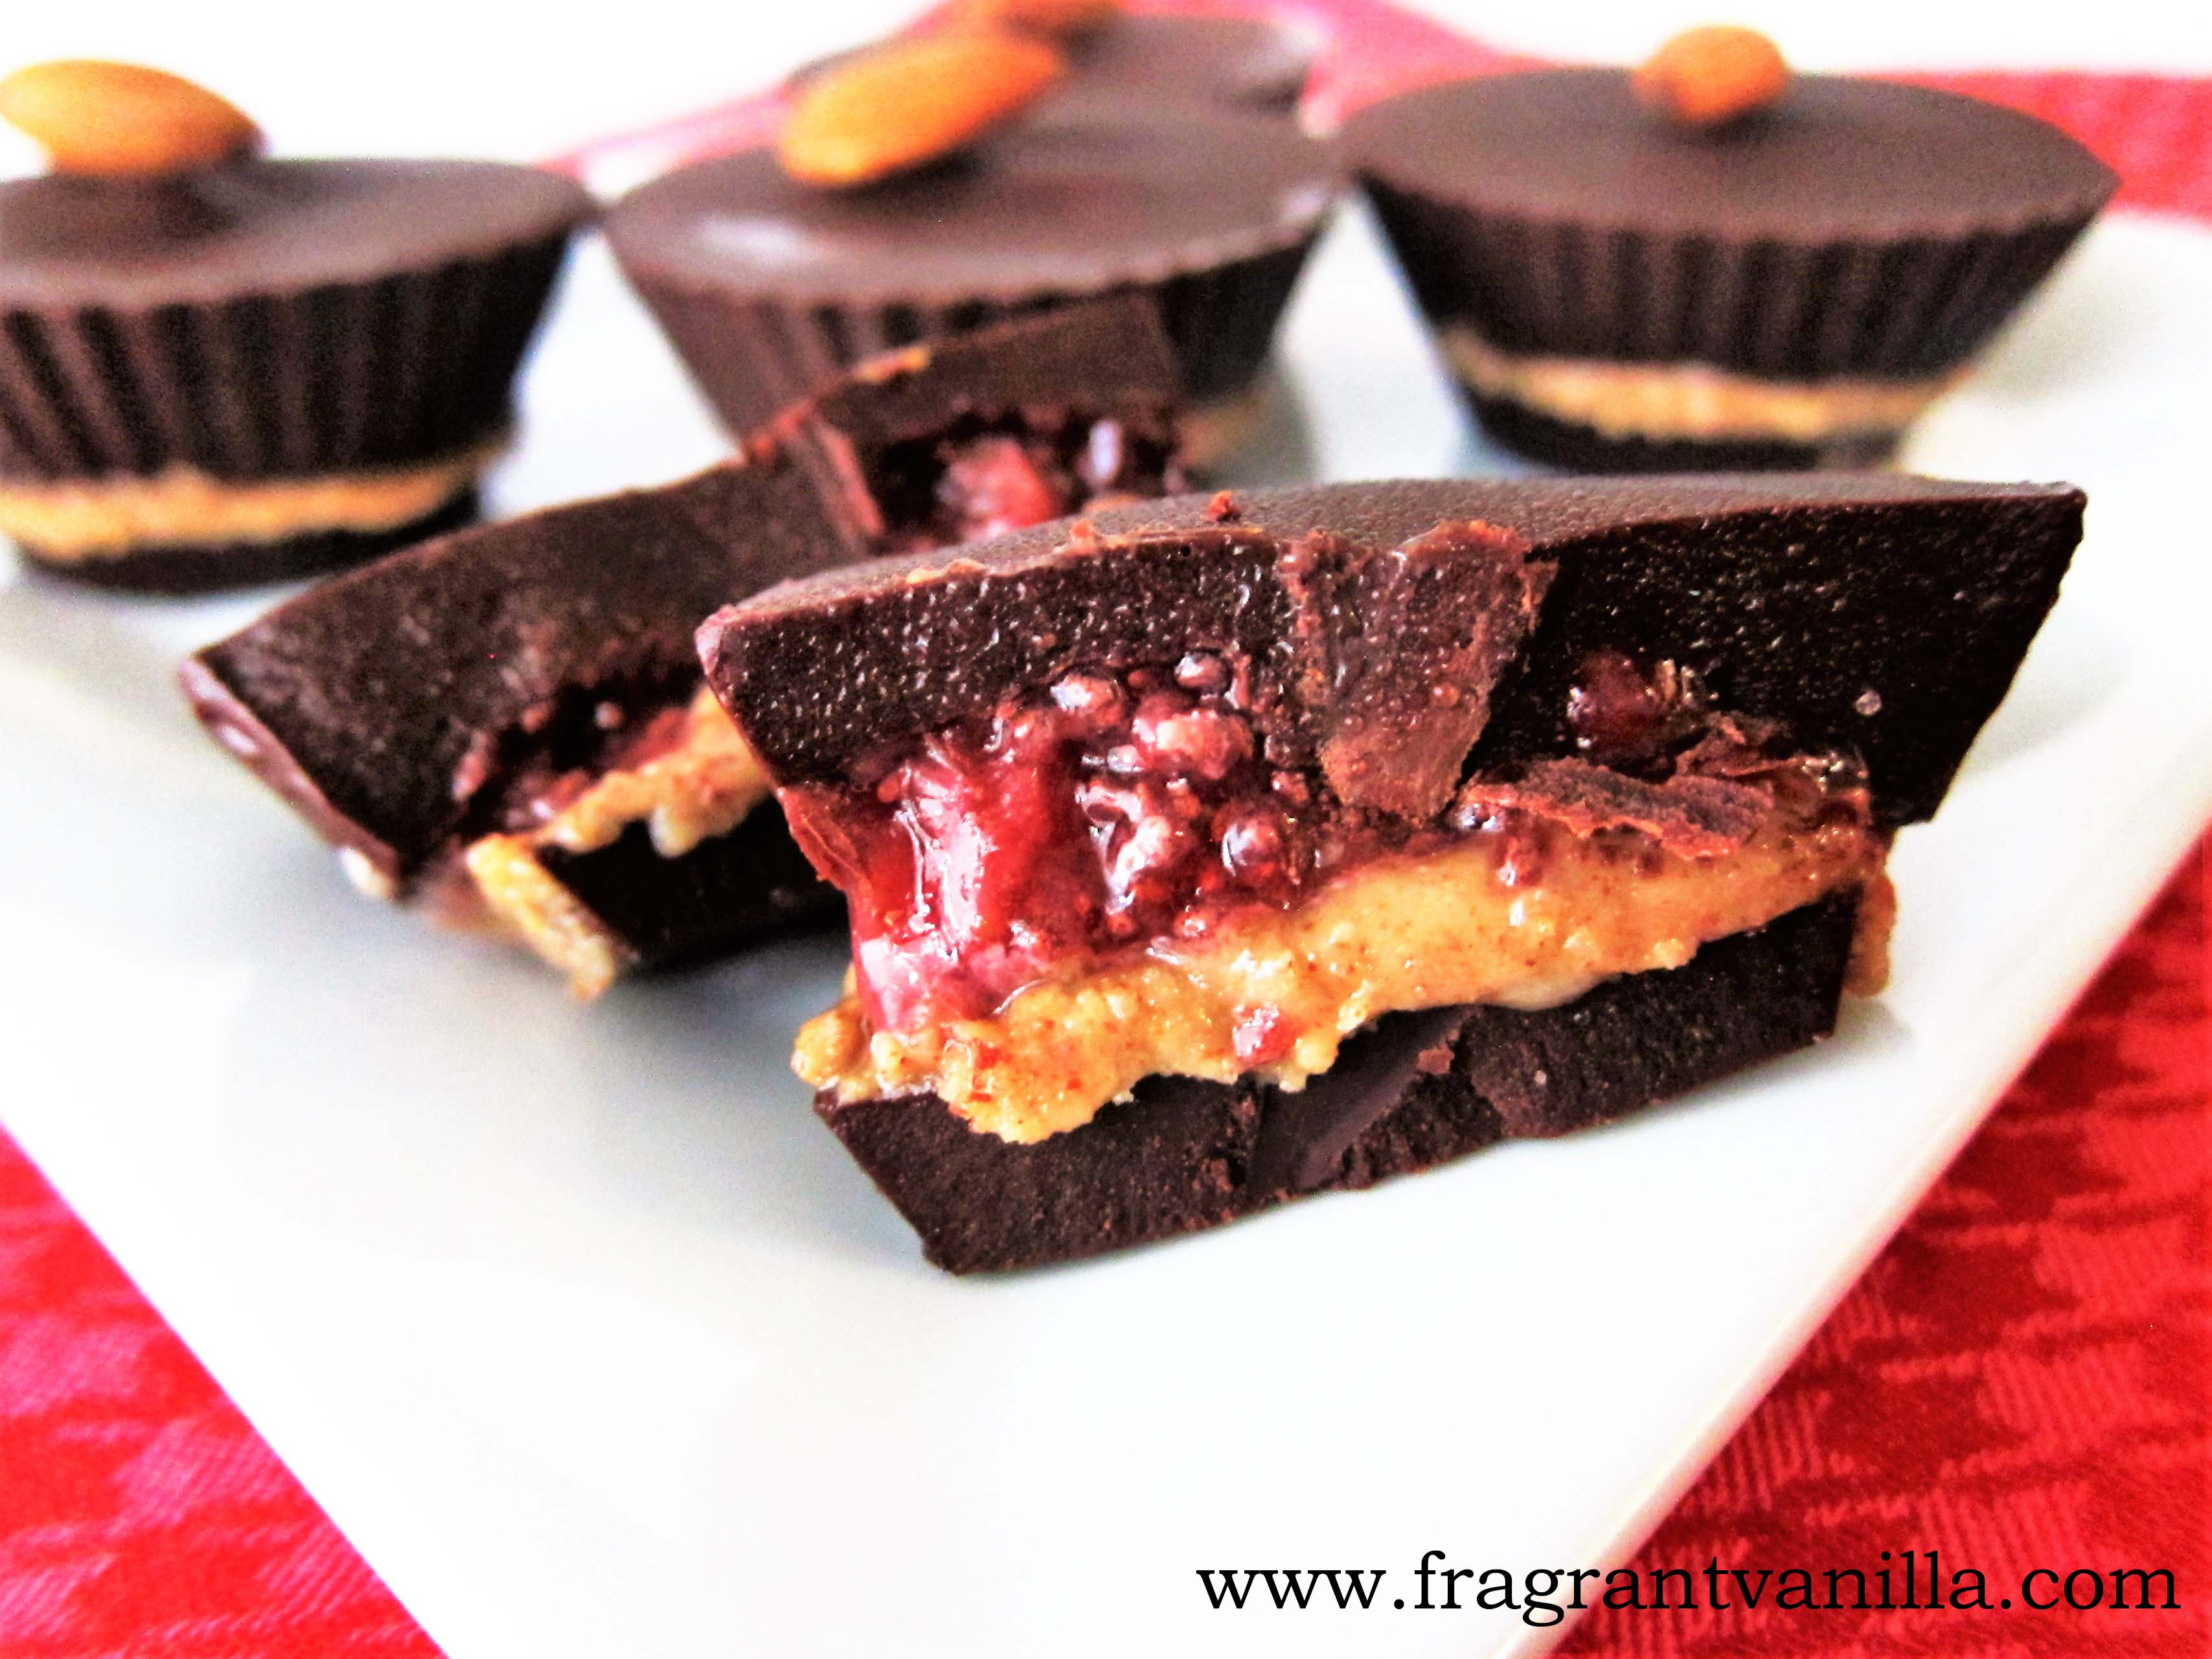
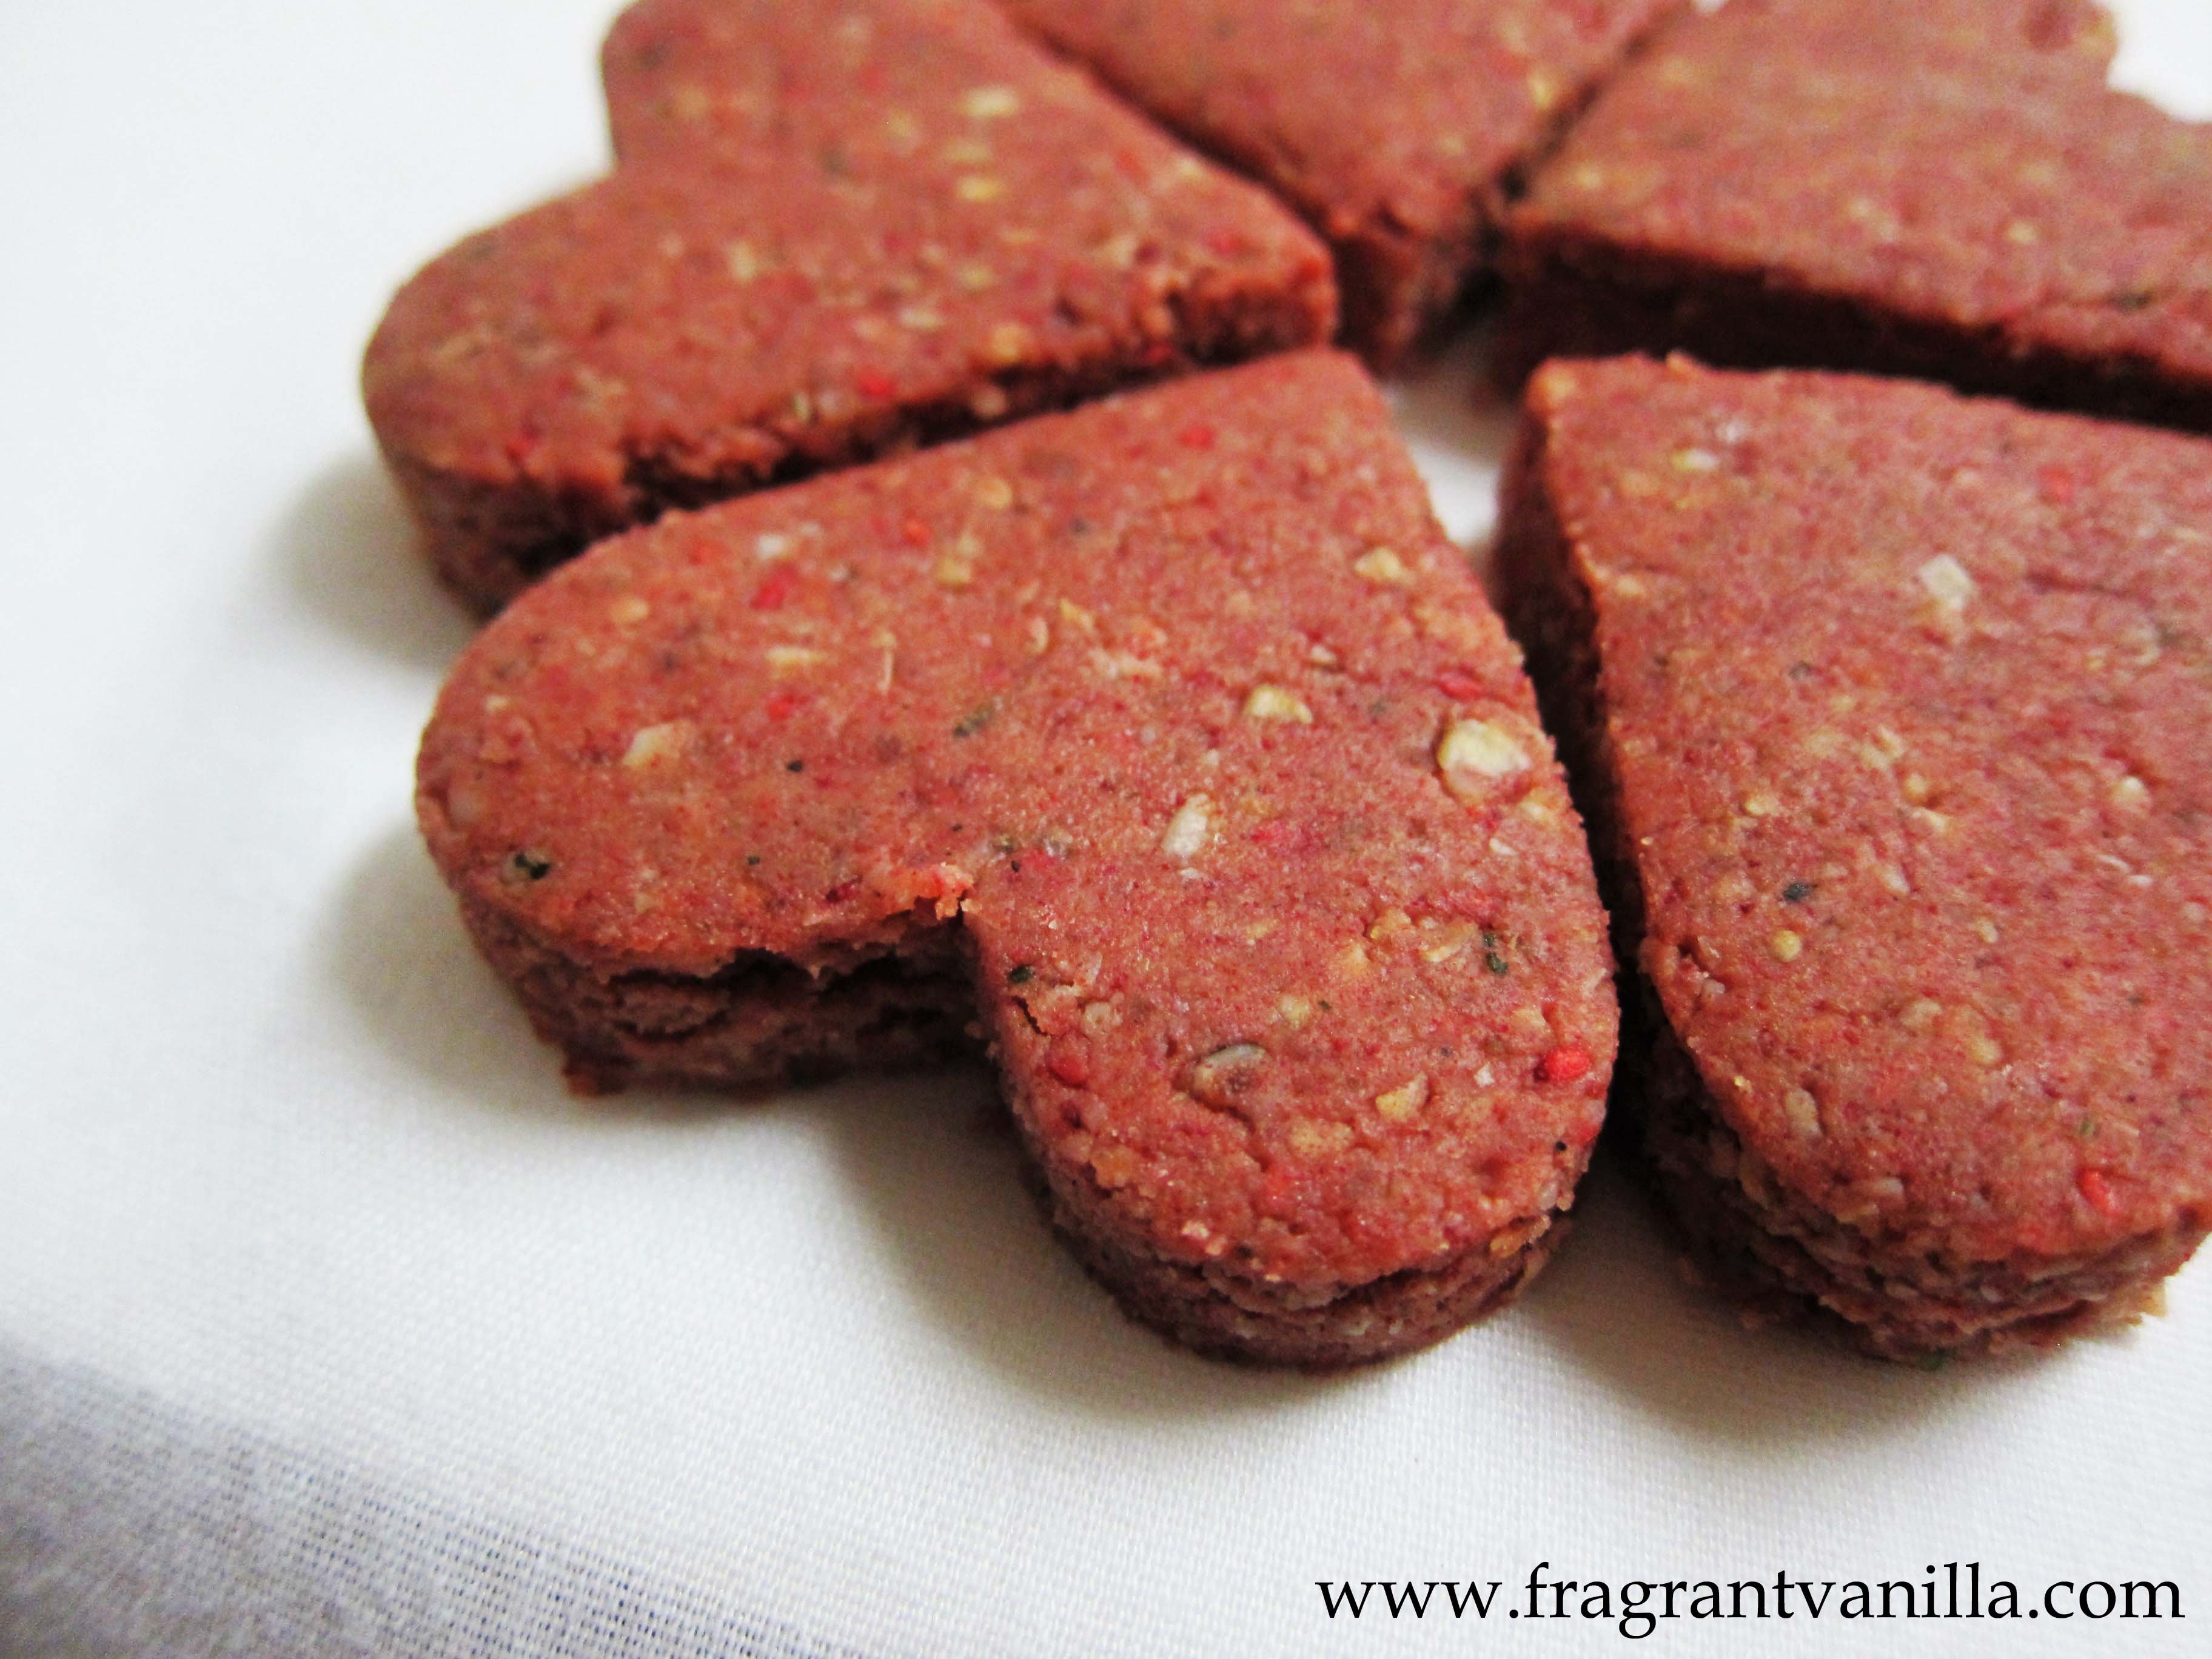
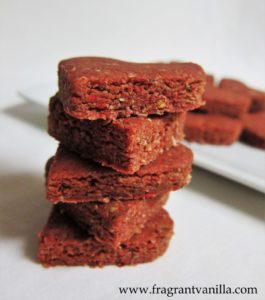
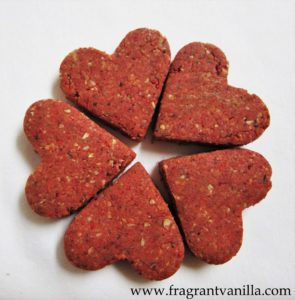
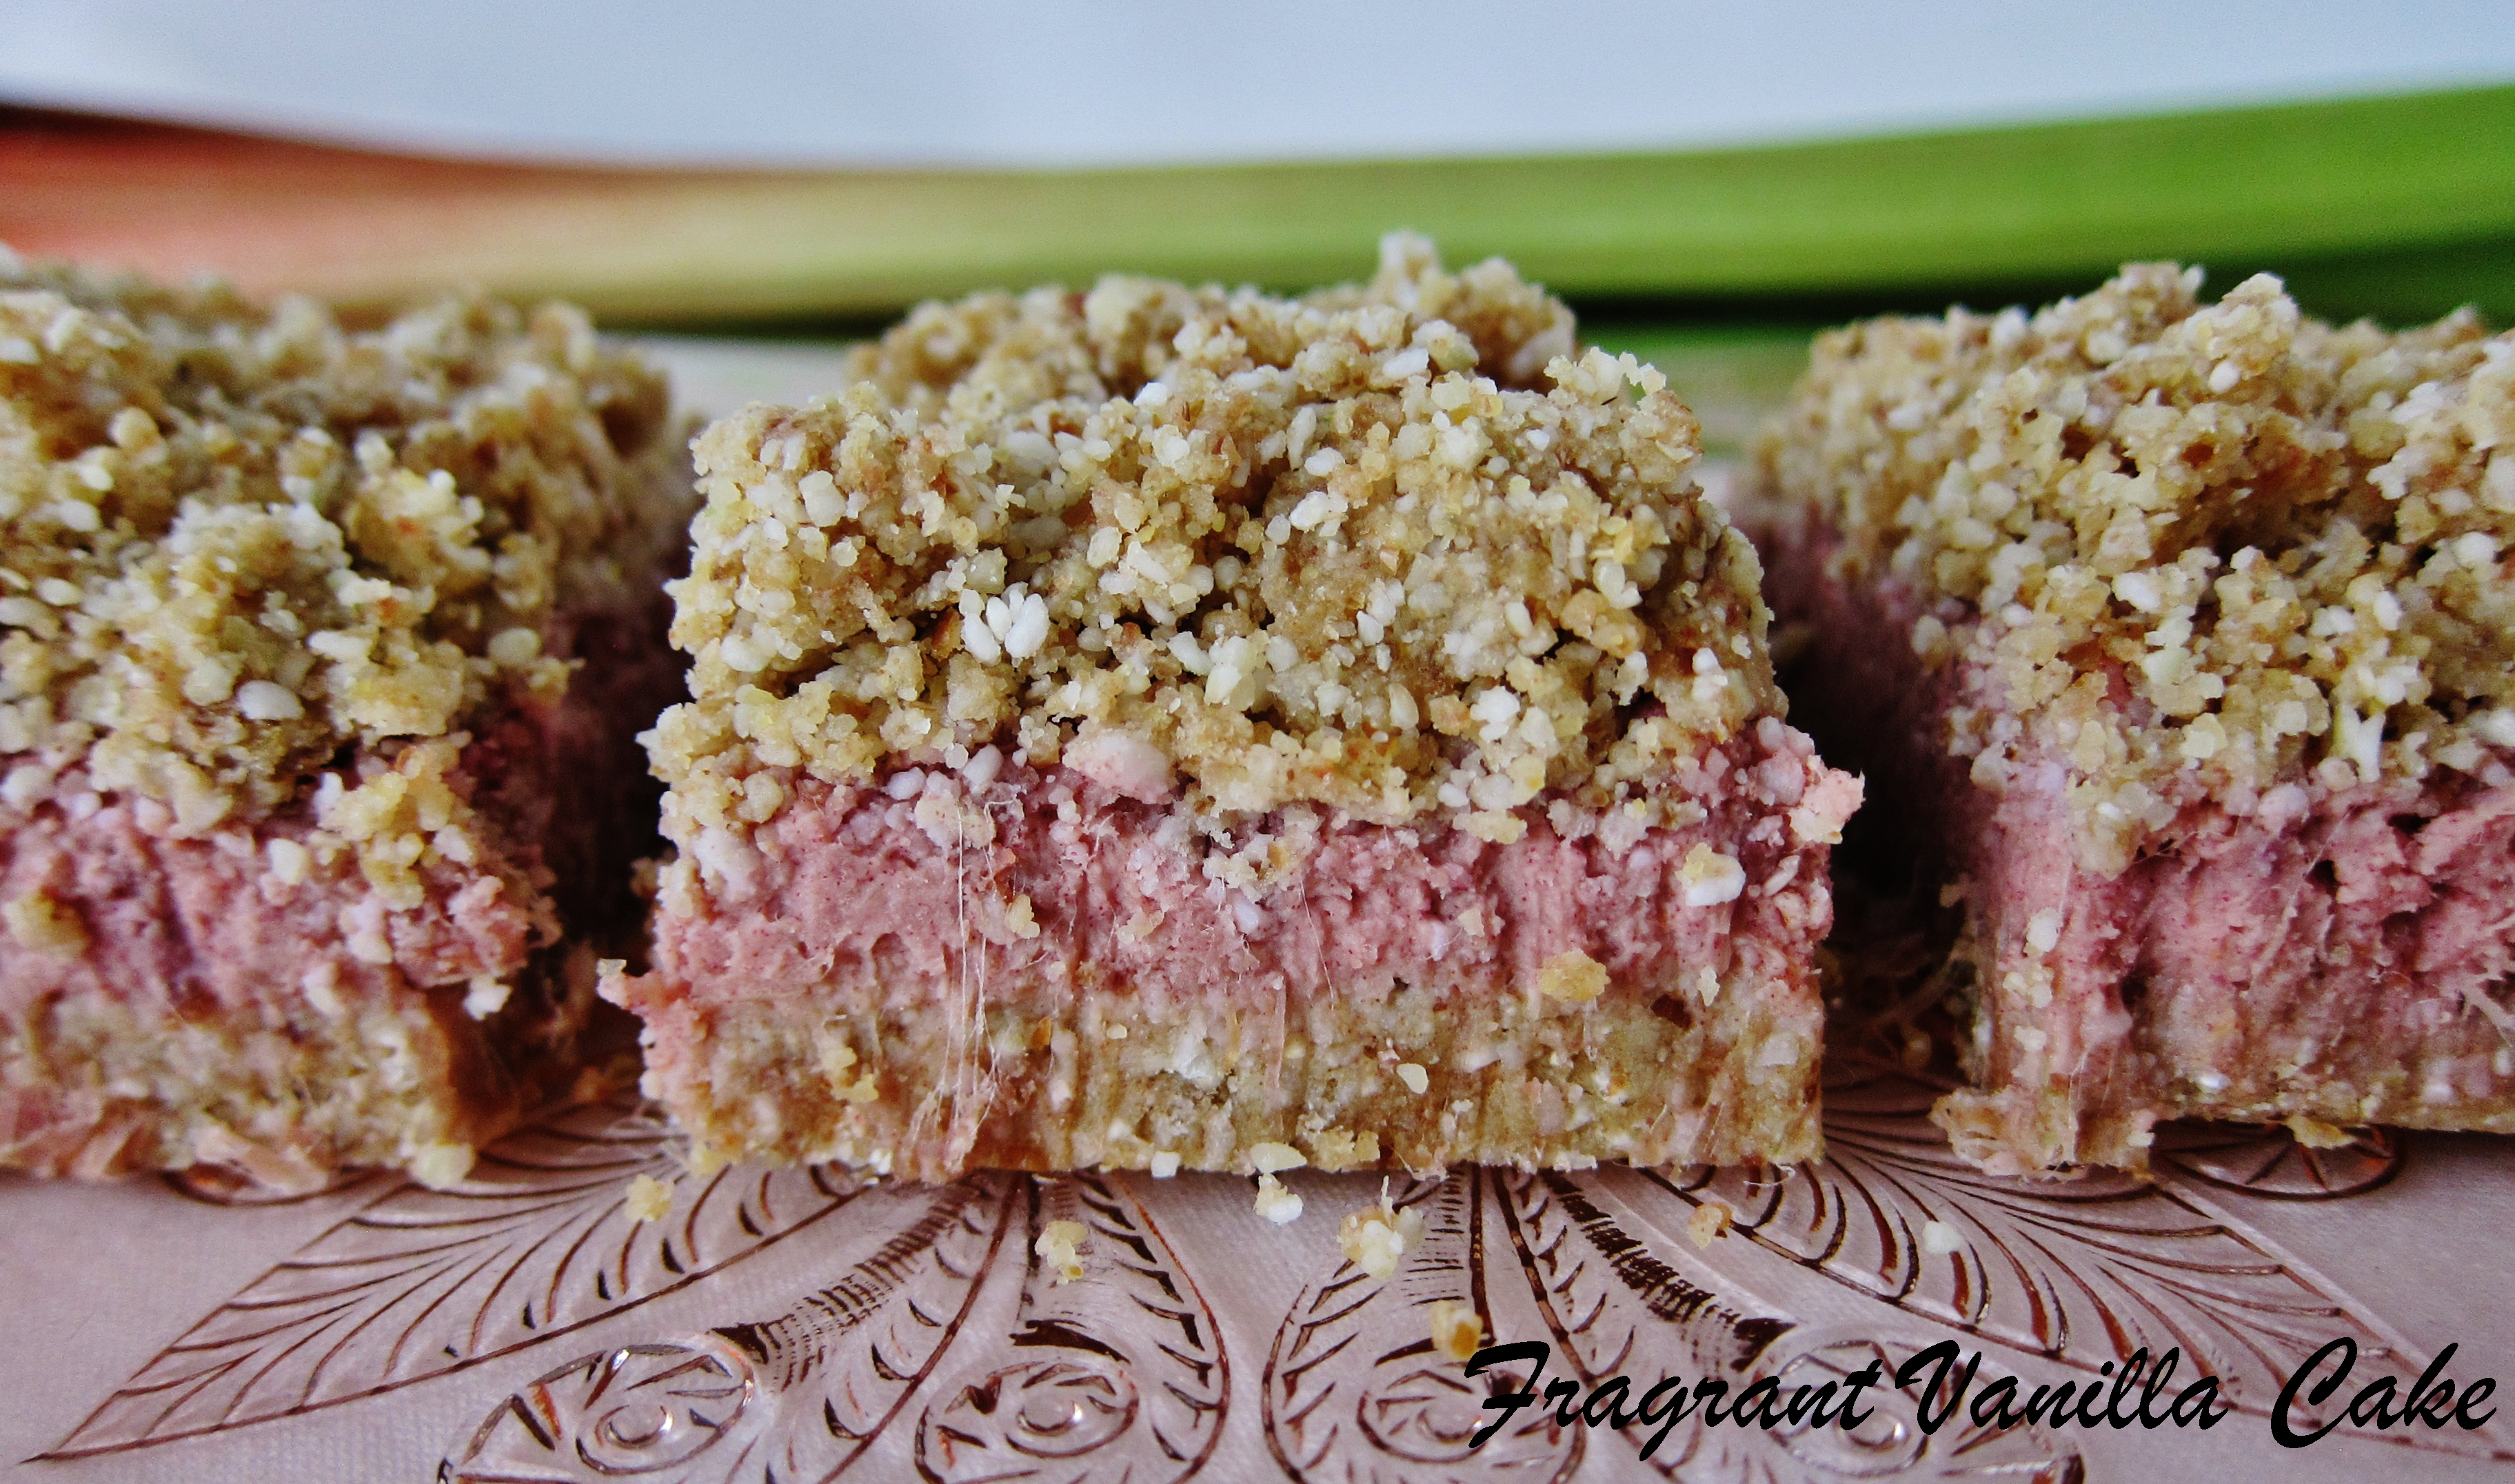
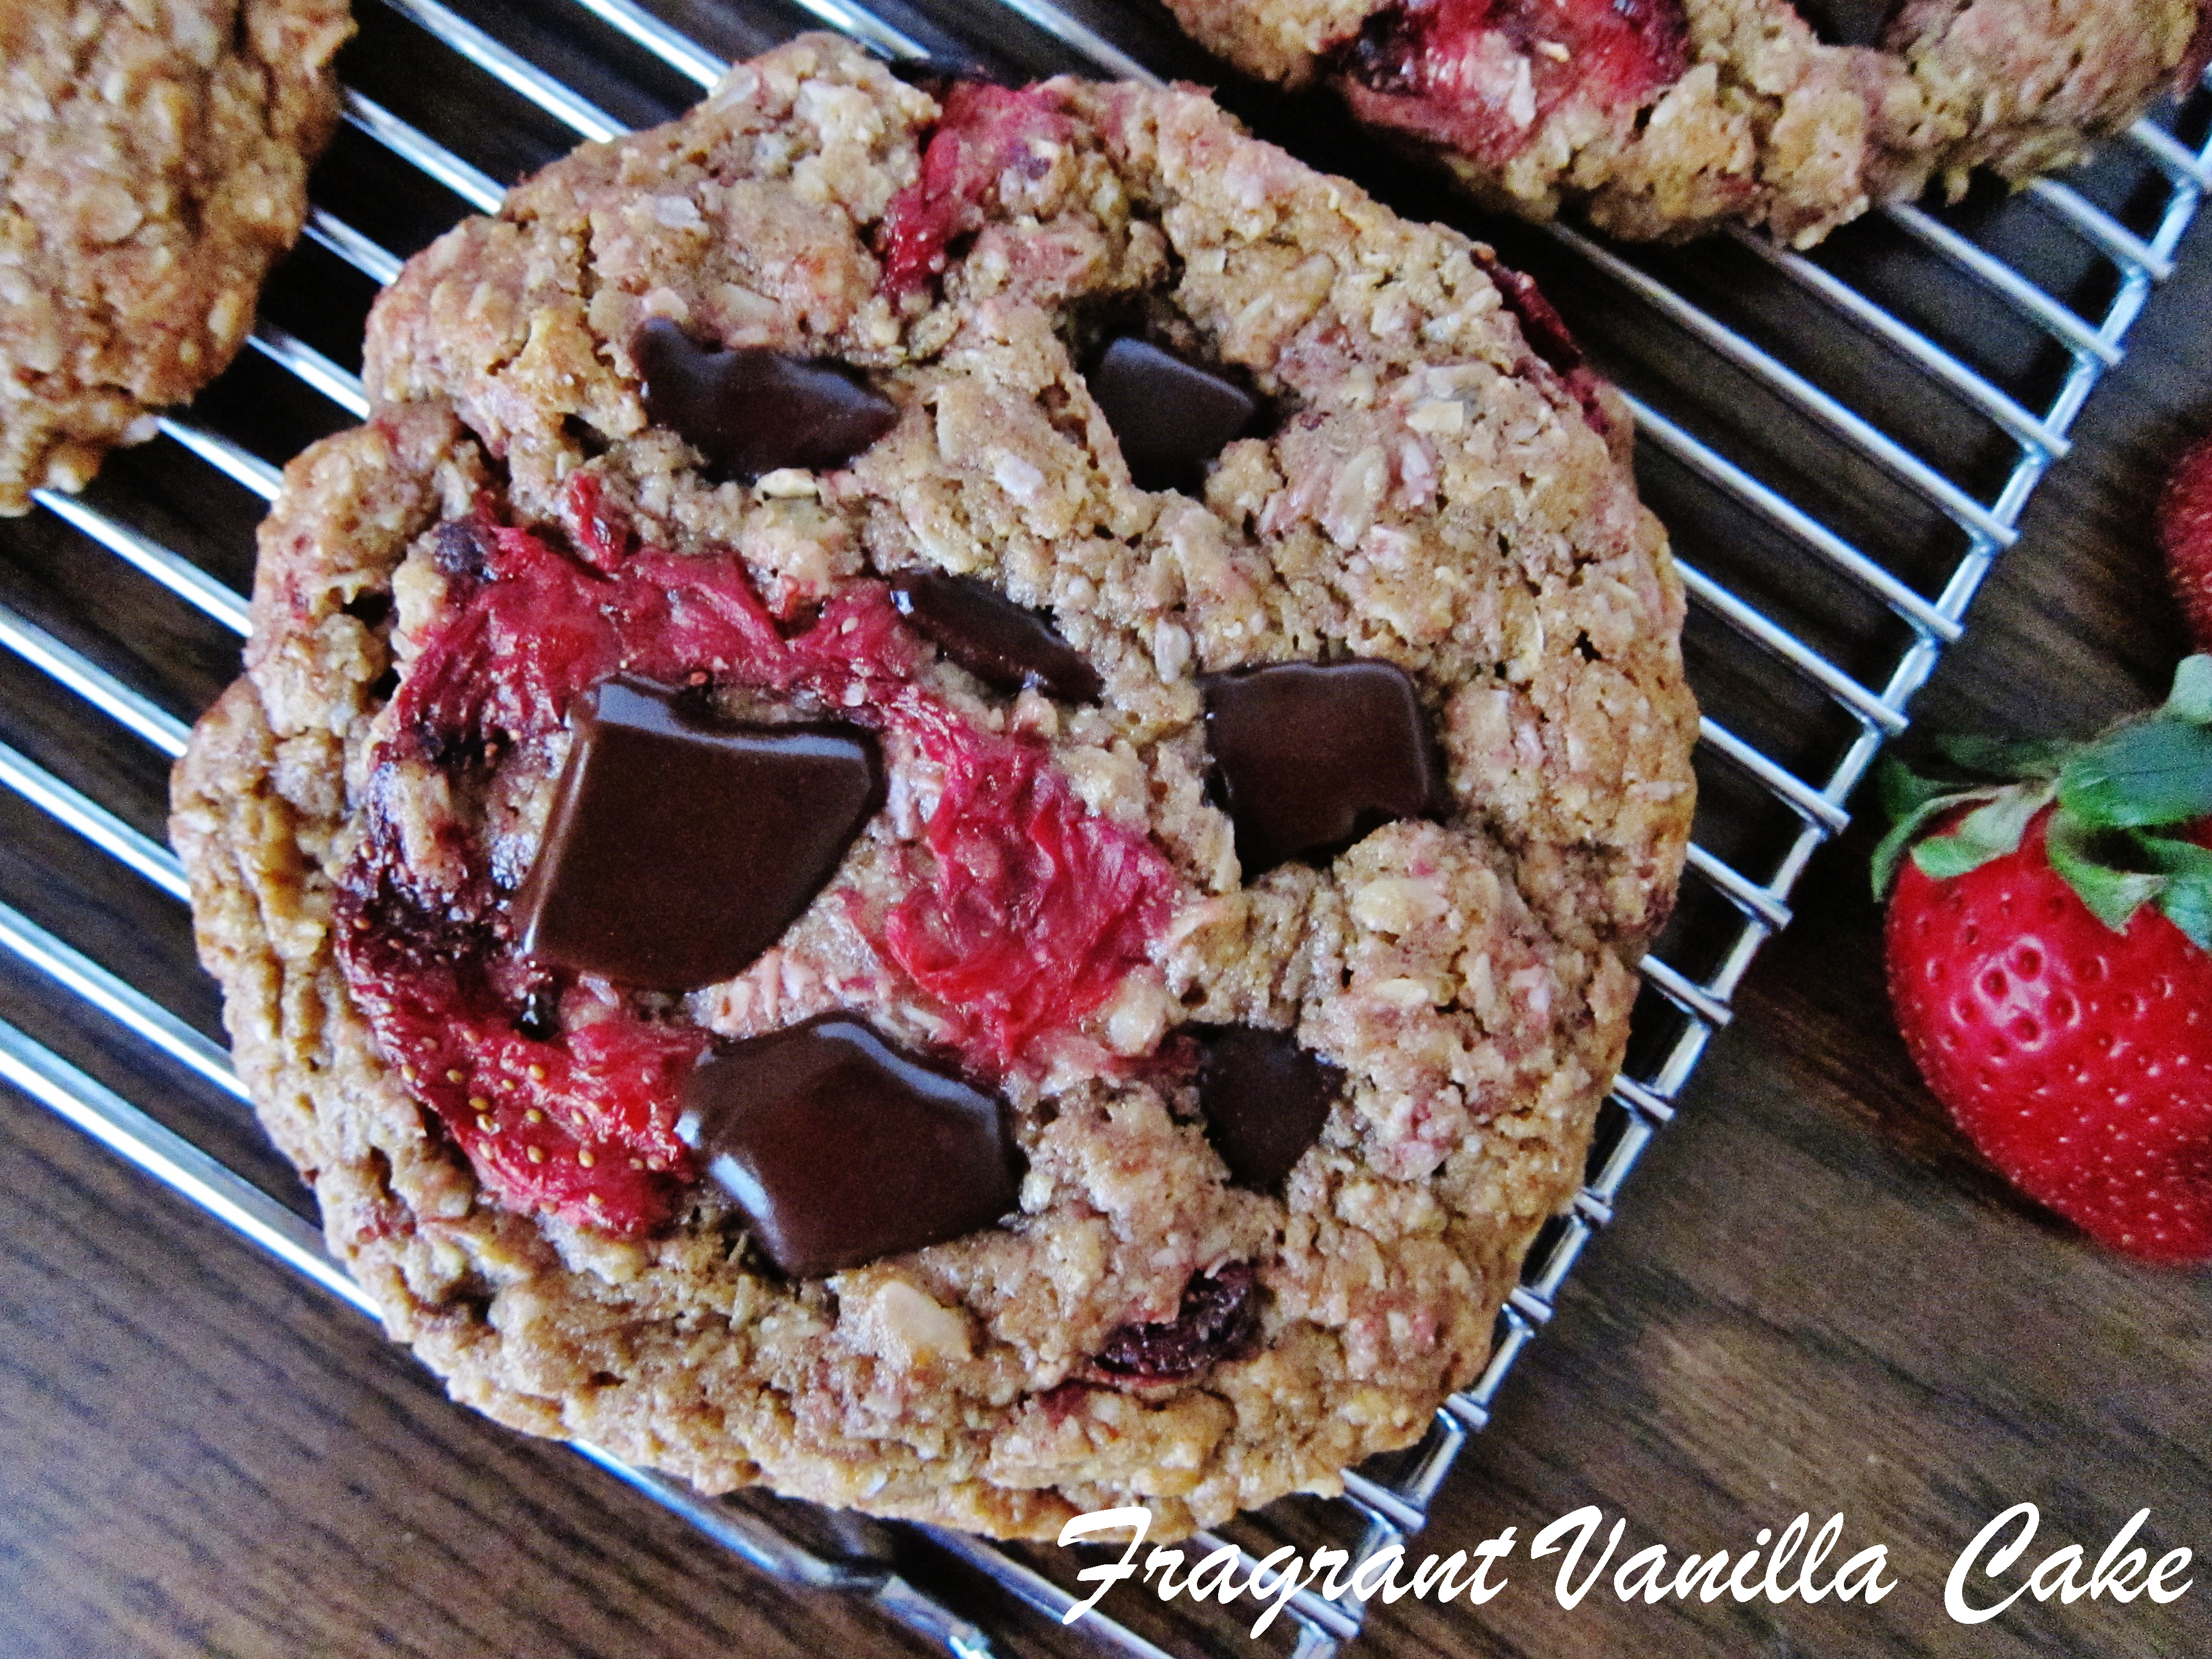
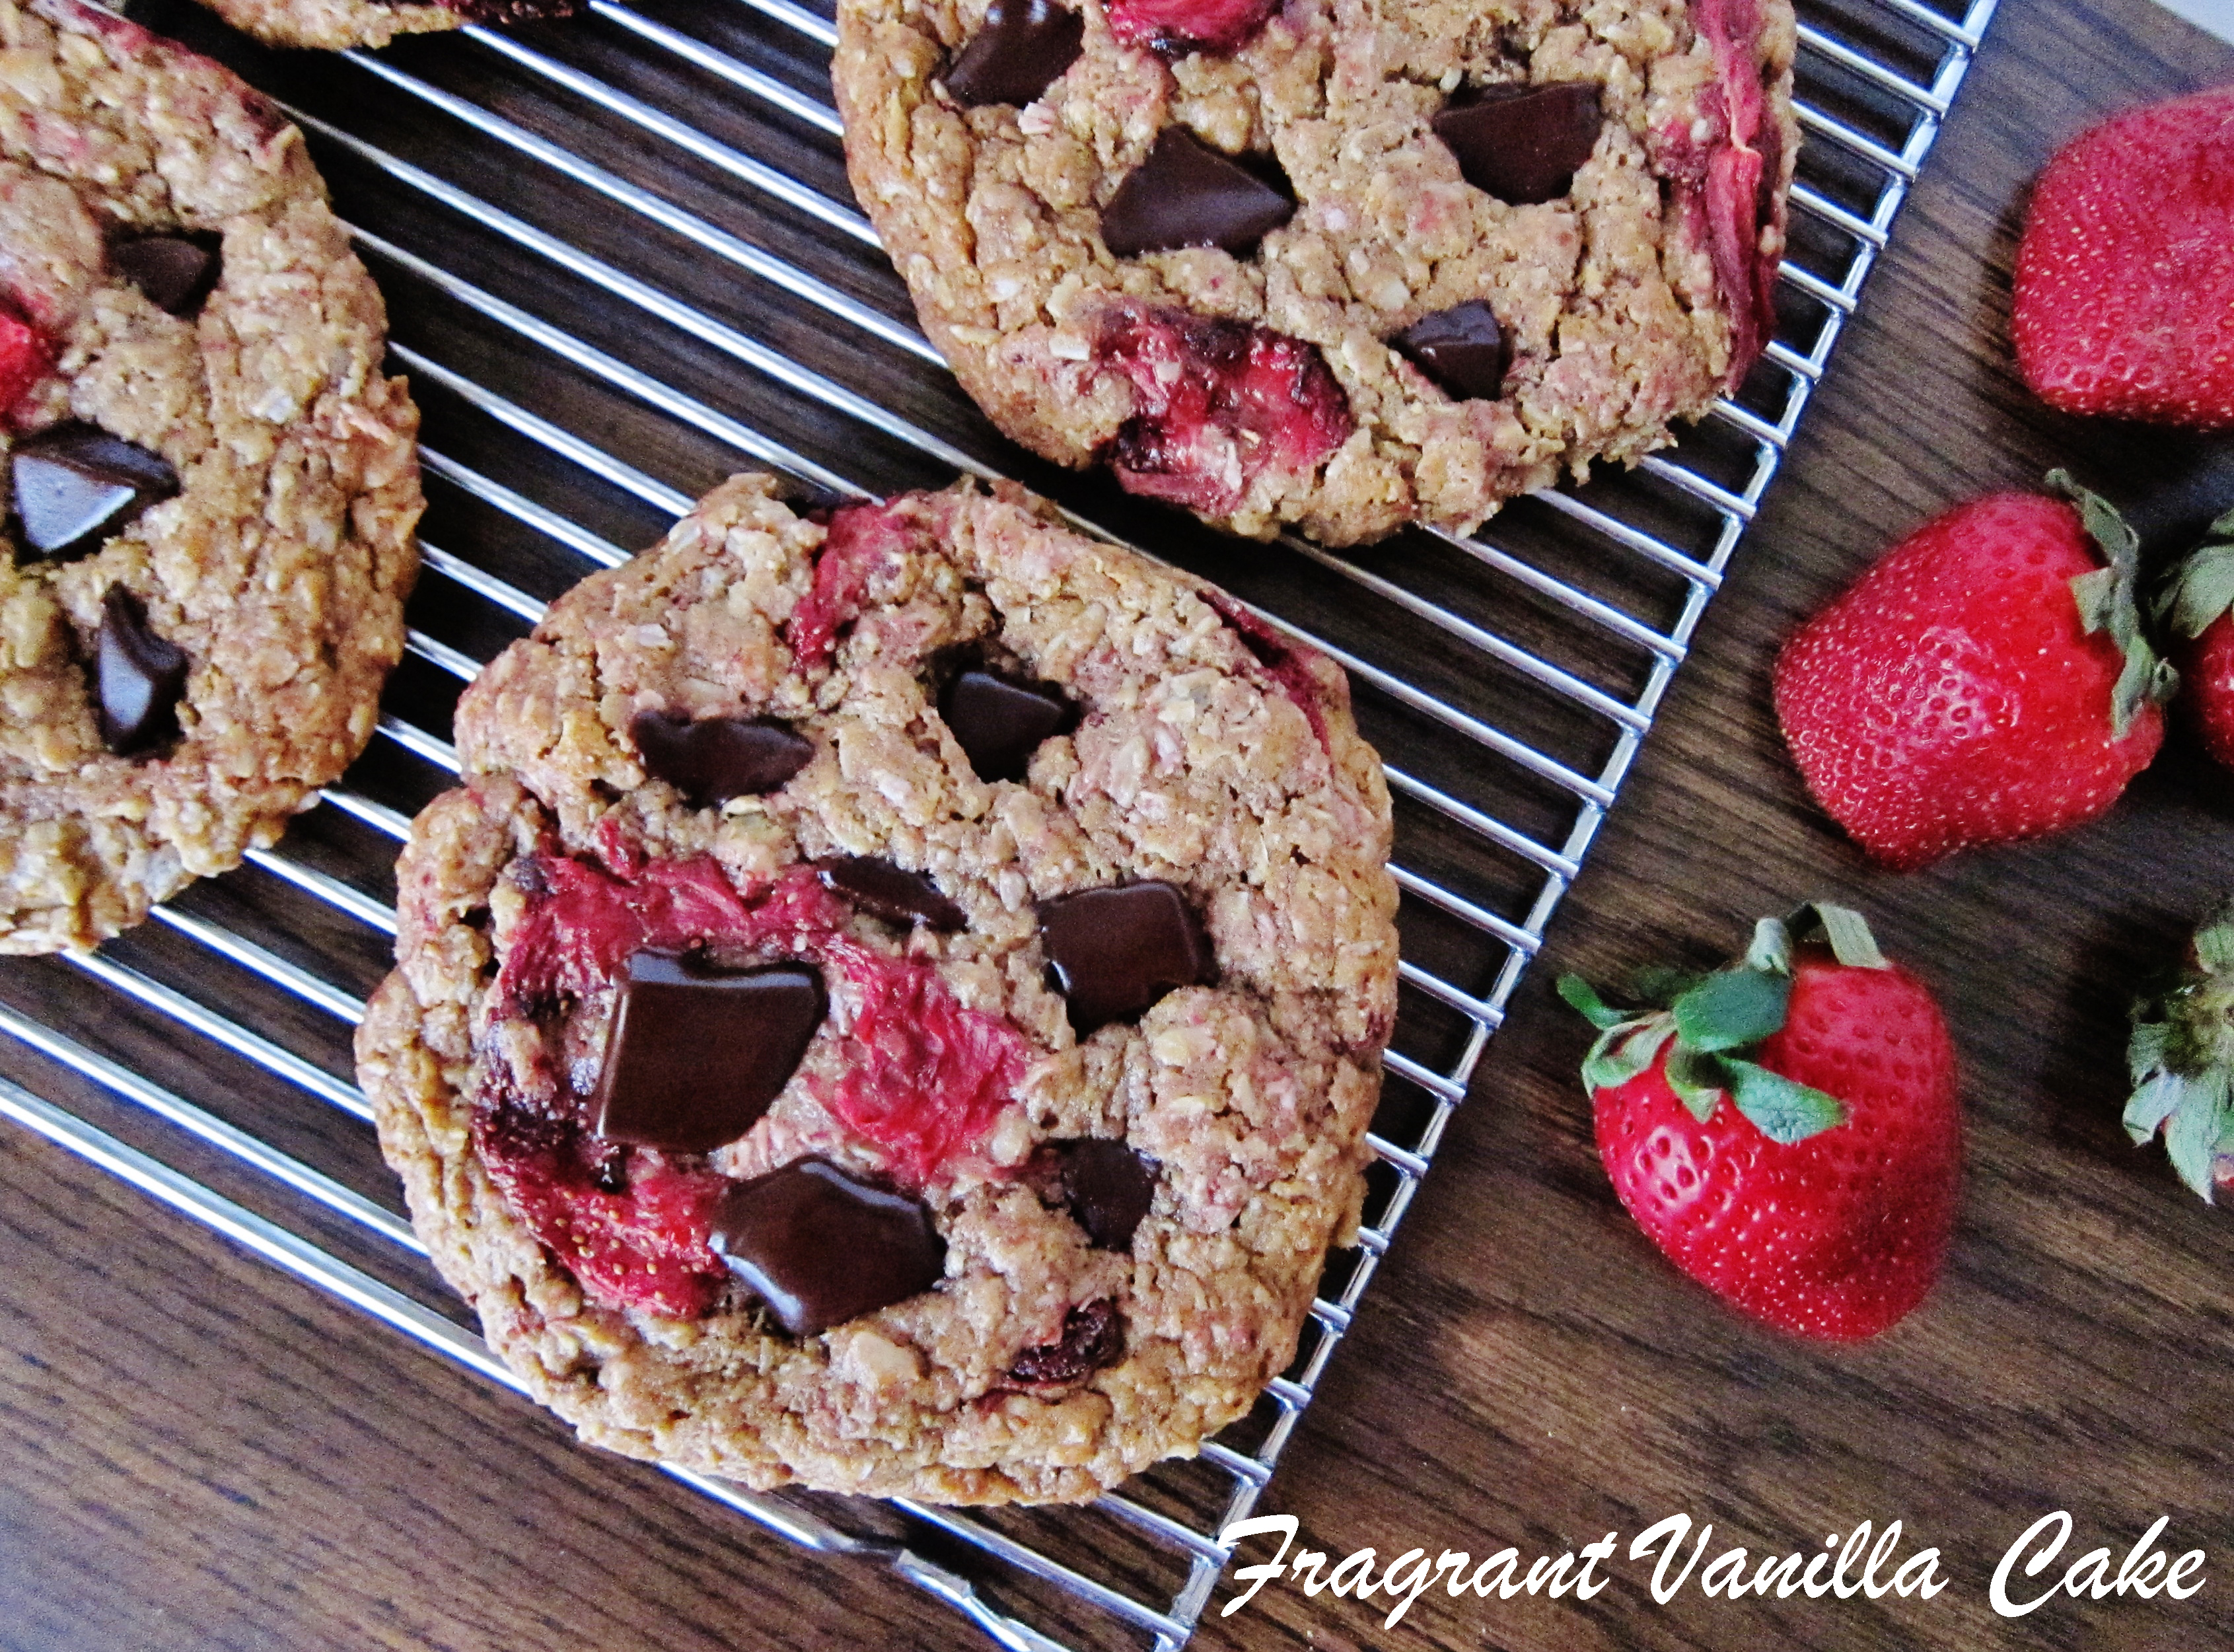
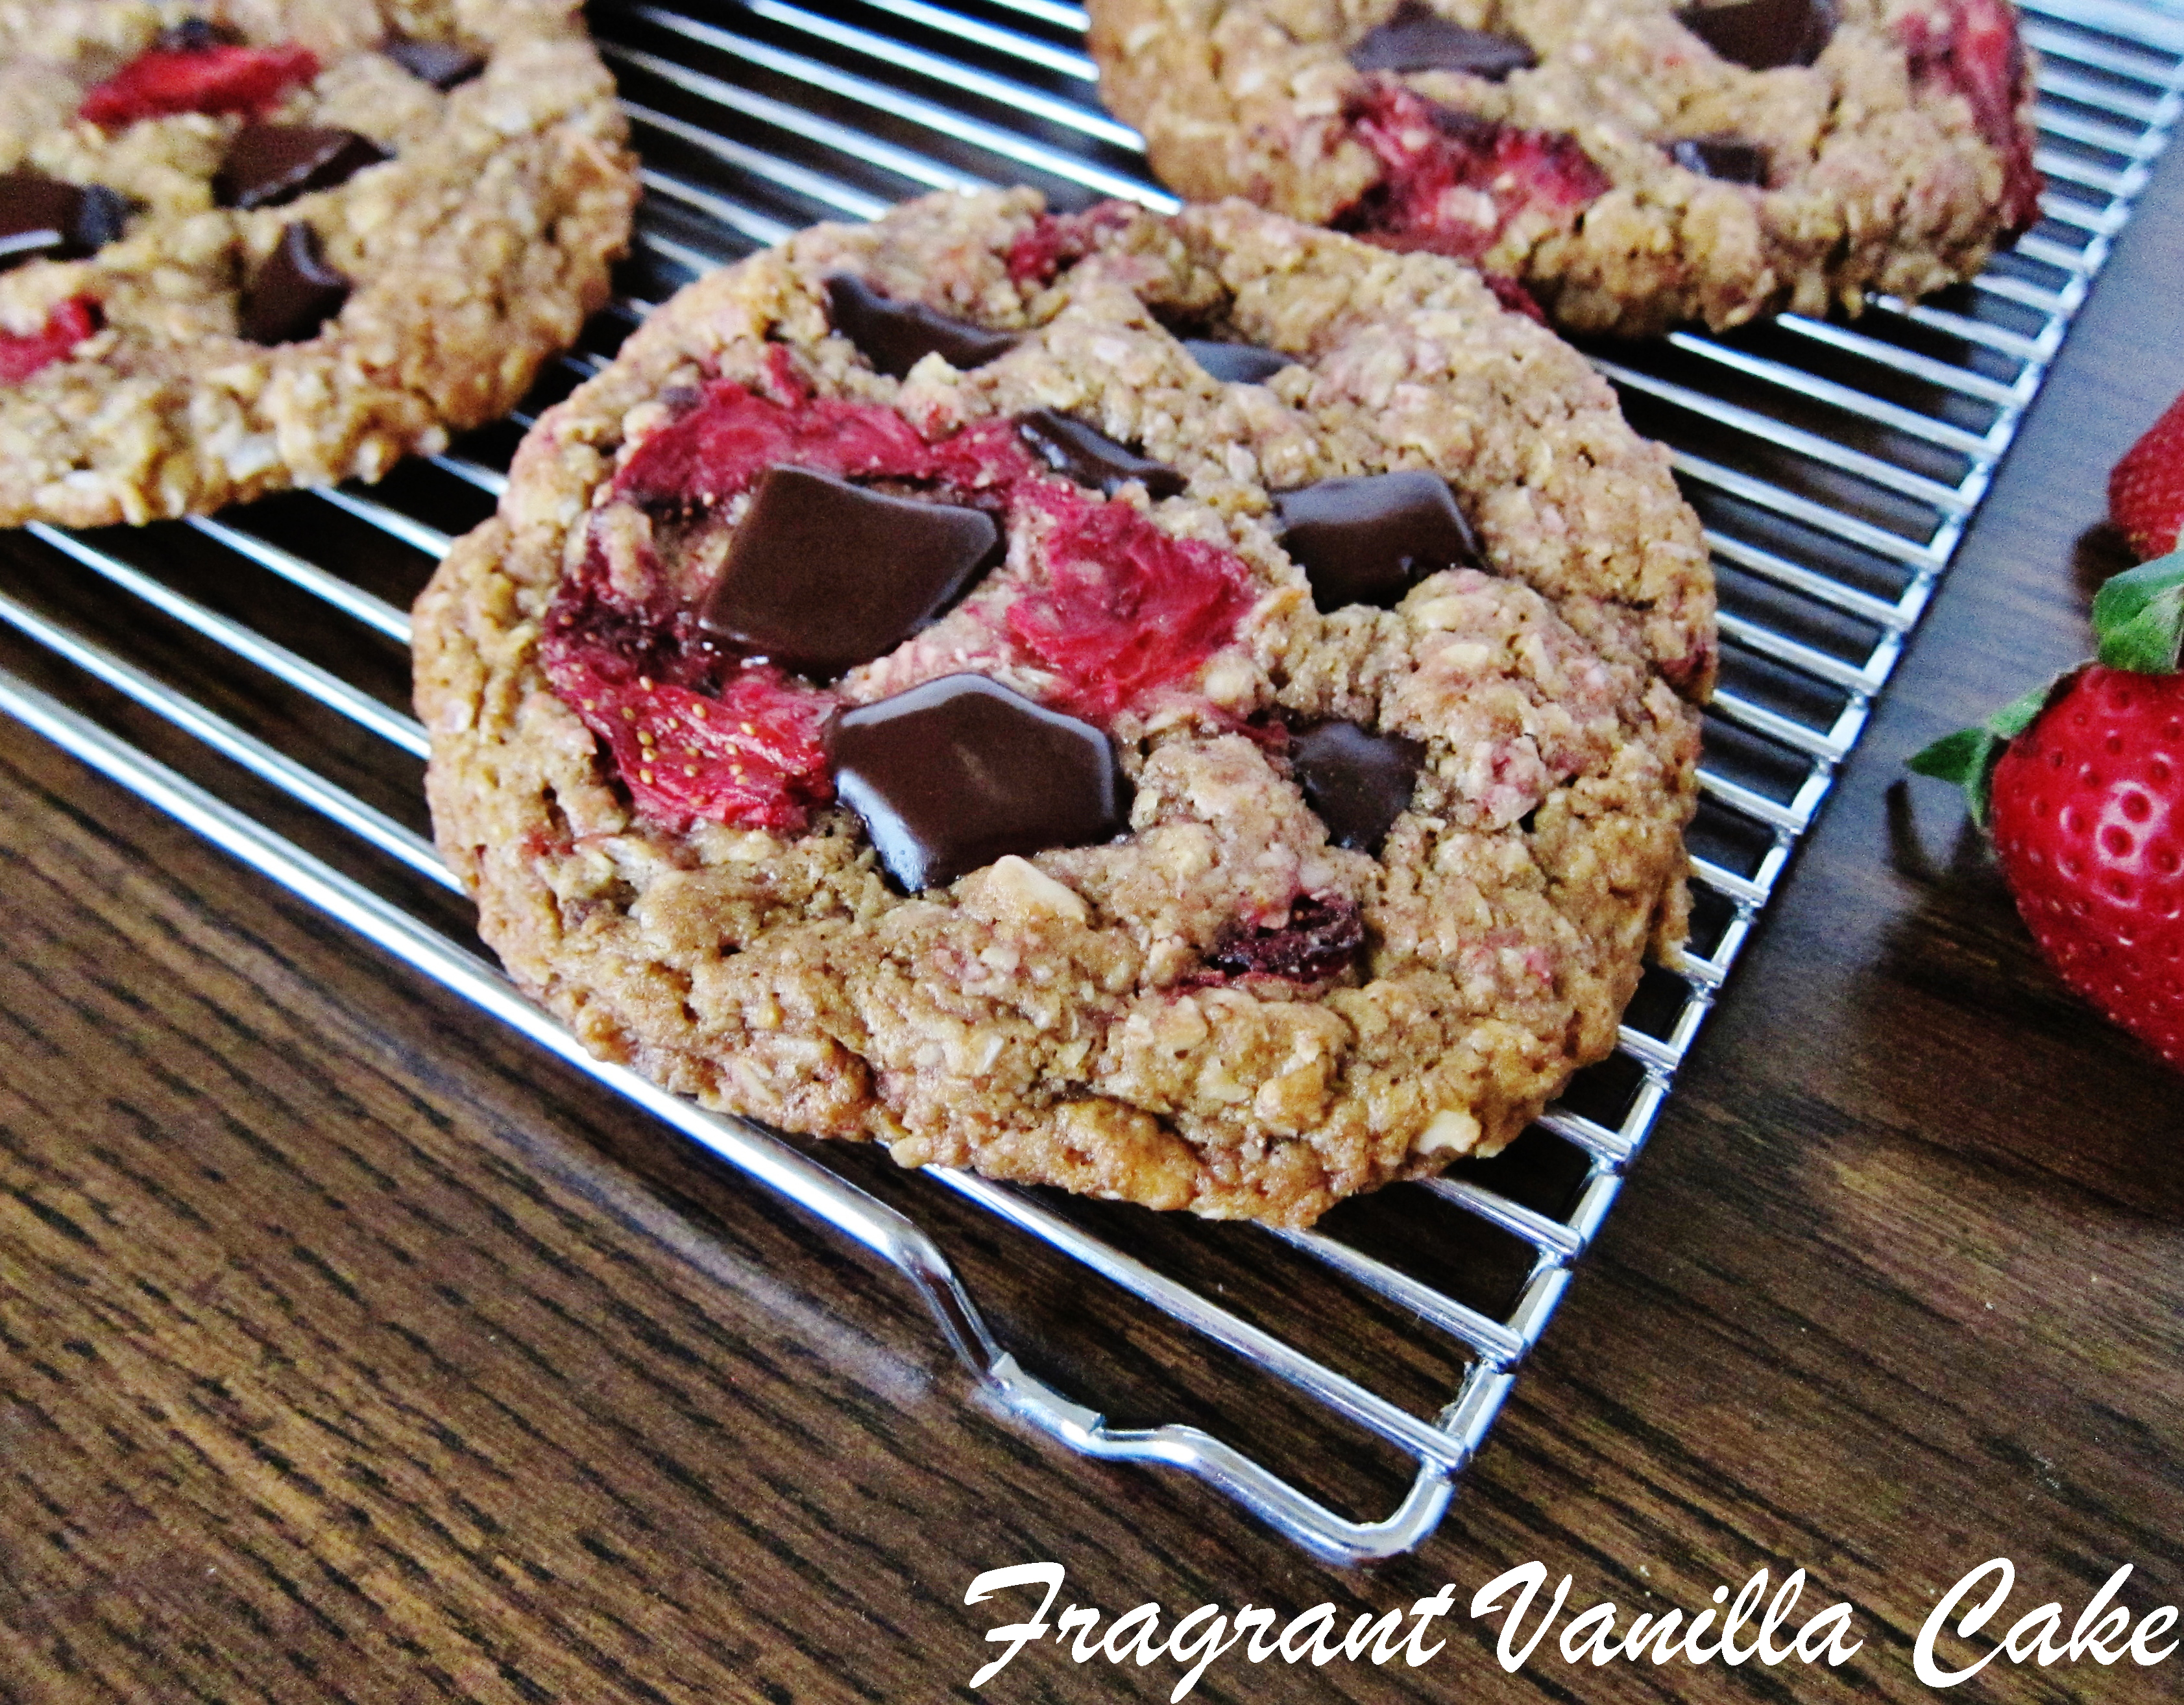
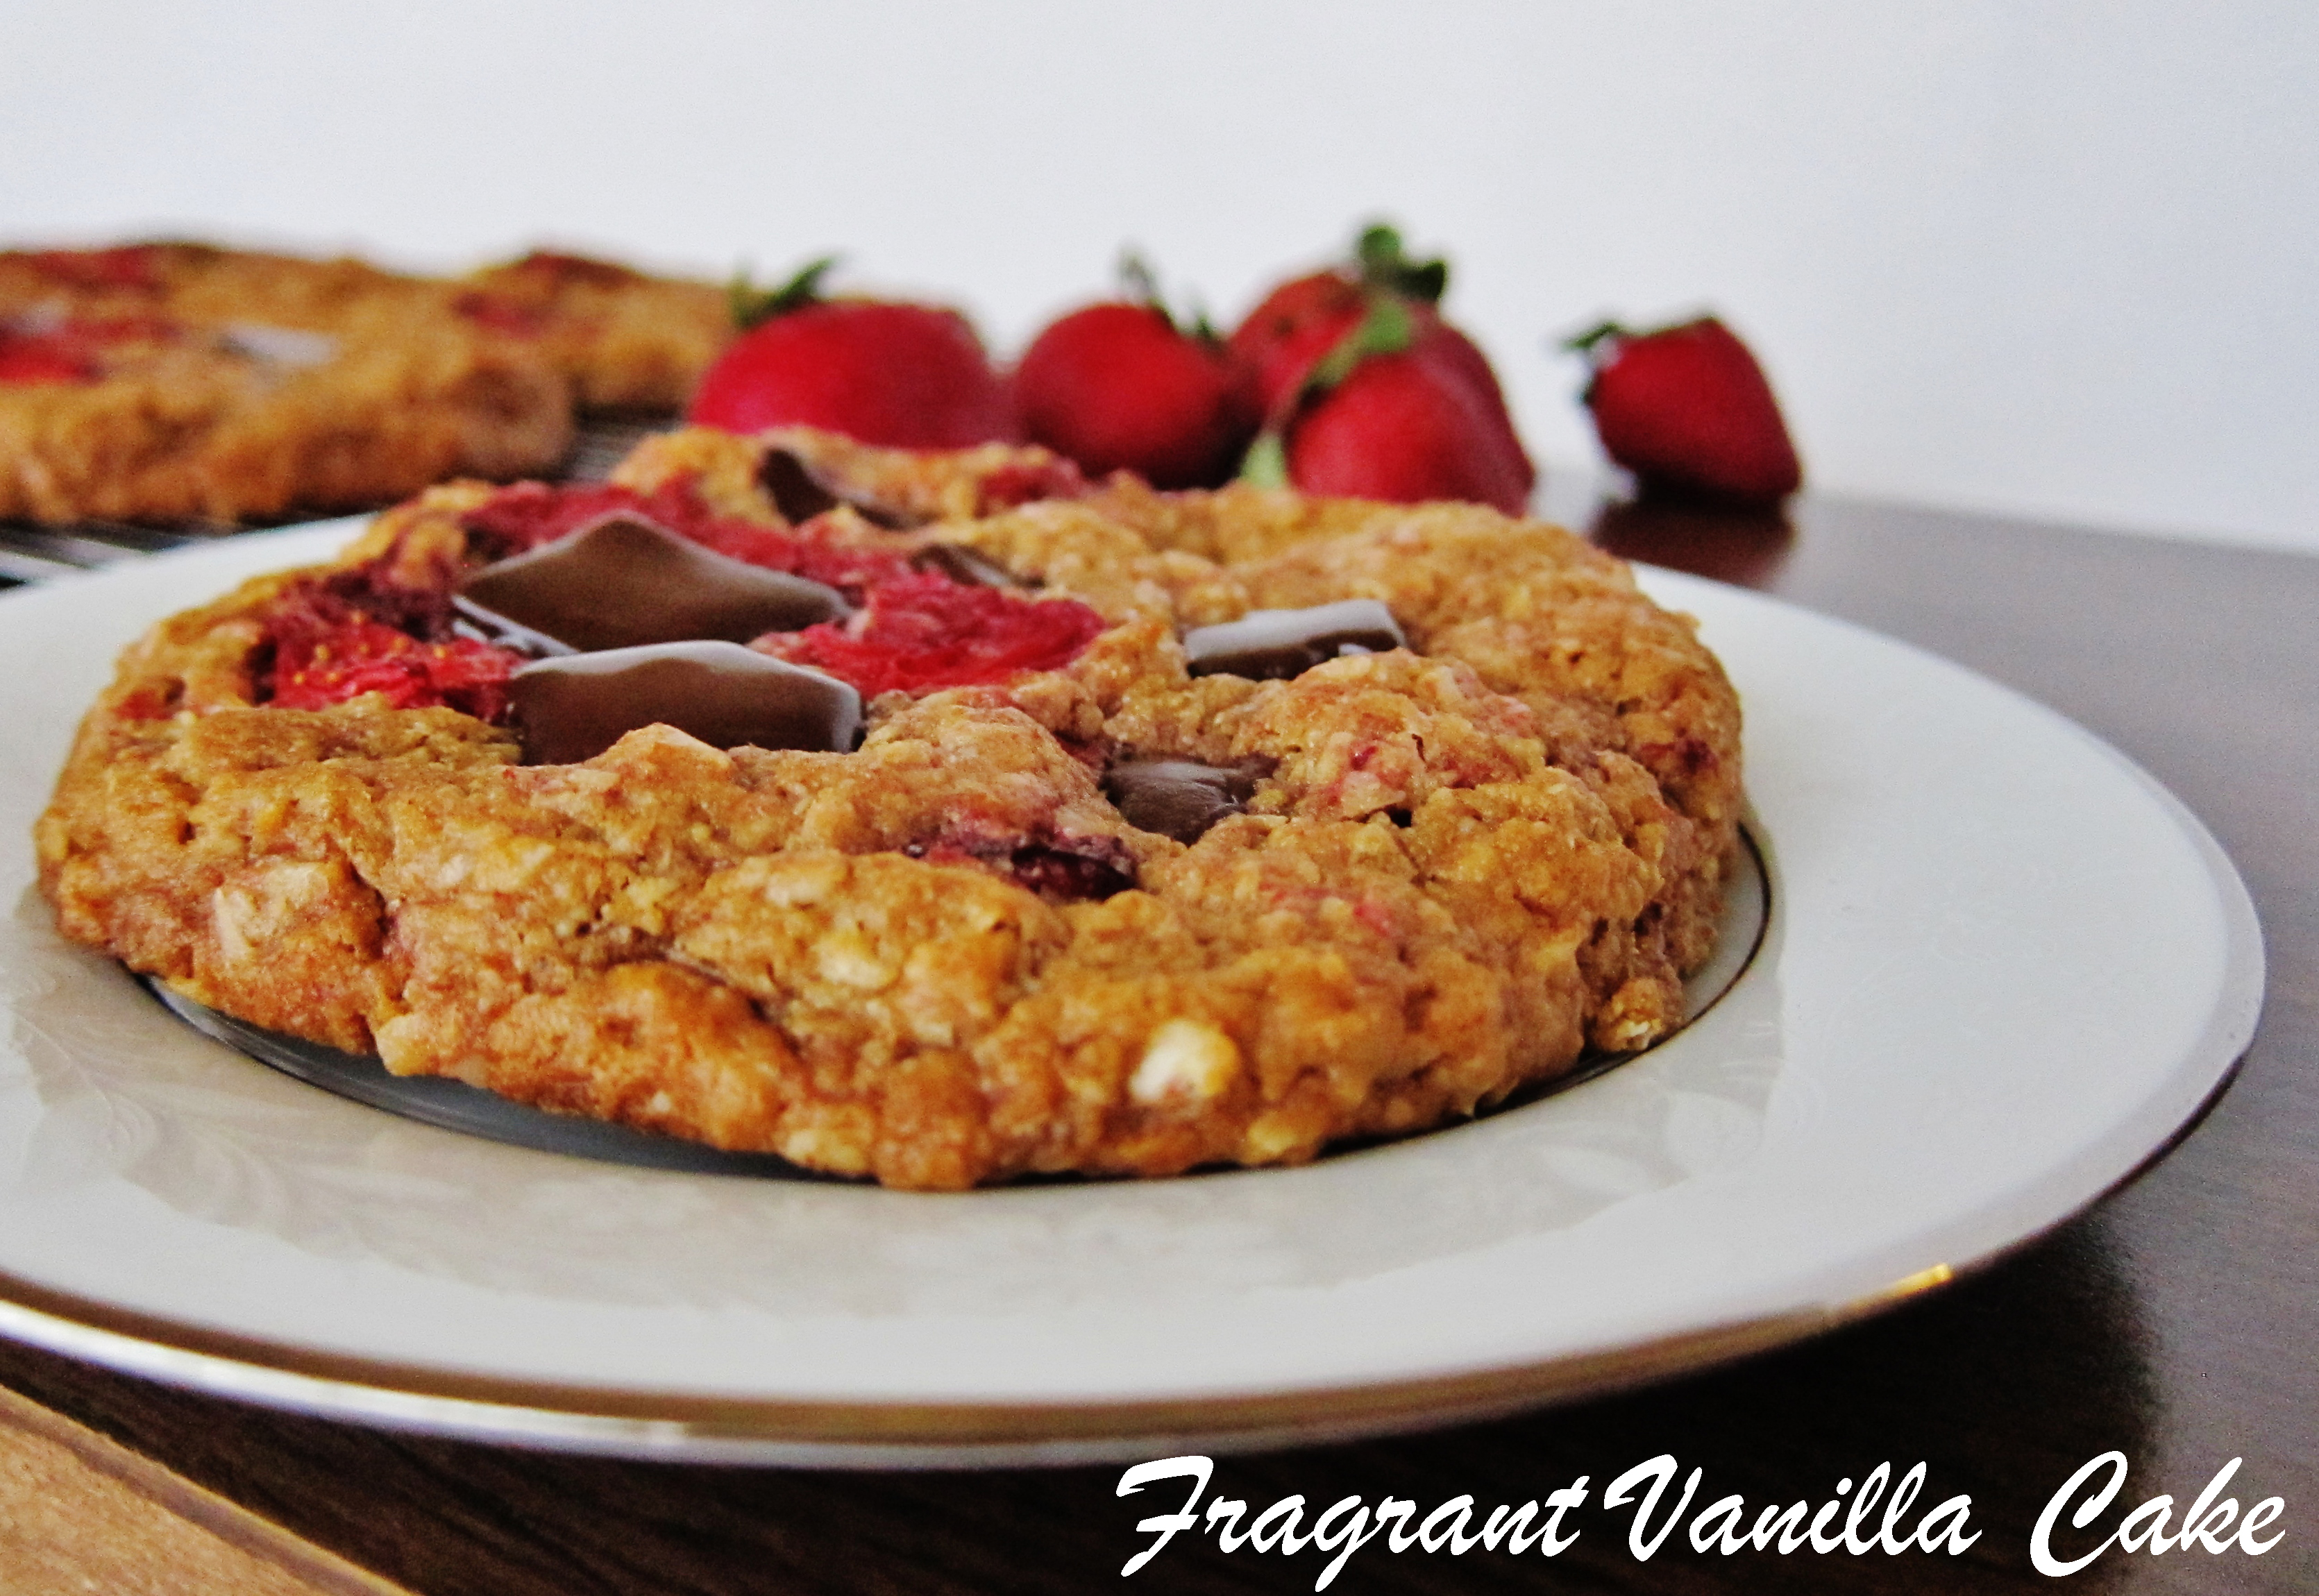
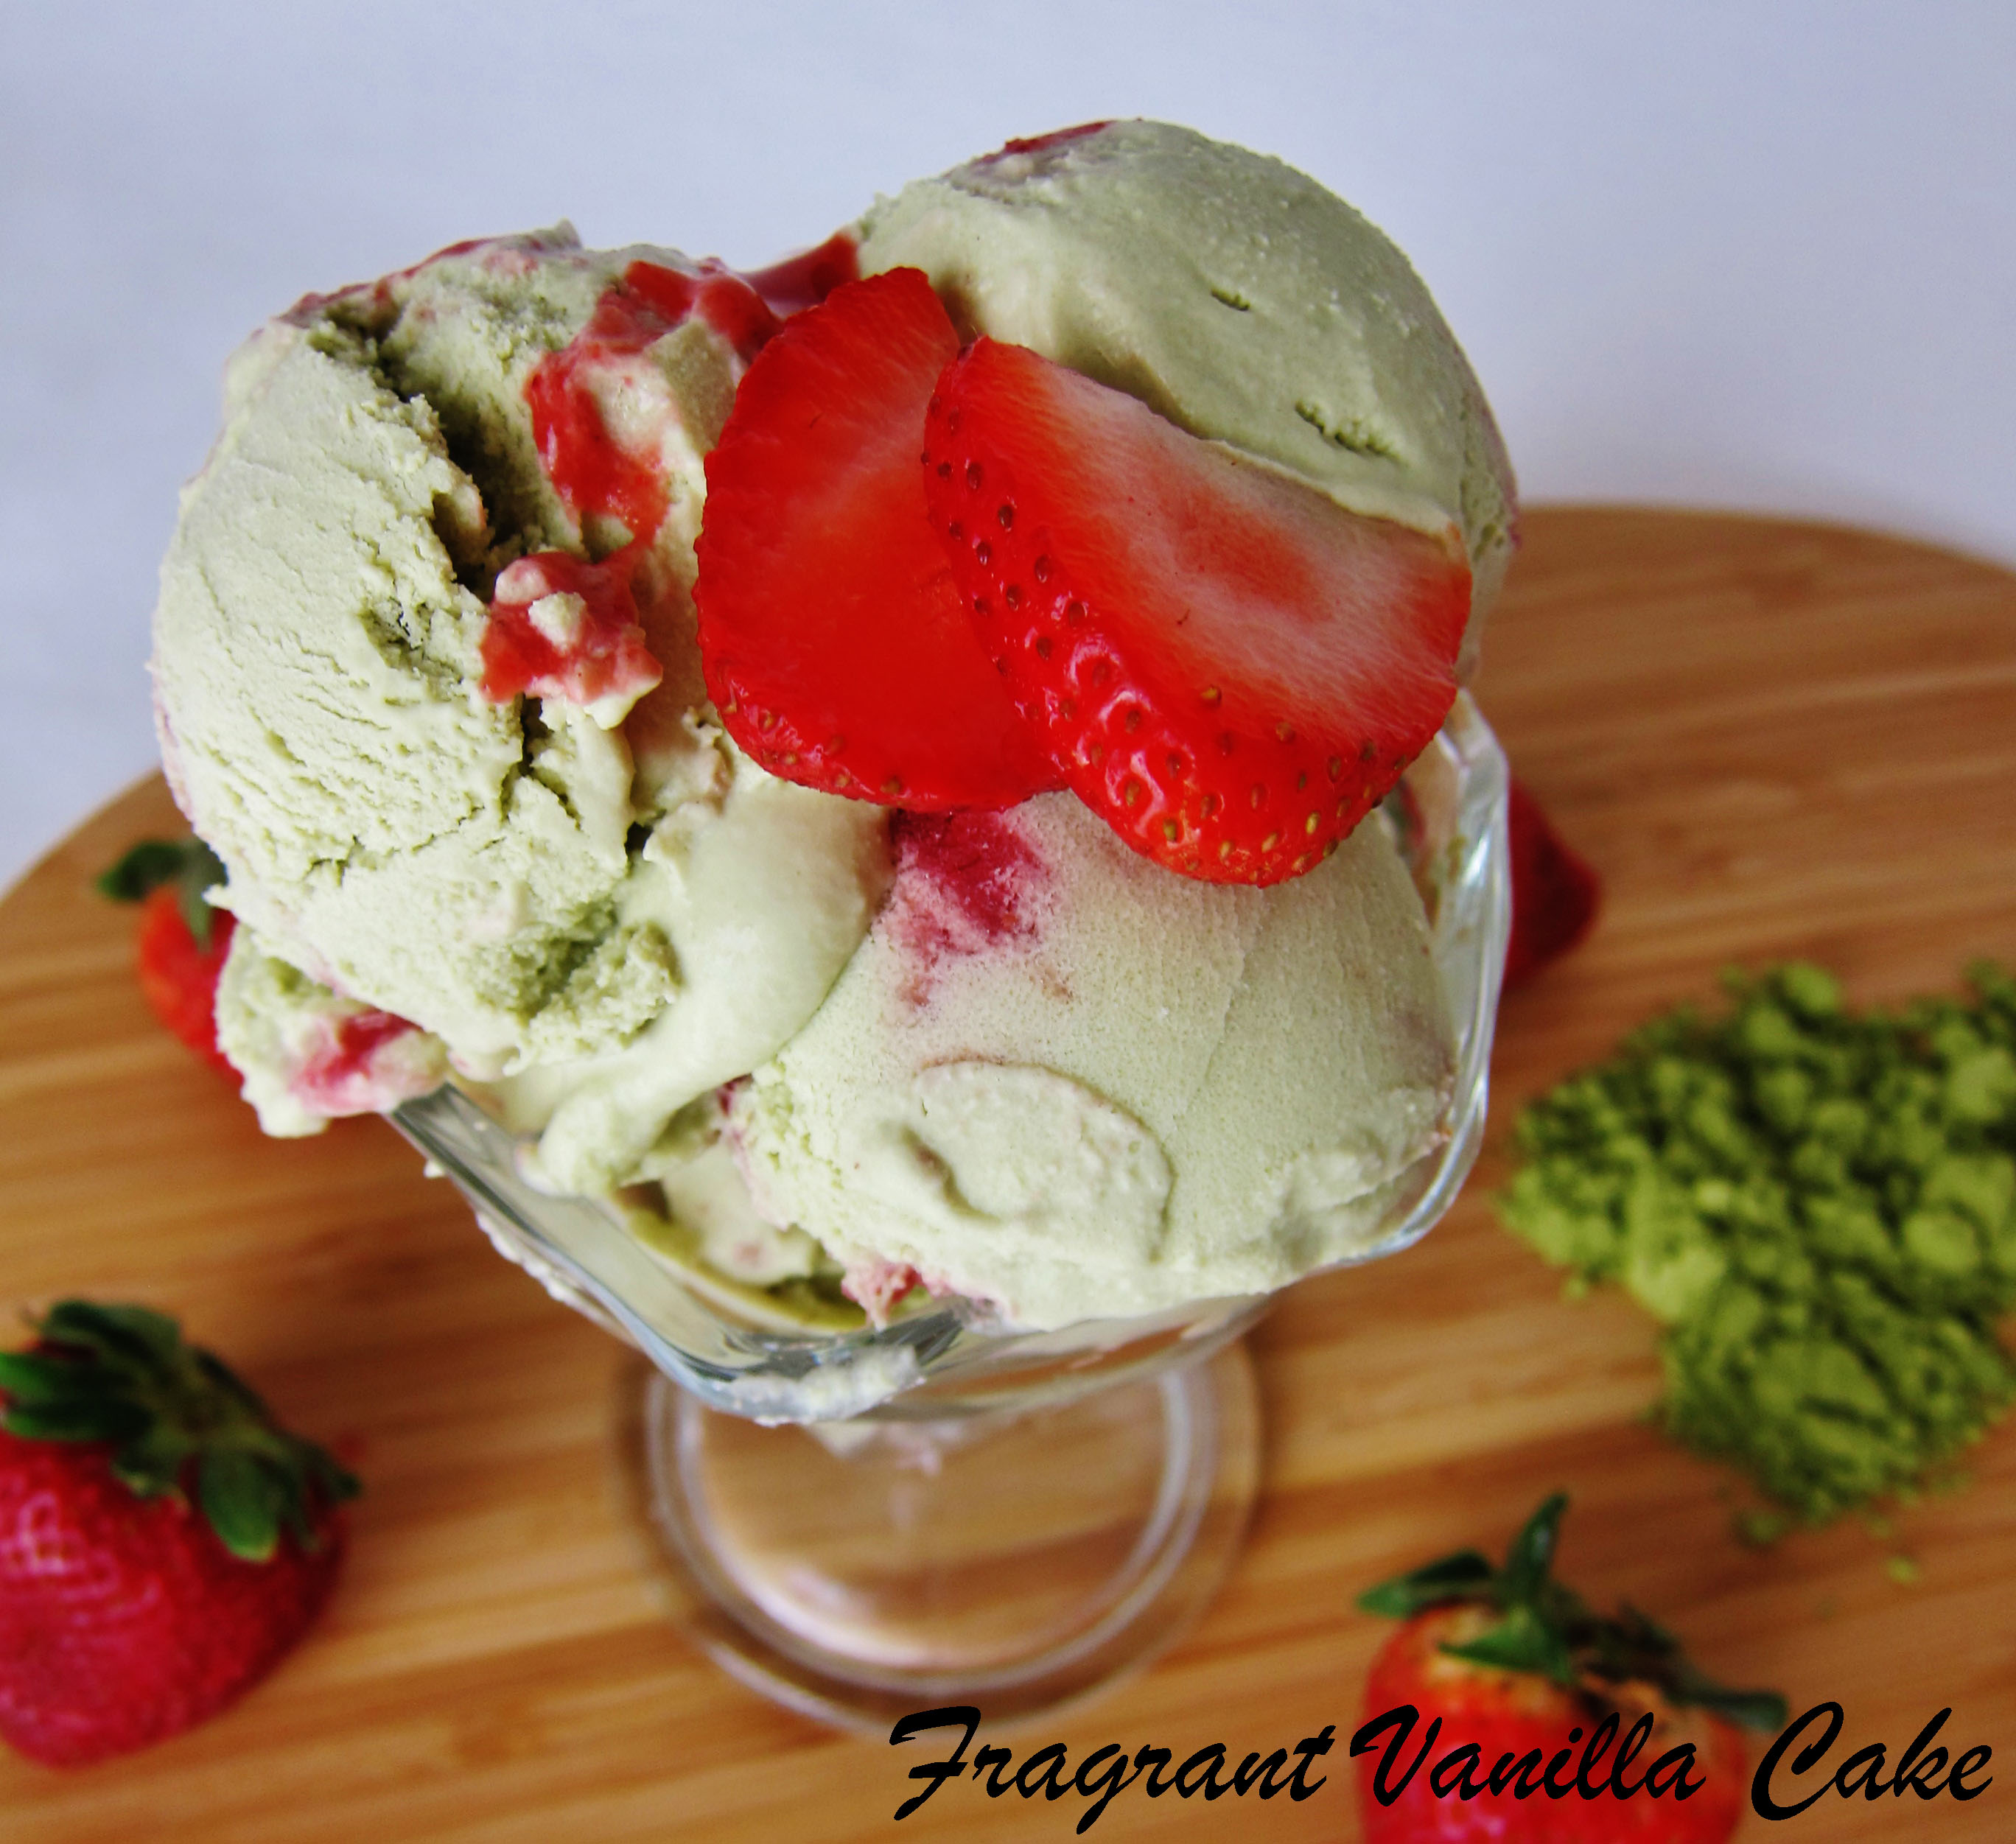
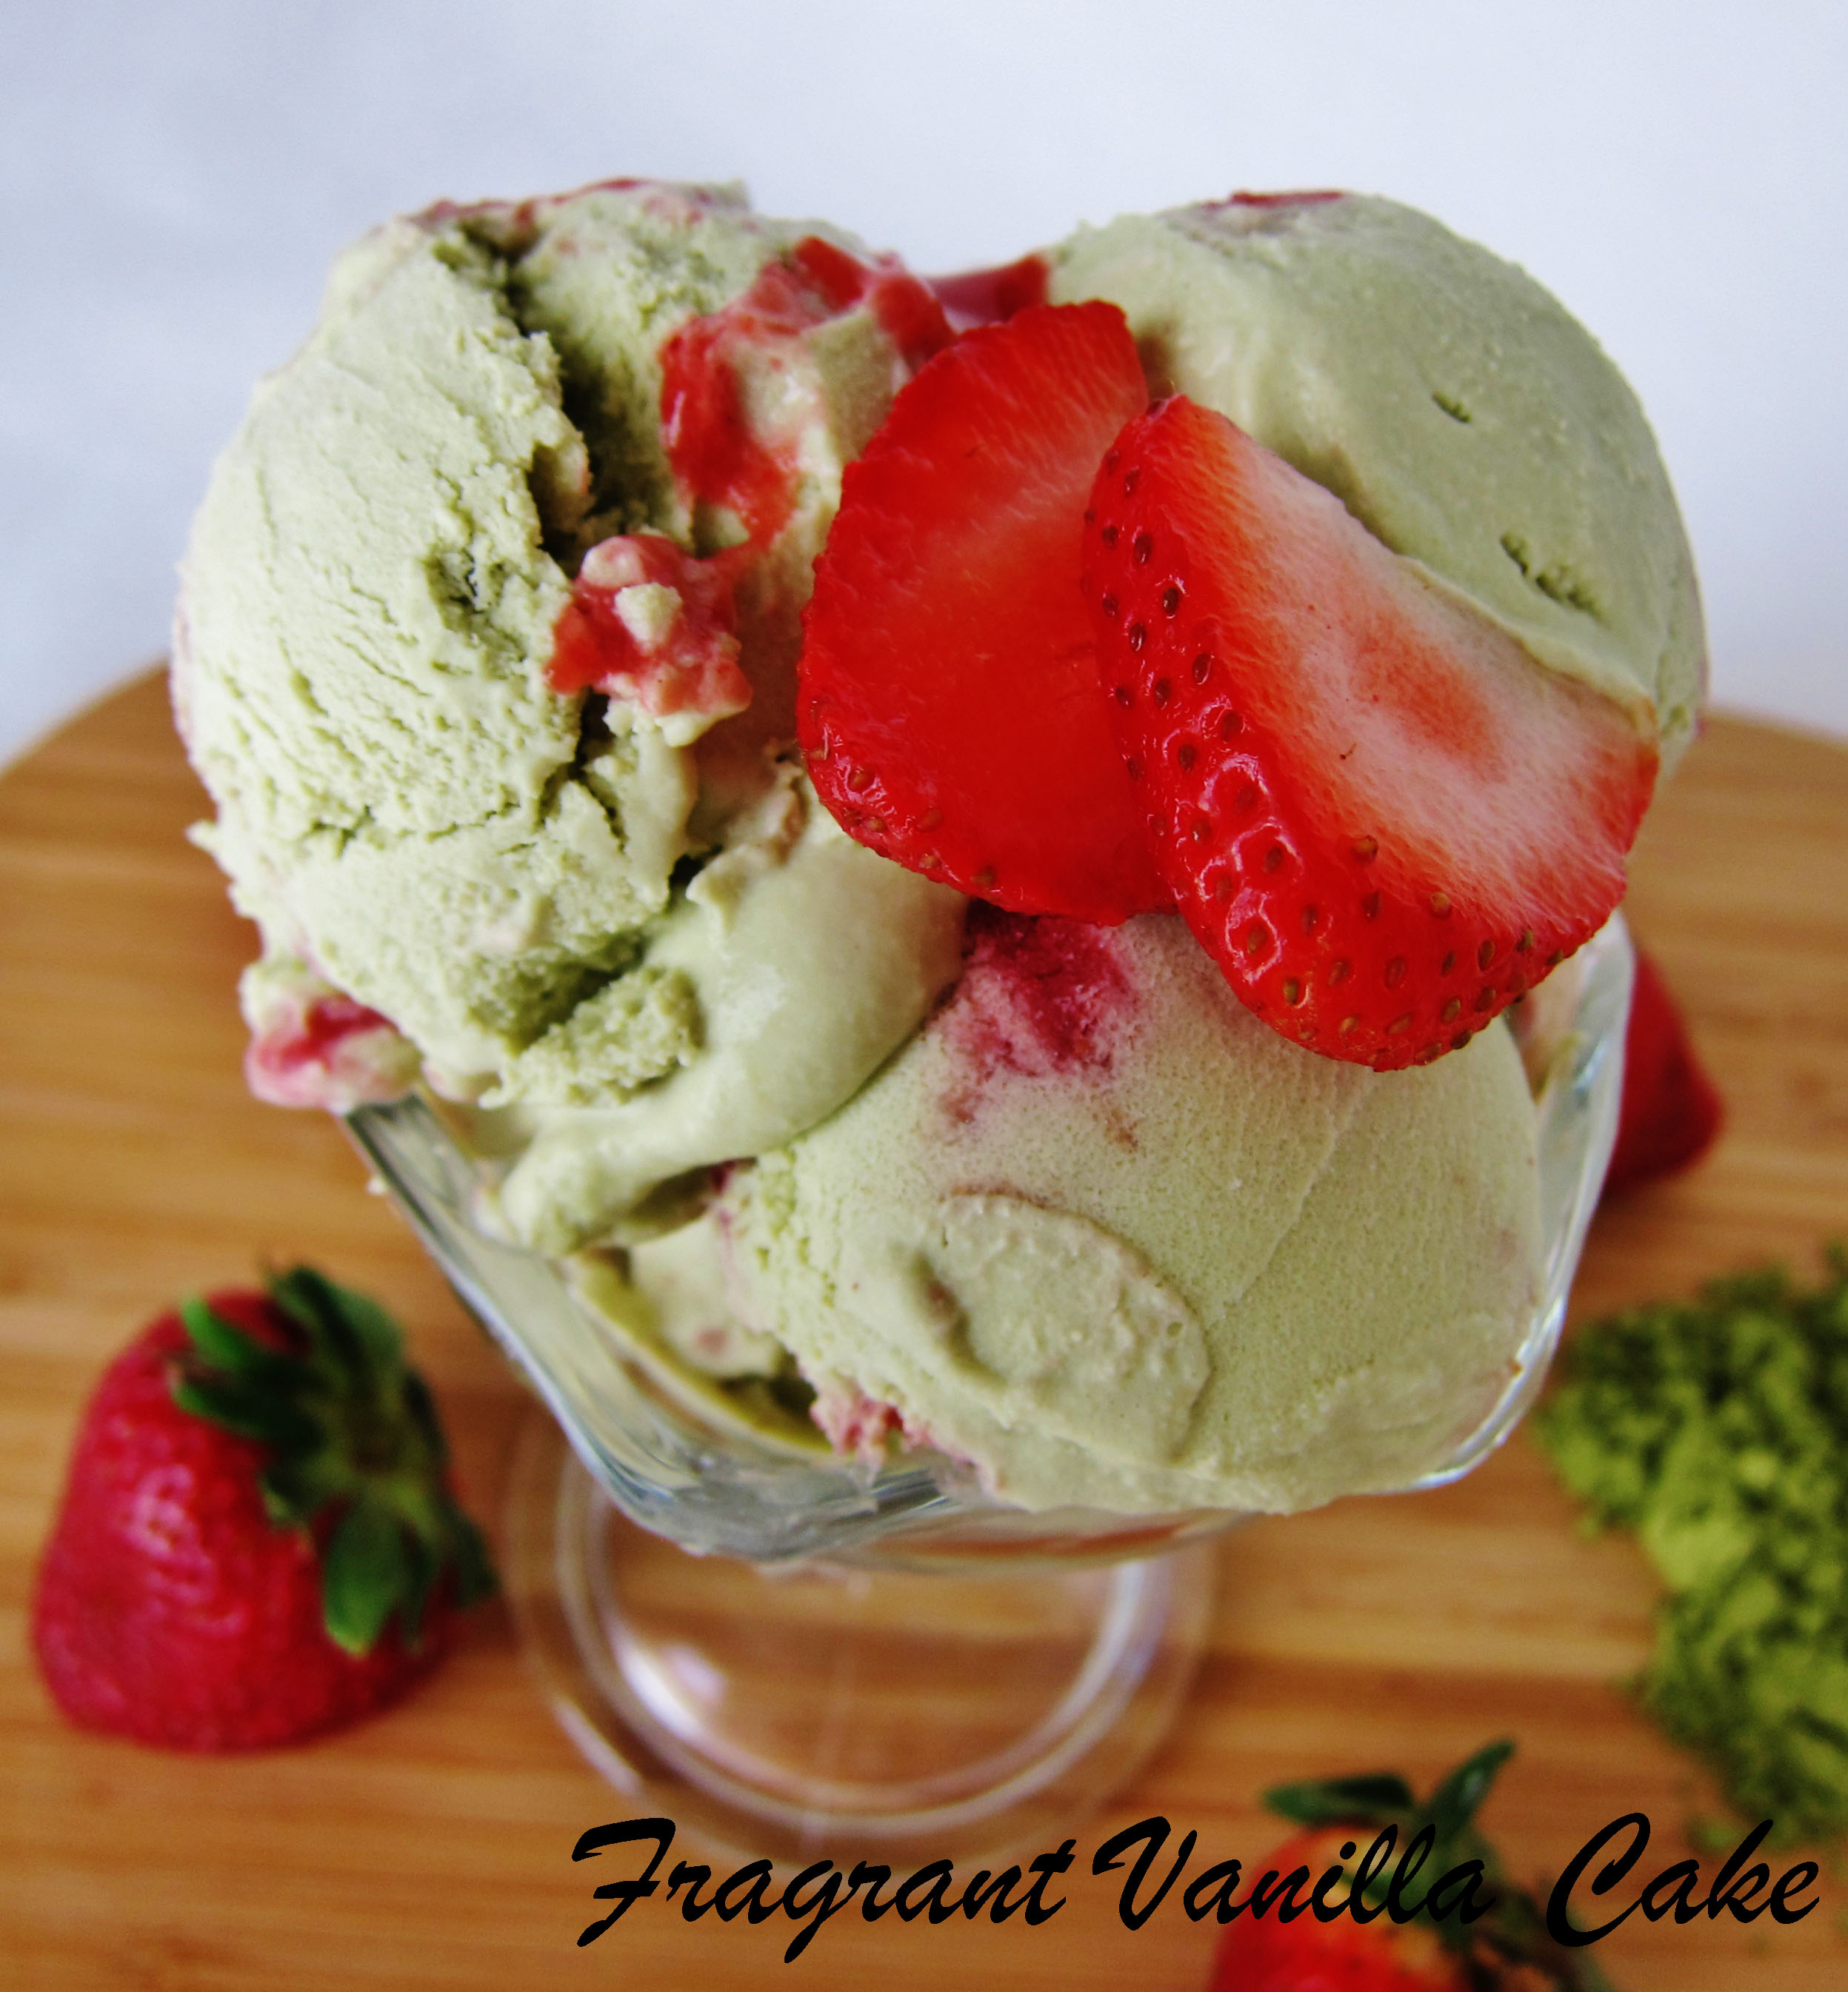
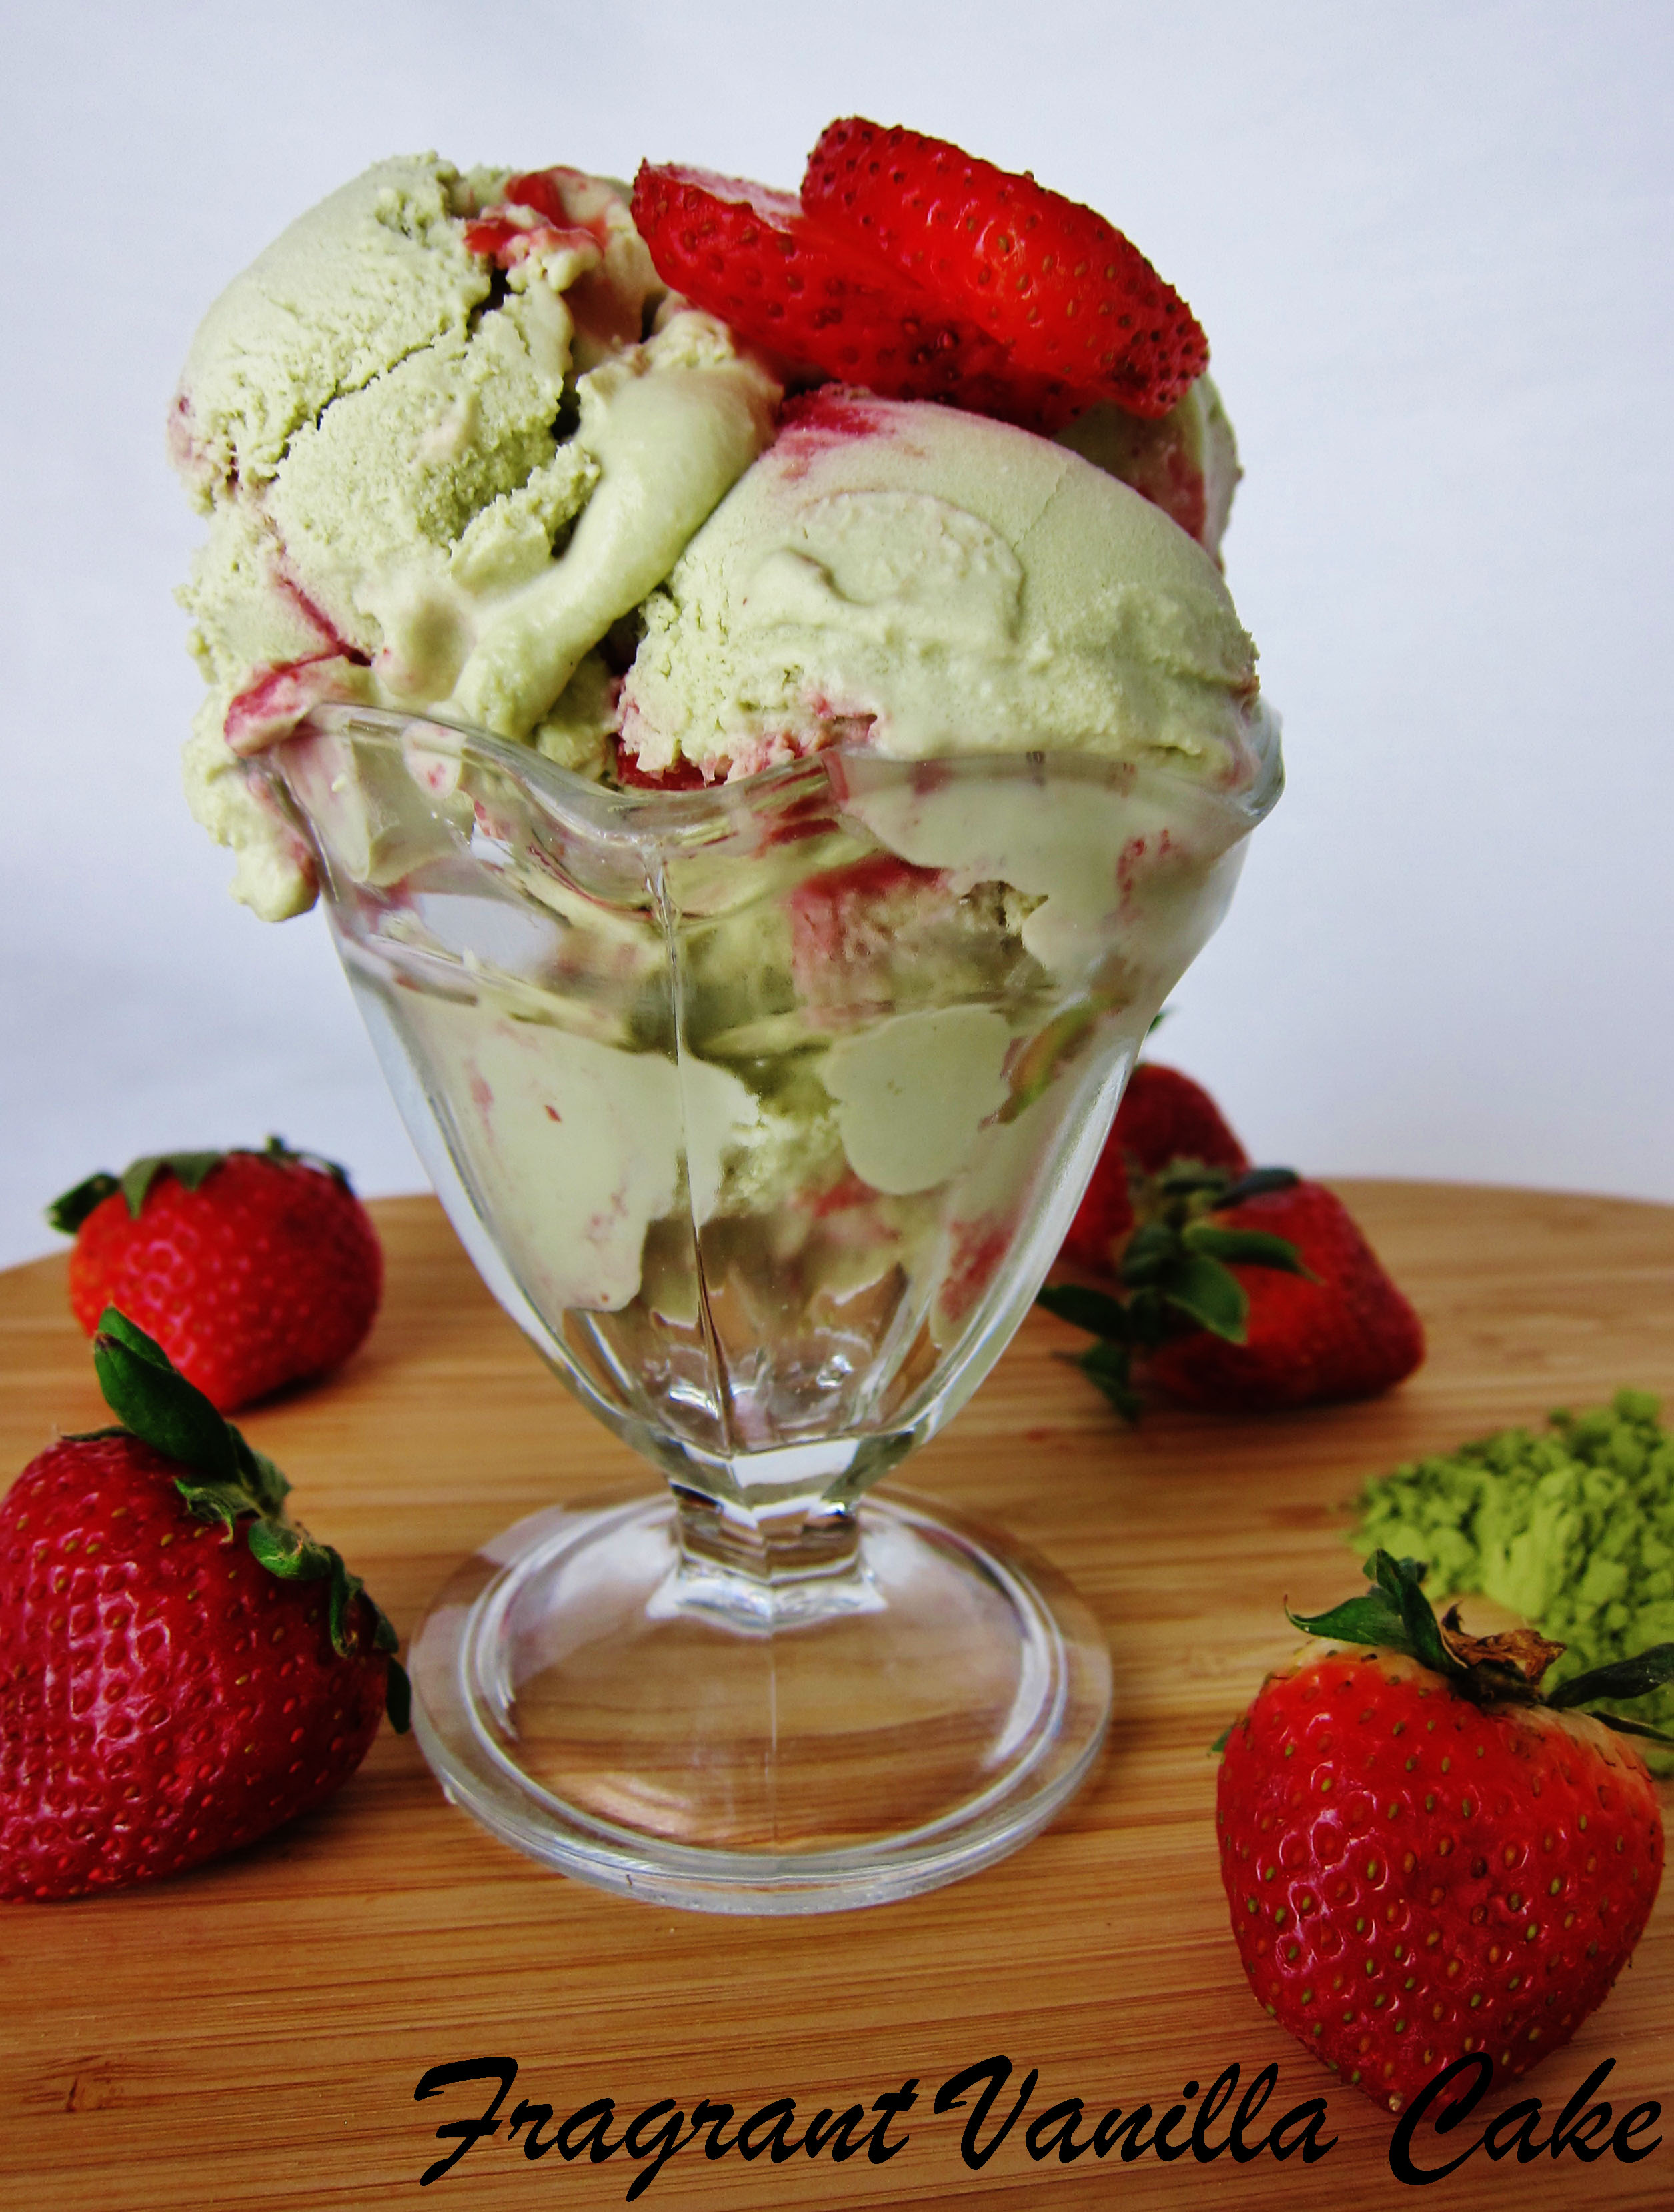
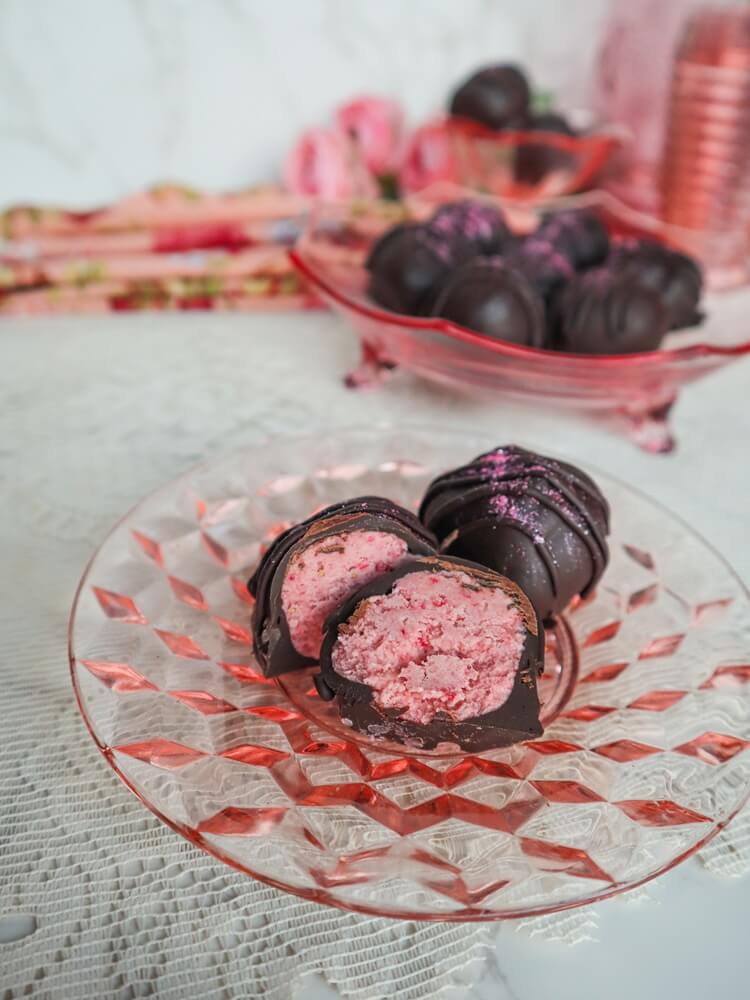
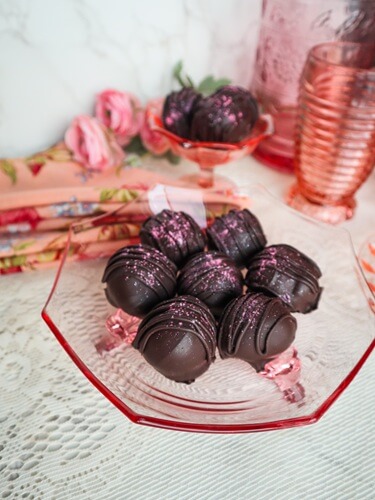
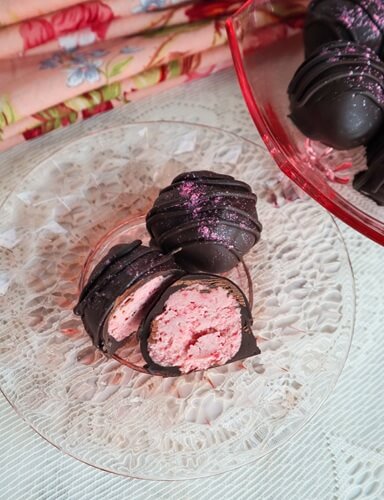
    I’ve always loved making candy around Valentine’s Day! I love all things chocolate and so this year I decided to make some Vegan Strawberry White Chocolate Lavender Truffles! Berries and chocolate are one of my favorite combinations and I love lavender and chocolate and lavender and berries as well!

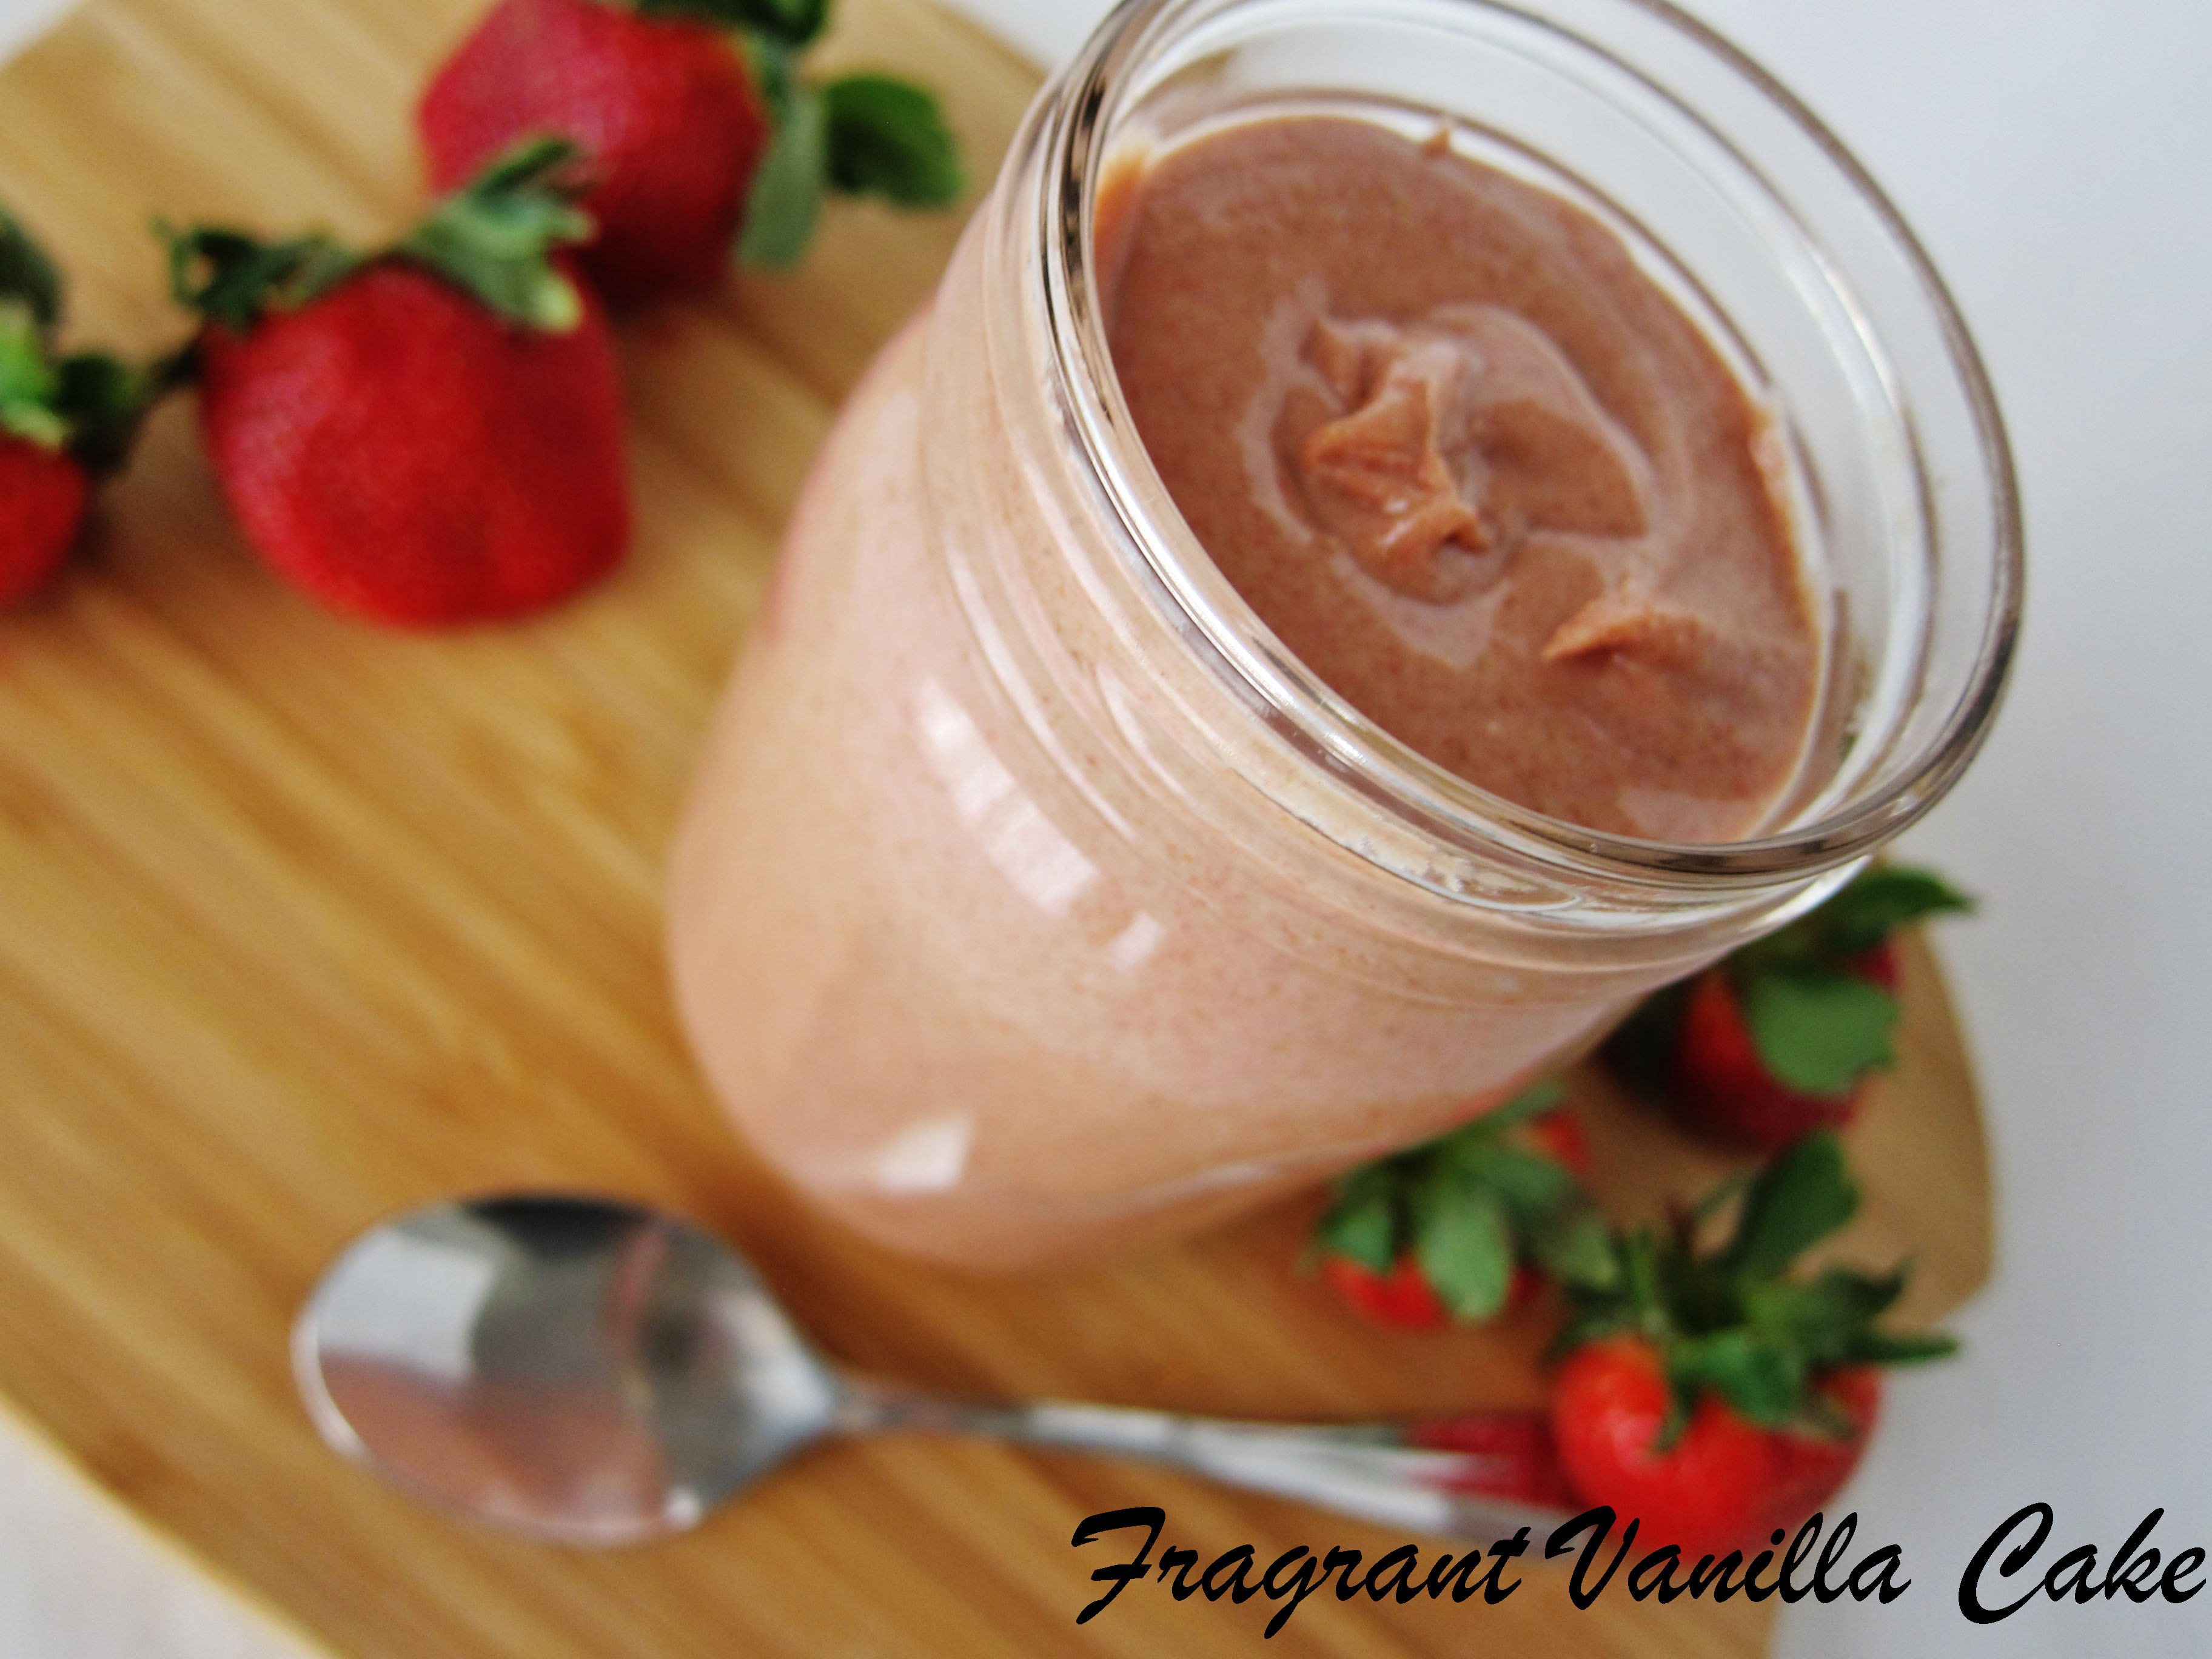
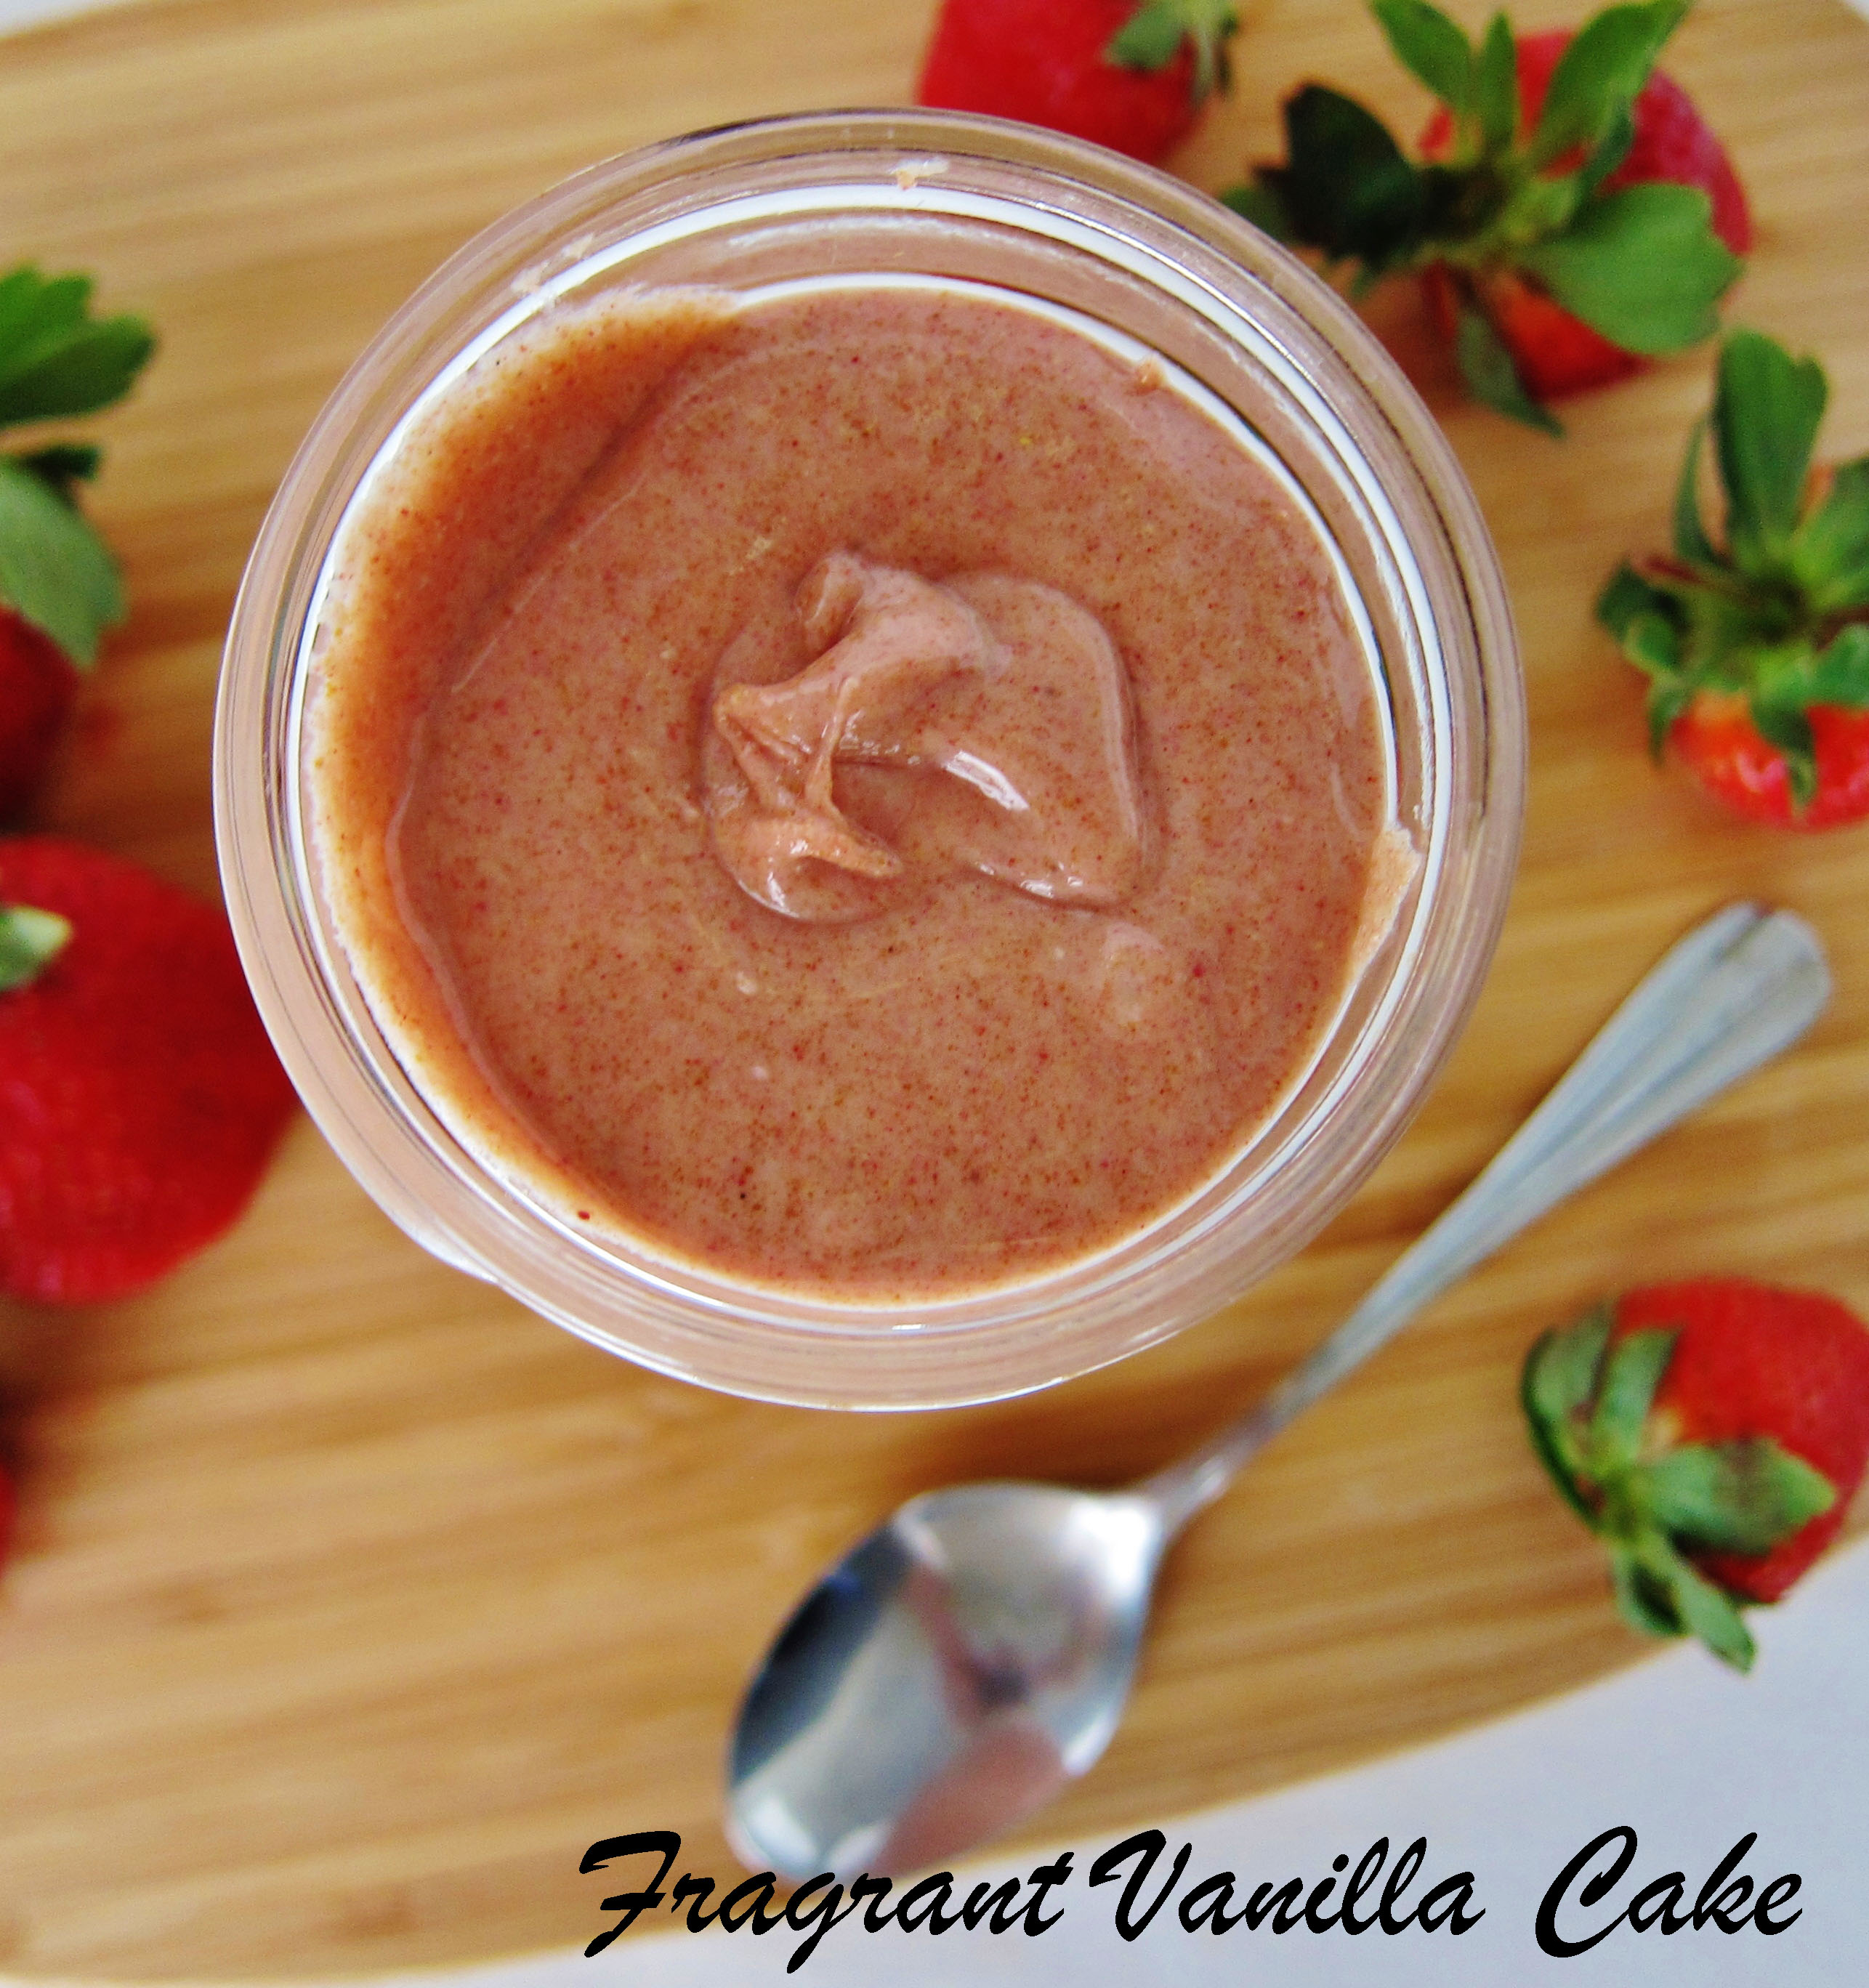
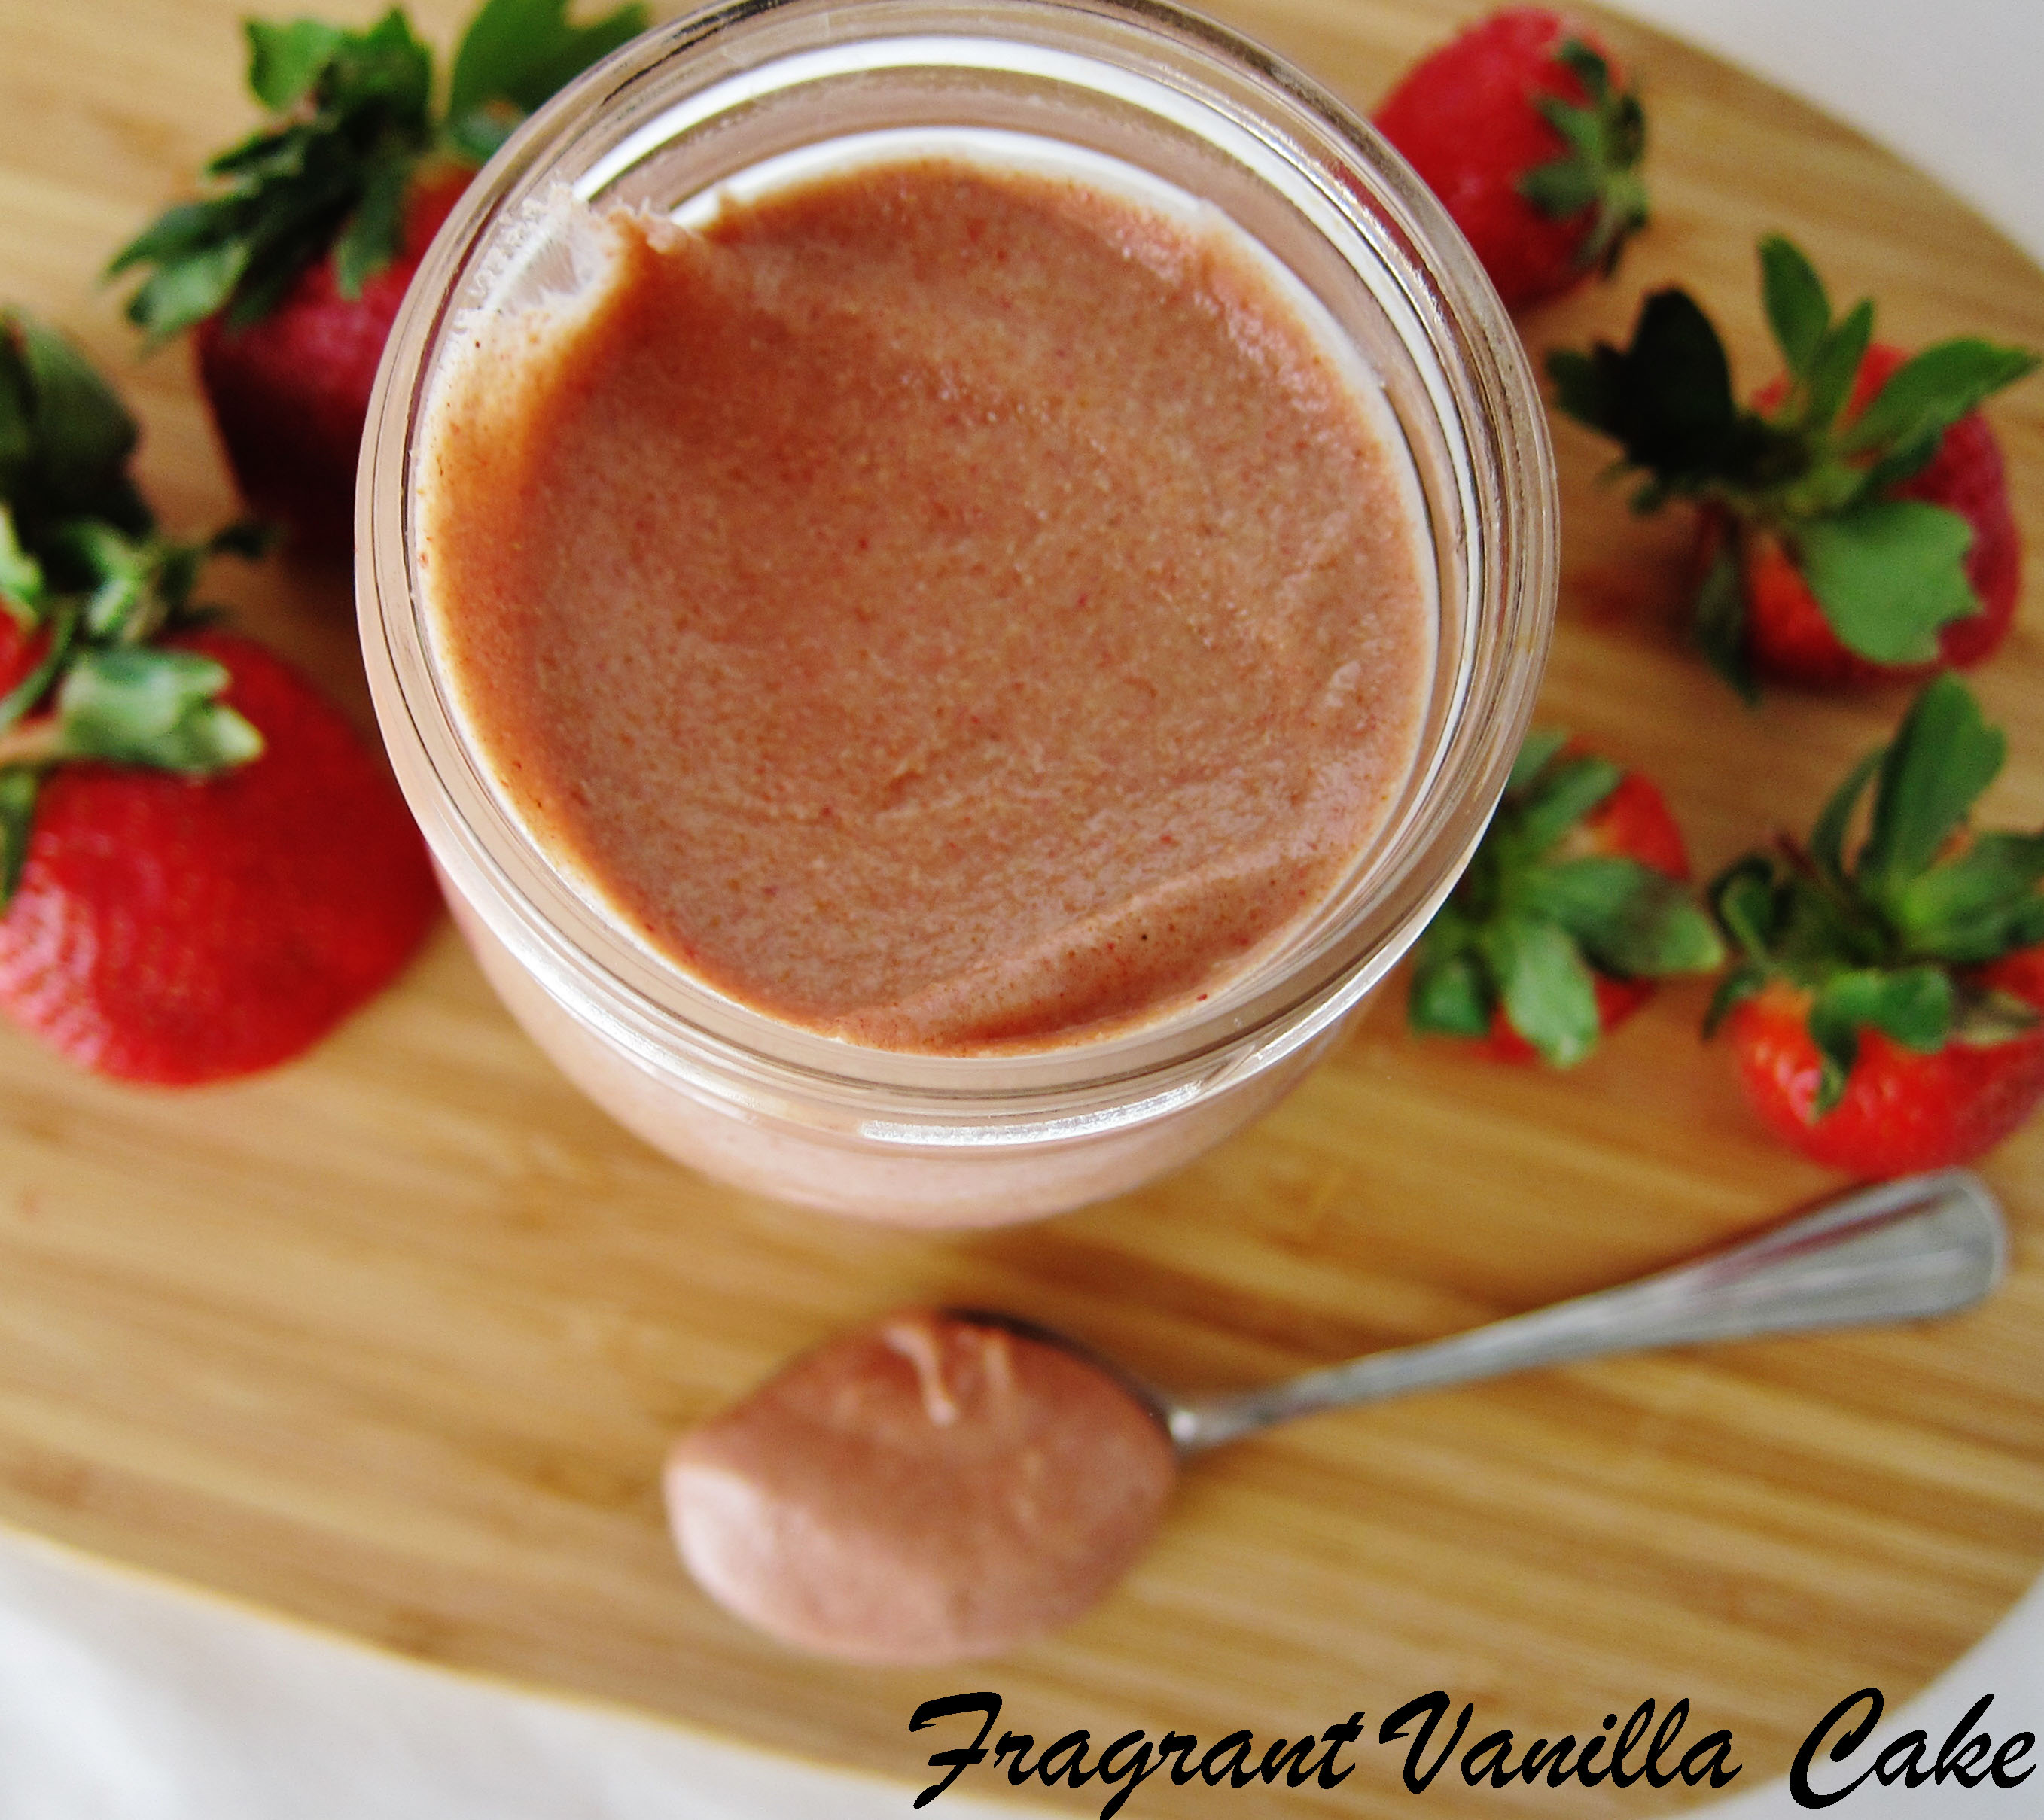
    For the white chocolate cream filling, I used a combination of cacao butter, cashew butter And coconut butter with some maple syrup to sweeten. It makes for a rich white chocolate cream center that is heavenly on its own or delicious when flavored.

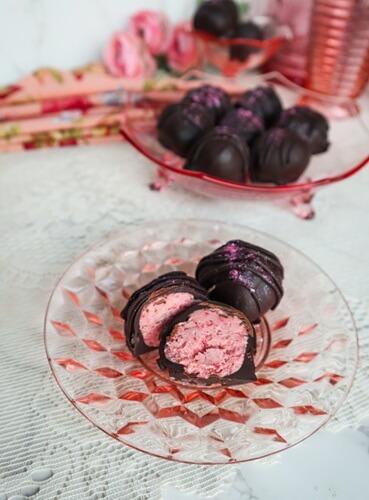
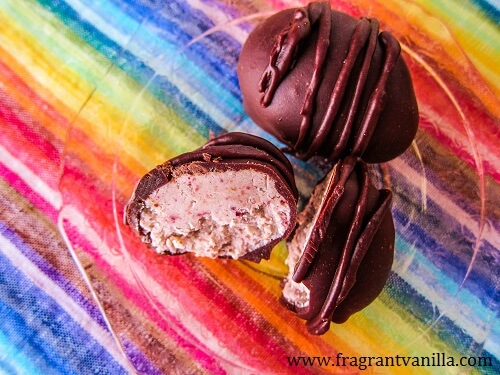
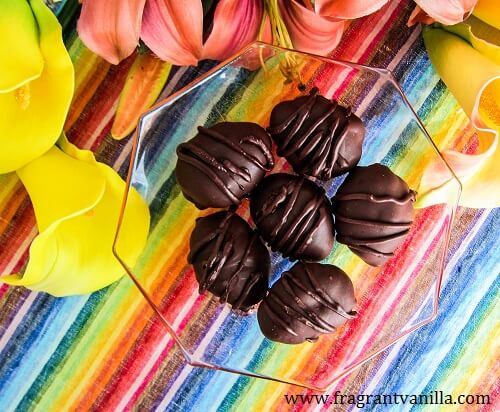
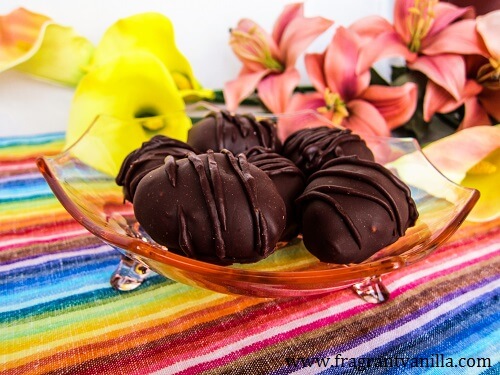
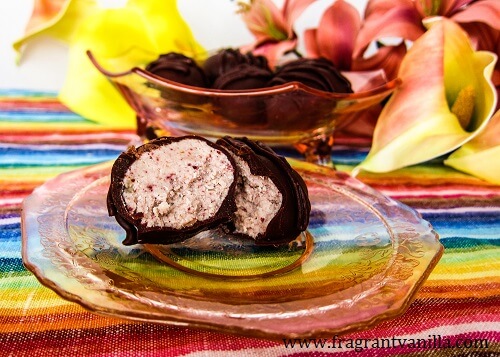
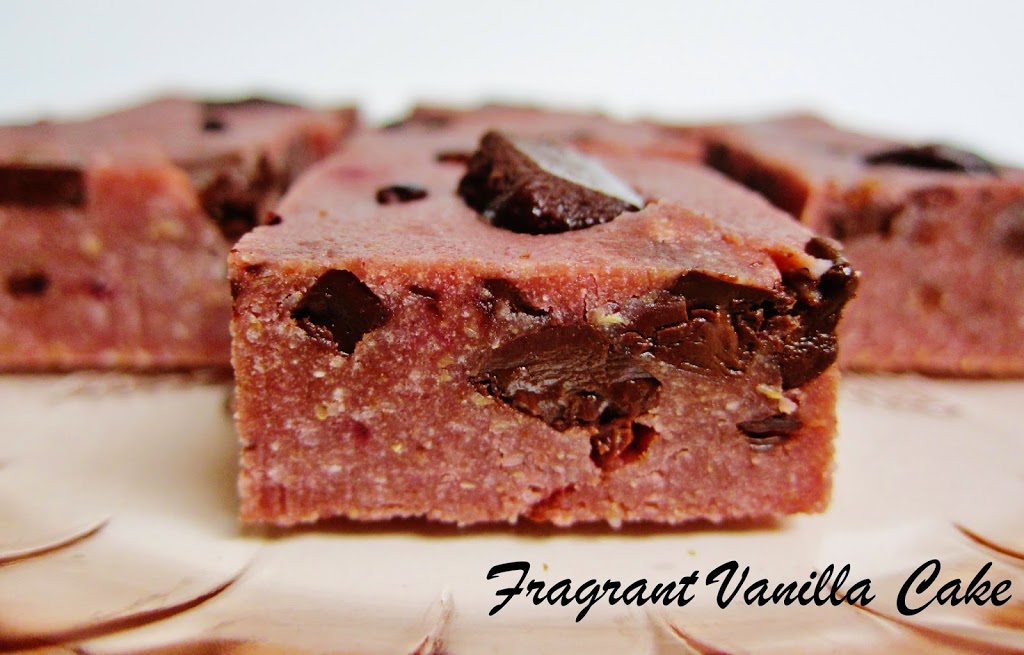
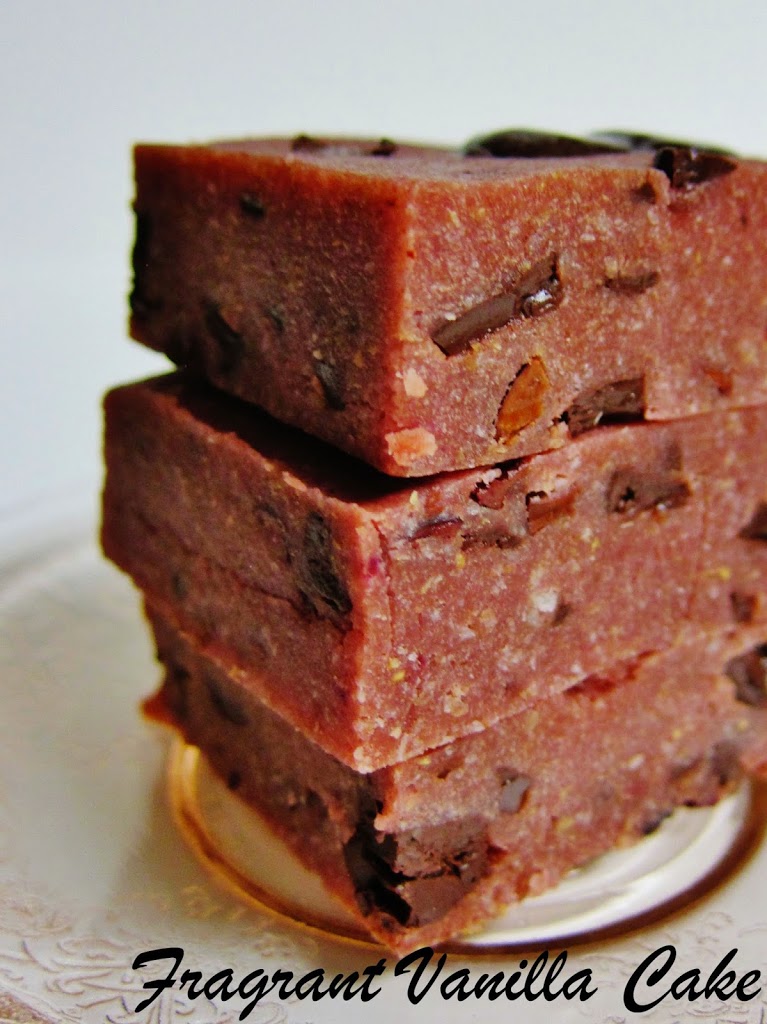
    I added vanilla and strawberries and a little lavender and it was perfect! I dipped these in melted dark chocolate and I could not wait to try them!

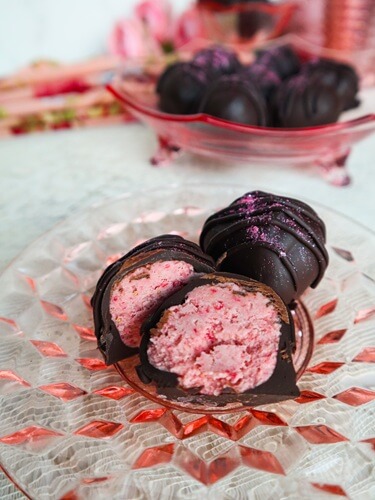
    They were so heavenly! Rich, creamy white chocolate berry centers with a hint of lavender and vanilla and the perfect amount of dark chocolate to balance it all out! These Vegan Strawberry White Chocolate Lavender Truffles would make the perfect home made Valentine’s Day treat!

    Vegan Strawberry White Chocolate Lavender Truffles
    Makes 10 chocolates

    Ingredients:

    White Chocolate:

    • 1/4 cup cacao butter (2 oz) or coconut oil if unavailable
    • 2 Tbsp raw cashew butter
    • 1/4 cup coconut butter
    • 1 tsp pure vanilla extract
    • 2 Tbsp maple syrup
    • 1 cup freeze dried strawberries
    • 2 tsp dried lavender flowers
    • 1/4 cup filtered water


    Dark Chocolate:

    • 1/2 cup cacao butter (4 oz) or coconut butter if unavailable
    • 3/4 cup cacao powder, or unsweetened cocoa powder
    • 1/4 cup maple syrup
    • pinch sea salt


    Directions:

    1. Combine all of the white chocolate ingredients but the berries and water over a double boiler, and whisk until smooth.
    2. Pulverize the berries in a blender until fine, then whisk into the white chocolate along with the lavender and water. Place in the freezer for about 15-20 minutes until it is firm enough to scoop. Scoop into 12 balls, rolling them with your hands until smooth.   Place on a parchment lined tray, and place back into the freezer until firm, about 30 minutes.
    3. Meanwhile, to make the dark chocolate, combine all ingredients in a double boiler, and whisk until combined and melted.
    4. Once the filling has firmed up, dip each chocolate into the dark chocolate, being sure to let the excess drain off, and place back onto the tray (I like to set mine on a fork to allow it to drain better). Once they are all dipped, set them in the freezer until hardened.
      Store any leftover truffles in the refrigerator.
  • Vegan Strawberry Lemon Scones

    Vegan Strawberry Lemon Scones


    I used to work at a natural foods store that made all of their baked goods from scratch.  They made the best scones, that were very popular with the customers, and we would always make different flavors.  I learned how to make them from a lady that worked there before me, and then came up with a veganized version to sell there as well.  Sadly the store is no longer open, but I still love to make my own veganized version of the scones at home!  The other day I was thinking that some Vegan Strawberry Lemon Scones sounded amazing so I made a batch! 

    Scones are actually quite simple to make, and they will turn out well as long as you are careful how you mix up the dough.  You always want to start with the dry ingredients, mix them together well, then mix in the fat with your hands, leaving good sized chunks of it to create flakey pockets in your scones.  I use coconut oil in these because it is what we used to use there, since it was cost effective, but you could use vegan butter instead if you are not a fan of coconut oil.  After your dough is clumpy with the fat added, you mix in the full fat coconut milk until just barely mixed but still pretty clumpy.  You want the coconut milk to be chilled, because it is important the dough doesn’t get too warm or things will mix too much.  You do not want a smooth dough for these or they will be very dense which is not the goal here.  I also added in vanilla and lemon with the coconut milk in these.

    Next, you want to just fold in the strawberries so that they are evenly distributed before you shape them.  You want to pat the dough into a round, not handling it too much, then cut it into wedges and place them on a parchment lined tray.  I then drizzle them with a little more coconut milk and sprinkle them with a bit of sugar to create a nice crunchy outside.  These smell amazing while baking!  So heavenly!

    These scones are super delicious!  These are rich and delicious, melt in your mouth with sweet jammy berries baked into them throughout, scented with aromatic lemon and vanilla!  They are perfect with a cup of coffee or tea for a mid morning snack!  If you are in the mood for a delicious fresh baked scone that is way better than the ones you will find in most coffee shops, give these Vegan Strawberry Lemon Scones a try!


    Vegan Strawberry Lemon Scones

    Makes 8

    Ingredients:


    • 3 cups organic whole wheat pastry flour* or organic all purpose flour
    • 3/4 cup granulated sugar
    • 2 1/2 tsp baking powder
    • 1/4 tsp salt
    • 3/4 cup solid virgin coconut oil, cut into chunks (if your house is above 65F degrees, chill it first)
    • 1 1/2 cups (or as needed) cold full fat organic canned coconut milk (whisked until smooth if chunky)
    • 1 Tbsp lemon juice plus 2 Tbsp lemon zest
    • 1 Tbsp pure vanilla extract
    • 1 tsp lemon extract
    • 2 cups strawberries, quartered (or cut into eighths if large)
    • coconut milk for topping (if needed)
    • graulated sugar for sprinkling


    Instructions:

    1. Preheat oven to 375F degrees with the rack set at the middle position.
    2. Line a baking sheet with parchment.
    3. In a large bowl, combine the flour, sugar, baking powder, and salt. Cut in the coconut oil with a pastry blender or 2 knives until the mixture starts to clump into pea sized pieces. In a small bowl, stir the vanilla and lemon juice and zest and lemon extract into the coconut milk. Add the coconut milk to the dough, and stir a few times, but do not over-mix. The dough should hold together when squeezed, but still be clumpy.
    4. Fold in peaches until evenly distributed.
    5. Place dough on a floured work surface, and shape into a 4 inch wide log. Use a bench scraper to cut into 8 triangles.
    6. Place scones on the prepared baking sheet, reshaping slightly if necessary.
    7. Brush the tops lightly with the coconut milk (only if they seem dry, you want the sugar to stick), and sprinkle with granulated sugar.
    8. Place in the oven and bake for about 20 minutes , then after about 20 minutes you may need to reshape with 2 bench scrapers if the scones are spreading. Turn them then place back in the oven and bake 10-15 minutes more until they are lightly browned and cooked throughout.
    9. Cool on a wire rack.
    10. Enjoy!

    *If you prefer to make these gluten free, you can swap the whole wheat pastry flour for an all purpose baking flour like Bob’s Red Mill Gluten Free All Purpose Baking flour (I have tried this brand with success).

  • Vegan Strawberry Shortcake Cookies

    Vegan Strawberry Shortcake Cookies

    It definitely feels like summer here lately and with summer comes berries!  It think berries (I can’t pick just one type I love them all) are my favorite fruit.  I am loving all things strawberry right now, while they are in season here in Minnesota.  I love baked goods with berries, like scones, muffins, cakes, cobblers and crisps but I also love a good shortcake.  Since strawberry shortcake is so delicious, I decided to bake some strawberry shortcake inspired cookies! I have also been on a cookie baking kick lately.  I love them because they are an easy dessert.  I made these Vegan Strawberry Shortcake Cookies last weekend and they were so good I had to share the recipe!

    For the base of these cookies I used my chocolate chip cookie recipe. I just made a few swaps like I swapped the brown sugar for granulated sugar and added in strawberries instead of the chocolate chips.  I used whole wheat pastry flour for these because it is what I prefer and use most, but you can use regular all purpose flour if you prefer.  If you wanted to make them gluten free, you could use gluten free AP flour (I like Bob’s Red Mill Gluten Free All Purpose Baking Flour if I am making GF because I know it works).

    I have made scones before with fresh strawberries, but to be honest I wasn’t quite sure how they would behave in cookies. So I just had to wait and see how they turned out.  The dough was super delicious!  I definitely snacked on some while I was making them.  That is the best part of the cookie baking process after all as far as I am concerned!  They baked up beautifully!  The berries did not release too much moisture. That said, I would probably not use frozen berries for these because I feel like those would have too much moisture and the cookies would over spread.

    These smelled amazing while baking!  I could not wait to try them!  They were so heavenly!  Soft and chewy, with sweet jammy strawberries throughout and the scent of vanilla!  If you are a strawberry fan, and are in the mood for something sweet, definitely give these Vegan Strawberry Shortcake Cookies a try!

    Vegan Strawberry Shortcake Cookies

    Makes 16

    Ingredients:

    • 3/4 cup melted coconut oil
    • 1 1/2 cups granulated sugar
    • 1/2 cup applesauce at room temperature
    • 1 tsp pure vanilla extract
    • 1 tsp sea salt
    • 1 tsp baking soda
    • 1/2 tsp baking powder
    • 2 1/2 cups whole wheat pastry flour or all purpose flour (for a lighter colored cookie)
    • 1 1/2 cups fresh strawberries, cut into small pieces
    • Turbinado sugar for topping


    Instructions:

    1. Preheat the oven to 350F degrees, and line two sheet pans with parchment.
    2. In a large bowl, mix together the coconut oil, sugar, apple sauce and vanilla extract  until well blended.
    3. Mix in the salt, baking soda and baking powder then the flour until smooth.
    4. Stir in the berries until they are evenly distributed.
    5. Form the dough into 1 1/2 inch balls, and place on the cookie trays about 2 inches apart.
    6. Press the dough balls down slightly and sprinkle with turbinado sugar.
    7. Place the pans in the oven and bake for about 7 minutes, then rotate them and bake another 7 or so until the cookies are done and lightly brown at the edges.
    8. Remove from the oven and let cool at least 15 minutes before enjoying.
  • Vegan Strawberry Lemonade Bars

    Vegan Strawberry Lemonade Bars


    I have always been a fan of tart sweet lemon desserts, especially things involving lemon curd like lemon bars!  I saw some lemon bars on Instagram that someone had recently made and it reminded me of how delicious they are and how much I love them!  So I decided to make a lemon bar recipe that I have made in the past, but make it even better by adding in some strawberries to make them Vegan Strawberry Lemonade Bars!  Strawberries and lemon make me think of spring after all and it definitely feels like spring here now!  I am still waiting for the flowering trees and lilacs to start blooming here but it is exciting to see the trees sprouting leaves again! 


    They have a simple shortbread crust that just melts in your mouth.  It just has vegan butter, powdered sugar, flour, vanilla and sea salt.  You just mix it together, press it into the pan and bake it.  The filling for these bars does not get baked, just the crust.  So you can be starting on the filling while you make the crust.  If you wanted to make the crust gluten free, you can swap Bob’s Red Mill all purpose gluten free baking flour for the whole wheat pastry flour.  I have used this flour and it works well. 

    For the filling, I used a combo of lemon juice (with plenty of zest for flavor), strawberry jam and coconut cream to make this rich instead of the butter you sometimes find in lemon bar filling. I sweetened it with maple syrup and thickened it with cornstarch.  This filling is really easy to make, you just whisk it all together and cook it on the stove. It comes together pretty quickly.  I had a sample before pouring it over the crust and it was so delicious even before it had a chance to cool.

    I gave these a little dusting of powdered sugar and a touch of lemon zest to make them pretty and I could not wait to try them!  They turned out so delicious!  The perfect balance of tart and sweet with a luscious smooth filling scented with strawberries, lemon and vanilla on a buttery crust!  I shared some with my Mom who is also a big lemon bar fan, and she said they were excellent!  If you are a lemon fan definitely give these Vegan Strawberry Lemonade Bars a try!

    Vegan Strawberry Lemonade Bars

    Makes 16

    Crust:

    • 1 1/4 cups whole wheat pastry flour
    • 4 oz Earth Balance Vegan Butter or other vegan butter, softened and cut into pieces
    • 1/2 tsp pure vanilla extract
    • 1/4 cup powdered sugar
    • 1/8 tsp sea salt


    Filling:

    • 3/4 cup lemon juice
    • 2 Tbsp lemon zest
    • 3 Tbsp strawberry Jam
    • 1/2 cup cornstarch
    • 1 1/2 cups canned coconut cream
    • 1/4 cup plus 2 Tbsp maple syrup
    • 1/4 tsp sea salt
    • 1 tsp pure vanilla extract


    For Topping:

    • powdered sugar


    Instructions:

    1. Preheat the oven to 350F degrees, and line an 8×8 inch square pan with parchment paper (so that it goes up the sides too).
    2. To make the crust, mix all ingredients together in a bowl until combined with a wooden spoon, then press into the bottom of the prepared pan.
    3. Place the pan in the oven and bake for 20 minutes or until set and lightly browned. Remove from oven.
    4. To make the filling, combine all ingredients in a sauce pan, except the vanilla extract, and whisk to dissolve the cornstarch. Place on the stove over medium heat, whisking constantly until it is starting to thicken. When it starts to thicken cook for a minute or two, until it is thickened to the consistency of pudding, then whisk in the vanilla extract.
    5. Pour the filling over the prepared crust, and let cool completely, then refrigerate for a few hours until completely chilled.
    6. Dust the tops of the bars with powdered sugar by putting it in a fine meshed strainer and tapping it over them.
    7. Cut into 16 bars.


    Store any extra bars in the refrigerator in an airtight container.

    *If you wanted to make these gluten free, you could use Bob’s Red Mill gluten free all purpose baking flour instead of the pastry flour.

  • Strawberry Granola

    Strawberry Granola


    I love home made granola!  It is so easy to make, and so much better than store bought that since I started making my own I have never gone back.  I love that I can create my own flavors as well!  The only problem with it is that when I have a pan of it cooling on the counter it is really hard to stop snacking on as it is so good and so delicious when a little bit warm still.  Last weekend I made a really simple one and it was so delicious I have to share the recipe.  It is Strawberry Granola!  Although I love nuts and coconut shreds in my granola much of the time, I really let the strawberries be the star of this one! 

    I used thick rolled oats as the base, because those are what I normally eat and they give it a good crunch.  I made a coating of coconut oil, raw cashew butter, sweetened with maple syrup, strawberry powder and vanilla and it smelled amazing before even coating the granola!  This is definitely a winning combo and the aroma was so heavenly while it baked! 

    I added in freeze dried strawberries after it was baked and it was perfect!  Yes, I have been using a lot of them in my recipes lately but I bought quite a lot of them and I love them in recipes because they add so much intense strawberry flavor!  This granola was so delicious sweet with strawberries and vanilla with a good crunch, so simple but so good!  My husband Eric even ate quite a bit which means it has to be good given he doesn’t usually eat any sort of oats that are not quick cooking.  If you are in the mood for a crunchy munchy snack, definitely give this Strawberry Granola a try!

    Strawberry Granola

    Makes 6 cups

    Ingredients:

    • 3 cups organic gluten free old fashioned rolled oats
    • 3 Tbsp coconut oil, warmed to liquid
    • 3 Tbsp maple syrup
    • 3 Tbsp cup raw cashew butter or almond butter
    • 1 Tbsp strawberry powder
    • 1/2 tsp sea salt
    • 1 tsp pure vanilla extract
    • 1 cup freeze dried strawberries


    Instructions:

    1. Line a large baking sheet with non-stick foil, and spray with cooking spray.
    2. Preheat the oven to 350F and set rack at the medium position.
    3. Add oats to a large bowl.
    4. In another bowl, whisk together oil, maple syrup, cashew butter, strawberry powder, sea salt, and vanilla extract until well combined, then pour over oats and toss to coat until completely blended.
    5. Pour out onto prepared baking sheet, and spread out evenly.
    6. Bake for 35 minutes, stirring about every 10 minutes or so until the granola is evenly browned. Remove from oven and let cool. Stir in strawberries and enjoy!
  • Vegan Strawberry Rosewater Cake

    Vegan Strawberry Rosewater Cake

    Valentine’s Day is one of my favorite holidays to make desserts for because I love all things pink and berry flavored!  So this year I thought it would be fun to make a Vegan Strawberry Rosewater Cake!  I know Valentine’s Day is not for a few weeks, but I make stuff for the entire month before to enjoy!  This one turned out so delicious I had to share it with you all!  Also, it has been really cold here in Minnesota, it was in the single digits all last week so it was the perfect time to stay inside and bake a cake!

    For this cake I used my vanilla cake batter, and scented it with vanilla and rosewater.  This batter is easy to make, nothing too fussy which is why I love it! I used whole wheat pastry flour, because it is what I have on hand and prefer, but if you wanted to use all purpose flour that would work as well.  Or if you wanted to make a gluten free cake, Bob’s Red Mill Gluten Free All Purpose Baking Flour works well too.  I recommend this specific brand because I have tried it with success.

    I filled and frosted the cake with a delicious strawberry rose buttercream frosting! It is easy to make, and for the lovely color I used ground freeze dried strawberries!  They don’t add excess moisture to the frosting, but they make it a beautiful color and give it intense strawberry flavor!  It is one of my favorite frostings!  I also included a layer of strawberry jam in the filling which made it extra delicious!  It was made by Eric’s Dad and it is the perfect sweetness level!  The strawberries in it taste like they were just picked!  The thing I love about this cake is you can make it in the winter if you don’t have fresh berries but it tastes like summer!

    This cake turned out so delicious!  It was heavenly with its soft vanilla rose scented cake layers, gooey strawberry jam and sweet strawberry buttercream frosting! This would be perfect for upcoming Valentine’s Day, or any day really you are craving cake (because there is no need to wait for a holiday).  So if you are in the mood for something sweet, give this Vegan Strawberry Rosewater Cake a try!

    Vegan Strawberry Rosewater Cake

    Makes one 2 layer 6 inch cake

    Ingredients:

    Cake:

    • 1 1/2 cups all purpose flour
    • 3/4 cup plus 2 Tbsp granulated sugar
    • 3/4 tsp baking powder (1/2 tsp plus 1/4 tsp)
    • 1/2 tsp sea salt
    • 2 flax eggs (2 Tbsp golden ground flax seed mixed with 1/4 cup plus 2 Tbsp filtered water, allowed to sit 15 minutes)
    • 1/4 cup plus 2 Tbsp avocado oil or other neutral oil
    • 1/2 cup plant based milk (I used Oatly but you can use what you prefer)
    • 1 1/2 tsp pure vanilla extract
    • 1 Tbsp rosewater


    Frosting:

    • 1 1/2 cups vegan butter, I used Earth Balance (at room temperature)
    • 2-3 Tbsp plant based milk (I used Oatly, but you can use what you prefer), add 3 then if needed add another if frosting comes out too stiff
    • 1 tsp pure vanilla extract
    • 1 Tbsp rosewater
    • 4 cups powdered sugar
    • vegan food coloring (optional)


    Filling:

    • 1/3 cup strawberry jam


    Instructions:

    1. Preheat oven to 350F degrees, and line 2 6 inch round cake pans with parchment on the bottom and oil the sides.
    2. In a large bowl, combine the flour, sugar, baking powder and sea salt and whisk to blend.
    3. Add the flax eggs, avocado oil, oat milk, vanilla and rosewater and beat with an electric mixer for about a minute (or 3 minutes if doing it by hand with a whisk).
    4. Pour the cake batter into the prepared pans, dividing it evenly between the two of them.
    5. Place the cakes in the oven and bake for about 30 minutes until the cakes are done in the center (you are able to insert a toothpick into the center and it comes out almost clean with a few moist crumbs).
    6. Remove from the oven and let cool 20 minutes, then remove the cakes from the pans by cutting around the sides, placing a plate on top then inverting it and tapping on it.  Allow them then to cool completely once they are out of the pans.
    7. To make the frosting, beat the butter with the milk, vanilla and rosewater until fluffy.
    8. Add the powdered sugar 1 cup at a time, and beat until completely mixed and light and fluffy (if the frosting is too stiff add that other Tbsp of milk).
    9. When ready to frost, Place one cake layer on a plate, spread about 1/4 inch thick layer of the frosting over it.  Pipe a half inch thick line of frosting along the outside edge.  Spoon the strawberry jam into the center and spread out evenly inside the piped line.
    10. Place the next cake layer on top.
    11. Spread the remaining frosting on the top and down the sides of the cake evenly, then place the rest of the frosting in a pastry bag and use it to decorate the top.  This frosting recipe makes enough that you should be able to do some generous piping decorations on top, because I like a lot of frosting! If you wish to tint the frosting colors as I did, feel free to.
    12. Serve the cake and enjoy!
  • Vegan Strawberry Lemon Mug Cake

    Vegan Strawberry Lemon Mug Cake

    Sometimes you just want cake, but you don’t want to make a whole giant cake, and go through the trouble of frosting it.  Which is where mug cakes come in!  They are perfect for a single serving of cake just for yourself and want it fast! Which is why I decided to make this Vegan Strawberry Lemon Mug Cake last weekend!  It was super easy to make and in  less than an hour (which was mainly baking and cooling time with not a lot of effort) I was enjoying it!  I love the combination of strawberry and lemon especially in cakes if you do too and you want a fancier cake you can also check out my recipe for Vegan Strawberry Lemon Layer Cake!

    But I was not going for fancy last weekend I was going for quick and easy when the cake craving struck!  I used my vanilla cake batter, and flavored it with a touch of lemon juice and zest.  It was just enough to give it plenty of lemon flavor and aroma but not so much that it was too tart or anything. I made this with whole wheat pastry flour but if you didn’t have that on hand you could also use regular all purpose flour.  If you wanted to make this gluten free, you can make it with Bob’s Red Mill gluten free all purpose baking flour instead (I have made many cakes with this flour and I know it works well) or your favorite gluten free all purpose flour that you have tested and know it substitutes well for regular flour.

    Once I had poured the lemon vanilla cake batter into the mug it was time for the strawberry.  I used some of Eric’s Dad’s jam, spooned it on top and swirled it into the cake a few times with a knife to create a marbled affect and balance of the lemon cake with the strawberry jam.  It smelled so heavenly while baking, I could not wait to try it!  It only took about 30 minutes to bake luckily and then I let it cool down for about 15 minutes before enjoying.

    I topped it off with some vegan whipped cream (the plant based almond whipped cream from Aldi which I had on hand and made it super convenient) and it was amazing!  Soft and light with tart sweet lemon vanilla flavor and aroma and the gooey strawberry jam!  The mellow whipped cream was the icing on top of the cake!  I also think that some vegan vanilla ice cream would be awesome on top of the warm cake and I am totally trying that next time I make this if I have it on hand.  If you are in the mood for some cake, definitely give this Vegan Strawberry Lemon Mug Cake a try!

    Vegan  Strawberry Lemon Mug Cake

    Makes one 8 oz mug cake

    Ingredients:

    Cake:

    • 1/4 cup plus 2 Tbsp  organic whole wheat pastry flour or all purpose flour
    • 2 Tbsp granulated sugar
    • 1/8 tsp plus 1/16 tsp baking powder
    • 1/8 tsp sea salt
    • 1 1/2 tsp ground flax seed mixed with 1 1/2 Tbsp filtered water
    • 1 1/2 Tbsp avocado oil or other neutral oil
    • 2 Tbsp plant based milk
    • 1 tsp lemon zest
    • 1 tsp lemon juice
    • 1/4 tsp pure vanilla extract
    • 2 heaping Tbsp strawberry jam


    Instructions:

    1. Preheat oven to 350F degrees, and oil a 12 oz mug.
    2. In a large bowl, combine the flour, sugar, baking powder and sea salt and whisk to blend.
    3. Add the flax eggs, avocado oil, milk, lemon juice and zest and vanilla and beat with an electric mixer for about a minute (or 3 minutes if doing it by hand with a whisk).
    4. Pour the cake batter the prepared mug.
    5. Spoon the jam over the cake batter and swirl with a knife a few times.
    6. Place the cakes in the oven and bake for about 25-30 minutes until the cake is done in the center (you are able to insert a toothpick into the center and it comes out almost clean with a few moist crumbs).
    7. Remove from the oven and let cool at least 15minutes, then top with some plant based whipped cream (I used almond whipped cream from Aldi) and enjoy warm!
  • Vegan Roasted Strawberry Rhubarb Ice Cream

    Vegan Roasted Strawberry Rhubarb Ice Cream

    Strawberries and rhubarb together is one of my all time favorite combos!  Ever since I first tried my Grandma’s strawberry rhubarb sauce when I was little that she made with the rhubarb growing in her back yard I was a fan.  That stuff was so simple, just strawberries, rhubarb and sugar.  It was so good!  I ate it by the bowlful!  I still love strawberries and rhubarb in desserts.  I had just gotten some rhubarb from my Dad’s back yard and I decided that I needed to make something good with it.  Since it has been warm here lately I thought Vegan Roasted Strawberry Rhubarb Ice Cream sounded amazing!

    Now roasted ice cream may sound like an oxymoron, but the roasting part takes place before the fruit is added to the ice cream.  I just spread out the strawberries and rhubarb on a sheet pan and roasted them to extreme flavorful deliciousness!  Roasting brings flavors out and intensifies them after all, and this was the idea.  That and it gets rid of excess moisture in the fruit.  Which contributes to more icy ice cream which is actually not a good thing unless you are going for a granita or popsicle or something.  The less ice the more creamy the ice cream.

    For the ice cream base, I used a combination of coconut milk and almond butter this time.  If you wanted you could use cashew butter I just prefer almond (as much as I love cashews they upset my stomach a bit), and it was what I had on hand. I really couldn’t taste it in the finished product, it just contributed to the ice cream’s gelato like texture. I also added a touch of vanilla and I sweetened this one with dates because I wanted to go the natural sugars route this time. Plus again, they don’t add excess moisture like say, maple syrup would add.  But if you do not want to use dates and maple syrup is easier for you, it is about 1/3 of a cup you would need for this.

    This ice cream turned out super delicious!  It was so creamy and dreamy, the perfect balance of tart and sweet from the strawberries and rhubarb and packed with flavor!  If you have strawberries and rhubarb on hand and are craving some delicious ice cream, definitely give this Vegan Roasted Strawberry Rhubarb Ice Cream a try this spring or summer!

    Vegan Roasted Strawberry Rhubarb Ice Cream
    Makes 3 cups

    Ingredients:

    • coconut oil spray for pan
    • 1 1/2 cups strawberries
    • 1 1/2 cups sliced rhubarb
    • 1 15 oz can full fat coconut milk
    • 1/2 cup almond butter or raw cashew butter
    • 3/4 cup soft, pitted medjool dates (if they are not soft, soak them in filtered water for 30 minutes before using)
    • 1 tsp pure vanilla extract


    Instructions:

    1. Preheat the oven to 375F degrees, and line a sheet pan with parchment, lightly oiled with coconut oil.
    2. Spread out the strawberries and rhubarb on the parchment and place in the oven. Roast until the fruit is tender, about 30 minutes. Remove from the oven and let cool completely.
    3. Combine the fruit with all other ingredients in a blender and blend until smooth.
    4. Pour into an ice cream maker and process according to directions.  Alternatively, if you do not have an ice cream maker, pour it into a bowl, and whisk every half hour until it is to the consistency of a thick malt.
    5. Pour into a freezer safe container with a lid, and continue to freeze until firm enough to scoop (at least 4 hours or overnight). If it becomes too firm, simply let it sit out for 15 minutes before serving.
  • Mango Strawberry Granola

    Mango Strawberry Granola


    I was never a big granola person, until I discovered home made granola!  Store bought was a bit too sweet and sugary for me sometimes, and the flavors weren’t that exciting but when I make my own at home I can tailor it to my sweetness level and add all kinds of fun add ins!  Granola is something that I love to have on hand, and when I make it it is fun to snack on because nothing beats a pan full of warm granola fresh from the oven!  There are times when I can not stop snacking on it and 1/4 of the pan is gone before I know it!  Last weekend I decided to make some Mango Strawberry Granola and it turned out so delicious I decided to share the recipe with you all! 

    For my granola base, I like to use old fashioned rolled oats because I like texture.  If you prefer a different oat such as just regular rolled that would work too.  The idea is to use what you have on hand!  In this one I used pistachios and pecans, two of my favorite nuts for snacking but I think this would be awesome with cashews as well if you like those going with the tropical theme.  If you wanted to add in a little coconut that would be good too, and I am totally going to do that next time, I just didn’t have any on hand.

    I used coconut oil to get this nice and crispy, but I also added in some almond butter instead of just using all oil because I prefer that. A note for those that want to go oil free, I have successfully replaced the oil with a fruit puree before, and that works great along with the nut butter. So if you wanted to use a mango puree or banana puree to make this oil free go for it! I add in some sea salt and vanilla and this granola is perfectly balanced!

    It smelled so amazing while baking I could not wait to enjoy some!  But first I added in the fruit which is actually freeze dried, so it works out perfect for keeping this more shelf stable.  If it lasts that long that is.  It is pretty darn addicting when you start snacking on it from the tray, and my husband who is kind of picky sometimes about this type of stuff actually liked it too!  If you are looking for the perfect crunchy snack, definitely give this Mango Strawberry Granola a try!

    Mango Strawberry Granola

    Makes 6 cups

    Ingredients:

    • 3 cups organic old fashioned rolled oats
    • 1 cup shelled pistachios
    • 1 cup pecans
    • 1/4 cup coconut oil, warmed to liquid
    • 1/4 cup maple syrup
    • 1/4 cup almond butter or cashew butter
    • 1/2 tsp sea salt
    • 1 tsp pure vanilla extract
    • 1/2 cup freeze dried strawberries
    • 1/2 cup freeze dried mangoes


    Instructions:

    1. Line a large baking sheet with non-stick foil, and spray with cooking spray.
    2. Preheat the oven to 350F and set rack at the medium position.
    3. In a large bowl, combine oats and nuts, and set aside.
    4. In another bowl, whisk together oil, maple syrup, almond butter, sea salt, and vanilla extract until well combined, then pour over oat mixture and toss to coat until completely blended.
    5. Pour out onto prepared baking sheet, and spread out evenly.
    6. Bake for 35 minutes, stirring about every 10 minutes or so until the granola is evenly browned. Remove from oven and let cool. Stir in strawberries and mangoes and enjoy!
  • Vegan Strawberry Rhubarb Pistachio Jam Bars

    Vegan Strawberry Rhubarb Pistachio Jam Bars

    I am super excited for rhubarb season!  We aren’t quite there yet in Minnesota.  Well, maybe that is an understatement.  We just cleared the snow and grass is barely beginning to grow so maybe about a month.  But there is hope, it got up to 88 degrees this week, a record high for that day!  I saw a Facebook post that someone had some just poking up in their garden.  Anyways, until it has grown enough to be harvested, I am enjoying the strawberry rhubarb jam and frozen rhubarb I saved from last year.  I decided to take some of that jam last weekend and make some Vegan Strawberry Rhubarb Pistachio Bars to satisfy my rhubarb dessert craving!

    I love jam bars with the crumble on top!  They are like the best of both worlds with cookies (since the top and bottom are similar to a cookie recipe) and jam, and much easier to make than a sandwich cookie!  When I make my dough for the crust and topping, I like to make it with a recipe that has oatmeal in it for more texture.  Don’t get me wrong, I love all streusel and crumble topping but oatmeal just completes it in my opinion.  This one has a buttery rich tasting crust thanks to the coconut oil used in it, and it is really easy to make!

    I decided to add pistachios to this as well, because why not?  They are nutty and delicious and so pretty in everything you add them to! They added a nice crunch to the crust and topping, plus a touch of saltiness since the ones I had were salted.  You can use unsalted if you prefer.  For the strawberry rhubarb jam, I used some of Eric’s Dad’s home made jam and it was perfect!  If you can not find strawberry rhubarb jam, you could cook about 3/4 cup of rhubarb and combine it with 1 1/2 cups jam (I would sautee it with a little water in a pan over medium heat until it softens, then drain any excess water before adding it to the jam).

    These bars smelled so heavenly while baking, I could not wait to taste them!  They turned out so delicious!  The pistachio vanilla topping and crust were just the right amount of crunch and had a rich buttery texture and paired perfectly with the sweet tart rhubarb!  Strawberry rhubarb pie is one of my favorite things ever and honestly this is on the same level of delicious but less work to make!  If you are a strawberry rhubarb fan, definitely try out these Vegan Strawberry Rhubarb Pistachio Bars this year!

    Vegan Strawberry Rhubarb Pistachio Bars

    Makes 16

    Ingredients:

    • 1 1/2 cups rolled oats
    • 1 1/4 cups vegan whole wheat pastry flour
    • 1/2 tsp baking soda
    • 1/2 tsp sea salt
    • 1/2 cup melted coconut oil
    • 1 cup maple sugar or brown sugar
    • 1 Tbsp ground flax seed mixed with 3 Tbsp filtered water
    • 1 tsp pure vanilla extract
    • 3/4 cup chopped pistachios
    • 2 cups strawberry rhubarb jam


    Instructions:

    1. Preheat the oven to 350F, and line a 9×9 pan with parchment.
    2. In a large bowl, combine the oats, flour, baking soda, sea salt, and set aside.
    3. In another bowl, mix together the coconut oil, maple sugar, flax mixture and vanilla, then mix into the oat mixture until well combined. Mix in 1/2 cup of pistachios.  Set aside.
    4. Press 2/3 of the oat mixture into the 9×9 inch pan evenly, then spread the jam over it. Sprinkle with the remaining oat mixture and pistachios and place in the oven.
    5. Bake for 30 minutes, then remove from the oven and let cool completely before cutting into 16 bars.
  • Vegan Strawberry Rhubarb Scones

    Vegan Strawberry Rhubarb Scones


    Strawberries and rhubarb are one of my all time favorite combinations!  I think it all started when I was little.  My Grandma used to grow a row of giant rhubarb plants behind her garage, and she would use them to make this really delicious strawberry rhubarb sauce which she would give to us in large jars.  It was so good I would eat it by the large bowl full just by itself.  I remember my Grandma telling me not to eat so much at a time or I would get a tummy ache, but I never did.  It was wayyy better than applesauce!  It had the perfect balance of tart and sweet.  So good over ice cream also for a sundae!  I still like to make strawberry rhubarb desserts now as an adult.  Last weekend I decided to make some Vegan Strawberry Rhubarb Scones!  This is something I have been baking a lot at work lately because we have a giant box of rhubarb, and the customers seem to love them so I wanted some for myself at home! 

    I have actually never made strawberry rhubarb scones at home so this seemed like the perfect opportunity.  I have only made strawberry and knew I loved those.  I made a couple of changes though from the ones I make at work, such as using whole wheat pastry flour instead of the ap flour we use there so they are a little darker in color.  If you wanted to make these gluten free, you could use Bob’s Red Mill all purpose baking flour swapped 1:1 for the flour I have used.  I have used it before and it comes out successfully.  Also, I used maple sugar instead of granulated sugar because that is what I prefer to use at home, but you can also use either brown sugar, white sugar or even coconut sugar if you prefer those and they will still be delicious!

    Other than that, the ratios of oil and coconut milk I used are similar  and work well so I did not change them.  No these are not a low fat scone, I developed them to make them the best texture and flavor and we could all use a nice treat once in a while lol!  I love scones even more than muffins because they are a little less sweet, but they have that crunchiness on the outside and tenderness in the middle.  For these, just mixing the dough until combined and leaving lumps of coconut oil is best for the lovely texture. You do not want to over-mix, you want to handle these just enough to create the tender texture kind of like you would treat a biscuit dough.   I have made them so many times I know how it should feel, and if it is your first time you may be tempted to mix it until smooth but don’t do it!

    These smelled so lovely while baking!  I could not wait to try one! They are definitely something that should be enjoyed still slightly warm from the oven because it brings out the flavor!  They are just sweet enough with a tender texture, and pockets of jammy sweet berries and tart rhubarb throughout, with a crisp sweet coating on the outside!  If you are looking for a treat for brunch or just because, definitely give these Vegan Strawberry Rhubarb Scones a try!

    Vegan Strawberry Rhubarb Scones

    Makes 8

    Ingredients:

    • 3 cups organic whole wheat pastry flour* or organic all purpose flour
    • 3/4 cup maple sugar or brown sugar
    • 2 1/2 tsp baking powder
    • 1/4 tsp salt
    • 3/4 cup solid virgin coconut oil, cut into chunks (if your house is above 65F degrees, chill it first)
    • 1 1/2 cups (or as needed) cold full fat organic canned coconut milk (whisked until smooth if chunky)
    • 1 Tbsp pure vanilla extract
    • 1 cup fresh rhubarb sliced into 1/4 inch slices
    • 1 cup fresh or frozen strawberries, cut into quarters or sliced
    • coconut milk for topping (if needed)
    • turbinado sugar for sprinkling


    Instructions:

    1. Preheat oven to 375F degrees with the rack set at the middle position.
    2. Line a baking sheet with parchment.
    3. In a large bowl, combine the flour, sugar, baking powder, and salt. Cut in the coconut oil with a pastry blender or 2 knives until the mixture starts to clump into pea sized pieces. In a small bowl, stir the vanilla into the coconut milk. Add the coconut milk to the dough, and stir a few times, but do not over-mix. The dough should hold together when squeezed, but still be clumpy.
    4. Fold in strawberries and rhubarb until evenly distributed.
    5. Place dough on a floured work surface, and shape into a 4 inch wide log. Use a bench scraper to cut into 8 triangles.
    6. Place scones on the prepared baking sheet, reshaping slightly if necessary.
    7. Brush the tops lightly with the coconut milk (only if they seem dry, you want the sugar to stick), and sprinkle with coconut sugar.
    8. Place in the oven and bake for about 15 minutes , then after about 15 minutes you may need to reshape with 2 bench scrapers if the scones are spreading. Turn them then place back in the oven and bake 15 minutes more until they are lightly browned and cooked throughout.
    9. Cool on a wire rack.
    10. Enjoy!

    *If you prefer to make these gluten free, you can swap the whole wheat pastry flour for an all purpose baking flour like Bob’s Red Mill Gluten Free All Purpose Baking flour (I have tried this brand with success).


  • Vegan Strawberry Sweet Rolls

    Vegan Strawberry Sweet Rolls

    Spring has arrived in full force, the trees are blossoming, the grass is vibrant green, and the birds are singing.  I love it!  And, I am inspired to make desserts that have spring ingredients, like these Vegan Strawberry Sweet Rolls! Minnesota strawberries won’t be here for a little while, they are in their flowering stage, or at least the wild ones are. I have seen quite a few while hiking, so there should be plenty later in the season.  But for now I will settle for the store bought and frozen.  I have been wanting to make these rolls for quite a while, and I finally bought some yeast and found the time to do so.  Funny story, I popped them in the oven and the sirens started sounding for a tornado warning, so we had to go downstairs, but luckily by the time the storm passed, they were just about done baking and they turned out just right. 

    I love making sweet rolls, or any kind of bread dough for that matter, it is so relaxing kneading it!  For this dough, I used my recipe for cinnamon rolls but modified.  It has full fat coconut milk to give it a little richness, and flax eggs in place of the eggs used in regular roll recipes. I scented it with vanilla and sweetened it with maple sugar.  If you didn’t have maple sugar you could use brown sugar or granulated sugar instead and it will still turn out delicious! I used whole wheat pastry flour but you could also use all purpose flour for these if a lighter crumb and dough is desired.

    I filled the rolls with some jam that we received from Eric’s Dad.  He makes the best jam we have ever tasted!  He grows his own berries, and the jam is perfectly balanced.  Not too sweet like some store bought jams that just taste like sugar, this has just the flavor of real fresh strawberries.  It is perfect in things like these rolls!  I used plenty of it in the filling, so they were oozing a bit while baking, but that is just how I like them!  My kitchen smelled so heavenly when I pulled them from the oven!

    I frosted them with a faux cream cheese frosting made out of raw cashew butter, coconut butter, and coconut milk and it was the perfect thing to top them off with!  They turned out so heavenly!  Soft and sweet, gooey jammy berries and that rich “cream cheese” frosting!  If you are looking for a treat to make for brunch this weekend, definitely give these Strawberry Sweet Rolls a try!


    Vegan Strawberry Sweet Rolls

    Makes 12

    Dough:

    • 1/2 cup warm water ( 105-110F degrees)
    • 1 packet active dry yeast (1/4 oz)
    • 3/4 cup warm full fat coconut milk (I warmed it up on the stove)
    • 1/4 cup maple sugar or coconut sugar
    • 1 tsp pure vanilla extract
    • 1 tsp sea salt
    • 1 Tbsp ground flax seed, mixed with 3 Tbsp filtered water
    • 3 1/2 cups whole wheat pastry flour or as needed


    Filling:

    • 3/4 cup strawberry jam
    • 1 cup sliced (or frozen, thawed and drained) strawberries


    Glaze:

    • 1/4 cup raw cashew butter
    • 1/4 cup coconut butter (not oil)
    • 1/4 cup coconut milk or as needed
    • 1 tsp pure vanilla extract
    • 1/2 tsp lemon juice
    • 1/4 tsp sea salt


    Instructions:

    1. To make the dough, combine the yeast and the warm water (about 110F degrees, you don’t want to kill the yeast) plus a pinch of maple sugar and stir to dissolve. Let sit 5-10 minutes until it starts to foam.
    2. In a large bowl, combine the coconut milk, maple sugar, vanilla extract, salt and flax mixture and mix together to combine.
    3. Add the yeast, and 2 cups of flour and mix to combine.
    4. Add the remaining 1 1/2 cups of flour and mix until you have a smooth dough (you may need to use your hands at the end to mix it in).
    5. Turn out onto a lightly floured surface, and knead for 5-10 minutes until smooth and supple. If it is too sticky add a little flour but you want to add as little as possible because if you add too much the dough gets tough.
    6. Place in an oiled bowl, and cover. Let rise for about 1 1/2 hours until doubled in size.
    7. When it is ready, turn out onto the counter or a board and roll out into a 9×15 inch rectangle.
    8. Mix together the filling ingredients and spread it evenly over the dough.
    9. Roll it up, then cut the roll into 12 pieces.
    10. Oil an 8×8 inch square baking pan, and place them in the pan.
    11. Cover and let rise for 45 minutes.
    12. Meanwhile heat the oven to 350F degrees.
    13. When the rolls have risen for 45 minutes, place them in the preheated oven and bake for about 30 minutes until starting to brown and cooked through.
    14. Remove from the oven and let cool 15 minutes.
    15. Whisk the glaze ingredients together, adding a little bit more coconut milk if it seems too thick.
    16. Pour the glaze over the rolls, and enjoy!

    These keep covered at room temperature for up to 3 days, or refrigerated for up to 1 week.

  • Vegan Strawberry Lemon Layer Cake

    Vegan Strawberry Lemon Layer Cake

    The weather here in Minnesota just seems to want to stay cold, in fact we had snow for Easter last weekend, and earlier in the week.  But that isn’t stopping me from enjoying the flavors of spring and looking forward to a warmer season.  We don’t really get strawberries here until the end of May usually, but I decided to make a Strawberry Lemon Layer Cake for Easter last weekend because I was craving them.  Luckily I just needed freeze dried strawberries to flavor the frosting and I had some strawberry jam that Eric’s Dad made with the fresh strawberries from his garden last year.  I love a lemon berry combination this time of year it is just so fresh and the perfect thing to make when you want to leave winter in the past.

    For the cake layers, I used a vanilla cake batter that I have made before with flax eggs, but to flavor it with lemon I added lemon juice and zest in place of some of the water for the flax eggs (so I didn’t add extra moisture). I used whole wheat pastry flour for this, but if you wanted the cake to be lighter in color and texture you could use regular all purpose flour or even cake flour for the lightest cake.  I just used what I had on hand but I know everyone has different preferences with how they prefer their cakes.

    The cakes smelled heavenly as they baked, and they baked up nicely!  I could not wait to try them, but they had to cool first and of course I had to add the strawberry element in the filling and frosting. I actually made my cakes the day before I frosted them because I was making them after work (I almost always do this so that they have plenty of time to cool).  But it is important that you remove them from the pans after they cool about 20 minutes so they don’t become to moist and can cool properly.  Once they have cooled completely I just wrap them with parchment in between and refrigerate them overnight so they are ready to go the next day.

    For the frosting I made a vegan buttercream with a hint of lemon plus plenty of strawberry flavor thanks to the freeze dried strawberry powder I used.  This is a great way to flavor frosting without adding moisture. The frosting was heavenly!  I sandwiched the cake together with it and some of Eric’s Dad’s strawberry jam and it was sooo good!  The cake was sweet, and a little tart thanks to the lemon, the cake layers soft and tender and the frosting rich and creamy.  If you are in the mood for something strawberry definitely give this Vegan Strawberry Lemon Layer Cake a try!

    Vegan Strawberry Lemon Layer Cake

    Makes one 2 layer 6 inch cake

    Ingredients:

    Cake:

    • 1 1/2 cups whole wheat pastry flour
    • 3/4 cup plus 2 Tbsp maple sugar or granulated sugar
    • 3/4 tsp baking powder (1/2 tsp plus 1/4 tsp)
    • 1/2 tsp sea salt
    • 2 Tbsp ground flax seed
    • 1/4 cup lemon juice
    • 1 Tbsp lemon zest
    • 2 Tbsp filtered water
    • 1/4 cup plus 2 Tbsp avocado oil
    • 1/2 cup oat milk (I used Oatly) or other plant based milk
    • 1 1/2 tsp pure vanilla extract


    Frosting:

    • 1 1/2 cups vegan butter, I used Earth Balance (at room temperature)
    • 1 Tbsp lemon juice
    • 2-3 Tbsp oat milk (I used Oatly, but you can use what you prefer), add 3 then if needed add another if frosting comes out too stiff
    • 1 tsp pure vanilla extract
    • 1/2 cup freeze dried strawberries, blended in a blender until they are fine powder
    • 4 cups powdered sugar


    Filling:

    • 1/3 cup strawberry jam


    1. Preheat oven to 350F degrees, and line 2 6 inch round cake pans with parchment on the bottom and oil the sides.
    2. In a large bowl, combine the flour, sugar, baking powder and sea salt and whisk to blend.
    3. Mix together the ground flax seed, lemon juice and zest, and water.
    4. Add the flax mixture, avocado oil, oat milk, and vanilla to the flour mixture and beat with an electric mixer for about a minute (or a little longer if doing it by hand with a whisk).
    5. Pour the cake batter into the prepared pans, dividing evenly between them.
    6. Place the cakes in the oven and bake for about 30 minutes until the cakes are done in the center (you are able to insert a toothpick into the center and it comes out almost clean with a few moist crumbs).
    7. Remove from the oven and let cool 20 minutes, then remove the cakes from the pans by cutting around the sides, placing a plate on top then inverting it and tapping on it.  Allow them then to cool completely once they are out of the pans.
    8. To make the frosting, beat the butter with the milk, lemon juice, and vanilla until fluffy.
    9. Add the strawberry powder, and then powdered sugar 1 cup at a time, and beat until completely mixed and light and fluffy (if the frosting is too stiff add that other Tbsp of milk).
    10. When ready to frost, Place one cake layer on a plate, spread about 1/4 inch thick layer of the frosting over that, then pipe a frosting barrier around the edge of the cake so that the filling does not ooze (tall enough so that it will be thicker than the filling).
    11. Spoon the jam into the middle of it and spread out evenly to the barrier frosting.  Place the next cake layer on top.
    12. Spread the remaining frosting on the top and down the sides of the cake evenly, then place the rest of the frosting in a pastry bag and use it to decorate the top.  This frosting recipe makes enough that you should be able to do some generous piping decorations on top, because I like a lot of frosting!
    13. Serve the cake and enjoy!


    Notes:

    If you would like to make a 9 inch round cake, double the entire recipe, and bake it in two 9 inch round pans, increasing the baking time slightly until the cakes are baked through about 30-35 minutes.


  • Strawberry Pistachio Almond Halva

    Strawberry Pistachio Almond Halva

    You know what you can do for yourself when you had a tough day and just want to wind down and enjoy something sweet?  Whip up a batch of halva!  Seriously, it is so delicious and easy to make!  I began to love it a few years back when Eric and I bought some slices from a local company, but I didn’t realize I could make it at home until this year when I decided to give it a go.  How hard could it be after all?  Turns out, not hard at all once you get it down if you own a candy thermometer (which is one crucial part of the process).  I admit I tried to make it without one the first time and it didn’t turn out as nice (it gets a bit crumbly and won’t set nicely), but once I bought one, it was perfect!  I started out making the classic kind with  tahini, and that is super delicious and you can flavor it with so many things!  But I recently started experimenting with other nut butters.  So far I have made a peanut butter and chocolate, and then this Strawberry Pistachio Almond Halva with almond butter! It turned out so good I had to share!

    I always have lots of different nut butters on hand for different recipes and for just eating, so I thought why not try out different ones in halva!  I make my own nut butters at home with my high speed blender.  I think they taste much better than most store bought brands, and that way I control what goes into them. As in, they are only made from whatever nut I am blending and not a bunch of weird oils added in.  If you own a high speed blender and want to make your own, blend 4 cups nuts with sea salt to taste on high, using the tamper to press the nuts down into the blades, and blend until it becomes smooth nut butter.  Trust me it is sooo much better than just buying a jar!  But of course store bought would work for this recipe if you don’t have a blender, just make sure it is smooth, and only contains almonds and salt.

    I associate strawberries with Valentine’s Day, so that is why I chose strawberries for pairing with the almond butter this time, I also added in a bit of vanilla extract to make it fragrant and crunchy salty pistachios for color and texture!  It didn’t take long to make at all!  The thing that takes the longest is simply waiting for the sugar syrup to cook to 250F degrees, after that all you do is stir it into your almond butter mixture, press it into the pan and volia!  Delicious halva after it chills for a while.

    This halva is heavenly!  Sweet and salty, melt in your mouth texture, fragrant with almond, vanilla and strawberries!  I think this would be perfect for Valentine’s Day, I know it certainly is in my home, since my husband Eric loves it and can eat half a batch in one sitting. My favorite type of valentine’s gift or any gift for that matter is one that has thought and love put into it and I am all for edible gifts!  So why not give this Strawberry Pistachio Almond Halva a try!

    Strawberry Pistachio Almond Halva

    Makes 1 lb

    Ingredients:
    • 1 1/2 cups smooth natural (unsweetened) almond butter, stirred well, at room temperature
    • 1/4 tsp sea salt
    • 1/2 tsp pure vanilla extract
    • 1 cup granulated sugar
    • 1/4 cup filtered water
    • 1/2 cup chopped pistachios, plus more for topping
    • 1/2 cup freeze dried strawberries, broken up, plus more for topping


    Instructions:
    1. Line an 8×8 inch square pan with parchment (letting it go up the sides as well).
    2. In a medium sized bowl, combine the almond butter, sea salt, vanilla pistachios, and strawberries and mix until well blended.  Set aside.
    3. In a small saucepan with a candy thermometer in it, combine the sugar and water over medium high heat, and stir to dissolve the sugar.  Bring to a boil, and allow to cook while stirring occasionally so it does not burn, until it turns golden brown and reaches 250F degrees.
    4. When it reaches the proper temperature, pour into the halva mixture in a thin stream while stirring constantly until it is just blended (you don’t want to over-mix or it will become crumbly).
    5. Dump the halva into the prepared pan, and press it out evenly.  Sprinkle with the remaining about 2 Tbsp pistachios and freeze dried strawberries and press them into it to adhere them.
    6. Place the halva in the refrigerator and allow to chill and set for a couple hours until it is firm.
    7. Cut into pieces, and enjoy!

    Keeps for 1 month in the refrigerator.


  • Vegan Neapolitan Ice Cream Cake

    Vegan Neapolitan Ice Cream Cake

    I always liked neapolitan ice cream.  It seemed kind of fancy with its 3 flavors layered together and it meant that you didn’t have to simply choose one flavor of ice cream which was always hard for me. But I haven’t seen any vegan neapolitan ice cream for sale, so I thought I would make my own.  Except I thought it would be fun to make a cake instead of just ice cream to scoop so I went for it!  It has been warming up here lately and pretty soon it will feel summery so it is the perfect time of year to start making ice cream treats! Not that I don’t eat them year round because I totally do!  They are just that much more refreshing if it is warm.

    I have an ice cream maker but I actually didn’t use it to make this because it was not frozen and I didn’t want to wait  until the next day. So that makes the recipe a little easier!  If you wanted to use one you could if you wanted to speed up the process you would just end up freezing the plain vanilla base, then dividing it and whisking in the other two flavors then layering it.  But it turned out just as delicious without that step and I am all for making it a little more easy.

    For the base I used coconut milk with a little raw cashew butter to make it rich and creamy and it was heavenly!  I made the vanilla first, then whisked a strawberry puree into some and also cacao powder for the chocolate portion.  For the crust I made something similar to what I make for my raw style cheesecakes and it worked out perfect!  I like to think of it as a much healthier version of an oreo crust, since I don’t keep oreos on hand or really any store bought cookies that could be used for a crust.

    I drizzled it with a little chocolate fudge and topped it off with strawberries and it was ready to dive into!  I could not wait!  It was so heavenly!  The vanilla, chocolate and strawberry ice creams were creamy, dreamy and sweet the perfect match for each other!  This upgraded version of the ice cream I ate as a child is way better than the original!

    Vegan Neapolitan Ice Cream Cake

    Makes 1 8 inch round cake

    Crust:

    • 3/4 cup organic gluten free rolled oats
    • 3/4 cup finely shredded dried unsweetened coconut
    • 3 Tbsp unsweetened cocoa powder
    • 3/4 cup soft pitted medjool dates (soaked in filtered water if not soft for 30 minutes and drained well.)
    • 3 Tbsp almond butter
    • 1/4 tsp sea salt


    Ice Cream:

    • 2 15 oz cans full fat coconut milk (use a brand that is mostly thick cream like Thai Kitchen)
    • 1/2 cup raw cashew butter
    • 3/4 cup maple syrup
    • 1 tsp pure vanilla extract
    • 1/4 tsp sea salt
    • 3 Tbsp cacao powder
    • 1/3 cup strawberry puree

    For topping:

    Fudge:

    • 2 Tbsp cacao powder
    • 1 Tbsp maple syrup or as needed

    Strawberries


    Instructions:

    1. Oil a 8 inch spring form pan and line with parchment paper.
    2. To make the crust, combine all ingredients in a food processor and process until fine and starting to hold together when squeezed. Once it is at that stage, press it into the bottom of the prepared pan.  Set aside.
    3. To make the ice cream, combine all ingredients but the cacao powder and strawberries in a high speed blender or food processor and blend until very smooth (if you are using a food processor and it still has little bits you may want to strain it through a fine meshed strainer to remove them).
    4. Pour into a bowl and place in the freezer for about 30 minutes or until chilled, whisking after 15.
    5. Divide between 3 bowls, and whisk the cacao powder into one of them, the strawberries into another and leaving the last vanilla.
    6. To assemble the cake, pour vanilla ice cream over the crust, then place in the freezer for about 20 minutes until the top is more firm, then pour the chocolate ice cream and repeat the process then the strawberry.
    7. Place in the freezer until firm, about 6 hours.
    8. Unmold the cake.
    9. To make the fudge, whisk together the cacao powder and maple syrup until smooth (if it is too thick add a little more syrup until it is pourable but still thick).
    10. Drizzle the fudge over the top of the cake and top with strawberries.
    11. Enjoy!

    Store any leftover cake in the freezer in an airtight container.


  • Vegan Strawberry Lemon White Chocolate Cups 

    Vegan Strawberry Lemon White Chocolate Cups 

    Meteorological spring is here, and even thought it is not technical spring on the calendar, I am treating it like it is.  I am so ready to wear cute spring clothes, watch everything start to green up outside and to eat delicious spring produce!  One of my favorite of which is strawberries.  They won’t be in season here yet for a while, but Eric’s Dad sent us some of his home made strawberry jam so that is just as good!  It is seriously the best jam I have ever had, he grows the berries in his back yard and they are amazing! 

    So I decided to make a treat with some of it, some strawberry lemon white chocolate cups! It is spring candy and Easter candy time so why not?!  I always love some good white chocolate. I make my own, since most of the stuff at the store is not made with actual cacao butter, and some of the vegan ones I have tried were either super expensive or just meh. Plus it is fun to make your own if you happen to have the ingredients on hand, which I always do because they are part of my dessert making pantry.

    For the white chocolate I use a mixture of cacao butter, coconut butter and cashew butter to give it a smooth rich melt in your mouth texture.  A little maple syrup and vanilla to sweeten it and it is so good!  This time I added a little bit of lemon juice and zest to make it lemon flavored. I love lemon desserts in the spring!

    I could not wait to try these once they were ready!  They were just as heavenly as I imagined!  Smooth, rich melt in your mouth vanilla and lemon scented white chocolate with sweet gooey strawberry jam on the inside!  So much better than most things you can buy at the store!  If you are a fan of white chocolate, give these a try! 

    Vegan Strawberry Lemon White Chocolate Cups 

    Makes 6

    Ingredients:

    • 1/2 cup cacao butter (2 oz)
    • 1/4 cup raw cashew butter
    • 1/4 cup coconut butter
    • 1 tsp pure vanilla extract
    • 3 Tbsp maple syrup (or to taste)
    • 1/8 tsp sea salt
    • 2 Tbsp lemon juice
    • about 1/2 cup strawberry jam


    Instructions:

    1. Combine cacao butter, cashew butter, vanilla, maple syrup,  and sea salt over a double boiler, and whisk until smooth.
    2. Whisk the lemon juice and zest into the white chocolate.
    3. Pour about 1/4 inch into the bottom of 6 silicone muffin tins or large peanut butter cup molds, and place in the freezer until hard, which usually takes about 10 minutes or so depending on how warm it is.
    4. When that chocolate has hardened, spoon about 1 tsp of strawberry jam into the center of each (being careful not to let it spread too much to the edges) and then top with enough white chocolate to cover it.
    5. Place back into the freezer until set, about 30 minutes.
    6. Pop chocolate out of molds and enjoy!
    7. Store in the refrigerator for a month or an airtight container in the freezer for up to three months.


  • Vegan Strawberry Matcha Chocolate Bars

    Vegan Strawberry Matcha Chocolate Bars


    It has been feeling like spring here in Minnesota, so I am in the mood for spring colors and flavors.  I am so ready to put away the heavy winter clothes and bring out the fun spring wardrobe! But I know the weather can turn on a dime so it will still be a few weeks I am sure before I can store away the coats for good for the season.  I am going to soak up as much sunshine as I can, and savor the fact that the snow is melting and make spring themed food.  Like these strawberry matcha chocolate bars that I made last week.

    For some reason, I love the flavor matcha for spring.  Mainly because of the green color, which is perfect for growth to symbolize spring, but also it is so light and fresh!  Strawberries are a late spring crop here, coming in about May or June, but I like to start enjoying them as soon as I can get them for a good price in stores.  For these bars though, I actually used freeze dried ones (so they didn’t add moisture to my chocolate) so it didn’t matter.

    I had the idea to make a chocolate bars with spring colors in a white chocolate and swirl that into a dark chocolate bar, and strawberry powder and matcha powder were the perfect way to accomplish this!  They would have been good on their own as flavored white chocolates, but I just love the combination of white and dark chocolate so much when they are combined. One is dark and intense and one is mellow and sweet so they balance each other out.

    These turned out just as I had imagined them!  Super delicious with the rich dark chocolate, the light smooth sweet strawberry chocolate and the earthy matcha!  They were perfectly balanced, and so heavenly!  I have to admit, I made these just for myself and I did not share.  But they would make a lovely gift, and they would be perfect for Easter as an alternative to store bought candy. 

    Vegan Strawberry Matcha Chocolate Bars

    Makes 4

    Matcha and Strawberry White Chocolate:

    • 1/4 cup cacao butter
    • 2 Tbsp coconut butter (warmed to liquid)
    • 2 Tbsp raw cashew butter
    • 1 tsp pure vanilla extract
    • 2 Tbsp maple syrup (or to taste)
    • pinch sea salt
    • 1/4 tsp matcha powder
    • 2 Tbsp strawberry power (I took freeze dried strawberries and ground them up with a mortar and pestle)


      Dark Chocolate:

    • 1 1/2 cups chopped good quality vegan dark chocolate


        Instructions:

    1. Combine the cacao butter, cashew butter, and coconut butter, and  in the top of a double boiler, and melt until smooth.
    2. Add the maple syrup, vanilla, and sea salt and whisk together until well blended.
    3. Divide between 2 bowls.  Whisk the matcha into one, and the strawberry powder into the other.
    4. drizzle half of the matcha white chocolate and strawberry white chocolate in random designs into the bottoms of 4 standard sized chocolate bar molds set on a tray.
    5. Place the tray with the molds in the freezer until the white chocolate has set.
    6. Meanwhile, clean out the double boiler, and add the dark chocolate to it, melting it until smooth.
    7. When the white chocolate has hardened, pour the dark chocolate over it to fill the molds, and smooth to the sides (working quickly because if you go too slow the white chocolate will start to melt and not look neat).  Then drizzle the remaining strawberry and matcha white chocolate over that.
    8. Set the tray with the molds back into the freezer until set, about 20 minutes.
    9. Unmold and enjoy!


    Chocolate bars keep in a container in the refrigerator for up to a month.

  • Vegan Peanut Butter and Jelly Sweet Rolls

    Vegan Peanut Butter and Jelly Sweet Rolls


    I have made classic caramel rolls, and cinnamon rolls but I thought I would make something a little different last weekend as far as rolls went because I am always open to trying new things when it comes to making recipes! I has some of Eric’s Dad’s home made jam and I thought about making some strawberries and cream rolls, but then I thought peanut butter and jelly rolls sounded even more amazing so that is what I made!  It was the perfect day to do so because it was in the single digits outside, so perfect baking weather to stay inside warm and cozy.

    A while back sweet rolls intimidated me because of the whole yeast and letting it rise factor. But once you get the hang of it, it is really quite easy and simple!  These do take a bit of time, but it is the perfect weekend project, and you can enjoy the fruits of your labor after!  There is nothing more satisfying than making your own really good treat like these rolls! For the base, I used whole wheat pastry flour because it is what I have on hand and it worked perfectly!  Could you use regular AP flour?  Yes, if you prefer a lighter roll, I just like the whole wheat.  I added a bit of peanut butter and vanilla to it plus a bit of maple sugar to sweeten and it was just right. 

    It kneaded up and rose nicely.  For the filling, I gave it a layer of peanut butter and jelly because  just adding the peanut butter to the dough wasn’t enough peanut butter flavor for me.  They smelled amazing while baking! Once they emerged from the oven and had a little time to cool, I made a quick peanut butter maple topping that tasted like peanut butter caramel and drizzled that over them. 

    They were sooo good!  Soft textured rolls just as sweet rolls should be with gooey peanut butter and jam inside and that sweet glaze was just the thing to top them off with!  Kind of like a PB and J in roll form.  If you are a big PB and J fan like me, definitely give these a try!

    Vegan Peanut Butter and Jelly Sweet Rolls

    Makes 12

    Dough:

    • 1/4 oz active dry yeast
    • 1/2 cup warm water ( 105-110F degrees)
    • 3/4 cup warm coconut milk (I warmed it up on the stove)
    • 1/4 cup peanut butter
    • 1/4 cup maple sugar or coconut sugar
    • 1 tsp sea salt
    • 1 Tbsp ground flax seed, mixed with 3 Tbsp filtered water
    • 3 3/4 cups whole wheat pastry flour or as needed


    Filling:

    • 3/4 cup peanut butter
    • 3/4 cup strawberry or raspberry jelly


    Topping:

    • 1/4 cup peanut butter
    • 1/4 cup maple syrup
    • 1/8 tsp sea salt


    Instructions:

    1. To make the dough, combine the yeast and the warm water plus a pinch of maple sugar and stir to dissolve. Let sit 5-10 minutes until it starts to foam.
    2. In a large bowl, combine the coconut milk, maple sugar, salt and flax mixture and mix together to combine.
    3. Add the yeast, and 2 cups of flour and mix to combine.
    4. Add the remaining 1 3/4 cups of flour and mix until you have a smooth dough (you may need to use your hands at the end to mix it in).
    5. Turn out onto a lightly floured surface, and knead for 5-10 minutes until smooth and supple. If it is too sticky add a little more flour but you want to add as little as possible because if you add too much the dough gets tough.
    6. Place in an oiled bowl, and cover. Let rise for about 1 1/2 hours until doubled in size.
    7. When it is ready, turn out onto the counter or a board and roll out into a 9 x 15 inch rectangle.
    8. For the filling, spread the peanut butter evenly over the dough, then the jelly.
    9. Roll it up (the short side down, so you have a longer roll), then cut the roll into 12 pieces.
    10. Oil an 8×8 inch square baking pan, and place them in the pan.
    11. Cover and let rise for 45 minutes.
    12. Meanwhile heat the oven to 350F degrees.
    13. When the rolls have risen for 45 minutes, place them in the preheated oven and bake for about 30 minutes until starting to brown and cooked through.
    14. Remove from the oven and let cool 15 minutes.
    15. To make the topping, whisk the peanut butter and and maple syrup together until smooth with the sea salt.  Add a little more syrup if it seems too thick (since peanut butter varies in thickness) to pour over the rolls.
    16. Drizzle the peanut butter mixture over the rolls and enjoy!

    These keep covered at room temperature for up to 3 days, or refrigerated for up to 1 week.

  • Strawberry Pistachio Lemon Granola

    Strawberry Pistachio Lemon Granola

    When I was little I thought that granola was something that hippies ate that you got at the health food store. So in other words a health food. Little did I know that it was actually really delicious, which I discovered in college when I decided to make a granola recipe from a breakfast cookbook I had borrowed from the library. I made it and I was hooked. I loved that I could make different flavors and switch up the ingredients for interesting combinations. For a while I was making it every week, and I had a few friends who would actually request I make a bag of it for them it was that good. I don’t make it every week anymore, but I do make a big bag once a month to have on hand for when the granola craving strikes. I don’t usually have it for breakfast, it is usually a snack when I want something crunchy and slightly sweet. It is also awesome to top cut up fruit in a bowl off with.

    I ran out of my stash I keep in the refrigerator, and so I made some Strawberry Pistachio Lemon Granola last weekend. It was so good I just had to share the recipe with you all. I usually stick to pretty standard flavors lately but I felt like making something Spring like since it seems that Spring has finally sprung here with everything looking green and the flowers finally starting to show up. Strawberries are a must in the Spring for me so I figured they would be perfect to include!

    I had some pistachios on hand as well, and thought those would be lovely with the red strawberries. If you are looking for affordable shelled pistachios by the way, Aldi has them for a great price! Back to the granola though, lastly I wanted to add a bit of lemon and coconut, which I also like to include in my Spring desserts.

    OMG it smelled amazing while baking! That is one of the things I love about granola. That and eating it as it cools. A big portion of the pan is usually gone, because like pop corn, it is hard to stop snacking on. Especially if is calling to you in plain sight and smelling all delicious. If you have never made your own granola, you sooo need to try it!

    Strawberry Pistachio Lemon Granola
    Makes 6 cups

    Ingredients:

    • 3 cups organic gluten free old fashioned rolled oats
    • 1 cup shelled pistachios
    • 1 cups finely shredded, dried unsweetened coconut
    • 1/4 cup coconut oil, warmed to liquid
    • 1/4 cup maple syrup
    • 1/4 cup raw cashew butter or almond butter
    • 1 Tbsp organic lemon zest
    • 1 Tbsp lemon juice
    • 1/2 tsp sea salt
    • 1 tsp pure vanilla extract
    • 1 cup freeze dried strawberries

    Instructions:

    1. Line a large baking sheet with non-stick foil, and spray with cooking spray.
    2. Preheat the oven to 350F and set rack at the medium position.
    3. In a large bowl, combine oats, nuts, and coconut, and set aside.
    4. In another bowl, whisk together oil, maple syrup, cashew butter, lemon juice and zest, sea salt, and vanilla extract until well combined, then pour over oat mixture and toss to coat until completely blended.
    5. Pour out onto prepared baking sheet, and spread out evenly.
    6. Bake for 35 minutes, stirring about every 10 minutes or so until the granola is evenly browned. Remove from oven and let cool. Stir in strawberries and enjoy!
  • Vegan Chocolate Strawberry Scones

    Vegan Chocolate Strawberry Scones

    I am so happy it is finally getting comfortably warm outside! Eric and I went for a walk in the afternoon around the Stone Arch area of Minneapolis last weekend and it was so warm that I wore shorts and a tank top and was even sweating a little despite the breeze. Let me tell you, it is a nice change from the snow we had just a couple weeks ago. We decided when we got done walking that something cool sounded good and I had the idea to hit up Crepe and Spoon a vegan and crepe shop in the area. I have always wanted to try it, and the ice cream I had ended up being super delicious. I got the raspberry lemonade ice cream in a waffle cone. I haven’t had a waffle cone since I was a kid probably and I loved it! We will definitely be going back there, especially this Summer.

    It was a little chillier on my other day off, so I decided to do some baking. I had picked up some organic strawberries at Aldi for a good price, and I thought they would be lovely in some scones. I had made some chocolate strawberry scones a while back before I went vegan and they were really good so I decided to recreate those.

    Scones are actually a fairly quick and easy thing to make provided you have your coconut milk chilled (which I always do because I store it in the refrigerator since I mostly use it chilled). For the base, I used a mixture of whole wheat pastry flour and almond flour with coconut oil and full fat coconut milk to make it nice and rich, plus of course some cacao powder and vanilla. The secret to making these flakey and delicious is to not over-mix the dough. this dough is super delicious by the way, I had to sample it before baking of course.

    They smelled amazing while they baked almost like brownies, and they were lovely when I pulled them out of the oven. I decided to top them off with a bit of melted dark chocolate too though to make them even more pretty. They were delicious warm (the best way to eat scones) with plenty of chocolate flavor, gooey chocolate chips and jammy strawberries in a tender dough! If you have strawberries and chocolate on hand, give these a try!

    Vegan Chocolate Strawberry Scones
    Makes 8

    Ingredients:

    Scones:

    • 2 1/2 cups organic whole wheat pastry flour
    • 1/2 cup almond meal
    • 1/4 cup cacao powder or unsweetened cocoa powder
    • 1/2 cup coconut sugar
    • 2 1/2 tsp baking powder
    • 1/4 tsp salt
    • 1/2 cup virgin coconut oil, cut into chunks
    • 1 cup cold full fat organic canned coconut milk (whisked until smooth if chunky)
    • 1 Tbsp pure vanilla extract
    • 1 1/2 cup fresh organic strawberries, sliced
    • 3/4 cup vegan dark chocolate chips or chunks
    • coconut milk for topping (if needed)
    • coconut sugar for sprinkling

    Instructions:

    1. Preheat oven to 425F degrees with the rack set at the middle position.
    2. Line a baking sheet with parchment.
    3. In a large bowl, combine the flour, almond meal, cacao powder, sugar, baking powder, and salt. Cut in the coconut oil with a pastry blender or 2 knives until the mixture starts to clump into pea sized pieces. In a small bowl, stir the vanilla into the coconut milk. Add the coconut milk to the dough, and stir a few times, but do not over-mix. The dough should hold together when squeezed, but still be clumpy.
    4. Fold in strawberries and chocolate chips until evenly distributed.
    5. Place dough on a floured work surface, and shape into a circle, a few inches high. Use a bench scraper to cut into 8 triangles (like a pizza).
    6. Place scones on the prepared baking sheet, reshaping slightly if necessary.
    7. Brush the tops lightly with the coconut milk (only if they seem dry, you want the sugar to stick), and sprinkle with coconut sugar.
    8. Place in the oven and bake for about 20 minutes or until golden brown (after about 15 minutes you may need to reshape with 2 bench scrapers if the scones are spreading, then place back in the oven).
    9. Cool on a wire rack.
    10. Enjoy!
  • Vegan Strawberry Frosted Vanilla Cookies

    Vegan Strawberry Frosted Vanilla Cookies

    Back when I was in high school I didn’t cook a lot, but what I did do once in a while was make cookies.  I especially loved my Grandma’s cookie recipes, frosted sugar cookies being one of my favorites.  I used to make a big batch, and share them with my friends and family.  They were really rich delicious cookies with about a pound of butter in the dough, sugar plus powdered sugar and of course I topped them off with buttercream frosting that had more butter and sugar.  So just one was plenty or you might go into a sugar coma.  Well, several different people I gave a plate to ate the entire plate in one day!  So I guess that means they were pretty darn good.  Well, I don’t make those cookies any more because they were obviously not vegan and I try to make things that are a bit healthier.  But I do still like frosted vanilla cookies.

    So last weekend I decided to make some vanilla frosted cookies.  They are more shortbread buttery type cookies than the softer sugar cookies I used to make, but I like the texture of these even better. The cookie base is pretty simple and easy to make, not fussy at all. I use a mixture of whole wheat pastry flour plus a little tapioca flour to make the texture more tender. And for the fat in the dough I use a mixture of avocado oil and coconut oil because if it were all just coconut oil they would be harder at room temperature but the avocado oil makes the consistency more like actual butter or buttery spread.  I am just not a fan of using store bought buttery spreads and would rather mix my own oils.  The result is a delicious tender buttery cookie! 

    They smell amazing while baking too because of course you can’t go wrong with vanilla.  For the frosting on these cookies I thought about making a buttercream style vegan frosting, but decided to go with more of a glaze one instead.  It is much easier to make and still good. I made a simple coconut butter glaze.  I wanted a pink frosting, so I ground up some freeze dried strawberries into a powder to color it and it was so good!  Like sweet strawberries and cream frosting! Lastly, I sprinkled the frosted cookies with some little candy balls, because why not make them pretty.  These would be perfect for upcoming Valentine’s Day, don’t you think?

    Vegan Strawberry Frosted Vanilla Cookies 
    Makes about 16

    Ingredients:

    • 1 3/4 cups organic whole wheat pastry flour*
    • 1/4 cup tapioca flour**
    • 1/4 cup plus 2 Tbsp maple sugar
    • 1/4 tsp sea salt
    • 1/4 cup melted coconut oil
    • 1/4 cup plus 2 Tbsp avocado oil (or other neutral oil liquid at cool temperatures)
    • 1 Tbsp filtered water
    • 1 tsp pure vanilla extract

    Frosting and Topping:

    • ¼ cup plus 2 Tbsp coconut butter, warmed to liquid
    • ¼ cup plus 2 Tbsp filtered water (or as needed)
    • 1 Tbsp maple syrup
    • 2 Tbsp strawberry powder***
    • vegan sprinkles (optional)

    Instructions:

    1. Preheat the oven to 300F degrees, and line a baking sheet with parchment.
    2. To make the dough, mix all ingredients together in a bowl until combined and smooth (it may be slightly crumbly, and that is ok, just squeeze it back together), then place on a piece of parchment paper and roll out 1/4 inch thick.  Cut into shapes with a medium sized cookie cutter (I used a heart shape) and place them onto the prepared pan. Re-roll any scraps squeezing them back together and rolling them out, and cutting into more shapes until all of the dough is used.  Place the cut shapes on the pan into the freezer to chill for 10 minutes before baking.
    3. Place the pan in the oven and bake for 20-25 minutes or until set and just barely beginning to brown at the edge.
    4. Remove the pan from the oven and let cool completely on a rack.
    5. Mix together the coconut butter, maple syrup and dried strawberries until smooth adding a touch more filtered water if it is too thick (you want it a thick glaze consistency). 
    6. Spread a thin layer of the frosting over the cookies, and sprinkle with the sprinkles.  Set the glazed cookies in the freezer for about 5-10 minutes until set.
    7. Store any leftover cookies in an airtight container in the refrigerator or freezer.

    *If you wanted to make these cookies gluten free, you could use Bob’s Red Mill gluten free all purpose baking flour instead of the pastry flour.

    **If you do not have tapioca flour you can substitute cornstarch.

    ***To make strawberry powder, grind freeze dried strawberries to a fine flour consistency with a mortar and pestle, or grind in a clean dry spice grinder.

  • Strawberry Jalapeno Jam

    Strawberry Jalapeno Jam

    My Grandma did lots of preserving fruits and vegetables through canning. My favorite was the strawberry jam it was so good!  I mean, I don’t think anything can compare to home made berry jam. Maybe that is why my Dad always bought strawberry jam when I was little, because his Mom made it for him growing up.  My Mom would buy raspberry which is my favorite now as an adult (strawberry a close second).  We never had grape jam at my house, so when I had it at a friend’s house I thought it was special.  I have always wanted to make my own home made jam, and I finally got around to it this week.  I guess it kind of intimidated me, the whole canning process.  But I read some recipes online and realized it isn’t that complicated at all!  So I went for it.  First I made a mixed berry jam.  Something simple to start off with.  My problem is sometimes when I am making something for the first time I try to make it too complicated or switch it up too much from the recipes I have read.  The first one turned out delicious!  I made a low sugar jam using maple syrup instead of the usual cane sugar or white sugar because I prefer to not use lots of processed sugar in things. So I was pleased that it tasted just as good as the jam I have grown up eating without all of the extra sugar.  I mean, if your fruit is flavorful and ripe, you should not need much sugar.

    I wanted to make another jam since the first one turned out so well, which is the recipe I am sharing with you all today!  I decided on a Strawberry Jalapeno Jam!  Strawberries were a good price, and I wanted something a little non-traditional so I decided to add the kick of jalapenos as well!  Eric is always telling me I should add chilies to things (like desserts not just savory stuff), so I figured he would appreciate me sharing the finished product with him as well!

    It wasn’t really that complicated to make.  Don’t let making jam intimidate you like it did me.  I don’t know why I didn’t just try making it 10 years ago!  My kitchen smelled amazing while the jam was cooking, like I was baking a strawberry pie or something.  I could not wait to try it.  But I had to wait until the next day once it cooled to taste the finished product.  I know the purpose of canning things isn’t to dig into them right away, but I am impatient.  It was super delicious!  Sweet intense strawberry flavor with just a hint of a kick of the jalapenos but not so much that they overwhelmed it. If you have fresh, ripe strawberries, make your self some of this so that you can enjoy it in the Winter when you are missing fresh berries!

    Strawberry Jalapeno Jam
    Makes about 4 cups (2 16 oz jars)


    • 2 clean 16 oz canning jars
    • 5 cups fresh organic strawberries, hulled
    • 1 large organic jalapeno, sliced (or diced if you don’t like big pieces)
    • 2/3 cup apple juice
    • 3 Tbsp lemon juice
    • 1/2 cup maple syrup
    • 1 1/2 Tbsp Pomona’s Universal Pectin (it works with low sugar jams)
    • 2 tsp calcium water*
    • 1/2 cup maple syrup


    Instructions:

    1. Bring a large pot of water with a canning rack at the bottom to a boil for sterilizing the jars.  Place the jars on the rack, bring to a boil, then lower to a simmer for 10 minutes.  Turn off the heat, add the lids to the pot, and let sit until you are ready to use.
    2. In another pot, combine the berries, jalapeno, apple juice, and lemon juice .  Bring to a hard boil, and stir constantly.
    3. Mix together the pectin, calcium water and maple syrup until pectin is fully dissolved and there are no lumps.  Add to the jam, and continue to boil for 2 minutes, still stirring to make sure it doesn’t stick to the bottom. remove from heat.
    4. Remove the jars from the water bath, and dry off the outside.
    5. Spoon the jam into the jars, leaving 1/4 inch of space at the top. Wipe the tops of the jars clean if any fruit spilled on them.
    6. Top with the lids, and screw on the bands until just tight (or fingertip tight, screwed on with light pressure from your fingers not cranked on to the tightest possible).
    7. Place jars back in the pot on the rack making sure they are covered by 1 inch of water and allow to simmer for 10 minutes. Turn off the heat and allow to sit for 5 minutes.
    8. Remove cans from water and let cool.  Let sit for 1 day, then check to make sure they sealed properly (you should not be able to push the lid up and down in the center it should stay put if sealed properly).
    9. Store jam in a cool place out of sunlight (like a basement shelf or cupboard).


    *If you buy the pectin I suggest in the recipe, the calcium comes with the pectin in the package.  All you need to do to make the water is mix 1/2 tsp white calcium powder with 1/2 cup of water to make the calcium water.  I mixed it in a jar and put it in the refrigerator for future batches (you only need 2 tsp for the recipe).


  • Lets get Fizzy with Sparkling ICE and my Strawberry Kiwi Sparkling Tonic!

    Lets get Fizzy with Sparkling ICE and my Strawberry Kiwi Sparkling Tonic!

    This post is sponsored by Sparkling ICE but the content and opinions expressed here are my own.

    I love sparkly things, especially in cocktails!  And I have been making quite a few lately!  It has been really steamy here in Minnesota this week!  We had a heat index of about 108F degrees a few days back, and it created some monster thunderstorms, but they didn’t do much to cool it off outside. I pretty much expect that July will be hot as it is the peak of Summer.  But you know what makes it better?  Those cocktails I mentioned earlier.  I don’t mind the 90F degree heat so much when I am sitting on the patio sipping something cool.  I love my Summer drinks, but what I don’t love is added sugar in them.  A lot of drink mixes come with loads of sugar so I avoid that stuff.  But you know what I just discovered that is perfect for using in cocktails?  Sparkling ICE !  It is a fruity sparkling water with zero sugar, zero calories, vitamins, antioxidants and loads of natural fruit flavor.  When I was younger I pretty much lived on sparkling water. I have never been one to drink pop, but I love the fizz of sparkling water, and the Sparkling ICE is some of the most delicious I have tasted! My boyfriend Eric has been drinking it for a while, because he decided that he wanted to drink less sugary soda, and he buys this instead. He was the one who first got me to try it, and it is super refreshing and delicious!  The Kiwi Strawberry and Lemon Lime flavors are my favorite.

    The Lemon Lime is good for when you want a citrus twist in your cocktail, and even just adding a shot of vodka or tequila to it is a simple cocktail that anyone can make!  But I made something a little more fancy yesterday, a Strawberry Kiwi Sparkling Tonic!  I have been craving a gin drink since I saw one in a restaurant on a cocktail menu, but I had decided not to order it because it had honey in it (which isn’t vegan), plus it had another sugary syrup too which was too much sugar, and I told myself, I should make one at home because I knew I could make one that was just as good.  So I bought myself a bottle of gin, and some Kiwi Strawberry Sparkling ICE as well as some fresh berries and lemons and I had the makings for a delicious cocktail! I muddled mint and strawberries in a shaker, then added the lemon juice, gin and Kiwi Strawberry Sparkling ICE and voila!  A delicious refreshing drink. It only took me a couple of minutes to make, and it was as good as something I would have ordered in a restaurant.  If you want to impress your friends at your next gathering make them one of these cocktails, recipe is at the bottom of the post.

    Drinks with no added sugar and only natural ingredients are important to me, which is why I often choose Sparkling ICE as my mixer! Most of us are wanting to look good in our Summer clothes and be confident, and making drinks that are low in calories, and don’t make us feel yucky or give us a sugar buzz is a good way to keep us feeling that way!  You can find all 16 flavors of Sparkling ICE on Amazon HERE!

    Strawberry Kiwi Sparkling Tonic
    Makes 1 drink

    Ingredients:


    Instructions:

    1. In a cocktail shaker, combine the ice, strawberries, mint leaves, and muddle (smash) it all together with a muddler, or the end of a wooden spoon if you do not have one.
    2. Add the lemon juice, put the top of the shaker on, and shake it briefly, then pour in the Sparkling ICE and stir it a few times to blend.
    3. Pour into a tall serving glass over ice, and enjoy!
  • Vegan Strawberry Margarita Pie

    Vegan Strawberry Margarita Pie

    I am not used to the humidity here yet.  We basically went from Winter (18 inches of snow) to Spring for a few weeks right into hot Summer weather.   I really prefer moderate weather like 45 degrees in the morning and a high of 70 degrees or lower in the afternoon which is why I love early Fall so much.  I still go out and run though, and I ask myself why I am doing it half way through.  It is character building for sure, and I never quit.  Last Friday I was 6 miles into my 7 mile run and feeling way too hot and sweaty when I thought to myself, a cool strawberry margarita pie sounds amazing!  So I made up my mind that I had to finish the run, and make one later that day after work.  I ended up finishing my run a minute faster than I had been so that made up for being uncomfortable.  It ended up being kind of a butt kicking stressful day, work was really busy, and I found out my website was not working so I had to make phone calls to get help fixing it when I got home instead of relaxing.  So, I really needed to make that pie to unwind and calm myself afterwards.  I find making desserts relaxing.  And, why not a dreamy strawberry pie with lime and tequila?!

    I had envisioned a creamy strawberry lime filling laced with tequila and swirled with a strawberry puree.  Served nice and cold of course.  The perfect thing to make when it was 90 degrees and I didn’t want to heat up the oven.  I used a mixture of coconut milk, coconut butter, cashew butter to create a creamy base, and added plenty of strawberries, lime and tequila to make it a margarita pie.  The filling was luscious and sooo good even before it was ready to be spooned into the pie.

    Kind of like ice cream, only not as cold. For the crust, I made a simple no bake crust with quinoa flakes, coconut, almond meal, and dates and it was perfect!  Simple, so that the filling could shine. Once the filling was all chilled, I swirled a sweet raspberry puree into it and it was so good!   The pie turned out fabulous!  It tastes like Summer, and it is perfect for when you want to indulge but not heat up the house.   Also, it is perfect for unwinding after a stressful week.  I hope you all had a wonderful Holiday weekend!

    Vegan Strawberry Margarita Pie

    Make 1 8 inch pie

    Crust:

    • 1 cup quinoa flakes, or rolled oats if you don’t mind it not being gluten free
    • ½ cup finely shredded, dried coconut
    • ½ cup almond meal
    • ½ cup pitted medjool dates, soaked in filtered water and drained well if they are not soft
    • ¼ tsp sea salt


    Filling:

    • 1 15 oz can full fat coconut milk (you want the kind that has mostly cream, at least ¾ of the can)
    • ½ cup raw cashew butter
    • 1 cup fresh organic strawberries
    • 1/3 cup maple syrup
    • ¼ cup lime juice
    • 1 Tbsp organic lime zest
    • 3 Tbsp tequila (make sure it is vegan on Barnivore)
    • ¼ tsp sea salt
    • 1 cup coconut butter, warmed to liquid


    Swirl:

    • ¾ cup fresh organic strawberries
    • 2 tsp maple syrup
    • 1 tsp chia seeds
    • Pinch sea salt


    Instructions:

    1. To make the crust, combine all ingredients in a food processor and process until fine crumbs that hold together when squeezed.  Press into the bottom of an 8 inch removable bottom tart pan or oiled pie plate.  Set aside in the freezer.
    2. To make the filling, combine all ingredients but the coconut butter in a high speed blender and blend until smooth.  Add the coconut butter and blend until combined.  Pour into a bowl, and chill in the freezer until it thickens to the consistency of whipped cream (you want to whisk it occasionally so it chills evenly).
    3. Meanwhile, for the swirl, blend the ¾ cup strawberries, maple syrup, chia seeds, and sea salt in a blender until smooth and set aside.
    4. Once the filling has thickened, spread half into the pie crust (it will be mounded) then drop half of the strawberry puree over that and swirl it with a knife.  Spoon the remaining filling over that, then drop more of the swirl over it by the tsp, and swirl with a knife.
    5. Place back in the freezer to chill until firm enough to cut, a few hours.
    6. Remove from the freezer, garnish with berries and lime, and serve!


  • Vegan Strawberry Lemon Cheesecake Popsicles

    Vegan Strawberry Lemon Cheesecake Popsicles

    It feels like Summer here, so I am craving popsicles.  When I was little, they were an essential item that we always had to have around in the freezer.  The plain fruit sweetened ones were my favorite, especially the raspberry or strawberry.  I wasn’t as big of a fan of the fake ones that were blue and green and whatnot.  Although I would never turn down a Freezee (those colored tubes of popsicle ice in case you have not heard of them), those were very popular when I was little.  Now as an adult, I like to get a little more creative with my popsicles, adding interesting flavors, or turning classic desserts into them.  Like the strawberry lemon cheesecake popsicles I made last weekend.  They tasted just like strawberry cheesecake!  I suppose it might be more appropriate to call them ice cream bars, but I am just sticking with popsicle, because that is the mold shape that I have.  I had organic strawberries on hand so I didn’t have to buy any ingredients, which is always a win in my opinion!

    The strawberries are so good and flavorful lately too, so I knew these were going to be good before I even made them.  What most people don’t realize is that it is really easy to substitute dairy in vegan recipes like this one.  Vegan cheesecake is just as delicious if not even more delicious than traditional dairy cheesecake.  I made a rich ice cream base with coconut milk and cashew butter and it tasted just like cheesecake once I added the vanilla.  I also added plenty of lemon zest and a bit of juice to give it a refreshing lemon flavor that didn’t overpower.  I wanted these to be layered, so I had a layer of strawberries, then a layer of strawberry cheesecake cream then the plain lemon cheesecake cream. They were lovely!  Then I just had to let them chill and set.

    I wanted to try one, but I had to leave them overnight because I made them in the evening.  But it was perfect, because I got to try them the next day when it was pretty warm out after taking a walk, and I needed something refreshing.  They were sooo good!  They tasted just like cheesecake with a hint of lemon and the sweet jammy strawberries were what made it!  you would never guess that this does not contain any dairy, since it tastes so rich and delicious!  Give these a try, no need to wait until it is actually Summer!

    Vegan Strawberry Lemon Cheesecake Popsicles

    Makes 8

    Ingredients:

    • 2 cups full fat coconut milk
    • 1/2 cup raw cashew butter
    • 1/4 cup maple syrup
    • 1 tsp pure vanilla extract
    • pinch sea salt
    • 1 Tbsp lemon zest
    • 2 Tbsp lemon juice
    • 1 cup organic strawberries, chopped (divided)


    Instructions:

    1. Combine the full fat coconut milk, cashew butter, syrup, vanilla, sea salt, lemon zest and juice in a blender and blend until smooth.  Remove half and set aside in a bowl.
    2. Drop a few strawberries into the bottoms of 8 popsicle molds.
    3. Blend the remaining coconut mixture (that you did not remove) with the remaining berries, then pour over the strawberries in the molds. Pour the mixture you had set aside without the strawberries over that.
    4. Place sticks into the molds, leaving about 1 inch at the top, then place in the freezer until completely hard, about 4-6 hours (or overnight).
  • Vegan Strawberries and Cream Brownies 

    Vegan Strawberries and Cream Brownies 

    I spent most of last weekend outside, going for long bike rides and walks, because I feel like we haven’t seen the sun or warmth like this in forever.  I mean, Winter lasted an extra 2 months, and now I feel like Summer has arrived and we have skipped Spring weather wise.  It is ok though, it feels nice and now we just have to wait for the plants to catch up.  When I did take a break from the outdoors stuff,I made some really delicious food. On Sunday, after Eric and I took a 27 mile bike ride, I made some vegan ramen from a recipe by Cilantro and Citronella.  You can find it HERE.  Man was it ever delicious!  I don’t usually follow recipes when I make stuff, but her recipe sounded amazing.  I was craving that type of ramen because it is the type I like to order at a local restaurant and I wanted to make it at home.  It turned out sooo good! It has a creamy sesame broth that makes it like comfort food.  I know, not really 80 degree weather type food but I was hungry for it.  The second thing I made is what this post is all about, some Vegan Strawberries and Cream Brownies.

    I am in a strawberry type of mood now that it feels like Summer, and I thought to myself, why not pair them with chocolate in some fudgy brownies?!  Yes, my brownies have to be fudgy, I am not a cakey brownie person at all.  I used my gluten free brownie base for these, and they turned out perfect!  It has a mixture of apple sauce and avocado oil to keep it moist but you would never know.  If you don’t have access to avocado oil, olive oil would work too (you can’t taste it because of the strong chocolate flavor).  For the strawberries and cream part, I used a mixture of coconut milk and cashew butter with freeze dried strawberries and it turned out like strawberry cheesecake swirls.  Why freeze dried strawberries?  Well, they are packed with strawberry flavor, but don’t add a lot of moisture to the recipe.  Lastly, I dropped some strawberry jam over the brownies as well.  I swirled it together, and could not wait to try them!

    Sadly I had to wait until they cooled but it was so worth it!  They were so good!  Super fudgy texture, rich chocolate flavor and sweet strawberry cheesecake like filling with flavorful jam throughout.  They taste like Summer brownies!  I mean, these are so much better than chocolate dipped strawberries!  If you are in the mood for something chocolaty, give these a try!  I hope you are all having a wonderful week!

    Vegan Strawberries and Cream Brownies 
    Makes 16

    Cheesecake swirl:

    • 1 cup freeze dried strawberries
    • 3/4 cup thick coconut milk (from the top of a chilled can)
    • 1/2 cup raw cashew butter
    • 2 Tbsp maple syrup
    • 1/8 tsp sea salt
    • 1 tsp pure vanilla extract


    Brownies:

    • 1/4 cup avocado oil
    • 1/2 cup applesauce
    • 1 cup coconut sugar
    • 2 Tbsp ground flax seed mixed with 1/4 cup plus 2 Tbsp filtered water
    • 2 teaspoon vanilla extract
    • 1 cup gluten free all-purpose flour
    • 1/2 cup cacao powder or unsweetened cocoa powder
    • 1/4 teaspoon sea salt
    • 1/2 cup strawberry rhubarb jam


    Ingredients:

    1. To make the swirl, combine all ingredients in a blender and blend until smooth.  Pour into a bowl and set aside.
    2. To make the brownies, pre-heat the oven to 375F degrees. Whisk together the sugar, avocado oil and applesauce until well combined and the sugar is starting to break down.
    3. Add the flax water mixture, and vanilla and beat until smooth.
    4. Add the flour, cacao powder and sea salt and beat until smooth.
    5. Scrape the batter into a greased 8×8 inch pan, then pour the swirl over it, then drop the jam by the tsp over that.
    6. Place in the oven, and Bake for about 30 minutes or until set (but do not over bake).
    7. Let cool completely before cutting into bars.


  • Vegan Almond Strawberry Rhubarb Jam Bars

    Vegan Almond Strawberry Rhubarb Jam Bars

    I am so ready for strawberry and rhubarb season!  Spring is way behind here this year, with ice still on the lakes, snow on the ground and the ducks and geese that flew back here to Minnesota look confused.  Hopefully soon we will have green grass, tulips blooming and rhubarb growing.  But until then I will dream about it and enjoy strawberry rhubarb jam instead.  I was gifted a jar of lovely strawberry rhubarb jam and it honestly tastes like Summer.  When I was little, my Grandma used to make strawberry rhubarb sauce with the rhubarb that grew behind her garage and it was one of my all time favorite things!  I would eat a giant bowl and she would always warn me that if I ate too much I would get a stomach ache, but I never did.  It was so good.  Maybe that is why I love the combination of strawberries and rhubarb so much, it brings back good memories.  Monday, I decided that some strawberry rhubarb jam bars sounded good, so I went to work making some.

    Raw Guru recently sent me a care package including some Raw Guru Supernova Almond Flour and Raw Guru Supernova Raw Almonds, so I thought why not give the bars a buttery almond crust.  They are really good quality almonds from Italy, and they are actually truly raw and unpasturized, which is really hard to find here in the US.  They get toasted in this recipe, but if you are looking for raw almonds for raw recipes, these are awesome!  I actually made some almond butter from them, as well as used some chopped up nuts in the recipe, and the almond flour of course, so they are filled with almond goodness! The crust also doubled as a crunchy topping, so there is plenty of almond goodness to go around.  The flavor paired perfectly with the strawberry rhubarb.

    These smelled amazing while baking with the jammy fruit and almond crust toasting as it baked.  I could not wait to try them!  But unfortunately I had to wait until they cooled so that they would cut nice.  That is the downside of being a food blogger sometimes, you can’t just dive right into things.  It is ok though, because it was so worth the wait!  The gooey sweet tart strawberry rhubarb jam was amazing with the rich buttery almond crust!  If you are ready for Spring, whip up a batch of these!  If you can’t find strawberry rhubarb jam, you can use strawberry and they will still be really good.  Lastly, I would like to mention, that Raw Guru has been kind enough to give me a coupon code for you all, to get 10% off of your order.  So if you go on their website, when you are checking out with your items, enter the coupon code: FRAGRANTVANILLA

    Vegan Almond Strawberry Rhubarb Jam Bars
    Makes 16 bars

    Ingredients:

    • 1/4 cup coconut oil, warmed to liquid
    • 3/4 cup coconut sugar
    • 1 tsp pure vanilla extract
    • 3 Tbsp filtered water mixed with 1 Tbsp ground flax seed
    • 1 cup almond butter
    • 3/4 cups all purpose gluten free flour
    • 3/4 cup Raw Guru almond flour
    • 1/2 tsp baking powder
    • 1/2 tsp sea salt
    • 1 1/4 cups strawberry rhubarb jam (make sure it is vegan)
    • 2/3 cup chopped Raw Guru almonds


    Instructions:

    1. Preheat oven to 350F degrees with the rack set in the center position. Line a 9×9 inch square pan with parchment, and/or grease it with coconut oil.
    2. Whisk the coconut oil and sugar together in a bowl with the vanilla and flax mixture until the sugar starts to dissolve. Then add the almond butter and mix until combined.
    3. Add the flour, almond flour, baking powder, sea salt and stir in until well blended.
    4. Spread 2/3 of this mixture over the bottom of the pan, pressing it to the edges with your fingers.  Then spread the jam over that with a spoon or offset spatula. Drop chunks of the remaining dough over that, and sprinkle with the almonds.
    5. Place in the oven. Bake for about 45 minutes until lightly browned and set.
    6. Remove from the oven and let cool completely before cutting into bars.


  • Strawberry Dessert Hummus

    Strawberry Dessert Hummus

    Sometimes I start making a recipe and it turns into something totally different.  That was what happened a few days ago when I was going to make some Vegan High Protein Cookie Dough, but I ended up making strawberry hummus instead.  How does that happen?  Well, the cookie dough base is chickpeas, so I threw those in the blender, along with some almond butter and dates.  There weren’t quite enough dates in the container I was using so I went back in the refrigerator for more and saw the large amount of strawberries in there.  Hey…I could make strawberry hummus!  I thought to myself.  I am obsessed with chickpeas and hummus and love snacking on them, so I why not make a dessert hummus and change it up from the always savory?!  So that is how I ended up with the recipe I am sharing with you now.  I ended up not even needing the extra dates because it was sweet enough with the berries.

    This is super simple, just 5 ingredients including sea salt!  You whiz it all together in the blender and voila!  Snack deliciousness!  Now you may be thinking to yourself, it sounds a bit weird, but it is actually really good.  You can’t taste the chickpeas.  To me this is actually reminiscent of raw strawberry cheesecake before it has set up, so really tasty!  Not to mention packed with strawberry flavor.

    So what do you serve this with?  Well, I honestly just ate mine with more strawberries, dipping them into it and it was heavenly that way.  But I think you could spread this on bagels cream cheese style because of how much it reminds me of strawberry cheesecake.  Or you could just eat it straight up with a spoon.  As I also did.  I love dessert hummus!  If you are in the mood for something a little different featuring strawberries, give this a try!

    Strawberry Dessert Hummus
    Makes about 2 cups

    • 1 cup cooked chickpeas
    • 1 1/2 cups organic strawberries
    • 1/3 cup pitted medjool dates (if they are not soft, soak them in filtered water for 30 minutes and drain well)
    • 1/4 cup raw almond butter
    • 1/4 tsp sea salt
    1. In a high speed blender or food processor, combine all ingredients, and blend until smooth.
    2. Enjoy!  Store unused dough in the refrigerator.
  • Vegan White Chocolate Strawberry Almond Butter Cups

    Vegan White Chocolate Strawberry Almond Butter Cups

    Berries and white chocolate is a simply heavenly combination!  So thank goodness I am able to make vegan white chocolate at home so I can enjoy it.  I admit, when I went vegan I thought I would not be able to enjoy it again since it has milk a lot of the time, and I don’t eat refined sugars or sketchy ingredients which can be found in a lot of commercial white chocolate even the plant based ones, so it seemed impossible.  But I have found recipes that allow me to make it at home, and tailored them to my tastes and needs and come up with one that I like and don’t feel yucky after eating.  I was craving white chocolate and berries together the other day, and I had just made a batch of strawberry chia jam, so the first thing that popped into my mind was strawberry white chocolate cups.  But that wasn’t decadent enough, I had to add almond butter too to make it even more crave worthy.

    This white chocolate is so good you will want to scrape the bowl clean with your spatula to enjoy every little bit.  The base is a mixture of cacao butter, coconut butter and cashew butter and it is luscious and creamy almost once set!  I sweeten it with a little maple syrup and it is just right. For the jam, like I mentioned I used a strawberry chia jam I had made the day before.  I like it because not only is it delicious but you get the health benefits of the the chia seeds along with your sweet jam!  If you would like to make some for yourself, all you need to do is cook 3 cups strawberries, 2 Tbsp water, 2 Tbsp maple syrup, a pinch sea salt, and 1 Tbsp lemon juice over medium heat in a sauce pan for about 15 minutes until the berries have softened.  Then mash them a little with a fork and add 1/3 cup chia seeds.  Allow to cool and sit for 30 minutes until it thickens. It keeps in the refrigerator for 2 weeks.

    It is so good with the white chocolate and almond butter in these candies let me tell you!  These are simply heavenly. Of course if you have your own favorite strawberry jam you would like to use, (or even another flavor of jam) these would be just as delicious I am sure.

    Vegan White Chocolate Strawberry Almond Butter Cups
    Makes 6 large candies

    Ingredients:

    • 1/4 cup cacao butter (2 oz)
    • 2 Tbsp raw cashew butter
    • 1/4 cup coconut butter
    • 1 tsp pure vanilla extract
    • 2 Tbsp maple syrup (or to taste)
    • 1/8 tsp sea salt
    • 2 Tbsp strawberry jam
    • 2 Tbsp organic almond butter


    Instructions:

    1. Combine cacao butter, cashew butter, vanilla, maple syrup,  and sea salt over a double boiler, and whisk until smooth.  Pour into the bottoms of 6 larger peanut butter cup tins (or molds), then place them in the freezer to set.
    2. Once the bottom chocolate has set, spoon about 1 tsp of the almond butter and then the jam onto the top of the set chocolate, then pour remaining melted chocolate over that.
    3. Place them in the freezer to set, about 15 minutes.
    4. Store in the refrigerator.

  • Vegan Strawberry Chocolate Eggs

    Vegan Strawberry Chocolate Eggs

    When I was little, I really looked forward to the Easter candy in the Spring.  I think it was my favorite candy of the year, because it was all decorated in cute pastel colors, and chocolate bunnies and eggs were usually bigger than the other Holiday’s candies.  My favorite were the Reese’s peanut butter eggs and the berry cream eggs, either strawberry or raspberry.  I was always hoping for those in my Easter basket.  I have since started to make my own, since most of the commercial candy companies are filled with refined sugars, dairy, and preservatives I don’t want to be putting into my body.  But I do still like to indulge, I just do it with healthier ingredients.  Who says you have to give up your Easter candy because you are vegan?! Plus, I love making home made candy.  It is fun, and also fun to share with people, and they appreciate that you put work into it.

    So, I decided to make some strawberry cream eggs this year.  I realized Easter is fast approaching so I better get with the program!  I feel like this year is going so fast that the Holidays come and go and I barely have time to enjoy them.  So, I got to work and made some deliciousness of the Easter candy variety!  The filling was luscious, a mixture of cacao butter (which makes it taste like white chocolate), cashew butter and coconut butter.  These were rich as candy should be.  I used dried strawberries in them because they pack loads of intense flavor, and don’t add any extra moisture so good for candy.  I could not stop sampling the filling, because it was so good, but I knew I better because I wanted to end up with enough eggs.

    Once the filling was shaped and frozen, I dipped the little eggs into home made dark chocolate.  I could not wait to try them!  They were super delicious, even better than the cream eggs I had as a child, and they didn’t leave me feeling yuck.  The good thing about these is that they are good sized, so one is satisfying.  If you have time, why not make your own Easter candy this year instead of buying it?  It is a lot of fun, and stuff tastes so much better knowing you put love into it!

    Vegan Strawberry Chocolate Eggs 
    Makes 6-8 large eggs

    Ingredients:

    White Chocolate:

    • 1/4 cup cacao butter (2 oz) or coconut oil if unavailable
    • 2 Tbsp raw cashew butter
    • 1/4 cup coconut butter
    • 1 tsp pure vanilla extract
    • 2 Tbsp maple syrup
    • 1 cup freeze dried strawberries
    • 1/4 cup filtered water


    Dark Chocolate:

    • 1/2 cup cacao butter (4 oz) or coconut butter if unavailable
    • 3/4 cup cacao powder
    • 1/4 cup maple syrup
    • pinch sea salt


    Directions:

    1. Combine all of the white chocolate ingredients but the berries and water over a double boiler, and whisk until smooth.
    2. Pulverize the berries in a blender until fine, then whisk into the white chocolate along with the water. Place in the freezer for about 15-20 minutes until it is firm enough to scoop. Scoop into 8 balls, rolling them with your hands and shaping them into eggs.   Place on a parchment lined tray, and place back into the freezer until firm, about 30 minutes.
    3. Meanwhile, to make the dark chocolate, combine all ingredients in a double boiler, and whisk until combined and melted.
    4. Once the filling has firmed up, dip each chocolate into the dark chocolate, being sure to let the excess drain off, and place back onto the tray (I like to set mine on a fork to allow it to drain better). Once they are all dipped, set them in the freezer until hardened.
      Store any leftover truffles in the refrigerator.
  • Vegan Strawberries and Cream Doughnuts

    Vegan Strawberries and Cream Doughnuts

    Strawberries and Cream Doughnuts 4

    When I was little I was a big Strawberry Shortcake fan.  As in the popular cute kids TV character with her own show.  My Grandma had taped the episodes for me and I would watch them over and over again.  If you never watched the show, Strawberry Shortcake was the main character and she had friends who also had dessert themed names and clothes, like Apple Dumpling and Raspberry Tart.  They all had pets too with names like custard, who was Strawberry Shortcake’s cat.  I would have loved to have been Strawberry Shortcake and lived in a delicious village filled with food themed items.  I used to imagine her house smelled like strawberry shortcake, and she baked desserts all day. Sounded like fun!  So now, whenever I smell something strawberry baking, I think about this chapter of my life, when I loved Strawberry Shortcake.  I really think sometimes the 80’s cartoons were the best, and they need to have more shows for kids like that now.

    Strawberries and Cream Doughnuts

    Back to the baking part, my coworker at the deli likes to make strawberries and cream scones, and whenever that sweet aroma hits me, it reminds me of strawberry shortcake, and also makes me want to bake something with strawberries.  Well, she made some the other day and I decided that making something with strawberries sounded like a good idea! But I had just made scones, so I decided on doughnuts.  Because I thought I could put a delicious glaze over them too with strawberries and coconut cream.  Ever since I bought my doughnut pan, I am really into baked doughnuts.  I can say I have had a regular fried doughnut in over 10 years because they didn’t appeal to me, but I love the cakey baked ones.  So easy too, just pour the batter in, bake and top with whatever you want if you want anything.  Plus, they are healthier if you use the right ingredients.

    Strawberries and Cream Doughnuts 1

    I made the cake base for mine fruit sweetened with freeze dried strawberries and dates.  If you are wondering why freeze dried strawberries are in this recipe, well, they do not add excess moisture and they have loads of flavor.  So I gave these doughnuts a double strawberry whammy with both fresh and freeze dried.  They turned out so delicious too!  My kitchen smelled like Strawberry Shortcake’s house (well, at least as I imagine it would smell)!  The doughnuts turned out light and delicious with jammy strawberries on the inside and the rich strawberries and cream glaze was the perfect topper.  These taste like Summer!  Trust me, you need to give them a try the next time you are in the mood for a strawberry dessert!


    Vegan Strawberries and Cream Doughnuts
    Makes 6-8 Large doughnuts (depending on your molds)

    Ingredients:

    Batter:

    • 1/2 cup soft, pitted medjool dates, soaked in filtered water for 30 minutes and drained
    • 1 cup coconut milk
    • 2 Tbsp raw pecan butter or raw almond butter
    • 1 tsp pure vanilla extract
    • 1/2 cup freeze dried organic strawberries
    • 1/4 tsp sea salt
    • 3/4 cup all purpose gluten free flour
    • 1/2 tsp baking powder
    • 1/2 tsp plus 1/4 tsp baking soda
    • 1 Tbsp cider vinegar
    • 1 cup organic strawberries, cut into eighths

    Glaze:

    • 1 cup full fat coconut milk at room temperature (not just from the top of the can, but blended)
    • 1/2 cup freeze dried strawberries, crushed
    • 1 1/2 Tbsp maple syrup
    • 1 tsp pure vanilla extract
    • pinch sea salt
    • 1/4 cup plus 2 Tbsp coconut butter (not oil), warmed to liquid

    Freeze dried or fresh organic strawberries for topping the doughnuts

    1. Preheat the oven to 375F degrees, and oil a doughnut pan.
    2. To make the batter, combine the dates, coconut milk, pecan butter, vanilla, dried strawberries, and sea salt in a high speed blender and blend until smooth.  Add the flour, baking powder, baking soda, and blend until combined (but don’t overblend).  Add cider vinegar, and blend slowly until bubbles form (you don’t want to go fast or you will deflate it).  Fold in the strawberries, and pour into the prepared doughnut pan.
    3. Place the pan in the oven and bake for about 20 minutes until a toothpick inserted into the doughnut comes out almost clean.  Let cool completely on a wire rack before unmolding.
    4. To make the glaze, whisk together all ingredients until smooth, and place in the freezer to thicken just a little.  Once it has thickened, spread it over the tops of the doughnuts, and top them off with freeze dried strawberries (or fresh if you prefer).  Enjoy!


  • Raw Strawberry Jam and Almond Butter Cups

    Raw Strawberry Jam and Almond Butter Cups

    Strawberry Almond Butter Chocolate Cups 3

    I try to be thankful for the little things.  I am trying not to dwell on the negatives or things I can’t change lately and instead try and find the positives in things.  And if I can’t find a positive, like it is a really bad day or something I go home and do something that I enjoy to calm and relax myself.  Like making chocolates.  One can simply not be unhappy while making chocolate.  Chocolate makes me happy at least.  The other thing about it is, it is easy to make.  Of course you could start off with pre-made raw chocolate and melt it and that would be even easier but I usually make my own because it is cheaper.

    Strawberry Almond Butter Chocolate Cups 4

    I had some strawberries in my fridge and I was thinking about making chocolate dipped strawberries, but then I was also craving some nut butter…so I decided to make raw strawberry jam almond butter cups so I could have it all.  I whipped up my raw chocolate, and while the bases of the cups were setting I made the jam.  It is only 3 ingredients, so super simple and fast to make and of course it is raw so it doesn’t require cooking.  I had just made raw almond butter the day before so I was set!  They were ready within the hour and I was so ready to try one.

    Strawberry Almond Butter Chocolate Cups

    Talk about pure delicious goodness!  This is such a heavenly flavor combination! Like a AB and J with chocolate.  My Mom occasionally made me almond butter and jelly sandwiches as a kid, and I always thought that they were a little more special than PB and Js (as delicious as they were) because almond butter was harder to come by at that point in time.  Anyways, I was also happy I did not have to heat up the kitchen to make these, because it had been a hot humid day.  If you are in need of a little deliciousness in your life, do try these chocolate cups!

    Strawberry Almond Butter Chocolate Cups 2

    Raw Strawberry Jam and Almond Butter Cups
    Makes 6

    Chocolate:
    3/4 cup raw cacao powder
    1/2 cup melted cacao butter (warmed to liquid)
    pinch sea salt
    1/4 cup maple syrup (at room temperature)

    Filling:
    1/3 cup raw almond butter*
    1/3 cup quick raw strawberry jam (recipe follows)

    To make the chocolate, whisk together all ingredients until smooth. Spoon a little chocolate into the bottoms of 6 peanut butter cup molds, filling them about 1/4-1/3 full. Place in the freezer until hard, about 10 minutes. Once the chocolate has hardened, spoon a heaping tsp of the almond butter over that, making sure it stays in the center (so you don’t have it oozing out the sides later). Spoon a tsp of jam over that. Pour more chocolate over the cups until the jam is covered, and place them in the freezer until set, about 20 minutes. Store any extra in the refrigerator.

    Quick Raw Blackberry Jam:

    1 cup organic strawberries
    1 Tbsp raw coconut nectar or maple syrup
    1-2 Tbsp chia seeds

    Combine berries and nectar in a food processor and pulse until the strawberries are saucy. Pour into a bowl. Stir in the chia seeds. If they are very runny (if you used frozen) use 2 Tbsp chia seeds, if they are fresh use one. Keeps for 1 week in a covered container in the refrigerator.

    *If your almond butter is really runny, whisk some melted coconut butter or coconut oil into it, about 1 Tbsp to thicken it up.


  • Vegan Green Tea Strawberry Rhubarb Cupcakes

    Vegan Green Tea Strawberry Rhubarb Cupcakes

    Did your Grandma ever make jam? Or did she have friends that did who shared it with you? Well mine did, and let me tell you, that jam was some of the best I have ever eaten. I mean really, most store bought jam just doesn’t compare to home made. So, I was thinking about how I don’t eat much jam anymore and the fact that I kind of missed it at that moment. I decided at that point that I needed to make some of my own. The reason I stay away from most of it now is the loads of sugar that is added to it. But in making my own I could control that. I made a quick strawberry rhubarb refrigerator jam, with chia seeds to thicken it. Because to be completely honest making that Grandma style jam where you have to boil the jars and all scares me. Anyways, the quick jam I made turned out so delicious!

    Green Tea Cupcakes with Strawberry Rhubarb Filling 2

    It reminded me of that jam I enjoyed as a child, but had much less sugar so it was just right for my tastes. Of course I just enjoyed some of it. Because who doesn’t love a PB & J? But I wanted to make something with some of it too. So, I decided it would be awesome stuffed into cupcakes. I love a good surprise inside my cupcake. Nothing like biting into one and finding delicious jam like a jelly doughnut!
    Green Tea Cupcakes with Strawberry Rhubarb Filling 1

    I didn’t just make these vanilla cupcakes though, I made them green tea cupcakes. Green tea is so good with berries, and if you haven’t tried this combination you simply must! In the summer a chilled green tea with berries is so refreshing. But back to my cupcakes. Matcha (green tea) powder makes it possible to make pretty much green tea anything without having to steep tea bags or worry about your food tasting bitter because you steeped them too long. You just add it to the recipe, so easy!  These cupcakes turned out so delicious! I frosted them with a fluffy matcha coconut buttercream and it went so well with the jammy sweet strawberry rhubarb and moist matcha cake. The color combination made me happy too. I would have shared these with you all if I could, but since I couldn’t I figure sharing the recipe will have to do!

    Green Tea Cupcakes with Strawberry Rhubarb Filling

    Vegan Green Tea Strawberry Rhubarb Cupcakes

    Makes 10

    Cake:
    3/4 cup all purpose gluten free flour
    3/4 tsp baking soda
    1/2 tsp baking powder
    1 1/2 Tbsp matcha powder
    1/4 tsp sea salt
    1/2 cup packed soft medjool dates, pitted, soaked in water for 30 minutes and 1/2 cup of the water reserved
    2 Tbsp coconut oil, warmed to liquid
    1 tsp pure vanilla extract
    1/2 cup light coconut milk
    1 Tbsp apple cider vinegar

    3/4 cup Strawberry Rhubarb Chia Refrigerator Jam

    Frosting:
    1 15 oz can full fat coconut milk, chilled overnight in the refrigerator
    1/4 cup maple syrup
    1 tsp pure vanilla extract
    1 1/2 Tbsp matcha powder
    1/2 cup plus 2 Tbsp coconut butter, warmed to liquid

    Organic strawberries for decorating

    Preheat the oven to 375F degrees and position rack in center of oven. Set out 16 standard sized cupcake liners. Whisk flour, baking powder, matcha, baking soda, sea salt, in a large bowl to blend well. Place dates, reserved water, oil, coconut milk, and vanilla into a blender, and blend until smooth, then whisk this blended mixture into the flour mixture until well blended. Whisk in the cider vinegar until bubbles form. Spoon the batter into the bottoms of the liners, then top with a scant Tbsp jam, then the rest of the batter (but not filling more than 3/4 full). Place in the oven and bake for about 15 minutes until set.  Remove from the oven and let cool completely.

    To make the frosting, combine all ingredients in a high speed blender and blend until smooth. Pour into a bowl and place in the freezer.  Chill for about 30-45 minutes until the consistency of frosting.  Set aside in the refrigerator until ready to use. When ready to use, place in a pastry bag and pipe over the cupcakes (or just spread it). Top with a half a strawberry. Enjoy! Refrigerate any leftovers.


  • Individual Vegan Strawberry Rhubarb Cobbler with Almond Biscuits

    Individual Vegan Strawberry Rhubarb Cobbler with Almond Biscuits

    Individual Strawberry Rhubarb Cobblers 4

    A lot of times when I go out running, I admire the gardens in people’s yards as I run past wishing they were mine, and I was able to grow all of the good stuff they are.  I live in a townhome, so all I am allowed is small pots.  I grow herbs, but that is about it. There isn’t much growing this time of the year, but there is rhubarb, which got me to thinking I want strawberry rhubarb something or other. It is such a delicious combination.  My Grandma used to make the most delicious strawberry rhubarb sauce, and I would eat so much that she would say “Careful, or you will get a stomach ache!” I assume from all of the sugar.  I never did though.  I loved that stuff.

    Individual Strawberry Rhubarb Cobblers 2

    My Dad grows rhubarb, and I hope to go over to his house and pick some soon, but I caved and bought some at the store because it was there,  and I had loads of strawberries at home and I wanted to make something strawberry rhubarb!  I had recently seen some individual strawberry rhubarb cobblers on Facebook, and I admit they made me crave them hard core.  They were not vegan, but I said to myself, I can veganize them and I bet they will taste even better.  So I did.  I one upped them too, and made almond biscuits.  I made a few cobblers with nut biscuits last year and I fell in love with them.  My Mom enjoyed them so much she asked me to make them a couple times, so I shared some of these with her too.  OMG…did they ever smell amazing while baking. Like strawberry rhubarb pie, but these were so much easier to make.  They were so delicious!  The perfect way to end my strawberry rhubarb draught (both items are seasonal here in Minnesota in the Spring, and we have been eating winter produce for so long)!  Also, nothing beats having your own cute little individual dessert!  It is all yours, and portion controlled.

    Individual Strawberry Rhubarb Cobblers

    Individual Vegan Strawberry Rhubarb Cobblers with Almond Biscuits
    Serves 4

    Fruit:
    1 1/2 cups organic strawberries, quartered
    1 1/2 cups sliced organic rhubarb
    1 Tbsp maple syrup
    2 Tbsp gluten free all purpose flour
    1 Tbsp lemon juice
    1 tsp pure vanilla extract

    biscuit topping:
    3/4 cup all purpose gluten free flour
    1/2 cup almond meal
    2 Tbsp coconut sugar
    1/2 tsp plus 1/8 tsp baking powder
    1/8 tsp sea salt
    2 Tbsp solid coconut oil, cut into chunks
    1/4 cup cold full fat coconut milk (chilled in the fridge is best), mixed well
    1 tsp pure vanilla extract
    6 inch wide ovenproof bowl or pie plate

    Preheat oven to 400 degrees with the rack at the center position. Place a baking sheet lined with foil on the rack. Oil four 1 1/2 cup (capacity) ramakins with coconut oil. In a large bowl, toss together the fruit, maple syrup, lemon juice, vanilla, flour. Spoon into the ramakins, and cover with foil. Place plate on baking sheet and bake for 30 minutes until fruit is cooked through and bubbling.
    Meanwhile, when the fruit in the oven is almost at 45 min, to make biscuits, in a large bowl, combine the flour, almond meal, sugar, baking powder, and salt. Cut in the oil with a pastry blender or 2 knives until the mixture starts to clump into pea sized pieces. In a small bowl, stir the vanilla extract into the coconut milk. Add the milk to the dough, and stir a few times, but do not overmix. The dough should hold together when squeezed, but still be clumpy. Place dough on a floured work surface, and pat into four circles slightly smaller than the ramakin’s width (they don’t have to be perfect).

    Remove baking fruit from oven. Place biscuit circles on top of the cobbler. When all biscuits are on top of cobblers, sprinkle with coconut sugar and return to the oven. Bake for about 15 minutes

    until biscuits are cooked through and lightly brown and toasted on top (keep a close eye on they could burn very quickly). Remove from oven and let cool until warm, and top with some ice cream or coconut vanilla whipped cream and…enjoy!


  • Raw Strawberry Almond Energy Bites

    Raw Strawberry Almond Energy Bites

    It is so beautiful here lately.  I enjoy every bit of my morning runs, taking in the aroma of lilacs and blossoms with petals on the path at my feet, and the birds and frogs singing. Everything is alive again!  The rhubarb is even almost ready, which is really exciting.  I am a big fan of strawberry rhubarb, and I wait every year to enjoy that combination.  My Dad grows it in his back yard and he always shares.  Until then, I am enjoying the strawberries.  Not local ones yet, but next month.  I have been using a lot of dried organic strawberries in things because they pack so much flavor and not a lot of moisture if you are making something like say, energy bites.  Which is exactly what I used them for a few days back.

    Strawberry Energy Bites 2

    Energy Bites are my go to snack.  I make all different kinds, but my favorites involve one of two things.  Chocolate or fruit.  This last time I decided on strawberries of course, and they were delicious, which is why I have to share the recipe with you.  They are relatively simple to make, and so satisfying and good.  To be honest, these are often times my bed time snack.  You know, when you want something munchy, but not bad for you, because it is right before bed?  Maybe they should be called my bed time snack bites.  But then people would probably get confused and yell at me for eating before bed.  So I call them energy bites because they are perfect to eat after your workout as well.

    Strawberry Energy Bites 3

    Anybody can make these, and I think anyone could enjoy them.  They taste much better than most commercially made energy bars or bites, and of course good ingredients go into these and with store bought ones you don’t know sometimes.  These keep in the refrigerator for about a month, but I actually like them frozen because it gives them a firmer texture (even though they only last a week at my house).  I hope you are all having a lovely weekend!

    Strawberry Energy Bites 1


    Raw Strawberry Almond Energy Bites

    Makes 16

    1/3 cup pitted medjool dates

    2 scoops Sprout Living Vanilla Lucuma Protein Powder (about 1/4 cup)

    1/3 cup raw almond butter

    ½ cup raw coconut butter, warmed to liquid

    3/4 cup freeze dried strawberries

    ½ cup raw gluten free rolled oats (sprouted, dehydrated buckwheat groats may be substituted)

    1/2 cup hemp seeds

    In a food processor, combine the coconut butter, almond butter, and dates together, and blend until smooth, then add the strawberries and oats, and pulse to blend.  The add to a bowl. Add all other ingredients to the bowl, and mix until well distributed. Press out into a rectangle on a sheet of parchment paper, and cut into shapes with a small cookie cutter (re-pressing out scraps). Alternatively, you may roll them into balls (or sort of press them into balls, since it takes a bit of both).  Set those on a parchment paper lined tray, and place in the freezer for about 30 minutes until firm.  Store in a container in the refrigerator.


  • Mini Vegan Neapolitan Cakes

    Mini Vegan Neapolitan Cakes

    Neopolitan Cake 5

    Last weekend I decided I wanted to make a pink cake.  But I didn’t have any fresh or frozen berries to make some sort of beautiful berry layer cake, or cheesecake, and I am trying to use what I have at home in my recipes to save money, so I had to think of something else.  After looking in the refrigerator, I did have dried berries, to make a beautiful pink frosting.  So I could have some berries in my cake after all. I ended up deciding on neapolitan layer cake.

    Neopolitan Cake 4

    I have run across them on Pinterest a few times, you know on those odd days where I have free time and I get lost there looking at ideas, and I have always wanted to make one.  This was the perfect opportunity to do so.  My second requirement for this cake other than it being pink and cake was that it be small.  Like for two people to enjoy small.  I had enjoyed a bit too many sweets over the rest of the weekend and I wanted something that I could enjoy in one serving and share the other half with a family member.

    Neopolitan Cake 1

    So, I made a mini Neapolitan cake. It had a layer of chocolate cake, a layer of vanilla cake, and berry frosting encasing them. Now, I know the classic combination is strawberry with the vanilla and chocolate but I used raspberry here because it was what I had.  Now before anyone goes yelling at me telling me I can’t call it Neapolitan, too bad, I already have and I am using creative license here haha.

    Neopolitan Cake 3

    Funny thing happened while making this cake too. I thought it was going all perfect, then I realized I forgot to include the leavening agents and they were already half way through baking so I had to start over.  So much for a quick baking project.  I am just telling you this, so you know I am human and I mess up too sometimes, and have to start over or try again.  So I made them again and they came out perfect.  I frosted them with the raspberry cream frosting that tasted heavenly (those dried raspberries are even more flavorful in frosting than fresh and they don’t make it so watery…something to remember in the future).  This cake turned out even more delicious than I imagined!  So if you are looking for a cute little cake to make for your small family, this is it!  It actually serves 4, but it served 2 in my family because we like cake.

    Neopolitan Cake

    Mini Vegan Neapolitan Cakes

    Makes 2 6 inch 2 layer cakes

    2 4 inch cake pans

    Cake:
    3/4 cup quinoa flour (or all purpose gluten free flour)
    3/4 tsp baking soda
    1/2 tsp baking powder
    1/4 tsp sea salt
    1/2 cup packed soft medjool dates, pitted, soaked in water for 30 minutes and 1/4 cup of the water reserved
    2 Tbsp avocado oil or olive oil
    1 tsp pure vanilla extract
    1/2 cup filtered water

    1 1/2 Tbsp cacao powder or unsweetened cocoa powder
    1 Tbsp apple cider vinegar

    Frosting:
    1 15 oz can organic full fat coconut milk
    2 Tbsp maple syrup
    1/2 cup organic freeze dried strawberries or raspberries
    1 tsp pure vanilla extract
    1/2 cup plus 2 Tbsp coconut butter, warmed to liquid

    Preheat the oven to 375F degrees and position rack in center of oven. Line the bottoms of two 4-inch-diameter cake pans with 2-inch-high sides with parchment paper. Coat parchment paper and pan sides lightly with oil so that the cake doesn’t stick. Whisk flour, baking powder, baking soda, sea salt, in a large bowl to blend well. Place dates, reserved water, oil, and vanilla extract into a blender, and blend until smooth, then whisk this blended mixture into the flour mixture until well blended. Divide the mixture evenly between 2 bowls, and whisk the cacao powder into one.

    Whisk 1 1/2 tsp of cider vinegar into each bowl of batter until bubbles form. Transfer cake batter to prepared pans (pour the chocolate batter into one, and the vanilla batter into the other) and bake cakes until tester inserted into center comes out clean, about 20 minutes. Cool cakes completely in pan on rack, about 1 hour. Cut around sides of pan to loosen. Turn cakes out onto platter; peel off parchment paper. Let cool completely, then slice each in half horizontally so you have 2 layers out of each.

    Meanwhile, to make the frosting, combine all ingredients in a high speed blender and blend until smooth.  Pour into a bowl, and set in the freezer for about 30-45 minutes (whisking every 15) until it reaches the thickness and consistency of thick whipped cream or buttercream frosting.
    To assemble, place one chocolate cake layer on a plate, and spread frosting 1/2 inch thick over it. Place a vanilla cake layer over that, then spread the frosting on the top and down the sides of the cake. Repeat with the other cake.


  • Vegan Strawberry Basil Pizza

    Vegan Strawberry Basil Pizza

    Strawberry Basil Pizza 1

    About 5 years ago, I had a tradition of making pizza once a week.  Trying out different toppings and cheeses every time, experimenting with something new.  It was never just the standard usual recipes…it was things like caramelized fennel and onions with lemon, walnuts and pine nuts with pecorino romano…or apple gruyere with caramelized onions, and hazelnuts.  But my all time favorite out of all the recipes was a strawberry blue cheese with caramelized onions, walnuts and fresh basil.  It was heavenly.  That was the one pizza I did not mind repeating.  Sadly my pizza making has since gone by the wayside since I went vegan because I thought it would not be the same to bake a pizza without cheese and I did not really like any of the commercial vegan “melting” cheeses I had tried.  But I recently made a vegan mozzarella that made me want to try making pizza again!  It was melty, cheesy and perfect for pizza!

    Strawberry Basil Pizza 2

    I had to make my favorite pizza with it.  Minus the blue cheese part. But it was still amazing with just mozzarella.  This cheese is coconut milk based so it melts like a dream and I think it has much better flavor than the soy based cheeses you can buy.  If you think strawberries on pizza sounds weird, you need to try this. It is amazing. They roast into jammy goodness on the crust and you get something that is a little sweet, and a little savory and salty all at the same time. The basil adds a lovely fragrance to it. This is perfect for summer when fresh local berries are abundant, and I can pick basil right off the patio to top off the pizza!

    Strawberry Basil Pizza 3

    Vegan Strawberry Basil Pizza

    Makes one 14 inch pizza

    Vegan Mozzarella:

    Adapted from Olives for Dinner’s Mozzarella Recipe

    1 15 oz can full fat organic coconut milk

    2 Tbsp arrowroot starch

    1/4 plus 1 Tbsp filtered water

    3 Tbsp agar flakes or 1 Tbsp agar powder

    2 tsp lemon juice

    1 tsp sea salt or Himalayan salt

    1 Tbsp virgin coconut oil

    1 tsp guar gum

    To make the mozzarella cheese, heat the coconut milk in a saucepan, until it comes to a simmer.

    Meanwhile, dissolve the arrowroot starch in the water and set aside.

    Once the coconut milk has come to a simmer, add the agar flakes, and heat until they are dissolved (mine took about 8 minutes, if you are using the powder, it should dissolve within one minute).

    Next, add the lemon juice and sea salt to the coconut milk.

    Mix the coconut oil with the guar gum so that the guar gum does not clump up.

    Turn off the heat and add the arrowroot mixture, guar gum and coconut oil. Whisk for about 30 seconds, then pour into a silicone mold (I used a loaf pan, but if you had another shape you would like to use go ahead). Refrigerate for a few hours until firm, then pop out of the mold. You will need half the cheese for this recipe, reserve the other half for another use in the fridge, wrapped in an airtight container.  Shred the half you will be using into a bowl, and keep in the refrigerator until ready to use.

    Pizza Dough:

    2 cups gluten free all purpose flour

    1 cup cornmeal

    1/2 tsp sea salt

    1/2 tsp xanthan gum

    1/2 cup plus 1 Tbsp filtered water

    To make the pizza crust, combine the flour, cornmeal, xanthan gum and sea salt in a bowl, and whisk until well blended. Add the water, and mix in until you have a soft dough.

    Turn out onto a sheet of parchment paper with a light dusting of flour, and roll out into a 14 inch circle.  Set aside.

    Caramelized onions:

    1 medium red onion, sliced

    1 tsp olive oil

    pinch of sea salt

    To make the caramelized onions, heat the oil in a pan, and add the onions.  Cook, stirring often until the onions are very soft and starting to brown. Add the sea salt, and set aside.

    For Pizza Assembly:

    olive oil

    1 cup sliced strawberries

    1/4 cup raw walnuts

    2 Tbsp fresh basil leaves (torn or cut chiffonade)

    Pre-heat the oven to 400F degrees.  Set a pan on the center rack with an upside down sheet pan, or a pizza stone set on it. Brush the crust with olive oil, sprinkle with sea salt, and slide the parchment with the crust on it onto the stone.

    Bake crust for 15 minutes, then remove the crust from the oven (still on the parchment). Top the crust with the onions, scattering around evenly. Then the berries, and walnuts, then the cheese, making sure it is all evenly distributed.

    Place the pizza in the oven and bake for 20-25 minutes until the cheese is bubbling and starting to brown (keep an eye on it after 15 as some ovens cook faster than others). Remove the pizza and parchment from the oven, slide pizza onto a cutting board or plate, scatter basil over the top, slice and enjoy!


  • Vegan Strawberry Shortcake Shooters

    Vegan Strawberry Shortcake Shooters

    Strawberry Shortcake Shooters 1

    The strawberries are amazing this year!  I have been eating them up like crazy, but I like to do a little something special with them once in a while in the form of dessert too.  Last week I wanted to make something easy and fun with them and Eric suggested shooters.  Like alcohol shots. Since I am not into that sort of thing, I compromised and made my type of shooters.  Dessert ones.  He was happy anyway, because they were delicious.  I ended up making strawberry shortcake shooters…so much less work than regular strawberry shortcake from scratch, and they tasted just as good.

     Strawberry Shortcake Shooters 3

    I made a simple “cake” base to line the bottom of the glasses, and it was delicious, just like cake but not so much sugar and hard work.  I then topped it off with some strawberry whipped coconut cream and a fresh strawberry.  Keeping it simple, so we could enjoy them faster.  No excuse not to make these babies…so easy!  I think they would be perfect for entertaining as well, pulling out a tray of these would be pretty classy!

    Strawberry Shortcake Shooters

    Vegan Strawberry Shortcake Shooters

    Makes 6

    Cake:

    1/4 cup finely shredded, dried coconut

    1/4 cup raw almond meal

    3 large soft medjool dates, pitted

    pinch sea salt

    few tsp filtered water as needed

    Filling:

    1 can full fat organic coconut milk, chilled

    3 Tbsp maple syrup or raw coconut nectar

    pinch sea salt

    1 tsp pure vanilla extract

    1/3 cup plus 3 Tbsp raw coconut butter, warmed to liquid

    1/2 cup fresh organic strawberries

    In a food processor, combine all of the cake ingredients and process until they are crumbs that hold together slightly. Spoon into the bottoms of 6 shot glasses.

    For the filling, combine all ingredients but the coconut butter in a food processor and process until smooth. Add the coconut butter slowly with the motor running until incorporated.  (If at any time the mixtures become runny, it means they have become too warm, if so, place in the freezer in a bowl, and chill until thickened, or if they become clumpy it is because the fats have separated. If this happens, place in a high speed blender and blend until smooth, then do the chilling as just mentioned). Place in a bowl in the fridge.  In the food processor, process the strawberries until chopped into small pieces, then fold this into the cream you had set aside in the refrigerator. Place the  cream mixture in a pastry bag and pipe into the shot glasses over the crust (you may just spoon them as well if you don’t have a pastry bag).  Garnish the top with a strawberry. Serve chilled.

    Strawberry Shortcake Shooters 2


  • Vegan Double Berry Rhubarb Galette

    Vegan Double Berry Rhubarb Galette

    Galette 1

    I have been really craving pie lately.  A delicious fruit pie with a jammy filling, crisp rich crust, and sweet fruit inside.  I’m not very picky when it comes to the fruit.  It is all good…peaches, cherries, berries.  They all are amazing in a pie in my opinion.  So, I made a sort of pie last weekend.  A lazy person’s pie.  A galette.  So, a tart and a pie made free form, not picky at all and perfect for the mood I was in and the time frame I had.

    Galette 3

      I had about an hour after work to make it, so a non fussy free form crust was ideal. Only rolling out one circle and not having to do anything cutesy with it (not that there is anything wrong with cutesy, I love cutesy but not when I have little time).  I used my gluten free pie crust, and enclosed inside was the most delicious filling combination. Sweet blueberries, tart rhubarb from my Dad’s garden, and some flavorful, jammy strawberries.  Once it had baked and the aroma had permeated the air in my home and it was all bubbly and delicious looking, I was quite excited.

    Galette 5

    It was pure delicious goodness.  The first day I enjoyed it unadorned and I was reminded of how wonderful galettes are.  and the second day, I served some of it with some coconut whipped cream and it was the perfect accompaniment.  I am one of those people who usually always has to have ice cream or whipped cream with their fruit pie, but I was a little lazy the first day.  It was wonderful anyhow even without it.  If you want a delicious pie, but not all the fuss, you must try this.

    Galette 6

    Vegan Double Berry Rhubarb Galette

    Crust:

    2 1/2 cups all purpose gluten free flour*

    1/4 tsp sea salt

    1/4 cup coconut sugar

    7 Tbsp coconut oil in solid state, cut into chunks

    1 Tbsp organic lemon zest

    1 tsp pure vanilla extract

    5-6 Tbsp ice water

    Filling:
    2 cups organic rhubarb, sliced

    1 cup organic strawberries, quartered

    1 cup organic blueberries

    2 Tbsp lemon juice

    1 Tbsp organic lemon zest

    2 tsp pure vanilla extract

    1/4 cup arrowroot starch

    1/2 cup coconut sugar

    pinch of sea salt

    Coconut sugar for sprinkling

    To make crust, combine flour, sea salt, sugar and coconut oil in a bowl, and use a pastry blender to cut into the mixture until it resembles pea sized chunks (you can also use your hands).  Add zest, and vanilla and water and mix into the dough.  Knead a few times until it comes together (you may need to add an additional Tbsp more water).  Shape into and roll out into a 1/4 inch thick circle on a sheet of parchment (you will want to dust the parchment underneath with a little flour and dust the rolling pin too to avoid sticking. If the dough has gotten too warm, place in the refrigerator).  Preheat oven to 375 degrees.

    Place rhubarb and berries, lemon juice, zest, vanilla, arrowroot, sugar and sea salt in a large bowl and toss to combine. Arrange fruit mixture on top of dough on each round, leaving a  1 1/2-inch border all the way around. Fold border over the fruit mixture, overlapping where necessary and pressing gently to adhere the folds (it doesn’t have to be perfect, it is rustic). Brush edges of dough with water, sprinkle with sugar, and bake until crust is deep golden brown and juices are bubbling, 45 minutes or so. Transfer baking sheet to a wire rack to cool the galette. Serve warm or at room temperature.
    *You may use whole wheat pastry flour if you do not wish to make this gluten free.
    Galette 4


  • Raw Strawberry Rhubarb Cheesecake Bars

    Raw Strawberry Rhubarb Cheesecake Bars

    Straw Rhu Bars 1

    I was over at my Dad’s house on Father’s Day and I picked  a whole bunch of rhubarb.  I almost left without it, but Eric reminded me it was there, and I was all like… “Are you wanting me to bake something with it, or is that a hint?” Of course it was, and he had a point. Rhubarb is delicious.  Especially when used in desserts, and paired with some sort of berries.  Which is what I decided to do this time.

    Straw Rhu Bars 3

    The next day I thought about it long and hard and what sounded the absolute best to me were some strawberry rhubarb bars.  I had seen a baked version on Pinterest a while back and said to myself, “I need to rawify and veganize those!” That was a couple months ago though, so it was about time I did, and now I finally had more rhubarb to do so!

    Straw Rhu Bars 2

    I wanted these to be intensely strawberry rhubarb. Sometimes when you make a cheesecake the filling takes away from the flavors of the fruit, but not mine.  I used strawberries and rhubarb both in the creamy filling and in a jammy swirl that marbled throughout the bars.  They were pure delicious goodness!  Tart and sweet just how strawberry rhubarb desserts should be not overly sweetened (I feel some people use too much sweetener with rhubarb and it is not tart enough anymore).  Perfectly balanced.  It is the height of strawberry rhubarb season, and if you love the combo like I do, you must try these.

    Straw Rhu Bars 4

    Raw Strawberry Rhubarb Cheesecake Bars 
    Makes 12

    Crust:

    1 cups finely shredded dried coconut

    1 cup sprouted buckwheat groats (or additional shredded coconut)

    1/2 cup soft medjool dates, pitted

    1/4 tsp himalayan salt

    2 Tbsp ground flaxseed

    Filling:

    2 cups young coconut meat, packed

    1/4 cup raw coconut nectar or maple syrup

    1 tsp vanilla extract

    pinch sea salt

    1 cup organic strawberries

    1 cup diced organic rhubarb

    1/2 cup plus 2 Tbsp raw coconut butter or oil, warmed to liquid

    Swirl:

    1/2 cup organic strawberries

    1/2 cup diced organic rhubarb

    1 Tbsp raw coconut nectar or maple syrup

    2 tsp raw coconut butter, warmed to liquid

    For the crust, combine all ingredients in the food processor and process until small crumbs and starting to hold together.
    Press into an 8×8 inch (or 9×9 inch if you want the bars thinner) pan lined with foil or parchment and oiled with coconut oil (for easy removal).  Set aside in the freezer.
    For the filling, combine all ingredients but the coconut butter in a high speed blender or food processor and blend until smooth. Add the coconut butter and blend until smooth.  Set aside in a bowl.

    To make the swirl, blend all ingredients in a blender until smooth.  Set aside.

    To assemble the bars, drop some of the swirl by the tsp over the crust, then pour the filling over that.  Drop the rest of the swirl by the tsp over that, then swirl with a knife.
    Place in the freezer to set, about 2 hours.  Cut into bars and serve!
    Store any extra bars in the refrigerator.


  • Raw Strawberry Rhubarb Bars

    Raw Strawberry Rhubarb Bars

    rhubarb

    My Grandma always had a large amount of rhubarb growing behind her garage.  And she knew just what to do with it.  She made the most amazing strawberry rhubarb sauce and I looked forward to it every year.  She made jars and jars of it to give away, I feel like most of it went to me and I was very happy to receive it. I think maybe I get my love of preparing food for others from her.  I can remember her spending lots of time in the kitchen and she never complained about it.

    Strawberry Rhubarb Bars

    Anyways, back to the sauce.  I ate it straight out of the jar and she would always tell me not to eat too much or I would get a tummy ache.  But I never did.  It was the perfect balance of sweet and tart.  So to this day, I think about that sauce and I still love strawberry rhubarb.  I make my own version now without processed sugar and it is just as good.  But I also like to be creative sometimes and make other desserts with strawberries and rhubarb too.  I made some bars this week and they were wonderful.  Just the right amount of tart and sweet just like Grandma’s sauce.

    Strawberry Rhubarb Bars 2

    They had to have a crumble topping so that they would taste like little squares of strawberry rhubarb crumble pie which is what I was going for.  I think they turned out quite heavenly.  My Grandma is no longer around to share them with but I think she would have approved. I shared them with my Mom and she loved them! I think I may just have to make more strawberry rhubarb desserts soon because these were so good!

    Strawberry Rhubarb Bars 3

    Raw Strawberry Rhubarb Bars 
    Makes 12

    Crust:

    1 1/2 cups finely shredded dried coconut

    1 1/2 cup sprouted buckwheat groats (or additional shredded coconut)

    1 cup soft medjool dates, pitted

    1/2 tsp himalayan salt

    1/4 cup ground flaxseed

    Filling:

    2 cups chopped rhubarb

    1 cup fresh strawberries

    1/2 cup pitted medjool dates

    1 tsp vanilla extract

    pinch sea salt

    1/2 cup raw coconut butter, warmed to liquid

    For the crust, combine all ingredients in the food processor and process until small crumbs and starting to hold together. Remove 1/3 of the mixture and place in a bowl.
    Press into a 7X7 or 8×8 inch pan lined with foil or parchment and oiled with coconut oil (for easy removal).  Set aside in the freezer.
    For the filling, combine ingredients in a food processor and blend until smooth. Spread out over the prepared crust, then sprinkle with the remaining crust mixture.
    Place in the freezer to set, about 30 minutes.  Cut into bars and serve!
    Store any extra bars in the refrigerator.


  • Vegan Strawberry Lavender Scones

    Vegan Strawberry Lavender Scones

    Strawberry Scones

    They make the most delicious smelling scones in the deli where I work, and since my work station is next to the baked goods cooling rack, I get to enjoy the heavenly aroma.  It is one of the happiest smells in the world.  If I am having a bad day, and there are some there, I need just take a deep breath through my nose, and it is better.  I am one of those people who associates smells strongly with memory, and those bring back good memories.  The strawberry ones smell like strawberry shortcake, which is a classic that I love.  So after a bunch of scone smelling last Friday, I decided I wanted some.  I had some fresh organic strawberries, and I decided that they would be awesome in the scones along with some lavender.  Berries and lavender are a match made in heaven and I love them together.

    Strawberry Scones 2

    These smelled absolutely amazing while they were baking, and since I knew I got to enjoy one they made me even more happy than the scones at work.  Eating one of these babies makes me think of a lazy Saturday morning, sleeping in late and sitting out on the porch for breakfast with one of these and some tea (since I don’t drink coffee).  I don’t ever sleep in on Saturdays, and I don’t have a porch, but a girl can dream! Maybe someday!

    Strawberry Scones 3

    Vegan Strawberry Lavender Scones
    Makes 8

    • 3 cups all purpose gluten free flour
    • 1/2 cup coconut sugar
    • 2 1/2 tsp baking powder
    • 1 Tbsp dried lavender flowers (make sure they are very fresh)
    • 1/4 tsp salt
    • 1/2 cup virgin coconut oil, cut into chunks
    • 1 cup cold full fat organic canned coconut milk (whisked until smooth if chunky)
    • 1 Tbsp pure vanilla extract
    • 2 cups fresh organic strawberries cut into chunks
    • coconut milk for topping
    • coconut sugar for sprinkling


    Preheat oven to 425 with the rack set at the middle position. Line a baking sheet with parchment. In a large bowl, combine the flour, sugar, baking powder, and salt. Cut in the coconut oil with a pastry blender or 2 knives until the mixture starts to clump into pea sized pieces. In a small bowl, stir the vanilla into the coconut milk. Add the coconut milk to the dough, and stir a few times, but do not over-mix. The dough should hold together when squeezed, but still be clumpy. fold in strawberries and lavender until evenly distributed. place dough on a floured work surface, and shape into a 4 inch wide log. Use a bench scraper to cut into triangles. There should be about 8. Place scones on the prepared baking sheet, reshaping slightly if necessary. Brush the tops lightly with the coconut milk (only if they seem dry, you want the sugar to stick), and sprinkle with coconut sugar. Bake for about 20 minutes or until golden brown (after about 15 minutes you may need to reshape with 2 bench scrapers if the scones are spreading, then place back in the oven). Cool on a wire rack.
  • Raw Tutti Frutti Ice Cream

    Raw Tutti Frutti Ice Cream

    Tutti Frutti Ice Cream 4

    Sprout Living was kind enough to send me some more of their Green Kingdom Epic Protein powder to use in recipes.  In case you didn’t catch my other post about it a few months back, this stuff is awesome!  Honestly, it is my all time favorite protein powder.  It is delicious as well as packed with nutrients including greens, it has a good texture, and most importantly it helps me refuel after a workout and feel good.  So what all is in this stuff?  Well, a blend of sprouted brown rice, yellow pea, sacha inchi, and cranberry proteins as well as superfoods  and greens.  It is raw, vegan, and organic.  I love it just plain with water mixed in (not all protein powders taste good that way, but theirs does).  And it is wonderful in smoothies and shakes like the Raw Green Berry Layered Shake I made recently. It has a fruity flavor to it, so I thought why not add it to a tropical ice cream recipe!

    Tutti Frutti Ice Cream

    I ended up making what I called Tutti Frutti Ice Cream.  I am not sure what the original or traditional tutti frutti ice creams had in them, but this tasted tutti frutti to me!  So delicious, a blend of mango, pineapple and banana with the sweet fruity protein and marbled with a strawberry swirl plus a plain fruit blend swirl for a pretty effect.  It was sooo good!

    Tutti Frutti Ice Cream 3

    Why not have your ice cream and get some protein too!  The protein powder enhanced the flavor and made it taste even better. Plus you get some of your daily greens in your ice cream!  If you have not tried the Sprout Living Green Kingdom Epic Protein Powder, you should definitely get on it.  I am super picky about protein powders and I love it.

    Tutti Frutti Ice Cream 1

    Raw Tutti Frutti Ice Cream 

    Makes 4 cups

    1 cup ripe mangoes

    1 cup ripe pineapple

    1 cup mashed banana

    2 cups young coconut meat

    3/4 cup coconut water

    2 tsp pure vanilla extract

    1/4 tsp sea salt

    1/2 cup raw coconut nectar

    3/4 cup coconut butter

    2 scoops Sprout Living Epic Green Kingdom Protein Powder

    Swirl:

    1/2 cup fresh strawberries

    1 Tbsp coconut nectar

    In a high speed blender or food processor, combine all ingredients for the ice cream until smooth.  Remove 1/3 cup of the mixture and set aside.  Add the protein powder to the remaining mixture in the blender and blend until smooth.  Pour the mixture with the protein powder into an ice cream maker, processing according to the package directions.
    Meanwhile, to make the swirl, combine all ingredients in a high speed blender or food processor until smooth, and set aside until the ice cream is done. 
    Pour 1/3 of the finished ice cream into a freezer safe container, then drop some of the swirl by the Tbsp over that, as well as the plain mixture, then half the remaining ice cream, then more swirl and plain mixture, then the last of the ice cream and more swirl and plain mixture, and swirl with a knife to marble.  Let chill in the freezer for about 4 hours or overnight until more firm before scooping (if it becomes too hard, let sit out about 15-20 minutes before serving.  

    Tutti Frutti Ice Cream 2

  • Raw Mango Berry Coconut Yogurt Cake

    Raw Mango Berry Coconut Yogurt Cake

    Berry Mango Cake 5

    I used to eat tons of yogurt as a kid.  It was packed into my lunch as a child, because I was pretty picky, and it was something that I would actually eat. And, it was my go to snack.  Usually strawberry.  That was my favorite.  This habit continued until a few years back when I decided to eliminate dairy, and at that point I was eating about 2 cups of Greek yogurt a day.  I loved the stuff!  But it didn’t love me back.  I never knew why I had so much discomfort before I gave it up.  My stomach felt so much better after I replaced it with chia seed porridge to go with my fruit instead of the dairy filled yogurt.  I admit, I missed it a little, which is why I was thrilled when I discovered I could make my own probiotic rich yogurt with young coconuts last year. Since then not only is it a treat to enjoy alone but a wonderful thing to use in recipes.

    Berry Mango Cake

    Like the Raw Mango Berry Coconut Yogurt Cake I made last weekend.  OMG…was it ever good!  If you miss dairy, and are looking for that tang in your cheesecakes that the traditional ones have, you have got to try this.  I used to always add yogurt to my cheesecakes before I started making dairy free ones, and adding the coconut yogurt does the trick too.  It is really quite simple to make, just involves starting the day before and allowing your coconut yogurt to ferment overnight with the probiotics.

    Berry Mango Cake 3

    The berries and mango added to the yogurt in the cake is a simply heavenly combination!  Plus it makes for a pretty colored design in the cake.  I felt as if it was Summer while enjoying this, and it definitely put me in my happy place!  The best part is my stomach felt happy after eating it too! I felt light and satisfied. Which is not something I could say if I had eaten one of my original cheesecakes from years ago.

    Berry Mango Cake 2

    Raw Mango Berry Coconut Yogurt Cake
    Makes one 6 inch cake

    Ingredients:

    Crust:

    • 2/3 cup raw sprouted buckwheat groats (or additional coconut)
    • 1/3 cup ground flax seed
    • 3/4 cup dried finely shredded coconut
    • 1/8 teaspoon sea salt
    • 10-12 soft medjool dates, pitted and chopped (if they are not soft, soak them in water until they are and drain them well)


    Filling:

    • 4 cups young coconut meat*
    • 1/2 cup coconut water
    • 1 tsp powdered probiotics (you can open capsules and pour them in)
    • juice and zest of one lime
    • 2/3 cup raw coconut nectar, or maple syrup
    • 1/2  teaspoon sea salt
    • 1 Tbsp pure vanilla extract and seeds from half a vanilla bean
    • 3/4 cup raw coconut butter (warmed to liquid)
    • 1/2 cup fresh organic mangoes
    • 1/2 cup fresh organic strawberries
    • 1/2 cup fresh organic blackberries


    Topping:

    • Fresh strawberries and blackberries decorating


    Instructions:

    1. Lightly coat a 6 inch spring form removable bottom pans with coconut oil. To prepare the crust, process flax, coconut, buckwheat and sea salt in a food processor until fine crumbs, then add the dates and process until the mixture holds together when squeezed between your fingers (if not holding together, add more dates). Firmly press crust into the bottom of the prepared pan, and set aside.
    2. To make the filling, in a high speed blender or food processor, combine coconut meat and water, and puree until smooth.  Mix in the probiotic powder, place in a bowl, and let sit out on the counter overnight.
    3. The next day, add to a high speed blender with the lime juice and zest, coconut nectar, sea salt, and vanilla in a food processor and blend until smooth and creamy. With the processor running, add the coconut butter and and process for a minute until blended.
    4. Divide the mixture into three bowls.  Add one back to the food processor and add the mango.  Blend until smooth.  Place back in the bowl. Add the next bowl contents to the food processor. Add the strawberries, and blend until smooth.  Place back in the bowl.  Add the next bowl to the food processor and add the blackberries and blend until smooth.  Place back into the bowl.
    5. To assemble cheesecake, drop the three fillings over the crust alternating the colors.
    6. Once the pan is full, tap the bottom on the counter to level, and swirl with a knife in a spiral from the outside in to the center, then a toothpick if you want more intricate swirls.
    7. Place in the freezer for about 4 hours to firm up.
    8. Garnish the top with fresh berries before serving.


    *If you do not have access to young coconut meat and you do not mind the recipe not being nut free, you can substitute 4 cups raw cashews soaked for 4 hours and drained in the filling.

    Berry Mango Cake 4

  • Vegan Strawberry Chocolate Chunk Oatmeal Cookies

    Vegan Strawberry Chocolate Chunk Oatmeal Cookies

    Strawberry Oatmeal Cookies 2

    I recently had a good amount of strawberries, and I decided to dry some.  I thought the intensely flavored strawberries would be wonderful in recipes like granola.  But I was craving some oatmeal cookies, and I didn’t want to just make the usual (I never do, it has to have a twist on it).  So, I decided to make strawberry chocolate chunk.

    Strawberry Oatmeal Cookies

    I am in the mood for strawberries, since I have been deprived of them all winter long and spring is finally here, so they are ending up in many of the sweets I make lately. I know you usually find raisins in oatmeal cookies, not strawberries, but they ended up being pretty awesome in the cookies.  Especially with the chocolate chunks, because chocolate loves strawberries.  These are simply heavenly. If you are bored of the same old oatmeal cookies, give these a go!

    Strawberry Oatmeal Cookies 1

    Vegan Strawberry Chocolate Chunk Oatmeal Cookies
    Makes about 4 dozen

    1 cup virgin coconut oil, warmed to liquid
    1 1/2 cups coconut sugar
    2 flax eggs*
    1 Tbsp pure vanilla extract
    1 1/2 cups gluten free oat flour
    1 tsp baking soda
    3/4 tsp sea salt
    3 cups gluten free old fashioned rolled oats
    2 cups vegan chocolate chunks
    2 cups dried strawberries**

    In a large mixing bowl, mix together the coconut oil and sugar until well blended. Add flax eggs, vanilla, and beat until well combined (the mixture will become very thick). Mix in the flour, soda, and sea salt until well blended. Mix in the oats until well combined, then add chocolate and strawberries and mix until evenly distributed throughout the dough. Heat the oven to 350 degrees with the rack set at the middle position. Line 2 baking sheets with parchment paper. Roll the dough into 12 large balls, and spread them out on the 2 cookie sheets with plenty of room in between. Bake for 13-15 minutes or until golden, but not overbaked. Let cool on sheet a few minutes, then remove to a wire rack lined with parchment to cool.

    *Whisk together 2 Tbsp ground flax seed, 1/4 cup and 2 Tbsp water in a small bowl.  Allow to sit in the fridge for 15 minutes until the mixture has set up (or become kind of thick).

    **I made my own dried strawberries. To make them, simply slice the strawberries thin, and place them on a lined dehydrator tray.  Dry at 115F for about 24 hours until very dry.

    Strawberry Oatmeal Cookies 3
  • Raw Green Tea Ice Cream with Strawberry Swirl

    Raw Green Tea Ice Cream with Strawberry Swirl

    Green Tea Strawberry Ice Cream 3
    When I was enjoying a cup of warm matcha recently, I admired the lovely green color in my mug and I thought, how lovely would it be to make a matcha ice cream with a strawberry swirl?  The green contrasting the red, and the earthy matcha paired with the sweet berries.  I had to make it.  I have always been a fan of matcha ice cream, ever since I tasted some as an 8 year old in a Japanese restaurant.  At that point, I felt like I was eating something exotic and special.

    Green Tea Strawberry Ice Cream

    I still love it.  Especially when made with coconut based ice cream, because that flavor is perfect with the matcha.  That is exactly what I used for this recipe.  The base tasted wonderful, even before I put it in the ice cream maker.  Once frozen and swirled with a simple strawberry sauce, it was simply heavenly.  I don’t care if it is not summer yet, I love my ice cream.  And this is the perfect spring ice cream!
     Green Tea Strawberry Ice Cream 2

    Raw Green Tea Ice Cream with Strawberry Swirl
    Makes about 6 cups

    Ice Cream:

    1 cup coconut water

    2 Tbsp matcha powder

    4 cups young coconut meat*

    1/2 cup raw coconut nectar or maple syrup

    seeds of one vanilla bean or 2 tsp pure vanilla extract

    a pinch of sea salt

    1/2 cup coconut oil, warmed to liquid

    Swirl:

    1 1/2 cups fresh organic strawberries

    2 Tbsp raw coconut nectar

    pinch sea salt
    Add coconut water to a high speed blender or food processor, along with matcha, coconut, coconut nectar, vanilla, and sea salt. Process until smooth, then with the processor running, add the coconut oil slowly and process until well incorporated, about a minute. Pour the strained mixture into an ice cream maker and process according to directions.

    Meanwhile, to make the strawberry swirl, combine all ingredients in a high speed blender or food processor and blend until smooth.  Set aside.

    When ice cream has finished churning, remove from ice cream maker, and pour 1/3 of it into a freezer safe container with a lid. Then spoon some of the swirl over. Then half the remaining ice cream, then more swirl, then remaining ice cream, then swirl.  Swirl the ice cream through with a knife to marble it.  Cover.  Let sit in the freezer for at least four hours or overnight to firm up to scoopable consistency.

    *If young coconut meat is unavailable, you may substitute 4 cups raw cashews, soaked 4 hours and drained.

    Green Tea Strawberry Ice Cream 1

  • Raw Strawberries and Cream Nut Butter

    Raw Strawberries and Cream Nut Butter

    Strawberries and Cream Butter 1

    I have been wanting to make this nut butter for a while, but I waited until spring.  Because spring means strawberries are more flavorful and tasty.  I make my own interestingly flavored nut butters all the time.  To me plain nut butters are usually just for use in recipes.  But when I add things like dark or white chocolate, maple and spices they begin to become an indulgence all on their own. So this week, I made Raw Strawberries and Cream Nut Butter.

    Strawberries and Cream Butter

    If I were rich, I would have used macadamia nuts, because they are so dreamy, but since I am on a budget (I am sure you can probably relate), and I did not happen to have any macadamias because I always pounce on them when I am gifted some or get them on sale, I used cashews.  Which turned out amazing in the nut butter so it was still a win.  I combined them with some home made dried strawberries, vanilla, coconut sugar, and a bit of sea salt and OMG was it ever heavenly!

    Strawberries and Cream Butter 2

    And it was so simple to make! I enjoy this by the spoonful like some sort of truffle filling without a shell, or I like to warm it in the dehydrator slightly and drizzle it over fruit. But of course any way you use other nut butter you could use this too.   Spring is here, bring on the strawberries!

    Strawberries and Cream Butter 3


    Raw Strawberries and Cream Nut Butter

    Makes about 2 1/2 cups

    3 cups raw cashews (macadamia nuts or pine nuts will also work)

    2 cups dried strawberries*

    1/2 cup raw coconut sugar

    1 tsp pure vanilla extract

    1/4 tsp sea salt

    In a high speed blender, blend the raw cashews at high speed, using the tamper to press them into the blades until they are smooth.  Add the remaining ingredients, and blend until smooth.  Store in a jar in the fridge.

    *I made my own dried strawberries.  To do so, slice strawberries thinly and place on a lined dehydrator sheet at 115F for about 24 hours until no moisture remains.  If you cannot make your own, use freeze dried not the sugar sweetened soft strawberries because they will gum up your blender.


  • Raw Strawberry Chocolate Chunk Blondies

    Raw Strawberry Chocolate Chunk Blondies

    I love making every variation possible of berries and chocolate this time of the year.  Yes, it is because Valentine’s Day makes me feel like it is ok to use berries in the winter even though they are not growing here in Minnesota because there is snow on the ground.  Good thing I can still get fresh or frozen organic berries or I would be really missing them since we go about half a year without them here.  Anyways, back to my berries and chocolate thing, I tend to do this every year, and in past years creating a Raw Dark Chocolate Raspberry Truffle Cake, Raw Raspberry Rose Cream Truffles, and Raw Red Velvet Strawberry Filled Doughnuts to name a few of many.  This year is no different.  I am craving the berries and chocolate so I decided to make some Raw Strawberry Chocolate Chunk Blondies.

    Blondies are already one of my favorite bars, so add in the sweetness of strawberries and even better, right?!  I thought so at least.  I added in some dark chocolate chunks as well as some raw cacao nibs because I love all of the different textures in the soft dough.  I had to keep sampling the dough as I formed them into the bars just to make sure it was alright wink, wink.  Of course it was, who am I kidding, I just thought it was so good I couldn’t wait for them to firm up before eating.  These needed no dehydration so you need not wait long to enjoy them.  They taste kind of like strawberry shortcake married a blondie and had a baby.  These are perfect for Valentine’s Day, but luckilly after winter comes spring, and more berries…so more opportunities to make these again!

    Raw Strawberry Chocolate Chunk Blondies
    Makes 24

    Dough:
    2 cups raw coconut flour (home made is preferred)*
    1 cups sprouted buckwheat flour (or additional coconut flour)
    1/4 cup plus 2 Tbsp ground flax seed
    1 cups soft medjool dates, pitted
    1/4 tsp sea salt
    1 tsp pure vanilla extract
    1 cups fresh strawberries**
    1/4 cup raw almond butter
    2 Tbsp raw coconut butter (NOT oil), warmed to liquid

    3/4 cup chopped raw dark chocolate
    1/2 cup raw cacao nibs

    For the dough, in a food processor, combine the coconut flour, buckwheat flour, flax seed, dates and salt, and process until the dates are very finely chopped and it is all well combined.  Add the vanilla, berries, almond butter, and coconut butter and process until smooth like dough.  Mix in the chopped raw dark chocolate and raw cacao nibs. Then press the blondies into a 1 1/2 inch square on a foil lined sheet pan. Place in the freezer until set (about an hour), then cut into 12 squares and enjoy!  Store in the fridge.

    *Make your own coconut flour by buzzing 2 cups finely shredded dried coconut in a high speed blender for about 15-30 seconds until fine flour (but not too long or you will get butter).
    **Since berries may vary in moisture levels, if you find that your blondies are too wet, add a little more coconut flour.  To dry, add a little water 1 tsp at a time while mixing the dough before adding the chocolate and cacao nibs.


  • Vegan Strawberry Almond Layer Cake

    Vegan Strawberry Almond Layer Cake

    1 Corinthians 13:4-7

    Love is patient, love is kind. It does not envy, it does not boast, it is not proud. It does not dishonor others, it is not self-seeking, it is not easily angered, it keeps no record of wrongs. Love does not delight in evil but rejoices with the truth. It always protects, always trusts, always hopes, always perseveres. Love never fails.

    I couldn’t agree more with that passage, and although we should think about treating others with love every day, since Valentine’s Day is coming up, the day which is supposed to be all about love, how appropriate is it to remind ourselves of that?! As you can tell I am not into all of the commercial spend lots of money aspect of Valentine’s Day.  It is not all about the flowers and expensive jewelry that so often people get so wrapped up in. By the way, when did every holiday become all about spending lots of money?  To me, Valentine’s Day should be a day to share our love for others family, friends, significant others, whomever we have in our lives that we love.  My perfect Valentine’s Day doesn’t involve going out for expensive dinner, jewelry and flowers…it involves time to appreciate each other .  Going out and enjoying nature, maybe hitting a museum to admire the art together.  A home made dinner and dessert, alone time to relax with each other. Just low key, but the things I really enjoy.  After all, love is about feeling happy, seeing every day the things you love in that other person and appreciating them.  Knowing that they will be there for you in the future, and thankful that they are in your life.  Being grateful that you have gotten through tough times with that person and the relationship becoming stronger in the process.  Being patient with them when they do stupid things that you don’t agree with sometimes, and taking their good advice to change when you are the one doing the stupid things.  So, to me Valentine’s Day should be a day to reflect on all of this and appreciate the one you love for who they are.

    Although I share my love in many ways, one of the ways I express my love is through food in case you couldn’t tell that already.  I enjoy making things for those I am close to in my life and sharing.  The latest thing I made to share was a Vegan Strawberry Almond Layer Cake last weekend.  Truth be told, I wanted a cake with pink frosting and that was why I made it to begin with.  Plus as I have mentioned in some previous blog posts, Valentine’s Day is an excuse to use strawberries in desserts when they are not necessarily in season.  I know, shame on me…but they are organic at least, and the good news is that you can use frozen in this recipe.  For the cake part, I made it gluten free, laced with strawberry puree, and 3 hits of almond.  Milk, oil and extract.  Which all made for a delicious moist cake!  For the frosting I kept it pretty simple, no added jam layers and whatnot, just pink strawberry frosting with a hint of white chocolate in the form of cacao butter and a secret ingredient to make the color extra pretty. Beets.  Yes, I used beets in the frosting, and no you can not taste them.  This cake was fabulous!  I shared it with my special someone, my boyfriend Eric who loves desserts even more than I do.

    Vegan Strawberry Almond Layer Cake
    Makes 1 6 inch 4 layer cake

    2 6 inch cake pans

    Cake:
    1 3/4 cups Bob’s Red Mill All Purpose Gluten Free Flour
    1 tsp baking soda
    1/2 tsp sea salt
    1 cup coconut sugar
    1/4 cup virgin coconut oil, warmed to liquid
    1/4 cup almond oil
    1/2 cup almond milk
    1/2 cup pureed strawberries
    1 Tbsp pure vanilla extract
    1 tsp almond extract
    2 Tbsp cider vinegar

    Frosting:
    4 cups young coconut meat*
    2 cups chopped raw red beet
    2 cups fresh strawberries
    3/4 cup raw coconut nectar, maple syrup or agave nectar
    1/2  tsp sea salt
    seeds of one vanilla bean, or 1 Tbsp pure vanilla extract
    3/4 cup coconut butter, warmed to liquid
    1/4 cup raw cacao butter, warmed to liquid**

    Preheat the oven to 375 degrees and position rack in center of oven. Line two six-inch-diameter cake pans with 2-inch-high sides with parchment paper. Coat parchment paper and pan sides lightly with coconut oil so that the cake doesn’t stick and line the bottom of the pan with a piece of parchment fit to the pan.
    Whisk flour, baking soda, sea salt, and sugar in a large bowl to blend well.
    Whisk oils, almond milk, berry puree, vanilla extract and almond extract together in small bowl to blend well, then whisk into the flour mixture until well blended. Whisk in the cider vinegar until bubbles form.
    Transfer cake batter to prepared pan and bake cakes until tester inserted into center comes out clean, about 25-30 minutes.
    Cool cakes completely in pan on rack, about 1 hour. Cut around sides of pan to loosen. Turn cakes out onto platter; peel off parchment paper. Let cool completely, then place in the fridge to chill until very cold to make slicing easier. When chilled, slice cakes horizontally in half so that you have 4 layers.

    Meanwhile, to make the frosting, combine all ingredients but the coconut butter and cacao butter in a high speed blender or food processor and process until smooth.  With the motor running, add the coconut butter and cacao butter and process a minute more.  Pour the frosting into a bowl and let sit in the fridge until the consistency of whipped cream.
    When ready to frost, place one cake layer on a plate. spread frosting about 1/2 inch thick over the first layer, then top with the second.  Repeat the frosting, then another cake layer, then more frosting then the last cake layer. Spread frosting over the top and down the sides of the cake.  (place any remaining frosting in a pastry bag and pipe decoratively over the cake).  Store cake in the fridge.
    *If you do not have access to young coconut meat, you can use 4 cups soaked cashews instead along with the other cashews.
    **If you can not get cacao butter, you can substitute more coconut butter or coconut oil.

    ***if you would like a 4 layer 9 inch cake, double this entire recipe and bake in two 9 inch cake pans.


  • Raw Neapolitan Cheesecake, Blogaversary and a Giveaway!

    Raw Neapolitan Cheesecake, Blogaversary and a Giveaway!

    4 years ago today I posted my first recipe on this blog.  It was a red velvet cupcake recipe featuring beets, and it was not plant based at all because I had used cream cheese frosting and I had taken a single photo of the cupcakes with the worst lighting possible.  But I was proud of it.  I was sharing my recipes as I wanted to not just on Facebook, but on a blog.  Before I started blogging, blogs to me were something other professional people did.  Not just random people looking to share recipes with their friends like I was trying to do at that point.  So it felt like an accomplishment.

    That was after all what I started this blog for.  To simply share dessert recipes with friends.  So much has changed since then.  It has become more than that.  I still share recipes, but with way more people than I had originally imagined.  That is awesome.  It makes me happy that so many of you want to read my recipes!  I have changed my ways of eating as well.  I went from vegetarian to vegan to mostly raw recipes and including savory items as well with the occasional body care recipe.
    I figure why limit myself to just desserts, and I know others might like to enjoy what I am having for dinner as well.  I never thought I would have the audience I now have, and I am extremely grateful for each and every one of you who take the time to visit my blog and hear what I have to say or to find a recipe to try. Thank you so much for making my day by being here.

    Since it is my blogaversary, I thought I would make a delicious cake to celebrate!  A Raw Neapolitan Cheesecake to be exact.  Neapolitan ice cream reminds me of birthday parties as a kid for some reason, so I thought a neapolitan cake for my blog’s birthday would be appropriate.  I made a simple raw cheesecake with fresh organic strawberries for one layer, raw cacao powder for the next and vanilla bean for the other and it was delicious!  Simple to make as well, which I know you all appreciate. I think this might be a good recipe for Valentine’s Day as well since anything with strawberries and chocolate is welcome on that holiday (at least for me).

    Lastly, besides the delicious cake, to celebrate I am giving away a copy of my latest book “Fragrant Vanilla Cake: Sweet and Savory” to one lucky winner!  So scroll down to the bottom to enter!  Good luck to you all and thank you for allowing me to keep my blog going with all of your support!

    Raw Neapolitan Cheesecake
    Makes one 6 inch cake

    Crust:
    2/3 cup raw sprouted buckwheat groats (or additional coconut)
    1/3 cup ground flaxseed
    3/4 cup dried finely shredded coconut
    1/3 cup raw cacao powder
    1/8 teaspoon sea salt
    10-12 soft medjool dates, pitted and chopped (if they are not soft, soak them in water until they are and drain them well)

    Filling:
    4 cups young coconut meat*
    1/2 cup coconut water
    2/3 cup raw coconut nectar, or maple syrup
    1/2  teaspoon sea salt
    1 Tbsp pure vanilla extract and seeds from half a vanilla bean
    3/4 cup raw coconut butter (warmed to liquid)

    1/2 cup fresh organic strawberries
    3 Tbsp raw cacao powder

    Lightly coat a 6 inch spring form removable bottom pan with coconut oil. To prepare the crust, process flax, coconut, buckwheat and sea salt in a food processor until fine crumbs, then add the dates and process until the mixture holds together when squeezed between your fingers (if not holding together, add more dates). Firmly press crust into the bottom of the prepared pan, and set aside.

    To make the filling, in a high speed blender or food processor, combine coconut meat, water, coconut nectar, sea salt, vanilla and blend until smooth and creamy. With the processor running, add the coconut butter and process for a minute until blended.

    Divide the mixture into 3 bowls.  Place one back into the blender and add the 1/2 cup strawberries. Blend until smooth, then pour back into the bowl.  Rinse out the blender. Add the second bowl back to the food processor and add the cacao powder.  Blend until smooth, and pour back into the bowl.

    To assemble the cake, pour the chocolate filling into the pan over the crust, reserving 2 Tbsp in the bowl and smooth out.  Then pour the vanilla filling over that smoothing out and reserving 2 Tbsp in the bowl.  Pour the strawberry filling over that, and smooth out.  Then drop the reserved fillings over that randomly by the 1/2 tsp, and swirl with a knife then a toothpick for smaller swirls.  Place in the freezer for about 4 hours to firm up. Store in the fridge.

    *If you do not have access to young coconut meat, you can substitute 4 cups raw cashews soaked for 4 hours and drained.


    a Rafflecopter giveaway

  • Beet Ravioli with Orange Thyme Ricotta and Orange Strawberry Sauce

    Beet Ravioli with Orange Thyme Ricotta and Orange Strawberry Sauce

    I have been eating beets in a lot of salads lately, and I love them but I decided that I needed to be a little more interesting with the combination so I made beet ravioli.  I cut it into hearts to be cute, and laced the macadamia inside with some thyme and orange.
    I finished it off with a strawberry orange sauce and served it with greens and it was a delicious light meal.  I can’t believe it took me over 1/2 a year into being raw before I tried beet ravioli.  I will definitely have to come up with different sauces and fillings now because it was awesome!

    Beet Ravioli with Orange Thyme Ricotta and Orange Strawberry Sauce
    Serves 4

    Macadamia Ricotta:
    2 cups Macadamias, soaked for at least 4 hours, drained (or cashews if you prefer)
    juice of one lemon
    1 tsp sea salt
    1 1/2 Tbsp orange zest
    1 Tbsp fresh thyme, minced

    Strawberry Orange Sauce:
    1 cup fresh strawberries
    1/4 cup fresh orange juice
    2 soft medjool dates, pitted
    a pinch of sea salt
    1/4 tsp thyme

    24 large thin slices of raw beet,cut into hearts if desired
    greens for serving
    strawberries and orange slices for serving

    To make Macadamia ricotta, Combine the macadamias, lemon juice, and sea salt and orange zest and thyme in a high speed blender or food processor and process until smooth with about 3 Tbsp of filtered water (or enough to make a thick soft cheese consistency without being runny).  Wrap cheese in a double layer of cheesecloth, and place in the fridge to let sit a day or two.

    For the sauce, combine all ingredients in a food processor until smooth.
    To assemble, scoop about 1 Tbsp of the ricotta onto half the beet slices, then top with another beet slice to make ravioli.  Place 3 on each plate, then place a hanful of greens, some strawberries and orange slices.  Spoon some of the sauce over the ravioli on each plate and use the extra for the greens if desired.