Tag: hazelnut

  • Vegan Chocolate Hazelnut Pop Tarts

    Vegan Chocolate Hazelnut Pop Tarts


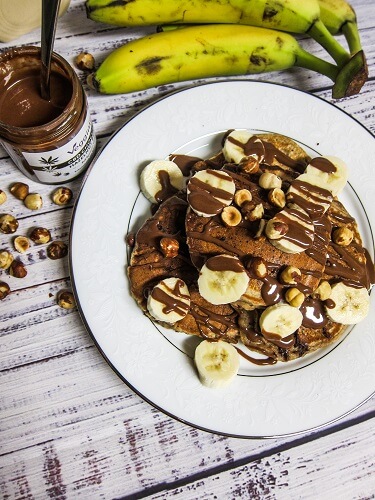
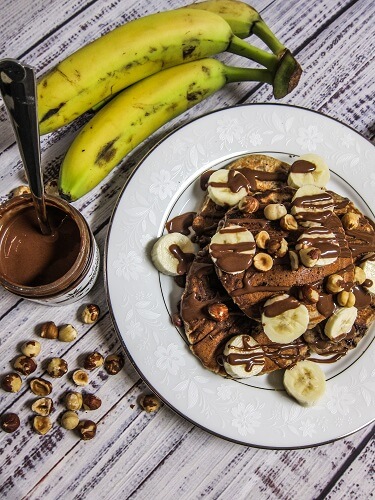
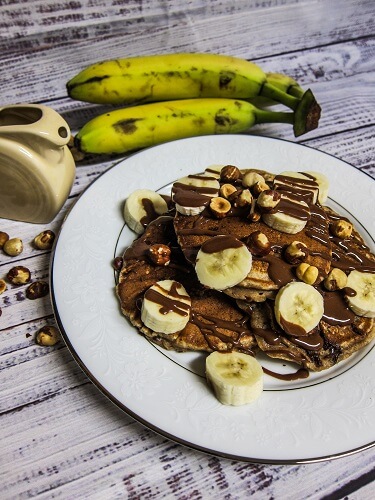
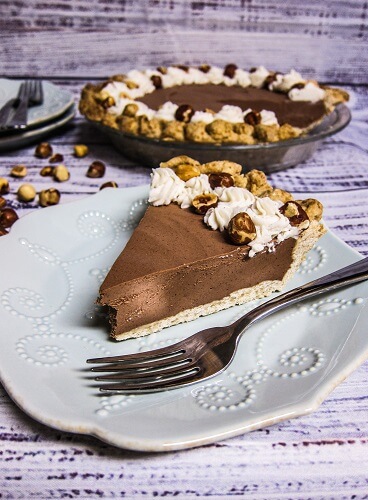
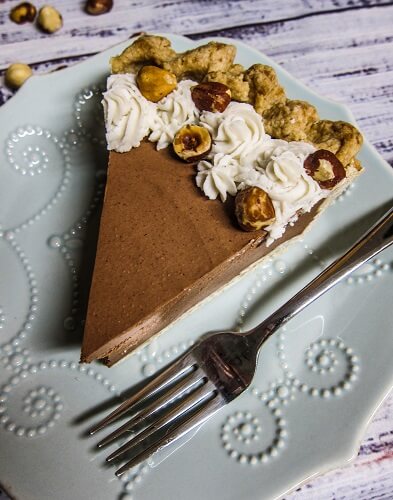
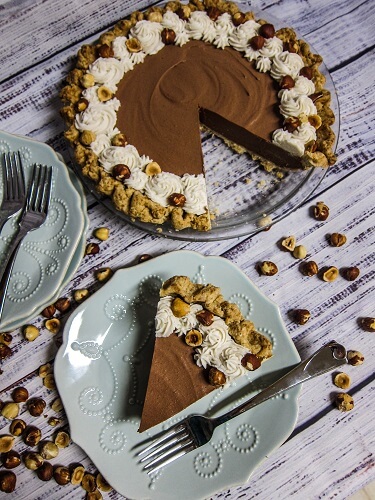
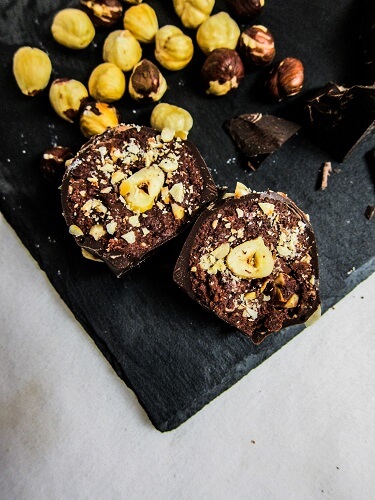
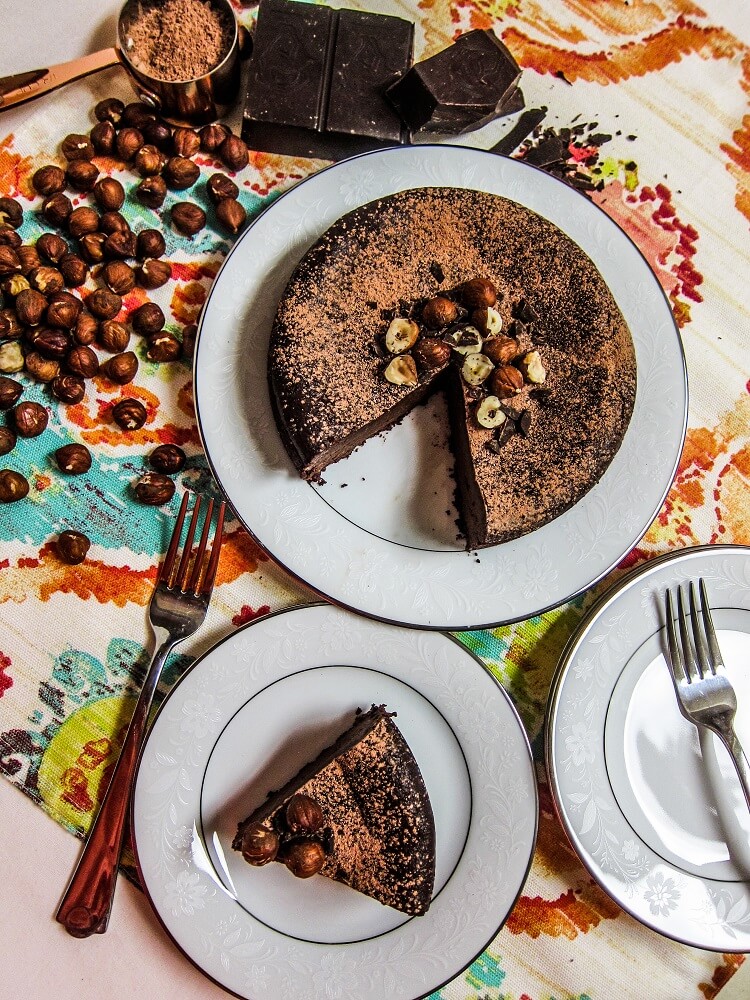
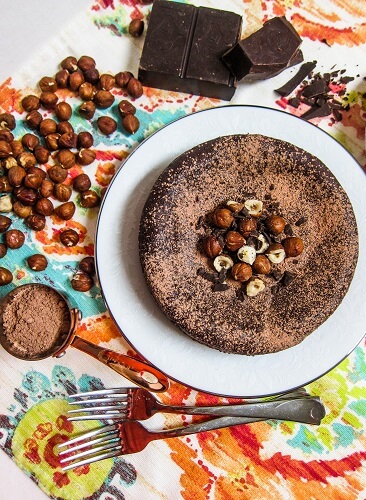
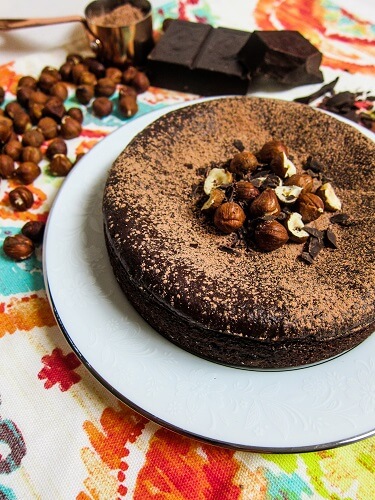
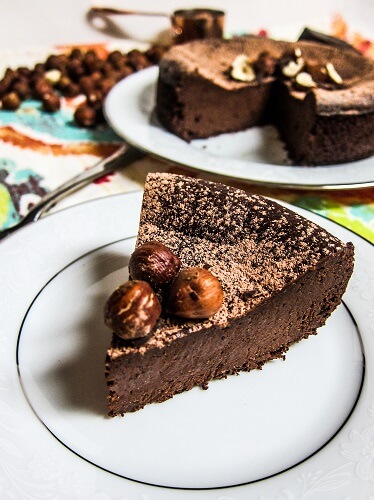
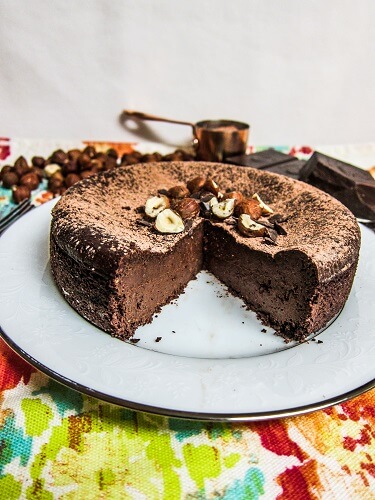
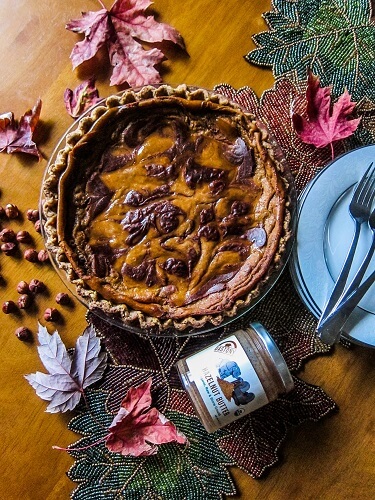
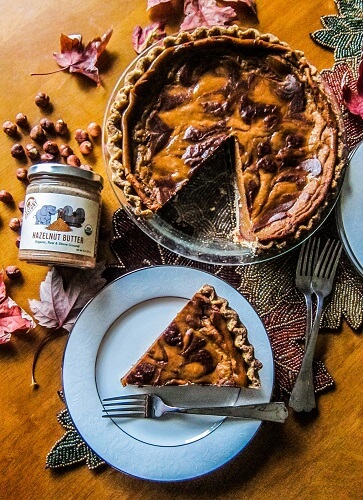
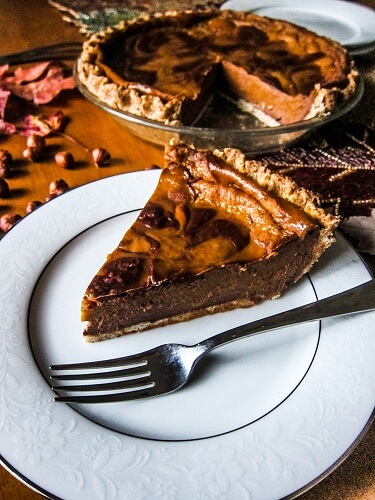
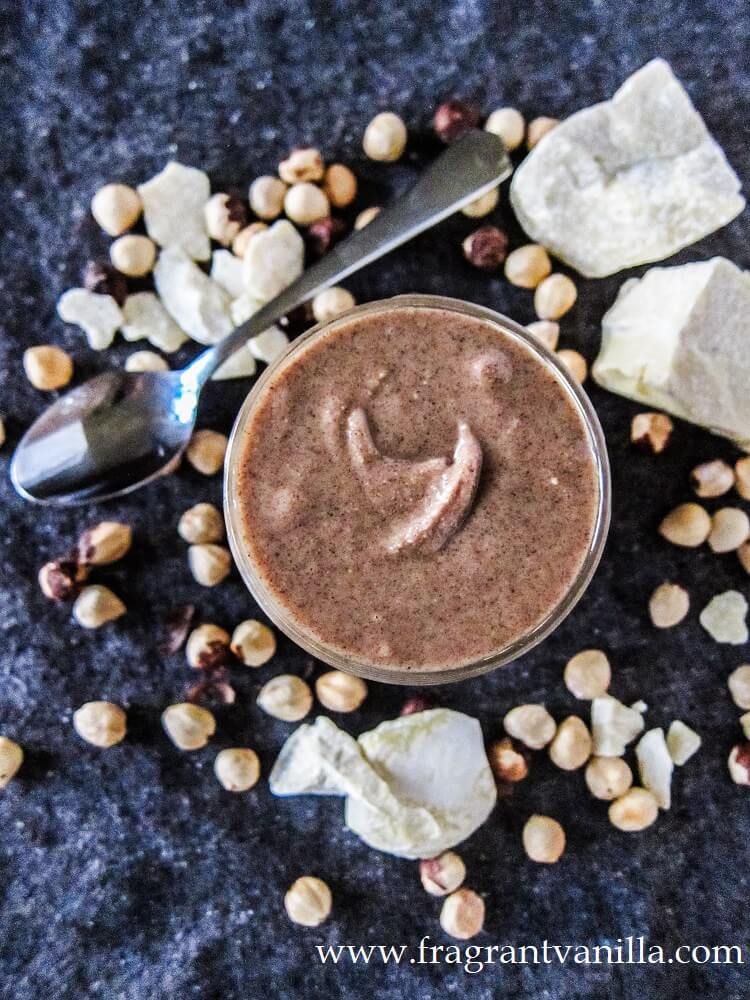
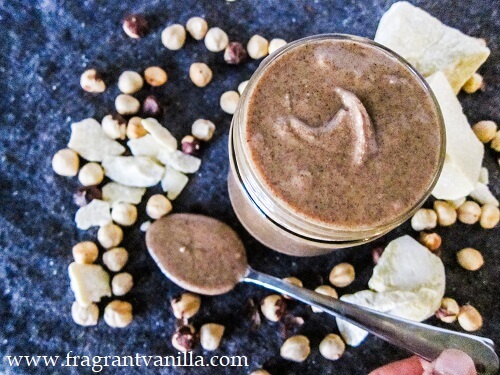
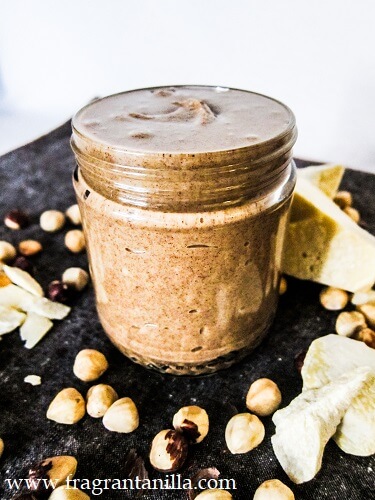
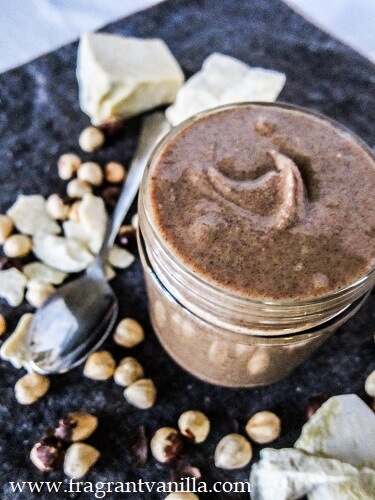
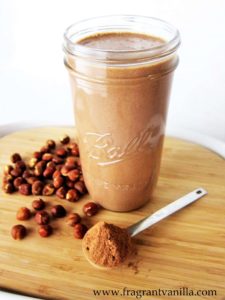
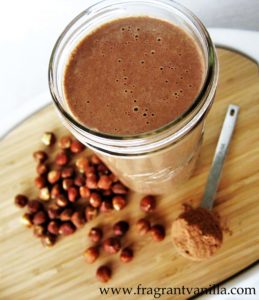
    I loved Nutella as a kid.  I remember thinking it was pretty awesome that I could have chocolate on toast for breakfast (because it pretty much just tasted like chocolate with not much nut flavor since it is so sugary).  It is pretty much dessert after all.  My Mom wouldn’t let me eat it all the time for that reason, and so it felt like a treat.  I still love the chocolate hazelnut combination and even make my own nutella sometimes, but it is definitely a healthier version with hazelnuts as the first ingredient and not sugar.  

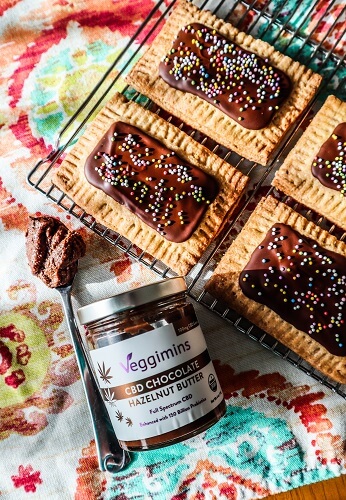
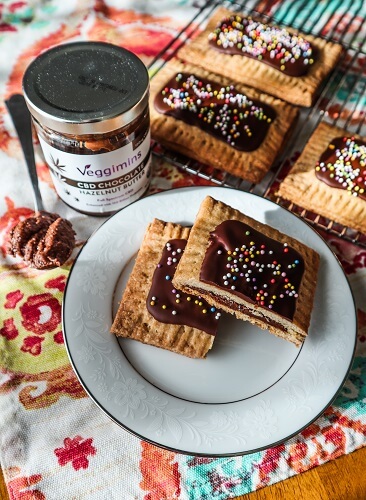
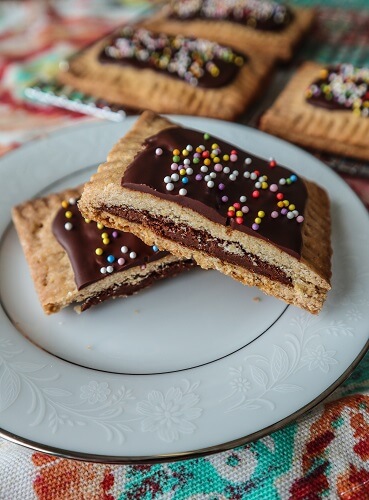
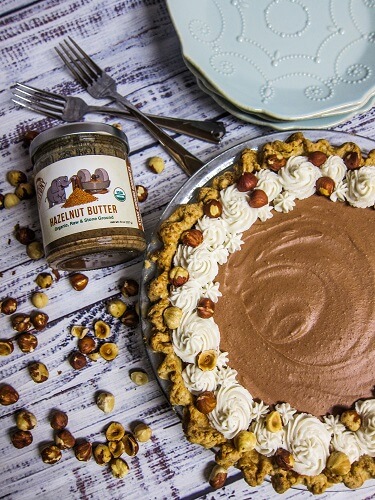
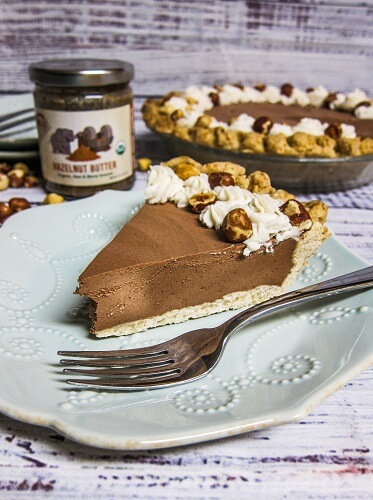
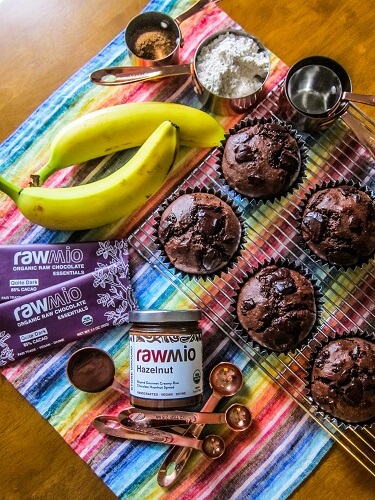
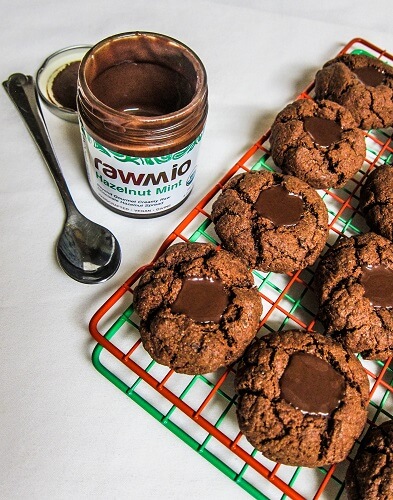
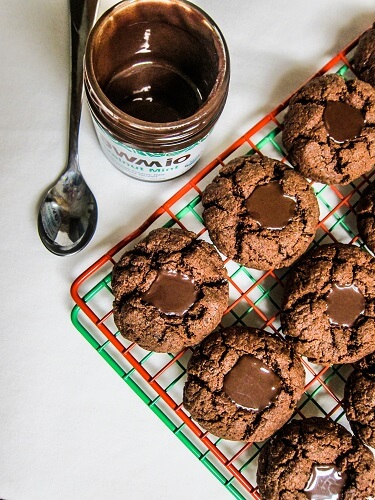
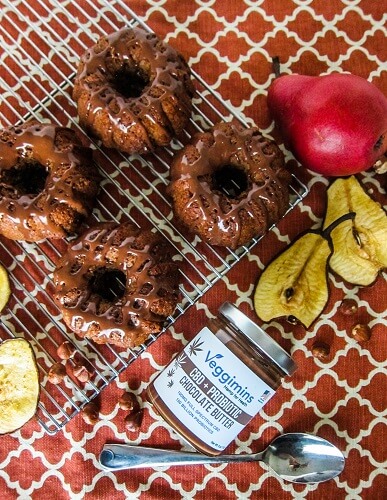
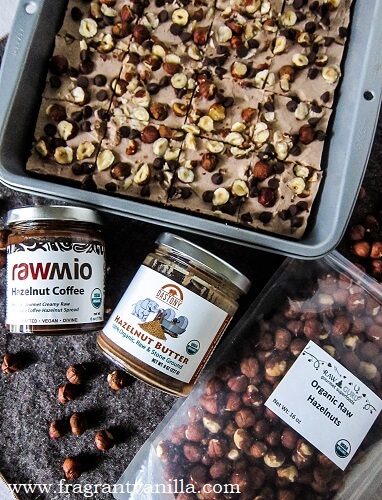
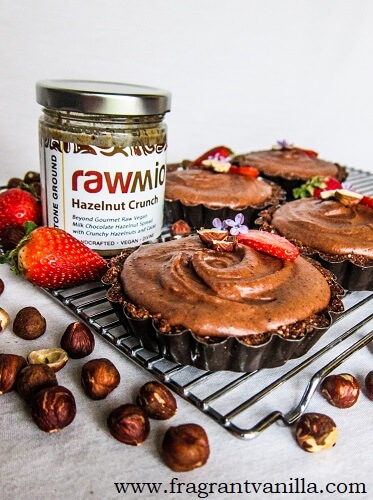
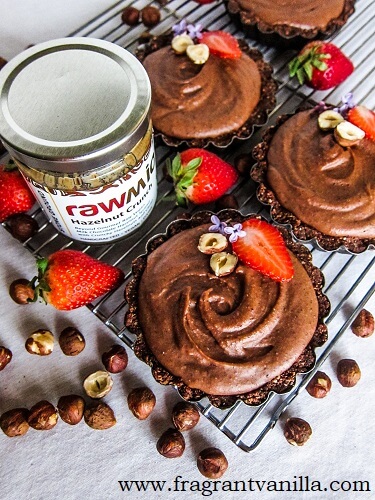
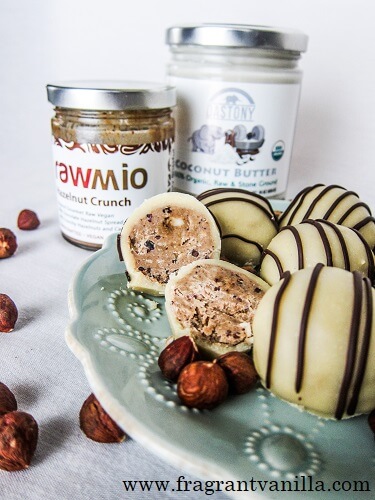
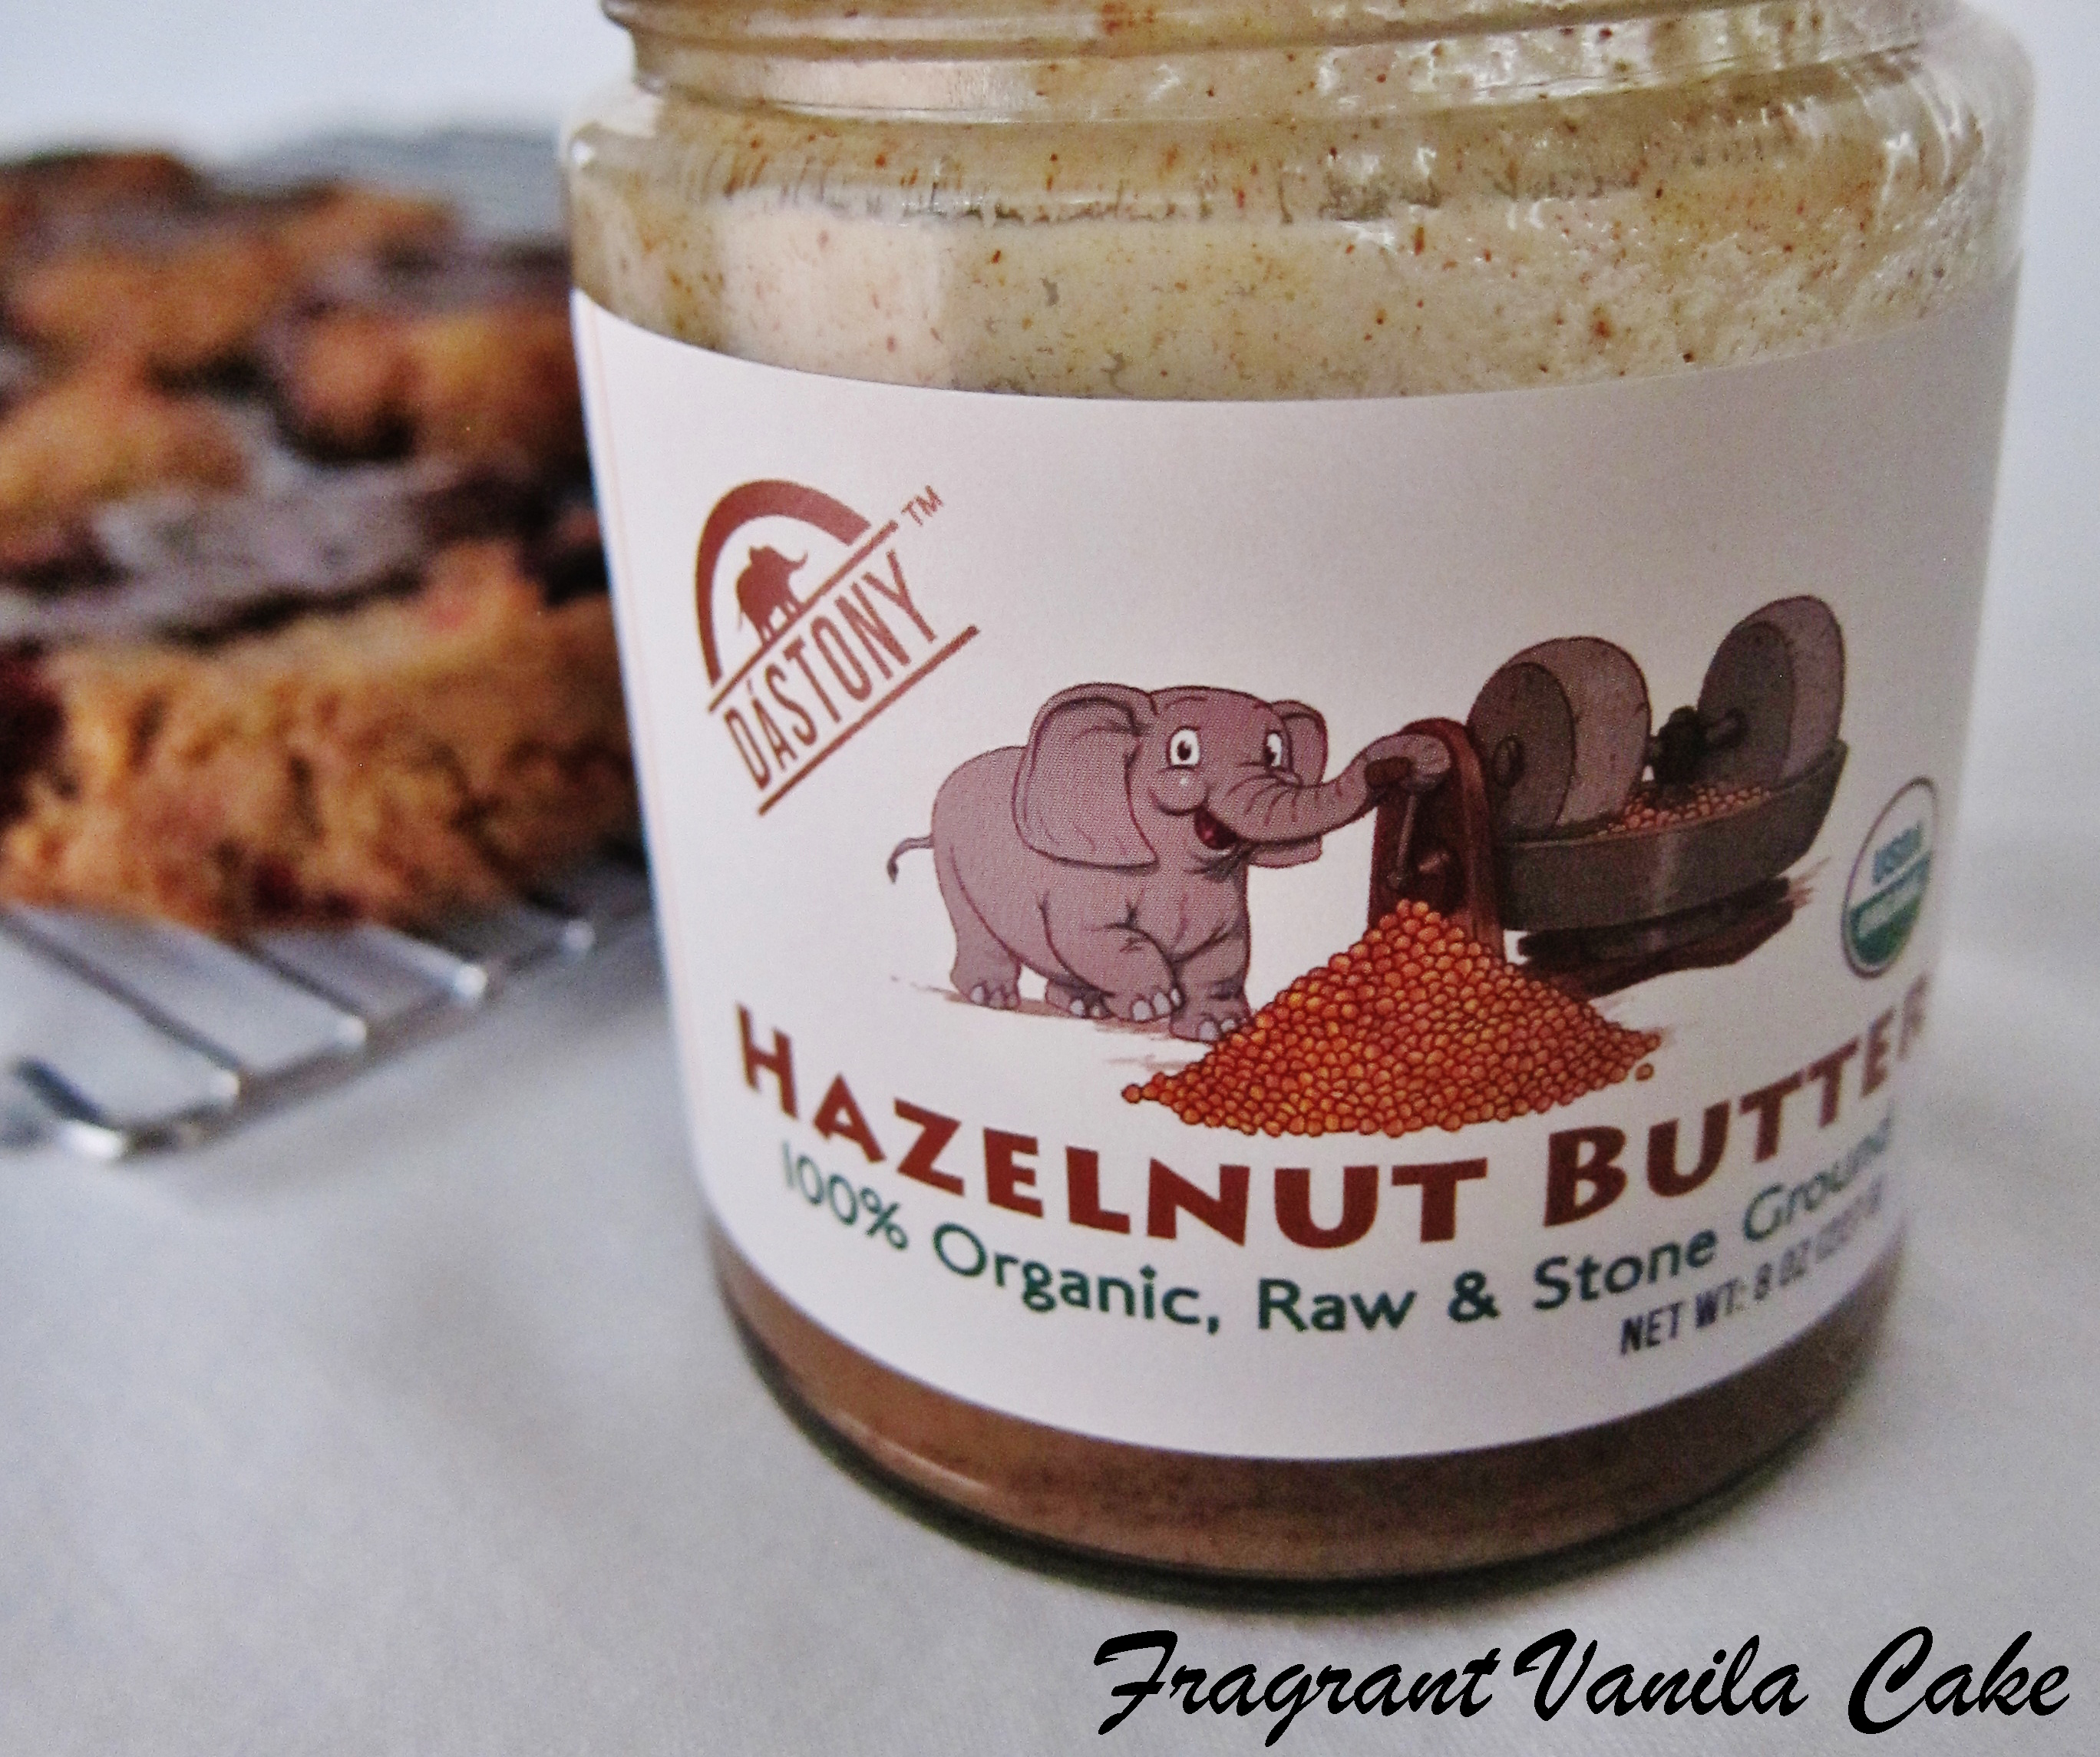
    There are a few vegan nutella brands that I like too, like the Rawmio Chocolate Hazelnut Spread and CBD Chocolate Hazelnut Butter from Raw Guru.   They are delicious just with a spoon or in recipes.  They recently sent me some of the CBD Chocolate Hazelnut Butter and I decided to make some pop tarts with it.  Pop tarts were another thing I loved growing up, and I enjoy making home made ones.  They are way better than the store bought versions ever were, more like mini hand pies because the crust actually tastes good. I thought nutella ones would be heavenly!

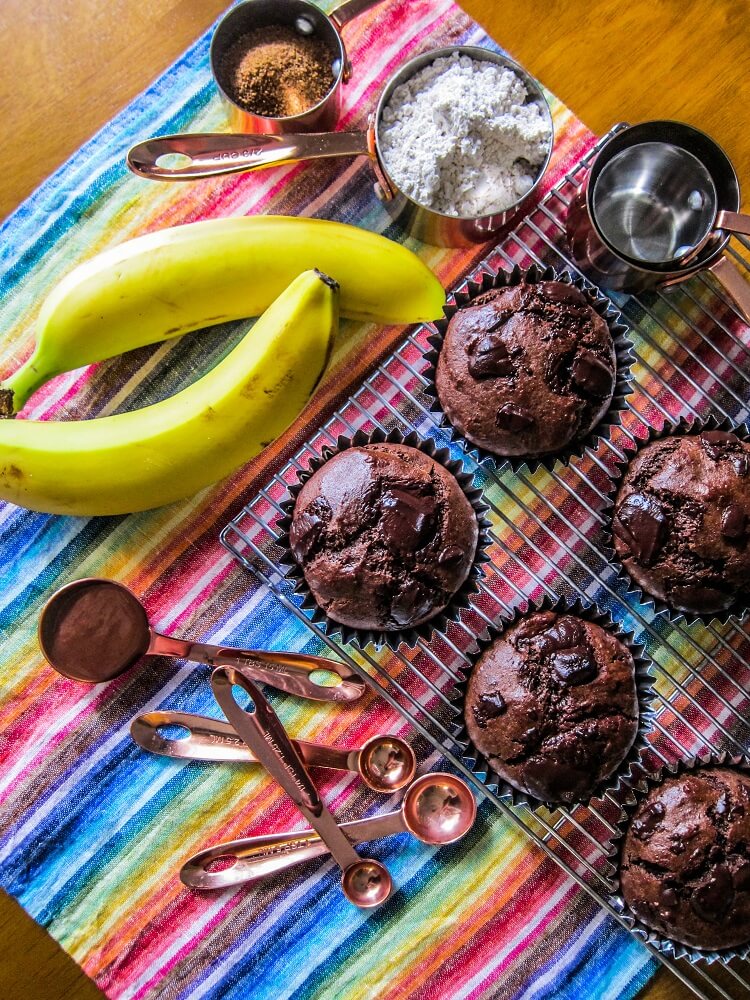
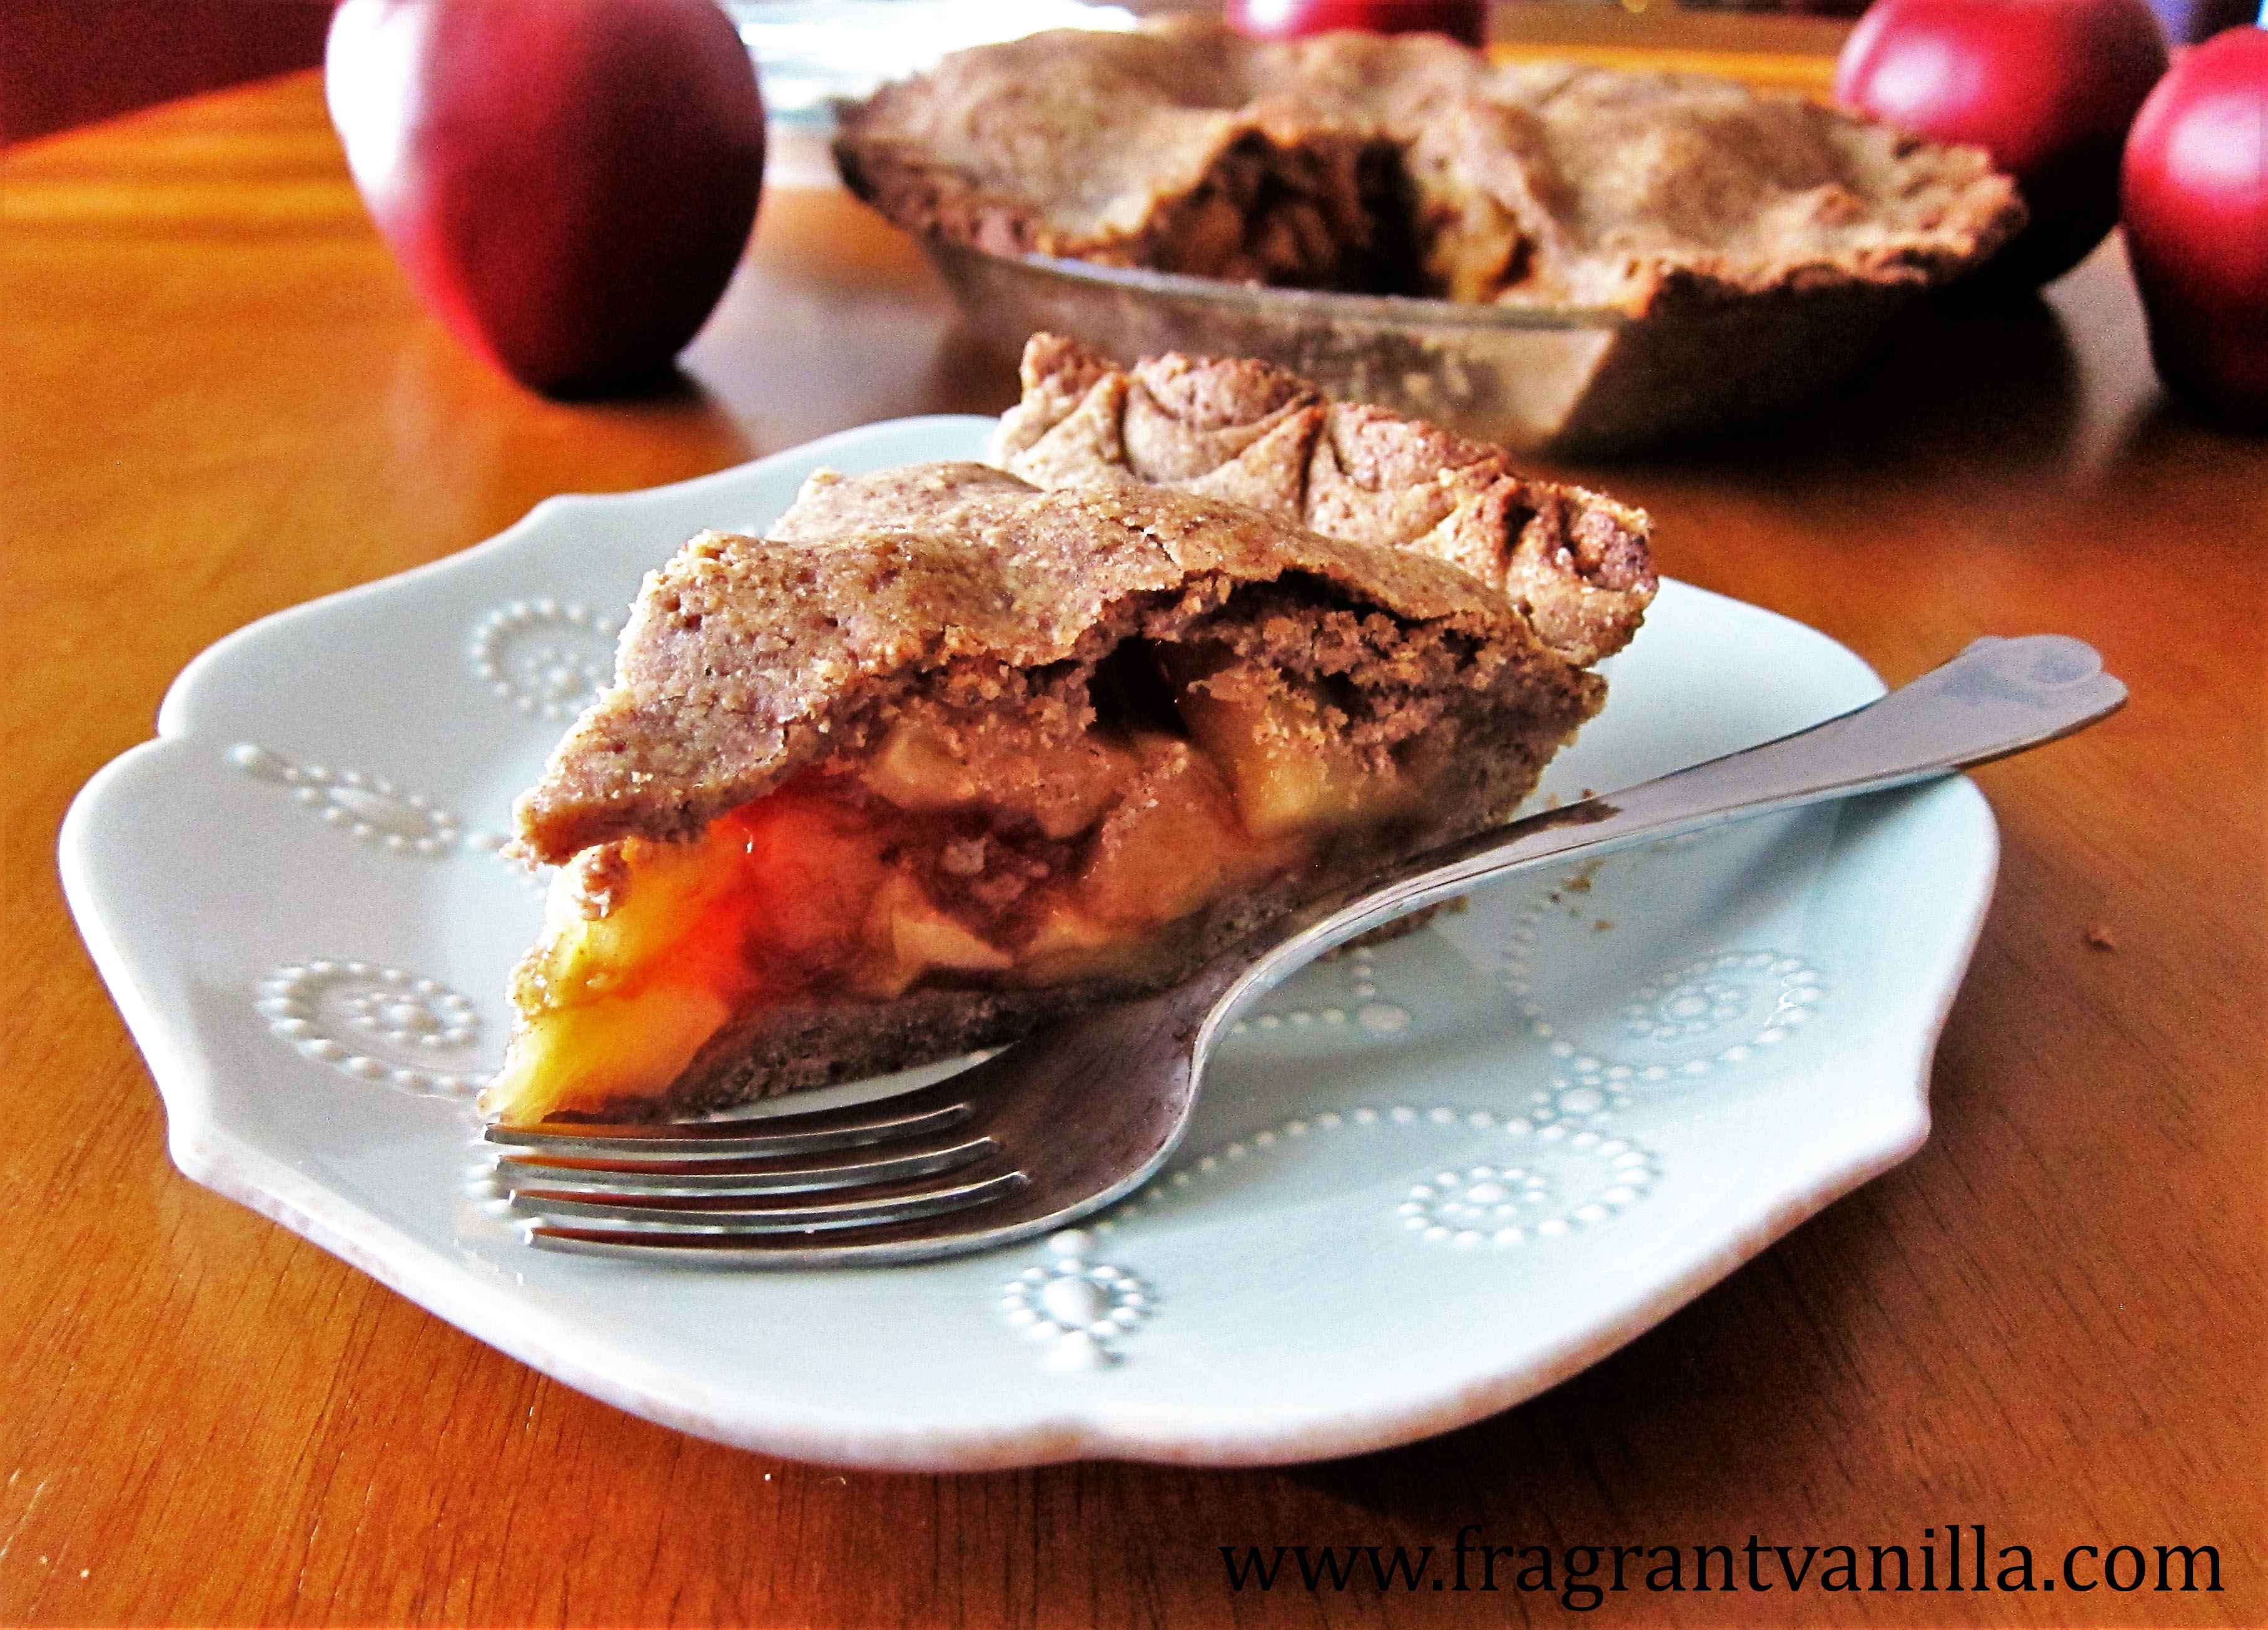
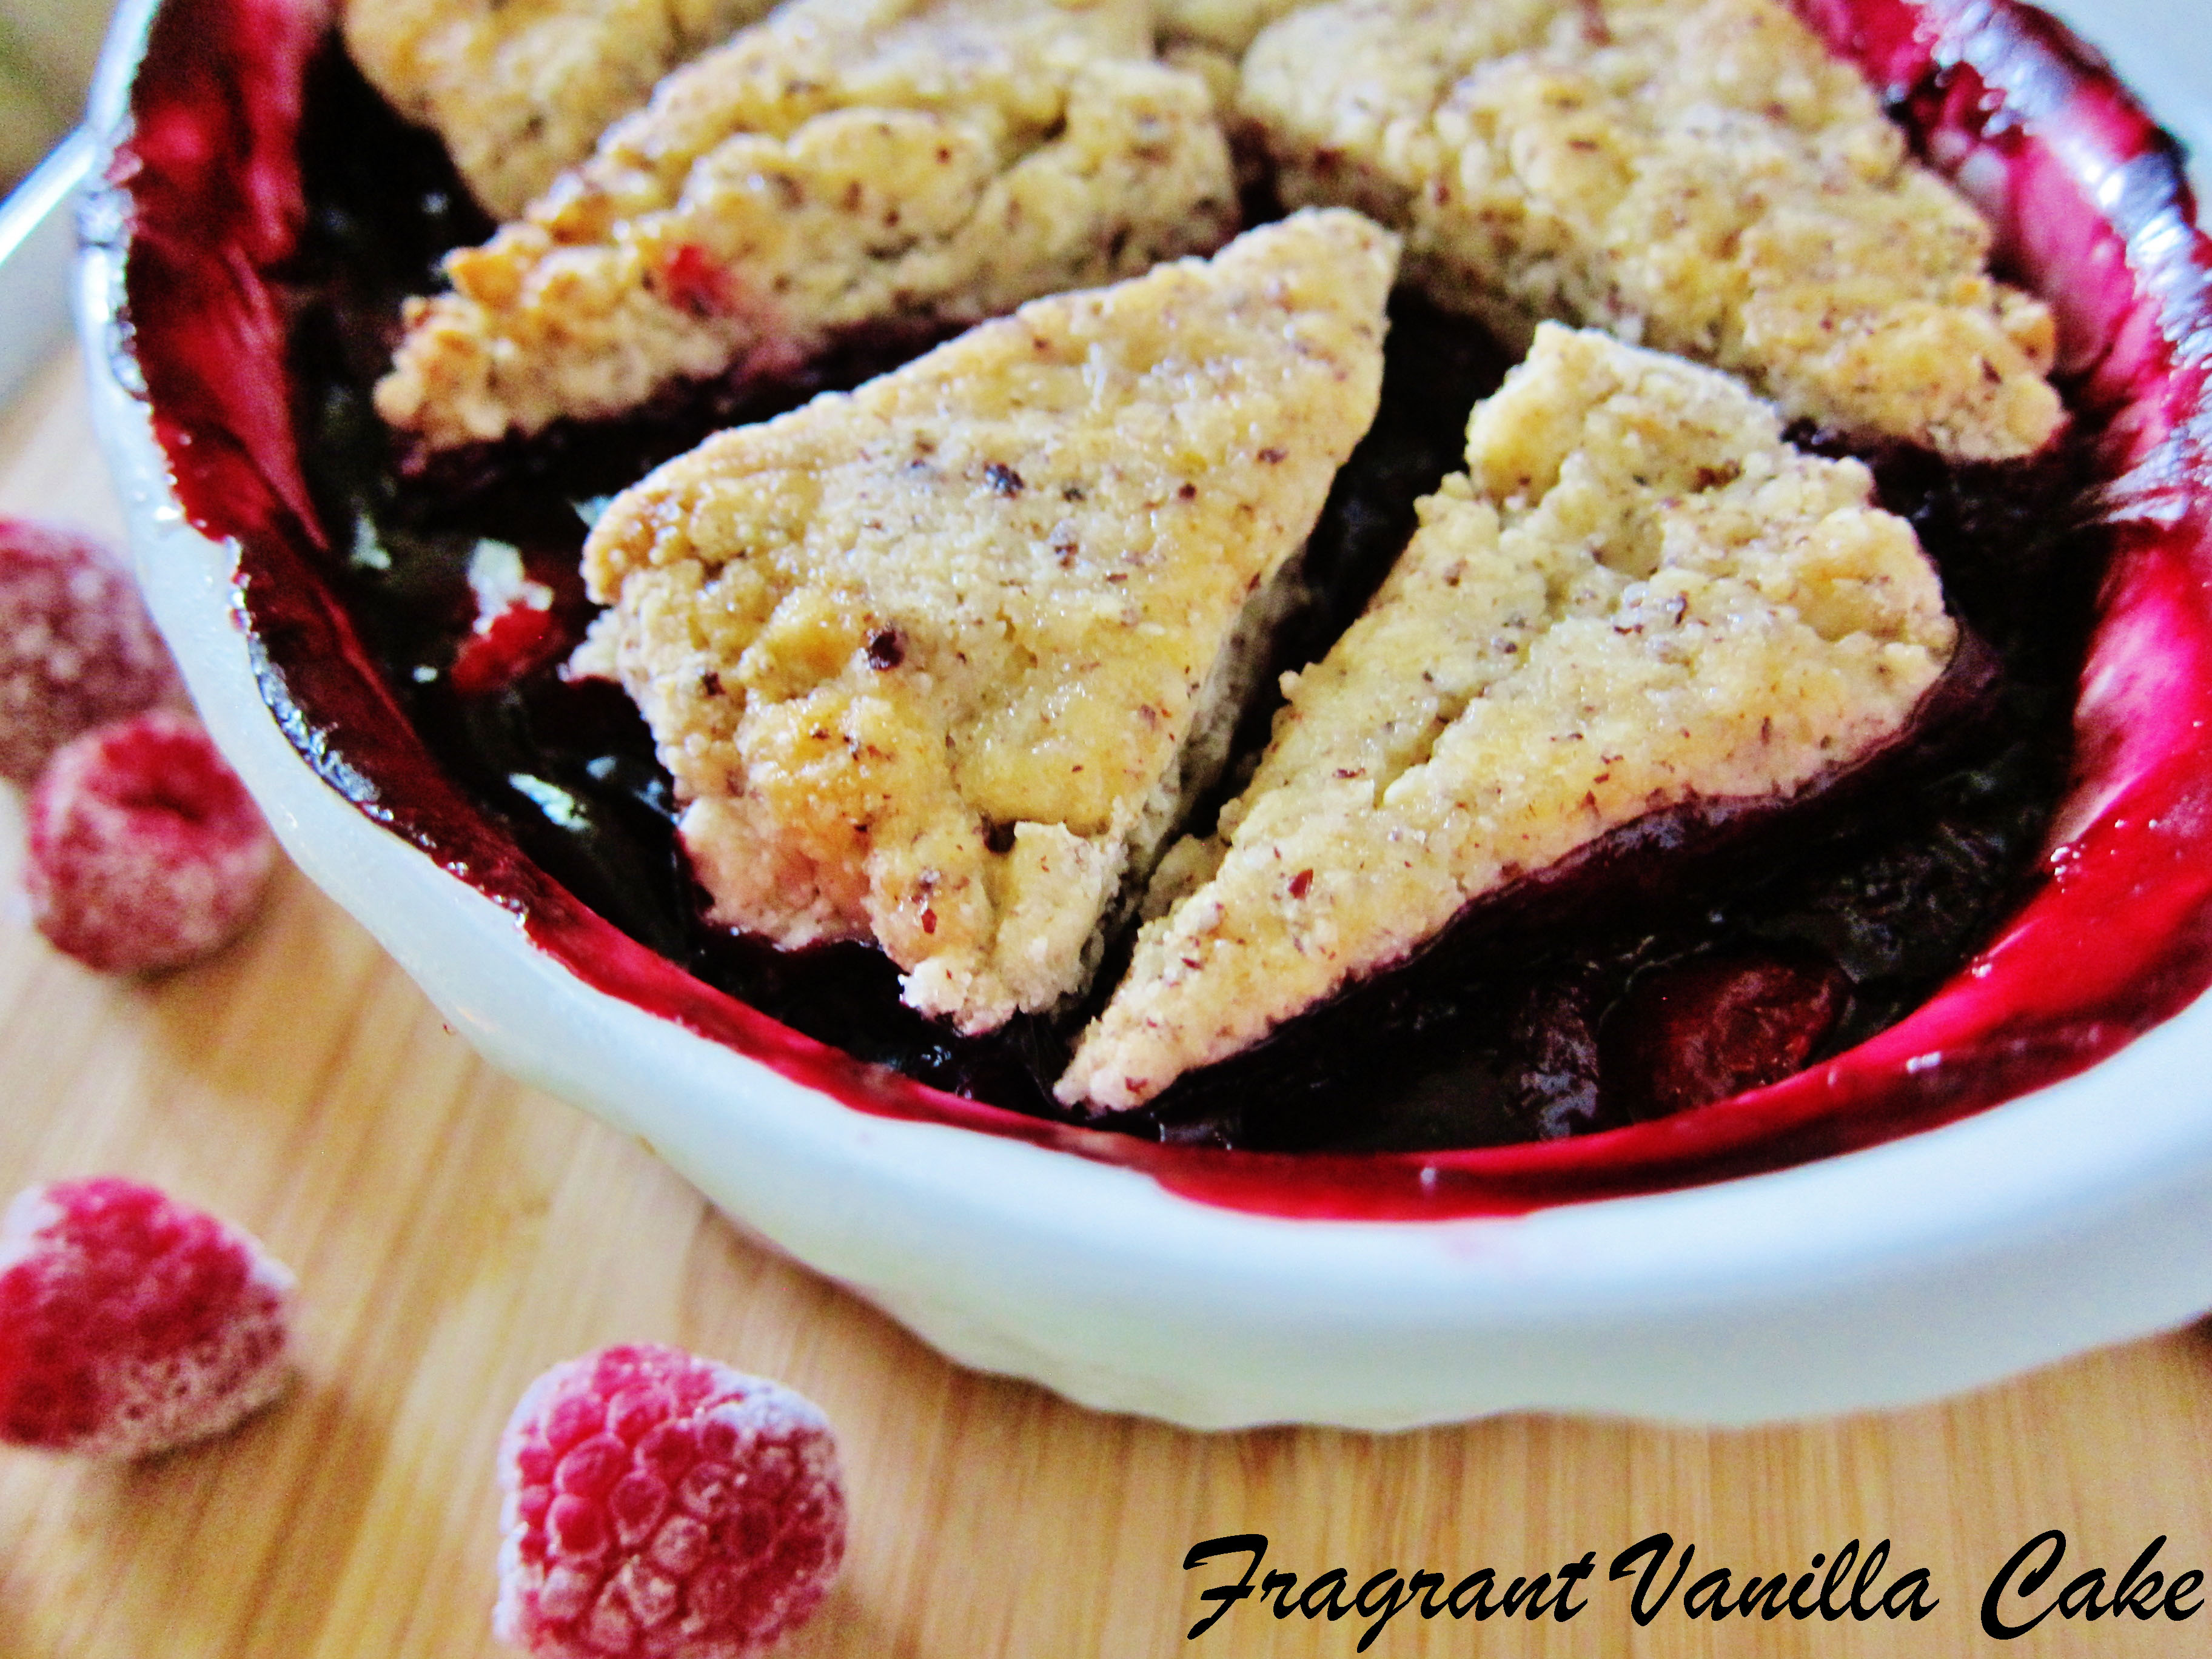
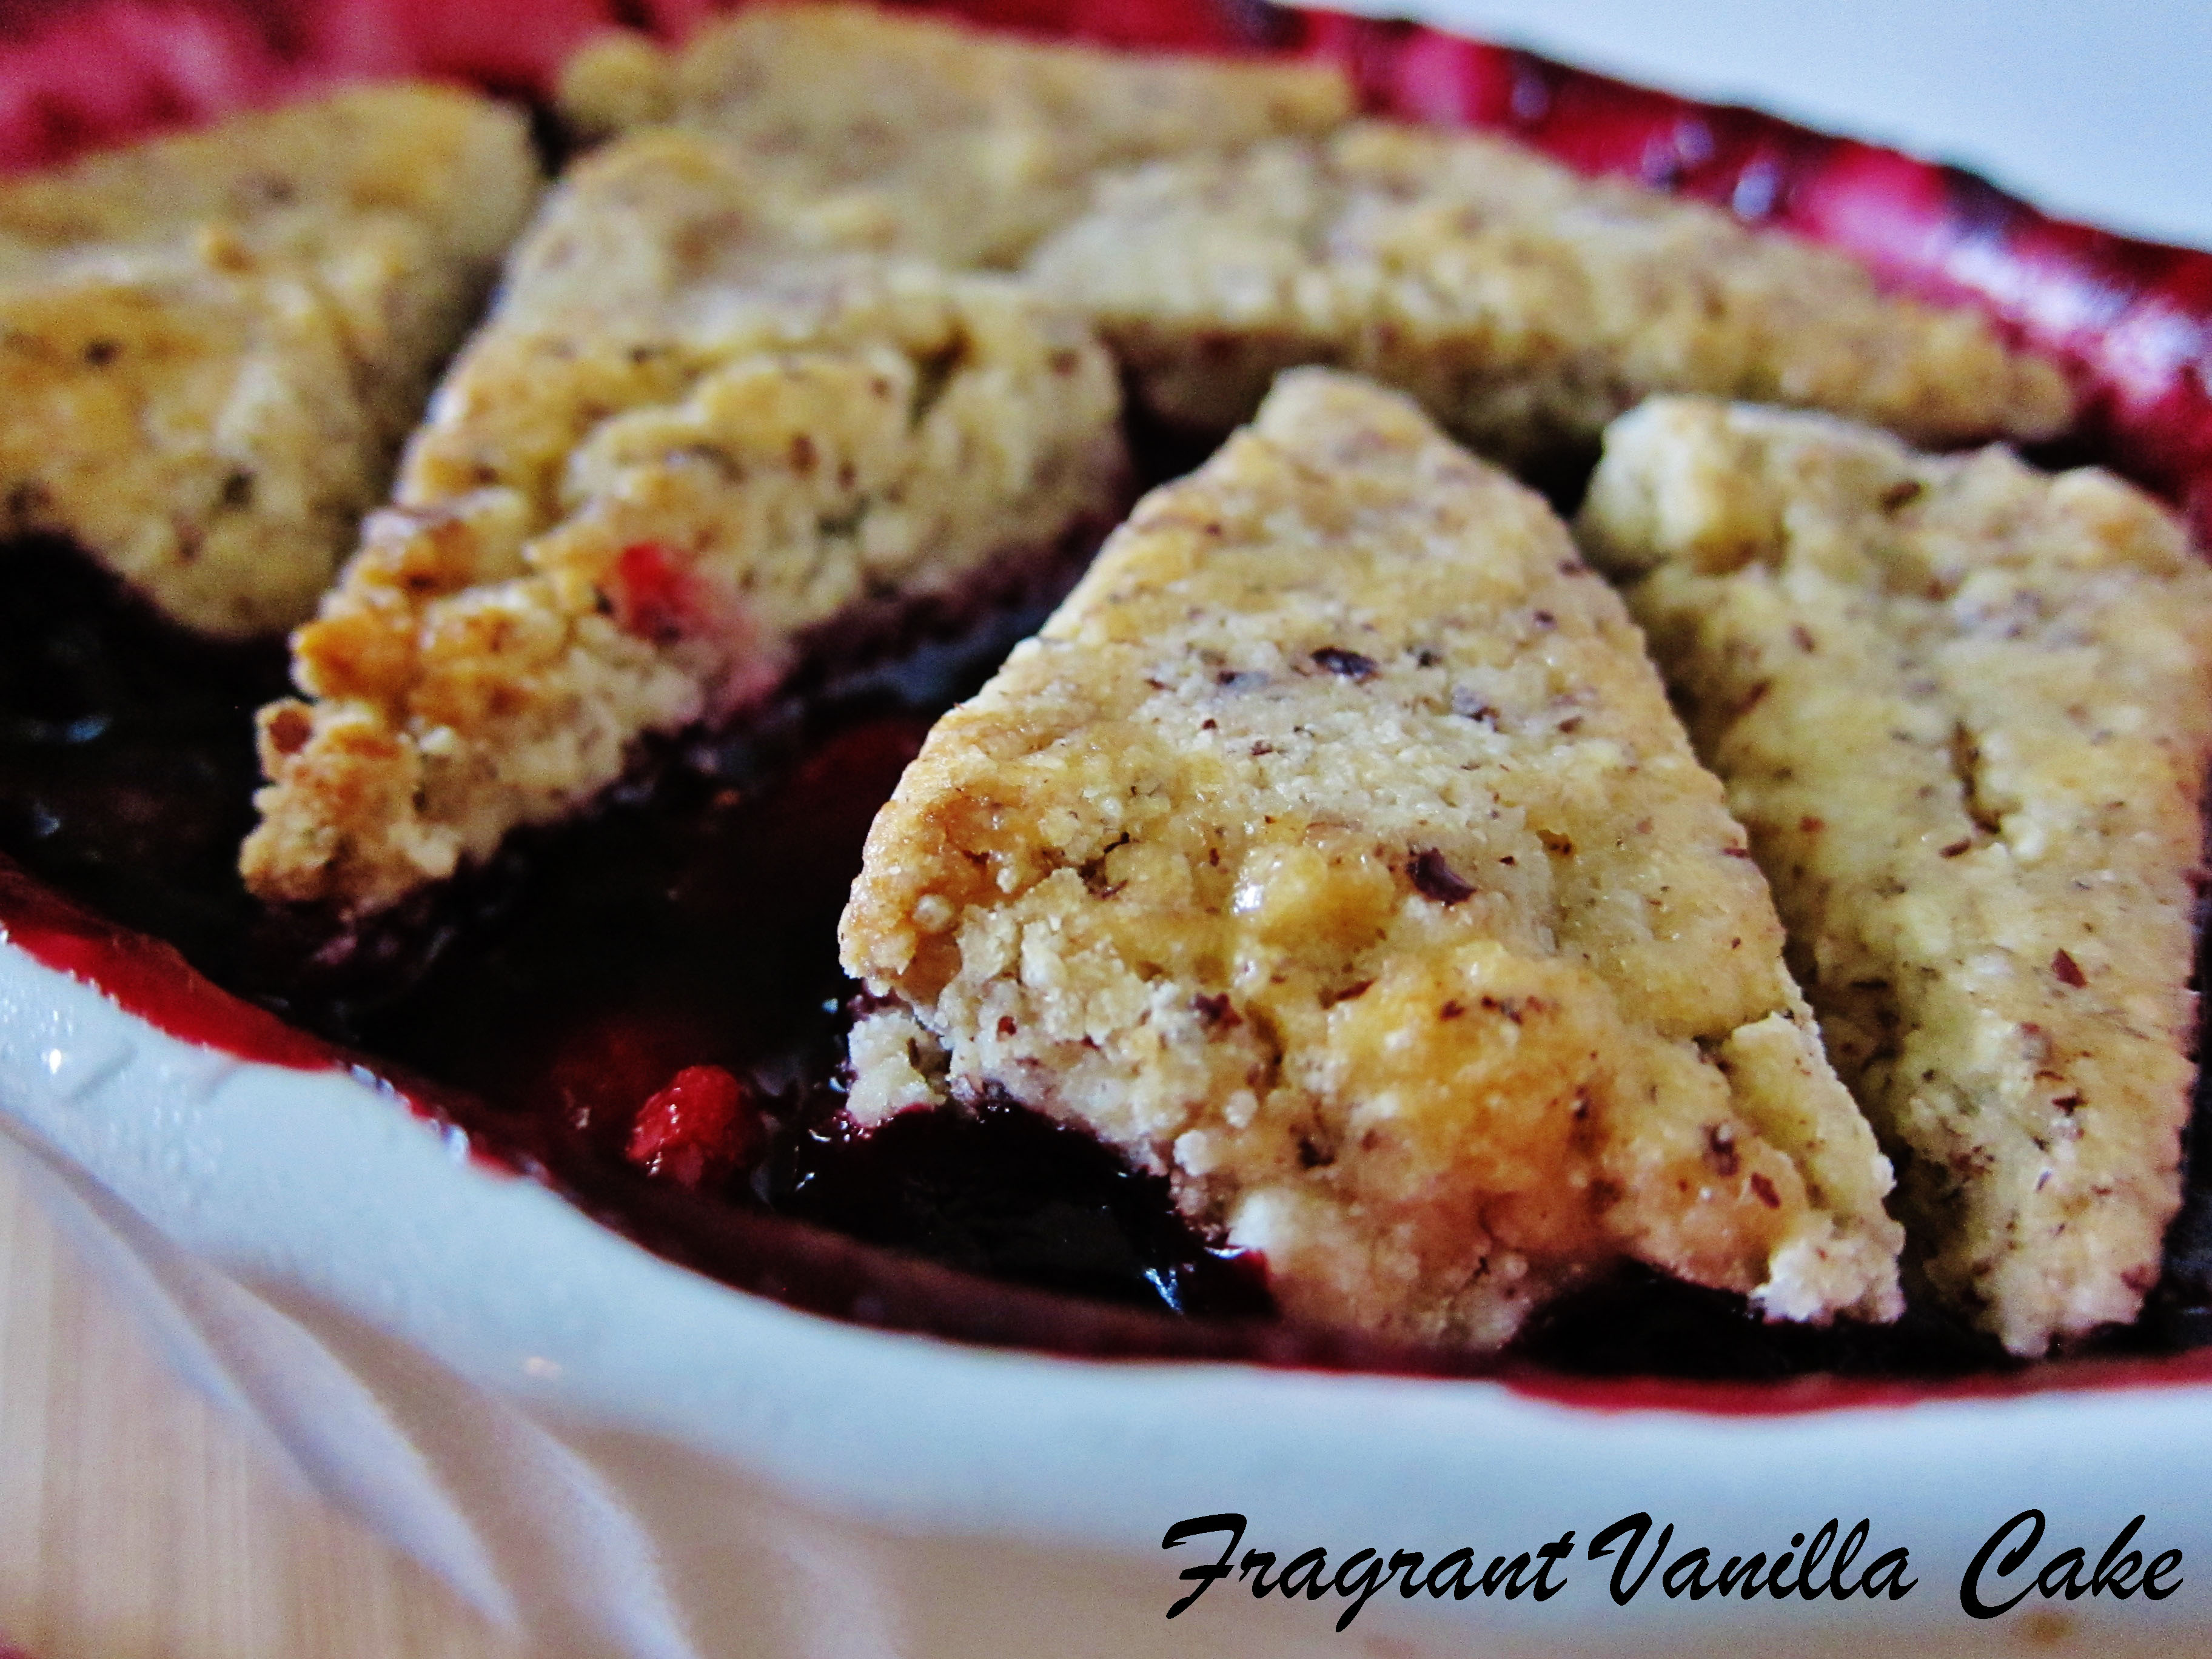
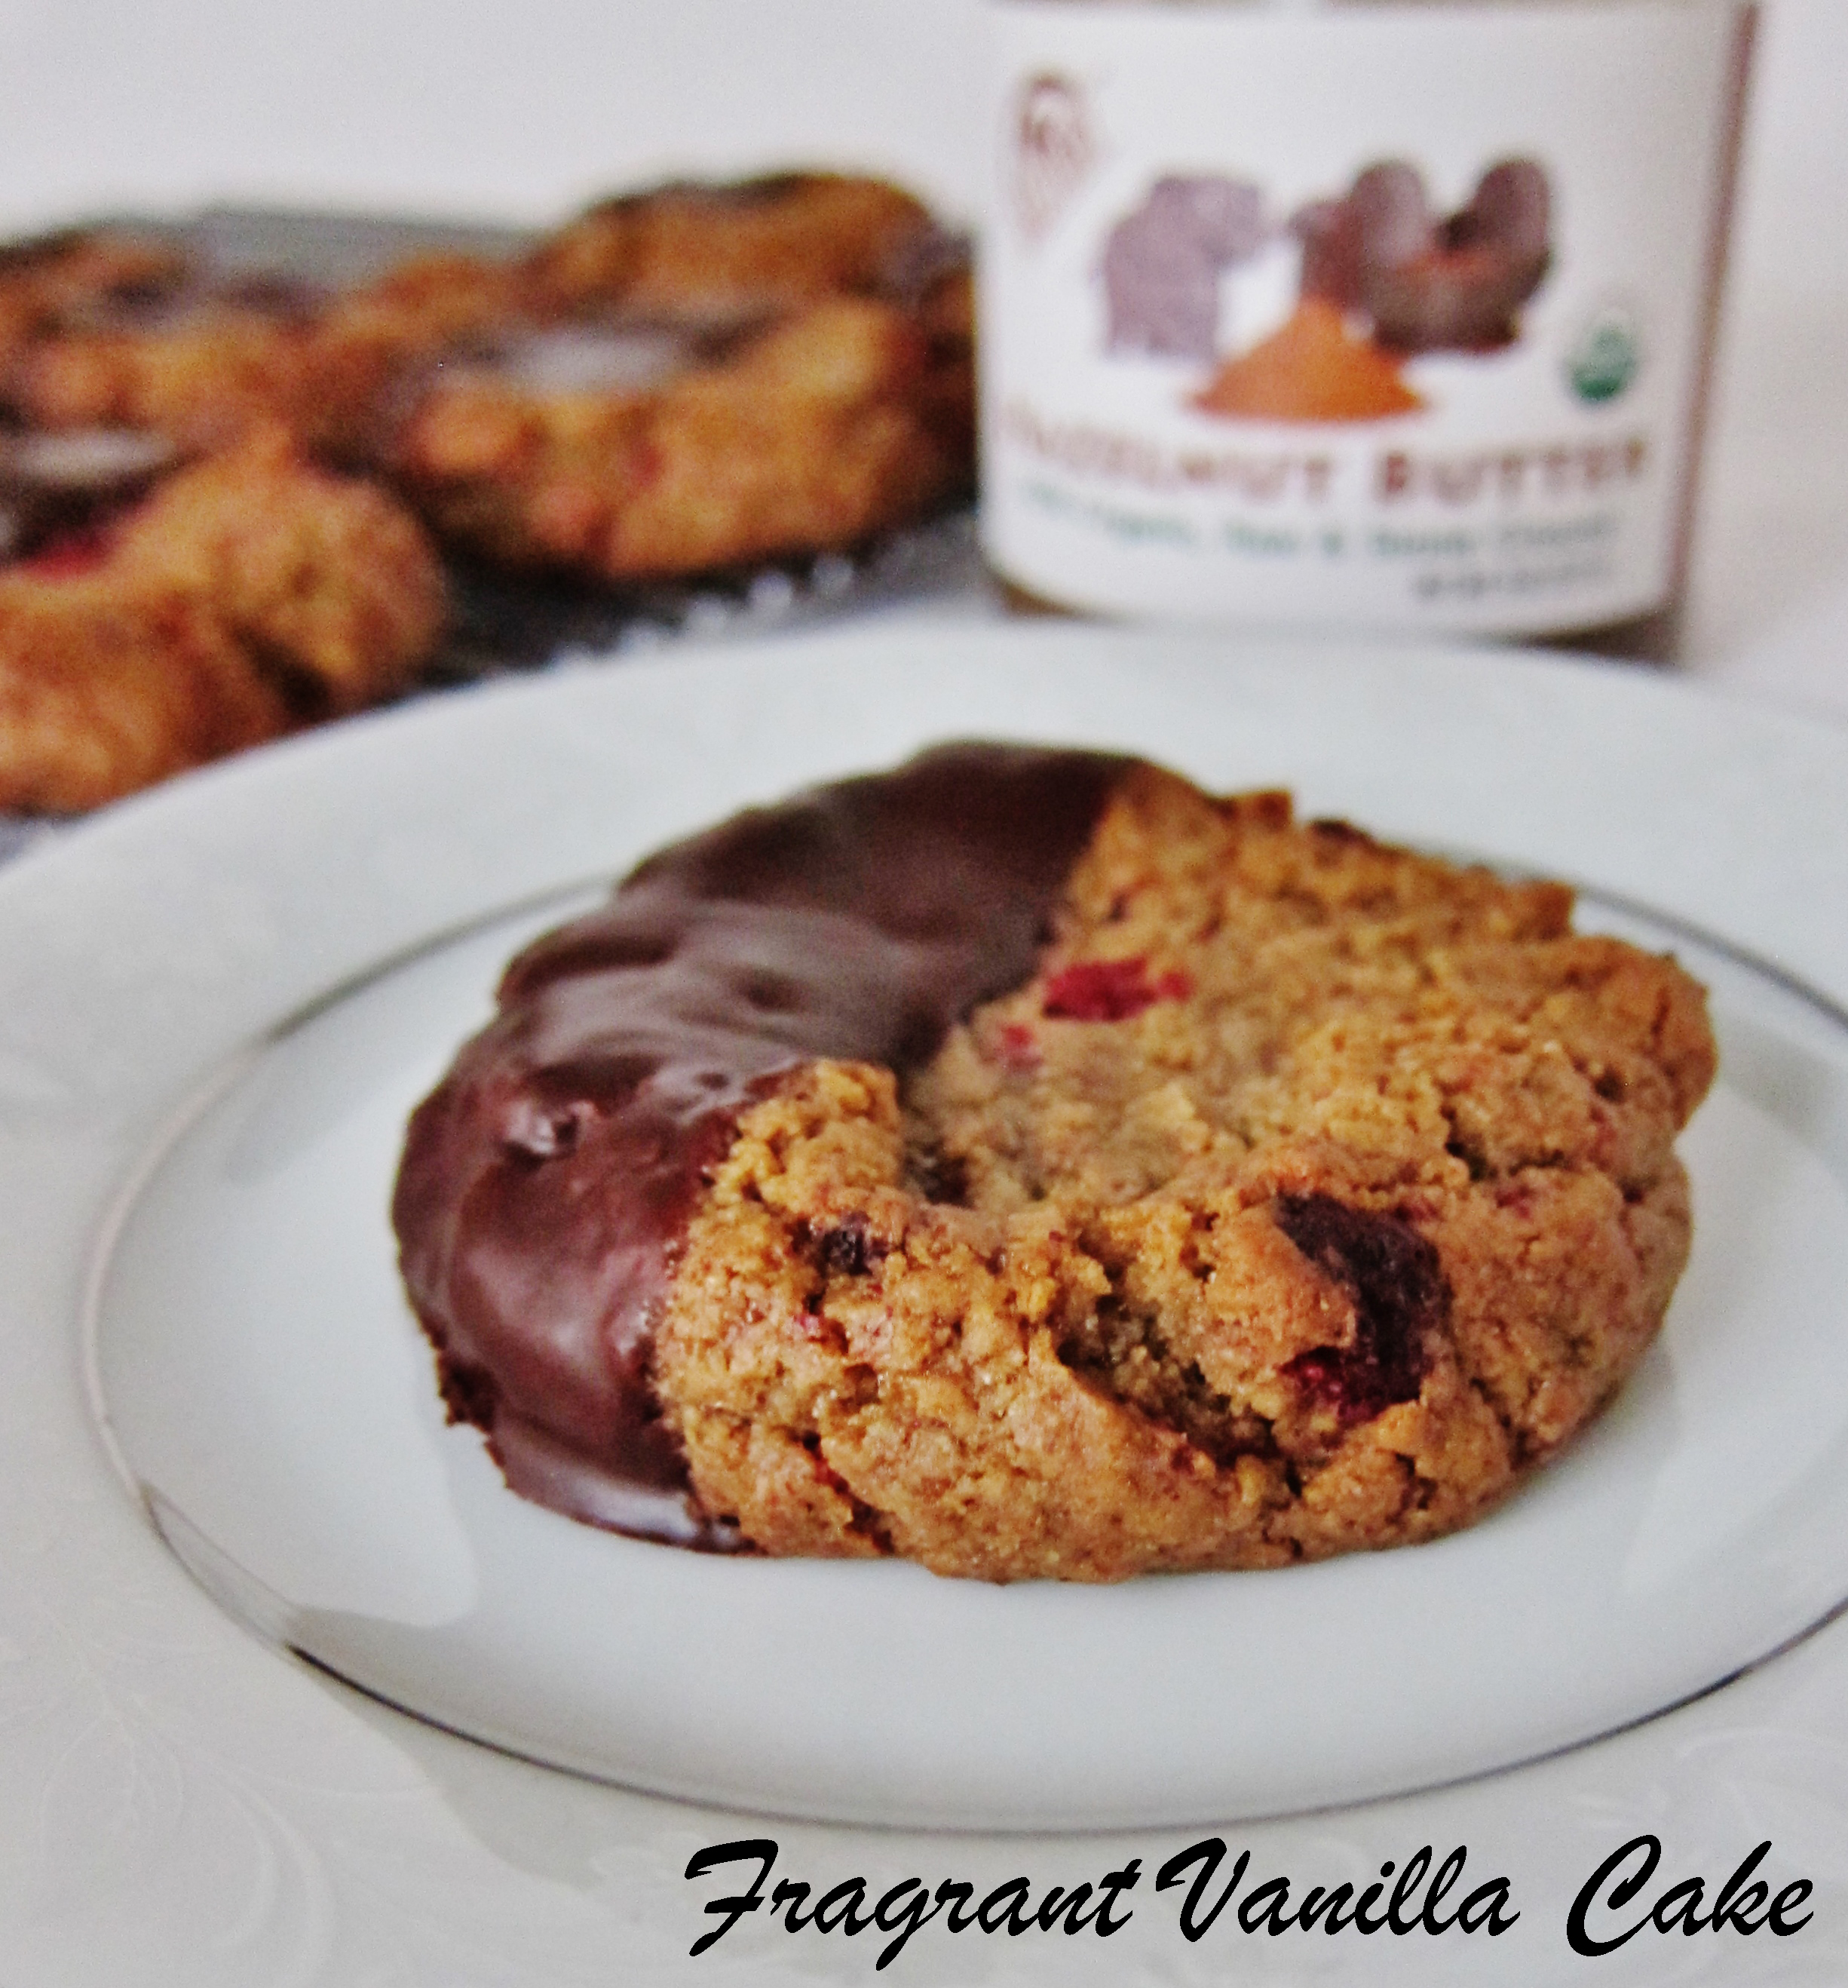
    So I made my classic flakey coconut oil pie crust for the outside, and used that hazelnut butter for the filling.  They actually were pretty quick and easy to make, since I already had the hazelnut butter.  But if you would rather make your own instead of using store bought I have included instructions at the bottom for that as well.  Don’t have hazelnut butter?  Use your favorite nut butter, it will still be amazing!  

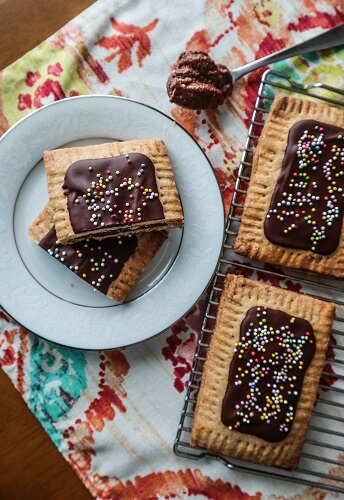
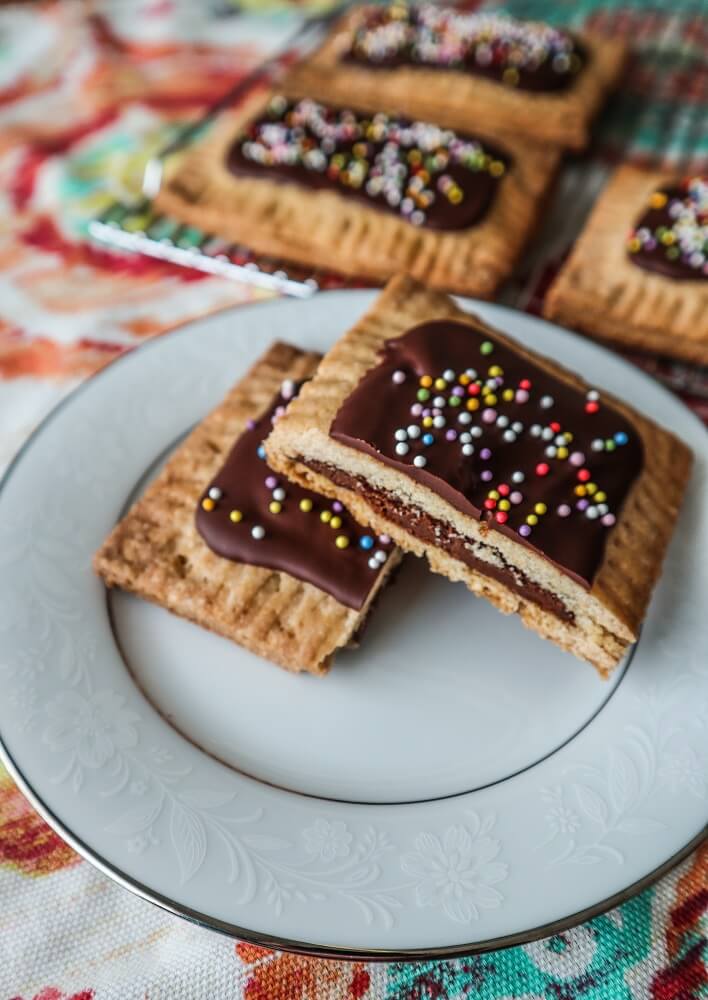
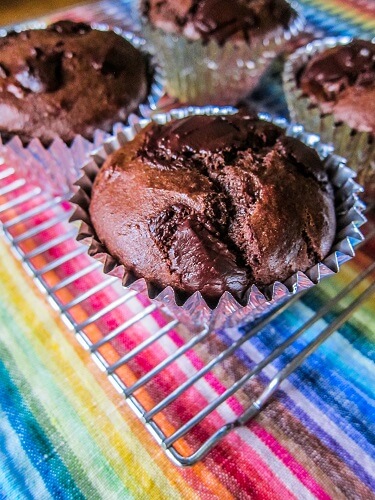
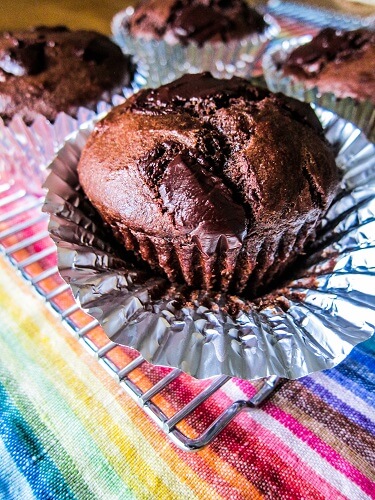
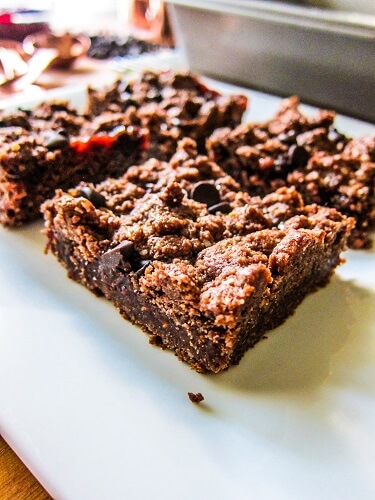
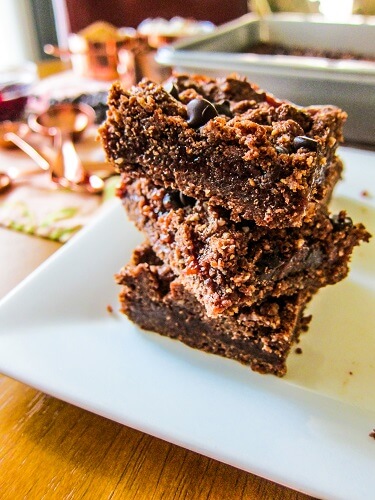
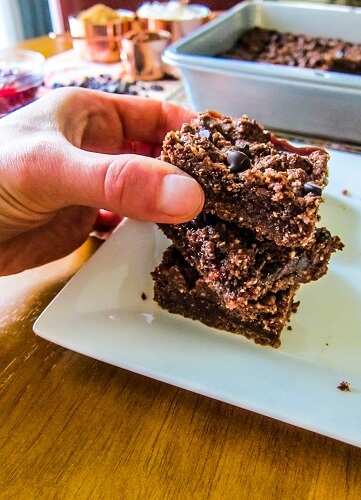
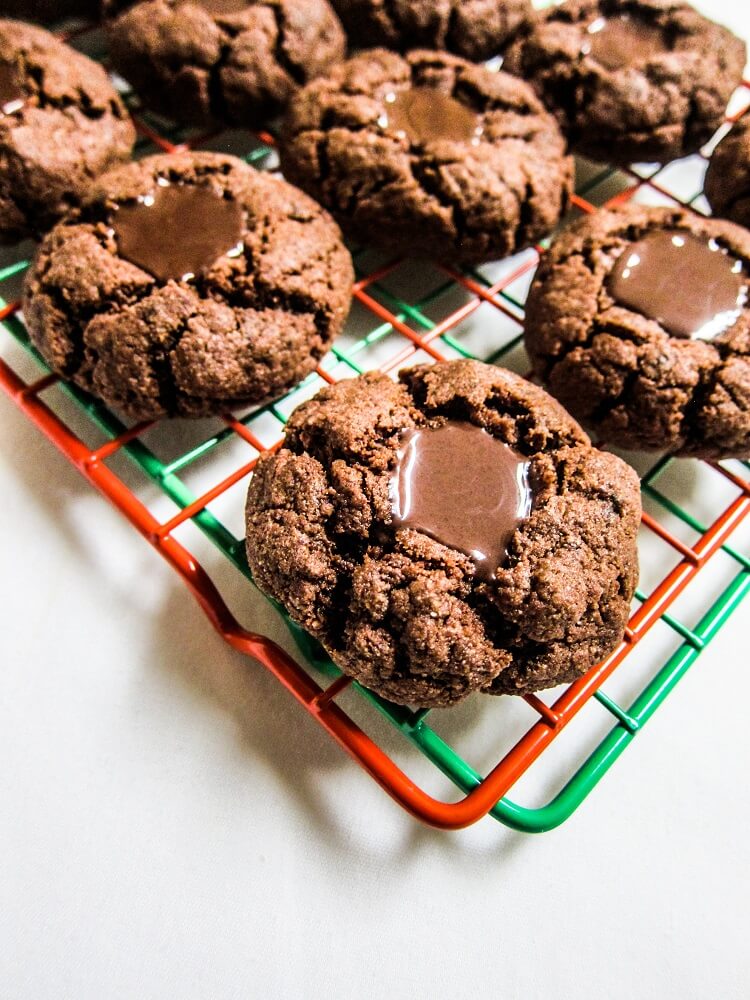
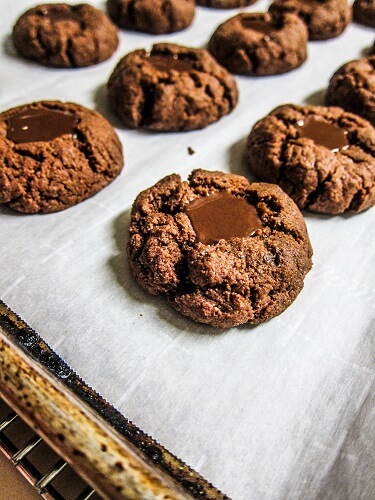
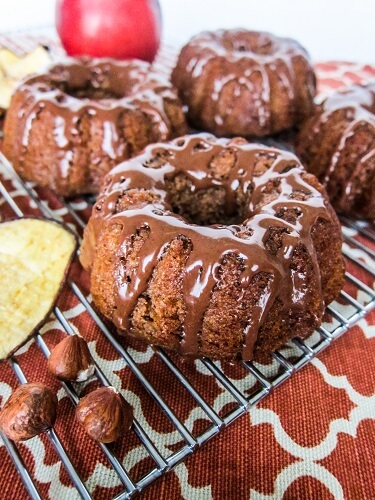
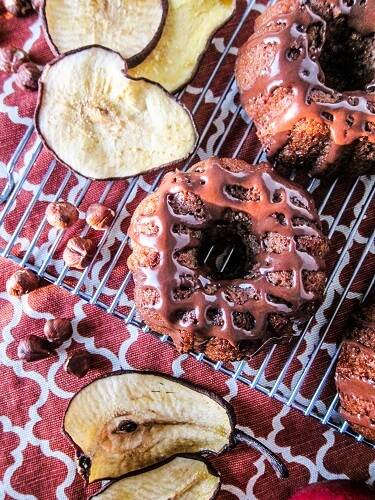
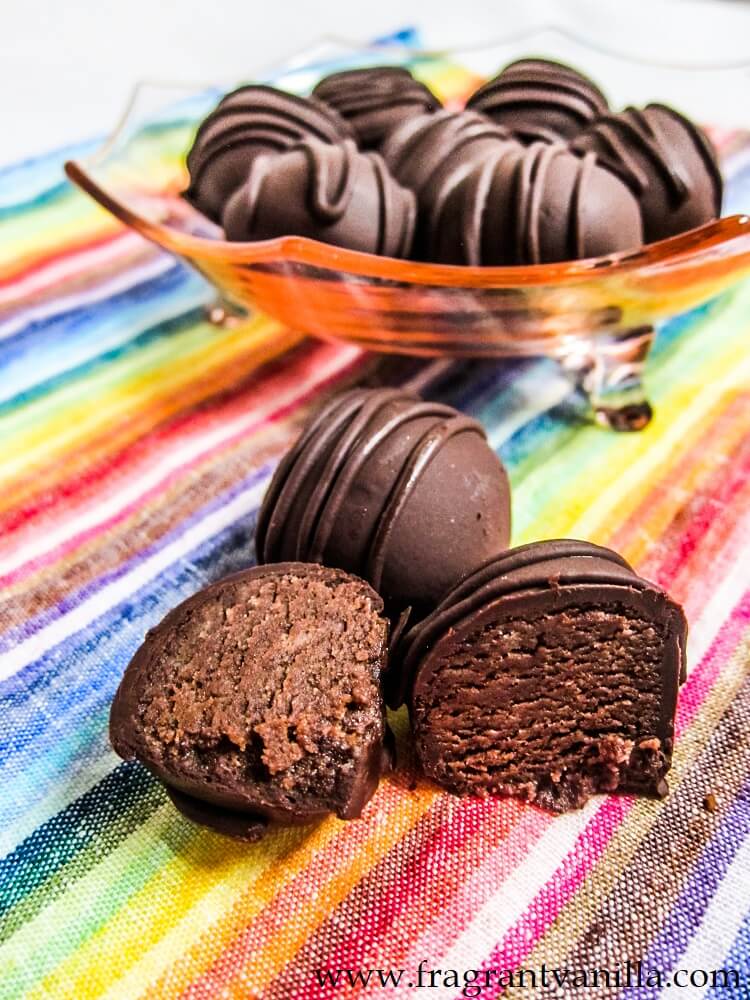
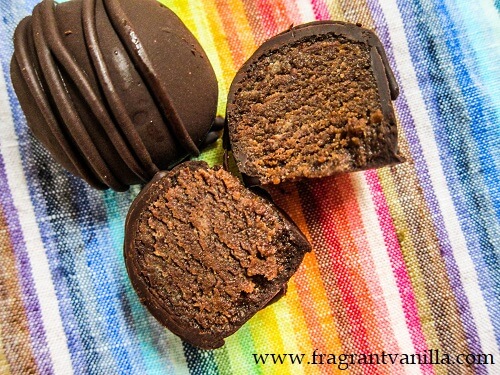
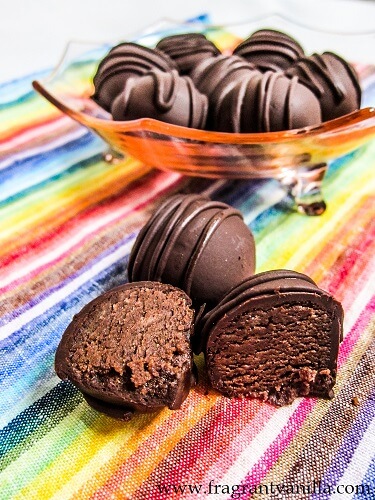
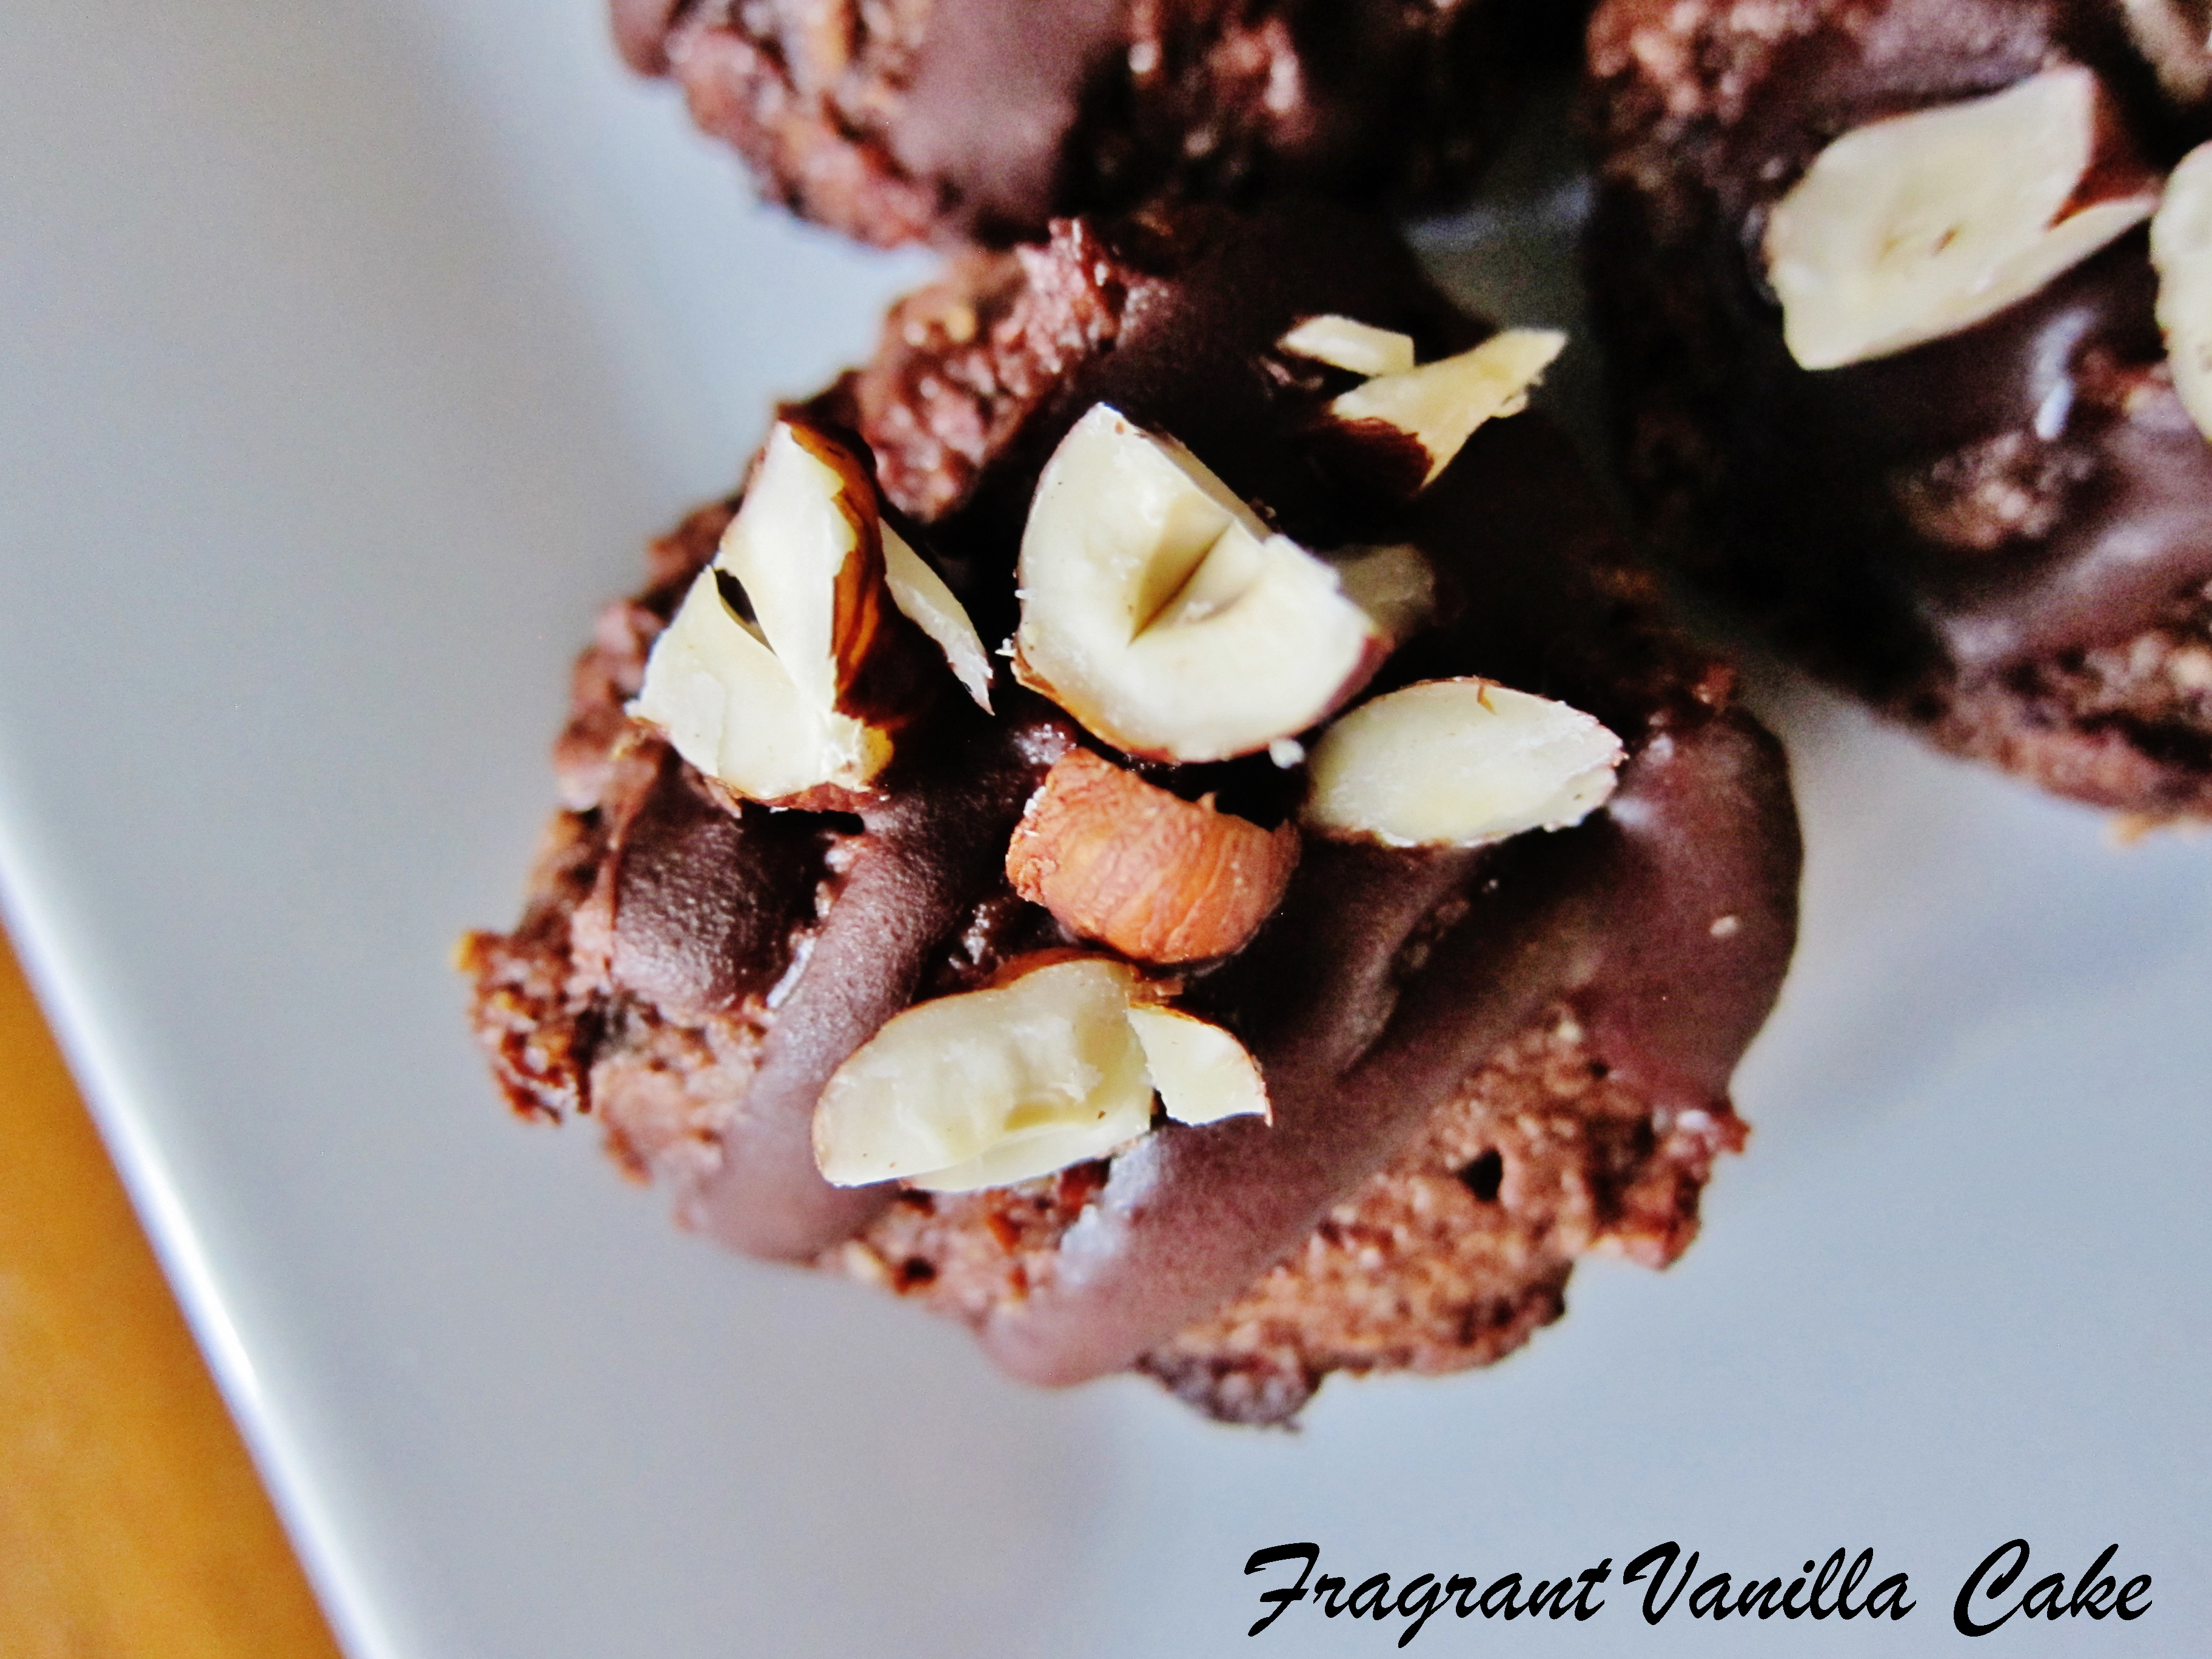
    These smelled amazing while baking.  Like chocolate pie! I could not wait to try them!  But I let them cool down first, and then added a dark chocolate glaze.  Since pop tarts are just so much better with a glaze.  They were totally heavenly!  My 8 year old self would have loved them!  If you are a nutella fan, give these a try! 

    Vegan Chocolate Hazelnut Pop Tarts

    Makes 8

    Crust:

    • 2 1/2 cups organic whole wheat pastry flour
    • 1/4 cup coconut sugar
    • 1/2 tsp sea salt
    • 3/4 cup coconut oil in its solid state
    • about 6-7 Tbsp cold water (or as needed)


    Filling:


    Glaze:

    • 1/2 cup dark chocolate chips


    Instructions:

    1. To make the crust, in a large bowl, mix together flour, sugar, and sea salt. Cut in coconut oil with a pastry blender or 2 knives until it is in pea sized pieces. Mix in just enough water to create a smooth dough that holds together but isn’t too sticky. Add more water if needed, and knead slightly until a smooth dough is created.
    2. Roll out into a large rectangle and cut into 16 identical rectangles.  Chill if too soft before assembling.  You want the dough a little pliable, but not so warm that it will break. Preheat oven to 375F degrees. Put the dough in the refrigerator for a few minutes if it seems too soft. 
    3. To assemble the pop tarts, spread about 2 Tbsp of the hazelnut butter on half of the dough rectangles (leaving a boarder so you can attach the dough at the sides). Cover with the remaining pieces of dough (I used a small spatula to carefully move them), pressing the edges and crimping with a fork or the edge of something with a flat edge, like a spatula. Bake for about 30 minutes until the crusts are starting to brown lightly. Remove from oven and let cool on a wire rack until warm.
    4. Melt the dark chocolate for the glaze in the top of a double boiler. Spoon some of the dark chocolate over each pop tart, and smooth it out to cover the top. Let harden before serving.


    *If you would prefer to make your own filling, you can mix together 1 cup hazelnut butter with 1/4 cup unsweetened cocoa powder and 1/4 cup maple syrup (or to taste) and 1/4 tsp sea salt.


  • Vegan Chocolate Orange Hazelnut Cupcakes

    Vegan Chocolate Orange Hazelnut Cupcakes

    Chocolate and oranges are a match made in heaven. My Mom used to buy dark chocolate oranges, shaped like an actual orange with sections when I was little and I thought they were the coolest thing ever. I mean chocolate is already the coolest, but make it shaped like and orange with orange flavor, even better.  So ever since then I have always loved the combo.  I felt like making some chocolate cupcakes last weekend, and decided to make them chocolate orange, but take that even up a level and add hazelnut to the mix.

    Raw Guru recently sent me some Rawmio orange chocolate hearts and those were kind of the inspiration for the chocolate orange flavor because I remembered how good it was, plus they sent me some Rawmio chocolate hazelnut spread which I thought would be amazing in cupcakes as well!  I was super excited about these!  I made a simple chocolate cake base, with coconut milk and the Rawmio chocolate hazelnut spread for richness.  I also added in a bit of orange juice and zest to give them a lovely orange flavor.  The batter tasted heavenly even before I baked it!

    They smelled amazing while baking as well!  I could not wait to finish them and of course try one.  But first, I needed to create a luscious frosting for them. I used full fat coconut milk (mostly the cream) to make it extra rich and smooth and added in more of the Rawmio chocolate spread as well as some more cacao powder and maple syrup to sweeten plus orange.  It was sooo good, like just eat out of a bowl good, because it tasted like chocolate hazelnut orange mousse.

    The finished cupcakes turned out lovely!  I topped them with some dried orange slices and some of those adorable Rawmio chocolate orange hearts.  They were so good too, rich soft chocolate cake with a hint of hazelnut and orange topped off with the most luscious mousse like frosting that echoed the flavor of the cake.  If you are a chocolate fan, definitely give these a try!

    Vegan Chocolate Orange Hazelnut Cupcakes
    Makes 8

    Ingredients:

    Cake:

    • 3/4 cup organic whole wheat pastry flour
    • 2 Tbsp cacao powder or unsweetened cocoa powder
    • 3/4 tsp baking soda
    • 1/2 tsp baking powder
    • 1/4 tsp sea salt
    • 1/2 cup maple sugar
    • 1/2 cup full fat coconut milk (the thick kind, I prefer Thai Kitchen brand) at room temperature
    • 1/4 cup Rawmio Chocolate Hazelnut Spread (or hazelnut butter)
    • 1/4 cup orange juice plus 1 Tbsp orange zest
    • 1 Tbsp cider vinegar


    Frosting:

    • 1 cup canned full fat coconut milk (you want to use a brand that is at least 3/4 of the can thick cream or it will not work for this recipe, I like Thai Kitchen brand)
    • 1/4 cup Rawmio Chocolate Hazelnut Spread (or 1/4 cup hazelnut butter mixed with 1 Tbsp cacao powder and 2 tsp maple syrup)
    • 2 Tbsp maple syrup
    • 1 Tbsp orange zest
    • 1 Tbsp orange juice
    • 1/8 tsp sea salt
    • 1/4 cup plus 2 Tbsp melted Dastony Coconut Butter (not coconut oil), warmed to liquid


    Garnish:


    Instructions:

    1. Preheat the oven to 350F degrees and position rack in center of oven.
    2. Oil 8 muffin tins or line them with paper liners.
    3. Whisk flour, cacao powder, baking soda, sea salt, and sugar in a large bowl to blend well.
    4. Whisk coconut milk, the Rawmio chocolate hazelnut spread, and the orange juice and zest together in small bowl to blend well, then whisk into the flour mixture until well blended.
    5. Whisk the cider vinegar into the batter.
    6. Transfer the cake batter to prepared tins.
    7. Place in the oven, and bake until tester inserted into center comes out clean with just a few moist crumbs attached, about 17-20 minutes.
    8. Remove from the oven and let cool completely.
    9. To make the frosting, combine all ingredients in a high speed blender and blend until completely smooth.  Pour into a bowl and place in the freezer until the consistency of stiffly whipped cream (about 30-45 minutes depending on how warm it has gotten).  Once it is ready place in the refrigerator until ready to frost.
    10. When ready to assemble, place the frosting in a pastry bag and pipe over the cupcakes.
    11. Garnish with Rawmio chocolate hearts.
    12. Enjoy! Refrigerate cupcakes if you have leftovers.

    Cupcakes keeps stored in the refrigerator, covered for up to 1 week.

    Notes:

    If you would rather use coconut sugar or even just granulated sugar for this, either will work in place of the maple sugar.

    This cake can be made gluten free by swapping out the whole wheat pastry flour for Bob’s Red Mill gluten free all purpose baking flour (this is a brand I have used before and have tested it in cakes with great results).

  • Vegan Banana Hazelnut Chocolate Pancakes

    Vegan Banana Hazelnut Chocolate Pancakes

    When you get a bunch of free bananas, you make banana goodies. Or freeze them for smoothies, but I already had some in the freezer so I made some banana bread pudding earlier this week, and then these banana hazelnut chocolate chip pancakes this weekend.  I guess I am in the mood for brunchy banana deliciousness.  I haven’t made pancakes in at least a few months so it was about time.  I actually decided to make them because I had a hectic long day at work after the holidays playing catch up and pancakes sounded like the perfect thing to calm down with.  There is something comforting about making pancakes and enjoying them in your PJs!

    I was going to go with just banana pancakes with caramel or syrup, but then I remembered that I had some Veggimins CBD Chocolate Hazelnut Spread from Raw Guru that I could drizzle over them. So I went with a banana chocolate chip hazelnut flavor combo.  I am one of those people who can’t just make plain anything so it isn’t surprising.  I love that these pancakes are so quick and easy to make so you can enjoy them fast!

    For the base, I used Bob’s Red Mill all purpose gluten free baking flour because it is what I happened to have on hand, but you could use whole wheat pastry flour if you don’t want them gluten free.  Next I added in bananas and maple syrup for sweetness plus some hazelnut butter for richness instead of oil.  Yes, these are oil free, and you would never guess by tasting them.  Lastly I stirred in some chocolate chips because why not?!

    They cooked up beautifully and smelled amazing and I could not wait to try them.  But first, I topped them off with bananas, some chopped hazelnuts and of course the Veggimins CBD Chocolate Hazelnut Spread.  I love that stuff, it is so good, and why not get your daily dose of CBD in chocolate form!  The pancakes were heavenly!  Sweet, filled with banana chocolate and hazelnut flavors and fluffy on the inside with gooey chocolate chips!  If you have some ripe bananas on hand, you know what to make now!

    Vegan Banana Hazelnut Chocolate Pancakes
    Makes 12

    Ingredients:

    Toppings:


    Directions:

    1. In a food processor, combine all pancake ingredients (except the chocolate chips) and process until just blended (alternatively you can whisk it if you don’t have a food processor), stir in the chocolate chips, pour into a bowl and set aside.
    2. To cook pancakes, preheat oven to 110 degrees. Heat a large ceramic non-stick* pan over medium heat. Once hot, add the batter in 1/4 cup amounts (I did 3 at a time, but it depends on your pan), and let cook for about 2-3 minutes on the first side until set and starting to brown, then flip with a spatula, and cook another 2-3 minutes.
    3. When cooked, place on a plate and keep warm in the oven while you repeat the process with the remaining pancakes.

    *If you don’t have the Veggimins CBD chocolate hazelnut spread, you can whisk together 1/4 cup hazelnut butter (or almond butter or your choice of nut or seed butter) with 2 Tbsp unsweetened cocoa powder and 3-4 Tbsp maple syrup (or as needed to make it pourable), plus a pinch of sea salt instead.

    *Note: If you do not own a non-stick pan, you may need to lightly oil your pan to prevent sticking, if you do not mind these not being oil free.

  • Vegan Chocolate Hazelnut Silk Pie

    Vegan Chocolate Hazelnut Silk Pie

    Pumpkin, pecan and apple were always staples at Thanksgiving growing up, and I made pumpkin and apple pies before Thanksgiving this year earlier in the season, but this year I decided to make a chocolate hazelnut pie specifically for Thanksgiving.  I was thinking something similar to French silk pie but with hazelnut because chocolate sounded so good to me at the time, and Raw Guru had sent me some of their Dastony Hazelnut Butter.  My family liked the idea too so I went for it!  I have a confession to make, I have decided I am not making much in the way of food for Thanksgiving this year, since we are going out to dinner the following weekend, but I am making dessert!  I get a little bit burnt out on making Thanksgiving food since I work in a deli and it is really busy this time of the year making all of the Thanksgiving dishes.  So I like a break on the actual holiday sometimes.

    But back to the pie which is the important part of this post!  I wanted it similar to French silk, so a classic buttery tasting pie crust.  For that, I used my classic coconut oil pie crust.  It has just 5 ingredients, whole wheat pastry flour, coconut oil, coconut sugar, and sea salt plus cold water.  It always tastes nice and rich, and bakes up nicely.  If you wanted to make it gluten free, you could swap Bob’s Red Mill gluten free all purpose baking flour for the whole wheat pastry.  I have tried it before with good results (but I have not tested other brands so I can’t say the same for how they would turn out).

    For the filling, it needed to be rich and delicious almost like a chocolate mousse with hazelnut so I used a combination of full fat coconut milk (mostly cream) combined with the Dastony Hazelnut butter, and coconut butter for a crave worthy concoction.  Once I added the maple syrup and cacao powder it was heavenly!  I could not stop tasting it!  It is really easy to make though, you just buzz everything in the blender and pour it into the crust and chill.

    Lastly, I wanted to top it off with some coconut whipped cream and hazelnuts to make it pretty.  I could not wait to try it!  I had to wait until the next day for it to chill but it was well worth the wait.  It was crave worthy!  Rich, smooth chocolate hazelnut filling (way better than any Nutella I ate growing up), a buttery tasting crust and vanilla whipped coconut cream and crunchy hazelnuts!  Just the sort of thing you want to go back for a second slice of!  If you are in the mood for something rich and chocolaty, definitely give this a try!

    Vegan Chocolate Hazelnut Silk Pie

    makes one 8 inch pie

    Crust:

    • 1 1/4 cups organic whole wheat pastry flour*
    • 3 Tbsp maple sugar or coconut sugar
    • 1/4 tsp sea salt
    • 1/4 cup plus 2 Tbsp coconut oil in its solid state
    • about 3-6 Tbsp cold water


    Filling:


    Cream Topping:


    Garnish:

    • toasted hazelnuts


    Instructions:

    1. To make the crust, in a large bowl, mix together flour, sugar, sea salt, and spices. Cut in coconut oil with a pastry blender or 2 knives until it is in pea sized pieces. Mix in  just enough water to create a smooth dough that holds together but isn’t too sticky. Add more water if needed, and knead slightly until a smooth dough is created. Roll out into a 10 inch circle on a sheet of parchment paper, then use the paper to help you transfer it to an 8 inch pie dish.  Flute the edges, and set aside in the refrigerator until solid.
    2. Pre-heat the oven to 350F degrees. Place foil inside the pie crust, and weight down with pie weights or dried beans.  Place the pie in the oven and bake for 30 minutes, then remove the weights and foil and bake 10-15 minutes more or until lightly browned. When it is done baking, let cool completely.
    3. For the filling, combine all ingredients in a high speed blender and blend until smooth. Pour into the crust.
    4. Place in the freezer until set, about 2 hours.
    5. Meanwhile, for the cream topping, combine all ingredients in a blender and blend until completely smooth. Pour into a bowl and place in the freezer until it is thick like whipped cream (whisking every so often), about 20-30 minutes.
    6. Once the cream is ready, place it in a pastry bag and pipe around the sides of the pie (and serve with the extra if desired) or just spread it over the top in the center.  Garnish with hazelnuts, enjoy!

    Pie keeps up to 1 week in the refrigerator, covered or in a container.

    *If you wanted to make the crust gluten free, you could swap Bob’s Red Mill gluten free all purpose baking flour for the whole wheat pastry. I have tried this brand and know it will turn out well.

    *For the coconut milk, you want the kind that is 3/4 full of cream in the can, or it will not work and turn out runny, I used Thai Kitchen full fat milk, but their unsweetened canned coconut cream would work as well.

  • Vegan Dark Chocolate Hazelnut Banana Muffins

    Vegan Dark Chocolate Hazelnut Banana Muffins

    Last weekend we took a trip up north to Duluth and we had to stop at a couple of gas stations along the way. I don’t usually pay attention to much in a gas station besides where the bathroom is on a road trip, but while I was in there some giant muffins caught my eye. They brought back memories of when I was younger and I used to go to the gas station with my Dad and beg him to buy me muffins and doughnuts. I loved those giant muffins! So, I said to myself as I was standing there, I need to make some muffins
    soon. So, I made some later in the week. Raw Guru had recently sent me some Rawmio Hazelnut Chocolate Spread some of the most heavenly stuff ever, and rather than just eat it with a spoon like I usually do, I decided that it would be awesome in the muffins.

    I was just going to make some chocolate hazelnut muffins, but since I had some bananas on hand, I decided that banana muffins sounded equally as delicious and I added those in there too. Plus, bananas give things a nice moist soft texture which is perfect in muffins! These were really simple and easy to make too, so perfect for when you don’t have a lot of time, but still want to enjoy something delicious and sweet!

    They actually happen to be oil free, because the bananas provide plenty of moisture and the nut butter provides a bit of richness. The batter was super delicious. Yes, I tested it and yes, I licked the bowl clean after I was done scooping the batter into the tins. It was even more delicious with the chocolate chunks I stirred into it. I just took some Rawmio dark chocolate bars and chopped those up and added them. Because one can never have too much chocolate in a chocolate dessert!

    The muffins baked up beautifully! Nice and domed on top. I hate flat muffins. The muffin tops are the best part after all, and when they are flat there is no top! Also, I hate when I bake them and then they fall and they are all sunken. These ones maintained their height even as they cooled. I had to try one while they were still a little warm because those gooey chocolate chips in the sweet muffin batter make it even better. They were super delicious! They had a moist, light crumb, plenty of chocolate flavor and a hint of hazelnut and banana! If you are in the mood for something chocolaty, give these a try!

    Vegan Dark Chocolate Hazelnut Banana Muffins
    Makes 12

    Ingredients:

    • 1 cup coconut sugar
    • 3/4 cup Rawmio chocolate hazelnut spread (or hazelnut butter)
    • 1 cup mashed ripe organic bananas
    • 1 ½ Tbsp ground flax seed mixed with 4 ½ Tbsp filtered water
    • 1 ¼ cups organic whole wheat pastry flour
    • ¼ cup cacao powder
    • ½ tsp sea salt
    • ½ tsp baking soda
    • 1/8 tsp baking powder
    • ¾ cup chopped Rawmio Essentials dark chocolate or vegan dark chocolate chips or chunks

    Instructions:

    1. Preheat the oven to 350F degrees, and line 12 muffin tins with liners.
    2. Whisk together the coconut sugar, rawmio chocolate spread, banana and flax mixture in a large
      bowl.
    3. Add the flour, cacao powder, sea salt, baking soda and baking powder and whisk until smooth.
    4. Add the chocolate chips, and mix in until well distributed.
    5. Spoon into the muffin tins.
    6. Place in the oven and bake for about 25 minutes or until a toothpick inserted into the center
      comes out almost clean with a few moist crumbs attached.
    7. Let cool on a rack for at least 20 minutes before enjoying.
  • Vegan Chocolate Raspberry Jam Bars

    Vegan Chocolate Raspberry Jam Bars

    I recently had dinner with my Mom at a local cafe and we were looking at the dessert case on the way out. There were beautiful cakes and tarts but the thing that caught our eye were some raspberry chocolate bars. They had a crunchy chocolate streusel on top as well as chocolate chips and a raspberry jam filling. My Mom said to me, I bet you could make some of those at home! So, I decided that I would create my own version!

    I tend to do baking projects on my days off when I have more time, and they sounded really good so I went for it! I have made jam bars before and loved them, I have just never tried chocolate ones. I decided to even improve upon the idea and make them chocolate hazelnut raspberry jam bars. Because I normally use nut butter in my jam bars anyway to make them extra delicious and I happened to have hazelnut butter and hazelnut meal on hand.

    Chocolate and hazelnuts are an amazing combination anyhow add in raspberry and its even better! The crust is really easy to make, you just mix it all together, press half into the pan, top with the jam and then crumble the rest of the crust and chocolate chips over that! I admit, I did sample a bit of the crust while I was making it, because it was like super delicious cookie dough. I am one of those people who likes to sample what I am making all the way through and I am just a sucker for cookie dough and batter!

    Lastly I sprinkled on some chocolate chips before baking because one can never have too much chocolate in a chocolate dessert, right? They smelled amazing while baking. Too bad I had to wait until they cooled completely to cut them so they stayed pretty. It was well worth the wait though! They were heavenly! Rich, chocolaty hazelnut cookie crust and crumble plus the dark chocolate chips and gooey tart sweet jam…total deliciousness! So the next time you are craving a baked chocolate treat, give these a try instead of just brownies!

    Vegan Chocolate Raspberry Jam Bars
    Makes 16 bars

    Ingredients:

    Crust/topping:

    • 1/2 cup coconut oil, warmed to liquid
    • 3/4 cup coconut sugar
    • 3 Tbsp filtered water mixed with 1 Tbsp ground flax seed
    • 3/4 cup hazelnut butter
    • 3/4 cups whole wheat pastry flour
    • 1/2 cup hazelnut meal
    • 1/4 cup cacao powder or unsweetened cocoa powder
    • 1/2 tsp baking powder
    • 1/2 tsp sea salt

    Filling and Topping:

    • 3/4 cup vegan raspberry jam
    • 1/2 cup vegan dark chocolate chips

    Instructions:

    1. Preheat oven to 350F degrees with the rack set in the center position. Line a 9×9 inch square pan with parchment, and/or grease it with coconut oil.
    2. To make the crust, whisk the coconut oil and sugar together in a bowl with the flax mixture until the sugar starts to dissolve. Then add the hazelnut butter and mix until combined.
    3. Add the flour, cacao powder, hazelnut meal, baking powder, sea salt and stir in until well blended.
    4. Spread 2/3 of this mixture over the bottom of the pan, pressing it to the edges with your fingers.  Then spread the jam over that with a spoon or offset spatula. Drop chunks of the remaining dough over that and sprinkle with chocolate chips.
    5. Place in the oven. Bake for about 45 minutes until lightly browned and set.
    6. Remove from the oven and let cool completely before cutting into bars.
  • Double Hazelnut Chocolate Truffles

    Double Hazelnut Chocolate Truffles

    You know what always makes me happy? the aroma of nuts roasting in the oven. they always smell amazing and they are just begging to be snacked on as soon as they are cool enough to not burn you. Sometimes I am a little hasty I admit and I do end up burning my mouth. I had a bunch of hazelnuts on hand that I roasted for some hazelnut butter and I had extra, so I thought it would be the perfect time to make some copycat Fererro Rocher candy. I have kind of always wanted to make them, and just never gotten around to it.

    I feel like I am that way with a lot of recipes, I have so many ideas in my head that I say I am going to make, and they bounce around in there for a while, sometimes years and I finally decide to make them. At least I know I will never run out! These were actually fairly easy to make and I had all of the ingredients on hand. They are actually slightly less complicated then actual Fererro Rocher candy though, because I like easy when it comes to things like truffles, especially when I am making them on a week day after work.

    I used a hazelnut in the center just like the original, then I wrapped it in a layer of soft hazelnut chocolate fudge with crunchy chopped hazelnuts instead of the wafers in the original. I am not a big fan of wafers, and I had hazelnuts on hand so it worked out. If you wanted something a bit more crunchy, you could use chopped up wafers, or for a healthier more whole foods option, some sprouted dehydrated buckwheat groats. I used to always use those in my raw recipes whenever I wanted crunch.

    Lastly, I dipped the fudgy centers into dark chocolate and sprinkled them with more hazelnuts. These are packed with plenty of hazelnut and chocolate flavor. I actually like them better than the original Ferraro Rocher! That is the thing about making your own candy at home, you can tailor it to your own tastes! I love that! If you are a chocolate and hazelnut fan, give these a try!

    Double Hazelnut Chocolate Truffles

    Makes 16

    Ingredients:

    Filling:

    • 1 cup hazelnut butter (or almond butter if you don’t have any hazelnut butter)
    • 1/2 cup cacao powder
    • 1/4 cup plus 2 Tbsp maple syrup
    • 3/4 cup finely chopped roasted hazelnuts
    • 16 roasted hazelnuts

    Coating:

    • 1 1/2 cups chopped vegan dark chocolate
    • finely chopped roasted hazelnuts

    Instructions:

    1. Mix together the hazelnut butter, cacao powder, maple syrup, and chopped hazelnuts in a bowl until well blended and smooth (except for the chopped nuts)
    2. Form the mixture into 16 balls, and press a hazelnut into the center of each ball, forming it around it. Place the balls onto a parchment lined tray. Place in the freezer for 20 minutes.
    3. Melt the dark chocolate for the coating on the stove in a double boiler.
    4. Dip each ball into it, letting the excess drain off (I like to set it on a fork), and place back onto the tray and sprinkle with the chopped hazelnuts. Repeat with remaining truffles.
    5. Place in the freezer until set, about 5 minutes.
    6. Enjoy! Store in an airtight container with a lid in the refrigerator for up to a month.

  • Vegan Hazelnut Flourless Chocolate Cake

    Vegan Hazelnut Flourless Chocolate Cake

    I appreciate rich, dark chocolate much more this time of the year for some reason. Maybe because it is kind of like sweet comfort food, or because Valentine’s Day is just around the corner so I feel like chocolate is in order, but whatever the reason, I find myself enjoying it more lately. Mostly just dark chocolate candy, but I bought a big block of unsweetened chocolate for baking, and decided that making a flourless chocolate cake was a good idea.

    I figured it would be something that other people might want to make for Valentine’s day, it sounded good to me at the time, and I knew Eric would love it since he is the biggest chocolate lover I know, so I went for it! I haven’t made a flourless chocolate cake in a few years, so it was about time! I wanted this one to include hazelnut too though along with the chocolate because those two flavors are amazing together. I had some hazelnut meal and hazelnut butter on hand so it was perfect!

    Flourless chocolate cake is kind of odd compared to other cakes. It is mostly just chocolate and eggs if not vegan so I used flax eggs in mine and they work perfectly! This cake has 4 oz of unsweetened chocolate plus cacao powder so it is intensely chocolaty. I tasted some of the unsweetened chocolate as I was chopping it up for the cake and surprisingly I liked it. It was like savory chocolate! Once it was all melted together with the coconut sugar, hazelnuts and meal and flax eggs it tasted like brownie batter!

    It smelled amazing while baking! My house filled with the heavenly aroma of dark chocolate. I could not wait to try the cake! Luckily you don’t have to wait long for this one to cool, it is best served warm after all. It was amazing. Like a super decadent rich brownie. A small piece would satisfy, but of course I had to cut myself a large one. If you wanted to tone down the dark chocolate or make this even more decadent you could serve it with coconut whipped cream, or ice cream as well!

    Vegan Hazelnut Flourless Chocolate Cake
    Makes one 6 inch cake

    • 3 Tbsp ground flax seed
    • 1/2 cup plus 1 Tbsp filtered water
    • 4 ounces vegan unsweetened chocolate, chopped
    • 1/4 cup hazelnut butter or almond butter
    • 1/4 cup pureed pear or apple
    • 1 cup coconut sugar
    • 1/4 tsp sea salt
    • 1 tsp pure vanilla extract
    • 1/4 cup hazelnut meal*
    • 1/2 cup raw cacao powder or unsweetened cocoa powder plus additional for sprinkling
    • hazelnuts and chopped dark chocolate for garnish

    Instructions:

    1. In a bowl, whisk together the flax seed and water. Place in the fridge for 15 minutes to gel. This will be your flax eggs.
    2. Meanwhile, oil a 6 inch spring form pan with coconut oil and preheat the oven to 375F degrees.
    3. In the top of a double boiler, combine the chocolate and nut butter.  Allow to melt, whisking often.
    4. Whisk in the pear puree, sugar, sea salt, and vanilla until smooth.
    5. Add the flax eggs and allow to warm for a couple minutes with the other ingredients whisking often until completely smooth and uniform.  Whisk in the cacao powder and hazelnut meal until very well combined (you want to make sure the oil is emulsified in or it will separate when baking). 
    6. Pour into the prepared pan.
    7. Place in the oven and bake for about 30 minutes until dried on the top and mostly set.
    8. Once finished baking, remove from the oven, allow to cool 15 minutes, then release from the pan and dust with cacao powder.  
    9. Garnish with hazelnuts and chopped dark chocolate and serve!

    *To make the hazelnut meal, grind whole hazelnuts in the blender until flour consistency, but not too long or you will get butter. Or you can buy Bob’s Red Mill brand hazelnut meal on Amazon or Vitacost.

  • Vegan Chocolate Mint Hazelnut Thumb Print Cookies 

    Vegan Chocolate Mint Hazelnut Thumb Print Cookies 

    I love making Christmas cookies.  When I was little, my Mom and I would always pick out many different kinds then spend the day in the kitchen listening to Christmas music making them and afterwards we would put them all in a big container to enjoy for the Holidays and to give away.  We would always make the classics, like pecan tassies, frosted vanilla sugar cookies, gingerbread cookies and pfeffernüsse (German “pepper nut” cookies, or spiced cookies rolled in powdered sugar), but we would also pick some new ones every year to try.  That was the most exciting part for me.  We used to get cook books at the library and page through them looking for new recipes.  I like to keep that tradition going.  Make a few favorites and whip up some new ones.  The only difference is that I usually come up with my own new recipes instead of finding them in cook books.  I still share them with my Mom though, she loves having cookies on hand to enjoy with her coffee mid-morning.

    Raw Guru recently sent me some goodies including some Rawmio Chocolate Mint Hazelnut Spread and I thought it would be just the thing to use in some Christmas cookies. I mean, mint kind of screams holidays.  Plus I love nut butter in cookies, it makes them rich, chewy and delicious!  What I ended up making were some delicious thumb print cookies.  I haven’t made any in a few years and in the past I have filled them with jam, but I thought the chocolate mint spread would be perfect as a filling!

    For the cookie dough, I modified the dough I use for my peanut blossom cookies swapping some hazelnut butter for the usual peanut butter and adding in cacao powder to make them chocolaty rich and delicious!  It was some bomb tasting dough too!  I always taste my cookie dough.  Not just because I love it and it is the best part of baking cookies, but to make sure I am not missing any ingredients.  Funny story, last week I was making some cookies and I was somewhat distracted and I ended up forgetting to add the sugar. It was a good thing I tasted the dough because I prevented having to throw away the batch of cookies!  Luckily I was still able to add it.  I make mistakes too sometimes so don’t feel bad if you ever have an off day in the kitchen!

    Back to the cookies though, they smelled amazing while baking!  As soon as they came out of the oven, I filled them with the Rawmio Chocolate Mint Hazelnut Spread and I could not wait to try them!  They looked so good!  I admit I did try one while they were warm and the filling was all oozy and gooey and it was amazing!  But if you want them to look nice I recommend waiting until they cook and the centers solidify completely.  They are soft, chewy, rich and chocolaty, and minty fresh!  These make perfect Christmas cookies!  If you are a chocolate fan definitely give these a try!

    Vegan Chocolate Mint Hazelnut Thumb Print Cookies 
    Makes about 14 cookies

    • 3/4 cups maple sugar or coconut sugar
    • 3/4 cups Dastony hazelnut butter
    • 1/4 cup coconut oil, melted
    • 1 Tbsp ground flax seed, and 3 Tbsp filtered water mixed together and allowed to sit for 15 minutes before using in the recipe
    • 1/2 tsp peppermint extract
    • 1 1/4 cups Bob’s Red Mill all purpose gluten free baking flour*
    • 1/4 cup Raw Guru cacao powder or unsweetened cocoa powder
    • 3/4 tsp baking soda
    • 1/2 tsp baking powder
    • Rawmio chocolate mint hazelnut spread (warmed to liquid if solid)*


    Instructions:

    1. Preheat the oven to 375F degrees. In a large bowl, whisk together the sugar, hazelnut butter, and coconut oil until well combined.  Add the flax mixture, peppermint extract, and whisk until smooth.
    2. Stir in all the remaining ingredients with a spoon, except for the hazelnut spread until smooth. The dough will be thick and soft.
    3. Form into 1 1/2 inch balls, and place on lined baking sheets a few inches apart.
    4. Place in the oven and bake for about 12 minutes until set.
    5. Remove from the oven and immediately press your thumb or the bottom of a small 1/2 tsp measuring spoon into the center of each to create an indentation (before they cool otherwise it won’t work).
    6. Spoon or pipe a little of the chocolate mint hazelnut spread into the center of each.  Allow to cool completely.


    *If you can not get the Rawmio spreads where you live, you can substitute 1/4 cup melted vegan dark chocolate whisked together with 2 Tbsp hazelnut butter, and 1/4 tsp peppermint extract until smooth.

    Notes:

    If you don’t like hazelnuts or can’t get hazelnut butter or make it, then you could use your favorite nut or seed butter, like almond butter for this recipe where the hazelnut is required.

    If you are not gluten free, you may use the same amount of whole wheat pastry flour in place of the GF flour.


  • Vegan Chocolate Hazelnut Swirled Pumpkin Pie

    Vegan Chocolate Hazelnut Swirled Pumpkin Pie


    I made a double chocolate pecan pie last weekend, and saved half in the freezer for Thanksgiving, and I thought I should make a pumpkin pie too, since it wouldn’t be right not to have both.  I don’t know about you, but when I was a kid, I thought that the dessert was the best part of the Thanksgiving meal, and I would always have a slice of each pie.  Usually pumpkin, pecan and apple. Now I usually make the apple pies earlier in the Fall and just make pecan and pumpkin because they seem more special and Thanksgiving exclusive.  This year I seem to have a chocolate theme going on.  I made the pecan pie with the chocolate I mentioned earlier and Raw Guru sent me some Dastony hazelnut butter and I was inspired to make some chocolate hazelnut pecan pie.  Their hazelnut butter is super silky and perfect for using in desserts.  Plus I figured “nutella” and pumpkin sounded amazing together so why not try it?!

    First, I made my classic pie crust using gluten free flour and coconut oil for the fat.  This always turns out good for me, and the coconut oil gives it a nice sweetness that is perfect for pie.  For the hazelnut part, I wanted a combination that was rich, creamy and delicious so I whisked together the hazelnut butter with some coconut cream and cacao powder plus a little maple syrup to sweeten and it was heavenly!  Before being baked, it tasted like smooth hazelnut mousse. Sooo good.  Yes, I always have to sample all of the elements of my desserts to make sure they are good before baking.  I am mainly testing to see if they are sweet enough or spiced enough in the case of the pumpkin part of this pie, plus it is kind of a little treat that only the baker gets to enjoy.  Same thing with licking the bowls. Best part of baking next to enjoying the finished product. You may be wondering how you get a pumpkin pie to set up without eggs, well for this one it is a combination of cornstarch and agar powder and it works wonders once the pie cools.  It sets up beautifully into a smooth custard.

    This pie smelled heavenly while baking.  The aromas of chocolate, nuts and spice filling my kitchen!  Unfortunately I had to wait until the next day to enjoy it because I baked it at night and it had to cool completely and set.  But it was well worth the wait!  This was seriously one of the best pumpkin pies I have tried/made.  I know I say that every year, but this was amazing!  A silky smooth texture, a layer of rich creamy chocolate filling, and sweet spiced pumpkin filling in a buttery tender crust!  Sooo good!  This is so much better than I remember pumpkin pie tasting when I was younger.  It was probably my least favorite of the 3 we always ate (pumpkin, pecan, apple), but now I think they are all tied. If you haven’t made your pumpkin pie for Thanksgiving yet, consider making this one.  I have a feeling you and your family will love it!

    Vegan Chocolate Hazelnut Pumpkin Pie
    Makes one 9 inch pie

    Crust:


    Chocolate filling:


    Filling:

    • 2 cups organic cooked pumpkin (canned is ok too), packed
    • 1/3 cup pure maple syrup
    • 3/4 cup full fat organic coconut milk
    • 2 tsp coconut oil
    • 1 1/4 teaspoon ground cinnamon
    • 1 teaspoon ground ginger
    • 1 /4 teaspoon ground nutmeg
    • 1/4 tsp ground cloves
    • 1/4 teaspoon salt
    • 1 1/2 tablespoons cornstarch
    • 3/4 teaspoon agar powder


    Instructions:

    1. To make the crust, in a large bowl, mix together flour, sugar, sea salt, and spices. Cut in coconut oil with a pastry blender or 2 knives until it is in pea sized pieces. Mix in  just enough water to create a smooth dough that holds together but isn’t too sticky. Add more water if needed, and knead slightly until a smooth dough is created. Roll out into a 10 inch circle on a sheet of parchment paper, then use the paper to help you transfer it to an 8 inch pie dish.  Flute the edges, and set aside in the refrigerator.
    2. Pre-heat the oven to 350F degrees.
    3. To make the chocolate filling, whisk together all ingredients until smooth and set aside.
    4. To make the pumpkin filling, place all ingredients in the blender and blend until smooth.
    5. To assemble the pie, pour most of the chocolate hazelnut filling layer over the crust (reserving about 1/4 cup), then pour the pumpkin filling over that.  Drop the remaining chocolate filling over the pumpkin filling in about 1/2 tsp amounts and swirl with a knife to create a pretty design.
    6. Place in the pre-heated oven and bake for about 1 hour and 20- 1 hour and 30 min. until the edges of the crust are lightly brown, and pie is still jiggly in the center but set at the edges (it will firm up once cool).  Allow to cool completely, then chill in the refrigerator for a few hours at least before serving (I chilled mine in the refrigerator overnight).
    7. Store any leftovers in the refrigerator.


  • Vegan Chai Spiced Pear Cakes with Hazelnut Chocolate Glaze

    Vegan Chai Spiced Pear Cakes with Hazelnut Chocolate Glaze

    So far Fall in Minnesota has been a rather chilly rainy one, the temperatures in the 30s and 40s most days with rain for 2 weeks straight it felt like until this week so we have all been bundling up. But finally we got a few lovely dry days in the 60s. This is the type of Fall I dream about, where it is warm enough to not have to wear jackets, and you can go out and enjoy the Fall colors on a hike and be comfortable.  I made sure to get outside, but I also decided to do some Fall baking to celebrate the perfect Fall days, and because cake sounded good.  I had some perfectly ripe Minnesota grown pears that a coworker had given me, and so I decided on pear bundt cakes.  Apple gets all the attention most of the time, you don’t hear about people going to the pear orchard to pick pears.  But they are super delicious so I am not sure why they don’t sell like apples do.  Heck, I would go to a pear orchard.  If you get a perfectly ripe, fragrant pear it is sweeter than an apple sometimes.  Back when I was in college, in the Fall one of my favorite things was to poach pears in the oven in a dish with spices, then eat them with ice cream.  Super delicious easy dessert.

    Anyways, back to those bundt cakes.  I suppose I could have made one large cake, but I like the idea of mini cakes, and they are perfect for sharing.  Not only that, they bake so much faster!  Only 20 minutes for these babies. For the batter, I pureed my pears, then blended them up with dates, spices, almond butter as a base to add the flour and other ingredients too.  This batter is actually fruit sweetened and oil free!  And, it is plenty sweet from the pears and dates.  It baked up beautifully and smelled amazing!

    But bundt cakes need a little glaze to decorate them so I decided to use some Veggimins Hemp CBD Chocolate Hazelnut Butter that Raw Guru sent me recently so drizzle over the cakes.  After all, pears, hazelnuts and chocolate are a match made in heaven.  This spread is bomb by the way, like the best nutella you will ever taste and what’s not to love about CBD oil being included in it.  It was amazing on the cakes!  They were so good… soft and sweet from the pears with a hint of spice and the rich dark chocolate. If you have pears on hand, give these a try!

    Vegan Chai Spiced Pear Cakes with Hazelnut Chocolate Glaze 
    Makes four 1 cup bundt cakes

    Ingredients:

    2 6 inch cake pans

    Cake:

    • 3/4 cups quinoa flour (or all purpose gluten free flour)
    • 3/4 tsp baking soda
    • 1/2 tsp baking powder
    • 1/4 tsp sea salt
    • 1/2 tsp cinnamon
    • 1/2 tsp ginger
    • 1/2 tsp cardamom
    • 1/4 tsp cloves
    • 1/4 tsp nutmeg
    • 1/2 cup packed soft medjool dates, pitted, soaked in water for 30 minutes and 1/2 cup of the soaking water reserved
    • 2 Tbsp almond butter
    • 1 tsp pure vanilla extract
    • 1/2 cup pureed ripe pears
    • 1 Tbsp apple cider vinegar


    Glaze:


    Directions:

    1. Preheat the oven to 375F degrees and position rack in center of oven. Oil 4 mini bundt pans.
    2. Whisk flour, baking powder, baking soda, spices and sea salt in a large bowl to blend well.  Set aside.
    3. Place dates, reserved water, almond butter, pear puree, and vanilla extract into a blender, and blend until smooth, then whisk this blended mixture into the flour mixture until well blended. Whisk in the cider vinegar until bubbles form.
    4. Transfer cake batter to prepared pans and bake cakes until tester inserted into center comes out clean, about 20 minutes. Remove from oven and cool cakes completely in pan on rack, about 1 hour.
    5. Un-mold onto a piece of parchment on a sheet pan.
    6. Warm the hazelnut butter slightly in a double boiler just until it is liquid enough to pour (but don’t over-heat), and drizzle over the cakes.
    7. Enjoy!


    *If you can’t get the CBD hazelnut butter, or would rather make your own glaze, you can instead whisk 1 Tbsp cacao powder into 1/4 cup hazelnut (or almond) butter, along with 1 Tbsp maple syrup and just enough water to make it pourable and use the same way you would use the CBD hazelnut butter.


  • Vegan Hazelnut Bliss Bars

    Vegan Hazelnut Bliss Bars

    About 5 years ago, I made some really amazing raw hazelnut bars with some hazelnut spreads that Rawmio sent me.  They had a chocolate crust, a layer of plain hazelnut cream and a layer of chocolate hazelnut cream with chocolate on top.  They were amazing!  Well, fast forward to now, when I was looking through my recipes from back in the day and I said to myself, I need to make these again!  But the old ones required cracking raw coconuts open, and a spread that no longer exists, so I decided to revamp the recipe to make it easier to make (no cracking young coconuts this time, or sprouting buckwheat groats for the crust).  And I was in luck, because Raw Guru had recently sent me 2 jars of hazelnut butter!  One Dastony Hazelnut Butter and one Rawmio Hazelnut Coffee Spread.  The plain hazelnut butter is silky smooth with intense hazelnut flavor and the hazelnut coffee is crave worthy, like something you could just eat with a spoon.  I totally wanted to, but I needed it for the recipe.  But seriously it tastes like they melted their dark chocolate right into it and added a hint of coffee. So much better than any other store bought hazelnut chocolate spread I have tried. Definitely check them both out on their website!

    For these bars, I wanted the crust to be about the same as the old one, so I made only one swap.  I traded the sprouted dehydrated buckwheat groats for organic gluten free rolled oats.  Back in the day I had the buckwheat on hand at all times because I was eating a fully raw diet, but since I am not anymore I don’t make them often.  Hence the oat substitution.  I prefer to use the things I have on hand and didn’t want to go through the 2 day process of making the buckwheat groats.  The crust tastes the same with the oats, so it all works out.  It ends up tasting like chocolate cookie dough!  For the fillings, I made a hazelnut cream and a coffee chocolate hazelnut cream. They were so freaking delicious I wanted to keep sampling it.  But I had to stop so I had enough for the bars. They reminded me of cheesecake crossed with mousse.

    Lastly I sprinkled the top of the bars with hazelnuts and chocolate, because I thought that they needed a bit of  texture and I didn’t want a layer of melted chocolate like the other bars because it doesn’t look nice when you cut it.  I could not wait to try these!  But unfortunately I had to wait until the next day because I was making them at night after work. I have to say though, they are well worth the wait!  The creams are silky smooth with a rich hazelnut and chocolate flavor, and the rich chocolate crust is perfect paired with it! These are the perfect thing to make in the Summer because they don’t require the oven at all!

    Vegan Hazelnut Bliss Bars
    Makes 16 bars

    Crust:

    • 1 cup Raw Guru hazelnuts
    • 1 cup finely shredded dried coconut
    • 3/4 cup organic gluten free rolled oats (or you may also use quinoa flakes)
    • 1/4 tsp sea salt
    • 1/2 cup raw cacao powder
    • 3/4 cup soft medjool dates, pitted (if not soft, soak them until they are and drain them)


    Creams:


    Topping:

    • 1/2 cup chopped Raw Guru hazelnuts
    • 1/2 cup vegan chocolate chips or chopped vegan dark chocolate


    Instructions:


    1. For the crust, combine hazelnuts, coconut, oats, sea salt, cacao powder and dates in the food processor and process until fine crumbs and starting to hold together when squeezed. Press the mixture into a 8×8 inch square pan lined with parchment paper. Set aside in the refrigerator.
    2. To make the creams, combine all ingredients but the hazelnut butter and hazelnut coffee spread in a food processor and process until smooth.  Remove from the food processor and divide into 2 bowls.  Place one back into the food processor and add the hazelnut butter.  Process until smooth, then place back in the bowl.  Add the second bowl to the food processor and add the hazelnut coffee.  Process until smooth, then pour over the crust, smoothing out.  Pour the plain hazelnut over that and smooth out. Sprinkle with the chopped hazelnuts and chocolate chips.  Place in the freezer until firmed up, for a couple of hours.  Or you can put it in the refrigerator overnight (but cover the top).
    3. When the bars have firmed up, cut into squares and enjoy!
    4. Store in the fridge.


  • Mini Vegan Nutella Mousse Tarts

    Mini Vegan Nutella Mousse Tarts

    When I was little, I loved Nutella.  I loved having Nutella toast, it was like having dessert for breakfast.  After all, the real Nutella has sugar as the main ingredient and is super sweet.  My 10 year old self loved that.  When I visited Europe in high school, I ate Nutella on baguettes almost every day for breakfast the two weeks we were there.  I know, super healthy, but when I was 16 I didn’t really care if I ate healthy or not.  As an adult, I prefer real nutella, not the commercial stuff, the small batch stuff I either make at home, or get from somewhere like Raw Guru. They have some amazing raw hazelnut spreads, like their Raw Hazelnut Crunch Spread.  They recently sent me a jar, and that stuff is pure deliciousness.  So much better than the Nutella I had as a kid. I decided to make it into some delicious nutella tarts last weekend.  I wanted a simple dessert involving chocolate and they fit the bill.  Plus, I was daydreaming about how good something nutella would be.

    They are super simple to make.  For the crust, I kept it gluten free by buzzing up a mixture of quinoa flakes, hazelnuts, Raw Guru cacao powder, dates, and sea salt in the food processor. If you have never heard of quinoa flakes, they are a great gluten free substitute for oats in most recipes, and they work awesome!  Anyways, the crust tasted wonderful like chocolate cookies, and I knew it would be perfect with the topping.  The topping is simple to make as well, and it gets its richness from coconut milk and butter and of course the delicious hazelnut spread.  It was heavenly!  I kept “sampling” it because it was so good.  Not because it needed anything but I wanted to keep eating it.  I had to control myself so that there would be enough for the tarts.   A little chill time in the freezer and voila!  Delicious dessert goodness.

    They taste like real home made nutella, so heavenly.  Rich smooth creamy mousse filling that melts in your mouth.  If you are in a chocolate mood, do yourself a favor and whip up a batch.  These babies are sooo good!  If you happen to wander over to the Raw Guru Website to check out their delicious Rawmio products I mentioned in the post, bring my coupon code with you in case you decide to order some.  Just type in the code FRAGRANTVANILLA to get 10% off your order!  I hope you are all having a wonderful week so far!

    Mini Vegan Nutella Mousse Tarts
    Makes 4 mini tarts

    Ingredients:

    Four 4 inch removable bottom tart pans

    Crust:

    • 1/2 cup quinoa flakes
    • 1/2 cup raw hazelnuts
    • 1/4 cup soft, pitted medjool dates (if they are not soft, soak them first in filtered water 30 minutes and drain well before using)
    • 2 Tbsp Raw Guru raw cacao powder
    • 1/4 tsp sea salt
    • 2 tsp filtered water (or as needed, see note in recipe)


    Filling:


    Instructions:

    1. To make the crust, combine all ingredients but the water in a food processor, and process until fine. Add the water (but only if you did not soak your dates in water) and process until it is starting to hold together but not too sticky.
    2. Oil four mini tart pans (4 inch wide), and press the crust into the bottoms and up the sides of the tart pans. Set aside in the refrigerator.
    3. To make the filling, combine all ingredients but the coconut butter in a high speed blender or food processor, and process until smooth.  Add the coconut butter, and process until just blended.
    4. Pour the filling into the tart shells, and place in the freezer for about 1 hour or until set.
    5. Remove from the freezer and enjoy!  Store any leftover tarts in the refrigerator.


    *If you are using regular hazelnut butter, add an additional 1-2 Tbsp maple syrup to the recipe.


  • Vegan Hazelnut Crunch White Chocolate Truffles

    Vegan Hazelnut Crunch White Chocolate Truffles

    It snowed for 2 days here, and I really didn’t feel like going outside.  I had to go to work, and drive home in a scary blizzard, but after that I just hunkered down until the snow stopped.  It was the perfect time to make some truffles.  I can’t imagine a better way to make the fact that there was a blizzard here in April than making candy in my kitchen.  My go to activity for when I can’t go outside is coming up with new recipes.  Desserts are my favorite of course.  Raw Guru recently sent me some of their Raw Coconut Butter , and Rawmio Hazelnut Crunch Spread, and I thought it would be perfect to make truffles with!  Their coconut butter is super smooth compared to the stuff I make at home, so it was a treat, and that hazelnut crunch spread is like dessert just by itself.  It is a smooth sweet raw hazelnut butter with vanilla and cacao nibs for crunch.  So good!  If you would like to try either of them, Raw Guru has given me a 10% off code for you to use when checking out on their website.  Just enter the code: FRAGRANTVANILLA

    So back to my truffles I have been telling you about.  The filling is super simple, you just combine the hazelnut crunch spread with the coconut butter and it is so good!  The spread is sweet enough that you don’t need to add anything to it.  But if you were making this with just a plain hazelnut butter, you could add maple syrup to taste. The filling mixture is so good, you will be tempted to eat it with a spoon. But trust me, it is even better with the white chocolate!  I used a mixture of the coconut butter, cashew butter and cacao butter sweetened with maple syrup and vanilla  which is what I always use, but it was even more delicious than usual.  The stone ground coconut butter is so much more silky than home made.

    I dipped the centers in the white chocolate, which always gets a little messy in my kitchen, but it is ok.  Because I like eating all of the excess chocolate that falls off and drips off. You don’t have to be perfect when making truffles, all that matters is that they taste good.  I actually ended up dipping these about 3 times to get a thick layer of the white chocolate, but it was so worth the extra effort, because they turned out so good!  I drizzled them with some dark chocolate for decoration and they were perfect!  I couldn’t wait to try the finished product.  They were bomb!  Sweet, rich nutty hazelnut filling with crunchy cacao nibs, and a sweet, vanilla scented white chocolate coating!  So much better than anything you can buy at the store or get in a box of chocolate.  If you are a white chocolate fan, give these a try! They definitely cured my snow blues!

    Vegan Hazelnut Crunch White Chocolate Truffles 
    Makes 8 truffles

    Ingredients:

    Filling:


    White Chocolate:


    Dark Chocolate:

    • about 1/2 cup chopped vegan dark chocolate or chocolate chips


    Directions:

    1. Combine Rawmio hazelnut butter and coconut butter, and whisk until completely combined. Place in the freezer for about 15 minutes until it is firm enough to scoop (stirring occasionally so it cools evenly). Scoop and roll into 8 balls, rolling them with your hands.   Place on a parchment lined tray, and place back into the freezer until firm, about 30 minutes.
    2. Meanwhile, to make the  white chocolate, combine all ingredients in a double boiler, and whisk until combined and melted.
    3. Once the filling has firmed up, dip each truffle into the white chocolate, being sure to let the excess drain off, and place back onto the tray (I like to set mine on a fork to allow it to drain better). Once they are all dipped, set them in the freezer until hardened.  If you want a thicker layer of white chocolate, you will have to repeat this process several times.  I dipped mine 3 times.  Allow to harden in the freezer.
    4. Melt the dark chocolate in the top of a double boiler, then drizzle it over the truffles.  Allow the chocolate to harden, then enjoy!
    5. Store any leftover truffles in the refrigerator.


    *If you are just using regular hazelnut butter, add 3 Tbsp of maple syrup to it (or to taste).

  • Vegan Nutella Truffles

    Vegan Nutella Truffles

    I used to think Nutella was pretty awesome when I was little.  I mean, I could eat chocolate on toast for breakfast and it was considered ok.  When I made a trip to Europe with my French class in high school, I ate nutella on baguettes or croissants every day.  What’s not to love about chocolate that is spreadable?!  I never thought about the fact that it had hazelnuts in it, because it didn’t really taste like them to me, and I have since looked at the ingredients and realize that it is because the first two ingredients are sugar and vegetable oil.  I didn’t really care what I ate then, and it didn’t matter to me at the time but it does now.  If I buy anything that is supposed to be nut butter, nuts better be the first ingredient in it.  I don’t eat real Nutella anyhow because it is not vegan.  So, I make my own more delicious vegan nutella!  I say more delicious because you can really taste the hazelnuts in it, and it contains way less sweetener (and no refined sugar).  I was given a bunch of hazelnuts recently and made a few jars of just plain hazelnut butter, and I decided that I wanted some “nutella” truffles.

    So, I whipped some up, and they were super simple!  Only 5 ingredients, if you use already made vegan dark chocolate.  I recommend Lily’s Dark Chocolate Chips, Zimt Baking Chocolate, or Luv Dark Chocolate Chunks for melting, because they are all either sugar free or refined sugar free and quality chocolate. I try to look for chocolate with few ingredients that are real.  The filling for the truffles is just hazelnut butter, maple syrup, sea salt and cacao butter, that is all!  I made my own hazelnut butter so it was a little less runny than some of the commercial brands, but if yours is commercial and more runny don’t worry, all you need to do is add a little more cacao powder (I have included instructions below). The truffles came out super delicious!

    This is way better than most of the Halloween candy out there, more like grown up real Halloween candy.  So, it is the perfect time of the year to make them, so you can enjoy them instead of the store bought candy that is not made with good ingredients.  I think if I had eaten these as a youngster,  I would not have liked the real Nutella because these are so much better and actually taste like hazelnuts!  If you are craving Nutella, you need to give these lovelies a try!

    Vegan Nutella Truffles
    Makes 12

    Ingredients:

    • 1 cup hazelnut butter*
    • 3 Tbsp maple syrup
    • 1/4 tsp sea salt
    • 3 Tbsp cacao powder (or unsweetened cocoa powder)
    • 1 cup chopped vegan dark chocolate


    Instructions:

    1. In a bowl, mix together the hazelnut butter, maple syrup, sea salt and cacao powder until well blended.
    2. Roll the mixture into balls, and place on a parchment lined tray. Freeze for about 1 hour.
    3. When the filling has chilled for an hour, melt the dark chocolate in the top of a double boiler until smooth.
    4. Dip each filling ball into the melted chocolate, let the excess drain off (I like to set it on a fork), and place back onto the tray.  When you are finished dipping them, place them in the freezer to firm up for about 10  minutes.
    5. Store truffles in the refrigerator for up to a few months in a sealed container.

    *Note: If you hazelnut butter is more runny, you may need to add an additional 2-3 Tbsp cacao powder to make the filling mixture firm enough.


  • White Chocolate Hazelnut Pecan Butter

    White Chocolate Hazelnut Pecan Butter

    I love me some nut butters.  At any given time you will find at least 8 different kinds in my pantry.  I make about 3 a week, because I use it in recipes, and of course just straight up eat it.  I mean is there any better quick comfort food than a big spoon of peanut butter?  I would go for that over a piece of chocolate any day.  Also, I find that the richness of nut butter satisfies any cravings I would have for animal based fats like cheese or butter.  I make my creamy salad dressings with walnut butter, and you would swear it had dairy in it, and I use nut butters in place of the butter in things like cakes.  Or if I am craving something rich, I just have a couple Tbsp of nut butter for a snack and I feel satisfied.  So, I am always coming up with new delicious flavors just to enjoy by the spoonful or with fruit or stirred into my oatmeal.  I was always fascinated by all of the gourmet flavors of nut butter at the store growing up, so I was super excited as an adult when I could make my own after I bought a high speed blender.  I haven’t actually bought any nut butter from the store in the past 4 years, I always just make it.  It is much cheaper that way, and I can play around with combinations of nuts or add ins.

    The latest flavor I made this week was a White Chocolate Hazelnut Pecan Butter.  It was simply heavenly, which is why I decided that I needed to share the recipe with you all.  It is actually really easy to make if you have a high speed blender or food processor.  I started out with a toasted hazelnut and pecan base, and added in some rich cacao butter to give it that white chocolate flavor.  I suppose I could have stirred in white chocolate chunks too, but that was not what I was going for because I wanted just the right amount of sweetness.  I thought the chunks would make it too sweet for me, and I wanted it smooth.  I am a more smooth nut butter type of girl, I do make exceptions (like I have added dark chocolate chunks) but rarely.  I added in some coconut sugar to this to sweeten it just enough, some sea salt for balance, and some vanilla bean seeds for that delicious vanilla aroma that you find in white chocolate.

    It was super delicious!  Sweet, with a white chocolate aroma, and nutty toasty flavor!  It is perfect for drizzling while warm (like when you first make it), and would be amazing on apples or pears for a healthy fall treat.  Or, when it cools down it is more firm and spreadable.  I like it both ways!  It is good to have options.  Don’t you agree?

    White Chocolate Hazelnut Pecan Butter
    Makes about 3 cups

    • 2 cups toasted hazelnuts
    • 1 1/2 cups toasted pecans
    • 1 1/2 oz cacao butter, warmed to liquid
    • 1/4 tsp sea salt
    • 1/4 cup raw coconut sugar
    • seeds of one vanilla bean


    Instructions:

    1. In a high speed blender, combine the nuts, cacao butter and sea salt and blend until smooth, using the tamper to push the mixture down into the blades.
    2. Add the coconut sugar and vanilla beans to the blender and blend until well incorporated.
    3. Pour into a jar.
    4. Enjoy!  Keeps for a few months at room temperature and up to 6 when kept in the refrigerator.
  • Vegan Hazelnut Crusted Apple Pie

    Vegan Hazelnut Crusted Apple Pie

    I ran my second race of the season Friday, and it was a bit challenging, but I like a challenge.  The course was not fast and flat like the previous one I had done, and I had gone into this thinking I was going to break my time from a few weeks back because I had people to push me.  Well…not so much.  It was like running a cross country course with slippery mud, dirt ruts, long grass and all!  So despite having a little slower time than I wanted (but hey, it was 30 seconds faster than last year at the same race), I said to myself, “I’ll take it!” because it was a bit warm and humid that day too.  It is those challenging runs and races that make us stronger after all.  I should feel awesome by the time the cool fall air rolls in and the temps in the AM are in the mid 50s.  That is my favorite type of running weather.  Especially when the trees are changing color and you can run through the crunchy leaves on the paths.
    Hazelnut Crusted Apple Pie 2
    I am in the mood for Fall, cozy sweaters, pumpkins and apple pie.  So, since I had the rest of the day off Friday, I made a glorious apple pie. One that was mounded tall with apples.  None of that flat pie because the apples shrunk type business.  Fill it properly!  For the filling I used my favorite local apples, the honey crisps.  No, they do not contain honey, I am still vegan, it is just what their name it.  They were developed here in Minnesota which I think is pretty awesome!  Anyways, they are the best pie apples next to Haralson which are from here too, and which is what my Mom uses. My Mom always said to use tart apples for pies for the best flavor and honey crisps are a perfect balance of tart and sweet.  Mom’s pies were always the best!  She doesn’t bake them anymore, so I share some of mine with her.
    Hazelnut Crusted Apple Pie 3
    I was going to make a regular old apple pie, but nut crusts on pies are always amazing so I made a hazelnut crust for this one.  It was so rich and delicious once baked to perfection!  When the apples were bubbling and the sweet aroma was permeating my house, I was happy with the sight of it as I pulled it from the oven.  After letting it cool, I couldn’t wait to dive in.  I topped it off with some of my pecan pie ice cream and it was amazing!  I love this time of the year!
    Hazelnut Crusted Apple Pie
    Vegan Hazelnut Crusted Apple Pie

    Makes 1 8 inch pie

    Ingredients:

    Crust:

    • 1 1/2 cups organic whole wheat pastry flour
    • 1 1/2 cups hazelnut flour*
    • 1/4 cup coconut sugar
    • 1/4 tsp sea salt
    • 1/4 cup plus 1 Tbsp coconut oil, in its solid form
    • 1/4 cup plus 1 Tbsp almond butter
    • about 4-6 Tbsp cold water


    Filling:

    • 4 large sweet tart apples (such as honey crisp), diced
    • 1/4 cup maple syrup
    • 2 tsp cinnamon
    • 4 Tbsp all purpose gluten free flour
    • 2 tsp pure vanilla extract


    Directions:

    1. To make the crust, in a large bowl, mix together flours, sugar, sea salt.  Cut in coconut oil and hazelnut butter with a pastry blender or 2 knives until it is in pea sized pieces.  Mix in just enough water to create a smooth dough that holds together but isn’t too sticky.  Add a touch of water if needed, and knead slightly until a smooth dough is created.  Divide into 2 balls.
    2. Roll each out into about a 9-10 inch round using parchment underneath and floured rolling pin.  Place bottom crust into an 8 inch pie pan and fit to edges.  If it tears, no worries, just press it back together and patch it up. Set aside in the refrigerator. Set the top crust aside (if it is pretty warm, place it in the refrigerator too, you just do not want it to get too hard or it will not be pliable to shape over the filling).
    3. Pre-heat the oven to 400F degrees. In a large bowl, toss together the filling ingredients. Spoon into crust.  Place the top crust over the filling using the parchment to assist. Crimp the edges, and cut a vent in the center.  Bake for about 1 hour and 45 minutes in the middle rack of the oven until apples are cooked through and bubbling.
    4. Remove from oven and let cool until warm, and top with some vegan ice cream or coconut vanilla whipped cream and…enjoy!


    *To make hazelnut flour, place hazelnuts in the blender and blend for about 30 seconds until they are finely ground like flour (but not too long or you will have butter).
    *Note: if you would like to make this a gluten free pie, I have also used Bob’s Red Mill Gluten Free Flour to make this crust with success, so just replace the whole wheat in equal amounts with it.


  • 5 Ingredient Vegan Blackberry Hazelnut Ice Cream

    5 Ingredient Vegan Blackberry Hazelnut Ice Cream

    Blackberry Hazelnut Ice Cream 1

    When I bought an ice cream maker about 10 years back, I had no idea how much I would use it.  But I ended up using it almost every week for a few years.  I originally bought it because I wanted to create healthier ice cream than the store bought that wasn’t full of weird additives.  At the time, I wanted everything to be low fat, sugar free (back in the days when I considered that healthy, and did not read ingredients on things necessarily to find out what was being subbed for those things). I of course didn’t have a blog yet either and wasn’t vegan and I experimented with making things like low fat frozen yogurt (which did not have a very good texture).  The ice creams tasted ok, but there was one ingredient that I discovered which really changed home made ice cream making for me and allowed me to create some bomb ice creams. Coconut milk.  I started out with low fat, but then got hooked on full fat organic for the silkiest creamiest ice creams.  It is a blank palate ready for whatever flavors you wish to make.

    Blackberry Hazelnut Ice Cream 2

    I now pretty much have the ice cream thing down. It is equally good made with young coconut meat and cashews mixed together for a good mouthfeel.  But when you are in a hurry, coconut milk is hands down the winner as far as I am concerned.  I now know that my body needs healthy fats in order to function, and I am not fat phobic, so I no longer make low fat ice cream because I would rather have a smaller serving of something that tastes amazing than a large serving of something mediocre.  Unless of course it is banana nice cream, which is soft serve and that is a different story (love that stuff).  So if you want low fat, make banana soft serve. If you want more traditional tasting ice cream, read on.

    Blackberry Hazelnut Ice Cream 3

    I made this wonderful blackberry hazelnut ice cream last week to go with a pie I had made and it was sooo good!  I had to share the recipe with you all because it is only 5 ingredients and super simple to make.  The texture kind of reminds me of gelato, and the flavor is like no other.  Sweet and nutty.  Like Fancy PB and J thanks to the hazelnut butter and blackberries. If you get some fresh organic blackberries, you must try this ice cream.  I have included instructions both for with an ice cream maker and without, so no excuses not to try it!

    Blackberry Hazelnut Ice Cream

    5 Ingredient Vegan Blackberry Hazelnut Ice Cream
    Makes 3 cups

    1 15 oz can full fat organic coconut milk
    1/2 cup raw hazelnut butter
    1 1/2 cups fresh organic blackberries
    1/4 cup soft, pitted medjool dates (if they are not soft, soak them in filtered water for 30 minutes before using)
    1/4 tsp sea salt

    Combine all ingredients in a blender and blend until smooth. Pour into an ice cream maker and process according to directions. Alternatively, if you do not have an ice cream maker, pour it into a bowl, and whisk every half hour until it is to the consistency of a thick malt. Pour into a freezer safe container with a lid, and continue to freeze until firm enough to scoop (at least 4 hours or overnight). If it becomes too firm, simply let it sit out for 15 minutes before serving.


  • Vegan Chocolate Hazelnut Scones

    Vegan Chocolate Hazelnut Scones

    Vegan Chocolate Hazelnut Scones 4

    I made some home made Nutella last week, and it got me wanting to make more hazelnut stuff.  It was just so good, so addictive.  Like you can’t have just one spoonful.  That is the problem with me and nut butter.  Anyways, I decided to make chocolate hazelnut scones.  I see my coworker making scones all the time at work and it makes me hungry for them.  So often times, I will make my own at home.  That way I can make whatever flavor I am craving as well, and of course know the scone is completely vegan.

    Vegan Chocolate Hazelnut Scones 2

    Anyways, back to these scones.  They were triple chocolate double hazelnut.  Because I used cacao powder in the dough as well as chocolate hazelnut butter, and chocolate chips.  They also had crunchy chopped hazelnuts.  This was such delicious dough, you have no idea.  I ALWAYS taste my dough or batter, no matter if I am making cookies, scones, or cake.  It has prevented me from forgetting to add sugar before, and not only that it is the home baker’s privilege to taste that deliciousness.

    Vegan Chocolate Hazelnut Scones 3

    I kind of left clumps of the chocolate hazelnut butter in them so it would create pockets of goodness in them once baked.  They baked up beautifully and smelled amazing when I pulled them from the oven.  They were tender and flaky as scones should be.  I would feed these to anyone skeptical that vegan baking is as good as traditional baking.  Sooo good.  These would make the perfect Saturday morning treat, baking them in your pjs and enjoying them while relaxing sounds perfect.  But of course you can make them right now too if you can’t wait.

    Vegan Chocolate Hazelnut Scones

    Vegan Chocolate Hazelnut Scones
    Makes 8

    2 3/4 cups all purpose gluten free flour
    1/4 cup raw cacao powder
    1/2 cup coconut sugar
    2 1/2 tsp baking powder
    1/4 tsp salt
    1/2 cup virgin coconut oil, cut into chunks
    1/4 cup chocolate hazelnut butter or hazelnut butter
    1 cup cold full fat organic canned coconut milk (whisked until smooth if chunky)
    1 Tbsp pure vanilla extract
    1/4 cup coconut sugar
    coconut milk for topping
    coconut sugar for sprinkling
    1 cup chopped, toasted hazelnuts
    1 cup vegan chocolate chips

    Preheat oven to 425F with the rack set at the middle position. Line a baking sheet with parchment.
    To a large bowl, add the flour, sugar, baking powder, and salt. Cut in the coconut oil with a pastry blender or 2 knives until the mixture starts to clump into pea sized pieces. In a small bowl, stir the vanilla into the coconut milk. Add the coconut milk to the dough, as well as the hazelnut butter, hazelnuts and chocolate chip, and stir a few times, but do not overmix. The dough should hold together when squeezed, but still be clumpy (you want pieces of coconut oil and hazelnut butter).
    Place dough on a piece of parchment, and shape (by patting and pushing together) into a circle. Cut into 8 wedges, and place on a parchment lined baking tray. Brush the tops lightly with the coconut milk (only if they seem dry, you want the sugar to stick), and sprinkle with coconut sugar. Bake for about 20 minutes or until golden brown. Cool on a wire rack.


  • Vegan Chocolate Hazelnut Berry Cake

    Vegan Chocolate Hazelnut Berry Cake

    The best things in life are free.  Going for a run and taking in the fresh air.  Smelling the lilacs. The sunshine. Taking in the beauty of nature God has created.  I have been appreciating all of this lately.  Work can be busy and stressful, bills can get expensive, and things don’t always go as planned in your life, but the little free things that make me happy are always there.  I am not picky, and it doesn’t take a lot to keep me happy and content.  You know what else makes me happy?  Cake. It isn’t always free, because it costs money to make it but it is still happiness on a plate, and more fun to make yourself.  I was hard core craving chocolate cake last weekend, so I made one.

    Chocolate Hazelnut Cake 2

    A chocolate hazelnut cake with berries.  Because I had berries on hand, and home made Nutella sounded fabulous.  I made decadent chocolate cake layers, which were actually oil free since I used hazelnut butter instead of the oil which gave the cake a nutty flavor.  For the frosting, just a simple mixture of dates, hazelnut butter, cacao powder, water and sea salt.  The most delicious chocolate frosting that tastes just like Nutella and works perfect for spreading smoothly over your cake.  That is if it all makes it onto the cake, you may be tempted to just eat it with a spoon.

    Chocolate Hazelnut Cake 1

    I filled the cake with fresh strawberries and blackberries, and OMG, was the combination ever heavenly.  It was the perfect Sunday night treat.  This was the chocolate cake I had been dreaming of for a week.  Happiness on a plate.  You will be in your happy place if you eat this cake.  Feel free to use whatever berries you have on hand if you make it, raspberries would be awesome in this as well.

    Chocolate Hazelnut Cake

    Vegan Chocolate Hazelnut Berry Cake

    Makes 1 6 inch 2 layer cake

    2 6 inch cake pans

    Cake:
    1 1/2 cups quinoa flour (or all purpose gluten free flour works also)
    1/4 cup cacao powder or unsweetened cocoa powder
    1 1/2 tsp baking soda
    1 tsp baking powder
    1/2 tsp sea salt
    1 cup packed soft medjool dates, pitted, soaked in water for 30 minutes and 1/2 cup of the water reserved
    1/4 cup raw hazelnut butter (smooth)
    1 Tbsp pure vanilla extract
    1 cup filtered water
    2 Tbsp apple cider vinegar

    Frosting
    3/4 cup pitted medjool dates, soaked in water for 30 minutes, and 3/4 cup of the water reserved
    1 cup raw hazelnut butter (smooth)
    1/2 Tbsp cacao powder
    pinch sea salt

    Filling:
    3/4 cup organic blackberries and strawberries (strawberries quartered)

    Preheat the oven to 375F degrees and position rack in center of oven. Line the bottoms of two six-inch-diameter cake pans with 2-inch-high sides with parchment paper. Coat parchment paper and pan sides lightly with coconut oil so that the cake doesn’t stick. Whisk flour, cacao powder, baking powder, baking soda, sea salt in a large bowl to blend well. Place dates, reserved water, hazelnut butter, water, and vanilla extract into a blender, and blend until smooth, then whisk this blended mixture into the flour mixture until well blended. Whisk in the cider vinegar until bubbles form. Transfer cake batter to prepared pans and bake cakes until tester inserted into center comes out clean, about 30 minutes. Cool cakes completely in pan on rack, about 1 hour. Cut around sides of pan to loosen. Turn cakes out onto platter; peel off parchment paper.
    Meanwhile, to make the frosting, combine all ingredients in a high speed blender or food processor and blend until smooth (since hazelnut butters and dates can vary, if the frosting is too thin, add a little more cacao powder, too thick, add a little more water).
    To assemble, place one cake layer on a plate, and spread about 3/4 cup of the chocolate chip frosting over it. Place the strawberries and blackberries on top of it. Place the other cake layer over that, and spread the rest of the frosting over the top and down the sides of the cake. Decorate the top of the cake with more berries if desired, and serve!


  • Raw Hazelnut Chocolate Mylk

    Raw Hazelnut Chocolate Mylk

    My boyfriend Eric has always been a big milk drinker, and even though dairy bothers his stomach, he still won’t give it up for long.  I am always trying to get him to buy plant based vegan milks, because of course I don’t believe in drinking animal milk in the first place, and I don’t want to see him suffer through stomach issues. Sometimes he does buy them, but he says that he doesn’t care for most of the store bought ones much. I have made him some in the past, and he enjoyed them, so recently I decided to make him some Raw Hazelnut Chocolate Mylk.

    Chocolate Hazelnut Milk 3E

    Chocolate milk is his favorite.  He is a big sweet lover, and can not resist it.  I had never made hazelnut mylk, so it was time to try.  It is relatively simple to make, the only prep is soaking the hazelnuts before blending (and the blending takes all of 2 minutes). So not having time to make this is not an excuse.  It turned out sooo good!  Like Nutella milk, but of course healthier.  I used dates to sweeten this so it was just sweet enough, but not so sweet that it was overwhelming.

    Chocolate Hazelnut Milk 1E

    I shared some of this mylk with my Mom as well, who said it is great to add to your coffee.  So, for any of you who are buying that artificial creamer stuff…you might want to give this mylk a try in your coffee. I always thought the artificial hazelnut creamer was gross when I used to drink coffee but this is the real deal, and it will make your coffee smell and taste amazing.  Maybe you are like Eric, trying to give up dairy, but you love your chocolate milk.  Well, guess what?  This recipe is just for you.  If you do not have hazelnuts on hand, this will work with any other nut as well.  Almonds, walnuts, cashews…just use your favorite. But if you are going for the Nutella vibe, then use hazelnuts of course.

    Chocolate Hazelnut Milk 4
    Raw Hazelnut Chocolate Mylk
    Makes 3-4 cups

    1 cup raw hazelnuts, soaked for 8 hours in filtered water and drained
    3-4 cups filtered water (depending on how thick you like it)
    4-6 pitted medjool dates (depending on how sweet you want it)
    3 Tbsp raw cacao powder
    1 Tbsp pure vanilla extract

    Combine all ingredients in a high speed blender and blend for 1 minute until smooth (strain if desired, but I like it as is).


  • Vegan Hazelnut Truffle Eggs

    Vegan Hazelnut Truffle Eggs

    Easter is coming up, so I thought it was about time I made some Easter treats.  When I was little, I was never a big fan of the jelly beans and Peeps.  I was all about the chocolate candies.  Reese’s peanut butter eggs were my favorite.  I have made my own before in recent years and they were wonderful and even better than the store bought ones.  So I thought why not make a twist on those and use hazelnut butter and chocolate for the filling?

    hazelnut chocolate eggs 3

    Sounded good to me, I love home made Nutella, and hazelnuts and chocolate are always a hit with everyone I know. So, I made some pretty simple truffle eggs.  Only 5 ingredients total, so anyone can do this!  If it is not around Easter, you do not have to shape them into eggs, but I think they are cute, and I have fun playing with my food.  It was sort of like molding play dough.

    hazelnut chocolate eggs 4

    For the filling, I used my own home made hazelnut butter, some cacao powder, a touch of maple syrup and sea salt.  It tasted like the most delicious fudge.  I shaped it into eggs, and dipped them into vegan dark chocolate.  I used a brand I am currently in love with that is local to me, LUV dark chocolate. It is sugar free, made from good ingredients and my favorite go to chocolate indulgence simple snack lately.

    hazelnut chocolate eggs 2

    The eggs were sooo good!  It would have been awesome to have treats like these in my Easter basket as a kid, and I would have loved them.  They are right up there with the peanut butter eggs! What is your favorite Easter candy?

    hazelnut chocolate eggs

    Vegan Hazelnut Truffle Eggs

    Filling:

    1 cup hazelnut butter*

    2/3 cup cacao powder or as needed*

    2 Tbsp maple syrup (or to taste)

    pinch sea salt

    Coating:

    1 cup chopped good quality vegan dark chocolate

    In a bowl, mix together the filling ingredients until smooth.  You want it to be the consistency of dough so you can shape it into eggs.  If it is too soft add a little more cacao powder, too hard, a little a touch of water or a little more maple syrup. Shape into 10 eggs, and place on a foil lined tray.  Refrigerate for about 30 minutes to chill.  Once the filling has chilled, melt the dark chocolate in the top of a double boiler.  Dip each egg into the melted dark chocolate, then place it back on the tray.  Allow the chocolate to set, which will happen faster if you pop them in the freezer for about 10 minutes. Store in the refrigerator in a sealed container for up to a month.

    *Since hazelnut butter varies in how smooth it is, the cacao powder amount may vary in this recipe.

    To make your own hazelnut butter, place 3 cups hazelnuts into  a high speed blender and blend until smooth, using the tamper to press them down into the blades (if you need to add a little (like a Tbsp at a time) hazelnut, walnut or almond oil to make it smoother if it seems too dry and is not blending smoothly).  You can also make it in a food processor, but keep in mind it will take a long time, and you have to scrape it down a lot.  Also, it will most likely not get very smooth.

    **If you want to make this recipe raw, use raw hazelnut butter, raw cacao powder, and raw dark chocolate.  When melting the dark chocolate be sure that it stays below 115F degrees.


  • Vegan Hazelnut Butter Cardamom Chocolate Chunk Cookies

    I bought a big old bag of hazelnuts recently, just to switch things up a bit. I am usually always buying almonds or walnuts, but the hazelnuts just sounded really good.  I toasted a big pan to use in recipes, then ended up making most of it into hazelnut butter…which was really good.  I snacked on some of it, but I decided that it also needed to be used in a delicious dessert as well.

    IMG_1606

    I had cookies in mind.  you know, like peanut butter cookies but with hazelnut butter?  I am more of a soft cookie person so it sounded fabulous to me.  They weren’t just going to be plain though.  I wanted to include chocolate chunks as well.  I could have made them really chocolaty and made the dough chocolate too, which would have made Eric even happier, but I am the type of person who likes balance.  So the chocolate chunks in the non-chocolate dough sounded better at the time.

    IMG_1603

    But that would have even been too plain for me.  Just the chocolate chunks weren’t enough, I decided that cardamom would be lovely in these cookies as well.  It is a warming spice, so perfect for this time of the year.  L. C. Finn’s a local company that makes wonderful extracts recently sent me some to try, and cardamom was one of them, so I put it to use.  Stay tuned, I will be talking more about L.C. Finn’s tomorrow and there will be a giveaway of their extracts!  Anyways, their cardamom extract was awesome I the cookies.  Light, but aromatic.  They smelled amazing and tasted even better.

    IMG_1602

    Vegan Hazelnut Butter Cardamom Chocolate Chunk Cookies

    Makes 12 cookies

    1 Tbsp ground flaxseed
    3 Tbsp filtered water
    1 cup coconut sugar
    3/4 cup Dastony hazelnut butter
    1/4 cup coconut oil, warmed to liquid
    1 tsp L.C. Finns vanilla extract
    1 tsp L.C. Finns cardamom extract (or 1 tsp dried cardamom)
    1 1/4 cups gluten free all purpose flour
    3/4 tsp baking soda
    1/2 tsp baking powder
    1/2 tsp sea salt
    1 cup vegan chocolate chunks or chips

    In a small bowl, whisk together the flax seed and water.  Place the bowl in the fridge for 15 minutes, this is your flax egg.
    In a large bowl, with a wooden spoon, mix together the sugar, hazelnut butter, coconut oil, vanilla and flax egg, until smooth.  Then mix in the flour, soda, baking powder, and sea salt in until the mixture is smooth.  Stir in the chocolate chunks or chips.
    Preheat the oven to 375F degrees.  Line a sheet pan with parchment.
    Shape the cookie dough into 2 inch balls, place on your baking sheet a few inches apart and flatten slightly with your hand.
    Place in the oven and bake at 375 for 12 minutes or so, until lightly browned and set.  Allow to cool completely on a rack.


  • Vegan Triple Berry Cobbler with Hazelnut Biscuits

    Vegan Triple Berry Cobbler with Hazelnut Biscuits

    Triple Berry Cobbler
    I was craving something fruity…like a pie or crumble, but I was also craving scones…what to make?  This is what I was thinking about on my walk after work on Friday.  I had lots of berries and I knew I was going to use those, but I equally wanted a pie (for all of that jammy delicious filling) and scones.  But then it hit me.  Cobbler!  I hadn’t made one in ages, at least 4 years.  But I used to love them!
      Triple Berry Cobbler 3 
    I could have my jammy filling and scones on top of it (since I use a dough similar to scones for my biscuits).  It was perfect!  I had some strawberries, blueberries and raspberries, so I decided to throw them all into the filling with a dash of lemon juice and vanilla.  They needed only a little sweetener because they were very flavorful.  For my biscuit topping I used my vegan scone dough, but added in some hazelnut meal for extra flavor and richness.  I have been loving that stuff lately.
    Triple Berry Cobbler 4
    It smelled amazing while baking and when I pulled it out of the oven and it was all bubbling and delicious I was getting really excited.  That is how I get when I haven’t made something in a while (who am I kidding, that is how I get every time I make dessert).  Anyways, it was sooo good!  The fruit was so flavorful, the perfect balance of tart and sweet and the rich biscuits were perfect atop it!  Add some vanilla coconut cream and you have pure heaven in a dish!
    Triple Berry Cobbler 2
    Vegan Triple Berry Cobbler with Hazelnut Biscuits
    Serves 4
    Fruit:
    2 1/2 cups mixed raspberries, strawberries (sliced), and blueberries
    1 Tbsp maple syrup
    2 Tbsp gluten free all purpose flour
    1/2 Tbsp lemon zest
    1 Tbsp lemon juice
    1 tsp pure vanilla extract
    biscuit topping:
    3/4 cup gluten free all purpose flour
    1/2 cup hazelnut meal
    2 Tbsp coconut sugar
    1/2 tsp plus 1/8 tsp baking powder
    1/8 tsp sea salt
    2 Tbsp solid coconut oil, cut into chunks
    1/4 cup cold full fat coconut milk (chilled in the fridge is best), mixed well
    1 tsp pure vanilla extract
    6 inch wide ovenproof bowl or pie plate
    Preheat oven to 400 degrees with the rack at the center position. Place a baking sheet lined with foil on the rack. Oil a 6 inch wide pie plate or bowl with coconut oil. In a large bowl, toss together the fruit, maple syrup, lemon juice and zest, vanilla, flour. Spoon into prepared bowl or pie plate, and cover with foil. Place plate on baking sheet and bake for 45 minutes until fruit is cooked through and bubbling.
    Meanwhile, when the fruit in the oven is almost at 45 min, to make biscuits, in a large bowl, combine the flour, hazelnut meal, sugar, baking powder, and salt. Cut in the oil with a pastry blender or 2 knives until the mixture starts to clump into pea sized pieces. In a small bowl, stir the vanilla extract into the coconut milk. Add the milk to the dough, and stir a few times, but do not overmix. The dough should hold together when squeezed, but still be clumpy. Place dough on a floured work surface, and pat into a 1/2 inch tall rectangle.
    Remove baking fruit from oven. Cut small shapes out of the dough using a cookie cutter (or free form it), and place on top of the cobbler.  When all biscuits are on top of cobbler, sprinkle with coconut sugar and return to the oven. Bake for about 20 minutes

    until biscuits are cooked through and lightly brown and toasted on top (keep a close eye on they could burn very quickly). Remove from oven and let cool until warm, and top with some ice cream or coconut vanilla whipped cream and…enjoy!


  • Vegan Blueberry Pluot Galette with Hazelnut Oat Crust

    Vegan Blueberry Pluot Galette with Hazelnut Oat Crust

    Blueberry Plulot Gallette 1
    I was really craving some blueberry pie last week.  But I had two problems. First, not enough blueberries to make a whole pie, and second, not enough time to make a pie. Because all that rolling and chilling and shaping, then waiting an hour for it to bake…yeah I did not have time. But I got some pie, just not in the usual form.  I made a galette instead.  A lazy free form pie that requires less time…but tastes equally as good.  I got around the blueberry problem by adding sweet pluots, which are amazing this year.
    Blueberry Plulot Gallette 2
    For the crust I wanted something a little different than the usual plain flour, so I added some hazelnut meal and it made it so buttery and delicious!  It ended up tasting like a shortbread crust with the rich coconut oil and nutty hazelnuts added and melted in my mouth as it was delicate.
    Blueberry Plulot Gallette 3
    The filling was jammy and delicious, the blueberries and pluots melting together into the perfect combination of tart and sweet but not so sweet that you could not taste the fruit.  It was delicious on its own, but the second day I enjoyed it with a dallop of coconut whipped cream left over from another dessert and it was pure heaven.  Two things.  If you have access to pluots this year, buy some they are amazing. And…you have to try making this. It is so good.  If you are not a typical baker and are worried about neatness, no worries.  This is a non-fussy not meant to look perfect dessert.
    Blueberry Plulot Gallette 4
    Vegan Blueberry Pluot Galette with Hazelnut Oat Crust
    2 galettes
    Crust:
    3 cups oat flour
    1 cup hazelnut meal
    1/4 cup coconut sugar
    1 tsp sea salt
    3/4 cup coconut oil, in its solid form
    filtered water as needed
    Filling:
    2 cups fresh blueberries
    2 large sliced pluots
    1/3 cup coconut sugar
    1 Tbsp pure vanilla extract
    the seeds of one vanilla bean
    juice of one small lemon
    a pinch of sea salt
    3 Tbsp arrowroot starch

    coconut milk, for brushing
    coconut sugar, for topping

    To make the crust, in a large bowl, mix together flour, meal, sugar, and sea salt.  Cut in coconut oil with a pastry blender or 2 knives until it is in pea sized pieces.  Mix in just enough water to create a smooth dough that holds together but isn’t too sticky.  Add a touch of water if needed, and knead slightly until a smooth dough is created.  Divide into 2 pieces and shape into rounds (if it is too soft, refrigerate for about 15 minutes to firm it up slightly.  You want it pliable, but not super soft or it will be hard to shape).
    Roll each out into a 14 inch round using parchment underneath and floured rolling pin.  If it tears, no worries, just press it back together and patch it up.
    Preheat oven to 400F degrees.  To make filling, mix together all ingredients in a large bowl.  Pour filling into middle of dough rounds (leaving a 1 1/2 inch boarder), then carefully fold up edges to cover the edge of the fruit. Brush edges with a little coconut milk, and sprinkle with sugar.  Place in the oven.  Bake for 45 minutes (checking after 20 and if they are very brown, if they are tent with foil) until bubbling and fruit is tender.  Remove from oven and let cool on a wire rack for at least an hour.


  • Vegan Chocolate Hazelnut Macaroons

    Vegan Chocolate Hazelnut Macaroons

    Hazelnut Chocolate Macaroons 2

    I was given some hazelnut meal and the first thought I had was to pair it with chocolate.  I was always a big fan of Nutella growing up, but I am an even bigger fan of home made hazelnut and chocolate butter. The flavor is just wonderful!  Hence the hazelnut and chocolate choice for the hazelnut meal recipe.  I decided to make simple macaroons.  I had recently made some coconut almond ones and they were awesome, so I thought I would create a similar (yet different tasting) recipe with these.

    Hazelnut Chocolate Macaroons 3

    I liked the texture the other ones I made had, and I had used a mixture similar to vegan marshmallow fluff to make them so I used that again as the base I added the chocolate and hazelnut meal to. I dehydrated the last batch though, because my oven was broken, but now it is fixed so I used that this time to bake the macaroons.  Either way works, and I have included directions for both.  Of course the plus side of the oven is they are done a lot faster.  Once they were baked, I decided that they were not pretty enough looking so I drizzled them with dark chocolate and sprinkled them with hazelnuts. Man were these ever delicious.  They taste like a macaroon and a hazelnut brownie had a baby together…simply heavenly!

    Hazelnut Chocolate Macaroons 4

    Vegan Chocolate Hazelnut Macaroons

    Makes 12

    1/2 cup plus 1 Tbsp reduced aquafaba*

    1 tsp guar gum

    1 tsp pure vanilla extract

    2 1/2 cups hazelnut meal

    1 cup fine coconut sugar

    1/3 cup cacao powder or unsweetened cocoa powder

    1/4 cup vegan dark chocolate, chopped

    chopped hazelnuts for topping

    In a food processor (you may also use a stand mixer for this, I just do not have one), whip the aquafaba to until thick, then add the guar gum and continue to whip or process to stiff peaks.  Add the sea salt, and the sugar a little at a time through the feed tube until it is incorporated, then continue to whip until the mixture is shiny and the sugar has dissolved.  Add the vanilla, and blend until incorporated.  Add the hazelnut meal and the cacao powder a little at a time, pulsing until incorporated (you can fold it in by hand, but I didn’t and it still worked out.  But if you are using a mixer with a whisk attachment you may want to so it doesn’t get all stuck in the whisk).  Scoop out the dough by the rounded Tbsp, and place on a parchment lined sheet pan.  Heat the oven to 350F degrees and bake for 30 minutes in the center of the oven.  (alternatively you may use a dehydrator instead.  Place the cookies on a lined dehydrator tray.  Dehydrate at 155F degrees for about 13-14 hours or until firm on the outside but still soft in the middle). Let cool.

    Melt the chocolate (I like to just pop mine in a bowl in the dehydrator, but if you prefer the double boiler, by all means, use that) in a bowl, and drizzle over the macaroons, then sprinkle them with chopped hazelnuts. Allow to set, and enjoy!  These keep well for a couple of weeks in the refrigerator in a sealed container.

    *Aquafaba is the liquid from cooked or canned chickpeas.  If you are using liquid from the cooked, you want to make sure it is thick (the consistency of egg whites), not watery.


  • Vegan Chocolate Dipped Hazelnut Butter Cookies with Raspberries and a Giveaway!

    Vegan Chocolate Dipped Hazelnut Butter Cookies with Raspberries and a Giveaway!

    Hazelnut Butter

    Windy City Organics was kind enough to send me some Dastony Nut Butters to create recipes with, and I could not have been more excited.  In case you haven’t noticed before I am in love with all things nut butter.  I have at least 6 types in my pantry at all times.  One of the nut butters they sent me was Raw Hazelnut Butter.  Let me tell you, it was the silkiest smoothest hazelnut butter I have ever tried.  It is delicious to enjoy by the spoonful on its own, or swirled into your morning porridge, or added to a smoothie to make it silky, but I wanted to make some cookies out of it.

    Hazelnut Raspberry Cookies 1

    I love peanut butter cookies, so I thought I would make some hazelnut butter cookies.  Sounds upscale doesn’t it.  Well it is kind of special, at least in my mind since hazelnut butter is more unusual than peanut butter.  I made a dough the way I would with peanut butter, but it was extra sweet and delicious thanks to the hazelnut butter.  I decided to add in some dried raspberries for a sort of PB and J effect, and it made it even better.  The tart berries contrasting the sweet cookie dough perfectly.  They smelled amazing while baking.

    Hazelnut Raspberry Cookies 2

    Once they were cooled I could not leave well enough alone, and I decided to dip them in dark chocolate.  OMG…were these ever good!  This is a heavenly combination, and I shared a few with my family who insisted I not share them with anyone else but them.  Trust me, you need to try making these gems.

    Hazelnut Raspberry Cookies

    If this hazelnut butter is sounding pretty good to you right now, I totally understand, and I have the solution.  You can either buy yourself some over at the Raw Guru Store, where they have 15% off all Dastony nut butter flavors if you use the special promo code: davanillacake15 and it is good from now until Monday 7/13!  So you can get a deal on any of the Dastony Nut butters, including the Hazelnut Butter! Not only that, I am giving away a prize pack including one Dastony Sesame Tahini and one Dastony Hazelnut Butter courtesy of Windy City Organics. Just scroll down below the recipe to enter my giveaway! (Open to the USA only, sorry.)

    Hazelnut Raspberry Cookies 4

    Vegan Chocolate Dipped Hazelnut Butter Cookies with Raspberries

    Makes 12 cookies

    1 Tbsp ground flaxseed

    3 Tbsp filtered water

    1 cup coconut sugar

    3/4 cup Dastony hazelnut butter

    1/4 cup coconut oil, warmed to liquid

    1 tsp pure vanilla extract

    1 1/4 cups gluten free all purpose flour

    3/4 tsp baking soda

    1/2 tsp baking powder

    1/2 tsp sea salt

    1 cup dried raspberries

    1/2 cup chopped vegan dark chocolate

    In a small bowl, whisk together the flax seed and water.  Place the bowl in the fridge for 15 minutes, this is your flax egg.

    In a large bowl, with a wooden spoon, mix together the sugar, hazelnut butter, coconut oil, vanilla and flax egg, until smooth.  Then mix in the flour, soda, baking powder, and sea salt in until the mixture is smooth.  Stir in the dried raspberries.

    Preheat the oven to 375F degrees.  Line a sheet pan with parchment.

    Shape the cookie dough into 2 inch balls, place on your baking sheet a few inches apart and flatten with a fork, like you would with peanut butter cookies.

    Place in the oven and bake at 375 for 12 minutes or so, until lightly browned and set.  Allow to cool completely on a rack.

    Melt the chocolate in the top of a double boiler (or your preferred method), and dip half of each of the cookies into the chocolate allowing the excess to drain off.  Set on a parchment lined tray to set the chocolate (it will set faster if you pop them in the freezer for about 5 minutes).

    Hazelnut Raspberry Cookies 5

    a Rafflecopter giveaway