Tag: layer cake

  • Vegan Peanut Butter Chocolate Layer Cake

    Vegan Peanut Butter Chocolate Layer Cake

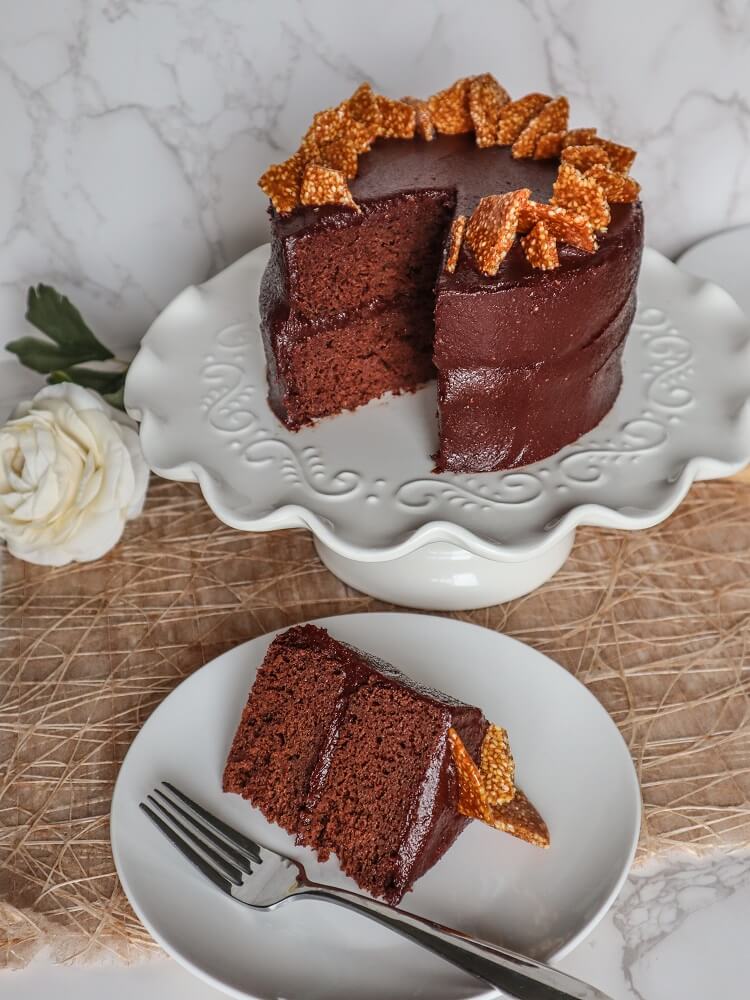
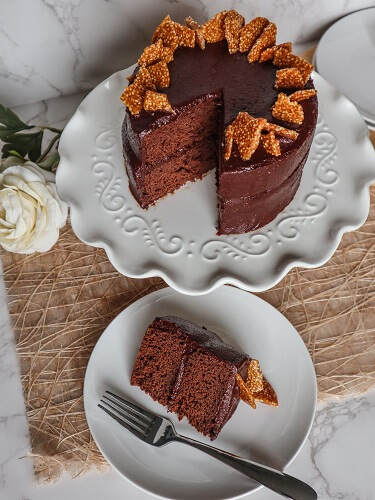
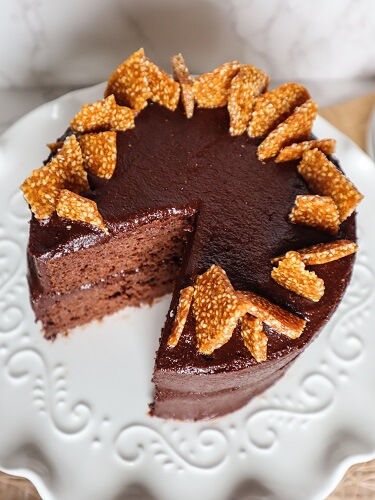
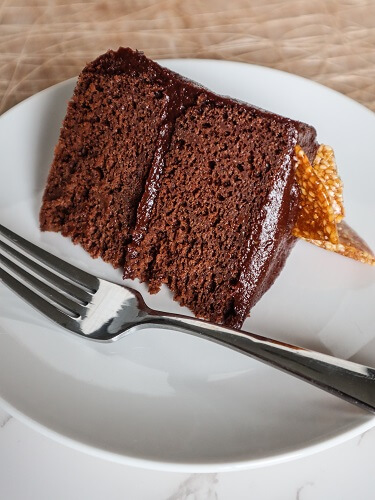
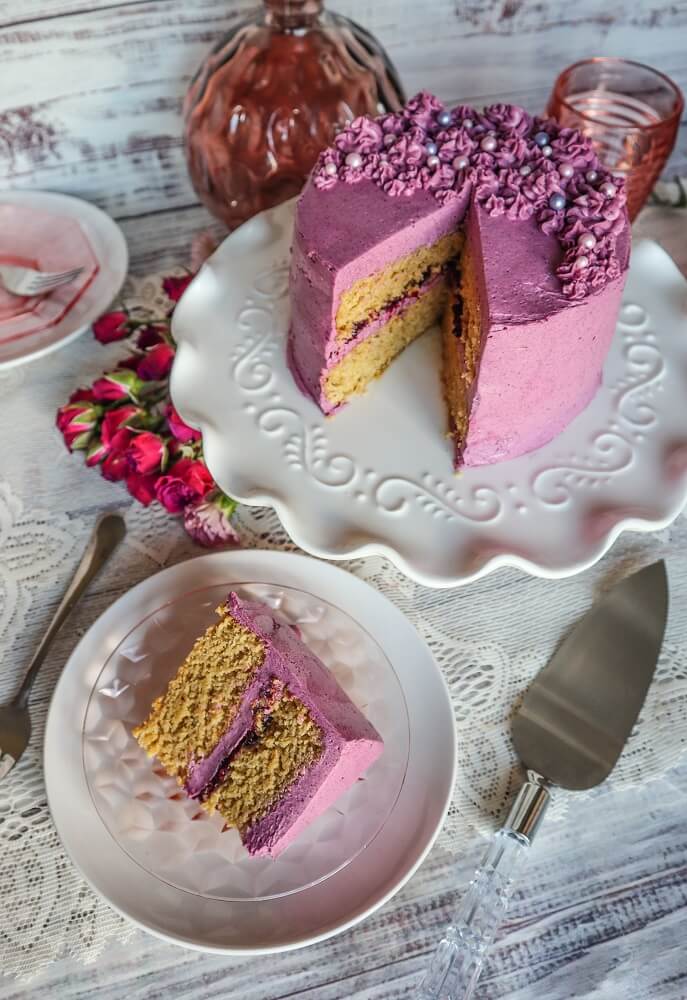
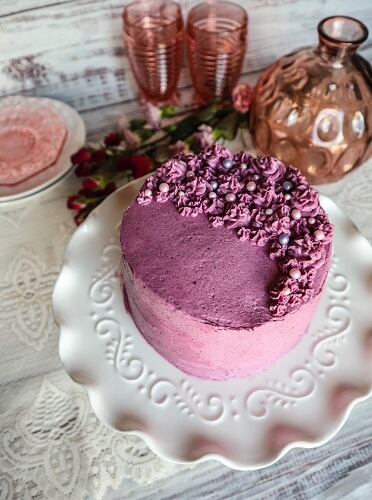
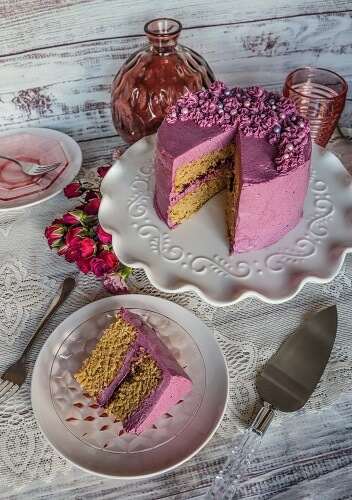
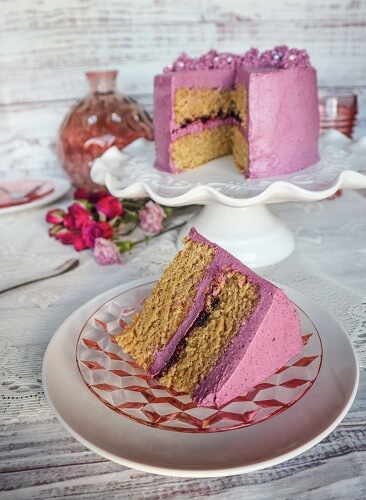
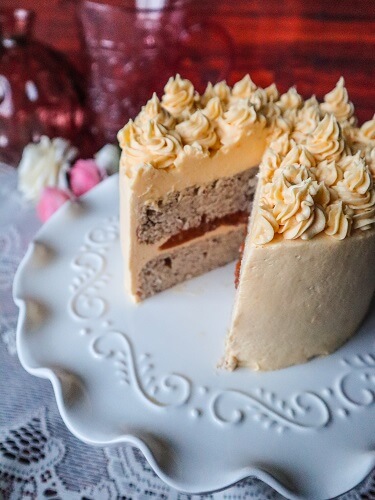
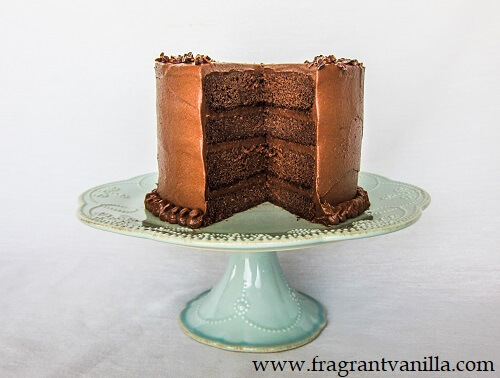
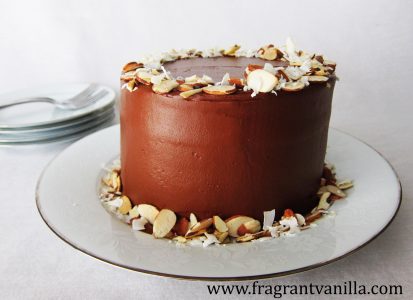
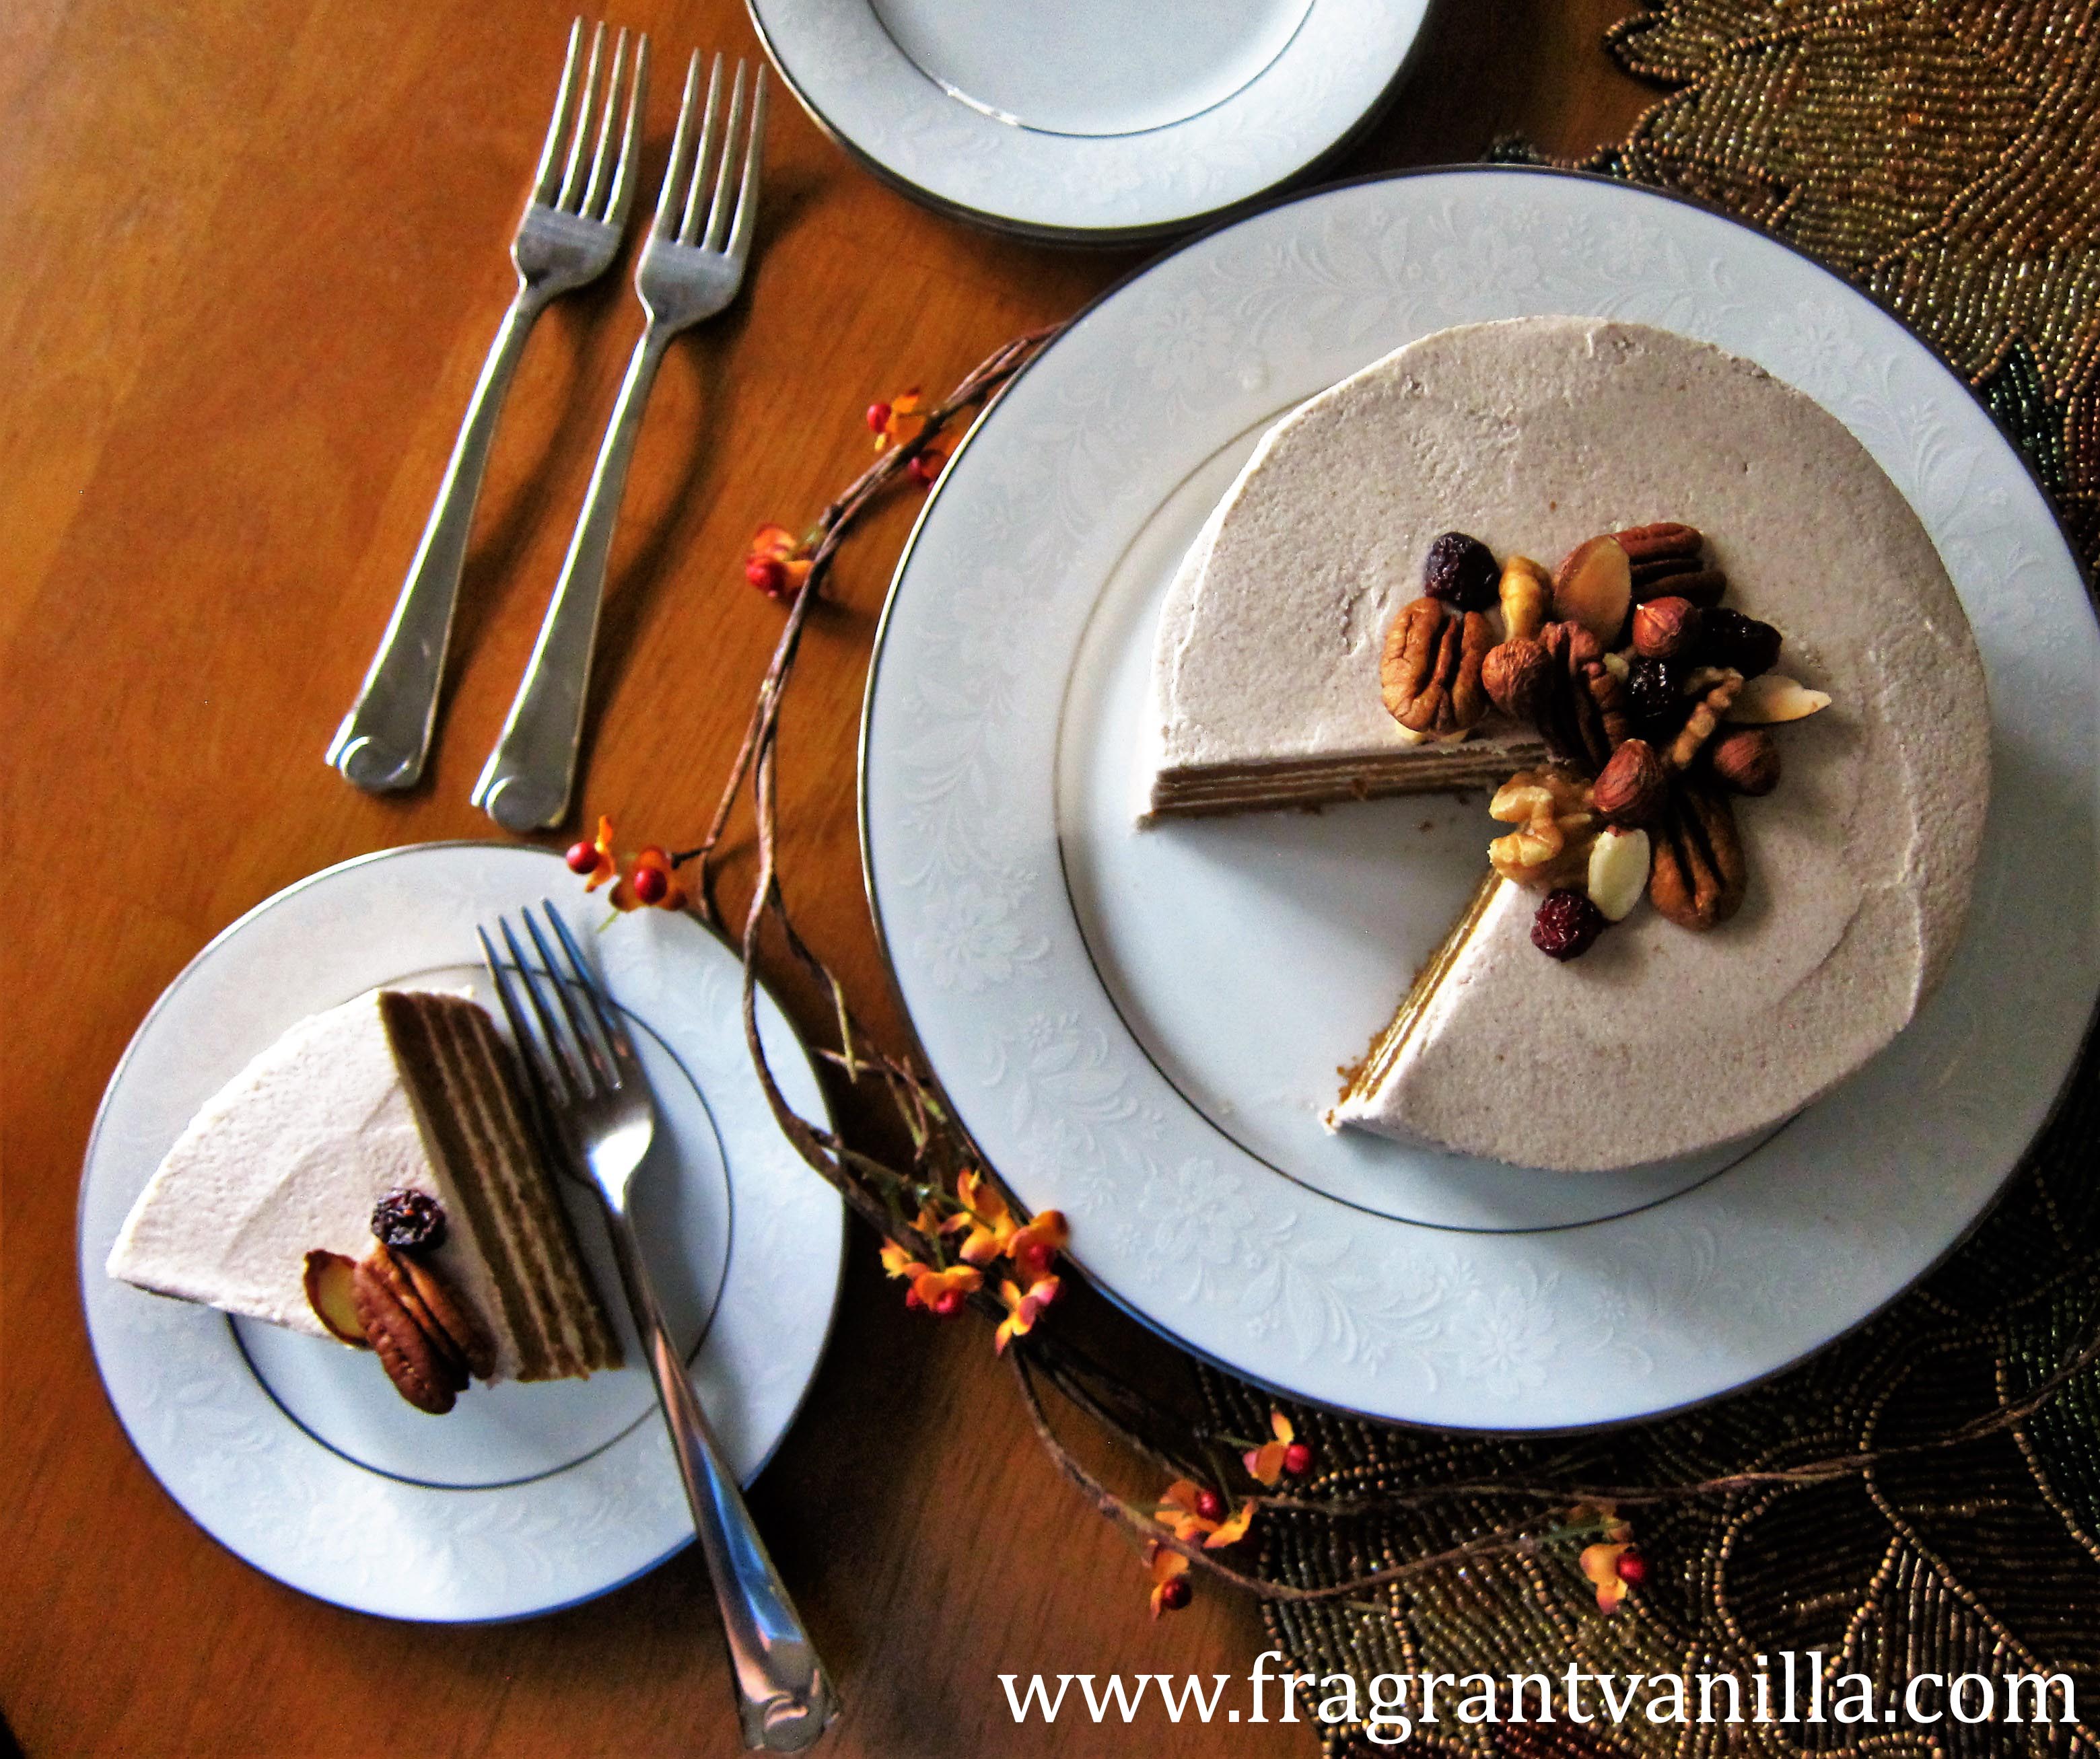
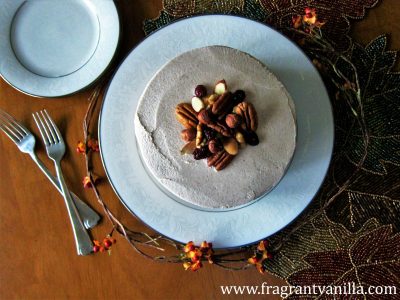
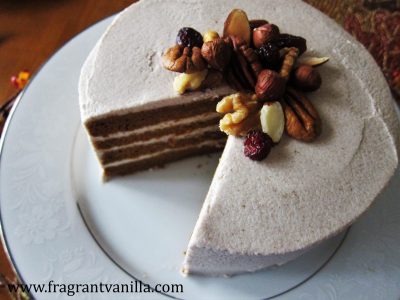
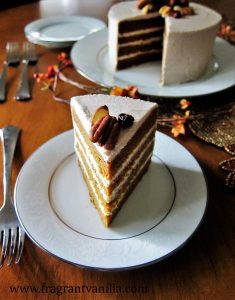
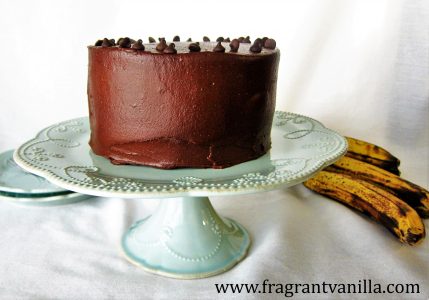
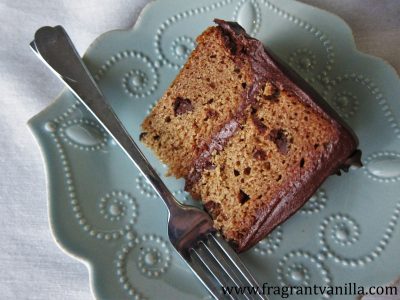
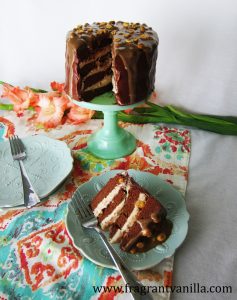
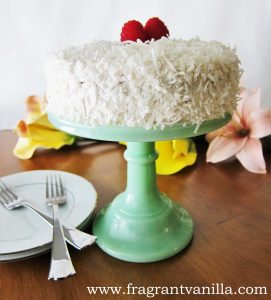
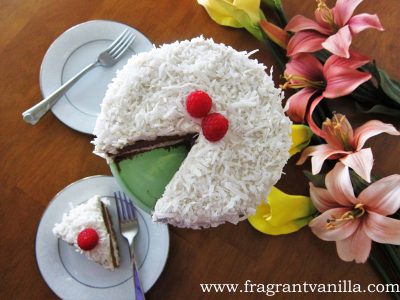
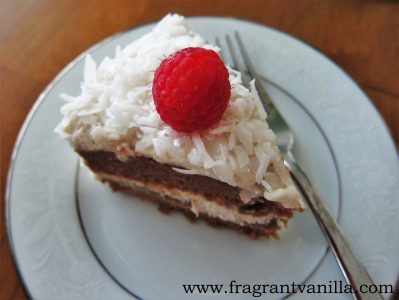
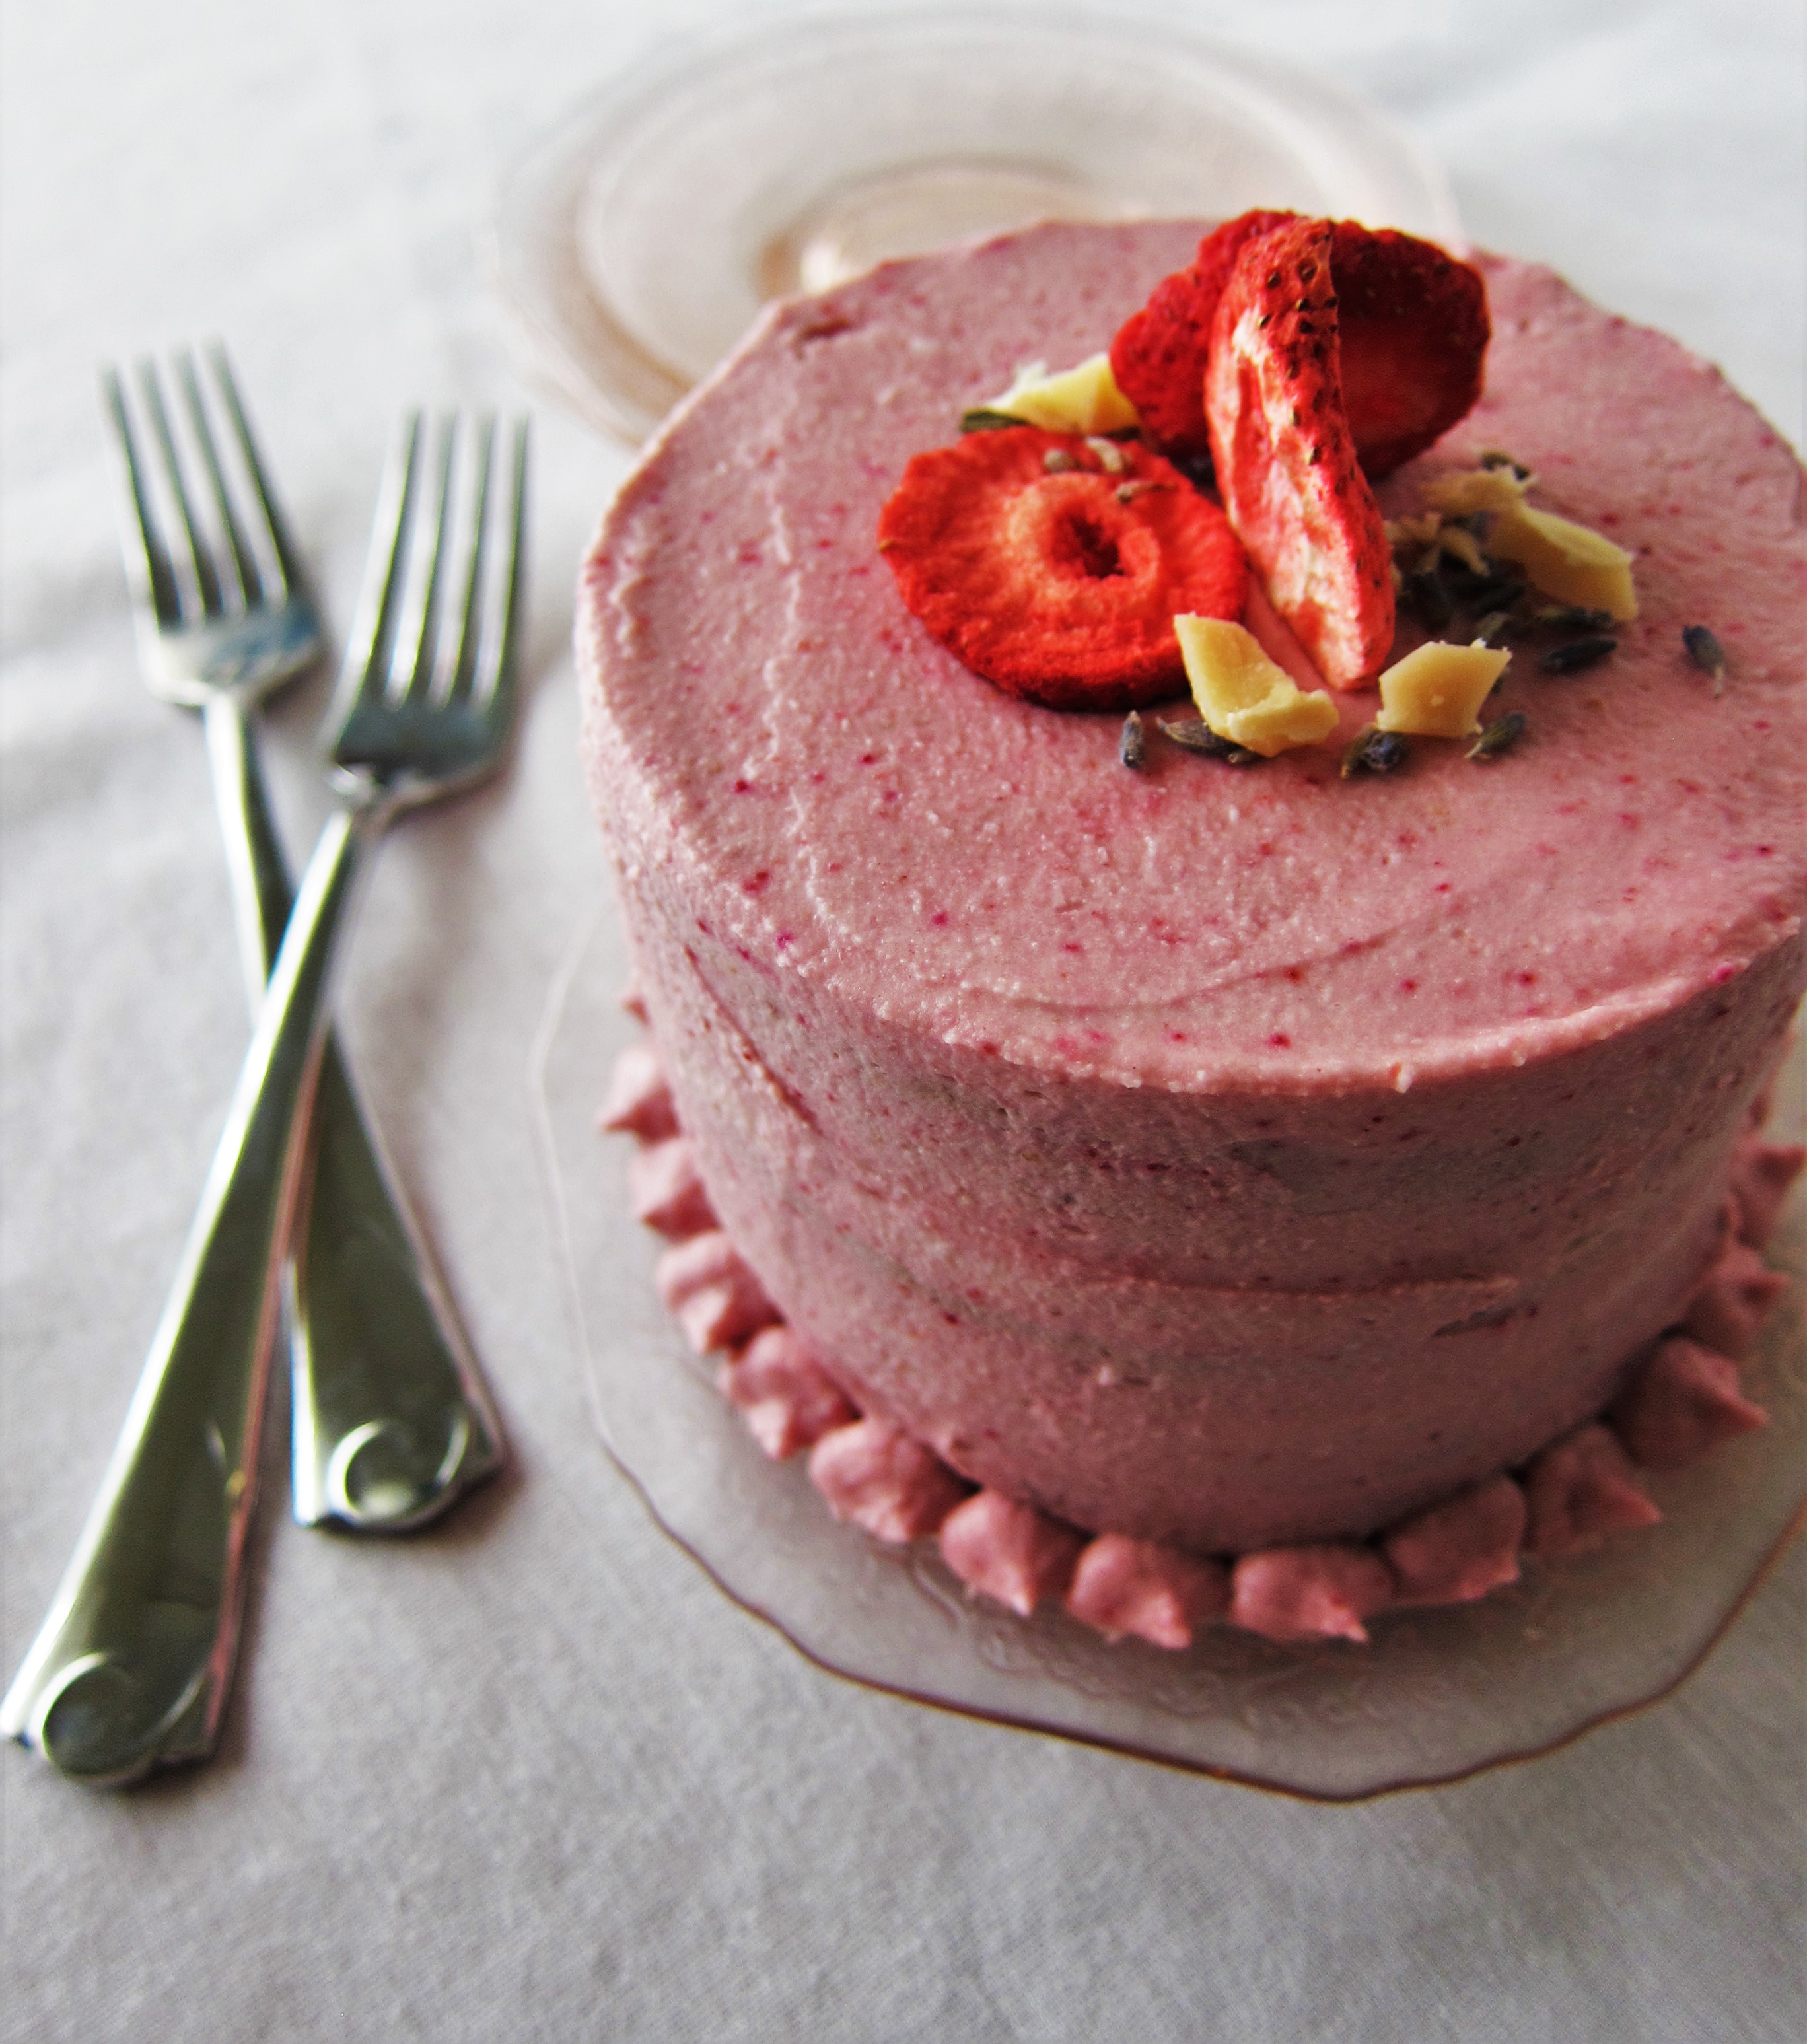
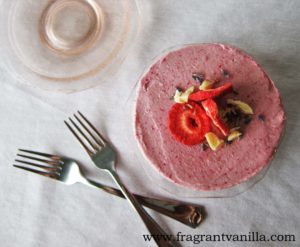
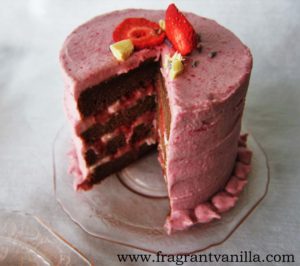
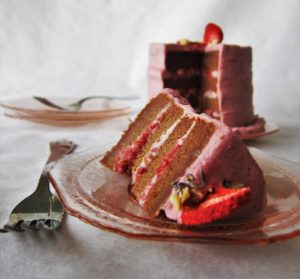
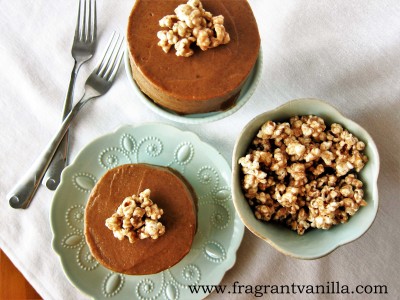
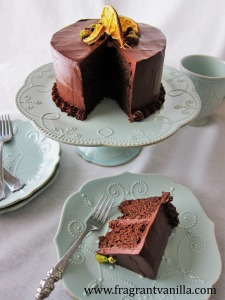
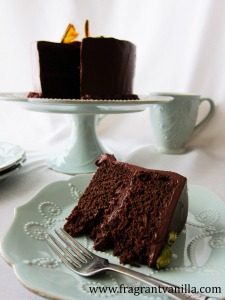
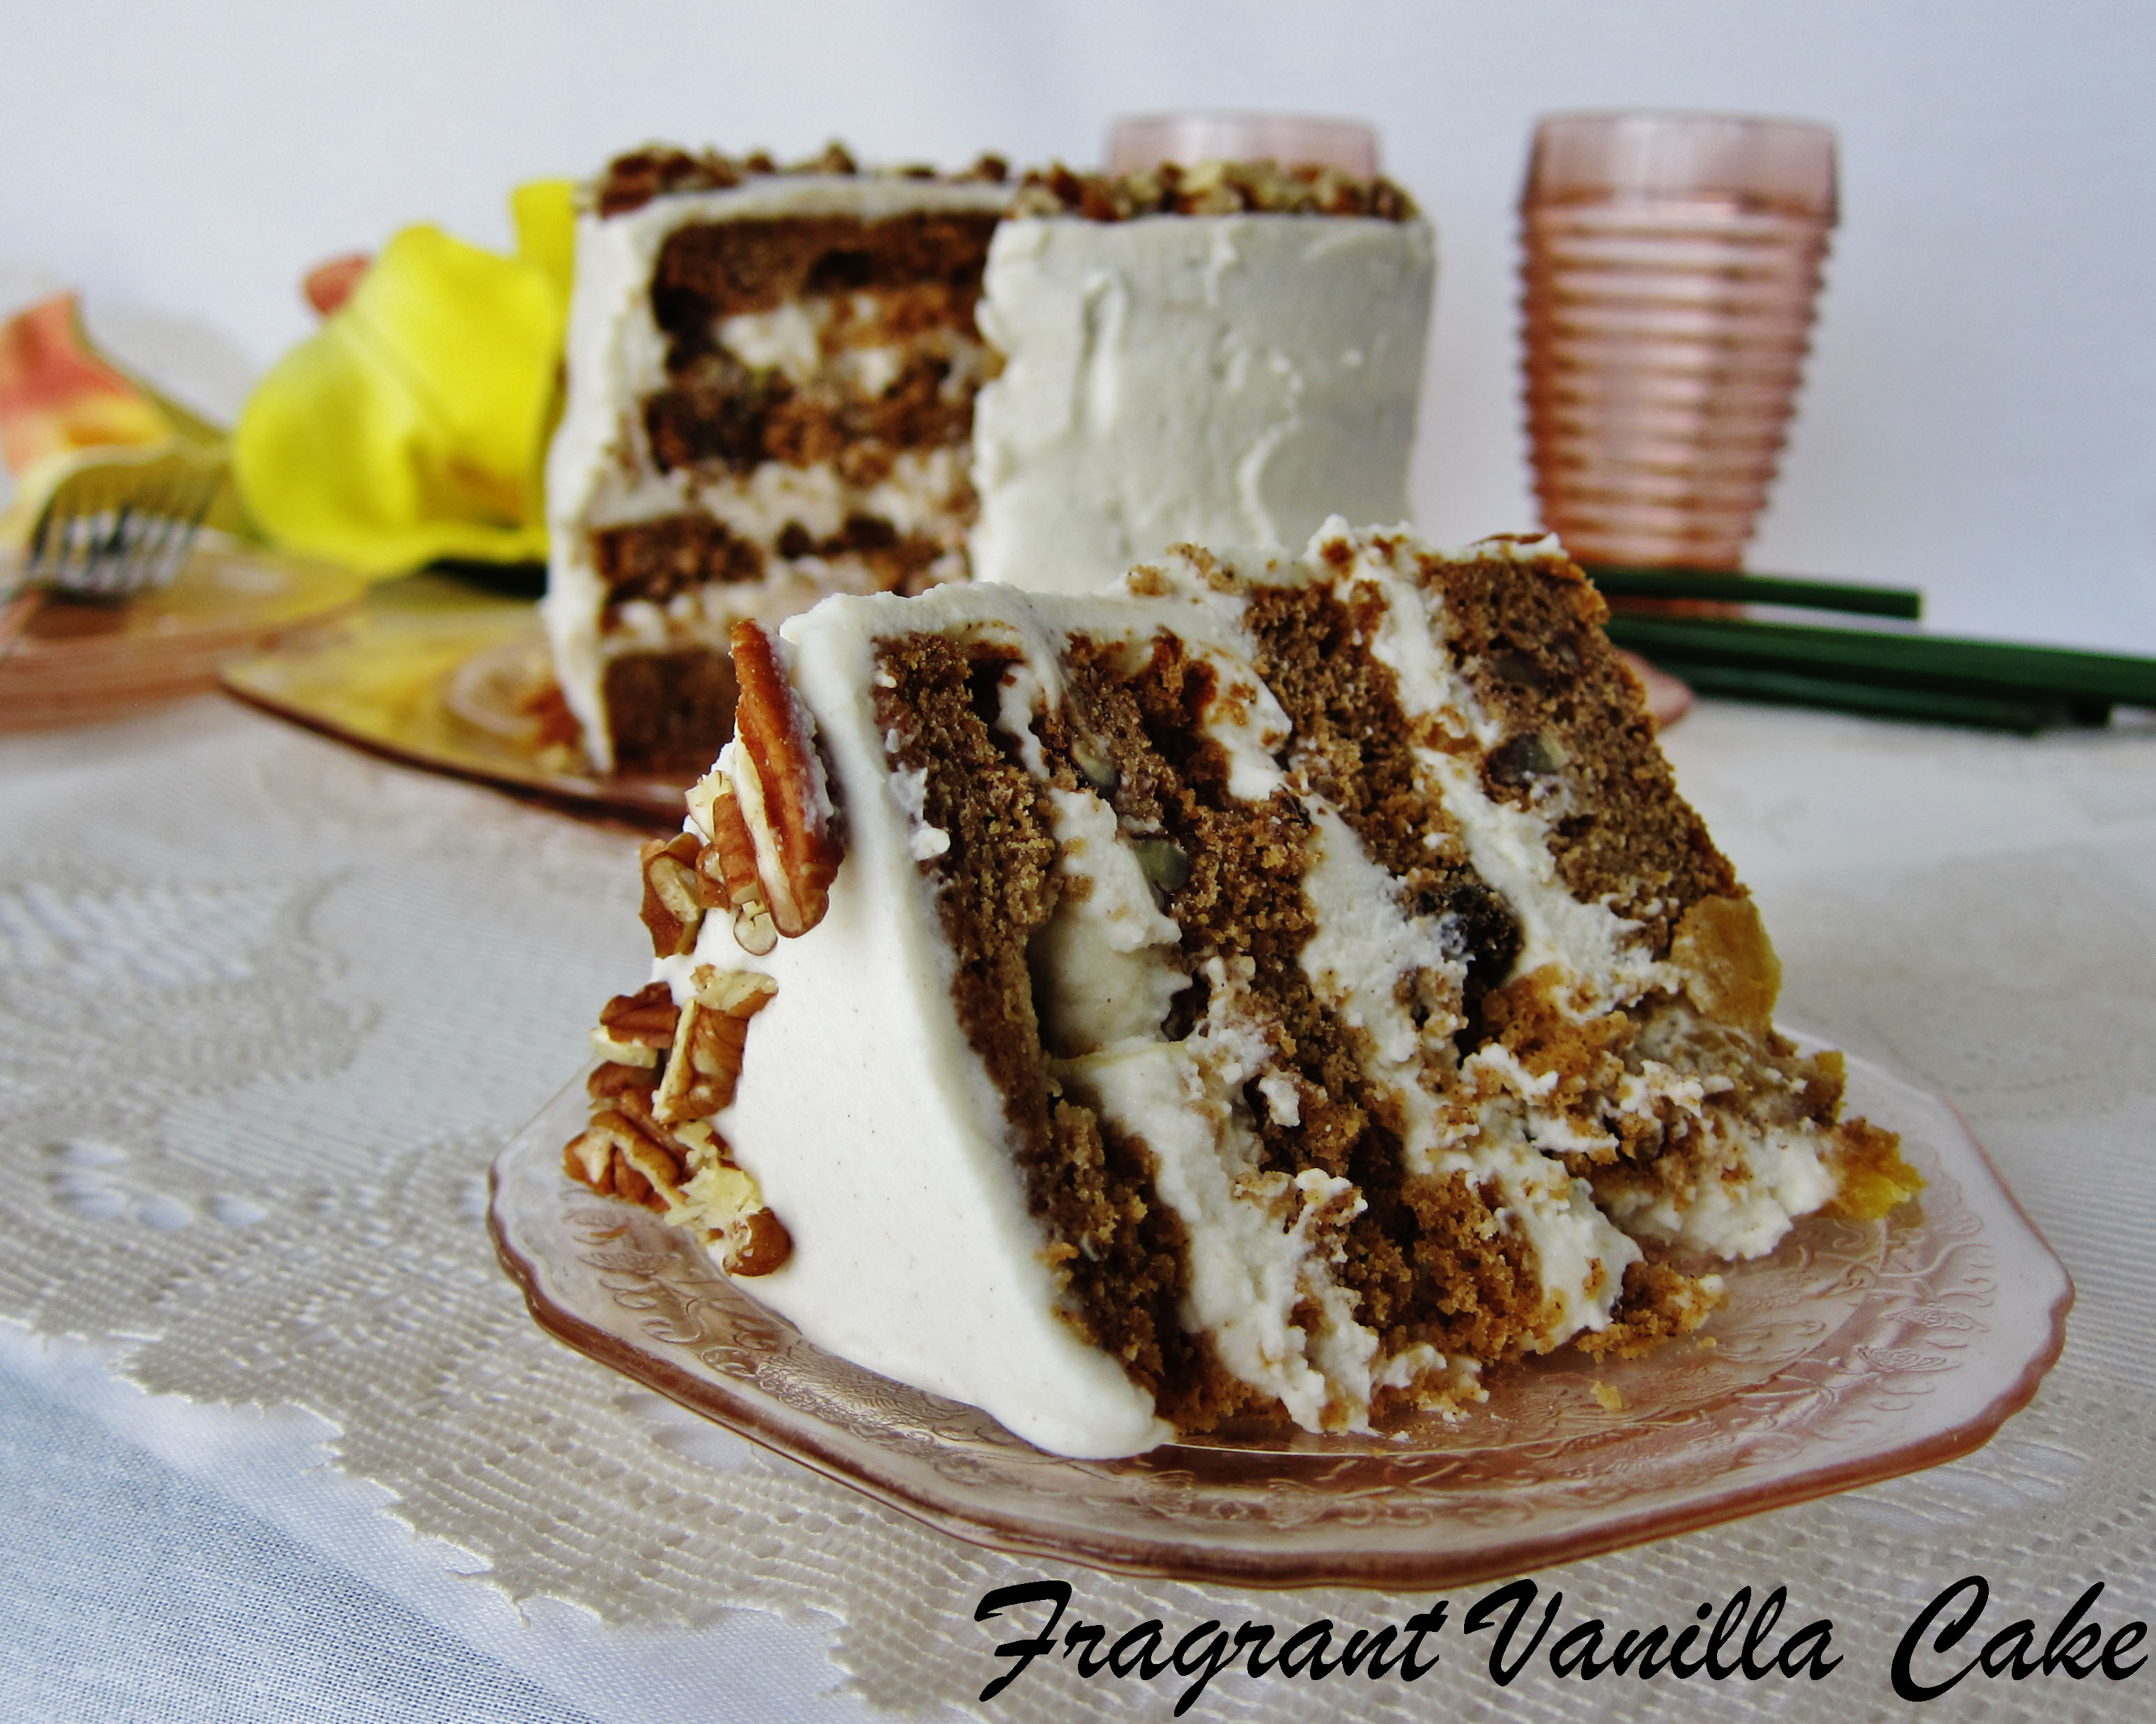
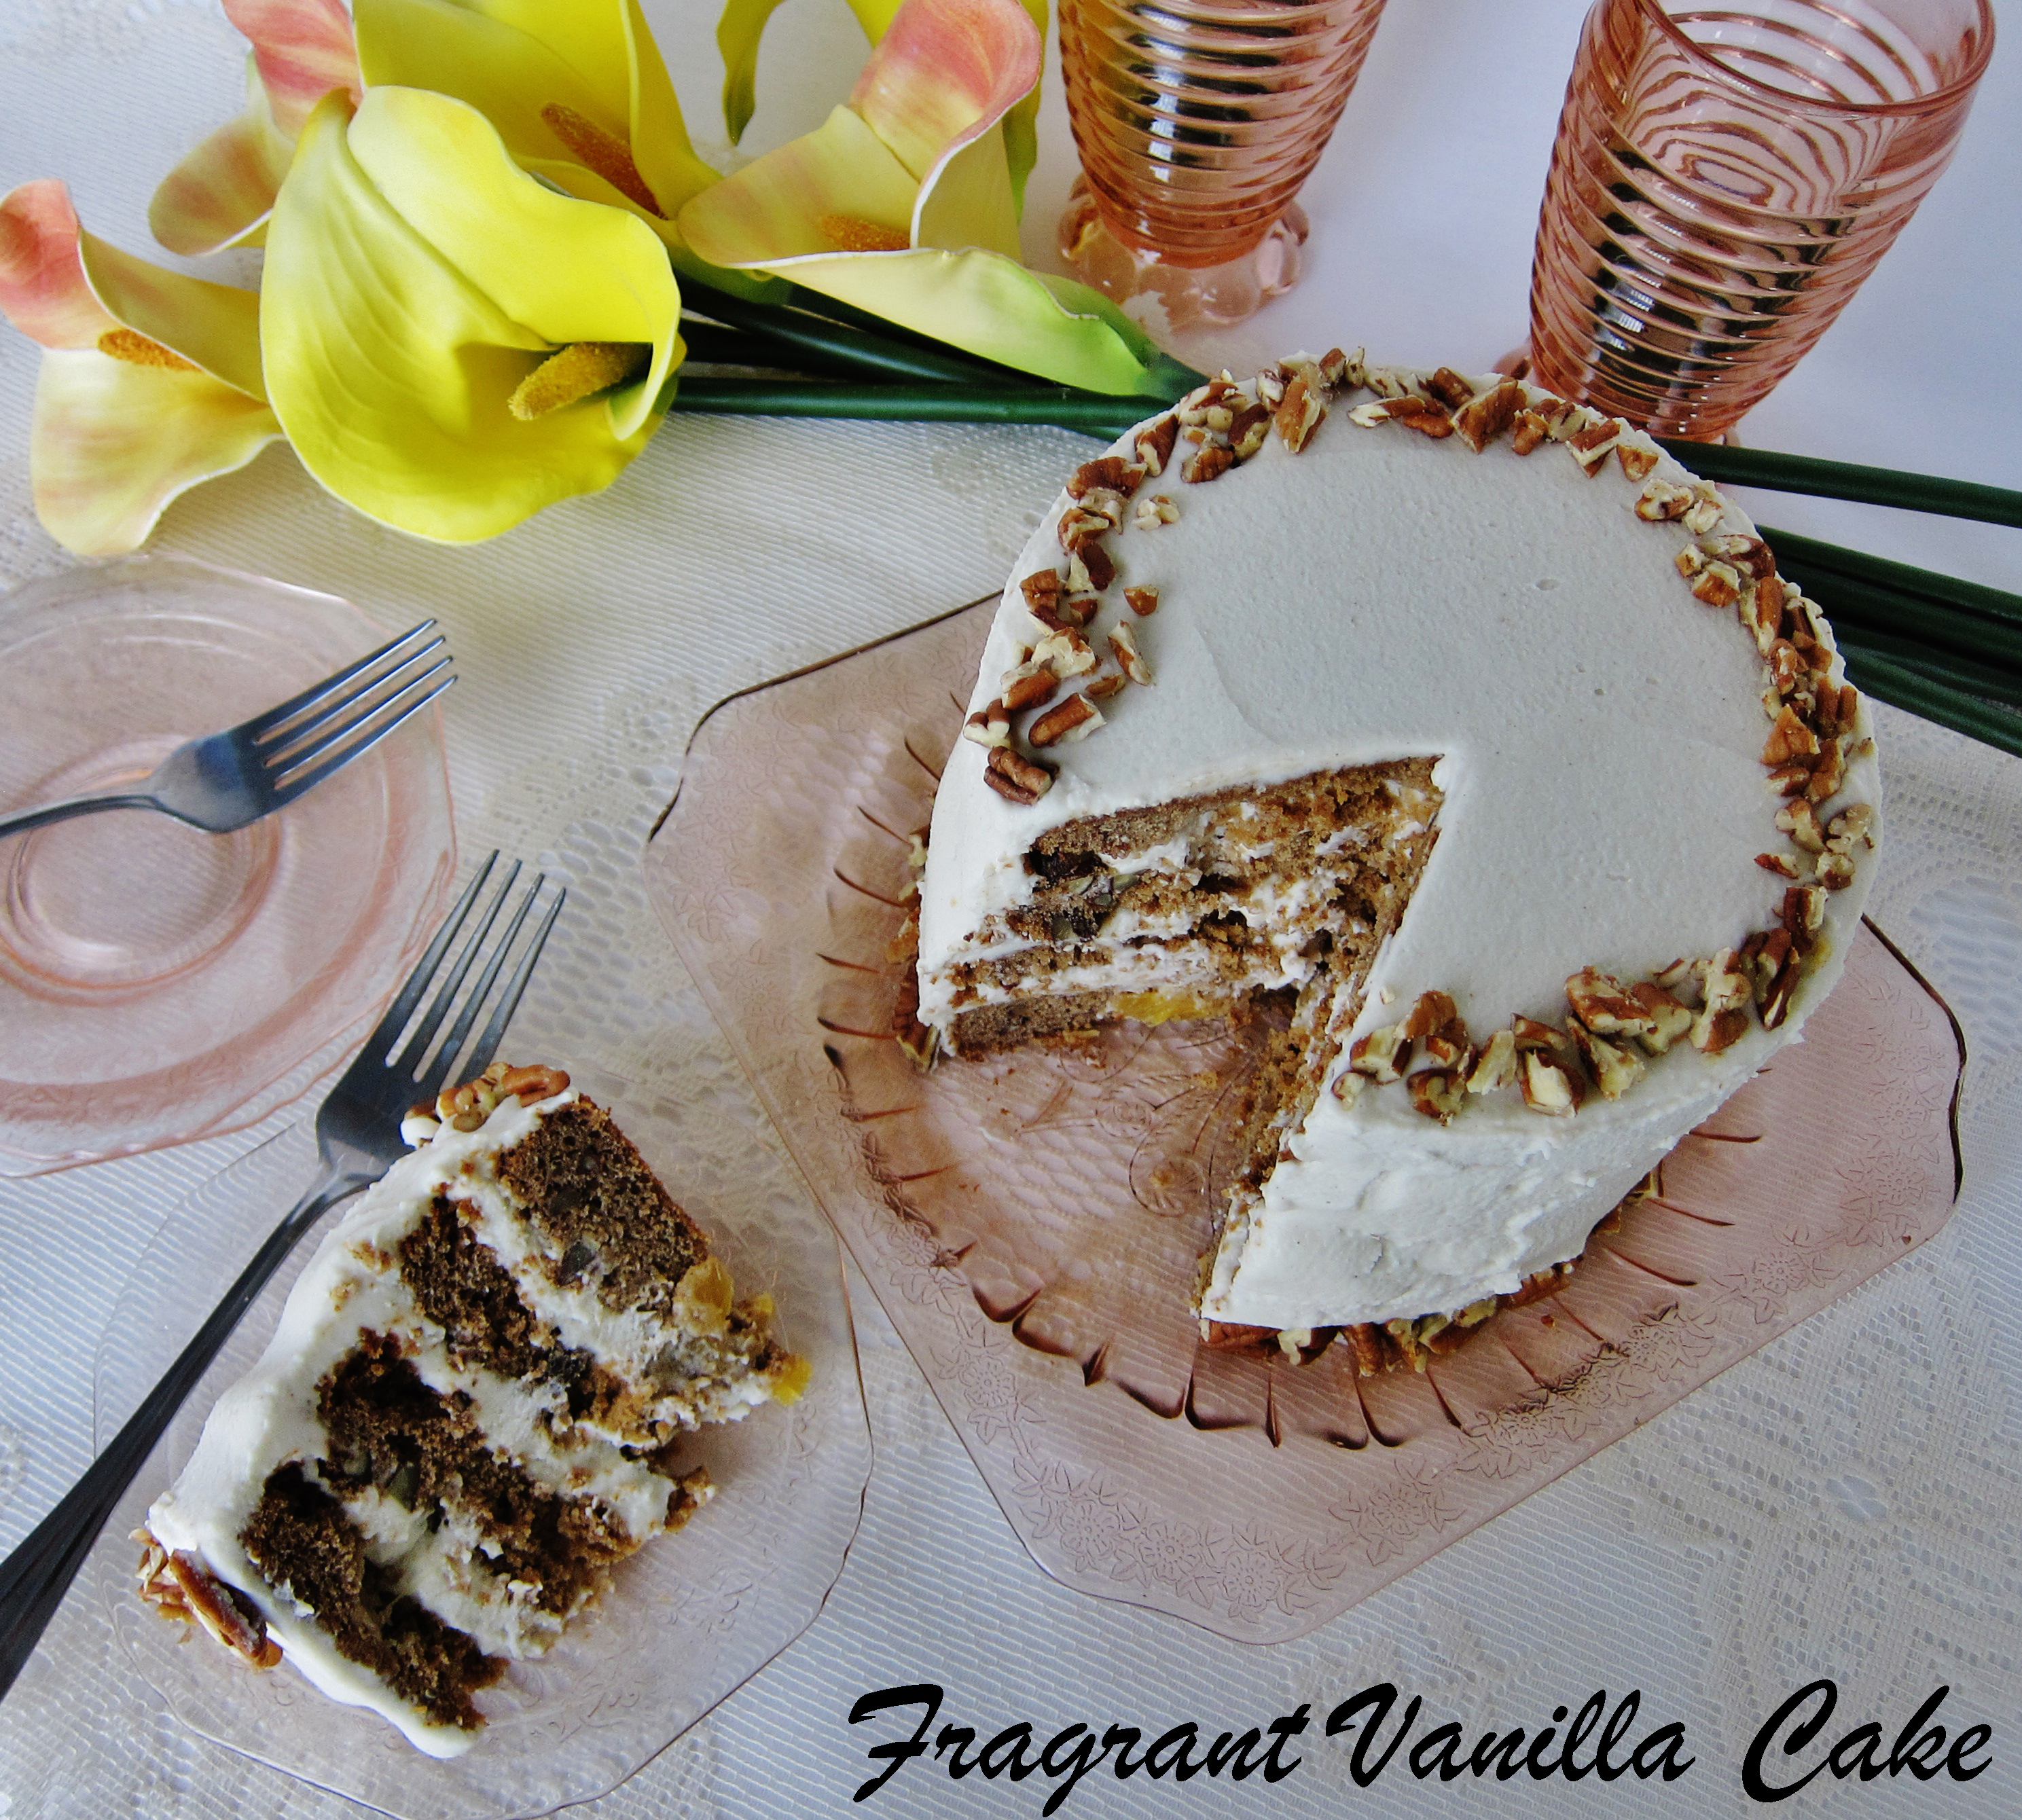
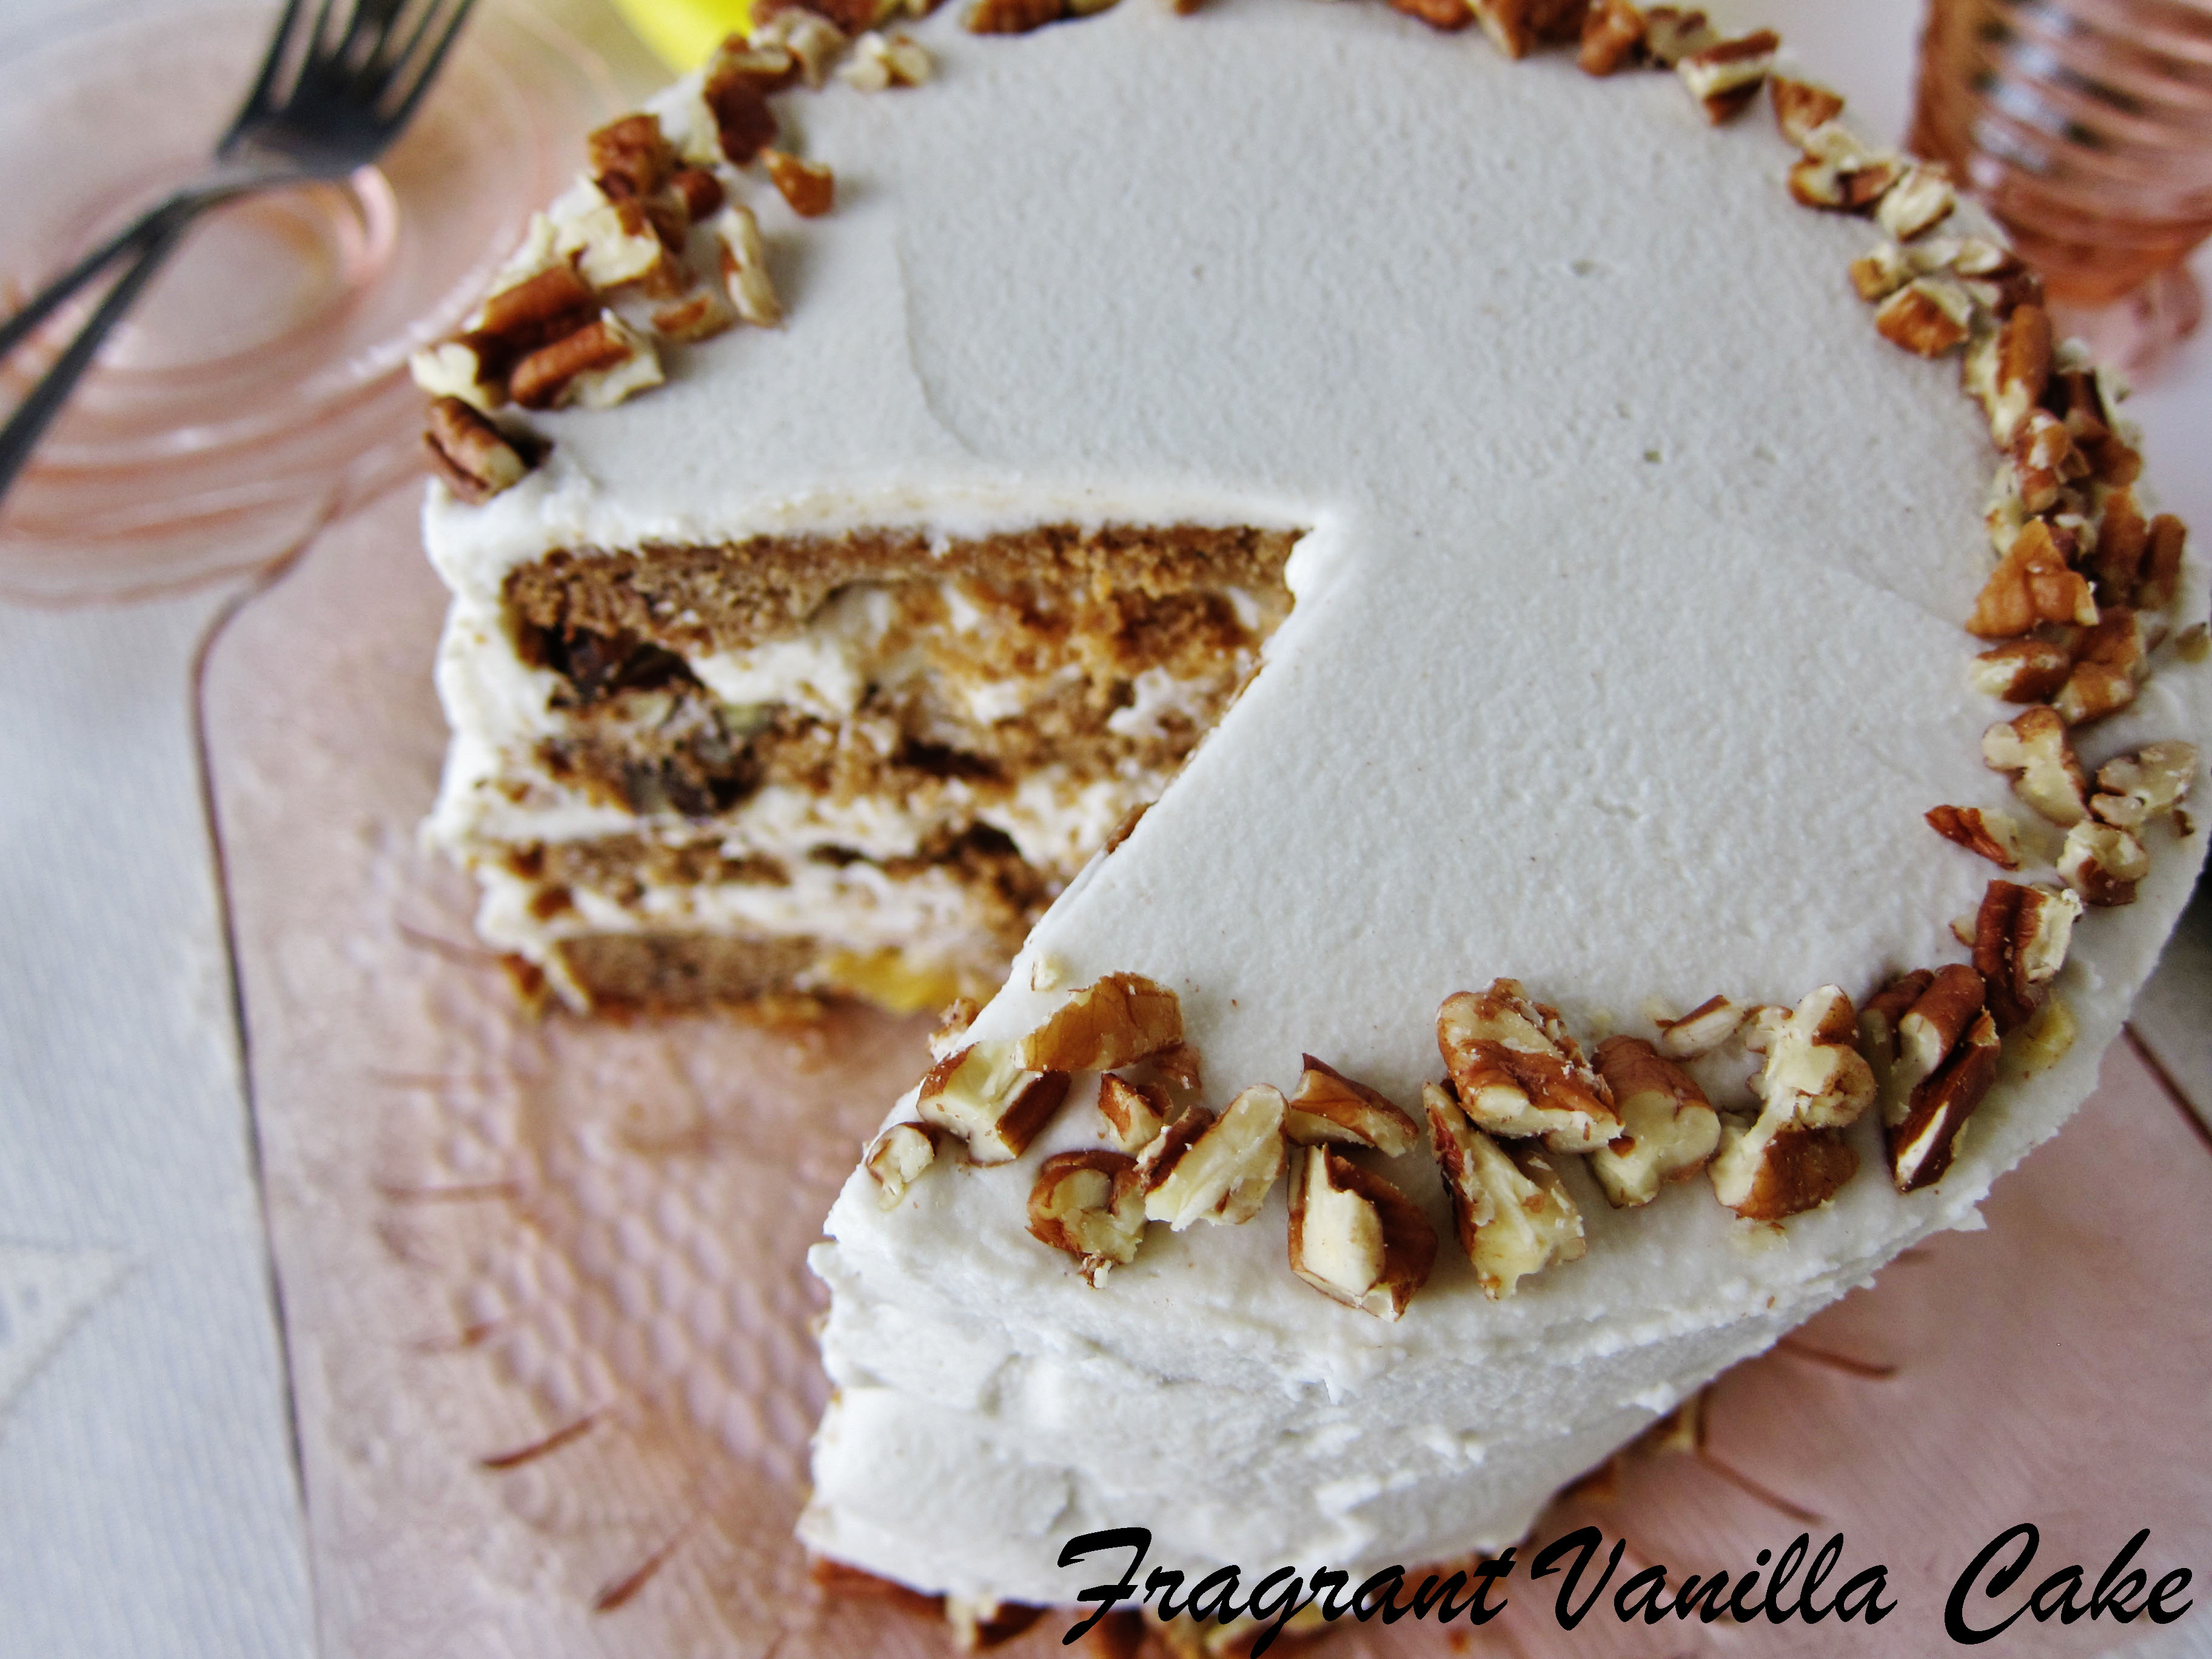
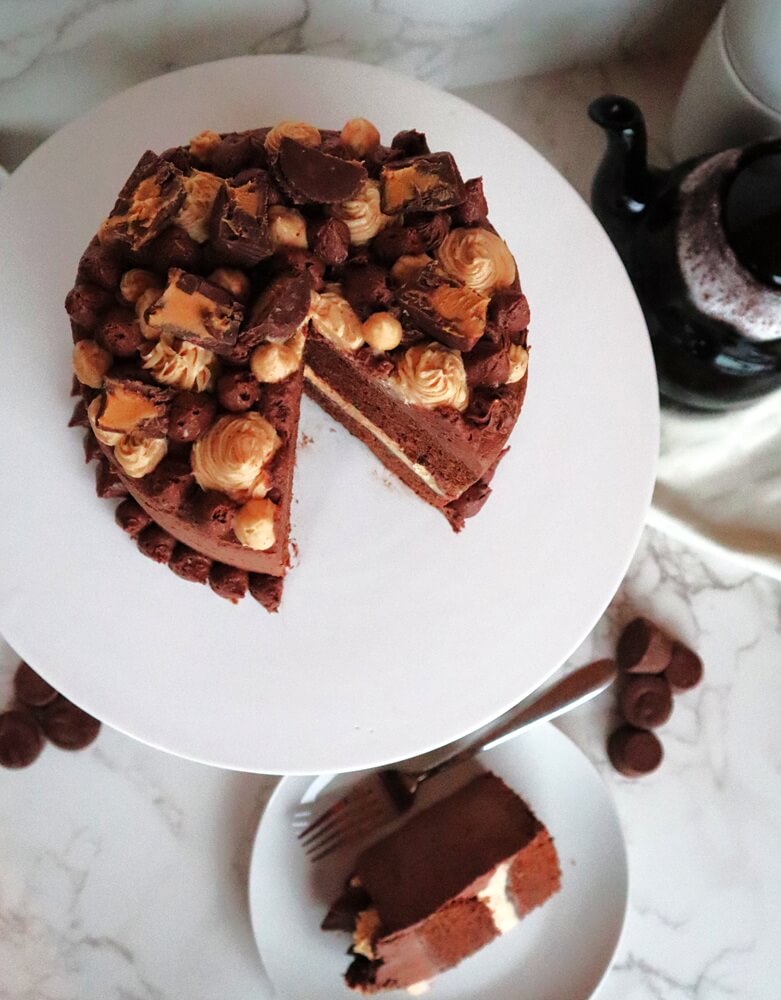
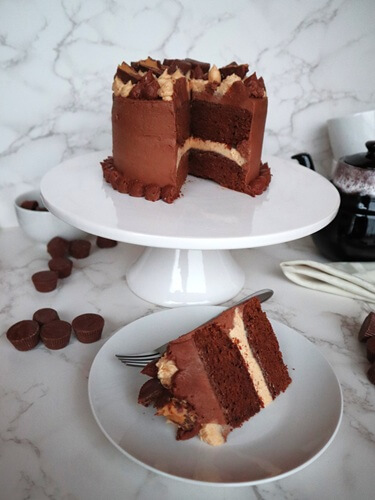
    Eric told me that his favorite cake I had ever made was a Vegan Chocolate Peanut Butter Layer Cake I made for his birthday a few years back. So I decided to make one again this year! Chocolate peanut butter is after all one of the best combinations ever!

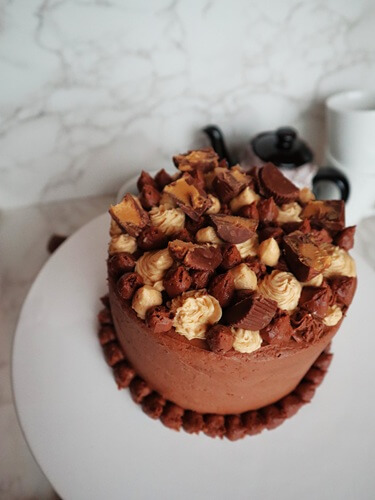
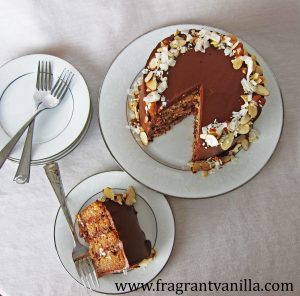
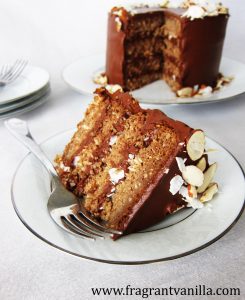
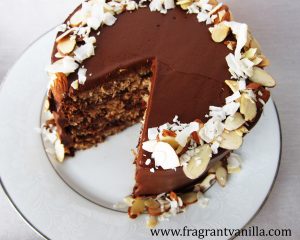
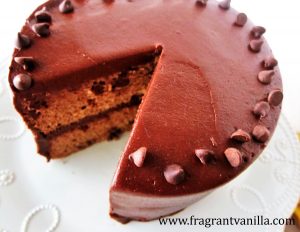
    So I made my chocolate cake layers for the base, using just the right amount of cocoa powder to make it rich, chocolaty and delicious. I use whole wheat pastry flour for this, but if you prefer regular all purpose flour, or even a gluten free flour (such as Bob’s Red Mill all purpose baking flour, which I’ve found works well) to make a gluten free version, you can use those if you prefer.

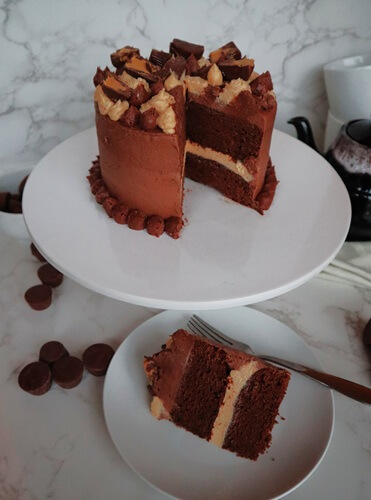
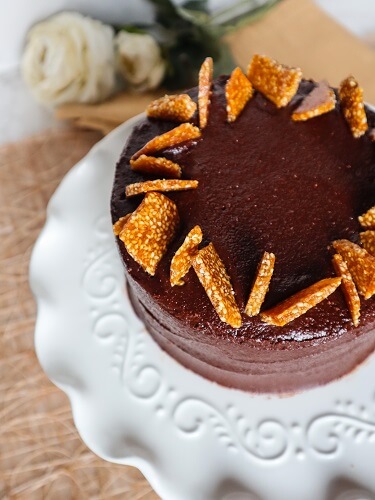
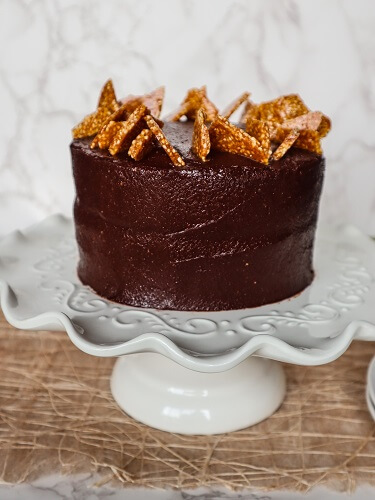
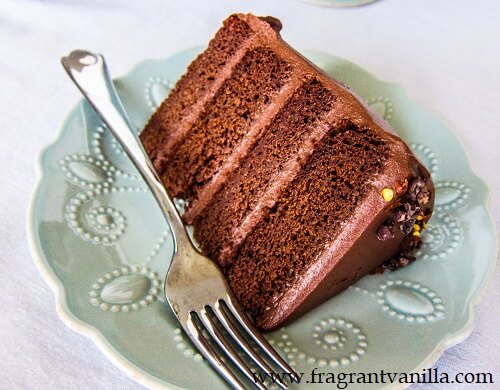
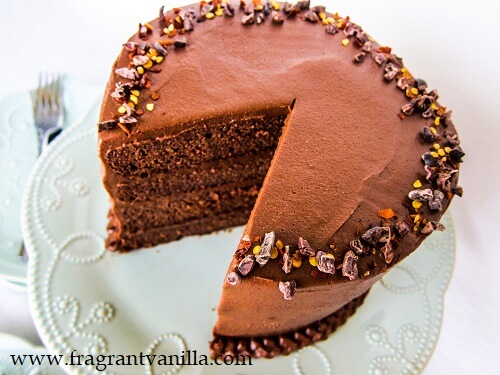
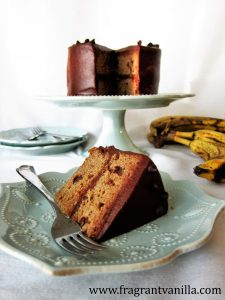
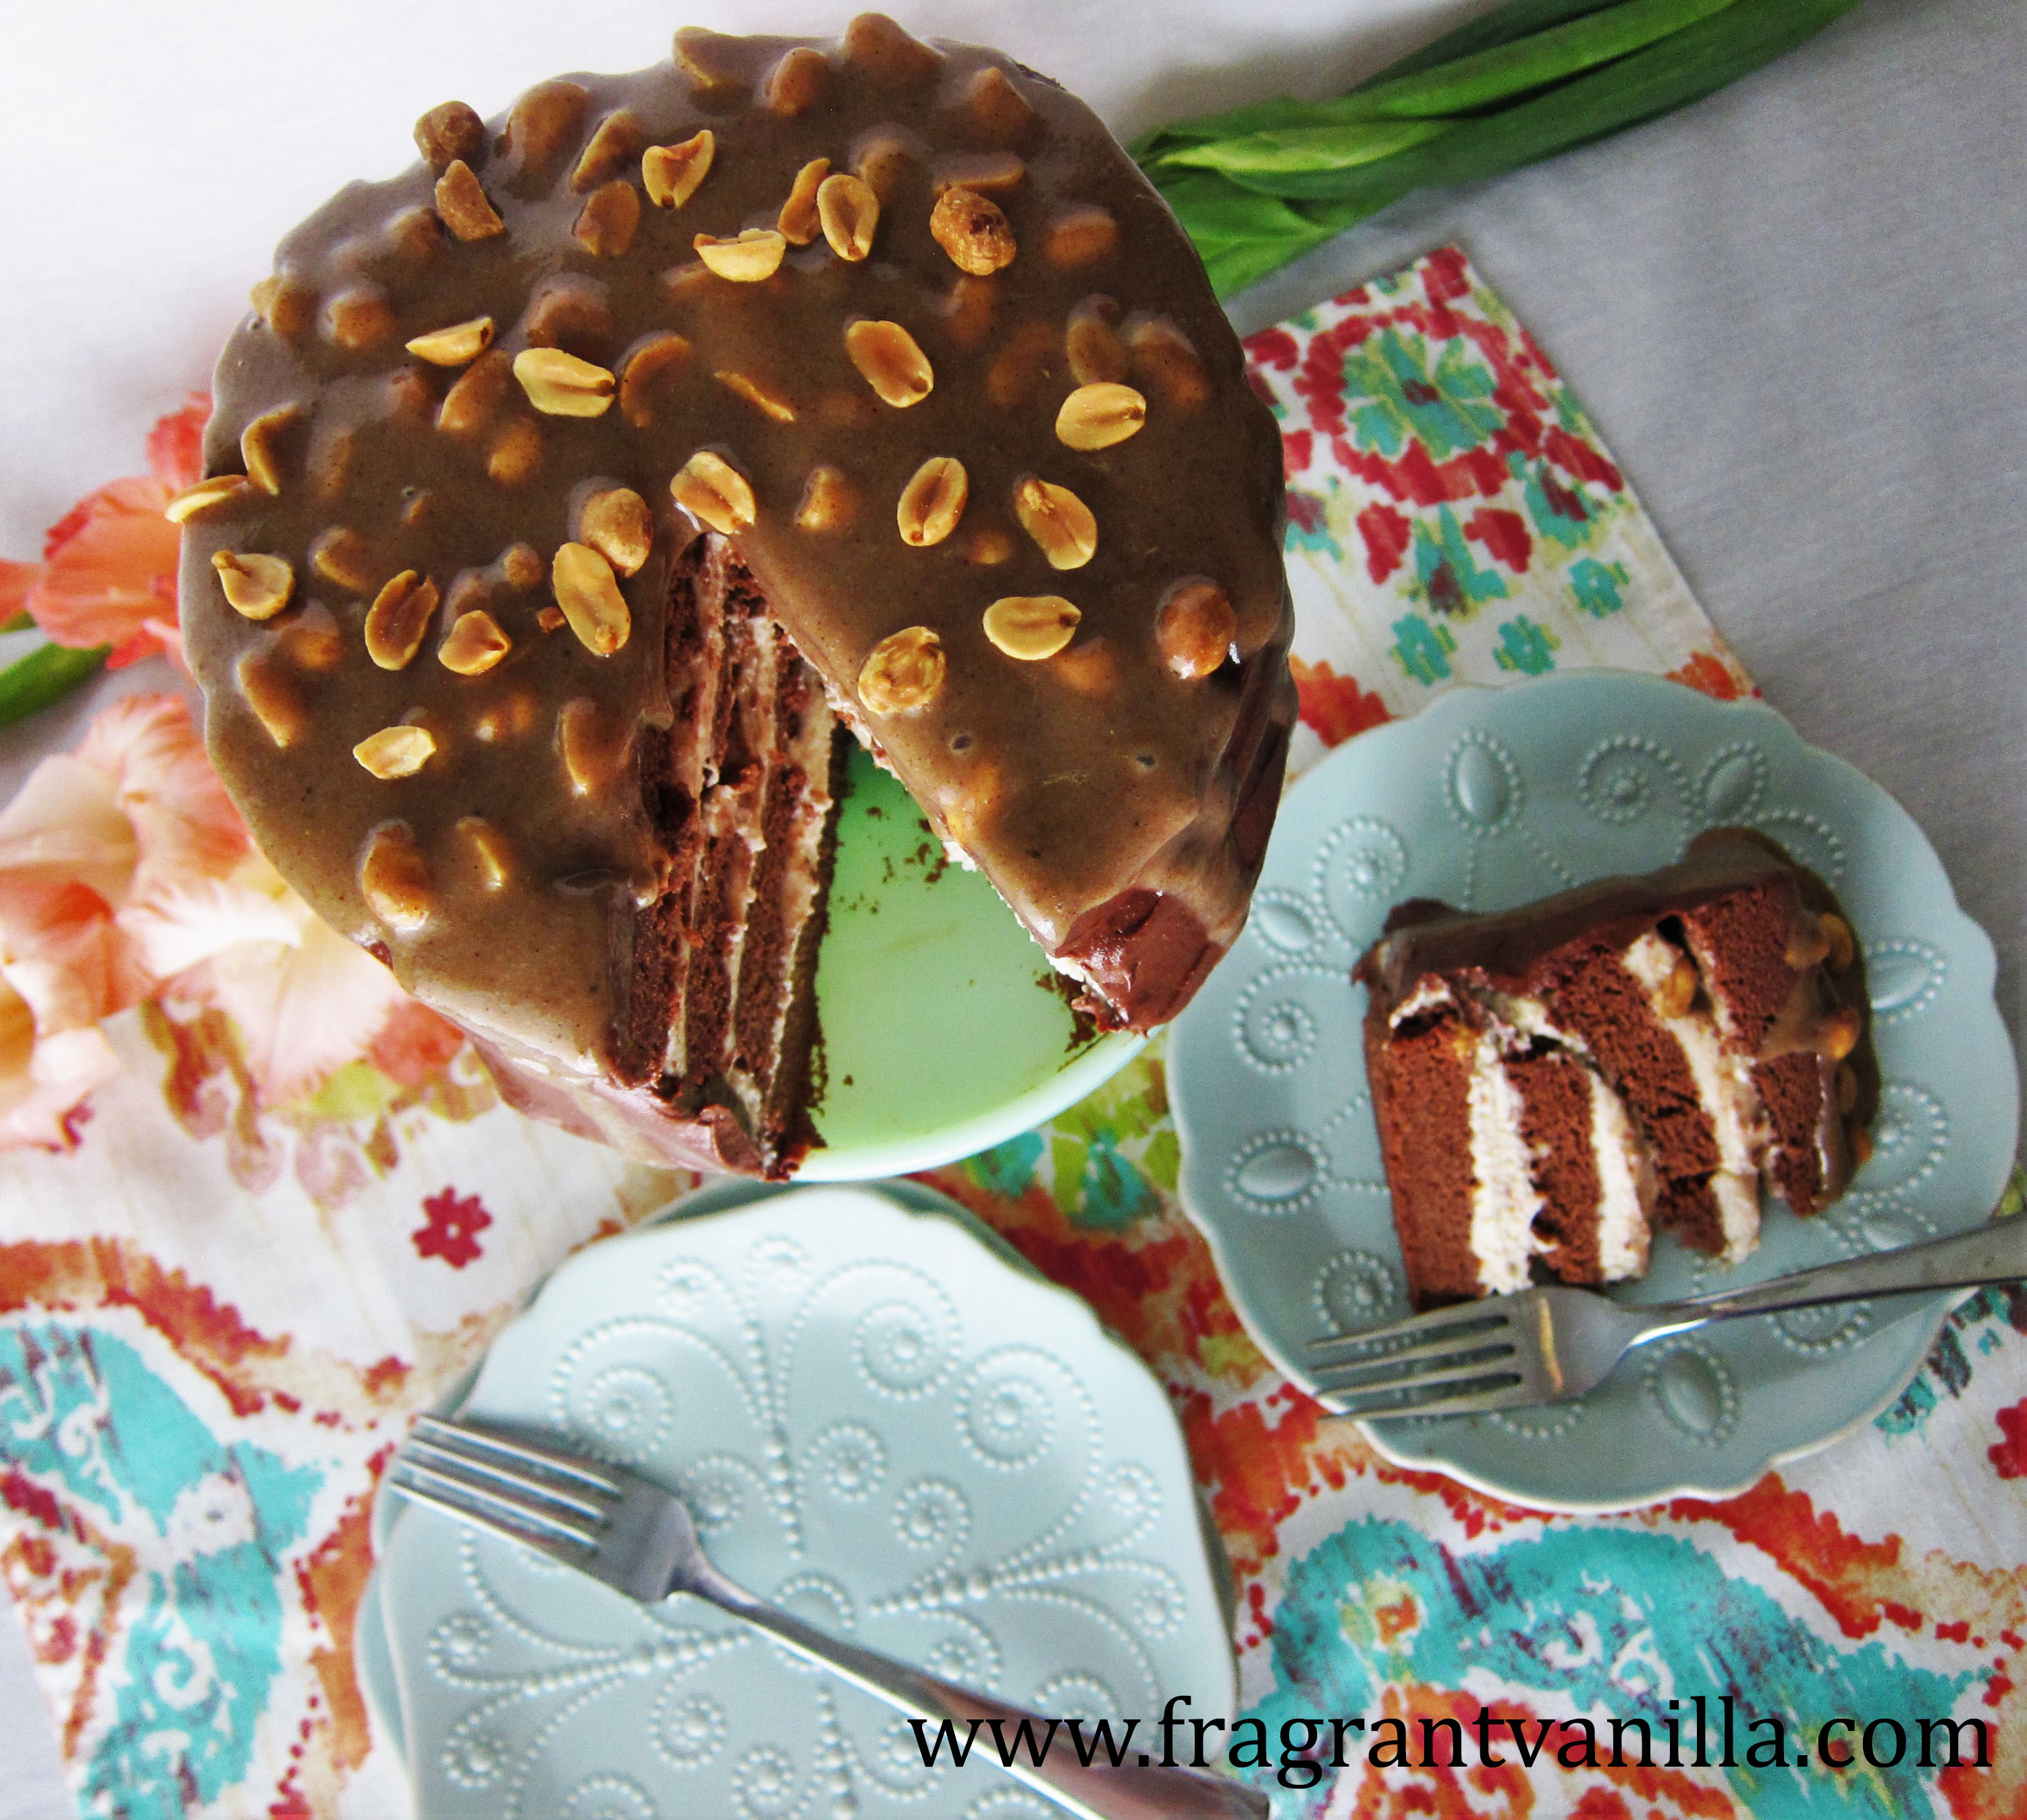
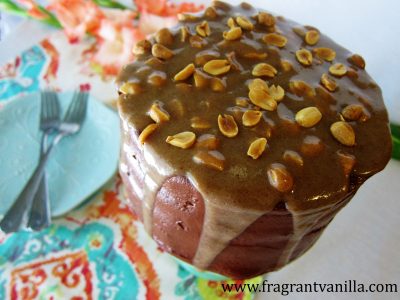
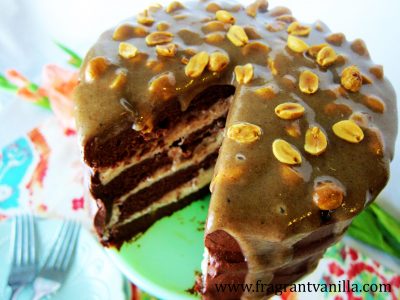
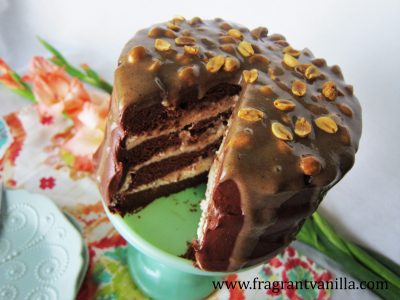
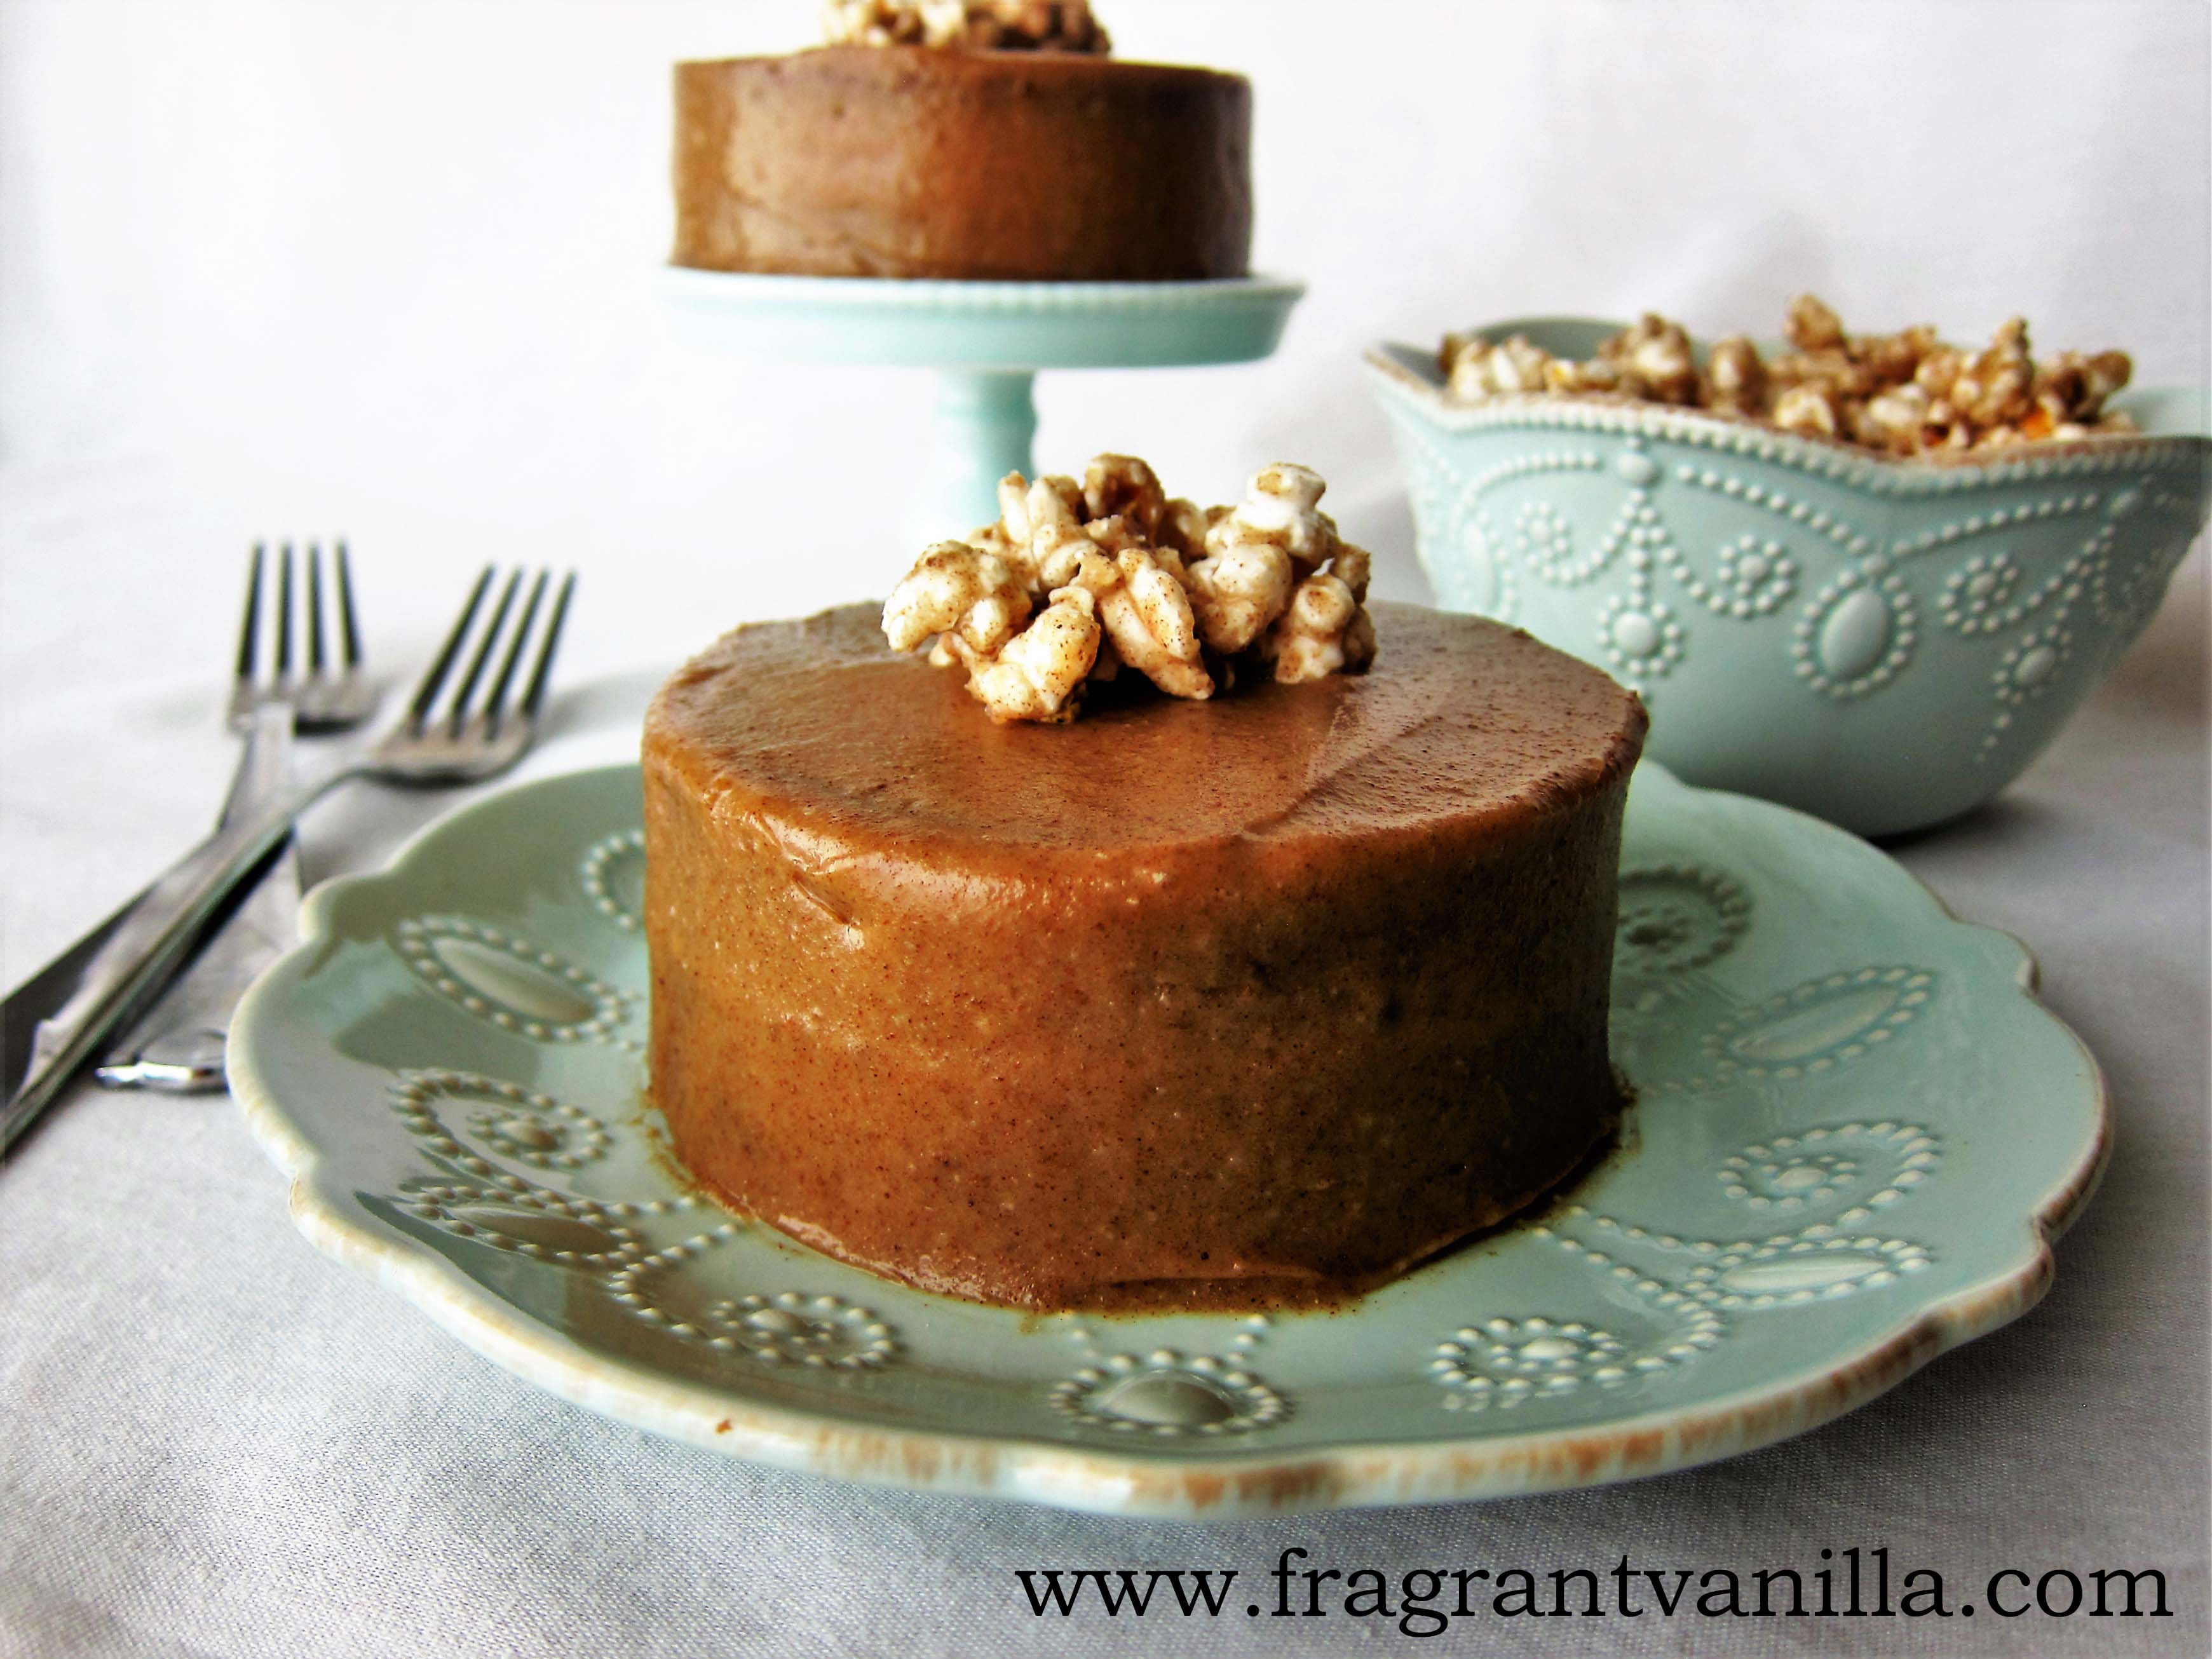
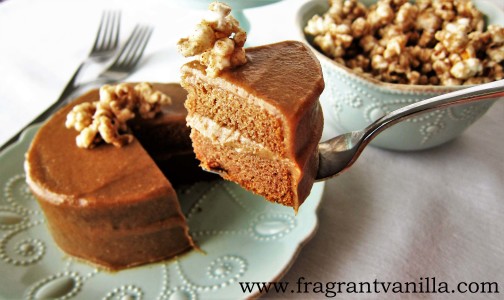
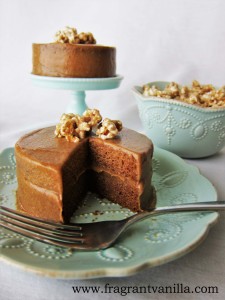
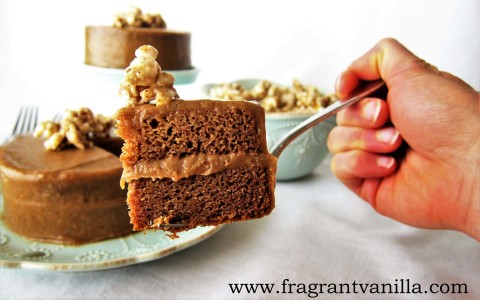
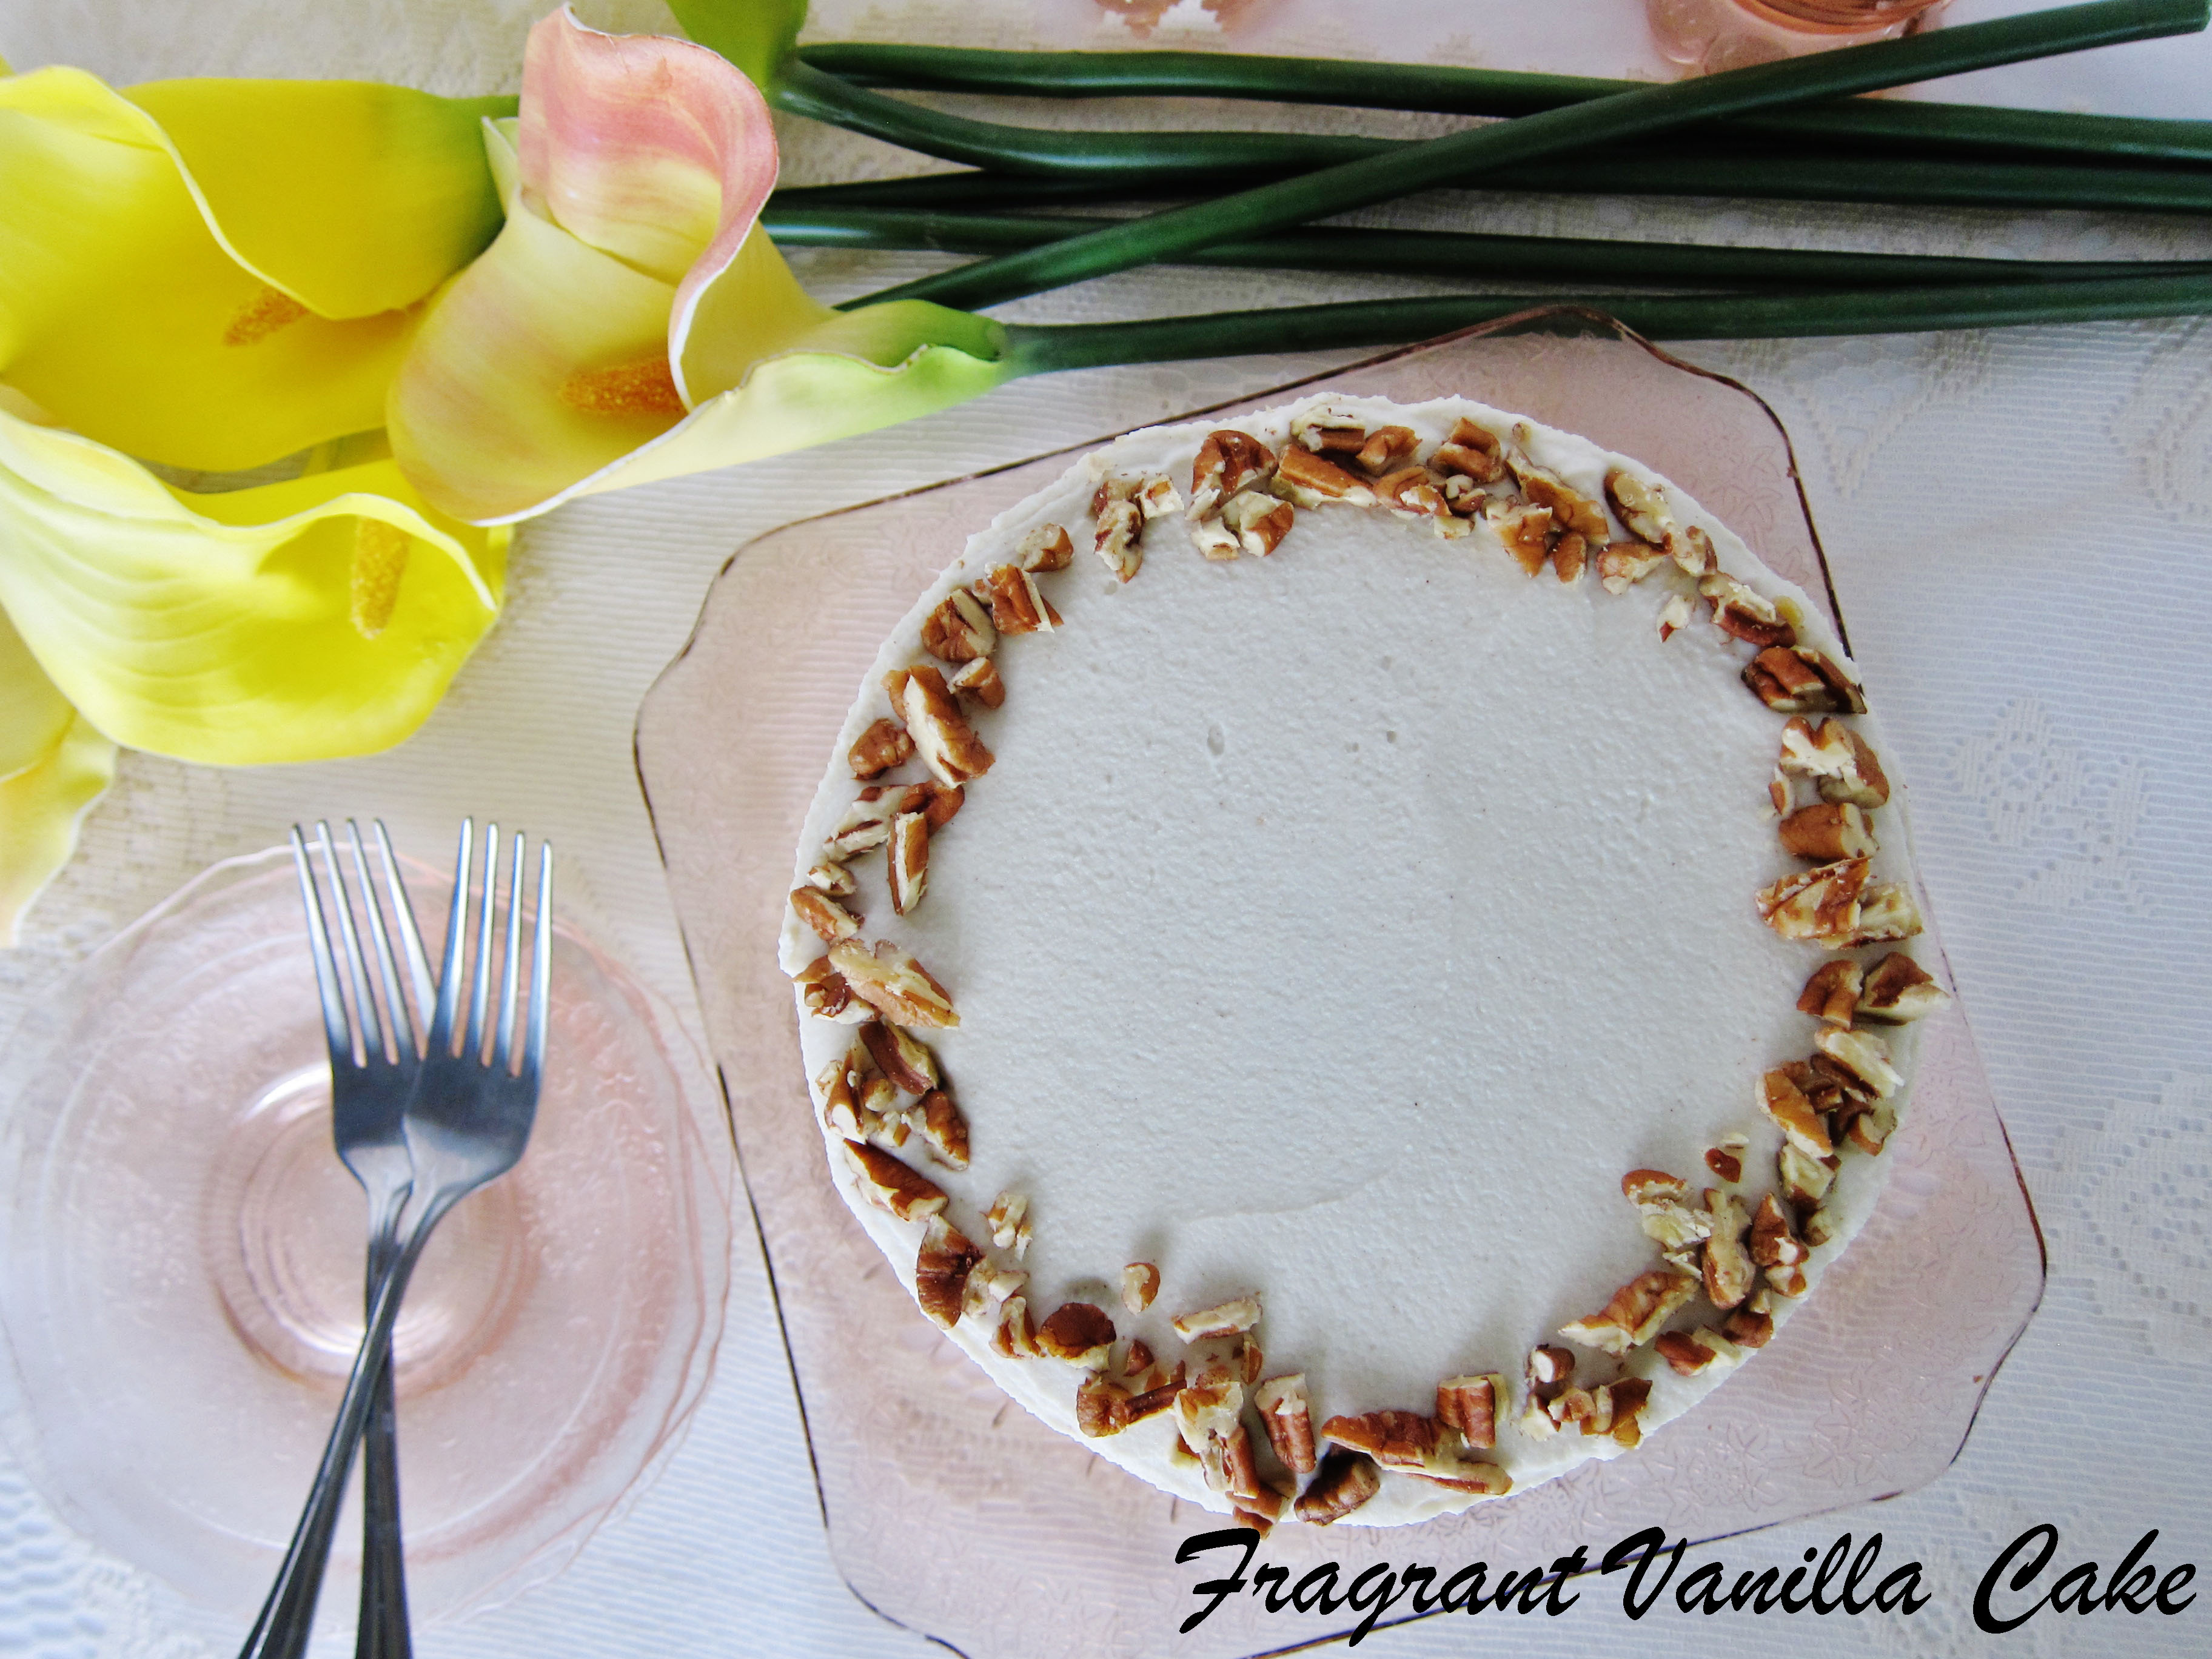
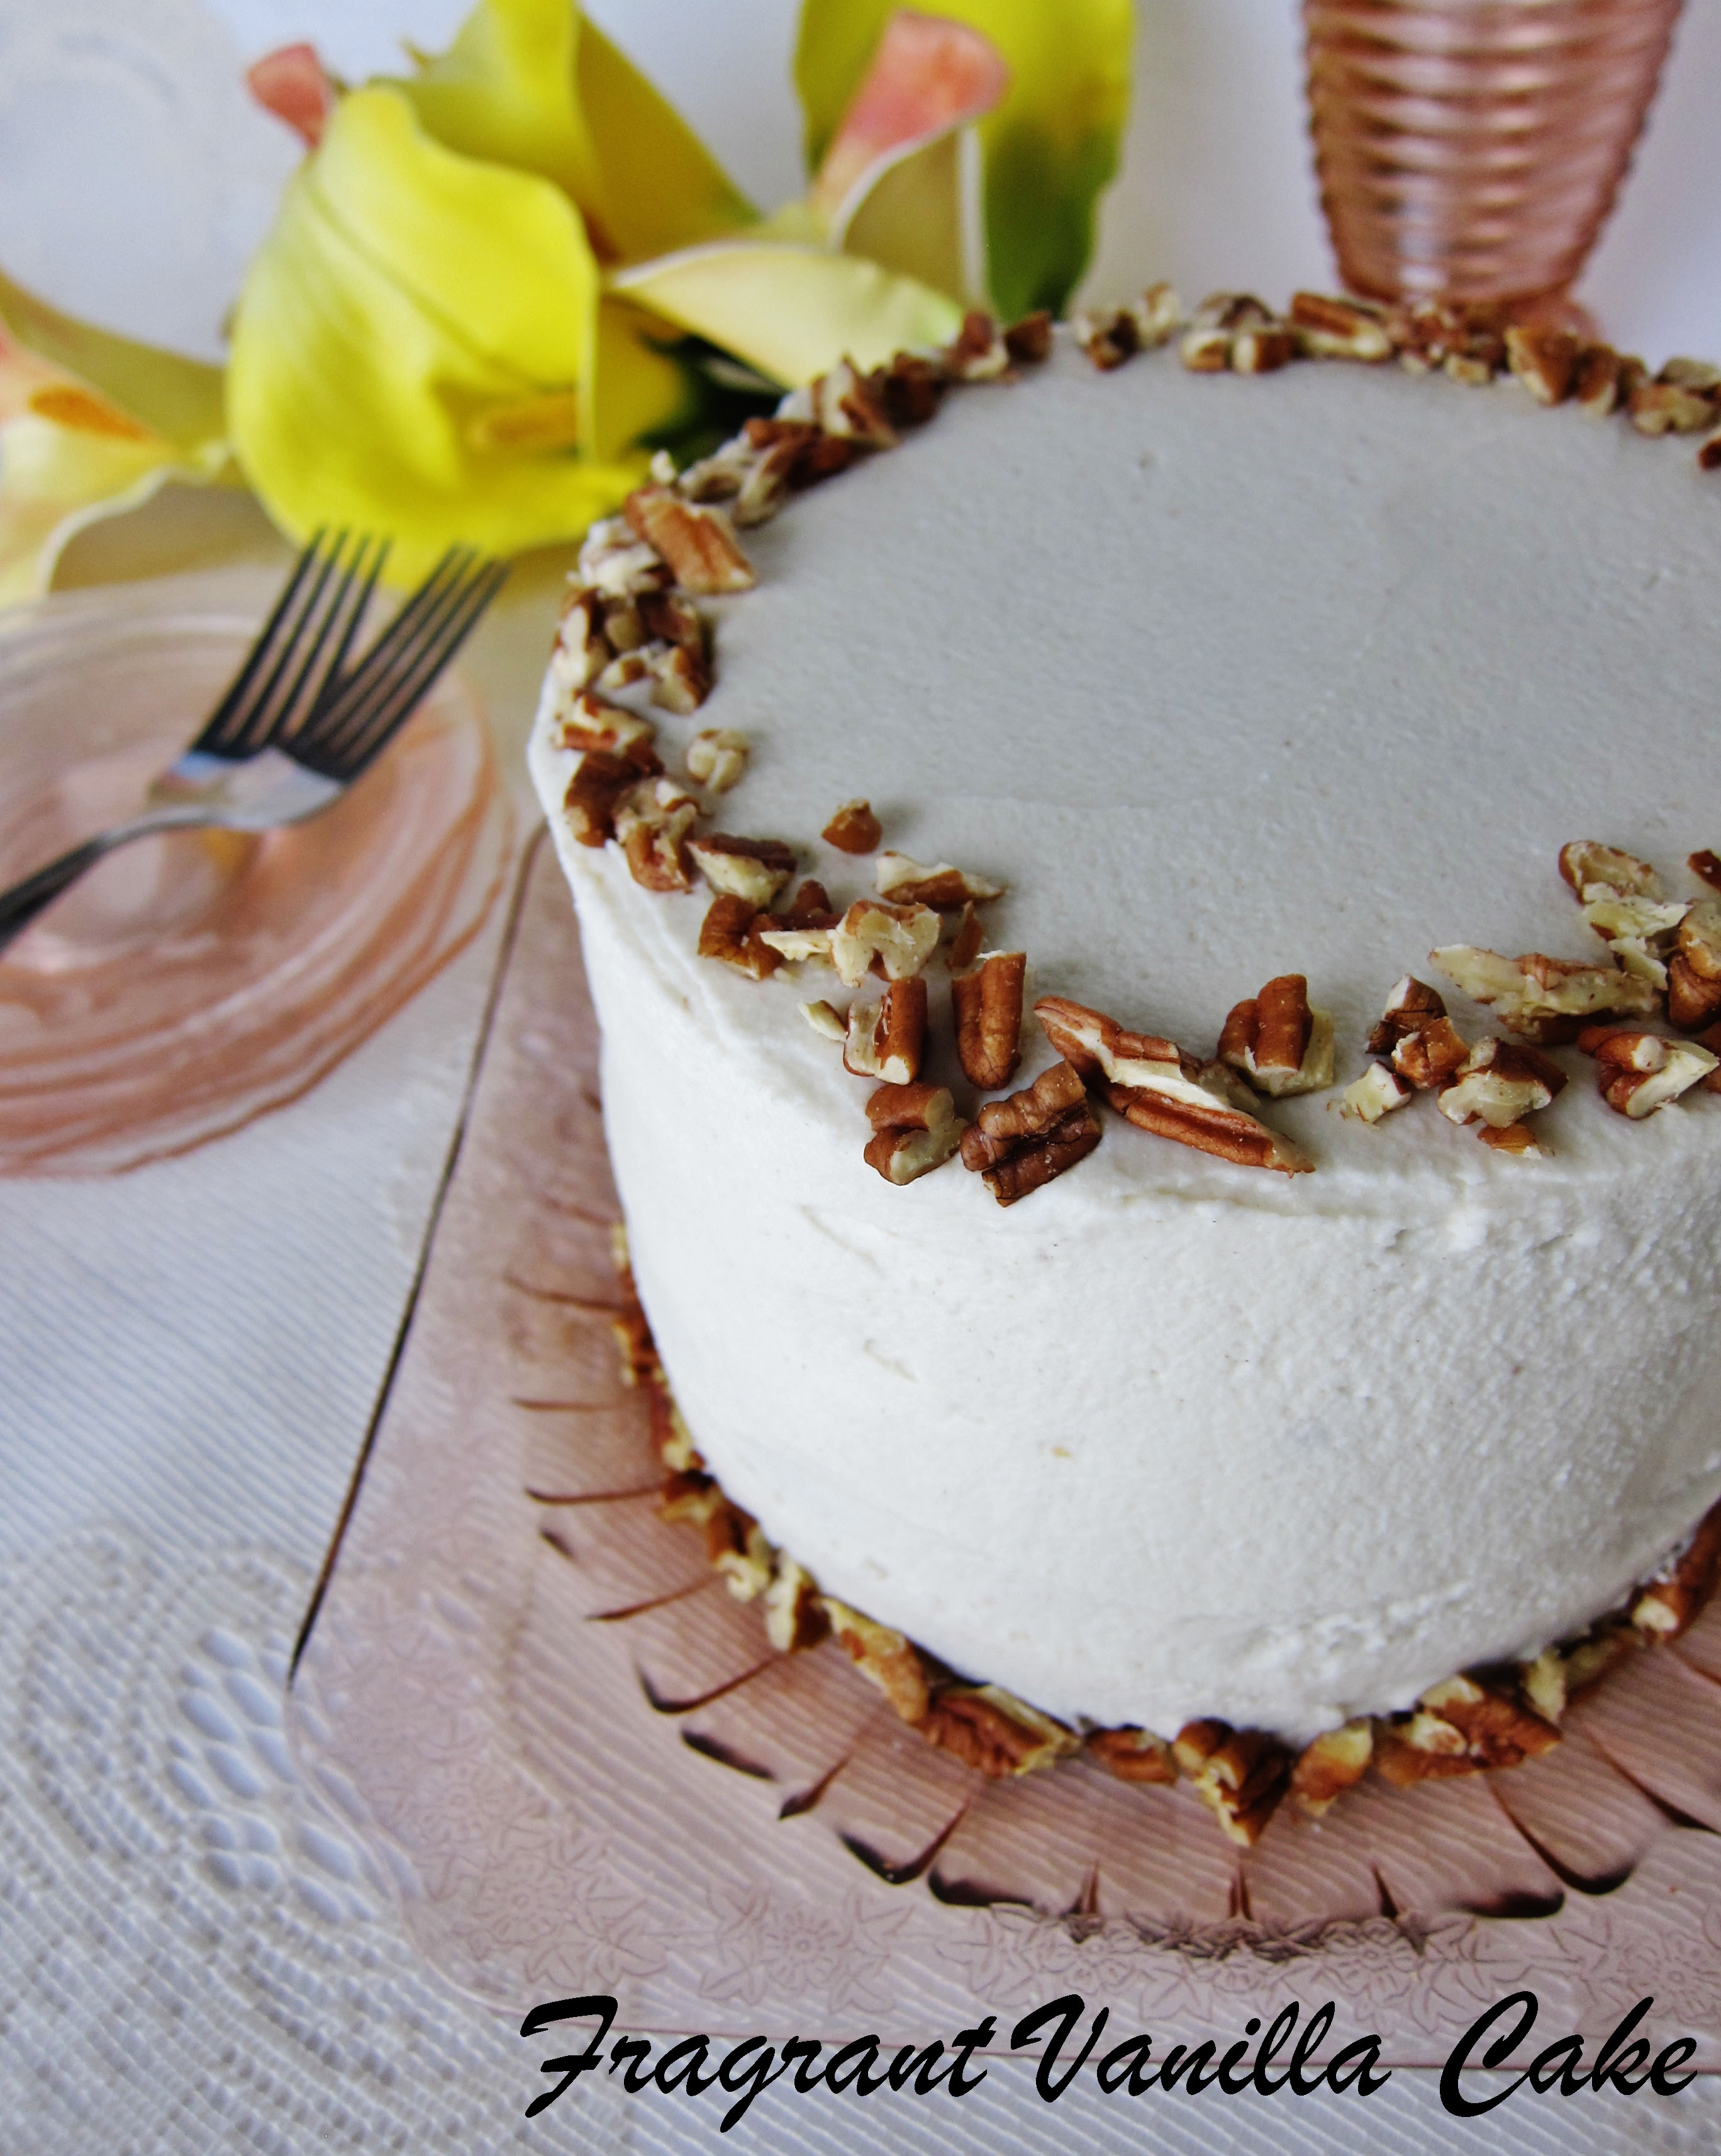
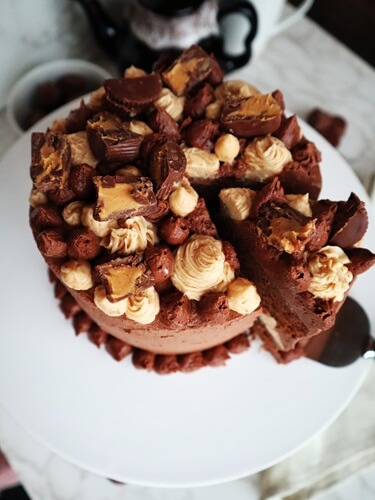
    I made a peanut butter buttercream
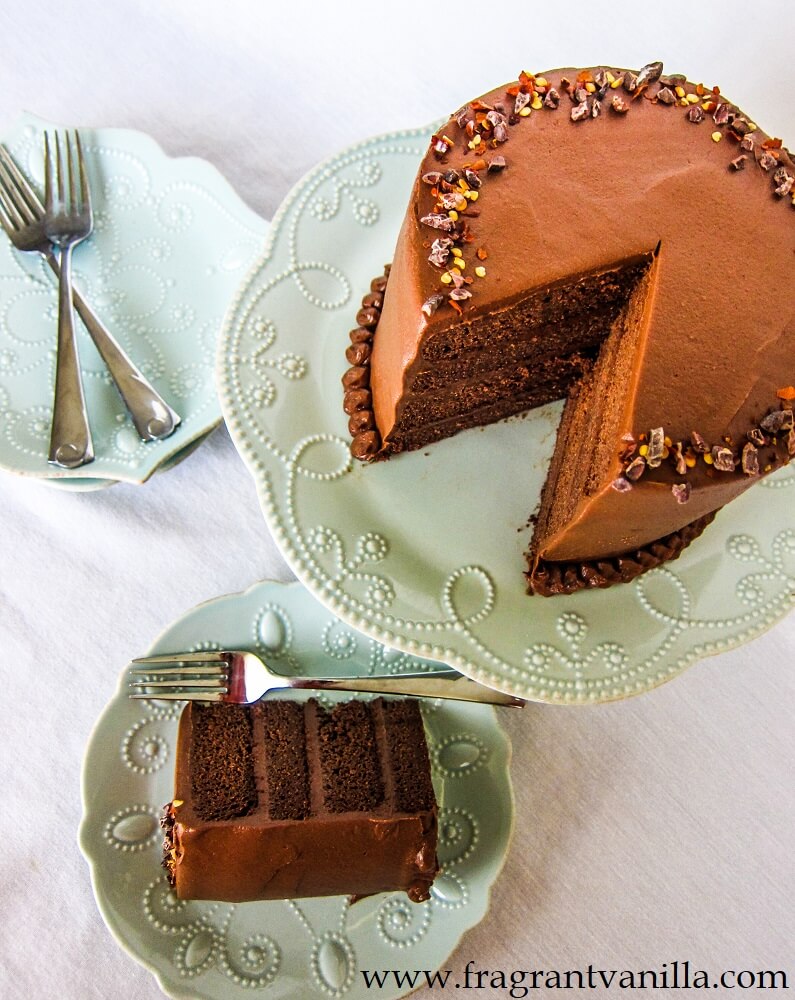
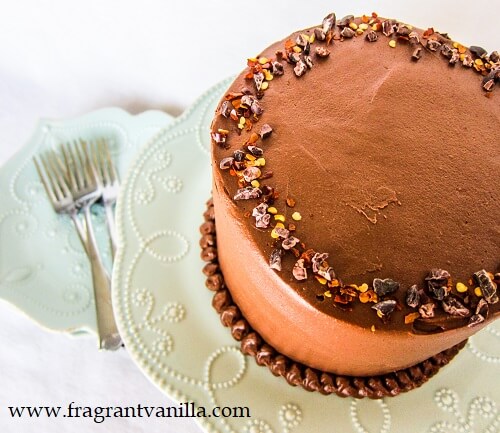
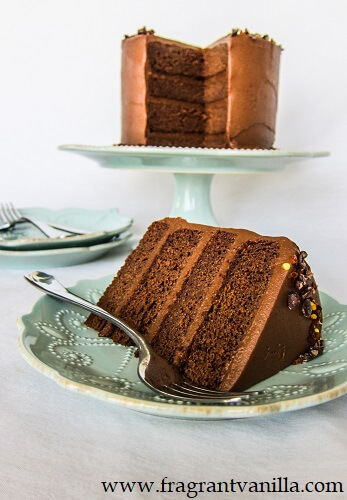
    frosting for the filling, because he said he wanted a rich peanut butter filling, and I frosted the outside with chocolate peanut butter buttercream. Lastly I topped it off with vegan peanut butter cups.

    It was so heavenly! Layers of rich dark chocolate cake with plenty of rich peanut butter and chocolate buttercream! Eric loved it as well which was the most important thing! If you are a chocolate and peanut butter lover too, definitely check out this Vegan Chocolate Peanut Butter Layer Cake recipe!

    Vegan Peanut Butter Chocolate Layer Cake

    Makes one 2 layer 6 inch cake

    Ingredients:

    Cake:

    • 1 1/2 cups all purpose flour
    • 3/4 cup plus 2 Tbsp granulated sugar
    • 3/4 tsp baking powder (1/2 tsp plus 1/4 tsp)
    • 1/2 tsp sea salt
    • 2 flax eggs (2 Tbsp golden ground flax seed mixed with 1/4 cup plus 2 Tbsp filtered water, allowed to sit 15 minutes)
    • 1/4 cup plus 2 Tbsp avocado oil or other neutral oil
    • 1/2 cup plant based milk (I used Oatly but you can use what you prefer)
    • 1 1/2 tsp pure vanilla extract
    • 1/4 cup cacao powder


    Frosting:

    • 1 1/2 cups vegan butter, I used Earth Balance (at room temperature)
    • 1/4 cup smooth peanut butter
    • 3-4 Tbsp plant based milk (I used Oatly, but you can use what you prefer), add 3 then if needed add another if frosting comes out too stiff
    • 1 tsp pure vanilla extract
    • 3 1/2 cups powdered sugar
    • 1/4 cup cacao powder


    For Topping:

    • Vegan peanut butter cups


    Instructions:

    1. Preheat oven to 350F degrees, and line 2 6 inch round cake pans with parchment on the bottom and oil the sides.
    2. In a large bowl, combine the flour, sugar, baking powder and sea salt and whisk to blend.
    3. Add the flax eggs, avocado oil, oat milk and vanilla and cacao powder and beat with an electric mixer for about a minute (or 3 minutes if doing it by hand with a whisk).
    4. Pour the cake batter into the prepared pans, dividing evenly between them.
    5. Place the cakes in the oven and bake for about 30 minutes until the cakes are done in the center (you are able to insert a toothpick into the center and it comes out almost clean with a few moist crumbs).
    6. Remove from the oven and let cool 20 minutes, then remove the cakes from the pans by cutting around the sides, placing a plate on top then inverting it and tapping on it.  Allow them then to cool completely once they are out of the pans.
    7. To make the frosting, beat the butter with the milk, vanilla and peanut butter until fluffy.
    8. Add the powdered sugar 1 cup at a time, and beat until completely mixed and light and fluffy (if the frosting is too stiff add that other Tbsp of milk). Remove 3/4 cup of the frosting.
    9. Beat the cacao powder into the remaining frosting.
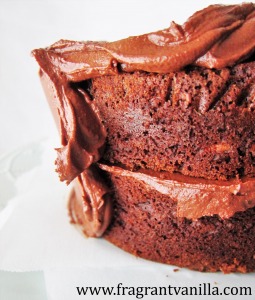
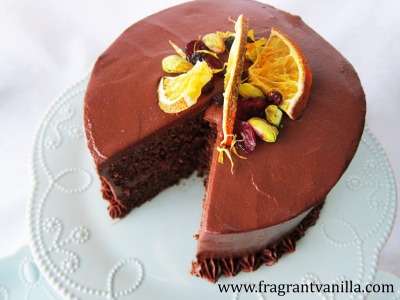
    10. When ready to frost, Place one cake layer on a plate, spread the peanut butter frosting about 1/2 inch thick layer of the frosting over it.
    11. Place the next cake layer on top.
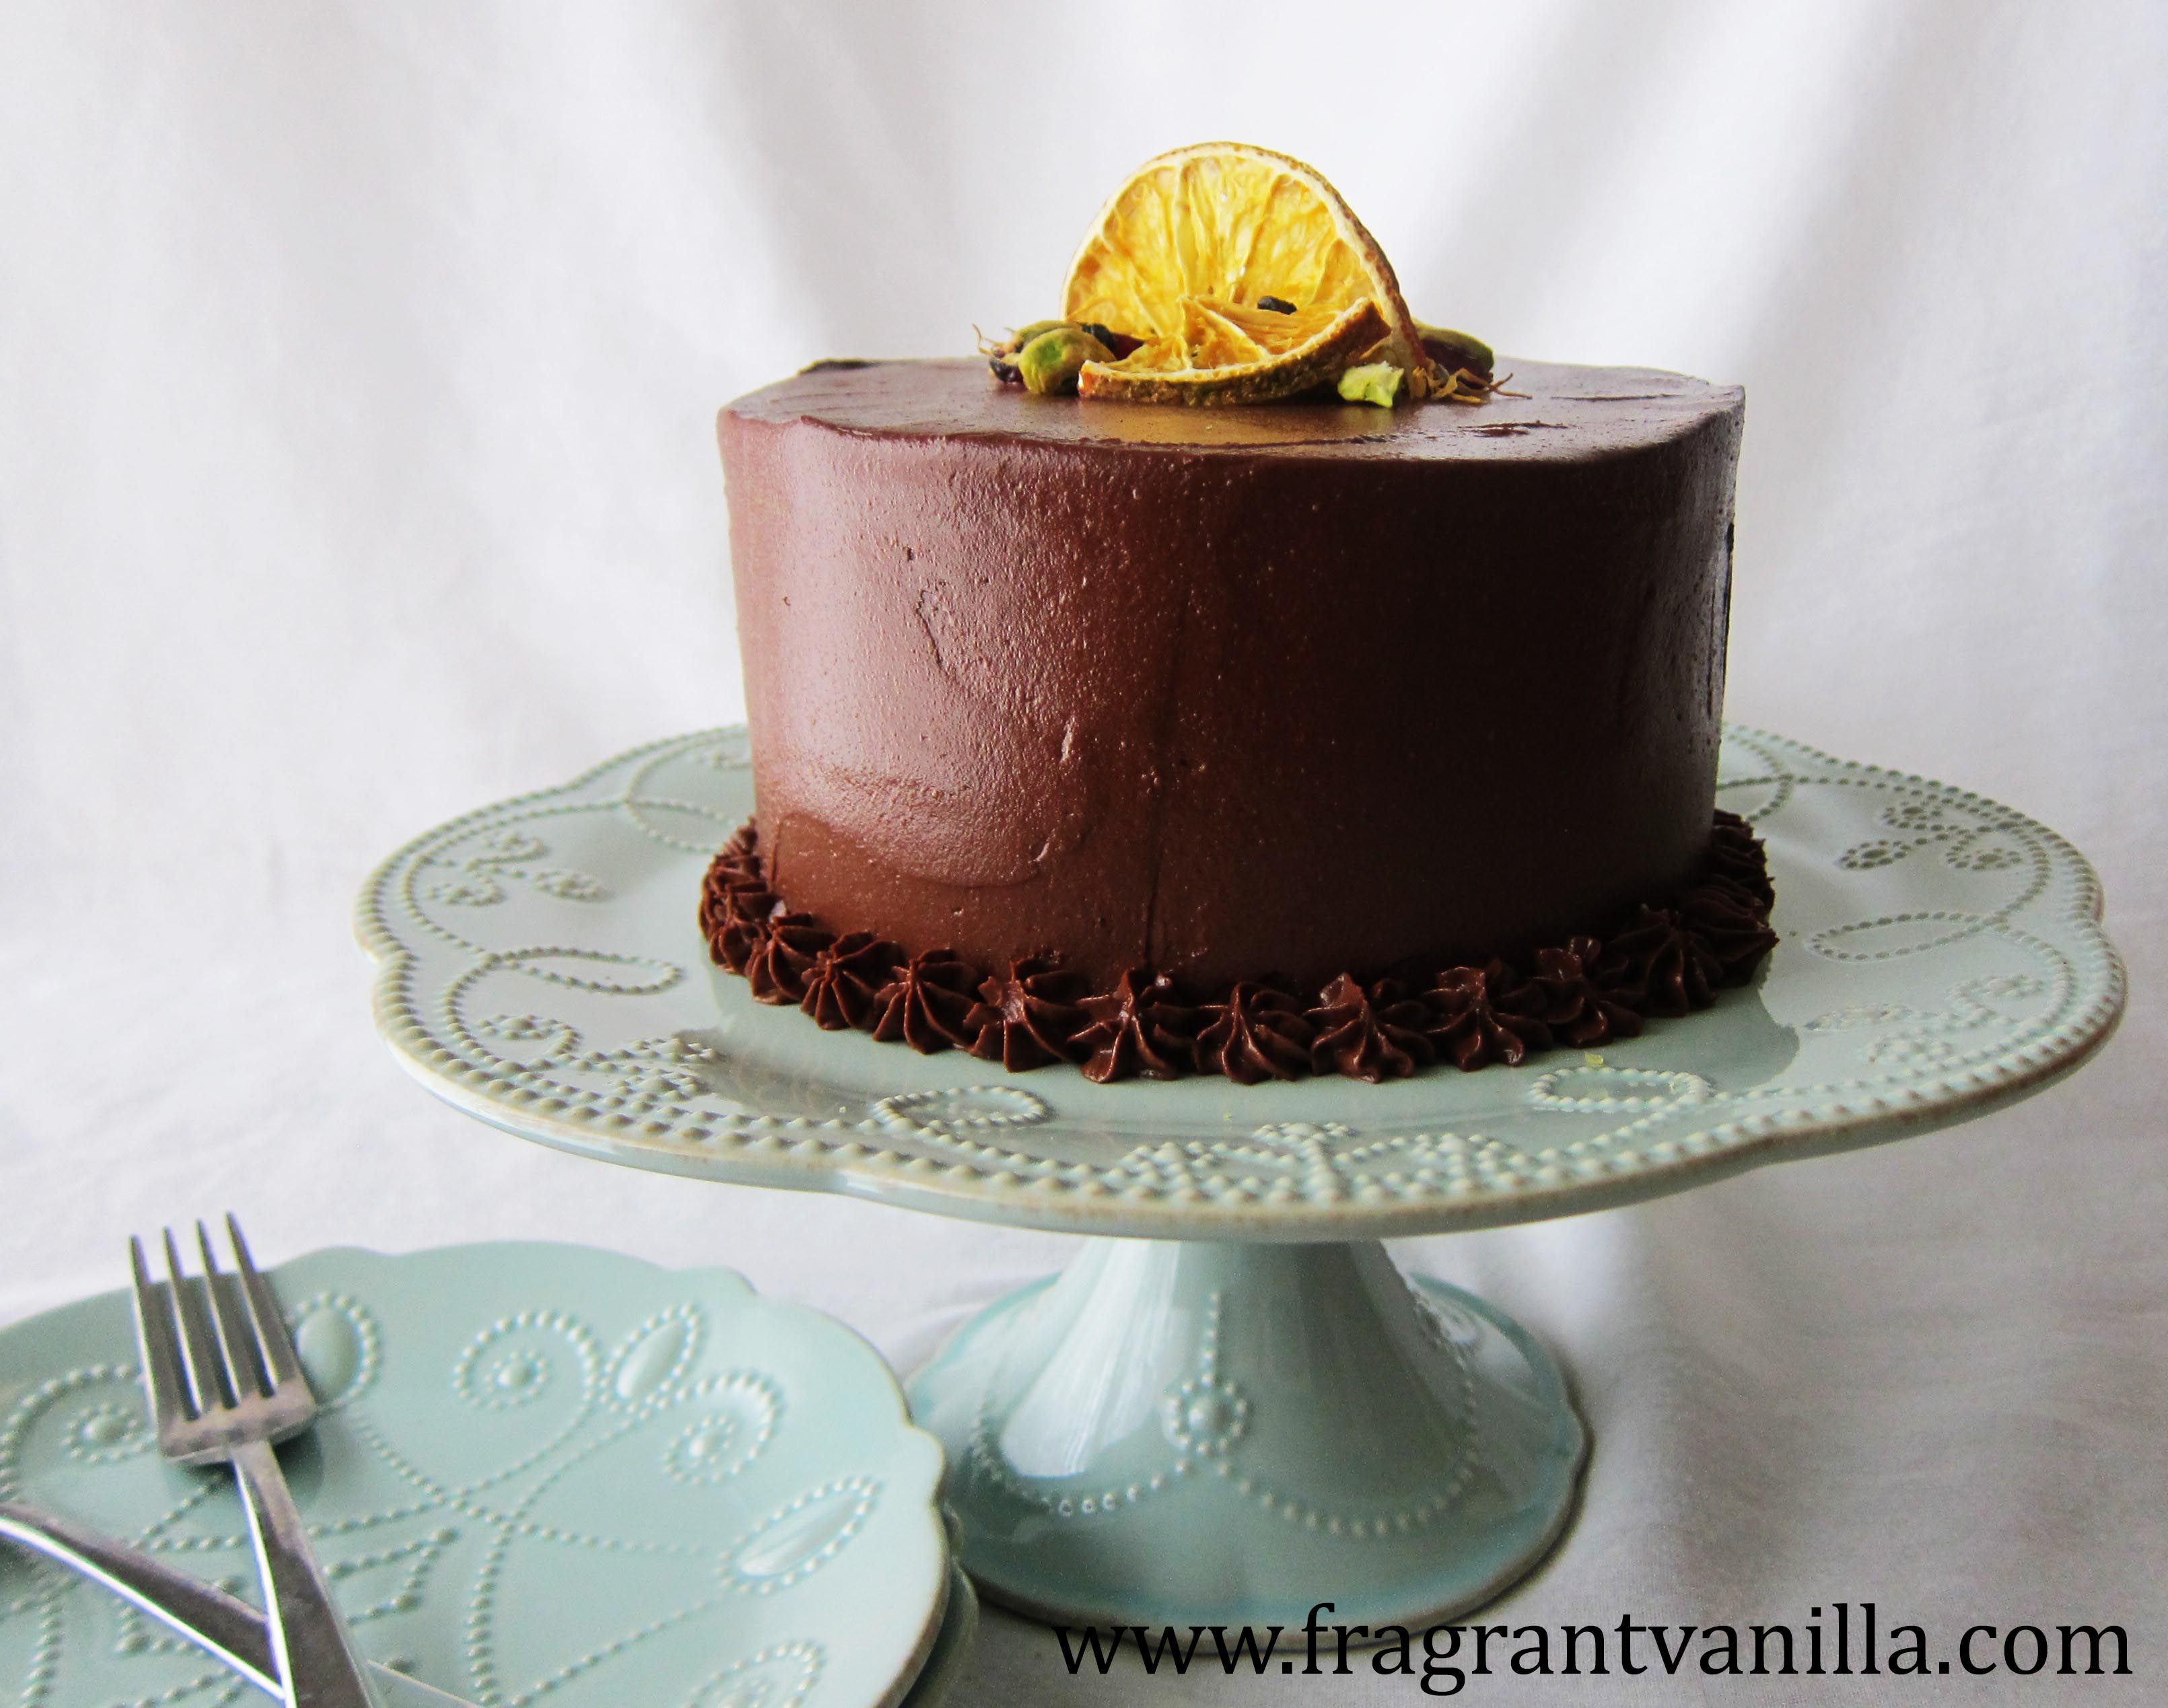
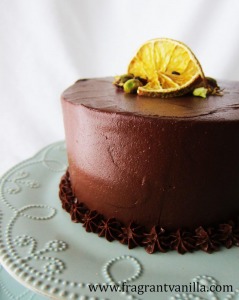
    12. Spread the chocolate frosting on the top and down the sides of the cake evenly, then place the rest of the frosting in a pastry bag and use it to decorate the top.  This frosting recipe makes enough that you should be able to do some generous piping decorations on top, because I like a lot of frosting! Top with peanut butter cups.
    13. Serve the cake and enjoy!
  • Vegan Tahini Chocolate Cake 

    Vegan Tahini Chocolate Cake 

    I am a big fan of tahini.  It is good in savory applications like hummus, dressing and sauces, but it is equally good in desserts.  I had bought a bunch of tahini for making halva, and decided that a chocolate and tahini dessert will be amazing.  What I decided on was a Vegan Tahini Chocolate Cake.  Because sometimes you just crave a really good chocolate cake!  And one needs no special occasion to make a cake, everyday is a good day for cake as far as I am concerned!

    For the base, I used my date sweetened chocolate cake made rich with tahini instead of oil.  I love date sweetened cakes, because they stay nice and moist without being heavy.  Also, the dates give the flavor of the cake a caramel note.  The batter was delicious even before I baked it.  I used whole wheat pastry flour in this because it is what I have the most of on hand, but you could make this with all purpose flour as well.  Also, if you wanted to make this gluten free, you could use Bob’s Red Mill all purpose baking flour or your favorite AP flour blend for this instead.  I have tried many of my cakes and baked goods with Bob’s Red Mill before and always had success which is why I recommend that specific brand.

    The cake baked up beautifully and filled my kitchen with the most heavenly aroma like brownies.  I wanted a simple frosting for this cake that was easy to make so I went with tahini in the base as well.  I added in cacao powder and maple syrup and it made a delicious fudgy frosting!  It worked out perfect on the cake, spread nicely and didn’t involve any chilling or whipping or anything.

    Lastly, I topped the cake off with some home made sesame brittle to make it pretty. I could not wait to try it!  It was super delicious, fudgy and rich with intense chocolate flavor and a bit of nuttiness from the tahini.  Sooo heavenly!  You would never guess it was vegan, gluten free and oil free!  I shared some with family and friends and they loved it as well.  If you are a chocolate fan, definitely give this Vegan Tahini Chocolate Cake a try!

    Vegan Tahini Chocolate Cake 

    Makes one 2 layer 6 inch cake

    Ingredients:

    6 inch cake pans

    Cake:

    • 1 1/2 whole wheat pastry flour*
    • 1/4 cup cacao powder or unsweetened cocoa powder
    • 1 1/2 tsp baking soda
    • 1 tsp baking powder
    • 1/2 tsp sea salt
    • 1 1/2 cups packed soft medjool dates, pitted, soaked in water for 30 minutes and drained
    • 1/4 cup tahini
    • 2 tsp pure vanilla extract
    • 2 cups filtered water
    • 2 Tbsp apple cider vinegar


    Frosting:

    • 1 1/4 cups tahini
    • 1/2 cup maple syrup
    • 1/4 cup filtered water (or as needed)
    • 3/4 cup cacao powder
    • 1/4 tsp sea salt


    Sesame Brittle (optional):

    • 1/2 cup maple sugar (or granulated sugar)
    • 1/3 cup sesame seeds


    Directions:

    1. Preheat the oven to 350F degrees and position rack in center of oven.
    2. Oil two 6 inch round cake pans with coconut oil and line the bottom with parchment.
    3. Whisk flour, cocoa powder, baking powder, baking soda, sea salt in a large bowl to blend well.
    4. Place dates, water, tahini, and vanilla extract into a blender, and blend until smooth, then whisk this blended mixture into the flour mixture until well blended. Whisk in the cider vinegar until bubbles form.
    5. Pour the cake batter into prepared pans, and place in the oven.
    6. Bake cakes until set and a toothpick inserted into the center comes out almost clean, about 30 minutes.  Remove from oven, let cool completely, then un-mold them onto two plates, cover and set aside.
    7. To make the frosting, combine tahini, maple syrup, 2 Tbsp of the water,  the cacao powder and sea salt in a high speed blender or food processor and blend until completely smooth adding the last 2 Tbsp water if needed to create a spreadable but not runny consistency (the reason I have you add half the water first then add more if needed is because tahini can vary in texture and consistency.  Also a side note, if you end up adding too much water just add more cocoa powder to thicken the frosting).
    8. To assemble, place one cake layer on a plate, and spread about 1/2 cup frosting over it.  Place the other cake layer over that, then spread the remaining frosting on the top and down the sides of the cake.  Place cake in refrigerator while you make the brittle.
    9. To make the brittle, in a non-stick pan, melt the sugar until it is completely smooth over medium heat (this should take about 5 minutes), add the sesame seeds, stir until mixed in well, then pour onto a sheet of parchment or foil and allow to cool completely.  Once it has cooled, break into pieces and decorate the top of the cake with it.
    10. Enjoy!


    *If you would like to make this cake gluten free, you can use Bob’s Red Mill all purpose baking flour, I have used this flour with good results in my cakes.

  • Vegan Almond Praline Cake

    Vegan Almond Praline Cake

    Around the holidays I like to make candy, things like peanut brittle and almond praline brittle are one of my husband Eric’s favorites! I made some almond praline brittle last weekend, because I thought it sounded good, then I thought about how good it might be as an element of texture included in a cake!  It is so delicious and flavorful, like crunchy almond vanilla scented caramel.  So I decided to make a Vegan Almond Praline Cake!

    I already had the almond praline made.  It is really simple, you just melt sugar and add almonds, salt and vanilla and you get the most delicious crunchy candy once it hardens!  Next, for the cake, I made my classic vanilla cake recipe with almond added and I knew it would be perfect with the almond praline! I used whole wheat pastry flour for my cake batter but if you like to use all purpose flour that would work as well.  Or even a gluten free flour blend like Bob’s Red Mill gluten free all purpose baking flour (which I have used before and know works for a recipe like this).  While I normally use avocado oil in my cakes in this one I happened to use almond because we had some on hand. I thought I might as well keep with the almond theme.  These cakes always smell so heavenly while they bake!

    For the frosting I made a simple vanilla buttercream.  This is honestly my favorite frosting and my go too frosting because it is so easy to make and always tastes so good.  I used Earth Balance sticks this time.  I have been making this frosting recipe so long that it is actually from the non-vegan one my Grandma taught me, when I went vegan I just swapped the butter for vegan butter and it tastes just as good!  I kept the frosting simple because I knew I would be including the praline on top of the cake and in the middle layer. I chopped up some of the praline to put in the center layer of the cake and it worked out perfect!

    I could not wait to try the finished cake!  Even Eric wanted to try a piece as soon as I was done taking my photos of it and he isn’t a big cake person like me. It was so delicious!  Sweet, soft vanilla almond scented cake sandwiched together with luscious vanilla buttercream, and crunchy almond praline! I am in love with this combo!  If you are in the mood for something sweet, definitely give this Vegan Almond Praline Cake a try!

    Vegan Almond Praline Cake

    Makes one 2 layer 6 inch cake

    Ingredients:

    Cake:

    • 1 1/2 cups organic whole wheat pastry flour or all purpose flour
    • 3/4 cup plus 2 Tbsp granulated sugar
    • 3/4 tsp baking powder (1/2 tsp plus 1/4 tsp)
    • 1/2 tsp sea salt
    • 2 flax eggs (2 Tbsp golden ground flax seed mixed with 1/4 cup plus 2 Tbsp filtered water, allowed to sit 15 minutes)
    • 1/4 cup plus 2 Tbsp almond oil or other neutral oil
    • 1/2 cup plant based milk
    • 1 1/2 tsp pure vanilla extract
    • 1/2 tsp almond extract

    Almond Praline:

    • 1 cup granulated sugar
    • 1/8 tsp sea salt
    • 2/3 cup chopped almonds
    • 1 tsp pure vanilla extract

    Frosting:

    • 1 1/2 cups vegan butter, I used Earth Balance (at room temperature)
    • 3-4 Tbsp oat milk (I used Oatly, but you can use what you prefer), add 3 then if needed add another if frosting comes out too stiff
    • 1 tsp pure vanilla extract
    • 1/2 tsp pure almond extract
    • 4 cups powdered sugar


    Instructions:

    1. Preheat oven to 350F degrees, and line 2 6 inch round cake pans with parchment on the bottom and oil the sides.
    2. In a large bowl, combine the flour, sugar, baking powder and sea salt and whisk to blend.
    3. Add the flax eggs, avocado oil, oat milk, and vanilla and beat with an electric mixer for about a minute (or 3 minutes if doing it by hand with a whisk).
    4. Pour the cake batter into the prepared pans, dividing evenly between them.
    5. Place the cakes in the oven and bake for about 30 minutes until the cakes are done in the center (you are able to insert a toothpick into the center and it comes out almost clean with a few moist crumbs).
    6. Remove from the oven and let cool 20 minutes, then remove the cakes from the pans by cutting around the sides, placing a plate on top then inverting it and tapping on it.  Allow them then to cool completely once they are out of the pans.
    7. To make the praline, in a non-stick pan, melt the sugar and salt until completely smooth and liquid over medium heat (this should take about 5 minutes), add the almonds and vanilla (it will foam slightly so be careful), stir until mixed in well, then pour onto a sheet of parchment or foil and allow to cool completely.  Once it has cooled, break into small pieces
    8. Chop up about 1/3 cup of the brittle to smaller pieces and save the rest for decorating the cake (and eating).
    9. To make the frosting, beat the butter with the milk and vanilla until fluffy.
    10. Add the powdered sugar 1 cup at a time, and beat until completely mixed and light and fluffy (if the frosting is too stiff add that other Tbsp of milk).
    11. When ready to frost, Place one cake layer on a plate, spread about 1/2 inch thick layer of the frosting over it, then top with the chopped brittle.
    12. Spread a thin layer of frosting on what will be the bottom of the other cake layer, then place on top of the brittle.
    13. Spread the remaining frosting on the top and down the sides of the cake evenly, then place the rest of the frosting in a pastry bag and use it to decorate the top and the remaining brittle pieces.  This frosting recipe makes enough that you should be able to do some generous piping decorations on top, because I like a lot of frosting!
    14. Serve the cake and enjoy!


  • Vegan Blueberry Vanilla Layer Cake

    Vegan Blueberry Vanilla Layer Cake

    For my Birthday every year I like to bake myself a cake, this year wouldn’t be any different. I  had a Vegan Vanilla Blueberry Layer Cake in mind way in advance, I had bought the ingredients, then this week happened and I almost delayed making the cake (but didn’t because I am posting it obviously).  It was quite the roller coaster of things last week, starting last Monday finding out that the store of the deli I work at currently will be closing at the end of the month and my last day would be Thursday.  Now, I have been there 16 years, and so I was really sad about it because I love the people I work with and it has become kind of a second home.  But I started applying for jobs right away so I know I will survive and be ok even if I will miss everyone.  Then on Wednesday someone hacked my Facebook and posted banned content, so Facebook has suspended my personal page, I may never get it back (depends on what they decide after 30 days), and I can not access my Fragrant Vanilla Cake business page, and that may be deleted too if my personal page is.  So I apologize to anyone who has tried to message me or if I haven’t answered comments, because I am not able to access the page. If you want to ask me a question I will get the message if you message me on Instagram or post a comment on here.

    But anyway, back to the cake I planned on making. I decided to make it anyway despite all the stuff going on because baking cheers me up!  It is fun to make cake after all and it sounded really good.  Eric’s Dad gave me some blueberry jam, so that is what made me think to make a Vegan Vanilla Blueberry Layer Cake in the first place.  I thought it could have a blueberry frosting too and vanilla cake layers.  So, I made a classic vanilla cake for the cake layers.  I used whole wheat pastry flour, but if you wanted to use regular AP flour you could use that instead. Or if you wanted it gluten free, you could use gluten free all purpose flour, I like Bob’s Red Mill all purpose baking flour, I have used it before with success.

    The cakes smelled heavenly while baking!  I baked them a day ahead of time, and then frosted them the next day.  I usually do this with cake, because that way I can ensure it is cooled completely and I feel like it is more sturdy. I made a blueberry vanilla buttercream frosting with blueberry powder to give it a lovely purple color.  How do you make blueberry powder?  By blending freeze dried blueberries in a blender until they are a fine powder.  It gives the frosting a wonderful flavor as well! I filled the cake with Eric’s Dad’s Jam and it was perfect!

    This cake turned out so heavenly!  The cake was soft and delicious, scented with vanilla and it paired perfectly with the gooey blueberry jam and rich sweet blueberry buttercream frosting! It definitely cheered me up and made the perfect Summer Birthday cake!  If you love blueberries, definitely give this Vegan Vanilla Blueberry Layer Cake a try!

    Vegan Blueberry Vanilla Layer Cake

    Makes one 2 layer 6 inch cake

    Ingredients:

    Cake:

    • 1 1/2 cups whole wheat pastry flour
    • 3/4 cup plus 2 Tbsp maple sugar or granulated sugar
    • 3/4 tsp baking powder (1/2 tsp plus 1/4 tsp)
    • 1/2 tsp sea salt
    • 2 flax eggs (2 Tbsp ground flax seed mixed with 1/4 cup plus 2 Tbsp filtered water, allowed to sit 15 minutes)
    • 1/4 cup plus 2 Tbsp avocado oil
    • 1/2 cup oat milk (I used Oatly) or other plant based milk
    • 1 1/2 tsp pure vanilla extract


    Frosting:

    • 1 1/2 cups vegan butter, I used Earth Balance (at room temperature)
    • 3-4 Tbsp oat milk (or you can use whatever plant based milk you prefer), add 3 then if needed add another if frosting comes out too stiff
    • 1 tsp pure vanilla extract
    • 1/2 cup freeze dried blueberries, blended in a blender until they are fine powder
    • 3 1/2 cups powdered sugar


    Filling:

    • 1/3 cup blueberry jam


    1. Preheat oven to 350F degrees, and line 2 6 inch round cake pans with parchment on the bottom and oil the sides.
    2. In a large bowl, combine the flour, sugar, baking powder and sea salt and whisk to blend.
    3. Add the flax eggs, avocado oil, milk, and vanilla and beat with an electric mixer for about a minute (or a little longer if doing it by hand with a whisk).
    4. Pour the cake batter into the prepared pans, dividing evenly between them.
    5. Place the cakes in the oven and bake for 25-30 minutes until the cakes are done in the center (you are able to insert a toothpick into the center and it comes out almost clean with a few moist crumbs).
    6. Remove from the oven and let cool 20 minutes, then remove the cakes from the pans by cutting around the sides, placing a plate on top then inverting it and tapping on it.  Allow them then to cool completely once they are out of the pans.
    7. To make the frosting, beat the butter with the milk and vanilla until fluffy.
    8. Add the blueberry powder, and then powdered sugar 1 cup at a time, and beat until completely mixed and light and fluffy (if the frosting is too stiff add that other Tbsp of milk).
    9. When ready to frost, Place one cake layer on a plate, spread about 1/4 inch thick layer of the frosting over that, then pipe a frosting barrier around the edge of the cake so that the filling does not ooze (tall enough so that it will be thicker than the filling).
    10. Spoon the jam into the middle of it and spread out evenly to the barrier frosting.  Place the next cake layer on top.
    11. Spread the remaining frosting on the top and down the sides of the cake evenly, then place the rest of the frosting in a pastry bag and use it to decorate the top.  This frosting recipe makes enough that you should be able to do some generous piping decorations on top, because I like a lot of frosting!
    12. Serve the cake and enjoy!


    Notes:

    If you would like to make a 9 inch round cake, double the entire recipe, and bake it in two 9 inch round pans, increasing the baking time slightly until the cakes are baked through about 30-35 minutes.

  • Vegan Strawberry Lemon Layer Cake

    Vegan Strawberry Lemon Layer Cake

    The weather here in Minnesota just seems to want to stay cold, in fact we had snow for Easter last weekend, and earlier in the week.  But that isn’t stopping me from enjoying the flavors of spring and looking forward to a warmer season.  We don’t really get strawberries here until the end of May usually, but I decided to make a Strawberry Lemon Layer Cake for Easter last weekend because I was craving them.  Luckily I just needed freeze dried strawberries to flavor the frosting and I had some strawberry jam that Eric’s Dad made with the fresh strawberries from his garden last year.  I love a lemon berry combination this time of year it is just so fresh and the perfect thing to make when you want to leave winter in the past.

    For the cake layers, I used a vanilla cake batter that I have made before with flax eggs, but to flavor it with lemon I added lemon juice and zest in place of some of the water for the flax eggs (so I didn’t add extra moisture). I used whole wheat pastry flour for this, but if you wanted the cake to be lighter in color and texture you could use regular all purpose flour or even cake flour for the lightest cake.  I just used what I had on hand but I know everyone has different preferences with how they prefer their cakes.

    The cakes smelled heavenly as they baked, and they baked up nicely!  I could not wait to try them, but they had to cool first and of course I had to add the strawberry element in the filling and frosting. I actually made my cakes the day before I frosted them because I was making them after work (I almost always do this so that they have plenty of time to cool).  But it is important that you remove them from the pans after they cool about 20 minutes so they don’t become to moist and can cool properly.  Once they have cooled completely I just wrap them with parchment in between and refrigerate them overnight so they are ready to go the next day.

    For the frosting I made a vegan buttercream with a hint of lemon plus plenty of strawberry flavor thanks to the freeze dried strawberry powder I used.  This is a great way to flavor frosting without adding moisture. The frosting was heavenly!  I sandwiched the cake together with it and some of Eric’s Dad’s strawberry jam and it was sooo good!  The cake was sweet, and a little tart thanks to the lemon, the cake layers soft and tender and the frosting rich and creamy.  If you are in the mood for something strawberry definitely give this Vegan Strawberry Lemon Layer Cake a try!

    Vegan Strawberry Lemon Layer Cake

    Makes one 2 layer 6 inch cake

    Ingredients:

    Cake:

    • 1 1/2 cups whole wheat pastry flour
    • 3/4 cup plus 2 Tbsp maple sugar or granulated sugar
    • 3/4 tsp baking powder (1/2 tsp plus 1/4 tsp)
    • 1/2 tsp sea salt
    • 2 Tbsp ground flax seed
    • 1/4 cup lemon juice
    • 1 Tbsp lemon zest
    • 2 Tbsp filtered water
    • 1/4 cup plus 2 Tbsp avocado oil
    • 1/2 cup oat milk (I used Oatly) or other plant based milk
    • 1 1/2 tsp pure vanilla extract


    Frosting:

    • 1 1/2 cups vegan butter, I used Earth Balance (at room temperature)
    • 1 Tbsp lemon juice
    • 2-3 Tbsp oat milk (I used Oatly, but you can use what you prefer), add 3 then if needed add another if frosting comes out too stiff
    • 1 tsp pure vanilla extract
    • 1/2 cup freeze dried strawberries, blended in a blender until they are fine powder
    • 4 cups powdered sugar


    Filling:

    • 1/3 cup strawberry jam


    1. Preheat oven to 350F degrees, and line 2 6 inch round cake pans with parchment on the bottom and oil the sides.
    2. In a large bowl, combine the flour, sugar, baking powder and sea salt and whisk to blend.
    3. Mix together the ground flax seed, lemon juice and zest, and water.
    4. Add the flax mixture, avocado oil, oat milk, and vanilla to the flour mixture and beat with an electric mixer for about a minute (or a little longer if doing it by hand with a whisk).
    5. Pour the cake batter into the prepared pans, dividing evenly between them.
    6. Place the cakes in the oven and bake for about 30 minutes until the cakes are done in the center (you are able to insert a toothpick into the center and it comes out almost clean with a few moist crumbs).
    7. Remove from the oven and let cool 20 minutes, then remove the cakes from the pans by cutting around the sides, placing a plate on top then inverting it and tapping on it.  Allow them then to cool completely once they are out of the pans.
    8. To make the frosting, beat the butter with the milk, lemon juice, and vanilla until fluffy.
    9. Add the strawberry powder, and then powdered sugar 1 cup at a time, and beat until completely mixed and light and fluffy (if the frosting is too stiff add that other Tbsp of milk).
    10. When ready to frost, Place one cake layer on a plate, spread about 1/4 inch thick layer of the frosting over that, then pipe a frosting barrier around the edge of the cake so that the filling does not ooze (tall enough so that it will be thicker than the filling).
    11. Spoon the jam into the middle of it and spread out evenly to the barrier frosting.  Place the next cake layer on top.
    12. Spread the remaining frosting on the top and down the sides of the cake evenly, then place the rest of the frosting in a pastry bag and use it to decorate the top.  This frosting recipe makes enough that you should be able to do some generous piping decorations on top, because I like a lot of frosting!
    13. Serve the cake and enjoy!


    Notes:

    If you would like to make a 9 inch round cake, double the entire recipe, and bake it in two 9 inch round pans, increasing the baking time slightly until the cakes are baked through about 30-35 minutes.


  • Vegan Peaches and Cream Layer Cake

    Vegan Peaches and Cream Layer Cake

    Last week, I had the idea to make a peaches and cream layer cake. I admit I was inspired by some peach jam that I had just opened up that Eric’s Dad sent home with us when we visited him in Michigan last fall.  He makes some of the best jams, and this peach jam tastes just like peach pie!  So I began to wonder what it would be like in a cake filling. I usually just go to the old raspberry or strawberry filling but a peach cake sounded amazing!  Also, I have never had peach cake, so I thought it would be fun to make!  This Vegan Peaches and Cream Layer Cake might look like it is time consuming but it was really pretty easy!

    For the cake portion, I just wanted to make a vanilla cake so that it could serve as a blank (but delicious) palate for the peach flavors.  I thought about including some peach in the cake part but I ultimately decided on just vanilla so that the filling and frosting could shine. If you wanted it to have more peach flavor though, you could add about 1/4 cup peach powder (freeze dried peaches ground to powder, what I used in the frosting) included in the cake batter with the flour. I just used a simple vanilla cake recipe with flax eggs for the cake portion, it is really easy and pretty fool proof. I used whole wheat pastry flour for this, but if you preferred all purpose flour, or even cake flour (for an even lighter cake) you could use that, I just prefer the whole wheat for myself.

    As far as the sweetener for the cake batter goes, I used maple sugar, but if you wanted a more white cake you could use a golden flax seed instead of brown, and a granulated sugar instead of the maple. I don’t mind if my cake is a little darker in color because I used a little less processed ingredients, but I know it might matter to some people. The cakes smelled amazing while baking! I love the scent of vanilla cake, hence my blog name.  But I could not wait to make the frosting and include the filling and taste the finished product!

    For the filling as I mentioned earlier I used Eric’s Dad’s peach jam.  It worked out perfectly in the cake, like a peach pie filling!  I made a simple vegan buttercream frosting for the cake as well, flavored with peach powder.  It is just freeze dried peaches ground to a fine powder and it has so much flavor!  Also, it tinted the frosting a pretty peach color so I didn’t even have to use food coloring!  This cake was sooo delicious!  Soft and sweet scented with vanilla and fragrant peaches, the smooth rich buttercream the perfect thing to top it off with!  I know it is not peach season, but this seriously tastes like summer and we could use a bit of that!  If you are a peach fan, definitely give this Vegan Peaches and Cream Cake a try!

    Vegan Peaches and Cream Layer Cake

    Makes one 2 layer 6 inch cake

    Ingredients:

    Cake:

    • 1 1/2 cups whole wheat pastry flour
    • 3/4 cup plus 2 Tbsp maple sugar or granulated sugar
    • 3/4 tsp baking powder (1/2 tsp plus 1/4 tsp)
    • 1/2 tsp sea salt
    • 2 flax eggs (2 Tbsp ground flax seed mixed with 1/4 cup plus 2 Tbsp filtered water, allowed to sit 15 minutes)
    • 1/4 cup plus 2 Tbsp avocado oil
    • 1/2 cup oat milk (I used Oatly) or other plant based milk
    • 1 1/2 tsp pure vanilla extract


    Frosting:

    • 1 1/2 cups vegan butter, I used Earth Balance (at room temperature)
    • 3-4 Tbsp oat milk (I used Oatly, but you can use what you prefer), add 3 then if needed add another if frosting comes out too stiff
    • 1 tsp pure vanilla extract
    • 1/2 cup freeze dried peaches, blended in a blender until they are fine powder
    • 4 cups powdered sugar


    Filling:

    • 1/3 cup peach jam


    1. Preheat oven to 350F degrees, and line 2 6 inch round cake pans with parchment on the bottom and oil the sides.
    2. In a large bowl, combine the flour, sugar, baking powder and sea salt and whisk to blend.
    3. Add the flax eggs, avocado oil, oat milk, and vanilla and beat with an electric mixer for about a minute (or a little longer if doing it by hand with a whisk).
    4. Pour the cake batter into the prepared pans, dividing evenly between them.
    5. Place the cakes in the oven and bake for 25-30 minutes until the cakes are done in the center (you are able to insert a toothpick into the center and it comes out almost clean with a few moist crumbs).
    6. Remove from the oven and let cool 20 minutes, then remove the cakes from the pans by cutting around the sides, placing a plate on top then inverting it and tapping on it.  Allow them then to cool completely once they are out of the pans.
    7. To make the frosting, beat the butter with the milk and vanilla until fluffy.
    8. Add the peach powder, and then powdered sugar 1 cup at a time, and beat until completely mixed and light and fluffy (if the frosting is too stiff add that other Tbsp of milk).
    9. When ready to frost, Place one cake layer on a plate, spread about 1/4 inch thick layer of the frosting over that, then pipe a frosting barrier around the edge of the cake so that the filling does not ooze (tall enough so that it will be thicker than the filling).
    10. Spoon the jam into the middle of it and spread out evenly to the barrier frosting.  Place the next cake layer on top.
    11. Spread the remaining frosting on the top and down the sides of the cake evenly, then place the rest of the frosting in a pastry bag and use it to decorate the top.  This frosting recipe makes enough that you should be able to do some generous piping decorations on top, because I like a lot of frosting!
    12. Serve the cake and enjoy!


    Notes:

    If you would like to make a 9 inch round cake, double the entire recipe, and bake it in two 9 inch round pans, increasing the baking time slightly until the cakes are baked through about 30-35 minutes.


  • Vegan Mexican Dark Chocolate Layer Cake 

    Vegan Mexican Dark Chocolate Layer Cake 

    Last weekend we celebrated Eric’s Birthday, and he totally lucked out because the weather has been fabulous and warm here lately and his Birthday didn’t fall on Thanksgiving this year.  Some years it does and it is kind of not fair since who wants their Birthday on a Holiday when everything is closed and you can’t do the things you want to.  So, this year  we visited our favorite brewery, took a brewery tour, and enjoyed one of our favorite special occasion restaurants.  I felt bad because he did have to work on Thanksgiving, so I tried to make the weekend fun.  He is my best friend and of course one of my top recipe tasters so he is super important to me.  So, I wanted him to be able enjoy himself.   His Birthday is actually today even though we celebrated it early due to having to work, and as is tradition I made him a cake.  Ever since 2012 (when we met), I have made him a cake of his choice.  Back then I was raw vegan so the first one was a Raw Mexican Dark Chocolate Turtle Cheesecake and it was heavenly!  He almost always chooses chocolate, although last year it was a Vegan Sweet Potato Bourbon Caramel Pecan Cake.  This year we decided to go for the spiced chocolate again with a Mexican Dark Chocolate Layer Cake.  It was definitely a good choice, and just the cake I would pick for him.

    He is obsessed with hot peppers.  In fact, the first food item I ever shared with him when we first met was a small jar of habanero hot sauce.  We both appreciate that sort of thing, because he actually makes hot sauce too.  At one point we would buy a 5 lb box of habaneros at a time from the produce department at my work and share it to make hot sauces.  That kind of went by the wayside, because we are both busy, but he still asks me “what if you made (insert dessert here) with hot peppers?  I have made quite a few spicy things pairing sweets and heat for him in the past.  He recently got a pepper grinder with ghost peppers in it and we sat at the table eating dinner, both trying it and sweating.  He put way more peppers than me on his food but it was pretty comical to watch each other sweat.  That is what kind of gave us the idea for this cake.  Chocolate and spicy peppers are heavenly together.  I did not put ghost peppers in this cake though, I went for the more mild chipotle pepper because I figure you want to still be able to taste the cake as you eat it.

    I made a decadent rich chocolate cake batter sweetened with dates and it made for a moist and delicious cake that wasn’t too heavy, but just right.  I am super picky about cake consistency, and so I made sure to bake this for just the right amount of time.  Nothing ruins a cake like over baking it (or under baking it).  I had added chipolte powder and cinnamon into the batter to give it an aromatic special touch.  You could taste the spice in there, and it had a bit of heat, but not so much that you couldn’t taste the rich chocolate flavor.  For the frosting, I went with a super fudgy one that is my go to for many cakes, one made with a sweet potato base.  It may sound weird but it is amazing once it is finished and tastes super rich.  So yes, this cake is actually refined sugar free, and gluten free but you would never know because it tasted amazing.  It was the perfect cake for my favorite guy on his birthday!

    Vegan Mexican Dark Chocolate Cake 
    Makes one 2 layer 6 inch cake

    Ingredients:

    2 6 inch cake pans

    Cake:

    • 1 1/2 cups Bob’s Red Mill Gluten Free All Purpose Flour
    • 1/4 cup cacao powder or unsweetened cocoa powder
    • 1 1/2 tsp baking soda
    • 1 tsp baking powder
    • 1/2 tsp sea salt
    • 1 tsp cinnamon
    • 1/2 tsp ground chipotle pepper
    • 1 1/4 cups packed soft medjool dates, pitted, soaked in water for 30 minutes and drained
    • 1/4 cup almond butter
    • 2 tsp pure vanilla extract
    • 2 cups filtered water
    • 2 Tbsp apple cider vinegar


    Frosting:

    • 1 1/4 cups mashed Japanese sweet potatoes*
    • 1  cup soft pitted medjool dates (soaked in water for 30 minutes and drained before using if not soft)
    • 1/3 cup almond butter
    • 1/2 cup filtered water (or as needed)
    • 1/2 cup unsweetened cocoa powder
    • 1 tsp pure vanilla extract
    • 1/4 tsp ground chipotle powder
    • 1/4 tsp sea salt


    Directions:

    1. Preheat the oven to 375F degrees and position rack in center of oven.
    2. Oil two 6 inch round cake pans with coconut oil and line the bottom with parchment.
    3. Whisk flour, cocoa powder, baking powder, baking soda, cinnamon, chipotle sea salt in a large bowl to blend well.
    4. Place dates, water, almond butter, and vanilla extract into a blender, and blend until smooth, then whisk this blended mixture into the flour mixture until well blended. Whisk in the cider vinegar until bubbles form.
    5. Pour the cake batter into prepared pans, and place in the oven.
    6. Bake cakes until set and a toothpick inserted into the center comes out almost clean, about 25-30 minutes.  Remove from oven, let cool completely, the un-mold them onto two plates (I like to cover mine and chill in the refrigerator for a few hours to make slicing easier).
    7. Slice cakes in half horizontally so that you have 4 layers. Set aside.
    8. To make the frosting, combine all ingredients in a blender and blend until smooth (adding water a little at a time if you think it is too thick).  Set aside.
    9. To assemble, place one cake layer on a plate, and spread frosting 1/4 inch thick over it. Place the other cake layer over that, then spread more frosting, over it like the last layer.  Repeat with another layer, and top off with last piece of cake.  Spread the remaining frosting on the top and down the sides of the cake.


    *I like to roast my sweet potatoes in the oven. To do so, cut them in half, and place them cut side down on a parchment lined tray.  Roast at 400F degrees for about an hour or until they are tender.  Let cool before pureeing.

  • Vegan Peanut Butter Love Cake

    Vegan Peanut Butter Love Cake

    If I could eat a whole jar of peanut butter I would.  I love the stuff, and I always have since I was a little kid.  Reese’s peanut butter cups were something I looked forward to on the holidays where chocolate was included, and peanut butter sandwiches were a staple in my school lunches since I never wanted to eat sandwiches with meat like the other kids did.  Now I like to just eat a scoop of peanut butter now and then, or stir it into my oatmeal.  Although, I am sure my serving size is always larger than what it says on the jar.  Many of my favorite desserts contain it as well.  Like these chocolate peanut butter lava cakes, or this peanut butter and jelly pie, or this PB and J layer cake.  So, when I was having a hard time thinking of what type of cake to make last weekend (because I wanted cake, and it is a tradition Eric and I always share dessert and wine on Sunday nights and that dessert is usually cake in some form) I came back to my old friend peanut butter.  Now peanut butter is simple mind you, but this cake turned out beautiful!  My inspiration came from a non-vegan cake on Pinterest.  I had seen it a while back and said to myself, I need to veganize and healthify that. So now was the time.

    For the cake layers, I included peanut butter in the batter (because hey, it is the star of the cake) and it tasted delicious.  It is an oil free date sweetened cake batter actually, my go-to recipe as of late.  The richness comes from the peanut butter, and the dates give it a sort of caramel flavor.  The cake layers baked up beautifully, soft and moist as cake should be but not heavy.  For the frosting, I made a sort of vegan peanut butter “buttercream” frosting.  It was so delicious, tasting like peanut butter mousse.  Lastly, the cake needed to have another peanut butter element (as if the first two weren’t enough), so I made a sweet peanut butter caramel.  This was date based as well, so this entire cake is fruit sweetened.

    I topped it off with crunchy roasted peanuts and it was even more beautiful than I imagined. Also, it tasted even better than I expected.  I knew it would be good, but this was yummalicious!  Perfectly moist soft cake sandwiched together and topped off with gooey sweet caramel, luscious dreamy frosting and crunchy peanuts!  I think this would make the perfect Birthday cake if you know a peanut butter lover.  Eric and I devoured our first pieces very quickly, and I had given a piece to my Mom and she loved it even though she is not normally a peanut butter person, so all big thumbs up from my taste testers!  Trust me, you need this cake in your life!

    Vegan Peanut Butter Love Cake
    Makes one 2 layer 6 inch cake

    Ingredients:

    2 6 inch cake pans

    Cake:

    • 1 1/2 cups Bob’s Red Mill Gluten Free All Purpose Flour
    • 1 1/2 tsp baking soda
    • 1 tsp baking powder
    • 1/2 tsp sea salt
    • 1 cup packed soft medjool dates, pitted, soaked in water for 30 minutes and 1 cup of the water reserved
    • 1/4 cup organic peanut butter
    • 2 tsp pure vanilla extract
    • 1 cup filtered water
    • 2 Tbsp apple cider vinegar

    Vegan Peanut Butter Cream Frosting:

    • 1 15 oz can full fat organic coconut milk, chilled (You want to make sure it is a brand that is very thick at least 2/3 of the can like Thai Kitchen)
    • 1/2 cup organic peanut butter
    • 1/4 cup maple syrup
    • 1 tsp pure vanilla extract
    • 1/4 tsp sea salt
    • 1/2 cup plus 2 Tbsp melted coconut butter (warmed to liquid)

    Peanut Butter Caramel:

    • 1 cup soft medjool dates, pitted (if they are not soft, soak them in water and drain well first)
    • 2 heaping Tbsp peanut butter
    • 1 Tbsp coconut oil, warmed to liquid
    • 1/8 tsp sea salt
    • 1 tsp pure vanilla extract
    • 1/4 cup filtered water (plus more as needed)

    1/2 cup chopped organic roasted peanuts for topping cake

    Directions:

    1. Preheat the oven to 375F degrees and position rack in center of oven.
    2. Oil two 6 inch round cake pans with coconut oil and line the bottom with parchment.
    3. Whisk flour, baking powder, baking soda, sea salt in a large bowl to blend well.
    4. Place dates, reserved water, peanut butter, water, and vanilla extract into a blender, and blend until smooth, then whisk this blended mixture into the flour mixture until well blended. Whisk in the cider vinegar until bubbles form.
    5. Pour the cake batter into prepared pan, and place in the oven.
    6. Bake cake until set and a toothpick inserted into the center comes out almost clean, about 25-30 minutes.  Remove from oven, let cool completely, then unmold onto plates.
    7. To make the frosting, combine all ingredients in a high speed blender or food processor and blend until completely smooth.  Pour into a bowl and place in the freezer until the consistency of stiffly whipped cream (about 30-45 minutes depending on how warm it has gotten).  Once it is ready place in the refrigerator until ready to assemble.
    8. To make the caramel, combine all ingredients in a high speed blender or food processor and blend until smooth (adding a little water if necessary, it should be the consistency of pourable but still thick caramel).
    9. To assemble, place one cake layer on a plate.  Spread 3/4 cup frosting over the cake layer, then some of the caramel (keeping it more in the center, and leaving a one inch frosting boarder at the edges).  Place the other cake layer over that, and spread the remaining frosting over the top and down the sides of the cake.  Pour caramel over that, and allow to drip down the sides.  Top with chopped peanuts.
  • Vegan Turmeric Spice Cake

    Vegan Turmeric Spice Cake

    Turmeric Spice Cake 4

    I love turmeric!  Not only is it a beautiful color, but it also has health benefits.  I include some in my diet every day, and I notice that when I do I am less sore from my workouts.  You may not think something as simple as a spice could do so much, but it really does!  I haven’t taken Advil or any of those sorts of pain killers in years (check out this post for more ideas on how I combat pain naturally).  Turmeric doesn’t have much of a flavor, but I like to include it in my oatmeal, or curry dishes.  Also, it makes a great natural food coloring.  When I make things like lemon bars, I add a dash for a lovely yellow color.  My Mom asked me the other day, why not make a turmeric cake?  So I thought about it and the more I thought, the better it sounded.  I decided to combine the turmeric with warming spices, so it would taste like a delicious turmeric latte.  If you have never had one they are awesome!  I hadn’t made a spice cake in a while, and it sounded good.  It is still Winter after all, and I am still in need of some warming spices.  Especially after a long run outside in the brisk air, which was what I did the day I made the cake.

    Turmeric Spice Cake

    I am finding that I am more optimistic about the fact that it is Winter than I have been in the last few years.  Maybe because the roads are pretty clear and it hasn’t been below 20 degrees for a while.  And when you can dream about the delicious cake you are going to enjoy later in the warmth of your home, even better!  I made the cake layers date sweetened, and the slightly caramel flavor of the dates paired perfectly with my turmeric spice mix!  I had to taste the batter to make sure it was good before I baked it, and it tasted good, but it smelled even more amazing while baking!  The aroma of freshly baked spice cake takes me back to when I was younger and my Mom used to occasionally bake them.  They were always a treat!  Like a classic spice cake, I wanted to frost this one with vegan “cream cheese” frosting.  Which is actually my favorite vegan go to frosting of choice (well, maybe a tie with fudge, but it depends on the mood I am in).

    Turmeric Spice Cake 1

    Once the cake was all frosted and pretty, and I got to dive into it, it was quite delicious!  Moist and fragrant with spice, and creamy sweet frosting…I was in heaven!  If you are in the mood for cake, and don’t know what to make, give this a try!  It is the perfect warming Winter cake recipe!  I think sitting in my PJs eating cake with a loved one is one of my favorite things.  Especially when I am in a warm kitchen looking out at the snow.

    Turmeric Spice Cake 2

    Vegan Turmeric Spice Cake
    Makes one 2 layer 6 inch cake

    Ingredients:

    2 6 inch cake pans

    Cake:

    • 3/4 cup Bob’s Red Mill Gluten Free All Purpose Flour
    • 3/4 tsp baking soda
    • 1/2 tsp baking powder
    • 1/4 tsp sea salt
    • 1/2 cup packed soft medjool dates, pitted, soaked in water for 30 minutes and 1/2 cup of the water reserved
    • 2 Tbsp raw almond butter
    • 1 tsp pure vanilla extract
    • 1 tsp turmeric
    • 1/2 tsp cinnamon
    • 1/2 tsp ginger
    • 1/8 tsp nutmeg
    • 1/2 cup filtered water
    • 1 Tbsp apple cider vinegar

    Vegan Cream Cheese Frosting:

    • 1 15 oz can full fat organic coconut milk, chilled
    • 1/2 cup raw cashew butter
    • 1/4 cup maple syrup
    • 1 tsp pure vanilla extract
    • 1/4 tsp sea salt
    • 1/4 tsp cider vinegar
    • 1/2 cup plus 2 Tbsp melted coconut butter (warmed to liquid)


    Directions:

    1. Preheat the oven to 375F degrees and position rack in center of oven.
    2. Oil a 6 inch round cake pan with coconut oil and line the bottom with parchment.
    3. Whisk flour, baking powder, baking soda, sea salt in a large bowl to blend well.
    4. Place dates, reserved water, almond butter, water, turmeric, and vanilla extract into a blender, and blend until smooth, then whisk this blended mixture into the flour mixture until well blended. Whisk in the cider vinegar until bubbles form.
    5. Pour the cake batter into prepared pan, and place in the oven.
    6. Bake cake until set and a toothpick inserted into the center comes out almost clean, about 25-30 minutes.  Remove from oven, let cool completely, then unmold onto a plate. Cut in half horizontally so that you have 2 layers.
    7. To make the frosting, combine all ingredients in a high speed blender and blend until completely smooth.  Pour into a bowl and place in the freezer until the consistency of stiffly whipped cream (about 30-45 minutes depending on how warm it has gotten).  Once it is ready place in the refrigerator until ready to assemble.
    8. To assemble, place one cake layer on a plate.  Spread frosting 1/4 inch thick over the cake layer.  Place the other cake layer over that, and spread the remaining frosting over the top and down the sides of the cake.

    Turmeric Spice Cake 51

  • Vegan Almond Joy  Cake

    Vegan Almond Joy Cake

    Almond Joy Cake

    If it ain’t broke, why fix it, right?  Well, not always.  Even when things are really good the way that they have always been sometimes there comes a time when you need to improve upon them.  I have decided to remake some of my old recipes and revamp them.  The old recipes were good (as in tasted really good), and baked up beautifully.  But some of them contain ingredients I no longer use and I have better baking techniques, so I have decided to revise them to make them even better!  I am sure you all can appreciate that, I know I can.  I always appreciate things that are new and improved.  So the first of such recipes I decided to remake was a Vegan Almond Joy Cake.  I made one about 6 years ago for my Mom, because one of her favorite candies was always almond joy. The cake was really delicious, and we all loved it, but it was not gluten free, and loaded up with sugar and oil, so I decided to make it gluten free, make it oil free, and fruit sweetened!  I think this new version turned out just as good as the old one, but it is healthier and contains more good things.

    Almond Joy Cake 1

    I like my desserts to be more than just delicious sometimes, I want them to contain some nutrients as well.  So for this cake, I made the batter fruit sweetened with dates.  Yes, I know dates are a form of sugar too, but I feel better when I eat them than some other sugars.  They are about as natural as you can get when it comes to sweetening things because they are just dried fruits.  I call them nature’s candy because they taste like little caramels.  Not only do they sweeten the cake, they keep it moist and delicious!  The batter tasted wonderful, and smelled fragrant with almond and vanilla.  One of my favorite combinations, that makes me think of Birthday cake.  Since this was an almond joy cake though, it had coconut and almonds were folded in, and I could not stop sampling it.  Eric even had to give it a sample too!  The cakes smelled so delicious while baking, I couldn’t wait for the cake to be assembled!

    Almond Joy Cake 2

    The original frosting had 2 ingredients. Agave nectar and cocoa powder.  It was a bit too sweet (at least with my current tastes) and I don’t feel like that combination has much nutritional value (at least not the agave nectar), so I made this one a little different.  The bulk of it I made from cooked sweet potatoes, which not only add sweetness, but also make for a creamy frosting as well.  I sweetened it with dates also.  Don’t worry, you can not taste the sweet potatoes once the cacao powder and other ingredients are added, it only tastes like the most delicious fudgy frosting ever!  It was perfect on the cake! It was super delicious, I enjoyed it just as much as the other one, and felt better after eating it.  I hope you enjoy the new and improved recipe as well!

    Almond Joy Cake 5

    Vegan Almond Joy Cake
    Makes 1 6 inch 4 layer cake

    Ingredients:

    2 6 inch cake pans

    Cake:

    • 1 1/2 cups quinoa flour (or all purpose gluten free flour)
    • 1 1/2 tsp baking soda
    • 1 tsp baking powder
    • 1/2 tsp sea salt
    • 1 cup packed soft medjool dates, pitted, soaked in water for 30 minutes and 1 cup of the soaking water reserved
    • 1/4 cup organic almond butter
    • 1 Tbsp pure vanilla extract
    • 1 tsp almond extract
    • 1 cup thin coconut milk, or filtered water
    • 2 Tbsp apple cider vinegar
    • 1/2 cup finely shredded coconut
    • 1/2 cup sliced almonds


    Frosting:

    • 1 1/2 cups mashed Japanese sweet potatoes*
    • 1 1/4 cups soft pitted medjool dates (soaked in water for 30 minutes and drained before using if not soft)
    • 1/3 cup almond butter
    • 1 cup filtered water (or as needed)
    • 1 cup unsweetened cocoa powder
    • 1 tsp pure vanilla extract
    • 1/4 tsp sea salt


    Sliced almonds and large flake coconut for layers and decorating


    Directions:

    1. Preheat the oven to 375F degrees and position rack in center of oven. Line two six-inch-diameter cake pans with 2-inch-high sides with parchment paper. Coat parchment paper and pan sides lightly with oil so that the cake doesn’t stick and line the bottom of the pan.
    2. Whisk flour, baking powder, baking soda, and sea salt in a large bowl to blend well.  Set aside.
    3. Place dates, reserved water, almond butter, coconut milk, and vanilla extract into a blender, and blend until smooth, then whisk this blended mixture into the flour mixture until well blended. Whisk in the cider vinegar until bubbles form. Fold in coconut and almonds.  Transfer cake batter to prepared pans and bake cakes until tester inserted into center comes out clean, about 25-30 minutes. Cool cakes completely in pan on rack, about 1 hour. Cut around sides of pan to loosen. Turn cakes out onto a plate, peel off parchment paper.  If you have time, I would recommend chilling cakes overnight in the refrigerator before slicing into layers, it makes it easier.  Cut cakes in half horizontally so that you have 4 layers.
    4. To make the frosting, combine all ingredients in a blender and blend until smooth (adding water a little at a time if you think it is too thick).  Pour into a bowl.
    5. To assemble, place one cake layer on a plate, and spread about 1/2 cup frosting over it, then sprinkle with some almonds and coconut.  Place another cake layer over that and repeat.  Place another layer over that and repeat.  Top with the last cake layer. Spread the remaining frosting on the top and down the sides of the cake.
    6. Sprinkle the almonds and coconut around the top and bottom of the cake.


    *I roast my sweet potatoes in the oven.  Simply slice in half lengthwise, place cut side down on a parchment lined tray, and roast in a 400F degree oven until tender about 1 hour.  Peel off the skin and mash.

    ***if you would like a 2 layer 9 inch cake, double this entire recipe and bake in two 9 inch cake pans.  It will take longer to bake, about 50 minutes to 1 hour.

    Almond Joy Cake 4

  • Vegan White Chocolate Grapefruit Cake

    Vegan White Chocolate Grapefruit Cake

    grapefruit-cake-with-white-chocolate-frosting-5

    New Years Eve deserves a special cake, so I knew I wanted to make one, but I wasn’t quite sure what kind.  Sometimes my brain is a crazy snow globe with all of my recipe ideas floating around in it at once, getting tangled up with the other things going on in my life.  I would bounce from one idea to another, but they all sounded so good…so I needed a little help deciding and turned to Eric.  He often helps me decide when I am stuck between recipes.  Like a coin toss, but better because he is the one I will be sharing with most of the time.  I wanted something seasonal, and citrus was on the table, and we decided on Grapefruit white chocolate.  I have made grapefruit cakes before, but they were raw, never baked, so this would be different.  The cake I had imagined had layers of moist  grapefruit scented cake, luscious white chocolate cream cheese frosting and grapefruit curd in between the layers to break up all the sweet with a hint of tart.  I admit sometimes lately I shy away from cakes with more steps that are maybe a little more complicated, but what the heck, I was off work that day so why not?

    grapefruit-cake-with-white-chocolate-frosting

    For the cake layers, I added plenty of grapefruit in the form of juice and zest.  Grapefruits are at their best this time of the year, so it is the perfect time to use them in recipes!  I sweetened my cake with dates to both keep it moist, and give it a slight caramel flavor (which I love, and goes awesome with citrus).   Also, a little almond butter for richness, which I am preferring to just oil lately in my cakes.  The cake baked up beautifully, nice and light and aromatic.  I could not wait to assemble it!  But first I had to make the grapefruit curd and frosting.  For the curd, I used my usual lemon curd recipe modified and it turned out perfect!  It was so flavorful thanks to the lovely organic Rio Star grapefruits I had picked up at work.

    grapefruit-cake-with-white-chocolate-frosting-3

    For the frosting, I used my usual vegan cream cheese frosting with a coconut cashew base with a touch of cacao butter to make it taste like white chocolate.  Man was it good.  Like eat with a spoon, or top off your piece of pie with it good.  I never miss dairy as a vegan, because there are so many good substitutes for it!  I used to make cream cheese frosting all the time when I was not vegan, so it was one of the first things I figured out how to make vegan.  Anyways, it is good stuff.  And, this cake turned out lovely!  Moist grapefruit scented cake with sweet tart grapefruit curd, and creamy rich “cream cheese” frosting with a touch of white chocolate goodness.  Definitely a New Years Eve worthy cake, and good for curing those Winter blues.  It may be cold where you live, but this cake tastes like sunshine and happiness!

    grapefruit-cake-with-white-chocolate-frosting-4

    Vegan White Chocolate Grapefruit Cake
    Makes one 2 layer 6 inch cake

    Ingredients:

    2 6 inch cake pans

    Cake:

    • 1 1/2 cups Bob’s Red Mill Gluten Free All Purpose Flour
    • 1 1/2 tsp baking soda
    • 1 tsp baking powder
    • 1/2 tsp sea salt
    • 1 cup packed soft medjool dates, pitted, soaked in water for 30 minutes and 1 cup of the water reserved
    • 1/4 cup raw almond butter
    • 2 tsp pure vanilla extract
    • 2 Tbsp organic grapefruit zest
    • 1  cup grapefruit juice
    • 2 Tbsp apple cider vinegar


    Curd Filling:
    • 1/2 cup plus 1 Tbsp fresh grapefruit juice
    • 1/2 Tbsp organic grapefruit zest
    • 2 Tbsp maple syrup
    • 2 Tbsp cornstarch
    • pinch of sea salt
    • 1 Tbsp full fat coconut milk
    • 1 tsp pure vanilla extract
    • 1 1/2 tsp coconut oil


    Frosting:

    • 1 15 oz can full fat organic coconut milk, chilled
    • 1/2 cup raw cashew butter
    • 1/4 cup maple syrup
    • 1 tsp pure vanilla extract
    • 1/4 tsp sea salt
    • 1/4 tsp cider vinegar
    • 1/4 cup plus 2 Tbsp melted coconut butter (warmed to liquid)
    • 1/4 cup melted cacao butter warmed to liquid (or additional coconut butter if unavailable)


    Directions:

    1. Preheat the oven to 375F degrees and position rack in center of oven.
    2. Oil two 6 inch round cake pan with coconut oil and line the bottom with parchment.
    3. Whisk flour, baking powder, baking soda, sea salt in a large bowl to blend well.
    4. Place dates, reserved water, almond butter, grapefruit juice and zest, and vanilla extract into a blender, and blend until smooth, then whisk this blended mixture into the flour mixture until well blended. Whisk in the cider vinegar until bubbles form.
    5. Pour the cake batter into prepared pans, and place in the oven.
    6. Bake cakes until set and a toothpick inserted into the center comes out almost clean, about 25-30 minutes.  Remove from oven, let cool completely, then unmold onto a plate.
    7. To make the filling, combine maple syrup, cornstarch, and sea salt in a medium pot, and whisk until combined. Add the juice and zest and whisk until smooth. Heat over medium high heat whisking constantly until thickened to a curd or pudding like consistency, about 10 minutes. Remove from heat and whisk in coconut milk, coconut oil, and vanilla. Pour into a bowl, and let chill in the fridge until very cold, at least an hour.
    8. To make the frosting, combine all ingredients in a high speed blender and blend until completely smooth.  Pour into a bowl and place in the freezer until the consistency of stiffly whipped cream (about 30-45 minutes depending on how warm it has gotten.  Once it is ready place in the refrigerator until ready to assemble.
    9. To assemble, place one cake layer on a plate, and spread frosting 1/4 inch thick over it.  Then spread some of the curd over that.  Place the other cake layer over that, then spread more frosting, and curd over it like the last layer.  Repeat with another layer, and top off with last piece of cake.  Spread the remaining frosting on the top and down the sides of the cake.

    grapefruit-cake-with-white-chocolate-frosting-2


  • Vegan Pumpkin Spice Cake with Cream Cheese Frosting

    Vegan Pumpkin Spice Cake with Cream Cheese Frosting

    Pumpkin Spice Cake with Cinnamon Cream Cheese Frosting 4

    Sometimes you have a good week where everything goes right, and sometimes you don’t.  What matters is how you deal with it, and whether it makes you a better person, or a worse person.  Well, I had one of those not so good weeks, you know where nothing goes the way you planned it, things break and need to be fixed, work is crazy, and it rains a lot.  But you know what?  I got through it without having a breakdown thanks to prayer, baking (to calm myself) and running (to get out my frustrations).  Eric had had an even more stressful week than me, so I thought I would bake us a delicious cake to make the weekend better.  I knew the next week would be a lot better after all!  Also, Saturday was the 4 year anniversary of the day we met, cake was needed to celebrate that too!  I can’t believe it has been 4 years, it seems like only yesterday he was trying to sell me $18 worth of vanilla beans for $2 on his second day of work as a cashier, because he was distracted by me, and that cute smile caught my eye (don’t worry, I was honest and fixed the mistake).  We met at the health food store where the deli is that I work in.  Best friends right away.  So that is worth cake!  Not that anyone ever needs a reason to eat cake… just sayin’.

    Pumpkin Spice Cake with Cinnamon Cream Cheese Frosting 1

    I decided to make a pumpkin spice cake.  It has been ages since I made a plain pumpkin spice cake, usually it is all jazzed up with some unusual flavor or another.  But you know what?  I wanted the classic.  Pumpkin spice with cream cheese frosting.  Eric’s only request was that the frosting contain cinnamon.  Which sounded perfect!  This cake is relatively simple to make as far as the batter goes.  One of the things I used to hate about traditional cake recipes with eggs and such is that you had to beat the batter a certain way, fold it together etc.  Vegan cakes are so much less fussy.  I used my classic pumpkin pie spice mix in this but with one special ingredient, chipotle pepper.  For a little warmth and heat.  You may think this sounds weird, but it just gives that cake that *POP* of flavor that is unexpected.  One of the first things Eric and I realized we had in common is our love for spicy things, so it was fitting that I added a little to this cake.  The cakes smelled amazing while baking, like Autumn spices.

    Pumpkin Spice Cake with Cinnamon Cream Cheese Frosting 2

    I made a faux cream cheese frosting with a coconut milk base and a little cashew butter.  It tastes even better than actual cream cheese frosting if you ask me.  I am actually kind of grossed out by real dairy now, because of the stuff that is behind it and the actual dairy itself.  Can any of you other vegans relate?  Anyways, this “cream cheese” frosting was wonderful!  I added the cinnamon like Eric wanted and it was so good you could eat it with a spoon.  But once on the cake, even better.  This cake tasted fabulous!  The warming spices were perfect in the soft, light pumpkin cake, and the frosting was luscious, sweet and creamy!  It was simply crave worthy!  Lets just say the pieces of cake I cut for us to enjoy were gone really fast.  We both loved it!

    Pumpkin Spice Cake with Cinnamon Cream Cheese Frosting

    Vegan Pumpkin Spice Cake with Cinnamon Cream Cheese Frosting
    Makes 1 6 inch 2 layer cake

    Ingredients:

    2 6 inch cake pans

    Cake:

    • 1 1/2 cups quinoa flour (or all purpose gluten free flour)
    • 1 1/2 tsp baking soda
    • 1 tsp baking powder
    • 1/2 tsp sea salt
    • 1 Tbsp cinnamon
    • 1 tsp ginger
    • 1/2 tsp nutmeg
    • 1/2 tsp cloves
    • 1/4 tsp chipotle powder
    • 1 cup packed soft medjool dates, pitted, soaked in water for 30 minutes and 1 cup of the soaking water reserved
    • 1/4 cup almond butter
    • 1 Tbsp pure vanilla extract
    • 1 cup pumpkin puree
    • 2 Tbsp apple cider vinegar


    Frosting:

    • 1 15 oz can full fat organic coconut milk  (you want a brand that is mostly the thick cream like Thai Kitchen full fat coconut milk or coconut cream or it will not work), chilled
    • 1/2 cup raw cashew butter
    • 1/4 cup maple syrup
    • 1 tsp pure vanilla extract
    • 1/2 tsp cinnamon
    • 1/4 tsp sea salt
    • 1/4 tsp cider vinegar
    • 3/4 cup melted coconut butter (warmed to liquid)


    Directions:

    1. Preheat the oven to 375F degrees and position rack in center of oven. Line two six-inch-diameter cake pans with 2-inch-high sides with parchment paper. Coat parchment paper and pan sides lightly with oil so that the cake doesn’t stick and line the bottom of the pan with a piece of parchment fit to the pan.
    2. Whisk flour, baking powder, baking soda, spices and sea salt in a large bowl to blend well.  Set aside.
    3. Place dates, reserved water, almond butter, pumpkin puree, and vanilla extract into a blender, and blend until smooth, then whisk this blended mixture into the flour mixture until well blended. Whisk in the cider vinegar until bubbles form. Transfer cake batter to prepared pans and bake cakes until tester inserted into center comes out clean, about 30 minutes. Cool cakes completely in pan on rack, about 1 hour. Cut around sides of pan to loosen. Turn cakes out onto plates, and peel off parchment paper. Slice each in half horizontally so that you have 4 layers (being really careful, because it is delicate).  Set aside, covered so that it doesn’t dry out.
    4. To make the frosting, combine all ingredients in a high speed blender and blend until completely smooth.  Pour into a bowl and place in the freezer until the consistency of stiffly whipped cream (about 30-45 minutes depending on how warm it has gotten.  Once it is ready place in the refrigerator until ready to assemble.
    5. To assemble, place one cake layer on a plate, and spread frosting 1/4 inch thick over it.  Place the other cake layer over that, then spread more frosting over it like the last layer.  Repeat with another layer, and top off with last piece of cake.  Spread the remaining frosting on the top and down the sides of the cake.

    ***If you would like a 2 layer 9 inch cake, double this entire recipe and bake in two 9 inch cake pans.  It will take longer to bake, about 50 minutes to 1 hour.


  • Vegan Chocolate Chip Banana Cake with Peanut Butter Fudge Frosting

    Vegan Chocolate Chip Banana Cake with Peanut Butter Fudge Frosting

    Banana Cake 4

    One time I found out Eric threw out some over ripe bananas.  “What were you thinking?!” I asked.  “You should have given them to me!” I said.  I mean, he knows I freeze them for smoothies, and can make some bomb vegan desserts with them (which I always share with him).  Not just banana bread, but nice cream, cakes, cookies and whatnot.  I am one of those people who asks the people at the store if they have overripe bananas in the back I can have that they can not sell.  I hate throwing out such a useful ingredient.  To be completely honest, I don’t think I have bought a banana in a while because of this.  Of all of the things I make with banana, I think cakes and banana bread are my favorite.  Probably because my Mom used to make that type of stuff when I was little and it was always so good!  She revamped my Grandma’s banana bread recipe adding chocolate chips to it instead of the nuts and switching out the milk with soy milk when I was little and it always turned out wonderful.  My favorite was when she made it in a cake pan, and we put frosting on it.

    Banana Cake 1

    Well, I decided that I was a banana cake type of weekend last weekend.  Banana chocolate chip cake.  Probably because my coworker made banana chocolate chip scones in the deli, and they made me want banana chocolate chip something.  There is just something comforting about banana chocolate chip baked goods.  They remind me of the excitement of waiting for my Mom’s desserts to be done baking and cooling enough to cut into and enjoy.  Because if they don’t require frosting, you know they are amazing when the chocolate chips are still gooey.  Well, my cake would need to cool completely unfortunately because I was going for a layer cake.  Cream cheese frosting used to be my old standby, but I decided to make a peanut butter fudge frosting this time.

    Banana Cake 2

    This cake is actually fruit sweetened, thanks to the dates and bananas in the batter. The dates give it a caramelly flavor reminiscent of brown sugar which is what my Mom used in her banana bread.  I made this oil free as well, swapping in peanut butter in place of the oil.  It was perfectly moist thanks to the bananas and dates, and the peanut butter added just the right amount of richness.  Once it was frosted we couldn’t wait to dive in.  It was simply heavenly let me tell you!  I think this would be the perfect simple Birthday cake!  If you are not a fan of peanut butter, use your favorite nut butter instead, just make sure it is one that is smooth and spreadable.

    Banana Cake

    Vegan Chocolate Chip Banana Cake with Peanut Butter Fudge Frosting
    Makes 1 6 inch 2 layer cake

    Ingredients:

    2 6 inch cake pans

    Cake:

    • 1 1/2 cups quinoa flour (or all purpose gluten free flour)
    • 1 1/2 tsp baking soda
    • 1 tsp baking powder
    • 1/2 tsp sea salt
    • 1 cup packed soft medjool dates, pitted, soaked in water for 30 minutes and 1 cup of the soaking water reserved
    • 1/4 cup organic peanut butter
    • 1 Tbsp pure vanilla extract
    • 1 cup pureed organic bananas
    • 2 Tbsp apple cider vinegar
    • 3/4 cup vegan chocolate chips


    Frosting:

    • 1 1/4 cups pitted medjool dates, soaked in water for 30 minutes, and 1 cup of the water reserved
    • 3/4 cup organic peanut butter
    • 3/4 cup cacao powder
    • pinch sea salt


    Directions:

    1. Preheat the oven to 375F degrees and position rack in center of oven. Line two six-inch-diameter cake pans with 2-inch-high sides with parchment paper. Coat parchment paper and pan sides lightly with oil so that the cake doesn’t stick and line the bottom of the pan with a piece of parchment fit to the pan.
    2. Whisk flour, baking powder, baking soda, and sea salt in a large bowl to blend well.  Set aside.
    3. Place dates, reserved water, peanut butter, banana puree, and vanilla extract into a blender, and blend until smooth, then whisk this blended mixture into the flour mixture until well blended. Whisk in the cider vinegar until bubbles form. Mix in chocolate chips.  Transfer cake batter to prepared pans and bake cakes until tester inserted into center comes out clean, about 30 minutes. Cool cakes completely in pan on rack, about 1 hour. Cut around sides of pan to loosen. Turn cakes out onto platter; peel off parchment paper.
    4. Meanwhile, to make the frosting, combine all ingredients In a high speed blender, and blend until smooth (since moisture content in dates varies, and nut butters may vary in runniness, if it seems too thin, add a little more cacao powder, too thick, a little more water.
    5. To assemble, place one cake layer on a plate, and spread frosting 1/2 inch thick over it.  Place the other cake layer over that, then spread the remaining frosting on the top and down the sides of the cake.

    ***if you would like a 2 layer 9 inch cake, double this entire recipe and bake in two 9 inch cake pans.  It will take longer to bake, about 50 minutes to 1 hour.


  • Vegan Snickers Layer Cake

    Vegan Snickers Layer Cake

    Snickers Cake 6

    My birthday was last Friday, so this post is a little belated, but I promise you the recipe that accompanies it is well worth the wait. Normally I post my birthday cake recipe on my Birthday but it was a little busier this year and I wanted to relax and not stress myself out last week so I figured it was ok to wait. This year I turned 31, and I feel like I am more mature now that I am in my 30s, but I still also feel like I am 25. I don’t feel old enough to be 30 if that makes sense. When I was younger, I guess I thought I would have everything in my life figured out by the time I was 30 but I am still working on it, and learning valuable lessons. One of which is to take care of yourself first, because if you don’t do that, you will not be able to help out or take care of anyone else. It is not being selfish, it is being smart. Another thing, when I was younger I cared more about what other people thought about me and now, not so much. So what if I am a quiet introvert that likes to spend more time with the cat or just my significant other instead of going out to parties and being social? Also, who cares if someone doesn’t like what I am wearing or how I do my makeup? I wear what I like, and I am comfortable with how I look and who I am. Be who you are, do what you enjoy, dress how you like, what matters is that you are happy.

    Snickers Cake 5

    You know what made me really happy? The Snickers layer cake I made for my birthday. I am usually a vanilla girl, but this year I went chocolate with my cake, because that is what I was craving. And after all, I was the one making it so I had full say in what it was. I have always made my own cake, since I got into baking because it is the only way I can get exactly what I want, plus I actually enjoy it! I don’t know anyone around here who would make me a vegan Snickers cake. So, I went for it. I will admit right now, that this cake has quite a few steps to make it. None of them are very difficult, it is just a little more time consuming. But this is after all a special occasion cake so it is worth the time!

    Snickers Cake

    For the cake layers, I made a rich chocolate cake with dates to sweeten it. I find that dates give the cake the perfect amount of sweetness and moisture when baked for the proper amount of time. You can not taste the dates, they just give it a brown sugar like note of flavor. This cake batter recipe has been called the most delicious by my omnivore family and friends. So naturally I had to use it for this cake. I made a mousse filling topped off with peanuts that tasted like the nougat inside a snickers, as well as date caramel to top it and the cake off. For the outside of the cake, I made the most luscious peanut butter fudge frosting. It is only 4 ingredients, and simple to make, but it is sooo good.

    Snickers Cake 2

    Once this cake was assembled it was pretty marvelous to behold.  But most importantly, it met my standards for taste.  It tasted amazing.  Way better than any snickers bar because cake was involved.  Dare I say it one of the best cakes I have made lately (which is not to say the other cakes weren’t really good, this one just was out of this world good).  It was the perfect birthday cake.  I was very happy with it, it was fun to make on my day off, and it was a really good birthday present to myself.  Don’t worry, I did not eat it all myself, I am not selfish, I shared.  But it is something that you will want to go back for seconds for.  Just sayin’ when your Birthday comes around take note of this cake.

    Vegan Snickers Layer Cake
    Makes 1 6 inch 2 layer cake

    2 6 inch cake pans

    Cake:
    1 1/2 cups quinoa flour (or all purpose gluten free flour works also)
    1/4 cup cacao powder or unsweetened cocoa powder
    1 1/2 tsp baking soda
    1 tsp baking powder
    1/2 tsp sea salt
    1 cup packed soft medjool dates, pitted, soaked in water for 30 minutes and 1/2 cup of the water reserved
    1/4 cup organic peanut butter (smooth)
    1 Tbsp pure vanilla extract
    1 cup filtered water
    2 Tbsp apple cider vinegar

    Peanut Butter Caramel:
    1 cup pitted medjool dates
    3 Tbsp organic peanut butter
    1/3 cup filtered water (or as needed)
    1 tsp pure vanilla extract
    1/8 tsp sea salt

    Filling:
    1 15 oz can organic full fat coconut milk
    1/2 cup organic peanut butter
    1/4 cup maple syrup
    1 tsp pure vanilla extract
    1/4 tsp sea salt
    1/2 cup plus 2 Tbsp coconut butter, warmed to liquid

    Frosting
    3/4 cup pitted medjool dates, soaked in water for 30 minutes, and 3/4 cup of the water reserved
    1 cup organic peanut butter (smooth)
    1/2 Tbsp cacao powder
    pinch sea salt

    about 1 cup organic peanuts

    Preheat the oven to 375F degrees and position rack in center of oven. Line the bottoms of two six-inch-diameter cake pans with 2-inch-high sides with parchment paper. Coat parchment paper and pan sides lightly with coconut oil so that the cake doesn’t stick. Whisk flour, cacao powder, baking powder, baking soda, sea salt in a large bowl to blend well. Place dates, reserved water, peanut butter, water, and vanilla extract into a blender, and blend until smooth, then whisk this blended mixture into the flour mixture until well blended. Whisk in the cider vinegar until bubbles form. Transfer cake batter to prepared pans and bake cakes until tester inserted into center comes out clean, about 23-25 minutes. Cool cakes completely in pan on rack, about 1 hour. Cut around sides of pan to loosen. Turn cakes out onto platter; peel off parchment paper. Cut cakes in half horizontally with a serrated knife, or very sharp long knife (being very careful so that they don’t break) cover (so that they don’t dry out, you may stack them with parchment in between) and set aside.
    For the caramel, combine all ingredients in a high speed blender and blend until smooth (adding a little more water if needed to create a caramel that is not super runny but thin enough to almost pour). Set aside in the refrigerator.
    To make the filling, combine all ingredients in a high speed blender and blend until smooth, then pour into a bowl and place in the freezer until it is the consistency of whipped cream (it takes about 30-45 minutes depending on how warm it has gotten). Set aside in the refrigerator until ready to frost.
    To make the frosting, combine all ingredients in a high speed blender or food processor and blend until smooth (since hazelnut butters and dates can vary, if the frosting is too thin, add a little more cacao powder, too thick, add a little more water). Set aside in the refrigerator.
    To assemble the cake, place one layer on a plate, spread 1/3 of the filling over it, then some of the caramel and sprinkle with about 1/4 cup of the peanuts. Repeat with another layer and another, then ending with a cake layer on the top. Place the cake in the freezer for about half an hour to 45 minutes to firm up the filling so it stays put when you frost the cake. Spread the chocolate frosting over the top and down the sides of the cake. Top off with more peanuts, and pour remaining caramel carefully over the top allowing it to drip down the sides (if the caramel is not runny enough to drip down the sides of the cake add a little water to it first). Enjoy! Store leftover cake in the refrigerator.


  • Vegan Coconut Caramel Cake

    Vegan Coconut Caramel Cake

    Coconut Caramel Cake 5

    My Mom gave me a bag of shredded coconut and asked me to make something delicious with it.  I made some macaroons, but I also made the most glorious cake.  To begin with, when the idea of making a coconut cake came to mind, I was going to go for a classic coconut layer cake.  You know, all coconut.  Coconut cake layers and frosting.  But then I decided that caramel and coconut would be even better.  I mean, think about it.  German chocolate cake frosting is bomb and it has caramel with coconut.  So, that is where I was going with it.

    Coconut Caramel Cake 4

    I made the cake layers caramel flavored with dates and pecan butter, and they tasted amazing.  Even the batter before it was baked. They ended up being perfectly moist and soft yet fluffy like cake should be.  Needless to say I was proud of those cake layers.  I decided that the cake should have a caramel layer in between the cake layers so I whipped up some date caramel.  Lastly, I frosted it with the most luscious fluffy whipped coconut frosting, and dusted the outside with that fancy coconut.  It kind of looked like a giant snowball before I dropped a few raspberries onto it for garnish.

    Coconut Caramel Cake 3

    I could not wait to try it.  When I did, I was surprised with a party in my mouth.  Of sweet delicious flavors that is. The caramel was so good with the coconut and the coconut on the outside added a nice crunch.  It was simply heavenly.  I shared some with my Mom and Eric and they loved it too.  This is something you can’t just have one piece of, just sayin. I wish I could share a piece with you all, but since I can’t, I am sharing the recipe so you can enjoy it too!

    Coconut Caramel Cake

    Vegan Coconut Caramel Cake
    Makes 1 6 inch 2 layer cake

    2 6 inch cake pans

    Cake:
    1 1/2 cups quinoa flour (or all purpose gluten free flour)
    1 1/2 tsp baking soda
    1 tsp baking powder
    1/2 tsp sea salt
    1 cup packed soft medjool dates, pitted, soaked in water for 30 minutes and 1/2 cup of the water reserved
    1/4 cup raw pecan butter or raw almond butter
    2 tsp pure vanilla extract
    1 cup filtered water
    2 Tbsp apple cider vinegar

    Caramel Filling:
    1/2 cup pitted medjool dates, soaked in water for 30 minutes and 1/2 cup of the water reserved
    3 Tbsp raw pecan butter or raw almond butter
    1 tsp pure vanilla extract
    large pinch sea salt

    Frosting:
    1 15 oz can full fat organic coconut milk, chilled
    1/4 cup maple syrup
    1 tsp pure vanilla extract
    1/4 tsp sea salt
    1/2 cup plus 2 Tbsp melted coconut butter (warmed to liquid)

    Finely shredded, dried unsweetened coconut

    Preheat the oven to 375F and position rack in center of oven. Line the bottoms of two 6-inch-diameter cake pans with 2-inch-high sides with parchment paper. Coat parchment paper and pan sides lightly with oil so that the cake doesn’t stick. Whisk flour, baking powder, baking soda, sea salt, in a large bowl to blend well. Place dates, reserved water, pecan butter and vanilla extract into a blender, and blend until smooth, then whisk this blended mixture into the flour mixture until well blended.

    Whisk cider vinegar into the batter until bubbles form. Transfer cake batter to prepared pans and bake cakes until tester inserted into center comes out clean, about 25-30 minutes. Cool cakes completely in pan on rack, about 1 hour. Cut around sides of pan to loosen. Turn cakes out onto platter; peel off parchment paper. Let cool completely.

    Meanwhile, to make the filling, combine all ingredients in a high speed blender and blend until smooth.
    To make the frosting, combine all ingredients in a high speed blender and blend until completely smooth.  Pour into a bowl and place in the freezer until the consistency of stiffly whipped cream (about 30-45 minutes depending on how warm it has gotten.  Once it is ready place in the refrigerator until ready to assemble.
    To assemble, place one cake layer on a plate, and spread the caramel filling over it, then spread about 3/4 cup frosting over that. Place the other cake layer over that, then spread the remaining frosting on the top and down the sides of the cake. Coat the outside of the cake with shredded coconut.
    *Note: if you would like to make a 9 inch cake, double the cake recipe (and frosting recipe) and bake in two nine inch round pans, it will take 50-60 minutes to bake.
    Coconut Caramel Cake 2


  • Mini Strawberry White Chocolate Layer Cake

    Mini Strawberry White Chocolate Layer Cake

    Strawberry White Chocolate Cake 5

    Sometimes I just feel like making a pink girly dessert.  Maybe it is the five year old in me that forever wants to wear sparkles and pink.  So what if I am 30 I think that way sometimes.  So, I decided last weekend I was in that sort of mood and wanted a pink cake.  Maybe it had something to do with being a little stressed out about something and wanting to escape with making and eating a happy cake. But hey, it worked.  Cake making to me is relaxing. It feels like an art form, and is in a way.  An edible art form.  The process is so much fun, especially licking the excess frosting and batter bowls and decorating.  It always makes me feel happy, especially if I am pleased with the end result.  Which I usually am, and if I am not it has to do with how it looks, not usually how it tastes (and sometimes it is ok to have an ugly cake that tastes amazing).

    Strawberry White Chocolate Cake 4

    So anyways, back to this cake I made last weekend.  I am in a strawberry eating mood, since it Spring, so I made a Strawberry White Chocolate Layer Cake. Strawberries infused the vanilla cake batter, and the frosting.  I also used a quick strawberry “jam” in between the layers to give it extra flavor. Now you may be wondering if you read the recipe, why I used freeze dried strawberries.  Well, simply put they are loaded with intense strawberry flavor.  So the batter has more strawberry flavor if I use them in there than fresh pureed berries, since it is baked. As far as the frosting goes, they do not add any excess water, so it keeps the frosting from getting runny.  I reserved the fresh berries for the jam.

    Strawberry White Chocolate Cake

    IMG_2946

    Speaking of frosting, I gave it a white chocolate flavor by adding cacao butter along with the coconut butter.  It tasted like white chocolate strawberry mousse.  I made this a little cake, just enough for me and Eric to share for dessert.  It was delicious!  It had an intense strawberry flavor, it was moist, sweet, and delicious.  This is the perfect special Spring dessert for two to share!

    IMG_2944

    Mini Strawberry White Chocolate Layer Cake

    Makes 1 6 inch 4 layer cake

    2 4 inch cake pans

    Cake:
    3/4 cup all purpose gluten free flour
    3/4 tsp baking soda
    1/2 tsp baking powder
    1/4 tsp sea salt
    1/2 cup packed soft medjool dates, pitted, soaked in water for 30 minutes and 1/2 cup of the water reserved
    1 cup organic freeze dried strawberries
    2 Tbsp avocado oil
    1 tsp pure vanilla extract
    1/2 cup filtered water
    1 Tbsp apple cider vinegar

    Frosting:
    1 15 oz can organic full fat coconut milk
    2 Tbsp maple syrup
    3/4 cup organic freeze dried strawberries 
    1 tsp pure vanilla extract
    1/4 cup plus 2 Tbsp coconut butter, warmed to liquid
    1/4 cup cacao butter, warmed to liquid

    Strawberry Jam:
    3/4 cup fresh strawberries
    1 Tbsp maple syrup
    1 Tbsp lemon juice
    1 Tbsp coconut butter, warmed to liquid

    Preheat the oven to 375F degrees and position rack in center of oven. Line the bottoms of two 4-inch-diameter cake pans with 2-inch-high sides with parchment paper. Coat parchment paper and pan sides lightly with oil so that the cake doesn’t stick. Whisk flour, baking powder, baking soda, sea salt, in a large bowl to blend well. Place dates, reserved water, oil, dried strawberries, and vanilla extract into a high speed blender, and blend until smooth*, then whisk this blended mixture into the flour mixture until well blended.

    Whisk the cider vinegar into the batter until bubbles form. Transfer cake batter to prepared pans, and bake cakes until tester inserted into center comes out clean, about 20 minutes. Cool cakes completely in pan on rack, about 1 hour. Cut around sides of pan to loosen if they are stuck at all. Turn cakes out onto platter; peel off parchment paper. Let cool completely, then slice each in half horizontally so you have 2 layers out of each.

    Meanwhile, to make the frosting, combine all ingredients in a high speed blender and blend until smooth. Pour into a bowl, and set in the freezer for about 30-45 minutes (whisking every 15) until it reaches the thickness and consistency of thick whipped cream or buttercream frosting.
    For the jam, combine all ingredients in a food processor and pulse until jammy, and the strawberries are still a little chunky.
    To assemble, place one cake layer on a plate, and spread frosting 1/2 inch thick over it. Spread a little jam over that (keeping it about 1/2 inch from the sides so it does not ooze). Place another cake layer over that, then spread more frosting over it, then more jam, then another cake layer.  Then more frosting and jam and the last cake layer. Spread the remaining frosting on the top and down the sides of the cake. Store any leftover cake in the refrigerator.
     
    If you would like to bake a bigger cake, double the entire recipe for a 6 inch cake, and bake it for about 30 minutes instead of 20.  If you would like an 8 inch cake, quadruple the recipe, and bake for about 1 hour instead of 20.


  • Mini Vegan Caramel Cakes

    Mini Vegan Caramel Cakes

    Caramel Cake 5

    I have been wanting to make a caramel cake for some time, after seeing one that looked really good on a TV show I was watching, and drooling over another one on Pinterest which had caramel popcorn on top of it.  I thought, hey, I can make my own gluten free, sugar free (fruit sweetened) vegan version!  I knew just what  I would use to make taste like traditional caramel but healthier.  Dates.  Dates are always the answer when it comes to vegan caramel as far as I am concerned.

    Caramel Cake 3

    I fell in love with them when I first started making raw desserts, and I learned about date caramel.  Makes sense, because to me dates are nature’s caramel (really even better than traditional caramel if you ask me because they have health benefits that regular sugar doesn’t). When blended with just water and a little sea salt, you can make a delicious caramel sauce.  So I used them to sweeten the cake, as well as for the frosting.

    Caramel Cake 4

    I decided to make mini layer cakes, because of course it saves money (because I do not have a large family).  Plus I get my own little individual cake and they are cute!  I have included instructions though at the bottom if you would like to make a larger cake for a celebration or something.  For the frosting, I blended the dates with nut butter and a little vanilla and a touch of sea salt.

    Caramel Cake 1

    The cakes turned out even better than I imagined!  The dates providing just the right amount of moisture and sweetness, and the caramel gooey, sweet and better than real sugar caramel. I topped them off with some Vegan Caramel Corn that I had just made and it was the perfect topper!

    Caramel Cake

    Mini Vegan Caramel Cakes
    Makes 2 6 inch 2 layer cakes

    2 4 inch cake pans

    Cake:
    3/4 cup quinoa flour (or all purpose gluten free flour)
    3/4 tsp baking soda
    1/2 tsp baking powder
    1/4 tsp sea salt
    1/2 cup packed soft medjool dates, pitted, soaked in water for 30 minutes and 1/4 cup of the water reserved
    2 Tbsp avocado oil or olive oil
    1 tsp pure vanilla extract
    1/2 cup filtered water
    1 Tbsp apple cider vinegar

    Frosting:
    2/3 cup pitted medjool dates, soaked in water for 30 minutes and 1/2 cup of the water reserved
    1/4 cup plus 2 Tbsp raw pecan butter or raw almond butter
    1 Tbsp coconut butter, warmed to liquid
    1 tsp pure vanilla extract
    large pinch sea salt

    Vegan Caramel Corn for topping (omit the pecans in the recipe)

    Preheat the oven to 375F and position rack in center of oven. Line the bottoms of two 4-inch-diameter cake pans with 2-inch-high sides with parchment paper. Coat parchment paper and pan sides lightly with oil so that the cake doesn’t stick. Whisk flour, baking powder, baking soda, sea salt, in a large bowl to blend well. Place dates, reserved date water and additional 1/2 cup water, oil, and vanilla extract into a blender, and blend until smooth, then whisk this blended mixture into the flour mixture until well blended.

    Whisk cider vinegar into  the batter until bubbles form. Transfer cake batter to prepared pans and bake cakes until tester inserted into center comes out clean, about 25-30 minutes. Cool cakes completely in pan on rack, about 1 hour. Cut around sides of pan to loosen. Turn cakes out onto platter; peel off parchment paper. Let cool completely.

    Meanwhile, to make the frosting, combine all ingredients in a high speed blender and blend until smooth.
    To assemble, place one cake layer on a plate, and spread frosting 1/2 inch thick over it. Place the other cake layer over that, then spread the frosting on the top and down the sides of the cake.
    *Note: if you would like to make a 6 inch cake, double the cake recipe (and frosting recipe) and bake in two six inch round pans, it will take 30-40 minutes to bake.  If you would like to make a 9 inch cake, quadruple the recipe (frosting too) using two 9 inch pans and bake for about 50-60 minutes.
    Caramel Cake 2


  • Vegan Festive Carrot Cake

    Vegan Festive Carrot Cake

    Festive Carrot Cake 4

    Carrot cake has always appealed to me, ever since I tasted my first bite when I was about 5.  I was not one of those kids that turned up their nose at veggies.  Not that anyone ever turns their nose up at a good carrot cake once they taste it. It is good stuff!  Especially the carrot cake that my Mom used to make.  Of course the usual is good with the spices, caramel flavor, and cream cheese frosting.  But my Mom’s version included things that made you feel like you were on a tropical island. Pineapple, coconut and pecans.

    Festive Carrot Cake 6

    It was a gem from a church cookbook she had owned for probably 20 years.  It was so good.  However, now we both don’t eat refined sugar and I am a vegan, so it hasn’t been made since I was little.  So I decided I needed to recreate that cake this year for Easter.  It seemed appropriate, carrot cake to me it the quintessential Spring and Easter dessert, and the perfect centerpiece for your table.

    Festive Carrot Cake 3

    It was easy to recreate, and my version turned out just as good as Mom’s.  I made it gluten free with quinoa flour, and sweetened the cake with dates to give it that caramel flavor that the brown sugar in Mom’s cake once provided.  I added the classic carrot cake spices, and of course all of those delicious add ins Mom’s cake had. It needed to be frosted with a cream cheese frosting as well.

    Festive Carrot Cake 1

    So, I made a faux almond cream cheese frosting with coconut milk and almond butter. It was so good I had to lick the extra from the bowl.  The cake turned out fabulous!  I am proud to serve this for Easter, and it is really pretty easy to make, so you can be too!

    Festive Carrot Cake 2

    Vegan Festive Carrot Cake

    Makes 1 6 inch 2 layer cake

    2 6 inch cake pans

    Cake:
    1 1/2 cups quinoa flour (or all purpose gluten free flour)
    1 1/2 tsp baking soda
    1 tsp baking powder
    1/2 tsp sea salt
    2 tsp ground cinnamon
    2 tsp ground ginger
    1 cup packed soft medjool dates, pitted, soaked in water for 30 minutes and 1/2 cup of the water reserved
    1/4 cup avocado oil
    1 Tbsp pure vanilla extract
    1 cup pineapple juice at room temperature
    2 Tbsp apple cider vinegar
    3/4 cup crushed pineapple
    1/2 cup finely shredded, dried coconut
    1/4 cup chopped pecans
    1 1/4 cups shredded organic carrots

    Frosting:
    1 15 oz can full fat coconut milk, chilled
    1/4 cup maple syrup
    1 tsp cider vinegar
    2 tsp pure vanilla extract
    1/4 tsp sea salt
    1/2 cup raw almond butter
    1/2 cup plus 2 Tbsp coconut butter

    Preheat the oven to 375F degrees and position rack in center of oven. Line two six-inch-diameter cake pans with 2-inch-high sides with parchment paper. Coat parchment paper and pan sides lightly with oil so that the cake doesn’t stick and line the bottom of the pan with a piece of parchment fit to the pan. Whisk flour, baking powder, baking soda, sea salt, ginger, and cinnamon in a large bowl to blend well. Place dates, reserved water, oil, pineapple juice, and vanilla extract into a blender, and blend until smooth, then whisk this blended mixture into the flour mixture until well blended. Whisk in the cider vinegar until bubbles form. Mix in pineapple, coconut, walnuts and carrots.  Transfer cake batter to prepared pans and bake cakes until tester inserted into center comes out clean, about 35 minutes. Cool cakes completely in pan on rack, about 1 hour. Cut around sides of pan to loosen. Turn cakes out onto platter; peel off parchment paper. Let cool completely.

    To make the frosting, combine all ingredients in a blender, and blend until smooth.  Pour into a bowl, and place in the freezer until thickened.  You want to whisk it every 15 minutes and you know it is ready when it is thick like whipped cream, about 30-45 minutes depending on how warm it has gotten.
    To assemble, place one cake layer on a plate, and spread frosting 1/2 inch thick over it.  Place the other cake layer over that, then spread the remaining frosting on the top and down the sides of the cake.

    ***if you would like a 2 layer 9 inch cake, double this entire recipe and bake in two 9 inch cake pans. It will take longer to bake, about 50 minutes to an hour.


  • Vegan Chocolate Carrot Cake

    Vegan Chocolate Carrot Cake

    vegan-chocolate-carrot-cake-5

    Ever since last year when I saw a chocolate carrot cake, I have wanted to make one.  Because chocolate cake and carrot cake are both pretty amazing, and together they should be awesome, right?  Well I decided to make one last weekend.  It was time.  I had a big bag of carrots begging to be used in my refrigerator, and I was in the mood for something decadent and chocolaty, so it was happening.

    vegan-chocolate-carrot-cake-4

    I had a few things I was going to change about this carrot cake recipe from my normal carrot cake recipe though. Of course I was going to add cacao powder along with the usual spices, but I wanted to make this a fruit sweetened cake.  I have been experimenting with that a lot lately and liking the results.  I used dates for this, and they worked out perfect.  Just the perfect amount of sweet to offset the chocolate, and they kept this cake nice and moist.  Second, I switched up my usual gluten free flour for quinoa flour because I had it on hand, it is also gluten free, and works as a 1:1 swap for AP flour in baked goods.

    vegan-chocolate-carrot-cake

    The cake tasted amazing. I gobbled up the scraps I trimmed from it to even it out in no time.  It deserved a really decadent fudgy frosting.  Nothing else would do.  In the past, I would have simply mixed together maple syrup and cacao powder to get a fudgy frosting, but now I find that way too sweet. So I used dates instead as my sweetener, blended up with some water, nut butter and cacao powder, and what I got was the most amazing chocolate frosting I have eaten.  Only 4 ingredients, and so good!  It was also raw, so raw foodists take note, you can use this frosting recipe on your raw cakes as well!

    vegan-chocolate-carrot-cake-2

    This cake was freaking delicious once assembled.  Chocolate decadent deliciousness…and honestly one of the best things I have made as of lately.  It was simple to make as far as layer cakes go, so I would encourage you to try this!  Bake it for a loved ones Birthday, they will think you are awesome!

    vegan-chocolate-carrot-cake-1

    Vegan Chocolate Carrot Cake 

    Makes 1 6 inch 2 layer cake

    2 6 inch cake pans

    Cake:
    1 1/2 cups Bob’s Red Mill Gluten Free All Purpose Baking Flour
    1/3 cup cacao powder or unsweetened cocoa powder
    1 1/2 tsp baking soda
    1 tsp baking powder
    1/2 tsp sea salt
    2 tsp ground cinnamon
    2 tsp ground ginger
    1 cup packed soft medjool dates, pitted, soaked in water for 30 minutes and 1/2 cup of the water reserved
    1/4 cup avocado oil or olive oil
    1 Tbsp pure vanilla extract
    1 cup fresh orange juice at room temperature
    2 Tbsp apple cider vinegar
    1 1/4 cups shredded organic carrots

    Frosting
    1 1/4 cups pitted medjool dates, soaked in water for 30 minutes, and 1 cup of the water reserved
    3/4 cup raw walnut butter or raw almond butter
    3/4 cup cacao powder
    pinch sea salt

    Preheat the oven to 375F degrees and position rack in center of oven. Line two six-inch-diameter cake pans with 2-inch-high sides with parchment paper. Coat parchment paper and pan sides lightly with oil so that the cake doesn’t stick and line the bottom of the pan with a piece of parchment fit to the pan. Whisk flour, cacao powder, baking powder, baking soda, sea salt, ginger, and cinnamon in a large bowl to blend well. Place dates, reserved water, oil, orange juice, and vanilla extract into a blender, and blend until smooth, then whisk this blended mixture into the flour mixture until well blended. Whisk in the cider vinegar until bubbles form. Mix in carrots.  Transfer cake batter to prepared pans and bake cakes until tester inserted into center comes out clean, about 30 minutes. Cool cakes completely in pan on rack, about 1 hour. Cut around sides of pan to loosen. Turn cakes out onto platter; peel off parchment paper. Let cool completely.

    Meanwhile, to make the frosting, combine all ingredients In a high speed blender, and blend until smooth (since moisture content in dates varies, and nut butters may vary in runniness, if it seems too thin, add a little more cacao powder, too thick, a little more water).
    To assemble, place one cake layer on a plate, and spread frosting 1/2 inch thick over it.  Place the other cake layer over that, then spread the remaining frosting on the top and down the sides of the cake.
    ***if you would like a 2 layer 9 inch cake, double this entire recipe and bake in two 9 inch cake pans.


  • Vegan Mango Carrot Cake

    Vegan Mango Carrot Cake

    Mango Carrot Cake 4

    You know what makes me happy?  Spending the day with someone I love doing simple things.  I am not one of those types of people who needs to spend lots of money in order to be happy.  A day spent outdoors exploring, walking and enjoying the fresh air with one special person is enough to please me.  What makes that even better is if it is springtime and the flowers are starting to pop up out of the ground.  The happy tulips, crocus and daffodils are so beautiful and such a contrast to the dead leaves and brown grass everywhere else.  They announce spring is finally here.

    Mango Carrot Cake

    To top off that perfect Spring walk, coming home to a delicious carrot cake would be nice.  To me, carrot cake is the essence of Spring.  Probably because it is always a staple around Easter time here. I made one last weekend, and it was delightful.  I wanted to make something a little different than the usual carrot cake, maybe add in some fruit. My Mom always put pineapple in her carrot cake, so I thought, why not mango?  Mangoes were on sale, and they were so sweet I knew they would be wonderful in the carrot cake.

    Mango Carrot Cake 3

    I added them in the form of puree to keep the cake moist and sweeten it as well as some diced in the batter for little pockets of mango goodness within the sweet carrot cake.  For the frosting, I did something that I have been doing a lot lately, adding in vegetables or fruits (carrots in this case) along with the rich coconut milk for volume as well as color.  You could not taste them, but they made the frosting this lovely bright yellow hue the color of daffodils. How appropriate for Spring!

    Mango Carrot Cake 5

    The cake tasted wonderful!  Nice and sweet thanks to the mangoes and carrots and the creamy carrot coconut frosting was perfect to top it off and fill it.  This was one happy cake, not just because it was cheery, but because it tasted amazing.  I shared some with my loved ones and I know it made them happy too.

    Mango Carrot Cake 2

    Vegan Mango Carrot Cake (gluten free)

    Makes 1 6 inch 4 layer cake
    2 6 inch cake pans
    Cake:
    1 1/2 cups All Purpose Gluten Free Flour (or GF oat flour works here as well)
    1 cup coconut sugar
    1 1/2 tsp baking soda
    1 tsp baking powder
    1/2 tsp sea salt
    1 tsp ground cinnamon
    1 cup pureed fresh mango
    1/4 cup virgin coconut oil
    1 Tbsp pure vanilla extract
    1/4 cup + 2 Tbsp fresh orange juice at room temperature
    2 Tbsp apple cider vinegar
    1/2 cup diced mango
    1 1/4 cups shredded carrots
    Frosting:
    2 cans organic full fat coconut milk, chilled
    2 cups chopped carrots
    3/4 cup raw coconut nectar, maple syrup or agave nectar
    1/2  tsp sea salt
    2 tsp pure vanilla extract
    1 3/4 cups coconut butter, warmed to liquid

    Preheat the oven to 375 degrees and position rack in center of oven. Line two six-inch-diameter cake pans with 2-inch-high sides with parchment paper. Coat parchment paper and pan sides lightly with coconut oil so that the cake doesn’t stick and line the bottom of the pan with a piece of parchment fit to the pan. Whisk flour, baking powder, baking soda, sea salt, cinnamon and sugar in a large bowl to blend well. Whisk mango puree, oil, orange juice, and vanilla extract together in small bowl to blend well, then whisk into the flour mixture until well blended. Whisk in the cider vinegar until bubbles form. Mix in the diced mango and carrots.    Transfer cake batter to prepared pans and bake cakes until tester inserted into center comes out clean, about 30 minutes. Cool cakes completely in pan on rack, about 1 hour. Cut around sides of pan to loosen. Turn cakes out onto platter; peel off parchment paper. Let cool completely, then place in the fridge to chill until very cold to make slicing easier. When chilled, slice cakes horizontally in half so that you have 4 layers.

    Meanwhile, to make the frosting, combine all ingredients but the coconut butter in a high speed blender or food processor and blend until smooth.  With the motor running, add the coconut butter and process a minute more.  Pour the frosting into a bowl and let sit in the freezer until the consistency of whipped cream (this may take anywhere from 1/2 hour to an hour depending on how warm it has gotten).  When ready to frost, place one cake layer on a plate. spread frosting about 1/2 inch thick over the first layer, then top with the second.  Repeat the frosting, then another cake layer, then more frosting then the last cake layer. Spread frosting over the top and down the sides of the cake.
    Place extra frosting in a pastry bag and pipe decoratively on the cake if desired.
    Store any leftover cake in the refrigerator.
    ***if you would like a 4 layer 9 inch cake, double this entire recipe and bake in two 9 inch cake pans.
    Mango Carrot Cake 1
  • Vegan Hummingbird Cake

    Vegan Hummingbird Cake

    Hummingbird Cake 5 Best

    I have always wanted to make a hummingbird cake.  I have been hearing about them for years, and the old fashioned southern layer cake appealed to me. In case you haven’t heard of them, they are a moist banana and pineapple cake, spiced with cinnamon, studded with pecans, and topped off with cream cheese frosting. What’s not to love about that?  It sounded like something my Grandma might have made back in the day for a special occasion.  Because this is definitely a special occasion cake.  Since Easter is coming up, I thought also that if this turned out, it would make a perfect Easter cake to serve as a finale to the meal.

    Hummingbird Cake 1

    So, I went for it and made one.  Í used a gluten free vegan banana cake base that I have used in the past, and I swapped out pineapple juice for the coconut milk to make it extra sweet, and added in chunks of pineapple as well along with the pecans and cinnamon that were a must to make this cake traditional.  It smelled like heaven as it baked, and I couldn’t wait to finish it off with the frosting!

    Hummingbird Cake 3

    For the frosting I used a simple coconut base with a little lemon juice to give it a slight tang reminiscent of cream cheese.  It was fluffy and delicious and perfect with the moist cake!  I topped it off with more pecans, keeping it simple as far as decorating went this time.  OMG was it good.  The texture was perfect, the cake was moist and sweet with a little bit of fruitiness, and the pecans gave it a nice crunch.  I shared some with my boyfriend Eric, and the piece was all gone pretty fast which should say something.  I think this would be perfect for Easter if you wanted something elegant and traditional.  Don’t let the layers fool you, this is a pretty easy cake to make.

    Hummingbird Cake 2

    Vegan Hummingbird Layer Cake (gluten free)
    Makes 1 6 inch 4 layer cake

    Cake:
    1 1/2 cups Bob’s Red Mill Gluten Free All Purpose Flour
    1 cup coconut sugar
    1 1/2 tsp baking soda
    1 tsp baking powder
    1/2 tsp sea salt
    1 tsp ground cinnamon
    1 cup mashed bananas
    1/4 cup virgin coconut oil
    1 Tbsp pure vanilla extract
    1/4 cup + 2 Tbsp pineapple juice at room temperature
    2 Tbsp apple cider vinegar
    1/2 cup chopped pineapple
    1/3 cup chopped pecans

    Frosting:

    2 15 oz cans organic full fat coconut milk (the whole can, cream and water), chilled
    2 cups raw cashews, soaked for 4 hours and drained
    3/4 cup raw coconut nectar, or maple syrup
    1/2  tsp sea salt
    2 tsp pure vanilla extract
    juice of one lemon (about 3 Tbsp)
    1 3/4 cups coconut butter, warmed to liquid

    Preheat the oven to 375 degrees and position rack in center of oven. Line two six-inch-diameter cake pans with 2-inch-high sides with parchment paper. Coat parchment paper and pan sides lightly with coconut oil so that the cake doesn’t stick and line the bottom of the pan with a piece of parchment fit to the pan.
    Whisk flour, baking soda, sea salt, cinnamon and sugar in a large bowl to blend well.
    Whisk bananas, oil, pineapple juice, and vanilla extract together in small bowl to blend well, then whisk into the flour mixture until well blended. Whisk in the cider vinegar until bubbles form. Mix in the pineapple and pecans.
    Transfer cake batter to prepared pans and bake cakes until tester inserted into center comes out clean, about 25-30 minutes.
    Cool cakes completely in pan on rack, about 1 hour. Cut around sides of pan to loosen. Turn cakes out onto platter; peel off parchment paper. Let cool completely, then place in the fridge to chill until very cold to make slicing easier. When chilled, slice cakes horizontally in half so that you have 4 layers.
    Meanwhile, to make the frosting, combine all ingredients but the coconut butter in a high speed blender or food processor and blend until smooth.  With the motor running, add the coconut butter and process a minute more.  Pour the frosting into a bowl and let sit in the freezer until the consistency of whipped cream (this may take anywhere from 1/2 hour to an hour depending on how warm it has gotten).
    When ready to frost, place one cake layer on a plate. spread frosting about 1/2 inch thick over the first layer, then top with the second.  Repeat the frosting, then another cake layer, then more frosting then the last cake layer. Spread frosting over the top and down the sides of the cake.
    Garnish the cake with chopped pecans.
    Store any leftover cake in the refrigerator.

    ***if you would like a 4 layer 9 inch cake, double this entire recipe and bake in two 9 inch cake pans.

    Hummingbird Cake

  • Vegan Strawberry Almond Layer Cake

    Vegan Strawberry Almond Layer Cake

    1 Corinthians 13:4-7

    Love is patient, love is kind. It does not envy, it does not boast, it is not proud. It does not dishonor others, it is not self-seeking, it is not easily angered, it keeps no record of wrongs. Love does not delight in evil but rejoices with the truth. It always protects, always trusts, always hopes, always perseveres. Love never fails.

    I couldn’t agree more with that passage, and although we should think about treating others with love every day, since Valentine’s Day is coming up, the day which is supposed to be all about love, how appropriate is it to remind ourselves of that?! As you can tell I am not into all of the commercial spend lots of money aspect of Valentine’s Day.  It is not all about the flowers and expensive jewelry that so often people get so wrapped up in. By the way, when did every holiday become all about spending lots of money?  To me, Valentine’s Day should be a day to share our love for others family, friends, significant others, whomever we have in our lives that we love.  My perfect Valentine’s Day doesn’t involve going out for expensive dinner, jewelry and flowers…it involves time to appreciate each other .  Going out and enjoying nature, maybe hitting a museum to admire the art together.  A home made dinner and dessert, alone time to relax with each other. Just low key, but the things I really enjoy.  After all, love is about feeling happy, seeing every day the things you love in that other person and appreciating them.  Knowing that they will be there for you in the future, and thankful that they are in your life.  Being grateful that you have gotten through tough times with that person and the relationship becoming stronger in the process.  Being patient with them when they do stupid things that you don’t agree with sometimes, and taking their good advice to change when you are the one doing the stupid things.  So, to me Valentine’s Day should be a day to reflect on all of this and appreciate the one you love for who they are.

    Although I share my love in many ways, one of the ways I express my love is through food in case you couldn’t tell that already.  I enjoy making things for those I am close to in my life and sharing.  The latest thing I made to share was a Vegan Strawberry Almond Layer Cake last weekend.  Truth be told, I wanted a cake with pink frosting and that was why I made it to begin with.  Plus as I have mentioned in some previous blog posts, Valentine’s Day is an excuse to use strawberries in desserts when they are not necessarily in season.  I know, shame on me…but they are organic at least, and the good news is that you can use frozen in this recipe.  For the cake part, I made it gluten free, laced with strawberry puree, and 3 hits of almond.  Milk, oil and extract.  Which all made for a delicious moist cake!  For the frosting I kept it pretty simple, no added jam layers and whatnot, just pink strawberry frosting with a hint of white chocolate in the form of cacao butter and a secret ingredient to make the color extra pretty. Beets.  Yes, I used beets in the frosting, and no you can not taste them.  This cake was fabulous!  I shared it with my special someone, my boyfriend Eric who loves desserts even more than I do.

    Vegan Strawberry Almond Layer Cake
    Makes 1 6 inch 4 layer cake

    2 6 inch cake pans

    Cake:
    1 3/4 cups Bob’s Red Mill All Purpose Gluten Free Flour
    1 tsp baking soda
    1/2 tsp sea salt
    1 cup coconut sugar
    1/4 cup virgin coconut oil, warmed to liquid
    1/4 cup almond oil
    1/2 cup almond milk
    1/2 cup pureed strawberries
    1 Tbsp pure vanilla extract
    1 tsp almond extract
    2 Tbsp cider vinegar

    Frosting:
    4 cups young coconut meat*
    2 cups chopped raw red beet
    2 cups fresh strawberries
    3/4 cup raw coconut nectar, maple syrup or agave nectar
    1/2  tsp sea salt
    seeds of one vanilla bean, or 1 Tbsp pure vanilla extract
    3/4 cup coconut butter, warmed to liquid
    1/4 cup raw cacao butter, warmed to liquid**

    Preheat the oven to 375 degrees and position rack in center of oven. Line two six-inch-diameter cake pans with 2-inch-high sides with parchment paper. Coat parchment paper and pan sides lightly with coconut oil so that the cake doesn’t stick and line the bottom of the pan with a piece of parchment fit to the pan.
    Whisk flour, baking soda, sea salt, and sugar in a large bowl to blend well.
    Whisk oils, almond milk, berry puree, vanilla extract and almond extract together in small bowl to blend well, then whisk into the flour mixture until well blended. Whisk in the cider vinegar until bubbles form.
    Transfer cake batter to prepared pan and bake cakes until tester inserted into center comes out clean, about 25-30 minutes.
    Cool cakes completely in pan on rack, about 1 hour. Cut around sides of pan to loosen. Turn cakes out onto platter; peel off parchment paper. Let cool completely, then place in the fridge to chill until very cold to make slicing easier. When chilled, slice cakes horizontally in half so that you have 4 layers.

    Meanwhile, to make the frosting, combine all ingredients but the coconut butter and cacao butter in a high speed blender or food processor and process until smooth.  With the motor running, add the coconut butter and cacao butter and process a minute more.  Pour the frosting into a bowl and let sit in the fridge until the consistency of whipped cream.
    When ready to frost, place one cake layer on a plate. spread frosting about 1/2 inch thick over the first layer, then top with the second.  Repeat the frosting, then another cake layer, then more frosting then the last cake layer. Spread frosting over the top and down the sides of the cake.  (place any remaining frosting in a pastry bag and pipe decoratively over the cake).  Store cake in the fridge.
    *If you do not have access to young coconut meat, you can use 4 cups soaked cashews instead along with the other cashews.
    **If you can not get cacao butter, you can substitute more coconut butter or coconut oil.

    ***if you would like a 4 layer 9 inch cake, double this entire recipe and bake in two 9 inch cake pans.


  • Vegan Tiramisu Layer Cake (gluten free)

    Vegan Tiramisu Layer Cake (gluten free)


    I have always been a big fan of Tiramisu.  I first had it at an Italian restaurant with my Mom when I was in college, and I was hooked.  We thought it was so good that we even made some at home the authentic way with custard and mascarpone.  Out home made version was even better than the stuff at the restaurant!  I have made versions of it since then, the first ones with dairy years ago, then some raw vegan versions with special twists like adding in bananas which are wonderful with tiramisu FYI. I have made tiramisu brownies, tiramisu ice cream, but never a tiramisu layer cake.  Well, that changed last weekend.


    Maybe it had something to do with taking in the heavenly aroma of freshly ground coffee at work.  It made me long for some creamy tiramisu. Funny, because I am not a coffee drinker, but I love the smell of fresh ground beans.  It reminds me of the laid back Saturday mornings where my Mother used to grind them for her coffee. I love how smells bring back memories.  For me, I think sometimes they are even more powerful than photos.

    For this tiramisu cake, I did not mess with lady fingers, but instead baked a coffee spiked cake which was to later be soaked with a bit of coffee syrup like traditional tiramisu.  No messing with custards and folding in or whisking of anything here for the creamy frosting.  I simply threw all of it in the blender, chilled and voila!  I even threw in some coffee beans which contributed a nice coffee flavor and a little nibby texture leaving flecks in the light colored frosting.  A dusting of cacao was necessary between all of the layers for that little note of chocolate as well.  This cake was simply heavenly.  I no longer missed tiramisu, and I was in my happy place.  That is until my piece of cake was gone.

    Vegan Tiramisu Layer Cake (gluten free)

    Makes 1 6 inch 4 layer cake
    2 6 inch cake pans

    Cake:
    1 3/4 cups all purpose gluten free flour
    1 tsp baking soda
    1/2 tsp sea salt
    1 cup granulated coconut sugar
    1/2 cup virgin coconut oil, warmed to liquid
    1 cup freshly brewed organic coffee or espresso
    1 Tbsp pure vanilla extract
    2 Tbsp cider vinegar

    Frosting:
    2 cans organic full fat coconut milk, chilled
    2 cups soaked raw cashews
    3/4 cup raw coconut nectar, maple syrup or agave nectar
    1/2  tsp sea salt
    2 tsp pure vanilla extract
    2 Tbsp organic coffee beans
    2 cups coconut butter, warmed to liquid

    Syrup:
    2 Tbsp strong brewed organic coffee or espresso
    2 Tbsp maple syrup or coconut nectar

    cacao powder for dusting
    chopped vegan dark chocolate and coffee beans for garnish

    Preheat the oven to 375 degrees and position rack in center of oven. Line two six-inch-diameter cake pans with 2-inch-high sides with parchment paper. Coat parchment paper and pan sides lightly with coconut oil so that the cake doesn’t stick and line the bottom of the pan with a piece of parchment fit to the pan.
    Whisk flour, baking soda, sea salt, and sugar together in a large bowl to blend well.
    Whisk oil, coffee, and vanilla extract together in small bowl to blend well, then whisk into the flour mixture until well blended. Whisk in the cider vinegar until bubbles form.
    Transfer cake batter to prepared pans and bake cakes until tester inserted into center comes out clean, about 25-30 minutes.
    Cool cakes completely in pan on rack, about 1 hour. Cut around sides of pan to loosen. Turn cakes out onto platter; peel off parchment paper. Let cool completely, then place in the fridge to chill until very cold to make slicing easier. When chilled, slice cakes horizontally in half so that you have 4 layers.

    Meanwhile, to make the frosting, combine all ingredients but the coconut butter in a high speed blender or food processor and blend until smooth.  With the motor running, add the coconut butter and process a minute more.  Pour the frosting into a bowl and let sit in the freezer until the consistency of whipped cream (this may take anywhere from 1/2 hour to an hour depending on how warm it has gotten).
    Whisk together syrup ingredients in a small bowl.
    When ready to frost, place one cake layer on a plate. Brush with a little of the syrup, then dust with the cacao powder (I put mine in a fine meshed strainer and tapped it over the top). Spread frosting about 1/2 inch thick over the first layer, then top with the second. Brush that layer with the syrup, then dust with more cacao powder.  Repeat the frosting, then another cake layer, then more syrup, cacao powder, frosting then the last cake layer. Spread frosting over the top and down the sides of the cake.  Dust the top of the cake with cacao powder and chopped vegan dark chocolate if desired.  Store cake in the fridge. *if you would like a 4 layer 9 inch cake, double this entire recipe and bake in two 9 inch cake pans.


  • Vegan Dark Chocolate Blood Orange Layer Cake (gluten free)

    Vegan Dark Chocolate Blood Orange Layer Cake (gluten free)

    Last Saturday on Valentine’s Day, Eric and I decided to take a trip to the Minneapolis Institute of the Arts for a date.  I had planned on going for a nice walk outdoors somewhere, and as it worked out, Mother Nature did not cooperate and it was about 5F degrees that day.  So, the art museum was a warm and comforting place to go.  It was romantic walking through the museum and admiring art together.  They had an event going on where you place a red paper heart in front of your favorite piece.  So we carried the hearts with us for most of the date, and finally when we had already seen most of the museum, I saw the piece I loved the most. I was about to say so when at the same time Eric said “This one!” Turns out we both picked the same piece.  Funny because we have very different tastes, so it was pretty awesome we agreed this time.

    After the museum, we took a trip to the Wedge Co-op, and the first thing I saw when I walked through the door was a display of beautiful blood oranges.  I had to get some. I had been waiting for blood oranges for what seemed like forever and none of the stores near my home had them yet.  So, I was all over them.  I wanted to make a cake of some sort featuring them.  I asked Eric if he preferred a raw cheesecake or a layer cake, and layer cake it was!  This was going to be a post Valentine’s Day Cake, since I just wanted to spend time with Eric and why not make Valentine’s Day last two days and have cake on Sunday!

    I ended up making a chocolate cake with a fluffy coconut based white chocolate orange frosting that tasted like creamsicle.  It was delicious, and this cake ended up being a little like me and Eric’s taste in art.  He prefers chocolate, I prefer vanilla or fruit flavored.  But we both agreed that this cake was wonderful.  The best of both, and something we could share.

    Vegan Dark Chocolate Blood Orange Layer Cake (gluten free)
    Makes 1 6 inch 4 layer cake

    2 6 inch cake pans

    Cake:
    1 1/2 cups all purpose gluten free flour (or gluten free oat flour)
    1/3 cup cacao powder
    1 cup coconut sugar
    1 1/2 tsp baking soda
    1 tsp baking powder
    1 tsp sea salt
    1 cup pureed apple
    1/4 cup virgin olive oil
    1 Tbsp pure vanilla extract
    2 Tbsp orange zest
    1/4 cup + 2 Tbsp fresh blood orange juice at room temperature
    2 Tbsp apple cider vinegar

    Frosting:
    2 cans organic full fat coconut milk, chilled
    2 cups raw cashews, soaked for at least 4 hours in water and drained
    2/3 cup blood orange juice
    2 Tbsp blood orange zest
    3/4 cup raw coconut nectar, maple syrup or agave nectar
    1/2  tsp sea salt
    2 tsp pure vanilla extract
    1 2/3 cups coconut butter, warmed to liquid
    2/3 cup raw cacao butter, warmed to liquid**

    Preheat the oven to 375 degrees and position rack in center of oven. Line two six-inch-diameter cake pans with 2-inch-high sides with parchment paper. Coat parchment paper and pan sides lightly with coconut oil so that the cake doesn’t stick and line the bottom of the pan with a piece of parchment fit to the pan.
    Whisk flour, cacao powder, baking soda, sea salt, sugar in a large bowl to blend well.
    Whisk apple puree, oil, vanilla, orange zest and juice together in small bowl to blend well, then whisk into the flour mixture until well blended. Whisk in the cider vinegar until bubbles form.
    Transfer cake batter to prepared pans and bake cakes until tester inserted into center comes out clean, about 25-30 minutes.
    Cool cakes completely in pan on rack, about 1 hour. Cut around sides of pan to loosen. Turn cakes out onto platter; peel off parchment paper. Let cool completely, then place in the fridge to chill until very cold to make slicing easier. When chilled, slice cakes horizontally in half so that you have 4 layers.

    Meanwhile, to make the frosting, combine all ingredients but the coconut butter and cacao butter in a high speed blender or food processor and blend until smooth.  With the motor running, add the coconut butter and cacao butter and process a minute more.  Pour the frosting into a bowl and let sit in the freezer until the consistency of whipped cream (this may take anywhere from 1/2 hour to an hour depending on how warm it has gotten).
    When ready to frost, place one cake layer on a plate. spread frosting about 1/2 inch thick over the first layer, then top with the second.  Repeat the frosting, then another cake layer, then more frosting then the last cake layer. Spread frosting over the top and down the sides of the cake.  Decorate the top of the cake with blood orange slices just before serving.  Store cake in the fridge.

    **If you can not get cacao butter, you can substitute more coconut butter or coconut oil.

    ***if you would like a 4 layer 9 inch cake, double this entire recipe and bake in two 9 inch cake pans.
  • Vegan Matcha Pear White Chocolate Layer Cake (gluten free)

    Vegan Matcha Pear White Chocolate Layer Cake (gluten free)

    I love everything about matcha.  Its earthy aroma and flavor, its beautiful green color, and how wonderful it goes with sweet things.  Although I am perfectly happy with my matcha lattes, I am a big fan of allowing it to be the star in other things as well. Some of my favorite things to pair it with are chocolate, both white and dark, almonds, and certain fruits.  I have made some things with banana and matcha and that was an amazing combination, but recently I tried pear and oh boy was it wonderful.

    I tend to make things based on what I have on hand, and last weekend I knew I wanted cake, and I knew I wanted to include matcha.  But the other components had not fallen into place yet.  I was thinking about it all day at work on Saturday and then finally when I was shopping for my groceries afterwards I saw the perfectly ripe pears. They were calling my name.  They sounded so good to me at that moment.  So…I thought why not pair the matcha with the pears in a cake?  Maybe add in a little white chocolate in the frosting for good measure too!

    I was excited about this one!  I love trying new flavor combinations and this one was going to be wonderful, I could feel it.  For the cake batter, I added pureed pears to keep it moist once baked, and a bit of earthy matcha as well not wanting to limit it just to the frosting.  It smelled amazing and I needed to make a frosting that was just as much so.  I did not have any young coconuts at the time, and I know you all sometimes appreciate when I use easier to find things in my recipes so I went with organic coconut milk for the creamy part of the frosting along with coconut butter to thicken pureed pears.  Adding pears to frosting?  Yes!  It worked too, adding extra sweetness and bulk without being entirely coconut or having to add cashews.  So I kept this nut free as well.  Some cacao butter also made its way into the frosting to give it a hint of white chocolate along with the earthy matcha and it was heavenly.

    I could have eaten that frosting in a bowl with a spoon like mousse, but I thought it would be better to clothe the cake with it. I loved the color this cake turned out, a light mossy green that made me long for spring and warmer weather and a walk through the forest.  It tasted simply heavenly, the sweet pears and white chocolate in the frosting perfect flavors for the earthy matcha to play with.  I topped it off with some of my matcha white chocolates just because.  Trust me, if you are matcha obsessed like me, you need to make this for yourself.  It will put you in your happy place!

    Vegan Matcha Pear White Chocolate Layer Cake (gluten free)

    Makes 1 6 inch 4 layer cake

    2 6 inch cake pans

    Cake:
    1 1/2 cups All Purpose Gluten Free Flour (or GF oat flour works here as well)
    1 cup coconut sugar
    1 1/2 tsp baking soda
    1 tsp baking powder
    1 tsp sea salt
    2 Tbsp matcha powder
    1 cup pureed fresh pear
    1/4 cup virgin coconut oil
    1 Tbsp pure vanilla extract
    1/4 cup + 2 Tbsp light coconut milk at room temperature
    2 Tbsp apple cider vinegar
    Frosting:
    2 cans organic full fat coconut milk, chilled
    2 cups peeled, diced fresh pears
    3/4 cup raw coconut nectar, maple syrup or agave nectar
    1/2  tsp sea salt
    2 Tbsp matcha powder
    2 tsp pure vanilla extract
    1 1/4 cups coconut butter, warmed to liquid
    1/3 cup raw cacao butter, warmed to liquid**Garnish:
    Matcha powder
    Chopped Raw Matcha White Chocolates

    Preheat the oven to 375 degrees and position rack in center of oven. Line two six-inch-diameter cake pans with 2-inch-high sides with parchment paper. Coat parchment paper and pan sides lightly with coconut oil so that the cake doesn’t stick and line the bottom of the pan with a piece of parchment fit to the pan.
    Whisk flour, baking soda, sea salt, sugar and matcha powder in a large bowl to blend well.
    Whisk oil, coconut milk, and vanilla extract together in small bowl to blend well, then whisk into the flour mixture until well blended. Whisk in the cider vinegar until bubbles form.
    Transfer cake batter to prepared pans and bake cakes until tester inserted into center comes out clean, about 25-30 minutes.
    Cool cakes completely in pan on rack, about 1 hour. Cut around sides of pan to loosen. Turn cakes out onto platter; peel off parchment paper. Let cool completely, then place in the fridge to chill until very cold to make slicing easier. When chilled, slice cakes horizontally in half so that you have 4 layers.

    Meanwhile, to make the frosting, combine all ingredients but the coconut butter and cacao butter in a high speed blender or food processor and blend until smooth.  With the motor running, add the coconut butter and cacao butter and process a minute more.  Pour the frosting into a bowl and let sit in the freezer until the consistency of whipped cream (this may take anywhere from 1/2 hour to an hour depending on how warm it has gotten).
    When ready to frost, place one cake layer on a plate. spread frosting about 1/2 inch thick over the first layer, then top with the second.  Repeat the frosting, then another cake layer, then more frosting then the last cake layer. Spread frosting over the top and down the sides of the cake.  Dust the top of the cake with matcha (I put mine in a fine meshed strainer and tapped it over the top) and matcha white chocolate if desired.  Store cake in the fridge.

    **If you can not get cacao butter, you can substitute more coconut butter or coconut oil.

    ***if you would like a 4 layer 9 inch cake, double this entire recipe and bake in two 9 inch cake pans.