I am so ready for spring! It felt like Spring here in Minnesota for about a week with temperatures in the high 30s and 40s and the snow was melting. Loading....
View Recipes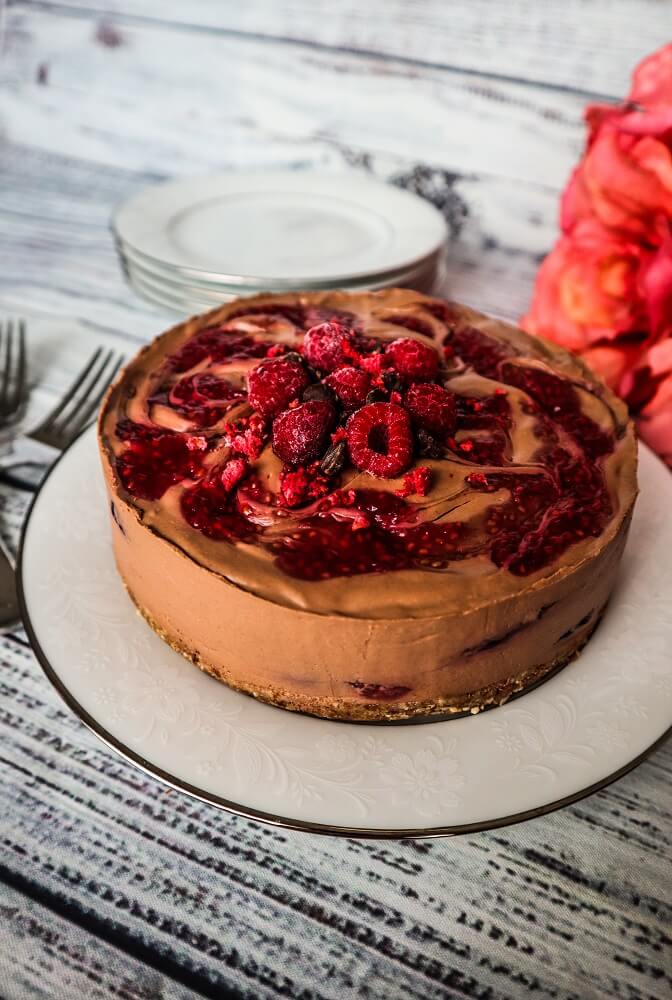
Vegan Raspberry Swirled Chocolate Cheesecake
Cheesecake has to be my all time favorite dessert! Even before I was vegan I would make it or buy it a lot. There is just something soLoading....
View Recipes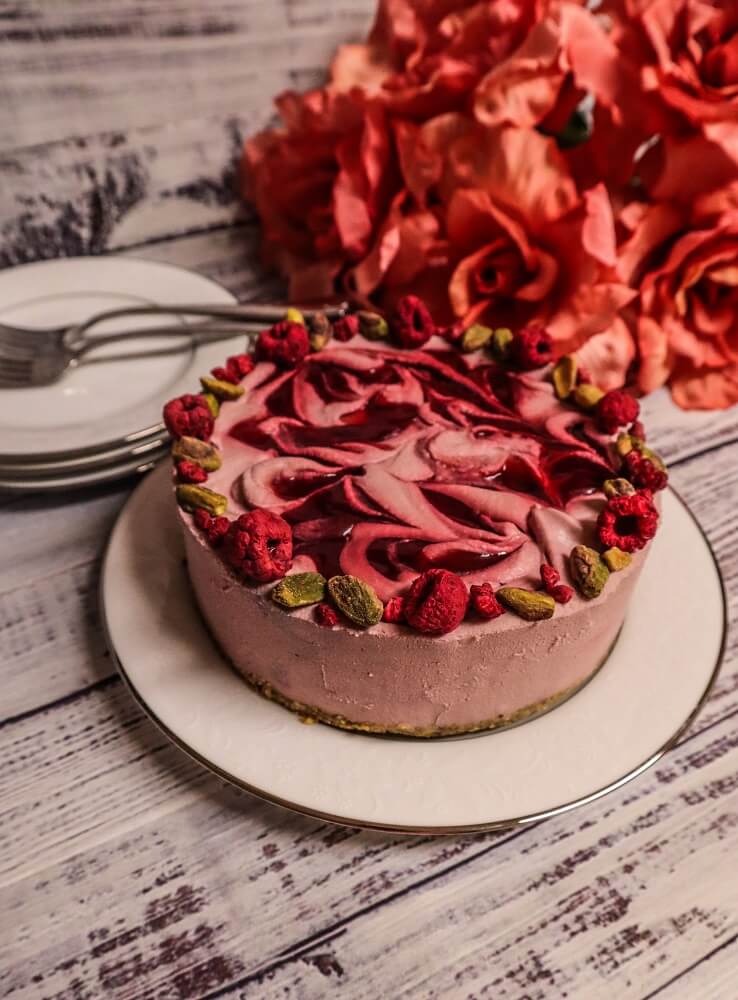
Vegan Raspberry Rose Cheesecake
I know we are far from summer, but I am missing summer berries, so I thought I would make a raspberry cheesecake to remind me of it. When I wasLoading....
View Recipes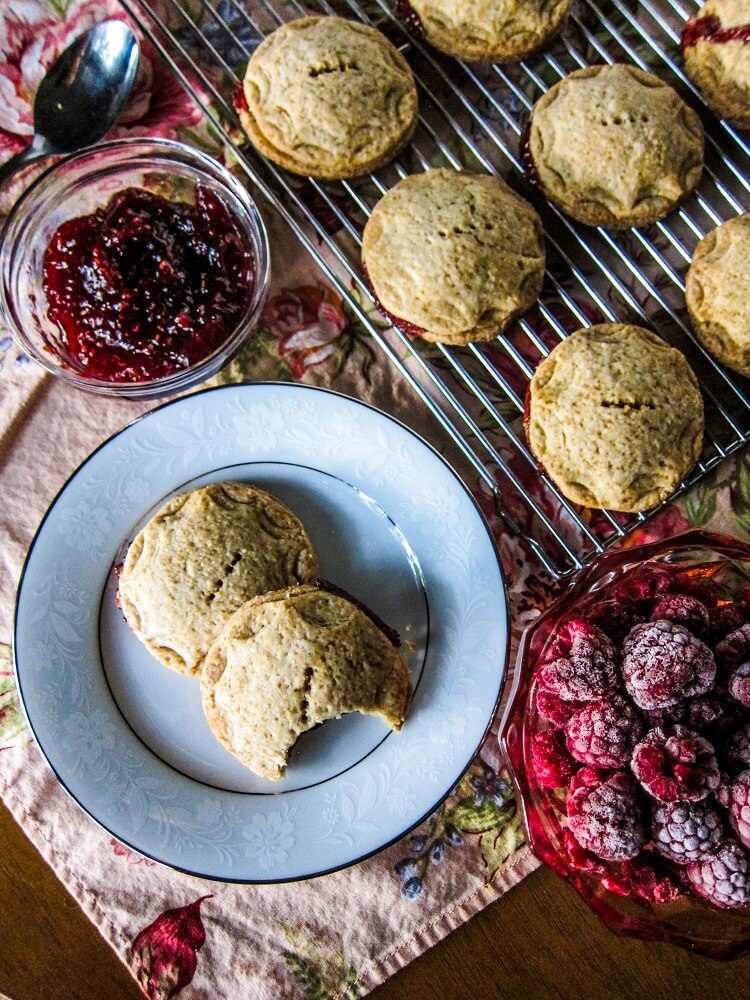
Vegan Raspberry Lavender Pie Cookies
Raspberries are my all time favorite fruit. Maybe because they are somewhat abundant here in Minnesota and I ate a lot of them as a kid. Or because they haveLoading....
View Recipes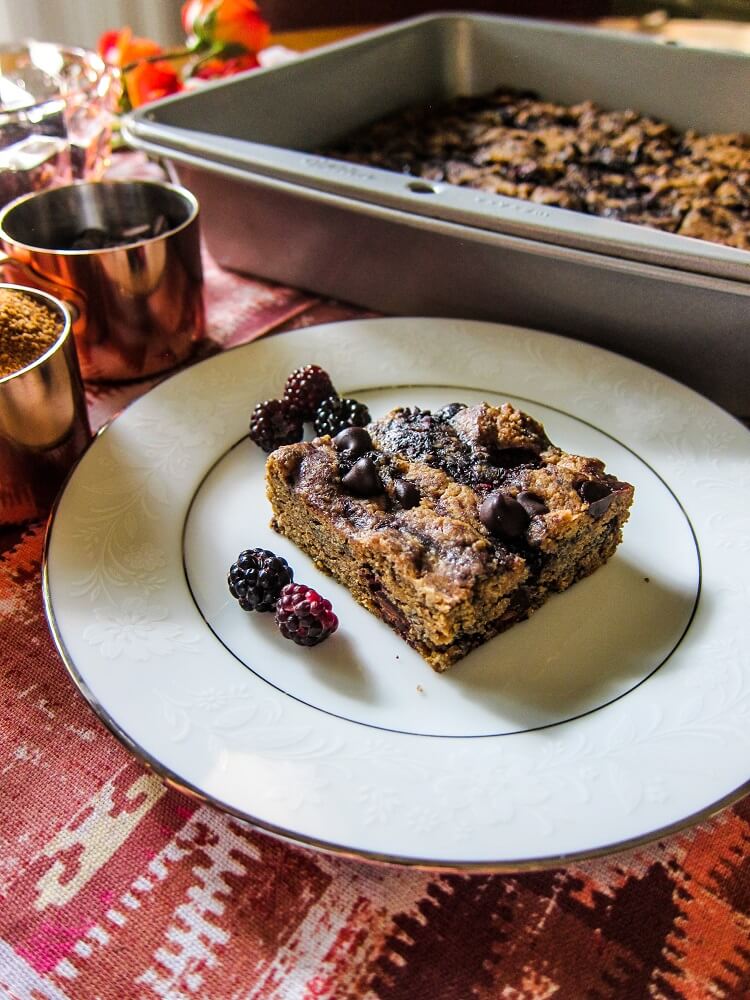
Vegan Black Raspberry Blondies
Sometimes on my runs I am in the zone and sorting out my own thoughts, and other times I pay more attention to the beautiful things in nature around me.Loading....
View Recipes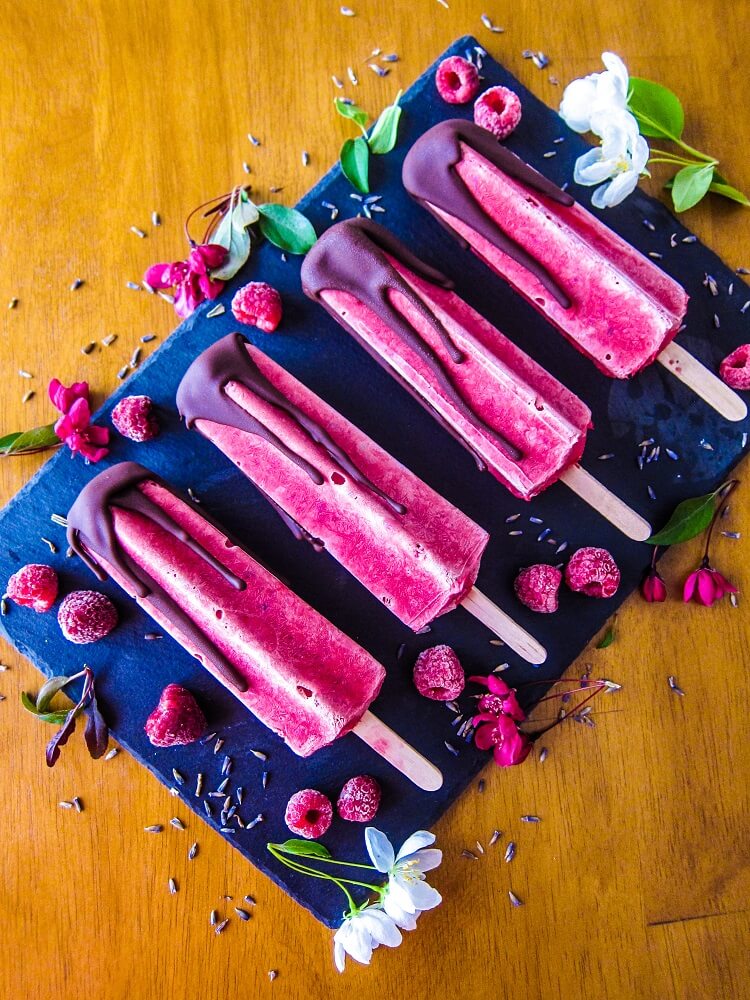
Vegan Chocolate Dipped Raspberry Lavender Ice Cream Pops
Warmer weather is approaching and they said it was supposed to be nice last weekend so I figured I would make some ice cream. Not the scoop-able kind though, someLoading....
View Recipes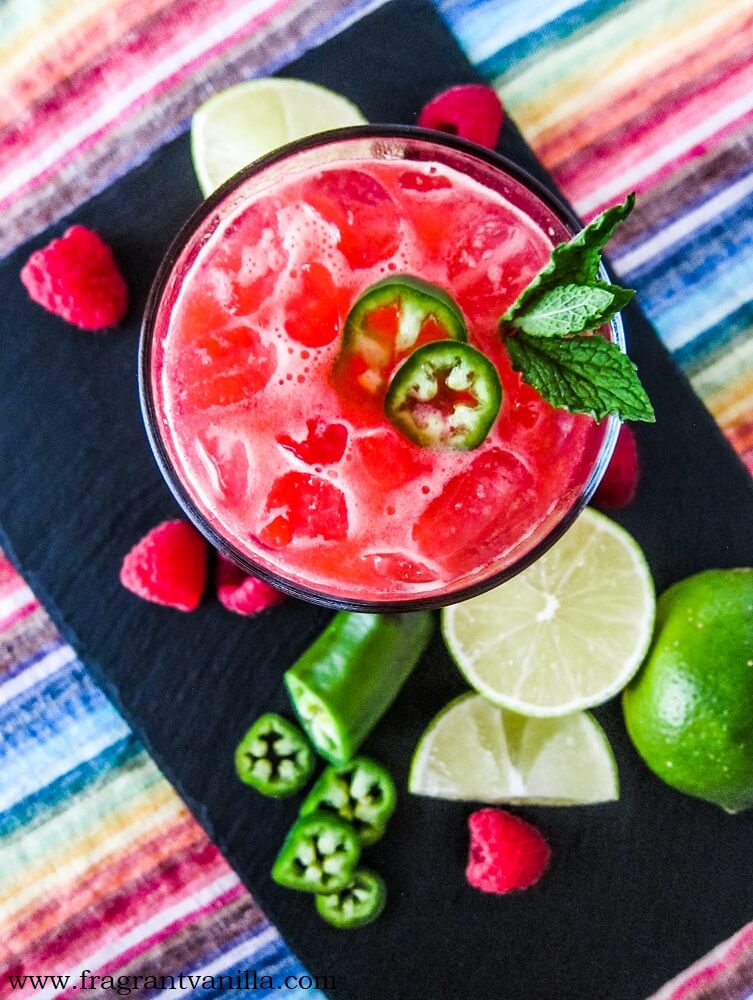
Raspberry Jalapeno Margarita
The first food item that I had made that I shared with my boyfriend Eric wasn’t a dessert, it was my habanero hot sauce. One of the first things thatLoading....
View Recipes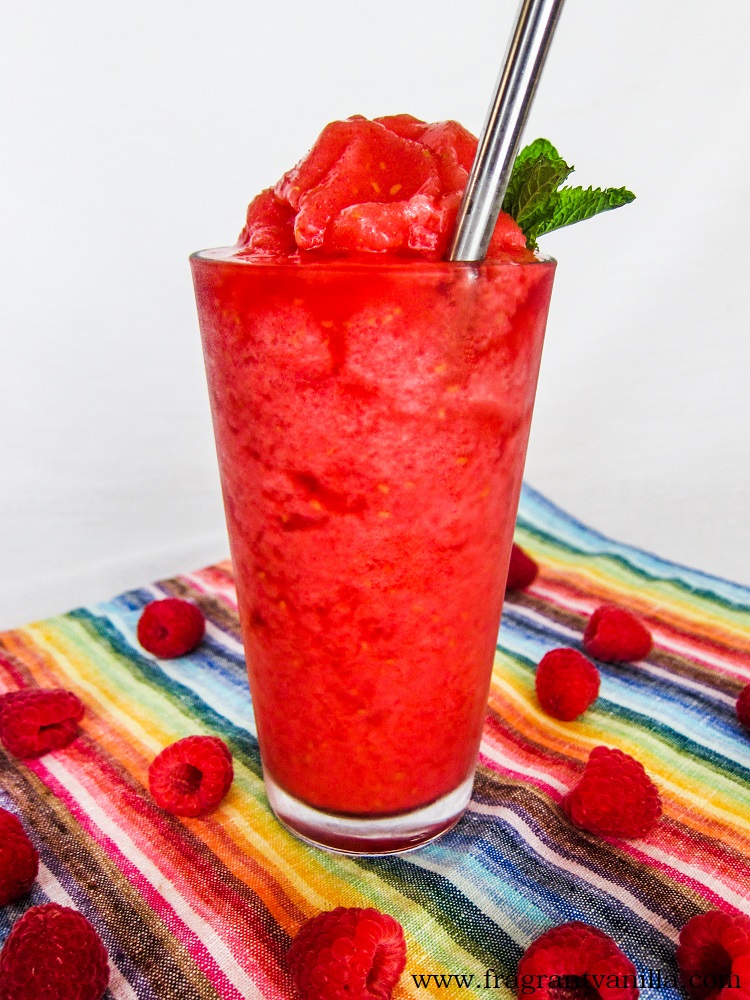
Raspberry Rosé Slushie
People think of Minnesota as being the land of snow and ice, but what they don’t realize is that there is a part of the year when it gets prettyLoading....
View Recipes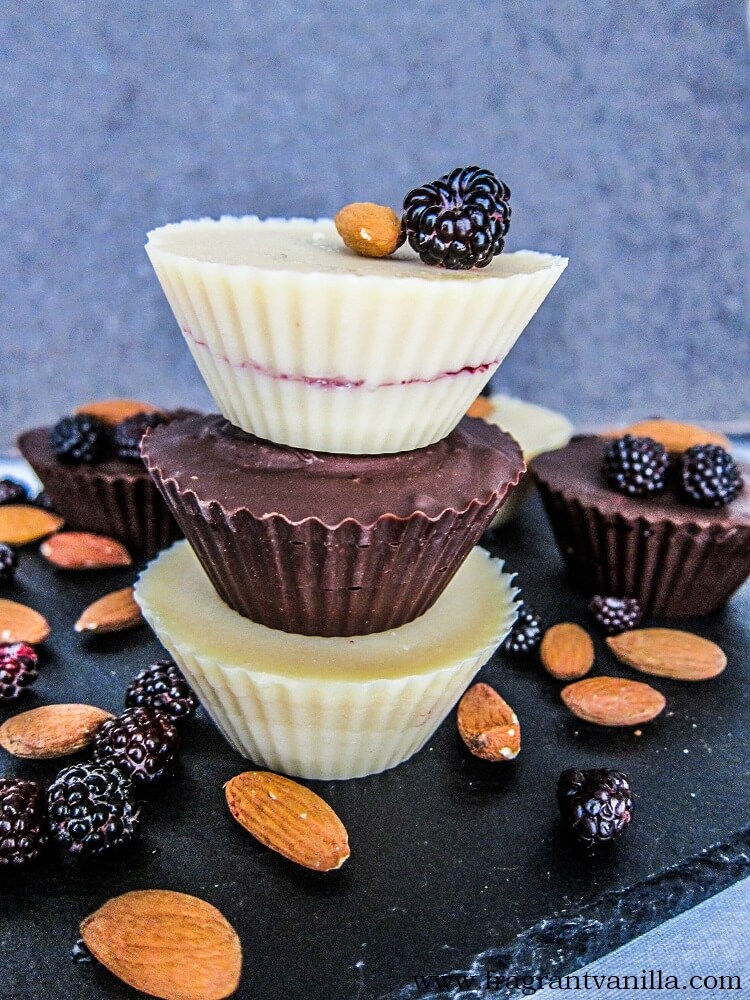
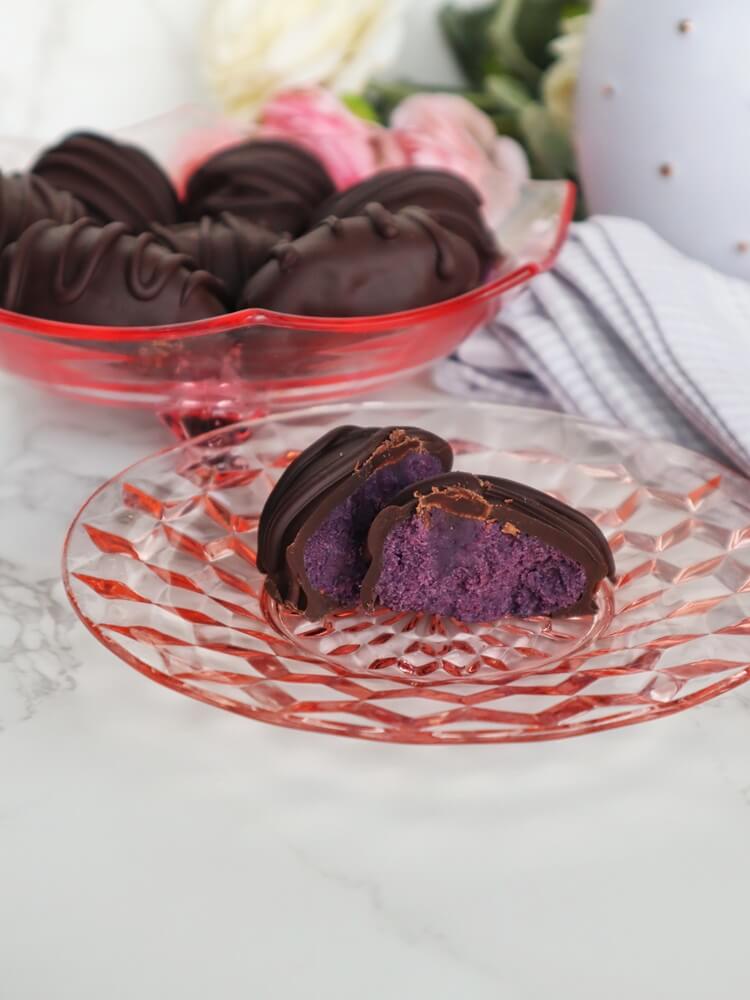
Vegan Chocolate Black Raspberry Almond Butter Cups
I know that being a runner doesn’t define me, but I still get kind of sad and feel lost when I have an injury and can’t do the thing ILoading....
View Recipes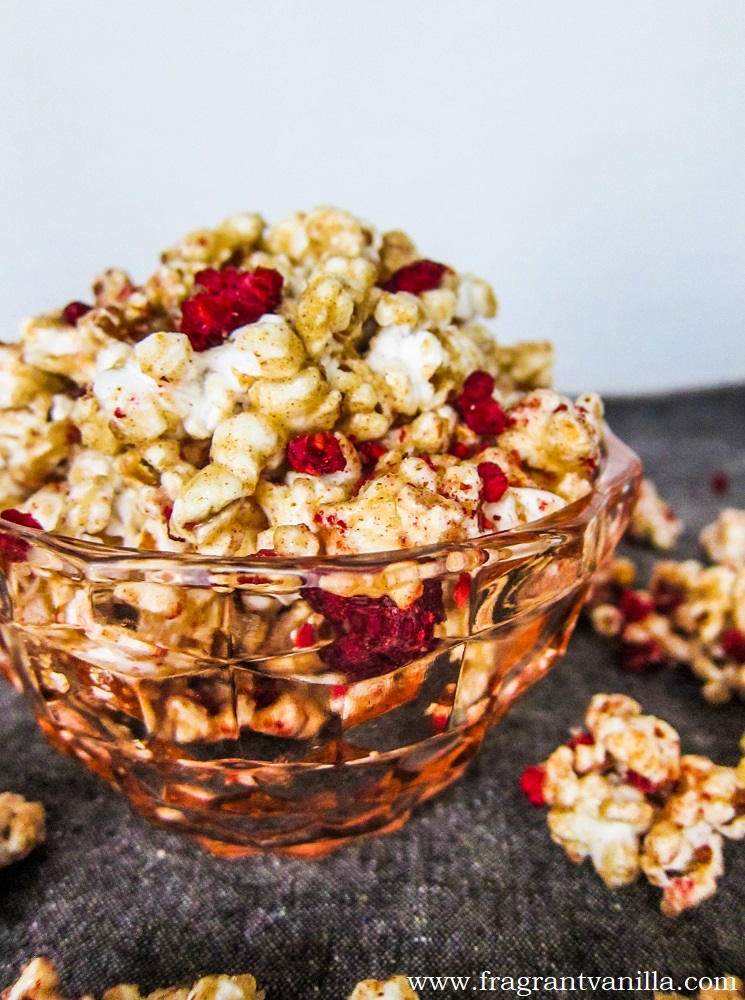
Vegan Raspberry Ghost Pepper Caramel Corn
They are coming out with ghost pepper everything lately. Well, mostly savory items, I haven’t seen any commercial ghost pepper desserts, just things like chips, hot sauces, BBQ sauce etc. Loading....
View Recipes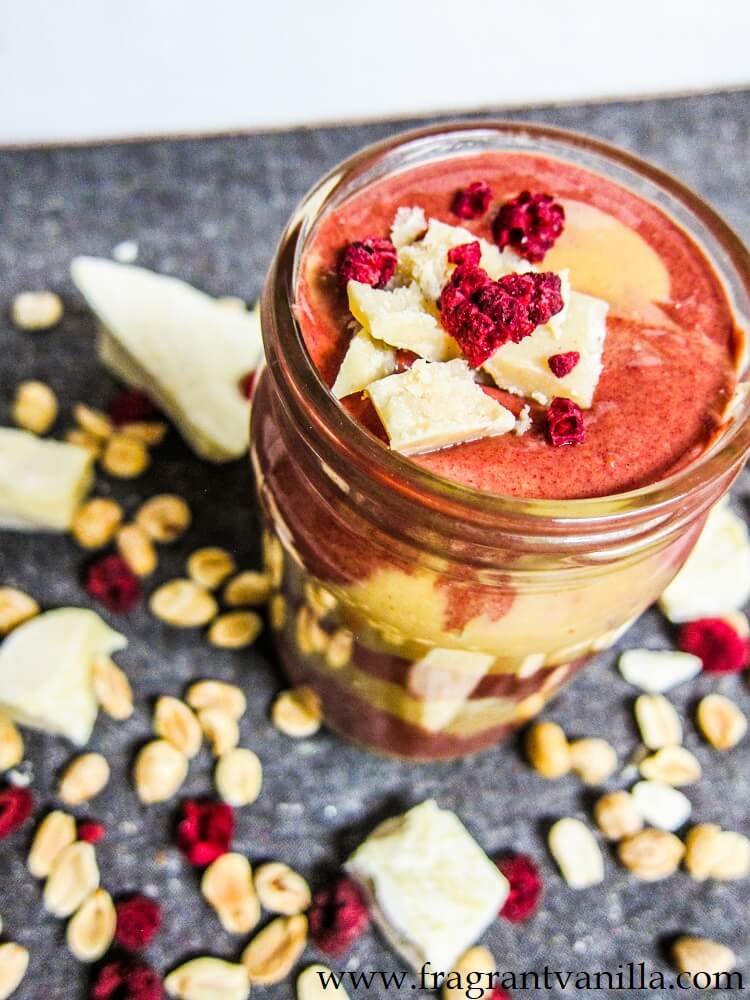
Raspberry White Chocolate Chunk Peanut Butter
When I was in high school shopping with my Mom at the store, I came across a jar of the most amazing sounding peanut butter ever. It was raspberry whiteLoading....
View Recipes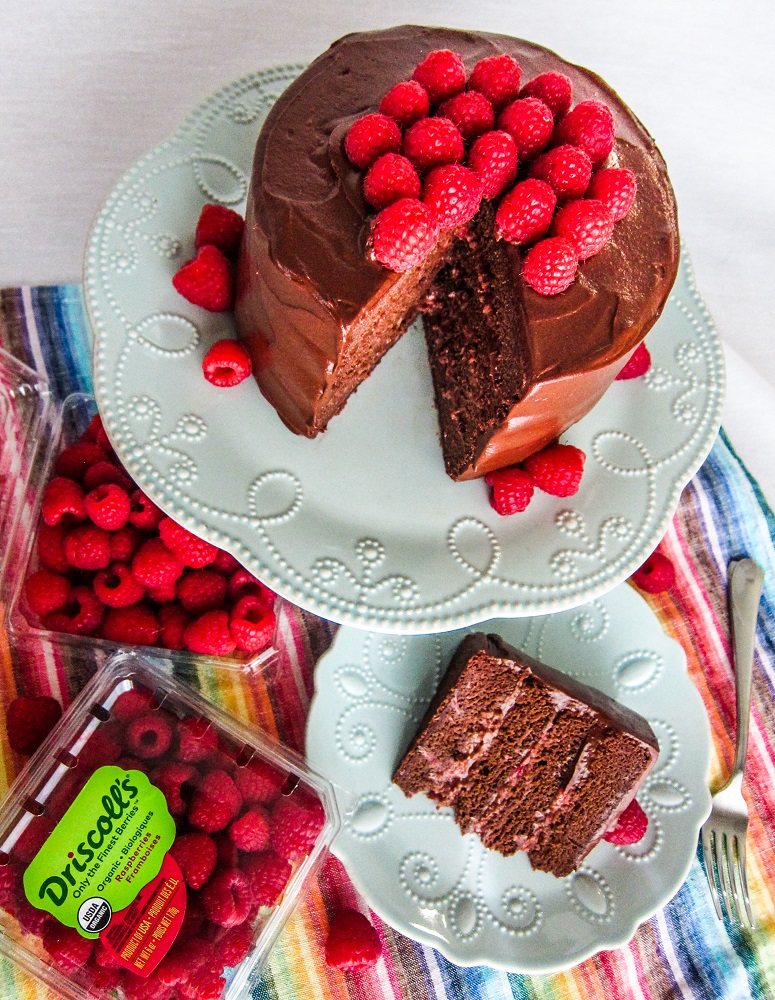
Vegan Dark Chocolate Raspberry Layer Cake featuring Driscoll’s Berries
This post has been graciously sponsored by TheFeedFeed & Driscoll’s! All opinions are my own. Thanks for supporting the brands that support me! Did you know that the Minneapolis-St PaulLoading....
View Recipes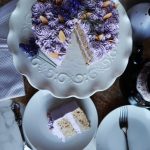
Vegan Lavender Vanilla Almond Cake
I always enjoy making my own birthday cakes, because I love making...
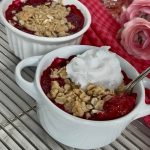
Vegan Raspberry Rhubarb Crisp
I love rhubarb season! Ever since I was little and I...

Vegan Chocolate Pistachio Shortbread Cookie Sandwiches
I was craving some dark chocolate short bread and my Mom had...
Vegan Blueberry Chocolate Eggs
Even though the stores are filled with Easter candy, I like to...