I can’t believe it is already July! Time has flown this year with all that is going on, and I feel a bit out of sorts as toLoading....
View Recipes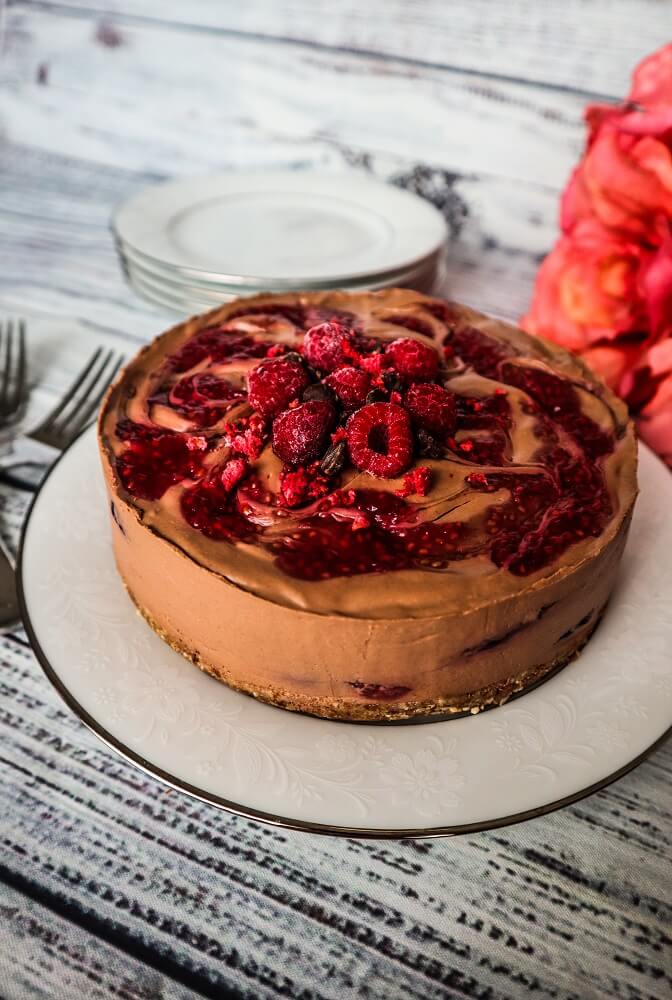
Vegan Raspberry Swirled Chocolate Cheesecake
Cheesecake has to be my all time favorite dessert! Even before I was vegan I would make it or buy it a lot. There is just something soLoading....
View Recipes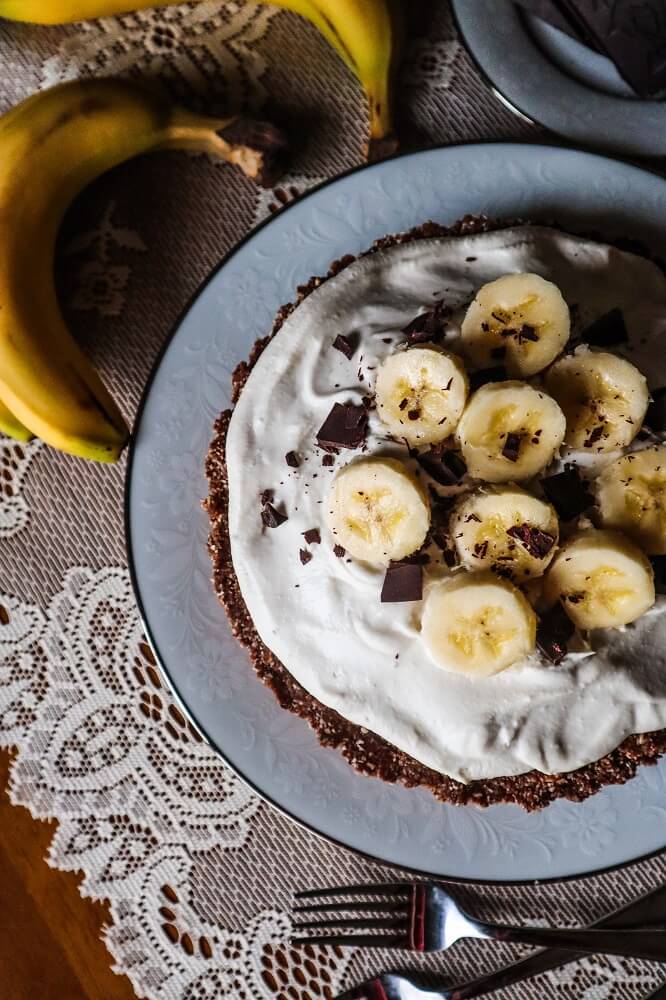
Vegan Chocolate Banana Cream Pie
About 10 years ago, there was a really good local upscale restaurant (that has sadly since closed) that my Mom and I would visit often, and they had amazing bananaLoading....
View Recipes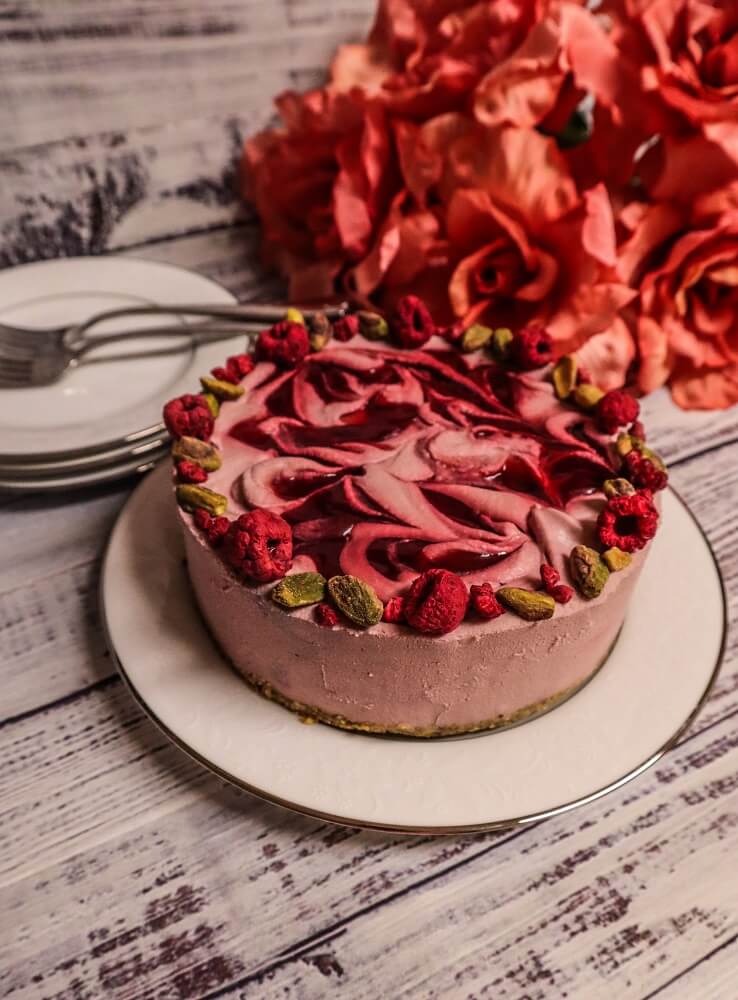
Vegan Raspberry Rose Cheesecake
I know we are far from summer, but I am missing summer berries, so I thought I would make a raspberry cheesecake to remind me of it. When I wasLoading....
View Recipes
Vegan Caramel Apple Cheesecake
I made a visit to a local apple orchard a few weekends back, and I still had some apples on hand, so I decided that I had to make something reallyLoading....
View Recipes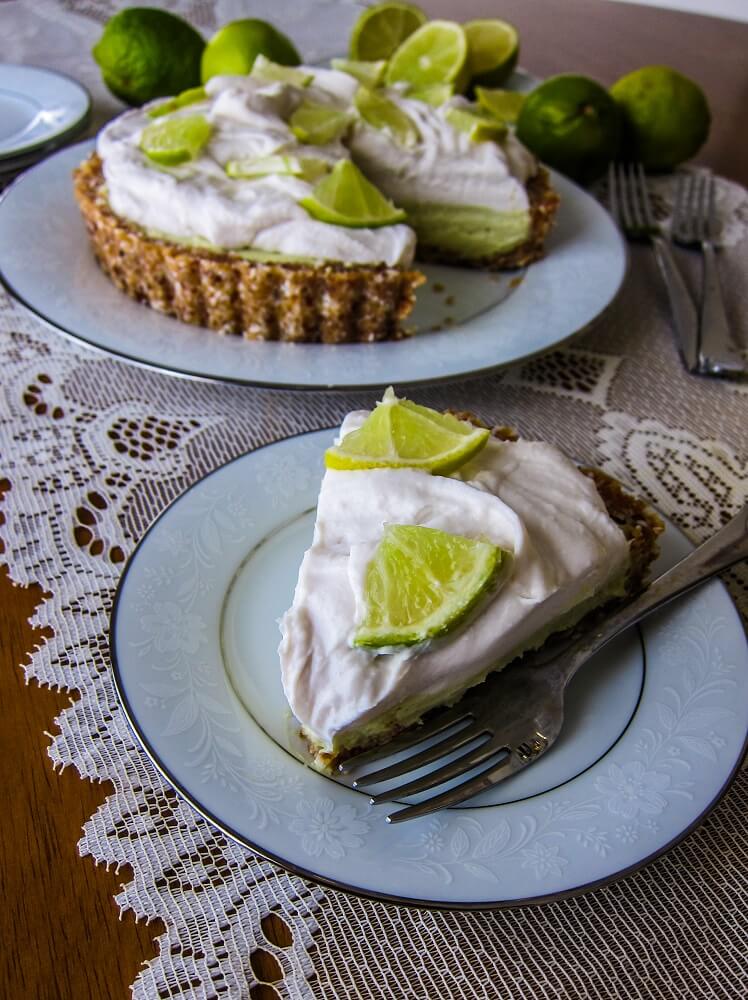
Vegan Key Lime White Chocolate Mousse Tart
I was given a big bag of organic limes and so I thought it was the perfect time to make some key lime pie! Me not being one to makeLoading....
View Recipes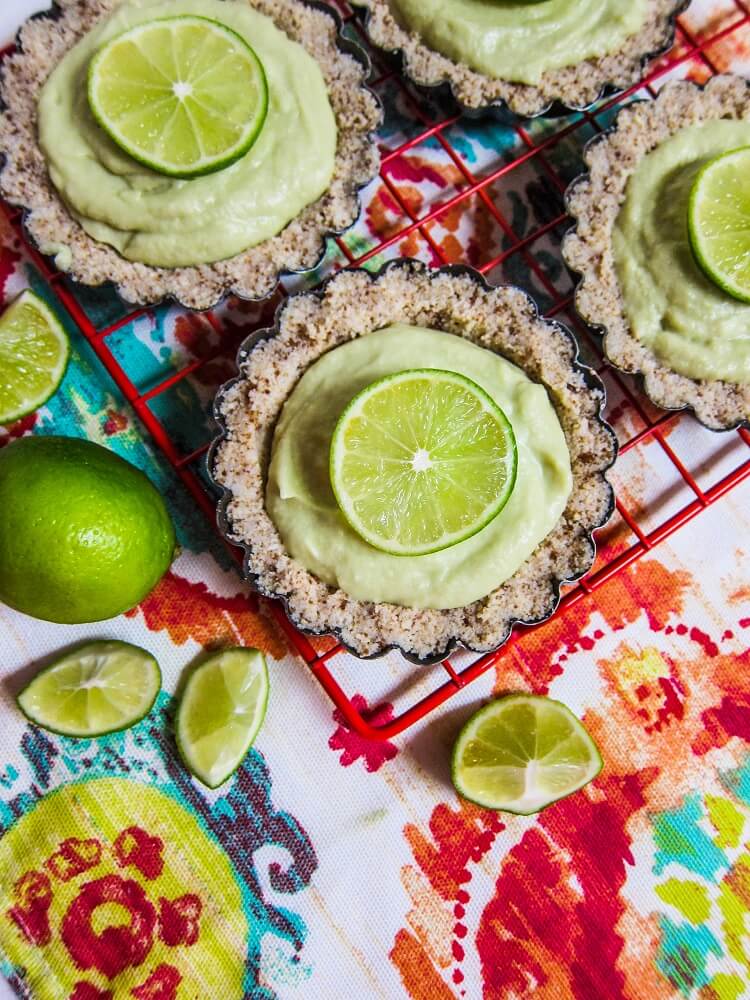
Mini Avocado Lime Cream Tartlettes
I had a bag of limes on my counter just waiting to be used for something and key lime pie sounded really good, but I didn’t want to make aLoading....
View Recipes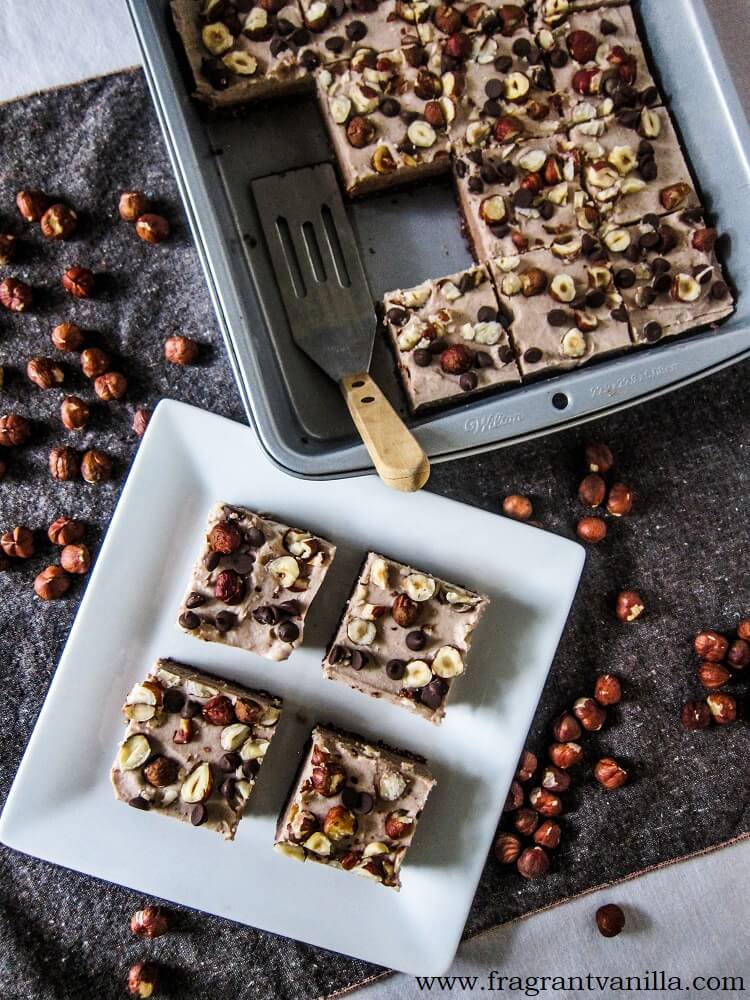
Vegan Hazelnut Bliss Bars
About 5 years ago, I made some really amazing raw hazelnut bars with some hazelnut spreads that Rawmio sent me. They had a chocolate crust, a layer of plain hazelnutLoading....
View Recipes
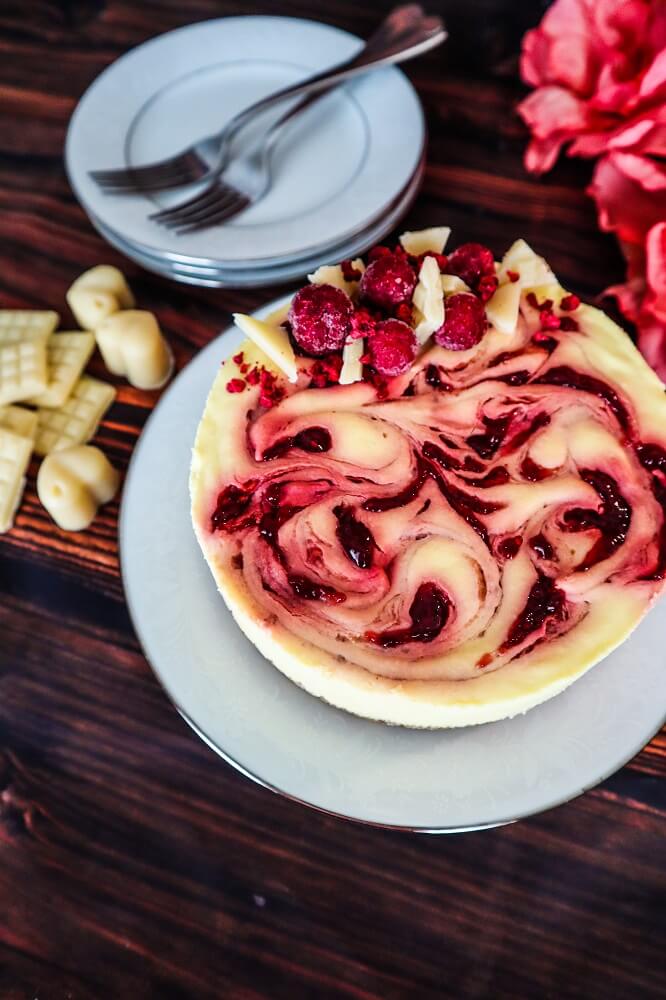
Vegan Raspberry White Chocolate Cheesecake
I make my own Birthday cake every year, and half the time when I tell people that, they are baffled as to why. I even had someone tell me thatLoading....
View Recipes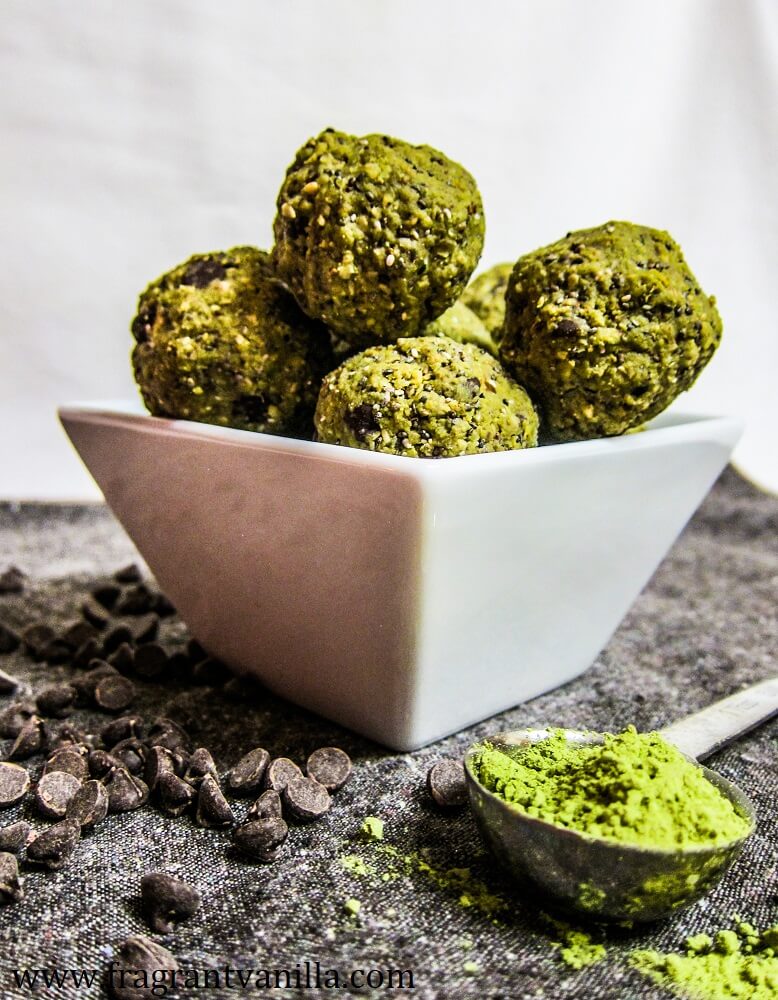
Matcha Mint Chocolate Chip Energy Bites
It is in the single digits here in Minnesota. When I went to yesterday morning it was -5F degrees. Which kind of feels like a shock right now because itLoading....
View Recipes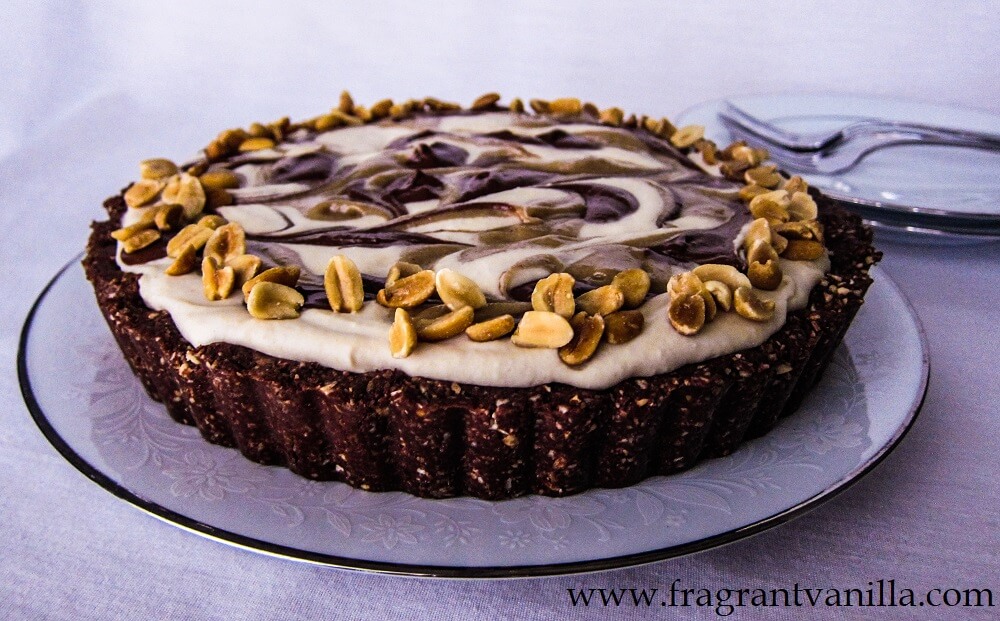
Vegan Snickers Pie
People always ask me why on earth I make my own Birthday cake. Well, it is simple. I can’t get the kind of cake I want anywhere, and I actuallyLoading....
View Recipes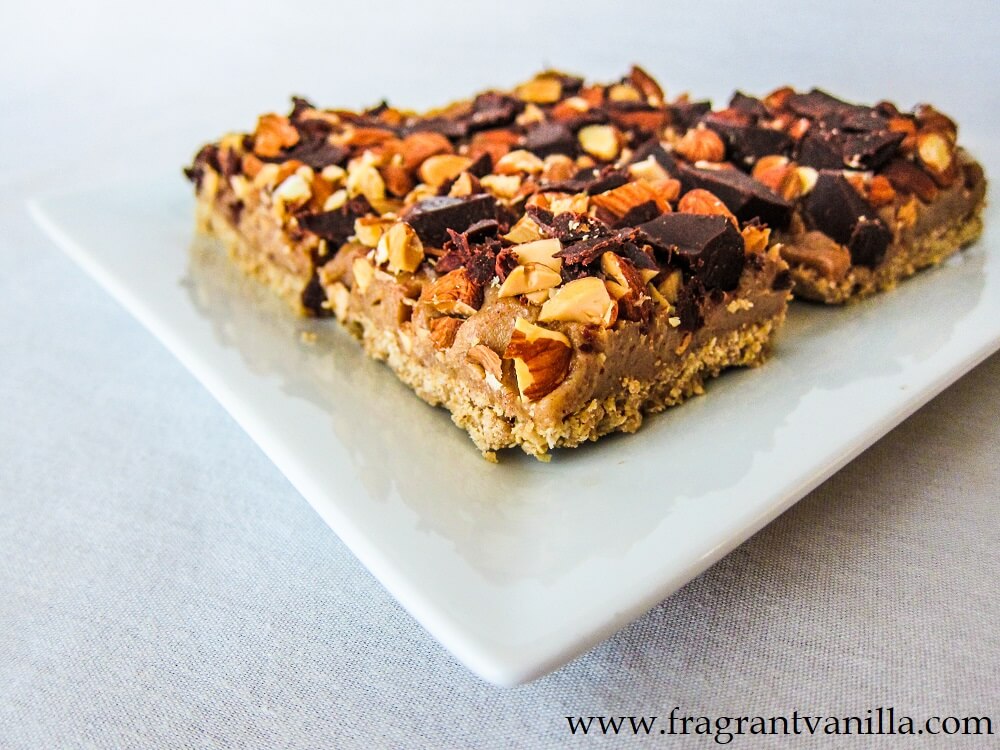
Vegan Almond Caramel Bars
Wednesday was hot, hot, hot. Well, in the 90s with high humidity. I know some people love this weather, and it is great for laying around at the pool, butLoading....
View Recipes
Vegan Chocolate Pistachio Shortbread Cookie Sandwiches
I was craving some dark chocolate short bread and my Mom had...
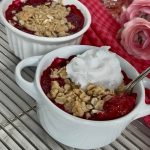
Vegan Raspberry Rhubarb Crisp
I love rhubarb season! Ever since I was little and I...
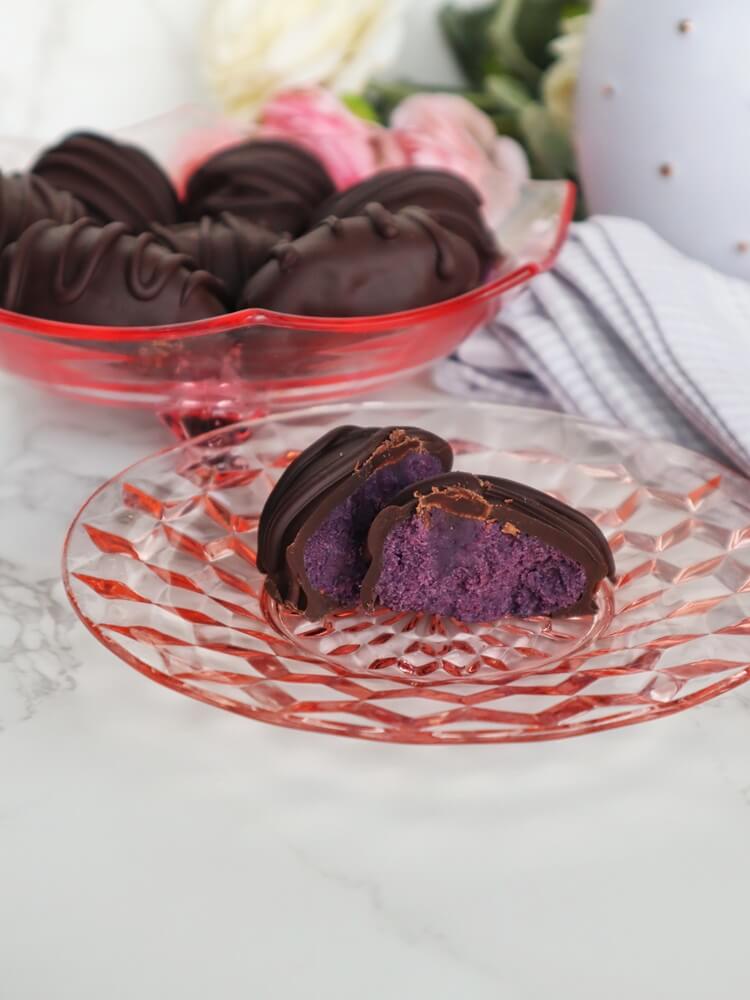
Vegan Blueberry Chocolate Eggs
Even though the stores are filled with Easter candy, I like to...
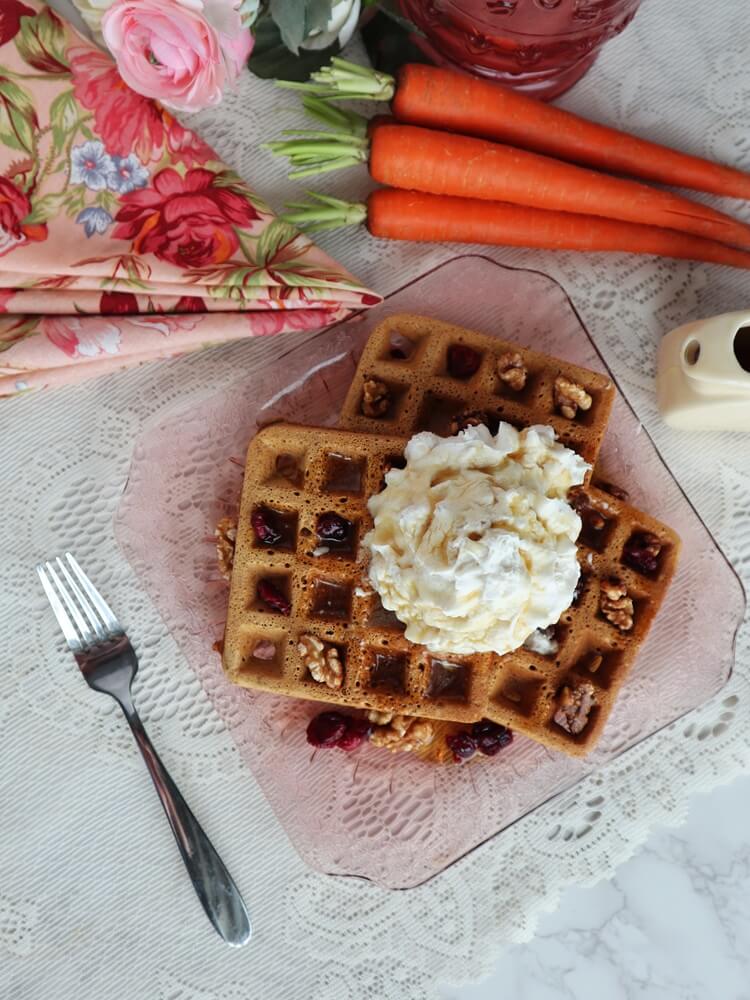
Vegan Carrot Cake Waffles
When I was little, I loved it when my Mom would make...