Month: November 2015

  • Vegan Gingerbread Cheesecake and a L. C. Finns Extract Giveaway!

    Vegan Gingerbread Cheesecake and a L. C. Finns Extract Giveaway!

    IMG_1629

    When L. C. Finns contacted me and asked if I would like to try their line of flavor extracts I was excited.  I looked on their website and discovered that they make all of their extracts small batch by hand, and they are made with real ingredients!  Heck yes I wanted to try them.  And even better, they are located very close to where I live!  I am always up for supporting local companies, especially ones like this one that use real stuff in their products.

    IMG_1545

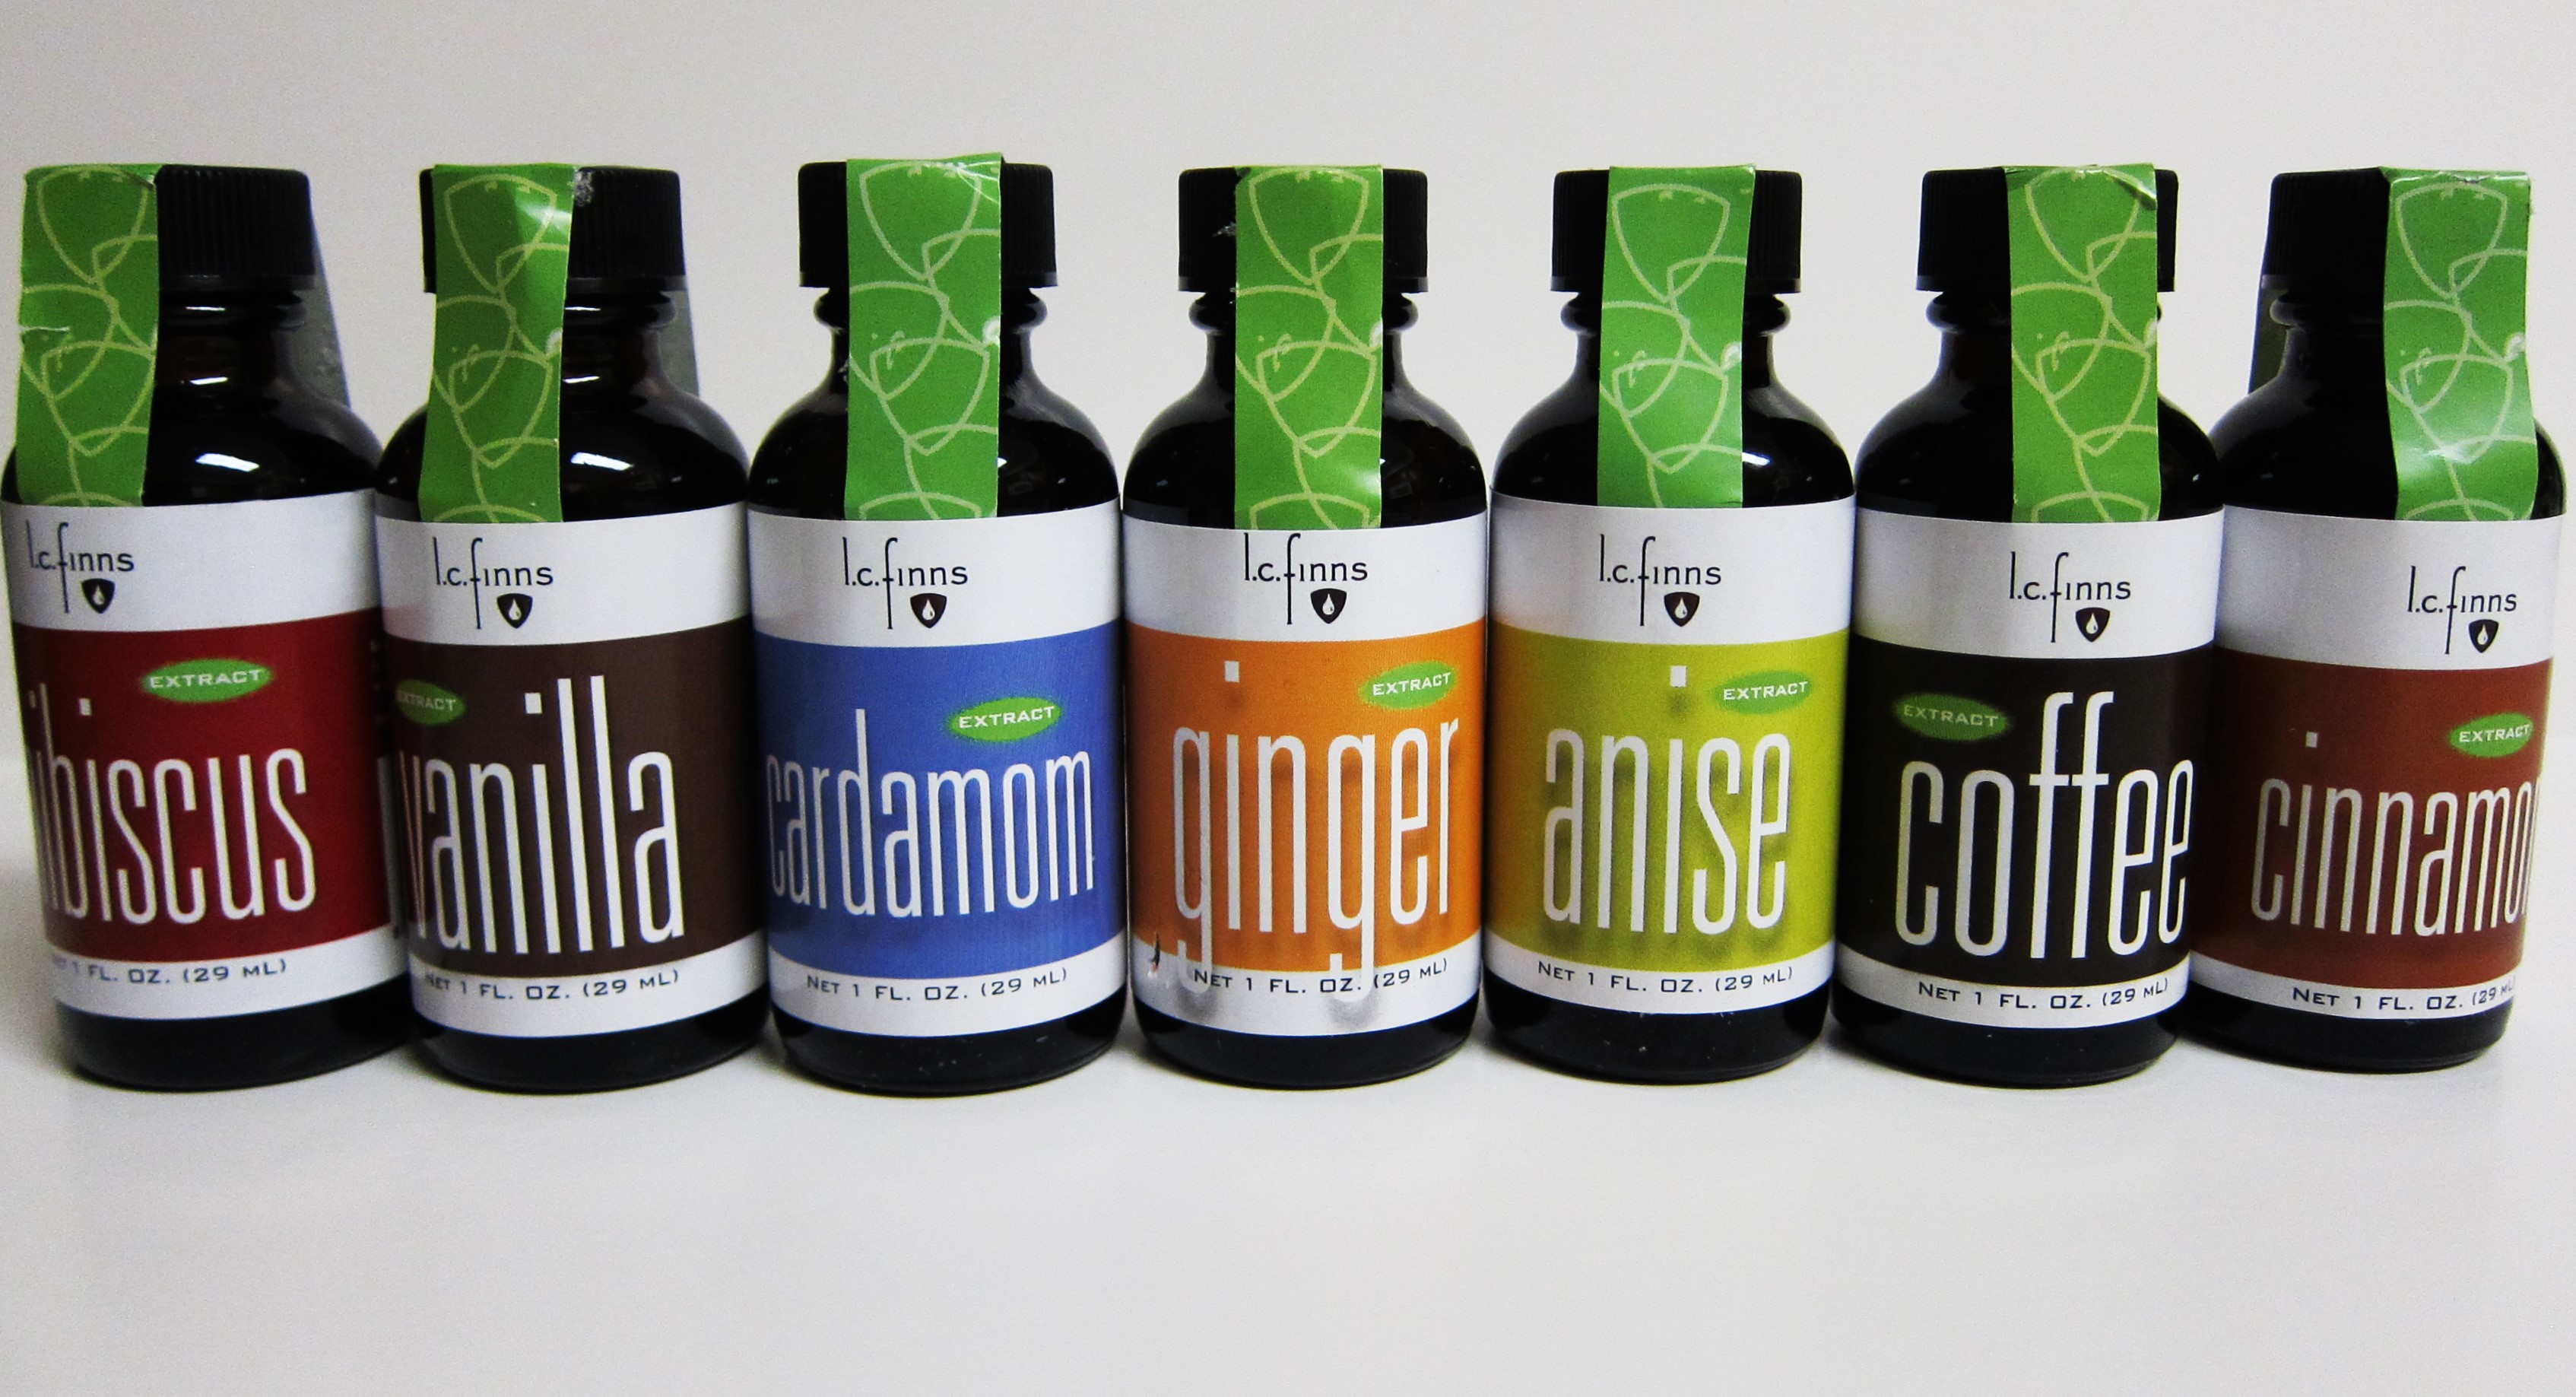
    Another thing that caught my eye was the flavors that they make.  Of course there was the vanilla extract, but they also have coffee, cardamom, anise, hibiscus, cinnamon, and ginger. I don’t think I have ever seen these flavors in natural form elsewhere.  When the box arrived I could not wait to open it.  I immediately had to smell them.  They smelled amazing.  The beautiful aromas making my nose happy. And, they were all full sized bottles, how generous!  I was very grateful to receive such a gift.

    IMG_1627

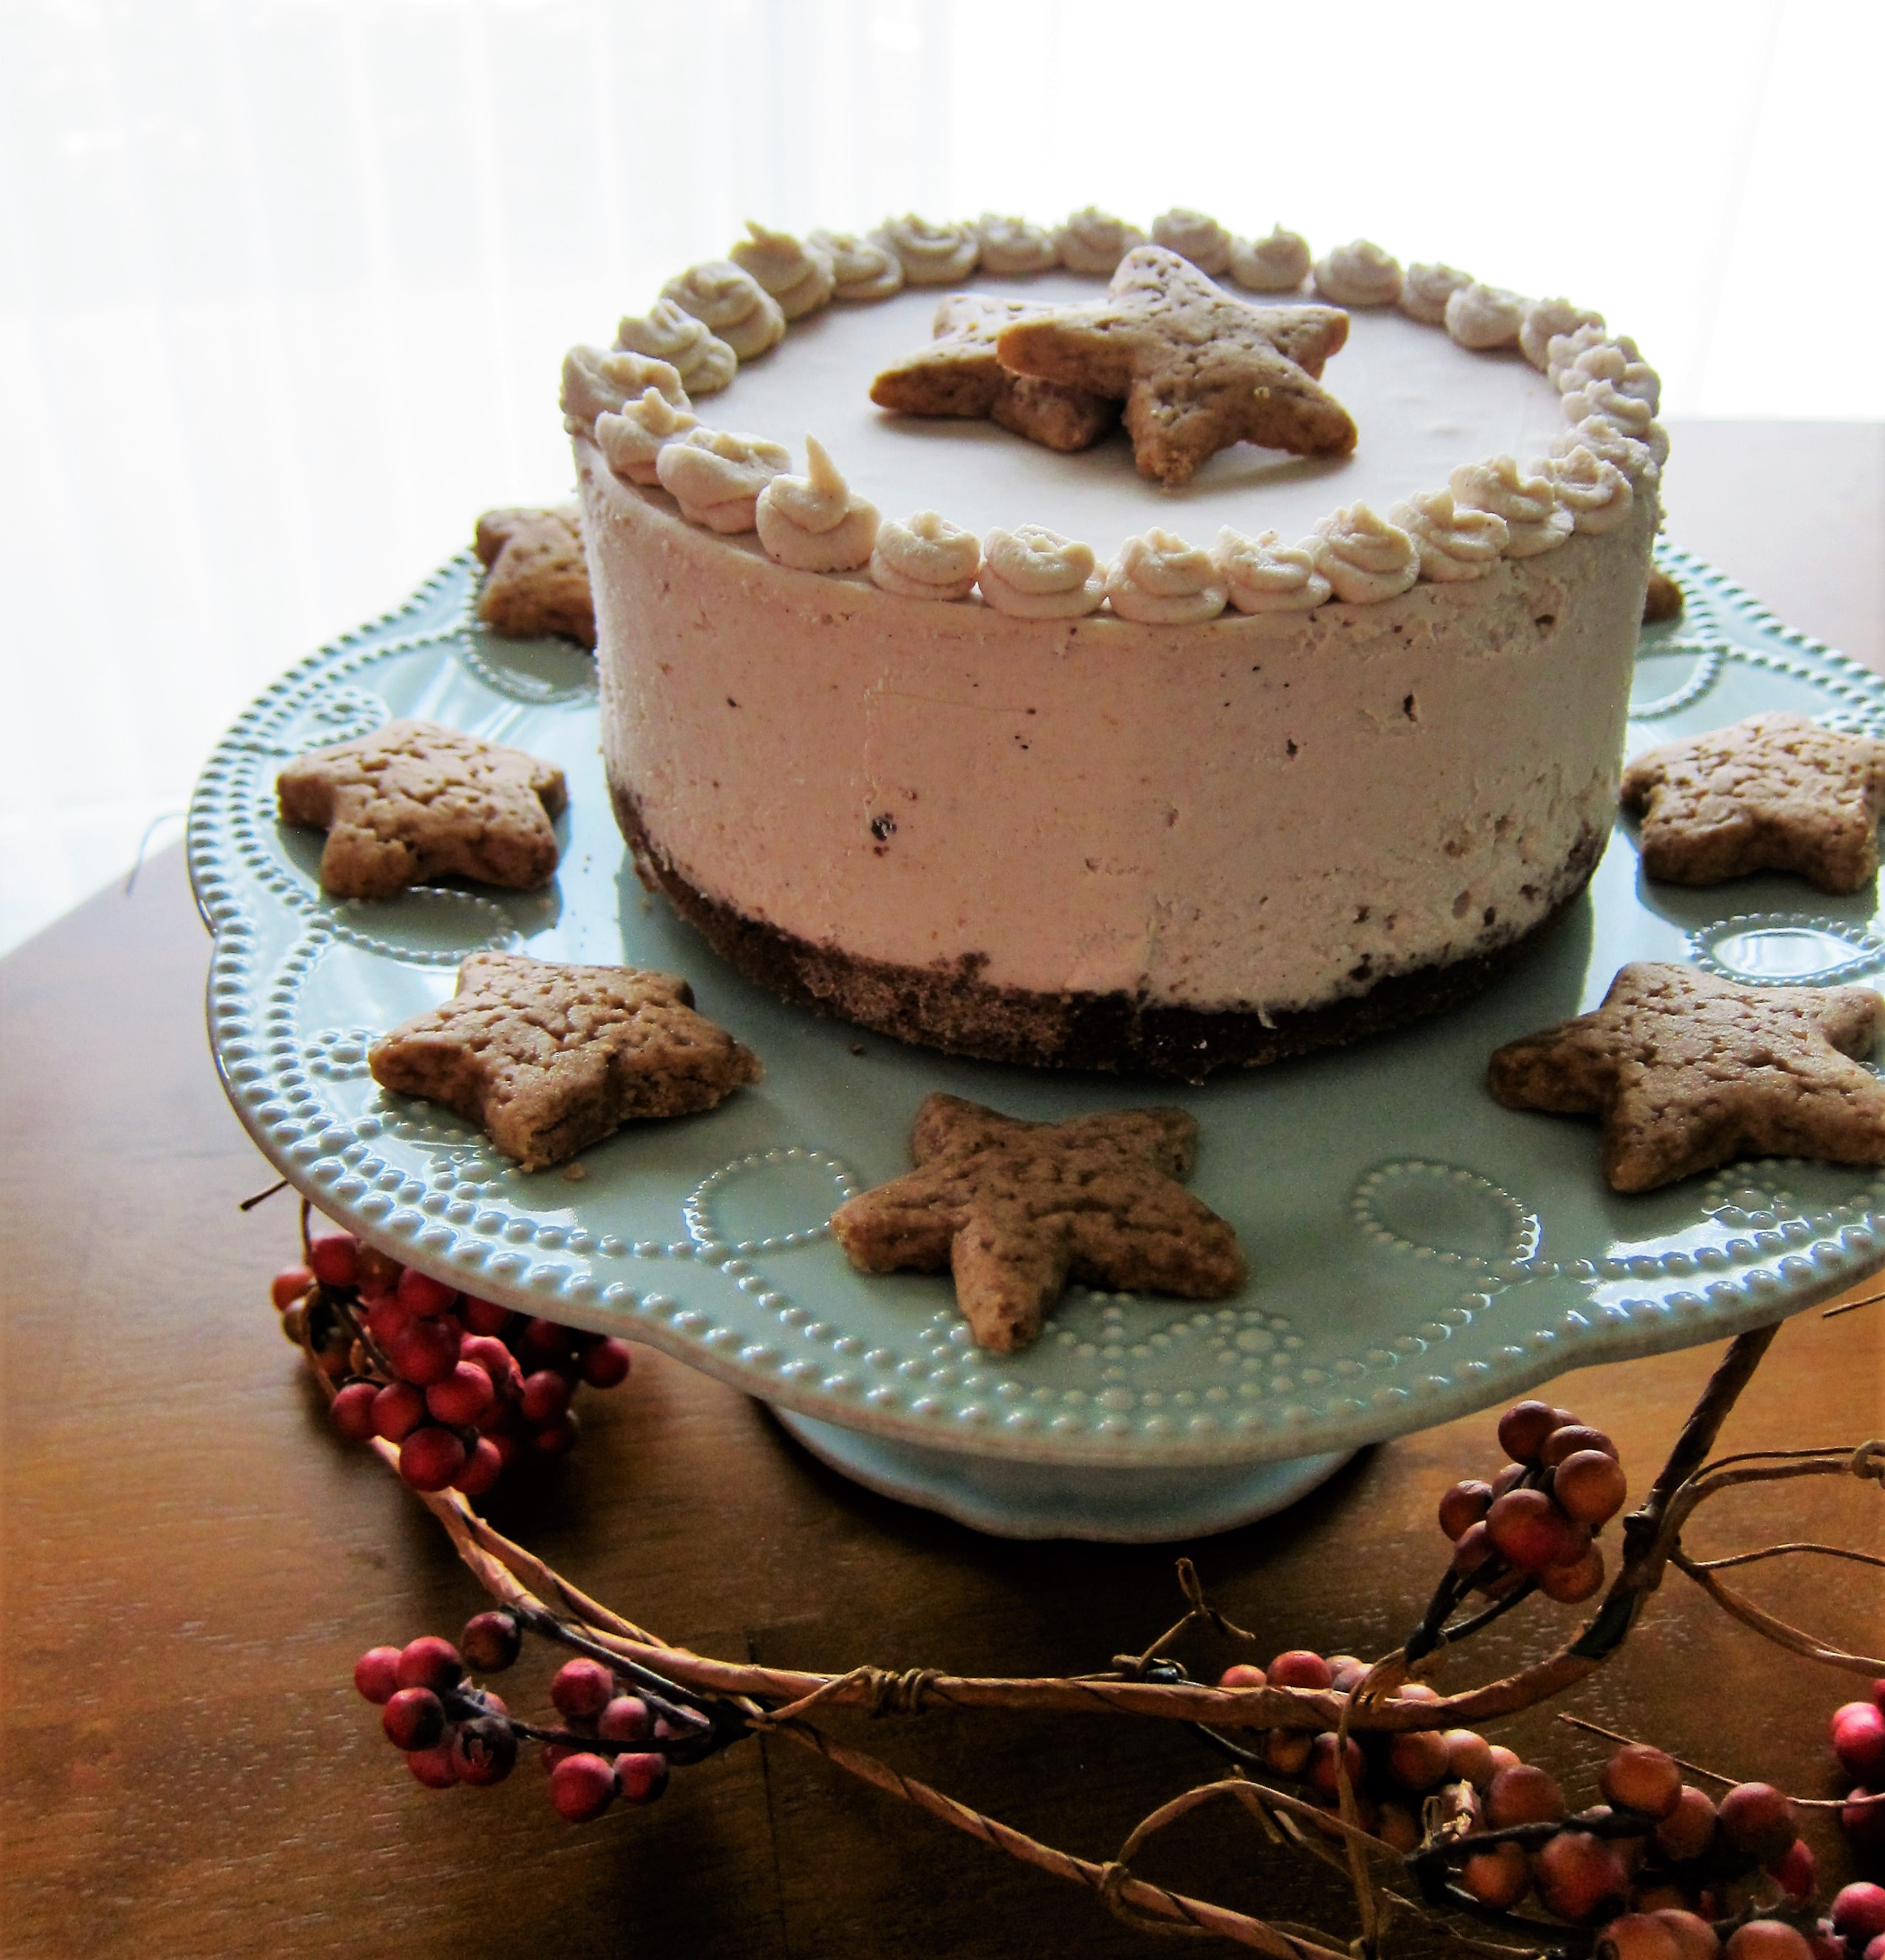
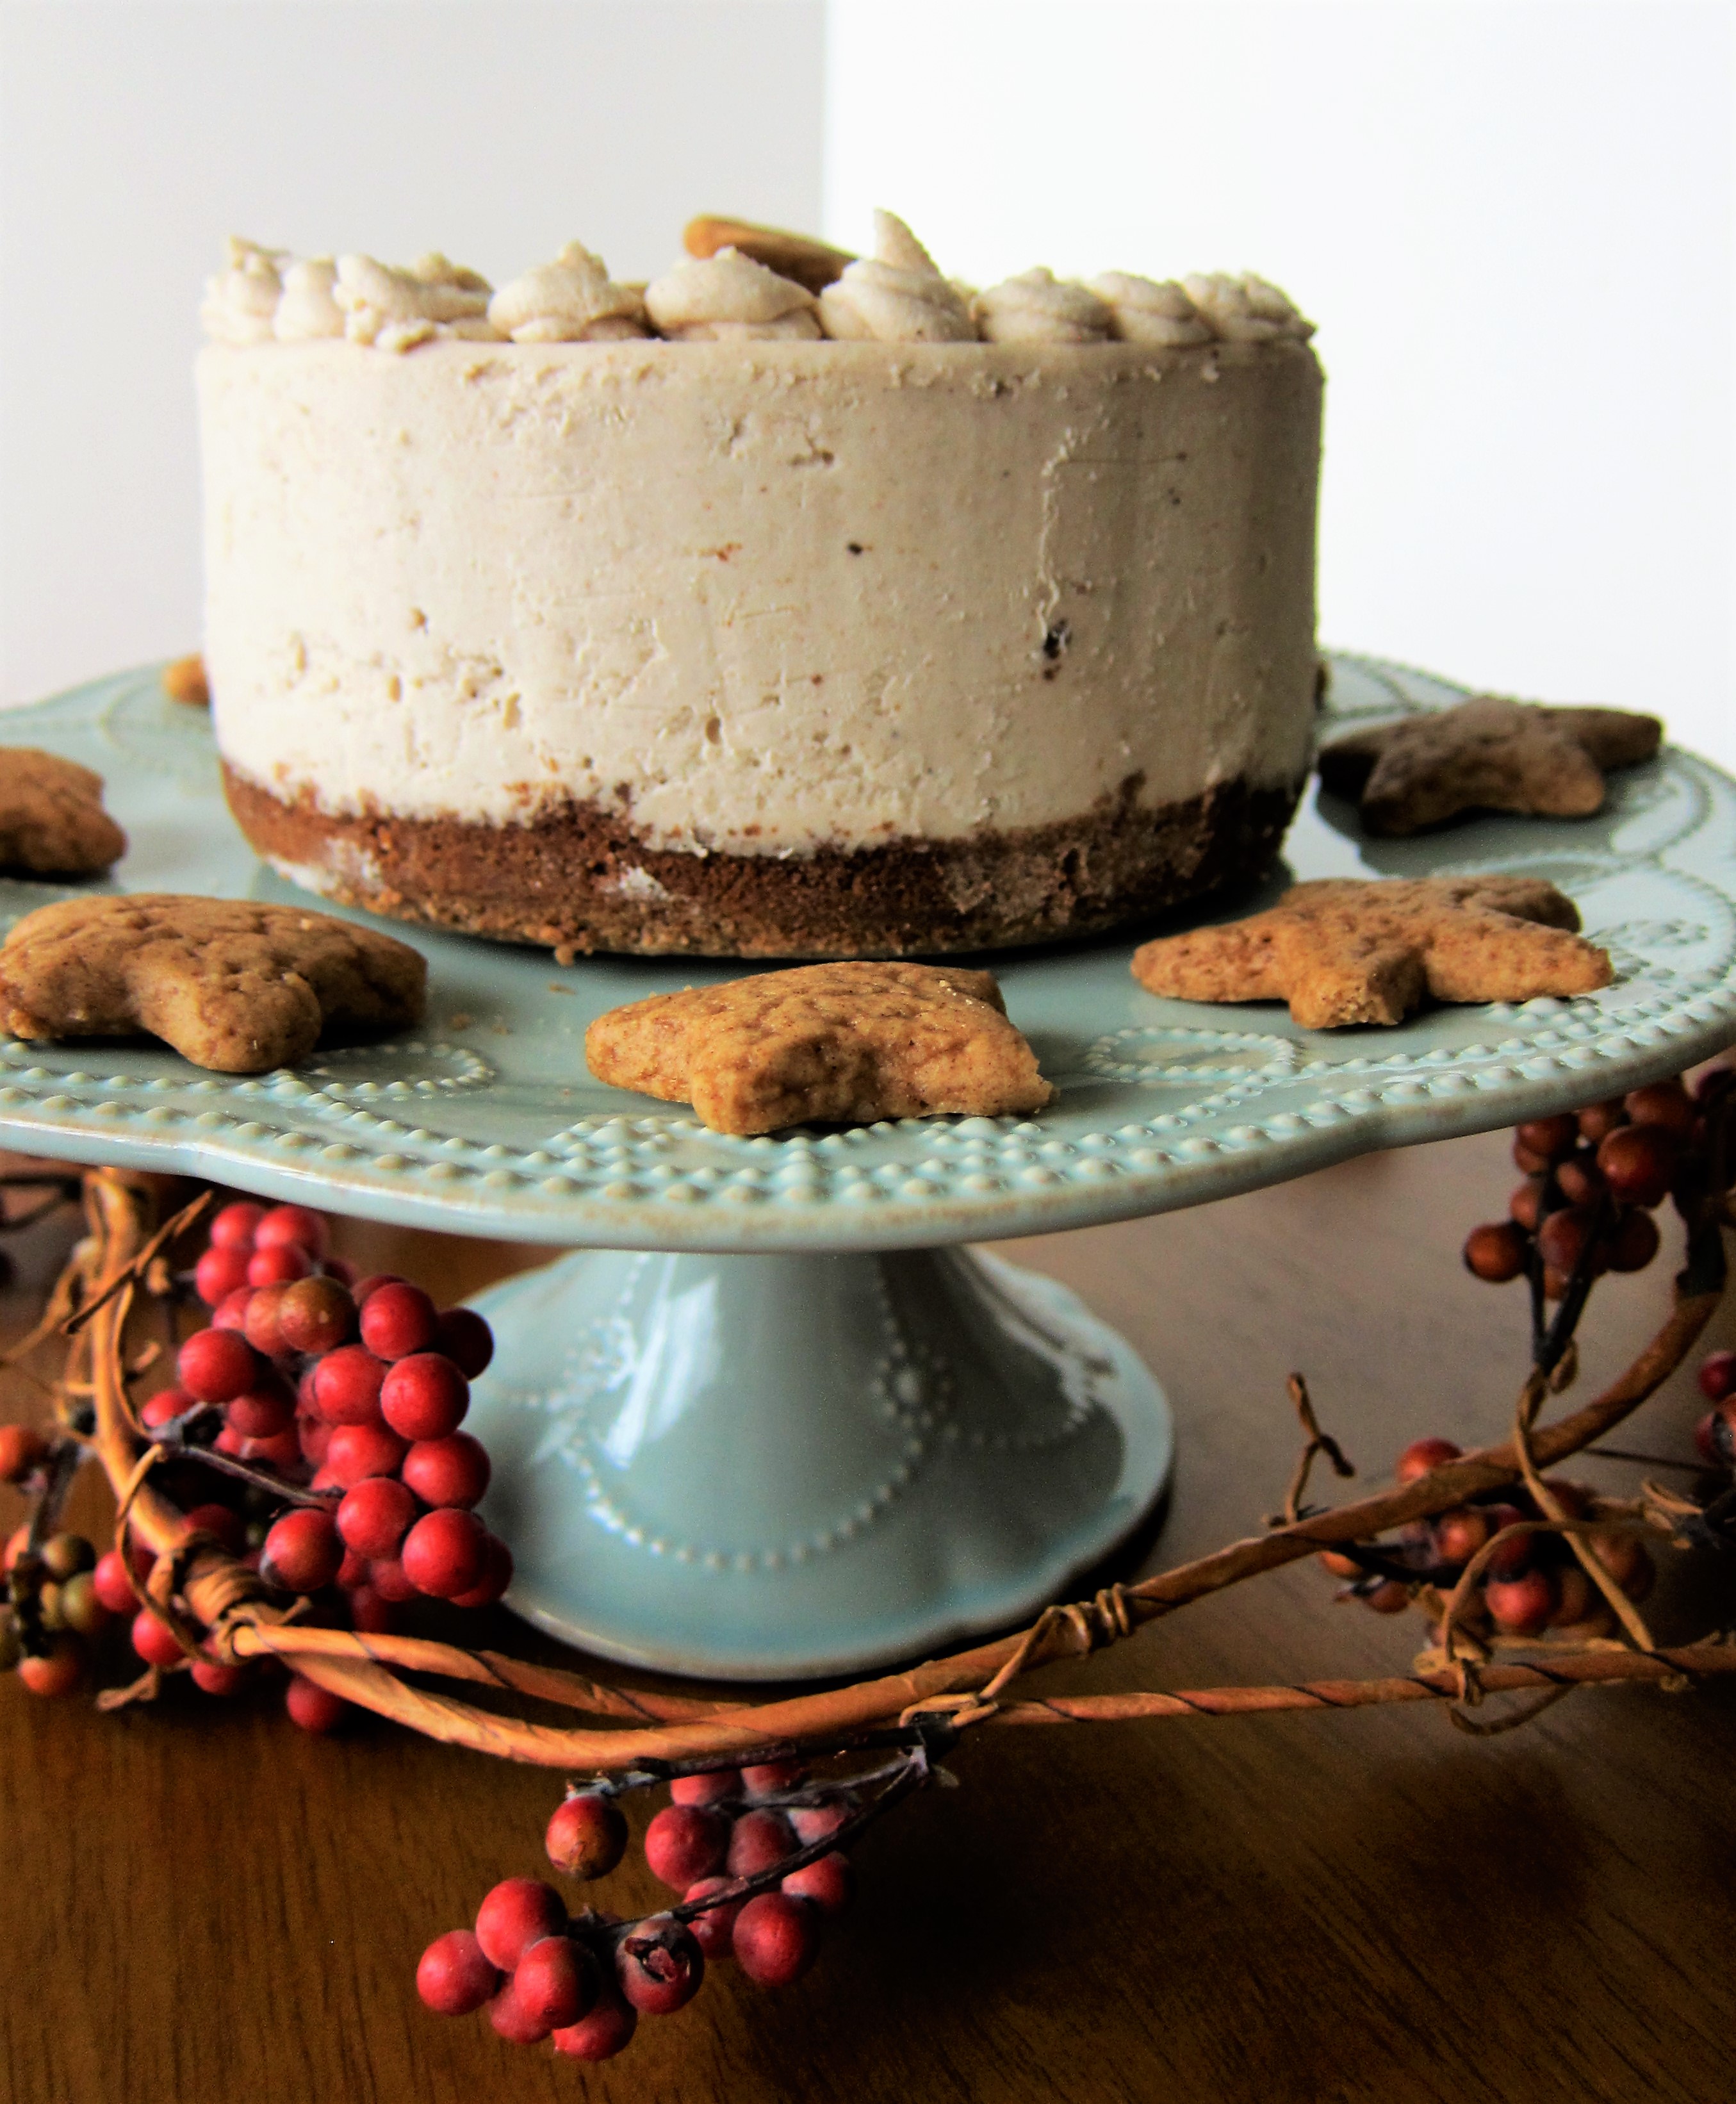
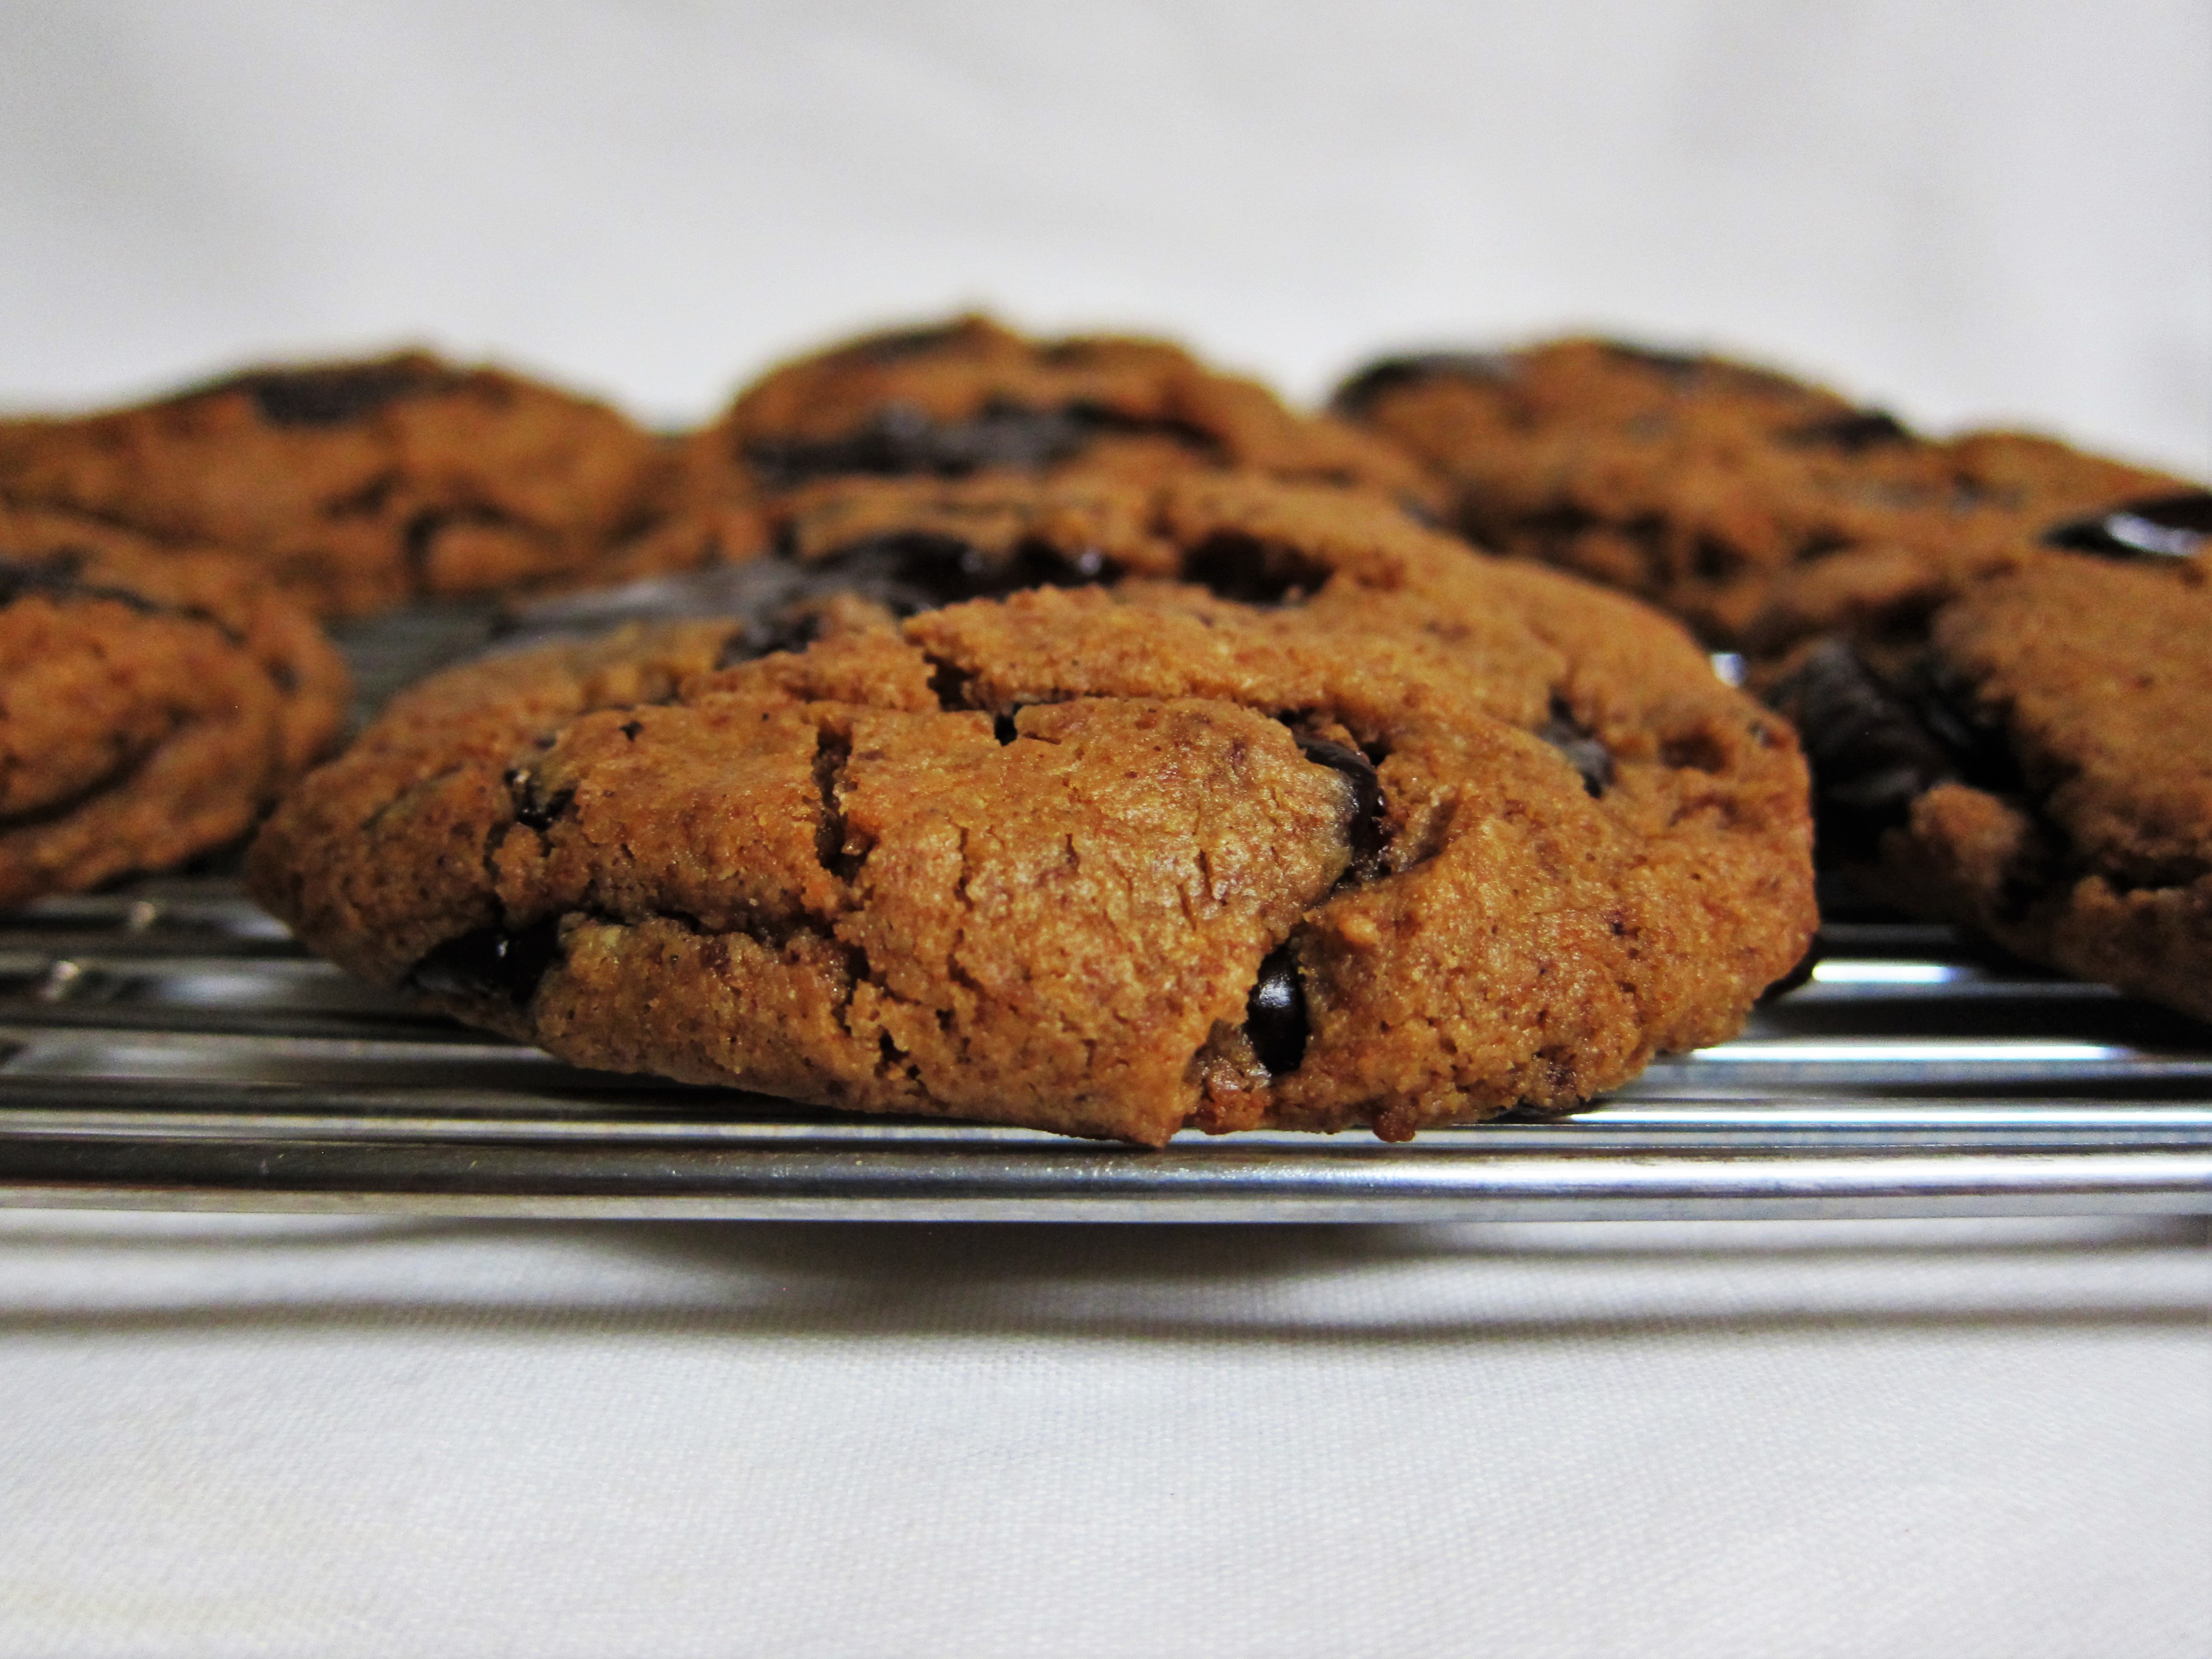
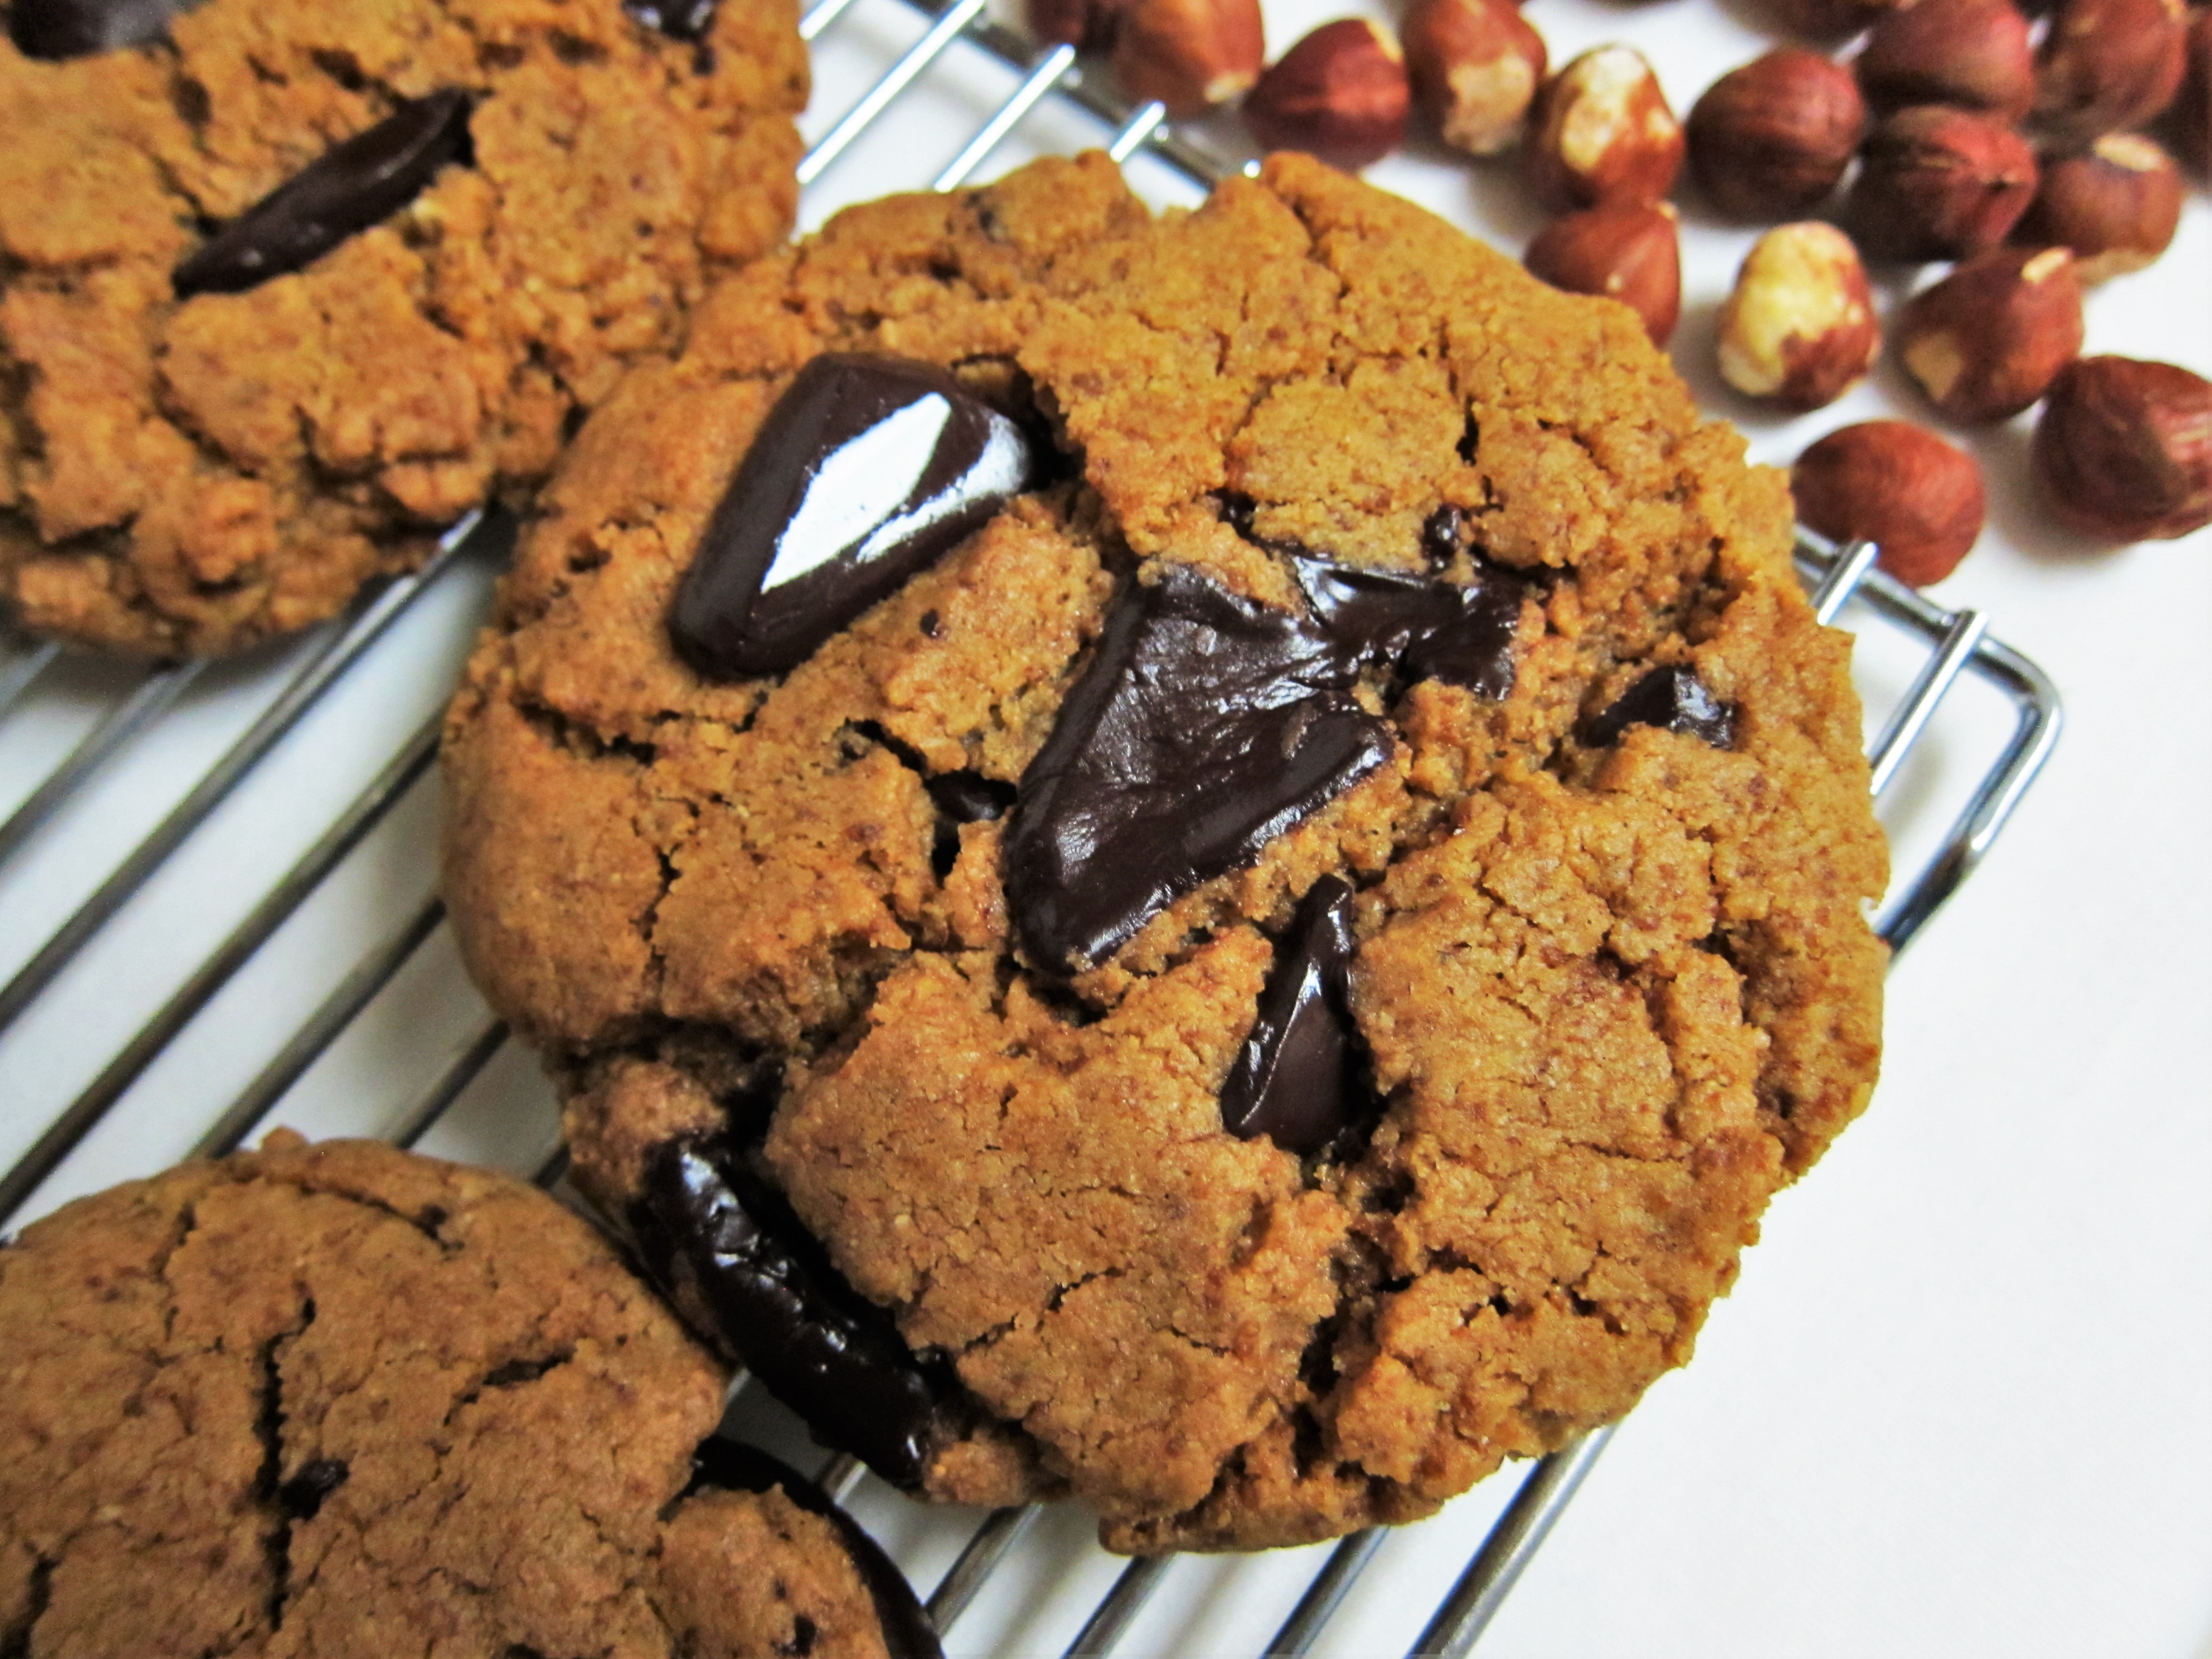
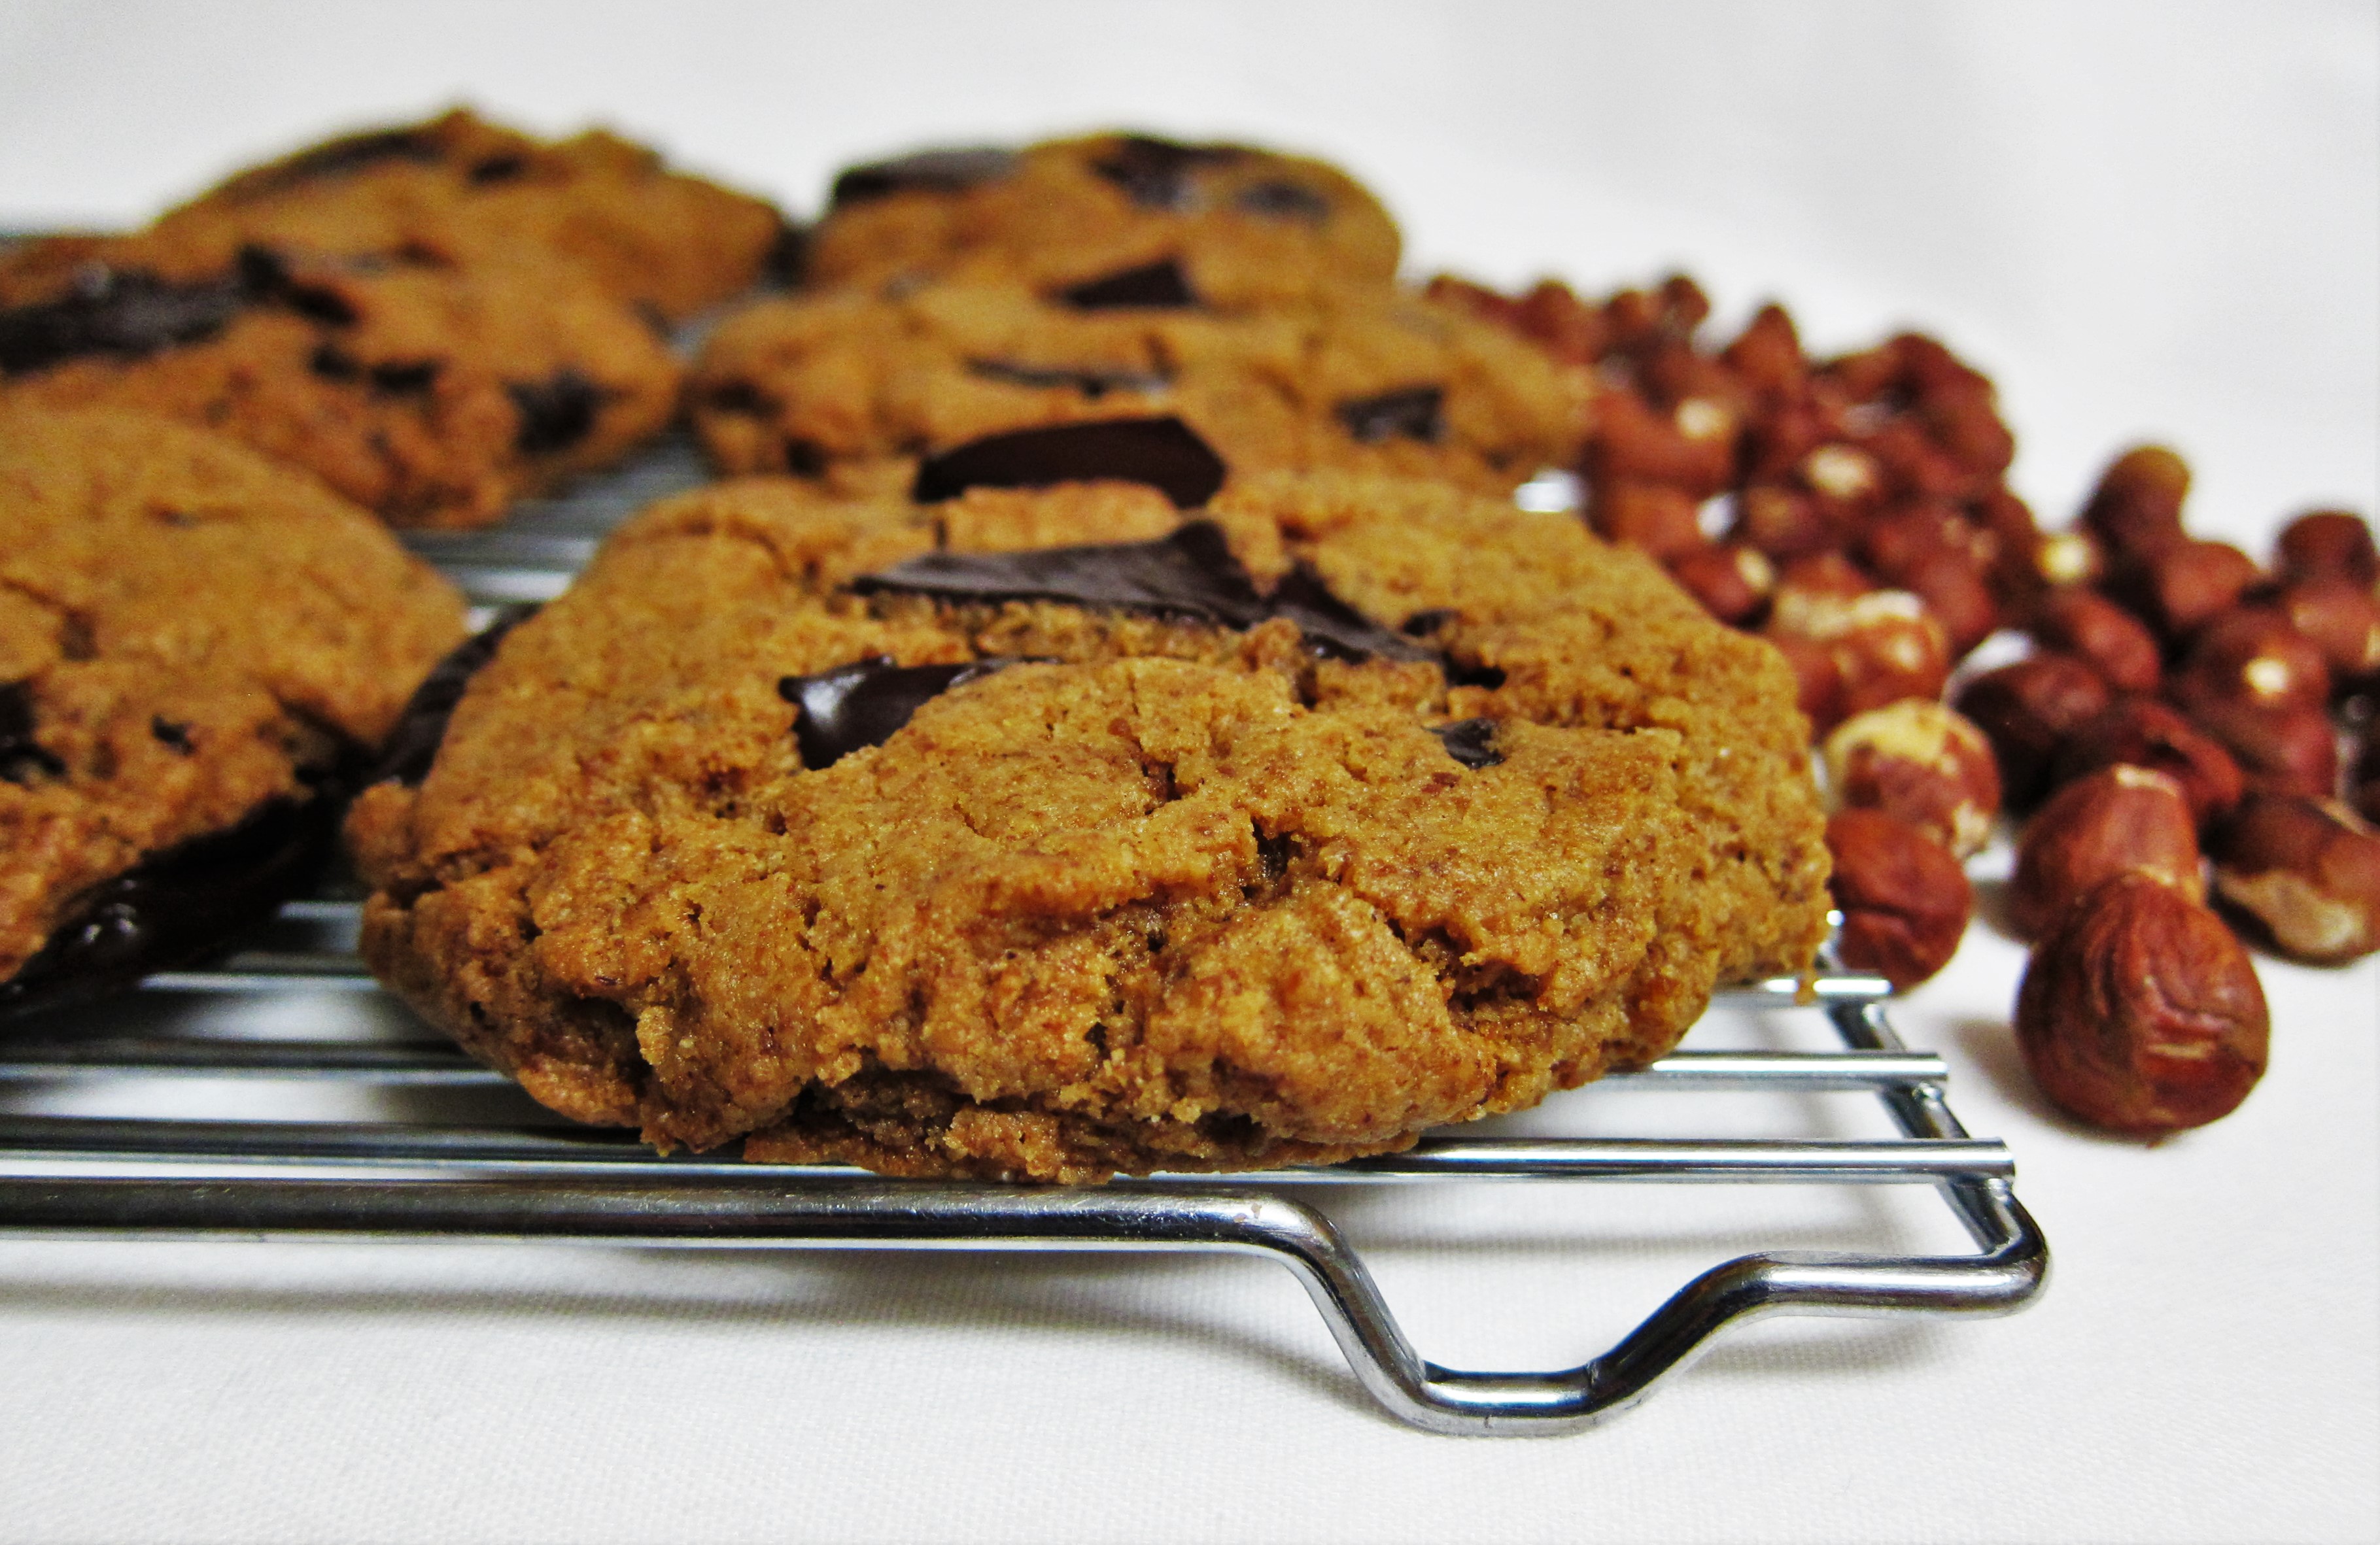
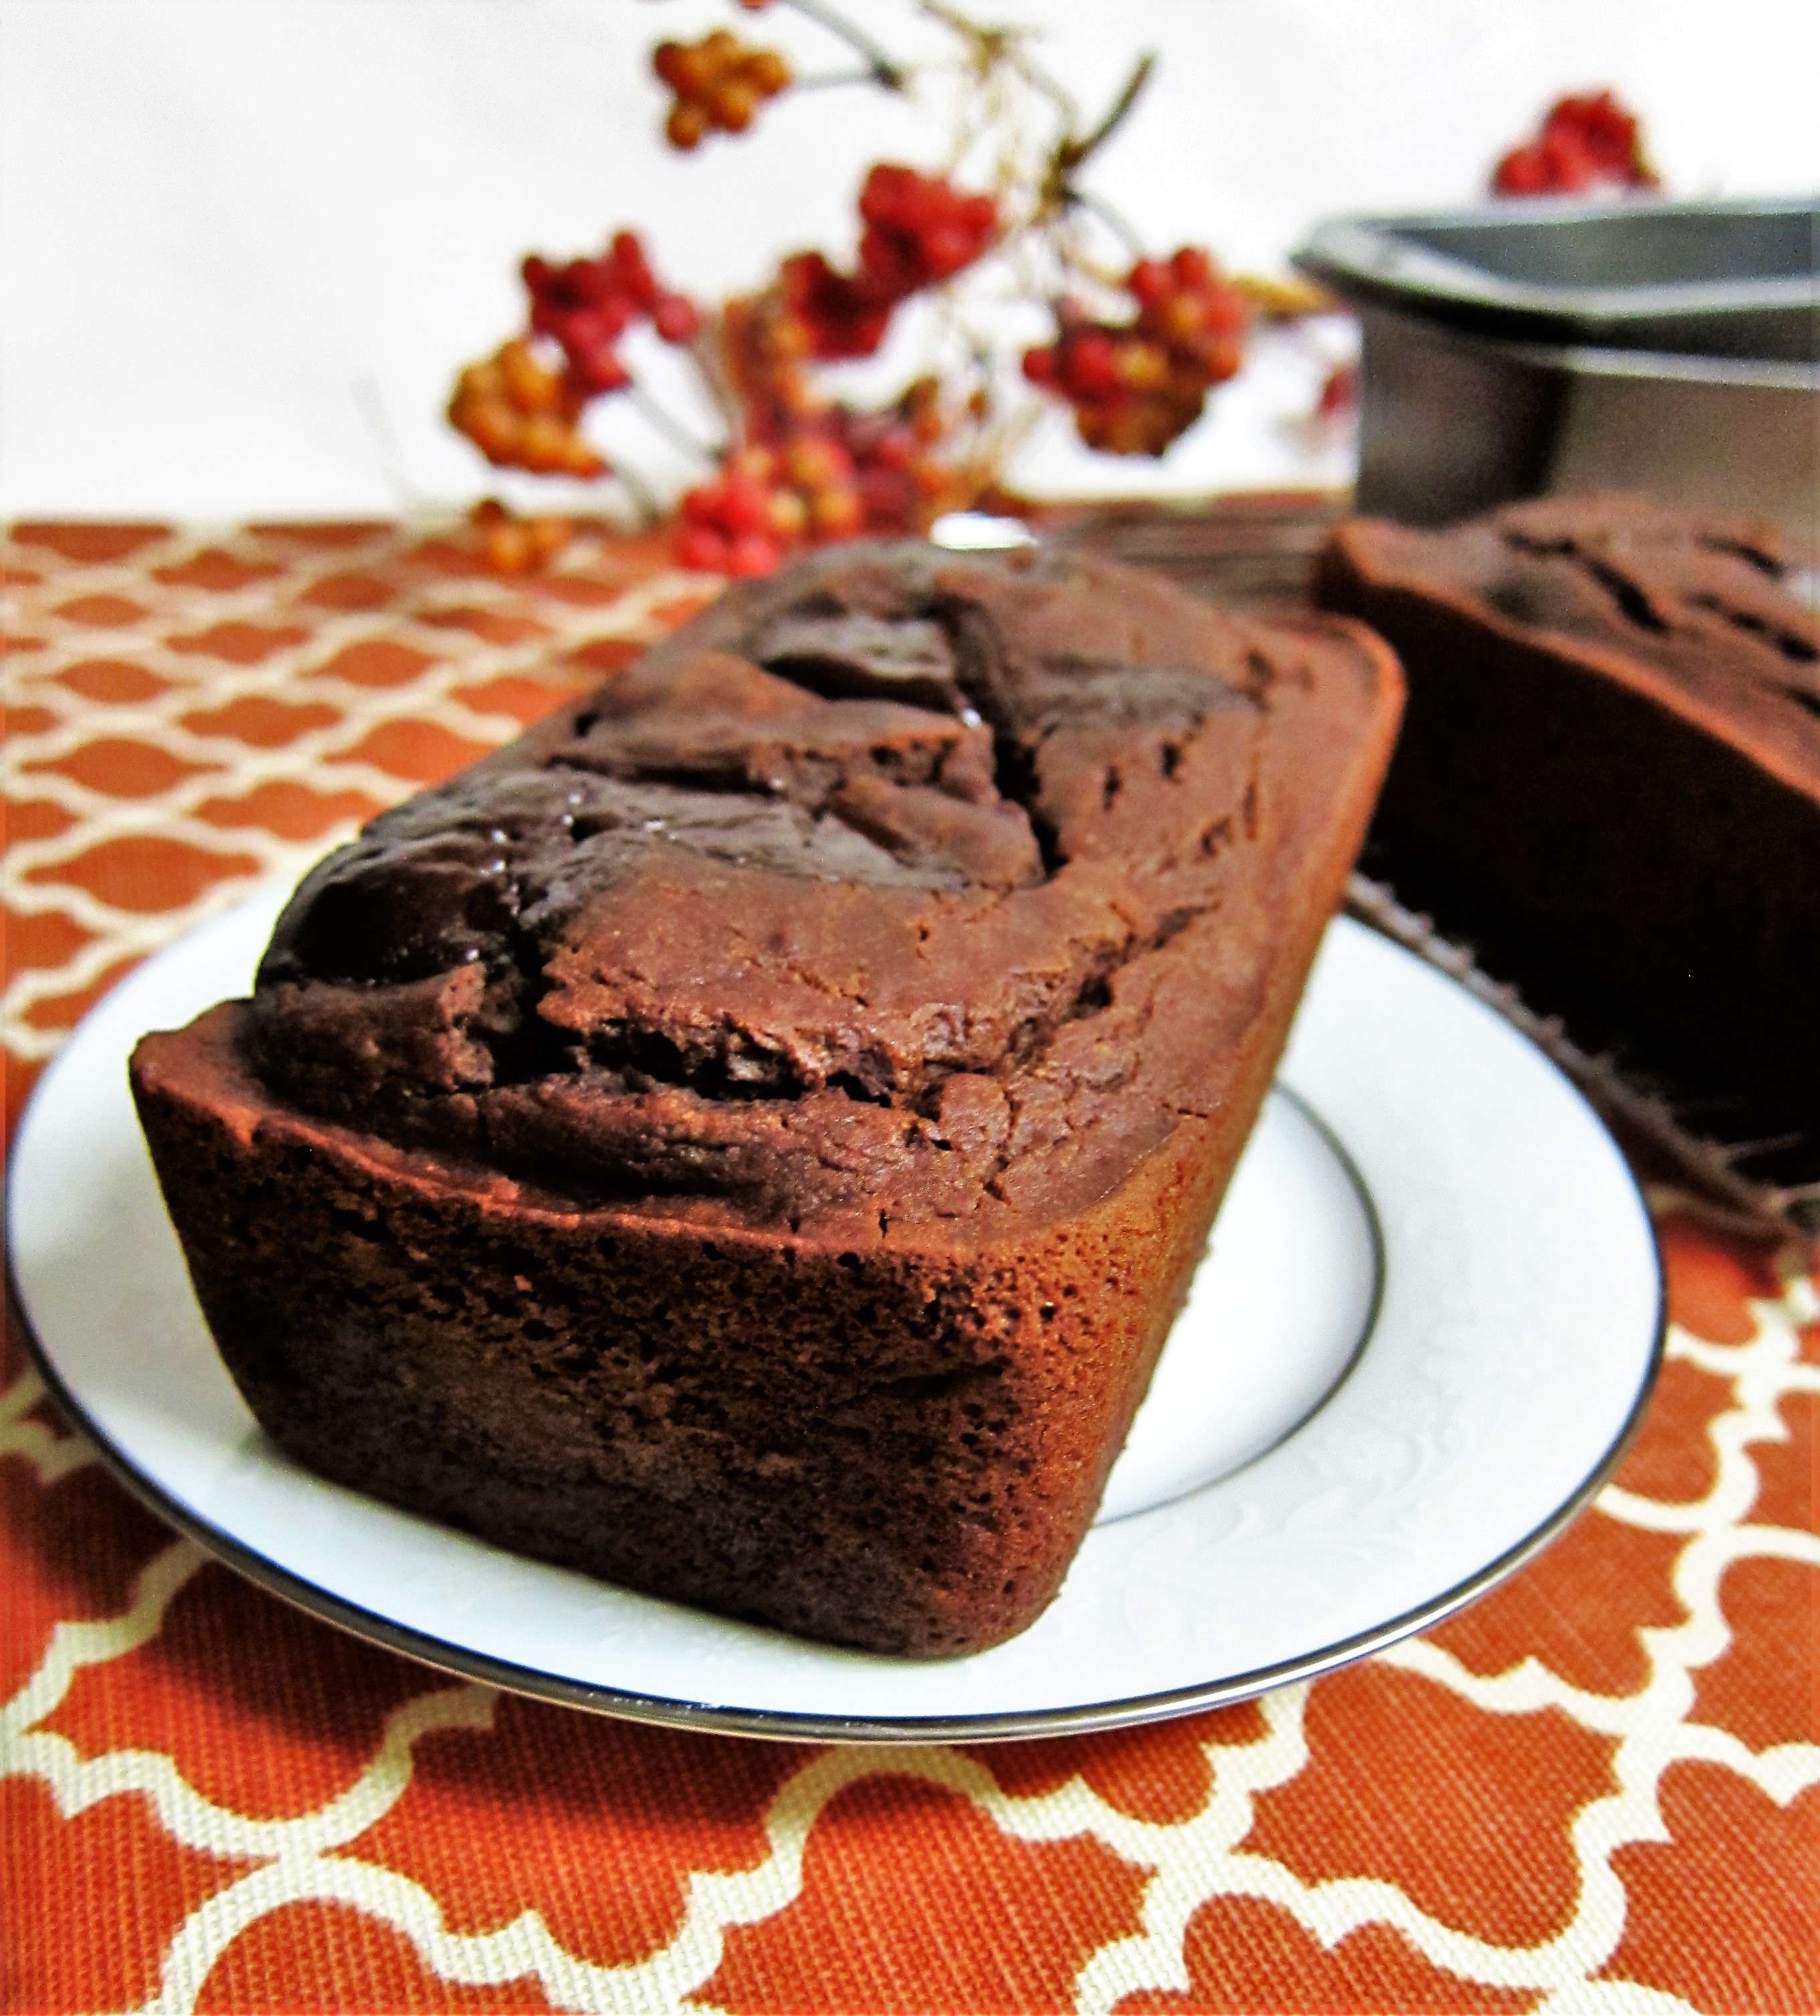
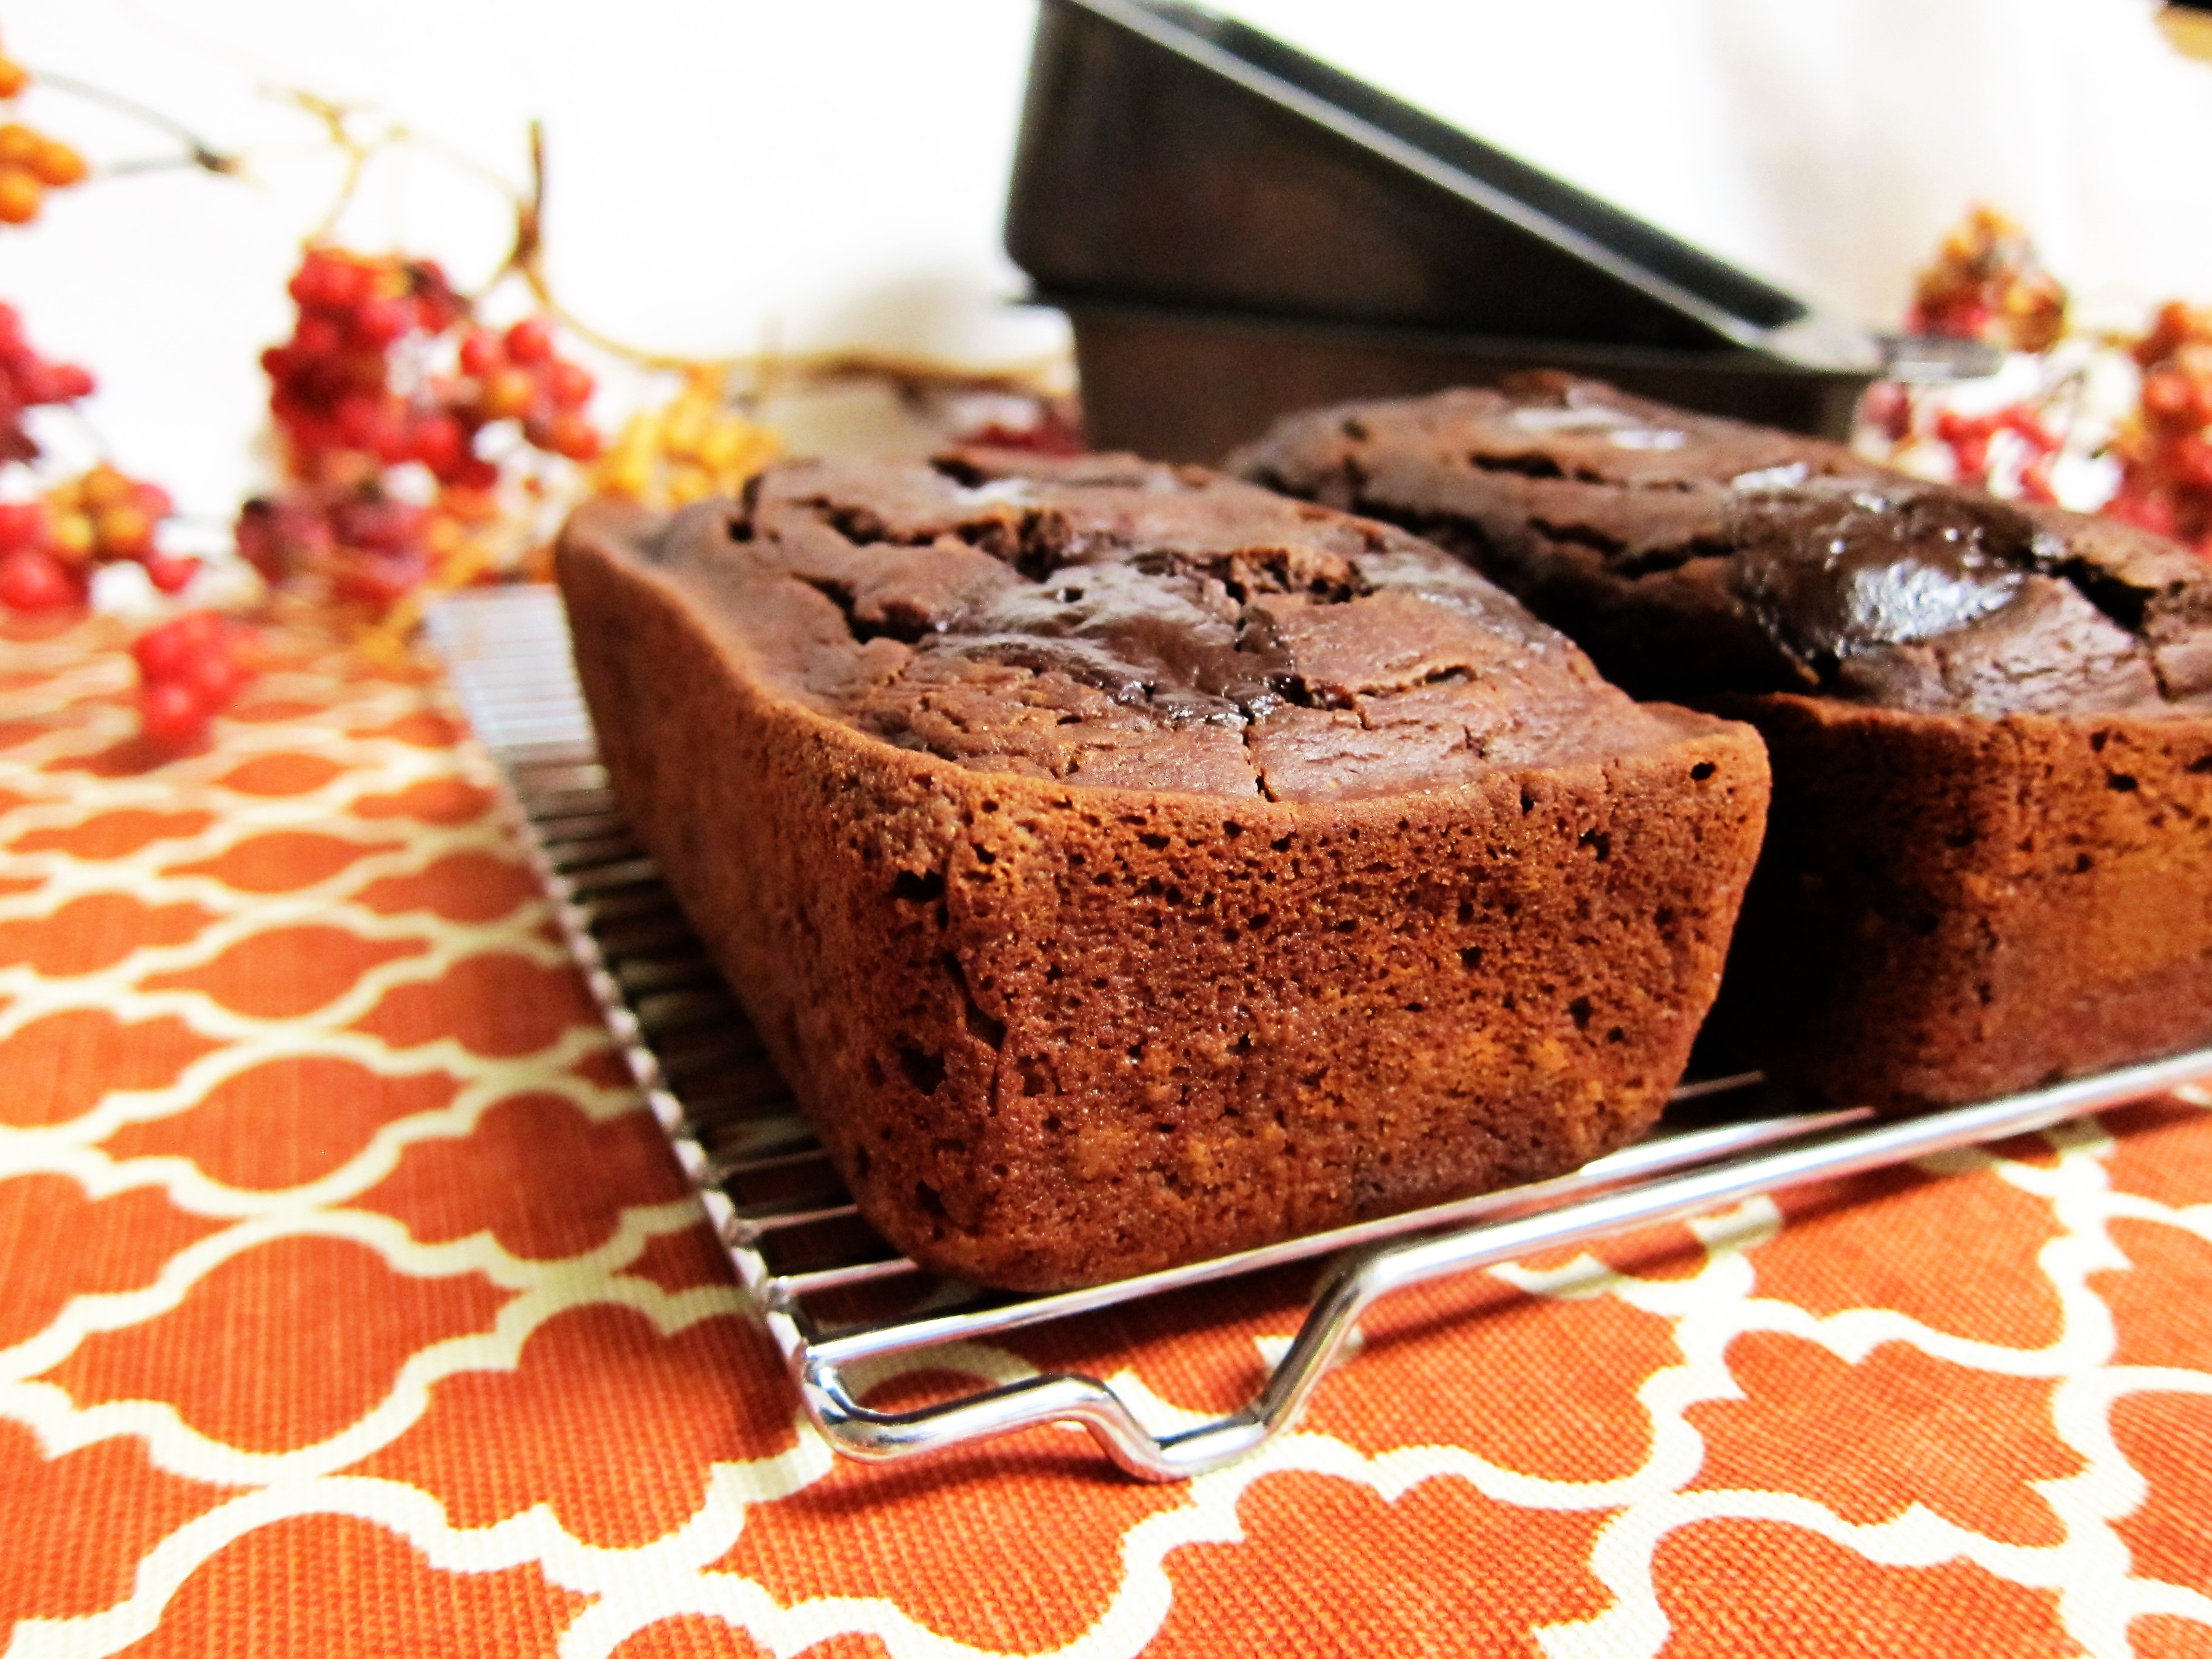
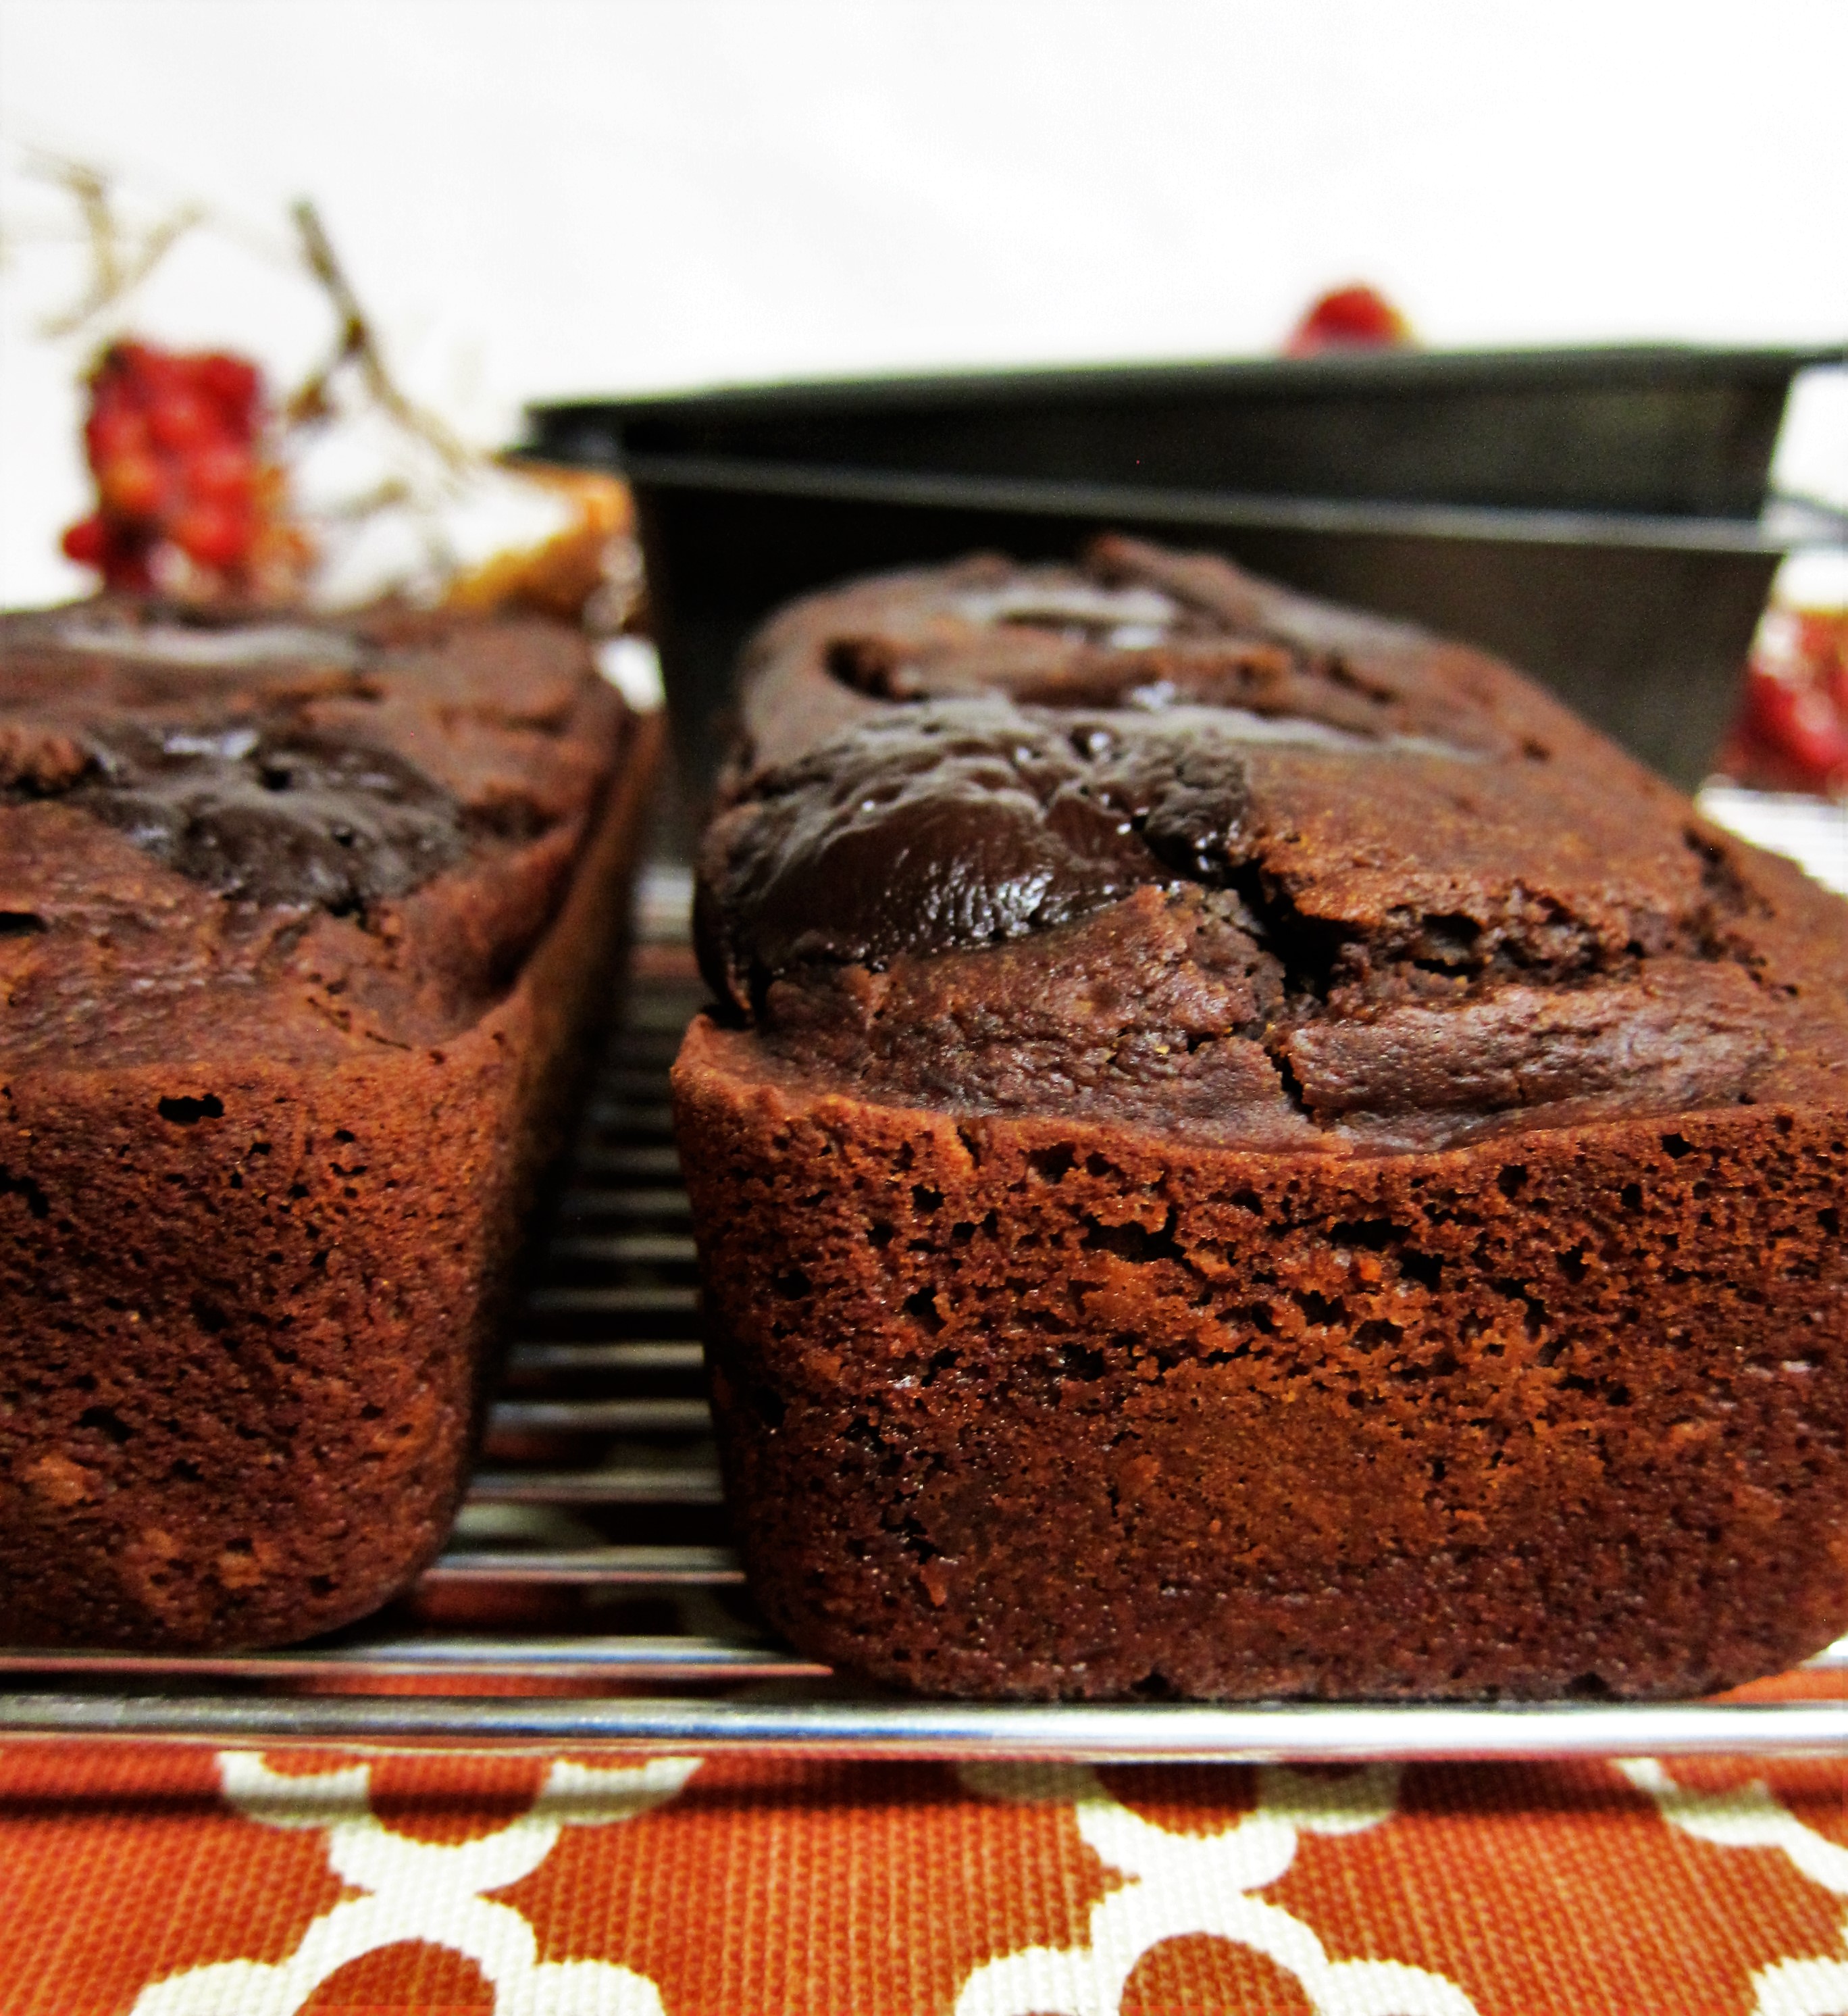
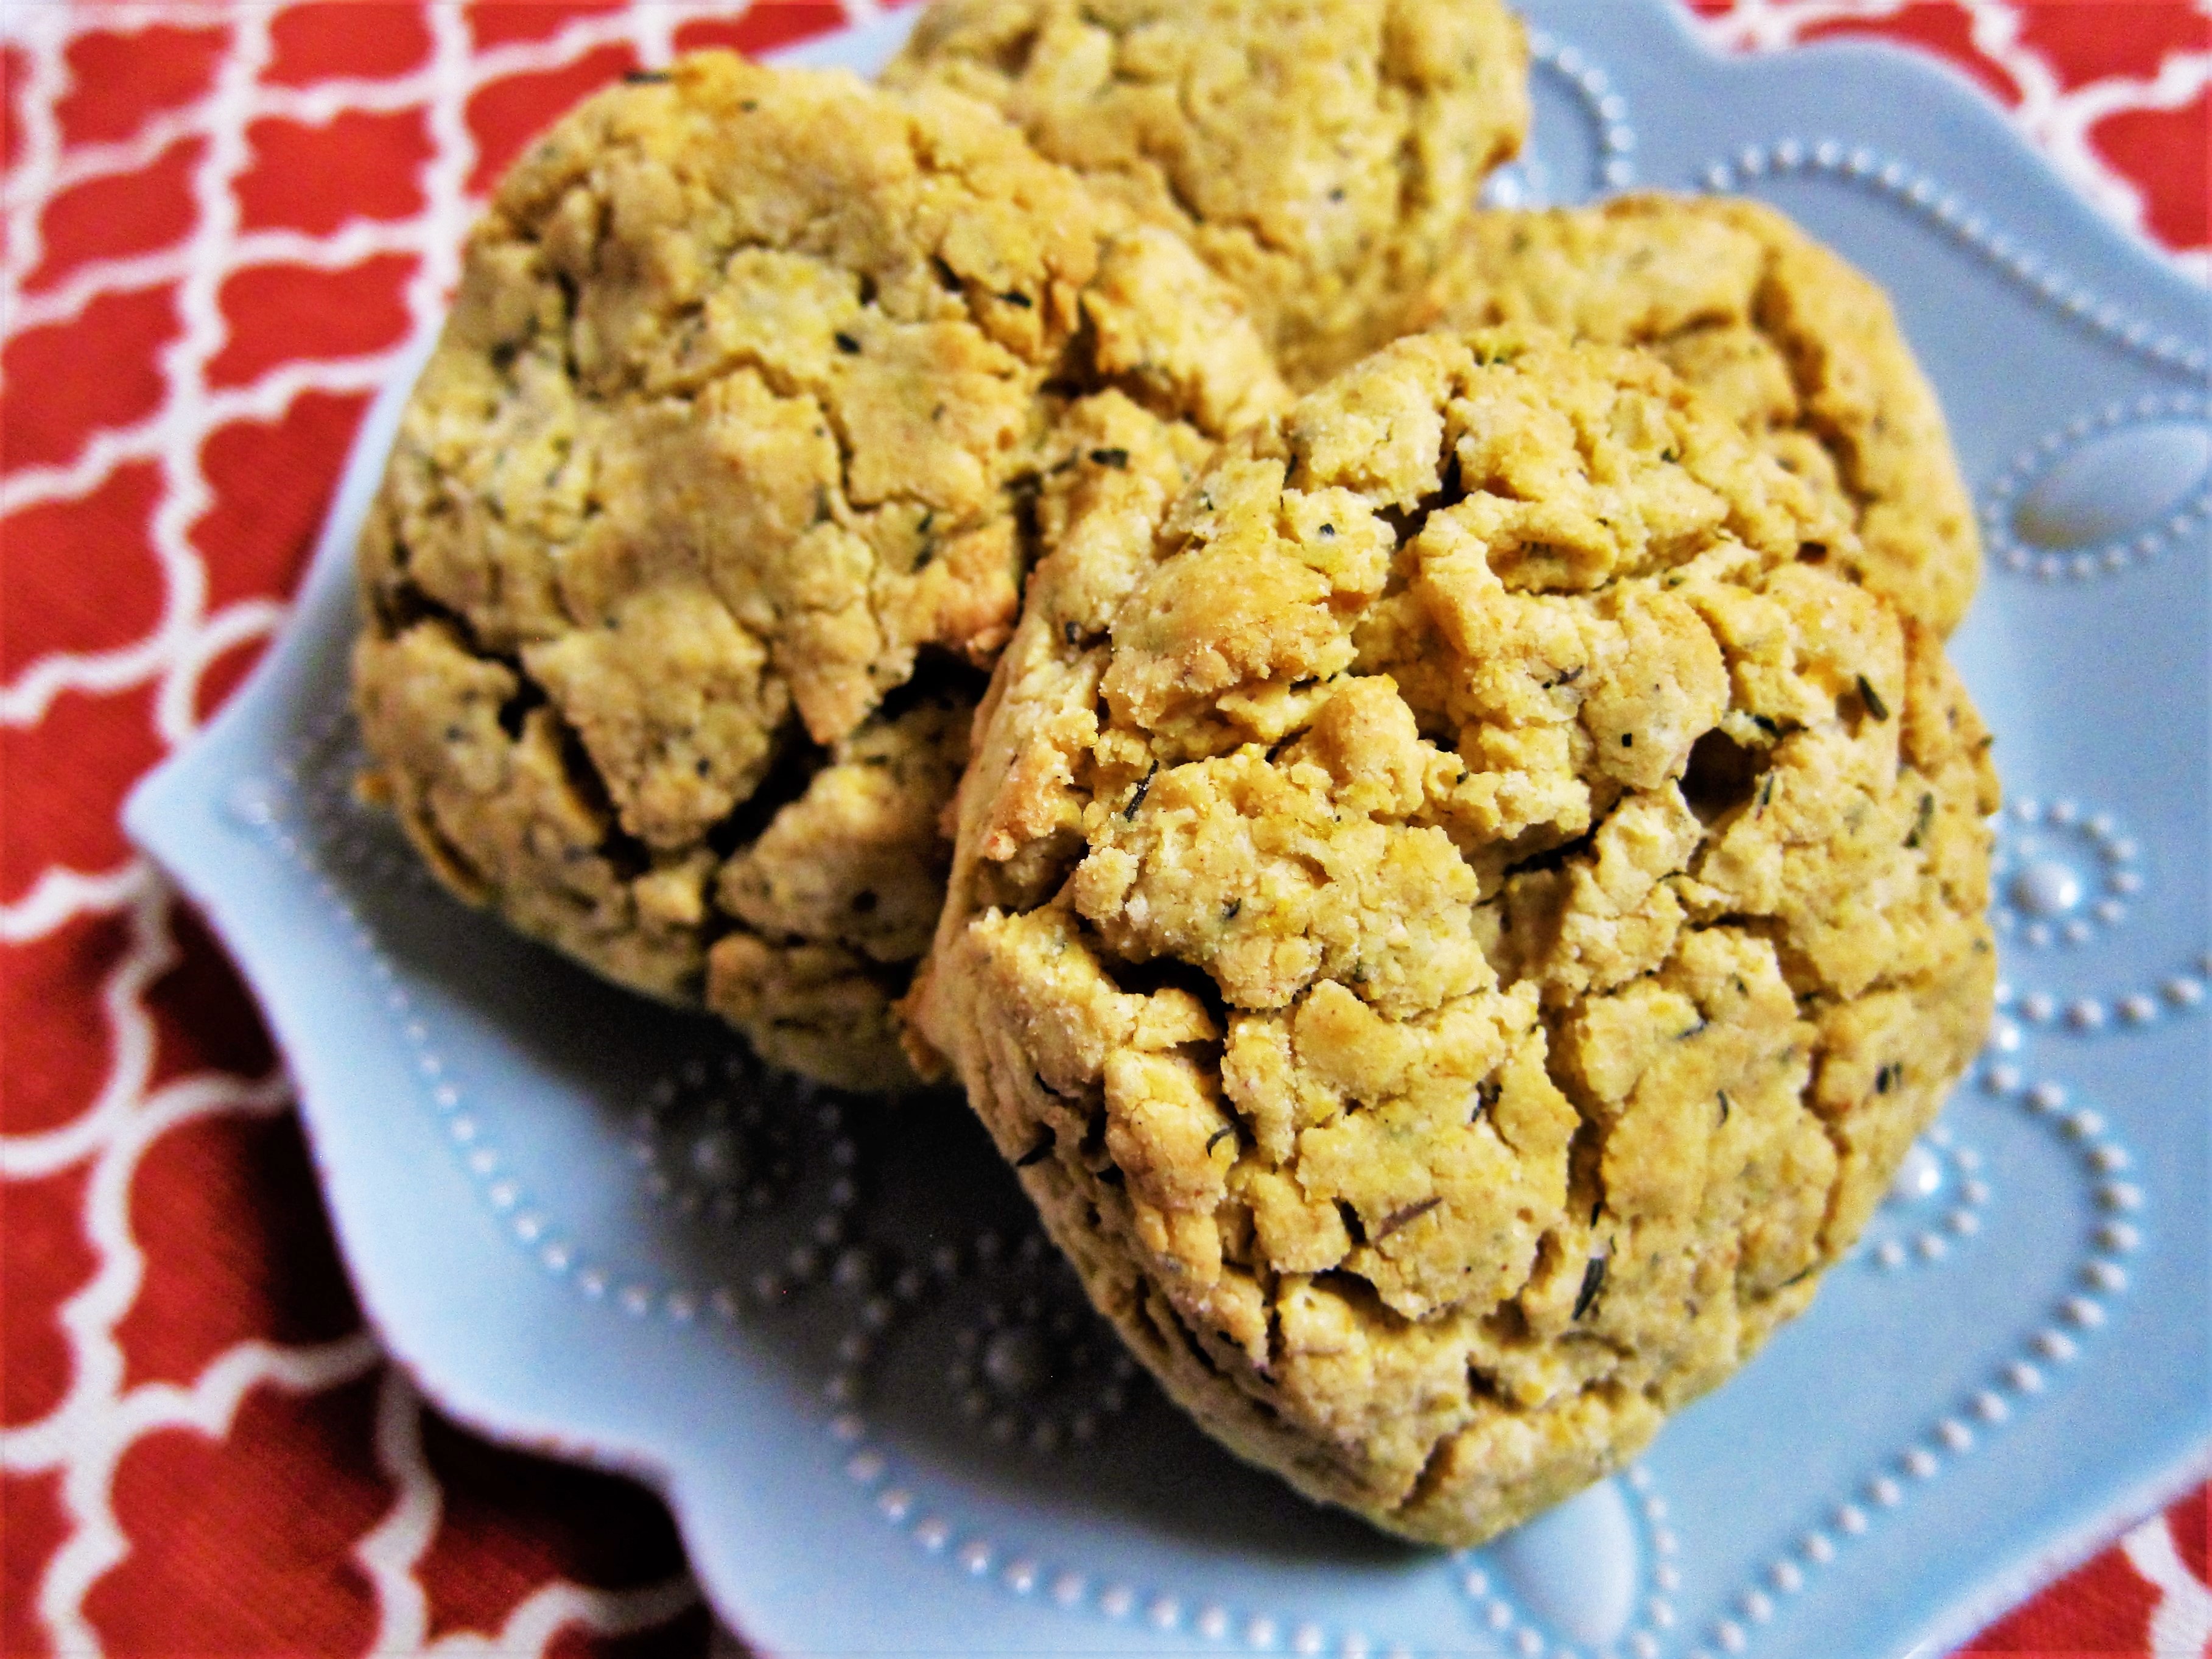
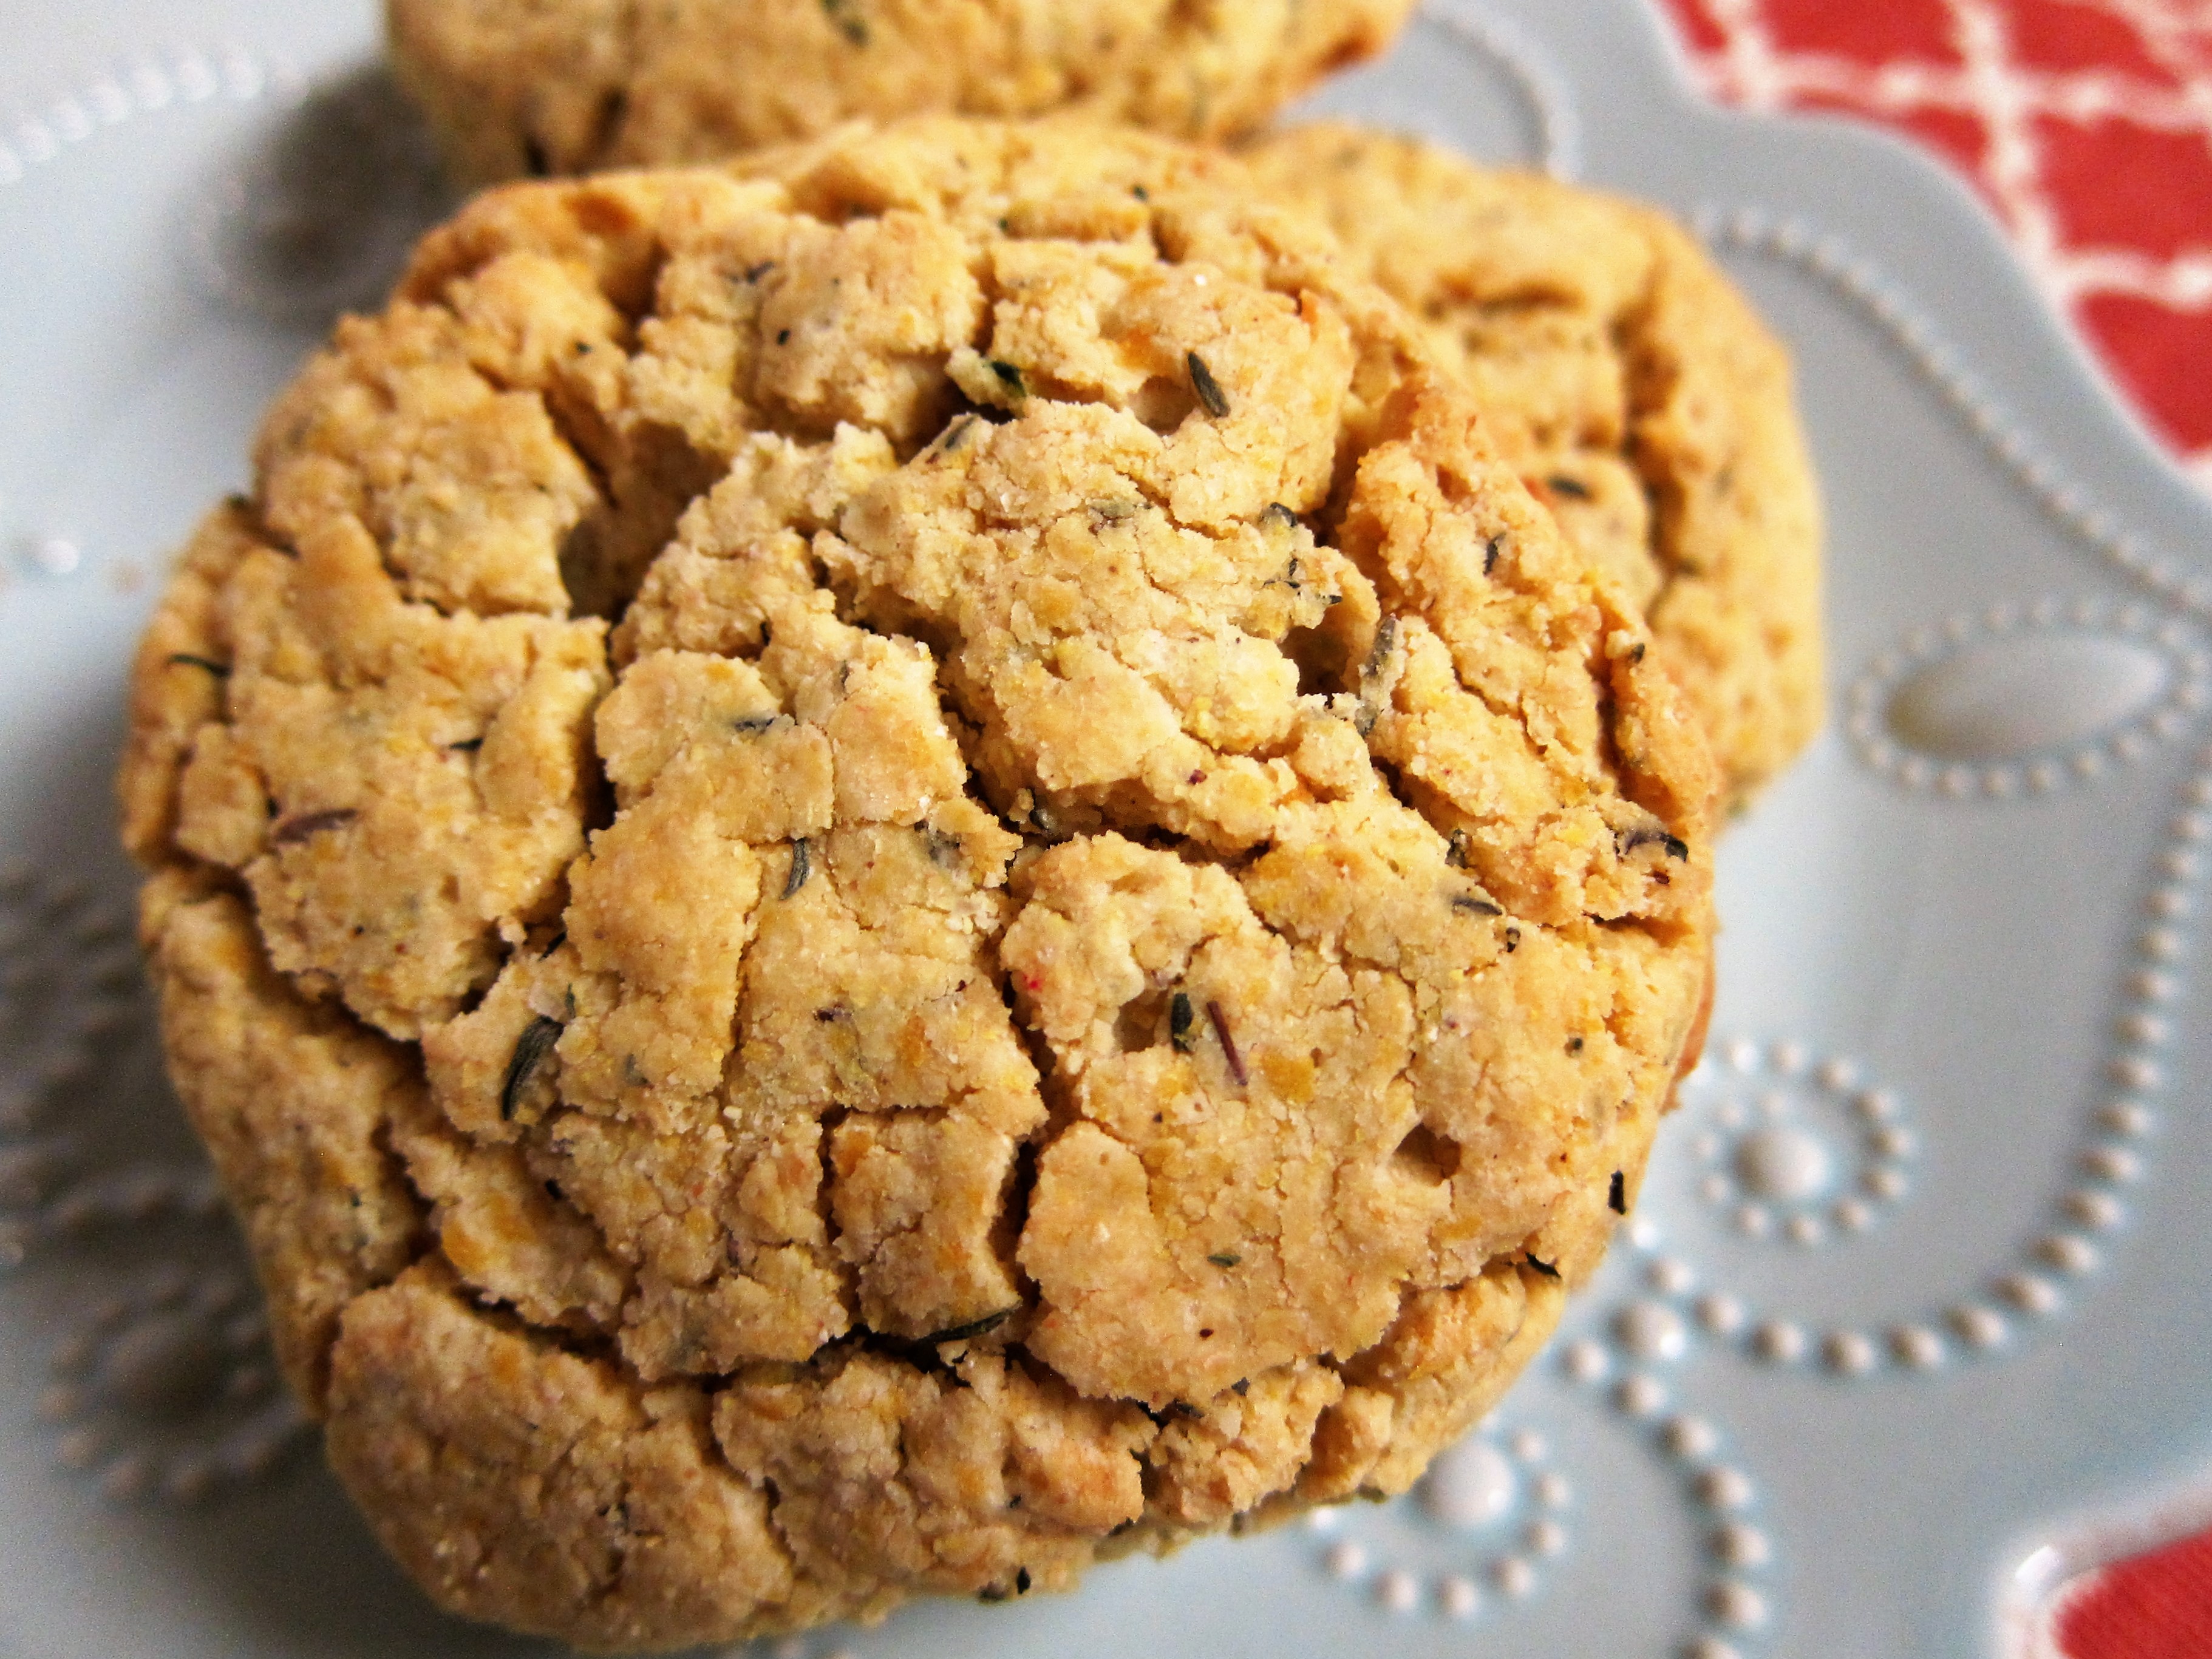
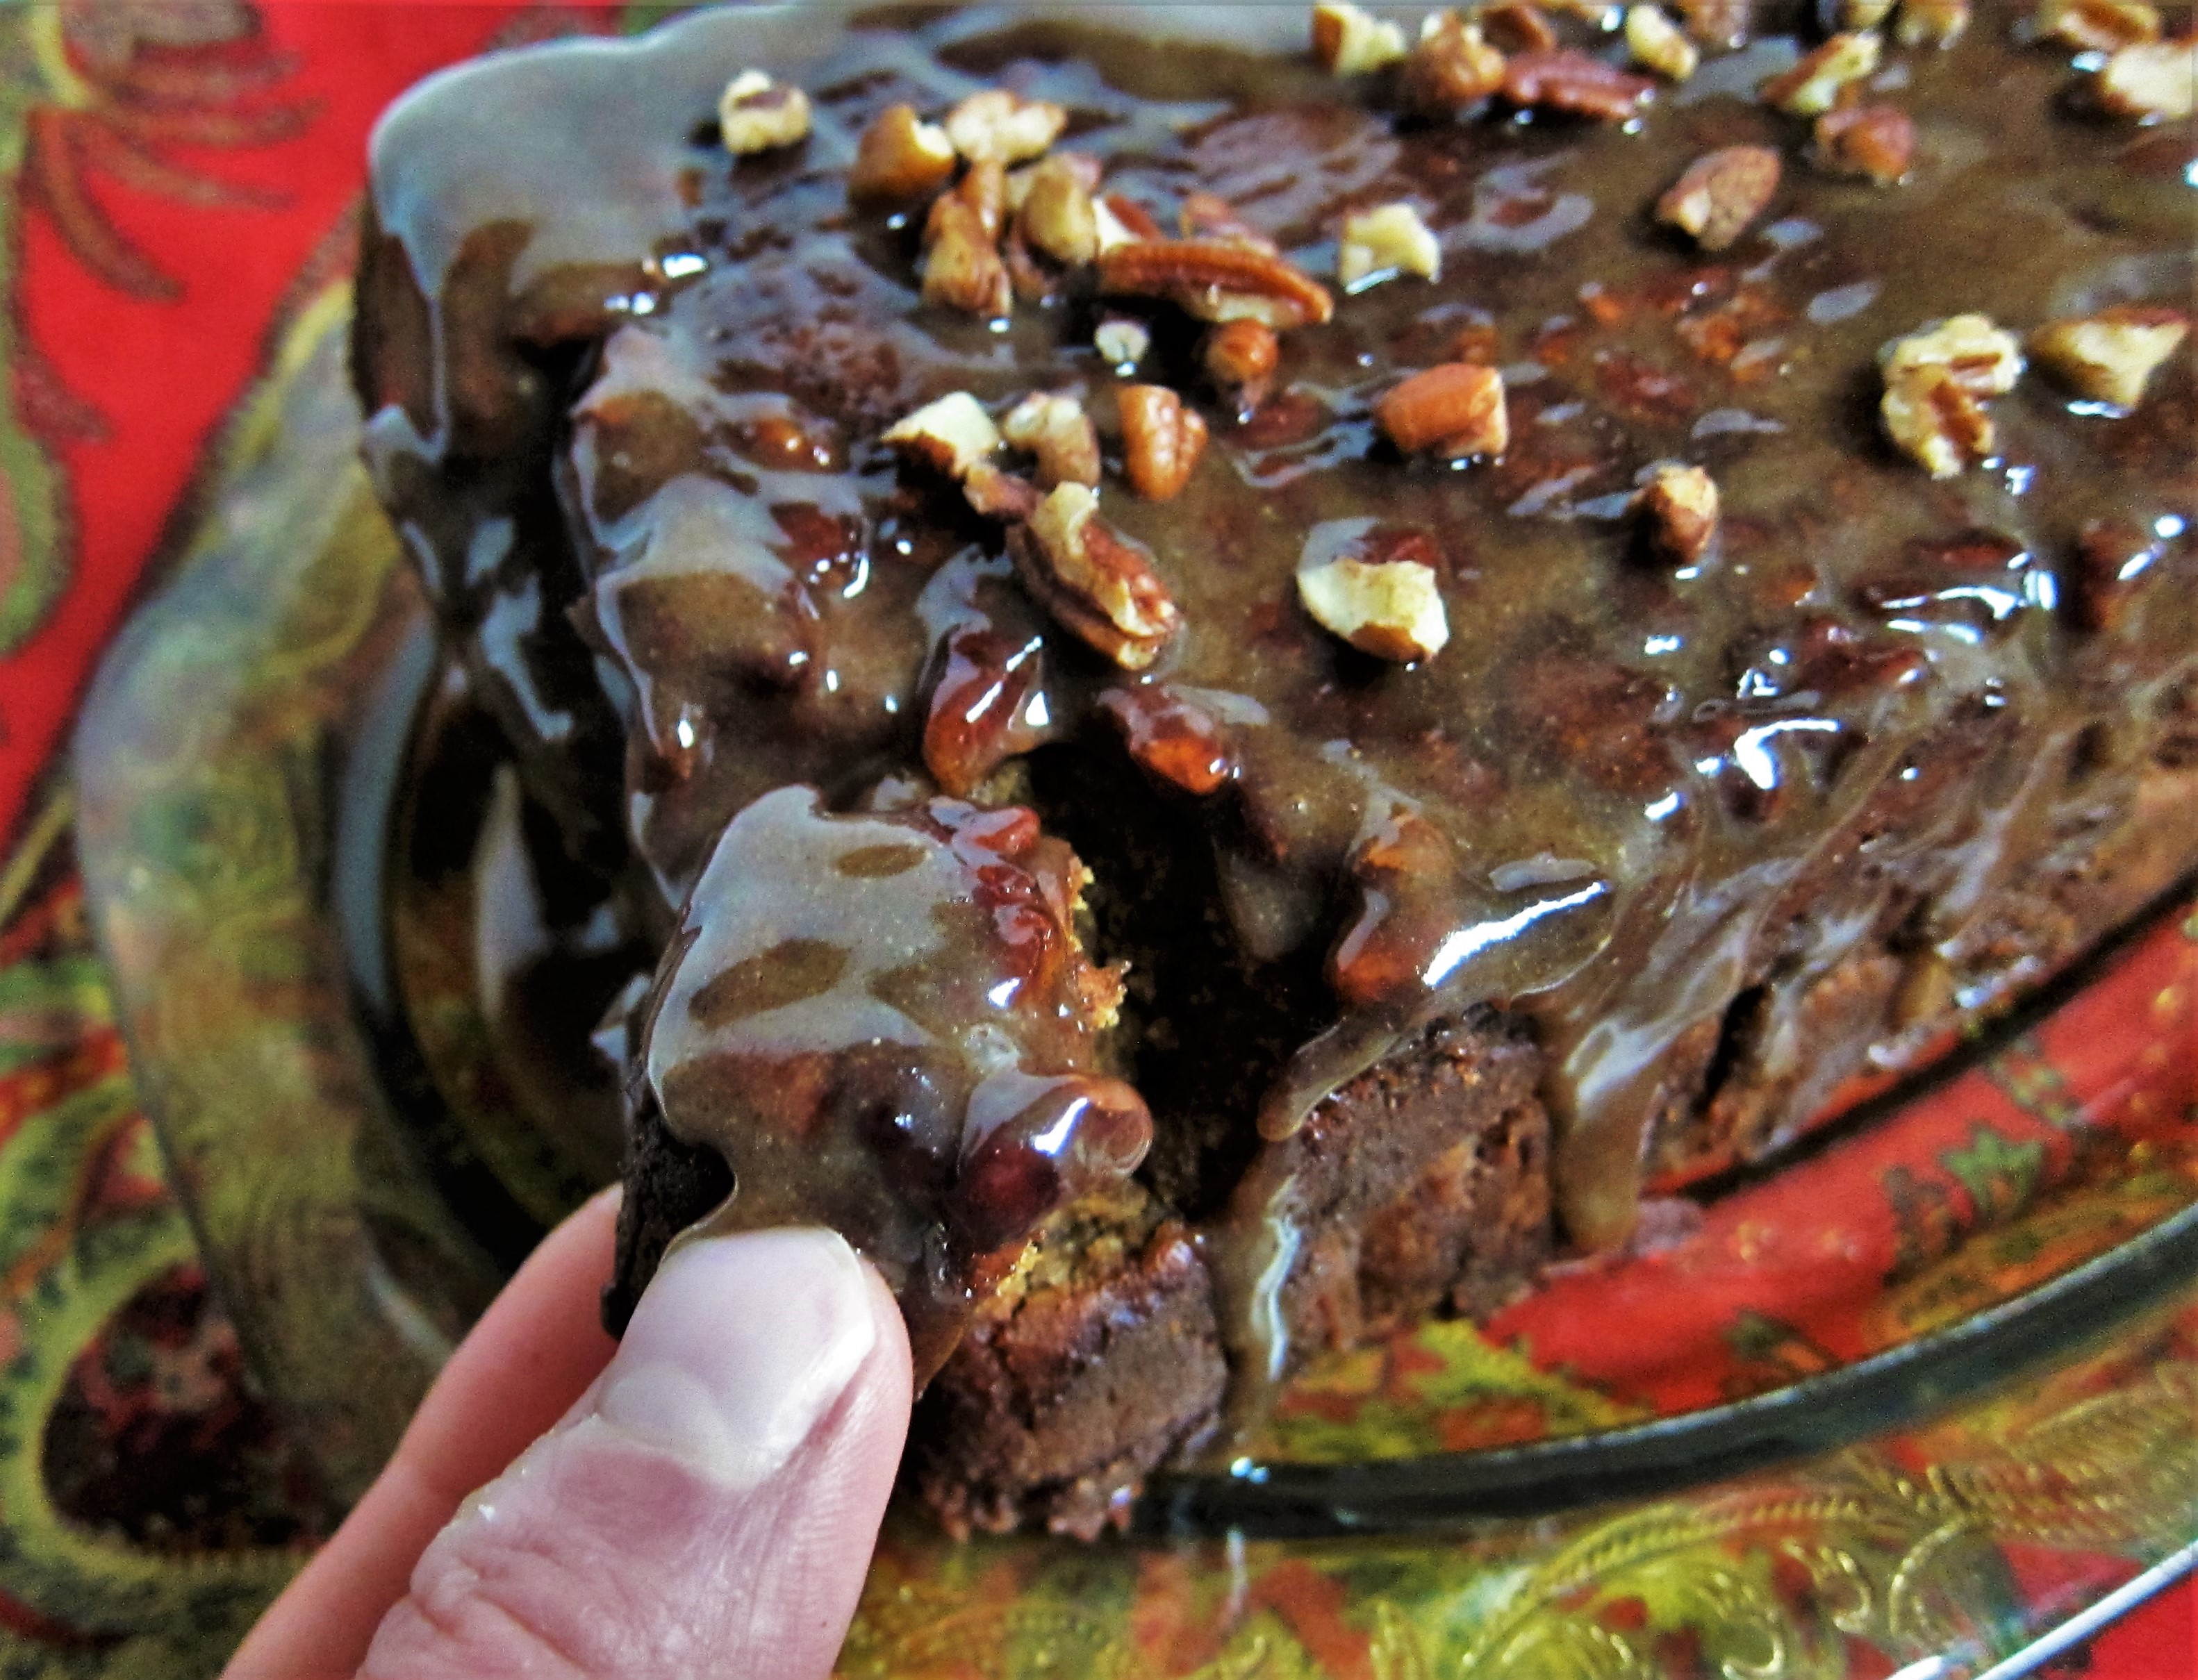
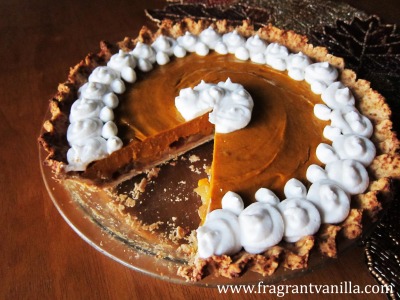
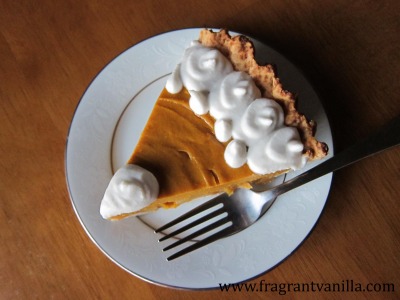
    I had to test them out in a few recipes, my Vegan Mocha Pumpkin Bread, and my Vegan Hazelnut Cardamom Chocolate Chunk Cookies.  They contributed lovely flavors to both!  I decided that I needed to create something even more spectacular with them, so I made a Vegan Gingerbread Cheesecake! About 10 years ago, I had made a gingerbread cheesecake for Christmas, and it was so good.  I have never attempted to veganize it until now.

    IMG_1640

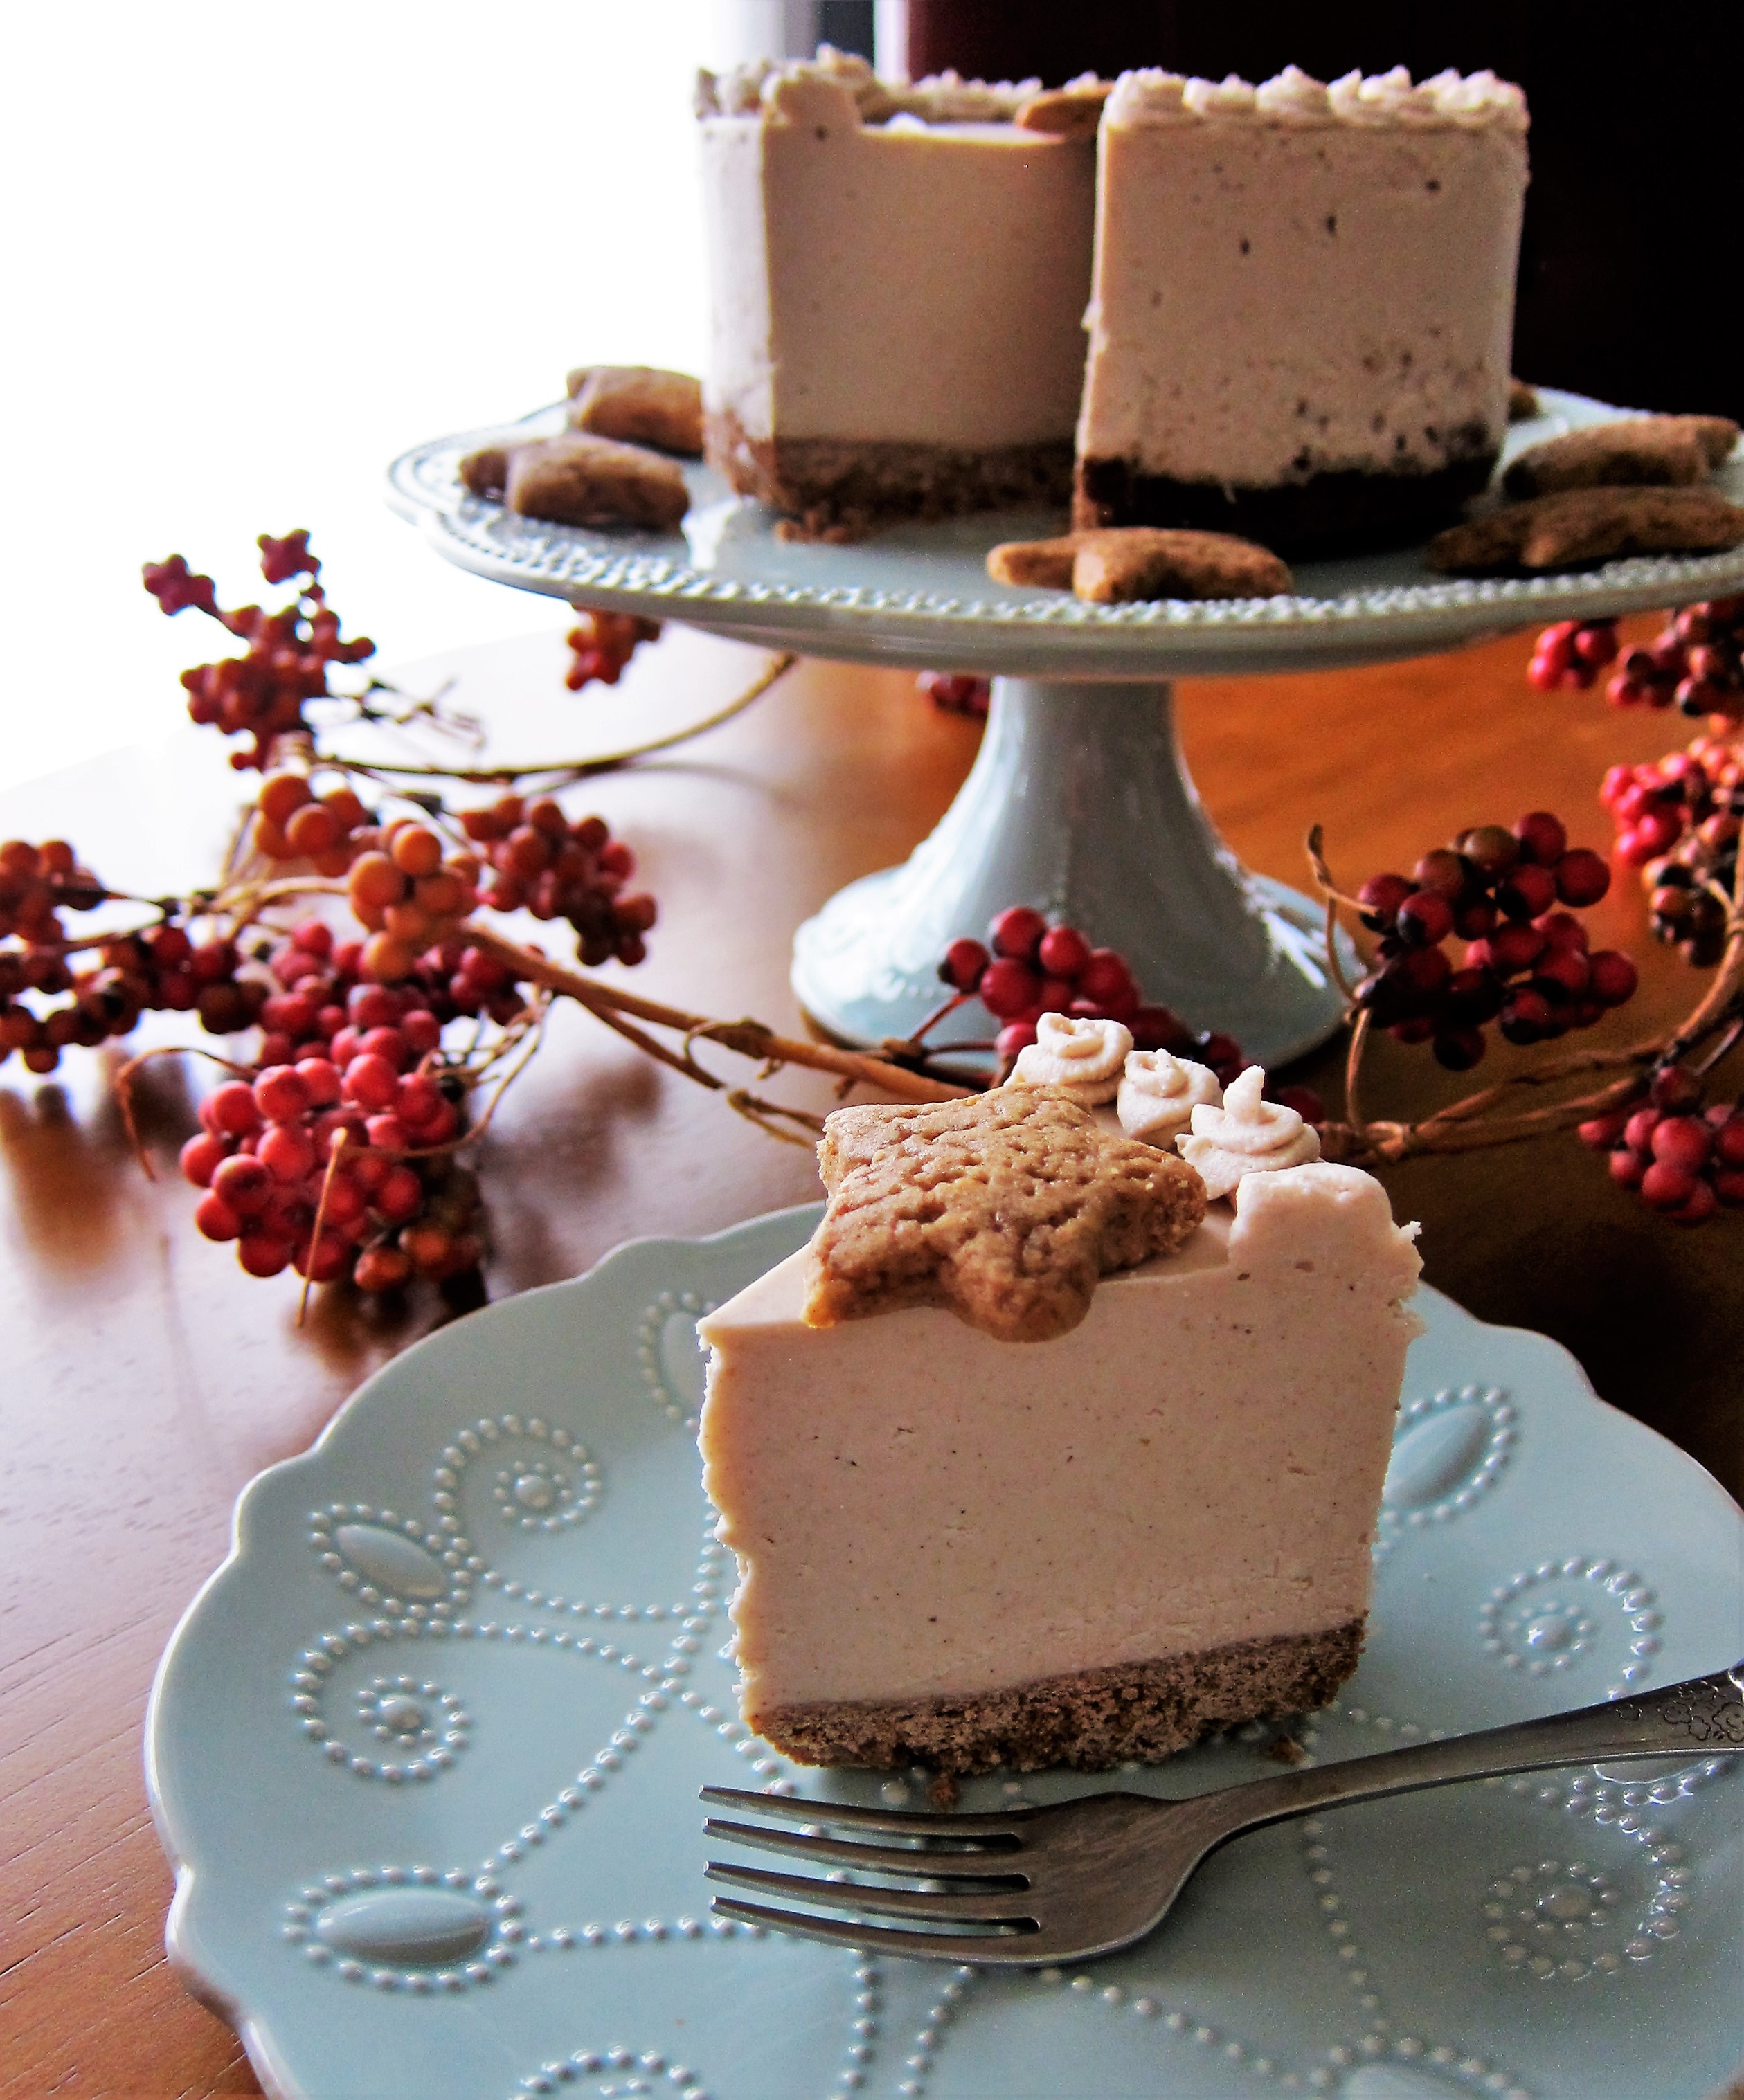
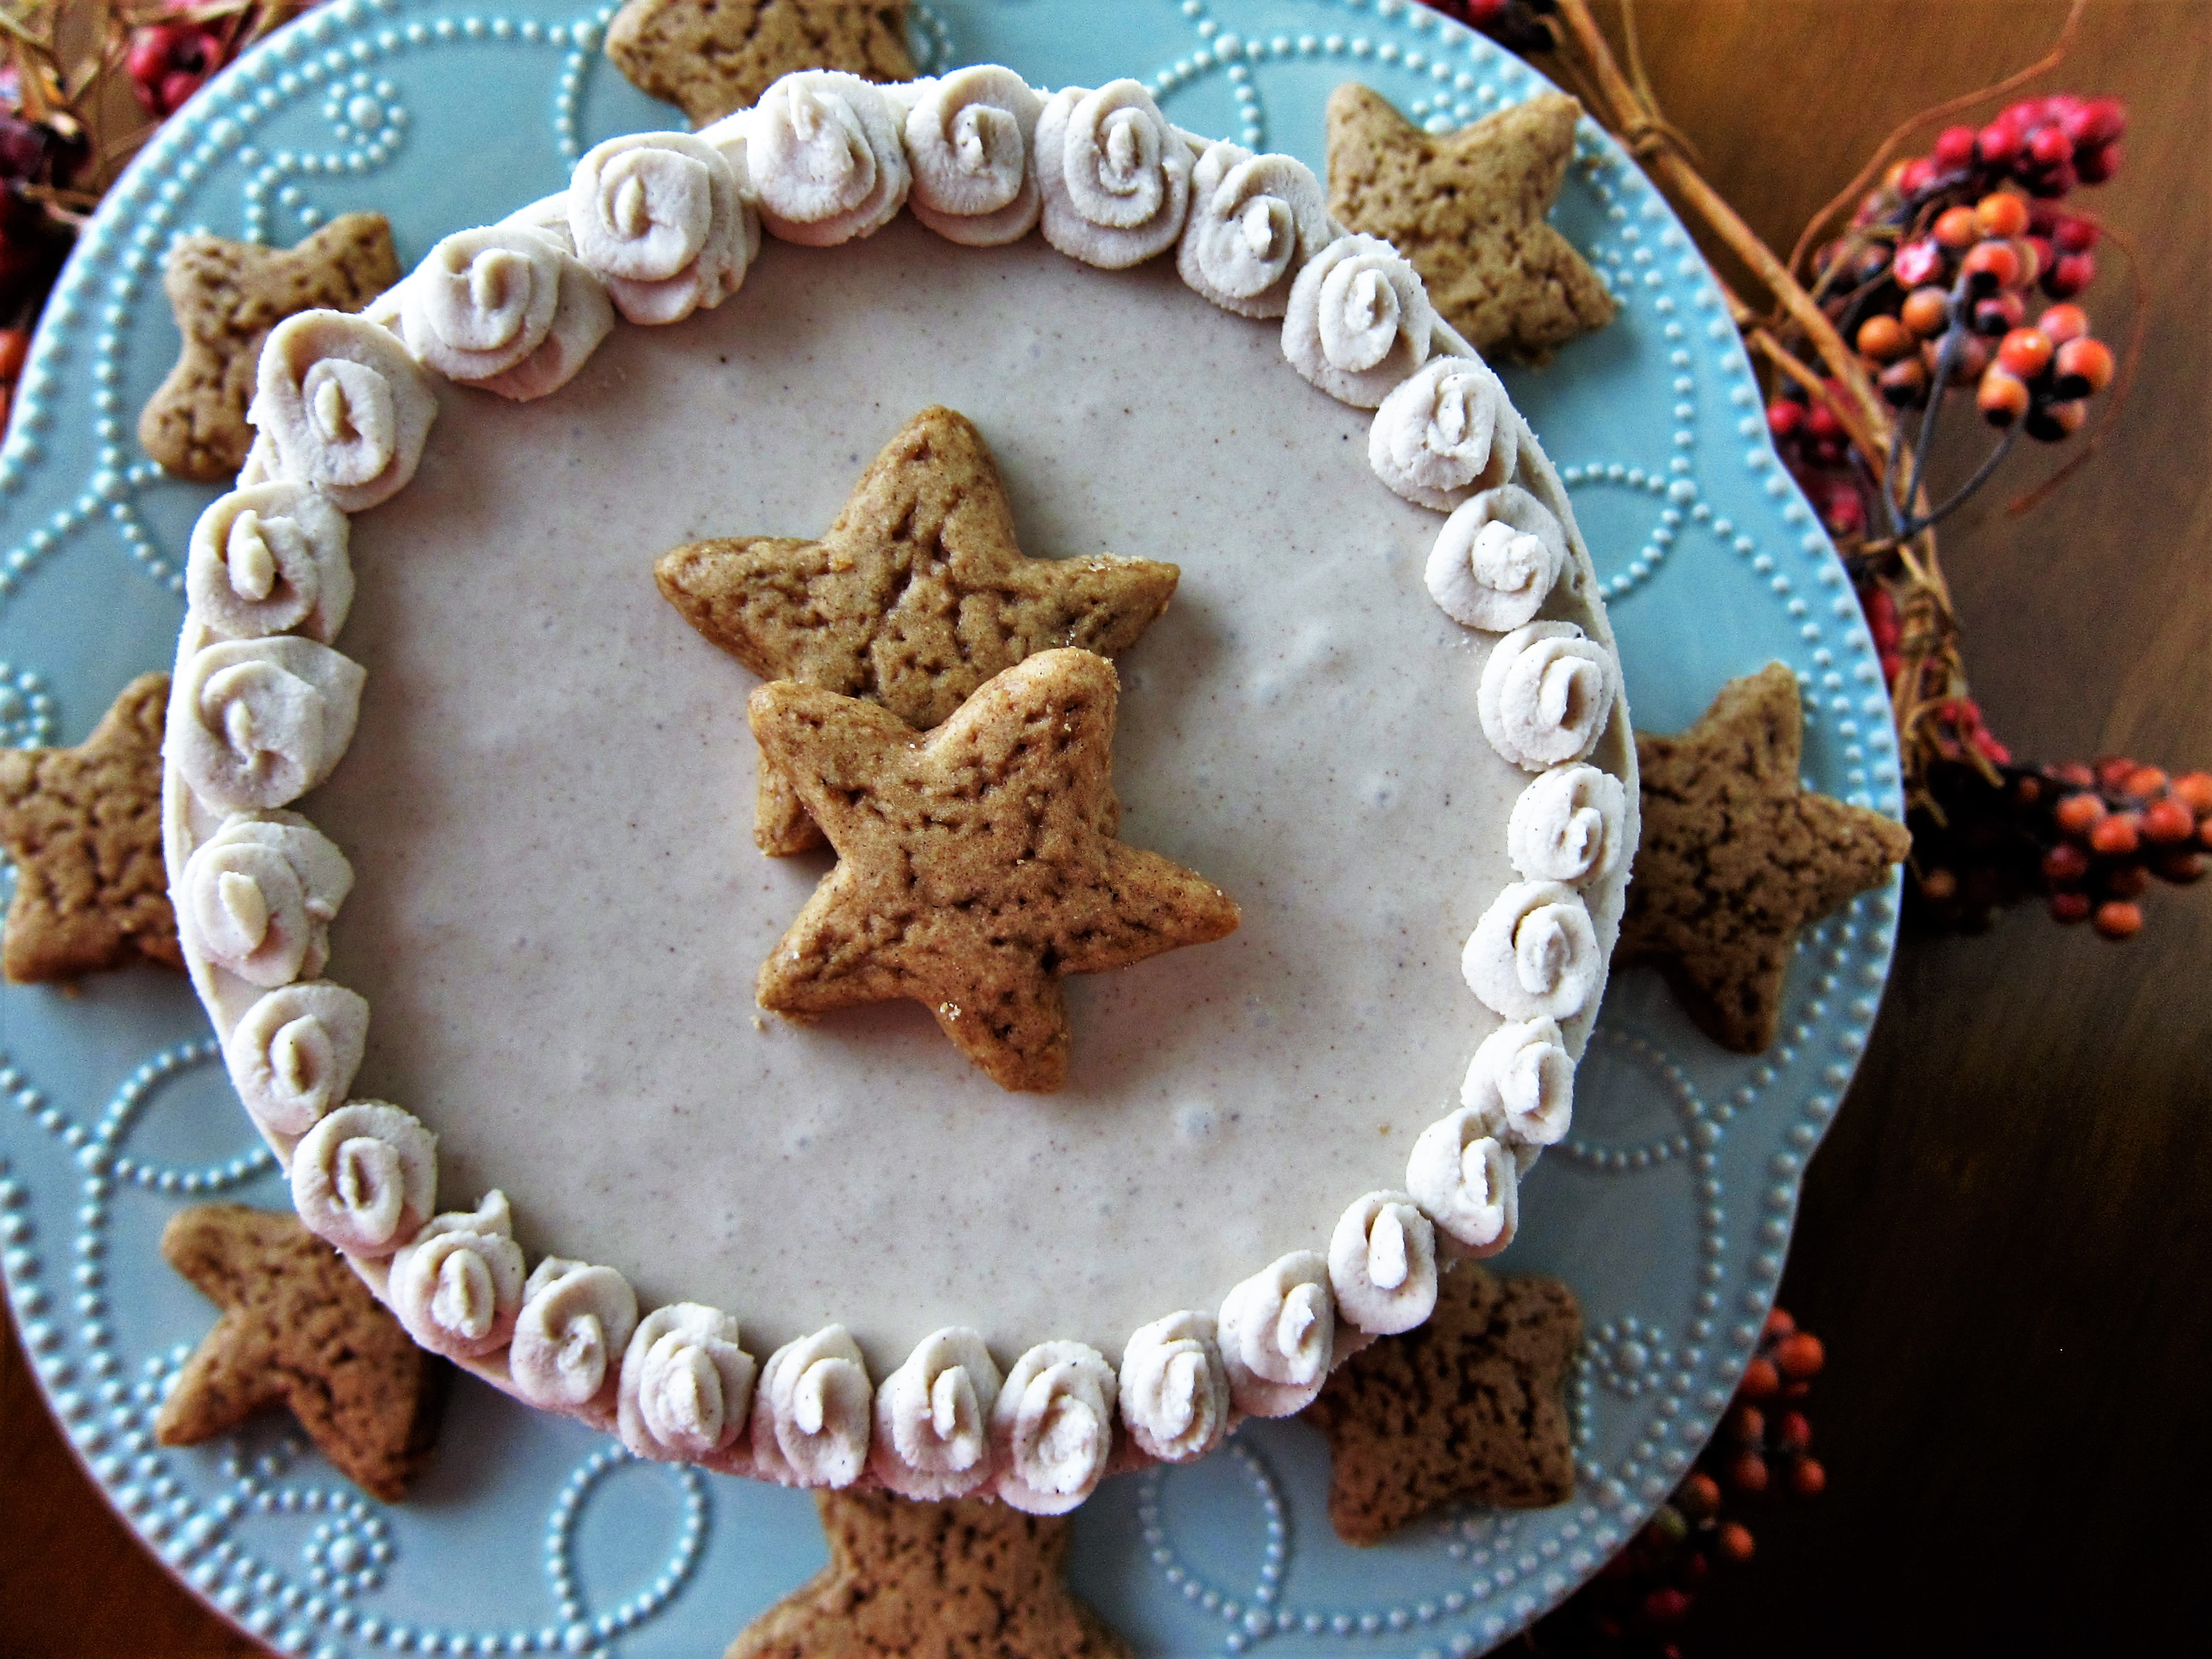
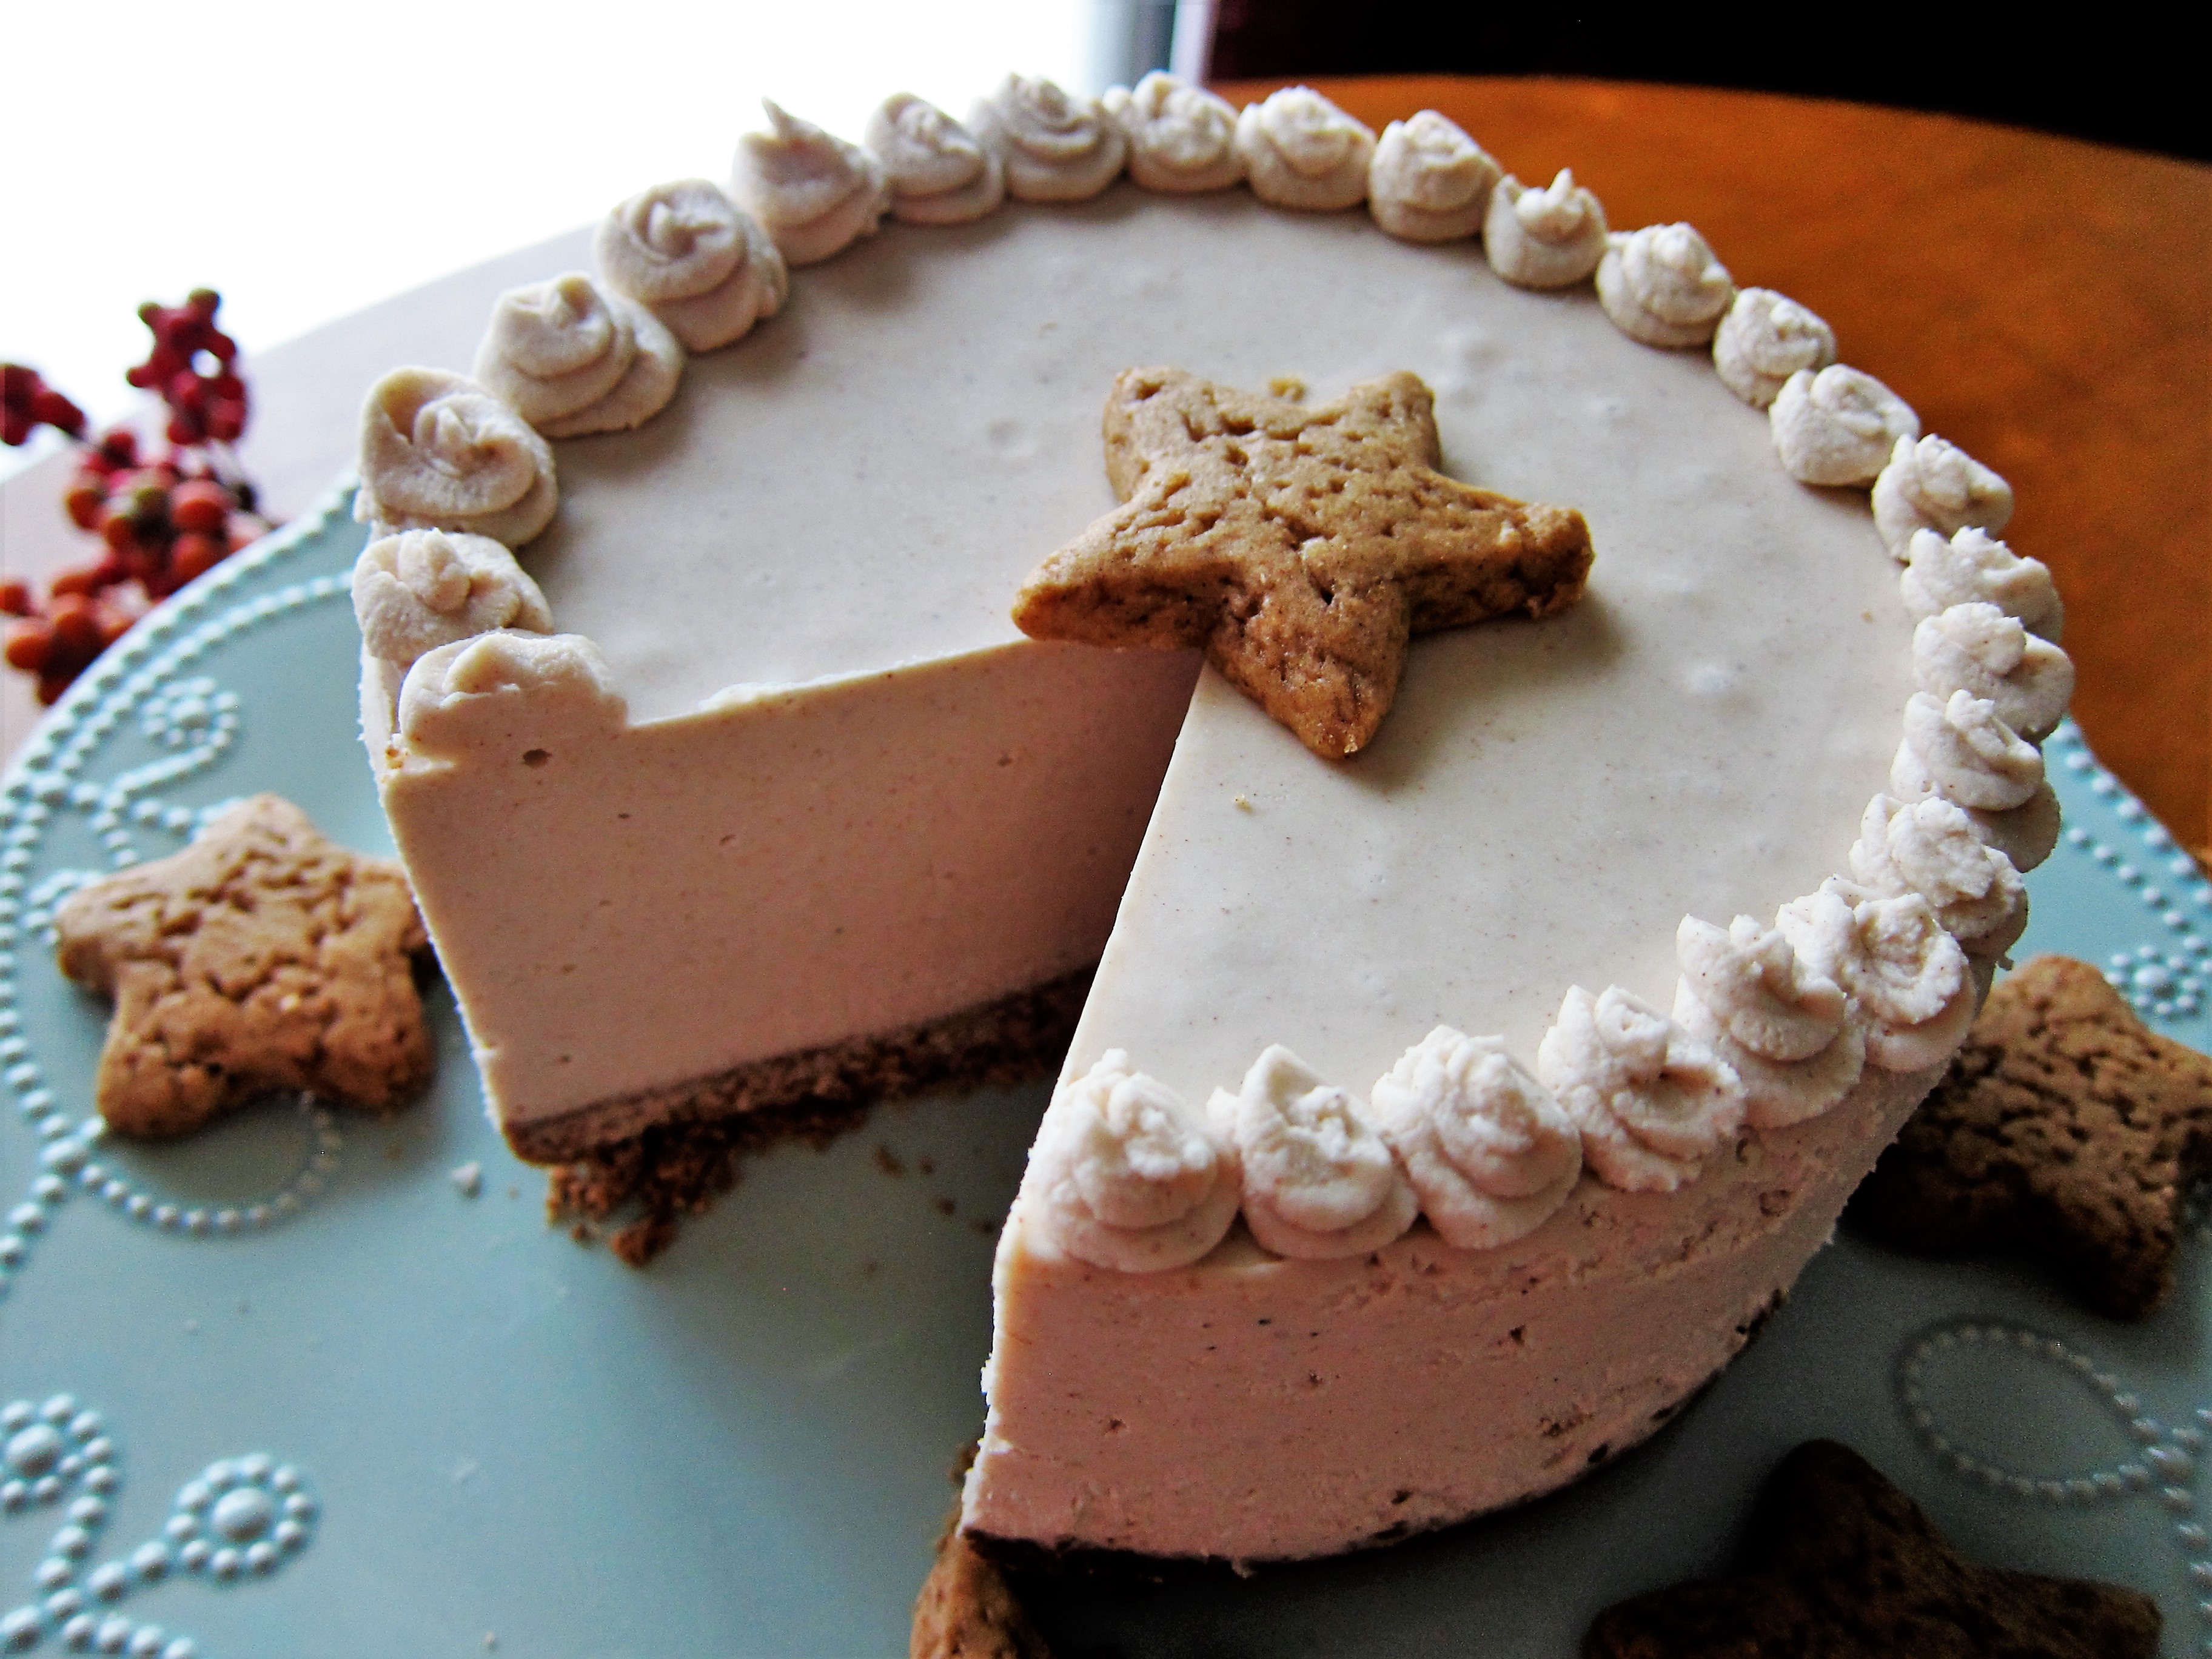
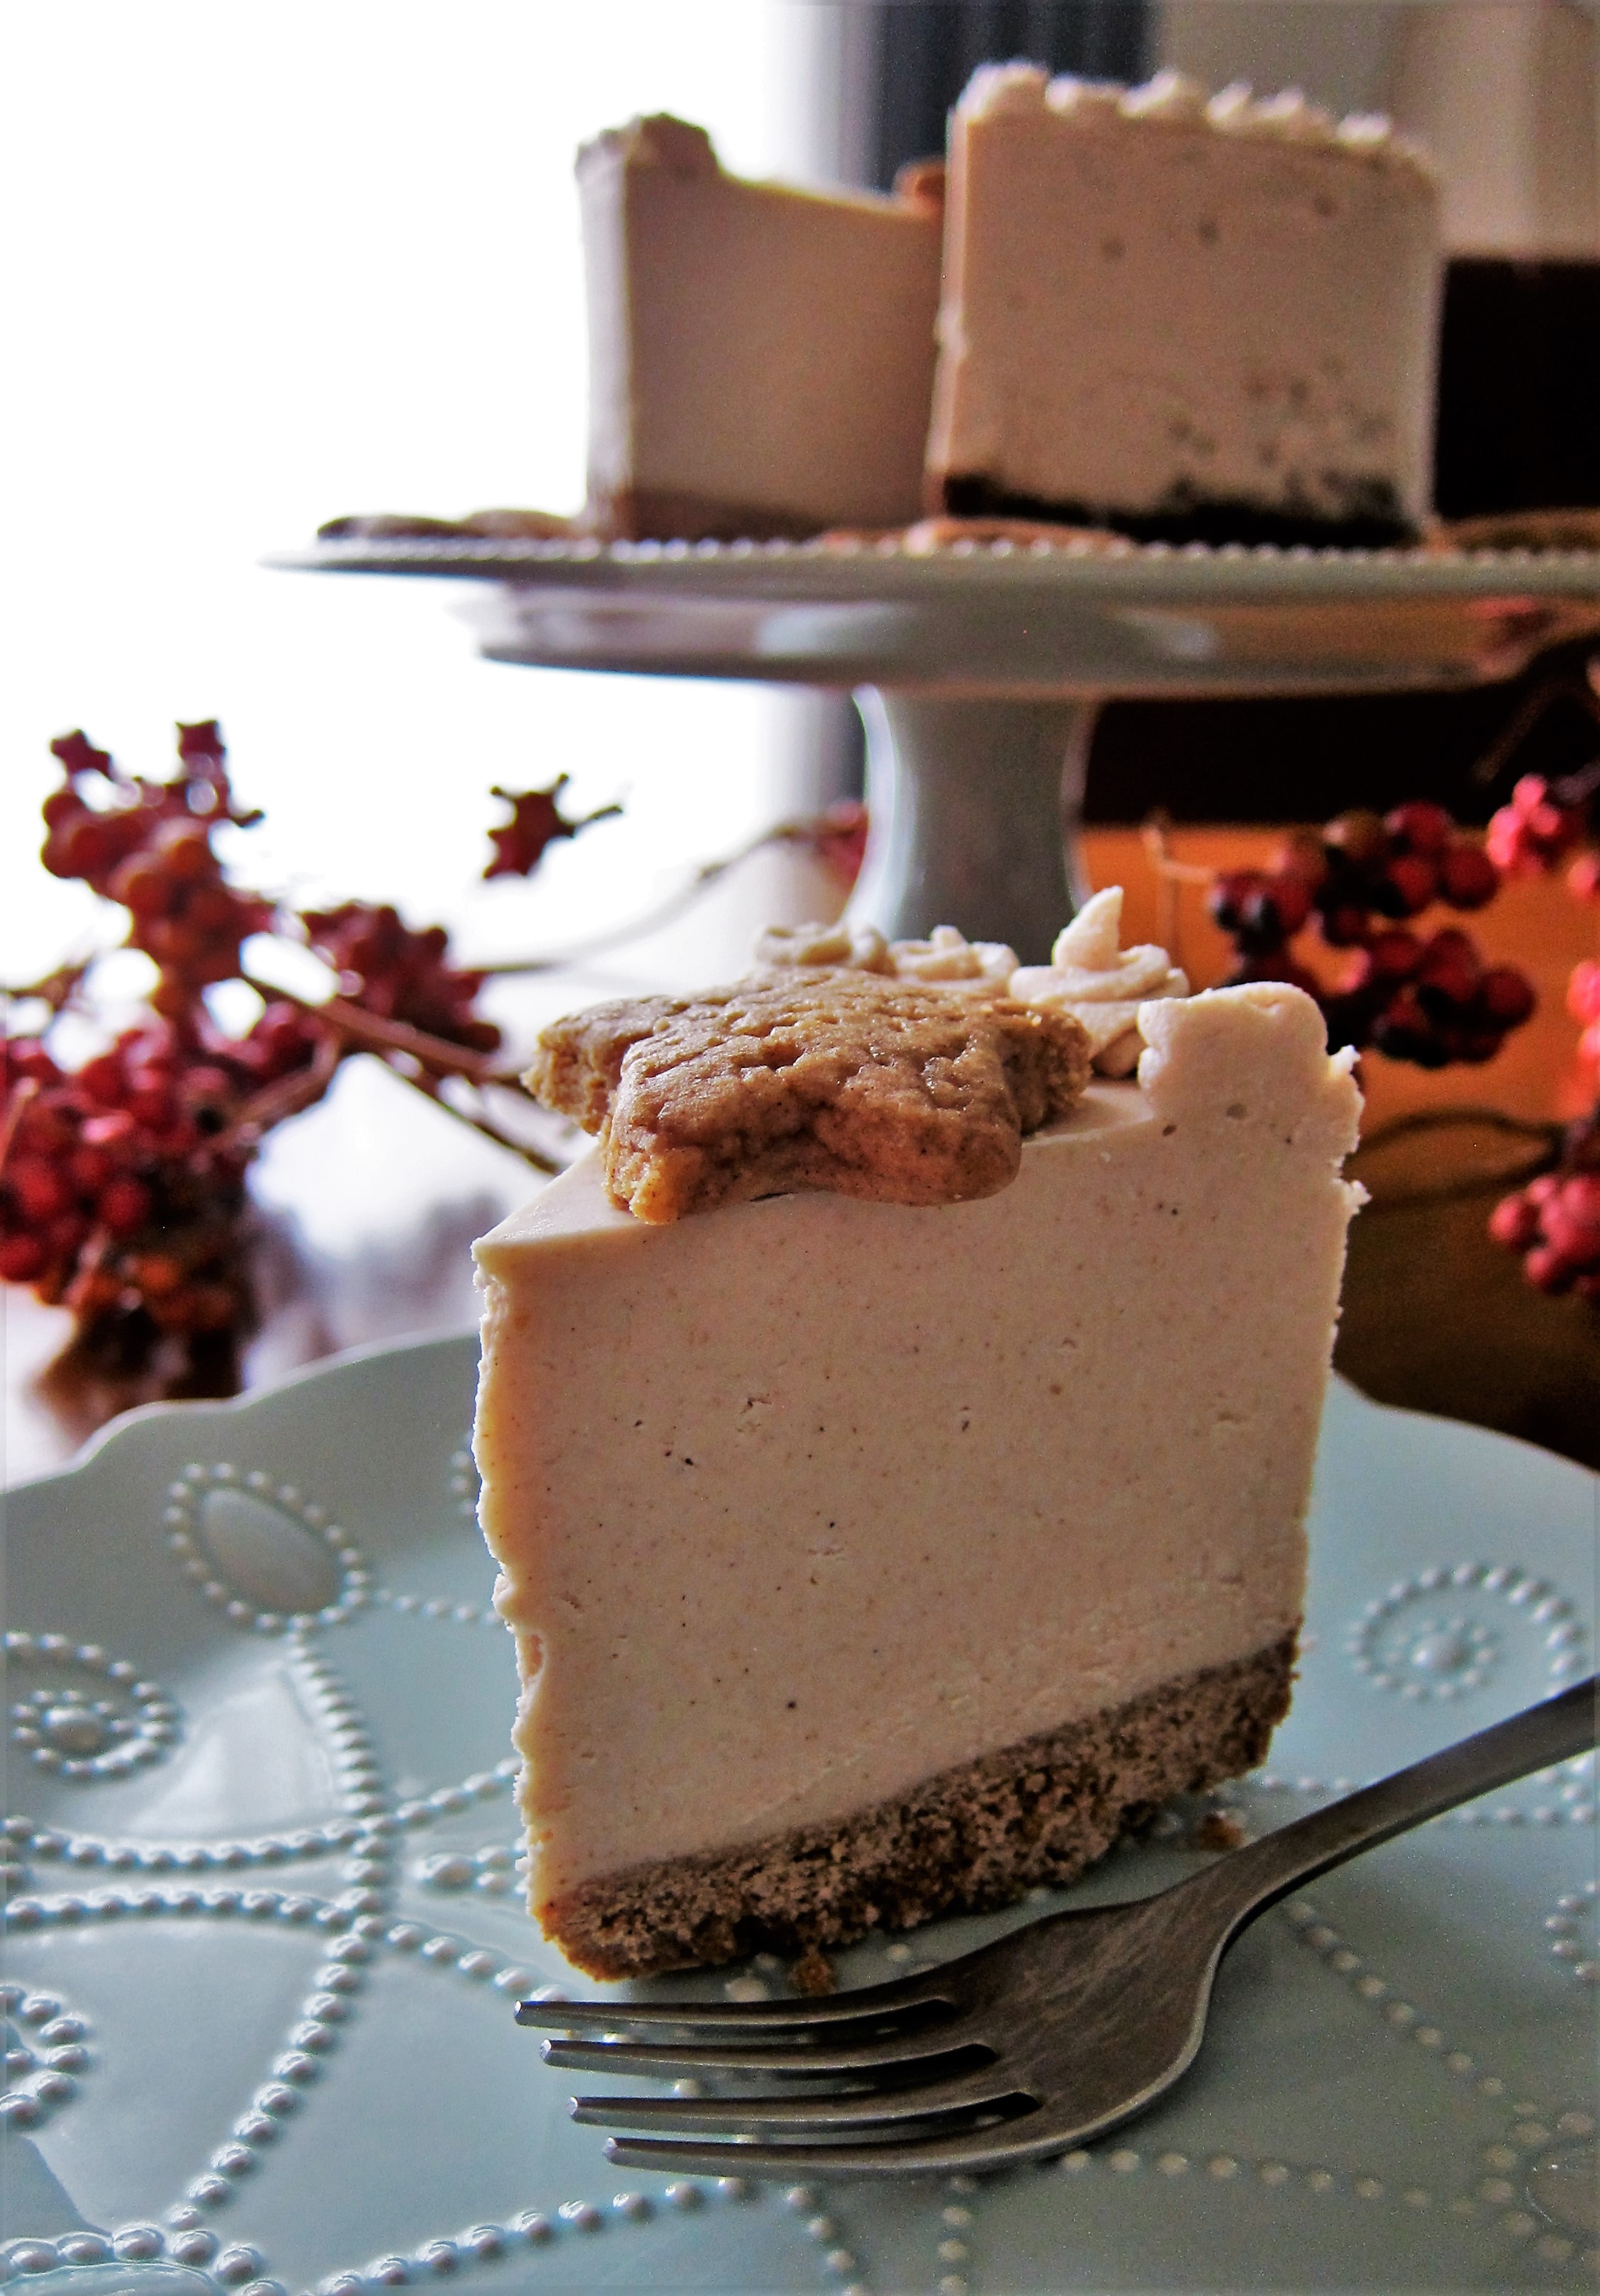
    I was excited about this.  I could use four of the flavor extracts in it, the vanilla, the cinnamon, the ginger and the anise. I made little vegan gingerbread cookies, then used those as the base of the cheesecake, then made a luscious cheesecake filling from coconut milk flavored with the same aromatic ingredients.  This was going to be sooo good!

    IMG_1641

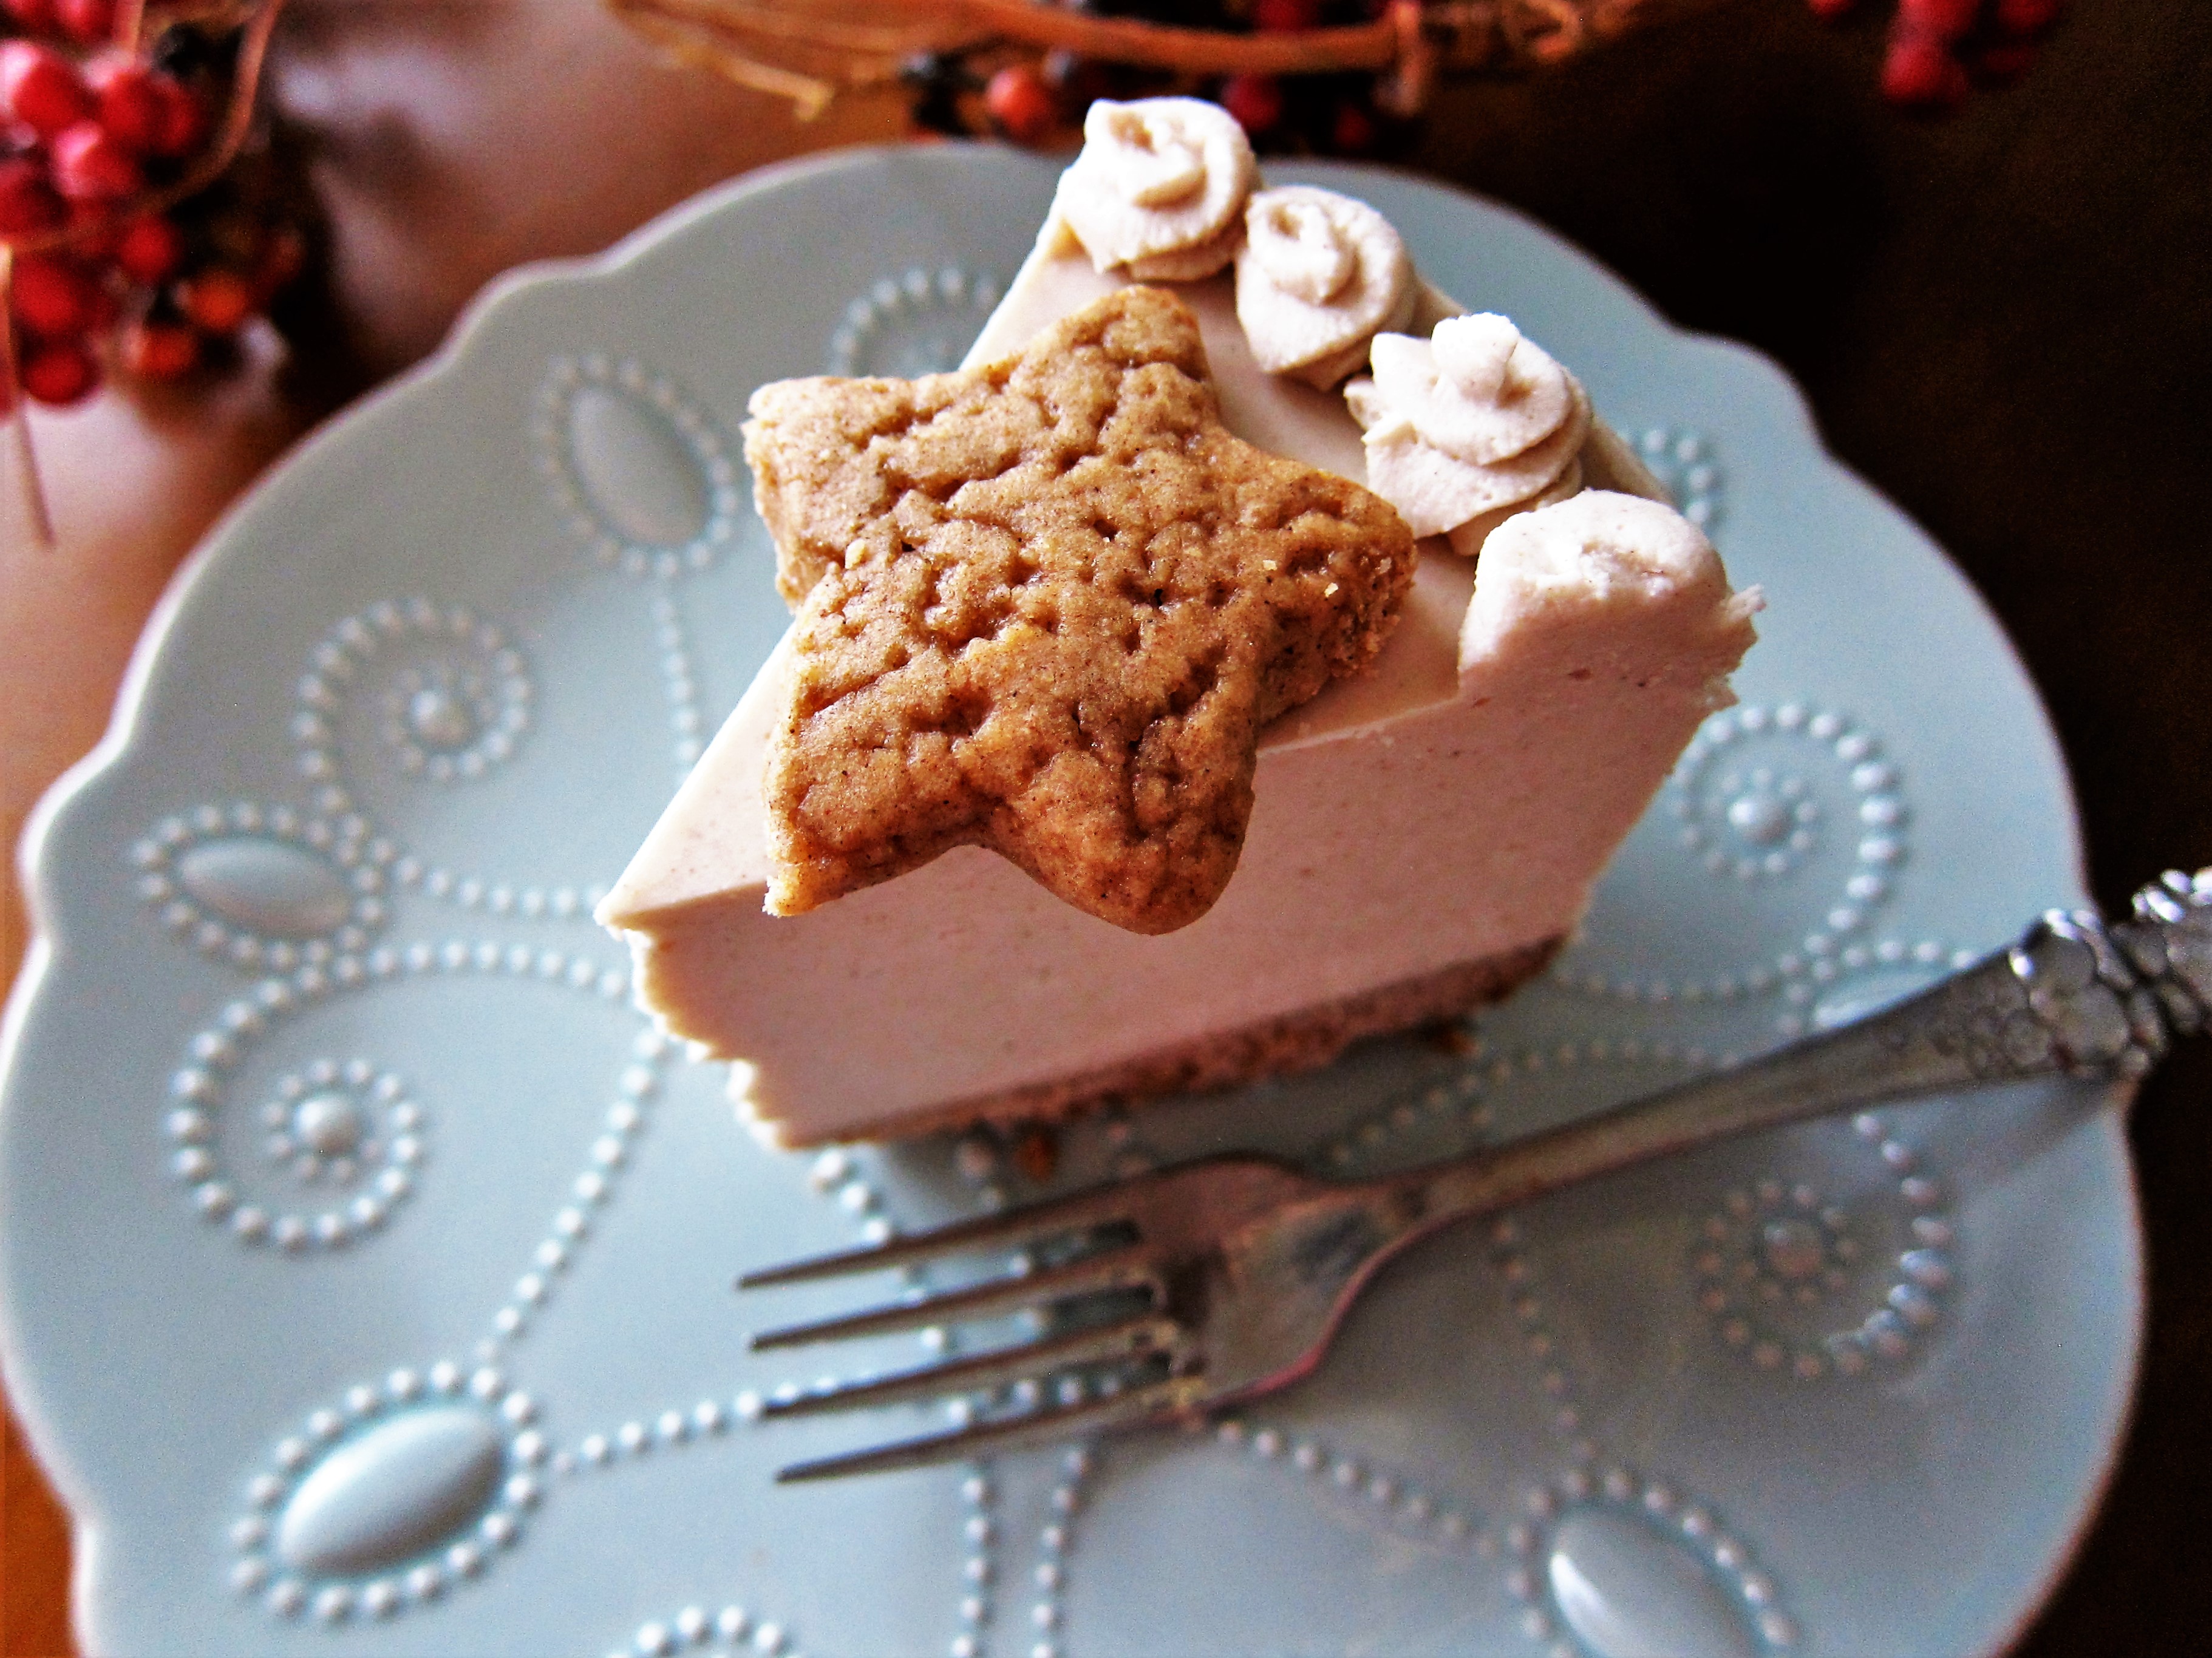
    The extracts added a special little aromatic note to the cake, it was beautiful!  Are you intrigued yet about these lovely extracts?  Well, guess what? L. C. Finns was kind enough to let me do a giveaway of their products.  One lucky winner will get a set of all seven extracts!  So, scroll to the bottom of the page to enter (US residents only please)!  Or, if you would like, you can purchase the extracts for yourself L. C. Finns website HERE.  These would be perfect for Christmas presents or Christmas baking.

    IMG_1642

    Vegan Gingerbread Cheesecake
    Makes one 6 inch cake

    Crust:

    1 cup crushed vegan gingerbread cookies (recipe follows)
    1 1/2 Tbsp coconut oil, melted

    Filling:

    1 cup gingerbread crumbs
    2 15 oz cans full fat coconut milk
    2/3 cup maple syrup
    1/4 tsp sea salt
    2 tsp each L.C. Finns cinnamon, ginger, vanilla and anise extracts
    2 tsp cinnamon
    1 Tbsp ginger
    1/2 tsp nutmeg
    1/2 tsp cloves
    1 1/2 cups coconut butter (not oil), warmed to liquid

    Preheat the oven to 375F degrees. To make the crust, place the 2 cups gingerbread cookies in a food processor, and process until crumbs.  Add the coconut oil, and pulse until it is well incorporated. Press the crust into the bottom of a 6 inch round deep springform cake pan.  Place in the oven and bake for about 10 minutes until it is browning a little and set. Remove from the oven and let cool completely.

    Meanwhile, to make the filling, combine all ingredients but the coconut butter, in a high speed blender or food processor and blend until smooth. With the motor running, add the coconut butter and process a minute more (if it starts to get lumpy at all during the process it is just the fat separating because it is 2 different temperatures. Just continue to blend until it is smooth, and it will get warm so it will just have to chill longer). Pour the filling over the prepared crust, and place in the freezer to set for about 4 hours. Decorate with extra gingerbread cookies.

    Mini Vegan Gingerbread Cookies
    Makes about 50 mini cookies

    1 Tbsp ground flax seed
    3 Tbsp filtered water
    2 1/4 cups gluten free all purpose flour
    1/3 cup coconut sugar
    2 tsp cinnamon
    2 tsp ground ginger
    1/4 tsp nutmeg
    1/4 tsp cloves
    1/4 tsp baking soda
    1/4 tsp sea salt
    1/3 cup maple syrup
    1/2 cup melted coconut oil
    1 tsp each L.C. Finns cinnamon, ginger, vanilla and anise extracts

    In a small bowl, whisk together the flax seed and water and set aside.
    In a large bowl, whisk together the flour, sugar, cinnamon, ginger, nutmeg, cloves, baking soda, and sea salt.
    Whisk in the remaining ingredients, and the flax mixture until smooth. Scoop dough onto a piece of parchment, and sort of flatten with your hands. Place in the freezer for about 30-45 minutes, or until it is more firm and rollable.
    Pre-heat the oven to 350F When ready to roll, flour a rolling pin, and roll the dough out 1/8 inch thick on a sheet of parchment. Cut into small shapes with a cookie cutter and place on two parchment lined baking sheets. Re-roll any scraps and cut them out as well (if at any time it gets too warm and sticky, place back in the freezer for 5-10 min).
    Place cookies in the oven and bake for about 15 minutes until set, a little crispy, and starting to brown at the edges. Let cool completely. You will need to crush up 2 cups for the recipe, but reserve the rest for decorating or eating.

    IMG_1644


    a Rafflecopter giveaway

  • Vegan Hazelnut Butter Cardamom Chocolate Chunk Cookies

    I bought a big old bag of hazelnuts recently, just to switch things up a bit. I am usually always buying almonds or walnuts, but the hazelnuts just sounded really good.  I toasted a big pan to use in recipes, then ended up making most of it into hazelnut butter…which was really good.  I snacked on some of it, but I decided that it also needed to be used in a delicious dessert as well.

    IMG_1606

    I had cookies in mind.  you know, like peanut butter cookies but with hazelnut butter?  I am more of a soft cookie person so it sounded fabulous to me.  They weren’t just going to be plain though.  I wanted to include chocolate chunks as well.  I could have made them really chocolaty and made the dough chocolate too, which would have made Eric even happier, but I am the type of person who likes balance.  So the chocolate chunks in the non-chocolate dough sounded better at the time.

    IMG_1603

    But that would have even been too plain for me.  Just the chocolate chunks weren’t enough, I decided that cardamom would be lovely in these cookies as well.  It is a warming spice, so perfect for this time of the year.  L. C. Finn’s a local company that makes wonderful extracts recently sent me some to try, and cardamom was one of them, so I put it to use.  Stay tuned, I will be talking more about L.C. Finn’s tomorrow and there will be a giveaway of their extracts!  Anyways, their cardamom extract was awesome I the cookies.  Light, but aromatic.  They smelled amazing and tasted even better.

    IMG_1602

    Vegan Hazelnut Butter Cardamom Chocolate Chunk Cookies

    Makes 12 cookies

    1 Tbsp ground flaxseed
    3 Tbsp filtered water
    1 cup coconut sugar
    3/4 cup Dastony hazelnut butter
    1/4 cup coconut oil, warmed to liquid
    1 tsp L.C. Finns vanilla extract
    1 tsp L.C. Finns cardamom extract (or 1 tsp dried cardamom)
    1 1/4 cups gluten free all purpose flour
    3/4 tsp baking soda
    1/2 tsp baking powder
    1/2 tsp sea salt
    1 cup vegan chocolate chunks or chips

    In a small bowl, whisk together the flax seed and water.  Place the bowl in the fridge for 15 minutes, this is your flax egg.
    In a large bowl, with a wooden spoon, mix together the sugar, hazelnut butter, coconut oil, vanilla and flax egg, until smooth.  Then mix in the flour, soda, baking powder, and sea salt in until the mixture is smooth.  Stir in the chocolate chunks or chips.
    Preheat the oven to 375F degrees.  Line a sheet pan with parchment.
    Shape the cookie dough into 2 inch balls, place on your baking sheet a few inches apart and flatten slightly with your hand.
    Place in the oven and bake at 375 for 12 minutes or so, until lightly browned and set.  Allow to cool completely on a rack.


  • Vegan Mocha Pumpkin Bread

    Vegan Mocha Pumpkin Bread

    IMG_1558

    I had some leftover pumpkin from another recipe needing to be used in the fridge, and I did not want to put a lot of work into making something with it.  Cake sounded good, but I have made lots of pumpkin spice cakes this year. Plus cake was a little more work than I wanted.  Chocolate also sounded good, so I wanted to incorporate that, and Eric had recently suggested I make something with coffee…so what I finally decided on was pumpkin mocha bread.  Quick bread…a simple cake with no layers and frosting to mess with.  My mouth was watering at the thought of it.  Not only was this bread going to be flavored with pumpkin spice, cacao powder and coffee, it had to have gooey chocolate chunks, because I was totally going to eat it warm.

    IMG_1566

    It came together fast, and smelled like heaven while baking.  I made mini loaves, so one loaf was perfect for two to share.  What I got when I cut into one was gooey delicious chocolate, and soft and aromatic bread that tasted wonderful.  A hint of spice, a hint of coffee, and just enough chocolate to make me and Eric happy.  If you have leftover canned pumpkin and coffee after this week, now you know what to make!

    IMG_1567

    Vegan Mocha Pumpkin Bread

    Makes 4 mini loaves

    1 1/2 cups gluten free all purpose flour
    1/4 cup cacao powder
    1 cup coconut sugar
    2 Tbsp cinnamon
    2 tsp ground ginger
    1/2 tsp ground nutmeg
    1/4 tsp cloves
    1 tsp baking soda
    1 tsp baking powder
    1/2 tsp sea salt
    3/4 cup pureed pumpkin or squash
    1/4 cup olive oil
    1 Tbsp pure vanilla extract
    1 Tbsp l. c. Finns coffee extract
    1/2 cup + 2 Tbsp coffee
    2 Tbsp apple cider vinegar

    1 cup chopped vegan dark chocolate

    Preheat the oven to 375F degrees and position rack in center of oven. Oil four small bundt pans. Whisk flour, baking soda, spices, salt, and sugar in a large bowl to blend well. Whisk pumpkin, oil, vanilla extract, and coffee together in small bowl to blend well, then whisk into the flour mixture until well blended. Whisk in cider vinegar until pale swirls form in the batter and it is well combined. Transfer cake batter to prepared pan and bake cakes until tester inserted into center comes out clean, about 25-30 minutes. Cool cake completely in pan on rack, about 1 hour. Cut around sides of pan to loosen. Turn cake out onto platter; peel off parchment paper. Let cool completely.


  • Vegan Cheddar Thyme Biscuits

    Vegan Cheddar Thyme Biscuits

    I haven’t made biscuits in ages, and I know I have never made vegan biscuits, so I decided to make some last Monday on my day off.  Honestly, I had seen someone making some on a cooking show and they started to sound really good to me.  I told Eric I was going to make them, and he said that his favorite biscuits were always the ones at Red Lobster.  They were mine too growing up.  I am sure they were from a boxed mix and none of us would eat them now, but they were sure good back then.  So, I decided to make my biscuits cheddar.

    IMG_1601

    I wanted something herb in them, so I decided on thyme, because it is my favorite herb in the chillier months.  Plus, cheddar thyme is a delicious combination.  I ended up making basically a savory version of my scone dough, because I know it turns out flaky and tender when handled properly.  I did not use vegan butter in these, but instead coconut oil, because it sort of behaves like butter and I am not a big fan of fake butter.

    IMG_1599

    They smelled amazing while baking, and tasted even better.  I enjoyed them much more than typical non-vegan biscuits.  Just goes to show that vegan foods are just as delicious.  I think these would be a wonderful addition to your Holiday table.

    IMG_1600

    Vegan Cheddar Thyme Biscuits
    Makes 8

    2 cups all purpose gluten free flour
    1 cup organic cornmeal
    1/4 cup nutritional yeast
    2 Tbsp dried thyme
    2 1/2 tsp baking powder
    1/4 tsp salt
    1/2 cup virgin coconut oil, cut into chunks
    1 cup cold full fat organic canned coconut milk (whisked until smooth if chunky)

    Preheat oven to 425 with the rack set at the middle position. Line a baking sheet with parchment. In a large bowl, combine the flour, baking powder, and salt. Cut in the coconut oil with a pastry blender or 2 knives until the mixture starts to clump into pea sized pieces.
    Add the coconut milk to the dough, and stir a few times, but do not overmix. The dough should hold together when squeezed, but still be clumpy (do not overmix, you want chunks of the oil in the dough or it will become tough). Press the dough into a 1 1/2 inch thick rectangle, then cut out the biscuits with round cookie cutter.  Reshape the scraps into a rounds too but try not to handle the dough too much or the biscuits will become tough.
    Place scones on the prepared baking sheet, reshaping slightly if necessary. Bake for about 20 minutes or until golden brown. Cool on a wire rack.


  • Vegan Cranberry Pear Pie with Walnut Crumble Topping

    Vegan Cranberry Pear Pie with Walnut Crumble Topping

    IMG_1570
    When I was little, I thought cranberries came in a can, jiggled and nothing more.  I was not a big fan, and usually didn’t take any on Thanksgiving.  They just seemed to me like they were part of the tradition but nobody really ate them.  Thank goodness I have since been exposed to good cranberries.  I love buying fresh ones this time of the year and making them into something delicious.  Especially when used in a baked dessert where they can be allowed to become almost jammy.  So when I saw some at the store last week, I had to pick them up.
    IMG_1574
    I decided to bake one of those delicious desserts, a vegan cranberry pear pie.  Pears are sweet, cranberries are tart, so it is the perfect pairing! I am on a huge pie kick lately.  My favorite is with a crumble topping. It is a bit less fussy, and even more delicious and crunchy. I am a big texture person so the jammy filling with a crunchy topping is perfect in my book.  Especially when paired with coconut whipped cream or ice cream.
    IMG_1575
    I used an equal of cranberries and pears in the filling to balance it out nicely.  Some orange zest and juice joined the show since it is a lovely flavor with cranberry. I was getting excited about this!  I made a crunchy walnut crumble topping, and I knew this was going to be good.  Once it was smelling all wonderful and baked to jammy perfection I could not wait to dive in.
    IMG_1577
    I always have to cut myself a pretty large piece.  It was wonderful.  Sweet, tart, crunchy, melt in your mouth, heavenly.  No reason to be sad about summer fruit being out of season when you have this type of deliciousness!  Cranberries to the rescue!  This would be the perfect addition to a Holiday table!
    IMG_1578
    Vegan Cranberry Pear Pie with Walnut Crumble Topping

    Makes 1 9 inch pie

    Crust:
    1 1/2 cups all purpose gluten free flour
    3 Tbsp coconut sugar
    1/4 tsp sea salt
    6 Tbsp coconut oil, in its solid form
    about 2-3 Tbsp cold water

    Filling:
    3 cups diced ripe pears
    3 cups fresh or frozen organic cranberries (if they are frozen, thaw them first, and drain off any liquid)
    juice and zest of one small orange
    1/4 cup coconut sugar
    2 Tbsp arrowroot powder or all purpose gluten free flour
    2 tsp pure vanilla extract
    1/4 tsp cinnamon
    pinch sea salt

    Topping:
    3/4 cup gluten free all purpose flour
    3 Tbsp coconut sugar
    1/4 cup melted coconut oil
    1/2 cup gluten free rolled oats
    3/4 cup chopped walnuts
    pinch sea salt

    To make the crust, in a large bowl, mix together flour, sugar, sea salt.  Cut in coconut oil with a pastry blender or 2 knives until it is in pea sized pieces.  Mix in just enough water to create a smooth dough that holds together but isn’t too sticky.  Add a 2-3 Tbsp water as needed, and knead slightly until a smooth dough is created.
    Roll out into about a 9 inch round using parchment underneath and floured rolling pin.  Place dough into an 8 inch pie pan and fit to edges (being careful since gluten free dough is more fragile). If it tears, no worries, just press it back together and patch it up. Flute the edges, or crimp with a fork. Set aside in the refrigerator.
    To make the topping, combine all ingredients in a bowl, and mix together and squeeze together until it is clumping up a bit.  Set aside.

    Pre-heat the oven to 400F degrees. In a large bowl, toss together the filling ingredients. Spoon into crust.  Scatter the topping over that. Bake for 1 hour in the middle rack of the oven until pears are cooked through, cranberries have burts and it is and bubbling (after 15 minutes check it and if it is getting too dark, tent it with foil for the rest of the time in the oven).

    Remove from oven and let cool until warm, and top with some ice cream or coconut vanilla whipped cream and enjoy!


  • Vegan Squash Cornbread Stuffing

    Vegan Squash Cornbread Stuffing

    IMG_1547

     I have made lots of traditional Thanksgiving foods in the past, but oddly enough, I have never actually made stuffing. Which is kind of weird since I did love my Grandmother’s stuffing, and it was one of my favorite things at Thanksgiving.  So, this year I decided to make some.  I am really not a big bread person, but when I do eat bread 99% of the time it is home made.  I wanted a gluten free bread for this, and I decided on cornbread since it is a quick-bread and fast to make. My favorite cornbread recipe is actually a squash cornbread.  It is lower in fat than most, and it makes a perfect partner for chili.  So I used that recipe for this.

    IMG_1549

    I added in the usual suspects, celery, onions, and garlic, and mushrooms to give it an earthy flavor.  Thyme, rosemary, and sage of course had to be present, and I used my own flavorful home made veggie stock.  When I make my stock, it has lots of onions and garlic, and a bit of celery…so good.  I work in a deli so I have lots of veggie trimmings to use in stock.  Anyways, once this stuffing was all baked into delicious goodness I could not wait to try it.  It smelled amazing.  I like the contrast of the crisp bits on top with the soft stuffing beneath.  Crave worthy.  I think this would have passed Grandma’s taste test.  It was delicious!

    IMG_1550

    Vegan Squash Cornbread Stuffing

    Serves 6-8

    1 loaf squash cornbread (recipe follows), diced

    1 Tbsp olive oil

    4 stalks celery, sliced

    1 onion, diced

    1 1/2 cups crimini mushrooms, sliced

    3 garlic cloves, minced

    1 tsp dried thyme

    1 tsp dried rosemary

    1/2 tsp dried sage

    1 1/2 cups flavorful veggie stock (or as needed)

    sea salt to taste

    Pre-heat the oven to 400F degrees.  Spread the bread cubes out on a sheet pan, and toast in the oven for about 10 minutes until a little dry.  Remove from the oven and set aside in a large bowl.

    Meanwhile, in a skillet over medium heat, heat the olive oil, and add the celery, onions, and mushrooms.  Sautee until tender, about 10 minutes, then add the garlic and herbs and sautee a minute more.  Add 1 cup of the stock to deglaze and scrape up any brown bits. Pour this mixture over the bread in the bowl, and toss gently to mix together. Pour into an 8 inch square oiled baking dish.  Drizzle the top with a little olive oil (optional, if you are toasting the top). Place in the oven, cover,  and bake for about 30 minutes until heated through, removing the foil for the last 10 minutes if you want to brown the top and get it crispy.  Serve warm.

    Vegan Squash Cornbread

    1 loaf

    1 cup medium grind cornmeal

    1 cup all purpose gluten free flour

    1 1/2 tsp baking soda

    1 tsp baking powder

    1 tsp sea salt

    1 cup coconut milk

    1/2 cup squash or pumpkin puree

    2 Tbsp coconut oil

    1 Tbsp maple syrup

    1 Tbsp cider vinegar

    Preheat the oven to 375 degrees. Oil an 8×4 inch pan with coconut oil. In a large bowl, whisk together cornmeal, flour, baking soda, baking powder, sea salt. Whisk in coconut milk, squash, coconut oil, and maple syrup until well combined. Whisk in cider vinegar quickly until just combined, then pour into prepared pan. Bake for 15-20 minutes until lightly golden on top and a toothpick inserted into the center comes out clean. Cool a few minutes before turning out from pans.


  • Vegan Mini Chocolate Hazelnut Tarts

    Vegan Mini Chocolate Hazelnut Tarts

    IMG_1537

    I was thinking all day Monday about what I wanted to make that night and I was sorta stumped.  I knew I wanted something dessert, and I knew I wanted to make something new that I hadn’t made before but I could not think of what.  Lots of things sounded good to me.  My  mind kept wandering back to pie or tarts.  I have been on a huge pie and tart kick lately.  I was roasting up some hazelnuts for a savory recipe, and snacking on them as I went, and it came to me.  Something hazelnut.  They were so good I just couldn’t resist.  Hazelnut chocolate.  Why not?!

    IMG_1539

    Everybody, myself included loves Nutella.  Right?!  I didn’t have any Nutella, but I did have hazelnuts, hazelnut butter, and chocolate on hand.  I was thinking sort of ganache tarts with the hazelnuts and just a plain crust to showcase the flavors of the deliciousness inside.  That was what I ended up making. It may sound involved, but it really was not a big time commitment to make.  I have had these mini tart pans for about 8 years and never used them. I would say this was the perfect time to break them out. And I have now decided that they need to be used more often than every 8 years.

    IMG_1538

    I love that these are individual, like you get an entire tart all to yourself!  I think they would be a good option for Thanksgiving too if you are serving chocolate lovers.  I shared one with my Mom and she was a huge fan of these, and I have a feeling your family will be too!  They are pretty darn crave worthy.

    IMG_1543


    Vegan Mini Chocolate Hazelnut Tarts

    Makes 16

    Crust:

    2 1/2 cups all purpose gluten free flour

    1/4 cup coconut sugar or maple sugar

    1/2 tsp sea salt

    3/4 cup coconut oil in its solid state

    about 6-7 Tbsp cold water

    Filling:

    8 oz vegan dark chocolate, chopped

    1/4 cup full fat coconut milk (from the top of the can)

    2 Tbsp hazelnut butter

    1 cup toasted hazelnuts

    To make the crust, in a large bowl, mix together flour, sugar, and sea salt. Cut in coconut oil with a pastry blender or 2 knives until it is in pea sized pieces. Mix in  just enough water to create a smooth dough that holds together but isn’t too sticky. Add more water if needed, and knead slightly until a smooth dough is created. Roll out into a rectangle using floured parchment underneath and floured rolling pin. Cut into 8 five inch circles.  Oil 8 four inch mini tart pans well with coconut oil and fit the circles into them. Shape to fit the pans, don’t worry if they tear, just press them back together. Set aside in the refrigerator.

    Preheat oven to 375F degrees, then place the tart shells in the oven and bake for about 20 minutes until lightly brown.  Remove from the oven and let cool.

    To make filling, combine all ingredients in a double boiler over low heat except the hazelnuts, whisk until the chocolate has melted and the mixture is smooth. Spoon the filling into the crusts and top with the hazelnuts. Place in the freezer for about 20 minutes until set.


  • Maple Chestnut Truffles

    Maple Chestnut Truffles

    IMG_1443

    I was so excited last weekend when I went to the store and saw chestnuts!  Every year I have to buy some to roast, because they are delicious and I love snacking on them.  Eric had never tried them before so even more of a reason to buy them this time. We snacked on some, but I decided that I wanted to use the rest in some sort of dessert.  I have always just roasted them and ate them as a snack in the past, but this year I actually wanted to try using them in things.  I decided to go simple with the first recipe though, and made truffles.

    IMG_1446

    I wanted the chestnut flavor to shine in the filling, so I included just a few ingredients.  Among them maple syrup as a sweetener, and it was delicious with the chestnut flavor.  I blended the filling until very smooth in the food processor and it was delicious.  Almost like a caramelly nut butter.  Once I rolled it into truffles, and dipped them in chocolate though it was heavenly!


    IMG_1451

    The dark chocolate was perfect with the vanilla maple chestnut filling to balance it out.  Simple, but delicious and I think anyone could appreciate these.  I cant wait to experiment more with chestnuts, they are sooo good!  Now if only I had an open fire to roast them on like the Christmas song!  I will have to settle for my oven for now.

    IMG_1452

    Maple Chestnut Truffles

    Makes 12

    Filling:

    3/4 cup chestnuts, roasted*
    3 Tbsp maple syrup
    1/4 cup coconut butter
    1/8 tsp sea salt
    2 tsp pure vanilla extract
    1/3 cup filtered water

    Coating:

    3/4 cup vegan dark chocolate, chopped

    In a high speed blender or food processor, combine all filling ingredients, and blend until smooth. Scoop out 1 1/2 inch balls onto a foil lined tray, and place in the freezer for about 20 minutes until you can shape them into neat little balls. Place back in the freezer.

    In the top of a double boiler, melt the chocolate.  Dip each little chestnut filling ball into the chocolate, then place back on the foil.  When you are all finished, place them back in the freezer until the chocolate sets.

    Store in the refrigerator for up to 2 weeks.

    *To roast the chestnuts, pre-heat the oven to 475F degrees.  Cut a small X into the top of each one with a knife, then spread them out on a sheet pan. Place in the oven and roast for about 20 minutes, or until they start to smell aromatic. Let cool, then peel them (It usually works to gently squeeze them to get a crack down the outside of the shell, then pop them out


  • Vegan Apple Raspberry Pie with Almond Streusel Topping

    Vegan Apple Raspberry Pie with Almond Streusel Topping

     IMG_1476
    My Mom recently told me about a pie she had enjoyed at a restaurant that was so good.  It was an apple raspberry pie with an almond crumble topping.  It sounded so good to me, that I decided I wanted to enjoy some too, so I decided to create one myself. Apples are plentiful this time of the year, and I had some frozen raspberries on hand, so I had no excuses.
    IMG_1477
    I used my usual gluten free crust enhanced with a little almond flour for extra richness and flavor, a perfect carrier for the sweet tart filling that it was to hold.  I used honeycrisp apples, my favorite since they have a nice crunch, and the perfect balance of tart and sweet.  Although the raspberries were frozen, once baked into the pie you could not tell. I topped it all off with an almond oat streusel, piled high for extra deliciousness (I tend to steal pieces of the streusel to snack on as the pie cools).
    IMG_1480
    It smelled amazing while baking, and I could not wait to try it.  The streusel was sweet, crunchy, and a little salty, a perfect topping for the jammy apple raspberry filling.  I enjoyed mine warm, the perfect way to enjoy fruit pie if you ask me.  Top it off with vegan ice cream or coconut whipped cream and you have something pretty delicious there!  One of my favorite types of comfort food this time of the year!
    IMG_1482
    Vegan Apple Raspberry Pie with Almond Streusel Topping

    Makes 1 8 inch pie

    Crust:
    3/4 cups all purpose gluten free flour
    3/4 cup almond flour
    2 Tbsp coconut sugar
    1/4 tsp sea salt
    5 Tbsp coconut oil, in its solid form

    about 2-3 Tbsp cold water

    Filling:

    3 cups diced sweet tart apples (such as honeycrisp)

    3 cups fresh or frozen organic raspberries (if they are frozen, thaw them first, and drain off any liquid)

    juice of one lemon

    1/4 cup coconut sugar

    2 Tbsp arrowroot powder or all purpose gluten free flour

    2 tsp pure vanilla extract

    pinch sea salt

    Topping:

    3/4 cup gluten free all purpose flour

    3 Tbsp coconut sugar

    3 Tbsp melted coconut oil

    1/2 cup rolled oats

    3/4 cup chopped almonds

    pinch sea salt

    To make the crust, in a large bowl, mix together flour, sugar, sea salt.  Cut in coconut oil with a pastry blender or 2 knives until it is in pea sized pieces.  Mix in just enough water to create a smooth dough that holds together but isn’t too sticky.  Add a touch of water if needed, and knead slightly until a smooth dough is created.
    Roll out into about a 10 inch round using parchment underneath and floured rolling pin.  Place bottom crust into an 8 inch pie pan and fit to edges (being careful since gluten free dough is more fragile). If it tears, no worries, just press it back together and patch it up. Flute the edges, or crimp with a fork. Set aside in the refrigerator.
    To make the topping, combine all ingredients in a bowl, and mix together and squeeze together until it is clumping up a bit.  Set aside.

    Pre-heat the oven to 400F degrees. In a large bowl, toss together the filling ingredient. Spoon into crust.  Scatter the topping over that. Bake for 1 hour in the middle rack of the oven until apples are cooked through and bubbling (after 15 minutes check it and if it is getting too dark, tent it with foil for the rest of the time in the oven).

    Remove from oven and let cool until warm, and top with some ice cream or coconut vanilla whipped cream and…enjoy!

    IMG_1483


  • Vegan Sweet Potato Cranberry Pancakes

    Vegan Sweet Potato Cranberry Pancakes

    IMG_1457

    Last Thursday, It was a rather chilly day, and Eric and I had just arrived back from a walk in the in the dark. It was sleeting, which had made it even more chilly, and all I could think about was what sort of warm comfort food I was going to make when I arrived home.  My first thought was waffles, and so I went for it.  Sweet potato cranberry waffles.  Sounded really good.  I had lots of cooked sweet potatoes on hand.  I whipped up the batter, poured it into the iron and they were smelling amazing.  Only one problem.  When I went to open the iron, they were sticking really bad.  A total flop.  Yes, I have some flops I just don’t usually share them with you all.  It was sort of funny, and sort of sad at the same time.  Also a little irritating since I hate wasting ingredients.  I tossed the flops out though, and decided pancakes would be fail proof.

    IMG_1458

    I made them sweet potato cranberry as well, and they came out lovely.  This made me pretty happy after the flop.  Eric was teasing me about my flop waffles, but I still shared some pancakes with him.  They turned out really delicious!  They smelled wonderful while cooking, thanks to the aromatic spices I included and sweet potatoes.

    IMG_1459

    I topped them off with a maple pecan syrup, and it was all in all a delicious combination!  Breakfast for dinner is a treat sometimes, and needed sometimes.  Kind of makes me feel like a little kid again, because I always loved it when my Mom made pancakes or waffles for dinner when I was young.  These would also be perfect on a chilly weekend morning when you have time to relax and enjoy the day!

    IMG_1461

    Vegan Sweet Potato Cranberry Pancakes

    Makes 3 Belgian Waffles

    2 Tbsp ground flax seed

    1/4 cup plus 2 Tbsp filtered water

    2 cups gluten free all purpose flour

    3/4 tsp sea salt

    1 tsp baking powder

    1/4 tsp baking soda

    1/2 cup coconut sugar

    1 1/4 cups thin coconut milk  at room temperature

    3/4 cup sweet potato puree

    3 Tbsp melted virgin coconut oil warmed to liquid

    1/2 cup dried cranberries

    Maple Pecan Syrup Drizzle:

    2 Tbsp maple syrup

    1/4 cup pecan butter

    1-2 Tbsp filtered water or as needed

    In a small bowl, whisk together the flax seed and water, and set in the fridge for 15 minutes until the mixture is gel like.
    Meanwhile, whisk together the flour, salt, baking powder, baking soda, and coconut sugar in a large bowl.  Whisk in the coconut milk, sweet potato and oil until combined, then the flax eggs (flax water mixture) until combined. Stir in the cranberries.

    To cook pancakes, preheat oven to 200 degrees. Heat a large non-stick pan over medium heat and add a little coconut oil to coat the bottom. Once hot, add the batter in 1/4 cup amounts (I did 3 at a time, but it depends on your pan). Let the pancakes cook for about 2-3 minutes on the first side until set and starting to brown, then flip with a spatula and cook another 2-3 minutes on the other side. When cooked, place on a plate and keep warm in the oven while you repeat the process with the remaining pancakes.

    To drizzle, whisk together all ingredients until smooth (if it is too thick to drizzle, whisk in a little more filtered water), then drizzle over the pancakes before serving.


  • Sweet and Spicy Double Squash Salad

    Sweet and Spicy Double Squash Salad

    IMG_1437

    I can never get enough of squash when it comes into season. It is so good roasted especially, and butternut and buttercup are so sweet that they almost taste like dessert to me.  So I eat it about as much as I can while I can get the local varieties.  It is kind of addictive.  One year, when I was younger, my Mom said I had a squash tan, because I ate so much it tinted my skin a little orange.  I did not mind though.  I try to be a little more balanced with my veggies now, getting a variety of different ones, but if I had to pick one veggie this time of the year, it would be squash.  The other night, I decided I wanted to enjoy a simple squash salad for dinner, and it turned out so tasty that I decided I needed to share the recipe with you all.

    IMG_1439

    I actually had butternut squash and zucchini, so it ended up being a double squash salad!  I roasted them both to deliciousness, then tossed them with cranberries, a sweet and spicy dressing with jalapeno, maple syrup, citrus and toasted cumin.  lastly, I made some spiced pumpkin seeds to sprinkle over it all.  Was it ever delicious!  I served it with grilled tempeh on the side, and it made the perfect autumn dinner!

    IMG_1441

    Serves 2-3

    1 large (or 2 smaller) butternut squash, peeled, seeded and cubed

    4 medium zucchini, cut into thick half moons

    olive oil

    sea salt

    Spiced Pumpkin Seeds:

    1/2 cup pumpkin seeds

    1 Tbsp maple syrup

    sea salt to taste

    1/4 tsp cinnamon

    1/8 tsp ground chipotle peppers

    1 Tbsp coconut sugar

    Dressing:

    2 Tbsp lemon juice

    1 Tbsp maple syrup

    1 Tbsp olive oil

    1 tsp toasted whole cumin seeds

    1/4 tsp red pepper flakes

    1/2 jalapeno, seeded and minced

    sea salt to taste

    1/2 cup cranberries

    To prepare the squash, heat the oven to 400F degrees, and oil 2 sheet pans.  Toss the butternut squash with just enough olive oil to coat, and spread out on one of the sheet pans.  Do the same with the zucchini.  Place both in the oven and roast until the squash is tender.  About 20-30 minutes for the zucchini, and about 40-50 minutes for the squash (rotate the pans half way through).  Once they are done, let cool until just warm.

    Meanwhile, to make the pumpkin seeds, add all ingredients but the sugar to a pan, and cook over medium heat until the seeds are toasted and the syrup starts to evaporate.  Add the coconut sugar and stir to coat. Remove from heat.

    Whisk together dressing ingredients in a small bowl.

    In a large bowl, combine the squash, the cranberries, and the pumpkin seeds, and toss together until well coated.  Serve!


  • Vegan Pumpkin Pull Apart Bread

    Vegan Pumpkin Pull Apart Bread

    IMG_1433

    My Grandma used to make the most wonderful thing in the world (at least to my five year old self), monkey bread.  In case you have never heard of it, it is  bread that is shaped into little balls, all baked together with cinnamon sugar that becomes gooey and caramel like, and pecans.  It was good stuff, and I always got excited when Grandma had some sitting on her counter when I came over.  Which she often did.  I have since made a few versions of it as an adult, and I think they would have made Grandma proud.  I decided this week that I wanted to make some again, because I was craving it.  I had been given some lovely sprouted whole wheat flour  that I could use in my recipe too! I don’t use a lot of wheat in my baking, but when I do, I make sure it is organic.

    IMG_1434

    This time I made a pumpkin pull apart bread.  Since I had pumpkin on hand as well, and tis the season.  I wanted a smaller loaf than Grandma used to make, so I made the recipe about half as large, and baked it in a loaf pan instead of a bundt.  I used maple sugar and maple syrup  instead of all of the brown sugar, which also gave it an awesome maple flavor.  It smelled amazing, and the caramel lover that I am, I fully enjoyed this!  I think it would be the perfect treat for a weekend morning, especially if it is chilly and you want to warm the house while baking something delicious.

    IMG_1436

    Vegan Pumpkin Pull Apart Bread

    Makes one 8×4 inch loaf
    Dough:
    1 packet rapid rise yeast
    1 1/2 tsp maple syrup
    1/2 cup warm water
    1/2 cup coconut milk or almond milk

    1/2 cup plus 2 Tbsp maple sugar

    1/2 cup pumpkin puree or canned pumpkin

    2 Tbsp coconut oil

    1 Tbsp pure vanilla extract

    2 tsp maple extract

    1 1/2 tsp sea salt

    2 tsp cinnamon

    2 tsp ginger

    1/2 tsp nutmeg

    1/4 tsp cloves

    4 cups organic sprouted whole wheat flour (plus additional as needed)

    3/4 cup chopped pecans

    Coating:

    1/2 cup maple sugar

    1 1/2 tsp cinnamon

    Topping:

    2/3 cup pecan butter

    1/2 cup maple syrup

    1/2 cup maple sugar

    1/4 cup filtered water

    good pinch sea salt

    In a large bowl, combine yeast, 1 Tbsp maple syrup and water. Let sit 5 minutes, until yeast is foamy, then add coconut milk, maple sugar, pumpkin, coconut oil, maple extract, vanilla, and sea salt. Mix well, then add the flour 1 cup at a time until dough is not sticky. Place dough on a lightly floured surface, and knead until smooth and elastic, about 10 minutes. Place in an oiled bowl, cover with plastic wrap, and place in a warm area to rise for about an hour, or until doubled in bulk. Oil a 4×8 inch bread pan with coconut oil. Scatter some of the pecans into the bottom of the pan. When dough has risen, punch it down, and divide into 16 pieces, and cut each into quarters. Combine 1/4 cup maple sugar and 2 tsp cinnamon in a large ziplock bag. Place half dough balls in bag, zip up, and shake in bag to coat. Remove from bag and repeat with remaining balls. Place dough balls into the pan, scattering in pecans as you go as well. In small bowl, for topping, mix together ingredients. Whisk until well combined and sugar is dissolved. Pour half over the dough balls. Cover with plastic wrap and place in a warm place to rise. Let rise until almost doubled in bulk, about 35-45 minutes. Meanwhile, preheat oven to 375 degrees with the rack set at the middle position. Bake for 20-25 minutes, until golden brown and done in the center (keep a close watch as it browns quickly, and if it is brown after only 10 minutes, cover with foil and continue to bake until done). Remove from oven and let cool slightly, about a minute, then invert onto foil. Drizzle the remaining topping over it. Serve warm!


  • Vegan Italian Sausage Casserole

    Vegan Italian Sausage Casserole

    IMG_1424

    My Mom used to make a casserole when I was little that was one of my favorite things.  It had pasta, a flavorful red sauce, sausage, and cheese. I could have done without the sausage, because I have never been a meat fan, but it always tasted amazing, like lasagna but so much easier to make for my Mom.  I decided this week, that I wanted to recreate a vegan version of this pasta.  I have lots of pasta in my cupboard, all of the bean variety.  You know, made from lentils and edamame?  Wonderful food invention I have been loving lately since I am always looking to add more protein to my meals, and I try to stay away from gluten the majority of the time.  If you haven’t heard of it, check it out HERE.

    IMG_1425

    So anyways, back to the pasta dish I made, instead of the sausage I opted for chickpeas, since I have used them as a substitute for pasta before.  I made a flavorful red sauce, with all of the seasonings my Mom used to include, and made  a vegan mozzarella so that it could still have the melty cheese on top that I loved so much.  Once it was all bubbly delicious from its time spent in the oven, I could not wait to try it.  It smelled wonderful and just as good as my Mom’s, and it tasted even better.  This dish would be perfect to serve to non-vegans to prove to them that they can still have cheesy comfort food.

    IMG_1429

    Vegan Italian Sausage Casserole

    Serves 4

    Vegan Mozzarella:

    1 15 oz can full fat organic coconut milk

    2 Tbsp arrowroot starch

    1/4 plus 1 Tbsp filtered water

    1 Tbsp agar powder

    2 tsp lemon juice

    1 tsp sea salt or Himalayan salt

    1 Tbsp virgin coconut oil

    1 tsp guar gum

    Pasta:

    6 oz Green lentil spiral pasta

    Sausage and Sauce:

    2 tsp olive oil

    2 garlic cloves, minced

    1 tsp dried basil

    1 tsp dried oregano

    1/2 tsp fennel seeds

    1/4 tsp red pepper flakes

    1 1/2 cups cooked garbanzo beans

    sea salt to taste

    1 28 oz can tomatoes

    To make the mozzarella cheese, heat the coconut milk in a saucepan, until it comes to a simmer.

    Meanwhile, dissolve the arrowroot starch in the water and set aside.

    Once the coconut milk has come to a simmer, add the agar powder, and heat until it is dissolved , it should dissolve within one minute.

    Next, add the lemon juice and sea salt to the coconut milk.

    Mix the coconut oil with the guar gum so that the guar gum does not clump up.

    Turn off the heat and add the arrowroot mixture, guar gum and coconut oil. Whisk for about 30 seconds, then pour into a silicone mold (I used a loaf pan, but if you had another shape you would like to use go ahead). Refrigerate for a few hours until firm, then pop out of the mold. Shred into a bowl, and keep in the refrigerator until ready to use.

    Cook pasta according to package directions and set aside.

    To make the sausage and sauce, heat olive oil in a saucepan, add garlic and herbs and cook for a minute until fragrant.  Add the chickpeas, and cook for a few minutes, mashing them against the side of the pan.  Add the tomatoes, and simmer for about 15 minutes to allow the flavors to blend.  Once it has finished cooking, stir in the pasta, then 1/2 the cheese.  Pour into an oiled baking dish, and sprinkle with the remaining cheese.

    Place in the oven and bake for about 20 minutes until bubbling and cheese has melted.


  • Vegan Sweet Potato Tart with Cinnamon Pecan Streusel Topping

    Vegan Sweet Potato Tart with Cinnamon Pecan Streusel Topping

    IMG_1403

    I love, love, love sweet potatoes and yams. One of my all time favorite things is to roast them until they are intense in flavor and then just enjoy them with a squeeze of lime and sea salt, or to make fries out of them with a little olive oil and sea salt.  So good.  Almost like dessert even though it is savory.  I made a sweet potato casserole last week with maple pecan topping and it was so good I decided to make a pie in a similar fashion.  Just a little sweeter of course since this was to be dessert and not just a side dish.

    IMG_1404

    I had about 2 cups of cooked sweet potatoes, so that pie became a tart, but it was still just as good.  I used my usual gluten free pie crust, because I wanted all of the attention to be on the filling and it is a perfect blank palette.  For the filling, a bit of maple syrup, cinnamon and vanilla to flavor and it was so good. Sweet potatoes are so good to begin with, they don’t need much added to create dessert.

    IMG_1406

    I topped it off with a crunchy pecan streusel topping, and it smelled amazing while baking.  Like spiced brown sugar and sweet potatoes, an aroma that I wouldn’t mind wearing around like a perfume it smells so wonderful.  It tasted wonderful too once I allowed to cool and was able to dive in.  Sooo good.

    IMG_1408

    This would be a nice alternative to pumpkin pie for Thanksgiving!  Or, if you happen to roast up some yams and have extra, you know what to do with them now!

    IMG_1407

    Vegan Sweet Potato Tart with Cinnamon Pecan Streusel Topping

    Makes one 8 inch tart

    Crust:

    1 1/4 cups all purpose gluten free flour

    2 Tbsp coconut sugar or maple sugar

    1/4 tsp sea salt

    1/4 cup plus 2 Tbsp coconut oil in its solid state

    about 3-6 Tbsp cold water

    Filling:

    2 cups cooked yams or sweet potatoes, packed

    1/3 cup pure maple syrup

    1 cup full fat coconut milk

    2 tsp pure vanilla extract

    2 tsp coconut oil

    1/4 teaspoon ground cinnamon

    1/4 teaspoon salt

    1 1/2 tablespoons cornstarch

    3/4 teaspoon agar powder

    Topping:

    2 Tbsp coconut oil in its solid state

    2 Tbsp coconut sugar

    1/3 cup gluten free all purpose flour

    1/2 cup chopped pecans

    1/2 teaspoon ground cinnamon

    To make the crust, in a large bowl, mix together flour, sugar, and sea salt. Cut in coconut oil with a pastry blender or 2 knives until it is in pea sized pieces. Mix in  just enough water to create a smooth dough that holds together but isn’t too sticky. Add more water if needed, and knead slightly until a smooth dough is created. Roll out into a 9 inch circle on a sheet of parchment paper, then use the paper to help you transfer it to an 8 inch tart pan (if it rips, just patch it and press back into shape).  Set aside in the refrigerator.

    Pre-heat the oven to 375F degrees.

    To make the filling, place all ingredients in the blender and blend until smooth, then pour into the prepared crust.

    In a bowl, mix together the streusel ingredients with your hands until they clump up (it helps to squeeze them together with your fingers).  Sprinkle the streusel over the pie.

    Place in the pre-heated oven and bake for about  40-45 min. until the edges of the crust are lightly brown, and tart is set.  Allow to cool completely.

    Serve with coconut whipped cream if desired.


  • Raw Cranberry Pecan Truffles

    Raw Cranberry Pecan Truffles

     IMG_1393

    It is the time of year when I find myself adding cranberries to everything.  Salads, desserts, savory dishes…they are so pretty, like little red jewels, plus they are delicious.  I am one of those people who likes tart things.  Anyways, I decided last week one night that some cranberry pecan truffles sounded amazing.  I love pecans as well, they are so buttery and delicious and I thought they would go perfect with the tart berries.

    IMG_1395

    I wasn’t sure exactly how I was going to make them when I started, and just started adding things to the food processor, and what I ended up with was pure deliciousness.  I was going to add cacao powder into the mixture, but I decided I liked it as it was with the pecans and cranberries as the stars and the main thing that I tasted.  I did however dip them in raw chocolate because I wanted a little chocolate to go with them but still be able to taste the delicate flavors.

    IMG_1397

    I think these would make lovely holiday gifts, but you could of course make a batch for yourself, because you deserve to enjoy delicious things and feel special.  These are easy to make, so no excuses not to try them!

    IMG_1398

    Raw Cranberry Pecan Truffles

    makes 12

    1 cup dried cranberries

    1/2 cup soft, pitted medjool dates

    2 cup raw pecans

    1 cup finely shredded, dried coconut

    1 tsp cinnamon

    1 Tbsp orange zest

    1/8 tsp sea salt

    1/2 cup raw chocolate, chopped

    Combine all ingredients in a food processor and process until the mixture holds together when squeezed. Shape into 12 balls, and place in the freezer for 15 minutes.

    Melt the raw chocolate either over a double boiler (not letting it get above 115F degrees), or pop it into the dehydrator at 115F degrees, and stir about every 10 minutes until it melts.

    Dip each cranberry pecan ball into the melted chocolate and set on a foil or parchment lined tray (I like to use a fork to set it on and dip it to let the excess drain off). Allow to set, place in the freezer for 15 minutes.  Store in an airtight container in the refrigerator for 2 weeks.


  • Vegan Pumpkin Cinnamon Roll Pancakes (gluten free)

    Vegan Pumpkin Cinnamon Roll Pancakes (gluten free)

     IMG_1378
    I asked Eric what I should make one night last week and he said cinnamon rolls.  But unfortunately it was a work night, and I didn’t have a lot of time to let those babies rise, so I couldn’t make them.  But they sounded really good to me too, so I thought I would find a way to make them…and I did.  Sort of.  You see, pancakes also sounded good to me so I told him I would make cinnamon roll pancakes.  He loved the idea so I went with it. They were sounding so good to me the more I thought about them.
    IMG_1376
    I had an open can of pumpkin, so I thought I would make them pumpkin as well, since it is fall and this time of the year pumpkin puree is my go to ingredient for keeping things moist and lowering fat in recipes.  I added pumpkin pie spices as well, because why not?  It was going to be pumpkin after all.  I also added flax and Sprout Living vanilla lucuma protein powder to the batter to give these a little extra protein boost. I made a little cinnamon swirl, and piped it over the pancakes in a spiral and they were transformed into a cinnamon roll pancake hybrid.
    IMG_1380
    The swirl sort of melted as they cooked but it worked!  Sort of like real cinnamon rolls where the cinnamon seeps into the dough as they bake. They smelled amazing. I drizzled them with a coconut milk based “cream cheese” icing and it was perfect!  All of the flavors in the cinnamon rolls me and Eric wanted but in pancake form.  I will have my cinnamon rolls when I get the time eventually, but until then I have this deliciousness to enjoy!
    IMG_1382
    Vegan Pumpkin Cinnamon Roll Pancakes (gluten free)
    Serves 2
    Ingredients:
    2 Tbsp ground flax seed
    1 tsp aluminum-free baking powder
    1 Tbsp cinnamon
    1 tsp ginger
    ¼ tsp nutmeg
    ¼ tsp cloves
    1/2 cup pumpkin puree
    1 cup filtered water
    2 tsp pure vanilla extract
    1/4 tsp sea salt
    2-3 Tbsp maple syrup (depending on how sweet you like them)
    Swirl:
    1/4 cup maple syrup
    2 Tbsp coconut sugar
    2 Tbsp pecan butter (or almond butter)
    1 Tbsp cinnamon
    Cream cheese drizzle:
    1/4 cup thick coconut milk
    2 Tbsp raw cashew butter
    2 tsp maple syrup
    pinch sea salt
    1 tsp cider vinegar
    In a food processor, combine all pancake ingredients and process until just blended, pour into a bowl and set aside (or whisk them together if you do not have a food processor).
    To make the swirl, whisk together all ingredients in a bowl, then place in a pastry bag with a small tip (or a ziplock bag with the corner cut off).
    To cook pancakes, preheat oven to 200 degrees. Heat a large non-stick pan over medium heat and add a little coconut oil to coat the bottom. Once hot, add the batter in 1/4 cup amounts (I did 3 at a time, but it depends on your pan), pipe the swirl over the pancake snail style from the outside to the inside in a spiral fashion. Let the pancakes cook for about 2-3 minutes on the first side until set and starting to brown, then flip with a spatula and cook another 2-3 minutes on the other side. When cooked, place on a plate swirl side up and keep warm in the oven while you repeat the process with the remaining pancakes.
    To make the cream cheese drizzle, whisk together all ingredients until smooth (if it is too thick to drizzle, whisk in a little more milk or filtered water), then drizzle over the pancakes before serving.


  • Peanut Maple Crunch Granola

    Peanut Maple Crunch Granola

     IMG_1369

    I asked Eric what type of granola I should make last week.  He said something maple.  I wanted to make something new not something I had made before because I like to always try something new when it comes to making food, so o decided maple with peanut butter.  Because peanuts with a little salt and something sweet are pretty crave worthy.  Think PB cookies.  One of the most delicious things in the world.  At least to me because I am a crazy peanut butter lover.

    IMG_1370

    So, peanut butter and sweet maple it was.  Kind of simple I know, and maybe not the prettiest stuff but it tasted damn good.  Like crave worthy good.  I don’t eat my granola for breakfast, I eat it for a crunchy snack, but I still like it to have some healthy things in it.  In this one I included chia seeds and flax seeds along with the oats, peanuts, and buckwheat for crunch.  You may wonder why I dehydrated this granola instead of baking it since it is not a completely raw recipe because I used roasted peanuts and peanut butter.  Well, I like the texture and flavor of dehydrated granola.  I did not want it to brown, and all of the ingredients were raw except the peanuts, peanut butter and maple syrup. I like to combine raw and cooked food because even partial raw foods in your daily meals is beneficial. If you wanted this completely raw, you may use raw jungle peanuts and peanut butter. Either way, if you are a PB fan, this granola should be on your to make list!

    IMG_1372

    Peanut Maple Crunch Granola

    Makes about 8-10 cups of delicious granola

    3 cups gluten free raw rolled oats

    3 cups activated buckwheat* or just 3 more cups oats

    2 cups organic peanuts

    1/2 cup ground flax seeds

    1/2 cup chia seeds

    1 cup organic peanut butter

    1/2 cup filtered water

    1/2 cup maple syrup or raw coconut nectar

    1 1/2 tsp sea salt

    1 Tbsp pure vanilla extract

    1 tsp maple extract
    In a large bowl, combine oats, peanuts, flax seed, chia seeds, and set aside. In another bowl, whisk together peanut butter, water, maple syrup, sea salt and vanilla and maple extracts until well combined, then pour over oat mixture and toss to coat until completely blended. Pour out onto 2 lined dehydrator trays, and dehydrate at 115F for 24 hours or until crispy. Alternatively you may make the granola in an oven at low temperature, 150F degrees, and it will take less time to dry.

    *To activate the buckwheat, soak raw buckwheat groats for 30 minutes in filtered water, then rinse and drain well.


  • Vegan Mini Pecan Pies

    Vegan Mini Pecan Pies

    IMG_1357 (2)

    Pecan pie was always my Mother and Grandmother’s favorite dessert when it came to Thanksgiving desserts. My Grandma would always serve apple, pumpkin and pecan, and the pecan was always the pie that had some left over because most people in my family are not huge nut fans and prefer the apple and pumpkin.  I always had to have a slice of each type of pie.  It was Thanksgiving after all, and that was what I had really been looking forward to all day, the desserts.  I enjoyed the pecan.  I mean what is not to love about caramelly pie filled with delicious rich pecans in a buttery crust?!  I guess I am biased though because I love pecans and other types of nuts.

    IMG_1359

    I have never actually baked a vegan pecan pie, and I am in Thanksgiving recipes mode so I decided I had to this year.  But I didn’t want a giant one at the time, so I went for mini pecan pies using a muffin pan as my pie pan. I was crossing my fingers that they would come out of the pan intact since I secretly always worry when I make pies in a not removable bottom pan but they came out beautifully!  Instead of the usual corn syrup and brown sugar that go into the crust, I used a date caramel laced with pecan butter.  Pretty much what I make my caramel out of but thicker.  OMG was it ever good.  I mixed the pecans into this, and it made the perfect filling.

    IMG_1361

    I used my gluten free coconut oil pie crust recipe, because it is my favorite lately and the flaky crust was perfect with the sweet filling.  These were even better than I remember pecan pie.  The best part is you don’t have to cut pieces of pie with these, you get your own cute little pie!  These can be made ahead, so I think they would be perfect for Thanksgiving.

     IMG_1364

    Vegan Mini Pecan Pies

    Makes 16

    Crust:

    2 1/2 cups all purpose gluten free flour

    1/4 cup coconut sugar or maple sugar

    1/2 tsp sea salt

    3/4 cup coconut oil in its solid state

    about 6-7 Tbsp cold water

    Filling:

    2 cups soft pitted medjool dates (if they are not soft, soak them in filtered water for 30 minutes and drain well before using)

    1/2 cup pecan butter

    2 Tbsp maple syrup

    1/4 tsp sea salt

    2 tsp pure vanilla extract

    1/2 cup filtered water

    2 Tbsp coconut butter or oil

    1 1/2 cups toasted pecans, plus more for pie tops

    To make the crust, in a large bowl, mix together flour, sugar, and sea salt. Cut in coconut oil with a pastry blender or 2 knives until it is in pea sized pieces. Mix in  just enough water to create a smooth dough that holds together but isn’t too sticky. Add more water if needed, and knead slightly until a smooth dough is created. Roll out into a rectangle using floured parchment underneath and floured rolling pin. Cut into 16 circles.  Oil a muffin pan well with coconut oil and fit the circles into the holes. Shape the edges that stick out if desired (I fluted mine). Preheat oven to 375F degrees. To make filling, combine all ingredients in a high speed blender or food processor except the pecans. Process until smooth, then scrape into a bowl and stir in the pecans. Spoon the filling into the crusts in the pie tin, and top with more pecans to make the tops look pretty. Place in the oven. Bake for about 30 minutes until the crusts are starting to brown lightly. Remove from oven and let cool on a wire rack until warm.

    IMG_1363


  • Vegan Butternut Squash Apple Pie

    Vegan Butternut Squash Apple Pie

    butternut-squash-and-apple-pie-4

    Eric recently made his own pumpkin pie from scratch (like roasting the pumpkins and all). His turned out so cute, he made mini ones, and it made appreciate the fact that he can bake if he wants to.  I can’t say I can say that about any other guys I have had in my life so I consider it impressive. It got me wanting to make my own similar pie.  But with squash, because I actually like squash better than pumpkins.  I made a squash pie a long time ago before I was vegan and it was so good!  It was time to try again.

    butternut-squash-and-apple-pie-3

    I am really picky when it comes to squash I like to buy and eat. The two I like the best are kabocha and butternut. Both really sweet squash varieties that bake up nicely.  I used butternut for my pie this time. I haven’t made a straight up pumpkin type pie in a while, so I was looking forward to this! But I wanted to add another element to it as well.  I have been really craving apple pie lately, so I made a layer of apple pie on top of the crust before the squash filling.

    butternut-squash-and-apple-pie

    I used haralsons for that, my favorite baking apple introduced to me by my Mom who made the best apple pie when I was younger.  The squash filling was sweetened with maple syrup, made rich with coconut milk, and it had all the spices I use in my pumpkin pie.  It smelled delicious while baking with all of the warm aromatic spices filling the kitchen.

    butternut-squash-and-apple-pie-2

    It tasted even better!  I always used to have pumpkin and apple pie on thanksgiving anyhow, so if you made this for Thanksgiving you would just have to cut yourself one piece.  The butternut squash is even sweeter and silkier than pumpkin which I love.  If you have butternut squash and apples on hand you should really give this a go.  You might find that you want to serve it for Thanksgiving this year!

    butternut-squash-and-apple-pie-1

    Vegan Butternut Squash Apple Pie

    Makes one 8 inch pie

    Crust:

    1 1/4 cups all purpose gluten free flour

    2 Tbsp coconut sugar or maple sugar

    1/4 tsp sea salt

    1/4 cup plus 2 Tbsp coconut oil in its solid state

    about 3-6 Tbsp cold water

    Apples:

    3 medium tart sweet apples, diced

    1 tsp cinnamon

    1/4 cup coconut sugar

    pinch sea salt

    juice of one lemon

    Filling:

    2 cups cooked butternut squash, packed

    1/3 cup pure maple syrup

    3/4 cup full fat coconut milk

    2 tsp coconut oil

    1 1/4 teaspoon ground cinnamon

    1 teaspoon ground ginger

    1 /4 teaspoon ground nutmeg

    1/4 tsp ground cloves

    1/4 teaspoon salt

    1 1/2 tablespoons cornstarch

    3/4 teaspoon agar powder

    To make the crust, in a large bowl, mix together flour, sugar, sea salt, and spices. Cut in coconut oil with a pastry blender or 2 knives until it is in pea sized pieces. Mix in  just enough water to create a smooth dough that holds together but isn’t too sticky. Add more water if needed, and knead slightly until a smooth dough is created. Roll out into a 9 inch circle on a sheet of parchment paper, then use the paper to help you transfer it to an 8 inch pie dish.  Flute the edges, and set aside in the refrigerator.

    Pre-heat the oven to 375F degrees.

    To make the apples, place them in a sautee pan over medium heat with all of the other ingredients, cover with a lid, and cook until the apples are tender, about 10 minutes. Set aside.

    To make the squash filling, place all ingredients in the blender and blend until smooth.

    To assemble the pie, scatter the apples over the crust, then pour the filling over that.

    Place in the pre-heated oven and bake for about  40-45 min. until the edges of the crust are lightly brown, and pie is set.  Allow to cool completely.

    Serve with coconut whipped cream if desired.