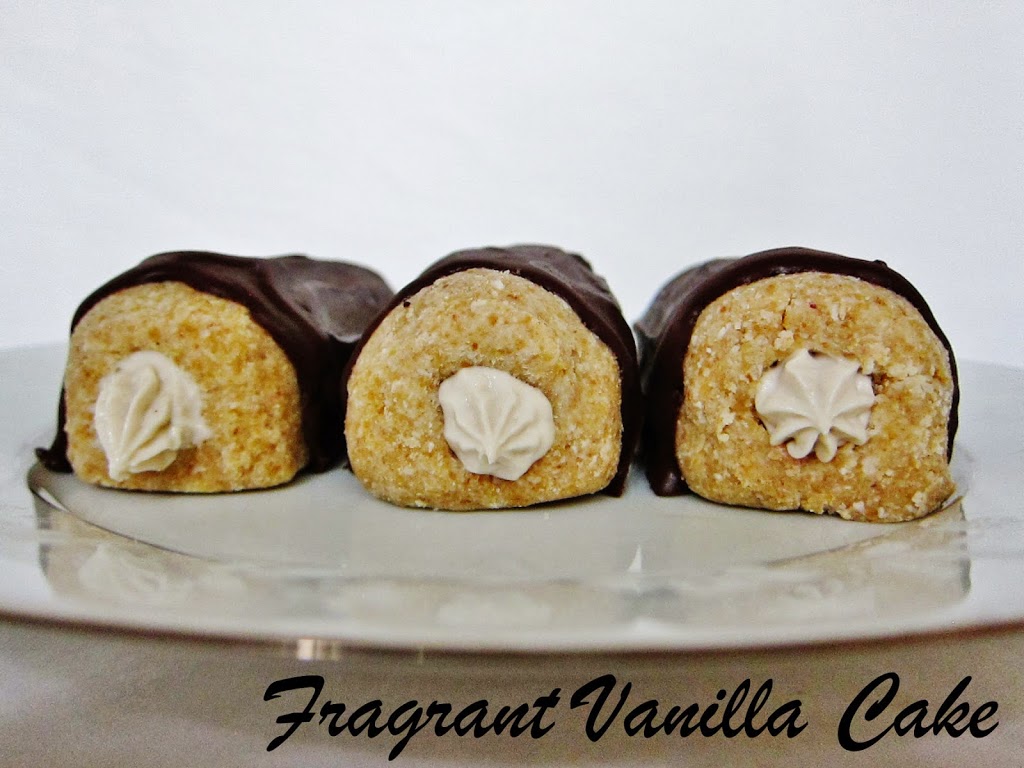
Raw Chocolate Covered Twinkies
America is obsessed with Twinkies. I never understood that. In fact, if I were going to have a packaged snack, I always preferred the oatmeal cream pies over Twinkies any day. Maybe I am weird...or I just have different tastes. To me they tasted a little artificial, even as a child. So, if they weren't my favorite, then why did I make a raw version? Well, two reasons. First off, I figured that the rawified version would be way better than the original, and I love vanilla cake and cream...so why not? Second, my boyfriend Eric asked me to make some a while back and I finally decided to give it a go. I knew they would not be the spongy consistency of the popular packaged snack, but that didn't bother me. I decided that I didn't want to dehydrate these babies this time (I am impatient lately), so I made a simple batter which didn't require it.
The batter was freaking amazing and I admit to enjoying so much of it that it sort of became my dinner that night (sorry, not sorry). I made a simple coconut cream to fill them, and although I knew they would be delicious as was, I started to think they would be even better with a chocolate glaze. Now, I know that is not how the classic Twinkies come, but I don't care, I am not a purist.
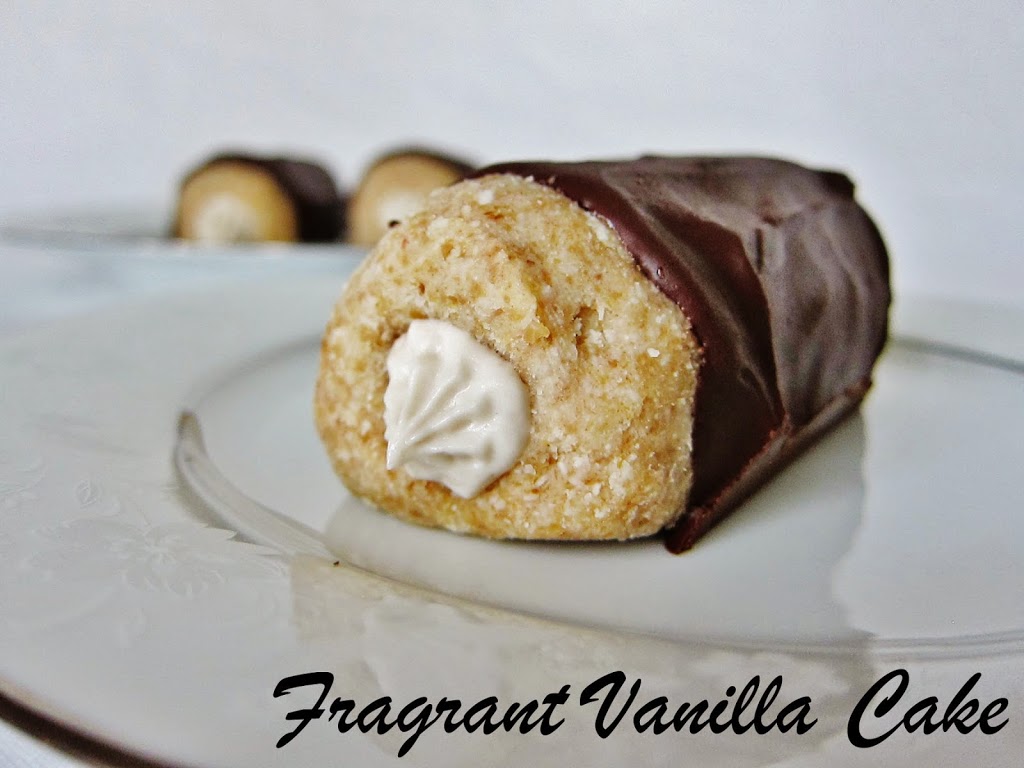
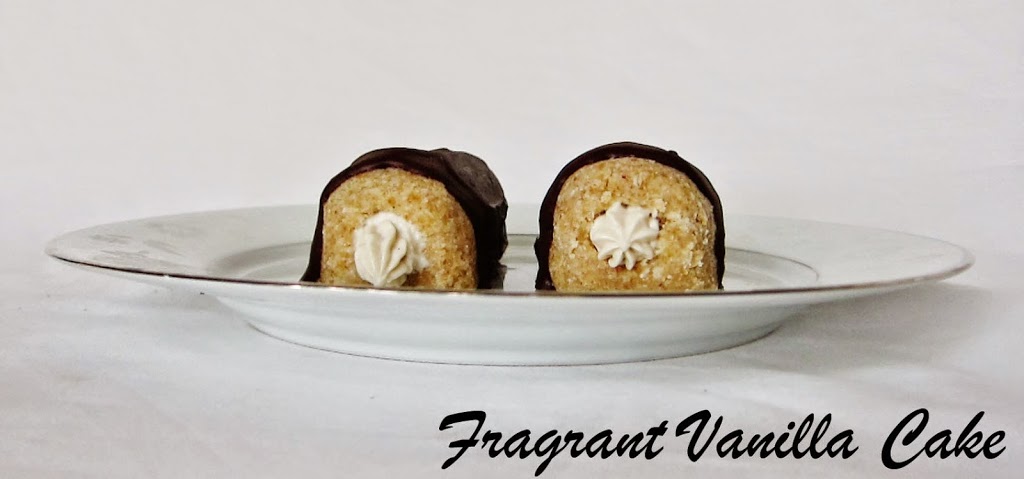
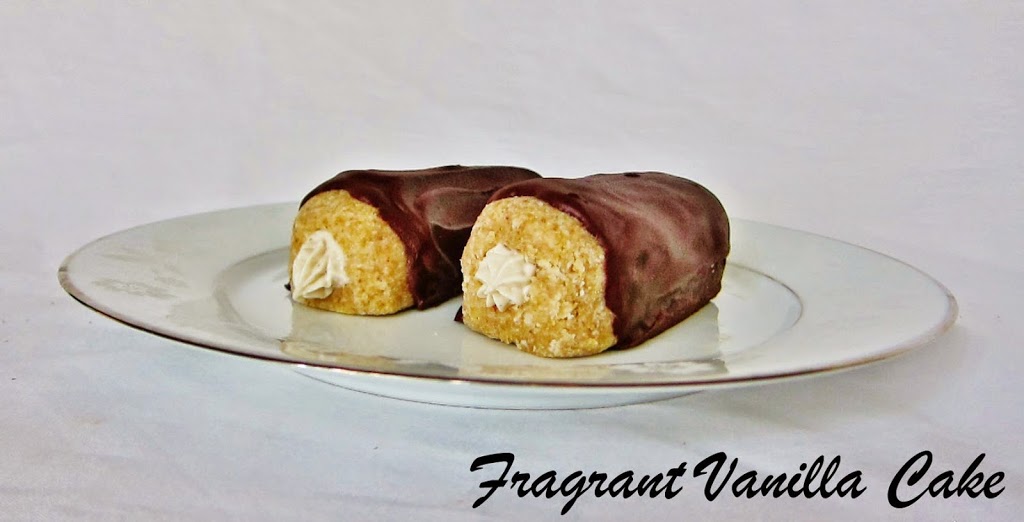
I like this version way better than the original! Flavorful vanilla cake, silky vanilla cream, and decadent dark chocolate...nothing like the fake tasting spongy cake and fake cream of the original. If Twinkies were originally made like this when I was a kid, I think I would have actually liked them.

Raw Chocolate Covered Twinkies
Makes 6
2 cups fresh young coconut meat*
1/4 cup raw coconut nectar, or your choice of raw liquid sweetener
1 Tbsp pure vanilla extract and seeds of a vanilla bean
1/4 cup plus 2 Tbsp raw coconut butter (warmed to liquid)
Cake:
5 1/2 cups finely shredded, dried coconut
1 1/2 cups soft medjool dates, pitted (if not soft, soak them in filtered water 30 minutes and drain well)
1 Tbsp pure vanilla extract
1/4 tsp sea salt
1 1/2 cups finely ground golden flaxseed
1 cup coconut water
1/4 cup plus 2 Tbsp raw cacao powder
2 Tbsp raw coconut nectar or your choice of liquid raw sweetener
a pinch sea salt
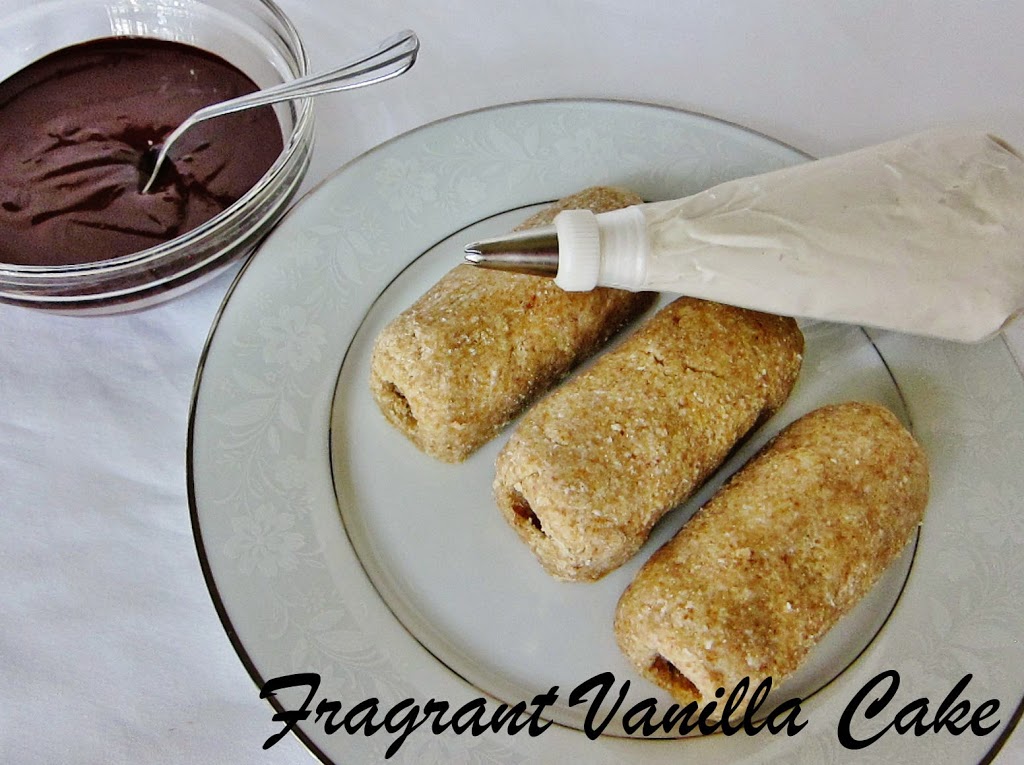
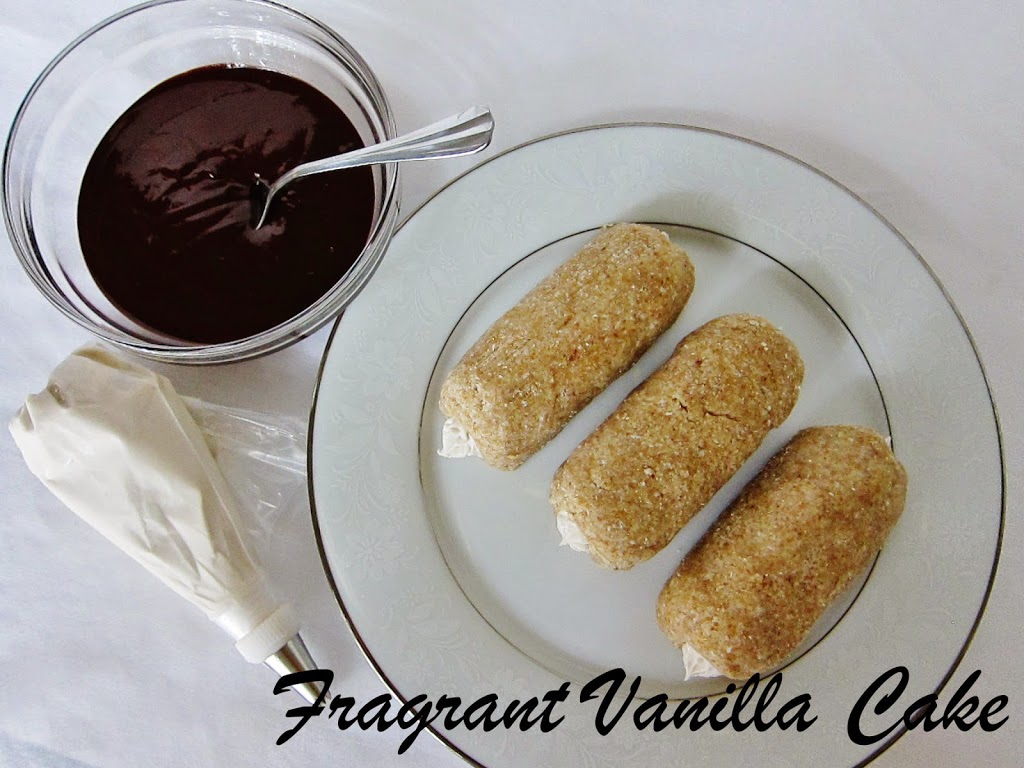
For the cake, buzz the finely shredded coconut in a blender just until finely ground (but not too long or you will get butter). Add to a food processor with the dates, vanilla, and sea salt, flaxseed, and process until it is well combined and very fine. Remove the mixture from the food processor and place in a large bowl. Add the coconut butter and water, to the food processor until smooth like thick coconut milk, then pour into the bowl with the other mixture. Mix in with your hands until blended (mixing with hands makes it less likely to get over mixed. If it seems to dry, add a little more water by the Tbsp). On a parchment or foil lined tray, shape into six twinkies. use a chopstick or something similar to create a 1/2 inch round hole through the twinkie lengthwise (being careful since they are a bit fragile).
Whisk together the chocolate glaze, then spread over the tops of the twinkies. Place in the freezer for about 5 minutes to set, then enjoy! Note: these are best served right away at room temperature (they are softer and more flavorful), but store them in the fridge if not eating them right away.
*If you cannot get fresh coconut meat, you can use raw cashews instead. Soak 2 cups raw cashews in filtered water, 4 hours then drain. Continue with the cake recipe.