Month: April 2021

  • Vegan Carrot Cake Roll

    Vegan Carrot Cake Roll

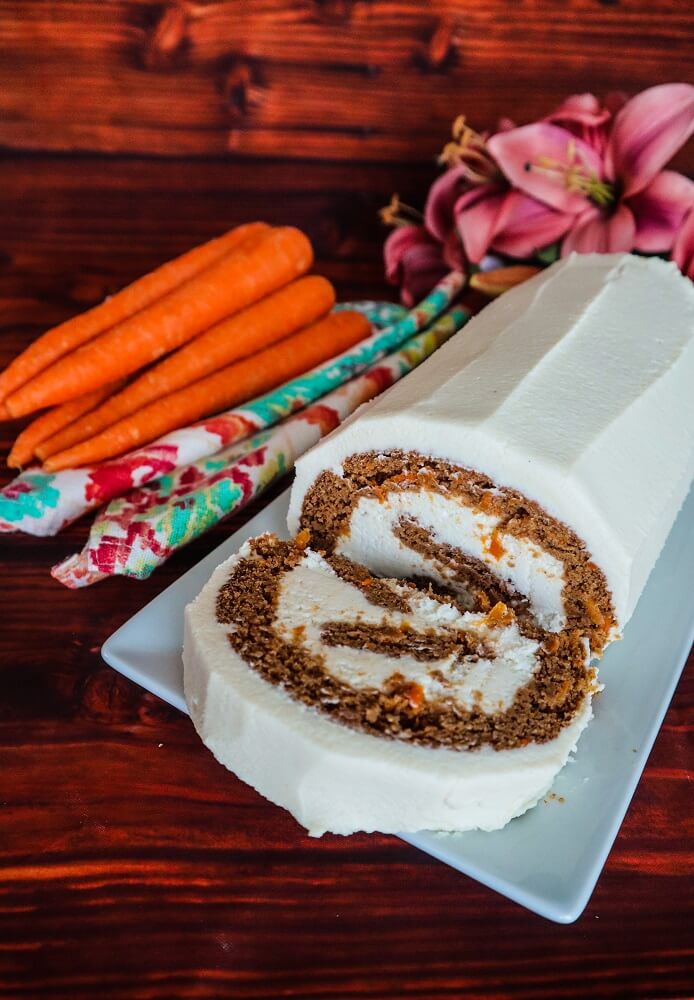
    I was buying carrots for a recipe and all there was to buy was a giant bag of carrots, not the bulk ones I normally buy.  I only needed one or two for my recipe but I bought it because they were an important part of it.  I had a lot of extra carrots leftover after though, so I started to think of fun ways to use them.  The first that came to mind was carrot cake!  I love carrot cake and I actually have not made any yet this year even though I consider it a spring dessert so it was about time!  I have actually been wanting to make a vegan carrot cake roll for a while now and this was the perfect opportunity!

    I love cake rolls because I think they are easier to make than a layer cake but you still get a good amount of frosting!  Also, they are a bit less fussy to frost and look beautiful, provided you are careful when rolling them.  I think I have it figured out pretty well though, I haven’t had one break since the first one I made years ago and that was because it was too dry. This base cake recipe that I use now though is moist and pliable so it is the perfect candidate for a rolled cake!

    It actually uses dates as a sweetener, which you can’t really taste they just give it a nice texture and caramel brown sugar like sweetness. I add in some spices as is essential for carrot cake as far as I am concerned, and vanilla and the batter smells heavenly!  Lastly I added plenty of carrots. Sometimes I put nuts and raisins in my carrot cake but I didn’t this time simply because I wanted it to slice nicely.

    It baked up beautifully and deserved a delicious filling and frosting. I made some faux cream cheese frosting and it was the perfect partner for the cake!  It was so heavenly!  Lightly spiced, sweet and the perfect light and soft texture!  If you are a carrot cake fan, or have too many carrots on hand like I did, give this a try!

    Vegan Carrot Cake Roll 

    Makes one 15 inch long rolled cake, serves 8-10

    Ingredients:

    15×10 inch jelly roll pan

    Cake:

    • 1 1/2 cups organic whole wheat pastry flour*
    • 1 1/2 tsp baking soda
    • 1 tsp baking powder
    • 1/2 tsp sea salt
    • 1 tsp cinnamon
    • 1 tsp ginger
    • 1/8 tsp nutmeg
    • 1 1/4 cups packed soft medjool dates, pitted, soaked in water for 30 minutes and 2 cups of the soaking water reserved
    • 1/4 cup almond butter
    • 1 Tbsp pure vanilla extract
    • 1 cup shredded carrots
    • 2 Tbsp apple cider vinegar


    Filling:

    • 1 15 oz can full fat organic coconut milk  (you want a brand that is mostly the thick cream like Thai Kitchen full fat coconut milk or coconut cream or it will not work and won’t thicken), chilled
    • 1/2 cup raw cashew butter
    • 1/4 cup maple syrup
    • 1 tsp pure vanilla extract
    • 1/4 tsp sea salt
    • 1/4 tsp cider vinegar
    • 3/4 cup melted coconut butter (warmed to liquid)*


    Frosting:

    • 1 cup full fat organic coconut milk  (you want a brand that is mostly the thick cream like Thai Kitchen full fat coconut milk or coconut cream or it will not work and won’t thicken), chilled
    • 1/2 cup mashed banana
    • 1/2 cup raw cashew butter
    • 1/4 cup maple syrup
    • 1 tsp pure vanilla extract
    • 1/4 tsp sea salt
    • 1/4 tsp cider vinegar
    • 3/4 cup melted coconut butter (warmed to liquid)*


    Directions:

    1. Preheat the oven to 350F degrees and position rack in center of oven.
    2. Line a 15 x 10 inch jellyroll pan with parchment paper.
    3. Coat parchment paper and pan sides lightly with oil so that the cake doesn’t stick.
    4. Whisk flour, baking powder, baking soda, spices and sea salt in a large bowl to blend well.  Set aside.
    5. Place dates, reserved water, almond butter, and vanilla extract into a blender, and blend until smooth, then whisk this blended mixture into the flour mixture until well blended. Whisk in the carrots, then the cider vinegar until bubbles form.
    6. Transfer cake batter to prepared pan and bake cake until tester inserted into center comes out clean, about 15-20 minutes.
    7. Cool cake completely.
    8. To make the filling, combine all ingredients in a high speed blender and blend until completely smooth.  Pour into a bowl and place in the freezer until the consistency of stiffly whipped cream (about 30-45 minutes depending on how warm it has gotten.  Once it is ready place in the refrigerator until ready to assemble.
    9. When ready to assemble, spread filling over the top of the cake, then roll up jellyroll style starting with the short side and using the parchment to assist you in rolling.  Be careful because you don’t want it to break, but if it cracks as you roll it no worries, keep rolling.  Let chill in the freezer once rolled for a few hours before frosting the outside.
    10. To make the frosting, combine all ingredients in a high speed blender and blend until completely smooth.  Pour into a bowl and place in the freezer until the consistency of stiffly whipped cream (about 30-45 minutes depending on how warm it has gotten.  Once it is ready place in the refrigerator until ready to frost.  Spread the frosting over the outside of the cake, and serve!


    Keeps for up to 1 week covered in the refrigerator.

    *If you would like to make this gluten free, swap the whole wheat flour for Bob’s Red Mill Gluten Free All Purpose Baking Flour (I have tested this brand and know it works, but have not tried other brands so I am not sure if they would turn out the same).

    *If you don’t have coconut butter but you have cacao butter, you can sub melted cacao butter for the coconut butter and the cake will have a white chocolate flavored frosting/filling.

  • Key Lime Sugar Cookies

    Key Lime Sugar Cookies

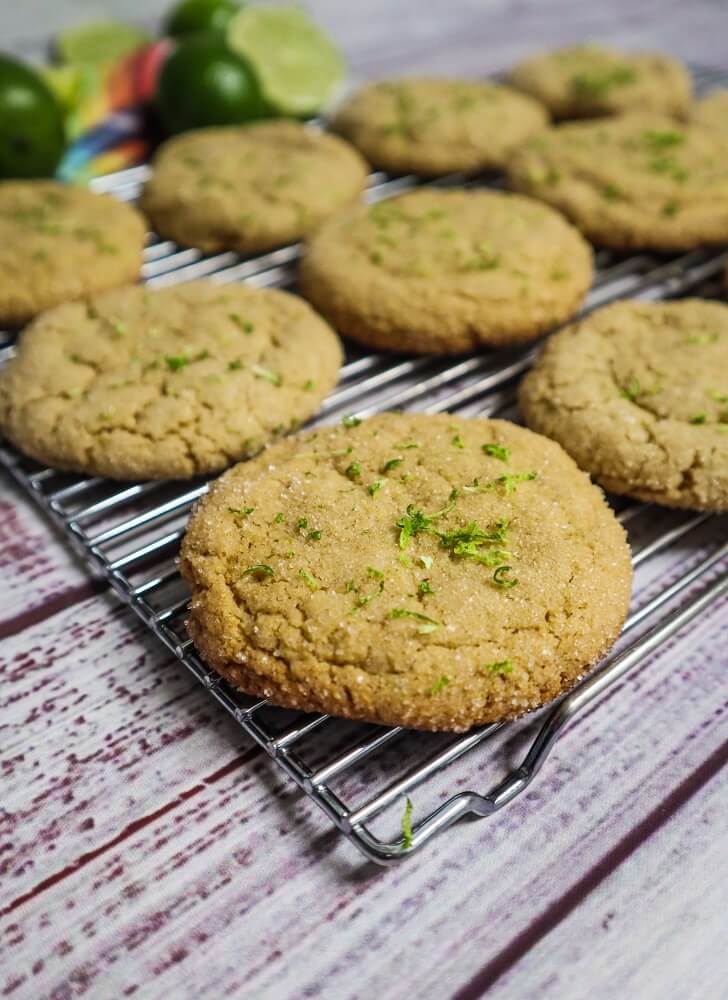
    I had some limes leftover from making a key lime pie recently so I was trying to come up with something delicious to make with them. Of course limeade is always good, but I wanted something a little more fun, creative and dessert themed.  I finally decided to make cookies with them.  I wanted something simple, so I decided on sugar cookies.  The deli I work in sells some lemon sugar cookies that look amazing (that I can’t have because they aren’t vegan), so I thought why not make some lime ones that I can enjoy!  Also, as a side note I should remedy that not having a vegan version of thee cookies when I am less busy since I do bake some vegan cookies at work and I thought these might be a good test of that since lemon and lime are similar.

    Back to these cookies though, for the base of these I used a snickerdoodle cookie I make modified without the cinnamon and with lime swapped in and it worked out perfect!  Traditionally sugar cookies just have a lot of oil, but I have a secret ingredient to cut the oil and give these a soft and chewy texture that I add…apple sauce!  Every time I tell someone about this when they taste my cookies they are usually shocked because you would never guess its in there it just gives them a nice texture!

    These cookies are actually really easy to make, which I love.  No refrigerating or fancy cutting required.  Just a bit of rolling into balls which I consider fun because it reminds me of play dough!  The dough was also super delicious because I did eat some since it is my favorite part of the baking process.  Plus I had to make sure they tasted good before baking wink wink.

    They smelled heavenly as they baked, like a key lime pie, but sweeter!  I could not wait to try some but they had to cool first.  Luckily that didn’t take long.  If they were chocolate chip cookies I would have dove right in but I feel like the lime flavor tastes better once cooled. They were so heavenly when it was time to try them!  They had a buttery rich texture with a soft middle and crisp outside and a fragrant lime vanilla flavor.  These will be perfect for spring and summer and I have a feeling they would pair really well with a margarita!

    Key Lime Sugar Cookies

    Makes about  1 dozen

    Ingredients:

    • 3/4 cup melted coconut oil
    • 1/2 cup apple sauce
    • 2 Tbsp lime juice
    • 2 Tbsp lime zest
    • 1 1/2 cups maple sugar or granulated sugar
    • 1 tsp pure vanilla extract
    • 1/2 tsp sea salt
    • 1 tsp baking powder
    • 1/2 tsp baking soda
    • 2 1/2 cups whole wheat pastry flour or all purpose flour


    Instructions:

    1. Preheat the oven to 350F degrees, and line a sheet pan with parchment.
    2. In a large bowl, combine the coconut oil, apple sauce, lime juice and zest, sugar, vanilla and sea salt and stir until smooth.
    3. Stir in the baking powder and soda, then the flour until it is completely combined.
    4. Shape the dough into 1 1/2 inch balls, place them on a baking tray, sprinkle with a little more sugar and flatten them slightly.
    5. Place the tray in the oven and bake about 13 minutes until starting to brown at the edges. Remove from oven and let cool before enjoying.


    Cookies keep for up to 1 week in an airtight container at room temperature, 2 weeks in the refrigerator or 4 months frozen.

  • Vegan Key Lime Pie

    Vegan Key Lime Pie


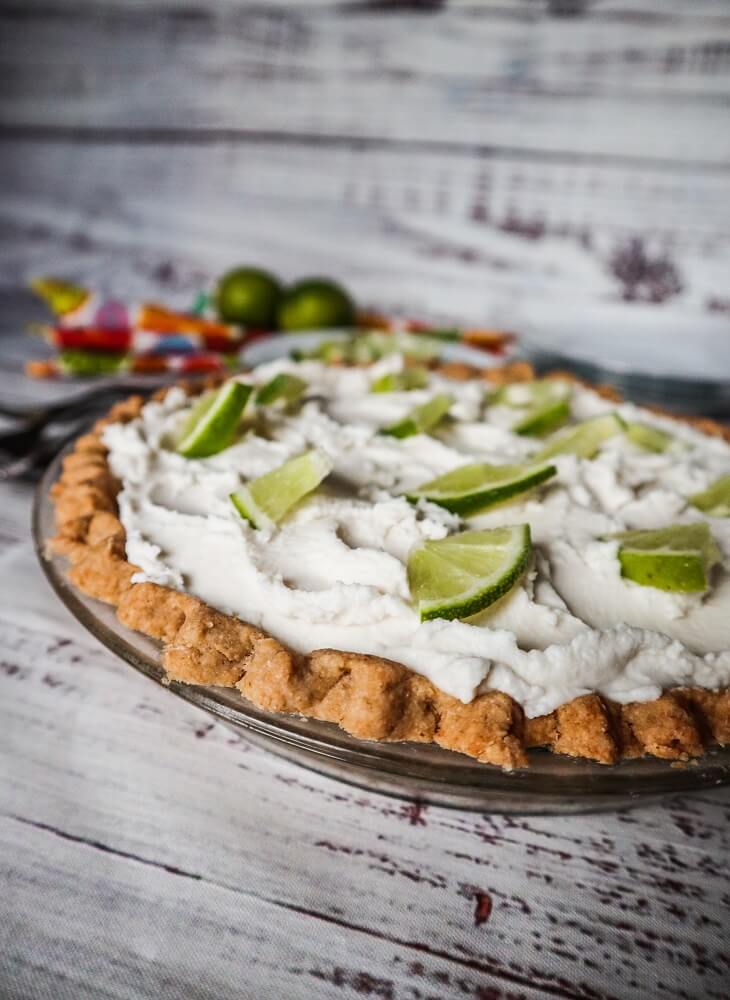
    I have always loved key lime pie.  When I was little my Mom and I would order it at restaurants when we saw it on the menu or occasionally make our own.  It had to be the perfect balance of tart and sweet though, maybe a little more on the tart side and have plenty of real lime flavor.  We always put plenty of lime juice and zest into ours so it was fragrant and delicious!  I realized I hadn’t made any in forever last week so I decided to whip one up.  I actually haven’t made aa cooked one (I have made some raw lime pies since before I went vegan so I tried one out this time, basing it off of one of my lemon pie recipes.  

    I know graham cracker crusts are classic on a key lime pie, but I went for a regular buttery tasting pie crust this time (since I didn’t have graham crackers and did not feel like making them from scratch).  But I always have pie crust ingredients!  So I made a coconut oil pie crust.  It requires being partially baked before filling, but by the time the filling is done it is ready to go!  

    For the filling I use a good amount of lime juice with coconut milk, maple syrup to sweeten and a bit of cornstarch to thicken.  It works out well, and you end up with something that it like a lemon meringue pie filling, but with lime and creamier (which fits key lime pie).  I could not wait to try it!  But first, it had to cool completely. 

    I topped it off with a good amount of coconut cream to balance out the tart lime filling and it was perfect!  This pie was heavenly!  The lime scented tart sweet smooth filling was so good with the creamy vanilla coconut cream and buttery tasting pie crust!  If you are a citrus fan, definitely give this a try! 

    Vegan Key Lime Pie

    makes one 8 inch pie

    Crust:

    • 1 1/4 cups organic whole wheat pastry flour*
    • 3 Tbsp maple sugar or coconut sugar
    • 1/4 tsp sea salt
    • 1/4 cup plus 2 Tbsp coconut oil in its solid state
    • about 3-6 Tbsp cold water


      Filling:

    • 3/4 cup lime juice
    • 2 Tbsp lime zest
    • 1/4 cup plus 2 Tbsp cup cornstarch
    • 1 3/4 cup (one 15 oz can) full fat organic coconut milk* or canned unsweetened coconut cream
    • 1/4 cup plus 2 Tbsp maple syrup
    • 1/4 tsp spinach powder (for color, optional)
    • 1/4 tsp sea salt
    • 1 tsp pure vanilla extract


      Cream Topping:


      Instructions:

    1. To make the crust, in a large bowl, mix together flour, sugar, sea salt, and spices. Cut in coconut oil with a pastry blender or 2 knives until it is in pea sized pieces. Mix in  just enough water to create a smooth dough that holds together but isn’t too sticky. Add more water if needed, and knead slightly until a smooth dough is created. Roll out into a 10 inch circle on a sheet of parchment paper, then use the paper to help you transfer it to an 8 inch pie dish.  Flute the edges, and set aside in the refrigerator until solid.
    2. Pre-heat the oven to 350F degrees. Place foil inside the pie crust, and weight down with pie weights or dried beans.  Place the pie in the oven and bake for 30 minutes, then remove from the oven.
    3. Meanwhile, for the filling, combine all ingredients in a saucepan, and bring to a boil.  Lower to a simmer and cook until thickened. Remove from heat, and pour into the prepared pie crust. Place in the oven and bake for 15 minutes.  Remove from the oven and let cool completely, then refrigerate until chilled.
    4. To make the cream topping, combine all ingredients in a blender and blend until completely smooth. Pour into a bowl and place in the freezer until it is thick like whipped cream (whisking every so often), about 20-30 minutes.
    5. Once the cream is ready, spread over the top of the pie, and refrigerate for a few hours before serving.

      Pie keeps up to 1 week in the refrigerator, covered or in a container. *If you wanted to make the crust gluten free, you could swap Bob’s Red Mill gluten free all purpose baking flour for the whole wheat pastry. I have tried this brand and know it will turn out well. *For the coconut milk, you want the kind that is 3/4 full of cream in the can, or it will not work and turn out runny, I used Thai Kitchen full fat milk, but their unsweetened canned coconut cream would work as well.

  • Vegan Banana Cake Roll with Cream Cheese Filling

    Vegan Banana Cake Roll with Cream Cheese Filling

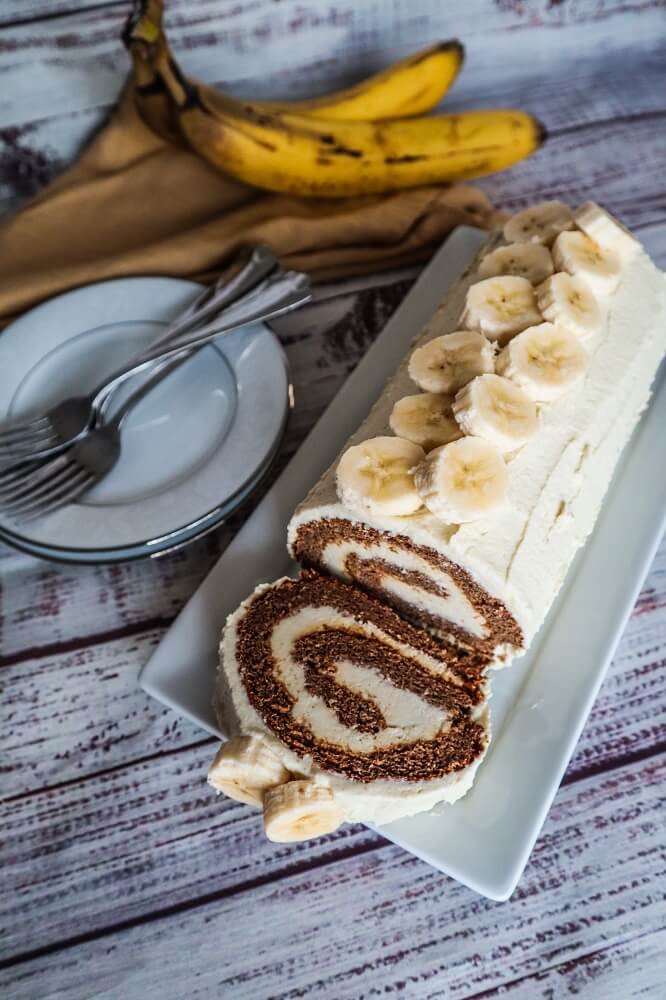
    Roll cakes used to intimidate me, but now I find that they are easier to make than a layer cake because the frosting is far less fussy (if they have any). So when I had some over ripe bananas and I was craving banana cake this week, that is what I decided to make. I rarely end up with over ripe bananas lately because I eat a lot of them but I bought too many so it was the perfect time to make a cake!  Sure you can freeze them and make ice cream or a smoothie but cake is far more fun!  Plus I had never made a banana roll cake and I was excited about it.

    When I was in college I bought a book with many really good baking recipes and it contained a banana cake with cream cheese frosting that quickly became one of my family’s favorites.  We made it for birthdays, holidays and celebrations and everyone loved it.  I have since veganized it and made it healthier and this roll cake is based off of that recipe because I knew it would be delicious!

    The cake batter is actually completely sweetened with dates and bananas, and it makes for a sweet soft cake that rolls more easily an is far less likely to break when rolling. My main tip for rolling these is chill them until they are completely cool, make sure the frosting is the right consistency and then once you have spread it on evenly use the parchment to assist you at rolling it tightly, peeling it off as you roll.  You will get the hang of it don’t worry.

    I filled this with a rich and creamy faux cream cheese frosting and it was perfect!  I decided to make a sweet banana cream frosting for the outside.  It was so good!  Soft and sweet, scented with banana and vanilla with a luscious creamy frosting!  If you have over ripe bananas on hand, you know what to do with them!

    Vegan Banana Cake Roll with Cream Cheese Filling
    Makes one 15 inch long rolled cake, serves 8-10

    Ingredients:

    15×10 inch jelly roll pan

    Cake:

    • 1 1/2 cups organic whole wheat pastry flour*
    • 1 1/2 tsp baking soda
    • 1 tsp baking powder
    • 1/2 tsp sea salt
    • 1 tsp cinnamon
    • 1/8 tsp nutmeg
    • 1 1/4 cups packed soft medjool dates, pitted, soaked in water for 30 minutes and 1 cup of the soaking water reserved
    • 1/4 cup almond butter
    • 1 Tbsp pure vanilla extract
    • 1 cup mashed banana
    • 2 Tbsp apple cider vinegar


    Filling:

    • 1 15 oz can full fat organic coconut milk  (you want a brand that is mostly the thick cream like Thai Kitchen full fat coconut milk or coconut cream or it will not work and won’t thicken), chilled
    • 1/2 cup raw cashew butter
    • 1/4 cup maple syrup
    • 1 tsp pure vanilla extract
    • 1/4 tsp sea salt
    • 1/4 tsp cider vinegar
    • 3/4 cup melted coconut butter (warmed to liquid)*


    Frosting:

    • 1 cup full fat organic coconut milk  (you want a brand that is mostly the thick cream like Thai Kitchen full fat coconut milk or coconut cream or it will not work and won’t thicken), chilled
    • 1/2 cup mashed banana
    • 1/2 cup raw cashew butter
    • 1/4 cup maple syrup
    • 1 tsp pure vanilla extract
    • 1/4 tsp sea salt
    • 1/4 tsp cider vinegar
    • 3/4 cup melted coconut butter (warmed to liquid)*


    Directions:

    1. Preheat the oven to 350F degrees and position rack in center of oven.
    2. Line a 15 x 10 inch jellyroll pan with parchment paper.
    3. Coat parchment paper and pan sides lightly with oil so that the cake doesn’t stick.
    4. Whisk flour, baking powder, baking soda, spices and sea salt in a large bowl to blend well.  Set aside.
    5. Place dates, reserved water, almond butter, banana, and vanilla extract into a blender, and blend until smooth, then whisk this blended mixture into the flour mixture until well blended. Whisk in the cider vinegar until bubbles form.
    6. Transfer cake batter to prepared pan and bake cake until tester inserted into center comes out clean, about 15-20 minutes.
    7. Cool cake completely.
    8. To make the filling, combine all ingredients in a high speed blender and blend until completely smooth.  Pour into a bowl and place in the freezer until the consistency of stiffly whipped cream (about 30-45 minutes depending on how warm it has gotten.  Once it is ready place in the refrigerator until ready to assemble.
    9. When ready to assemble, spread filling over the top of the cake, then roll up jellyroll style starting with the short side and using the parchment to assist you in rolling.  Be careful because the cake is fragile, but if it cracks as you roll it no worries, keep rolling.  Let chill in the freezer once rolled for a few hours before frosting the outside.
    10. To make the frosting, combine all ingredients in a high speed blender and blend until completely smooth.  Pour into a bowl and place in the freezer until the consistency of stiffly whipped cream (about 30-45 minutes depending on how warm it has gotten.  Once it is ready place in the refrigerator until ready to frost.  Spread the frosting over the outside of the cake, and serve!


    Keeps for up to 1 week covered in the refrigerator.

    *If you would like to make this gluten free, swap the whole wheat flour for Bob’s Red Mill Gluten Free All Purpose Baking Flour (I have tested this brand and know it works, but have not tried other brands so I am not sure if they would turn out the same).

    *If you don’t have coconut butter but you have cacao butter, you can sub melted cacao butter for the coconut butter and the cake will have a white chocolate flavored frosting/filling.

  • Vegan Caramel Pistachio Tart

    Vegan Caramel Pistachio Tart


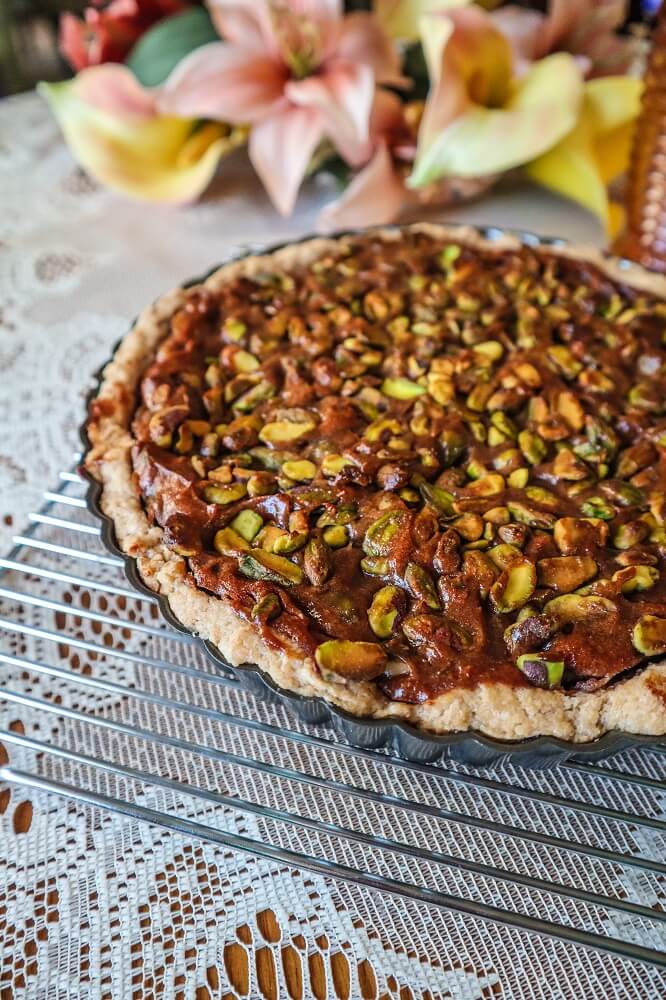
    My Mom’s Birthday is in a few days and this year she requested a caramel nut tart.  Pecans are good, but you know what’s even better and prettier for spring?  Pistachios!  I have a funny story about them too.  Back when I was in high school and I went shopping with my Mom one time I filled up a giant bag of organic pistachios from the bulk section at the co op we shopped at.  When we got to the register to buy them they rang up at $45 or so!  I didn’t know they were so spendy and we didn’t really want to buy that many if they were so expensive but my Mom ended up buying them anyway and we ended up making them into a caramel tart like the one I decided to make this week. 

    The original one had a lot of dairy, butter and refined sugar in it, but I have come up with a version that is vegan and a bit healthier.  For this one, I make a coconut oil crust which is easy to make and still tastes rich and buttery like the original one.  For the filling instead of all the cream and sugar I made a date caramel.  I love dates they are like nature’s caramel, so heavenly!  When you blend them up with a few other ingredients, they make a great caramel for a pie or tart filling!

    As far as the pistachios went, no they did not cost $45 this time. You can actually get them for a reasonable price at Aldi!  Which is where I usually buy the ones I snack on.  They worked great for this tart!  I could not stop sampling the filling it was so good!  It also smelled so heavenly while baking!

    We could not wait to try it!  My Mom loved it (and me too)!  It was gooey and sweet with vanilla scented caramel, crunchy, salty and nutty thanks to the pistachios and the buttery crust was a nice touch!  If you are a fan of pistachios, definitely give this a try!  Also, it would be perfect for Easter!

    Vegan Caramel Pistachio Tart

    Makes one 8 inch tart

    Ingredients:

    Crust:

    • 3/4 cup plus 3 Tbsp organic whole wheat pastry flour 
    • 1 1/2 Tbsp coconut sugar or maple sugar
    • 1/8 tsp sea salt
    • 1/4 cup plus 1 Tbsp coconut oil in its solid state
    • about 2-3 Tbsp cold water


    Filling:

    • 1 1/2 cups soft pitted medjool dates (if they are not soft, soak them in filtered water for 30 minutes and drain well before using)
    • 1/2 cup raw cashew butter
    • 2 Tbsp maple syrup
    • 1/4 tsp sea salt
    • 2 tsp pure vanilla extract
    • 1/2 cup filtered water
    • 2 Tbsp coconut butter or oil
    • 1 3/4 cups shelled pistachios, plus more for the top


    Instructions:

    1. Preheat the oven to 375F degrees, and oil an 8 inch removable bottom tart pan.
    2. To make the crust, in a large bowl, mix together flour, sugar, and sea salt. Cut in coconut oil with a pastry blender or 2 knives until it is in pea sized pieces. Mix in  just enough water to create a smooth dough that holds together but isn’t too sticky. Add more water if needed, and knead slightly until a smooth dough is created. Roll out into a 9 inch circle using floured parchment underneath and floured rolling pin. Fit into the prepared pan, using the parchment to assist. Set aside.
    3. To make filling, combine all ingredients in a high speed blender or food processor except the cashews. Process until smooth, then scrape into a bowl and stir in the pistachios. Spoon the filling into the crust and top with more pistachios to make the top look pretty.
    4. Place pies in the oven. Bake for about 30 minutes until the crust is starting to brown lightly. Remove from oven and let cool completely on a wire rack.
    5. Remove the bottom of the pan, and enjoy!