Tag: side dish

  • Rutabaga and Yam Fries with Garlic Dipping Sauce

    Rutabaga and Yam Fries with Garlic Dipping Sauce

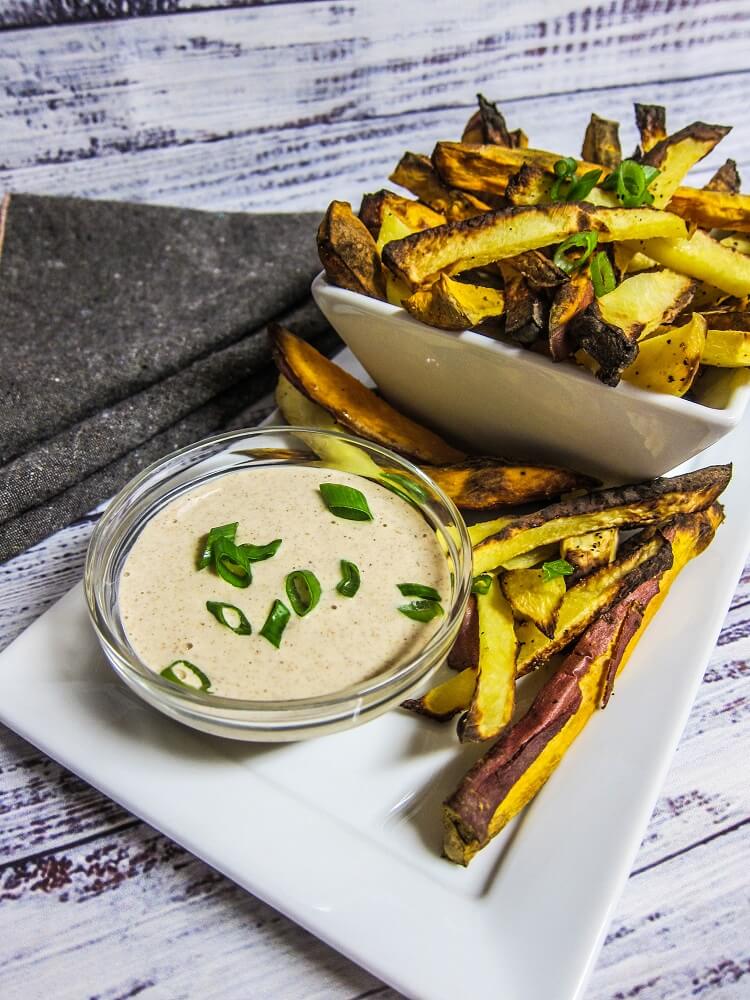
    One of my all time favorite things we make at the deli I work at is sweet potato or yam fries.  They are so simple but so good.  So, often times I will make them at home.  I call them my bacon, because they are to me what bacon is to meat eaters.  Hard to stop eating and kind of addictive.  You know maybe if more people tried them they would think giving up bacon isn’t so bad!  I was making a recipe for work the other day, and I got to thinking, since yam fries are good, what about other veggies as fries?  The rutabaga I was using for a recipe sounded like a good thing to test out, so I bought myself some and decided to give it a go.

    The truth is I used to hate rutabaga back in the day and my Dad would always tease me and say that is what we were going to have for dinner.  I don’t know why I hated it, I think it was because it was a foreign veggie to me at the time and I had been told it was gross and maybe once my Grandma had made some and I didn’t care for it.  But then when I was in college and experimenting with cooking and all sorts of new veggies I decided to try it again and ended up loving it.  The recipe that I had made the first time was a vanilla scented mashed rutabaga and it was amazing!  But it is so good roasted and in soups too I quickly discovered.  It has a sort of sweet flavor to it.

    I figured it would be perfect made into fries.  I combined them with some yams I had on hand, because why not do two different veggies?  As far as I am concerned the more veggies the better when it comes to what I eat. I kept them simple, just tossing them with a bit of avocado oil, sea salt, pepper and cayenne and it was perfect to showcase the sweetness of the rutabagas and yams.  They would have been good just like that, but I decided to make a dipping sauce as well.

    For the dipping sauce, I wanted something creamy and garlicy so I whisked together some almond butter, garlic, lemon and salt with a bit of water to thin it out and it was perfect!  You could use a different nut butter or even tahini for a nut free version if you prefer and it would be delicious as well.  The fries were sooo good!  The sweetness of the root veggies was brought out even more by roasting and the garlic sauce was the perfect partner for them!  Definitely give these a try this winter, just be warned, you may eat the whole batch they are pretty darn addictive!

    Rutabaga and Yam Fries with Garlic Dipping Sauce
    Serves 2-4

    Ingredients:

    Yams:

    • 2 medium sized yams, cut into fries
    • 1 large rutabaga peeled and cut into fries
    • 1 Tbsp avocado oil
    • 1/2 tsp sea salt (or to taste)
    • 1/4 tsp ground black pepper
    • 1/8 tsp ground cayenne or chipotle powder


    Sauce:

    • 1/3 cup filtered water (or as needed)
    • 1/3 cup almond butter
    • 1/4 tsp sea salt
    • 1 tsp lemon juice
    • 1 garlic clove, minced


    Instructions:

    1. To make the fries, preheat the oven to 400F degrees, and line a sheet pan with parchment.
    2. Toss the fries with the oil, sea salt, pepper and chipotle powder until they are coated, and spread them out on the sheet pan.
    3. Place in the oven and roast until tender and starting to brown, about 45 minutes.
    4. Meanwhile, to make the dip, combine all ingredients in a bowl, and whisk until smooth (if you want it thinner, add more water since almond butters vary in texture sometimes).  Set aside.
    5. When the fries are done, remove them from the oven and serve with the dip!
  • Vegan Sweet Potato Casserole and Vegan Sweet Potato Maple Cake with McCormick Spices!

    Vegan Sweet Potato Casserole and Vegan Sweet Potato Maple Cake with McCormick Spices!

    This post is sponsored by McCormick® but the content and opinions expressed here are my own.

    There are so many things to be excited about around the holidays!  Seeing friends and family you might not normally see the rest of the year because they live far away, the celebrations, and of course the amazing food!  I have to say, ever since I was a little kid, the food has always been pretty important to me, even when I did not make it myself.  I loved helping my Mom and Grandma in the kitchen, preparing the meals and desserts for the holidays!  I am so happy I get to continue the tradition of making food for my loved ones around the holidays, even if my Grandmas are no longer around to celebrate with me.  I know they would love the things I am making.  Good recipes start with good ingredients, which is why I love McCormick® Spices.  They are really good quality (they know a thing or two about making spices since they have been around for over 100 years) and they are affordable which is important to me!  Also, you can find them at Walmart, which is where I bought mine, in the baking aisle with all of the other seasonings and baking goodies!  I don’t know about you, but it is one of my favorite aisles.  Maybe I am biased because I love to bake!

    I picked up some McCormick® vanilla (one of my most used ingredients in my recipes), nutmeg and cinnamon at Walmart. I planned on making a dish that my family loves, Sweet Potato Casserole!  We have always been fond of sweet potatoes, and although back in the day my Grandma used to make the casserole with the marshmallows, our tastes have changed a bit and we now prefer it a little simpler and less sweet (but still plenty sweet enough).  It is really simple to make, and so good!  I just take sweet potatoes or yams and roast them into sweet flavorful perfection in the oven, then scoop out the flesh and mash it until it is light and fluffy with a bit of McCormick® cinnamon, nutmeg and maple syrup, then top it off with crunchy pecans and a little bit of maple sugar!  When it is all baked and the topping is all crispy it is heavenly!  The perfect side dish for your holiday meal!  Recipe follows post.

    If you happen to have leftovers from the casserole, I also have a delicious Maple Sweet Potato Cake that I made with them.  Don’t have time to make something right away with them?  Put them in a container and freeze them for later.  Just thaw before using in your recipe.  I love leftover sweet potatoes in general, there is so much you can do with them.  Make pancakes, muffins, bread, or the cake that I just mentioned if you want to be a little more over the top.  I love making cakes, so of course that is what I chose.  Not only that, it is perfect for Holiday entertaining as well!  Who doesn’t love cake?  I know my family does.  My Grandma and Mom passed down their love of maple to me, so that is what gave me the idea to pair the sweet potatoes with maple in this!  Not only that, I already had the McCormick® spices and flavors on hand I would need for it!  So wins all around!

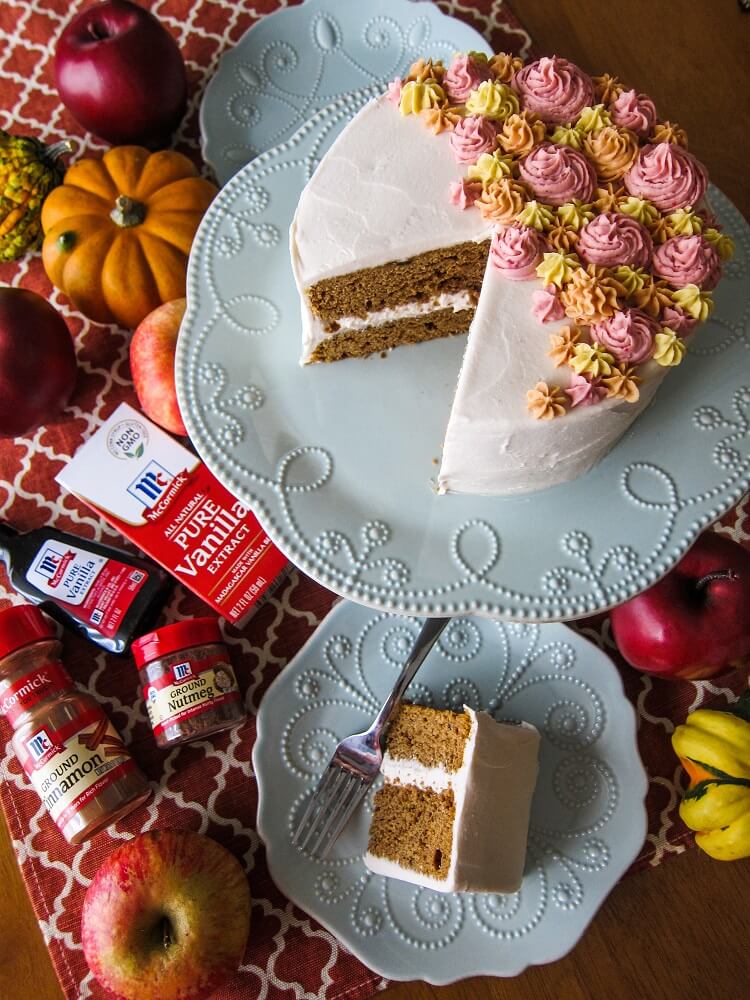
    I know some people like to make pie for the holidays, and we do as well, but I like cake even more because it just seems so festive!  For this one, I made a flavorful batter with the leftover mashed sweet potatoes, plus maple sugar and of course McCormick® cinnamon, nutmeg and vanilla for an aromatic cake.  Let me tell you, it fills your home with the most heavenly aroma! What you get is a soft, moist but light and fluffy cake with a slight caramel maple flavor and sweet spices!  It would be good on its own, but I decided to make a luscious faux cream cheese frosting for it!

    That has always been my favorite type of frosting after all.  I was so happy when I figured out how to veganize it!  I use a coconut cream base with a bit of cashew butter to give it a nice texture along with maple syrup to sweeten, and this time I added some McCormick® pure vanilla extract to it!  Like I said earlier in the post, it is my most used flavor ingredient in my recipes.  The frosting was heavenly alone but I knew it would be even better on the cake!  Once it was all frosted and ready to go we couldn’t wait to try it!  It was sooo good, the soft sweet spiced cake with a hint of sweet potato and maple flavor plus the luscious creamy frosting!

    I hope you give these recipes a try this holiday season, my family loved them and I have a feeling you will too!  Definitely check out the McCormick® Spices next time you are in Walmart, or on their website HERE. They are just what you need for making super delicious holiday recipes, and so convenient!

    Vegan Sweet Potato Casserole

    Serves 8-10

    Sweet Potatoes:


    Topping:


    Instructions:

    1. Preheat the oven to 425F degrees.
    2. Prick sweet potatoes with a fork all over, and place in the oven on a baking sheet. Roast until tender, about 1 hour. Remove from the oven and cool until cool enough to handle.
    3. Remove the skins, place in a bowl, and add the maple syrup, coconut milk, McCormick Sea Salt, and McCormick® Ground Cinnamon and Nutmeg. Mash together with a potato masher or a large fork, and then place in an oiled 8 or 9 inch square baking dish (or two smaller casserole dishes).
    4. Sprinkle the pecans over the top, drizzle with the maple syrup and mix together the sugar and McCormick® Ground Cinnamon and sprinkle over the casserole.
    5. Lower the oven temperature to 375F degrees, and place the dish in. Bake for 20 minutes until warmed through and the topping is toasted and lightly brown.
    6. Remove from the oven and cool slightly before serving.
    7. Enjoy!

    Keeps refrigerated for up to 1 week, when kept in an airtight container and the leftovers are perfect for using in my maple sweet potato cake recipe (see below)!


    Vegan Maple Sweet Potato Cake
    Makes 1 6 inch 2 layer cake
    2 6 inch cake pans
    Cake:


    Frosting:


    Instructions:

    1. Preheat the oven to 350F degrees and position rack in center of oven.
    2. Line two six-inch-diameter cake pans with 2-inch-high sides with parchment paper. Coat parchment paper and pan sides lightly with oil.
    3. Whisk flour, baking soda, McCormick® Ground Cinnamon, McCormick® Ground Nutmeg, McCormick® Sea Salt, and sugar in a large bowl to blend well.
    4. Whisk sweet potato, pecan butter, McCormick® Maple Extract, McCormick® Vanilla Extract, and water together in small bowl to blend well, then whisk into the flour mixture until well blended.
    5. Whisk in cider vinegar until pale bubble swirls form in the batter and it is well combined (but don’t over mix).
    6. Fold in pecans.
    7. Transfer cake batter to prepared pans and bake cakes until tester inserted into center comes out almost clean with a few moist crumbs attached, about 25-30 minutes.  Remove from oven.
    8. Cool cakes completely in pan on rack, about 1 hour. Cut around sides of pans to loosen. Turn cakes out onto platter; peel off parchment paper.
    9. Meanwhile, to make the frosting, combine all ingredients but the coconut butter, in a high speed blender or food processor and blend until smooth.  With the motor running, add the coconut butter and process a minute more (if it starts to get lumpy at all during the process it is just the fat separating because it is 2 different temperatures.  Just continue to blend until it is smooth, and it will get warm so it will just have to chill longer).
    10. Pour the frosting into a bowl and let sit in the freezer until the consistency of whipped cream, whisking every 15 minutes (this may take anywhere from 15 minutes to hour to an hour depending on how warm it has gotten and which appliance you used).
    11. When ready to frost, place one cake layer on a plate. spread frosting about 1/2 inch thick over the first layer, then top with the second. Spread remaining frosting over the top and down the sides of the cake. You can tint the remaining frosting with natural food coloring if you wish and decorate the top, or just decorate with pecans.
    12. Refrigerate for at least 1 hour before serving.

    Store any leftover cake in the refrigerator, keeps in an airtight container for up to 1 week.

  • Vegan Mexican Street Corn

    Vegan Mexican Street Corn

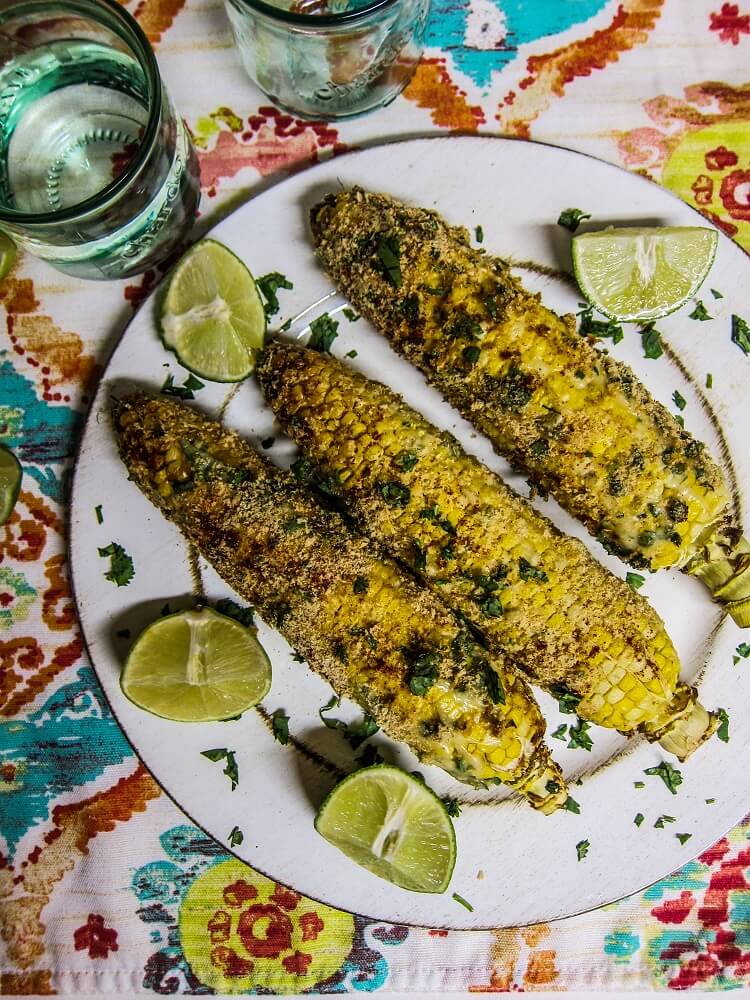
    I have been wanting to make veganized Mexican street corn for a while now, and I finally decided to do so this week when I got a good deal on organic sweet corn.  You know what is really sad? I haven’t had any sweet corn yet at all this year until now, and it is the end of summer!  So it was about time. What gave me the idea to make the Mexican street corn in the first place besides finding the corn on sale, was seeing someone make it in an air fryer on a show I was watching.  It seemed like a really good idea to roast corn in the air fryer. Especially when you are someone like me that doesn’t own a grill.  I use my air fryer all the time anyhow, even more often than my actual oven for roasting vegetables.

    It worked out perfect for the corn!  It roasted up in about 25 minutes and it was some of the best corn I had tasted, even without the topping I put on it.  Roasting it makes it even more sweet and flavorful.  I grew up always just eating microwaved or steamed corn and it just isn’t the same. Traditionally Mexican street corn has a mayonnaise mixture spread over it and it is then dipped in Mexican cheese.  Since I have always thought mayonnaise is gross and I am vegan I went about it a little bit differently.  Raw Guru recently sent me some macadamia nut butter, so I used that for the creamy element instead of the mayo.  It works similarly to raw cashew butter in things like vegan cheese sauce so I figured it would be perfect. Of course if you can’t get macadamia nut butter, you could use raw cashew butter instead in this recipe.

    I mixed it with a little bit of lime juice, garlic, sea salt and water and it was super delicious.  Way tastier than actual mayo would ever be.  It needed something cheesy flavored for the coating as well, so I went with nutritional yeast.  It is a vegan staple after all. Also, I sprinkled a bit of cilantro and paprika over it for color and flavor and because it is traditional.  It may not be quite as pretty as the real thing but trust me it is even better tasting.

    How things look isn’t always most important anyhow.  This corn was bomb, and honestly some of the best tasting corn I have tried!  Trust me when I say you might just eat the whole batch of this yourself, so maybe double it if you are sharing with other people.  I think this is one dish that is perfect for enjoying the last of the sweet corn of summer with!  So get on it!

    Vegan Mexican Street Corn

    Makes 3

    Ingredients:

    • 3 ears organic sweet corn, leaves and silk removed, and washed
    • 1/4 cup macadamia nut butter or raw cashew butter
    • 1 Tbsp lime juice
    • 1/4 tsp sea salt
    • 1 garlic clove, minced
    • 3 Tbsp minced cilantro
    • 1/4 cup plus 2 Tbsp nutritional yeast
    • about tsp smokey paprika

    Instructions:

    1. Place the corn in your air fryer and cook at 375F degrees for 25 minutes until tender (alternatively you could use an oven and place the corn on a sheet pan, but it may take 5-10 more minutes).
    2. Meanwhile, mix together the macadamia nut butter, lime juice, and garlic plus 1 Tbsp of filtered water (or as needed to thin it out to mayonnaise consistency).
    3. When the corn comes out of the air fryer, brush the macadamia nut butter mixture over it, sprinkle it with the cilantro, nutritional yeast, and paprika, and serve!
  • Sweet and Spicy Roasted Brussels Sprouts

    Sweet and Spicy Roasted Brussels Sprouts

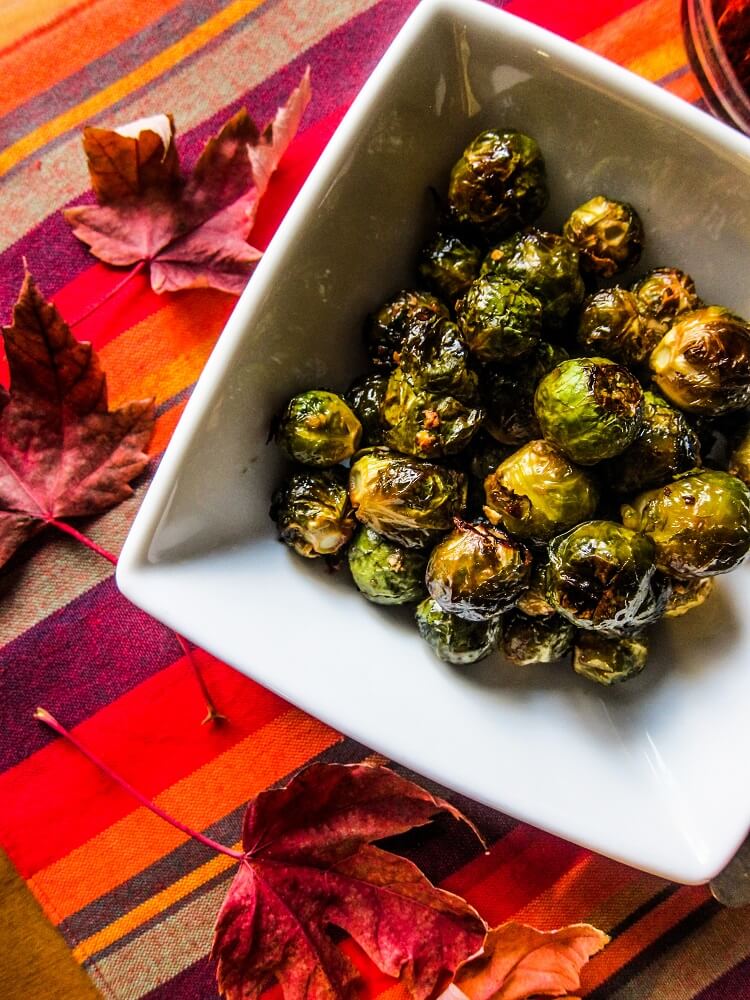
    One of my all time favorite items to make in the Fall is roasted brussels sprouts.  They are like savory candy honestly.  Tender on the inside, crispy and salty on the outside…sooo good!  I make them all the time at work with just a little olive oil and sea salt and they are amazing.  I could seriously eat a giant bowl of them and be happy.  Funny because as a kid I thought brussels sprouts were gross.  Probably because my Grandma steamed them for Thanksgiving and they were kind of mushy and stinky (they are a cruciferous vegetables after all).  I would take some just because I felt like I needed to take a little of everything but they were definitely not my favorite. It all depends on how you cook them though!  They are so delicious when roasted to crispy perfection!  So that is mainly how I make them.  Sometimes I will add them halved to a stir fry, but I don’t over-cook them.

    My Mom gave me a bag of them that she had picked up at Trader Joes and asked me to try making a side dish with Asian flavors that could be used for Thanksgiving with them.  Of course I was down for that, I do enjoy them after all!  So I created a simple dish that was easy to make, and I was enjoying delicious roasted brussels sprouts in about 45 minutes! I wanted them to be salty, sweet and have a little kick to them.  So I combined some home made chili oil, maple syrup, tamari, lime juice and garlic as a sort of marinade, tossed the brussels sprouts with that, and roasted them to flavorful perfection.

    They turned out so good!  Sweet, spicy, salty and tender. I think these would make a perfect Thanksgiving side dish!  I shared them with my Mom and she approved as well.  I think that if people served these instead of steamed brussels sprouts a whole lot more people would learn to love them!  I will definitely be making these again soon! Speaking of Thanksgiving side dishes, what is your favorite?  Mine were always mashed potatoes and stuffing, but of course now I can add brussels sprouts to the list!

    Sweet and Spicy Roasted Brussels Sprouts
    Serves 4

    • 2 Tbsp chili oil
    • 3 Tbsp maple syrup
    • 2 Tbsp tamari
    • 1 Tbsp lime juice
    • 2 garlic cloves, minced
    • 2 lbs fresh organic brussels sprouts, trimmed
    1. Preheat the oven to 350F degrees, and oil a sheet pan.
    2. Add all ingredients to a bowl, and toss the brussels sprouts until coated in the mixture.
    3. Spread out on the sheet pan, place in the oven and roast until the brussels sprouts are tender, about 45 minutes.
    4. Remove from the oven, and enjoy!


  • Butternut Squash and Cranberry Casserole

    Butternut Squash and Cranberry Casserole

    Squash is one of my favorite things ever, and I get super excited when it comes into season.  There was a point in my life when I was younger when I used to eat it almost every day for pretty much the Fall and Winter seasons in different ways for dinner. My skin even started to take on a little squash like hue that my Mom called my “squash tan”.  I don’t go quite to that extreme now, but I do enjoy it a couple of times a week.  After all, it is not around all year (well at least not the good tasting kind that only come when in season) so it is special and deserves to be enjoyed.  I love it stuffed, roasted in cubes in salads, or even mashed sometimes.  I can’t believe as a little kid I thought it was gross because I had been told that it was by a family member and I didn’t want to try it.  I was missing out.  I started to enjoy it though, when my Mom served the roasted kind stuffed with apples.  It turned me around and got me over my fear.  I have mostly  been roasting it cubed up this year for salads because it gets nice and crispy, but sometimes I roast it cut in half, which is what I did the other night when I happened to have a lot of extra squash.  I thought I could use it for other recipes.  You know, you can replace canned pumpkin in desserts with it, and it tastes even more sweet and delicious!  But this time I decided to make a savory side fit for the Thanksgiving table.

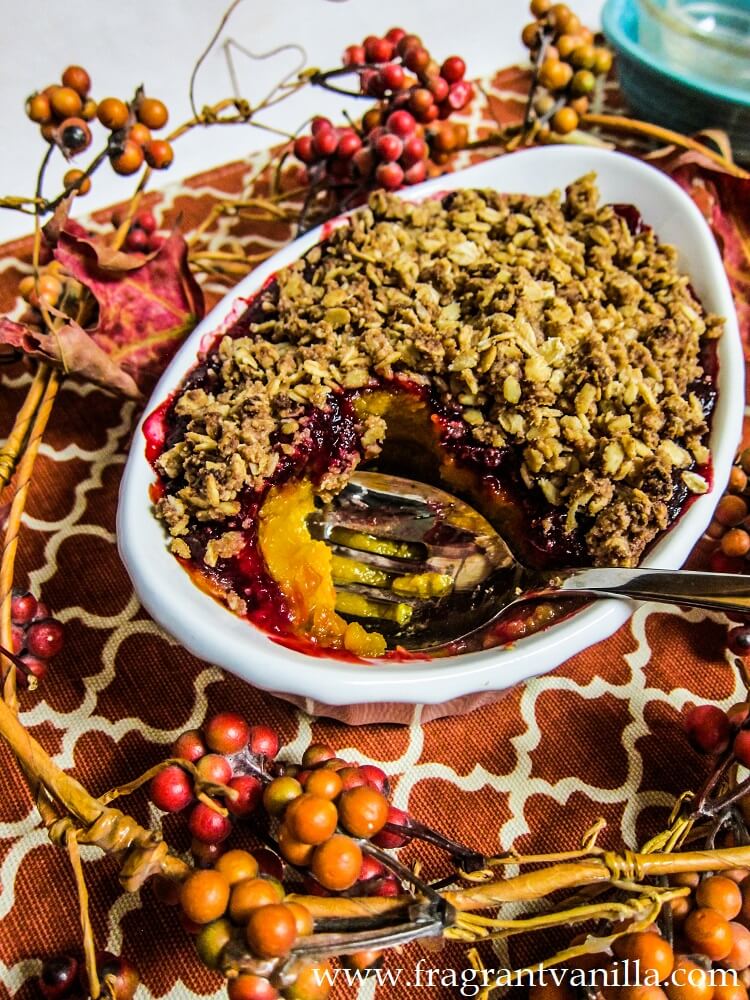
    Everyone makes sweet potato casserole, and that is fine, I love sweet potatoes, but I thought why not make a squash casserole?  I have not seen one before (I am sure they are out there, I have just never tried one), and I thought it would be delicious.  I also had a package of cranberries in my refrigerator waiting to be used in a recipes, so I decided to make this a double layer casserole with the cranberries.  I cooked them into a jammy sauce.  Not that nasty stuff from the can type of sauce, but the good kind that can only come from real cranberries.  I like them a little chunky.  Trust me, butternut squash and cranberries are a delicious combination for those that are skeptical.  Plus you get two of your Thanksgiving sides in one!

    Lastly, I wasn’t going to leave the casserole just like that, because in Minnesota casserole, (or really “Hot Dish” as we call it), should have some sort of crispy topping sprinkled on top that can be browned.  So, I made an oat streusel.  The whole thing smelled amazing while baking! Kind of like dessert, but it is definitely a savory Thanksgiving side.  It was super delicious!  The squash was sweet and delicious, the cranberries slightly tart, aromatic with orange and jammy, and the struesel was the perfect touch, crunchy and satisfying.  If you are looking for a new dish to try this Thanksgiving, give this a go!

    Butternut Squash and Cranberry Casserole
    Serves 12

    Ingredients:

    Squash:

    • 2 large butternut squash, halved
    • 1 tsp cinnamon
    • 2 Tbsp maple syrup
    • 1/4 tsp sea salt


    Craberries:

    • 2 7.5 oz packages fresh organic cranberries
    • 1/2 cup maple syrup (or to taste)
    • 1/4 cup orange juice
    • 1/4 tsp sea salt


    Topping:

    • 1/2 cup gluten free rolled oats
    • 2 Tbsp gluten free all purpose flour
    • 1/4 cup coconut sugar
    • 1/4 tsp sea salt
    • 1/2 tsp cinnamon
    • 2 Tbsp coconut oil


    Instructions:

    1. Preheat the oven to 400F degrees and oil a sheet pan, or line it with parchment.
    2. Cut the squash in half lengthwise and remove the seeds.  Place cut side down on the tray, and place in the oven.  Roast for about an hour until the squash is tender.  Remove from the oven and scoop out the flesh into a bowl.
    3. Add the maple syrup, cinnamon, and sea salt, and mash the squash with them until there are not any big lumps.  Spoon into an 8×8 square pan, or two smaller casserole pans (which is what I did).
    4. To make the cranberries, combine them with the syrup, orange juice, and sea salt in a saucepan and bring to a boil.  Lower to a simmer and cook until the cranberries are tender and thickened, about 15 minutes.  Remove from heat, and pour over the squash in the pan.
    5. To make the topping, combine all ingredients in a bowl, and mix together with your hands until it is small clumps that hold together when squeezed.  Scatter over the cranberries evenly.
    6. Place the pan (or pans) in the oven and bake until the topping is browned about 15-20 minutes.
    7. Remove from the oven and serve!
  • Vegan Cheesy Potato Casserole

    Vegan Cheesy Potato Casserole

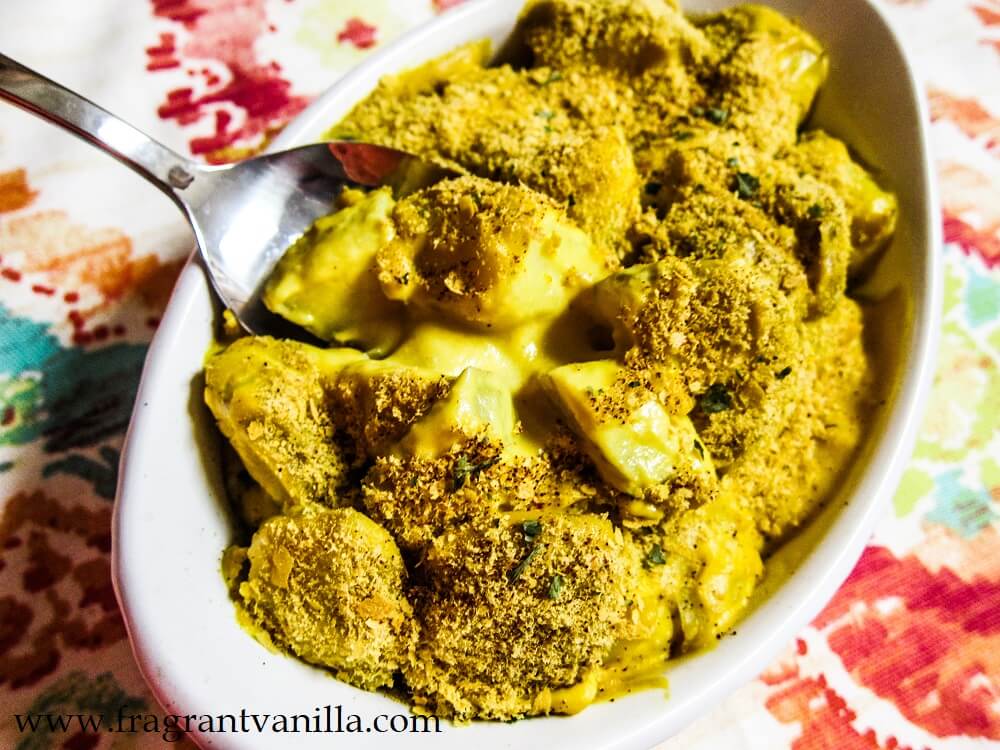
    My Mom used to make a really delicious cheesy potato casserole when I was young to serve at family gatherings. Usually brunch type occasions, like when she hosted Easter at our house, or maybe a Christmas special request from me.  I used to ask her to make it a lot because it was so good!  I think it filled most of my plate when it was served over all else.  I could have cared less about the meat of course, and I always took my token amount of veggies, and a roll, but the potatoes were the star to me.  I mean, what’s not to like about layers of creamy cheese and potatoes!  I have been saying to myself for a while now, you have to make a vegan version.  So this past week, I finally got around to it.  I had extra potatoes on hand, and some cheese sauce left over from some mac and cheese that I had made, so it was perfect!  My Mom used to use frozen hash browns in hers, but I decided to be a little different with mine since I don’t think I have ever bought frozen hash browns, and I had fresh potatoes to use up.

    I guess this was sort of in the style of a cheesy potatoes one of my coworkers at the deli used to make, crossed with my Mom’s potatoes. My coworker always just used large diced potatoes in her casserole and a little kick.  My Mom’s was more mellow and just creamy and delicious.  Combining the two ended up being awesome.  Of course both of these dishes had tons of cheese, butter, flour and cream.  I think my Mom’s had heavy cream in fact, because this dish was considered a treat.  But my cheesy potatoes actually have a healthy cheese sauce made from a secret ingredient that gives them their lovely yellow color.  Winter squash!  I like to hide veggies in my dishes, and lighten things up with them, so that was the idea here.  I guess I can’t bring myself to make vegan mac and cheese without including veggies in the sauce, so why would I not include them with the potatoes?  Don’t worry, the sauce is super delicious.  I added cashew butter to give it a little richness and volume so it has more of the texture of cheese, along with things like miso, nooch (nutritional yeast), salt, mustard and garlic to give it a wonderful savory flavor.  It may sound like a weird combo but it is so good once it is done!

    Once combined with the cooked potatoes it is bomb!  I could eat a giant bowl of these potatoes (just like I used to when I was little), but I would not feel bad about doing so or get a tummy ache after because these are so much healthier than the original version.  I love recreating old dishes from my childhood and making them vegan!  Often times they turn out even better!  If you are looking for a delicious side dish, or maybe you are just craving potatoes and cheese, which is totally legit too, give these a try!

    Vegan Cheesy Potato Casserole

    Serves 6-8

    Cheese Sauce:

    • 2 cups mashed cooked butternut squash or sweet potato*
    • 1 cup hot filtered water (or as needed)
    • 1/3 cup raw cashew butter or almond butter
    • 1 medium garlic clove
    • 2 tsp yellow mustard or stone ground mustard
    • 1 Tbsp apple cider vinegar
    • 1 Tbsp white miso (optional)
    • 1/4 cup plus 2 Tbsp nutritional yeast
    • 1/8 tsp cayenne pepper
    • 3/4 tsp sea salt (or to taste)


    Potatoes:

    • 3 lbs yukon gold potatoes, cut into 1 inch cubes
    • filtered water
    • sea salt


    Topping:

    • 3 Tbsp nutritional yeast
    • paprika for sprinkling


    Instructions:

    1. To make the cheese sauce, combine the squash, water, cashew butter, garlic, mustard, cider vinegar, yeast, cayenne, sea salt and turmeric in a high speed blender and blend until smooth and the consistency of cheese (if it is too thick add a little more water).  Set aside.
    2. Preheat the oven to 375F degrees.
    3. To make the potatoes, put them in a large pot, and cover with filtered water by 1 inch.  Add a few tsp sea salt to the water.  Bring to a boil, and then lower to a simmer.  Allow the potatoes to cook until tender, about 10-12 minutes.  Drain, then add back to the pot.
    4. Stir in the cheese sauce, then pour into a baking dish.
    5. Sprinkle the potatoes with the nutritional yeast, and place in the oven for about 15 minutes.  Sprinkle with paprika and serve!

    *To cook the squash, I like to roast them in the oven.  Cut one medium squash in half top to bottom, and remove the seeds.  Place cut side down on a sheet pan lined with parchment and bake for about an hour at 400F degrees or until tender.  Remove from oven and let cool before removing the skin and mashing.

  • Vegan Cheesy Hasselback Potatoes

    Vegan Cheesy Hasselback Potatoes

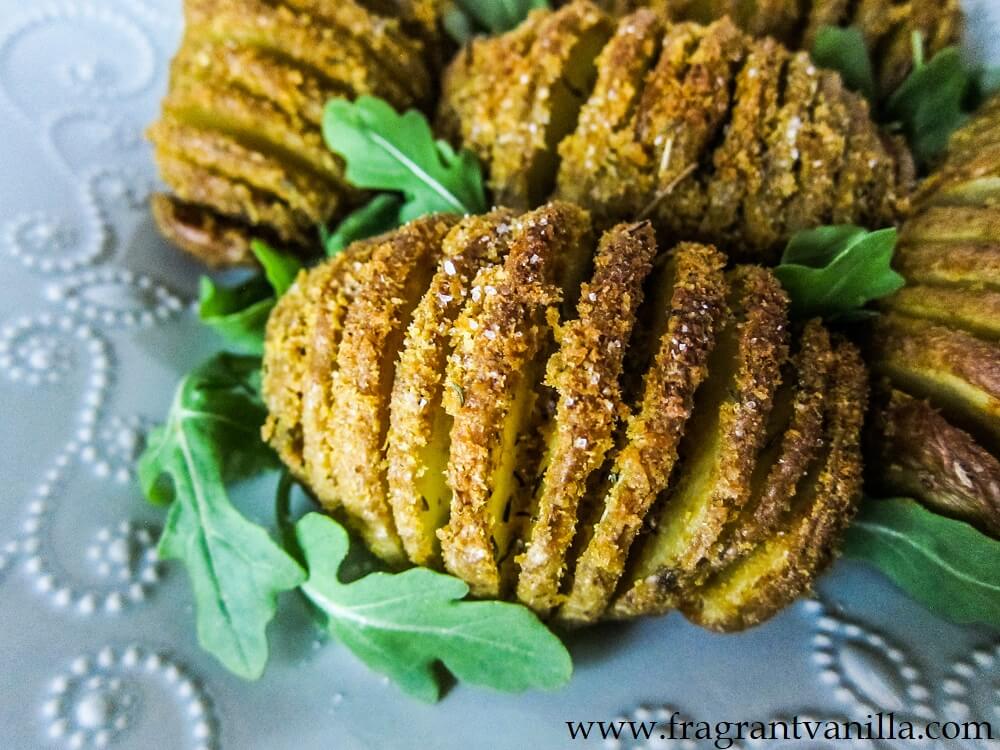
    Monday was kind of a rainy dreary day here in Minnesota.  Everyone was excited about the lunar eclipse taking place, but it ended up being covered by clouds.  Eric and I were hoping to see it, but instead we went out for a walk with our umbrellas.  It was one of those days where the weather makes you tired and you want to just curl up and watch movies.  I had a big bag of potatoes that needed to be eaten and I figured this was just the day to use them. After all, potatoes are one of the best comfort foods!  I thought about mashed potatoes, tater tots, or just roasted potatoes, but I wanted to do something more fun with them.  I decided on a vegan version of hasselback potatoes. I had seen a version on Pinterest for parmesan hasselback potatoes, and I figured I could make cheesy vegan potatoes with some nutritional yeast to make them a bit crispy instead.

    I have always seen this type of potato dish, and always wanted to try it but never have for some reason.  Maybe all of the little cuts into the potatoes intimidated me.  They sounded time consuming. But actually these ended up being fairly quick to prep.  They took a while to bake, but that gives you time to relax, or prepare something to go with them.  Most recipes for hasselback potatoes have lots of butter, but I used avocado oil instead.  Because it is vegan of course, and because it is neutral and stands up to high heat.  I coated the potatoes with plenty of nooch as well as some thyme, sea salt, garlic and pepper, to keep it simple.  A good hour plus in the oven later, my house smelled wonderful.  I don’t know about you, but nutritional yeast is a life saver for anyone who is craving something cheesy.  Good on popcorn or pasta dishes, or now roasted potatoes!

    They turned out delicious!  Cheesy tasting with just the right amount of garlic and thyme for aromatics.  Some of the potato at the edges got nice and crispy like chips, which was delicious, but then the inside ones were nice and tender.  These would be delicious served with a vegan porterhouse “steak” from the Herbivorous Butcher, or some sauteed tempeh, or my Chickpea Cutlets with Mushroom Gravy.  They turned out even more delicious than I thought, and I definitely forgot about the crummy weather outside.  So the next time you are in the mood for some comfort food potato style, give these a try!

    Vegan Cheesy Hasselback Potatoes
    Serves 5

    Ingredients:

    • 10 medium organic Yukon Gold potatoes
    • avocado oil or olive oil
    • 1 cup nutritional yeast
    • 1/2 tsp sea salt
    • 1/4 tsp black pepper
    • 2 tsp dried thyme
    • 2 garlic cloves, minced


    Instructions:

    1. Preheat the oven to 400F degrees, and oil a sheet pan.
    2. To prepare the potatoes, place one on a cutting board, and set 2 chopsticks on either side of it lengthwise (this will prevent you from cutting all the way through).  Use a knife to cut it into 1/8 inch thick slices crosswise, and set on the pan.  Repeat with the remaining potatoes.
    3. When they are all cut, drizzle each one with the avocado oil, being sure it covers all of the potato and gets in the sliced part too (being careful not to break it).
    4. Combine the nutritional yeast, sea salt, pepper, thyme, and garlic in a bowl, and mix up.
    5. Roll each potato in this mixture, and sprinkle a little between each cut.  Place back on the tray.  Repeat with other potatoes.
    6. Drizzle with a little more oil, and sprinkle with some of the leftover nutritional yeast mixture.
    7. Place in the oven and bake for about 1 hour and 15 minutes until the potatoes are tender and browning slightly.
    8. Remove from the oven and let cool for a few minutes before serving.


  • Vegan Creamed Spinach

    Vegan Creamed Spinach

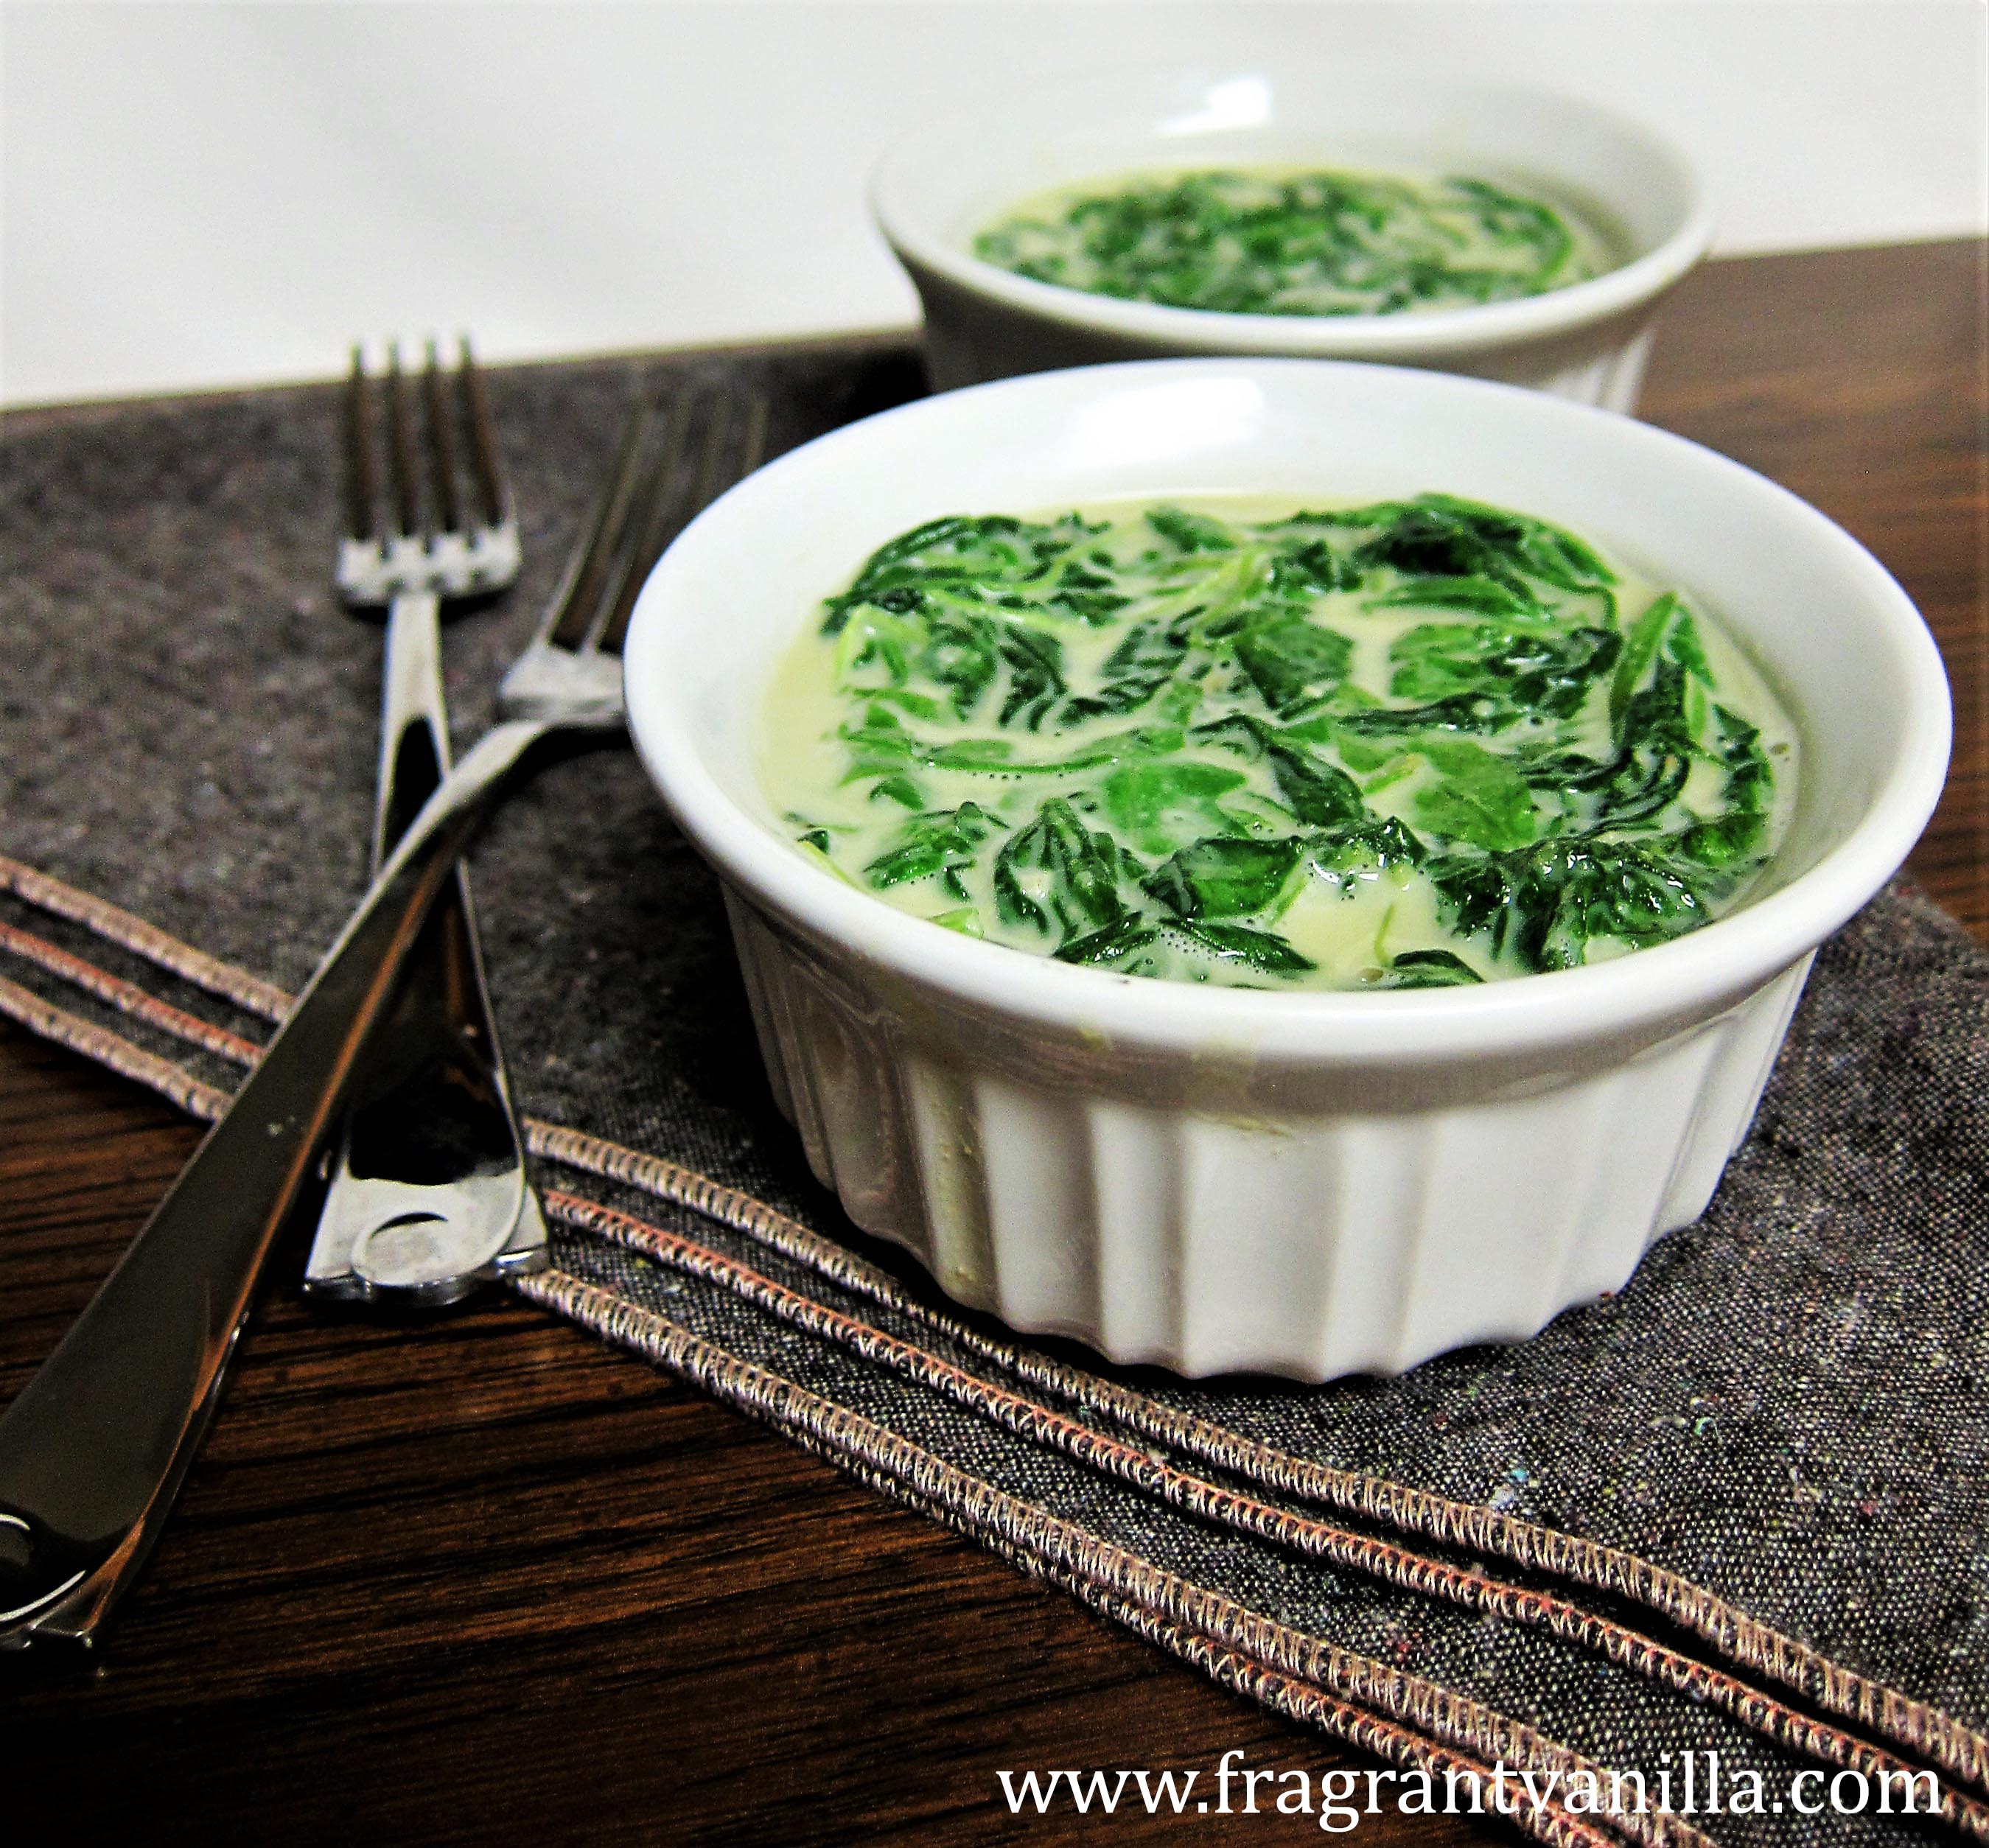
    My Mom and I were recently out to one of our favorite restaurants, one known for creatively using seasonal veggies, and she ordered the creamed spinach.  She said it was really good, but of course it had dairy in it, so I couldn’t try it.  But, she said “I bet you can recreate this at home using vegan ingredients, and it would be even better!”  She has confidence in my veganizing and cooking skills.  Of course I was all for it, I love making new (or old classic) recipes for people who want them without the animal products.  So, I went for it!  Something like cream is not hard to recreate when you have cashews and coconut milk on hand.  No, this is not a low fat recipe because that is not what she wanted.  Yes, I know you could use some sort of veggie pureed in the sauce if you wanted it to be but I will leave that for another day. Cashews and coconut milk are darn delicious and are staples of vegan mac and cheeses and fettuccini alfredos everywhere!

    creamed-spinach-3

    The creamed spinach she had at the restaurant had parmesan cheese in it, so I decided to give this a little cheesy flavor along with the richness by adding a little miso, nutritional yeast and lemon juice for zip!  A touch of garlic, and voila!  Cheesy creamy deliciousness ready for the spinach!  Now 18 oz of spinach might seem like a lot mind you (it is like 3 bags baby spinach), but it wilts down to practically nothing, and this does serve 4 people.  If you want to get a lot of spinach in fast, this is definitely a way to do it.  I think Popeye would be proud.  Just take care not to overcook it, you don’t want to lose those nutrients!

    creamed-spinach-1

    This is sooo good!  It better than just regular creamed spinach that most people make, not only because it is vegan, but because it is delicious!  My Mom was excited about it, and she much approved!  I think this would be a good addition to your Thanksgiving or Holiday table.  You could just make the cream part ahead of time, reheat and add the spinach at the last minute before serving.  Because one can never have too many veggie dishes on the table for the Holidays right?

    creamed-spinach

    Vegan Creamed Spinach
    Serves 4-6

    • Ingredients:
    • 1 1/4 cups organic coconut milk
    • 1/2 cup raw cashew butter
    • 1 garlic clove, minced
    • 2 Tbsp nutritional yeast
    • 1 tsp white miso
    • 1/2 tsp lemon juice
    • 1/4 tsp sea salt or to taste
    • 1 Tbsp arrowroot powder dissolved in 1 Tbsp filtered water
    • 18 oz  organic baby spinach leaves

    Directions:

    1. In a medium saucepan, combine the coconut milk and cashew butter and heat until almost simmering and they are combined.
    2. Add the garlic, yeast, miso, lemon juice and sea salt and cook until combined.
    3. Add the arrowroot and cook until thickened slightly.  Remove from heat.
    4. Add the spinach in batches until it is all wilted down (taking care not to overcook it).
    5. Pour into a dish, and serve!


  • Vegan Cheesy Squash Tots with Cranberry Chipotle Ketchup

    Vegan Cheesy Squash Tots with Cranberry Chipotle Ketchup

    cheesy-squash-tots-3

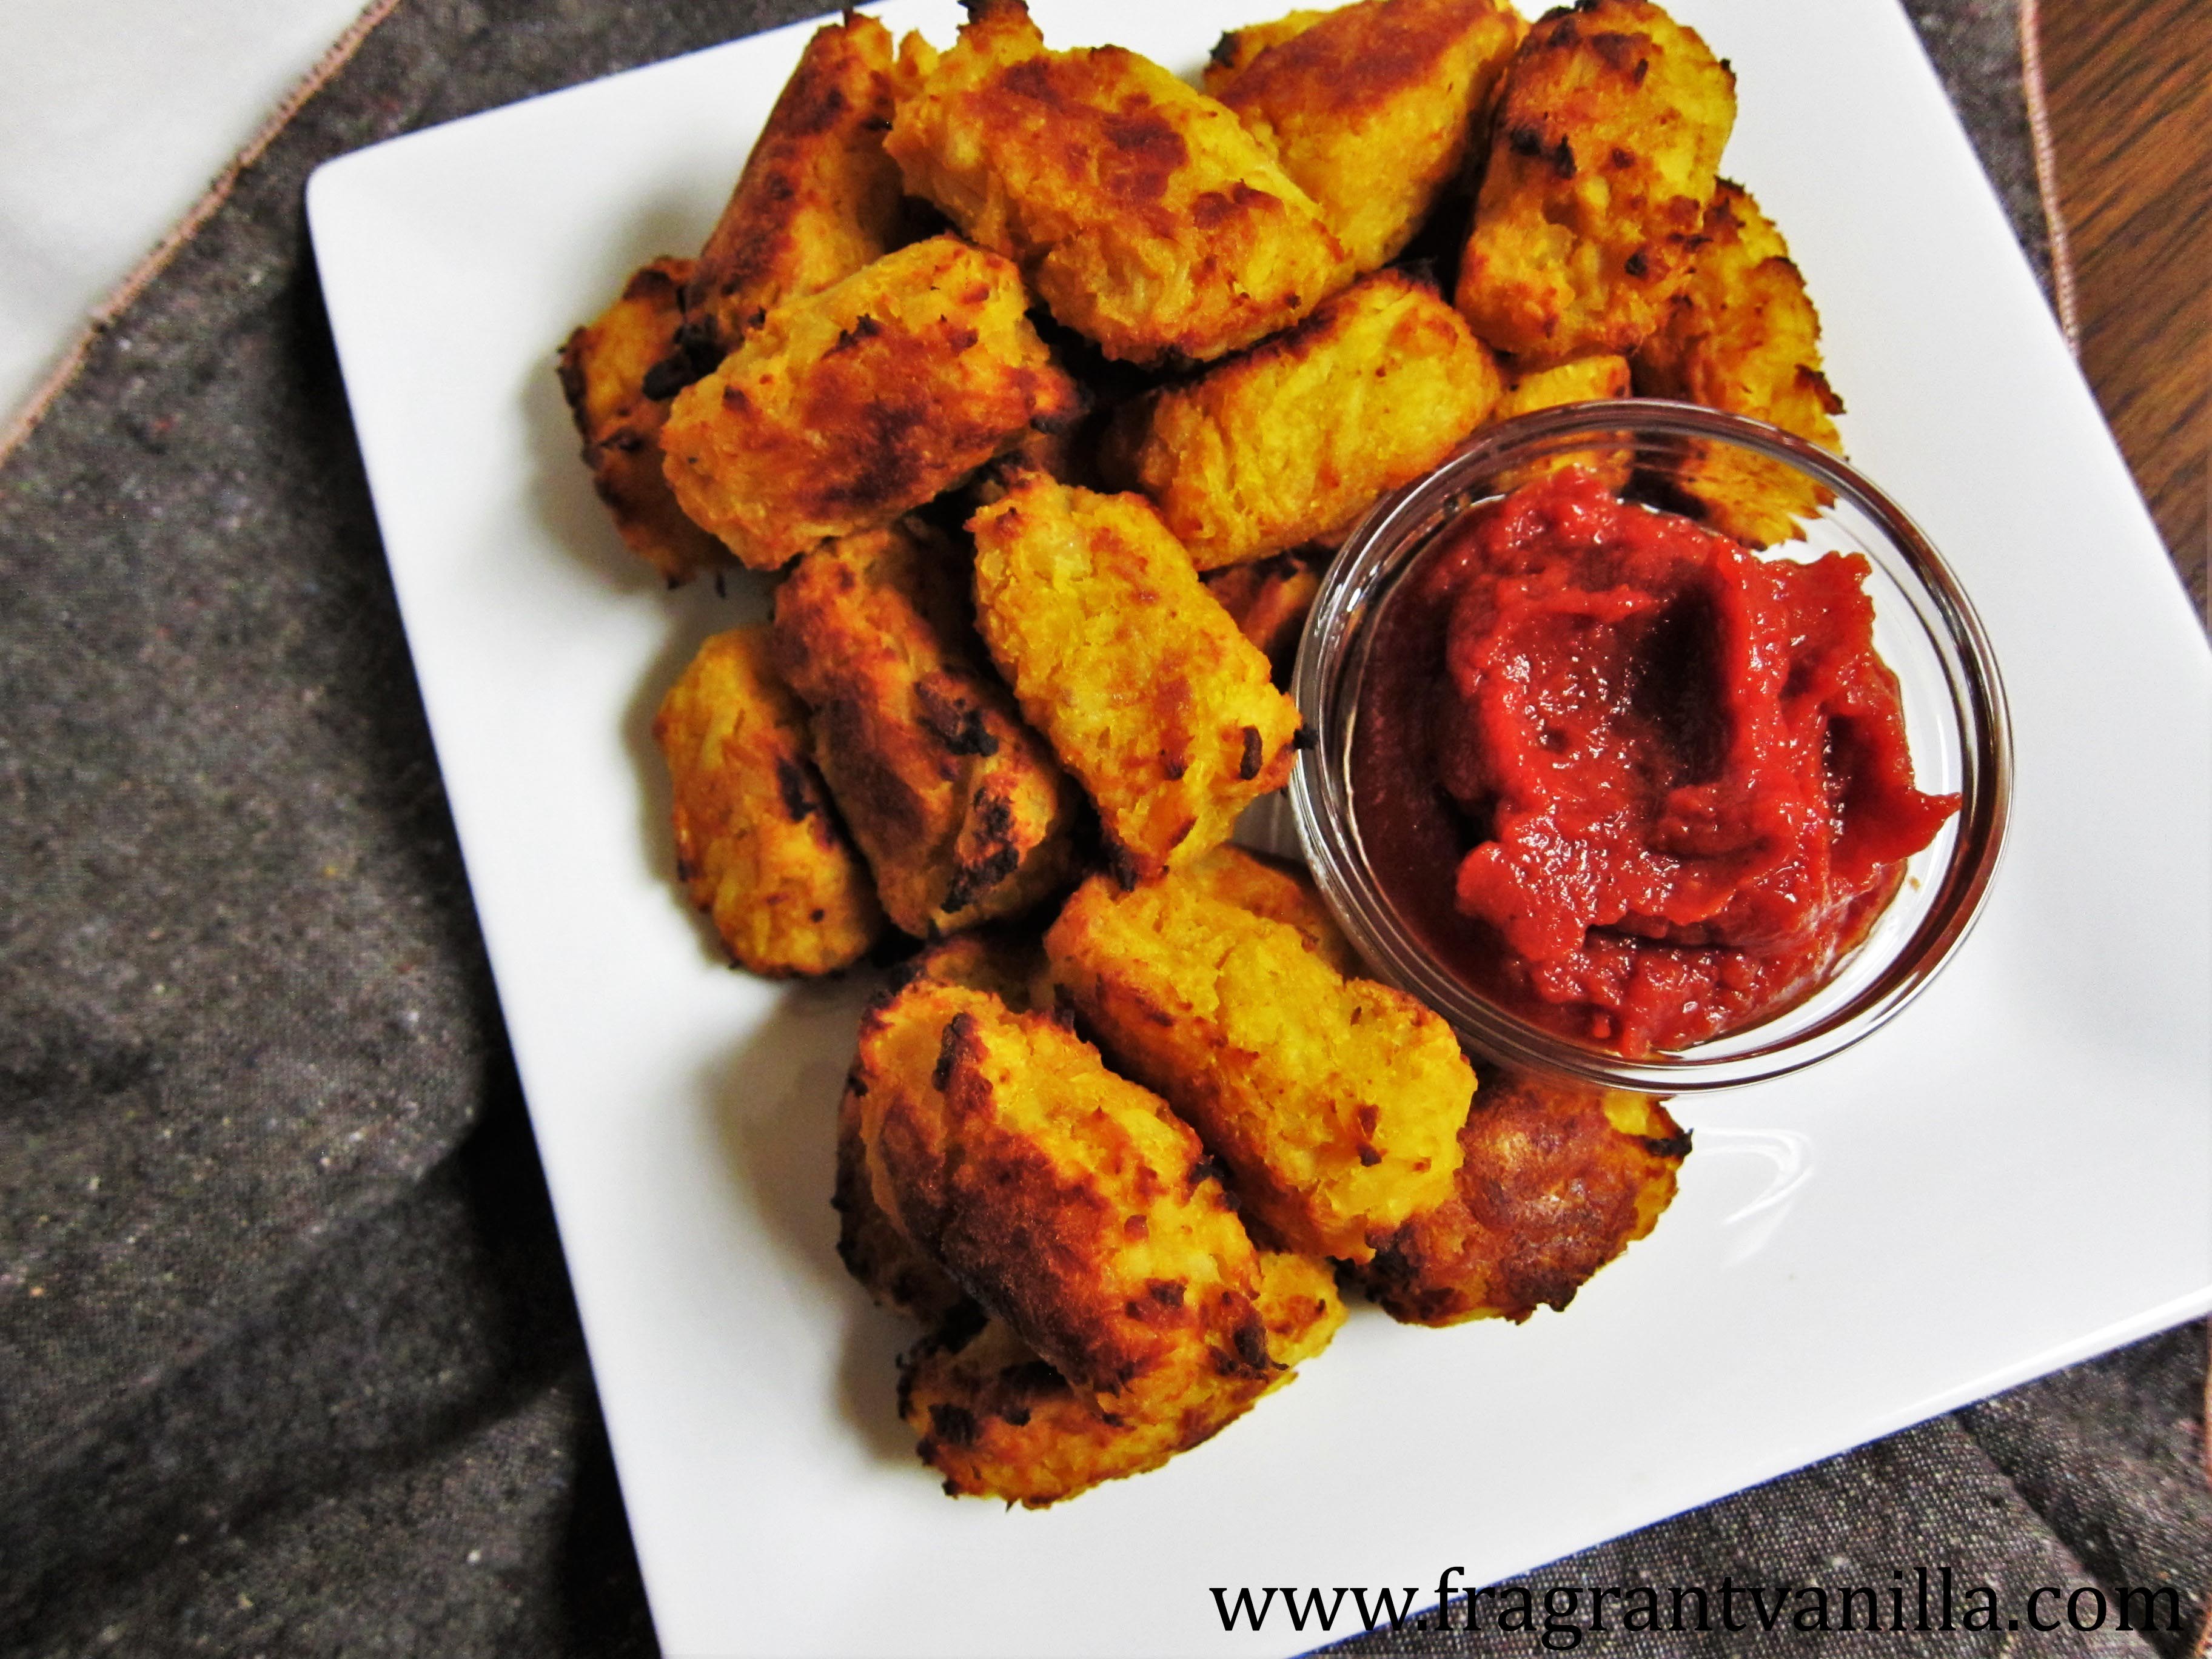
    It’s funny, growing up I was never a big fan of tater tots.  Whenever they were included in my school lunches, I just left them there, because for some reason they did not appeal to me.  French fries however were another story.  Kind of weird for a kid or teenager I know, but that is how I was.  So, as an adult, I decided to make my own tater tots at home once, and see if I liked them any better.  Well, I am happy to report I loved them!  They were so much better than the gross frozen ones in my school lunch.  I even made vegan tater tot hot dish with some!  I was no longer against tater tots.  But sadly, it has been last year since I made any.  I consider them sort of a cool weather thing, so now is the time.

    cheesy-squash-tots-2

    I wanted to make some yesterday, but I decided to do a variation on the ones from last year due to my lack of potatoes, and my love of all things squash right now.  I made cheesy squash tots.  They were made the same as the other ones, but these were even better!  They had the sweetness of butternut squash, the starch of the potatoes, and I could have eaten the whole batch!  I added some nutritional yeast for the cheesy flavor, and a dash of chipotle and sea salt and they were just right!  I made some of my Cranberry Chipotle Ketchup to dip them in and it was perfect!  I am not a big fan of most store bought ketchups because they have lots of sugar but this ketchup tastes better and is sweetened mostly with fruit.  These tots are crave worthy…just sayin’ so do make yourself some when you get the chance!

    cheesy-squash-tots-4

    Also, do you notice the pretty heathered granite napkin my tater tots are sitting on?  Well, it was a gift from Kari over at the Beautiful Ingredient!  She sells them over at Food 52!  She actually started making the napkins for her family, and turned it into a side business!  So cool! The napkin she sent me is made with organic cotton and hemp recycled fibers, so these are a product you can feel good about using! I love the idea of cloth napkins, not only for food photos, but for every day use. My family has been using them for a while, because it saves on costs and the environment of course.  These are good quality napkins that I can tell will hold up well for a long time. If you would like to buy some hers for yourself, you can find them HERE.  Also, Kari has been kind enough to offer a discount code on her products, so when you head over use the discount code: HOLIDAYVB1012 for 15% off of $25 orders through November. While you are over at her blog be sure to check out her recipes as well, they all sound delicious!

    cheesy-squash-tots

    Vegan Cheesy Squash Tots with Cranberry Chipotle Ketchup
    Serves 2-4 (two if you are me)

    Ingredients:

    • 3 russett potatoes, peeled and cut into 2 inch chunks
    • 1 medium butternut squash, peeled and cut into chunks
    • filtered water
    • sea salt to taste
    • 1/3 cup nutritional yeast
    • 1/4 tsp chipotle pepper
    • 1 Tbsp olive or avocado oil (optional)
    • Cranberry Chipotle Ketchup

    Directions:

    Pre-heat the oven to 425F degrees. To make the tater tots, place the potatoes and squash in a large pot of salted boiling water on the stove, and bring to a boil.  Cook until the potatoes and squash are just tender but not too mushy, and drain. Let cool until able to handle the potatoes, and grate them into a bowl.  Add sea salt to taste, nutritional yeast, chipotle pepper, and mix together. Shape the potatoes into tater tots (they will be a little sticky, but no worries, they will crisp up when baked).  Place on an oiled sheet pan, and drizzle with 1 Tbsp oil, tossing them around in it gently to coat them.  Place in the oven and bake for about 30 minutes until lightly browned and crisp on the outside. Serve with chipotle cranberry ketchup, or your favorite ketchup.

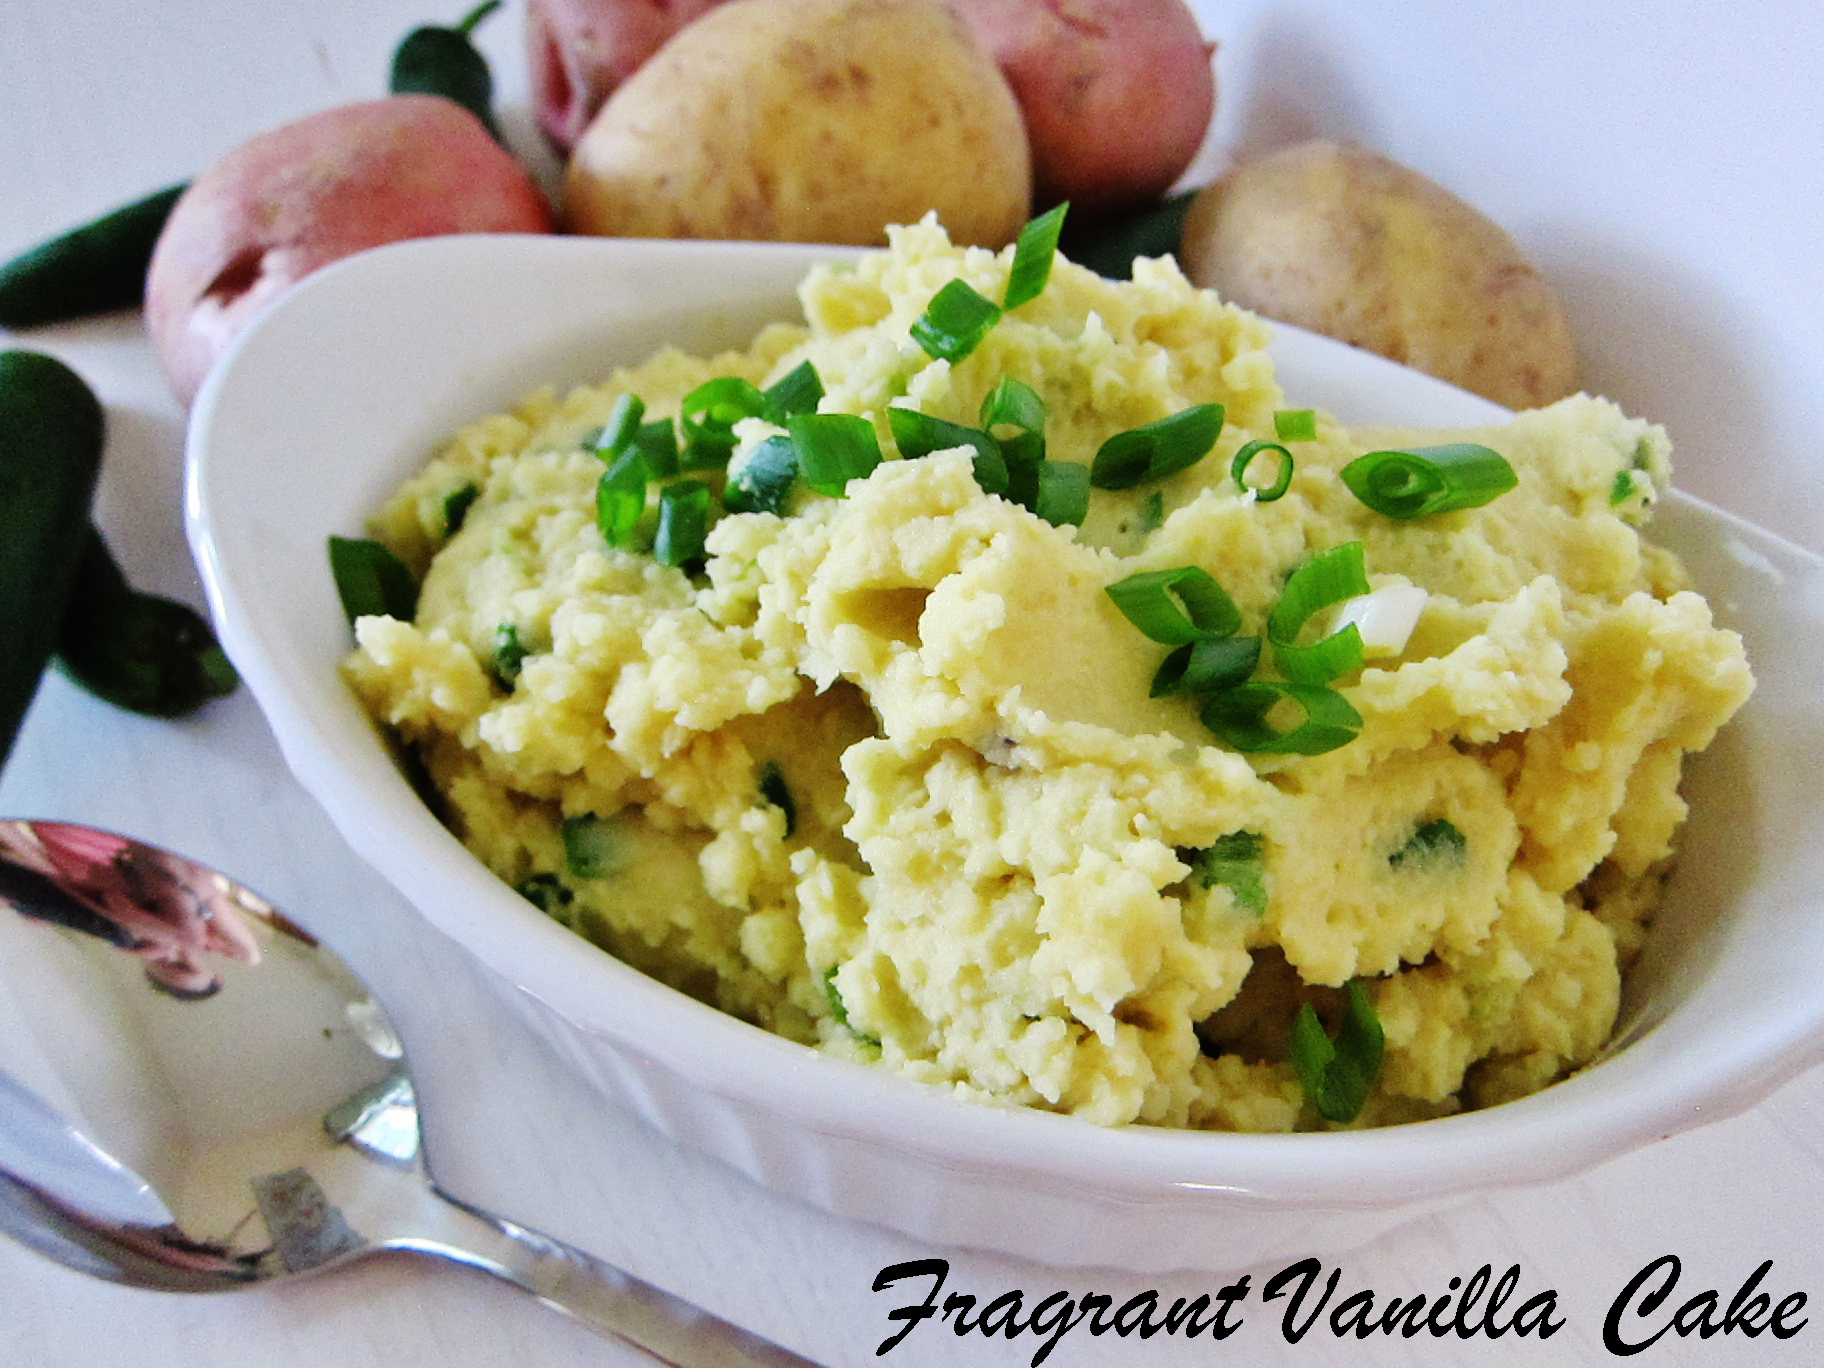
  • Vegan Jalapeno Cheddar Mashed Potatoes

    Vegan Jalapeno Cheddar Mashed Potatoes

    Jalapeno Cheddar Taters 1

    Who doesn’t like mashed potatoes?!  They are after all one of the quintessential comfort foods. I remember when I was little I loved them…especially when my Mom made them out of a box.  Sad, I know.  But my 5 year old self did not have the best tastes.  Funny because she made them the old fashioned way too, but I did not like those. My tastes changed as I got older though and I loved my Grandma’s home made mashed potatoes.  She knew what she was doing making them!  They were perfect clouds of fluffy warm rich delicious goodness that I could not wait to dive into on the Holidays. I now make my own mashed potatoes, and I think they are pretty tasty.  I had made some last Thanksgiving for my family and my Mom said that they were even better than Grandmas.  Which was a big complement.  Grandma would have been proud had she still been alive to try mine.

    Jalapeno Cheddar Taters 2

    I do not save them just for holidays though.  I had a craving for them recently, and I decided to make a version that was kicked up a notch. Not only were they fluffy and delicious, they had spicy bits of jalapeno, savory scallions, and the flavor of cheese.  Pretty awesome if you ask me.  They are a wonderful side dish for a non-meat loaf…or just as a midnight snack.  Crave worthy I tell you!  I need to create a new shepard’s pie recipe just so I can use these to top it.

    Jalapeno Cheddar Taters 3

    6 medium russet potatoes or Yukon gold potatoes peeled and cut into large cubes

    1 clove garlic, minced

    3 scallions, sliced

    1 jalapeno, minced

    sea salt to taste

    1/4 cup nutritional yeast

    1/2 cup coconut milk or other non dairy milk or as needed

    Place the potatoes in a large pot of salted water (the potatoes should be completely covered), and bring to a boil.  Lower to a simmer, and cook for about 10 minutes until the potatoes are very tender when pierced with a fork.  Drain, and put through a ricer (if you do not have a ricer, it is ok, they will still work just might not be as smooth) into a bowl.  If you do not have a ricer, simply use a potato masher.  Stir in all remaining ingredients, whipping the potatoes with a wooden spoon until they are light and fluffy, adding a little more milk if necessary.  Serve right away!