Tag: probiotics

  • Vegan Yogurt Cheesecake in a Jar

    Vegan Yogurt Cheesecake in a Jar

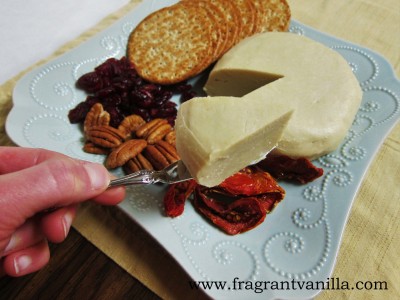
    Cheesecake is my favorite dessert. It was even before I went vegan. I thought I would never enjoy it again when I had to give up dairy, but boy was I wrong! Vegan cheesecakes are even more delicious than their dairy cousins if you ask me. In fact, it was a raw cheesecake that made me decide to take the plunge and go vegan 7 years ago. I tried it and it was so good, I decided that if I could still enjoy delicious goodies like cheesecake as a vegan it would not be bad after all! I don’t even miss any non-vegan items now.

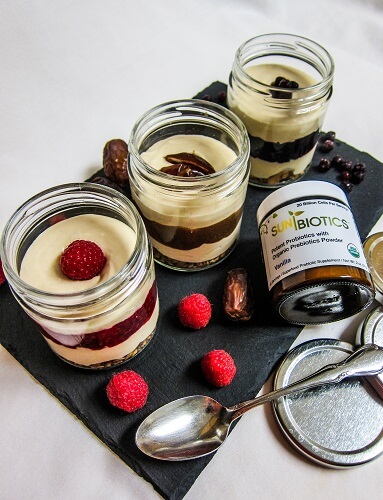
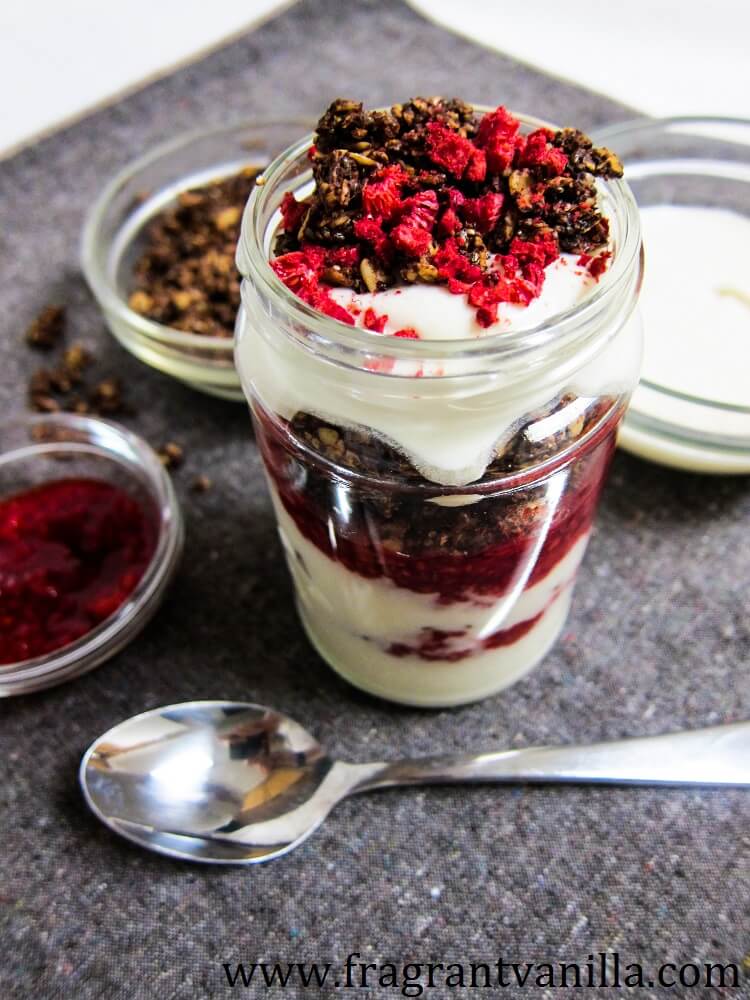
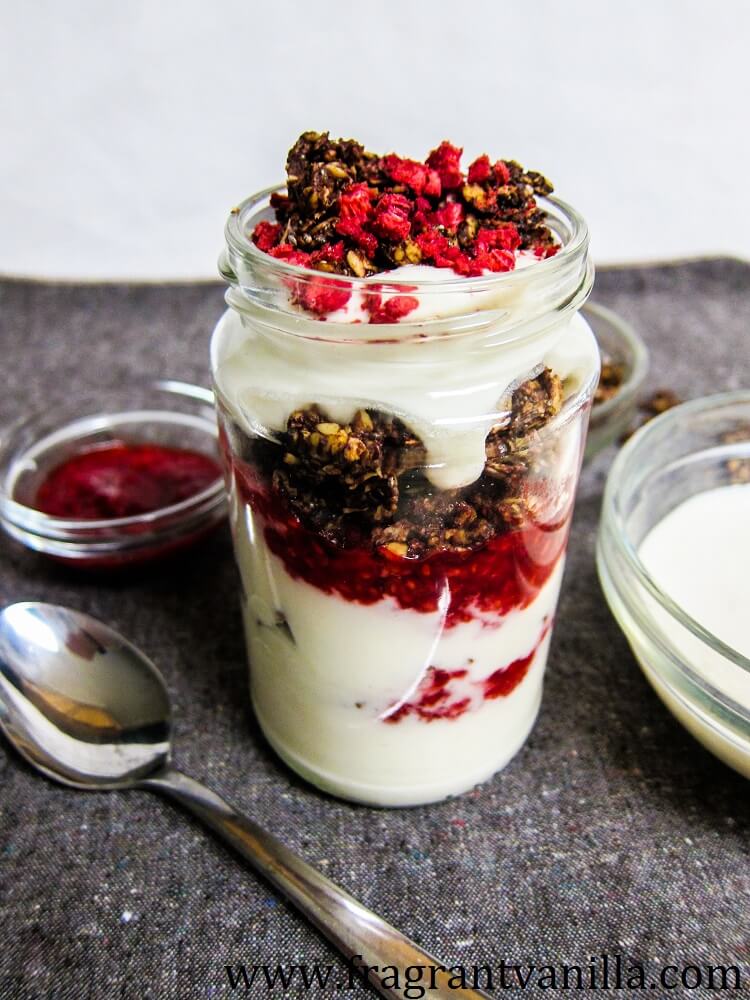
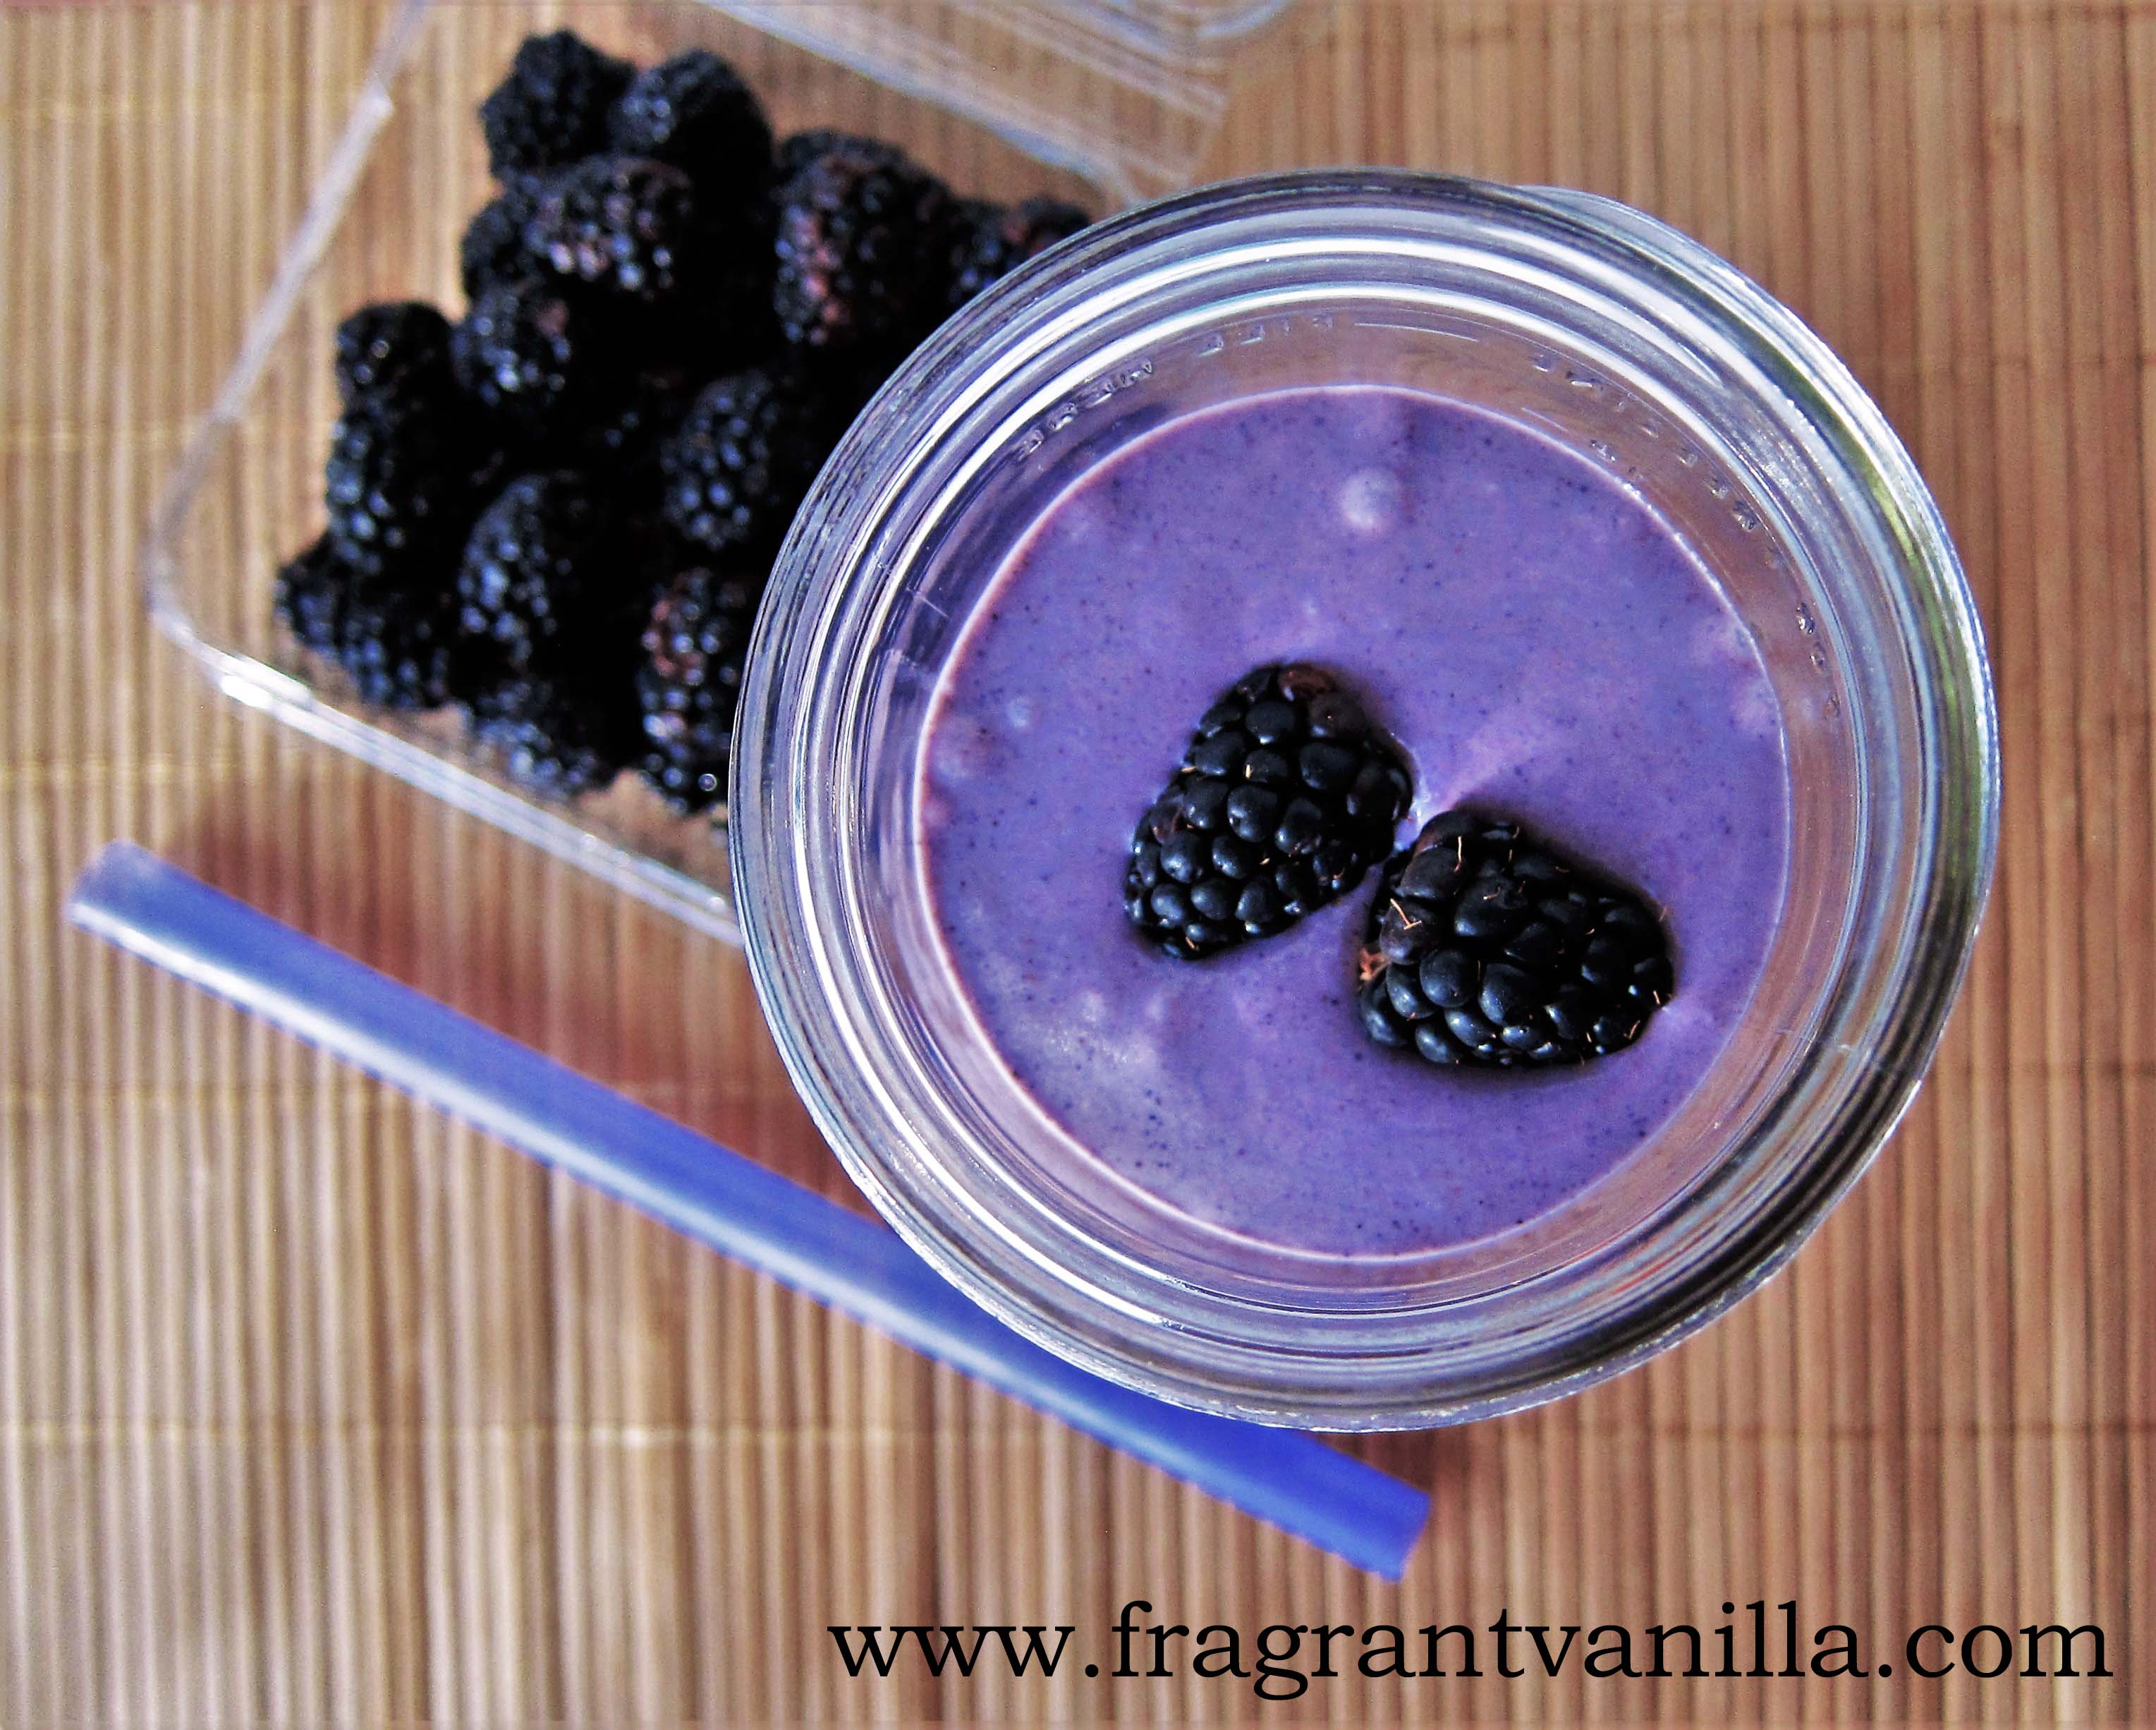
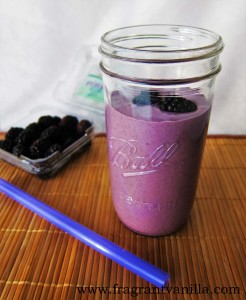
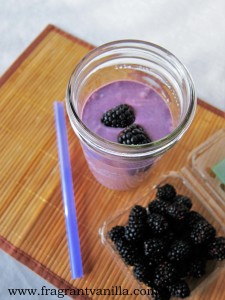
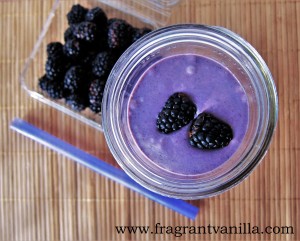
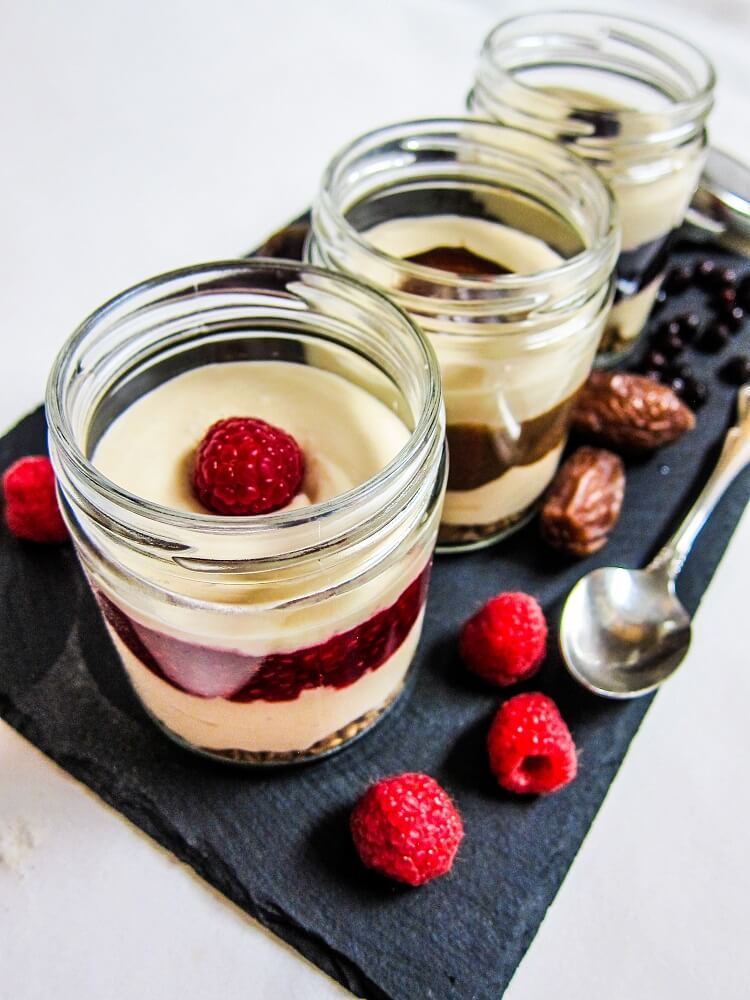
    Sometimes I want cheesecake, but I don’t want to make a whole big giant one just for myself and my boyfriend Eric so I make smaller ones. But last week, I had made some vanilla coconut yogurt using some vanilla Sunbiotics probiotics powder from Raw Guru and I decided that it would be amazing in some mini cheesecakes. I decided to do something I haven’t done before and made cheesecakes in a jar. Why not? They are portable, so if you want to bring a treat to go with your lunch, or save it for later, just screw the top on!

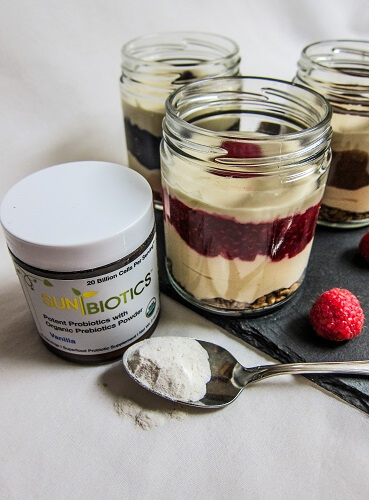
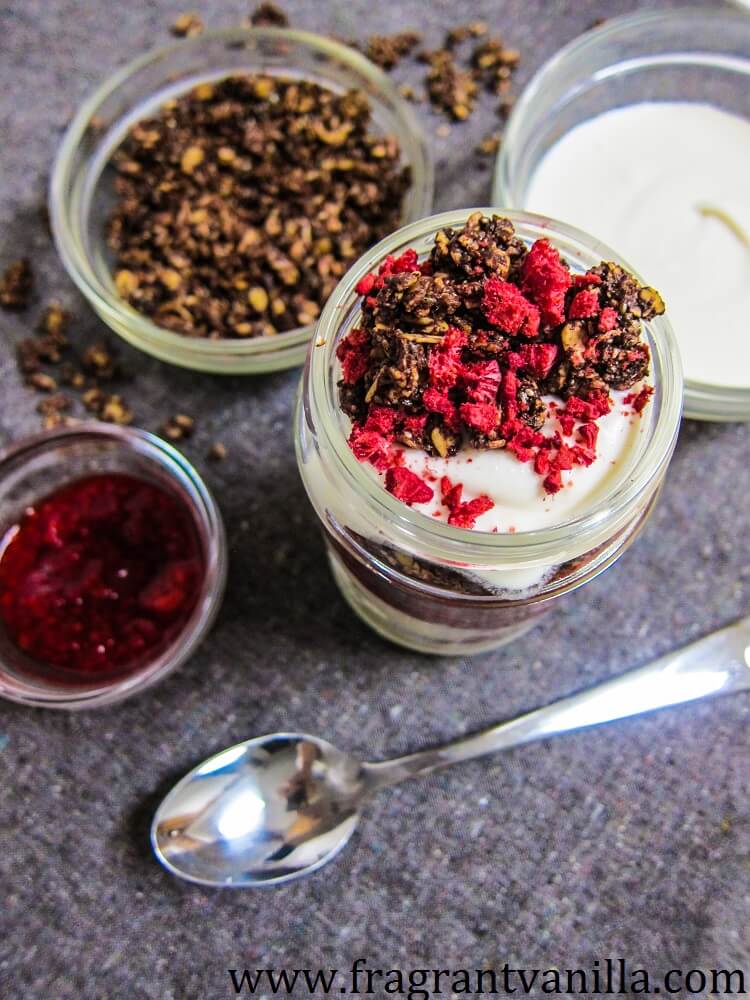
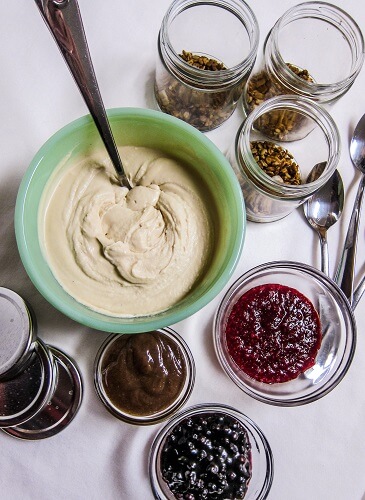
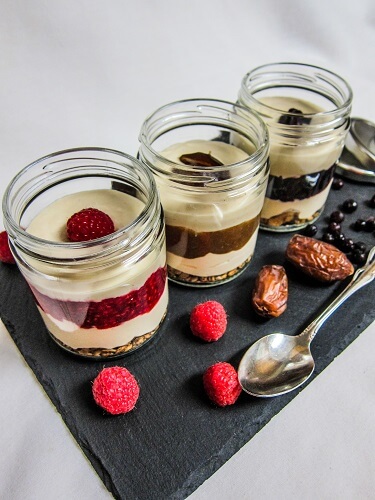
    Once the coconut yogurt is made, these are really easy to whip up fast. The yogurt is an overnight process, but it really is worth it, and that probiotic powder gives it the perfect tang! I try to get in a daily dose of gut healthy probiotics so I love that I can include it in dessert. I wanted these to be simple and easy so for the crust, I used some home made vanilla granola I already had on hand. You could use store bought though if you wanted.

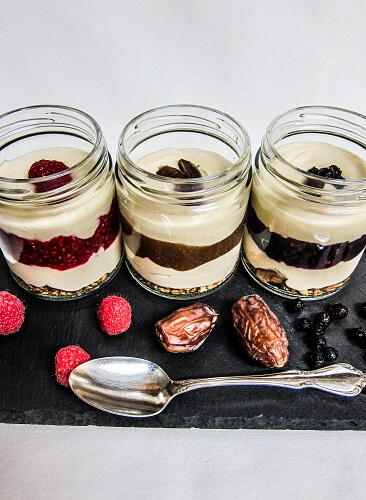
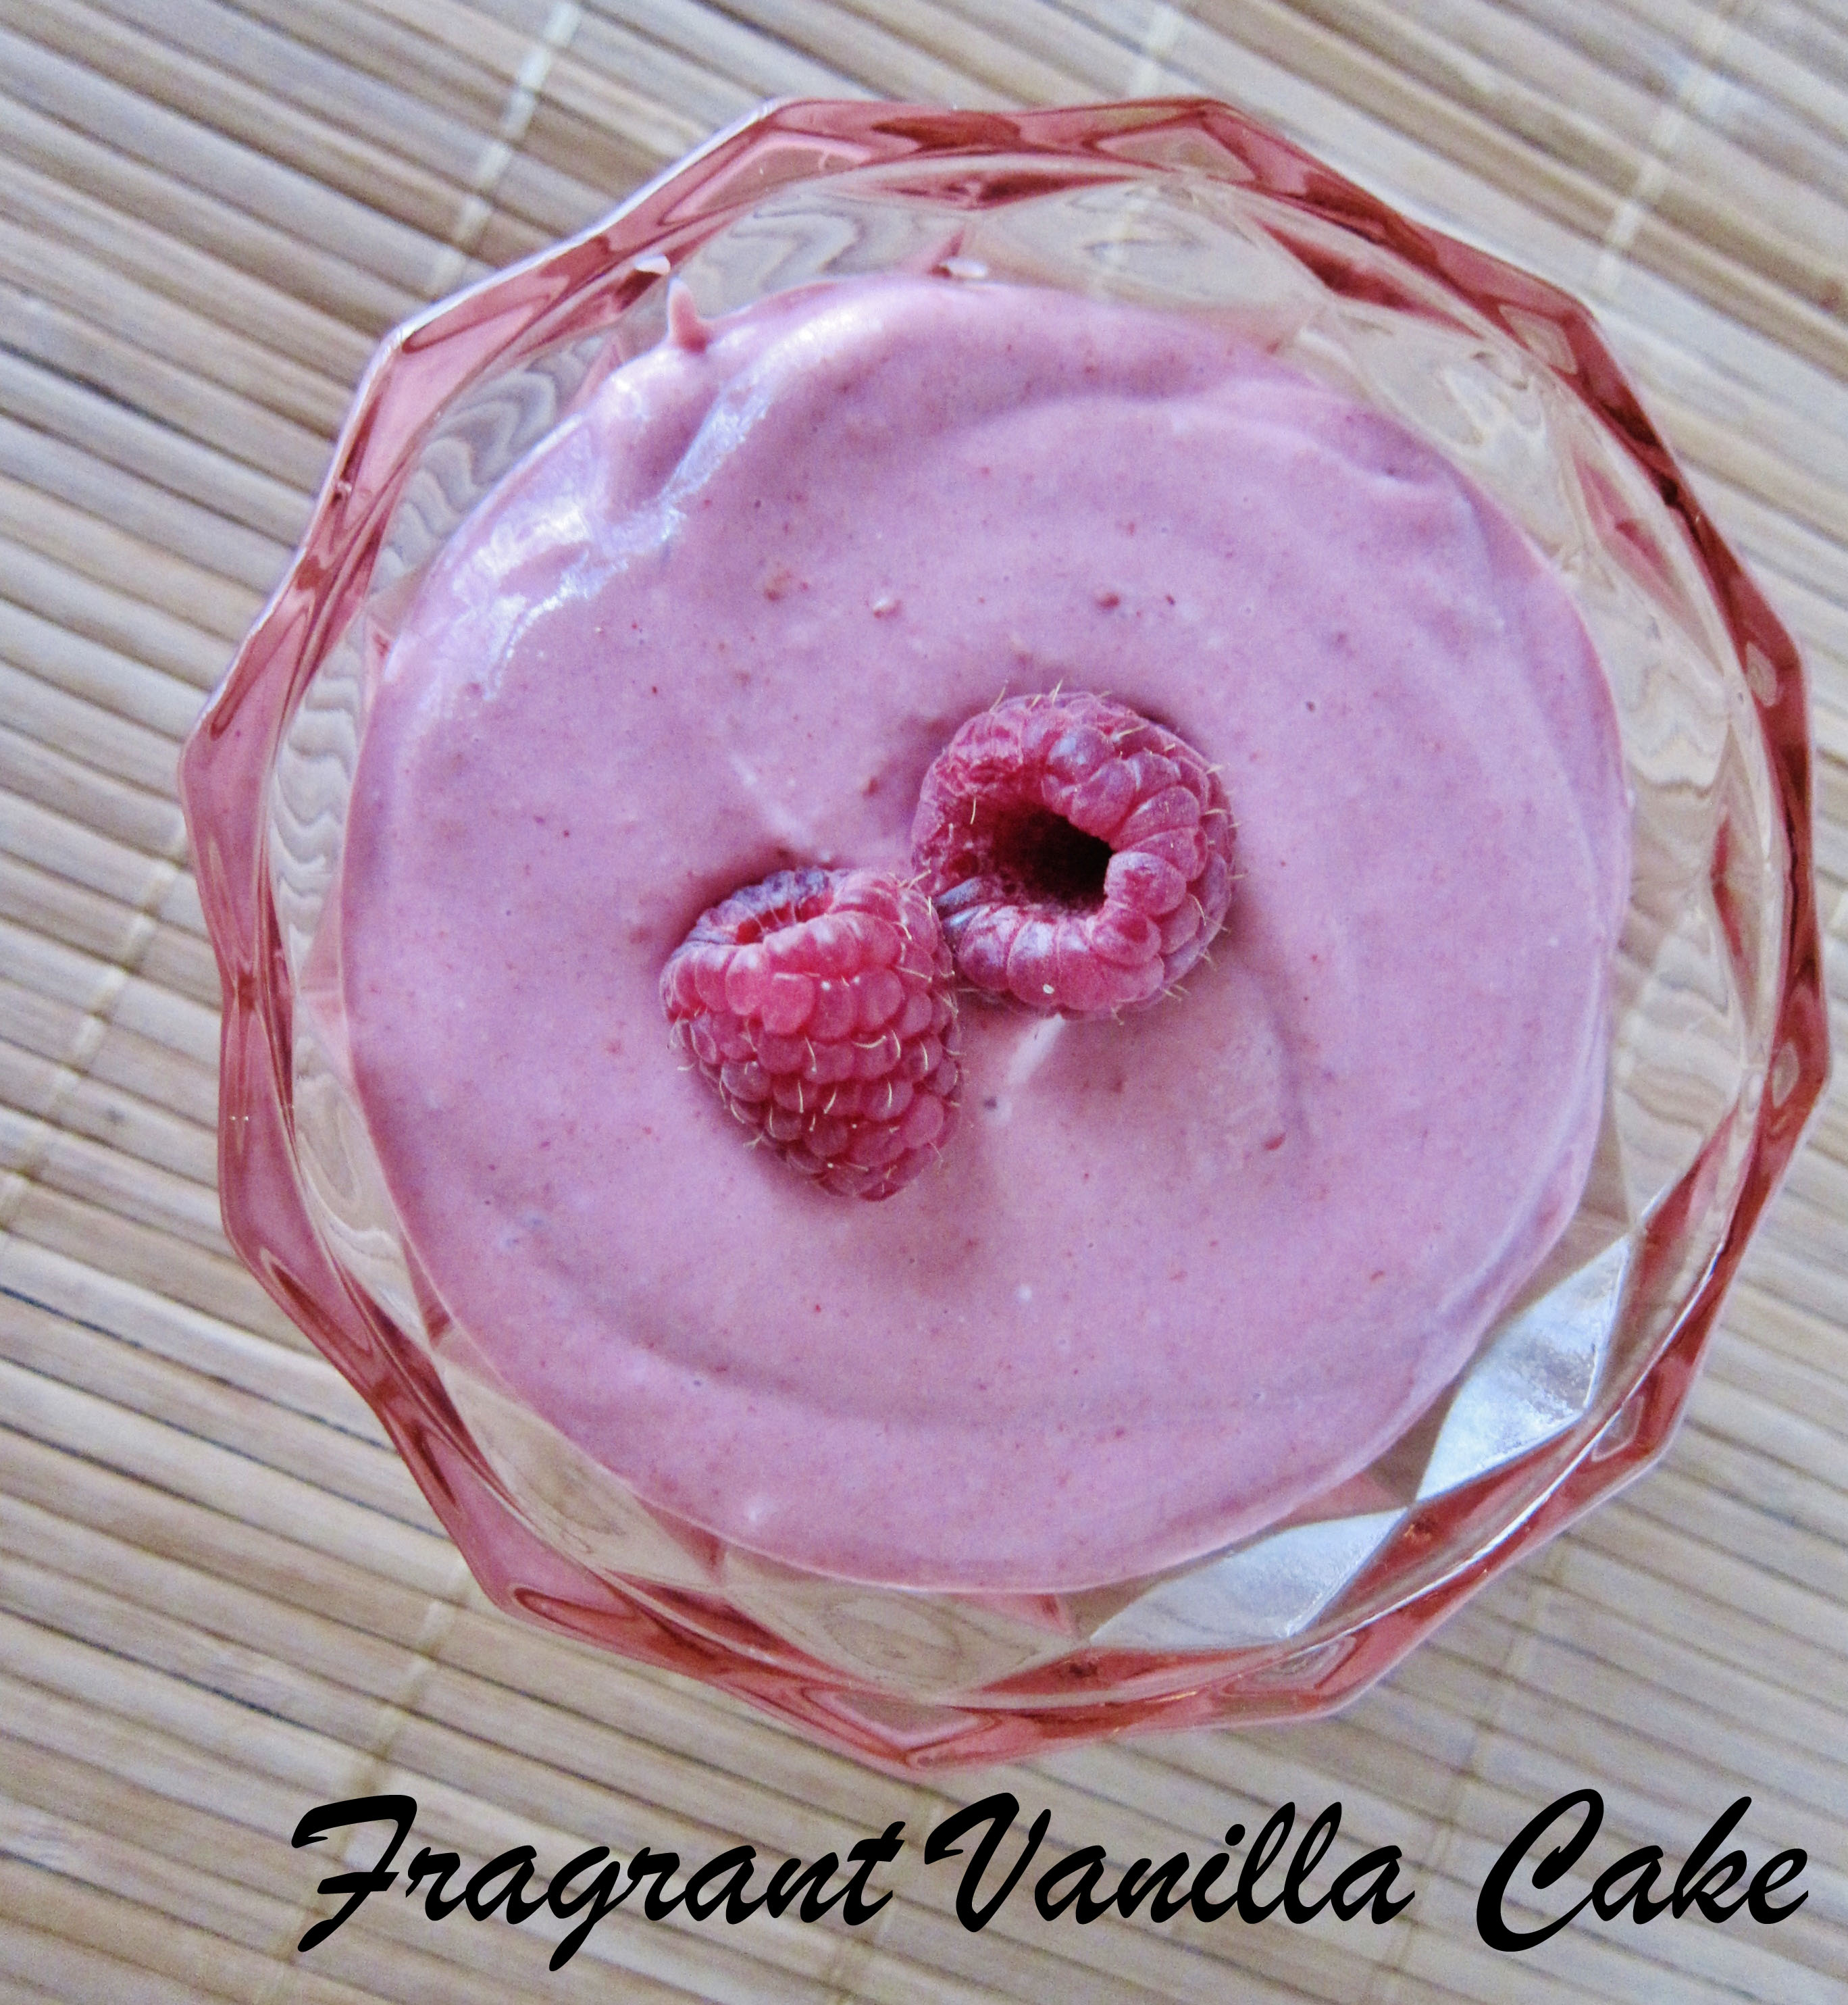
    I made 3 different fillings, because variety is the spice of life! But of course you could just pick one (the filling recipes below are for 3 jars). I made strawberry, blueberry and caramel and they were all super delicious! This is not a super stiff dense cheesecake, it is more light and creamy like a cheesecake yogurt mousse which is how I wanted it. These are crave worthy! If you are a cheesecake fan, give these a try!

    Vegan Yogurt Cheesecake in a Jar 

    Serves 3

    Ingredients:

    Vanilla Coconut Cheesecake Yogurt:

    • 2 cups organic full fat coconut milk (use a brand that has a thick cream at the top (2/3 of the can), such as Thai Kitchen or it won’t be thick enough)
    • 1 tsp Sunbiotics vanilla probiotic powder
    • 1/2 cup Dastony coconut butter or home made coconut butter (not oil), warmed to liquid
    • 1 tsp pure vanilla extract
    • ¼ cup date paste* or maple syrup

    For assembly:

    • Vegan Vanilla Granola
    • Flavor of choice (pick one):
      • Caramel: 1/2 cup date paste mixed with 3 Tbsp almond butter, 1 tsp vanilla and a few Tbsp filtered water to thin out (add more if too thick).
      • Raspberry: Mash 1 1/2 cups fresh or frozen raspberries with 2 Tbsp maple syrup
      • Blueberry: Mash 1 1 1/2 cup frozen (thawed) blueberries with 2 Tbsp maple syrup

    1. To make the yogurt, combine the coconut milk and probiotic powder in a blender and blend until smooth. Pour into a bowl, cover, and let sit overnight on the counter until tangy.
    2. The next day, blend with coconut butter, vanilla extract, and date paste until smooth, then pour into a bowl and chill until just thickened to the consistency or heavy cream.
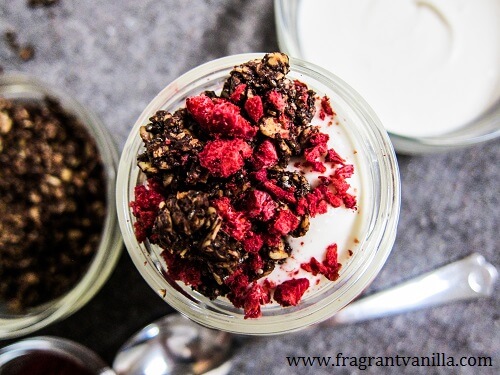
    3. To assemble, put 3 Tbsp granola into the bottom of 3 small jars, then top with 2/3 of the cheesecake yogurt (divided between the three).
    4. Top with the flavor of choice (dividing evenly between the three), then the remaining yogurt.
    5. Serve!
    6. Keeps in the refrigerator for up to 1 week with a lid on.

    *Date Paste: Blend 1 ¼ cups pitted soft medjool dates (if they are not soft, soak them in filtered water for 30 minutes and drain) and 2/3 cup filtered water in a blender until smooth.  Store in a jar in the refrigerator up to 1 week.  This can be used in recipes instead of other liquid sweeteners such as maple syrup or coconut nectar.

  • Chocolate Chia Crunch Granola and Coconut Yogurt Parfait

    Chocolate Chia Crunch Granola and Coconut Yogurt Parfait

    There was a time in my life before I went vegan that I ate yogurt every afternoon for a snack topped off with fruit.  I was a huge yogurt eater, because I figured it was packed with protein.  I always bought Greek yogurt in a big tub, because I liked how thick it was, and I ate about 2 cups a day.  I did not realize that is was causing some tummy troubles too until I decided to give up yogurt when I became vegan.  I replaced it with chia porridge for a while, because chia seeds have protein and healthy oils.  But I did not eat plant based yogurt for a few years after becoming vegan.  I am not much of a fan of commercial faux dairy products because a lot of them have processed ingredients or added sugar (I make exceptions if they have few healthy ingredients and not any added sugar) so I went without yogurt for a while, but then I finally decided to make some.  It was less difficult than  I thought it would be and I have since made many different kinds.  The first was with young fresh coconuts and it was delicious.  I flavored it with various fruits and it was even better than dairy yogurt in my opinion.  But I know young coconuts are expensive and not always practical unless you live somewhere tropical, so I have made equally good yogurt with canned coconut milk.  Coconut milk yogurt is my favorite, over other plant based yogurts.

    So, I have been seeing a bunch of commercials lately for yogurt with toppings, and I loved the idea so I decided to make my own.  I thought a crunchy element and a fruity element would be perfect to combine with my vanilla coconut yogurt.  For the crunchy, I made a chocolate chia granola.  It tastes like dessert, but it packs fiber and protein!  It was super simple to make, and it is actually oil free because I used a little nut butter to coat it. I have to warn you though, once you start munching on it it is hard to put down.  I mashed up some organic raspberries as a sort of simple and healthier jam to include with the yogurt as well. I am not a fan of super sweet jam with loads of sugar, I would rather mash up fresh fruit instead!  Here’s a tip, if your fruit is a little too runny when you mash it up (if you are making this sort of jam) add a few tsp chia seeds to it, and it will thicken it right up.  It is perfect for raspberries, because they are already seedy and the chia seeds blend right in. I am a chunky jam sort of gal so seeds don’t bother me at all.  I didn’t need any for this though, because you don’t really need a thick jam.

    I thought about pouring the yogurt into bowls, and just topping it with the granola and berries, but I thought layering it into a parfait would be more fun.  So that is how it ended up.  It was super delicious!  Of course this could be breakfast, or a dessert or both!  The yogurt is slightly tangy and sweet and it is perfect with the tart jammy berries and crunchy chocolate cookie like granola! I am going to have to try more new yogurt and topping combos!

    Chocolate Chia Crunch Granola and Coconut Yogurt Parfait

    Serves 3

    Ingredients:

    Vanilla Coconut Yogurt:

    • 2 cups organic full fat coconut milk
    • ½ tsp probiotic powder
    • 3-4 Tbsp coconut butter (not oil), warmed to liquid*
    • 1 tsp pure vanilla extract
    • ¼ cup date paste* or maple syrup


    Chocolate Granola:

    • 2 cups gluten free oats
    • ¼ cup plus 2 Tbsp almond butter
    • 3 Tbsp date paste or maple syrup
    • 2 Tbsp cocoa powder
    • 3 Tbsp chia seeds
    • ¼ tsp sea salt


    3 cups organic raspberries (fresh or thawed frozen)


    1. To make the yogurt, combine the coconut milk and probiotic powder in a blender and blend until smooth. Pour into a bowl, cover, and let sit overnight on the counter until tangy.
    2. The next day, blend with coconut butter, vanilla extract, and date paste until smooth, then pour into a bowl and chill.
    3. To make the granola, preheat oven to 350F degrees.
    4. combine all ingredients in a bowl, and mix well with your hands until it is evenly coated with the nut butter, date paste and cocoa powder. Spread out on a parchment lined sheet pan.
    5. Place in the oven and bake for 35 minutes, stirring and rotating halfway through. Let cool completely.
    6. Mash the raspberries.
    7. To assemble, layer the yogurt, raspberries and granola into jars or glasses, and enjoy!


    *Date Paste: Blend 1 ¼ cups pitted soft medjool dates (if they are not soft, soak them in filtered water for 30 minutes and drain) and 2/3 cup filtered water in a blender until smooth.  Store in a jar in the refrigerator up to 1 week.  This can be used in recipes instead of other liquid sweeteners such as maple syrup or coconut nectar.

    *If your coconut milk is on the thinner side use 4 Tbsp coconut butter, it thickens the yogurt.


  • Pomegranate Rosemary Kombucha

    Pomegranate Rosemary Kombucha

    I used to make kombucha all the time, after Eric got me into it a few years back.  I would make all sorts of delicious flavors, depending on what fruit was in season, and it was pretty exciting!  But then my kombucha making fell by the wayside when I got busy, and other things took priority.  I had been meaning to get back into it for a while now, because I do love kombucha and it is so expensive at the store.  So, I finally started again, about a month ago, and I am now enjoying delicious probiotic rich, healthy kombucha that is pretty cost effective.  If you love kombucha, I definitely recommend making your own, because you will save so much money, and you can make delicious flavor combinations.  Not to mention it is healthier than some of the store bought brands.  It may sound like a difficult process, but really it is easy once you get into it and have it fermenting at all times so you always have a supply.

    pomegranate-rosemary-kombucha-2

    It isn’t just the flavor and refreshing element of the kombucha that I enjoy, but the fact that it supplies my body with healthy probiotics.  I feel like when I am drinking it my digestion is better, which is probably because of the healthy bacteria it contributes to my gut. I like to flavor mine with a little fruit to make it more interesting, although I like it just plain sometimes as well.  This last batch, I decided to flavor with some pomegranate and rosemary because it was just what I happened to have on hand, and it seemed like a good, festive holiday combination!

    pomegranate-rosemary-kombucha

    It turned out delicious, which is why I recommend trying it if you get some kombucha going.  Pour some of this kombucha into a glass, and it is sort of like a healthier cocktail!  Don’t let the amount of time it takes to make this discourage you, it is mostly hands off, and like I said before, once you get a continuous supply going it is easy.  Feel free to sub in other fruit for the pomegranate (keeping in mind you might need to puree it) and omit the rosemary or add a different herb to your liking.  Also if you have any questions, I am always happy to answer them in the comments section!

    pomegranate-rosemary-kombucha-1

    Pomegranate Rosemary Kombucha
    Makes about 4 quarts

    Ingredients:

    • 4 quarts filtered water
    • 5 Tbsp loose green tea placed in a piece of cheesecloth and tied (like a sachet).
    • 1 cup raw sugar
    • 1 large glass jar (large enough to hold the 4 quarts liquid)
    • 1 cup starter tea (half a 16 oz plain kombucha from the store will work )
    • 1 Scoby*
    • Cheesecloth or large coffee filters**
    • 4 32 oz glass jars
    • 1 cup fresh pomegranate seeds, crushed to release their juices
    • a few sprigs fresh organic rosemary

    Instructions:

    1. To make the kombucha, wash your hands very well with apple cider vinegar or soap (but not antibacterial because this can contaminate the Kombucha and make it not work).  Wash out the glass jar you will be using to make the kombucha with the cider vinegar as well to sanitize it.
    2. Next, fill a 3 liter pot with 4 quarts of filtered water, and bring to a boil.  Boil for 5 minutes to sanitize it.
    3. Add the green tea sachet, and let steep for about 3 minutes (or as long as you would normally brew tea).  Turn off heat and add 1 cup raw sugar. Stir to dissolve, then let sit until the water cools to 75 degrees F.  You do not want to add the culture when it is hot, or it will kill it.
    4. When the tea is cool, pour it into the glass jar and add the starter tea, Sanitize hands with the cider vinegar and gently put the scoby into the tea, cover the top of the jar with the cloth, and secure it tightly with rubber band.
    5. Put the jar somewhere warm and dark where it won’t be disturbed (I put mine in a closet on the top shelf). Temperature should be consistently at least 70 degrees if possible. Lower temperatures will make it grow slowly, but below 70ºF makes it more likely that unwanted organisms will start growing too.
    6. Wait about a week. When the tea starts to get smelly like vinegar, you can start tasting it.  The scoby should form another scoby in the jar, and it may sink and it may float. If it floats though, it helps prevent mold. Note that if you see mold you have to throw the batch away and start over with a new scoby.
    7. When ready to test, remove a small amount.  The best way to pull a sample is with a straw. Dip the straw about halfway into the tea, cover the end with your finger, pull the straw out and drink the liquid inside or put that liquid on the test strip.  If the kombucha tastes really sweet, it is not done, and it needs more time to eat the sugar.  If it tastes slightly vinegary, it is done and ready to be put in jars.  How warm it is in your house affects how fast the kombucha is ready.  I find that in the Summer mine is done faster.
    8. Gently remove original scoby and new baby scoby with clean hands (sanitized with the vinegar is fine) and set them in a clean container. They may be stuck together. Pour a little of the kombucha on them and cover them to save them for another batch (they should be kept at room temperature.
    9. Pour the brewed kombucha into clean jars (but reserve 1 cup of the kombucha to make another batch next time).  Fill them almost to the top but leave a little space for them to get fizzy and to add the flavor.  Add some of the pomegranate seeds to to each jar, then sprinkle a few of the rosemary leaves into each jar.  Put the lids on tight and let sit 3-5 days at room temperature to ferment and become carbonated.  Once they are fizzy, you can strain them into other clean jars (or not depending on your taste).  Store in the fridge.

    *a scoby is a culture that is used to make kombucha, you can read more about them here: http://en.wikipedia.org/wiki/Kombucha

    I grew my own, see how HERE.

    **If you tend to have fruit flies, use the coffee filters, because the fruit flies can not go through them, you do not want them getting into your kombucha because you will have to throw it out.

  • Spicy Ginger Garlic Saurkraut

    Spicy Ginger Garlic Saurkraut

    ginger garlic saurkraut

    What many people don’t realize is that keeping your gut healthy is important.  If it is not healthy, and does not have enough healthy bacteria in it, you might start to have problems with digestion, get sick more often (because much of your immune system is there), have skin issues, and feel tired among other things.  And those aren’t even the most serious issues.  I don’t want all that, so I try my best to feed myself probiotic rich foods.  You can get probiotics in pill form, but of course you have to be careful what kind.  Some are not vegan, and some do not work as well as they say that they do.  It is really best to get most of your probiotics from your diet if you can.  Things like kombucha, sauerkraut, cultured coconut yogurt, and miso are rich in probiotics.  I started out making sauerkraut thinking it would be a fun thing to do, and because I like it, but I then realized that it can be a great source of probiotics!

    ginger garlic saurkraut 2

    Today I am sharing with you my latest sauerkraut.  I will call it quasi kimchee, because it was inspired by some kimchee.  I bought some kimchee at the health food store I work in (vegan of course, it did not contain any fish like some of the traditional ones do), and it was so good I was hooked.  Problem is it is kind of spendy, and I knew I could make something similar at home.  So I just used the same ingredients listed in it, and came up with something that I liked just as much.  The process is different than making kimchee, so before anyone starts telling me it is not authentic, I was not trying to be.  I just wanted something that tasted good. Saurkraut is really easy to make once you get the hang of it, and so worth it to get your daily dose of probiotics in.  I love adding it to my lunch salads, or wraps to give them that extra punch of flavor!  Don’t be afraid to try making your own, I have never had a batch not turn out.

    ginger garlic saurkraut 3

    Spicy Ginger Garlic Saurkraut

    Makes 2 32 oz jars

    1 large head green cabbage, 3 outer leaves reserved whole, and the rest thinly sliced or shredded
    1 Tbsp sea salt
    1 large carrot, cut julienne
    1 garlic clove, sliced
    1 1/2 Tbsp fresh ginger, minced
    1 1/2 tsp red pepper flakes
    filtered water as needed
    1 large 8 cup jar with a wide mouth

    In a large bowl, combine the sliced cabbage with the sea salt. Massage with your hands, squeezing it until you get a good amount of water out of the cabbage at the bottom of the bowl and it is softened a little. Mix in the carrot, garlic, ginger, pepper flakes. Place in the 8 cup jar, pressing out any air, and pour in the extra water at the bottom of the bowl. Top with the reserved cabbage leaves. If the water does not rise above the cabbage in the jar, pour filtered water over it so it does (you want all the cabbage completely submerged). Put a weight on top of the cabbage leaves so that they stay submerged (I used a small prep bowl that fit inside the jar) you do not want the cabbage exposed to the air. Cover the jar with a towel and place it somewhere where it will not be disturbed like in a closet (and you may want to set it on a tray in case it leaks a little). Check it every few days to make sure it does not have any mold on the top, and if it does simply remove it with a spoon (the rest is ok as long as it is in the brine). After 7 days, it should be ready (or when it is fermented to your liking, I just find that mine is usually done after 7). Place in jars and store in the fridge.


  • Vegan Sharp Cheddar Cheeze

    Vegan Sharp Cheddar Cheeze

    Vegan Sharp Cheddar 1

    I recently had some really good vegan cheese, and it got me to thinking I should make some of my own again.  It has been a while since I have, and I usually just make the quick type that is done right away the day you start it. This time though, I wanted to make a cheddar type cheese.  So, a little more sharp with more character.  I happened to have just enough cashews in my fridge too!  Of course, macadamia nuts are my nut of choice when it comes to vegan cheese, but they are so spendy so cashews are a good substitute.

    Vegan Sharp Cheddar 3

    It is pretty simple to make, although it takes a few days.  The reason it has to sit overnight is so that the probiotic powder can do its work on the cheese to give it that tangy flavor.  I also added miso to give it even more cheese flavor, since the mac and cheese recipes I used to make always had it included.  After the cheese sat overnight, I thought it needed to be a bit more firm, so I added some coconut butter before shaping it into a little wheel.

    Vegan Sharp Cheddar

    I am calling this vegan sharp cheddar cheese, because sharp cheddar is what it reminded me of most, and I love the word cheeze for some reason.  Plus, I know some people freak out over me calling this cheese even if it is vegan (so silly, its my blog so I can call it what I want to, and hey it is cultured).  So cheeze it is.  Really good cheeze too.  I made a pasta dish with the stuff that wasn’t snacked on, which I will share soon.

    Vegan Sharp Cheddar 2

    Vegan Sharp Cheddar Cheeze

    Serves 10

    2 cups raw cashews, soaked for 4 hours, and drained

    1 tsp probiotic powder

    1/4 cup filtered water

    1 Tbsp white miso

    1/2 tsp sea salt (or to taste)

    1/3 cup raw coconut butter, warmed to liquid

    In a high speed blender combine the soaked cashews, probiotic powder, filtered water, and miso and blend until smooth.  Pour into a bowl, cover and place in a warm spot (like 70 degrees).  Let sit overnight.  When the cheese is tangy, add it to a food processor or blender and add the sea salt and coconut butter and blend until well incorporated.  Pour into a bowl, place in the freezer for about 10 minutes, then scrape onto a piece of plastic wrap, and shape into a wheel while wrapping tightly. Place in the refrigerator until firm, a few hours.  Then enjoy!


  • Vegan Blackberry Kefir

    Vegan Blackberry Kefir

    When I was at the store last weekend with Eric, he was gravitating towards the kefir. He said his stomach felt messed up, and he thought the probiotics might help. Maybe so, but the dairy might upset it more I said. I am not a fan of dairy obviously, being vegan. I used to eat lots and lots of yogurt before I was vegan and I often had an upset stomach and intestines. When I stopped eating the yogurt that I thought was so healthy, those symptoms went away. So anyways, back to that kefir, I thought to myself, I should make a vegan version!

    Blackberry Kefir 1

    Because it sounded really good actually. I have made coconut yogurt before, so why not make a probiotic rich drinkable version to share with Eric too since he felt he needed it. I had frozen blackberries on hand, so I thought blackberry kefir would be perfect. It is actually really easy to make, it does have to sit overnight though. I added in some Original Sprout Living Epic Protein so it has protein like dairy yogurt (so no excuses to not make it for those people who always say to me they are missing out on the protein in non-dairy yogurt.)

    Blackberry Kefir 2

    This is kind of rich, but so was the full fat yogurt I used to eat, and you just have a little not the whole thing in one sitting (although Eric has been known to do that with such beverages ha ha). It was delicious. The most delicious drinkable yogurt I have had. And not overly sweet just sweet enough to make me and Eric both happy (he likes it more sweet, me less). You do not have to drink dairy to enjoy delicious yogurt!

    Blackberry Kefir

    Vegan Blackberry Kefir
    Makes about 2 cups

    1 15 oz can full fat organic coconut milk*
    2 scoops (about 1/4 cup) Sprout Living Epic Original Protein Powder
    2 tsp powdered probiotics (I emptied out the capsules)
    1/2 cup raw cashew butter
    1 cup organic blackberries
    2 Tbsp maple syrup (or to taste)

    In a blender, blend together the coconut milk, protein powder and probiotics. Pour into a bowl, cover, and let sit overnight in a warm place (about 75F degrees at least). The next day, blend in all remaining ingredients, chill and enjoy! Keeps for one week in the refrigerator.

    *If you wanted to make this recipe raw, just substitute thick raw coconut milk (about 1 3/4 cups) for the canned.

    *If you find it is too thick after you make it (since it may vary depending on the coconut milk you use etc.), add a little water to thin it out.


  • Spicy Pink Jalapeno Saurkraut

    Spicy Pink Jalapeno Saurkraut

    Spicy Saurkraut 2

    An unhappy tummy is an unhappy person. At least with my personal experience.  Which is why I like to keep my gut happy.  Eating probiotics is one way to help with that.  So why is it important to have a healthy gut?  Well, a lot of your immunity lives in your gut. The healthy bacteria are important for you to stay healthy.  An unhealthy gut can cause inflammation in your body, acne, fatigue and cause your immunity to go down so you can be more susceptible to illness.  And I don’t want that.  So I enjoy eating things rich in probiotics like sauerkraut.  I make my own at home and it is really easy.  I don’t always make the same kind because I like to keep things interesting.

    Spicy Saurkraut 1

    Using purple cabbage is my favorite though because it makes the most beautiful pink saukraut!  The last batch I made was a spicy jalapeno and it was so good I figured some of you might enjoy it too so I decided to share the recipe.  I like this on top of my lunch salad as an added flavor or just on its own.  I have always been a fan of sauerkraut since I was young, but this is the best stuff I have had!  In case you would like a few more probiotic rich recipes, check these out:

    003

    Blackberry Lavender Kombucha

    Raspberry Coconut Yogurt

    Raw Raspberry Coconut Yogurt

    Spicy Saurkraut 3

    Spicy Pink Jalapeno Saurkraut

    Makes 2 32 oz jars

    1 large head red cabbage, 3 outer leaves reserved whole, and the rest thinly sliced or shredded

    1 Tbsp sea salt

    1 large carrot, cut julienne

    1 garlic clove, sliced

    2 tsp cumin seeds

    2 tsp coriander seeds

    4 jalapeno or chili peppers, seeded

    filtered water as needed

    1 large 8 cup jar with a wide mouth

    In a large bowl, combine the sliced cabbage with the sea salt.  Massage with your hands, squeezing it until you get a good amount of water out of the cabbage at the bottom of the bowl and it is softened a little.  Mix in the carrot, garlic, cumin, coriander, jalapeno.  Place in the 8 cup jar, pressing out any air, and pour in the extra water at the bottom of the bowl.  Top with the reserved cabbage leaves.  If the water does not rise above the cabbage in the jar, pour filtered water over it so it does (you want all the cabbage completely submerged).  Put a weight on top of the cabbage leaves so that they stay submerged (I used a small prep bowl that fit inside the jar) you do not want the cabbage exposed to the air.  Cover the jar with a towel and place it somewhere where it will not be disturbed like in a closet (and you may want to set it on a tray in case it leaks a little).  Check it every few days to make sure it does not have any mold on the top, and if it does simply remove it with a spoon (the rest is ok as long as it is in the brine). After 7 days, it should be ready (or when it is fermented to your liking, I just find that mine is usually done after 7).  Place in jars and store in the fridge.